Transcripts
1. Introduction: Welcome to Oil Painting
with Steve Simon. Hello, I'm Steve Simon
and this is first course in a ten course
curriculum on oil painting. In this course, we'll be
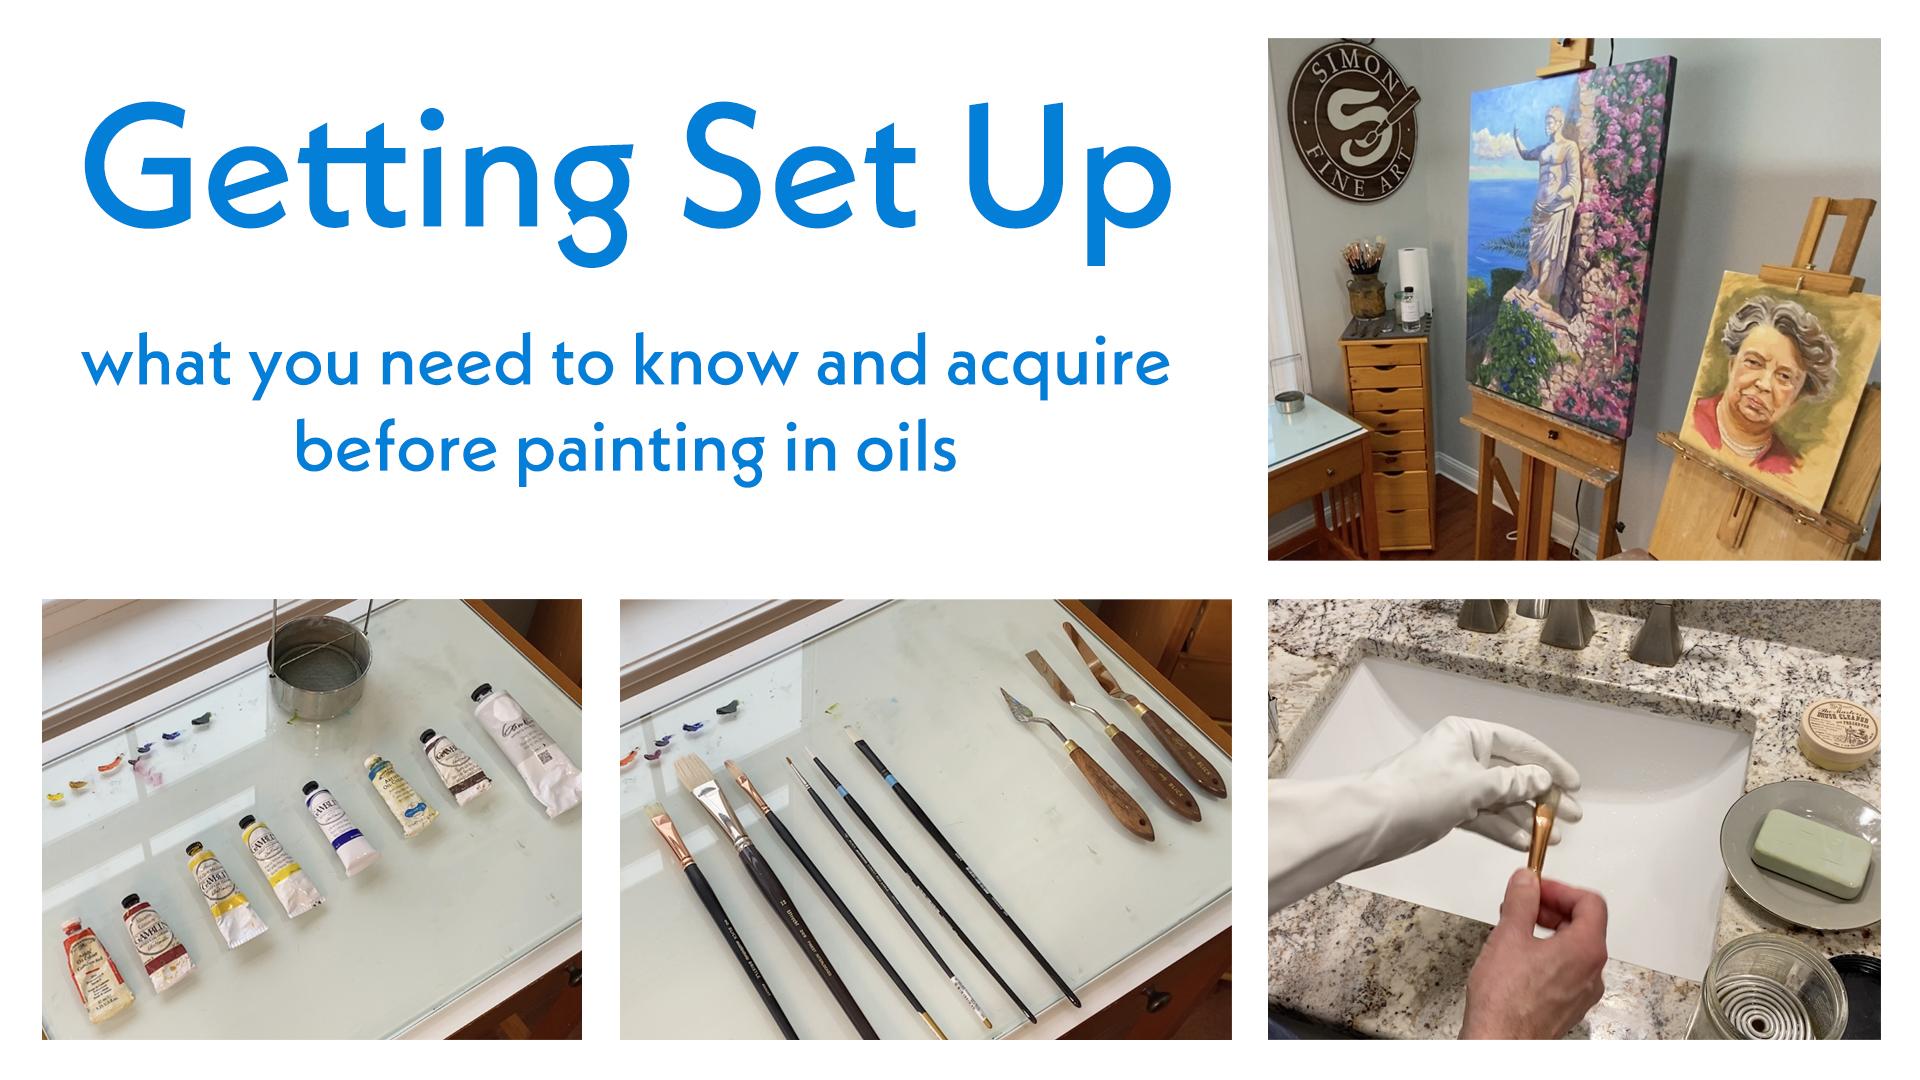
looking at quite simply, just getting set up. If you haven't
painted noils before or relatively new
to oil painting, you may have discovered
this can be a little bit of an overwhelming process to try to figure out
what is it I need, how does this whole thing work? A little bit as I say overwhelming and maybe even
a little bit intimidating. My job in this course is to
streamline that process. I will be hopefully
simplifying it as much as possible and then allowing
you just to cut to the chase. To get started, you
might be wondering, what kind of brushes
should I be acquiring? What kind of paints? How do I set up my workspace
with easels and palette? What surfaces should
I be painting on? How do I go about
cleaning my brushes? All of that and more
will be answered in this first course
on how to get set up.
2. Workspace and Palettes: So here we are, welcome
to my studio space. Just a broad sweep of the corner of my
studio that I use for painting with a
couple of easels. Set up table where I
put my palette on, just chest of drawers where I put all my paints
and other supplies. I don't normally have this
second easel set up here, but I just wanted to pull that out called the French easel. We use this mostly for
painting outdoors. People that paint on the go
would use something like this French easel or something
called the poschad box. We'll get into that
when we paint outdoors. But over here, this is the
easel I use in studio. As you can see, it accommodates a larger canvas,
or in this case, I painted on wood panel a
little bit about lighting. I live in New Hampshire, a little bit of a
dreary day out there. Ideally, the light coming
in from the window, ideally should be
from the North. Mine is a little bit Northwest, can't really move my house
to accommodate that need, but the reason for that is
the temperature of the light. You don't want bright
yellow direct light coming into the studio. It can cause color shifts. Also the light that you may
use to illuminate your space, which you're definitely
going to need some light, should be daylight temperature, which is something like
5,000 degrees Kelvin. In other words, a daylight
bulb works best in your space. Again, you don't want color shift happening
in your color judgment. To talk a little
bit about palette, I, I just purchased actually
a tempered piece of glass. Put it on this white board
that sits on my table. You're going to find
that glass is just really nice because
you can get in there and scrape off paint once it's hardening somewhere to swear by using more of a
neutral background, I find white works fine in terms of maintaining colored judgment. There are, however, a
couple other options. One option, as you may have
seen over on my French easel, is this palette wood color. Again, more of a
neutral background, a little bit of a finger hole. If you're really dynamic painter where you're moving
around a lot, then something I use
also for outdoors, are these disposable palettes. It's a waxy paper, you don't have to worry
about scraping paint off, you just throw the whole thing out once your oil paint is drying or hardening
onto the surface.
3. Brushes and Knives: On to brushes and knives. Firstly, brushes come in two
distinctly different styles, natural, bristles,
and synthetic. Then they come in
different shapes. First off is a natural brush. This is natural hog hair
product produced by Blick. You can get on ****
Blick.com This is, as you can see, a bright brush. Now what a bright means is
it's flat along the top. It comes in contact with your painting and the pristls
are relatively short. This happens to be a size
eight brush and sizing. Again, it is really a matter
of personal preference and how large you're going to
be painting in this course. We're going to be painting
mostly pretty small canvases. We'll talk about as we
get into each painting, a little bit more about
the size of the brush. But I would say
certainly nothing larger than a size 12 you're going to need for any of the paintings in this course. This size 12 natural
brush is flat on top, but you'll notice the bristles
are quite a bit longer. This is what's
referred to as a flat. These two are similar in that the tops where you're coming in contact the
painting are flat. But the brights have
the shorter bristles, the flat, the longer bristles. You probably want to invest
a little bit in both of those to get a feel for what you're most
comfortable with. There is going to be
some subtle differences in application of those brushes. Next up is our Filberts. This is really the workhorse
of the oil painter. This has a rounded top, the bristles, the
length of them will vary quite a bit
from brush to brush. That's our fill. Then
there are natural, again, this is
actually sable hair, small round that I use for
details like I don't know, maybe like the white spot, white highlight on a pupil
or something like that. I've pulled this one out
because it's also a round but it's synthetic synthetic round. Then another synthetic flat
on top, long reversals. So we would call this a flat. Those just a quick
rundown of brushes. I've purchased all
these from **** Blick.com Great source for anything that you're going
to need for this course now. Next the painting knives. Again, the knives really come into different flavors
for the different functions. You can see it's
got a lot of use. This is my mixing knife. This is going to be
the knife I used to mix colors on my palette. Sometimes we're going to be
a palette knife like this, other times just be
mixing with your brush. Then there's a variety
of knives that have different shapes that are
your brush painting knives. We'll get into that as
we go along as well.
4. Cleaning Brushes While Painting: To clean your brushes
while you're painting. Some people object to painting
in oils because they claim they're sensitive
to the solvents that are used in painting. It can be a problem
for some people, but really if you're
using the right supplies, it really isn't a problem. I highly recommend this
product by gambling called Gamsol for cleaning your
brushes and thinning medium. It's an odorless
mineral spirits. It's really the odor of
mineral spirits that bothers people if it
bothers you at all. When I paint, I generally have that window
over there cracked and just encourage the
fumes out that window. Even have a fan that I set up that blows it out the window. If you're concerned
about VOCs, that thing, I would recommend a
well ventilated space to try to encourage
those fumes out the window gas by gambling a couple of different choices in terms
of cleaning your brushes. This is a more
substantial set up. I like using this in studio. Reason being is if I've got a little paint on
the brush and in between I want to clean this up, it has this break
down here that does a really good job at
taking the paint off. Then you're going to need
just a paper towel set up to dry off the brush. This is also handy because
while you're painting, you're going to be using
more than one brush. And this provides a nice little stand to put your brush on. I've taken the palette out of my French easel just
to show you that there's also these
containers for cleaning it. Brush that clip on to your pal, which is handy when
you're outside. And you're probably
lifting this up to get paints out underneath
and that kind of thing. It's nice to have that capacity. And they also come with a second container
for your medium. This would be your
solvent to clean brushes if you're using medium, which I do so only
very sparingly, you could put it in that second container once this starts to fill
up with paint. In other words, this
is obviously going to get dirty from
cleaning your paint. The nice thing about this
little screen down here is it prevents your brush from getting down into that
cookie paint down there. Eventually, that's going to fill up enough that
you're going to want to dump out this Sam
salt that's in here. What I end up doing is I pour it into just any
old jar like this. Then I let that settle. If you take a look, you
can see that the bottom is the paint that's been cleaned off has
settled on the bottom. Even if I shake that
up, it barely moves. There's just a thick layer
of paint down there. In other words, it
separates out by itself. I can then pour this
back into my Pam bottle. What I end up doing, I use a funnel to pour this
back into my Gal container. I get a lot of mileage out
of one of these jars of gas. Really, in the end, the only
thing that I'm depleting is when that is coming off
on the paper towel.
5. Paints: Onto the good stuff. The paint
paint come in a variety of qualities you're going to find there's like a student
grade professional grade. Then even grades beyond that, I use professional
grade oil colors. Mostly I use Gambling
and Windsor and Newton. There's a big discussion
among artists. If you talk to any artists about what their
color palette is, boy, you're going to get a
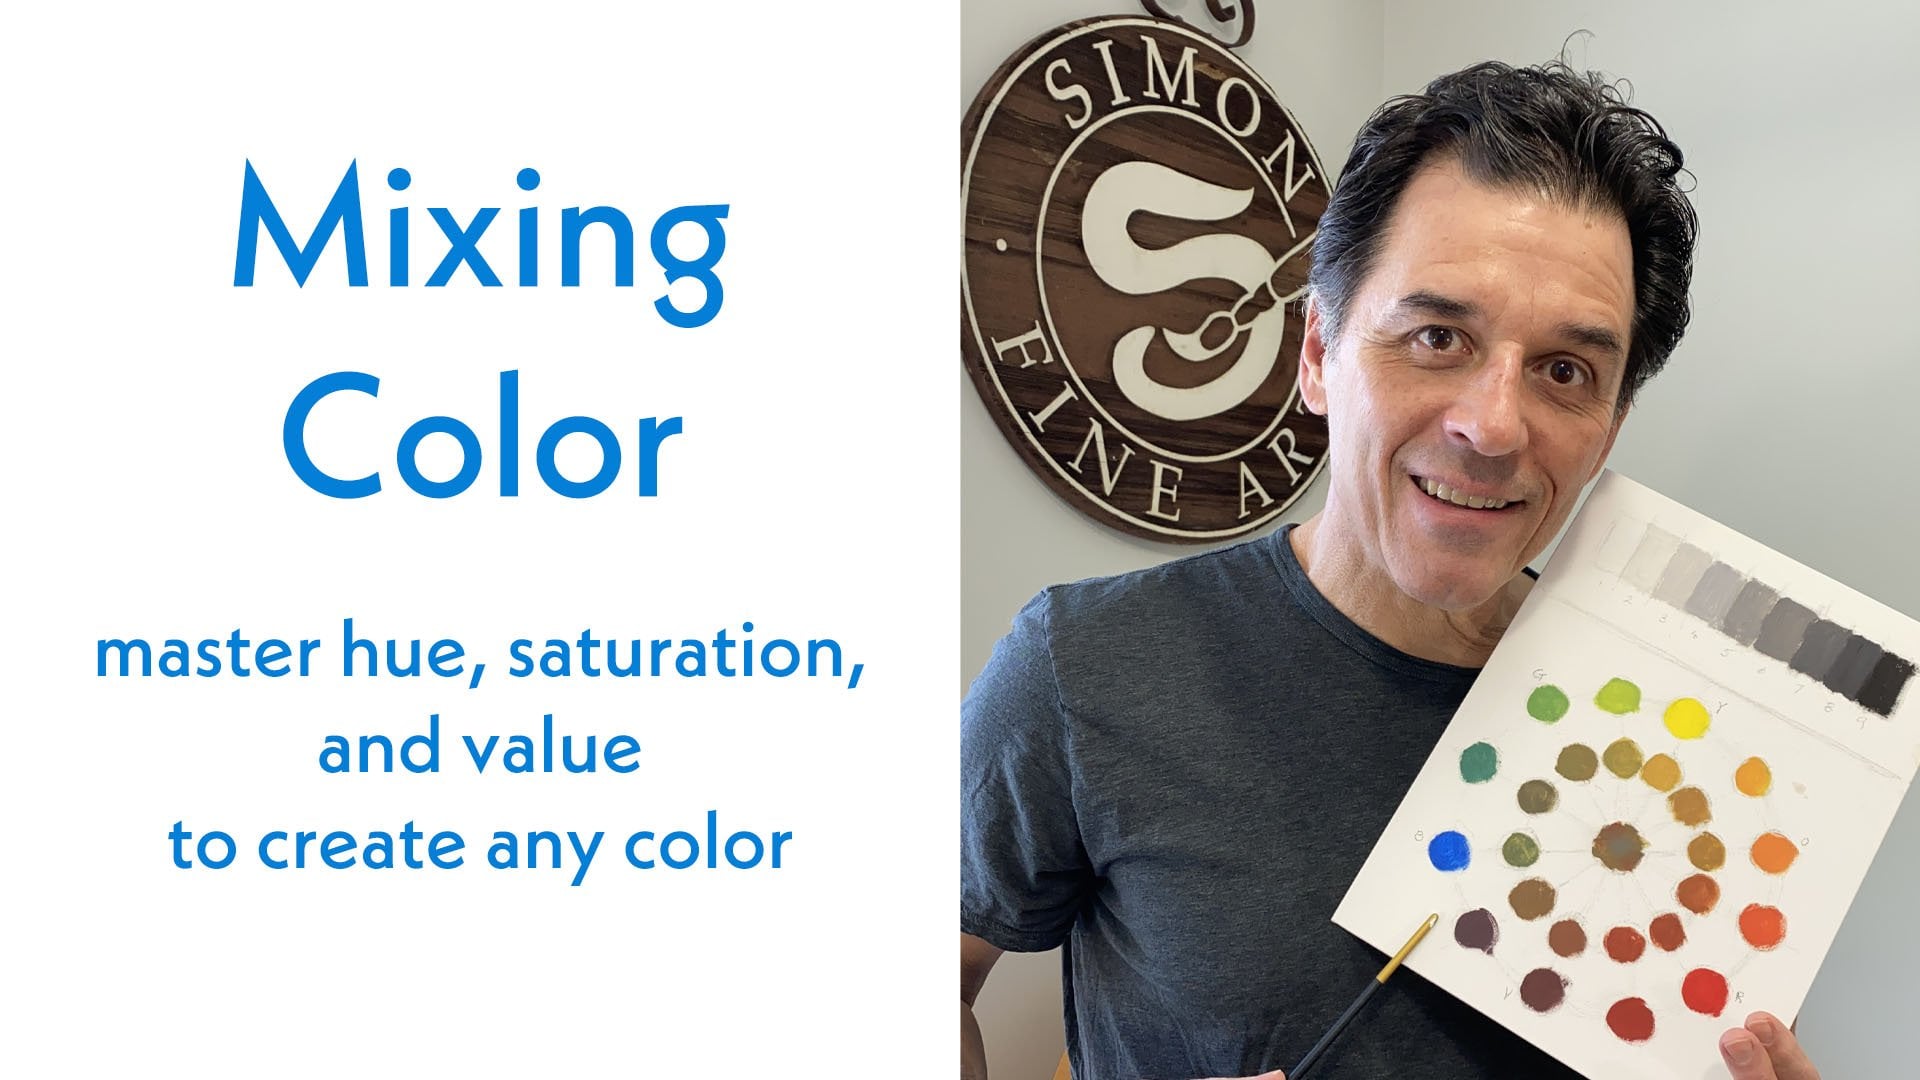
variety of different answers. In one of the lessons
in this course, we're actually going to be using specific color palette called the Zorn palette for
doing portrait painting, which is a very limited palette. There's an argument to
be made for limiting your palette that creates more of a color
harmony in your work. In one of the early lessons of this course where we
learn how to mix paint, we're going to be using
a specific set of colors that I've laid out here. And that is a, and a cool, warm and cool, warm and cool of each of
the three primary colors. The reason for that is we're
going to be mixing each of the worms in the cools to create the purest primary color. Then we're going to be
using those primaries to create the secondaries
and so on. I've added burnt
umber into that, which is, let's call it a
universal darkening agent. Then there's a variety of
different whites to use. I prefer zinc white. This again, is a
gambling product.
6. Painting Surfaces: Now let's talk about the
surfaces you can paint on or what artists
refer to as supports. Firstly, the simplest
and most economical, and what I would recommend for this course is just
the canvas panel. When you do buy these, I would recommend taking
a look at the reviews for any of them online and see if people are talking
about them warping or not. That's one of the problems
with these canvas boards. It's just chipboard in there. Particularly if you start
buying these larger sizes, they can have this
tendency to warp. Is your painting dries. It's particularly true of acrylic painting because
you're using water. And when that water des, funky things can happen,
these really economical. And what I would recommend
for this course, one of the things we talk
about which supports is the reason we're painting
on canvas in general, is it has what artist
referred to as a tooth, a rough surface that enables
the paint to grab onto. Okay. This is a good too. It's what we call primed. In other words, Jesse, I'm going to talk a
little bit about Jess in your own supports as well. That's the canvas board. I also like to paint on wood. Plastic wrapping wood obviously has a lot less
tooth than canvas. It's a less rough surface, but it's rough enough
that you can paint on it. Now I don't recommend
painting directly onto the wood but rather
using artist plaster. We call Jess really, it does just look and feel like plaster but it's artist
white Esso again, I get this from black **** Blick.com You're going to just use just a rough
brush actually. The rougher a brush
or more bristly the better and just code it. When I paint on wood, I use two coats of Jess. Baltic Birch is the best of the wood
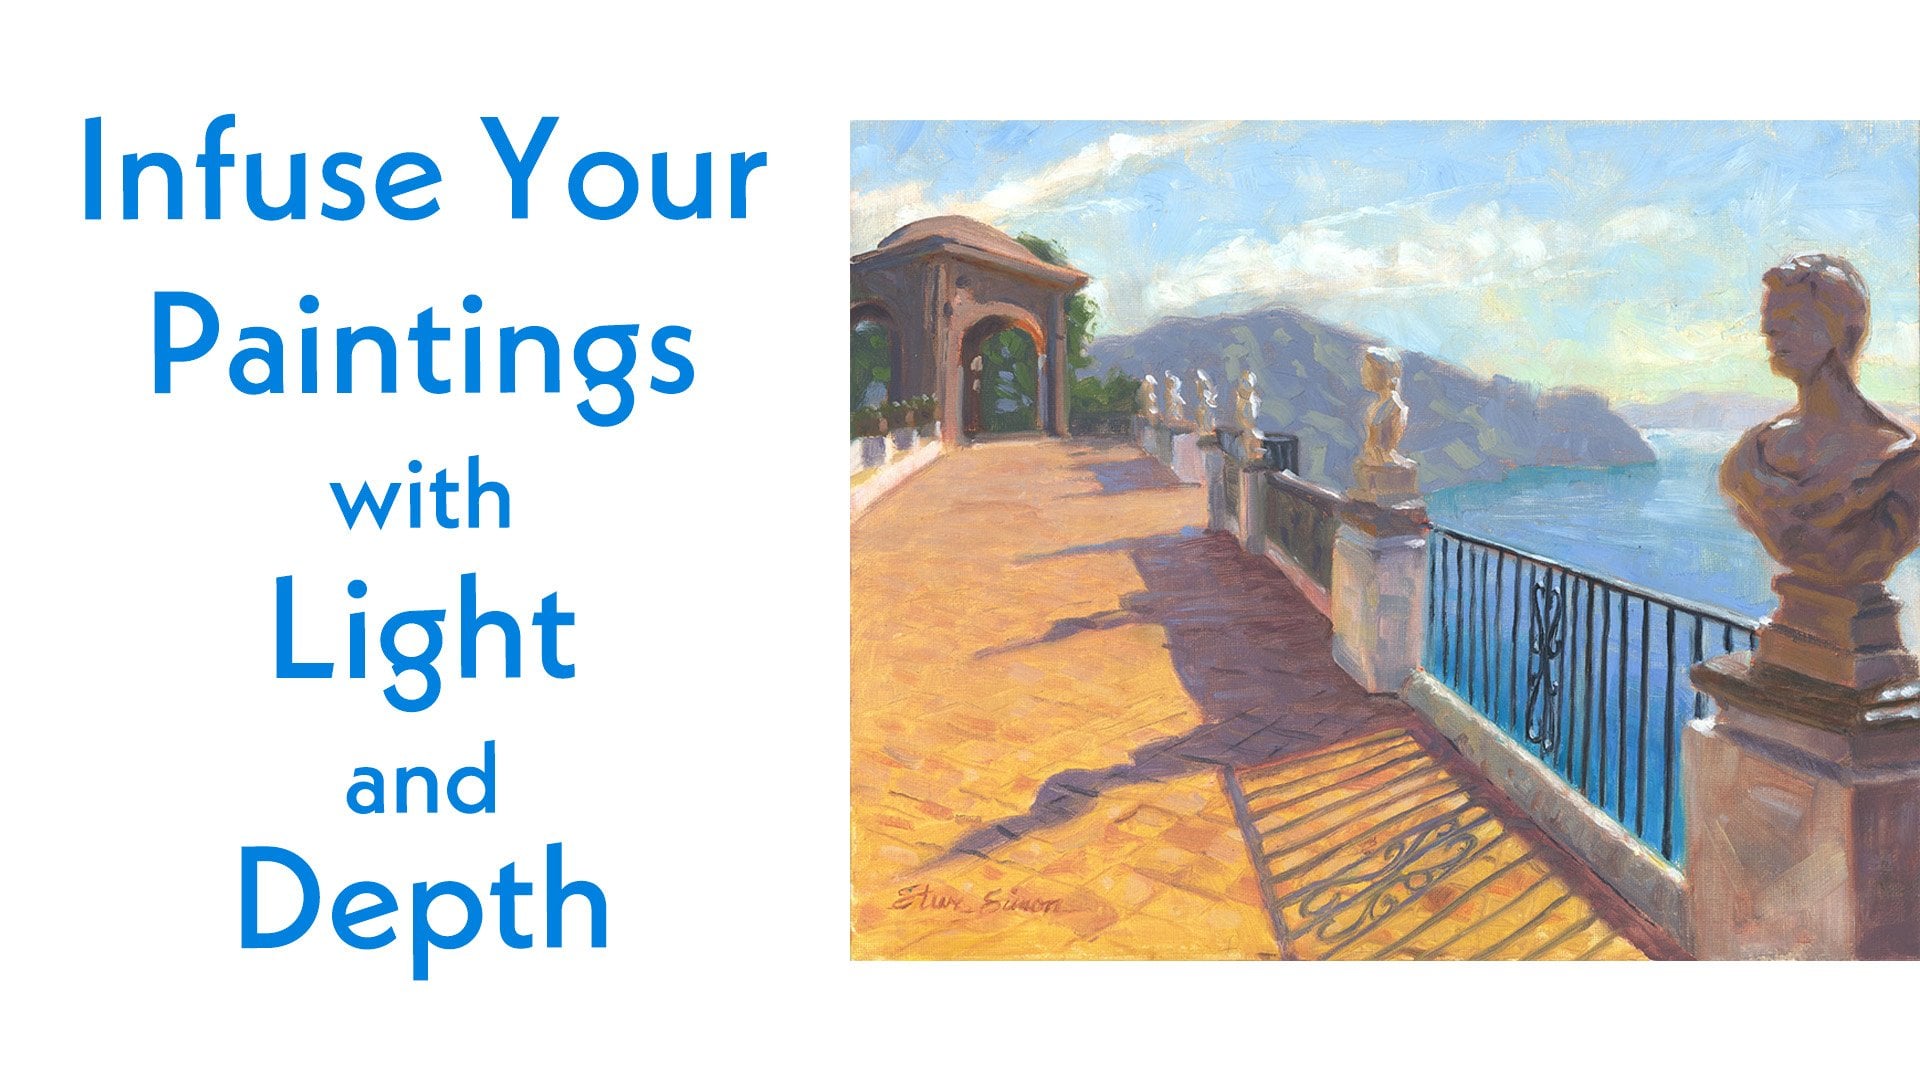
surfaces to paint on. This is actually
an example seen I painted from Grand Canyon on
a hiking trip, I went there. It's an example of Baltic birch
panel that actually comes what's called
cradle, this cradle. I've painted these
edges as gold. I do that before I
paint the image, and then I just
put a hanger on it and then this can serve
as a finished piece. Don't necessarily
need to frame it, or if you want to, you can still frame around
the cradled wood. Then lastly, and
perhaps most commonly, what we find is
stretched canvas, right? This is probably what
you're used to seeing. Canvas is stretched
over stretcher bars and then staple along the edges. Sometimes you'll find these with weather stripping
through there. Those are nice if your canvas ever starts to get
loose and that can happen, you can see this is tight as a drum to tighten
that back down. You can spray this with water. And as the water
dries will cause a subtle shrinking and it'll
tighten the canvas back up. This is just an example
of stretched canvas. This is a commission piece of Granellic Glacier and
Glacier National Park that I still need to send
off to the customer. Those are the different
kinds of supports. There is the opportunity also
to stretch your own canvas. Now, I do this very rarely because supports are just
so readily available, especially stretched canvas in so many different sizes that there's usually not a need to stretch your own canvas. But if you do, it
does come up with me. Sometimes there's a specific
space that needs to be filled or whatever
you're going to need to buy your
own stretcher bars, buy your own loose canvas, and then you'll need
of these crazy pliers. That's actually a canvas stretcher enables you
to pull on the canvas. And this little thing
provides leverage on the stretcher bar to
pull the canvas over. And then you'll need the staple
along the back side edge. I hope that helps you in
terms of the supports. Again, for this course, I just recommend
relatively small, like eight by ten or 11 by 14 canvas panels
of canvas boards, that will serve you well.
7. Cleaning Brushes After Painting: Just a quick tutorial on
how I go about cleaning my brushes in your studio. Of course, you cleaned up your brush with your solvent
as much as possible. Then I use one of the
what's called silicoils. I put walnut oil in here. It's actually a
really good medium for cleaning off the paint
off of your brushes. And it's like fighting
fire with fire. We're using oil to
actually clean the brush. Then there's a
couple brush soaps on the market you can buy. Or even just a bar
of soap works fine, which is what I
just normally use. You can just the off of there, the excess oil paint. What you're really
trying to do is get into this base down by where the bristles meet what's
called the fair rule. This metal thing here. This is what will kill a brush
before it's time. If you get paint and
gunked up in there and dried up in that base, you really just want
to work that out. I do recommend a dish glove, especially if some of the paints have cadmium or cobalt in them. You really don't want to be bringing that into
through your skin. Just work out the oils in the media or the
paint out of the brush, taking particular interest in that area down by the
base, Rinse it off. Use not hot water,
but warm water. If your brush gets
it all misshape and just massage the bristles
back into place. Some artist will even leave a little bit of
soap on the brush, and as the soap dries, it forces the brush to
maintain its natural shape.
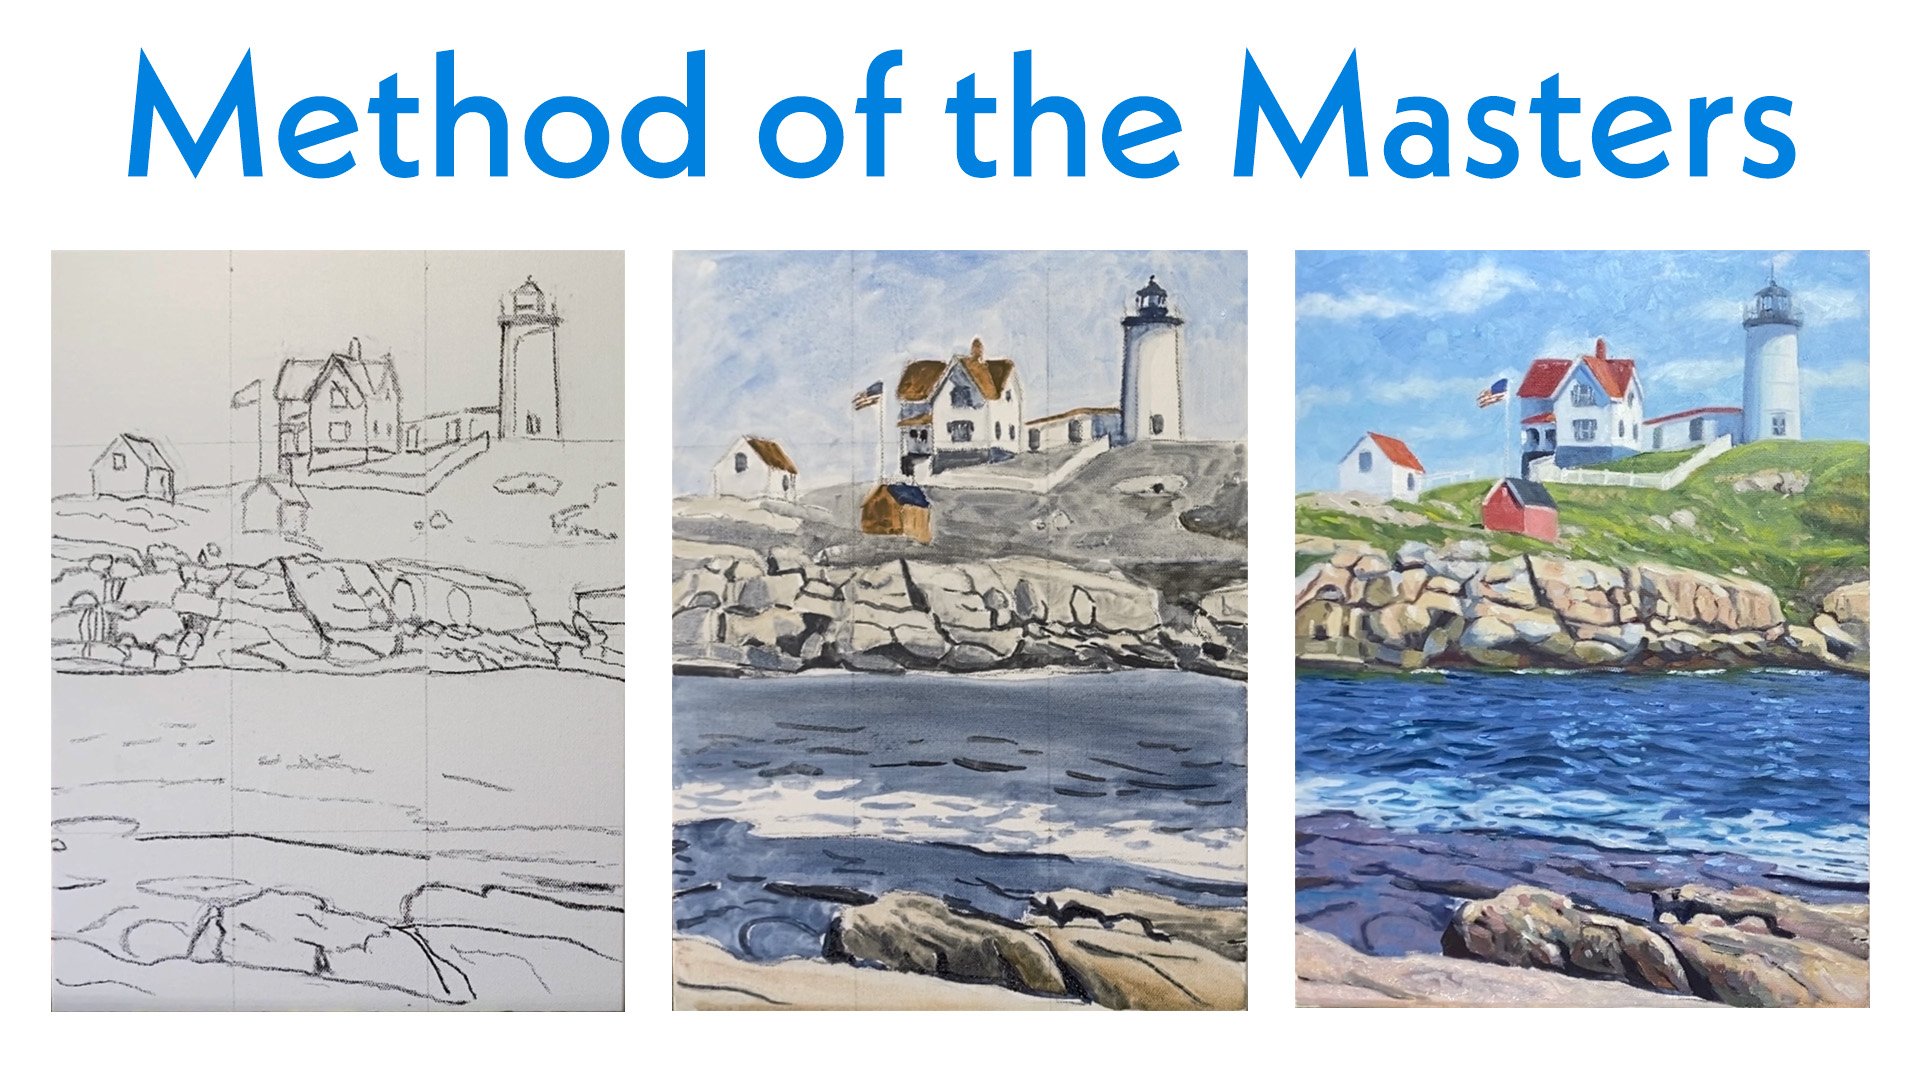
8. Drawing Supplies: Lesson, lesson two. We're going to be working on
our drawing skills. You're going to want
some, a sketch pad as one of these regular erasers that we're all
familiar with is fine, but I recommend a needed eraser. Looks like this. It's almost
like Plato thing, pencil. Eventually, when we
get to lesson five, where we're exploring
the classical academic painting method, you're going to want
some vine charcoal. You can decide whether
or not you want to buy that ahead of time if you're going to
be participating in lesson number five.
9. Final Thoughts: Last point I want to
make is setting up your workspace to facilitate
proper painting posture. So firstly, just the
proper painting posture is if you're right candid, it's right foot
forward. Obvious sleep. Your left handed,
let's work forward, but I'm right candid.
So demonstrate. The posture is
right foot forward, the left foot is back. Similar to, think about it
like we're throwing darts. That posture that you would
take throwing darts or to point and shoot free throws. It's basically wrist, elbow, shoulder, all in the same line. You know, we don't want to be painting like that and we don't want to be painting like this. To facilitate that right
foot forward posture and standing back from the
canvas is going to help us take in the broader
picture as we're painting. We already too close, too
narrowly focused on spill, taking everything in
this proper posture. To facilitate that, I put my
palette off to my left side. Whether it's that my body as I'm working out a palette over here mixed to naturally
turn this way. And I haven't a natural
rhythm like that. If I were to put this
palette will be here, I would be turning this way. And it would almost encourage
you to do the wrong thing. Does that make sense?
Hope that makes sense. Thanks for watching this
whole video and seeing it through each of our lessons has a project
associated with it. I presented a lot of equipment, supplies, materials in this. You can certainly
make your choice what you think is
relevant to you. Each of the lessons will have the specific list of items that we'll need for those lessons. So maybe you have some
of this stuff are your, maybe you just want to acquire
stuff as you go along. Each of our lessons
has a project. Quite simply, the project for this lesson is to collect
what you think you need. I would love to take
a look at what you've assembled and how you've
set up your work sticks. Thanks again and happy, pay.
 Steve Simon, Simon Fine Art