Transcripts
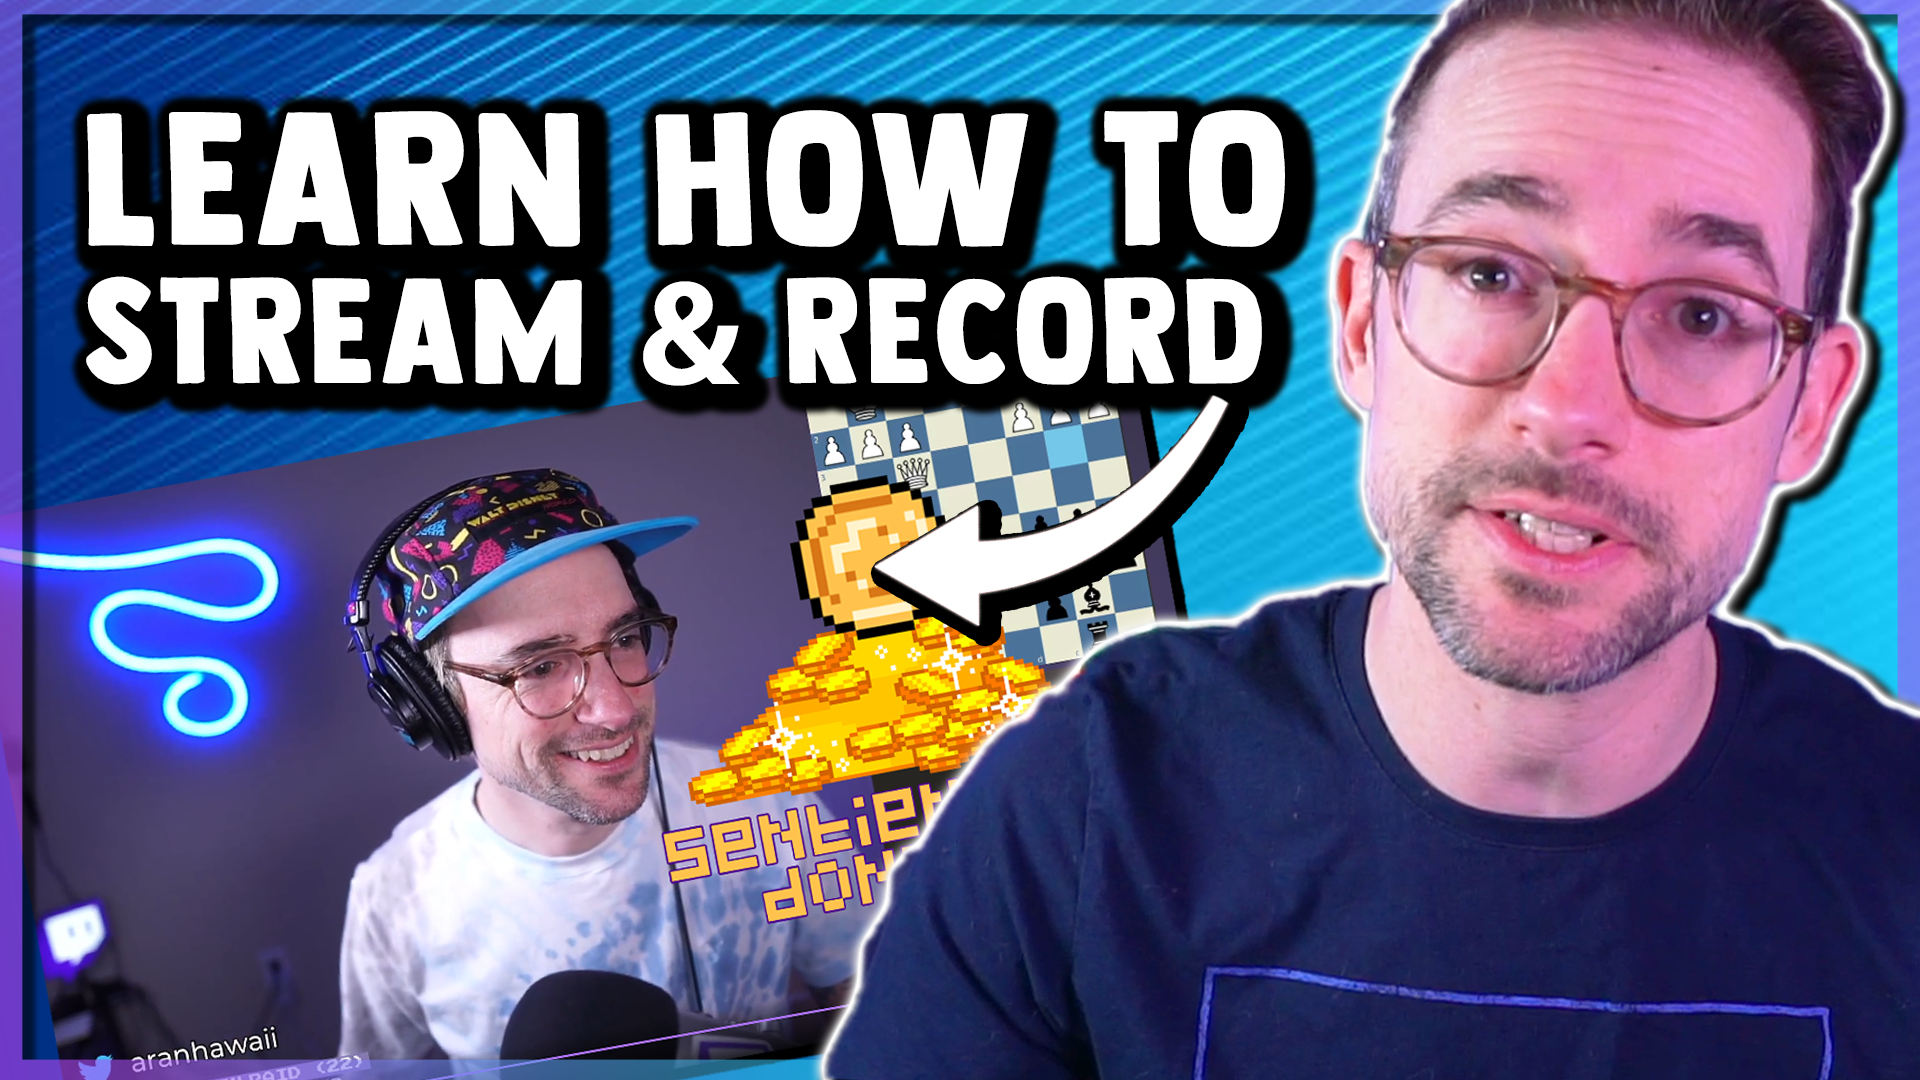
1. Introduction: Hi, my name is Arne and welcome to my Skillshare course, where I'm going to teach you how to stream or record your content. And you'll be able to do this to whichever platform you have in mind like Twitch, YouTube or elsewhere, you may be planning on sharing gameplay or teaching a skill or a course, or just hanging out with people in a live environment. We're just talking about a subject and posting that on YouTube or elsewhere. Well, if you're new to this, this is the perfect horse for you because I'm going to teach you how to do all of those things in just a few classes. It can seem intimidating to start, but by the time you're done with this class, you'll be able to do it confidently for some background on who I am. I am currently the Director of broadcast operations for chess.com. I supervise all of the live streaming of chess commentary for chess.com, various streaming channels. And I've been doing that for about three years now. I decided to make a Skillshare course because that's what I like to do. I'd like to share my skills that I've picked up along the way with others. So here you are. I'm going to share that stuff with you and welcome to the class.
2. Class Project Preview: Now when taking a Skillshare course, you will usually do a class project. And we will do one here where you're going to share everything that you learn at the end of this course with a video clip that shows you demonstrating all of the skills and what are those things? Well, you're going to learn to build a scene in OBS Studio, which is the software I believe to be preferable for streaming and recording content. You will capture a source like a game, a webpage, or a program. You'll add a webcam to your scenes. You'll capture microphone audio, whether that's a microphone that you attach to your computer or one that's already built into your webcam. You'll configure your settings in OBS for maximum quality and stability. You'll connect OVS to your favorite streaming platforms like Twitch or YouTube or others. And if you're just planning on recording content and uploading it later, you'll also be able to configure OBS settings to optimize for that. And then your class project will be to submit a 60 second or more clip of your streamed or recorded content. You're going to learn everything that you need to be able to complete this class projects successfully. So do not worry about it. And I'll see you in the next video.
3. What You Will Need: All right, So what are all the things that you're going to need in order to take the course and complete your project. Let's list them. You're going to need a PC or a laptop. Now, if you have a Mac, that's okay. But the course is going to be demonstrated using Windows 10. Most of these things should still work on the Mac version of OBS Studio, you're going to need a webcam. And if you don't have one, they're pretty affordable out on the market and just connect via USB. You'll need a microphone so people can hear you, of course. And if your webcam doesn't have a built-in microphone, then you can also get a decent microphone on the market that connects via USB. You'll need a stable Internet connection and preferably a wired one over Ethernet versus a wireless one. And you'll want a good upload rate for that Internet connection, and we'll talk about that in a later video. And then of course, you need a goal for your content. Are you going to live stream it? Or are you going to record it and upload it? What are you going to be doing in that content? Are you sharing yourself playing a game or using a program? Are you teaching someone else how to do something? And is that something that happens in software on a PC or a lecture that needs a presentation tool? Are you demonstrating a real skill that requires the use of your webcam like a makeup tutorial, or maybe even a second webcam to demonstrate something happening on the table in front of you, you need to know what you're going to do so that you know what's a focus on when you're taking this course and what is the destination for your content. Or you live streaming it into what platform? Where if you're recording and uploading it, Where's that going? You've got to have that in mind so that you're ready to pick up on all the things that are necessary to do that successfully. Much of this course is going to focus on Twitch and YouTube for live streaming, and YouTube for recording. But the skills that you're going to gain will be useful in any situation and on any destination that you have in mind. So gather up all of those things and write down all of those goals that you have. And in the next class, we're going to teach you how to install and begin using OBS Studio.
4. Installing OBS: All right, so now we're going to start by downloading OBS Studio, a free program for streaming and recording. In my opinion, it's the most stable program and it's also the least resource intensive. So it's not going to tax your computer's resources as much as other ones like stream labs, OBS. So first go to OBS project.com slash download and choose your operating system, whether it's Windows, Mac or Linux. In this course, I'm going to demonstrate everything using Windows 10, but it all should still apply to you if you're using Mac or Linux as well. And then click Download installer, save the file, and then we'll open it up. All right, so we'll go through this step-by-step. We'll click Next on the license. Now you're going to choose your destination folder. Usually the default destination is fine and click finish, and then it'll launch. Now if you run into an auto configuration wizard and you probably will when you first install this, I actually recommend that since you're taking this course, to just close this window rather than selecting any of these. Now if you did, It's okay, Don't worry about it. But if you have the opportunity, you can just close this. Don't worry if your user interface here on your first install, it doesn't look exactly like the one that you see on screen. I've got a couple extra things going on here, but it's okay. Some of the things that you probably do have identical to my screen share here is the scenes area, the bottom left, the sources area next to it. You may have an audio mixer area there, and then you've got a couple of screens or maybe you just have one screen, in which case I'll click studio mode down here. And it probably, maybe it looks like this. And we'll talk a little bit more about what studio mode is in a future video. The key thing that I want you to find in here is the settings. And there's two places that you can go to get in there. The first one is down here on the bottom right by clicking the Settings button. And the second is by going up to File and settings. Either way they take you to the same menu and we're going to do a lot of stuff in here a little bit later. Now the goal of using OBS is simple. It's to assemble a bunch of sources in order to create a scene that your audience will view. And this course will teach you exactly how to do all of that. Now, when you close OBS, it will not ask you if you want to save your progress. That's because it automatically saves everything when you close it. But if you're nervous about losing your work, there's a way to still save everything. You can save your scene collection by going up to Scene Collection, export and then exporting the JSON file somewhere that you're going to remember to find it later. Of course, if you need to import a scene collection in the future, you would go to Scene Collection and import. You can also create a profile which will save your settings, like your bit rates and things like that, that we're going to set in the Settings menu by going to profile export. And if you don't already have anything in here, you can create a new profile right now, give it a name, and then export it. Now, if you're using Windows, I want to give you an extra tip and that's how to make sure that OBS Studio always runs IT administrator mode when you use it, don't ask me why this is important, but a lot of the developers say that it helps. So that's why I do it and I'll show you how to do it. And the program is running just right-click the icon on your taskbar, and then right-click OBS Studio, click Properties, then compatibility, and then check the box for run this program as an administrator and Apply and Okay, this will make sure that every time you open OBS Studio, it's going to ask you to say yes to running it in administrator mode. Now hopefully you're not already overwhelmed here and if you are, don't worry about it, I'm going to make this easy. So in the next class, we're going to talk about some settings that you should go ahead and set first in OBS Studio.
5. Early OBS Settings: All right, So now it's time to go through some early settings in OBS Studio. So I like to use the bottom-right button and click Settings. And then we'll start in this first General tab, you can choose your theme, I like dark mode. And for these first two checkboxes, show confirmation dialog when streaming starts and when streaming stops. I highly recommend that you check these. I think they're unchecked when you first install, but that just gives you a confirmation dialog before you go live. The last thing anyone wants to do is go live without realizing it. You can also do show confirmation dialog when Stopping recording. So if you're gonna do recordings and you don't want to accidentally stop your recording early. This is a good one. If you want to record your streams on your local drive while you're streaming, you could consider checking the box for automatically record when streaming so that when you click that Start Streaming button, it also begins to record. All you would need to do if you wanted to do it manually was just clicks start streaming, and then also click Start Recording. All the other settings in this general tab should be good to go in the beginning. So let's move on. The stream tab is where you connect the streaming platform that you want to stream to. And we'll go over that in a later video. Now the output tab is where you're going to set up your settings for the quality of your stream and the quality of your recording. And it probably defaults to this simple mode. But I'm going to say, let's go in and select advanced. And we'll do our work in here. Now, when you first come in here, you will be in the streaming tab. And the first thing we want to check is which encoder we're using. Now there's software encoding and hardware encoding. Software encoding uses your CPU on your computer, but that's being shared with a lot of other programs and processes, right? So we want to use our hardware encoder. If we have a video card, graphics card to check for that, just go ahead and click into the drop-down and see if you have other options besides X2, 64 dot 264, quick sync. There are different names for software encoding that CPU based. Now for me, I have an NVIDIA graphics card, and so that's what I would select to ensure that I'm using my graphics hardware rather than my processor for all of this. Now I don't recommend that you rescale output in this menu. I'll show you in another menu where to decide the final size of your stream or file. All of these other settings down below, we're going to cover in a future video about bitrates and streaming destinations. Let's click over to the Recording tab next. And the first thing that you want to set as your recording path, where do you want the videos to go on your system when you're done? Now the current path shows here, and if you want to change it, click browse and choose a different folder. Now in recording format, there's a lot of different file formats that it will save two. For ease of use, I actually recommend just MP4. Or if you're on a Mac, probably MOV. But if you want to learn about all the other file formats and what they do, I would say that's good research for you to engage with outside of this class. Now you have a couple of ways of deciding how to encode the video. And that's going to affect file size and the quality and things like that. Now, the default is to use the stream encoder. And basically what that means is if you go back to the Streaming tab, it's going to use whichever encoder is selected here. And it's also going to use some of the other parameters that we set in the streaming tab. It's going to use those same settings if you want your recordings to have other specific settings not related to the way that your stream gets encoded. Then you would go in here, choose your encoder. Once again, software encoder, hardware encoder, I recommend hardware. And then you would set your own properties just like you would in the streaming tab here for recordings, but we'll dive into that stuff in a future video. The audio tab and replay buffer tabs should be fine, as is the Audio tab is where you would bring in different sources of audio which is also covered in a future video in this series, the video tab is where you choose your canvas resolution, which is the resolution that you're designing your scenes in within OBS. And then your output resolution, which is the final physical size of your video or stream. I personally like to have them both at 1920 by 1080. And you can choose your frames per second quality, 30 frames, 60 frames or otherwise, for ease of use again, I like to use 30 in the Advanced tab. If you have this process priority drop-down, I recommend you use above normal. That's basically telling your operating system that when prioritizing which programs get more processing power than others, that it should be preferential to OBS getting a good amount of the processing power. Go ahead and save and close. And then I'm going to show you one other thing and OBS Studio, and that's Docs. Now docs are all the different windows in OBS with different kinds of information. For example, your scenes area is a dock. The sources areas that dock. The mixer is a doc. And you may not already have this up, but this stats area is a dock and I'll show you if you wanted to have that extra information on the performance of OBS, how to get that. I'm going to close it so it's not there. And we're gonna go to View Docs stats. And it'll add that doc. Now, docs can also be moved around. Now in order to do that, you can just click and drag the title of the dock and it'll pop out. If you just let it go, it's going to sit there on its own, or you can drag it to another area. And as you drag it to edges, you'll see where else it could go and then let go to place it. There are lots of other docs available in OBS. So just go to View Docs and you'll see what's there. And once you have it the way you like it, if you want to make sure that you can't accidentally drag a doc away from where you had it. Then you can go to lock UI. Those are your basic settings to get you started. In the next video, we're gonna talk about studio mode so that you can transition between scenes in a professional manner.
6. Studio Mode: So now we're gonna talk about studio mode. Studio mode allows you to preview another scene before making it live for your audience. Otherwise, this large preview that you see is what everyone sees. So I've got two scenes here, and I actually can't preview what's in this other scene. So if I just clicked it, it would take me to whatever that content is. Now, what if I want to be certain of what's in that scene before I go there. Well, I'm going to show you how to do that using studio mode. I haven't showed you how to add anything to scenes yet, but we're gonna get to that in a future video for now. I just want to make sure you understand the studio mode because I'd like you to do your work in studio mode as you move through this course. So go all the way to the right-hand side and click studio mode. And now you'll see two windows. The right-hand side window is the program side, and that is the live side. And the left-hand side is your preview side. That's just for you to see what scene you have selected. Now if I click into my second scene in my scene list, I can see what the other scene looks like without making it live for the audience yet. And that's going to allow me to do a lot of things. Not only am I going to be confident about what I'm about to show them? But I could also even do some editing or build a scene while another scene is still alive. The other thing that this allows you to do is choose how to transition from scene to scene. And you'll notice when you enabled studio mode that their buttons here in the middle for transitioning. And they already are some quick transitions loaded as buttons here, you can use cut to simply cut quickly from scene to scene. You can use fade to cross-fade from one to the other end. You can actually change the duration of that fade by clicking the little arrow next to it and changing this value here. This is currently set to 300 milliseconds, which is three-tenths of a second. But let's say we wanted a full second. We would change this to 100. And now when we click it, the transition takes place more slowly over the course of a full second. Now the transition button actually uses the global transition. And you would find that in this scene transitions dock. And if you don't have that doc, click View Docs, scene transitions. And whatever is set on this drop-down is the global transition. Currently it's a fade with a 300 millisecond duration. So if I click transition, then it is going to do exactly that. If you wanted the global transition to be a cut, so that when you click transition it cuts, then you would want to change this in the duck to cut. And now when I click transition, it just cuts. Now the last thing is what I mentioned before, that you can edit on the previous side without affecting what is live. And I'm going to show you that in just a few steps. So if we're in a different scene from the one that's currently live, I can be editing that and still have what's live on the right-hand side there for the audience to view. I can also edit the scene that we're currently in by going to that scene and making changes. And notice that even though it's the same scene as the one that is live for the audience. It's not changing what they're seeing in real time. And then if I want to introduce that change, I can transition it over to the live side and now it's live for them. But know that once you've made that change, you've edited that scene. And so you'll notice that the previous side and the live side match because that is the change that I made to that scene. Now, I highly recommend that while taking this course, you use studio mode for everything as you follow step-by-step. There are exceptions like when making fine tuning adjustments to the elements in your scene. And I'll show you that when we get to that stage. But in my opinion, studio mode is the best way to learn. It's a good habit to form. And the next video, we're going to teach you how to start adding things to scenes in OBS.
7. Adding Sources: All right, So now it is time to start adding sources, two scenes in OBS. Now sources can be anything, it can be webcams, it can be images or videos, captures of games or browsers or software. Pretty much anything you can think of. There is a source type for that, so you can add those to your scenes. So let's start with an image source first, make sure you're in the scene you want. Then in the sources side, click the Plus and go to image. You can give it a name of label. I'm going to call it template and click. Okay, and now you have to target the image that you want on your system. I'm going to choose a template for a broadcast that we are currently doing. And click OK. And one thing I like to do is once that source is placed, click the lock. That makes it so that you can click and drag and it won't move your source in that scene. If you want to add a webcam, then you would add a video source by clicking the Plus video capture device. You can also label it. I'll call this one Sony cam. And click. Okay, and then in the drop-down, you'll find your webcam and click OK. And now I'll very quickly show you how to resize your webcam. You simply hover over a corner point and click and drag. If you want to, now move it, click anywhere inside and drag. And now to complete the relationship between my template and my webcam, we want to reorder the sources in the source list so that we have a top and bottom relationship between those two. My template wants to go in front of my webcam. So I will click and drag the template up and Lego. And now you'll see my webcam has dropped underneath the template within the cut-out container so that it looks clean and I like how everything looks. So I'll make sure that I locked my webcam. Now for this next step, I'm going to create a new scene. And you can do that by going to the scenes doc and clicking the Plus. You can give the scene a name. I'm going to name it after the game, that I'm going to capture it in the scene. And that game is called dwarf romantic. And with the game running, we can choose a game capture by going to the sources list, clicking the plus end game capture. You can give it a name or not. Click, Okay? And now if the game is running in full screen, you can use capture any full-screen application, and it might find it. If not, you can choose capture specific window and then target the window that you want to capture. I'm going to find the program of the game and click Okay. Now it might appear or you may have to click into the program itself for to then show up in OBS. And just like before, if you want to add a webcam to this scene, then simply go to your sources list, add a video capture device. And if you've already added that device in OBS previously, you can click, add existing, click the camera and OK. And then we'll grab a corner point like before to resize. And once you're happy with the way that you are seen as arranged, I like to lock all the sources. Next, I'll create a new scene and add a media source like a video in the scenes dot click the Plus. I'm going to call this St. Louis B-roll and click OK in the sources list, click the plus and media source and target the file. I'm also going to uncheck restart playback when source becomes available because I want to preview the video on the previous side and click Okay, and there's my video. And if you like the positioning, go ahead and lock it. And if I push this video to the live side, it's going to start wherever it is currently in the file. If you wanted to restart from the beginning of the video when you make it live, then just double-click the source to get back into the properties and check the restart playback and click. Okay, and now when I transition the video to play live, it will start at the beginning of the file. What if I wanted to capture a specific window that's open on my computer. And this can be software or it can be, let's say, an Internet browser. Well then we're going to use a window Capture source. So I'll make a new scene to demonstrate that, I'll click the plus and the sources list and go to window Capture and then click Okay, and now I have to choose the window that I want to capture for this example, I'm going to capture chess.com and click Okay, and now I can stream maybe myself playing chess. Now let's go back to this first scene one more time so I can show you how to add text. We'll go to our source list and choose Text. And let's call this name tag, because that's what I'm going to use this for. I'll go ahead and put my name. You can select a font. I like to start with a large size so that when I make it smaller, it stays sharp. If you make it small and then make it larger than it could lose quality. I'll click Okay and Okay, and now I want to place it here in my scene on this name tag br. So I'll bring it over by clicking and dragging, and I'll make it smaller by grabbing a corner point and dragging and then clicking inside again to move it into position. If you want to hide this bounding box, just click anywhere. Now you may notice in the sources list that one available type is audio input capture. And you could potentially use this to capture an audio device like a microphone. But I don't actually suggest that you use that in a source within a scene. And we'll get into audio in a future video where I'll show you what I believe is a better method. And there you go. That's how you add some of the most common sources to scenes. In the next video, we'll go into more detail about how to crop and resize sources in a scene to get them looking exactly how you would like them.
8. Cropping and Copy Paste: So now we're gonna go into more detail about customizing the appearance of sources in your scenes. So for this first demonstration, we'll just use an image source. And I'll click the Plus an image and we'll find an image. Now we talked about resizing where you can grab a corner point and drag to resize your image and clicking within the image and dragging to reposition it. Now if you wanted to crop the image, you can do that by holding the Alt key before clicking. And you can grab a corner point or a side point. So I'll hold Alt on my keyboard. I'm going to assign point, clicking and dragging to crop into the source. You can also do this on a corner point by holding Alt, clicking the corner point and dragging to crop your source. Now let's say you wanted to start over from the beginning and have it be at the size and position than it was when you first edit it. You can click on the source, go to transform and reset transform. And now we'll go back to what it was when you first add it and you can try again, another thing that you can have an OBS and this may start out as the default is snapping. And what that is is sources grabbing to nearby edges when you get close enough to them. So let's say I wanted to grab this and move it to the bottom right corner and have this corner exactly touching this corner in the scene. Grab and drag. And as you get close, it will grab the nearby edge. And as I move down, it will also grab there as well. Let go. And it's in position. You can also disable snapping if you don't like that. Let's say you wanted to get very near to the edge, but not all the way and you didn't want it to snap, go to Settings. And in this first general tab, go to source alignment snapping and uncheck the Enable box. Apply. Okay? And now it won't snap to the edge. And I can get very close without it automatically grabbing that edge. Now let's say I wanted to center this source in the very center of the screen so that the center of the image is in the center of the scene. You can right-click transform and center to screen. Now what if I wanted it higher up in the scene, but I wanted it to be centered from left to right. So let's say it started here. I'll bring it to the height that I want in my scene. Right-click Transform center horizontally. You can also do this vertically in case you wanted it off to one side, but centered from top to bottom by right-clicking transform center vertically. And there are lots of other settings in the transform menu that you can exploit. Now if you wanted to have a source in your scene multiple times, then you could also copy and paste, rather than having to go through the process of adding it. Again as a source, you can do that by going to your source list, right-clicking on the source one selected copy. And then in the empty space of the source doc, right-click and paste. Now there's reference and duplicate. And in this example, we'll use reference, but I'll explain the difference in the next step. It will paste exactly where the original is. And then you can move and reposition as you like. Now, pasting a reference means that it shares the same target. So if we were to go in and say, open the properties and retarget to a different image than they will both change to that image. It's referencing the target of the original if you wanted to only change one of them rather than having them share the same target. We'll go back and I'll demonstrate how that's done by using duplicate instead of reference. So I'll choose the smaller one. Right-click. Copy, right-click, and paste. Duplicate this time. Let's move this to another area of the screen and I'll change the target of this new copy to something different. And click Okay, now if those two source images were the same size, it wouldn't re-size. But since this source is a smaller physical size, it has come in at that size. Another important demonstration of the difference between reference and duplicate is with text. Let's add some text to this scene by clicking the Plus and text. I'll add some sample text. Click Okay, I'll make it smaller and place it somewhere in my scene. And now if I wanted to copy this, I would right-click, copy, right-click and I'll paste reference first. I'm going to move it to somewhere else in my scene. But now if I go in by double-clicking and edit that text to something else and click OK. It will change them both because they are referencing one another. If instead, I right-click and paste duplicate. Now, if I go into the properties of the duplicate and change the text, it operates independently of the original copy. Now that you've learned how to add sources and resize them, copy and paste them. The next video, we'll get into audio.
9. Audio: Okay, so now we're going to start talking about audio. And we're going to begin by just adding a microphone. Now you may already have a microphone built into your webcam or you've connected one to your computer separately. The best place to connect microphones is in the Settings area of OBS. So we're gonna go there now and go to the Audio tab. And now in there, in the general area, I recommend if you're going to be streaming, that you actually set the channels from stereo to mono. And what that does is prevents some viewers who are wearing headphones for only hearing audio on one side of their headphones rather than both. This is a common issue with a lot of people. So this kind of just takes care of that issue right off the bat. Now the next thing you're gonna do is go down to this first Mike slash auxiliary audio area. Click the drop-down, and then find your microphone. I have a Yeti microphone plugged in via USB. So I'm going to select that and then click Apply and Okay. And now in the audio mixer Doc, you should see Mike slash ox with a signal when you're speaking into your microphone. Obviously, if there's a mute button on your microphone, make sure that that's unmuted. If you don't see the audio mixer doc and OBS simply go up to View Docs audio mixer. So how can you tell if you're too loud or too quiet for your audience now that you've set up your microphone. Well, what you'll do is use this visualization of the green, yellow, and red areas in order to determine how loud or how quiet you are when you're speaking. And you should test this while you're still offline or not yet recording at your softest when speaking, you should probably reached the very top of the green area, which is the bottom of the yellow area. And it's your loudest, you should be touching somewhere between the middle of the yellow area and the top of the yellow area, which is around the bottom of the red area. If you're reaching into the Read More often than not, then you want to bring your level down. And you can do that by just grabbing this slider here and dragging it down. You can continue to speak while testing and moving this to see where you are now reaching as you speak. And then get the level where you need. If you find that even at your loudest you're too low, then you may need to do a number of things. If there are gain or volume controls on the microphone itself, then you may need to bring those up and try again. If however, you find that everything else is completely maxed out and you're still not loud enough. Maybe you've brought the mic closer to yourself as well, and that just hasn't quite done it. You could try adding a gain filter to your microphone in OBS. You would do that by clicking the gear filters. The plus gain. Okay? And then you can bring this gain up above 0 to a value that may help you get more. I would say go about five at a time and see if that gives you a range that you need. So we'll add five now, and I'll close this. And then as I speak, I'll see that I'm going a little bit farther than I need to, but it's given me the range to allow me to then adjust from there. So I'll bring this back down. And now I'm back at a comfortable range to mute your microphone and OBS simply go down to this speaker icon, click. And if it's red, you are now muted. And you can see as I'm speaking, there is no signal being sent. Now, what about audio from your computer? Whether it's audio from a game that you're playing, video that you may be watching in a browser like YouTube, or music from a music app in the same area of settings. Audio go to the first option for desktop audio. Click that and you can set it to a number of options. You could choose Default. And then whatever output device is the device selected in your operating system, windows, for example, that will be the audio that also makes it into OBS. So anything playing through there will also be brought into OBS. Or you can choose a specific device, like your speakers or your headphones. And then only the audio going through that device will make it into OBS. I'm going to choose default because that's the simplest option to demonstrate, but I could also choose my speakers. And then it's only the audio going out through the speakers or the headphones if they're connected. So I'll choose default, Apply and Okay, and now we have a new item in our audio mixer called Desktop Audio. And now if I play some kind of audio through the system, it will show, for example, an open Spotify right now and play some music. And you'll see the signal making its way into OBS as well. And again, the same rules apply in order to determine how loud or how quiet the audio is for the audience, and you can bring those levels up or down as needed. One thing to consider with things like game sound or music or videos is whether or not people can hear you over that audio. Meaning if the ratio of loudness between you and that audio isn't quite right, then your audio may drown your voice out when you're speaking. So what you wanna do is consider that ratio and then bring your voice a little bit higher than the max of that audio. So I'll unmute the microphone so that you can visualize here that the music and my voice may be competing. So what I can do is set my microphone to a level that I feel is appropriate. But then bring the music down a bit lower so that the ratio is, I would say about two to one, where the music is peaking about halfway from where my microphone is peaking. If you have a live audience, they can even tell you if they want you to bring something up or down to improve their experience. Another thing that you can do in the audio mixer doc is changed the orientation of these faders. So if you right-click and check or uncheck vertical layout, you'll get a different layout. So you can have a horizontal layout or vertical layout. It's up to you, whichever you prefer. In this case, because I've only got two audio sources, it's kind of nice that they occupy enough space. The audio mixer for me to see it in a different way. You'd use maybe a vertical layout if you had a lot more audio sources and you want it to be able to see them all without scrolling. Either orientation can also be modified in terms of how much space the audio mixer takes up by just grabbing the bar between it and a nearby duck and sliding it. Now, I mentioned in a previous video that I don't recommend that you add microphones or audio sources as sources in specific scenes by using audio input capture or output capture. And so I'll go ahead and demonstrate why I believe this is not the preferred method for demonstration purposes. I'm going to remove my microphone from the settings so that it no longer appears in the mixer. And now I'll add it in this scene as an audio input capture. Now when the scene is active, you'll see the audio input capture of my microphone. But if I were to say be in another scene where it is not a source and that scene is life, the audio input disappears. So they're no longer hearing you. And more often than not, you want to be heard in all of your scenes. So then you would have to add that source in every scene. So why not just go ahead and do that in the settings. It's always there. And then for the exceptions to the rule where you're in scenes that you don't want to be heard in, you can just mute the microphone in the audio mixer doc having to add the audio input capture source in a lot of scenes is just more work than it's worth and can cause some confusion when you think maybe you're being heard, but you're not because you forgot to put that source in that scene. So again, I recommend that you just go into Settings, audio, and add your microphone there. Now, music files that you want to play in your scenes should be added as sources in those specific scenes. And you can do that by clicking the plus media source and finding the file. Once you've targeted your file and you want it to loop, you can check the loop box. If you don't, then the file will only play once and then it will stop. And now when the scene with the music file in it is live, you will see a new item in the mixer and you'll see the audio and you can adjust that level as needed. If I were to switch to another scene that did not have that in as a source, then it will disappear. And those are the basics about dealing with audio in OBS. If you have issues with your microphone, try unplugging and plugging it back in or restarting OBS or even your computer and trying again. In the next video, we're going to talk about how to connect OBS to the streaming service that you would like to stream live two and go through the settings again for quality of that stream.
10. Stream Settings: All right, So now we're gonna get into settings for live broadcasts, stream keys, and all the things that you need to connect your OBS to the streaming platform of your choice. Now, every streaming platform has recommended settings for that platform. And you should probably go ahead at some point before you start your first stream and check those out. For example, I have twitches, Recommended Settings up on screen, and they've sorted them by hardware encoding and software encoding options. And there's a number of different outputs. If you wanted to output at 10 ADP, 60 frames per second, which would be the highest quality possible for, let's say, a gameplay with very intense graphical needs. And you want all of that quality to come through on your stream, then you would be looking at these recommendations so long as your hardware is actually capable of that kind of Broadcasts, they usually also state a maximum bit rate for their platform. For example, on Twitch, they max out at 6000 bit rate. So there's no need to go above that because it's not going to give you any additional quality for this demonstration, I'm going to go through what's probably the most common physical size and frame rate for streams. And that's 1080 at 30 frames. So we're just going to copy these exact recommendations from Twitch and bring them into OBS. And that's going to be these right here. So we'll go to Settings output and make sure you're in the streaming tab. And then we're going to copy these settings from twitches recommendations rate control set to CBR, bit rate to 4500 keyframe interval to preset quality. And then for our physical resolution, will go to the video tab and make sure that our canvas and output resolution, our 1920 by 1080 and our frames per second is set to 30. And then click Apply. And Okay. Now remember these settings in the Output tab are based on my using my hardware as an encoder. But if you're going to use software encoding, where if that's your only option, then make sure that you use recommendations from that platform for that encoder. If you're only planning to record, we'll go over those kinds of settings in the next video. But now you know where those settings go in the OBS settings menus. So when you look at the recommended settings, you know where to place them. Now probably the most important data point In order to guarantee your quality and stability of your live stream is the upload rate that's provided by your Internet service provider. Now, down and dirty way to find out what that is is to go and do a speed test. I usually go to speedtest.net. Click Go and allow it to run. And that's going to give us a quick look at what our maximum upload rate is for the Internet that we have. Now you want there to be a cushion between your maximum upload rate from your ISP and the bit rate that you set in OBS so that there's room between those two values. So with a bit rates set to 4500, I would recommend that you have at least six megs or more of upload coming from your ISP in order to give you a safe cushion. Otherwise, your streams can be unstable and cause buffering or lag or kick you off line completely. So now that we've got our settings, then we need to connect to that streaming platform. And we'll do that by going into settings stream and then choosing the service that you're going to stream to. There are a lot of popular options already populated here like Twitch, YouTube, Facebook, or you can click Show All to find other additional streaming services. Now in this example with Twitch, there are actually two ways to connect OBS with Twitch. The first way is to provide a stream key directly into OBS. The second way is to actually authorize OBS to communicate with your Twitch channel, to connect Twitch directly with OBS, click Connect account and then login to your Twitch account and it should connect. Now when you click Apply, you may see some additional docs appear in OBS. And that's because there are some integrations that will allow you to have added features and OBS because it's connected directly with your Twitch account for me, those docs or a stream information where I can set my stream title, go live notification, game category, et cetera, like I would on Twitch and the chat. And you can drag these docs and place them anywhere you like in OBS like you would any other doc. Now the other way you can connect twitch or another streaming service is by providing the stream key. And you would use, use stream key instead of Connect. And you would type that stream key in here. Now, very important before I go into the next step, you need to know that your Stream Key allows access to stream to your channel. So you need to treat this information as extremely private. Anyone who has your Stream Key can stream to your account without being logged in. Otherwise, this can be dangerous because you don't want anyone to just do that. So keep your Stream Key private. Don't show it to anyone that you don't trust, and especially don't allow it to appear on your stream or in your recordings. So now we need to find the area on Twitch where I can copy my stream key. If you're on Twitch dot tv, you would go to your icon on the top right. Click Creator dashboard settings stream. And your Stream Key is at the top. You can click copy and then go back to OBS and paste it. And now you're ready to stream to twitch. Any other platform that you can stream two can provide you with a stream key. They may also require a server URL, and you can place those in the OBS settings as well. For example, if it were a custom destination, you would need to also provide a server URL here, as well as the stream key. And that's how you enter in your information into OBS to be able to stream to whichever platform you choose. In the next video, we're going to talk about recording settings in OBS. If you're choosing to record content to upload later.
11. Recording Settings: So now we're gonna talk about recording settings in OBS for whatever platform you plan on recording and uploading content to. In this example, I have YouTube's recommended encoding settings, which you can find online, and we'll go through them and then enter them into OBS. Youtube's help page shows recommended settings of MP4 file format, an audio codec, video codec, frame rate, bit rate, resolution and aspect ratio, and color space. Your frame rate may depend on the kind of camera that you're using to record footage of yourself. But you should be fine with 30 frames per second. In most cases, your bit rate depends on the physical size that you intend to present when you upload your file. Since we've been doing everything in this class with 10 80, we'll look at those rates at 30 frames per second. For a standard definition, they recommend eight. And for high definition at 30 frames, 10. So now let's enter some of those settings in OBS. By going to settings, output and recording. Remember to choose your recording path that you would like your files to be saved in. We'll set a recording format to mp4, which was YouTube's recommendation. I'll choose my hardware encoder. But if you don't have one, then just choose the available software encoder. I'll set my bit rate to 10, which is 1, 000, 000, 000, and click Apply. Now notice for audio track, we have audio track 1 as the checked audio track. This is actually convenient because audio track 1 is also the track use for streaming. Go into the Audio tab and set track one's audio bitrate to the recommended bit rate. On YouTube, this is recommended at 128. Now let's check our videos physical size and frame rate one more time by going to video and making sure that the canvas resolution and output resolution, or 1920 by 1080 and the frame values set to 30. Youtube also recommends a color space, 700 nine, and you can do that by going to advanced color space and choose 709 Apply and Okay, and now we've entered all of those recommended settings for that platform. And as mentioned earlier in the course, you can actually set OBS to start recording automatically when you start streaming. And you can do that by going to settings. And in the general tab, automatically record when streaming. You can also have it show you a confirmation dialog when Stopping recording and keep recording when you stop streaming. That depends entirely on how you intend to use S. And remember that a lot of streaming services automatically save your streams and you can download them after you're done streaming. This can save the amount of resources that are being taxed by your computer when you're streaming. Just download the file after you are done from that platform, do what you wanna do with it, and then upload it on Twitch. You may have to enable that by going to your Creator dashboard, clicking Settings stream, and enabling store past broadcasts. Now you know how to record on OBS and it's time to do the class project, which we will talk about in the next video.
12. Submitting Your Project: All right, you've completed the course and now it's time to submit a class project. And you can do that either as a short video clip uploaded as a file, or you can provide a URL to somewhere the video is hosted that I can go and view on Skillshare. You'll just go to the your project tab of the course and submit a new project. You can add a thumbnail image, and that can just be a screenshot of one of your scenes. I'd also love it if you shared a few words about what you're seeing is about why you built it the way you did. And what your ultimate goal is, whether it's live streaming, recording and uploading or both. You may also want to add that screenshot image again in the actual project itself, just in case the thumbnail crops out or it doesn't include the full scene. Hopefully, you can upload a clip of about 60 seconds or so of you in your scene doing whatever that thing is that you're going to be doing. Or just talking about the different elements in the scene and how you put them together. If you can't upload a video file for whatever reason it's okay. Try to then include a link to where I can go and view your footage, whether that's uploaded on YouTube, a video of a past stream on Twitch or elsewhere, or any way that you can share the clip with me and others. I say others because others skillshare members are going to be able to see your class project as well. So don't do anything, I wouldn't do it. You can also start a project and upload something that is a work in progress. And then ask me questions and get that feedback that you need so that you can then continue and update your project as you make progress. It's not important that it be perfect on the first go round. It just is important that you start. Perfection will come with time and experience, but for now, just show me what you're capable of doing after taking this class. Please also consider following my page on Skillshare and leaving a review because I'd love to know how I did. You can also consider subscribing on my YouTube channel, youtube.com slash aren't Hawaii where I upload all kinds of other tips for streamers and content creators. Thank you so much for taking this course. And I can't wait to see your projects.
 Aran S, Live Broadcaster