Transcripts
1. Intro : Hello, I'm pedis, I'm 21 years old and a self-taught embroidery artists. Often passionate about embroidery since I was 18 and I spent most of the time in my studio creating new works of art. In this class, we will embroider, there's embroidery work together. We will transfer the pattern onto fabric, learned some basic embroidery techniques and of course, close to the hoop.
2. materials : In this chapter, I will show you which materials you need to embroider this work. 13 centimeter embroidery hoop. Of course, you can use a size of your choice, a pattern. You can download this pattern as a PDF. A fabric. I really like to use cotton, but you can use fabric you want. The final will be very good because you can then write a finite with it. This is her. It would be very good if he uses small and sharpen belt and lining, we will use them too close to hoop. I preclude embroidery threads. I've already chosen the color pod, but you can use the ones you like. I prefer the threads from Gramsci and the friction Pilot pen, but this pen, we will transfer the pattern into fabric.
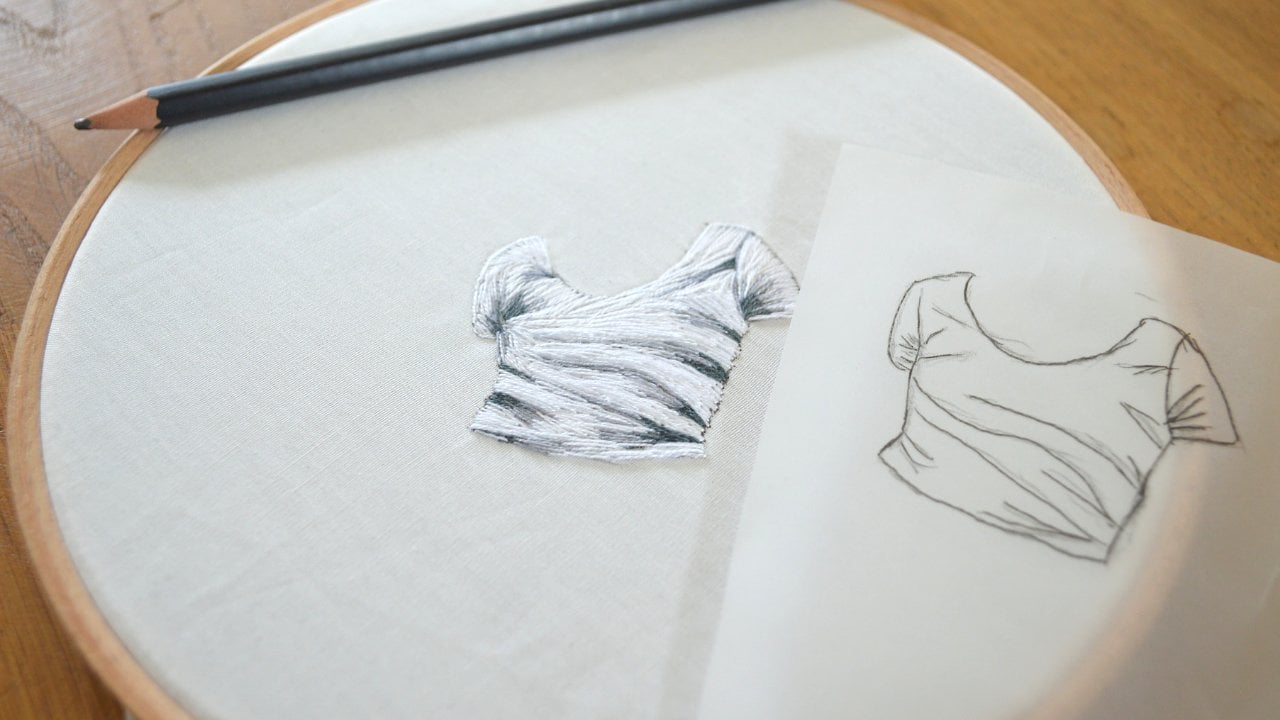
3. hoop the fabric & transfer pattern to fabric: In this chapter, we will hope the fabric, this is a very important point and we will transfer the pattern to fabric. We first losing the embroidery hoop, but the fabric on the inner ring place then the outer ring on the fabric. To improve the hold. We screw the outer ring tighter. As you can see, the fabric is loose. To get the fabric type towel, we pull on both sides at the same time until the fabric is completely smooth. Of course, a lot of methods to transfer the Patreon onto fabric. But today, which you would in a such way that we put the punchline backwards and turn it around until we have found the right position. I like to use washi tapes, so fix it. Once I found the right position, I chose todd, especially so that you don't have to buy a light box or an iPad if you don't have one. And in the end, I take the Patreon again, make some correction. And we're done so far.
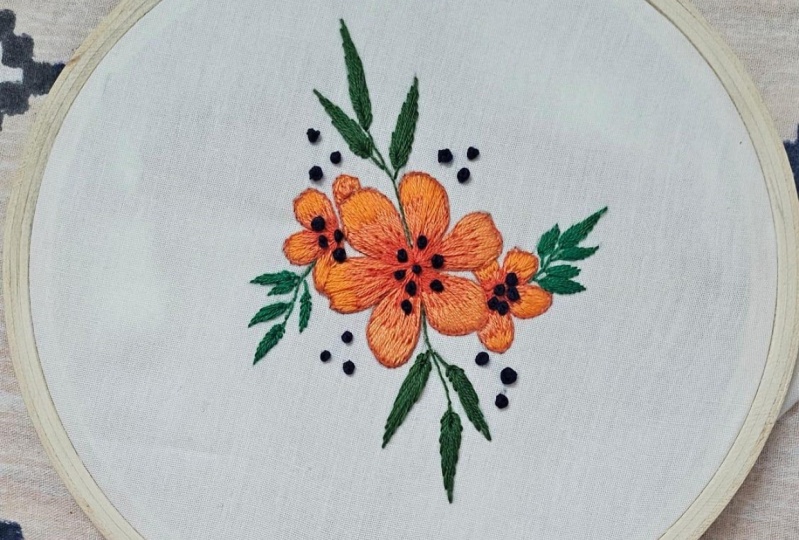
4. ombre flower embroidery with satin stitch: I will use these tree Jones to embroider the other flowers, and I will work with only two strands. One strand is only one thin thread and we're going to use only two of them. And that means that we solve the third one. Now, we start with the darkest tone as we want to create an umbrella. We embrace this flower with this atan stitch. Instead choose a very fine as shouldn't be right next to each other. But in the bottom part, the endpoint should be the same one or at least the same direction. We will continue this until we have filled the lower area. That is enough to continue with the remaining flowers according to the same principle. When we have finished embroidering all the flowers with the dark tone, we finished the stage by farming is touched a loop. Pulling the thread through the loop. We do that exactly two times and cut off the rest. Next we use this middle tone. And again with only two strands. Don't forget to make it not at the end of the threat. This can be done very easily by taking threat and wrapping it around the needle several times and then pulling it down to the end. And this is what the NAACP looks like. We continue June bride out with a town stitch. It is best to embroider into a darker shade at certain points to make it more natural. And as you can see, they're going very well together. Don't forget that will leave the upper area free for the light tone. We embrace the rest of the flower and exactly the same way and then go over to the lighter shade. Now we're done with the middle tone and I would like to show you again how to finish this stitch. As you can see, this creates a loop and now I leave the threat through the loop and pull on children not as farmed. And I do that twice. Now, it's time for the light tone. And this time we start from the edge and go a little bit into the middle tones so that a transition is forearmed. The second stage is a bit away from the first one so that it looks way more natural. Think that this is the secret. Not all such as starch from the edge, some storage from the middle so that it forms a nice transition. You carry on like this until you have filled in the entire area. We do the same with the rest of the flowers.
5. outlining of the flower with stem stitch: After we have completely filled and the flowers, I brush through the transition with the needle, I have the feeling that the umbrella looks smoother of that. And then we outline the flower as it looks much cleaner with it. I will use the darkest orange shade of our flower for this. And I will embroider with the stem stitch and I will only use one strand. For the stem search. Lead out the needle out of the fabric, and lead it in a little bit next to it. The threat is all the way through so that a loops farmed out the needle through the fabric very close to the first and pull it all the way through. We will continue with that. This creates a straight line, as you can see here. Continuing with the outlining until you have outlined the entire flower.
6. buds with french knot: To embroider the bots, like on the two flowers, I used this shade of brown as embroidery technique. I used the French knot, and I only used three strands which you can use as much strength as you want to create a French knot, leads out the needle, out of the fabric, rep, thread around the needle either two times, but you can do it as much as you want. The knot will be bigger as much as you wrap it around. And then put the needle back into the fabric and hold the needle down. I will do this now on the entire flower, also next to the flower, I will show you the results in the next video.
7. leaves with satin & stem stitch: We continue with the leaves. I will embrace these two in this light green shade and these two 1s in the slide, darker green tone. Now I will start embroidering these two stems. I will use the stem stitch as we did with the outlining of the flower. And this time also with only one strand, will lead the needle through the fabric at this point and form a loop by leading the needle through the fabric. Our point very close to the first. We lead the needle out again and this time pull the view out completely. Here we can already see a fine line that was created with the stem stitch. We continue this until we have reached the top point and repeated with the lower stem as well. Now we use three strands and embroider the leaves with is a tungsten leaves stitch out the top point and stitch in again below the middle. The process continues along the farm until you reach the bottom. This is what the end result looks like. I will carry out the same principle on these leaves. And the true side leaves will also be embroidered with the stem and the satin stitch.
8. close the hoop : This is what the end result of the embroidery work looks like. In order to remove the blue lines from the pond, we will blow a straight away with a hair dryer. As the patent is temperature dependent. After we have removed it, return to closing the embroidery hoop. First, we kept the fabric around the embroidery hoop in a circle to close because we need space for the taps. Then we cut small slits in the fabric, which works more easily with small and sharp scissors, then with large ones. Now we placed the inner lining in the embroidery hoop. Then we take the fabric glue very carefully to the inner ring of the embroidery hoop. We wait about two minutes before we fall down the tabs. After the two minutes, we carefully fold down the tabs. And now we wait about five to ten minutes until the fabric glue dries. When it's dry. We apply the fabric glue to the inner ring just as we did. But this time over the fabric. After weighing 20 minutes, we carefully place the felt on the top. Now press the sides a little harder in the end so that it also holds very well. Wait about five to ten minutes until it's dry.
9. we're done!: This is what our finished result looks like. If you turn it over, it looks like this when dried. I think it turned out very well. And I hope you enjoyed this class. If you have any questions, please let me know. I can't wait to see your embroidery breaks.
 Perestidem, Embroidery Artist