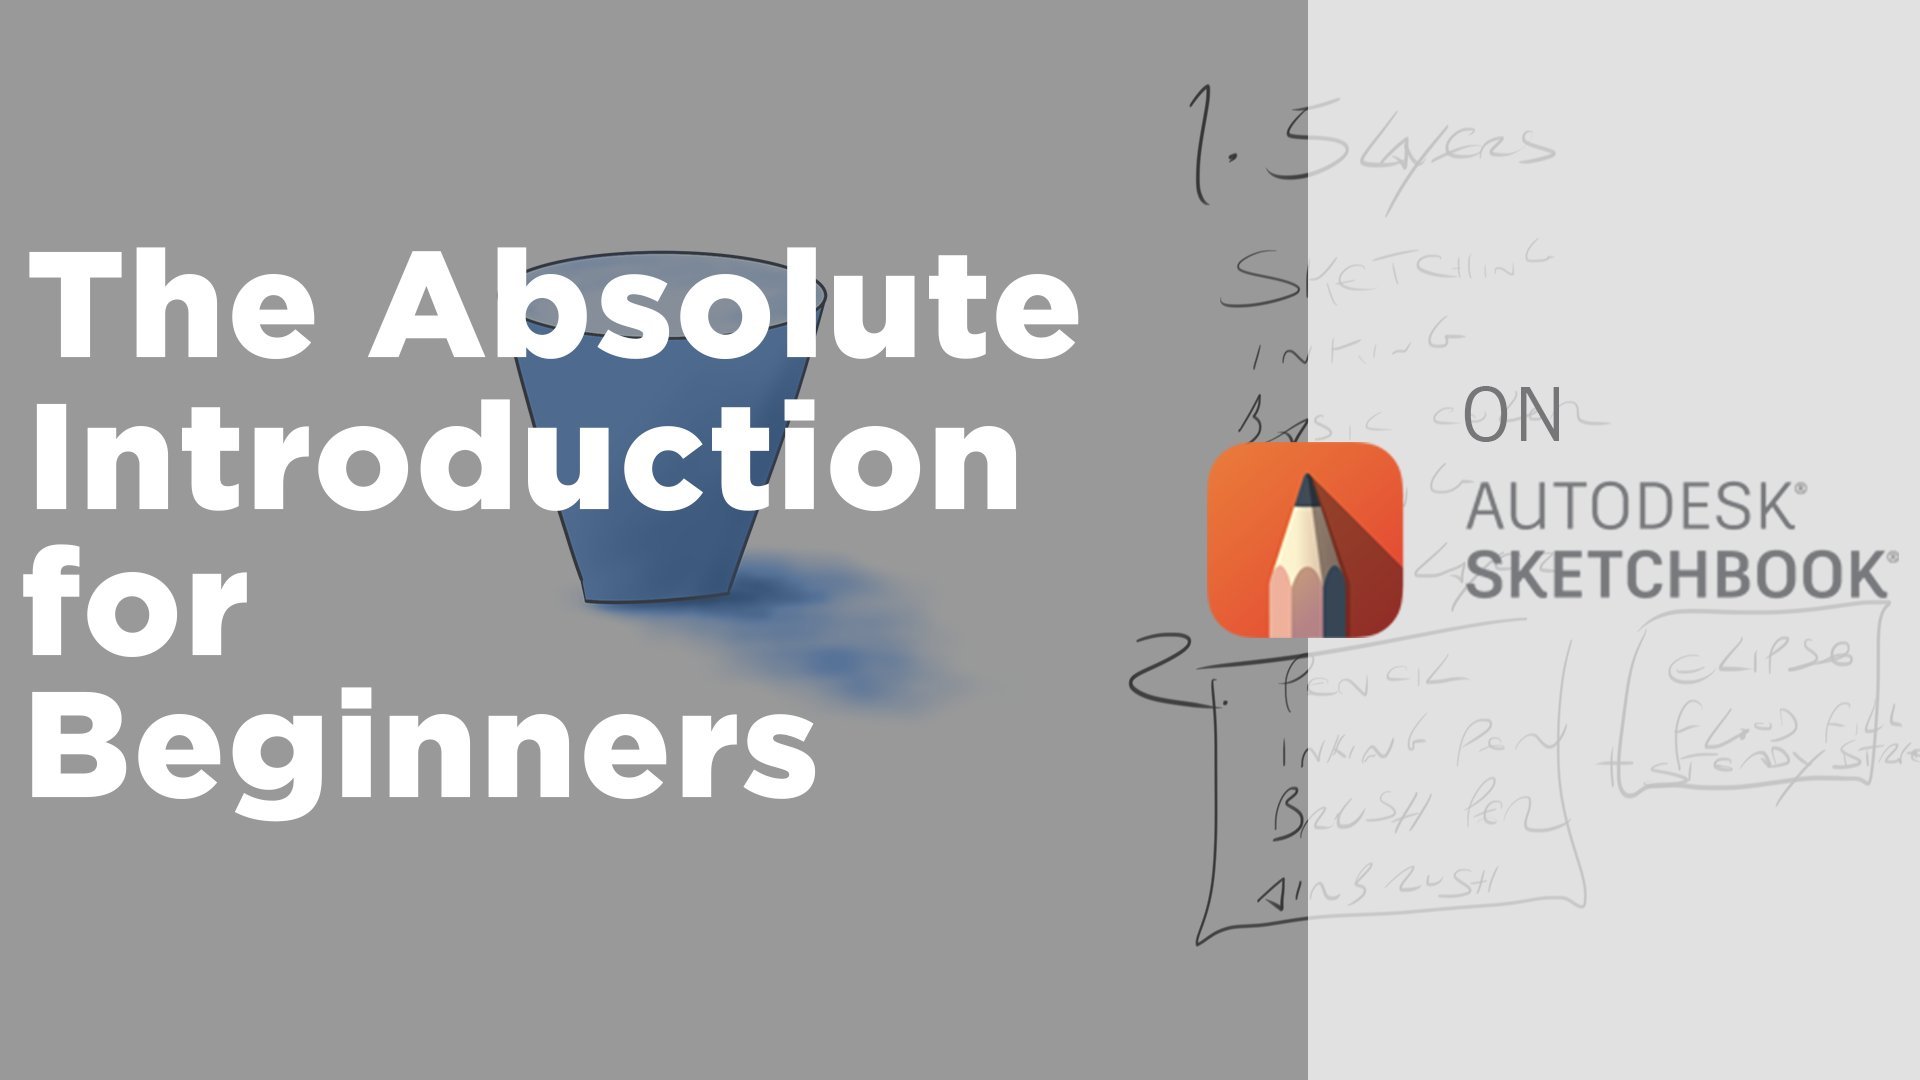
Transcripts
1. Intro: Imagine being able to create seems just like these. The feeling you get of creating new worlds, creating new stories. It is truly one of a kind. And today's class takes you through getting to know blender and everything that is capable of doing by exploring its interface. Getting to know all the capabilities and functionalities that it's unique to the software. And you will create your first full 3D scene. My name is Peter twist. I'm a 3D artist and illustrator currently living in Barcelona, Spain. I've been working as a treaty artists full-time for a little over two years now. And you've seen my portfolio. You'll see that all my pieces are environmental art. So that's what I specialize in and that's what I'll take you through in this session. So I'm going to share with you my favorite medium of illustration, which is 3D, and my favorite software to do so, which is blender. Stick around.
2. Interface Part 1: So let's get started downloading lender if you haven't done so already. It's pretty straightforward. You just go down to Blender.org. And here in the top center, you have the download button. You just choose your platform that you're using and you downloaded, followed the steps to install and you're ready to go. I'm going to click down here on the logo and the blender icon. And you should derive, once you open your ears, you should arrive at something looking like this, depending on the version that you download, a diversion that you're working on. And the background image might be different, but the layout is essentially just the same. We have here on the left all generic new files options that we can create. Down here we have the open that allows you to search for an older file or a previous found that you were working on and you keep working on it. And if that file is one of the most recent files that you open with blender. You also will have it here. You'll find it here on the right, which is like a quick shortcut directly to that file and you can resume your work. But for now, as we're new to Blender or we're going to create a new file. By clicking here. In general, this will open the default layout and the default file type of Blender, which we'll come down to three main areas, which is our 3D view port. This big window right here in the middle are outliner or our object and scene collections. Here on the top right. Collections are essentially folders. You can create new collections every time you're creating something. Because right now, organisation might not be that important, might not make such a huge difference. But once you start working with thousands of or even a few, dozens and dozens of new objects. You might want to separate them into collections or folders and keep your workflow more organized. So are seen collection here are outliner, and down here we have our Properties panel. Inside the Properties panel, we have both individual properties per object, or we also have here selection of properties for the entire scene. I'll go I'll go over in detail. Once we start going step-by-step here and the Properties panel. But for now, just know that the central, the central highlights Blender are basically the 3D view port, their outliner collections here, and our Properties panel. Okay, so just, just a quick note. You might, you might notice that while I'm hovering, my mouse, hovering from panel to panel, you will see that it changes lightly here into the gray area, gets a bit lighter. So you see which scene is being active or which panel is currently active. And this will matter in the future when we started using our shortcut or hotkeys, it matters to know which which window is active. So if we're doing a shortcut while hovering here on our outliner panel, it will work here and not defect or treaty viewport. So it's important to know, and you can see here this, every time I'm hovering a window, you can see changes that color. Bottom. Here in the bottom center, we have another view port, which is our timeline. The timeline always comes as default here in the bottom. I keep it here. It might be useful in the future and we will talk about it. But for now, I usually keep it here. And that's basically it. Regarding the basic layout then what what you land on as soon as you start a new general file. Splendor can be quite overwhelming in the beginning. But trust me, by the end of this class, you'll feel like you're pretty comfortable navigating through the entire, the entire software. So I'm going to, I'm actually going to activate here. I have an add-on that shares the, my, my keys basically. So you can see them right here. This represents my mouse. So left mouse button, middle mouse button on the wheel, and the right mouse button. I'm just gonna close here. So you'll be able to see and follow along better. If every time I'm clicking, obviously I'm always going to say it. Every time I click on something. I will say what I'm doing. But this will help you. I hope I hope you will help you to follow along easier. So I'm just going to show you here what these three items are. Because these are the default items. And let's say that the group that comes together when you start a default file in blender, you always come with a cube in the middle. And this is considered our object or mesh. We have here this rectangle, cone, garnish shape that you see. This is our camera will go into cameras specifics a bit later as well. And here, this circle with a line, this is a light. So this is basically a set of, Let's say, essential items that you need to create a basic scene. You always need an object, something to focus on. You need a light to be lighting the senior, otherwise it would be completely pitch black. And the camera to basically captured a moment are captured a scene that you are creating. Notice that every time I'm clicking here in the 3D view port, it's also changing the selection here in the outliner, right? So this allows you, and the opposite would be true as well. So if you, sometimes, if you have a lot of overlaying objects and you're having trouble reaching out to specific one. You can always come and click it here. And you will see the outline getting highlighted here. If you're clicking on it. So we're going to start by having a look here at all the options we have here. So the, these dropped drop-down menus are essentially normal, normal drop-down menus that you'll see in other types of software. You have your new file that you can create, open the Saves, import, export. So this is pretty self-explanatory. But every time we need something specific while we're creating are seen there, the important ones and the ones we're going to click on, Alawis, explain what they do individually in the edit as well. You have some, some options here. I really believed that we'll learn better by creating an actual scene. Instead of me just going through all the, all the tools that exist here and don't show them actually in, in a practical manner. So we're just, we will learn and project that will come further will be for you actually to create a full scene by yourself. But this is what we will do. This will be a great introduction to several shapes and several different objects and meshes in blender. Because this scene basically, I usually work on the stylized type, so sort of low poly, cartoonish illustrations. And in this basically represents here some rock scene, let's say in some, some trees. So I have two different types of trees. Rocks with several or several shapes or shapes and colors. And in some sort of weeds or, or tall grass here growing next to the rocks with the ground, the background. So this is a very simple scene, but he will touch on so many things, so many important things down. It's a great starting point to launch you into developing more advanced management kind of seat. So we're gonna go back to Blender and have a look at our scene. Let's start by talking about the treaty environment. So when we're talking about moving around our view port here, there's a few ways you can do it. And there's mainly, I was say three, there's three different ways that you can move around an object. So for instance, the middle mouse button, which is the wheel of a mouse, is essential. So I would recommend, I would definitely recommend having a mouse that has that extra button because for blender, to be honest, I know there's ways that you can work without it. There's very advanced Frankston for Mac users. The trackpad might be a good solution to work only with a laptop trackpad. But honestly right now I don't know how to work with that. Without a mouse that has three buttons. So if we click down on a middle mouse button and we drag, will be basically be circling around and moving up and down while moving to decide will be circling around our object. So go ahead and if you want, you can pause the video and try it yourself. Middle mouse button and just drag it around. One way we can move around our scheme. Okay? So go ahead and try it for yourself. Another way we can do it is hold down, shift, click the middle mouse button. And this will pan around arsine. So notice that I'm not circling around it. I'm panning up and down left and right around my scene so I can use the middle mouse button to circle over to the other side and maybe lifted. Go up and down holding Shift and the middle mouse button. So try it yourself. This will feel a little bit weird in the beginning. But I promise you after a few days of using using Blender, this'll be super, super intuitive. So and the third thing you can do with the middle mouse button around your scene is moving up or down. So male mouse, so the mouse wheel up or mouse wheel down with zoom in and zoom out of your scene so it can get really close. And start middle mouse button going around. You can really zoom out and do the same around your seat. Okay, so go ahead and try it for yourself. And if you're back, there's some quick, you, sometimes you can get lost in moving around with the wheel. So quick keys, if you have a notepad. Again, NUM pad is a very useful thing if you're using Blender. And we're going to learn the following. If we click one on the NUM pad. Num pad one, you'll move directly to the front view of your object. If we click number three, you'll move to sideview. And number seven, don't worry, after a few days, I promise you, you will know this by heart. Number seven goes directly to top view. Okay? Now this is top. And you will see now if I click the middle mouse button and drag, you'll see that I wasn't the top right and the same effect leak NUM pad one and go to front view. I can pan out. I can circle around and see that I was actually in the front. And three for side view and so on and so forth. Now, if you want to do the reverse, for instance, NUM pad one does front. If you do shift NUM pad one, it goes to back. Okay. So if I go to NUM pad seven and I go shift and amp seven, I'm now in the bottom. Instead of entry. I'm sideview. If I do shift three, I go to the other side view. Okay. Perfect. So if I'm ever loved, I always like to click front view and then drag a little bit to the right. And I'm back where we started.
3. Interface Part 2: So now to learn a little bit, Dao blender works. How a 3D space actually works. We have three axis. I'm going to select my object, precent G, which you, it's the same as clicking on this toolbar here on the left. So all of these actions that are here, we're actually going to use shortcuts for it. You'll be able to follow them here under the right, on the right side and the bottom. But basically I'm going to click G to grab. And now I can drag my object around. A treaty environment always has. And three axis. So we'll have, I'm going to press GIF to grab G2 graph. We have the x axis, sorry, which is the vertical one. It moves it up and down. We have the x axis, which basically moves in left and right. And we have the y axis that moves it front and back. So you'll see from me showing you this, these three axes already that every time we do some sort of action or transform to an object. So I'm going to press G to grab if I want to move it only in one axis. So before clicking down in a position. So I'll press now escape to let, let object, go back to its default location to where it was before I touched it. If I press G and I just move it around, now click, it moves to that position that I don't really know where it is. I really don't have a lot of control over it. So I'll press Control-C and go back. So now I know it's in its default position. And if I want to make sure that it only walks or it only moves around, this x axis, compresses g to grab X, any locks it to the x-axis and it doesn't move anywhere else, so I don't lose it in the space that I want. So I can move it to decide if I want to move it up, grab the and then drag it up or down and only click in the left mouse button. When I want to release it in any position. Here we go. And now we'll see it's pretty displaced from racial scene. Let's go back. So grab is one of the most essential moves that we can make. Another tool that we have that is very useful is the rotate. Again press are to rotate. And this basically is rotating it without being restrained to, to any axis at all. But for instance, if you restrain, press R to rotate, restraint to the x, to the z axis, you will rotate only on this vertical axis. The same way. Press R to rotate. Click X, and now it's rotating horizontally. And you can do the same just to try it out. Now rotate in a y axis and now you can rotate it sideways. Makes sense. Here's another good thing that you can do, which is every time you press R to rotate or G to grab. If you do Shift Z, it basically eliminates any sort of movement on that axis and it activates the other two. So I did shift the, so we will not move vertically. And I can move my position around knowing that it will stay on the same height. And now the third tool that we use the most, I would say so g to grab, R to rotate and we have S to scale. Basically scaling your object, dragging the mouse up or down. This is scaling your object equally throughout the entire mesh. Okay? So I'm going to press escape to get out of everytime we're doing some sort of transform or move or whatever actually might be to an object. If you press escape before pressing down on the left mouse button, you will get out and let's say cancel that action that you were doing. So I just want to zoom out so you can see There's no limit to two blender in terms of size. So if I press S Now to scale, I can drag out and just scale it as much as I wanted to. Okay? And the same goes to scaling down. Another cool shortcut that I didn't mention in the views in the NUM pad is every time we're super far out. And we want to zoom in exactly in one object, in the object that we have selected, we can press the dot key. So the full stop, full stop or dot key on a notepad. And if we click it, it will go and zoom in on the object that we have selected. So the same will happen for this slide. If I'm super zoomed out, I press the full stop here and on the notepad you'll go straight to the slide. So it's another hotkey that is good to know. Now scaling when we want to deform. Because you have to understand that every time we're building a scene, it it probably is made of a lot of cubes that are added to a scene and they're just scaled and rotated in a bit, modified individually, look different. But in the end, you can pretty sum up, can pretty much summed up the scene to lot of cubes. For instance, if I want to scale only on the z axis and basically stretch it up, I can press S to scale z to restrain it to the z-axis and drag it out. When I'm doing this, what I'm basically doing is literally stretching out and make it look different. It's not a cube anymore. So if I wanted to scale now and move it, for instance, scale at the cross the x axis. I can do just so. Perfect control Z. To go back to where we weren't. In. Here we are again in our default scene. So these are basically the tree three main tools that I use to move around my scenes. G to grab, R to rotate as the scale. So feel free to try it out before returning to the class. So try it as many times as you want. Change, change your object as many times as you want. Feel comfortable moving around the treaty, the treaty environment. And then we're going to start moving here around all the panels that are here. Moving through them quickly and will start creating our c. So now that you're back, hopefully feeling just a little bit more confident with the entire treaty blender environment. Let's quickly go over the menus that we have here on the top. So the layout, which is the current one and the most common, the one we're gonna do 90% of our work, modelling, which opens up a full range of tools targeted specifically at Modelling, at transforming and changing your objects. Sculpting, that changes completely the tools here on the side and gives you sculpting tools and you can deeply changed the mesh of your object. Uv Editing. This is where you can unwrap textures and paint them for instance, differently. This is a, this is for more intermediate to advanced topic and I'll cover it in future classes. But for now, just for you to know that it's there, texture paint as well. After you unwrap your textures, you can use them here. If you have a graphics tablet, for instance, you can paint and customize deeply your, your object. Shading. Shading is a tab that we will use. I like working here, even though we can do everything from the Layout tab, I like shading because it immediately separates into two views that we have here. Let's say sort of a preview of what our final scene will be. And we can change here the materials, the colors, which will go to more to mark the end of this class, we will start touching lightly here on materials. Animation obviously gives more, more attention to the timeline here you can see it's bigger and you have to view port here that will let you control better the movement of your scene. If you have, if you have an emission in the senior creating Rendering, will be the final, the final scene. So once all the settings are up and running, you can see the final render result compositing and scripting. We won't touch scripting it all compositing only at the very end of this scene. I'll just touch it very, very, very slightly because it's also an advanced topic and there's no, there's no point in discussing it here. But it will be helpful in the end just to get a more accurate and let's say faster render, so we will use it. But let's go down here to layout. And right now we are in object mode. That's the default mode for pretty much any scene here in Blender. But if you click on the drop-down menu, you have edit modes, cup mode, and paint modes here. We're not going to discuss the paint modes just yet, the sculpt mode either. That's for another class in the future. But for this one, we are going to make use of object mode and edit mode. Now, this is very important to make this distinction. And I'm gonna go ahead and show you that you can click on edit mode here and it enters edit mode. Any shows you all the tools that we would have here in the modelling tap, right? It opens up all the modelling tools. But another way to change modes is press tab on your keyboard. So tab2 edit mode, tab again to object map, right? Tab2 edit mode tab to get out of edit mode and into object mode once again. Now, what is this? What is this for? What? How does this help us? Tab to edit mode? And you see now here it opens these three little squares here. The first one means that worrying vertice select the vertex select. Here we are in edge select, and here we are in face select. What is the difference between them and how can we quickly move between these, these three modes? It's by pressing one on your keyboard, not the NUM pad, but one on your keyboard goes in to vertex mode. Number two changes to edge mode, and number three will change to face mode. If we are in face mode, we can only select the faces. A cube has six faces that we see. We can only select these faces if we are in hedged mode. However, we can select the edges. If you want to select more than one, you press shift, left-click. And now I selected these two. If I press one to go to vertex mode. Here we are. We can only select the vertices, right? And again, you hold Shift and you can select more than one. Now how is this useful? When an object mode? If I press G to grab and move the entire object, right? Now if I press tab to go into edit mode, and I have one vertex, one vertices here, one vertex, vertices, one vertex here selected. I can press G to grab. And I completely the form this shape, right? So now I'm moving it around with no specific direction, no straining on any of the axis. And we know that we can do it if we want. So control Z to go back. If I press the G, sorry, if I press G to grab and for instance, restrain it to the y axis, I can drag it to the side and I know we drag perfectly along that line. Right there. I can press this one and click on, click on G to ground constraint to the z-axis and grab it up. And there we go. Completely different form already. And remember, it's still a cube. It's still that cube that we created in the beginning. And we can press Tab Now to get out of edit mode. And we are an object mode. And we can still do everything that we were doing. We can scale it. You can scale it under x skeleton. The why. We can grab it. We can rotate. So you can still work at the same way we were working on and just that now we deform it completely. Let's go ahead and see pressed to, to go into Edge select, select an edge and drag the entire edge. Xia Dao works and oppress G Zed. And there we go. And let's see what would happen if we drag, for instance, this full face here. Press three to go into face, select, select that face, G to grab an x2, restrain it. And there we go. Proportionally. He drags everything. I want you to really try and edit your objects. So I'm gonna press tab to get out of edit mode and into object mode, right? I'm going to press x to delete or shift add. Add a cube. You can add a cylinder. Choose wherever our object or work with all of them if you wish. And before we move on to the next video, I want you to really get comfortable with moving your object, rotating it, changing it into an object mode, and then pressing Tab, go into edit mode and play around with the face select, the Edge select, and the vertex select. Okay, so really spend your time working on this. Really go into a diner, we can be a little bit boring if you're repeating everything you're doing. But it's crucial that you take your time and do so because you're going to need it to keep going with this class. Ok, so please take your time and come back to the next video.
4. Modeling Part 1: Okay. Now that you're back, so I'm going to clear my scene. And to good practice to save your first your first file. So here we are on skill share. I'm gonna go ahead and type this skill share class and just save this blender file. Okay, let's get started to know where we are. I'm gonna press one on the NUM pad to know what is front view. I'm going to press shift a to add. And I'm going to start by adding a plane. Why am I doing this? Because I just need to see you nice ground here just to know where I'm gonna put my, my objects and my scene. So I pressed as to scale it up and press one to see. I'd like to see this line here where the axis are intersecting and we're gonna press G to grab, I'm gonna place it just here. There's no specific reason to do this. It just really preference and is kind of the way I'm accustomed to sonar now it's set kind of underground on, let's say, almost ground 0 of Z. And it's a perfect way to start. So now I'm gonna go ahead and create our first object, which will be an ecosphere. Sorry, I put a real sphere. Sphere. Here we go. And now this ecosphere were going to turn it into a rock. So I'm gonna drag it more or less clear to decide. I'm going to press S to scale. Why? Just to make it a little bit thinner. Just like this. And I press R to rotate constraint into the z axis and turn it a little bit facing me to see that it's looking good. Scale z. Drag it up. Now you can see this area. You can see the outline faculty GAL80 don't see it. But my click, you can see the outline and could see the full shape. So if I knew I wanted, I want to show just a little bit more of my shape. Imagine this plane has the ground. When I click on G to grab z, to move it upwards. And there we go. Alright, so I understand that so far it's still a little bit low poly for us. But let's keep going with this and this. As I told you, the less faces we have, the less edges we have on a scene, the fastest it goes. When I press tab, if you remember what tab does, tag goes into edit mode. Tab to edit mode. Then I'm going to start changing a little bit more by faces. So I am going to press three to enter into phase. Select. There we go. Now I can select all these faces. And here is a point where I'm going to introduce just a little touch on deforming. Deforming objects. If I press a G2 graph, I'm grabbing let's say this face and the ones that are immediate immediately adjacent to it. So the ones that are actually touching it. But I wasn't affecting the rest of the shape. As you can see, it remains pretty static. Now, why does this matter? Because sometimes we like to change shapes and we would like to change it all of it accordingly. So if we go up here in the middle, you'll see that we have proportional editing. Okay? So it's a proportional edit mode that we can click there. Or we can also shortcut by clicking, oh, you press o, you enter, it activates. Right? What does this do now? So far? Nothing, but if I press a g to grab Now, you see that it opened up before I drag my mouse, he demon opened up a circle of influence here, which I can scroll up and make it smaller. So my area of influences obviously smaller. And I can feel it up. And I'm moving the entire shape with me, right? So I'm going to scale it just a little bit, almost covering the entire the entire shape. And move it just a little bit to the side. So I'm going to select this one here. Grab again, move it just a touch. Select here, graph. Now this one, I probably want to grab it down. So before I move on, I'm going to press the and there we go, drag it into the ground. I feel like this is being kinda flat here. So I'm going to press T again to grab and push it outwards. Maybe I would like a flatter top here. So if I want a flatters top, now I'm gonna go ahead and press one to move into vertex select. And I'm going to select this one here. Click on graph z, track it down. Every guy. It's starting to look like something. We're going to move this one a little bit as well. Inlet area, press tab into object mode. And here we go. If you remember, in the beginning, this was exactly an atmosphere which is starting to get a little bit of shape. We're going to press the X to delete. Perfect. So now we're gonna press one just to see where we stand on front view. Okay, three is the side view. Seven to top view. Okay, perfect. And zooming out to see the entire scene. I'm liking the waves looking. So now. Great way to add new objects to your seat. If you want an object that is based on one existing one, you can hold down shift and d, and that will duplicate your selected object. And before you click on anything, you can drag it and put it in any position that you want. And we're gonna press escape to cancel that action. Ok. So to cancel the move, it's still there. Just so you know, to cancel the MOOC, we're going to press Delete. Again, shift D to duplicate that we selected and shaped the duplicate. And now before I do anything, you can restrain it to any object that you want and move. So if we quickly want one, let me delete. Again, shift the duplicate x drafted side. Right? What I'm gonna do now, for instance, I would like a few rocks down here creating sort of steps upwards to the stone. So what I'm gonna do is click on this one, breast S to scale, drag it inward and scale it down. What I'm gonna do here now is if what I'm seeing here, it's more or less at a good height, that height that I want, I'm gonna move to top view by pressing seven g to grab Shift Z, eliminating the move on the z axis, restraining it to the x and the y. And I'm going to drag it here closer to the front of the rock. There we go. We can even adjusted a little bit slightly if you wish. So by selecting it pressed g, z, move it up a little bit. For instance, moving just a little bit in order to again move it sideways. And now let's say for instance, we wanted just the touch. But I was too, too oval, let's say the shape for a step. So I would scale it on the z axis and kinda do this crankiness, let's say to it so as to scale z to restrain it. And there we go. Perfect. And now after simply add variation to your shapes, I want to merge steps down here. So I'm gonna do shift D to duplicate z, constrained to be z-axis. Drag it down. And let's say I don't want it exactly looking like the top one. So just to quickly look different, I can press R to rotate, restrain it on its vertical axis. Root rotated slightly. And maybe now asked to scale z. Any, it looks sort of like a different rock. Is still the same object, just a little bit modified. And it makes it easier and faster to create. More develops into, let's say, I'm gonna go ahead. Once again, shift the duplicate z, go down. Drag it. Okay, perfect. Drag adjusted, touched now to decide. R to rotate again under zed axis. Very good. And let's try now rotate RDX axis. And there we go. Just a bit of variation for us. And I'm going to rotate on the y. Give it a sort of a flatter and flatter top flutter edge there on the rock. And now we could use a huge one here as a platform as well. I would say I'm going to duplicate this one. Shift, shift D. Move it to decide to scale to large for me. In terms of height, I'm going to ask to scale now. And scale only in the z. Scale it down and move it to the side. And now I don't want to move it under z-axis. I just want to drag it inwards. So xi, x0 to remove the move on the z-axis and just move it here. And now yes, we can add, we can change a little bit its height. So I'm going to go G to grab a little bit up. Perfect constraining again to the other two axis not to move it up or down. And there we got, how's that look? So far? Doesn't look like much, but it's starting to look like some sort of structure that we have here. The materials that will add that we'll add in the future will help creating the feeling of what the scene actually is. But right now is a simple structure. I think it's pretty, pretty solid and it's a good stepping stone. Creating a stone, a good stepping stone to actually develop your skills in Blender. Again, it's just a lot of adding objects, shifting them, creating them, duplicate them, and basically transformed them to, to adapt to whatever you want to represent. But that's all that it is two modelling. So again, shift the here to duplicate. Let's drag it down and drag it once again. Andi creating some sort of few steps here. Let's say one, they're going to go ahead and go to the top view here for this duplicate again, shift z because I don't want to move it up or down, just sideways. There we go. Create one here, scale at the bid down. Shift, the shift z. Again, not to move it up, a bird down. Press R, sorry. Press R to rotate it under zed axis. So vertically we're just rotating a little bit to look different and now scale it on, let's say the y axis, little bit outwards. Perfect. Shifty once again. Shift z, moving to the side. Rotate again under z. Sorry. Rotate on dizzy. Yes. No, yes. Scale on the x. Scale inwards a little bit on why. And now if we look down here, obviously they're going through the plane, right? But this area one visible. So that's why I like to put always a ground to start, to start building because It's more, it's also the way our mind works. It's easier to visualize something when we're building it for from the ground up, because that's just more natural. So setting a ground here helps us visualize. So now we have few steps going up to Iraq. So what we can start adding here now let's introduce a new shape. Is a tree.
5. Modeling Part 2: So we're gonna do two types of trees, but they're going to be quite simple. We're going to create these trees by one of them by adding a cylinder. So I'm gonna do shift right-click just to put the cursor here instead of up there on the rock. So I want the cursor here now on the plane. And I'm gonna do a little bit further, shift a to add. The Add menu is also here, right? The same menu is also here. For instance, I can do add cylinder there. Or I can just, as you, as we discussed already shift a add cylinder. Now remember what I told you about the menu that we have here in the bottom? That I can change if I wish, I can change its settings. I'm going to leave it at 16 for now. I'm gonna do scale in words because I want, I don't want to so thick. Then I move it up here. And I'm gonna scale now only in the z axis, right? So z and drag it outwards. Now making longer repress three now just to see front view. And now let's say every time I click front view, I would like to have the scene really facing towards me. So I'm gonna go ahead and click and drag. So right now I selected everything including the plane. We're gonna press one letter, press R. So one to front view on the nonfat R to rotate z. And I'm going to rotate it all here closer to my direction. So this is what I want to see when I press one. Perfect. Now we can keep working. So now we have, let's say the beginning of what is going to be our tree. We're going to move it up. So every transformation we do, either at scaling, rotating or whatever, it's always related to this center point here. Okay? This center point is usually, usually in dissenter of an object here, but we can change it by going to object and set origin. And we have a few options here. For instance, if we have geometry or origin to geometry, it's going to the center of the geometry. Now we have our object or mesh here. But if we wanted to change it to some place in specific, let's say I would like it to assume that it's origin and when it affects when I'm rotating or everything I wanted. From the bottom. If I do shift, right-click the cursor there, I got to object, set origin, origin to treat the cursor. I didn't have the object collected. Sorry, Said origin 3D cursor. And there we go. Now the origin is there. And how does this affect right now, if I want to scale it upwards, it will scale it up where stare, because it starts scaling from the origin point outward, right? So if the origin was in the center, you would scale equally to both sides. But right now, this is what happens. And if I want to rotate it the same, you rotate pivoting there on that origin point. Okay, perfect. So let's say I want to add a little bit of variation here on this tree. So I'm gonna go ahead and go into edit mode. Go up to my, my options of selection here. Remember, we can select the face by clicking here or by pressing the three key. I'm gonna select my top face here. And notice what happens when I decide to scale that top face. We're going to scale it inwards. Proportional editing isn't. I'm going to delete it now. I'm gonna take it off, take it off now. Scale, scale it inwards. And notice how I'm scaling dot top face. Maintaining the bottom phase in all these edges, just adapt to it. And all of a sudden I have pressing Tab two, object mode. I have a completely different shape now. That is looking more and more of the way I wanted to. So I'm going to select that again. I'm gonna press tab again to edit mode. And I'm going to introduce one thing that I use every time I'm modeling, which is a lookup. Okay? Look cuts are right here. But we can also get to them by being, by pressing, sorry, control are. Now before clicking anything else. You see that look at that it shows a circle up there. And if I move around my shape, you will find other Luke cups that are possible to do. Ok. In this case, I want to look at here in the middle. What does this do? This is adding edges to vertices to my mesh and gives me more options to transform it. So I'm going to click once. And once you click it, you can now drag and select the determined position around the z-axis that you want. So for instance, I'm going to want to loop cut. So I'm going to 11 right here. And I'm going to press click, left-click to place it again. Control are again creating a new look at. Once left, left-click wants to start moving it and left, left click twice to place it again. So now I'm going to have a look here. We're gonna go to front view with that Luke card selected. When I press g. Now I want to drag it around the z-axis. Just a little bit. And I'm gonna go here now, remember we're in edge mode and it only selects that edge, right? Because that's, an edge is always a connection between two vertices. But if I want to select the loop cut, I can press Alt that edge and he selects the entire look. Okay, now without looking at selected, I'm gonna press G to graph x and to the other area, to the other direction. Kinda like it. I'm gonna go to side view. It's pretty straight because we only moved it in front view. You don't notice that movement here, so let's add a little bit of variation here and do g again. And now along the y-axis, a little bit to the side. Alt. Click, select entire edge loop G to grab. Why. Move it out to us. And now we add a little bit of variation to our tree. We can even select again the entire edge loop and rotate it just a bit. And by rotating, we're giving also little bit of variation to our tree. We're going to go ahead and select this edge loop here and rotate it. Press tab to object mode and see how it's looking. So how can we, how can we add now some leaves to, to this three right here. I'm gonna go ahead and shift right mouse button. So shift right-click to add a little bit of height there. And I'm gonna go ahead and shift a to add, I'm going to add a plane. Ride around. They're gonna press S to scale or scale down my plane here. We're gonna do now S, y. Because I want to scale my plane around the y-axis. Perfect. We're gonna press tab to go into edit mode. And we're going to add some looped look cuts here. So let's do again control our loop cut. Drag it, click once, then drag it to the left. Again. Control are and look at once clicking and another second click to set it there. Okay? Now, since we're in edge mode, I'm going to click here and the bottom one, press S to scale skillet inward. Notice that it's not affecting the entire line because I have this lucas here. Click on the front one as to scale, scale it down as well. And this one scale just to touch as well. Just little bit. And there we go. Quite happy with the overall shape. Probably scale it down just a touch. Here on the top. Yeah, just like that. And now I want a little bit of a, let's say curvature to this, to this leaf. So without edge selected, I can go to sideview, press graph and z to grab it upwards. And that's moving it just a little bit, right? Again, 300 iPad sideview. Select that edge, G, G to ground Z and grab it up. It may be even this one. Now, I'll grab it down. And if we go to front view, as we always like a little bit of variation to make this edge 1-2 front view. And now we're going to rotate. Just a little bit. Drag up. So we can see that leave select that edge. Front view, rotate in the opposite direction. And see if that makes sense. Let's see how it will look like if we drag it, if we rotate. But on the same direction. We look good. I think so. So I'm going to press Tab to object Mode, seven to w, g to grab. Why in gravity here. Just so it stays in the center of our tree here. Now I do believe I do believe it's still too wide of a base here for that leaf. So I'm going to press Tab to edit mode. Try going outward so I can see the full Edges tab to edit mode selected as scaled-down. Taking makes a little bit more sense like this. And gt Grab once again. And the y. And there we go. There's another thing I would like to do now here. So I'm going to press now, I'm going to click here on our cylinder. So are our tree. We're gonna press H to hide. So if you ever want to unhide, it can just do Alt H and it unhide it, but H and hide it. And the reason why is because I wanted to zoom in here and I want to select there. So shipped right-click and I wanna put my cursor right there at the base. Why do I wanna do this? Because now I'm going to select it and I wanna go to object set origin, origin to treat the cursor, right? So I want to have the origin of this leaf now that I've changed, now that I've done all the changes that I would like to do to it. I want now to change the origin to be there. And the reason why is because I'm going to want to rotate around the tree and I wanted to rotate always in the center of the tree. So Alt H to unhide it. Go to top view. And now we delete selected. I'm gonna do shift D, R to rotate, rotate around the z. So presses z for that axis, just rotated to the set. 24 leaves. So ship D again, R to rotate around the z axis. Rotate it again, shift D, R to rotate along the z-axis, rotate it once more. Now, just going to look a little bit to the side. And we want to add some overall variation here. So now that the origin is set there, let's say we want to rotate this one in particular one. I lift it up just a little bit. So we're going to rotate around the y axis and just pull it a bit up. Click on this one. Rotate. And now it's, don't forget it's on the opposite side, so it's, it's a perpendicular. So we're gonna do rotate around the x and push it down. This one, we can rotate up now on the Y axis, just to touch. And this one, I'll leave it. What we want to do now. And to make our work easier, we're going to select holding Shift, select all four leaves. And we can do now, go to the front view. Shift D duplicates all for click Z for the z-axis. Drag up a little bit, rotate again, z around the z-axis. I rotate a little bit to the side, maybe for the rotation, for the move, the duplicate and the move up, it helps to be on front view, but maybe for the rotation, it helps to be on the top view, right? So, but we can see more or less here that it's in a pretty good position. If you want to gradually scale it down, let's say to smaller leaves as we go up. Maybe this makes sense to press S with all them selected, just kill them down. Just a touch. Shift d z to move up. Rotate around the z axis. Skill it just at that stack. And like this, you can press stop you and we'll see that performing here some sort of tree, you're pine tree shape. That is looking quite nice. I'm gonna go ahead and speed up the rest of the process, but just repeated shifty with all selected shift D. Once again, z to move up, rotate with our z to rotate only along the z axis and drag a little bit to the side. And if you want to scale them down a little bit and repeat the process.
6. Modeling Part 3: Okay. I'm quite happy with it. As you can see, it just distorting planes, a lot of planes and a cylinder. This is our tree. It's now, as you can see already, we have a lot, 44 planes just here. So it's worth it to, to start from the beginning already to organize our collections here. So I would drag it, try to select all the planes, don't touch anything else. But selecting the planes and a tree. Doing em to move new collection. And I'm gonna type trees. Perfect. The same way that a moment, I'm also gonna select here. I don't want to select the ground plane here, so that's why I'm hand peeking individually, each one. But holy shift, clicking on all the rocks here. And I selected a plan. I'm going to zoom-in. Once again. Maybe the bottom. Selecting all the rugs were going to move them. New collection, M for new collection. And name it, rocks. Enter. Perfect. This is helpful because when we start to have a scene that is busy, you can just come here to the collection. Click on the group, on the folder, right-click and do select object, and it selects all of them for you. And if I want to move it around G to grab and there we go. Perfect. So I'm gonna do just that. And we're gonna do select objects here. Go to top view, zoom out a little bit, shift D to rotate. I don't want to move it up or down. So shift Z and we're going to drag it here a little bit to the back. Going to rotate it. Again, this adds some variation. And I'm gonna scale it down and the z-axis. Notice that because we have everything selected, there's a lot of origin points. It's selecting everything and deforming it a little bit. But in this case, as I didn't do such a drastic scaling is not so bad. And this is going to be in the background. So I'm happy with that G to grab Z, grab it upwards, move it down, or sorry. Okay, so now I think we can add a second tree here. Second type, Let's say a tree's just for some variation and to introduce new ways of creating. So again, I would like to set more or less here in between these two trees. We're gonna do shift, right-click to set the cursor there, shift a to add. And we're going to add another cylinder. Perfect. Scale it down as to scale g to move up. And let's say now origin. The 3D cursor skillet indices. So we don't really scale it up. Perfect. Grab it down again. Origin guide a little bit. Lost there. So origin to 3D cursor once again. I'm quite happy with that. So I'm going to now scale it. I wanted to thinner. So I'm going to go again and press S to scale and do Shift Z because I don't want to spill it on the Z. And there we go. Perfect. Now, if we press, if you remember what full stop means, the period key on the NOPAT means I'm gonna be able to zoom in directly around the object that I'm working on. So R-d object that it's selected. Suppressing that key. Perfect. I'm gonna go into edit mode because we're going to create branches here. Okay? In the way I want to create branches is by adding loop cut. So I'm going to create a loop cut here. Click once. So control are to add loop cut, click once to set it there, and then drag it out. I only want to, so I'm going to do here one loop cut here. In another loop, could there press three to go into face mode? And we're going to select the very useful feature here, which is, I'm Select to these faces, Riemann three. Let's make it a thicker 13 of these faces. And press E to extrude. What this does is create new geometry based on a previous phase, or a vertex, or even an edge so you can extrude all three of them. But in this case, it's going to create a new, new geometry, new faces, the new edges, new vertex, vertices based on these three new phases, three phases that I have selected. So if I press E and drag it outwards, it's extruding dat and he just created all this new shape that you see. Okay, so with that still selected, I'm gonna rotate. Rotate here. Press E to extrude once again. Now in this position, left-click to set it. Rotate once again. E to extrude. Extrude once again. And now I'm gonna press S to scale and still eat to extrude. Once again an S to scale. One more time. I'm gonna do out. Sorry, go back to edit edge mode by clicking to undo out. Left-click, right, and it selects that Luca there. I'm going to press S to scale, scale it in order a little bit. And now clicking this one as well, left-click, selecting all of it. Maybe scale it up. Okay, perfect. We're gonna create another edge loop here because I want to small second branch coming this way here. So if I select control, our drag it a little bit up. And now this allows me to, this allows me to select now these three phases here. So pressing three to go to face, select shift, holding Shift down to select all three phases. And I can click to extrude. It's extruding this way here. I'm gonna press R to rotate, S to scale, E to extrude once again, rotate and scale down. And there we go. This is another branch. And I want another one coming out of here. But on this side here. So I'm going to select these three, this three on this side. E to extrude, scale it up a little bit. Rotate. E to extrude. R to rotate as the scale down. Okay? E to extrude R to rotate up, to scale it down. Let's rotate a little bit more. And skill inner parts. Okay, we're gonna press tab now to exit edit mode and into object mode. And there we go. And if this is more or less my scene, I want to see the tree from there. So I'm going to switch it, turn it around. So I'm going to r, the z, rotate a little bit more, R to rotate z. And there we go. Perfect. So now I want to create, let's say the branches, the leaves on these branches. And the way I would like to do this, to vary it from this shapes here. It's going to be with ICU spheres. Okay? So I'm gonna do shift, right-click right here at the tip of this branch. Shift a to add go to Mesh. Actually I'm going to add a UV sphere instead of an i equals three. We used I ecosphere for the rocks. And I was fear here. I'm going to scale it down. Press Full stop here on the NUM pad to zoom in on my object just to see if it's well-placed or not. We're going to move it a little bit here. Maybe scale it up a bit up. Ok. This will be one of the leaf. We're gonna shift D to duplicate it. Shift Z because I don't want to move it up or down, just to move it sideways. Skill it down. Here, grab it again, G to ground, shift Z, and just drag it forward. And I'm gonna do now G graph z over just a little bit up to sit on top of that branch. And I'm gonna do shift, the shift x0. So I duplicated it and I don't want to move it up just to move it here to this branch here. Another tip to whenever you wanna do something delicate hearing, if you don't want it to move it, if you don't want to move or rotate whatever transformation you are doing. So abruptly when you're doing some defeated g to grab, if I hold down, shift, grabs way slower, right? I can drag around. If I let go of a shift, I'm doing this with my mouse, right? But if I press Shift is waste muda. So let's say if I want to drag it up just a touch, I can do g to grab, hold, press Z for the axis, hold shift, and now drag and I'm dragging slowly up or down. Perfect. So let me just now place it. There we go. And I'm going to scale this one up, right? It's totally fine if they transpose each other just like this. And it actually looks pleasing to the eye. So I'm going to go ahead and add a b1 here. Shift a again to add, add another UV sphere. Scale it down. Maybe due to grab, grab it up. Perfect. Right here. We can scale it. And look. If you, even, if you're not a fan of the super, super wrong shaping all of them. S, z. Let's cut it down a little bit. And S to scale it up. Now. Scale it down, those only round. And there we go, a bit of variation there for you. And actually I would like this to be a little bit different in height from this one or this one way smaller. So I'm going to select all of it. Scaled down. Actually only scale into Z. Drag it down. Ok. Now this became a little bit exaggerated. Scale it into Z. Okay, great. This one, skill it into z. That's the great thing about blending ethanol. Can always make mistakes, come back, fix it, try to do better. Kinda like it.
7. Modeling Part 4: Now we have our basic scenes said. I would like to add just as I had on my, my previous work that I've done. With this, I had a few kind of weeds sprinkling from nerve from the ground. So springing from the ground. I'm going to duplicate one of these leaves here. She D to duplicate. And I move it here across. We're going to rotate it on the X. If another way to do it, to do these rotation, for instance, let me go to front view. For instance. We can rotate using numbers. So if I click on R to rotate and rotate around the x axis for instance, and I write 45. You'll do that 45 degrees. Ok. The same way I can. Let me undo this Control Z, R to rotate x again. And I do minus 45. So you literally type in minus 45. And then we go rotate in the opposite direction. And now again, keeping it, I want to rotate even more. Rotate x minus 45. Now it's full 90 degrees from that position that it was there. Okay. So rotate again now using the mouse so that, that will just to let you know that it's there and it's possible to do that. I want this way thinner. So scale, skilling, dx, drag down, perfect in, are just scaled down entirely because we want this way smaller. Notice now that it's rotating around this white. The last time I pressed on the NUM pad, the period key was around this big ball here. So right now, even though I'm working on this object here, it's still rotating there. So everytime I want my camera to reset or to go back to the one I'm working on. I just press the periodic you get out of that unpaired and there we go. So I'm gonna go and drag this down, grab Shift Z two that I want to move it up or down and just put it next to this rock here. We're going to our z, rotate around the z-axis still to be, skill it down entirely. And there we go. Zoom in again on it with period key. Rotate around to see that good. And I get shift the rotate to duplicate R to rotate z. Okay. Rotating on top of it now, so I'm gonna do g to grab, shift z to maintain the same height. Bring it to the side, rotate a little bit more with our Z. And I really like how it's looking. Okay, so we're gonna do now select both of them. Shift, left-click, whistle like both shift D to duplicate Shift Z because we don't want to move it up or down and drag it next to the next rank. Maybe scale it down a little bit, rotate in z for a little bit more variation is looking at maybe if we want to mix it up even more, we can select one of them, shift D to duplicate. Just drag it to the side, rotate on the Z. Here. Again, G to grab shifted z will be closer to them. And now we have three. Select all shift D shifts the morbid frontwards. Now here, frontwards instead of work, now move into the top front of this rock, R to rotate on the z. Scale it down. Perfect. Let's put a big one next to that tree. So shift E to duplicate ship dizzy, move it here next to the tree. Scale it up, grab, Get it out. Because he was a little bit inside the tree. Ok. It's looking nice. So now this is what you call a low policy. Okay? Meaning there's very low polygons. So the lowest amount possible of faces. You can see all the edges, everything is very cut. The, it's not a lot of smoothness. You can leave your seemed just like this. Or if you want, it's another, another possibility. If you want entirely, you could create something we smooth it. And this is usually done by adding modifiers. Okay, so I'm introducing here modifiers to class. Let's say I'm going to select this rock here. And I'm gonna go ahead, go ahead here to this wrench here and it's modifier properties. You've got to add modifier. Theres a lot can be overwhelming. We're not gonna get into this too much right now. We're just going to discuss one in particular, which is down here, the subdivision surface. Okay. I'm going to click it. You see immediately did changes and it's because of this here, the viewport, there's a one. If I put 0, it's back to where it was. So I'm gonna put this at 0 as well. The render is only for the final product. The viewport is what you're viewing live at the moment or Real-time while he working on it. But let's see what happens. Please look here at the Rock. As I put one. It added more phases to it. I'm going to put two more geometry and he's making it smarter. And I even go, I'm gonna go ahead and put three. And now it's onto smoke. Okay, what this effectively does so far, if you don't apply, it is not doing anything. So it's just visually and even for the outcome, you will work if we put the render here at three, even if we don't apply. Because once you apply, once you apply, a modifier is difficult to go back if you don't go and immediately will control Z if you start doing other actions and you forget about it, it's difficult to go back, but you can always leave a modifier open aids still working without applying it. But if I go into edit mode press tab, you still see the original mesh of well without being modified. You can still see the initial, right, these ones of this ionosphere that we created. So nothing changed. We can still touch it. I can still press three, grab this face, grab up. And now it just smooth it out and moves everything accordingly. But technically, nothing is deeply changed, so it's non-destructive. Let's say it's a way of work, way of working that is non-destructive and that's not always the best way to work, isn't it? So yeah, I loved this modifier and I use it for pretty much everything. So let's apply it to all the other. So instead of individually doing it, you can arrange them, select these objects. And now holding Shift, select the last one till this needs to be active. So the active object, which is the last way selected, needs to be the one that includes what you want to apply it to the rest. So now we've got selected. I go control l. So we have a full selection here of things that we can link to. But we're gonna ignore, oh, we're going to ignore it for now and just go down here to modifiers, ok. And this will modify everything that is selected according to your active selected objects. So we'd applied, didn't fully apply it of course, but it added this modifier here to all the other rocks. Okay, So now he becomes very, very smooth. You might not look like iraq, let's say, or the effect that you are looking for. But I kinda like it. And I'm going to now look at this, this way. We're going to drag it inwards just a bit here. Okay. Now I can, let's see what happens. Once I apply it. I can remind you the steps if you want once again to click here on the wrench with an object selected add modifier, go down to subdivision surface. Remember if you want the final result when rendering our image, if you want the final result to look exactly like the one that you're seeing here on the viewport. You need the numbers to be equal. So if it's a three here, it needs to be a three in the render, and there we go. So I'm going to select these other small rocks here. Click on the last one to be the active object control l to link and link modifiers. Okay? This is looking quite nice. Let me do the same for the trees. If I go here, add modifier subdivision surface. And go ahead. See what happened here. Because he was smoothing out here in the bottom. It kind of disappeared from the ground lead safe because it, it smooths the entire shape. What we can do here is click on the object. Click tab to go into edit mode. Control our for loop cut. Apply it, and drag it down. You see what's happening there. Because there is a loop cut. It's giving less chances to those edges to round up to the next looped up loop cut that was right here. So if I had a look at here, it's still a smooth tree trunk, but it's only smoothing and rounding from, let's say. From this face here, from that phase here, only until here, right? So let me repeat it for the top here, because I don't want to lose this definition that we had here as well. So we have this selected tab to edit mode, control our to-do loop, cut, click it, and drag it up. Not all the way up. Because that will lose the purpose of this subdivision surface modifier, but just a little bit still round. But he made it maintains the structure. Okay. And see how it looks if we add it to our leaves. I like it. I really do. Okay, so we're gonna go ahead and select all of them. Again. Remember, if you want, you can come down here and select them. Right? You can select them here. You can see this one as the modifier. So if I go to like tell them go all the way to the last was 44 wasn't I believe. Yes. 44 is the last one. So holding shift, clicking one, selects all. Don't forget to go and click on plane five, which is the last one. So holding shift, click on that one to make it the active and to show the modifier here, right? So it makes it the active object. And now you can link all the others to link modifiers. And Erica, looking quite nice. Alright, let's apply the same now to this little one here. So 12345. And choose an active one that already has the Modifier applied Control L set modifiers. And now these are pretty smooth out already. But it doesn't hurt to go select them and try to add that modifier as well. Link modifiers. Just smooth it out entirely. Do the same for this one. Now this is looking quite weird. You can guess, why is that? And can you you remember I excluded those faces. And before I just move on, could you just without me telling you, Could you if this happened to you, could you fix it? Do you remember what I've done, for instance, to this tree to try to to try to fix it. So I'm gonna go ahead and if you already had a think about it, press Tab to edit mode. Control our for loop cut. And I'm gonna set the loop guard here just to tighten. This area here, right? This will be enough. Again. I'm moving around, moving around a bigger object here, probably around this rock. And I'm not losing and losing sight of what's here. So I want to move it around it. So I'm going to press period or many keypad on the NOPAT, sorry. And now again into edit mode. Control, our for loop cut. Added right here. Tighten. This area here is looking okay. Tighten here as well. So look at here. Our loop cut. There we go. Control are here as well. Pull it up. Troll are here. Pull it down. Not looking so bad anymore. Is it already here? Control L, link modifiers. Same thing, edit mode. Let's go creating a loop cut here. Drag it down. Just to see the top here. Control loop, gut. Drag it there. We go. Be careful. Be careful not to have to select it. If you have two selected any press tab, you're going to edit mode on both of them. And you can easily destroyed if you don't, if you don't notice, you don't mean to, but it's something to watch out for. So tabbed to get out and be sure to select only one of the untyped. Okay? So now again, let me select all the, remember the key on the NUM pad to zoom in, which is the full stop period. The key, whatever you wanna call it, right? It zooms in on the objects selected. But it also helps you find it here in the outliner here into collections. So now with that selected, if, if I'm hovering here and I press the period key, it goes traded up plane. Okay? Which is perfect. So I'm gonna go to the last plane here, which is this 88. And that selects the reason I know this is because these are, these already have modifiers and are probably these ones and small ones that were created after. So now I have all those selected, just pressing one that has the modifier. I want control l to link modifiers. And everyone. Here now a full smooth scene to start, to start developing from. Okay. Now, I'm very pleased with the way it's looking. We can now looking out smoothest looks. On a scale. This is still a little bit changing. Changing. I would have been more. And want to make this flatter. Yeah. It's more like in edit mode. And then take these faces. You're dragging inwards. You don't need to do this. Just I was looking at it then. I fell plate like moving down a little bit. Dragging this one here, dragging inwards. Ok, back to object mode. And I'll drag it inside. Because I just want to show that a little bit bigger. Okay? And maybe, maybe pick this one up. Duplicate z scale scaling as well. And drag it there next to that tree. Okay, so top view G to grab it there. Okay. Just to add a little bit of depth to, to the scene. So one more here. Smaller, grab, dragged down, rotate, Shift D to duplicate t, put one next to it. Crystallite size a bit. Rotate. There we go. Okay, so now we want to start thinking about setting our final piece or final product. And for that we're gonna need our camera and our lights. Okay, so I'm gonna go ahead and remember we have them here in a separate separate folder, separate collection, highlighting, highlighting it. Now, making it visual. Here it is, our camera. So again, in order to get into camera view, we press 00 on the number pad, opens camera view. Now. To move the camera, if you want to move it next to the scene, there's a menu here that we can click on that arrow or click on the letter N and open to this menu here. Now, you won't have this blended kid or to shortcut viewer because these are add-ons that I installed later. But you will have these three. Okay? And if you go to the view to the view tab here, you have locked camera down here, log camera too few. Ok, so it means the camera will be locked to whatever you're seeing. If you press that now and close down the menu 0 to go into camera view. And you use, what do you usually use to move around the scene. So shift Middle button to pan around the scene. The middle button to rotate, zoom in on the wheel. So this lets you set the camera and start framing your seat. Okay, now, let's go into some basic considerations on on the camera. If you got well, once you have the camera selected, you have to be careful if you don't want to lose the view. You have to press 0 before starting to move again. Otherwise, you're gonna lose the positioning of your camera. But once you know that this is the one you want, you can be there and you can press M to open the menu and unlock here. So the log camera to you just click on it. And now the camera will be in that position there and you don't destroy it anymore and we can keep working. But now if we have more cameras selected and go here to camera properties. Any have you had a focal length, depth of field, and a camera size? Okay. Usually for scenes. For bigger scenes, I would like to go for a bigger focal length, so above the 100 millimeters to cap, to capture a bigger landscapes. But for this one, 50 is quite nice. I mean, if we press 0 again to see, I kinda look, I like it. How it, which pretty setup. It's good to have some negative space always when you're. But these are considerations for a later, later class. Right now, just to give you some notions to do your first render because I would like to see it when you complete the project die. I'm going to want to see your final renders. But we'll, we'll discuss a little bit more about camera properties in future classes. But just so you know, you can set up yours for 50 millimeters. Just know that this is here. And if you want to move the focal length, you know that you can't. Okay. So let's just put it down to 50. Hit enter. I'm pretty happy with that. Click 0, get out of camera view. And let's start talking about materials. Materials are essentially what's gonna give color and texture to your work. Okay, right now we have a light right here. That is light in the scene. And the way this is impacting Right now we are in solid view and this is, this is an unaffected by light. And let's discuss the views that we have here. Okay? So right now we are in this view port shading here. The solid mode of the view port chain. Okay? We have the wireframe mode here. If I click on it, you'll see that everything became a wireframe. Okay? You can see the mesh and how every object is built. You have here the preview mode. If we had materials assigned to it, you would see here dark colors, okay? Colors and textures. Right now everything is white. If I turn off the light, for instance, whereas I can delete it. And once I go into the rendered mode, which is here, everything is dark, okay, I'm going to press Control Z to go back. And now the light is affecting arsine.
8. Materials: But we will worry about our final render in a second. I just wanted you to see that is here and the light is already creating some shadows and it's beginning to look like in, like a full tree DC. But let's go back to solid mode. And now we're gonna go here to shading. Okay, just another thought here. We can actively, by selecting an object, we can actually add materials here. We can now active add materials here. But I like to go to the shading workspace here because it already has separate a few in Preview mode, in material preview mode here on the top. And he has here a Materials section down here. So this helps me increased the workflow. Awesome. So let's select this town here. Press knew this will create a new material and added immediately to this rock NEW. Let's go ahead and type ROC one. Okay, I'm gonna zoom in down here. There's a lot of options here. I'm not gonna go into nodes right now, but this needs to be connected. This controls the color and the properties our material. And this is the output. So this is what it seen, right? So if this wasn't connected, you wouldn't get anything in the end. Ok, so you absolutely need this to be connected here. I'm going to zoom in on it. So we can actually see what it's doing. Zooming here, there's not much that we need to change. I wouldn't touch any specular and issuing teen tent. You we don't need to discuss it right now. But I do like to work with the metallic and the roughness of the objects to create simple texture. So for Iraq, let's say that the roughness will be 0.9. Okay? The maximum being one, I'm going to put 0.9. Nothing is 100% rough or 100% metallic, right? Because if I turn this down and I'll put the metallic up, you'd see others, right? So let me add here to the roughness is 0.9 and metallic just a touch, just to have a little bit of reflection because it's important if there's 0, if there would be 100% roughness to 0%, metallic, light wouldn't have any sort of reflection on it. So we need just a little bit. And here, and I'm not going to touch from the subsurface color here for now. But in this base color, lets add more, let's say of a rocky color. For instance, due to a three, I already have colors that I like to use to ten. And I have here 0359, just to make it a little bit darker. And let's go ahead and go with this. Okay. Now this when we are, if we go to render mode and we see it changes a little bit obviously because now here it's affecting everything including the light. Okay. But we'll get into that. So perfect. Now that I have the first one selected, Let me change. For instance, let's create a new one now for discipline, say rock to rock too. And this one, I want to be the same 0.9 here, 0.1 in metallic to get a little bit of those reflections. And the base color, we can do, say 0.0617. Okay. A little bit darker, but that's fine. I want these ones to be exactly the same. And now exactly as we did for the modifiers, I'm selecting these three rocks. Selecting my active one with a modifier that I went with the material that I want this time, learn new control l right here. And now instead of modifiers and went to link the materials, and now it just linked the materials. I had to that one. Ok. Perfect. Now, I want these ones here in the bottom to look like the lighter one. Have another two there. And I'm going to link them to the big one. That's why it's the last one, ND active one, selected control l to link think materials. There we go. It's looking quite nice. Okay. Go back to the material preview. And let's choose, lets choose a color for these leaves right here. We can even start with our back. For instance. I should just say new material leaves one, let's say. And that will be again 2.1 roughness through 0.9. I'm going to put the same materials because I want a uniform. Again, this is supposed to be a more toy unlike render Indian. So we'd all should look more or less the same in terms of textures. So I'm gonna go ahead and select a color for this. Say, and let's go with a dark 1992083. Again, you can just you can just drag here whatever you feel like. Go drag it up or down for darker colors and select them. I just because I already have some colors pre-defined that I like to work with. And I like my work to look like it follows some sort of trend. And also people can identify little bit o, these are the color palette that Peter, you usually uses. So I like to work around the same ranges. Of course I have like five greens are six greens and I like to work with Greys, Blues, so on, so forth. Okay, so I'm going to introduce here. For the leaves, I'm going to introduce a second thing which is a subsurface. This basically it's like a color under the base color that you choosing. And it depends on the quantity that you put here will show one or the other or a mixture. So I'm gonna put here 50%. So I want 50 of the underlying color, which right now is a white. That's why it became like that. And I'm gonna go ahead and choose a really dark color for it, which is another green that I can work with. And this will be 00, almost nothing. Three zeros here, two to seven. Indegree 00 to five. Now the Blues even less, 017. Okay, this is it. So I'm going to show you now look at it. Look at that leaf there. If this was 0, you will show completely the base color. Okay? If there's one, you'll be completely this one. So I'm going to put a 0.5. he's sort of a mixing. It plays well when the light is hitting into rendered, the rendered mode in the end. So it's quite a nice feeling any effect to it. Okay, so now let's go, for instance, to this one I'm going to call leaves two. Leaves two. Same thing, 0.1, roughness. We know it. 0.9. Let's go with a colored here, a little bit lighter, easier to 96 here. C 2.0980019. Okay. Quite API without actually not going to go ahead. And I'm going to leave it like that. It kind of a mixture of green and an orange and good mix now for the fall season. So it kind of makes sense. I'm quite happy with that. So I'm gonna go and pick that small one, link it to the big one here. Control L. Link materials, give it the same color. Click on this one medium and link it to this one, control l materials. And there we go. Let's look in Nice. Okay, let's go for the leaves now. For instance, are these leaves I would a little bit more and no less saturated colors, not so strong. Let me do. Leave three. Leaves three. Our 0.01. metallic Carter, 0.9. Roughness in the base color. We'll go with 00569. And let's add some blues here. Okay. And that's different. That's nice. Okay. Alright, so let me identify this one here. Remember pressing one, oppressing the period on the NOPAT takes me straight. They're going down to number 44 because I still remember the 44. There. And clicking again on the active one. L, think the materials. Now, yeah. And now go again, period. Find it. I can even go for the small ones here already. It's like all the planes. And then still holding shift, click on this one here. Control l. Materials are the materials like ok. Now we're missing, the trucks are missing here. Also our ground. Let's not forget the ground. In the ground. Actually to be an interesting mixture, I would like it to be some sort of mixed with the base color and enough so certain subsurface color. So I'm gonna go here, type ground here as the base color. Let's do as a 0.209560, some green here. And now let's add, let's do that. Metallic. Do our roughness as usual. And let's say set a darker color here per subsurface. 296, red, green, or blue, very slightly. Okay? And let me list, say five. No, bid less than 0.3. I'll keep it like this. Okay? And now it seems like we're only missing our trees. So I'm going to click on one. Put trunk. And let's go ahead here and do for instance, near-zero, pretty seven. Okay? And 0639. Alright? So there are several ways when you're looking for colors, I use multiple sources. When I'd like to find new colors. Something weird here I see a reflection that I don't like. And he's the roughness that are born nine. And just as it 0.1 here. Okay? And let me, while I explain a, let me select the others and link to it. Control l materials. And he's length. When you're looking at making colors, you look for different sources. And there's a lot of sources that will give me the color in RGB, HSP, or hex. Ok, so that's why this last one I was put, putting here in HSV just because it's a color that I took from website that gave me that code instead of another. And that's the reason I put in there. Put it in, but there are several ways you can go about it. Are seniors looking quite full and I'm very happy when it comes to materials. If I go and check the rendered some nice shadows that were already starting to see. So okay, I'll give you time. We can stop here. This, this video. I'll give you time for you to tweak around your colors. Choose as many as you'd like. Choose whatever colors you would like. And once you're ready, you click on the next video and we'll start discussing lighting and setting our camera and finally, rendering.
9. Lighting and Rendering Part 1: So, so now we have our, our scene setup, we have our materials ready. Let's go out of shading, shading view here. Let's go to the layout. Let's go back to the layout. More space. We don't need to be touching a raw materials anymore. Let's go into camera view to see how it looks. Let's press our rendered view here to see how happy we are with it. From seemed as the way I'm seeing right now. I see we're missing some sort of background or something to support here. The fact that we don't want this empty because the render would come out with this empty. So I'm going to click 0 out of camera view. Click on the plane, shift D to duplicate, R to rotate around the x and rotate 90. Okay? There it is. Now, grab around a Y and grab it out. Okay? Now, if you go to 0, for the camera view, we can see array. Let me scale it up and drag it a little bit to the side. And there we go. Now we have sort of a background here. Now we have our light here. I'm going to click seven to go to the top view graph because you can grab a light, it's an object just like the others. Shift Z because we don't want to drag the light down and I'm going to move it. You see how that's affecting the scene? Where are you moving? A light around the scene? You'd immediately affects the shadows that are created from it, right? I'm going to create, I went to the light coming from this side here. Quite happy with it. Like the way creates the shadows here to the bank. But this feels very unnatural. So at this point flight. But me reduce a little bit too strong. Let see what happens. Okay? Okay. Alright, so I like to wait to creating just a small, a small. I liked the way to creating just a soft shadow on our object. Let's touch here on the colors. Because now it's a very strong white and it doesn't, it doesn't make a lot of sense. So let's keep it in the red. Gonna go for a yellow, warmer, warmer color for light. So a bit warmer. Now, let me switch it off here. It's quite soft. And it's a nice light creating like if we go to the 0 to camera view screening a nice scene. And now let's do here.. gonna do shift. Right-click just to put the cursor here in the middle. Shift a to add. And now we're gonna go down here, light. And I want to create the narrator light. Okay? Not a spotlight, not a son or a point. The one we have at the moment given the soft light, this is a point client, okay. We're gonna go ahead and go add wide area. Now we have an area, light their scale it up, scale it up. Alright, front view, grab into z and I want to drag it up. Okay, for us to the height we are where we already have our point light. There is fine. And now we need to, we're going to need to increase this nicely. So now it's only at 1010 watts light powerless give it the same as our point lights. Ok, perfect. Let's change our color here to one, okay? And we're going to keep it at, around the same as our point light. Let's give it a 0 here, a bit warmer there. Thanks, so perfect. We drag it down. But now our seniors still it's still too dark. Okay. So let me see. Phi skill does tend to double 300. Okay. 500. All right. We'll see if this is working. I'll give you an extra and extra tip here. Again, not going too much into it. There's no need for it. But it's good to know that we're there. Let's go to shading back again. In here, we know that we have the materials when we select, when we select our objects. But let's change here from object to world. Okay? Because you have to imagine this blender as an environment, okay, that right now the only source of light, it's here. But it's not getting anything around at, let's say, because it's now it's like in an empty space. Okay, so if we give it some sort of a world to situate itself in, it would also affect the colors of the materials. If we put even ourselves, right, if we take a picture indoors or skin looks a certain way. If we're outside, it will look our clothes, our hair. Everything will look completely different. And that's what we want to try and recreate here. Okay, so Let's go and get a new node here. I'm gonna go and shift a to add. We're going to go into HGRI, sorry. We're going to image texture. Going to an image texture. And let me open here my browser for you guys to see. There's one website called HGRI haven.com. Okay. And here we can get HER eyes for free. You go here, you click on HGRI. In, you can see all the options and you can see how it affects the materials, okay. Depending on the roughness there, if there are metallic or not. You have them all here and you can select by categories. We want a nice outdoor nature. Hgri to let us say this is like a tree 60 picture, that's what NHGRI is. Hd 360 photo, let's say. So looks quite nice as Chinese garden. I believe I have this already. But see, go ahead and download. I'm going to download it in 2K. He immediately starts downloading. And the way we do this is we go to click open. Go to our downloads. In now. Chinese garden. Opened the image is right there. And I'm gonna go ahead and attach it to our world output. Okay? He didn't see a lot of changes here, but he changed here. Okay. I'm going to show you how far this connected. This is what happened, right? There's nothing already around. What if I go to color? Again? Surface now are HGRI is here in the world and we're getting those reflections that we were getting from our beautiful picture. Okay, now we have an environment. Let's go back to object. Let's leave it here. Let's go back to Layout. And right now, it's important to know that we are in one of two possible render engines that blender has. Okay, if we've got the render properties here, you have render engine and we are in EV. Ev is, let's say a more recent Introduction to Blender. But he's great because he can work in real time and see actually how the shadows are affecting. And there's very little delay. There is no loading period at all. And I'll show you what I mean by that. If I switch here to cycles, you'll see how it takes to load. Takes longer. And it's all ingrain. Okay? And every time you move, it will take time to load as well, right? So cycle of Indian we'll probably, it depends on the situation, but most of the time I prefer to have my final render in cycles. No doubt, because we're gonna go through some settings here, some properties that we need to change in EV to make nice renders that in cycles they already come built in by nature. But, but it's difficult to work having cycles active here and try to see the final outcome. So I'm gonna put a0b0 and you see immediately the transitions, but you see all the options that are open here. That in cycles don't exist. There are very different. In EV. We have to set ambient occlusion this and put this down 0.90.1. This bloom. There's different options for shadows here, but let us go ahead and go to the lights already in use also contact shadows that they can start at 0.1. This is the distance, let's say. And if I drop an object is next to another, how close does it need to be to affect it in terms of shadow? So let's put this 0.1. I haven't checked the sides of our items actually have our objects. So if we select the rock here, press enter to open here the menu, go to item. Here we can see this rock, for instance, is one meter. Okay, that's freebie. This one. Almost two by two. It's pretty big. We can scale down just for you to see, just in case you want to. It doesn't affect at all arsine. I'll select all objects. Let me just hi delight. Sorry, hide, hide, and the camera. And then select everything else. We can scale down as much as we want altogether. And it doesn't change a thing. In terms of rendering, in terms of weight, it doesn't transform anything. So I just wanted to see right now we are at, for instance, x, that stone is now 0.06, while before it was almost two meters, we can even go half of that races now, is it 0.3? I mean, there really I missed one there. Then go back. Go back. Which 01:00 AM I missing? These sort of things happened? Nothing now I guess this does show that really changing the size, the actual size of the dimensions of an object doesn't really change anything in terms of workflow because you can zoom in as long as it as many times as you wish. So your workflow is unaltered and he also doesn't make a scene or a file smaller because of it. There's no, no, no change at all. Okay, let's bring up our objects here. Camera or light. All page shows all of them. Now they're quite dispersed and we see the camera. Obviously now, I'm going to log camera to view so I can zoom-in right on our scene. You were more or less here. Perfect. 0 to move out the scene. And we go. And let me select this light here I go again to the scene. I'm touching the light now it just, I want to see from the perspective of the camera. But I have the light selected, that area light, and I'm going to press x to scale it down. Okay. I want to scale that lights down because he was too big to disperse than I think I'm scaling it down properly. Just want to see how we will effect the scene. Scaling down. It's probably still too big. I really wanted this to be centered with my scene. So I'm going to grab the light shift D because I don't want to move it up or down and just put it straight on top. You see, you see the shadow moving on trees. Right? I don't want this provoking got much of a shadow on it, so I want to direct light on top. Okay, perfect. Clique one on the NUM pad for front view. Okay, going to drag that down. Alright, seven again, Perfect. 0 for camera view. And now, what do we think? Do we think this is too intense? One for front view? Zoom in on again. Drag it down. Alright. But I'll move this down. No, G to grab z. Z. Now it's too far away. So I'm gonna grab, again shifted V because I don't want to move it up or down. And I'm going to move it closely, closer here to just see now this one, this point light, yes, now I do want it provoking those shadows, right? So 0. Here we go. One to see what they're doing and, and grab it down. Okay. Camera view. I'm liking it. Grab again. Alright. Or forgot like the shadows right here. So I'm going to grab this one to the same level. Alright.
10. Lighting and Rendering Part 2: I'm like it'd be careful. You see the line here. This is the area light, so it's not catching that top part of our background plane there. If I click on G to grab and z, it's making a hard line there of shadow. So be sure when you're setting your camera angle, be sure to catch all the light. So if it's just here, it's perfect, right? Because we're not catching anything. Because this is the only part that is going to be rendered watching what's inside here, our camera view. We're getting very close now. We're really getting close there. I think this is very fair. Let me put it let me try that 150. I really like how it looks. Like this soft shadow that it created. What if I put this 75 back to 150? I like this. What do you think? Let me add. Okay, now, with point lights selected, again, I'm sorry if this is being too fast, but I do hope that you're seeing what I click on here and follow along because sometimes I might not say the key word. So, so often. But I'm constantly clicking, pressing the 0 that I'm pad. So I go in and out of my camera view, right? So selecting my point like their camera view to see the effect with the, with the my point light selected. Sorry, go here. In shadow. I'm going to click contact shadows. Didn't make a difference. Pretty big one, didn't it? Contact shadows. Okay, perfect. That means that light, it's affecting these individual objects. And because we have contact shadows on them, this is creating shadow under them on other objects and this creates a very nice effect. So I'm gonna go ahead here and do 3.1 to make it smaller. Or 0.01. We see the difference. 0.01. Very slight. But there is one. So I'm gonna go ahead and go through the 0.1. Too much. Maybe 0.05. Let's leave it at that. Perfect. Because I was telling you one thing. I was telling you that the size of the overall objects, all the objects, they don't really matter. But in reality, it does matter when we're talking about these little, these little definitions and properties here, for instance, the contact shadows, the distance obviously will matter and will affect the output of thanks. Also, we, as we noticed, when I resize it, when I scaled it down the entire thing, the lights were just too big and too strong for the scene. Because, for instance, this area light that we have here was at 500. And the scene was pretty dark in the beginning. And 500 just too much for now. So I put it down to 150, integrates a very nice environment overall light there with contact shadows here as well. 0.05. Let's put the same definition. And now 0 to come out of camera view. Click again on that light. Go again into camera view and see if there's anything else we would like to change. I'm quite happy. Let's go here to the render properties. Here. We are. Currently, we are shadows of camera touch here. Let's not discuss it. Right now. Blum, you can add a little bit of Blum and does sort of glows near the light spots. But I'm not going to touch it. I just want to show you now the difference. Because if we go here to the bottom, the output properties, so this will work combined with with our render properties. And we have our resolution. Okay? This is the standard HD 1080 HD to, to output their image. Here on the channels we can put always RGBA if you wish, as the alpha is for transparency. We can leave it on compression. I like to put it 00 compression when we're rendering NP and G. So if we click here on the file format, you can choose if this was an animation, we would choose here the mpeg video. But let's leave it at PNG. Okay? And PNG, it doesn't really matter when it's an image. It doesn't matter where you put it here. In the end of the Render, you'll be able to choose where you want to save it. But just for you to know that this is here and this is the resolution, if I put 1080 also here, you will do a square. So for instance, if you want something to applaud for him, for Instagram, it's important to know this is helpful so you have the full square and you can set it up accordingly. So anyway you want, I'm going to go back to 1920, right? So we just full 16 by nine, let's say type of resolution here and frame. To render. We can go here, render and render image or shortcut F2, F 12 on the keyboard. Right now we have a0b0 as are defined render. And this usually is very fast that when it's EV and we're gonna press F2. And here we go. I'm gonna zoom out. There. We got our full render. This is our finished finished picture. Unless a picture taken, it's already was very, very facet. Took three seconds, as you can see you and you can go to image, Save As, and then he select wherever you want to, save it, to rename it, you choose. Okay. I'm gonna do it because I'm going to run the comparison skill share. And we're gonna do 0b, render, 0 compression, RGB, RGB channel, safe. Okay? And now we're going to change here two cycles. Now, we remember saying that four cycles, things get very grainy and it's important. In EV, I usually don't touch it, but in cycles it's important that we change here the number of samples. So by square per inch, basically, the number of samples that blender is taking to produce the render, the higher the better. So I'm gonna go ahead and put, for instance, 600. Ok, 600. I'm going to go to Compositing here. Again, one thing that we usually don't need to touch, but I just want to let it here. I want to put it here for you guys to know just an additional step. And it's an advanced topic, but it's something that will help us just for this render. So use notes. Right here. This is our layer, or let's say our full scene. And the composite here shows our output. So we're just gonna go and click here, shift a, add, just like in any other area of Blender, search, D noise. And we're gonna put it here right in between. So it connects to the image connects there. So we don't need to go into the specifics of this. Just know that this will reduce the graininess so that grain in the image and it will speed the render time. So now cycles done only the render there. I'm not going to touch slide, I'm not going to touch anything. So we keep the same settings overall. And I just want you guys to see the difference. But at F2 now to render. And as we can see already, the scene takes a bit longer to render. So while we did in three seconds, the last, it's still here, right? Ev almost four seconds, 3.86. This has an expected time so far of 20 minutes, 21 minutes to fully render. So we're going to stop here and just speed up this process. And I'll check back with you guys in a second. So here it is. The finished render of cycles. It you can treat took way longer instead of 3.86 seconds. It took 30 minutes and 14 seconds. But let me save it in the same folder next to it. And I'm going to call it Cycles Render. Same definition 00 compressor compression or PNG. Let's compare it. Now. Side-by-side. Can go here. Lets go. This is our EV render, and this is our Cycles Render. There's pros and cons on both of them. To be honest. For instance, in a general rule, cycles is a more Tour representation of how light hits in reality. The textures are perceived way better. There's no, we don't have these problems like here. If you see the weeds here in the front, the way they get hit with shadow, they don't get cast the same way. So here's more seamless, That's a seamless transition. I do like more this harder shadow here, the darker shadow here. Maybe some hard shadows under these palm leaves, these pine leaves. But it just a matter of preference, it might not make such a big difference when the sees this small. But if you start working on something way more developed, let's say with a lot more objects. These little nuances will be important. And that's when cycles cams and really shines and performed well. So I'll leave it up to you, either EV or Cycles Render. Just remember when you do EV, You have to tweet those settings. Render Settings there with ambient occlusion in bloom if you want. And that's it. That's pretty much it.
11. Class Project: I hope, I really hope you learned and you enjoy the process. The full scene, I will leave it at this the way it is, and I'm quite happy with it with aligning with the background, with the ground, all my elements. I would probably, I would take the time maybe in just play a little bit with the colors, maybe the colors of the light. But I'll leave that up to you because I want to see your different your different takes on this. You can even add more rocks, are more trees. I'll leave it up to you. I really want you to be creative. So talking specifically about the class project, again, it just follow the class. Do seem exactly like this, or based on this, based on what you've learned. Just build a full landscape that can be shared with all of us here in the platform and render it either NAV or cycles. And please, just when you submit it, you submit the PNG. Just a brief comment to let me and all our other students here. Let us know which render engine engineer decided to choose. If there was a specific reason why you chose that? Engine. Cycles are EV. And if you wish, even a brief comment on what did you decide? What are your camera settings? Hollywood entirely up to you because that secondary, because what I really want is that you guys learn and most of all that you submit something that you felt like creating when you were creating it. So use the class to learn, but then just put out whatever you feel like you want to put out, honestly. And I wanna thank you. Thank you all for keeping up. I it's been a very long class, but it's absolutely necessary if we are to move on on two more intermediate and advanced classes in the future. This is really something we have to go through. So we're very excited to hear from you and see what you can create.
 Pedro Twist, 3D Artist & Illustrator