Transcripts
1. Let's go!: Do you want to create awesome surreal images
for your socials, but you don't have an expensive camera
or editing software, then this is your day. As this hands on class, we will create this image from
scratch with your iPhone. Hello, my name is
Emily, is that Scott? I'm a photo artists and
art director from Munich, and I create colorful
surrealistic images that have already been exhibited in multiple galleries
all around the world, such as in Paris, New York, as well as for apples shot and
edited on iPhone campaign. During the last couple of years, I've been creating many of my artwork solely with
my iPhone and iPad. One important lesson, it's not the device and make
some awesome images. It's your wisdom, the concept
you have for your photo. To bring these ideas to life. I've mastered a workflow
that helps me to create more consistently
and easily. So in this workshop
format class, I'll walk you through
everything I've learned over the past years about trading outstanding
images with your mobile. We're going to learn how
to get a sparking idea and tricks of how to post confidently
in front of the camera. We will go through the equipment
I use for shooting and editing on my iPhone and then
I find useful to invest in. And we will create this image together and I'll show
you how I got the idea, how I should photos. And of course, I'll
show you all the apps I use to edit this
image on my iPhone. And I teach you
step-by-step how to realize ideas by only
using your iPhone. Also, you will have access
to the images I use for the final results
so you can follow right along while I'm editing. So no matter if you're a beginner or already
a professional, but you want to learn more about iPhone photography and
conceptual photography. This workshop has something
new for everyone, and I hope to see you inside.
2. Welcome to the Class: Hey guys, Welcome to
today's workshop, which is all about getting
creative with your mobile. My name is Scott. I'm a photographer and digital artists and
I create colorful, surreal false, which I also often shoot an added
with my iPhone. I already worked with a bunch of big brands such as
Adobe and Apple, who which I shot
the shot and edited an iPhone campaign where
I've created this image, which was displayed on
huge billboards worldwide. So if you're interested
in how it did that, and if you want to learn which tricks you can easily
get similar results, you're right in this glass, as in the next 45 minutes. I'll let you know
everything about that. So what are we going to learn? First of all, I will show
you five ways of how I usually pump up my
creativity and get new ideas. Even though I think we're
all craters here for me, it's always really
interesting what tricks and ways others used to overcome
their creative block. And maybe some of
my techniques are also really interesting
option for you. Also nowadays is getting more
and more important to show your face on social
media and show the person behind
the art you create. But often, especially if you're not used to being in
front of the camera, you can feel awkward and
don't know how to pose. So in the second step, I'll share a few might
experience I gained over the last eight years as a
self portrait photographer, I give you nine
actionable tricks of how you can
improve your poses. Then of course, I will
show you the heart and software I use for shooting
my images with my iPhone. And let's foil it. If you have a stack of
books and your headphones and Adobe Creative
Cloud subscription, you are good to go. But even if you don't have
an Adobe subscription, there are plenty of other
apps you can use instead, which I will list in
a PDF I attached, I will show you
exactly how I shot these images and
as you may guess, I will provide you the
footage and we will edit this image to get us
solely with our phones. So if that sounds right to you, I would say let's start.
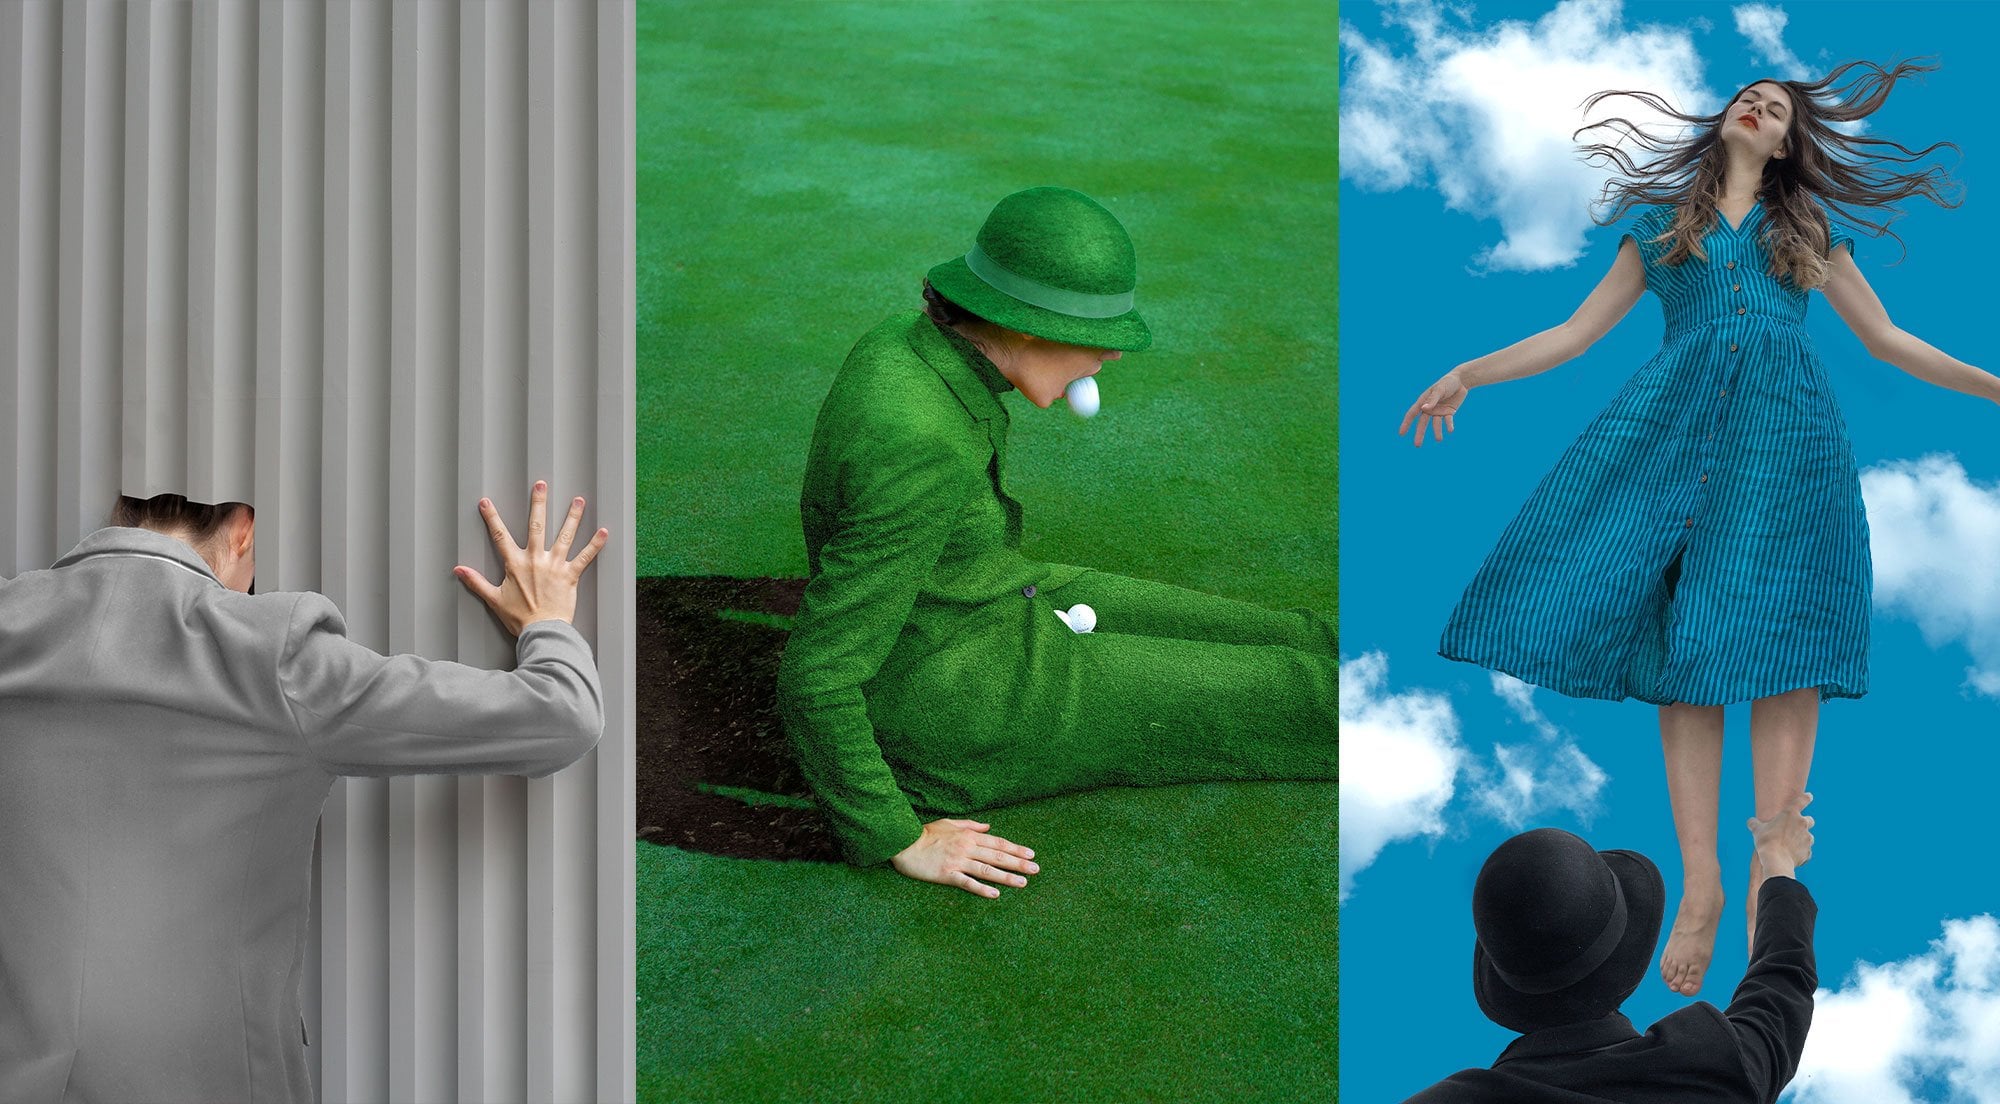
3. Inspiration: Getting great Ideas: So how do you get
great photo ideas? The easiest way for sure is to integrate odd in your life, I have a lot of different
artworks. Hey, my home. I love to go to art
shows and museums. And I have a lot of different Pinterest sports where collect images that
really inspire me. If you surround yourself
with art you really enjoy are really awesome
processes happening. You're building an archive
of images in your head. And then if you see an
idea you really like, you combine the idea with
another idea you've seen in an image before and a
whole new image is born. So what I would recommend
to you if you want to get more photo ideas
more intuitively, is to look up different photos every day
and just take them in. I promised you head will
do the rest of the magic. And I think I often do is try to actively observe my surrounding. The good thing is it doesn't
really matter where you are. You can do it from your train when you're
on your way home while you're walking
or while you're sitting bored at
home, for example, what I've realized is that
I often thought I needed fancy equipment or special props to shoot a cool new photo. But in fact, you
can really create awesome images with the objects which are basically around you. For example, you
can see that I only needed a cup of coffee
for this image, or wolf or this one. Or I just simply wrap all of my empty Amazon boxes and made them look like a huge
pile of presence. So the next time you don't
have a creative idea, pick an object around. You can think of
ten different ways, how you can integrate
this object in a photo and don't stop before you actually
have ten ideas. I will promise. The longest you'd think the more interesting
ideas will come to you. Which brings me
to the next trick I used to be more creative, which is to challenge myself. From time to time, I create challenges for myself to
just boost my creativity. What I can tell you
from my experience, if you're in the flow, you get so many ideas, you can eventually
use some outside of your challenge
afterwards as well. Different challenges
I did, for example, where my 24 days
challenge Welsh on one image every day in
December until Christmas. All my C music series
where I had to think of interesting images that
I can find in lyrics. But you can create
your own challenge that fits your needs. I promise it's really worth it. Lastly, I always find it a
really refreshing to take long walks and just clear my
head while I'm working. I always try to be an observer
and think of cool ways of how I can shoot images
within my neighborhood. Sometimes I even tried summer random outside of my city and I just basically look around as you will never know
what you may find. And this way I, for example, I found this huge
pile of logs or this golf course where
I showed these images, no matter which technique
you want to try out. I think it's always
really important to work with your productivity. Every creative probably has times where they feel
less or more creative. And the goal is to leverage these moments where you
feel most creative, even though you may think that you have more
important stuff to do, which is not always the case. And it's one thing
to think about.
4. Posing Tipps & Tricks: So now that we've
discussed how you get creative ideas
for your photos, let's talk about how you can actually improve your
posts in front of the camera so you are able to create the best
image as possible. So the first thing you
can do to get into the right mood for a shooting
is to turn on the music. Music awakes feelings
and helps you to express mood in your
poses with debts. Add it also, of course, means that you should
pick your music wisely on what mood you want
to have a new images. For example, for
this shooting here I had some slow and sad music playing in the background
because I want it to mood of the
image to be sad. Another example is
this fashion shooting. And I was actually playing
a 60 some music which really fit it to the
whole setting and help the girls to get
into the right wipe. The second tip is to simply move up with while
you're posing. Oftentimes, I see images on
social media where influences pose really weird and stiff and it always looks
really unnatural. And to be honest,
you don't want that. So the next time you're posing, just move a bit
like turn and spin, walk towards the camera. Arches. Move with your
hands through your hair. And as movement and
total just loosens tension and you
should just start having fun while
you're shooting. One of my favorite tips. They get any item with you
in front of the camera. Mostly people don't know what to do with their hands in
front of the camera. And if you just take any
item with you in the image, It's just makes it much easier. So if you're an artist,
you can, for example, show an image you've painted or you can have
your camera for me, for example, or your laptop headphones with
you in the photo. Anything that's related to your main theme or
your profession. But it can also just
pick up some leaf if you're outside or
pick some flowers, or just have maybe
a hat and new image and just place your
hands at the hat. It just simply gives
you something to interact with and helps it to be less nervous as you
can have something to do, focuses not only on you
but also on the item. Another thing is that looking straight onto the camera can be really intimidating even so
for me after all these years. So instead of looking like
a deer in the headlights, I would recommend to
you that you just look slightly right or
left to the camera. It also gives the image a more interesting
look as if you are, is thinking about what
you're seeing there, what you're looking at, and it doesn't look like
a normal holiday picture. And also, if you have
any item in your image, you can just look at this item. For example, if you
have your computer, you can obviously like
interact with your computer or maybe with your flowers or whatever you
have in the image. If you don't feel comfortable
at all in photos, there's still no reason to
not take awesome pictures. So you can simply
turn your back to the camera or maybe
go further away. So two focuses more
on the scenery. And this way you're letting
the fewer be part of your experience of
the things you are seeing because you both
look in the same direction. Another way to avoid images is just simply to
hide your face. It's just a really fun little
trick to be in the image, but also not really. And you can just simply hide
your face with flowers. You're painting. I had a plant or whatever seems fitting to your field
of professional. This way you can
actually also show your personality without
necessarily showing your face. One thing that always really
helped me to come up with really cool poses is to think of a story behind my images. So for example, in this image, I made up the story
that I was on a high cliff and I
needed to save someone. So I have to run fast over all this really high
stones and this image. I was actually in personalizing
the trees that have been fault and I was calling to
get an suffering and pain. But it doesn't always have to be as traumatic as my images. So you can just
simply have to start that you're sitting on
your computer and working. Or you can just
imitate that you're currently painting a new image. When I'm shooting
myself a trace, I also always take care
of how I place my arms. And what I've realized is that if you put them
too close to body, it can look a little bit like one whole body then just
your body and your arms. So what I usually try to do is keep a small gap between
my arms and my upper body. It's both in a good shape
and it doesn't look too like one big thing. And the last tip I have for
you is to simply look up hoses and have them as an inspiration board
while you're shooting. It sounds so simple, but truly it helps
a lot if you don't have to make up every
single post yourself. But just as I mentioned
at the beginning, I tried to be not too stiff and move a little bit
within the poses.
5. Hardware & Software: So now let's talk about
the heart and software I use for shooting and editing
my images with my phone. Firstly, of course,
I have a phone. I have an iPhone 11 which
has three different lenses. But as a mostly only shoot with my standard or
sometimes tele lens, it will work the same way
with any other phone as well. Also, if you have an
Android or any other phone, Don't worry, all
of the apps will work on Android and iPhones. Secondly, I have a tripod and a remote control
for my iPhone. And I bought this one really, I think Ambrose probably
the cheapest on Amazon. So it cost like $20 and the remote control
comes with the tripod. So I think it's not
really important to buy any expensive tripod
as the iPhone is on. Phones in general, are really, really light and I think
really heavy or expensive. Tripods are mostly for
heavier equipment. So for me, this works
really, really perfect. And this tripod actually also
has a really good height, so it also can go high enough for me to
shoot me full body. All saw the remote control, as I just mentioned, comes with the tripod
and it's super, super easy to connect
it with your iPhone. So you're basically just
connected ones with Bluetooth, and it's connected ever since. One thing you can consider investing in our studio lights. So I just simply bought two big softbox is say cos it
around 60 years at Amazon. And I just use them for
filming this workshop. I think they're
super, super useful, especially if you shoot a
lot of videos and photos. But you can just simply use your daylight
from your Windows. It just makes you a little bit
more dependent of the time of the day as you don't
always have sun and daylight. And lastly, I have a lot of
colorful background papers. I collected them in the
last couple of years, so just basically came together. But if you want to shoot cool photos on a plane,
colorful background, but you don't have the
budget or not the place to store like big
background papers, I would recommend to you
to either like paint one of your walls in a
certain color which you like, or you can basically just get wrapping paper
in different colors. And it's super cheap. And it actually
works really well. So that's what I've
been using for colors. I don't have as big
background papers and it worked pretty
decent for me. Now let's quickly talk about the software I'm using
for shooting my images. If you want, you can just
simply use your phone camera. There's definitely
nothing wrong about that. But I usually shoot
my images on my phone with my Lightroom camera for a bunch of
different reasons. First of all, you're
able to shoot in RAW, which is awesome for editing
your images afterwards. To do so, you just simply go on the Lightroom camera and
switch from JPEG to wrong. Secondly, if you use
the Lightroom camera, all of your images
you've shot are already in the Lightroom library
and as synchronizing. So you can also edit them
on your laptop or omega, whatever you're working on. And afterwards if you prefer. And as you will see in a second, I will edit all of my images
in Lightroom on my phone. So it's really useful to already have them all in my
Lightroom library. And lastly, there
are a couple of different options you have
in the Lightroom camera, which you don't have
an iPhone camera. So for example, you can
choose to white balance, which is really useful for me. I usually shoot it manually. So basically I just go on a white bands in the
Lightroom camera. I go on the Eyedropper tool and then this little thingy opens and you can just point towards any really plain white area. And then the white
balance is correct, which is really, really helpful. And when I shot with my
regular iPhone camera, I had problems are
a couple of times, especially when I was changing, when it was really sunny and then there are
clouds coming, that white bands would react
really, really weirdly. And some photos were really like yellowish and some of
them were magenta, etc. So that was my problem. And actually we've relied
room white balance. It's no deal anymore, so it's just always the
same white balance. Now about the apps I use
for editing on my iPhone.
6. Shooting the Photos: So let's jump right into the shooting of
the images we will use to add a disc final image
at the end of the workshop. And I just basically
want to show you the process of how I shot the image is really,
really quickly. So you can actually try
it yourself at home. It's really easy. But of course, as is a really short workshop, I just provided you
the images I shot. The idea for the photo
basically is that there's a kind of Polaroid
frame in the image. And I am standing there and coming out of this
polaroid frame. And I have a lot of different, like blue and red
flowers around me. Basically, it's just a
really fun image that just express my creativity
and my love for photos. So the first thing
I did was I took a white piece of paper and
I just cut out our frame, which looks like
a Polaroid frame. And then I took
this frame and I've put it on a red background. As initially, I
actually thought that I wanted to have a red
background of the image. And I just shot a couple
of photos from above. Then I looked for
some fitting clothes, and I really liked the all
in red outfit with the hats. And Diana put up my tripod and I just shot a couple of
images in my outfits, and I just use all
the posing tip. So I always had music
playing in the background. I was really motivated actually. And I am also try to have a gap between
my arms and my body. And I had, had as a prop, which was really,
really helpful. And of course I had
already the final image in my head where I have all
the flowers around myself. So I just basically knew I
should maybe look to the, towards the flowers
or surprised or just really happy basically because it should
be a happy photo. And the reason why I shot
the image is in front of a yellow wall instead
of the red background. I also have is that I knew
I just use my body but not the background
and read in front of Fred is always a
little harder to like, Find the edges and cut out
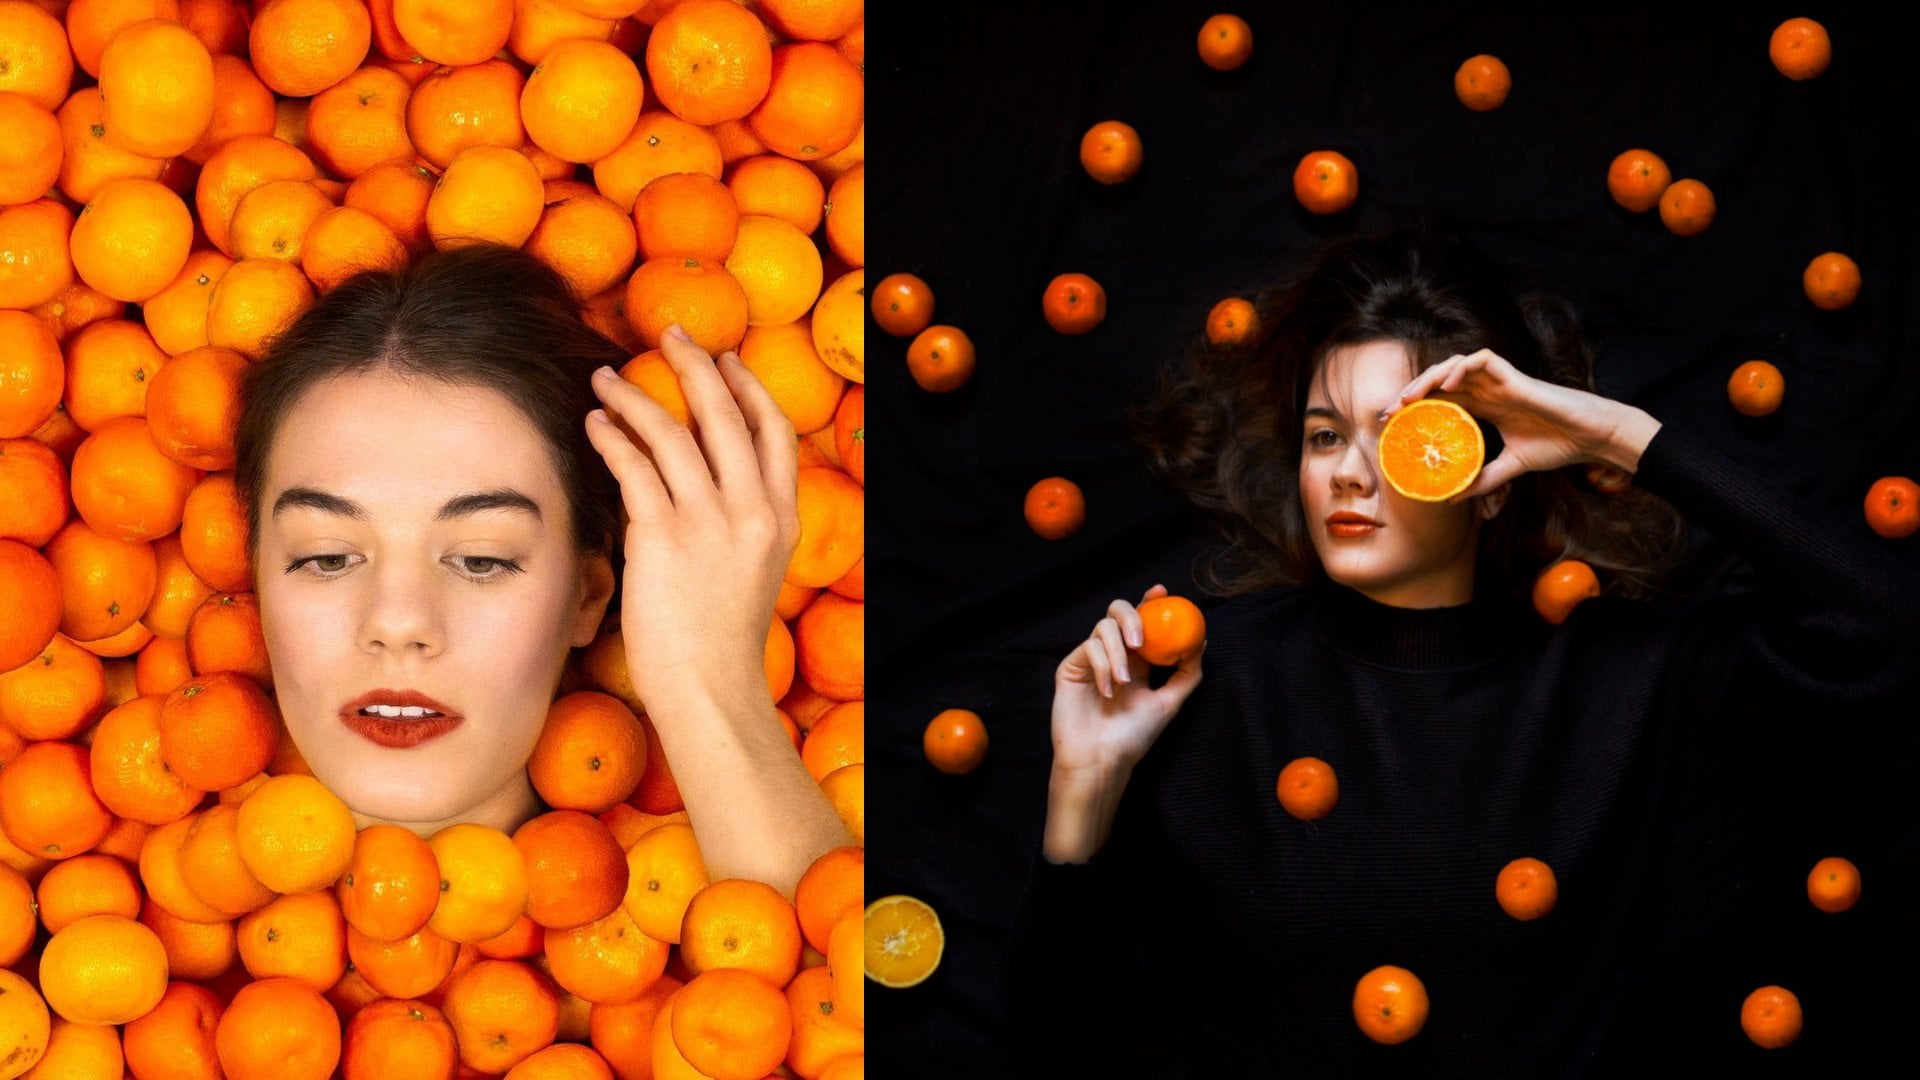
so it doesn't really matter, just maybe not color in color. And last week I bought a couple of flowers
I really loved. And I shot them in
front of white. White because it has the
highest contrast with the flowers and it's just much easier to cut them
out afterwards. So yeah, this is what
I use and what I shot. And now we're going to edit
the final image finally. And I'm gonna show you how
I do that with my iPhone.
7. Editing: Making adjustments: Let's now get to the main
part of the workshop. We will edit this
art work together. And if you haven't yet, please download
the Lightroom and the PS Express app and log
into your Adobe account. You can now download the images I just shot from the link. I put it in the
description down below. And if you just send
you a link to iPhone, you can just simply go
on a link and you'll see all the images
we need to edit. This image will open up. And you basically just have
to tap a little bit on this image and save it
to your camera roll. So it's really easy and I'm just saving all the images now. So safe. Okay, great. And if you have saved all the
images to your camera roll, you just simply open Lightroom and I created a new
folder for this workshop. And I just basically go on
this little icon down here. I say import from my
camera roll and I just basically select
the images I just downloaded and I say Add. So now we have all the images in our Lightroom folder and
the first thing we need to do is doing little adjustments before we even stitch
to the images together. So I would just jump on
the image of the person. And the first thing I
would like to do is adjust the red tones a little
bit because I want to have them a little
bit more saturated, a little darker, a
little bit more intense. So the first thing I would do
in this image, go on color. Go on mix. And you
can see you can change all of the
different colors now. So red, orange, yellow,
green, blue, etc. And obviously we want to
change the red tones now. I would just simply
go and switch to red tones a little bit to the right and left
and see what I like. I like it a little bit
to the left or you, and I want to have to
saturation higher. So I'm just adding
even more saturation and I'm making the red
tones a little darker. Not too much, but just
a tiny little bit. So it looks like a really nice
dark, saturated red tone. And I say that then we of course can go on
the lights as well. So I think the light is good, but we can just see
what we can improve. So I'm going to go on light and I'm just adding a little
bit more contrast here. I'm just lowering, lowering down the highlights
a tiny little bit because I think at some
hearts is a little too high. Then I'm going down
to the shadow. And just to let you know, I forgot to talk about that, but I use just a simple
pencil so you can just simply write with the pencil
as with any other one, but you have this Rava ending. This way you have more
control over the editing. And you can just use it as like a stylus pencil and
its cost nothing. I think most people have some similar pencil
at home as well. So if you have one, you can just go and grab it because it makes
things a bit easier. So now let's see at the shadows and I
usually like to hire the shadows a little bit because in a second I will
show you what I'm going to do. I'm going to paint with
light a little bit. And for that I
need a really like flatline so I can actually
adjust it later on. And then I'm going down. I think I think I liked
the light this way. So you can see I just made
the contrast a little higher, lower the highlights
a little bit, make the shadows
a little higher, and that's it, so
nothing dramatic. So as you can see, the first thing I
usually do is I adjust the colors as
I want them to be, as all of my images are
usually really colorful and IHS slide just
a tiny little bit. Now the most important
part comes into play. First of all, I will go on the healing brush
and I will just correct any pimples or anything which wasn't my
face, which I don't like. I mean, I don't have a lot of pimples luckily, but I mean, there's something down
here which I want to remove and maybe here
over there a little bit. So I'm just quickly going
to go on the healing brush. I have the Healing Brush and
not the stamp tool selected. And then I'm going on this area and I can
select a reference area. I think this looks
good and say, okay, the pimple is removed
and same over here. Now, painting with
flight part comes into play and I'm usually
doing it with masking. So I'm going to go on
this masking tool. I'm going to say plus. And I'm going to go on a brush. And I'm just placing
the brush anywhere outside of the image as
if it's inside the image. I have to experience that I just ran them become underbrush. And it just like
I can show you in a second one does but
basically brushes or masking and told to them as
perfect if you just want to have different
areas in the image which should have
different settings. So for example, if
you just want to. And trees to be a little
bit more saturated, you can just select
the trees and just make the saturation
a little higher. And in this image are
usually in my images. I have two different brushes. One where I make the
exposure a little higher and one where I make
the exposure a little lower. And then I just give
the whole image does a little surreal glowing look. So that's what I'm gonna do now. I'm just going to
go on the light and I just make the exposure
a little higher. And you can see there's
nothing selected yet. So I haven't brushed into my image gets so
nothing actually changed. But if I go in now and
I just have a really, really small brush, so you
can see it's not really big. I have really high feathering, so it means that the
edges are not hard, but really, really soft. And I have a really low
opacity like forex, maybe around five or six. And then I'm just going
to paint into the image and just highlight magma
cheekbones and areas, which I think really nice
if take low a little bit. So I'm just going
to do that now. And especially the hat I
think looks really nice if I just highlight it a little bit. Maybe I even make the
opacity a little higher. Maybe let's go on ten. And if you don't know
what you're doing, you can just see how it looks without the brush and brush. So you can already see that if you look on your head
and changed quite a bit. So I'm just starting to brush a little bit on my
trust and on my outfit. The brush smaller. And you can see it just adds this glow which I really love. And I'm doing that before as I'm stitching
together the images. Sometimes you just accidentally paint a little bit
over the edges. And I know that I'm going to cut out the whole person anyway, so it doesn't really matter. I just quickly can add
a little bit of glue. And Dan, I'm adding
another brush, as I mentioned before
and I'm just placing it. That's what I mean. I don't want to place it in
the middle of the image. I'm just placing it down here. And I'm just lowering the
exposure a little bit, maybe around minus one. And I can now brush in
and make area's darker, like maybe my cheekbones so they look a
little nicer, etc. So I'm going to show you
how I'm gonna do that. And you can do the same with the image as well if you like. So I have a brush
off, like nine. I have an opacity of, I think around ten was great. And then I'm just
going to go in and I'm just adding a little
bit of cheekbone, maybe even darkening
a little bit my lips. And what I propose,
brush smaller. And if you have to feeling
like it's not doing anything, as mentioned before,
just hide it and show it and you
see how you change it. So I think I did far
too much over here on the cheekbones and I'm
just pushing that way. You can remove things
with your eraser tool. I'm erasing dad and
then I'm gonna go in with even as softer brush. Now the outfit
again a little bit, so I'm just lowering
the opacity to five. And I'm just lowering
some areas here. Okay, cool. I think
that looks fine now. And I'm gonna say, okay. So you can, if you just hold on your image with
one finger and let go, you can see how it actually
changed the whole image. So you can see it really dramatically change the
look of the image already. The next thing I
would do is I'm gonna go out and I'm going
to go on the flowers. And I also would like to change the colors of the
flowers a little bit. So the red plot is, I think it's really fine, but I would saturate
it a little bit more. And I think it's kind
of like wireless. What kind of color
I would like to have this color,
this flower in blue. So I would firstly go on the color again
on the mixed tool, and then I would just
adjust the red tones again a little bit so saturated red flower make it
maybe a little darker. And then I would go on wireless Jones and I
would just make it blue. So you can see that
you can change to you after, after color. And I would just basically go into the blue tones and make it much more blue and then
maybe a little darker. So that's the way I want
the flowers look like as I have this blue
background and red dress. So I want the flowers
to fit to that. I would also change to
green tones a little bit as I think they look
far to yellowish. So let's see. I think I maybe even
have to go into yellow tones and
make them greener. So yeah, just go in the yellow tones and
switch to YouTube green. This way the stems
of the flowers look much nicer. Then I say dm. Then I'm gonna go on
the light and I'm going to make the highlights
even higher, contrast a little higher. So it actually
looks really nice. And maybe high-end shadows
a tiny little bit. I think this way it
looks kinda nice. And I go on. Okay, and now the trick comes. One thing I would recommend you to do if you like any kind of look and you
have other images which should be
in the same look. I would just go here on
the three little dots. Copy Settings. Say okay, and now
we can go on any of the other flower images
and just paste the settings. That's what I'm doing now. I'm just pasting all
the settings to all of the other images
of the flowers. So now we edited all the images as we want
them to be in Lightroom. We're going to export them and then we're
going to switch to PS Express and actually see how the whole
image comes together. So let's download the image and say Save image here as well, Export As Jay Pac large. And then say Save Image as well. Export S, Save image, export, Save image, export. Save Image. Perfect.
8. Editing: Compositing the image: Data, we're going to
jump into PS Express. And if you open it, you can see there are
different options. You can edit an image, you can retouch an image, you can mix an
image, collage, etc. So for stitching
images together, we have to mix an image. So basically what we're going to do is we're going to go on mix. Then we select the
Polaroid image, so the one with the
Polaroid framing. And then we're going to cut the framing out because we want to have a
blue background. I initially thought that I
want to have a red background. I could basically just have photograph that on
a blue background, but I wanted to
show you that it is possible to do it in
PS Express as well. I'm going to go on cut out. And you can see it already finds automatically
and it's a subject. So basically it just cuts out the framing around
Polaroid image, but I also want to read inside of the framing
cut out as well. So what we're going to do is
we're going to go on remove. And then you have two options. You can either brush
it out yourself or you can use the Smart
Remove tool as well. So that's what I'm
going to do now. And I'm just going over the red area and you
can see it already. Find it. Okay, but over there, it just took too much after framing and I'm just
gonna go over dad and just Bringing back
to frame here as well. And here it just added too much. And now I have to framing. So it was quite simple and
I just go and edit again. And now you can see
it's only the frame. The second thing we
need to do is we're going to create
another background. So what are we going to do is we're going to go
on this background. I can add now we can
choose any color you like. I just really like this
color for example, and I'm just placing it
underneath the framing. Sorry. And now it has a
blue background. If you want to zoom in and out, you have to take care of that. You haven't selected
any of the layers. So if you have selected a layer, you just make it
smaller or bigger, what you probably, maybe
usually don't want. So just make sure that you haven't selected
any of the layers. If you can't see the
layers over here, you just have to
type on the layer. And I can overhear. So you can blend in
and outer layers, but I would usually recommend you to have all the
layers visible. Then of course, we
need to import a girl because we have the girl in the image with all the flowers. So the first thing I would
do is I will just import and girl image where we already have all the painting with
light adjustments. And I can just go in
and cut out to them. And just go on the
subject cut out. And you can see it already
did a really decent job, but it hasn't selected
this area here. So I'm going to go
on the smart cutout again and just kinda go on over this area and it already removed it pretty well. Maybe I'm just gonna go in with the brush a little bit
and make it smaller. And just remove this area here, I'm going to add this finger. So I think that looks okay. Maybe I'm removing
this here as well. Okay, Cool. So now we have two girl
inside of the image, but we want it to look like the girl is coming
out of the frame. So while we going
to do is I foresee would probably make the
gorilla little smaller. So maybe around, maybe dad. Maybe I even made the framing of bigger around dad, maybe cool. And Dan, what are we going to do is we're going to
duplicate this layer. So we're going to
go under three. I can see a say Duplicate. And then one of the
layers is going on a nice layer of the framing
and one is above that, and one which is above the framing layer
is going to be cut. So we're going to
remove the downer body. So it actually looks like
I'm coming out of the frame. So for that I'm going
to use the brush and I'm gonna make the
brush a lot bigger. And I'm just cutting off the whole body down here and you can already see it already looks really good. We have to remove
even a little more. I'm just removing
that morph the body. And now it looks fine. So now the girl is looking
out of the framing. So the only thing
left to do to finish this image is to add
all the flowers. So as you can only have five separate layers
in PS Express, I will basically
merge the layers down which don't need
to be separated. So what do we actually need
to be as separated layers? I like the first two, so we need the girl as it is mostly or sometimes
in front of the flowers. So I needed to be
a separate layer. I also need the framing. What I need is the background
layer and this layer. So I'm going to
merge this down and just make it together
with the background. And then I'm going to
add a couple of flowers. So I think this one
is the first flower I'm going to add to this image. I'm just going to go on
cutout, say subject. And it already cut
it out pretty well. So I'm just going to add it
here somewhere around there. And obviously I want it to
be underneath the girls, so it's good around here, maybe maybe a little higher. Now. You can place it
wherever you want to, but it's just really simple. It cuts out the flowers
really, really easily. Then let's add another flower, maybe just time we want
to have to write one. And I'm gonna go
on cut out again. I say subject, I think
I don't need the stem, so I'm just I'm okay
with for removing them. So I'm just adding
down here, maybe here. Moving them underneath
the girl swell and just placing them where
I think it looks good. Maybe I'm just flipping
it. Looks better. Then we can as well just
simply duplicate them by, you can see we already
have five players now. So what I would do is
if I liked the flowers, like they are right now, I'm just marching them down. So I'm just saying, okay, Merge Down and these two flowers are combined now on one layer. And then I'm adding
this flower again. I'm cutting it out. Luckily, it's really, really
simple to cut it out. So it's nothing really special. And I'm just removing
the stem because I don't want to have
it in the image. Brush. And I'm placing it underneath
the girl one more time. And maybe placing it down here. And you can see we
need to like cut it a tiny little bit so
it doesn't look weird. So I'm just placing it here. I'm going to go
on a cutout tool. And I'm just cutting
a little bit of after these over here so it doesn't go into
the body of the girl. Cool. And if you think it
looks good and I will just merge it down again
with the other flowers. And then I would add two flowers as it's a little bit
more easier and it just fills out
the whole image. So I'm gonna go on cutout. Say subject cutout. Looks good. Say Okay, go underneath the girl. Looks good. I think we
need a flower down here, so I'm just going to merge them down so you can merge down. And I think I would like to add, maybe I even take this one again and I just used
the blue flowers. I'm just cutting out subject
and then I'm removing the red flower just really quickly with the
smart cutout tool. It, we got good. Cool. We're placing this one down here and just moving
it underneath the GRU. But we need to cut it obviously because L so it looks a little weird and I'm think I want to have it above
the red flower. So let's see. Yeah, you can just see how it
looks best in your opinion. I think it looks kinda
nice like maybe like this. And then I'm just
cutting off all the, and all the nice down
here because they just don't work with the image. So I'm just cutting it out. Now. It actually looks
already really good. Cool. Marched down. Maybe I even want to have a little red flower down here because it just looks
a little weird. There's no flour down there. Such as say subtract,
added down there. Who've done there? I merge it down with
the background. And Dan, I think the only
thing which is missing is some kind of flower which
just comes out of the frame. So that's why I actually selected these flowers
because I think they really fit to like going out of
the frame being a little bit like out of
out-of-control am. So I'm just cutting them
out like any other flowers. I'm gonna, gonna go on the
subject tool and you can see it selected too much
because it's so detailed. The cutout tool was not
working really, really well. So I'm going to add areas like this one with the actual and
the SOP smart swap checked. And I think I actually only
want to have the red flowers, so I'm just removing
the whole blue flower. I only need one. And then I'm going to go in and you can see they're white
areas still selected here. So I'm just gonna
go in with a brush. And I'm just painting
in with the brush and just removing
the white areas, which are really,
really obvious. So just removed
them, removed them. Let's see how it looks like. I mean, it's okay. I guess I'm putting
it underneath all the flowers
because it should come in from the background. And maybe something like this. I think I like it this way. So now we have finished with stitching the whole image
together and PS Express, and we're going to export it now and just jumping
really quickly back into Lightroom to make some final touch ups
really, really quickly. I'm just going to go here, up here and I'm saving
it and a high-quality. And now let's jump
into Lightroom.
9. Editing: Final touches: So back into Lightroom, I would just simply important
to image which has stitched together and add
it to my folder. And then we can just go into image and just do a
couple of adjustments. So I would just basically go on color because I
think for me color is the most important
and I wanted to adjust the blue
tones a little bit. I like to have them a little
bit more like Sudan toned. I would make the saturation
a little higher and I would make the blue tones even
darker around dad, maybe. And then I would go into
the red tones and even make the red tones a little bit
more traumatic like this. And lastly, I would
just simply go on the light and just adjusted
a tiny little bit. In a way, I think it looks good. So make the contrast
a little higher. Maybe the highlights,
maybe like this. Shadows are tiny little bit, just the way you
think it looks good. So maybe black tones, victim a little darker. And if you are tested
all the light, you can just simply maybe you have anything you
would like to adjust. Like you can just try things
out here in Lightroom. For me. That looks good. I'm just going to go on this little icon. I say Export and
just exporting it. And now we have the
final image which we shot and edited
with the iPhone.
10. What We've learned: So data set, that is how I
usually create my colorful, surreal images with
solely using my iPhone. And I hope you had as
much fun following this workshop as I had
creating this workshop, I hope you'll learn
some new things which you will try
out in the future. If you did, I would
be happy if you share it with me on
my social media. So it's at amnesias got on Instagram and at
amnesias gone YouTube. Also, if you want to learn more about creative photography, I think photography,
photographic tips in general, you can check out my
YouTube channel as I'm posting videos about these
topics really regularly. I hope you have a lot of fun with the other
workshops here now. And I hope I see you soon. Bye.
 Amelie Satzger, Photo Artist / Art Director