Transcripts
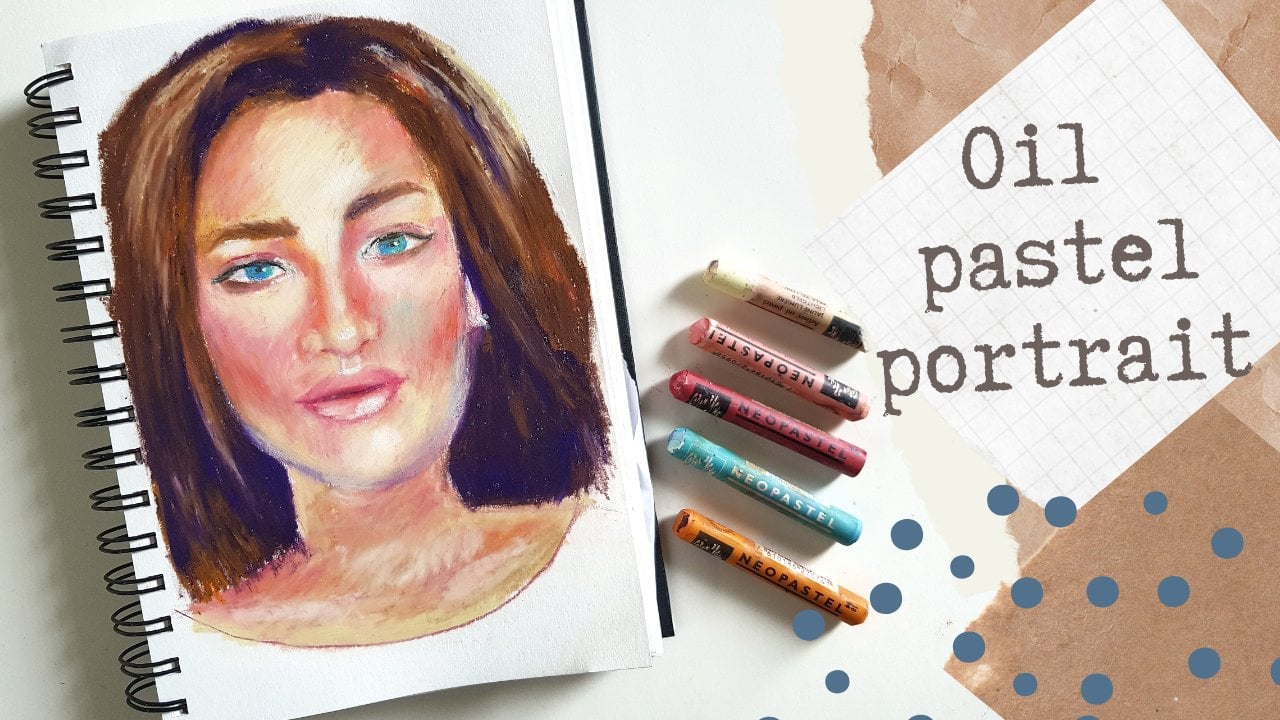
1. Mixed Media Portrait - Introduction: how everyone this is. And I am an artist based in Genoa, in India, and here I am with mixed media portrayed class for you. I have recently started started playing around with love mediums together on Have a Chief after I don't love to this technique in which I use different mediums, toe draw and paint a portrait. So I get asked a lot a lot of requests regarding the materials and everything the techniques mark making that is included in this process. So basically working with three millions, start off with charcoal and then we will establish the base layer with critics on to then finish it off. Soft Face tells a huge inspiration for this technique that I recently developed is mostly inspired by the famous artist. If you happen to get a chance to look into a few office pieces, it will really inspiring. This class is meant for you have ordered a little knowledge on how to draw entrance, and I have tried to go to down. I would use that we will be using for this project on it is all easily away with in your art supply stores. So So, without further start
2. Materials: So let's not down the materials that are required for this class sketchbook that has people with smooth finish are minimal picture and minimum thickness off 1 60 Chisolm. You may also use hoppers paper. What kind of paper for this but charcoal pencil. And the rules are, if any kind a stomped on a cotton one toe in the charcoal for a chronic colors. I am leaving the exact owns. However you may premix thes colors if you don't have any of thes colors are lavender, burnt sienna life portrait pink, light blue and titanium white, a small flat brush ACLU jar off water and a rap plot to soak up the excess freshwater. Lastly, some dry basements. I will be using a combination of both hard and soft pistols. It's basically a portrait set as shown here. Heart based ALS are by contact Barris. That is a portrait set on. The soft ones are mixed off you. Nissen's on Jackson's and all right, so these are all the materials required for this class. Now let's head onto the fun part that is creating the portrait
3. Charcoal Sketch: Now, for the first step, we will be drawing a sketch for the portrait with charcoal Bentsur. Here I am just applying the basic methods off. Drawing a portrait, I am drawing two circles and dividing it into two lines. Now, using a cotton ball toe blend, these charcoal marks and ah create this shade for the base sketch. So it's usually easier for me to start on with ah shaded surface rather than a clear white background. I start loosely and roughly with blending with the stump as well, just creating a loose shape where I want the face to be the hair and neck now, starting with the eyebrows. The reason why I created that line is so that the symmetry maintains also, if you may have noticed that I hold my pencil or charcoal pencil in this way, so it helps me make more lose marks on for details. I might move my hands a bit closer. So here and there I just bring in my stump or some blending to to just give a little bit off more dimension to it, just to give me an idea where I want the shadow areas to be here. I have brought some clear razor and shaping it into a point so I can just give some highlights toe those areas where I want to place the side of the nostrils away. The highlights fall. It's easier this way. So, rather than creating, are sharp edge with just a pencil. Um, it's a great way to create create those highlight areas. Now bring in the stump that already has a little bit off charcoal in it and shading it. Or so it gets a little bit easier toe identify where I want a certain feature to be like. For instance, I did that for the eyes and even the nose. So here I'm doing it for the lips and then, um, raising off that I want to just cut off the shape now carving out the shapes and the chin with the Raisa, it will be easier for us to give some dimensions later on when we use soft be stills in the third step. Ah, by covering up. But initially with some charcoal, it's here. I'm being bringing in Ah stump too much the charcoal faster. You may also use a cordon or ah, God, even your fingers toe much that all in. So this is how the first charcoal layer sketch should look like. And I will post this in the resource is section for your reference.
4. Acrylic layer: So now, starting with a second layer with our acrylics here I am squeezing out all the colors that I've mentioned earlier. I've also tried to put in frame at the mixing ballot so that you can see how I mix all the colors for each and every area. So I'm taking in some burnt sienna and leering it down in control areas, and then we'll fix in the tone in the later stage when we've reuse off baseballs. You may also see that I am mixing the lighter shades as well with burnt sienna to tone it down in the areas that I need different tones. So basically, in this step you will be seeing me use colors just as it is in some places, and in other areas, I will be mixing the color with lighter ones to tone it down or up according to the value off the area. Also, by value, I mean the lightness or darkness off the particular area. I wouldn't be much scared to use dark colors as we have a lot off light value colors in a piece. Tools to fix it later to also let you know beforehand. This stage off the portrait will look a bit ugly because off the unmatched owning colors, which might be alarming for few. But don't worry. Third step is all about fixing and tweaking the shades. So we have fun as much as we wanted this stage. - Now I'm swiveling my brush around to create some texture so that later in the stage, when we use softly stills, we have enough off texture for it to hold onto.
5. Pastel Layer: now for the final step. That is the base stints. I won't be talking much in this step, as I have put what colors I am using in a split screen so you can sit back and observe how I go about it. In few areas, I will be bringing in my charcoal pencil as well, to reiterate the lines to show the features. So sit back and enjoy That's
6. Closing tone: So this is how the final bees should look like. And I hope you had fun and gain few inside on how to paint a mixed media portrait. I would love to see your finished pieces as well. So do posted in the projects and resources section. Until then, keep creating.
 Nitika Alé, Artist