Transcripts
1. Mixed Media Flowers Skillshare INTRO: Hi, guys. I'm mixed media artist Sherry Burbach. Welcome to my skill share class mixed media flowers In this class, I'm gonna show you how to create flowers that are free form in nature and have mixed media elements like collage and paint and layers of texture and color. This this class is perfect for any level of painter, from beginner to advanced. You don't even need painting experience to create these types of flowers. If your season professional, you'll love these techniques of collage and paint and creating flowers with movement that air freeform and just really fun to make. Thanks for joining me and let's get painting.
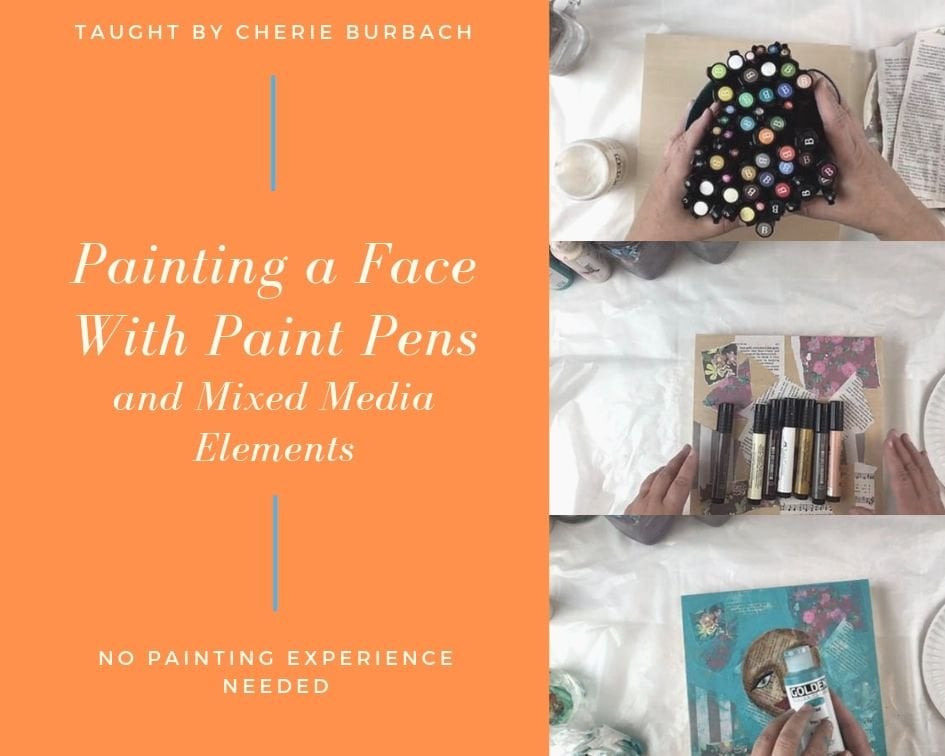
2. Mixed Media Flowers Skillshare SUPPLIES: mixed media aren't generally uses a variety of supplies. That's quite so fun. But you don't have to stress out about getting expensive supplies or getting the right supplies. This project's gonna be simple in that you can use really simple supplies to create these beautiful flowers. In this project, we're using paper and acrylics and different type of collage techniques. So, first of all, paper, I'm using a variety of papers, and you can use whatever you have. It doesn't matter. You could use scrap of paper, notebook paper maps, napkins really just kind of see what you have around the house and that will work for this project. We're also using regular body acrylic paint. Thes air Pain said, are typically found in big box stores, craft stores, hobby stores, art supply stores and they're generally inexpensive. I would recommend getting maybe two or three tubes, and they don't have to be this big of different types of paint that you can use to create your flowers. One of the colors you'll definitely need is black. It is a way that we pull everything together at the end of the project, and the way that we do that was we thin this paint down using a little bottle like this. Now, if you don't have this type of thing, this paint this bottle, don't worry about it. You can also use a big Sharpay or you could even use black paint with a paint brush. So I'm giving you a couple alternatives. But for the project, I'm going to show you. I'm using black paint that I think down in this little bottle with water. You also wanna have a canvas handy so you can create your picture and some regular gel gloss. This is Golden Brand that I'm holding right now in a phone brush. This is how we collage some of the materials onto the canvas. One final thing, if you've got some paper left over, is some embellishments thes air, things like butterflies or hearts or little pieces of paper that we're going to use to complement the picture at the very end. And it's optional, so if you don't have it, that's perfectly fine, too. So let's grab those supplies and get started
3. Adding Words to the Background: for this project. I have, um, 28 by 10 canvases. They're just regular campus that you get at the craft store or art store. I have some soft gel gloss and a phone brush. And what I've done is just lightly covered, Uh, this canvas and I'm gonna do it with this 12 with a soft gel gloss. Just a very light coat. Because when I want to do is just kind of prep these canvases and get them going. When you first pull canvas out of the packaging, it's very dry. So it kind of helps to get ah, layer of something on there so that the paint or the other collage material stick and this soft Joe glass will work well for that. I also have a collection of papers, and they have words on them and different sizes. And I'm gonna start and use this words to create kind of word art in different directions. To start is the base of my picture. Um, I have this collection of papers that I've gathered a downloadable pdf on my website, and I have a link to it right in this episode, um, lesson. So feel free to click on that and print it off. If you'd like to use the ones I'm using, Of course, you can use your own to that works. Now I have You know, these words in different sizes. And, of course, like every mixed media project, every collage project that I start, I'm going to start by just ripping. Ah, the edges. Now you can leave straight edges if you want. There's nothing wrong with straight edges, but I really like to rip, um, and have those kind of ragged edges on my backgrounds. So do that. I'm just gonna rip a few pages and, you know, create, um, little individual words that I can put down.
4. Create the Background Layer: Okay, so I have a little pile here. I'll see how far you get with this. If I need to create Maura, I will print up some or these types of words. But for now, what I will do is just kind of randomly place these words because I want them to provide kind of a black and white background as the base for the picture. So I have this layer of gel medium already on here, and it's a very light layer, so it's not a layer that will help anything. Stick if I put it on there now won't stick because really, that first layer is just to kind of prepare the canvas. So what I'm gonna do is put a little bit more on, because now I'm ready to actually glue things down. So I put a little bit more on and then a little bit more on the back. And these are all thin layers that I'm doing. So you don't have to do a lot of gel medium and place it on the back and then place it on the canvas and I smooth it out by putting it on and then working from the center out as I put it down on the canvas, and that helps smooth it out. And, you know, you may still have a bubble or two in there. Now, if you do, um, have a bubble on your, uh, a little piece of paper there. You know, I'm somebody that doesn't really mind that because I like wrinkles and bubbles. If you do, though, a spatula or some kind of straight edge works great to just smooth it out and again, start from the middle and bring it out to the edges. And I'm gonna just keep going and I'm gonna as I'm placing these, I'm going to do it a little bit different with each one. So you know, you can do this anyway that you would like, as far as putting the wording in one direction or another direction. Um, I'm gonna try and just scatter it a little bit because I wanted to have a variety. And I want these words to be going in a different direction because the goal of this project is not to, you know, have a background that somebody actually reads. But just to provide kind of an interesting um, Tex texture background. Um, where you know, there is wording there. You can see the words coming up, but it's not something that you're reading. It's just something that is, you know, in the background, supporting the art that will be in front of it. So now this pages kind of canvas rather's kind of filled up someone work on this next canvas. And this is why it's nice to have two of them going at the same time because you can really make a use of, you know, your time better, because now I can do both of these. Is that the same time? They will both dry and then I can begin working on both of them. So okay, now, just because I have, you know, a word cloud here of words together, I've kind of put them down like that on and kept that together. But you don't have to keep them together. If you download this sheet that I have created, um, you know, you can rip them in half and, you know, put break them up and put them in any direction. Feel free to use them as you see fit, because it's about being creative and just just kind of letting loose these early layers that we dio especially the first layer is really about plane. It isn't really about, you know, doing a finished picture or, you know, trying toe plan out. You know where everything is gonna go. You're really just building that base. Texture lie.
5. Building the Background: here Some of these words as I've ripped them. As you can see with roses, I've ripped off the edge here, the E and the S. And that's no big deal. You know, it really doesn't matter. It's, you know, it's to give you the idea of, um, the floral elements that we will be putting down all of these words represent flowers or some kind of floral elements. And, you know, you don't have to have it perfect and readable. Um, this background layer, especially, is about the subtleties. And so, um, you know, that's why these words are all going different directions and some are big and some are small. It's just creating interest in that way. And you can see I'm layering on top of other papers, too. So this first layer might have actually a couple layers of paper, and that's OK. Look a little closer here to the edge, ripped in half. That's OK, too. Okay, I put that other half over here. How about that? Randomly. It's nice to do a project. We're really anything goes like there's no rules. Um, I find comfort in that. I think so. Often One thing that limits us with art is we, you know, have all these rules in our head that we feel like we have to meet and things that we have to do. And, you know, you don't have to any of that do whatever you want. So as I'm placing this, I'm trying to, you know, get you know, we've got a lot of white space because, um, there was white on the edges of each of these papers, so I'm trying to just kind of fill that up. Really? And it might take me a couple rounds here because I got a lot of different words going on here. Um, and I really just wanna work until I feel like I have a good base. I'm not really trying to purposely use everything. I have a tile, but as long as I have it and I don't feel like this is done yet, then I want to keep working to make sure that I, you know, work until I get I get the background that I'm happy with
6. Adding Color to the Background: So I have given it a few minutes to dry, and it's just a little bit tacky now. That's not a big deal in this case. Normally with mixed media, we want to make sure every layer is completely dry before we move on. But in this case, the next step involves putting more of this job loss on the soft Joe glass. In fact, fact, we're gonna mix it with pigment, and so having it a little bit tacky is really not a big deal. So what I've done is take some of this soft gel gloss in a place it on my palette with a fresh, um, brush. It's just a regular craft phone brush and have also placed two different colors. Just a little bit of each one is a green yellow, so it's a very vibrant green yellow, and another is an ocean green. These air, both regular body acrylic there easily found everywhere from a big box store to a craft store. Um, and what what I'm gonna do is take these pigments. I like both the colors, and I want to just use them as a way to kind of now that I've had this initial black and white layer. I want to kind of just a soft layer of color over it because I still want the wording to show through. But I want there to be more than just white on the background because, you know, this is a mixed media full of color and texture. And so I want to create a soft background that we can then begin to layer on and start putting our flower designs on their. So the way that I work this when I use mediums of this type with pigment is that I put a little bit of I never take it from here and then dip, you know, because otherwise you'll get paint on your brush and then put it into the gel medium. You always want to keep the gel medium pure, so I always take a little bit and put it on the pallets. And then I take a little bit and I just start mixing my color and I do one color and then another color because I want. In fact, I might even get a separate foam foam brush for that to keep them separate. Um, because I want this to have two distinct colors. So now that I kind of mixed that, in fact, let me mix all of this and I'll put a separate amount for this little blue color. Okay, so I put about that much on, and this is to mix with the blue you kind of experiment. The more gel medium you put in the later the color. You can also experiment by taking the color and placing it into the gel medium just little dot you know, a little block by block, and that will kind of give you an idea. Color wise. I am somebody that likes to work really organically and so I don't You know, I don't I like the experiment. Part of mixed media. I don't always like to plan everything out and have everything exact because the really in life I mean, you just nothing is exact. So I like experimenting a little bit. As I'm looking at this, I can see that the green has a little bit more gel medium, which I mean, it would be a little bit more softer and the blue has less, but it doesn't matter because both the colors are going to go on. And, um and I like both of them. So the way that I'm looking at this is kind of just to put the blue on the bottom and have green on the top so that it kind of flows that way. And since I have these two canvases still kind of gonna keep them together and brush it on lightly and it doesn't have to match, exactly. But I you know, I'm just now that I have these two canvases together, I can at least keep them side by side. Now, what you'll see is because I have that Joe medium on there, see how it keeps the background, You know, it goes on very lightly, so it doesn't cover any of this. It allows all this to show through, but adds the pigment, and that's the effect we're looking for. That's what gel medium does. It's kind of a color extender, you know, it helps you extend the amount of paint that you might have on your palate, but it also softens that paint and changes the structure of it and what the paint does. Now I'm adding the green at the top. Oh, what I love that color, don't you? Did you love that soft like green color? So bright. So Bratton Pretty. So it kind of done the green up here, the blue down here. I want to get these in this center to blend. So I'm just gonna go back with the blue, bring it up, bring it up a little bit onto the green, and I'm gonna put these aside for a moment and then gather some of the other materials that we're gonna use to put our flowers on there.
7. Cutting Paper Flowers: So what I've gathered is just a little pile of paper. Random papers. Now, I always have a pile of random papers in my studio. I, you know, use paper a lot in my art. And so, um, I just kind of grabbed whatever is random. Where? What? I like what is calling to me for some reason what appeals to me. I don't really over think it. And you could plan out. This'd process a little bit more if you like, because I work differently. I like, you know, I'm looking at this paper right now, and it's appealing to me and I don't I am not worried about it. That's gonna match the, you know, the background that I created. I'm just thinking, Oh, that's kind of cool. I think I want to use that. And, you know, I have some other origami sheets that I might use and other just random paper that have used for other projects, you know, half a scrap of age. So I have these random sheets and I've also have some things that I have paper punched. I've paper punched some butterflies because I think that might be a cool thing to put on my picture, some leaves and see him. There were very tiny various leaves and also some leaves in with music sheets. So it kind of creates a different look. I don't know if I'll use all these at this point, but I'm just gonna have them off to the side in case I want to embellish. What I want to do with this pile of papers is just start creating a few base, um, pieces for the flowers. And I am going to do very simple flowers because I want this to be a project that you could do with your kids or if you have no artistic ability. You know, I don't want this to be really complicated. You can make it more complicated. Obviously, we can always complicate things. And, you know, you could make it more detailed and complicated. I want to keep it pretty simple. And this is what I'm gonna dio. So I'm gonna start with that very first piece of paper that drew me in. And I have just a regular old scissors. It isn't, you know, doesn't have a fancy designs to straight scissors, and I'm gonna just cut like, kind of a loose, wavy circle. And I want to cut a couple of them because these are gonna be, um you know, the background for some of the flowers that we create. So we just do that on all four corners, and I'm putting it on a paper plate just because it's easier for me to see. You know, I've got a lot going on here. Of course, you wouldn't have to put this on a separate palette. I'm just trying to keep it separate so I can see it. So I got a couple of those. Let's see what else we got here. I do like this and again. Um, I don't know if this will go with my background, but just because I like it, I think it goes. That's my philosophy with color and texture. If you like it all, don't worry about what somebody thinks. If it matches or not, you know, I feel like things that you like and surrounding yourself with things that you like. That is what makes you feel comfortable in your home or with art. And so this one, I may just kind of a really big circle. And as you can see I'm doing not trying to do a perfectly round one do kind of a bumpy kind of circle. And this has flowers on and already So how lucky is that? So I mean again used this as background my make a big circle. And let's do a couple small ones. Let's grab another color. We'll see. Do a couple small eyes When I'm doing this type of process where I'm gathering pieces for the art, I really am not thinking too much. I'm not like over analyzing, uh, you know, the pieces. The size is kind of estimating. I'm keeping it loose. I can always adjust. If some of these are too big, for example, I can always cut them down. If they're too small, I can cut another piece. You know, this isn't something that you need to really worry about. And, um, and even, you know, I've got a real thin piece of paper here. The other one, I just use this one was very thick. It doesn't matter. Thicknesses do not matter. So I'm kind of jiggling it back and forth and just keep cutting. So it's kind of one of those little roundish type circles
8. Placing the Paper Flowers: Now I have these two, um, canvases, and they nicely have this line that goes across thumb. And I do want them to be a set. And I'm just looking at them now because now I'm going to begin the flower placement and putting the basis down for flowers, and we're gonna get into the the picture itself. And I'm looking to see if I want to keep it this way. If I want to put it this way. Uh, you know, it's almost like this is a sky, and this is a grass area that could be cool. Um, could be cool this way, because they, uh, you know, are pretty that way. Could be cool this way. In fact, I kind of like it this way. Um, and so they're not too matchy, even though they are, uh, similar. And to me, this appeal. So I'm gonna move forward, uh, with this, and I'm gonna make one, uh, this way and one that way. So I had my phone brush have my soft gel gloss. Now I'm going to use these little circles I cut as the basis for some flowers and my thought in this is to use the ones that are a little bit bigger, um, as a base, and then to put a smaller one inside and to start building from there. That's my thought in doing this, Um, I'm gonna kind of dry fit them onto the paper or the campus rather before I attack everything down with gel medium, though. So I'm gonna see how I like it. And I'm just gonna move the pieces around and see, uh, you know what appeals to me. And if you don't use the mall, that's no big deal. You know, you cut extra, and you can always use it for something else. Um, I kind of like this and that. In fact, I might even just like this one, just plain like that. So for the sake of this project and using everything I cut and I like the placement of it, you know, I'm envisioning leaves and the base of a flower, and then the flowers. So, um, I think this is good. I can work with all of this. I like that. The we can still see wording in the background. I might maybe help move this one down because I do like these words and, you know, move this down because it seems like it has a little bit of a white area. You can adjust it a little bit. I like kind of that there. And maybe I'll put that here. If you make it down there, looks good.
9. Adhering the Paper Flowers: and now you can begin attacking it down. So it's the same process, a foam brush. And now we put a very thin layer on top of the Candice, and this is just to prepare the canvas to accept a new layer on top of it. And because we're gonna also put some Joe medium on the back of this, a little thin layer on the back, and we really want to make sure it's to cover the edges. That's what's really important, because that on something like this, where you have paper that you're putting down, if you don't put the edges tack down, it'll kind of pull up. So when you put it down, see how it fits on their, you know, rub it with your finger. I can see already. I have a lot of edges of her popping up. I've got this edge but doesn't have a lot. I am this edge but doesn't have a lot. This centre has a lot, so I'm gonna just go around wherever I see something popping up, and I'm just going to kind of put some underneath there and reattach it, and then once I feel like I have the edges glued down. Well, then I go through and brush the gel medium over the top Again. I tried to start from the middle so that I can mush it out. Mush it out is a technical term, by the way, Seiken Bush it out on, you know, fan it out so that it goes from the middle out to the edges. Lovely. And since I did that layer, I'm gonna go ahead and put you know, this is already wet and prepped, and I'm gonna go ahead and put that middle piece right on top of it, because that's gonna take advantage of the fact that this is still wet. Put that right in the middle. Okay, get this piece down. So I'm gonna work and place all of these down on my canvas.
10. Painting White Petals: I have a little paintbrush that has kind of Ah, just a long tip on it, because I think that will be a good size to draw some leaves and, um, some, you know, little petals. And now that we've got all this paper on here, I'm looking to add paint. So what I've done it has just taken a collection of paint that has appealed to me. For whatever reason, I've got some white, which is always good to have when you're painting. I have some magenta, a bright green, um ver 1,000,000. That's a pretty color. And I have a permanent bread. Um, these are different brands again, but they all are regular body acrylic, and I have them on my palettes. I'm gonna start just creating, and I think for this might just put one off the side. So I'm not overwhelmed with too many canvases. And also, it's good idea to have paper towels, handy toe wipe off your brush. Start by getting my brush wet, a little bit hands. I want to just start embellishing these flowers a little bit. I like what is happening with the colors and texture. It doesn't all go together and match. But, you know, as we air coming together and building these layers, all of these things are gonna come together. And that's what I like about it. When I choose this type of paper and the backgrounds, I'm not thinking about the end product, Meaning I'm not thinking about Does this paper go with this? Does this match with this? Is this too deep of a color for this? All these questions I feel like hinder you from moving forward and just creating. And what happens is when you let all that go and you just move forward and you just start creating, you do end up building a picture that you like in the end because it you all your creative juices get flowing them and you're not stopping yourself toe edit. And to think Well, I don't know if this is not stopping, You're just moving forward. And that's what I like about the mixed media process is it's very freeing in that regard. So I've got thes flower bases and I am looking to add kind of some simple pedals on, like over them in some cases, and maybe just a little like design. We'll see, um, I'm really when I'm looking at my palate. Now, I'm looking at these colors, and I'm kind of just trying to see like, um, I wonder what would go with this. Like, I'm not looking to match again. I'm just looking at what? What might work. And I'm really drawn to the white, which is maybe odd. Maybe it's because I do have a lot of color going on, but I like the idea of putting some white pedals down, and I might change that. You don't know, But I'm gonna put some pedals, just simple pedals right over right over this. And, you know, the white to me is kind of a nice accent color. Now, as I said, I may change my mind. You know, part of the painting process isn't thinking through everything. I had a time all the time. Sometimes you do, sometimes you plan out pictures and you think about it. And, you know, you kind of get prepared and, um, create based on the plan that you have in your mind or the image that you have in your mind . But sometimes it's a good idea to kind of play with it first to do the opposite, which is to have no plan and just to go with it. And just to first of all, enjoy that process of doing art. There are so many benefits of doing art that go beyond, you know, whatever final picture you create. There are so many lessons involved with creating, um that don't even register with you the first time you do it, You know what I mean? It's it applies to things that are going on in your life that have nothing to do with painting a picture. No, that's why creativity time and taking that time for yourself and doing E courses like this one is so important because, you know, in this busy world, we just don't get a lot of that. We don't get a lot of opportunity when it comes Teoh time for ourselves and things that we have to do where there's no expectation. And with an art project, there's no expectation, you know, you want to create something pretty that you like, But what is the worst that could happen? If you create something that you don't like, could you just start again and do a project again? Yes. Would that be terrible? No, because then you are getting more time in the studio you're creating again. It doesn't matter if you experiment a little bit with something on your canvas and you don't like it and you have to go back or you have to start over or it doesn't matter because you're getting the benefits of art and the benefits that fall in that space of you know, there is a space when you are thinking, and there's a space where your subconscious and there's a space where you are creating and your mind is not focused on things like your bills and your worries and all these other things, so I think it's good to be in that mind space as much as you can.
11. Painting the Flower Petals: Now, here's my little white flour. I really like it. I like that. It kind of just pops like the paper behind it. I think I will embellish this a little bit. Um, eventually. But I'm gonna leave it for right now because I like it. And that's really the only criteria involved. Although this brush, I feel like I need maybe a different brush because I feel like it's really Brisley, you know? All right, go for this song. This is a thicker brush, uh, softer bristles, much softer ism or expensive brush than this one. Any time you see the bristles like this, sometimes it's it means, um, you know, it's just it's a brush that's meant for different things. I've ever variety of them cause I used so many different mediums. So I'm gonna try this one next, we'll see what happens. It's not so bristly. We'll see what happens. I'm gonna work on. Let's see, I work on this guy and I really like the Vermillion. And so I like the paper that's around here. I like this little middle piece, but I kind of just wanna know. I wanna I won't embellish. So I'm going Teoh try and do just a little bit of, ah, center. That kind of move mimics the edge that we have. But then I'm also gonna do some, um, leaves, so or pedal. Sorry, that leaves. And I really like flowers that, um you know, I like this flowers design. I just like painting it. I find it soothing. Of course you could do any kind of design. So I have these little short pedals on the small guy. They can't match the paper like that. So I'm gonna get going. I'm going to continue on him and this other a flower, and then we'll go from there. So I finished the leaves on the pedals, keep saying leaves you guys. It's the pedals. The pedals on here have some short, stubby pedals. I have some just kind of fluid, you know, tendrils on this one. Thes are kind of like, beginning stages of these, um, flowers and put this aside and work on this one next. And I'm not again trying to match these, um, flowers to what these are. What I am trying to do is just kind of haven't so that these two complement each other. So I'm gonna keep the same colors, and I'm gonna work on this one now.
12. Outlining the Flowers: I still want to add some details on these flowers, and one way I want to do that is by taking some. I have a bottle here that I've put a little bit of regular body acrylic unknown and a little bit of water. And so it's kind of like creating Ah, fluid. Acrylic. Can I use this? I'm just shaking it up. So to make sure it's all incorporated, I'm gonna use this to, um at some, um, design elements and some lines and some details. I'm gonna start by going over some of these leaves, and I mean, I am working very loosely, so I am squeezing this out very loosely. I've got a little block here. That's OK, Really. Is it a big deal? I don't think so. I'll just make a block over here really loosely. I am just trying to add a little bit of lines and dots and some detail loosely putting some dots on there. You can say I went through, um, with my bottle, and you know, this is a messy step, but I think it really pulls everything together. Doesn't it really kind of looks cool. I like that we use that black to really outline and highlight it what it does. This kind of pulls all these colors together. It helps the background, which had been a little bit more prominent. Stay in the background really helps define these flowers. And I love that they're kind of so messy and crazy. I mean, they look to me like they're kind of blowing in the wind. Now, this is a very messy step because I created this with, um this squirt bottle and I stepped off the tip you could also use if you didn't want it to be this messy. I mean, I like this, but I know that my style of art is a little bit different sometimes than other people's she could also use could let it all dry. You could use a thick sharpie that would define all this. You could use paint that would define all that I like to working especially. I don't want to move it too much because it's still what but especially on these red flowers. See how the outline just kind of went over? It didn't hit the edges, but it kind of gives the impression of movement. I really like that, Um and I really like these. And I like the kind of shimmiri messy look, And so there are a number of ways you can create this edging.
13. Adding White: I am going to go ahead and on some of these spots where I have black. I'm just gonna go ahead and put some white, and I'm not really, you know, like, planning out. I'm kind of just feeling it.
14. Final Embellishments: I decided to let everything dry, and it is, and I'm ready to embellish. So there's a balance between embellishing to improve the look of it and really title together and then over doing it. So as I'm looking at all this, this is what I'm gonna be thinking of. I do have some areas that don't have wording. Um, and, you know, I think it would look good there. Certainly, on something like this, where the color really goes. Well, against that purple, the green really seems to hold that color. Well, so that's one thing I'm thinking about. I'm thinking about these colored leaves, which I actually really like and where I could put those. So I have created kind of like this really whimsical leaf, um, on there. But, you know, that might work on some as well. And just because their leaves doesn't mean they have to go on the stem. You know, I could put some leaves, um, that way as well. So I'm gonna be working on this, and I'm gonna show you what I'm doing. Um, and you can kind of see how I pick and choose and really find places for some of these embellishments, and then I'll show you how it all comes together at the end. - So there you have it. Um, I like the addition of the butterflies at the end, if you notice really close to If you look really close at that butterfly, Um and so you're seeing get there and let's see that one here. What I did was I added also a very thin layer of white dots on the butterflies. Um, and I think it helps pull everything together. Just these simple little embellishments. Um, because we had so much going on with texture and color and different elements. I didn't want to add a ton of leaves and other things that would kind of really confuse the I when it looked at the picture. I think there's enough going on, and there's enough black and white to pull it all together. So I, um, everything's dry. I'm really happy with it generally when we're doing a painting and you wondering if it is done because, you know, we could work on these making little changes for forever. But I think the question I get asked a lot at least is. How do you know when a painting is done. And what I feel is that when you when you just like it and you love it and you you get to this point. But you just look at it and think I like this. This is done when you get to that point, and sometimes it takes you a while. You have to step back. That's always a good thing to do. If you have been working on a painting and you don't you wonder if it's really completed or if you should keep working on it, take a step back, then come back to it. I have done that and I like these two. So these are done. I'm very happy with them. I like how they turned out, and we're on to the next project.
15. Mixed Media Flowers Skillshare CONCLUSION: Thank you so much for painting with me. I hope you enjoyed creating those freeform mixed media flowers, weren't they? Find I hope that you continue to take my classes and please feel free to share your works of creation with me and social media. I've got some of the links in the information to follow and thank you so much again for painting mixed media flowers with May.
 Cherie Burbach, Artist, Writer, Poet