Transcripts
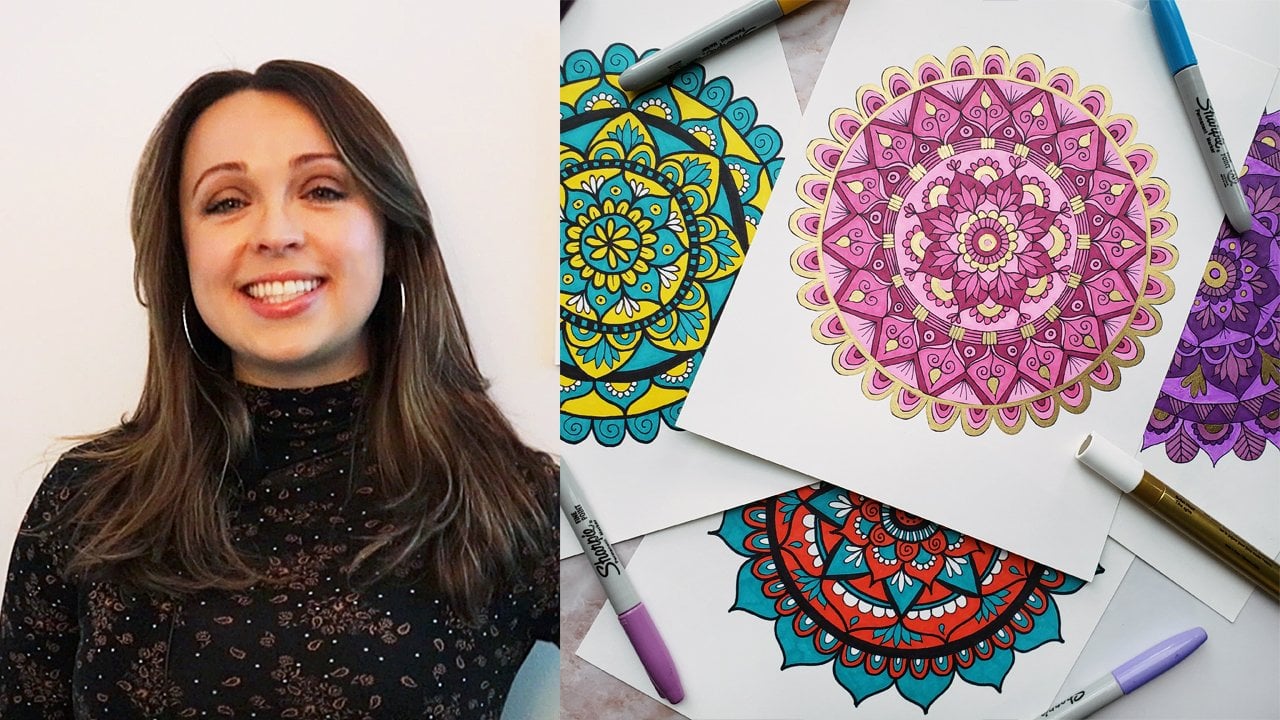
1. Introduction: Welcome to this meditative sketchbook Doodle Art challenge. Hi, I'm Julie. Over the next eight days, I'll be guiding you
through a series of simple doodle and coloring exercises designed to help calm your mind and
foster creativity. This class is really
about slowing down and enjoying the process. There's no pressure to
make anything perfect, just small simple habits
that build over time. Each day we'll be exploring a different doodle
technique and colors game. You don't need any fancy
supplies or equipment, just a sketchbook,
some coloring tools, and a quiet space to create. At the end of the class,
you're going to have a beautiful sketchbook
page filled with colorful doodles that
you can share in the class project
section or on Instagram. Thank you so much for
joining me today. We'll see you in the class. Let's get started.
2. Supplies, Project and Page Setup: So welcome to the
meditative sketchbook, Doodle Art Challenge, featuring eight days of mindful doodling
and coloring exercises. Mindful doodling like this is a low pressure way to create, and it's a great antidote to digital burnout and
doom scrolling. That sort of stuff.
In this lesson, we'll quickly discuss
the class project, go over the supplies
you're going to need, and then we're going to
jump right into setting up our sketchbook page so we can start doodling right
away in the next lesson. So your class project is
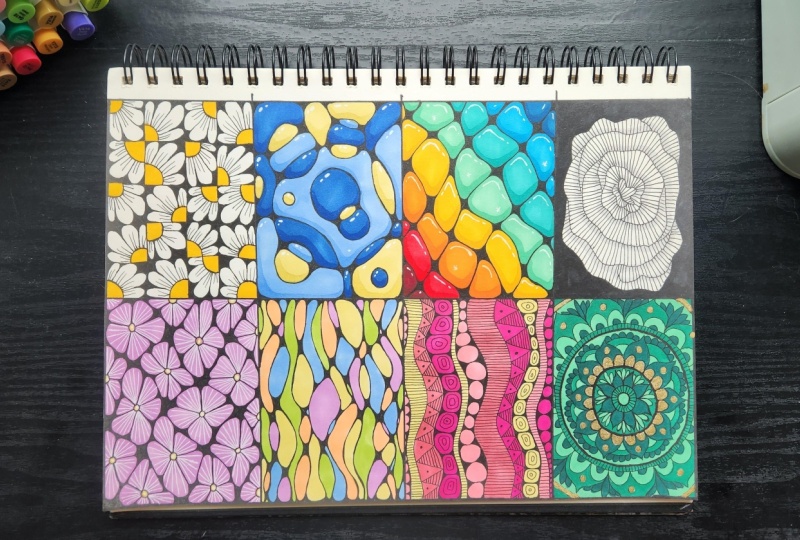
going to be to fill out a full sketchbook page with eight different mindful
doodle exercises. Our goal for this class and the challenge is just to have fun and
practice our skills. You can also follow
along with this class digitally using an app like
Procreate on your iPad. Kind of set this class
up like a challenge, so you could do
one per day or you can challenge yourself to do as many as you like
in one setting. However you want
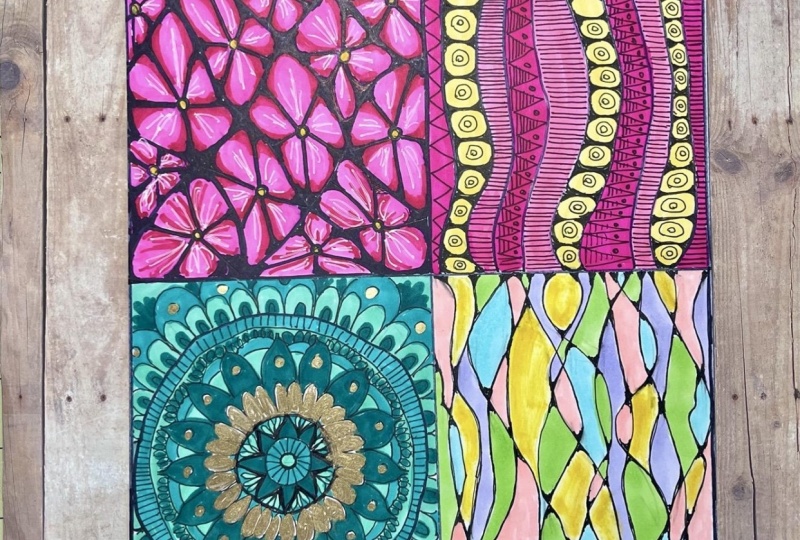
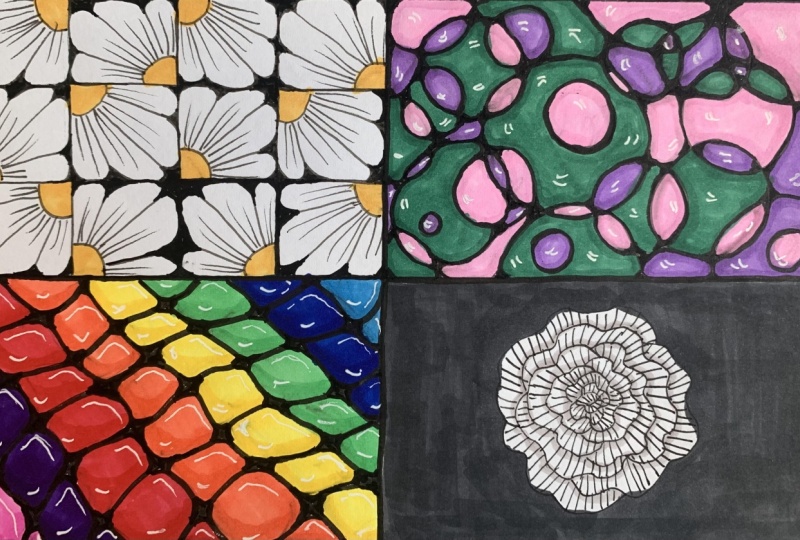
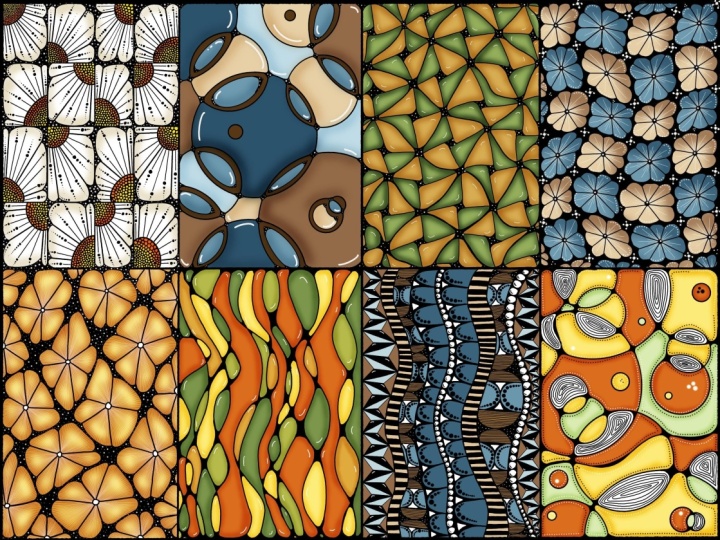
to use this class is completely fine and valid. So for your project, you can either post
your favorite doodle or a selection of your favorites
or post all eight doodles. Whatever you want to do,
I love to see your work. So let's go through the supplies you're going to need
for this class. So you're going to
need a sketchbook. I have one here
that's 8.5 by 11 ". You can just use a loose
piece of paper to draw on. You could also use a
small sketchbook with smaller pages and just do
one per page like this one. And for the setup section, you're going to
also need a ruler, a pencil, and an eraser. A variety of pens, including a fine liner
or a black Sharpie, a white gel pen. And then finally,
you're going to need some sort of
coloring tools. I'm going to be using
alcohol markers, but you could use other
types of markers, Sharpie markers, or
even pencil crayons, whatever you have on hand. Now we're going to get started
with setting up our page. So we're going to be splitting the page into eight sections. You're also going to need
another loose piece of paper or card stock to place behind the page you're drawing on to prevent bleed-through. And for this, we're
going to need the ruler, a pencil, and then a black pen. I'm going to use this
alcohol marker in black, or you could use a Sharpie. So first, we're going to just split the page in
half horizontally. So I'm just going
to kind of measure the page vertically and then
loosely mark the center. So I'm just going
to loosely kind of mark where the center
of the page falls. And then use my ruler to connect the two
marks that I made. So now we've split our
page roughly in half, and I'm just going to now
measure roughly orders. So now I'm just going
to roughly measure the quarters of the
page and then draw a little line and then
just connect the top and bottom where those
marks are made. So just kind of follow along
with what I'm doing here. I'm going to go back
over the pencil lines with a black marker. So again, you can
use the Sharpie, but I'm going to use my
alcohol marker here in black, and I'm going to
use the finer tip. I'm just going to use my ruler
again and line it up with that pencil line just to keep the lines
nice and straight. So I'm just using my
ruler as a guide and going over those pencil lines. So now I'm just going to add
some black outlines just to the outside just so I can
create some little boxes. This is kind of more
aesthetic reasons, so you don't have
to do this part, but I think it
just looks better. So now we have our grid of
eight different sections. So in the next lesson, we're
going to get started in the top left corner and
just go from there. So I'm excited to get started
on this challenge with you, and we will see you in the
next lesson. See you there.
3. Day 1 - Daisy Doodle: So welcome to day one, everyone. We're going to get started
on our first doodle, and we're going to be filling in the top left corner of our page. The supplies you're going
to need is a pencil, and we've got our pen. I like to use this
ballpoint pen, but you could use your fine
liner or Sharpie for this. And I've got a yellow
alcohol ink marker. You could also use the ruler, if you like, but I'm just
going to free hand it. And we're just going to start
with a very simple grid. Just go to start by
splitting up the page into about like a
four by five grid. And now we're gonna go in
and just add sort of like a semicircle to alternating
corners of each square. So you can kind of just follow along with what I'm doing here. So now that that's done, I'm going to go in to
each square and add three lines coming out from each semicircle,
just like this. So I'm going to go ahead and
do that for each square. So now that we've
completed that, the next thing that
we're going to do is to go in and
just round out each of the corners of
these petals or basically creating petals by rounding them out on just the one side, so the opposite side
of the semicircle. So just like you can
see, I'm doing here. So just going and rounding out each of those corners
to make it resemble, like, half of a flower. So now I'm just going to
go through and round out the petals for all
of these squares. And I'm also going to just add some little
embellishments as I go. So I'm just adding
some very simple lines to each of the petals just
to add a little bit of, like, interest or
flare to our design. So now that we're
done with that, we can move on to just adding a little bit
of color to our design. So we're just using
our yellow pen, and I'm just coloring in that little semicircle
in the corner. And that's literally all we're
gonna do for this doodle. It already looks
good, how it is. If you wanted to
color in your petals, that could also
look really cute. But I'm just going to stick
with the yellow and the white and the black
theme for this doodle. So I'm just going in and adding that nice yellow color
in each of the corners. So go ahead and finish
up your doodle, and we'll check in one more time at the end of this lesson. Alright, so congratulations. We've completed
our first doodle. So I look forward
to seeing you in the next lesson. I
will see you there. So
4. Day 2 - Circles: Okay, welcome to
our day two doodle, which I've very creatively
called circles. So the supplies you're gonna
need are your black pen. I'm using my ballpoint pen here, and I'm going to be using just three colors
for this doodle. So I'm gonna be using two
shades of blue and a yellow. And then I'm also
going to be using a white gel pen to add
some extra embellishments. You could also use
something round to trace if your hand is not
too steady to draw circles, but they also don't
have to be perfect. So I'm just going to go right in and start drawing some circles, and I kind of want to
overlap some, but not all. So I'm just going to start by drawing some bigger circles,
some smaller circles. We're going to do a big one in the middle here and then just continue kind of free
handing circle shapes. Just wherever there's
some empty space, we could add another circle. Okay, I think I'm
happy with this. So now I'm going
to go back in with my fall point pen
or our fine liner. And just like we did
in the last doodle, I'm going to go in and start rounding out all of the corners. Except the difference
here is we're going to round out all of the corners. So anywhere there is an overlap between those circle shapes, we're going to round it out. So we're going to kind of create these like amorphous blobs. So this is a really
satisfying exercise. You can literally take any sorts of shapes
or lines and just overlap them and then round out the corners to create
this kind of cool effect. So just going in and
rounding out all of the corners across this
whole doodle page. Okay, so now that that's done, we can start going
in with our colors. So I'm going to start
with my yellow color. And I'm just going to
kind of randomly choose a few sections to
color with my yellow. And I'm going in
with the brush side. So these pens have, like, a brush side, and then sort
of a more fine liner side. I usually like to color
with the brush side. However, I do like the fine
liner side as well, just for, like, the smaller
little sections where you just want
to have more control. So just going in and filling out those yellow sections now. And now we can start going
in with our blue colors. So I'm just starting
with the lighter blue and just doing the same thing. I'm going in and coloring a bunch of random sections
with this blue color. And next we're
going to go in with the final dark blue color and just fill out all of
the extra spaces. And there might be some
areas you want to go back in with the
other two shades. So just go ahead and fill out the rest of your colors here. Okay, so now you could be
done here. You can finish. You can just call this done. However, this is where we can
add a little bit of magic. So I'm going to actually
go back in with the same color and just sort of add a little
bit of, like, shading. So what's great about these
alcohol markers is you can literally layer the
same color on top. And it will just kind of
get darker and, like, blend more and more
when you do that. So I'm just going in with
the exact same shade. I just kind of adding, like, some shadow along the
bottom of each of these little blobs or these little cells
that we've created. Yeah, just adds,
like, some more. I just kind of makes it look
like a little bit three D, a little bit more interesting. And like I said, you
don't have to do this. You can just call it done
with the previous step, but I really like to do this stuff because I think it just makes it look way more, like, polished and finished. So now I'm going in
with my dark blue color and just adding that shadow to just the bottom part of
each of our little shapes. Okay, so now you could
also call it done here if you're bored and you want to move
on to the next doodle. But I'm actually
going to go in with our gel pen now and just
add a little bit more. Sort of a hint of,
like, a reflection. A little bit of extra detail here can really go a long way. I'm just adding some really
simple dots and circles to the top left corners of
each of our little sections. So this is really
going to enhance that kind of three D effect. And this is a really simple way just to, again, add some, like, visual interest to the doodles, and just to make them look more realistic or kind
of a three D look. So I'm going to go
ahead and finish that, and we'll meet you back here
when we're all finished. Alright, well, that's it
for our second doodle. I think it looks really great. I hope that you
enjoyed this one. And now we're gonna move
on to our third doodle. So we'll see you in
the next lesson. See you there.
5. Day 3 - Rainbow Stones: Alright, welcome to day three. In today's lesson, we're
going to be filling out the third
square on our page. Again, you can use
the pencil to start, but I'm just going
to go straight in with my ballpoint pen. And today, we're
going to be creating this rainbow stones design. So I'm just going to start
by drawing some kind of wavy lines diagonally
across our canvas. And I've got roughly
seven lines here. And I'm just going to intersect those lines by going diagonally the other way with these kind of wavy lines just like this. And now we're gonna go in
and round out the corners. So, again, just like we did
in the previous days doodle. I'm just going to
go in and round out all four corners of each square. So just like this,
you can follow along, and I'll meet you
at the next step. So now that we finish
rounding out our squares, the next step is to go
in with our colors. And I'm going with a
rainbow theme for this, but you can use any set
of colors you choose. So I've got, like, red, orange, sort of a
lighter orange, yellow, green, darker green, and a couple shades of
blue to round it out. So use whatever colors you like. And I'm going to start just in the lower left corner
of the canvas, and I'm just going in with
the dark red color to start. And I'm basically gonna do a different color
for each section. So you can follow along with me to color in the rest
of our squares. And once we're done with that, we can add some embellishments. So just like the
last doodle we did, I'm going to be going back in
with the exact same shades. And just like we did before, I'm going to round out
the bottoms and, like, add some shading
basically to make the cells look kind
of more three D. So I'm just going over the
bottom part of each cell with the exact same
shade that I filled them with just to darken
it up a little bit. And again, what I love about these alcohol
markers is that you can just keep building up
the color with each layer. So I'm just gonna
continue on and do that for each of the
cells on our canvas. Okay, now that we're
finished with that, we can optionally go in with our white gel pen and
add some more details, add some little highlights to the top of each of our squares. So I'm kind of doing it
a little bit different than the previous
doodle that we did. I'm just making them
a little bit bigger. So I'm kind of just adding to the three D effect of each cell, which kind of makes
them pop out and look like maybe some sort of gemstone or stone
or, like, a pebble. But yeah, just going in and adding some little
embellishments. And so you can go ahead
and follow along, and we'll meet you back here
to wrap up today's doodle. And that's it for
today's doodle. I really hope that you enjoyed this one and that you
got a really cool, three D effect with
these rainbow stones, and we'll be seeing you in the next lesson.
See you there.
6. Day 4 - Black and White Bloom: Okay, welcome to day four of our meditative sketchbook,
Doodle Art Challenge. And today, we're
going to be filling out our fourth square, and we're going to
be doing a doodle, I've called Black
and white bloom. And you'll see why very shortly. For today's doodle,
we're gonna be using just a black and a light
gray colored marker. And again, I'm going to
start with my ballpoint pen, or you can start with your
pencil and go over that. So I'm just going to
start in the middle and kind of create
little petal shapes, and I'm just going to continue
doing that and kind of organically grow this little
circle in the middle. So I'm just going to
add sort of, like, wavy lines that connect to each other and
create this sort of, like, bloom rose effect. So I'm just going to
keep going until I've filled out most of the page, but leaving a little bit of
space around the outside. And once you're happy
with how it looks, the next part is to go
in and add little lines. So coming out from the middle, I'm just adding straight lines next to each other as
close together as I can get and just slowly and
purposely drawing lines. It sounds boring, but it's
actually quite satisfying. So just go ahead and
follow along with me and continue to fill out
these little sections, and we'll meet you at the next. Okay, now that we're
done with that, take a break if you need to. If your hand is cramping
up or something like that, feel free to pause this video. But if you're ready to move on, the next step is going
to be to go in with our black marker and kind
of fill in the background, just the whole area
around our bloom. So I'm just starting by
outlining our shape. Using the finer end of
the alcohol marker, my markers have,
like, a fine end and then a brush tip
on the other side. So I like to do this kind
of work with the fine end. And now I'm going
to use my brush tip to fill in the
background portion. Black, which is going to make the doodle really stand out
against the background. And it's gonna create
this really bold effect. So now that that's done, I'm going to go in with this
really light gray marker and add some shadow detail, which is really going
to make it pop. And this is kind of the point where the doodle
really comes to life. So I'm just outlining around the inside portion
of these sections. So you can see I'm
just going around the inside portion of each
kind of petal in our bloom. And you can see
it's really subtle, but it's adding a shadow effect. And I'm probably going to go
over this twice, actually, just to make it a
little bit darker since we can layer these alcohol
markers to make them darker. Or you could use a
darker gray color in the first place if you wanted to make it pop even more. See, go ahead and
follow along with me to add this shading. So I did decide to go back
over the shading a little bit, just to darken it up and
make it pop even more. And nice. We're done. So I really hope you
enjoy today's doodle. I'm really excited for the
next half of our class. You're already halfway
through the challenge. So I really hope
you'll stick around for the second half
of our challenge, and we'll see you
in the next lesson.
7. Day 5 - Purple Flowers: Welcome to Day five.
We've made it to the second half of our
talent, so congratulations. Great job for sticking
it out this far. And as usual, you can
start with your pencil, but I'm just going to go
straight in with my pen, and we're gonna be drawing
these purple flowers today. Let's jump in. So similar to
our rainbow stones doodle, I'm going to start with
some diagonal wavy lines going across the canvas. This time, I'm making the
squares a little bit bigger, so I'm only doing about three or four lines
across the page this time. So now I'm gonna go in and draw a little circle in the
middle of each section. So just like this and making sure to get
these ones on the side. And now, I'm going to draw
several straight lines coming out from that central circle
to the edge of each square. So I'm going to be creating five different sections
which are going to become the petals
of our flower. So just like this, and
you can follow along with me and we'll check
back in at the next step. Okay, so now we're
going to round out each section similarly to how we've done in
previous doodles. Pretty similar to the
first one, actually, because we'll be creating
petals again by rounding out the sides of each of the petal sections
that we've created. So you can kind of see
how I'm doing that. So I'm just rounding
out the corners that are opposite to the circle. So you can clearly see how we're creating this flower shape now. So go ahead and do that
for each of the sections, and we'll check back
in at the next step. So now that we've finished that, now comes the fun part
where you get to decide which color you want
your flowers to be. So I'm going with
a purple color, but it also looks
really great with blue. So we're going to
start by going in with this light yellow color and filling in the middle
sections of our flowers. So I'm coloring in each
of those circle shapes. And now I'm going in
with my main color. So I'm going to make all of
my flowers the same color. You're welcome to do a
multicolor flower doodle today, if you like, but I'm
just going to keep it simple and do a single color. So yeah, I'm just going to go
ahead and fill out each of my petals with
this purple color. So just have fun coloring
your flower shapes, and we'll check in for the
final step of today's doodle. So now, the final step is to add some embellishments
with our white gel pen. And if you don't have
the white gel pen, you could also use your black pen to add
these same embellishments. So what I'm going to be doing is drawing some straight
lines coming out from the center circle of each flower and
across each petal. So for each petal,
I'm adding maybe five or six lines coming out from the
middle, just like this. So again, you can use the
black fine liner pen instead. If you don't have
the white gel pen, just make sure that it's quite thin because you don't want to cover too much of the color. You want to allow
a decent amount of that purple color
to show through. Or you could do a different
sort of decoration. You could do little dots
or swirly patterns or some other sort
of little pattern to embellish each
one of our petals, and it just adds a lot more
visual interest to the piece. So go ahead and
follow along with me, and we'll see you again to
wrap up today's doodle. Okay, and that is it for today's meditative
sketchbook Doodle. And I hope that you
liked this one. I think it turned out
really beautiful and bold. And even with the single color, it just looks really
cute and pretty. And those embellishments
really add a lot of impact. And we'll see you in
tomorrow's lesson. See you there. Oh
8. Day 6 - Colourful Waves: Welcome to day six. Today's doodle is
called Colorful waves, and we're going to be
filling in the sixth square of our sketchbook page today. And as usual, I'm just free handing with
my ballpoint pen. And I'm going to be drawing
these wavy vertical lines. And I want the lines to
mostly cross each other. So I just started with a
couple lines across the page, and now I'm going back over and filling it in with
some more wavy lines. The point is kind of to create all these little sections
by just overlapping lines. So just keep adding lines
until you like how it looks. And the next step is to go in and round out each
of these sections. So similar to how we've
done in previous doodles. So we're just going
to go in and fully round out every one of these little sections
that we've created. Everywhere there's a corner, everywhere there's
an intersection. We're just making each of these little
sections very fluid. So just follow along with me and enjoy this meditative
doodle process. So now that we're
done with that, we can go in with our colors. I've chosen these five
different pastel colors. So I've got sort of a yellow
green, a light purple, a light yellow, a
light pastel blue, and a pastel orange color. And I'm going to just start
with one color at a time. And again, you can choose any color combo that
you want to use. You don't have to follow
exactly what I'm doing. You can totally make it unique and use your
own favorite colors. So I'm just going in
and kind of randomly placing this first
color and just trying to spread it out relatively evenly
across our canvas. So next, I'm going in with this light yellow
color, and again, just sort of randomly and loosely picking spots
to put this color down. And next I'm going in with this light yellowish
green color. And now going in
with the light blue. And finally, I'm going to add my last color this light purple. Okay, and we're all done
with today's doodle. Feel free to go back in
with some embellishments, if you like, but I think
it looks good as is. So I hope you enjoyed
today's doodle, and we will see you
in tomorrow's lesson.
9. Day 7 - Wavy Lines: On to day seven, and congratulations if
you've made it this far, if you're following along
with the challenge, we're almost at
the finish lines. And today's doodle is
called wavy Lines. So as you can guess, we're going to start out
with some simple wavy lines just going vertically
down our canvas. But this time we're not going
to be crossing our lines. We're just going to keep them
separate from each other. So just keep that in mind, and we want to have some thicker and some thinner
areas to work with. So as you can see,
I'm doing here. And next we're going to go
in and fill out each of these sections we've created with a few different patterns. And I'm actually
going to start by laying down the colors first. So I've just got four
different colors here. I'm going for sort
of a monochromatic with a little pop of color. So I've got three
shades of pink, and then this really
pretty light yellow shade. So I'm going to start
with the yellow, and I'm just going to color in a few of these sections and kind of spread them across the canvas in a way
that feels balanced. So you can just follow along with me with your colors
that you've chosen. And in the next step, we'll start drawing
some patterns. So now that we've got
our colors laid down, I'm going to go back in
with my ballpoint pen, or you can use the fine
liner or sharpie to add some patterns within
each of these sections. So I'm going to start
with this yellow section, and I'm just going to start
with some horizontal lines. And I'm going to go all
the way top to bottom, trying to keep these
lines relatively even. And I'm going to pick
another section to fill in with these same lines. So I'm going with this lighter
pink section this time. And we just want to have
this pattern kind of spread evenly on our canvas. So just filling in
a couple sections with the same
pattern is going to create balance in our doodle. So now I'm going to move
on to a different pattern, and I'm going to do a zig
zag doodle this time. I'm going to start over
here in this pink section, and I'm just doing sort
of zig zag triangles. So just like I'm doing here, and I'm going to add some
more embellishments, and I'm just going to
simply add some dots. So only in the triangles
on the left side, I'm adding just a black
dot to the center. And now for the other side, I'm going to add some
more straight lines, but this time, the lines
are going vertically. So they're going the
opposite direction to the other lines we drew. You can see how even these
really simple marks can add a really interesting
and bold effect. So now I'm going to work
on the next section, this dark pink section here, and I'm going to create some little rectangle sections by adding some horizontal lines. So now what I'm
going to do is go in and round out each
of these sections like we did in the
previous doodles and creating like
a stone effect. So I'm gonna do that for each of these sections top to bottom. And now, just to add a
little more visual interest, I'm going to add
these little circles inside each of the sections. Now I'm going to recreate this same pattern in another
section of our doodle. So this time I'm going
with this yellow section. So I'm sectioning it out
into small rectangles. And then I'm going to go in
and round out the corners, and then finally,
I'll go in with those little embellishments
in the center. And now I need to do
another section with that zig zag pattern
we did earlier. So I'm going to do that
in this section here. So I'm just copying the
same pattern we did before, and then I'm going
to add the dots and the vertical lines
as embellishment. Now, we only have a
few sections left. I'm just going to go in
with some simple circles. So I'm just drawing a circle to basically the
width of the section. So I'm making sure my
circle is touching both sides of the section and also touching the
circle above it. So I'm going all
the way down top to bottom with these circle shapes. Now I'm going to fill in these little leftover
sections with black. And I'm going to recreate this exact same pattern in
another section of our canvas. So just drawing our
circles top to bottom, and then filling in the
extra space with black. And now I'm just left with this really tiny little section on the left side. I'm just going to draw,
like, semicircles, so it kind of hints
that the doodle is, like, extending off the page. Okay, and now we
just actually have this one last little
section here. I'm just going to fill
that in with lines. And now we're done with
our wavy lines doodle. I hope you enjoyed this. I feel like it
turned out looking really cool and interesting, even though we used such
simple and basic shapes. And we're almost at the
finish line, you guys. So please come back
for the final doodle, and we will see you
in tomorrow's lesson.
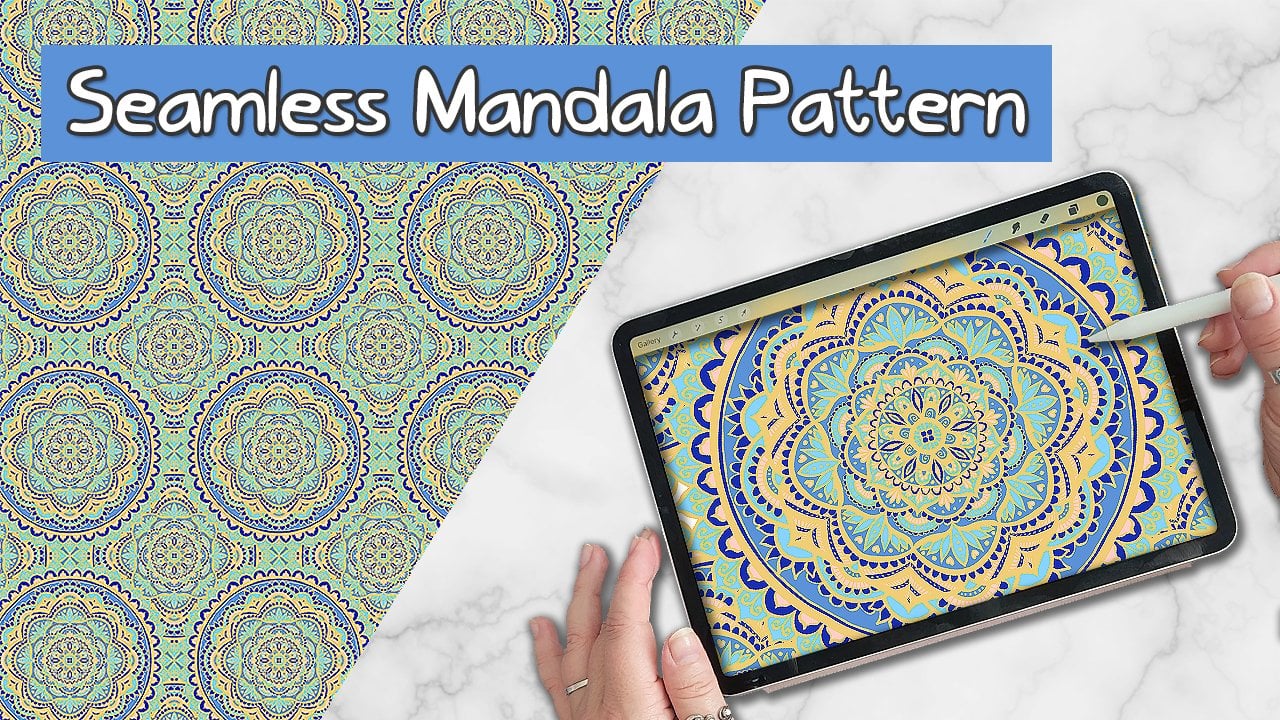
10. Day 8 - Classic Mandala: Okay, we've made it to
day eight, you guys. I am so proud of you. This has been actually a
challenge for me, as well. So I'm so happy that you've stuck around for
this final doodle, and it's one of my
favorites because it's a classic mandala doodle. So I'm really excited
to dive into this one. So for this final doodle, you're welcome to use a ruler to set up our mandala template
I'm going to draw here. I'm actually going
to get started with the pencil this time. I'm just free handing it, but I am using a
pencil this time, and I'm just going to create a really light and basic
grid for my mandala. So I'm starting with
horizontal lines, and then I also did one vertical
and one horizontal line. And then I just lightly drew
some concentric circles coming out from the center and going all the way to
the edge of the page. So I just created
a very light guide for myself to draw
this mandala today. So now I'm going to go in
with my pen or my fine liner and just start drawing from
the center of the page out. If you've never drawn a mandala before or you're not too
familiar with mandalas, that's the basic
structure of the mandala as you start from the center,
and then you draw out. And each layer, you
kind of add patterns. So I'm starting with just some very simple
concentric circles, and then I'm adding some lines coming out from that
central circle. And next, I'm going to
draw some petal shapes. So I'm very loosely using my
little template as a guide. They can be very
organic, if you like. If you can also make them
very rigid and geometric. Since we're kind of free
handing this one today, it's definitely gonna lean
more to the organic side. So now I'm just adding
some more little petals in between those
larger petal shapes that we did, just like this. And I'm just going to draw
another circle around this section just
to create kind of a base for my next
row of patterns. We're just kind of creating,
like, a new section. And now I'm adding some
more rounded petals to the outside of the circle. And you can continue to
follow along with me exactly, or you can kind of start to free hand different patterns and add more
embellishments as you go. And now I'm adding
some bigger petals. So now I'm just
starting to make the patterns a little bit larger as we move
out from the center. And I'm just gonna continue on adding more layers
to this mandala, and I'm gonna go all the way
off the edge of the page. So we're not stopping here. We're gonna just
keep going until the entire page has been filled. So now I'm going to go in with
this thicker black marker and just make some
of the lines of my mandala a little bit bolder, just to add some variation
to the weight of the line. To And now we can start coloring our mandala. So for this mandala, I'm going to be using
three shades of green, and then I'm going to be adding some embellishments with
this gold paint pen. The paint pen is optional. Obviously, if you
don't have that, you could use yellow or another complimentary
color instead. I was going again for sort of another monochromatic.
Color scheme here. And then just with that pop of, like, a complimentary color, I feel like that
often works very well for these types of designs. So for each row of the mandala, I'm going in with a
different colors. So I'm actually starting with
the lightest green color and then working my way out
to the darkest green color. And then I'll go back to
the lighter green and just keep swapping out
the colors in that way, just to make sure that there's no two sections with the same color right
next to each other. So I'm basically
just working my way out one color at a time. And I'm actually going to start adding some of my
gold color here. So, again, you could use, like, a yellow or another
complimentary color here, but I really like the
metallic gold and silver, and sometimes they have, like, a rose gold paint pen, which you can find
on Amazon or even, like, $1 store or any
art supply store. They should have
stuff like that. And I'm actually
just going to go through and add the gold to all the different
areas that I want to have gold
embellishments first. So then I can just color around these areas with my markers. So now I'm going back in with my green colors to finish
off coloring this design. So follow along with me
and enjoy the process. So that's it, you guys. We've finished creating our meditative
sketchbook doodles. So I really hope that you liked this one and make
sure to stick around for the wrap up video
to this class so I can give you some next
steps that you can take and how you can share your beautiful designs with
me and the rest of the class. So I hope to see you
there. We'll see you in the next
and final lesson.
11. Next Steps: Congratulations on completing this eight day sketchbook
doodle art challenge. I hope this gave you a
chance to slow down, enjoy the process, and
reconnect with your creativity. And remember, it doesn't
have to end here. You can come back and visit this class over and over again. You can repeat these
exercises anytime you need a reset and just use different
colors or techniques. Make sure to visit my website, jlliarsigs.com for more art inspiration
and design tutorials. And also be sure to
follow me here on Skillshare so you don't
miss my next class. I love to see what you create, so make sure you post in
the class project section. Thank you so much for
spending this time with me. I hope to see you in
another class very soon. Cheers.
 Julie Erin Designs, Artist and Entrepreneur