Transcripts
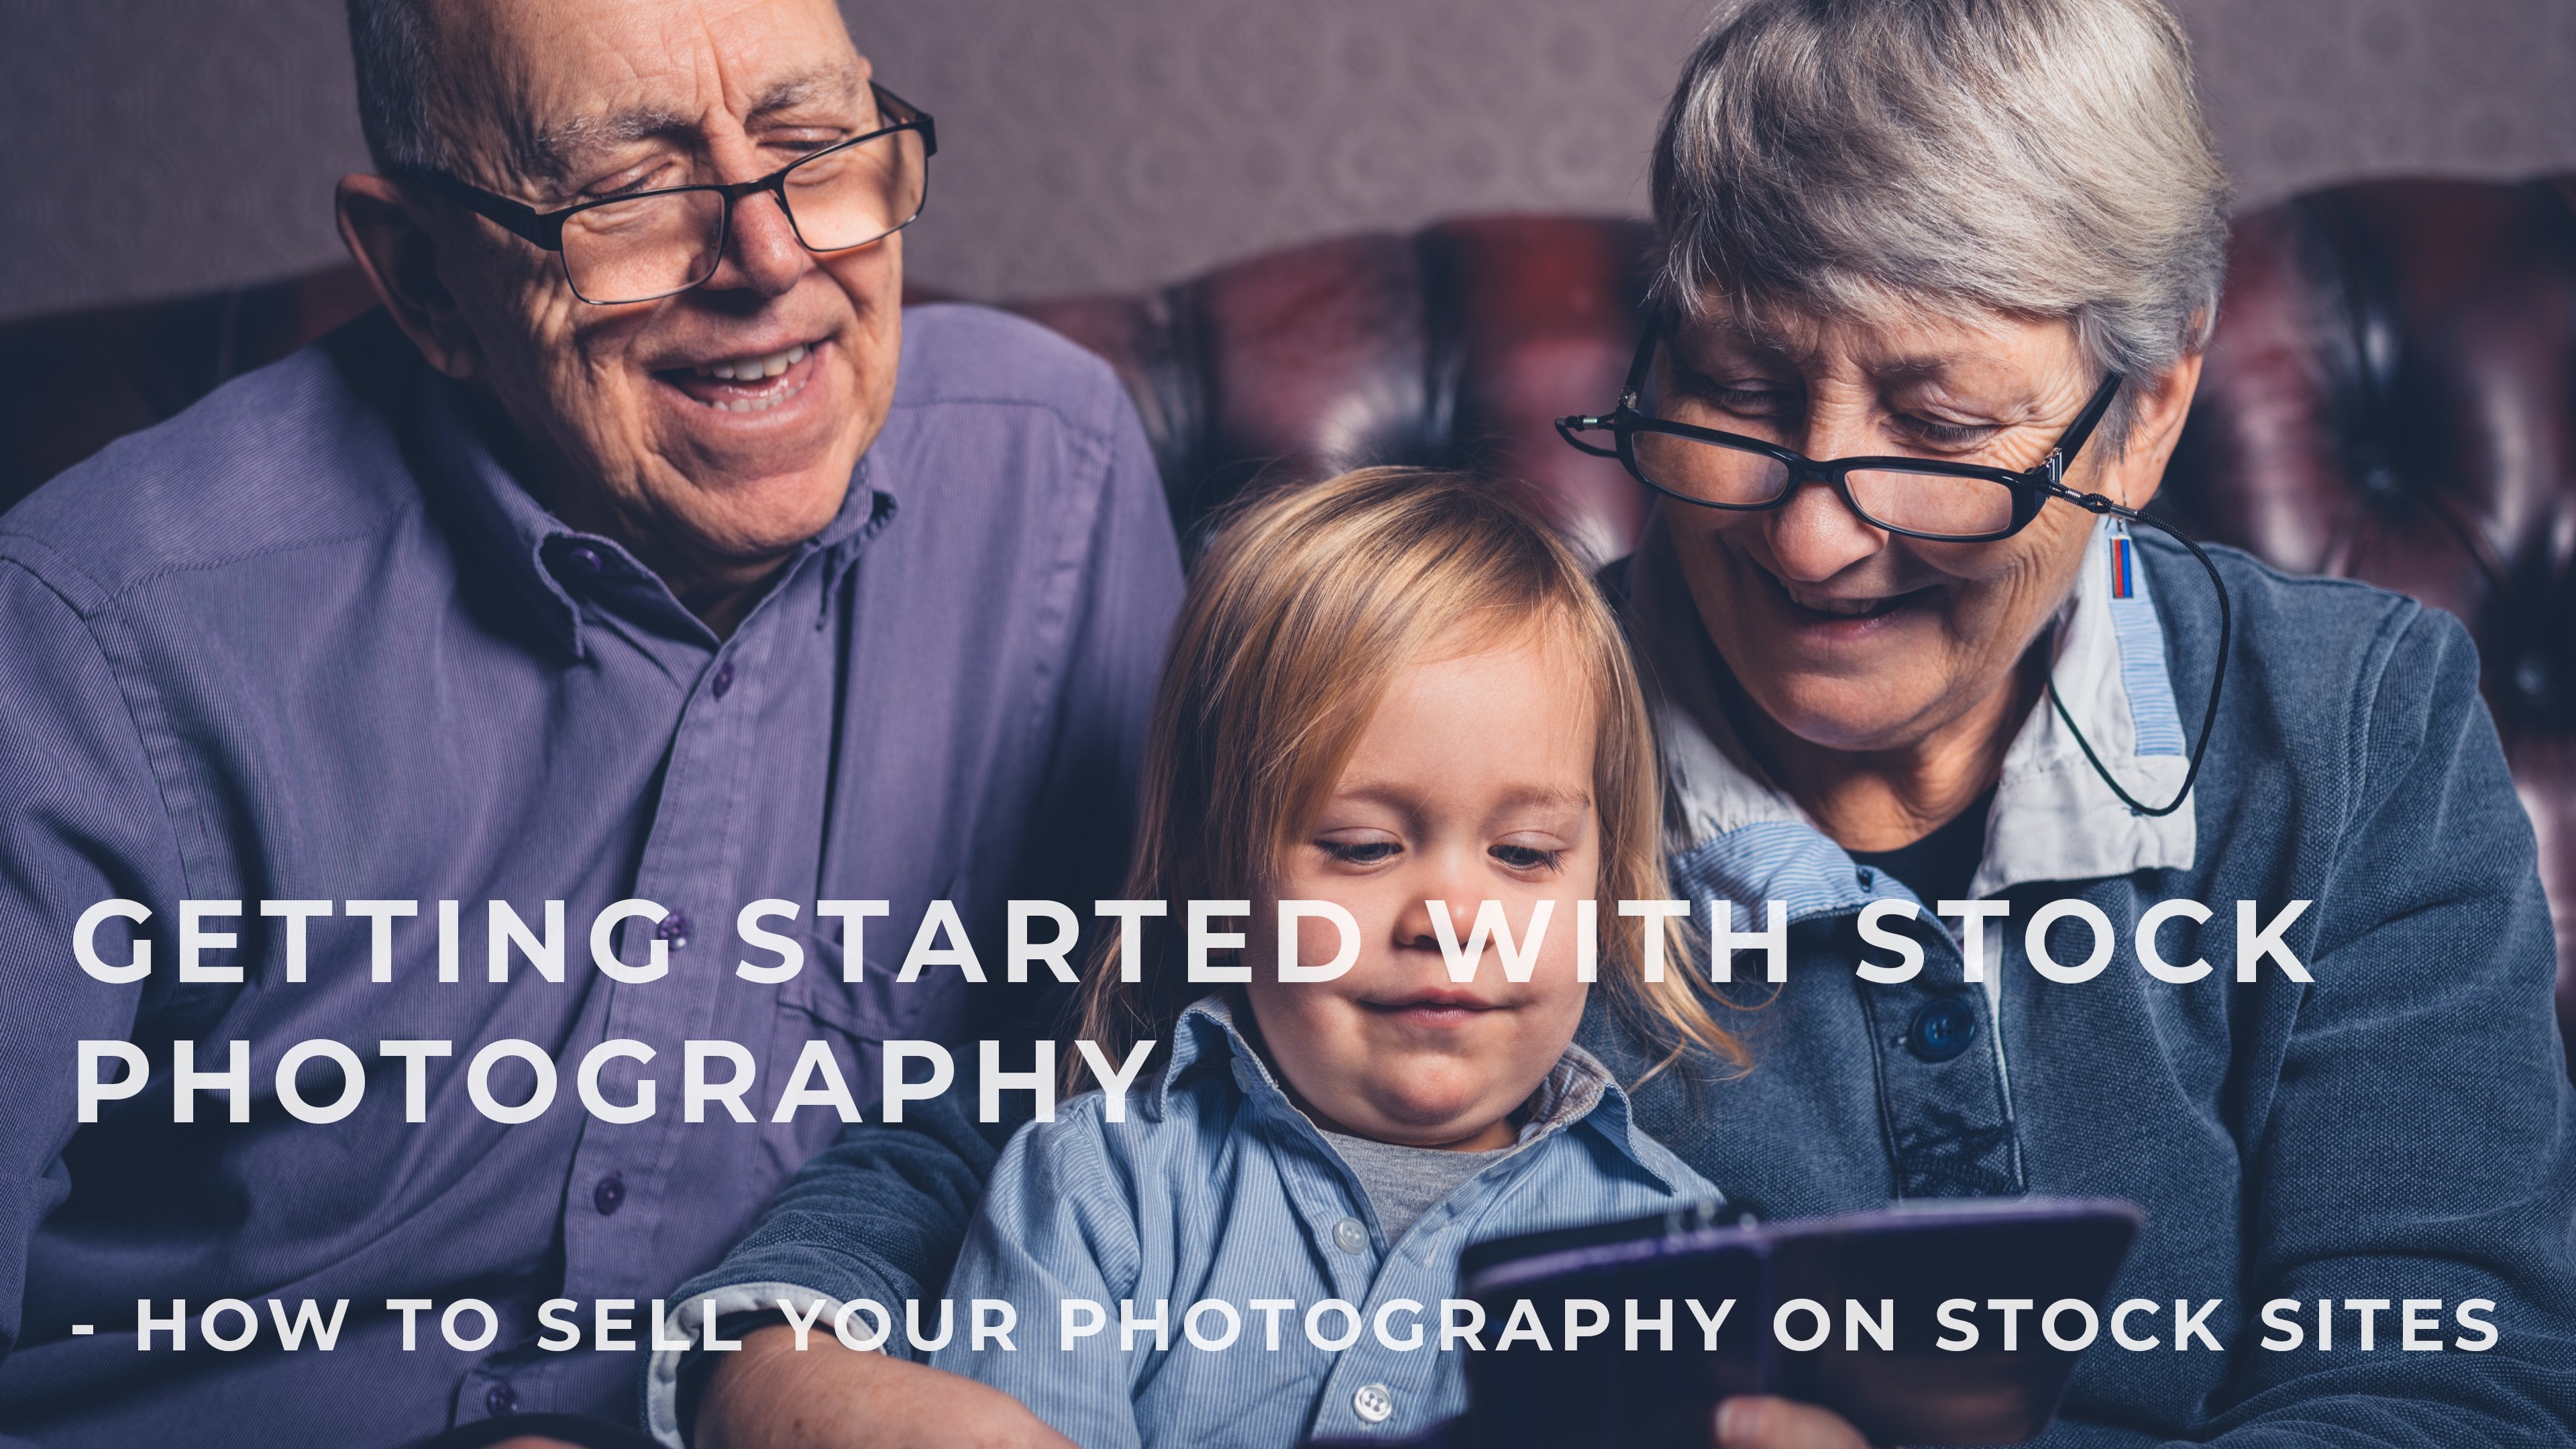
1. Introduction: A few things more satisfying. Being able to make money
from your creativity. Whether it's a full-time
living with just enough buy new equipment for hobby you're
passionate about. I'm Logan. In this class, we're going
to look at how to shoot a short little video clips that we can sell
a stock footage. I've been doing stock
photography for seven years. And two years ago, I started switching my focus
towards stock footage. If you're stopped
photographer thinking of making a move into video, like I did, you already know the ins and outs of how
this business works. But there are a few differences between stopped fee
and stock video, which we will discuss
in this class. If you're completely new to
photography, film-making, and the concept of selling your creative assets, the stock. Don't worry. This class, we'll cover all the
basics you need to get started from
choosing a camera and finding the shoe to color
grading your footage and uploading and key
wording on the stock sites. The class project will be
to shoot color, grade, and upload one video clip to stock site. I'd love
to see what you do. So please upload your
clips are stills from Eclipse treatments and
storyboards to the project page. Anyway, without any further ado, let's jump right into it.
2. Lesson 1 - What is Stock Footage?: In this first lesson,
we're just going to have a quick look at what
stock footage is, who's using it and what
they're using it for. Whenever somebody is working on a project that involves
moving images, they of course need footage. It doesn't matter if
you're an advertiser or a wedding videographer, YouTuber, music video director,
or Hollywood filmmaker. If you don't have any food edge, you don't have
anything to work with. Most of the time these
people will of course, go out and shoot the majority
of the footage themselves. But there are times
when it's just not convenient or feasible
for them to do so. And that's when producers and creators will turn
to stop footage, say for example, your YouTube. And you want to include
an aerial shot of New York City or a time-lapse
of Tokyo at nighttime. In most cases, you would
not have the budget or time to go out and acquire
that food it yourself. So you go to stock agency and browse their collection of
clips for what you need, you will find clips of
people chopping vegetables, families walking in
the countryside, cityscapes, rare
animals in the wild. Anything you can,
you can think of really who's shooting
these clips? Ion. And after taking this class, hopefully you will be two, doesn't matter where you
live and what you shoot. This is a global marketplace
that is rapidly expanding. So chances are that there's
always gonna be someone somewhere in the
world with a need for the footage that you
are able to provide. We'll talk more about what
to shoot and less than five. But first, let's have a look at the gear you
need to get started.
3. Lesson 2 - Cameras: If you watched my other
class of stock photography, you'll remember me saying repeatedly that your
camera doesn't really matter and you don't
need expensive dia to create content
that will sell. Now with video, unfortunately, that is not the case. Like I mentioned earlier, there are a few
differences between stock photography
and stock footage, of which the cost of entry
is probably the biggest. Liquid still cameras. The cost of video cameras, cinema cameras and hybrid
camera's capable of capturing high-quality video has come
down a lot in recent years, but the costs associated
with producing stock footage are still high compared to
still photography. The main reason for
this is file size. Video files are huge. It's possible to get a
relatively cheap cameras for capturing
high-quality video. But once you've done that, you need lots of hard drive
space to store your files. You need a computer powerful
enough to edit your files, and you need to pay for
electricity and bandwidth when your computer is just sitting
idle for several hours, uploading 20 gigabytes worth of video files to the stock sites in this lesson and the next, I'm going to try and offer my
suggestions for how it can do all of this as
cost-effectively as possible. So let's start with your
camera. You need to shoot. And for K, most clips
are still sold in HD. I know this from a contact
we wanted to major agencies and most people can't tell the difference
between HD and for K, especially considering
that a very large portion of content is consumed on
a small mobile devices. But nonetheless, you have to shoot and submit
your clips in for k, This is not a
requirement from the, from the agencies do they
will accept HD footage, but the day will come when
forecast the standard. So you want to make
sure your portfolio is as future-proof. And at the moment, for k, footage also commands a much higher price
tag than hates D. I highly recommend Sony cameras. There are other really good
brands out there, but for me, what sets Sony part is
the auto-focus ability. You see that stop consent, keeping your subject
in clear focus is one of the most
important things. If you're a one man
band, as I presume, you're pulling focus manually
while at the same time, moving your camera
either handheld or on a stabilized to make your shot more dynamic and interesting can be quite tricky. So autofocus has a
real lifesaver here. The Sony cameras will lock
on to the person's eye and keep tracking them in perfect
focus as they're moving. So this is done. Sony A7, R4. I'm mainly uses fulfilling my
classes and YouTube videos, but I've shot a few stock clips using this camera and
had some good sales. Another camera I used
to use sony A6 to 600, which is a lot cheaper
than this one. And I think that is probably the ideal camera if you're just starting out shooting
stock footage. It's one of the cheaper cameras. It has. Amazing autofocus
are talking about just like this more
expensive one. And all the Sony email
lenses will fit on there. And they're really great lenses. It's using for k obviously. But it also allows
you to shoot in a variety of different picture
profiles, including S log. If you don't know what
that means, don't worry. We're going to cover that in the lesson about color grading. Other things I like about
the Sony A6 is 600, is the battery life is great. It's really light. You can carry carried anywhere and just point
and shoot whenever you see something that might
making a good stock video, you can also control it
wirelessly with your phone and bring up in live
view on your device, which is great if you're
filming yourself, for example, if you modelling
and you own stock videos.
4. Lesson 3 - Lenses: Once you've decided on a
camera, you need to get a lens. That's right. Just one lens in the interest of
keeping costs down. One lens is really all you need. I recommend spending a little
extra money on this because a good lens is
something that will pay dividends in the long term. And unlike cameras, good quality lenses don't
really lose value as quickly. You want your one lens to be
as versatile as possible. So I recommend that
you get a zoom lens. The range can be as big
or as small as you like. It really depends on your
personal style and preference, but make sure that it
covers the equivalent of 28 to 50 millimeters on
a full frame camera. The Sony a 6600, I mentioned in the
previous lesson, is a crop sensor camera, meaning that the sensor is smaller than full-frame camera. The term full-frame goes back to the days of film and
refers to the size of AN 35-millimeter frame when you roll a film,
amongst other things, what happens when you put a full-frame lens on a crop
sensor camera is that you focal length changes because the sensor is smaller
when it sees through the, through the lens is going
to be more compressed, usually by a factor of
1.5 or thereabouts. So if you put a 50
millimeter lens on a crop sensor camera, the field of view
you're getting is actually 75 millimeters,
50 times 1.5. Why is this important when we're talking about
stock footage? The answers to human
eye and Hollywood, 50 millimeter is
the focal length closest to the field of
view of the human eye. Throughout the
history of cinema, the majority of films have
been shot with lenses and focal range between
2850 millimeter, because we have all been so conditioned to this focal range. Anything wider or tighter
will often look less pleasing to the eye shooting within this range as
a Stock contributor, It's important for two reasons. One, bias or stock
footage already have a sequence and they're buying stock footage to fill
gaps in that sequence, chances are that most of their footage has been shot
with a similar focal length. And they will want to
buy clips that will, will keep their project
looking consistent to bias. They seem to like footage
to look cinematic. You get that look
by using a lens that is slightly
wider than what the humanized can see therein
lies the magic of cinema was shown a world that is slightly more expensive than reality. Many celebrated
directors have said that their favorite focal length
is 28 millimeter. Guess what? The focal length
of the camera on the world's most
popular smartphone has 28 millimeter equivalent. I shoot most of my footage
with a focal length of 20 millimeter on our camera
with a super 35 sensor. So effectively, I'm shooting at the equivalent of 30 millimeter. I use this 35 millimeter lens for most of my still
photography as well. It's my personal preference, and I've found it to be popular
with costumers as well. There are two other things
you want from your lens. One, if you're
getting a zoom lens, you wanted to have a
constant aperture. Assume lens without
this feature will not allow you to use a
n, a wider aperture. And depending on how much
you zoom in and out, which brings us to two, you want a fast lens, meaning a lens does able to shoot wide-open and low f-stops, such as F1 or F2. This is essential for
keeping your focal plane thin and blurring out the
background behind your subject. Now why would we
want to do that? Two reasons. It gives you a footage
and more cinematic feel, and it helps hide logos, people, and property in the
background that you would otherwise need to get releases for in order to sell your footage on
stock sites, right? So one more thing before we
move on to the next lesson. Let's pick up this camera
again and show you filters. Using filters can
help give you food. It's a more stylized
look and feel. These include promise filters and polarizing filters
amongst others. But there's one filter that you absolutely must have on
our lens at all time. If you're shooting stock footage and you're shooting
in natural light. And that is a variable
neutral density filter. You need this in order to
effectively control the light entering the camera
so you're able to maintain you
decide frame rate. I will elaborate on this in the lesson about
camera settings. Right now, let's move on
to talk about computers.
5. Lesson 4 - Computers and Software: One thing that makes it expensive
to get started shooting stock footage is
the fact that you need a powerful computer
to edit your clips, that you will be shooting in for K, the faster the better. But in order to keep costs down, we're going to focus on the minimum you can get away with. We're gonna do that by looking
at the minimum recommended requirements of the software that I think you
should be using. And that is Da Vinci Resolve. Why Da Vinci Resolve? Well, first of all, it's free. That's a paid version as well, but all of the
essential features are available in
the free version. Resolvers always been
the go-to software for professional color
grading and it completely blows Premier and other
programs out of the water. So the minimum
requirements for running the Vinci Resolve
are as follows. When building a video
editing machine, a faster processor doesn't really make a huge,
huge difference. More RAM will make a difference. But what will make the
biggest difference is a faster GPU or graphics card. Unfortunately, the
free version of resolve does not support
hardware acceleration. So if you want to take advantage
of faster graphics card, you will need to upgrade to the paid version Resolve Studio, it's called, which
is roughly $300, which I think as cheap as
it's not a subscription, but a one-off purchase for perpetual license and you
will receive free upgrades. Henceforth, if you're buying
a laptop or a Mac where your choice of hard drive is fixed at the
time of purchase, I would recommend
that you just go with 512 gigabytes internal, or even as little
as 256 gigabytes. If you're working with video, you've got to need
external drives anyway. So there's no point in spending too much money on
internal storage. So what kind of
storage to need them? You need a scratch drive
and storage drive. A scratched drive is WAV files live when you
are working on them, It's where da Vinci will
cache the video previews that it is generating went
into rendering as you edit, a storage drive
is where you will keep your original files
when you're done editing and where you will keep your edited files when you
export them from Da Vinci, I'm using a raid server with a ten gigabit wired connection, which means that I'm able to use one external device for both my scratch
and storage drive. This is an expensive
way of doing things. So we're going to
look at a more budget friendly alternative
in order to read your video files and
edit them without any lacking of frames being
dropped and playback, you need to be using a fast
drive for your scratch disk. So you need an SSD, a solid state drive. I recommend the Samson
T7, one terabyte drive. It's blazing fast
and perfect for editing video from,
for your storage, I would suggest that you get a das directly attached storage. It's an enclosure that holds several drives working together
as one hard drive and you just plug it straight
into your computer using USB before the sake
of staying organized, this is so much better
than suddenly find yourself with a box full
of external USB drives. Wd myopic is a good
system to look into. You want to set up your
directly attached store it in a raid or AID. The reason for doing this is, like I just mentioned, several
drives acting as OneDrive, giving you more space, put together 54 terabyte drives, and you have a single
drive that 20 terabytes. But another reason
for doing this is for the sake of redundancy and
protection against data loss. There are various ways
of setting up a rate, but essentially what
it does is that it distributes fragments
of your files along with copies across
all the drives in a raid setup in the array. So if one drive fails, you won't lose any of your data. All you have to do is replace the broken drive with a new
one of the same capacity. If you're interested
in this kind of setup, I would recommend that
you use raid five. This is what I've found
to give the best balance between storage space
and data redundancy. Now for extra peace of mind, I will get two of
these external setups in order to have a backup
of everything as well. With regards to
backing up your files, you could use Cloud
Storage as well. But obviously it's going
to take a lot of time to upload your video files
and you need lots of storage. Crashplan for small business is the only service that
I have come across that offers unlimited storage
at an affordable price, $10 a month at the time
of recording this.
6. Lesson 5 - Other Equipment: This final lesson
about equipment, we're going to have a
look at some things you may or may not need depending on your personal preference
and style and what you're hoping to get
from shooting stock footage. First, let's talk
about stabilizes. Excessive camera shake is an instant rejection
from the agencies. So you want to make sure that you have a really steady hands. Or B, you use a tripod or
another type of stabilizer. I like Manfrotto tripods. This one here, the serial 55 is both lightweight and sturdy. It will hold up to
£19 with the tripod. I'm using the 502 fluid
with video head. A tripod. And a video has probably the cheapest investment
you can make to instantly on your game and make
your footage more interesting to buyers if you want to take it
one step further, I would suggest
getting a gimbal. I've been using their
own NSC and it has definitely helped me create
more dynamic footage, which is what
buyers love to see. Finally, there's
cameras, lidars, I think their stock
contributors, best friend, especially the motorized
ones with full pan tilt and focus functionality
like this endocrine system, you can program movement and the slider will remember
it for stock footage, you could set up a shot of
somebody doing something with their hands were on the same movement
again and again, but replaced the action
and objects featured. This will truly help you create more food it in less time. But these kind of systems are rather expensive
for very simple, cheap and easy slider movement, I suggest getting a skateboard. It takes a bit of practice
to pull it along at a, at a steady pace. But you could make
your footage look more smooth by shooting
in slow motion. Or if you're shooting some
objects on the table, all you have to do
is place your camera on a towel and gently
pull out along. The last piece of gear
I'm going to talk about is video light and
light modifiers. If you're shooting indoors, you have to get these. I'm not gonna go into too much
detail on how to use them because that's
really the subject for cinematography class. So there are lots of
different options available. I like using the 120
D from aperture. It's got a good light
output suitable for most small stock shoots. If you fill them in large
scenes of several people, you may need to get
something a little more powerful and, or
multiple lights, but the ones for any d is a really good all-rounder
for most purposes, I mostly use it with
the aperture lantern and amounted in a C
stand for stock footage. I like to keep it simple and
I don't want to introduce too many shadows and too much
contrast with the lantern. I'm able to simulate sunlight and have a nice
even light on my subject. If you don't have the budget for a professional video lights, but you can do is
get a flatline from your local hardware
store or garden center. Usually extremely powerful, and then you can adjust
the intensity. Also. They can get very hot. So be careful that
being said, however, they get the job done
and then very cheap in order to diffuse the light and make it more
softer and pleasing, all you need to do
is shine it through a standard white
five-dollar shower curtain. But again, watch
out for the heat if you're using a floodlight, place the lab to close, it could melt the shower
curtain reflectors or another cheap way of controlling the
available light by bouncing it where
you want it to go. You can use regular house
lights, ceiling lights. Usually they aren't
powerful enough, however, and you will need to set your
cameras frame rate to match the electric
frequency Few region in order to avoid flicker. So for example, that's
160th of a second for North America than 150th of
a second for a year, right? I think that's our
equipment sorted. Let's move on to actually
shooting some stock footage.
7. Lesson 6 - Planning Your Shoot: Okay. So we've got a camera
and other gifts audit. Now it's time to decide what to shoot and make a plan
for how to do it. If you're coming from a
background and stock photography, you already know what to
shoot and what not to shoot. If you're completely
new to this, I recommend that you watch my other class and
stock photography, particular the lessons about what to shoot and
what not to shoot. To sum up quickly though, you can submit any
content featuring recognizable people without
their written consent in the form of a model release, you can submit footage of recognizable property
without a property release. So that includes animals,
tattoos, artwork, graffiti. They're all considered property
and you need a release. You can never ever show trademarks are logos
and your stock footage, as I mentioned earlier, that's one reason why I like to shoot the lens wide open to blow out any potential issues
in the background. Well, that being said,
you can shoot and submit whatever you want. But if you want to
actually make sales, you need to research the
market and shoot what's in demand or break down
that process in a minute. First, I'll give
you another tip on what to shoot it should. What do you know? Don't try to copy other
contributors or jump on a trend if it's a subject you don't know anything about bias, want to see realistic
and genuine content. They get that when
content creators stick to what they know. If for example, you're
into gardening, shoot some footage of that. Don't go too high and models
to pose as businesspeople, just because you think
that's what's popular. I'll say it again. You get the most sales by
sticking with what you know. Now the way I like to research the market just to see
what's in demand is simply by reading
newsletters being sent out by most of
the major agencies. They will tell you
what's been selling, what they expect bias
will be looking for, and then what actual buyers
have directly requested. Another thing I like to
do is keyword research. I do this by going to
stock sites, search bar, usually Adobe Stock and
novel type in a word that I would like to
build a shoot around. So if for example
a tab and family, I will get auto suggestions
of search terms that people are actually looking for in this case against
family picnic, family, happy family
camping, family hiking. If you look closely at one
of them, hiking family LLC, that there are 17
thousand results. So that's pretty good. The search term hiking family
is not too competitive. So this is what you
would call a niche. I could dive deeper
into this to find a Micronesia with even
less competition, family hiking, family hiking. Perhaps I could specify
where there are hiking, a country and landscape. How about how about
a family hiking by a lake? Let's try that. 1677 results. Usually I will try to
find a search term that has at least 3 thousand results. You want to shoot
something that hasn't been covered too much already. But you also want to
feel relatively sure that it's something that
might be a market for it. Anyway, Let's say we're doing the family hiking
by the lake shoot. First thing we need to do
is find a leg and a family. It's always a good idea to
decide on our location before anything else and then build your ideas around that location. This way you forced to
work with what's there. And you want to start spending
extra money on bringing, bringing other things
and you want to keep your costs down anyway, you can always just try to
work with what you have. I live in the countryside, so finding a lake, it's not a problem
for me for a family. I've got one else to
my kids then mom, grandparents, they're happy
to participate for free. Great. Another cost effective to get your friends and
family to model view, of course, they
will need to sign a model release just
like anybody else. You need to remind them that the footage you're
shooting with them, that you're selling of
them on stock sides could be used for just about anything. By the way, I have attached a generic model release and the resources that
you can use with any agency unless
they specify that you need to use their
own model release. So once I have my location
and model sorted, I like to do a shortlist. A good way of deciding
what's shots to get is by thinking like a
filmmaker or storyteller, keep in mind that the
buyers have your footage, will want to use it as part of the story
that they're telling. So if you shot it as part of a narrative is just going to look a lot more
authentic and coherent. So using our example of a
family hiking by the lake, let's imagine how how
did they pass out? They might drive to the lake, pack up their car,
put on walking boots, get bags, blankets, picnic
stuff from the car, then they'll set
off on the hike. They might take breaks along the way, look at the scenery, stuff to tie shoelaces, check them up on their phones. They'll get to the lake.
What might they do that? They might have a picnic, the children might throw
rocks and the water. So shortlist might look
something like this. One, family parking call, family getting out of car, family getting
things from the car, changing into walking
boots and buy the car, walking through nature, stopping to tie
shoelaces, closeup, putting down bags by the lake, children throwing
rocks and the lake. This should just
be a loose list of the shots you would like
to get as you're filming, you'll think of many
more things to shoot as the situation is changing and it will change for
better or worse, especially if you're
working with children. It's always good to try and
capture the same shot from different angles and with
different focal lengths, you need wide establishing
shots and you need close-ups as
well as medium shots, shots of the surroundings without your talent
in the frame. If somebody bought all of your clips from a shoot and
they were able to create an interesting and engaging
narrative short film using only your Eclipse.
You've done a good job. Which reminds me of another thing you need to
include in your shortlist. Emotions. Write a list of the
emotions you would like to capture
if you're working with friends and
family rather than professional models and actors, you might not be able to get a convincing
performance from them. So don't try and
force them to do, do anything they're
not comfortable with. If you're working with
non-professionals, it's best to just let your
camera roll and tried to capture everything in a
candidate and relaxed way, regardless of who
you're working with, you need to plan their Wardrobe. If you're purchasing items
for your talents aware, be sure you've got
the sizes right. Remember to bring the close
to the set our location. So add it to your checklist
of what you need to bring. I don't recommend buying
clothes with shoots, but if you do keep the labels on and treat it well,
so you can return it. If you're asking your
talent to bring clothes, make sure to tell
them exactly what you want and that they
understand what you want. Tell them no logos are trademarks unless
they can be easily hidden if you want
certain colors or if you want to
avoid certain colors, tell you talent, ask them to bring a variety of
different options. Ideally, you would have met
with them in advance and decided exactly on what
you want them to bring. You won't waste time doing
this on your shoot day. So I mentioned adding the wardrobe items to a
checklist of things to bring. Other things you need to add include your camera
gear, your lenses, filters, memory cards,
batteries, tripods. Make a list of
everything you need for your shoot and check it item by item the night before to make sure you
don't forget anything. There's nothing worse than, than driving to a location
several hours away with a load of equipment
and Italian book, only to realize that you left your camera batteries at
home sitting in the charger. Another thing you
want to do with regards to your location, this may seem obvious, but you'd be surprised how
easy it is to overlook. Check the weather. If you want to shoot
a happy family hiking by the lake
on a sunny day, you don't want to plan
your shoot for a day when there's a flood
alert in place, you should always visit a
location beforehand to get a sense of when and where the sunlight is at its
best for the shoot. If you're planning,
a very helpful tool for this is a sunlight app. It will use coordinates and weather data to tell
you where the light will be and the quality of the light is a
diffused by clouds, too harsh, etc, right? So all the information
in this lesson was based on the assumption
that you're a one man band. Top-level stock
producers will treat a shoot like it's like
it's a small film set. They will bring along a crew. They will storyboard the shoot. They will write really
elaborate treatments, checklists and call sheets. They will arrange for
public liability insurance. They will bring them makeup
artists don't do it. If you're just starting out, you need to keep it as simple
and cheap as possible. Yes. To get good footage, proper preparation and planning is vital, but don't over do it. Keep it simple. As you're growing, you could
slowly start to strike up conversations with other people
who have relevant skills, such as makeup
artists and stylists. A good place to find
people like that to collaborate with
would be Instagram, which is also a good
place for finding models.
8. Lesson 7 - Setting Up Your Camera: Right? So we onset and we're
ready to start filming. How do we set up our camera? Obviously, there are many
different ways of doing this depending on what you're shooting and your
personal preference. I'm just gonna give
you a quick overview of what I think is the best way to shoot if you are creating
content for stock sites. So I mentioned Sony
cameras earlier. So that's what I'm gonna
be using for this lesson. If you have another camera,
it doesn't, doesn't matter. All what I'm about to say is
it's universally applicable. So first up, you want to
set your picture profile. You want to be using
a log profile. What that means is
that your camera will record everything looking really flat and
desaturated, boring. You wanted to do that because it gives you more options for color grading your footage
later on in post-production, if your research log profiles, you'll hear things like S log c log n log
to send into sin. And for hates log C7 or nine, it can be really
overwhelming and confusing. I like to keep it simple. With my Sony cameras
I use send it to some other profiles
might give you a more dynamic range or
slightly better color, which may be desirable if
you're shooting a film. But for stock footage and
send it to as a sufficient, like I said before, people buy stock footage to fill gaps. And so you don't want it to be too you don't want it to have
too much of distinct look. You want it to look good and stand out when it's
presented next to thousands of
other stock clips. But you don't want
it to look like the matrix or a
Michael Bay movie. The next thing we
want to do is set our frame rate and
shutter speed. For most stock agencies
will accept footage shot at 23.97 frames per second, 24 frames per second, Twenty-five frames per second, 30 frames per second. The United States, it's the largest market for
selling stock footage. So some might say
there's an argument for shooting your footage in
30 frames per second, which is the standard there. I don't think that's
the case anymore. Maybe in the old
days when people were watching that
analog television, 25 frames per second is
the standard for Europe. 24 frames per second
has always been the universal standard for
the cinema projection. And that's the one
I like to use. If a client wants to use a clip and a 30 frames per
second timeline, they can easily
transform it anyway. No matter what frame
rate you choose, you always need to set
your shutter speed to double the frame rate. So for 24 frames per second, you need a shutter speed
of 150th of a second. This is what has to
be done to create that slight motion blur that
is pleasing to the eye. It's pleasing mainly
because that's what we've been conditioned like through a, through a century of cinema. Using this frame rate
and shutter speed ratio on Sony cameras, you set your frame
rate at the same time, you set your recording format. So I'm going to do that as well. And I'm going to
select for k aperture. I like to shoot
wide-open at around f2. I mentioned earlier why
this is my preference. It gives you a cinematic feel and blows out elements
in the background. It wouldn't be allowed
in stock footage. However, when we
have our shutter speeds set at 150th of a second, we might need to
be shooting at f 16 or something like that to
maintain our shutter speed, especially if we're outside on a bright day, what can we do? We can use a variable
neutral density filter. This is the quickest way of getting the exposure
Right whilst keeping our shutter speed at 150th and keeping the lens
of a low F-stop. That's what we want. We attach our filter
and we can easily adjust how much light is slip through simply by turning it. Speaking of exposure, sometimes when you're
shooting outdoors, it can be really hard
to see your screen. And even if you're using
a viewfinder can be hard to know if you're getting
your exposure right. I recommend getting
an external monitor and check your exposure using tools such as
histograms and false color. I'm using this, you know,
we wanted to maximise another very important thing to do in order to get
proper colors, to set your white balance. And remember to set it
again every time there's a significant change in
lighting conditions. This is a color chart, is probably one of the
cheapest tools you can get. And yet it's one of the
most helpful get one. So this one from spider checker, it has all of these
colored squares on one side and a neutral
gray on the other side. When you're ready to
set your white balance, you go to your camera settings, choose custom white balance. Take a picture of the gray card in the light you will be using, and you're ready to go
when you're about to start shooting as
good talent to hold the the color chart
and then kept you a few seconds and then
gently turning it. We will use this when we
go to color grade audio. If your camera records
audio and you're able to turn it
off, didn't do so. Most agencies want clips to
be submitted without audio. By not recording
it, you will make your files slightly smaller. Final thing to do when
setting up your camera is check the batteries are fully
charged and ready to go.
9. Interlude: Hello class. Just a
quick reminder that it's good to take a little
break sometimes and learning. I hope you enjoyed
the lesson so far. We've covered a lot of material and we're ready to shoot
some stock footage. I don't feel that
you would put gain much just from
watching the shooting. So I encourage you to just
go out and film something. Now, I will do the same and I'll see you back
in the next lesson where we will edit and color grade our footage
in DaVinci Resolve.
10. Lesson 8 - Grading & Editing in Resolve: Welcome back class. So hopefully you shot some footage
that you are happy with. If you did, then we're ready
to color, grade and edited. The first thing we
need to do to do that is download the Vinci resolve. So it will go to
Blackmagic Design.com, forward slash products
slash Da Vinci Resolve. Here we see that
da Vinci Resolve 18 is the latest version. We'll just click here DaVinci
Resolve free download. Now you've got two options. You can download the
Vinci Resolve 18, which is the free version or
da Vinci Resolve Studio 18. But we're just going to go for the free version that's
got everything that we need to produce suitable
for stock sites. So in order to download it, you just need to fill
out your details here, your name, email,
and so on, so on. You don't need any
credit card details, anything like that.
Register and download. The installation process
is fairly simple. So I'll just leave
you to do that and I'll see you back
here in a few seconds. So I'm gonna be using the studio version that I already have installed
on my computer, which is the da Vinci
resolve 17 studio. But I'm only going to be
using the basic functions that are available in the free version that
you just installed. So when you open resolve
for the first time, you'll be asked to
create a new database, which is basically just a
file on your computer where you're da Vinci project
files will be stored. All your video files will be stored wherever you
decide to put them. So we're gonna go
ahead and create a new project. A new project. We're just going to
call that dark shadow. You can call it
whatever you like. The first thing we
wanna do is go to this little gear in the
lower-right corner here. Project settings set up the timeline to
match footage clip. So I'm gonna be working
with now I shut them in for k. So the timeline
resolution here, I want to change
that to 3,840 by 2160 ultra H D. That's the resolution you would
get from the Sony camera. I was using. The
timeline frame rate that's already set to 24. I want to keep that at
2424 frames per second. All of these other
settings here don't really have to worry too
much about those column. And it's meant, again, that's fine as it is
timeline color space, or you see seven
O nine gamma 2.4. That's what we want. Click Save. Okay? Alright, so here we are
in DaVinci Resolve, which is a very powerful
and advanced editing suite. But for this lesson, we're just going to do the
very basic color grading and editing that we need to do in
order to create some math, some clips to the suitable
for uploading to stock sites, though there are a
few different ways you can import clips into the Vinci result if you
want to meet you page here, go over here and you can right-click and select,
add new location, and then pick a folder on your hard drive or external hard drive where
you keep your video files. But I've gotten my clips on my desktop that it has already been added in the past as a
location to Da Vinci Resolve. I'll just select
clips that I want and drag and drop them
into the media pool. Alright, so I've got my
clips in DaVinci Resolve. Okay, Let's have a
look at our footage. So we'll go to the edit screen and we've got Eclipse up here. I'm going to double-click
on the clip that I want. And it'll show up
on the screen here. This screen here shows the
media that's selected, and this screen over
here shows what's happening on your
timeline, right? So I've got this clip
here with audio. I don't want to use the audio, so I'll just select the little
film, filmstrip icon here. Click that and drag
that onto my timeline. That way I'm only adding
the video and do that for this other clip I have
as well. Two clips here. And as you can see, I started my clip by showing
the camera my color chart. So what do we need to do to produce some clips that
are suitable for stock? We need to color
grade and we need to cut our footage
into small eclipse, I like to call a great first before I cut my footage
into small clips, I like to do that because
if I have a sense of what the final product is going
to look like and makes it easier for me to decide
where to cut the footage. So we're just going to jump
right in greatest footage. So we'll jump to the
color panel here, and you've got loads and loads
and loads of options here. But we're just going to keep
it really simple and do the most basic color
grade that we can get away with in order
to make the footage just pop a little bit and make
it suitable for stocks. So I shut this using
a sinner to profile. They can see it's kinda flat and I've got my
color chart here and I'm going to use to instantly
correct the colors. So what you're seeing here is a node DaVinci Resolve works
with what's known as nodes. It can kinda think
of nodes as layers, but rather than being layers on top of each other,
they're kinda sequential. Usually I would leave
the first one blank, then I'll add another one. Right-click and select add node, add a serial node, cenotes light layers,
but they are sequential. So just leave the first one
blank, then the second one. For example, we might apply
our color chart correction. Then we'll create another one and do it for just for contrast. And then another one where we will do our n is
a really good way of working because it's easy to isolate small corrections. We're just going to
jump right into it. And I highly recommend that you label your nodes. So
we're going to do that. No labels. So you're just
so we know what's going on and we'll call this
one Color job. I've got my color chart here. So I want to go to the color chart matching
tool here called unmatched. Actually call it, and I want to select the chart that I use, which was data colors
Spider check at 24. Then I'll go to this tool here on the chart and then listening is going
to pop up there. What I wanna do now is
just kinda drag it, drag the corners to match up
the squares with the colors. Then I'm going to have a bit
of configuration down here. The source gamma, if you're
using the center to profile, you would have just
had your gamma or EC seven or nine target gamma seven or nine target
calls back space seminar nine, college temperature
is set to 6,500, which is kinda like typical
daylight color temperature. It's going to click match
and see what happens. Okay? You can see it just changed the colors
slightly so you can switch your
individual nodes off by using a keyboard command D. You can see the difference
in mania, this is off. This is on using the colored chalk made the footage look a
little bit cooler. But it's still very
desaturated and flat, which is how we want it to look. We'll add a new node
and other Serial Node. Let's just put this
to the way here. There's one we're
going to call Luma. We're just gonna do
some basic adjustments to the exposure
here to the light. Basically, there are many
different ways of doing this. What I like to do
if I'm just doing a really quick and rough
color grade is to go to the color wheels and I like
to desaturate the footage. Let's move this
all the way to 0. And then I'll use
the curves here. So typically what we want is for this line
to look like an S, to create what is
known as M S curve. So I highly recommend you turn
on your sculpts over here and select the histogram. So what we're gonna do here
is we're going to take the lower left little thing here and we're going to
move it to the right. We can see the record kinda like a mountain shape here that
shows you your exposure. So this is this footage is
nicely exposed because you've got all your peaks kinda in
the middle of your histogram. You can see that
over here as well. Like if it's touching
the left hand side, then your footage would be underexposed and you're losing
details in the shadows. If it's touching the
right over here, then it's overexposed and you're losing details
in the highlights. I can actually show you that by cranking up the highlights, moving this away and
see, There we go. Now it's touching
the right over here. So that's not what
we want to do. What we want to do is to make this blacks as dark as
possible without clipping. So without losing any detail, we do that by dragging
the lower-left, got here. Around here with a word
of peaks start forming. And you can see the footage looks a lot more
contrasty already. And then we can bring the highlights down a
little bit as well, right? Then we're just going to
add a little point here. Drag that up, another one here. And we'll do one at
the bottom here. To create that kind of
s-shaped that we want. We can add more points
along the way if you want us to make it kinda smooth, this actually looks a
little bit too dark. So that would be the
points down here on the left and we need to
adjust a little bit. Just kinda raise them up a bit. Okay, So this looks pretty good, I think. Nice and contrasty. Okay, so next thing I do is I would go to the screen here, the RGB Mixer, and I'll just
pump all the outputs up, red output up, green output up. I'll put all the way to top. Then go back to my color
wheels, my primary wheels. So I'm actually in
the Log Wheels here, which it shouldn't
be it should be here, primary color wheels. And I'm going to start
playing back saturation. Bit too saturated now. Alright, so now that
I've got my color back, I might just fine tune
my S curve a little bit. I'll add another Serial Node and I'll call this one contrast. Just going to adjust
the contrast a little bit just to pivot. So I'm just going to move
this clip along actually, to get to the bit of the clip that I
actually want to use. By the way, i'm I'm
probably not going to submit this footage
to any stock sites. It was just something that
I filmed really quick. Just for this lesson, I was
about to head out. Thank you. Sun cream on my fingers and just looks a
little bit weird. I think for most of
the clips while you're able to see the
text in the book. Which means that it's
not suitable for stock footage because books
are subject to copyright, but this footage is fine for this lesson to show
you how to color grade, okay, so we've done the
contrast and you can see how that looks off and on. So it's very subtle. Most of these
adjustments you make and you want to keep them,
keep them quiet, subtle and K. So what
I'm gonna do next is I'm going to add
another serial node. And then I'm also going
to add a parallel node. So that's two nodes
that are doing two separate things
at the same time. And this is where
I'm going to create the look for the footage. So one of the nodes
is going to be skin tone and the other one
is going to be the look. So it will start
with the skin tone. So what I'm gonna do now
is I'm gonna go here to the qualifier and I'm going to select
somewhere on my skin, I'm going to hit Shift
and the letter H on my keyboard so I can
see what I'm selecting. Then I'm going to, this tool had a feather plus and just add some more
of the skin tone. You can see it's selecting
the background as well. This color is present in the background, so it's
selecting that too, doesn't matter because what we want to do is
warm up the skin, skin tones and warming up the similar tones and the background is
usually not a bad thing. I'm gonna hit Shift and
HCN and now I'm going to use my color wheels to
adjust the skin tone. So your color wheels here, you've got Lift, Gamma,
Gain and offset. So lift that controls the shadows if gamma is
the mid tones and again, it's the highlights, an offset. Everything together. So I'm just going to work with the lift and the Gamma for now. I'm just going to
push in a little bit more orange into those. So it's okay to overdo it
a little bit on gamma, adding a little bit of orange. Then with the highlights, I actually want to add
a little bit of blue. It looks a little bit too red. I'm just going to make shadows a little
bit more yellowish. What I can do here as well
as increase the contrast of just what I've selected in a qualifier and
decrease the cost. So I think I'm going to
increase it a little bit. And you can see how this looks quite unnatural and strange. So I overdid it a
bit and that's okay because I'm gonna go to
this tool over here, the key, and I'm going to
change the key output. I'm just going to drag it
all the way down to 0.4. So that's kinda like
transparency of the node. Basically, it's making denote
more transparent defect, more transparent and subtle. It's on, it's off On of Lucy. Just want to very, very subtle. Fact is one-to-one, the skin tones keep
them fairly subtle, but you can actually
do is you can check the skin tones are actually looking like skin tones with your vector
scope over here. So I want to make sure that
skin tones I actually turned on show skin tone indicated. So if we just switch
to this view again, so we just got a
skin tone selected. We want them to fall on this
line here and they do it. For example, I went through
and adjusted the left. You can see it's like
moving all over the place. It's not on the line anymore. I want to adjust it to
be right on the line. Okay, so I'll just
switch this back to our wave form and we'll
go and adjust the look. So for this one, what
I like to do is use the lock wheels and I like to add a bit of blue
to the shadows. And then up here
we've got the range, which is kinda sensitivity to where the shadows
are in your footage. You can see if I raise the range here than more shadows are
going to start turning bluish. Again. Just want to really
subtle, subtle effect. That looks, looks
pretty good I think. But overall, I feel that this
might look a bit too warm. So a quick way to fix that
is with the white balance. Soda column chart should have
adjusted the white balance. But perhaps when we
select the 6,500 K here, that wasn't actually accurate, might not have matched the
actual settings on my camera. So what we'll do is go back to a primary color wheels here and here we got
temperature and tint. This looks too orangey, so we can just lower
because the temperature of it and make it a little bit
more bluish a lot actually, I think it can actually
see the white, the white pages are
looking more white. And I'm doing this and add
a little bit of tint to it. Greenish. I'm happy with this. I would
submit a clip like this, but this grade, it looks
like it's been graded, but it's not too distinct. It's quite neutral still. It will look, look
attractive to bias and it will be easy for
them to add their own look, will be easy for them to do to change the grade if
they want more contrast or if they want it to look cooler or warmer,
and so on and so on. If once you've done your notes here and you feel like you want to change the overall look, what you could do is add an extra node right
here at the end. Just kinda play around with
the offset a little bit. If you want it to
be more reddish, more greenish, more bluish. To change the colors
a little bit and you can make it more bright, Ahmad, more dark simply
by changing this here. I might do that a
little bit actually. You can see a histogram
over here that some are red color is actually
slipping in the shadows now, so that's a bit too dark, but yeah, this looks fine. This looks good to me. So
if you're shooting a lot of footage and under similar
lighting conditions, once you've created a color graded you that you really like, a time-saving thing to do is to right-click on it and
select Grab Still. That will save the great domain and strategies used
for another clip. So for example, if we go to this other clip that I
shot, It's not graded. I can just select
my still over here, right-click and
select Apply Grade. And now it looks exactly like
the previous clip, right? So let's go back to
our edit screen and cut this up into small eclipse. We're on the edit screen here. So typically, most
oxides will say that your clip needs to be at
least five seconds long. I've found that my
most popular Eclipse tends to average around
18 seconds in length. But what's most
important is to cut your clips so the
action seems natural. You want maybe just a second or two before the main
action of the clip, like just leading INSEAD. So it's easy for clients
to create a transition, another clip into your clip without losing any
of the action. So I've got my two clips here. And the first one
here was really just a test shot and to get the color chart and I'm
not going to work on that. I'm just going to
delete that one. I'm going to focus
on this clip here. So what does this clip man sitting on steps reading a book. So the action starts around. Here, does not have
fumbling around with the book and nice and kind of settling in there. Let's say Man, turning
a page in a book, that's the main action. So I'm about to
turn a page there. So just go back a little bit. And let's say we want
to start it here. So I'll get my razor blade
tool and I'll cut it there. Select my arrow tool again, select this bit and delete it. Okay, Let's just play that back and see
what that looks like. So you can see that
it looks very jerky. This footage, like
what you're seeing up here is to playback frame rate 8.2 frames per second.
That's not good. I wanted to play back at
24 frames per second, the frame rate at
which it was shot. The reason why it would
sometimes do that, because of using a
really big file and possibly your computer
using resources elsewhere. So in my case, right now, because I'm screen recording
all of this that is slowing down when I play
playback frame rate. What I can do is go
up here to playback, timeline proxy mode, and
select quarter resolution. So that's going to show a lower resolution clip
in my preview here. And hopefully it'll
speed up the action. You can see now it's playing
back at 23.976 frames. So this bit where I'm
holding the page hip, if I zoom in on that, might actually be able to read the words on the page
and identify the book, which means that this would not be suitable for stock clip. But let's pretend that
that's not the case. This would probably be a
good place to cut it there. That's exactly 18 seconds.
What do you know? Like my razor blade
again and I'll cut it. Where I just caught this clip. Potentially, I could have
two separate stock clips. I could have this first one
when I'm holding the page. That could be 11 thing. And then here we could have another clip because
it's a different action. Moving my finger
along as I'm reading. Okay, So I'm putting
the book away here and getting ready to stand up. So I want to cut that. So you can just kinda like drag your clip as well to
make it shorter or longer. And if you've got this
magnet here highlighted, it will snap to where your play head is
situated on a timeline. So this second clip
ended up being nine seconds long,
which is okay. So when I cut clips
up like this, once I'm done cutting them, then I like to just move them. They bought up to each other. So something else
I'm gonna do here is fixed the composition
of this clip. I don't quite like how my end, my nose is cropped up here. So what I'm gonna do
is I'm just going to zoom in a little bit to
make it a little bit bigger. So you usually, you would
not want to do this because your upscaling Euclid, which means that it
could end up looking more grainy and pixelated, but just a tiny bit is okay, Like zooming all
the way like this. For most cameras that would
create an unusable clip. I'm just going to go just
a little bit like that. And I want to do that for this clip as well,
the second clip. So what I can do is
I can right-click on the clip I just
edited and select Copy. Then I can select my
second clip and select Paste Attributes, select
Video attributes. So then it will paste all the attributes
from the first clip. If those particular attributes. Select here. So
what I just did was I modified the x scale.
Let's select it here. So I'll click Apply, and now they're both the
same size they look at. Okay, so I've got these clips
and I'm quite happy with the way they look and I'm
ready to export them. So what I'll do is I
will go to deliver. And then you've got
some presets up here, but we're just going to use the custom settings
first, let's file name. Just call this man
reading location. Where do I want to save it? So this is where
you would select your external hard drive. You use storage
drive where you're archiving all you must eclipse, but I'm just going
to stick it on my desktop this time around. Okay. Render single clip,
individual clips. In my timeline. I've got to Eclipse and I want them
to be individual clips. I want to submit two
separate clips to stock sites with
single clip selected. Da Vinci will export
one single file. I don't want that, I
want individual clips. They've got a video
settings here. So that will be our codec, got lots and lots of
options here, though, you need to check
with the stock sites what they accept and
what they don't accept, what's universally accepted,
with the exception of maybe one or two
agencies is quick time. So we're going to say
Save that as our format. For video codec,
we want our file, file quality to be
as high as possible. You definitely want to select a high-quality codec
like Apple ProRes. And in a tight we want
to smoke for two to HQ. That's the highest
possible quality. So here we've got rendered
at source resolution. So that means that the
eventual output a file in the same dimension
as the source, but it's the same as the, as our timeline anyway. So we'll just leave that here. 3840 by 2160. Advanced settings. You don't need to look at
that, change anything here. Audio. We want to
de-select that. We don't want to export
any audio audio file. Here we want to select, use unique filenames
because we've got more than one file and I
think we're good to go, so we'll just click
Add to Render Queue. Then we've got two clips
over here waiting to be rendered and we'll
hit render all. So depending on your hardware and the size of the files
you're working with. This could take a little while, but I'll see you back here
when, when I'm done rendering. Oh wait, we're done rendering. So that took a few
minutes for me. So let's have a look
at our export files, like care Reveal in Finder. So good practice is to
have a quick look at the files that you
export it just to make sure that everything looks
the way you want it to do. It's going to preview that. So now I can
actually see some of the text in my book here
is in fact visible. So I won't be able to submit
this as a stock clip. But anyway, the color grade and the edits that I
made it look, look fine. Little bit the other one. Okay. This one this one
might be okay to submit. This one looks good. I might
try and submit this one. Hopefully you're happy with the results of your color
grading and editing as well. If you all, Let's move on to the next lesson and
submit our clips.
11. Lesson 9 - Submitting to Agencies: In the last lesson,
we got our clips ready for submission to go to the stock agencies if you haven't already signed
up as a contributor, now is the time to do it. Most of the old
photography stock agencies have started accepting
video clips as well. So if you already signed
up as a photographer, you could probably
start uploading straightaway if you've never contributed to
stock side before, delicate, I want you to upload a few of your best clips for their assessment before
letting you join. The process was signing up for various from agency to agency. So I'm not gonna go into
great detail about that. Instead, I'll just mention the agencies that I think
it's worth checking out and then you can find details on their respective websites
for how to sign up. So first up is Adobe Stock. This has rapidly become my best site where
sell the most footage. I liked this agency, they pay good royalties. And if you are below 300
clips and more than a year, you will qualify
for a subscription to the Adobe Creative
Cloud package. So that's photoshop
Premiere Edition. And loads more that they, they
will, they will give you. Why are the top seller
is pawn five before Adobe and all the others
started accepting video clips, this was really the only
place to go for video clips. For stock footage
is still one of the most popular aid agencies
for industry buyers. So that means Hollywood and other folks were really
big budgets to solve. That's one of my
favorite agencies. They're very boutique. With tiki. I make
good sales here. They are a bit more selective when choosing
contributors to accept. So it's probably
better to build up portfolio on other sides
before applying here. Deposit Photos is
another good options. I've always liked this
agency. Good royalties. Most people easily upload
process, dreams, time. That's a nice agency as well. Unfortunately, no, they
want Eclipse to be submitted using the
photo JPEG codec, whereas most other agencies will take progress as
well as voltage, apec, and other codecs. Dreams time will only
take photo JPEG. If you submit here, you need to make
a separate export and resolve just
for dreams time, if you watch a lot
of YouTube channels by filmmakers and photographers, you'll often see them promote
story blocks and black-box. I haven't tried using either. I noticed toy blocks only
work on subscription model, so I'm slightly worried that the return for clips sold
might not be that good, but of course, feel
free to look into them and then make
your own decision. Blackbox is a curator. You submit your clips to
them and they will keyword, edit and submit to
the stock agencies. They will do this under
the black box name. So this is not good if you're trying to
build your own brand, you will also lose out on that. The Creative Cloud
bonus from Adobe. You learn less per clip
sold as well after, after black-box have
taken their cut. Looking at the pros, however, it is a massive time-saver
to have someone else do all the editing and
key wording for you. Artless is another side
you could look into, just like the sole, they want to see an
existing portfolio before considering
your application. Finally, of course,
there's also shorted stock if you're happy to accept
$0.10 for videoclip, regardless of whether shot on an old iPhone or a
RED cinema camera, you could submit your work here. So once you've signed up, how
do you submit your clips? Using FTP is the way to go. In the lesson about
computers and hardware, I mentioned how I use network
attached storage, mass. If you can afford
this kind of setup, then that's really helpful. Units can be turned on all the time and it
can be uploading all these three gigabyte files using FTP throughout
the day and at night. You don't need a lot
of processing power just to open an FTP connection. So if you can't afford an S, I highly recommend getting
a cheap old laptop that you can connect your
external hard drive to. It will take several hours to upload a bunch of video clips, especially if you submit to three or more
different sites, it's better to just use
an old machine for this, for this task rather than
causing wear and tear into expensive editing computer by having it powered on
all day and night. Once your files online, you need to keep
them at titles and descriptions and attach
and property releases. All the sites will accept a CSV file with
this information. If you don't know a CSV file, this is a very
basic spreadsheet. You can create this manually
and Excel google Sheets or, or similar, similar
piece of software. But what I recommend that
you do is upload to pawn 5. First, write your
titles and keywords using quantifiers,
using the interface. Once you have done,
they have a feature where you can export
everything to a CSV file that will
basically create the file for you using all the correct
column headers and so on. Now you can just
take that CSV file and use it with the
other agencies. They may have to make
slight adjustments. Adobe, for example,
once a column name called name for the title, whereas most agencies
will use title.
12. The End: Well, this is the end. Thank you so much for
joining me for this class. By now, I hope you have a
good understanding of how to shoot and upload
footage to stock sites. If you're brand new
to this industry and you feel like there's
something I didn't cover. You might find the answer in my other course about
submitting still images. That's a short lesson there
about taxes, for example. Any questions at all? Don't hesitate to ask. And then the class
discussion get in touch on Instagram or through my
website, login Valentine.com. I also have a YouTube channel
where sometimes I'll blow photography and cinematography,
unrelated content. Alright, take care
everyone and I'm looking forward to
seeing your footage.
 Logan, null