Transcripts
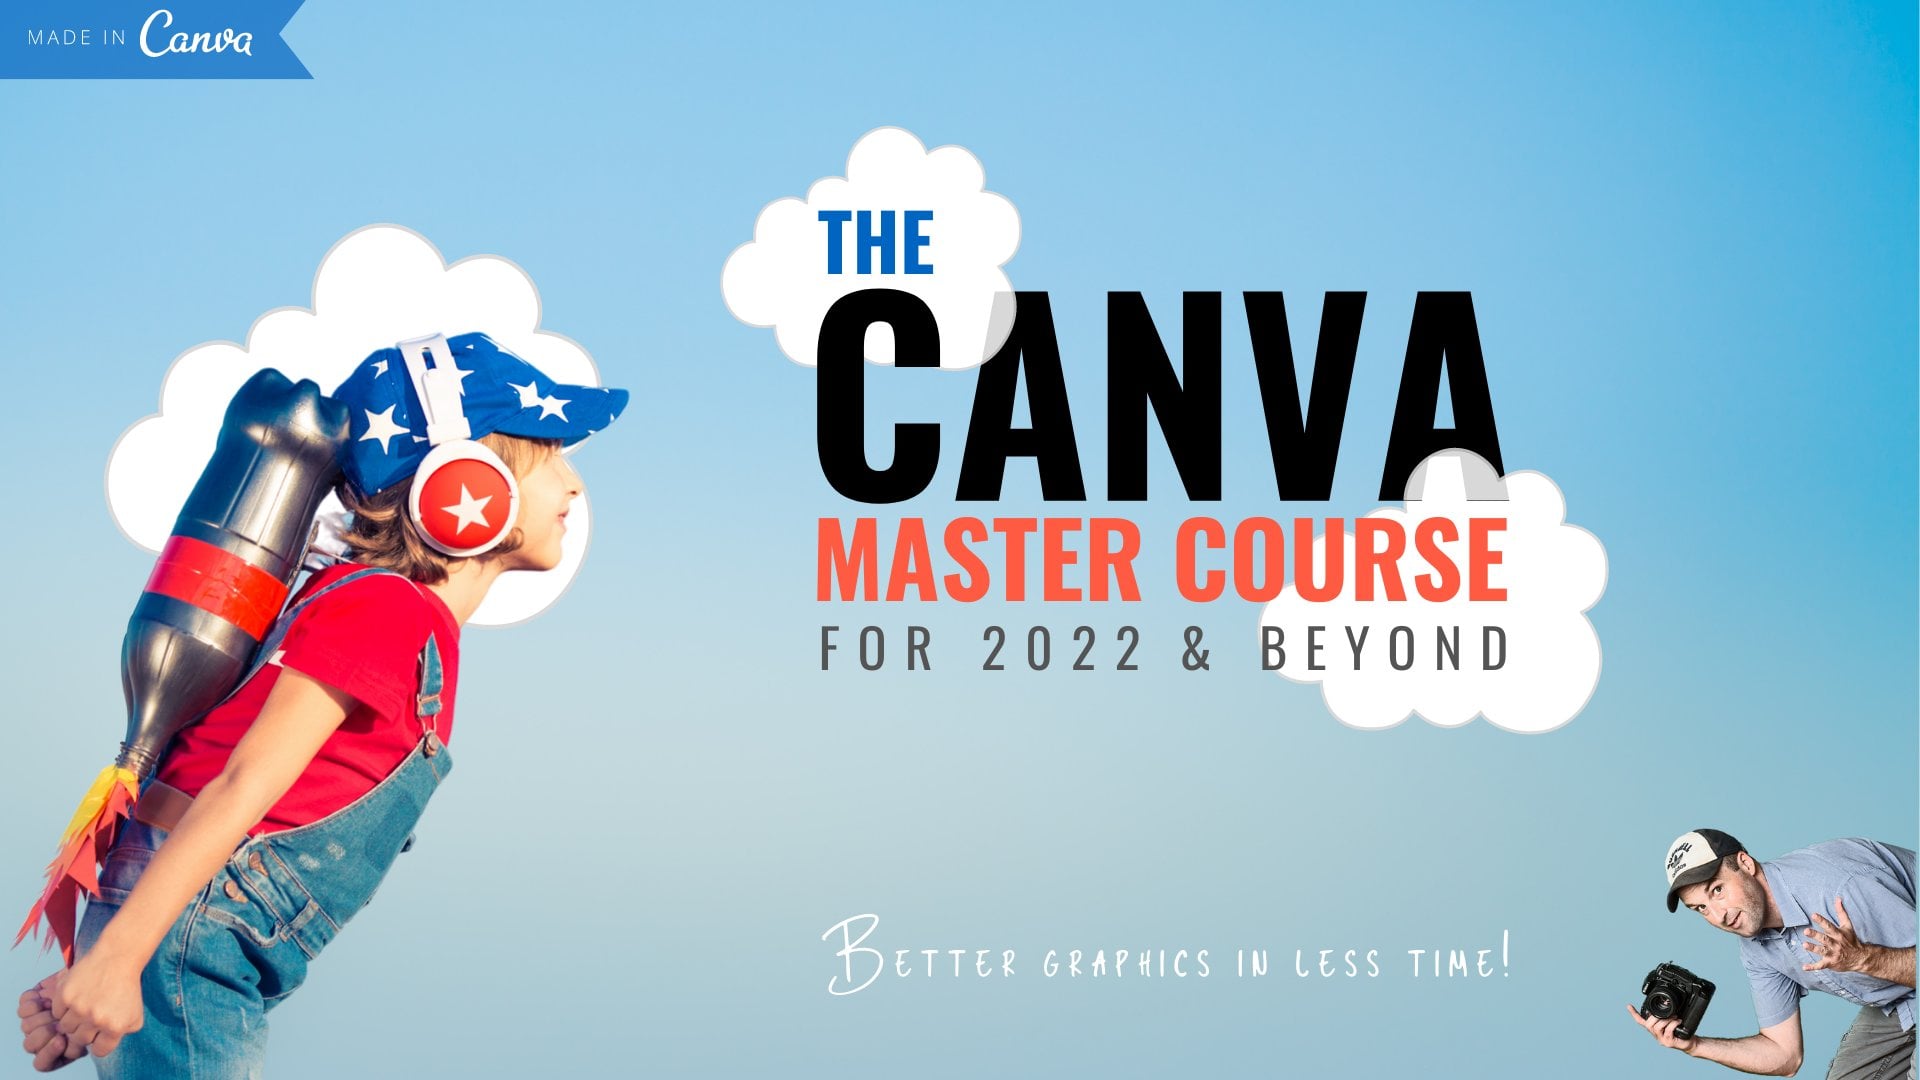
1. Course Intro: Hey, this is Greg, and thanks for your interest in this course mastering special effects
and animation in Canva. In this course, I'll
teach you how to push your creativity with
Canva to the limit. I'll teach you how to create
pop out effects like this. I'll teach you how to
create custom overlays. I'll teach you how to
create custom frames like this and this and this. And no, this is not an instance where you have to create
multiple copies of the same photo and put
them in each frame and then read re size
so they all match. No, this is just one frame. The process of creating custom frames that you
can bring back in Canva, is actually way easier and comes with way less restrictions
than most people think. So I'm going to show you just
how easy that process is. I'm going to dispel some
of these misconceptions, and I'll teach you how to use these frames in
really creative ways. So we'll learn all these
techniques and tricks, and then I'll teach you how
to take your designs even to another level by starting to
incorporate animation in Ca. I think it's going
to be a ton of fun. I really think you're
going to learn a lot. However, this horse does come with just a little
bit of a disclaimer. A disclaimer, what
does that mean? Well, let me tell you,
and let me explain. The disclaimer is
basically this. I am not someone who buys
into the 100% Canva mindset. And what do I mean by
the 100% va mindset? Well, all the time in
social media groups, I'll see someone post a design. Sometimes good,
sometimes not so good. And they'll add the tag
line 100% made in Campa. Now, that's great. There's nothing
wrong with making something 100% in Canva. However, sometimes I'll see them used this tag line
and post to design, and then they'll
have a description of their process or they'll show a video tutorial and it'll
leave me thinking to myself, I would never have tried that 100% amba simply because I know there's a much
more efficient way, a better way of doing it. Listen, I love Campa. I've been using amba and teaching Campa for
nearly a decade. So I get it. Campa is great
at so many different things. Ampa isn't great at everything. I've been using Photoshop for at least twice as long as
I've been using Canva. And so when someone comes
up to you and says, amba can do everything
Photoshop can do, I can tell you that
that person is 100% role. Look, that's okay. Different software excels
at different things. So when I sometimes say I
would never try that in Canva, it's not meant to be
a knock on Canva. It's just an acknowledgment
that as creators, we have to be aware of the
different tools around us, the different
approaches we can take. We should always be searching
for the best approach, the most efficient
workflow to get us to the result we want in
the least amount of time. If you've taken any
of my other courses, you know that that's
something I harp on. That's something I
always say. I'm always looking for smart workflows. I'm always looking for
ways to take back time. Because time is the one
resource we all share. It's a resource that's finite. We really have to be
guarding our time. So in this course,
we will be working in Cam with the vast
majority of the time, but occasionally we
will step out into a free version of an
online image editor called Photop that mimics a lot of the functionality and a lot of the options you
get in photoshop. By doing that just a little bit, we're going to be able to take some assets back
into Canva that are going to let us
push our creativity or our designs in
amba even farther. So yes, this course
is all about creating super cool designs and
animations in Canva. But yes, this course is also about looking for
smart workflows, ways we can save time, ways we can just work more efficiently because
that's important too. So if this course sounds
like it might be for you, then I would absolutely love
to see you on the inside, and I can't wait
to help you take your designs and creativity
to the next level.
2. How to Get the Most out of this Course: Hey, this is Greg.
I just wanted to jump on with a few
quick notes here before we really dive in
because I really want you to get the most
out of this course. Okay, so this course
is structured in such a way so that the lessons
will build on each other. So you don't absolutely
have to watch every lesson, but it is encouraged that you
at least check out these. So you make sure
you're familiar with the concepts before you
proceed on to the next lesson. So the course starts sort
of with the introduction. But then these first
several lessons here are really introductory
concepts that are sort of going to be the
framework for all the other lessons in the course. So we talk about some basics
that you have in Canva, like layers, frames and masking, gradients, photo manipulation,
textures, and overlays. So these are sort
of basic concepts that we're going to use
throughout the course. So if you're not familiar
with these concepts, make sure you check
out these lessons because we're going to build upon them throughout the course. Then throughout the
course, I'm going to have these challenge exercises, and these challenge exercises
really take what we're learning and allows you to
put it into real practice. So you try a project, you try
to do something yourself. Then you can share it down
here under the discussion. So that's just the way to reinforce everything
we're learning. So make sure you take part in
these challenge exercises. I encourage you to t I
encourage you to share so we can all sort of learn from each other and get inspiration. Then as we proceed
through the course. Let's just go through
it really quickly here. So we have these
introductory sections. One of these
introduction sections is photo P because we're using not just Canva
in this course, but we're using Photop sort of to pair with
Canva and to extend Canva to fill in those gaps for all those things that Canva
might not be great at. So we're going to bring Photop in and it's
going to allow us to do some things like custom
frames, custom verlates. We're going to create
those in photo P and then bring those
back into Canva. Now, Photop is a
free online editor, so you're not going to have
to pay anything for that. It's a free editor.
So I'll just give you a brief introduction here to that and then we're going to use it throughout the course. So then once we do this
introductory sections, then we move onto a section all about creating
custom overlay. So we go through
custom overlays. We talk about creating
lighting overlays, and then you have a
custom overlay challenge. Again, a chance to reinforce
what you're learning, a chance to create something
yourself, put into practice. And after the overlay sections, we're going to move into another large portion
of the course. Of course, that's all about
creating custom frames. So amba has its zown
set of frames where you can sort of use something
that's an image placeholder, and then you can drop an
image directly into it. But it has a limited
number of options. But now, suddenly, with what we're going to
learn in this course, you're really going to be able
to take any shape at all, anything you can
possibly think of. You're going to be able to
turn it into a custom frame. And so we go over a lot of different creative
options in here, creating frames from texts, multiple frames, frame collages. All sorts of creative things we're going to learn in
this part of the class. And so you do all
those, and then you have a custom
frame challenge. We're again, reinforcing
the concept, so you get to create
your own frame. Then we go to an advanced
compositing section. So basically, when
you're putting images together a whole bunch of
images into one design, maybe you're trying
to take one photo and make it look like it's
part of another photo, we're going to go over
some fundamental concepts that are really important to learn if you want
to get this right. So we have a couple
sections on that, and then that's going
to culminate with a couple of movie
poster examples. Again, learning some more about Photop that tool we're going to use to pair with Canva to
allow us to do even more. And then you have a
final challenge here, where you create your
own poster or you create your own double
exposure effect. And so, again, a chance to practice everything we learned. We're learning, a
chance to lock in that knowledge and really show that we understand
what we're doing. Again, share it down here, get feedback from your class. It'll be a fun way to
learn from each other, see what we're all creating. Then we get into all the
animation features in Canvas. So we start with the basics, but then we start to talk about some different
techniques you can use. So we talk about
using the rotate feature to do some things. We talk about the match
and move feature. We talk about the custom
animation feature. We go over some special
spotlight examples, some challenge exercises. I go through a bunch
of creative ways you can use animation in Canva. We talk about some
more examples, creating movie posters, adding animation to some of the things we did
earlier in the class. So again, this final
section, of course, of the course is all
about using animation, really to take our designs
to the next level. So there's really a lot here. It's really going to
let you expand your Canva knowledge,
but then also pair Photop with canvas to really take your designs
to the next level. So you're going to
be able to start to create things that
really pop that really stand out that set you above the
average Canva user. I hope you enjoy this
course. Have fun. Good luck with everything, and I'll see you in the next lesson.
3. Understanding Layers: Okay, let's talk about
layers in Canva, because understanding
how layers work in Canva is going to be crucial for just about everything
you do in Canva, especially when it comes to creating complex visual effects. Now, I understand that much of this might be review
for some of you, so of course, you can
skip ahead if you want. But since layers
are so important, I just wanted to include
this section to be sure everyone understands how
to get to the layers menu, the different methods
for selecting layers, repositioning layers,
moving layers up and down in the layer order, grouping layers, and
all that good stuff, so let's get into it. Anytime you add something
to a Canva project, it actually becomes
its own layer. So I could hit R right
now to add a rectangle. That's the keyboard shortcut
for adding a rectangle. And I've brought this
rectangle into Canva, and so this is actually
on its own layer. Now, I don't necessarily know that until I
start mousing around. And then as I mouse
around my project here, You can see that as you get
over a particular layer, you start to see
this blue outline. And if you click on that
with the blue outline there, it'll be selected,
and then you can move your mouse off and
it stays selected. So you can select
your different layers just by clicking on them here. However, I have a circle
layer in this project, which just by looking, you would not know.
You cannot see it. Now, I happen to
know that there is a control keyboard shortcut, but I can control
and then click, and I actually can select that circle because
I know it's there, and I know that control keyboard shortcut trick for
selecting a hidden layer. And that would be command on a Mac control on
Windows. However, Normally, you wouldn't
be able to do that, because if I try to
just click right here, even though I know
a circles there, I'm only going to select
the top layer because this woman is on top
in the layer stack. Now, the only way to be able to really
see your layers and understand what is in what order is usually by going
to the layers menu. And yes, luckily, there is a layers menu where
you can see all this. So if you have nothing selected, then you're going to
have this position menu here and you
can click on that. But any of your layers selected, you're going to see
the same position option up here in this top menu, and you can click
on that, and you're going to get over to two menu, the arranged menu
and the layers menu. They both exist under
this position menu here. Now, the layers
menu is where we're going to see all the
layers in our project. So we can see this
square that I added that actually is the top
layer in this project. And then I can see I have
the layer of the woman. I have this yellow circle,
which we can't see. Then we have the text
layers in Canva, and then this here is
the sort of Boca effects we're seeing in the background,
and then the flowers. And then, of course, this
one here with this symbol, this symbol means
it's the background. That means it is the backmst
layer in our project. Okay. So all these layers,
at any given time, you may have any number of
layers in your project, including layers
that you can't see. The good news is you
can come over here. You can select any layer
just by clicking on it here so I can
click on the circle, and then suddenly I can
use this little icon here. I can grab that and
I can move it up. And suddenly, I've moved it up to the top of my layer stack. So this gives you a way of repositioning your
layers in your design. And of course, this
is crucial because as you move a layer
around in your design, of course, that's going to
control what appears in front of what appears in
front of other objects. Now, there are some
keyboard shortcuts here, so let me just move this
square over this way. And then I'll move
it up a little further just so we
can see even better. Now I'm going to use
the control key on my keyboard along with
the bracket keys. So if I do my control
bracket keys, you notice over there
in the left menu, you can see the layer
move up and down, so I can use control and left bracket to move it all the
way down on the layer stack. I can't move it behind the
background, of course, but then I can use control in my right bracket key to move it slowly up the
layer stack again. Now, if you were on
a Mac, that would be command plus your bracket keys. But I can do it with control and bracket keys on here on Windows. And of course, if I do control
alt plus bracket keys, then I can make it jump from the top to the bottom
of the layer stack. Now, if you ever forget
these keyboard shortcuts, let me just move this
back to the front. Let's see, you can
right click on a layer. You can go under layer, and
you'll see here where it shows you what the
keyboard shortcuts are. Right click, you
can also just go to the contextual menu
via these three dots. And again, under
layer, it's going to show you those
keyboard shortcuts. And of course, the
keyboard shortcuts can save you a
little bit of time, but also at any time, you can also just go
under the position menu, just drag and drop. Drag and drop to reposition
layers in the layer stack. So understanding this layer, understanding this layer stack is going to be very important. Now, under here, we also
have the arrange menu, and under the arranged menu, you can actually have precise
positioning of layers. Again, it allows you to move your layers forward
and backwards. You can align them to the top of the page to
the left of your page. If you have multiple
items selected, so let me select
this layer here, and then you can shift click
to select another layer. So if you're selecting a
layer just by clicking on it here in your project view, you can just use the shift key and then
select something else, then you'll select
multiple layers. If I go under my layers menu, I can see these are
both selected now. And if I come back under
the arranged menu, when you have multiple
elements selected, then suddenly you can align them in relation to each other. So suddenly, I can get
these exactly lined up. So it's just good to
know all these commands. I'm not going to go into
them. Super detailed here. Just know you have this layers menu and you have
this arranged menu. On the arranged menu,
you can also do things like precisely
position things in here. So if I wanted the object to appear 200 pixels
into my design, I could hit 200 here to 100 and put that
directly in here. And the same thing here, I could do these
coordinates here. So if I hit zero here, let me hit zero, and
let me hit zero, just to show you that
would move it to the exact top and the
exact left of this. So you can use this for
precise positioning. You can even resize
elements here. So if I wanted this to
be a bigger rectangle, I could go like that. Of course, this isn't locked,
so it's going to hit Enter. It's going to resize
it, and suddenly, we have a different shape here. If I hit control z again
and I had this locked, and I did the same thing.
Now, when I do 600, it's also going to
resize the height, okay? So I won't get into all
the details beyond that, but just know you
can select things by clicking and dragging to
select the multiple items. You can click one item, shift click another item. If you're actually over
here on the layers menu, you can click an item,
and then you can control, click another item to
select multiple layers. So there are all
these different ways for selecting layers, and then you can
move them up and down just by clicking
and dragging or using those keyboard shortcuts I talked about when you
have something selected. And one other thing
would be if you wanted to group layers together, Now, if I look and I select both the square and
both this circle, then suddenly we have
this group option, I can click on group,
and then you'll notice they get clapsed
into one group. Now, even if I click off them, when I click back on them, they're both going
to be selected. They're going to move together. And I can start to do things
together with these shapes. I can come in here, I
can change the color. But you'll notice that only happened for one of the things. So there are some
things where you are going to have to come up
into your position menu, and you're going to
have to ungroup items. So if I just have this
option here, Ungroup, then suddenly there's
separate layers again in the layer stack, I can select just one of
them, or I can shift click. And do both of them, okay?
But it's good to know all these layer tricks for
working with layers in Canva, because it is going
to be crucial that you can get over
to this layers menu. You understand how
to reorder things. You understand how to see all
the layers in your design, just because things
can become hidden, because they're
behind other objects, or maybe it's a
layer where you have the transparency turned
all the way down. So again, you're not going
to realize it's there if you don't check out
this layers menu, okay? So these are layers in Canva. They're going to be crucial to just about everything you do, especially when
you start to build out complex visual designs. So make sure you
understand layers, okay? I'll see you in the next lesson.
4. Frames and Masking: Okay, let's start by
talking about frames and masking because we'll be taking advantage of frames a
lot in this course. And then masking is an
important concept that you'll hear talked about in
photoshop and other programs. So how does masking
relate to frames? Because that's going
to be important, and it really does get to the heart of what at this point in time still is a limitation of Camva that we're going
to have to deal with. So when we typically
think of the word frame, we probably think of something
like this, a photo frame. In other words,
something that contains something puts a decorative
border around something. So you have something like this. Now, if we go over to
our elements in Canva, we can go ahead and
type in the word frame, and we can see that we get
lots of things like that. We can see that here,
if I click on this, this is this little
polaroid graphic. This one over here,
is actually a photo. So if I click on that,
I have these photos. And so these items have
transparency as part of them, So I was able to drag them over, and then I also brought
over a photo of this gentleman and I was able
to position them behind. So, if I come up here and
I look at my layertack, we can see that I
have the frame here, and then I have the photo
positioned behind it. Now, when I did this, let
me just show you by moving the frame out of the way
or by grabbing the photo, you can see that sometimes
you'll have a photo that doesn't fit exactly in the frame that you
brought on screen. And so then maybe you would
have to resize it like this to make it look like it's totally contained
within the frame. That's the same sort of
thing that I did over here. So I have this polroid
and then of course, if I needed to adjust my photo, I can grab the sort
of side handles and have it so it fits perfectly behind this
little polaroid, what we're calling a frame. But of course, the heart
of what I'm getting at is that there
is also something in Canva that's specifically referred to as a frame that
works a little difference. So if we come back over elements again and we again type frame, We also notice that you have this category in Canva
elements called frames. And if I hit C all here, we can see that we get
all of these sort of shapes that have this
placeholder image, and they're all sorts
of different shapes, creative shapes, and then regular shapes
like this first one. Now, this first element is
the one I use the most often. It's just a square, but then it has these side handles so you can really drag it out to any sort of rectangular
shape you want, But as I mentioned before, there are also
creative ones in here, for example, you
get other shapes, you get some crazy patterns
down here like this. And of course, later
in this course, I'm going to teach
you how to create your own custom frames that
you can bring into Canva, which is really going to extend the types of things
you can do with frames because there are a limited number
of frames in here. But just so review for anyone who doesn't
know how frames work. I'm going to go over how
frames work right now. And so if I click
on this photo here, I can actually
right click on it, and you'll see I have
detach image because that image was actually
currently in a frame. Now, I'm not going to find
that if I come over here, if I right click on this image, it can replace the background and replace my
entire background. I'll hit controls
Z to undo that. But this is just a free
photo on the screen. It is not within a frame. So whenever you drag something
out on screen like this, that is specifically what's
called a canva frame is basically then you
can drag something over top of it and once
you're over top of the frame, you'll see it snap
into the frame, and then suddenly it's contained
within that frame, okay? How this relates to masking is that in other programs
like Photoshop, you'll hear the term masking, which is the same
sort of concept. Well, basically what a mask is. It's a defined area of the screen where you're
going to show the pixels, and then everything
else is hidden, okay? So they call it a mask
because it masks away certain pixels and allows
you to see other pixels. So that's the same idea
here with all these frames. They're going to let you see what specifically the shape is, but then anything
that's not part of that frame is going
to be hidden. So with this photo here,
if I double click on it, you can see that there
is more to the side here and there is more
to the side here, I can even resize it
within the frame. I can resize it by
dragging corners and then sort of grab it and
click it to move it around. And then when I
click outside of it, it snaps back to the frame. So even though if I double
click on this again, we can see there's
a lot of photo here that's being hidden away because it falls beyond
the area of the frame, okay? And this is how a mask
works in programs like Photoshop and in Photop which we're going to
use in this course, which is sort of lightweight
photoshop clone. They use the term mask. But mask and frame are
basically synonymous in the way they work that they hide certain pixels and allow
you to see other pixels. Now, there is a limit to Canva frames. They
are very useful. We're going to use them
a lot in the course, but they have what I consider to be two major limitations. The first I've
mentioned already, and that's the fact
that you only have a limited number of
frame options in here. You can't just create any
shape you want on screen. You can't make a selection
and turn into a frame. You're limited to these
shapes here, okay? We're going to talk about
a work around for that. We're going to talk
about how to create custom frames, so
we'll get into that. Now, the second
big limitation in Canva is that if I look
at this frame right here, right now, I can see all
the pixels completely. I I come up here, I can make all the pictels a certain
level of transparency, I can make them all, so
you can't see them at all, but there's no way to have
varying levels of transparent. I can't create a gradient on
this frame or this is 100%, and it fades to 0% here where you can't see
anything at the bottom, and you have that soft
edge. We cannot do that. That is a major limitation. Okay, so let me
just jump over to Photop and we'll go
over what I mean here, so we're just going to
jump over to the Photop. Now, if you're new to Photop, Photop is basically a
lightweight photoshop clo, So if you have photoshop, by all means, use photoshop. The interface and Photop is meant to look exactly
like photoshop. So if you know your
way around photoshop, you're going to know
your way around Photop and vice versa. But just know that Photop is a free, lightweight
photoshop clone. The reason why I'm using
it for this course because I know everybody's
not going to know photoshop. I know everybody's not going to have a budget for photoshop. So in this course,
I will be doing the work here in
Photop for those times when we need to step outside of Canva to do some things
like create custom frames. Now, let's just go over what I talked about the
limitations here and just show you how easily you can
get around some of those here inside a photo P. So I'm going to come over
here to the left, and I'm going to go to
the third tool down, this Lasso Tool here. And if I click on this here, same photos we had before, and we can see that there's a layer here where the photo is, and then we have a layer
that's our right background. But if I click on this
Lasso select tool, and I have our top layer, the photo layer selected, I can just draw any shape I want by holding down my mouse, any shape I want, I can drag around any shape
I want, then release. It'll make that selection. And then anytime you
have a selection like this inside a photo P, you can automatically turn
it into a mask or what we think of as a frame
inside of Canva. So if I come in
here now and they click down here on
this little icon here, it's add Roster mask. That's
what we want to do so. We're just going to click on
that, and we can see that instantly it creates this mask. And we can see there's
a little icon here. What you can actually
do is if you hold down the alter option key on your keyboard and
click on this mask. I'll show you the entire mask. The way this mask
is working now, the white area is that's what we're going to see
in the black area. Those are the areas
that are being hidden. And we can see that if we just click anytime you
want to get back from this view of the
mask to your photo, click on the photo itself, and now you're back viewing the photo with that
mask or frame, if you want to think of
it that way, applied. Now, the second limitation I mentioned about
frames or mask in Canva is that they can't have varying levels of transparency. Well, that is not the case in
photoshop or photo P here, because I can click
over on this mask. Now, you notice I clicked
from the photo to the mask, so I can now work on the mask, but I don't have the Alt option
click so we see the mask. I want to see the photo itself. But I click on the mask so
I can work with the mask. And then my favorite way of just doing a simple
blend with the mask and applying some
transparency at the edges is to click
on the mask itself, and I'm going to go up here and find this properties menu or I could go under a window and find properties if
it wasn't turned on. Here's properties. But
I see it right here, so I'm just going
to click it here, and then I can work
on the mask itself. So I clicked on the mask. And
now I can start to feather. And what this does is it starts applying a
feather at the edge. And so now if I do
something like that, now you can see
suddenly that now we have really blended
this image here, so let me just zoom in a little bit here so we
can see even better. Just the way how now
we have this mask. We created just a
sort of custom shape, but we had that hard edge. Now we have this
really nice soft edge. So you can do really creative
effects very easily in programs like Photoshop and Photop that you
cannot do in Canada. Now, good news, bad news. The good news is that if you
want to jump over to Photop, you want to do something
like this, and then you want to export it back
with transparency. I could turn this
off, I could go file. I could do export as. I'm going to export as a PNG. I'm going to keep transparency, and I could export this back
and then re import it into Canva and have it as a Canva
element I could work with. However, I cannot export a frame with soft
edges like this. If I want to go back and hit? Let me just hit Control Z here. Someone hit Control Z, just
to go back to my keystrokes. If I want to go back to this
hard edge frame, then yes. I'm going to show you
how you can bring a custom frame in the canva
that has this hard edge. But if you want to start
dealing with transparency, then that's where you'd
have to bring back a PNG, something
with transparency. You could not bring back
a usable canva frame. What do I mean by
usable canva frame? Well, here I am back in Canva, and we can see that shape
I created in Photop. I was able to easily
convert into a Canva frame. And so now it will work just the way you
expect a frame to. So you can very easily create
something like this in Photop and bring it back as a reusable frame in Canva that you can
use again and again. And this gets you
beyond the limits of just the custom
frames you find here. So now you're no longer limited to just these frames
here you see in Canva. Now you really can with Photop
create any shape you want. And turn it into a frame,
and I'm going to show you how to do that in
an upcoming lesson. However, it is going to be
a frame with a hard edge. You can vary the transparency, but you cannot have different
levels of transparency. So if we look at
this image here, another thing we can do is
we can go over to Photop. We can apply that feathered edge or a mask with transparency, varying transparency, and then we can bring the
final element back, but this is just a final element It is not an image within
a frame because you cannot have these varying
levels of transparency, this sort of feathered edge
with a Canva frame, okay? So I just want you to
understand how you can create custom frames that can end
up saving you a lot of time. You can also do things like this where you go outside
of Canva and then bring back an element
with this sort of varying levels
of transparency. But within Canva itself, you are going to
have limitations. I want you to
understand that because I want you to know
these workarounds. But then also if you
always find yourself doing advanced things where you need to step
outside of Canva, then there is a point
where you have to start to invest in
another program like Photoshop or use a free tool like Photop for
those workarounds. But again, it's just finding the white right workflow
that works for you. Of course, in this
course, I want to show you all these ways to
get around some of these Cava limitations
and to push yourself in your creativity
as far as you can.
5. Gradients: Gradients are another
design element that can add visual
interest to a design. So let's talk briefly
about gradients and Canva. So how do you find gradients, how do you create
custom gradients, and then what other
options do you have? Again, I know some of this might be review for some of you, so skip ahead as needed. Okay, so I have some gradient
examples on screen here. A gradient is just
when one area of color blends to
another area of color, and they can be simple
gradients like these, or they might have a
lot of colors where one color blends to
the next to the next. So let's go over how
you find gradients in Canva and then how you can create your own custom
gradients in Ca. So I'm going to select all
these and delete these. And first, we're going to
go under elements menu. This would be if you
want to search to see what gradients are available
in those canva elements, so you could do
something as simple as typing in gradients here. And if you do, you're going to get all sorts of results from graphics to photos
to videos to frame. So let's look at all
these really quick. So here's just a graphic
we can put on screen. This is not a good example
because that's a white one. So let me just go and
see some more here, so I could put this one here. Here's a gradient, so you
can resize it this way. That's a graphic gradient. There are photos here
where you have photos that you could use this as
backgrounds, get rid of that. You have videos where
if I play this, it's actually sort of like a
moving background gradient. We can get rid of that. And you even have
frames in here. We frames where then I could come in here under my elements, and let me just type in any sort of prompt
here to get a picture, and then, of course,
you could put something into a frame here. If I can grab
something, and then suddenly you have
that color overlay, that's sort of a gradient
overlay on top of your photo. So you have all these
different options. But the most basic idea here would be you just come
over here and you search, so the more specific you
can be in your search, so I could say
something like red to orange gradient and put
that into the search. And then suddenly I'm getting more specific options here since I had a more
specific search term. And then suddenly I
can come in here, I can find things I like. I can add them to my photo. That's the first option.
You can come over here. You can search up
here. You could use search terms like
semi transparent. Semi transparent gradient,
something like that. And then suddenly,
you're going to have gradients that come
in here where you can see this does have some
transparency built into it. And so this is one way you
can search for gradients. And if you search for
gradients, I would say, be as specific as possible
with your keywords. You use keywords
like transparent, keywords like radial or
rectangular or circular. Things like that are
going to help you return better results.
Okay, so that's option one. But now Canvas also has a way where you can add your
own gradients to shapes. So I'm just going to hit R to
add a rectangle on screen. We'll close that side window. And so now when you have a shape and you come to the fill color, you can come in here
and add a new color. You can have solid color, or
you can also add a gradient. Now, let me make this
a little bit bigger on screen just so we're going
to see it even better here. Now, suddenly, you come under your fill and you come
under the option here, you come under add new color. But instead of
choosing solid color, you can choose gradient. And then now you can
change the color of this, and you can change
the style of this. So under the style
menu here just gives you some different
style of gradients. Is it a circular gradient? Is it going from the top left
corner to the bottom right? Is it sort of a
horizontal gradient that goes from one side of
the screen to the next? And then, of course, you
can come in here and click on any of these
colors and come in here to adjust the color
to update your gradient. Now, you can also come in
here and add more colors. It's got one color now,
excuse me, two colors, green and pink, but I could
come in here and say, I also want to have a blue. And then suddenly we've
added that to the gradient. Now, you can even
come in here and you can add transparency to this. So if I add a new color, it's
going to add this color, but then I have this
transparency slider where I can make it
fade to transparent. I could add another color. Maybe I want that
to fade too just so I have more of a fade
out to transparency. So you'll have to play around to get to know this
gradient tool, but know now with any shape, you can come in here
and you can come under the color And instead of
adding a solid color, when you come in under
here, you can come under this gradient menu
and you can play around with adding
different colors. Now, if you have something
you want to remove, like maybe I don't
want that blue, I can just click the
x and get rid of it. And again, I think
it will let you add up to five colors to
your gradient here. And then, of course, you can
see the different options down here for what type of
gradient you want to apply. Now, as a perfect,
no, it's not perfect. I love the gradient
tool in Photoshop, and I'll show you in Photop in a later lesson and of course, how you can create gradients if you want to create a
gradient in another program, because that's your other
option is to create a gradient elsewhere and
then upload it to Canvas. So your three basic
options for gradients. Are you search in the
elements menu here? Search for gradients,
B as specific as you can with your keywords. Other otherwise, you can add a basic shape and then
come in here under the fill options and choose a gradient instead
of a solid color. And then, of course,
your third option would be to create a
gradient elsewhere and then upload it back into Canvas so you could make
use of it in Canvas. Gradients and make sure you're familiar with all the options.
6. Favorite Photo Manipulation Tricks: Okay. In this lesson, we're
going to talk about some of the photo manipulation
options you have in Canva, and I'm not going to
cover everything, but I am going to cover a few tricks that I use all the time. So I'm going to select
this photo here, and everything I
talk about here, you can find by
selecting a photo and then coming under
this edit photo menu. So this applies any roster
image inside of Canva, so photographs, things
of that nature. So once we have it in here, we have these magic
studio options, which we're not going
to go into great detail in in this course. But then we will talk a little bit about some of
these special effects, and I'll briefly mention
the adjust menu. So under this adjust menu, you have different things
like temperature tint, brightness contrast,
highlight shadows, whites, blacks, and then some color options and texture
options down here. Now, most of these
are self explanatory, and I'm not going to go over a lot of these in detail just because I don't use a lot of
these very often in Kanva Usually, I do photo retouching in a program like photoshop, because usually you have to
combine it with masking, and we talked about
how masking is not a strength inside of Canva. So it can just be a
little too heavy handed trying to do photo edits
here inside of Canva, but I'll go over some
of these very briefly. So you have the option to edit your whole image or just a
foreground or background. And again, how effective
this works is going to depend on whether your subject has a
simple background. This is a photo with a
very simple background. So if I select background here, then I can come in here and make brightness adjustments to
just affect the background. If I switch the foreground, then I could make
brightness adjustments that just affected
my main subject, and so on and so
forth with any of these sliders based upon what
you have selected up here. Now, a lot of times you might just be working with
the whole image. And again, you can come in here. You can shift the
temperature like that, so make it cooler, make
it warmer in tone. And then if you actually want to change and shift the colors, you have this tint slider. And again, very easily
to get a crazy result, so you can't be too
heavy handed in here. Again, brightness,
that just makes things brighter and darker. Contrast is going to push
your brights brighter and your darks darker
highlights and whites. Those are going to push the
white areas of your photo. And whites are sort
of the extreme. So you can push the
highlights up and it's not going to quite
wash out your whites. But then suddenly, if you
go do the white slider, then it's sort of pushing
some things to pure white. Same thing when you talk
about shadows in black. So usually shadows
will push things And so if I drag this
down all the way, it'll push the
shadows a lot darker, but it usually doesn't go to
full lawn all the way black. But if I do the black
slider and I push that up, then suddenly it's
starting to wash out some of that black and really
go to full black. Okay? So those are
the sliders in here. Then you have color adjustments. You can try to
edit just a color. So if I select on this color here and it finds that
color in your photo, and then I just try to
just do a venette on that. Again, a lot of these
don't work too well. So I don't mess around
with a lot of these a ton, especially these color
edits down here. It just doesn't do a great job. But you can do some minor edits in here and have some success. So feel free to play around. But I don't do that a lot, and we're not going
to talk about that a lot in this course, because this course is
really about sort of some of the special effects and things
we can do inside a cava. First of all, let's talk about the background remover first. So this is a pro feature. So if you're a free Canva user, you do not have this
background remover. However, what you
can do is if you're a free user is you can
click on your photo. You can come under here, under your apps tab. So if I come over
here under apps, then I can search for
background eraser. So I'll start to type it
out. I'll see it here. I can do background eraser, and then I can find this one here, this background eraser, and remove backgrounds
within seconds, so your images can
truly spotlight people. So you can open this and
it'll let you upload a file. So if you're using a
Canva element here, you might have to download
it, then re upload it. So it is a work around, but that is something you
can use if you're free user. Now, I have the Pccount
here, and anyway, the Pccount here can use this
background remover tool. So you just click on
this background remover, and then it attempts
to automatically remove the background
from your subject. And it doesn't work perfectly if you have a super
complex background, but for most subjects that have a relatively simple background, it does very easily
remove the background. And so this is a
very helpful feature because now suddenly you can use your elements to
your main subject in a different way and
get more creative. So I love using this
background remover, and that is a canva tool
that I use all the time. Now, let me go ahead in
size or down slightly. And let's just for
fun. Let's go in here. Let's make this
background gradient. And so I'll go ahead and
choose from my first color. Let's just use this
color sampler. We'll choose one of these
greens here from our dress. Didn't quite get
the one I wanted. Let's make it.
Well, that's good. And then we'll go ahead
in it here again, and we'll take that same color, but then we'll make
it a little brighter. Just for fun, we'll
put a little gradient like that in the background. So that's what you can easily do once you have your subject
removed from the background, then suddenly, you can choose what sort of background you
want to put behind them. Now, the background maneuver is the first thing
I use all the time. The other thing I
use all the time is actually down here
under the effects menu. I end up using this Detone
and blur all the time, and I sort of use
this as a hack, and this hack sort
of lets me take any photo like this that's
removed from the background, and it lets me do two things. Turn it to any color I want, and then I can
also add a blur to it if I want to sort of
have a soft edge effect or, you know, make it something
that looks like a shadow. So what I can do here
is first duplicate her, so I'm going to
duplicate my image here, so I have a second copy of
the image. Then I'll come not under mock ups. Let's go
back under edited photos. So then I wanted to
go here to do atone. And do atone basically, it takes the highlights and
applies one color to those, and then it takes your shadows and applies another
color of the dose. But you can come in here and you can set them both
to the same thing. So I can make these black, and I could also come in here and make my highlights black. And by doing that, I've turned
it to a solid black, okay? And so now that I
have a solid black, I can go ahead and I can
put that behind my subject, so I could come in here and
put it behind my subject. So maybe I want this to be
sort of a shadow on the wall, so I could move it over here. And then suddenly, I could
come in here and again, go back under edit photo. And this time, I'll use
the blur on that one, and I can sort of change the intensity of the
blur and go ahead and go back and now suddenly we
have this wall shadow effect. Now, you'll notice one of the things I wanted
to point out to you, one of the issues that you have with this
sometimes is if you have a subject that goes to
the edge of your frame here, then anything that's
on the edge will get this hard edge like
we're seeing right up here. See how it has that hard edge, So you're going to have
to watch for that, and sometimes you would maybe even have to download
something and re upload it if it's something that gets pushed
right up to the edge. So in this instance
here, though, maybe I would just
come in here and take this and make
it really big. So it looks like that light maybe the light is farther away. And of course, then,
once you do this, you can really come
in here and you can play around with
the transparency. And of course, we can go back in and play with
that blur setting. Now, I know this doesn't
look particularly good here, but if we made her bigger, it would match up
a little better. But the whole idea here is, I just want to show you some of the tools that I
use all the time, because they are
going to be things I referenced throughout
the course when I'm doing some of
these projects and we're making use of some
of these effects, okay? So these are some
of the ways you can manipulate a photo
inside of Canva, just to make it work
a little differently for you and to get these
different effects, so you can come up with
something new, okay? So I'll see you in
the next lesson.
7. Textures and Overlays: Using overlays in Canva, like texture or window lighting. Things like that are
another way you can really give an image a specific
feel, get creative. And also, when you're working on a photo composite and putting
multiple images together, using texture in that way can really be something that helps unify those elements and make it look like a
more cohesive design, like they belong together. But let's just work
through a basic example so I can show you what I mean, and then this is something we're going to use
throughout the course. Okay, so let's look
at this image here. Let's pretend I wanted to give this more of a grungy feel. So I could come on
here under elements, and I could search for
something like grunge. So I'm just going to type
in the search term grunge. And then I'm going to have
results here in graphics, photos, videos, and so on. And those might each
have some advantages. So if I go to graphics here, I'm going to find a number of elements that have some
transparency built in. And that can be a good thing. Let me just select
this one here. So if I select this here, we can see that it does have
some transparency knockouts. So I can apply this
and it's not going to totally cover my
subject himself. And of course, because
it's a graphic, I can also come in here
and choose a color, right? So that makes that an
interesting option. But of course, I
could also come in here and choose a photo. So
if you go under a photo, I could choose a photo that
has no transparency at all. So if I could use
something like this. Now, of course, if I cover
him completely with this, I'm not seeing my
photo at all now, but now what I can do
is come under here, and I can start
to knock this way back so that I start to
bring my subject back, but I still pick up some of the texture that's part of
that overlaying image, okay? We're laying that
on top, and then we're getting some of the
texture that shows through. Now, if I come under here under my position menu and
select my subject, and if I wanted to
brighten him up, I could come in here
and do things like brighten him up just to try to bring him
back a little bit more, But again, one of
the disadvantages of using a photo that
has no transparency, no knockouts through it
and putting that on top is that you do have this trade off where you start
to work with it here. In other words, if I want to get more of
this texture here, I lose my subject completely. If I drag it down
just a little bit, maybe it's too dark, it's
not really going to work. But so I have to
find it trade off, that area where I feel like
I'm not losing my photo, but I am starting to
pick up the texture. Now, the good news
is in this course, I'm going to teach
you how to create your own custom overlays, your own custom textures, and I'll show you how to build transparency into
some parts of them so that you can start to use them and get even more
texture into your photos. Now, let me just show
you a few examples. So I'm going to go here
under this projects tab. And under my folders, I have this favorite
texture folder, and I've started to populate this with some textures in here. And so we're talking
about textures, but it can also be things
like lighting effects. So just for example here, if I add this one here, this would just put sort of this dark window
light over here, so I could do something like
that, and then of course, I can come in here, still make adjustments to make this
a little bit more subtle. So you can do things like that. Now I have other
textures in here. This is like a cracked
Earth texture. So this is a little
extreme for this photo, but you could take
something like this. Of course, you
could dial it back, find right situation to use that. But let's
get rid of that one. Here's another one that's
a little bit more subtle. It's this brushed metal texture. So I could put this over top
and I could dial it down, so it's not quite as strong. And again, this has areas of
transparency built into it. Let's try another
one real quick. Let me just get
rid of this one so we don't have too many
textures in here. But let's try another
one. So here's one here. That is another type of
texture we could add, okay? So again, when you do a texture like this,
the other thing is, if I zoom way out, I could make this texture just way bigger. And so then when I zoom back in and fit this
back to the screen, then suddenly we're getting
a whole different look here. And I could again make this
smaller and more subtle. So again, just different ways to build up the texture
in your image, okay? Here's another one. Here's
an extreme example. You could create something
like this, okay? And again, once again, bring it in here has some
transparency built in, but you can always
lower it down. Okay? So in this next upcoming
section of the course, I'm going to teach you
how you can create your own custom
textures and overlays. So you can start to
build up this library of reusable creative
assets that you're just going to have organized
and at your fingertips. All right? I'll see you
in the next lesson.
8. Photo Pop Out Challenge: Okay, you've reached your
first challenge project in this course, and
this is the fun part. This is where you get to take
all the techniques we've been learning this far and
you start to practice them, and you just get to experiment around and you get to have fun. So the way this is
going to work is I'm going to show you how
to create a design. And then I'm going to ask you to create something similar. I don't want you to create
the exact same thing I do, but I want you to take some of these techniques that we go over here and then put them to
work in your own design. Okay, so I call this the
photo pop out effect. And basically, is you start
with a photo in a frame. It doesn't have to be
a rectangular frame. I've used a circle here, and then we're going
to use a couple of different layerings of those
photos to make it pop out. And then we're going to add some other background effects. You can use anything
we've done in this course,
textures, gradients, grunge effects,
anything you want to create an interesting
design. So here's one I did. So I'm going to walk you
through this one step by step. We're going to actually create this one from the ground up. And then I'll just
show you another one I created that's
totally different. This is just in a
totally different style. So just to show you, you don't have to do exactly what I do. You can create anything. It can be a person coming
out of a frame. It can be animal. It could
be anything else you want. Um, but I'm going to
walk you through it, and then I want you to
create your own project. All right. So let's
start on this one. Okay. So here I am
starting with the photo. Again, you can start with
any photo you want to use. I decided to start
with this one here. And a lot of times I'll make my background color for
something like this. Something similar to
a color in the photo. So I might come up here and use this color picker
and come somewhere here in the photo
and grab something, and then maybe I'll come
up and modify it slightly. So let me come and maybe move it a little bit more
towards orange, maybe a little darker,
something like that. Again, you can
tweak around here, maybe a little bit
closer back towards red. But something like that.
That's just my starting point. Then I'm going to come to
the photo and I'm going to immediately
duplicate the photo. Because, again,
as I said before, I'm going to want to use
multiple versions of this photo. And then I'm also
going to want to put one of the
versions in the frame and then layer another
version on top so we can make it look like it's
breaking out of the frame. So here, let's start with
going over to elements. Let's look for a circle frame. So I'm just going to
type in circle frame. And we'll see what
that brings up. Here's a basic circle frame. So let's do that. Let's start by putting this subject
into the frame. And then what I want to do is double click so I can sort of resize and reposition
in the frame. I want her elbow sort of breaking out of the
bottom of the frame, and then I also want her elbow to break out of the top
of the frame there. So something like that, and
then I'll click outside here. But before I click outside here, something helpful is I'm
going to want to be able to position this photo right
over top of this photo here. So it's helpful to know where the bounds of this photo are. Otherwise, you can spend a lot of time resizing and you're never going to get it to
line up exactly right. But if I know the
bounds, then I can make this photo layer right
on top of this photo. So what I'm going to
do is hit Shift R, and that's just to
bring up my rollers, because then from when your
rollers are on screen, you can just drag out a guide. So I'm going to
drag out a guide. So it's basically right
where that top border is. I'm going to drag out a guide basically where this
side border is. I'm going to drag out a guide, basically where this
bottom border is. Now I could drag
one out over here, but I don't really need it
when I have these three because these three are
going to be enough, okay? So once I've done that,
I'll go ahead and click out to commit
that to the frame. And then what I want to do
is layer this image on top. But first, I'm going to use the background remover
inside my frame, I want my photo to show. But then when it breaks
outside the frame, I want to use this
background remover. So first, let me come up here. And again, if you're not
a pro version of Camb, you're going to have
to find another way to remove the
background remember. I did mention that
one app you can find over here to
remove backgrounds, but we're going to use
under the edit photo, this background remover
since I have a pro account. Okay? So once I
have that removed, I have my background removed, but now I needed to
get it to line up, Uh, it still has the
bounds of this photo. So I know what I need
to do to get this to line up is I need to
bring it over here, put it here, and then resize it. Now, something to watch out for, if your cursor now when
you click on this, ever moves over the frame, it's going to want to snap into that frame and replace the
photo that's in there. We don't want that.
So I got to make sure that when I'm
dragging this photo, my cursor doesn't
move over this frame. So I'll grab it by
this far corner. That way, I can move it and
get it right aligned to those bottom two guides without actually coming
over the frame here, and then I'll grab
this top corner and then I'll pull it out here, and we can see when I
snap it into place, you can see how it basically
is perfectly aligned there. That lets me know I did my job. These guides have
been helpful, okay? So once I've done that, I'm going to want to
hide this portion here. But again, I'm going to need a third copy because if I try to hide this up to the
frame. Let's see. If I want to hide this up
to the frame right there, then you can see
that the issue is, for me to get her whole arm, I'm going to get some
spillover on the side of this. So I also have to drag it over here because I don't
want any spill. So I want something like that. But because I'm doing
that, I'm going to have to duplicate
this yet again. So before I even resize that, let me just take this here. I'm going to hit Control
D to duplicate it. Now we have another copy, which again is totally
over top, right? And I don't want it
to be in the frame. So let me just move it out
of the way for a second. Just to show you again, now, let me just bring
up the layers menu just so we can see, we
have the one in the frame. Now we have two other copies. I'll move both of these copies so they're in front
of the frame. But so we have the
one in the frame, and now we have
two other copies. So now we're working with
this first copy here, and remember what I want to
do is I want to bring this up just so I have the
whole arm like I do there, but then I'm going to drag it in so that it's not spilling
out of the frame there. Then I'm going to
bring this one here, and this one again, I'm going to line up based on this
guy to remember. I don't want to have
my cursor over here, so I'm going to grab
it by this far corner. I'll get it into
position like that. Now, it looks like
my resizing is off, so I'm going to have to
just drag it up like this, and let's see, let me
get it positioned. Sometimes you'll have
this issue where the sizing does get
skewed slightly. So sometimes you
do have to tinker, and I think what happens is is sometimes if you accidentally
start to resize something, the full photo isn't there, so I have to make sure that
I have my bounds out again, and then there, if
I go like that, that's perfectly an alignment, and then I can pull this. Again, sometimes the
guides in the way now, so I'll get that
guide out of there. I'll pull this up, and
then that should do it. Now, because I have three different
versions of this photo. I can make it look like it's contained in the bottom
part of the frame, and yet it's popping
out of the frame here and it's popping
out of the frame here, and I've done all
of this because I'm using these three
different layers. Now, not a bad idea now
to shift and group these, I can always ungroup them later, but now I know I can
move this around, and I'm not going to
lose that alignment. Now, I want to have sort of
like a white edge to this. So there are a couple of
different ways I can do that. I'm just going to
use a basic circle. So I'm just going to hit C key on the keyboard to
bring up that circle. I will make the circle white. And I want the circle to line up perfectly
over top of this. And so if you can't get
that to line up perfectly, one of the things I could do is come in here and ungroup
my other thing for a second. So let me come under position. Let me come in here and let
me ngroup this for a second. So I'm just going to ngroup because now that this circle
frame is an element again, I should get this to be
able to snap to the center. It wasn't snapping
before because it's taking the shape of the
whole group into account. But now that I have
this circle separate, this circle frame separate, now I can bring this
and I can have it snap exactly to the center
of that circle frame. Then when I do that, I can
sort of grab a corner. I'm going to hold
down the ult key. That would be option on Mac, but the aught key on windows, just to make it a
little bit bigger, sizing from the center outward. And now what I want to do is just bring it behind everything, and then I can full around
with how thick do I want this? Again, this is holding the
on the aut key on windows. That would be option on Mac, and I'll just make it about like that thickness
looks pretty good. Something like that.
So now already we have this really cool effect. And then when I did that,
I can see since I've added that circle background here,
that white background, that is changing
slightly where I want these images to expand to because this looks a little
wonky here at the bottom. So in other words, I
would want to take this particular side and
tuck it up slightly so that something like that so that it's not obscuring
the bottom part of my frame. So some little
adjustment like that. You got to make these little
adjustments on the way. Once you get comfortable
with the tools in here, you'll be able to make
them fairly easily. Okay, so that's the big
major part of my design. So now I would probably
would select all this again, but by dragging
around everything. I will group all
that, and then again, I can come in here and
I can resize this, and I can position it roughly to the center of my image here. Okay. So now that you
have that in place, if you don't want
these guides anymore, you can hide your guides at any time by just doing Shift R, we'll hide your
rulers and guides. So now they're not going to
be bothering you visually. Now we have those on screen. And now I can work on some of the other elements here I want
to finish off this design. So I decided I sort of wanted a grungy look for my background, And so I just came
under elements here and I searched for grunge, or actually, maybe I
searched for splatter. I'm not sure. So I think
I searched for splatter, and I think I found
this photo here. So if I click on that now, then I can add
that to my design. Again, I can go to the position, remember, but remember we have
those keyboard shortcuts. I can use the control and my bracket keys if I want
to move that behind. And since all of
that is grouped now, I basically only had to slide
it behind the one layer. And so then I would come in here position that however I want. And then the only thing I did to sort of make it a
little bit more cohesive with the rest
of the design is, I actually hit Control D to
duplicate that splatter. Again, once again, I moved
that back in the layer stack. So again, that's
control bracket key, and I did it again to move it back to the back of my design. And then what I did was I
just zoomed out so I could really grab this and
really stretch it, so I was getting this grunge sort of throughout
my whole design, and then I'll come
back here and again, fit to screen so I can
see a little bit better. And then I'm just
going to take that and really dial that back
because I don't want that nearly as in your face as the yellow
that's around here. And I chose the
yellow color because that really pops out
against the red. And then the other
splatter effect just sort of brings everything
together, I feel like. Okay? So that's really it. There wasn't a lot to this. But by adding some
different layers, It makes it a lot more
interesting than just having this photo of this
woman by itself or in a frame by itself
with no other effects. So this is something
that you can do layering like this just to
really bring a design to life. Okay? So I want you
to try something like this and remember all
the tricks we've learned. Remember how you can make duplicate versions
of your photo. Remember how you when you're clicking in on a photo and
you can see the bounds, you can drag out guides. So you can see
where the bounds of that photo is when you have to align your other photo on top, and then remember, just
to take advantage of your layers in the layer stack, moving things up and down, doing things like transparency, adding some of these fun
textures and have fun with it. Just if you want to
see another design, I'll walk you real quick
through this design. I'm not going to create
it from scratch, but I want to show you
some layers I used, and then one trick
I used at the end. So if we look at
this version here, I think it's this version
here, let me come in here. Under my layers here, and if I go to position and
I go to layers. There's actually a
background here. And if I bring it back, we can see that I have
the white hearts here, and they sort of bleed
out onto the background, but I really wanted to end
up with a look like this. So I'll walk you
through how I got that. But first, let me just start
here in this entire design, and I'll sort of
go layer by layer. So on top here, this is just a sort of a paper texture, a grunge paper texture, and I've just lowered the transparency down
just to give the whole feel more of an antique fear feel
to the whole thing. And then, of course, we
have a copy of our dog. This is him cut out from the background so I can make
him pop out of the frame. I did another layer behind him where I just have a shadow. So it's a little bit
of a drop shadow. And again, remember the trick, I showed you where you can use the Duotone filter to make anything, whatever
color you want. So I made it black, and then I added the blur effect
using that blur. And then for this frame here, I just have rectangles
basically making up my frame. So these are just rectangles, and I can move
those up and down. And of course, I have
those behind the dog, the cutout version of the dog. So it looks like he's coming
out of the frame here. And again, just here's
my actual frame, the actual dog itself. So if I drag this
one to the top, we can see that
that's the actual dog itself inside of a frame. So just a rectangular frame, I'll bring that back down. And then I just
added some hearts and sort of repeated the
shape, changed the size. Sometimes some
simple repetition, adding the same shape
or a similar shape, but varying the size,
varying the position. Sometimes like that,
I can just make a design more cohesive. And then, again, I like this background sort
of cutout here. So this is just this texture here that I used sort
of the frame to design. But then when I did
that, originally, I did not have this layer here. I had something like that.
So there was this sort of cool effect of it looking
like these white hearts were cutting out into the background. But then what I really
wanted to do is I wanted to maintain that sort
of antique look, so I wanted to make it
look like almost like inset paper with the tear here. And so the way I was able to do that and not
have these hearts bleeding out is what I did was I lowered the transparency
of this for a second, and then I exported
this image as a Jpeg. So this image with
the white background. And so then when I had this
image as a white background, and I brought that back in, One of my heart layers here, let me just this heart layer, I think I accidentally
changed the transparency. For some reason, that
doesn't look like, oh, this doesn't look
like it's bleeding to white because I have
this over top layer. But if I come in here and just turn that off for a second, you can see that this
is what I exported. And then when I brought
this back in as a Jpeg, since this is all sort of
central area and this is white, then I was able to
cut out the photo. And so in this
other version here, here's my cutout photo. So if I turn off this
background here, now I have this cutout photo that just is because
I exported the Jpeg. I brought it back
in, I cut it out, and that allowed me to do the background
effect like this. So sometimes it's those
little extra steps, you have to decide
whether it's worth it. To me, it was worth it
to do that extra step just to come in here and get
this more cohesive look. I did not want these hearts
to spill out of the frame. If I read to this again, I would probably take this
little photo frame and maybe find more of a vintage
frame for him to pop out of, so I'd have more of a
a more cohesive look. But this was still a
fun little design. So that gives you two ideas. You can choose something
similar to these. You can choose something
totally different. I just want you to do some
sort of frame pop out effect. Using a number of the techniques we've learned
thus far in the course, and most importantly, I
want you to have fun, okay? That's how we learn. We experiment around,
and we have fun. And then I'd love to
see what you create. So if you want to
share your design, what you're going
to do is just come up under the share option here and choose this
public view link. And in here, it says, You can create a public
view link to allow access. Anyone to access a view only
version of this design, no sign in required. So you're just
going to do it and create that link.
You can copy it down here. And then here
in Skillshare, you'll come to the challenge
project in question, and you're going to
come under here and you'll find this
discussions tab. And under here, you can choose this share a project option. And then you can embed a
link or upload an image. Now, I said, public share link. A Public share link is a
link to your live project, but it's not something
people can edit, but they can go in
there and view it. Forse, you also could download a JPEG or PNG,
whatever's appropriate. So you could use
either this upload image or this embed link, depending on what
you've done, and just go ahead and
put it all in here, submit it, and then everybody will be able to see your work. And we can all give each other feedback in a supportive way. All right, so that's a challenge
project. Best of luck.
9. Photopea Introduction: Now, obviously, in a
lot of this course, we're going to be using Canva. But as I mentioned in the
intro of this course, I do believe in knowing
what other tools are out there and taking advantage of
tools when they make sense. And for this course, we are sometimes
going to be stepping into an online photo
editor called Photop, and we're just going to use
the free version of Photop. So it'll be easy for everyone in the course to take
advantage of this. Now, all you're going to
do is go to photop.com. Now, that's actually just
out of my screen here, but I'll put it down here so
you can all see photop.com. So you're going to
go there, and then you don't even need to
sign up for account. We're just going to
use the free account, and you'll be fine. So, there shouldn't be
any need to sign up. You can just get in
here and immediately start taking advantage. Now, there is a paid
version of Photop. And if you click on this
account button here, then you have this
option to go premium. And all it does is you
get rid of the ads, you get a few other features. You can look into
that if you want to. I don't really
find it necessary. You can't see right
now because of the way I'm doing my
screen recording here, but just off to the right off the right of the screen now, there are some ads that sort of play in the right hand side of the screen when you have
this free version of Photop. So, of course, you can
upgrade this if you want to, I don't think you need to. And again, this is sort
of meant to be like a very lightweight
version of photoshop. But the menus in Photop are really set
up to mimic photoshop. So if you're watching
any Photoshop tutorials, a lot of times, all those tools are
going to be set up exactly the
same way in photo. And I'm not going to
make this class itself, like a full tutorial and Photop, but I'll show you everything
I'm doing so you can follow along with all the
different lessons and exercises we
have in this course. And then I'll think
about, you know, if there are enough questions, if people want a section of
the course to be on Photop. I could always add that
later. But I'm going to wait and see what the
feedback is on that. But I'll just go over some
very basic things here. So you're going to
come to photop.com, and then you could click
New Project and you can select between
all these different, you know, starting templates or file sizes or enter
your size up here. But for the most
of the time here, we're going to be bringing
stuff over from Canva. So all you're going
to do is go file, you're going to
go open, and then you're going to find
on the computer, you know, where you have
that particular images. So you'll navigate to that
folder and just click on it, and then it's going
to open here inside a Photop and this is
the Photop interface. And again, I'm not going to
go over everything in here. I'm not going to
have tutorials on all these different
things within Photop because we're going
to keep this mainly, of course, about Canva, but we are going to take advantage
of some of the tools. And so you can follow along
with all the things I do. And if you ever want to
learn more, just, you know, ask questions in the Q&A
part of this course. I'll think about adding sort of another section of the course on Photop if enough people want it. And of course, if you ever
have any questions too, you can look on something
like YouTube and type in searching for something
you can do in photoshop. And if you can do
it in photoshop, most of those features are
available in photo here. Okay? But so just some
very basics here, there's a layers menu down here where you can
add new layers, you can sort of
reposition your layers, you can turn layers on and off. You have some other features
up here related to layers. You have all your
tools over the left, and then you have sort of
contextual menu up top. But again, as we go through this course and as I'm
doing different things, I'm going to show
everything on screen here, so you'll be able to
follow along, no problem. Now, the other thing
I'll mention is a lot of times you're
going to go file open, and you're going to open
just a JPEG or a PNG. So a flat image file that's just going to
come in with one layer. However, if you're ever
doing work and you have different layers
in here and you want to save all your changes and
be able to come back and work with all the different
layers of your project later, then you can save
something off as a PSD. So you would go
file, save as PSD, and then save that
on your computer, and that is a file that
you can then reopen later in Photop that's going to maintain all those layers. Just as an example here, if I go file open, let me go back here and let
me look under my PSD folder, and I'll open this one
here called course image. And so if you remember that
course image I used in the intro videos here,
it's loading here. It should pop up on
screen here in a second. Give it a second
here and it should load on screen. So here it is. So you can see
actually I have quite a lot of layers in here. So I saved this off as a PSD, so I could work on it later. Now, I do have a version of
a photoshop that I pay for. So I don't actually use
photo P that often, but I'm using it in this
course because it is like a free light weight version of photoshop that
anyone can access. But again, very
easy for me to get around it here because
they set it up, so the interface is
exactly like photoshop. So that makes it very
easy to teach to you. So if you have any questions, just let me know in the
Q and A of this course. Okay? So again, this
is all at photop.com. We're going to be taking
advantage of this tool, It really is going
to fill in a lot of gaps where Canva has
some shortcomings, and it's going to let us
bring a lot of cool assets, including those custom frames, custom textures, all
sorts of things that we can create quickly
here, do a better job, do something we
couldn't do in Canva, and then take it
back into Canva, where you can very easily
try out different elements. We're going to use the power
of both of these programs, the advantages of both these programs in concert
with each other just so we can get the absolute
most out of our workflow. This is photo p.com. I'm going to be referencing it periodically in the course, periodically in the course, we'll jump out of Canva, and we'll jump into this,
but don't be nervous. It's going to be really easy
and you'll be able to follow step by step along with
what I'm doing on screen. Thanks for watching
this, and I'll see you in the next lesson.
10. Creating Custom Overlays Part 1: Okay, let's talk more about creating your own
custom overlays. Obviously, we can
come in Canva and we can search for different things. We could type in
something like texture, and if I type in
something like texture. We know we can find a photo
where we like the texture, and then you have the option of lowering down the transparency. So you get some of
that texture effect and you can still
see your photo. But, of course, sometimes
you may want to create your own custom overlays, things that you could use
again and again in Canva. So let's say I wanted to do some sort of splatter
effect overlay. So I might come over here and do something like type in splatter. So I'm going to type in
something like that. And now I have all these
different elements. Now, I could start to look under graphics,
look under photos. I could keep some of these
color elements if I knew I wanted always to have a pink
and blue thing like this, and I could add some
more elements to this. So maybe I want to do this. And of course, if I like
that color, that's good, or I could come in under
D atone and change the color to something that
matches this pink and blue. And then if I have a bunch
of these together and I've built out
something more complex, it would make sense to download this with
transparency. Nil transparency. The ability to download with transparency is a pro feature,
so keep that in mind. But if I did that and then
re uploaded it to Canva, then suddenly I have an overlay that's a little
bit more complex. I don't have to rebuild
every time if I like it. It's just another
thing I've added to my Canva library of assets, and I saved off to a folder organized in a way
that made sense to me. Now, of course, you
don't have to have color involved in
it at this point. I could just come
under graphics. And here, let's just
say I want to do some sort of splatter
effect here. I'm going to come in here
and change these around. And then at some point, I might bring in something
and I might say, Okay, I want some of
these elements to have a little bit
of transparency. So I could come in here
and I'm just going to lower down the transparency
for this one here, and then come back
under elements. Let me search for splatter again again under
these graphics, C A. And I'm just going to add
some different things out onto screen that I
think are interesting. Again, at this point, I'm probably thinking about what layers show
up behind others. I'm thinking about things like transparency and so
something like that. And so I could make it more
complicated if I wanted to. But let's just at this point, stop with this, and
then of course, once again, size it
up wherever you want. I usually don't size it past the edge because then you're
going to get that hard edge, and I want something where I
can sort of apply it and not see that hard edge if it doesn't happen to go to
the edge of the screen. So I watch to make sure my bounds are sort of
within the design, and then I'm going to go
ahead and once again, share, and we'll download this, and we're going to download it. Once again, it's a
PNG and once again, I'm going to save it
with transparency. So transparent background.
Yes, download. And then, of course, once again, once it downloads, save it
I'll call it whatever I want. So again, I'll just
call this splatter two. But you can name
things appropriately. And then once again, bring
it Roy back into Canava. So really easily, just
drop it back into Canva And then, of course, when
things come in to Canva, it's always a good
idea to check it off and save it to the
appropriate folder. So you might have called something called
splatter effects, or maybe it's called favorite
overlays, favorite texture. Whatever it makes sense to you. But the more you do this, the more you build up your
library of assets, the more you stay organized. So that's always a good idea. Now, again, once you have
something like that, let me come ahead in here, and I'm just going to type
in a model just so I can not under my uploads,
letter elements. I'm just going to type in
model just so I can find a picture to bring in
here just so we can see, go under photos, we'll
grab a picture here. Let's see which picture we want, doesn't matter too
much at this point, but something like this
where I bring this back in. And then, of course, I'm
going to come in here and I'm going to go ahead and remove
the background from this. I'll go ahead and do edit photo, remove background, or maybe
I would use this tool here. So if I go under something like, Magic Grab. Magic Grab
is another one of these magic studio tools where it basically applies
the background remover. But then if I look at this here, what it also does is it attempts to fill in the
pixels on the background where your subject
was so then you can reposition your
subject anywhere you want, you can size down your subject. So maybe I want her more over
on this side of my design. Now I have some
space first copy, but I also now have her on a different level
from the background. So now I can go under
my elements here, go under my uploads, and I have this splatter
effect which we just created, so I can bring it in here. And of course, we created
it in black and white, but we weren't so
concerned about that because I was more concerned with the
transparency levels. And I also know I
can at any time come in here under edit photo, and we've mentioned before, this duotone effect,
you can start to apply any color you want, so I could do
something like that. And of course, I can
make these colors whatever I want. So I could
come in here and say, I want this a little bit
more in the orange range, so I could do
something like that. And then, of course,
I'm going to come in here and the position, I'll move it behind my subject. And of course, then
you can size it up. You can do whatever you want. So maybe I'm going to frame behind her a little
bit like that, but maybe then I'll also
just duplicate this layer. And this one, I'll put
behind both of those. And then I'm actually
going to scale way down and just drag this way up, make it a little
bit more dramatic. And then also drop
down the transparency, maybe rotate this
level a little bit, and then we'll come back
here and fit to screen. So you can just start to do these different
creative effects. Uh, by creating
your own overlays. And this is the first technique. The first technique
is just taking some different elements
that may have transparency, building your own little
custom overlays that may be a set of a whole bunch
of canva elements you find. So you're making something
more complicated. But then once you bring it in, then it's a single
element here that you can save off to
one of your libraries. You don't have to
rebuild it every time. It's just this cool
asset that you've built and you can
reuse again and again. Now, the next level
of this we're going to get into in the
next video, which is, how do we step outside of Canva first second
into photo P and how do we use that to take something
that's more complicated, that's a solid photo and knock out some
parts of that photo. So we have some
transparency built in, and we just sort of bring
the texture back into Canva to again add to our
assets our overlay assets. So we're going to look into
that in the next video.
11. Creating Custom Overlays Part 2: In this lesson, we're
going to talk about a more advanced method for creating your own
custom overlays, which is going to
give you an even greater level of control. So let's look at an example. So let's say I
wanted to go under elements and look for
something like antique paper. So I'm going to
do antique paper. Now, we know from in the past, I could look at all
these things here. I could find one I like,
so maybe I like this, and I could sort of drag it
over my whole image here, and then of course,
I could come in here and we could
lower down capacity. So we know this, and you can
get good results like this. But if you want
even more control, Here's another method
you could use. Now, for this
method, we are going to make use of Photop again. Again, I've mentioned
before that Canva just cannot
do certain things. So every now and then, if you want to create
a certain asset, you may have to step
outside of Canva, and then what you can do is
end up with a asset that you bring back into Canva that's going to work
for you going forward. So let's say here is the
background we wanted. So first of all, maybe I
want this entire thing, so you can see the way I'm doing a presentation style
right now document. And this dimensions of this
doesn't quite match up, but maybe I do like
the way that it has sort of like more
at the edges here. And so maybe I don't want to scale it up all
the way like this. So something I could do is
just leave it like this. Let me go back
under my position, and let's turn off the photo
I have in here for a second. So if I just come under position,
and I'll take this one, I'll just drop the transparency
down on that photo layer. So now we just have
this layer here, and it comes sort of
to the edges here. It comes to the edges, but it doesn't make it to
this right edge. So I'm going to leave
it like that because I'm going to show you
how we could make this work better with a document that has
different dimensions. So I'm going to
go ahead now, and I'm just going to
go under share, and we will download this, either as a JPEG or a PNG, so I'm going to go
ahead and download, and we'll just do JPEG since that's going
to be super simple. So we'll do that. We'll
leave this the same. We'll go ahead and
we're going to download this and stick it
somewhere on my computer. I'm just going to call
it right now garnge antique paper antique paper. So we'll call it antique paper. We'll go ahead and save that. Now I'm going to jump
over into Photop here. What I'm going to do
is go to go file. I'm going to go open, and
then we're just going to find that antique paper
that I just saved off. So here it is right here, so I'll go ahead and click
on that, click Open. So now I have it
in here in Photop. Now, I'm not going
to make this course a full tutorial
on Photop because we're trying to work
mainly in Canva, but Photop again, is this
lightweight photoshop like tool where
we can go in here and do some things we
cannot do in Canva. The first thing I
can do is I can sort of change the dimensions
of this here, so it matches better with
this presentation style, which is wider than this
particular paper is here. But I want to resize
just horizontally now. I don't want to lose
this because if I just go and do a resize in Canva, let me just jump back for
a second, so we can see. So here in Canva, if I
wanted to resize this, I only can pull from the corners Let me just make
sure I have my photo here. Let me just get out here.
Let me get on this layer. I can only pull
from the corners. If I pull from here,
you notice how everything resizes,
so it doesn't matter. So I can't really
resize it the way I want to here in Canva. But here over in photo P, what I can do is I'm going to do Control Alt T is the keyboard
shortcut for resizing this. I could also go up
here to the menu and I could choose Edit and I could choose free transform. And you can see it has that Alt Control T keyboard shortcut. So I could choose
free transform, and I'm going to drag out by this control point to get
rid of the white here. But before I do, I'm going
to hold down the Shift key. And when I do that,
it means it's only going to resize
in this direction, it's not going to re
size up and down. So again, I'm holding
down my shift key, and I'm just going
to drag this out until I get rid of
that extra white, and then I'll go ahead and the enter key once I've done that. And so this is just
a way we can resize something like a background
to better fit our design. Now, of course, if you
had a photo or something, you wouldn't want to do
this because the pixels would stretch and look weird. But if you have something
that's sort of nondescript, like a textured background here, it's not going to
make a difference, and you can make the background better fit your
design dimensions. Okay, so, what we're going to do now is we're going to knock out certain brightness
levels in here so that we can see through some
of this picture here and create an overlay we can
bring back into Canva. Now, I'm not going to make
this a full Photop tutorial, but just some basics here. What you can do with the
background selected, you can just hit Control
J to duplicate that. It's going to make a copy. You can also just at
any point in time, make a new layer by using
this icon down here. Click on that new
layer. And then anytime you have a
layer highlighted, you could use the delete key on your keyboard to delete it. And another trick that's
helpful is if I'm on this layer here and or off
on this background layer, I can turn on the visibility of any layer. I can
turn it off and on. But with any layer
highlighted like this, you can fill it with either the foreground or the
background color. Now, it shows red
and white here, but usually it's black
and white by default. And you can return
to that by just hitting the D key
on your keyboard. It'll restore this
to black and white. But you can also come under
edit here and choose fill. And anytime you can choose to fill with the foreground
background color, or you can choose
a custom color. So right now, I'm just
going to fill this let's just fill it with
a background color, which is currently white.
We'll go ahead and click Okay. So now I have white here, and then I can turn this back on and here is my textured layer. Okay? So a lot of times I'll put a white or black background
behind my texture, which is on the layer above. And then what I'm going to do is you want to double
click on the layer. So this is your
left mouse button. You're going to double click. It's going to bring you
into this layer style menu. And then here you have
these blend if sliders. And what these lets you do is blend based on the brightness
level of that layer, or you could blend
the background. We're going to focus on
this current layer here. And so I can start
to drag this out. And as I do, it's going
to start to blend pixels. Real quick, let me just
close out of this, and I'm going to put
another layer above this, and I'm going to come back here with black and white selected. And I'm just going to create
a gradient that goes from black all the way on
one side to white, all the way on other side. Okay, so we have
this black to white. And now, if I come
up here to this, and let's just make
this background layer, something like red
just so we can make the super obvious red. And so now I have this
layer above this here. And so I'm going to
do the same thing where I double click in here. So, suddenly, if I start to
blend using this slider, you'll notice that as I
drag the white things, it's starting to show
through to the layer below. And I didn't actually
change that to red. I thought I filled
this with red, but let me make sure I do that again. Backspace. There we go. I filled with red. I just
used a keyboard shortcut, which was the same
as going to edit fill fill with foreground color. Now, let me do this again.
We come in here and if I start to drag this
back, then suddenly, you'll see that I
can blend based on the brightness values
of my current layer. So I can blend from the black slide side using this slider. I can blend from the white
side on this slider. So basically now when I
drag to the middle here, I basically say anything from 50% gray to white, I
don't want it to show. Now, if you notice, if
you look really closely, this is actually two
little triangles. The other trick you can do is
you can actually alt click holding down the
alter option key, and you can drag these apart, and then suddenly you
make a softer edge here, where you see now suddenly
it is blending more subtly, making a bigger
transition area right at the edge here based
on how you split that. So you split again
by ult dragging, either one of these triangles, got to get right on it,
hold down your ult key, and then you can
split with dragging. So, this gives you all sorts of sort of ability to come in
here and blend these layers. Now, even though this one isn't a desaturated
gray scale image, it still has brightness values from white, all
the way to black. Now, this doesn't quite
go all the way to black because there's
nothing super dark in here, but it still has those
brightness values. We can see how it's
brighter in here, some darker areas
at the corners. So if I do the same thing
where I left click, double click into this image, and then I come in here and I start to use these
blend sliders, I can blend what we're seeing. Now, let me just make this
white again behind this. It doesn't really matter, but you find what colors you
like to have back here. If I was sort of going to be blending and keeping
my dark areas, I might want a white
background like I'm doing. If I was keeping
my lighter areas and I wanted to be
able to see them, I would maybe have a black
background here just so I could see better what
my result is going to be. So again, double click. I'm going to drag out,
and I'm going to start to start blending and getting rid. And for this one, I'm just sort of going to
keep some of these rough corners, and then I might split this and
start to drag it out just to bring back some of the stuff intruding into
the center a little bit. But then suddenly, I can click. And if I turn on this background turn off that background layer, now we have this sort of overlay with transparency
in the center, but this grungy
effect at the edge. And so that's going
to give us even more control than putting just one photo over and
then having to lower the transparency of
everything at the same level. So I'm going to go
ahead now, and I'm going to go ahead
and save this off. So I will export this as a PNG, and I'm going to go
ahead and click Save. And when I do, let's
just call this grunge. Corners, something like
that, grunge corners. But then I'm going to come
back in here and just show you you can do this as
many times as you want, so you can have one single photo that you bring in here
because you like the texture. But then you can start to
pull out different areas. So I'll go ahead and
double click again. This time, I'm going to
drag it back to the center. But now, suddenly, I'm going to drag in from the side here. And so now we get
this central area. And so I'll drag
it way over here. But then again, I'm going to
use that alt trick to split our sliders and start to
bring some of this back. So now we sort of
have this center area where we don't have
anything at the edges, but we have this grungy
part in the center. So go ahead and
click Okay again. And then I can turn my
background on and off. But so that's what it looks
like, but I'm going to turn it off because I want
that transparency. And then once again,
I'm going to go file, and I'm going to go export as. We're going to export to
A export this as a PNG. I will once again hit Save, and we'll call this
grunge center. Again, whatever names make sense to you. I'm
going to do that. Then if I jump back into
our Canva design here, so let me just real
quick delete this. Actually, I'll keep
this for a second, but we're going to go
ahead and turn that off. We'll bring the transparency
of this photo back up. But now what we'll do is we'll
come into those downloads. Again, you can go into your
uploads and navigate to it, but I like to just use
this quick shortcut of dragging and dropping
from my recent downloads. And so now the advantage
of this method, let me just fit to screen here. I'm going to come
under elements. I'm going to find a frame. I'm going to add a frame
this kind of frame here. I'm going to pull it over
my image here so it covers my entire image over
top of my photo. And then if I go back to
those uploads, again, you can always
click on these and move them to a folder,
so you stay organized. But now, very quickly, boom, I can add texture that just appears at the
edges of my photo. Now, if I wanted to
duplicate this frame, let me just make sure I'm
seeing it on my layers here. Let me just hit Control
D to duplicate. You could also come under here. Use these three dots. Choose duplicate. Again, make sure that it's sitting right
on top of the other frame. But this time, let's go
back again to our uploads, and now we'll add the
center texture, okay? But so now we can work
with these independently. Maybe I want some texture
over the center of my image, but I don't want as much
as I do on the edges. I want to keep these sort of
darker tones at the edges, but then suddenly the center of my image, which I just added, I can affect the transparency of that separately from
that center layer, so suddenly I have
a lot more control. And, of course, you
can do the same thing you did in the past where you have all the
other tricks we've learned at your disposal, so maybe I'm going to
go under position. I'm going to go under
this subject here. We'll come in under
the edit photo. We will use this
magic grab tool. Again, what does the
magic grab tool does. It removes the subject
from the background, but it replaces those
background pixels. It puts the subject
on its own layer. So now the subject wants
to snap into the frame, so I have to be careful
as I move it here. Now, one trick is if you
keep your cursor outside, of the area. So outside of
that area where the frame is, then you can sort of adjust something and not have
it snap into the frame. So I'm just going to put
the subject like here. And then because I have the
subject on its own layer, let me just go back
to my position here. I could duplicate the subject, and I could make sure that
she is right on top lined up. And then one of
them I'm going to put behind all the texture. But the other one is
on top of the texture. So now if I actually, I didn't mean to lower the
transparency of that one, I want to lower the
transparency of this one. So now, suddenly, if I turn the transparency of this
top subject layer on, there she is behind all of
the grunge texture layers. But if I decide, I
want to be able to independently make her stand
out a little bit more, then suddenly I could bring the transparency back
on this top layer, so suddenly my subjects going to pop out a little bit
more because I'm sort of reducing the amount of texture I have over
top of that layer. Okay, so this new
method of going into Photop and using
these blend sliders. And remember the ability to
choose the alter option key and split those sliders to make a more gradual transition. And what you're doing is
you're paying attention to the brightness levels
in your photograph. Then suddenly, this opens up a whole new world of possibilities with
these overlays because you really can create endless backgrounds and textures
where you take textures from photographs and you
pull out certain parts of it using these sliders and keeping a certain
amount of transparency. And now you can have things
at the corners and things in your center that you can
independently operate. So it really is a
nice trick to know Even though we don't want to constantly be stepping out of Canva and back into Canva because it's
not a smart workflow. If you do it
occasionally to build up this asset that you can
then have in Canva, have organized in Canva, and reuse again and again, then that can become a
smart use of your time. So remember these tricks
for creating overlays, and in the next video, we're going to talk
about even another type of overlay you can create because it really is just about thinking creatively
at this point, and you really can come up
with a lot of cool things that you can do with
this simple technique.
12. Lighting Overlays: In the last two lectures
we were talking about creating texture overlays. Of course, you don't have to use overlays for just texture. In this lesson, we'll
talk about using overlays for pseudo
lighting techniques. And I say pseudo
lighting effects because we can actually
go back in time to when this photograph was taken and adjust the lighting that is
actually on this model here. But we can use these
overlay techniques to fake it a little bit and get some pretty
interesting results. So, as always, is the case, you can go under elements, and you can start your
search inside a cameva just to see what elements
already exist. So if I come in
here, I see one of my recent searches
was window light. I'm just going to
click on that to search for a window light again. Of course, you get
all these photos and you get all these graphics, and some of these
graphics already have some transparency built in. I could click on
any of these and suddenly we have an
interesting element we can add to our design. You can search for
other things as well. For example, I could
search for something like Palm front then once again, get some different graphics and photos and other
things. I go here, This is a photo cutout, and of course, remember
all our techniques. You always got to remember all these techniques
we're learning, so I could come into this
and we could do edit photo. And remember, we like to use this stu atone where we can then change the colors to
whatever we want. And then, of course,
we can also add the blur in here so we could
do something like this. And then suddenly we
could take this here, position it, wherever
we want here, and then go ahead and
lower the transparency. And so suddenly we're getting this interesting
lighting effect. So this is just showing you that there are
multiple techniques. And once you learn these
different techniques, you really can start to think creatively and end up
creating your own assets, so you're just not limited to only what is in
the Canva library. So I typed in Palm fran but maybe we're looking for a
different type of leaf. So I could come in here and
let me just type in leave. I'm just going to type in or maybe leaf, I'll type in leaf. And so I could even
take a graphic here. But let's just look at these
graphics for a second. So I could start to go
down here and I could say, Okay, this is pretty
interesting right here. So I could take this leaf. I'm going to hit control
X to just copy it. I'm going to put
it on a new page. I'm going to hit Control V, and we'll go ahead and expand that out here on this page. Let
me do another one as well. So let me just go to a new page, and then on this
other page here. Actually, let me go back
to that first page. So we have this leaf
here. I'm going to turn that into a
background element. But then also here, let me
come to this page here. We'll throw out these two
examples we put in here. Let's just use simple rectangle. So I'm going to hit R to
put a rectangle on screen, and I just want to make this into what's going
to be my light ray. So I may bring it
up here and maybe I want the light to come
in and sort of be streaming over her eyes here. Let me just lower
down a little bit, so I have a little bit
more room to drag this up, and then I'll hit my ult key option on Mac,
but alt on Windows. I'm holding down that ult key. I'm dragging out a
copy of this layer. I'm going to rotate
a little bit. And again, this is just going
to be my light beam here. And so I'll expand that out. And then I'm going to put
this on its own page. So let me just hit control and then control to
select this one as well. Excuse me, shift to
select both of these. Control X to copy again. We'll put it on a new
page, we'll hit Control V. And so I have
this element here, and then I have
this element here. Now, I'm going to
export each of these. I won't make you watch
me export these, but I'm just going to come on here and I'm going
to go share and I'm going to export and I'm
going to download these. I'm going to make sure
I choose PNG and then make sure I choose a
transparent background. And then we're going
to take these over into Photop to turn it into the background element that we're going to use sort of
as a pseudo lighting effect. So here we are over
now in Photop with these two images
we just exported from Cambus we have
this leaf image, and we have this image
with the two rectangles. And I'll start with
this leaf image. This is going to be really easy. So remember, in Photop
you can control click on any layer and windows
that would be command click on MAC to
select that layer. So I've selected this leaf here. Now, I actually want to select
the inverse of the leaf, so I'm going to go up here under my select menu and I'm going to select
inverse right here. And now we have the
inverse selected. Next, all you need to do is add a mask so we're going to
click the add Mask icon, Now we have a mask here. Now, we're not seeing anything because if we look at our mask, so we'll click on the
mask to look at it, we can see that the black
is what's being hidden. So we're actually
hiding the leaf, and then the white is
everything we're seeing, but there's nothing
in this here, so we're not seeing anything. But we're going to fill
all this with black. So now back over on our layer, not on our mask, but back
over here on our layer. I'm just going to
do control back space to fill with
the background layer. And so now we have this black, which is what we want
for our overlay, So we have the Black
field in that area. Now, the last thing
I'm going to do is, I'm just going to come
back on the mask itself. So again, you can
alt click over so you can see the mask
and work on the mask. And so now, what
we're going to do is go under the filter menu, and you have these
basic filters. I'm not going to go through
all of these, of course, but you can come down
and I'll show you this filter blur Cause
and blur gausian blur. And with this, you can
just basically come in here and add a nice
blur to something. You can full around
with the amount here, find something that
looks good to you. So maybe we'll go 32 pixels.
Go ahead and click Okay. And so now if we come back here, we can see this is what
it actually looks like. This is what we're actually
going to export back to Canva and use as our overlay. So all we need to do now
is come under a file. We'll go export as PNG
and give it a name, whatever you want, and go
ahead and save that off, and I'm just going
to save it here, and we'll look at
that in a minute. But before we look at that, let's fool with this one here. So now, with this one, let's
go through the same process. We're just going to control
click on our background. And then we're
going to go ahead. And this time, it is actually the area that I
want to fill with Black, so I'm going to go ahead
and add my mask here. I don't have to worry
about inversing. And then I'll come back
to this slayer again, control backspace
to fill with black. And then again, I'm going to hit Alt and click on my mask. Now, on Mac, that
would have been, option and click on the mask. And then when I have the mask. Once again, I'll just
go under Filter, Blur, gauze and blur once again, and again, once again, dial it down to something
that you think looks good. So maybe something like that,
we'll go ahead and hit. And then, of course, once again, we're going to come back
on the layer itself, and we're going to go
file export as PNG. So you can see this really does not take much time at all. Of course, it would be nice
to stay natively in Canva, but we're doing some
things that you're not always going to be
able to do in Canva. We have our tricks, but they
don't work for everything. So sometimes if you do step out of Canva and you
can do something quickly and create an asset that you might want to
reuse again and again, then it can still be
a smart workflow. Alright, let's jump back over into Canva and see what we have. So here we are back in Canva. I could go under
uploads to upload those two overlays we just
exported from Photop, but I'm just going
to grab it from my recent downloads
in my browser. Now I'm going just off
my screen to see this, so you're not quite going
to see what I'm doing. But same thing you
saw me do before. You should see it
pop up on screen now where I'm just
grabbing this one here, dragging it over, I'm
dragging this one back over. Now that's going to
bring the two overlays we just created back into Canva. And now, of course,
we could select them. We could save them off to something called
lighting effects, a folder that would
make sense to us. Then, of course, we have
these reusable assets that we can suddenly bring in here and get some
interesting effects. Let's look at this
leaf one here. Of course, we might want
to come in here and lower down the
transparency a little bit. But suddenly, that's really a pretty cool effect that
can add interest to a photo, and now that's something we can reuse if it's something we like. So let's throw that one out. And let's look at the other
one just to see what we have. So here's the other one that's just this beam of light sort of. So, again, I would
probably come in here and lower down the transparency
to something more subtle. But I just wanted to
illustrate to you that you have to think creatively when you're doing
these overlays. So you might bring in texture, but maybe for another project, another photo, you're looking
for something that's more like the pseudo lighting effect
like we're getting here. And of course, I'm applying
it on my subject here, but now you saw seen in some
of these other lessons, how you may have lots of different layers
in your projects, so maybe you're adding lighting
to the background layer. So just learn these techniques, learn these tools,
and you're going to have lots and lots of options. All right? Thanks for watching. I'll see you in the next lesson.
13. Custom Overlay Challenge: Welcome to your next
challenge exercise. Now in this exercise, I just want you to take what
you've learned in this section of the course and create any kind of
custom overlay. Now, it can be texture, it can be a lighting effect. Really can be anything you want using what you've learned in this
section of the course. Then I'll just pretend here I was completing
the challenge. So maybe you'll have a photo that you're going to
apply that overlay to. Maybe just give us a page
with the photo by itself, and then I'll just
come in here and create a duplicate on this page. And on this page, I'm
just going to put a frame over top because this is what I'm going
to drop that overlay into. And so then I will go find
my different overlays. I have them all
organized in a folder. I encourage you to do
something similar. So I'll come here. I'll find
here's my favorite textures. I also have ones with
lighting effects, but I'll just grab this texture
one and I'll drop one in. Now, if you want to show
off multiple versions of a texture that you created or different textures, you're
welcome to do that. So I could just duplicate
this page again. And I'll come down here and I'll find a different texture I like. So maybe let's see what
this one here is like. And then maybe for this one, I want to lower down the opacity. That's fine. So I could come in here and lower down the opacity. And then once you have it
applied and you're showing off a couple of your textures or overlays that you created. Again, it can be
lighting effects as well, whatever you want. Then you can just come under the share as we've done before. And then you can come up under the share menu and you can come down here and if you want, you can grab a public view link. This lets people look
at your project. They can't make edits, but
they can look at your project, or if you want, you can
download appropriate media. Then here in Skillshare,
just come under whatever challenge you happen
to be currently working on. Then come under here and come down to this
discussion tab, and then you can actually
use any of these tabs, start conversation, ask
questions share project. Any of those are going
to work. Just come in here and either insert the link. If you have that
public view link or if you downloaded
some media to share, use this add media and you can upload your media that way. And that way, we can
check out your challenge, but you can all get
inspiration from each other as we share
challenges here. And you can offer critiques, just keep your
critiques friendly and try to be as
helpful as possible. All right, I'll see you
in the next lesson.
14. How to Create a Custom Frame for Canva: Okay, in the first
section of the course, we started talking about frames, and we know that
we can come under the elements tab in Canva, and we can scroll
down and we can find this area called frames, and we can see all of these
frames that come with Canva. There's a decent
variety in here. But what if you really want to create anything
you can think of, anything you can imagine? Well, in that first
section of the course, I also offer to you the promise of this ability to create
custom frames in Canva. And I'm going to
fulfill that promise right now because
in this lesson, I'm going to teach
you how to create your own custom
frames for Canva. So if you want to create a frame like this,
you'll be able to do it. So this is just a
frame now in Canva. If you want to
create a text frame, without using the
little elements here, I've seen people that they painstakingly take
these letters. They're stuck with just
whatever fonts is. They build it out one by one. Then they have to add their
picture to each frame. Well, no, you won't have
to do that anymore. This just looks like text, but it actually is just a frame filled with a solid color. So I'll teach you how to use
curate frames using text. Of course, anything you want, so something like a
aspersion effect here. Yes, you can turn
that into a frame. You can even start
to get creative once you understand how
to create these frames, and potentially you can even
do something like this. So if I look at this
here and let me just come under my position and
look at my layers here. This is actually a frame with some other layers
over top of it. So it actually is
just a frame here. So let me take that
image out of the way. So let me take that out of the way again. Let's
move that up here. We can see that this
is just a frame, okay? So to add to that, I actually
have to get to where I can pose the frame a little bit. But then we'll see that, yes, this is just a frame there to have this in front
of it still too. But this is just a frame. So I'll teach you how to
do something like this, if you can start to
think creatively, then you can start to create these really complex ideas where you take a frame and you combine it with
some other layers. So suddenly you can create
an effect like this. Or maybe something like this
where if you look at this, again, once again, this
looks really complicated. I've seen things where
people were one by one, add a photo to a frame, and then again,
they have to make sure it lines up in each thing. So you can spend a
lot of time, but no, we're going to get it so you
can just create one frame. And so now if we look at this
and we detach this image, this is just actually this frame here behind everything else. So I will teach you
how to potentially be able to do things
like this and then turn it into this
more complex project where you start to
think creatively, you combine that frame
with other elements. Later section, of course, we're even going to look at animation. Once we can start to create
our own custom frames. How do we suddenly
bring things like animation into our design. So we're going to do
lots of cool stuff. And the way we'll work this
is we're going to sort of look at individual
projects and I'll show you examples so
that you can start to think creatively as you see some of the examples
I work through. But in this lesson,
let's start very simple. Let's create a very
simple frame outside of Canva in Photop and then you'll have an
idea of how it works. And then we'll get into
more complex frames. Now, you've heard
other people say, you can only use vector
images to start with. You have to do it in
programs like Figma. No, we're going to do
this all in Photop, and it's going to
be super simple once you realize
how easy this is, you're really going
to get excited because you're going to
be able to really just use your imagination and create any kind of frame you want,
so let's get started. Now, I'm going to
start in Canva, and a lot of times you
will be starting in Canva and using photos and graphics
in here for inspirations, building out what the shape
of your frame is going to be? You don't have to do that,
but I'm going to start in here just so you get an
idea of the full process. So let me just jump
over to a blank design. And again, you could
build this out with any sort of shapes
or elements you want and you're not limited to
just using vector graphics. You could start with a picture if you remove that picture from the background or
shapes with cutouts, photos that are cutouts. But I'm just going to do a
very simple shape to start. I'm going to hit C to put
a circle on the screen. I'll size it up a little bit. And again, I know
they're circle frames, so you wouldn't do this. You wouldn't create a frame that already existed in Canva, but I'm just doing
something very simple just so we understand the whole process that you'll be working through a lot of that time when you
create a frame. So what you want to do is
start with the shape here, and then I'm going to
go ahead and I'm going to export this
with transparency. Now, obviously, if you're not a pro user and you can't export something
with transparency, you're going to have
to find a work around. And one of those earlier
lessons, I talked about an app. You can find it here that will
remove from a background. You can find lots of sites that will remove the
background from a photo. So, find a work around
if you need to. But if you're a pro user, you're just going
to go ahead and come up here and you're
going to export something. So I will go ahead and
I will download this, and I'm going to choose P and G, and then I'm going to
make sure that I have this transparency
box checked on. So I'll go ahead
and download this. I'm just going to
put it in here, and I'll just call it
circle something simple. And so now I have
that circle graphic. I'm going to jump over
to Photop and Photop. This is where we're
going to take that shape we just created, and we're going to turn it
into something that we can bring back into Canva
as a working frame. So I'll just choose
open from computer and open that circle
we just created. And now we can continue on
and turn this into a frame. But that first step
is always going to be creating the basic shape
you want for your frame, or maybe it's a complex shape
you want for your frame, but some sort of shape that
also has some transparency, not transparency
within the shape itself because that frames are
not going to support that. But, in other words,
your frame is going to make up
the shape you want. And then things that
aren't part of that shape are just going to be the
transparent areas on screen. Now, a lot of times you're going to probably create
that shape in Canva, but you don't have to. You could do it in
another program. You can bring in a picture
that's already cut out, or you could even
create something here within Photop itself. But a lot of times
you'll do that in Canva. But so once we have that, now let's go through the
steps of how do we take this and turn it into something that we take
into Canva as a frame? Okay. So the first
step is you just want to be able to
select your element, select what's going
to be your frame. And so all you have
to do to do that here in Photop is you just hold down the control key on your keyboard and then
click on that layer, and it's going to make a
selection around that layer. Now, that's control on Windows, that would be the
command key on a Mac. So now we have this
selection around here. So now what you're going to do is you're going to go over to this path icon here
and we're going to go down and we're
going to find this little icon at the bottom right here, the fourth one in
that says selection to path and we're going
to click on that. And when I do, you'll notice
these little marching ants, this sort of dotted line
around your selection is going to turn into
sort of a blue outline, and you're going to
get this work path here. So, what did we just do? Well, for something to
be a frame in Canva, it needs to be a vector image. You don't have to
start with a vector. You can bring in anything,
but then you do need to go through the step of
converting it to a work path. And then the next thing we're going to do
is we're going to come back to the
layers icon here, so to our layers menu here. And now that we have
that work path, what we're going to do.
So we created the path. The path is
highlighted because we see the blue is
around the thing. We're coming back on our layer, and now we're just going to come up here under the layer menu, and we're going to
choose vector mask, and we're going to
choose current path. And when we do that, what
we've created here is we've created this sort of vector
mask around our item. Now, it's just showing as red here because that is
what is currently the layer, but we could even come in here on this layer now, and we could back space
to fill it with white. We could back space to fill it with black.
It doesn't matter. Even though we have
all black right here, we now have this vector
mask that is being applied, and that is the key step. You have to turn whatever
your shape is into a vector mask because
a vector is going to be what we can then
bring back into Canva. And so that's it. That's
all we need to do and we have something ready
to take back to Canva. I'm sorry if you were
expecting more steps. It's really not hard. So just remember you control
click to select it. You came over here
under the path, and you use this
little icon down here to turn your
selection into a path. And then you went
back on that layer, and then you went up
here and you went under layer and you go under this vector option and current
path will be an option, and then you turn
it into a path. And so, once you have
that here, you'll notice this little gray mask. Let me just add another layer, and let me just real quick
draw something else on screen. So let me just do
a little circle, and I'll do all back
space to fill this. And then, if I were to
just add a mask right now, this little mask icon, you'll notice that this mask is black. So one of the clues
that you've done this correctly is you don't
want this black mask, you should end up with
this sort of gray mask. This is going to
be a vector mask. So this is what we want
it to end up with here. And so, once you've done this, all you have to do is come under your file menu here and
we're going to do export as. And then a key part
of the step is you want to export
this as a PDF. When we export
something as a PDF, we're going to be able
to import that PDF, into Canva, and it's going to recognize what we've created. So if I choose PDF, and then you'll see the
save for web dialogue. An important part about this
here, these options here, rosterize all vectorized
text add crop marks. You want to leave all
of these turned off. So make sure none of
these checks are checked, and then you're
going to go ahead and you're going to click Save, and it's going to save
this off to a PDF, and so put it wherever you want. So it's just going
to be called circle for me here and this one thing. And then what I'm going
to do is I'm going to come back to my
Canva home screen, and then you can go in here and you can find the upload button, which is just off
screen right now. Let me resize this screen slightly so you can
see everything. So I could use this
upload and find that PDF or you can use the trick which
I've been doing before. If you can see your
recent downloads, you can actually
describe whatever and bring it right
on your home screen. So I'm just going to
drop that circle. And we can see right now it's
importing this circle PDF. So it just looks
like a circle here, But if I click into
it now, suddenly, we saw the way it flashed, we could see that it's a frame. But if you click on it, you can see that we
can detach this image. And so let me do that again, detach image. I'll
delete that image. And so, yes, now we have a frame here that we created outside
of Canva and Photop, and we brought it
back into Canva. So that's the very
simple process of this. Let me just go back into
Photop for a second. Because I did want to show
you that you can create more elements that
come back into Canva than just
the frame itself. So let me add a couple
more layers here. I'm going to pop these
behind that circle. And so on one of these, I'm
just going to grab here, and I'll come in here
and drag out a circle, and we're going to make
it a little bit bigger. And then let's fill that
with a different color. So I'll come in here
and I'll change this to Yellow, whatever. This doesn't
matter so much, but okay. And I'm going to control alt back space to
fill with that color. So we have this yellow
circle behind it now, and then I'll come down here and add something with the
actual shape tool down here. So I'm going to add
another circle, and I'm going to
shift drag out again. And this time, let's change
the color of this to blue. Now, I did that two
different ways, and they're sort of not
aligned up perfectly. I could realign them here. I get that more
behind everything. The reason why I did
two different ways is because this first one here, I created just by filling pixel, so that's going to
be a roster image. Now, the second one, I
used the shape tool, which is going to turn
into a vector image. You can see the
little icon path icon here on this that indicates
that's a vector image. And that's kind of important
because they're going to import differently into Canva, just the same way this frame is going to import differently. So let's do the same
thing. Let's export all of this to a PDF, and I'm going to go once
again under file up here, and we'll use export. And once again, we're just
going to export this as a PDF. And we'll go ahead and hit save. We have these turned off. That's fine. We'll
save this again. Circle one, that's fine. I'm going to go
ahead and save that. And then back on the Canva
home screen, the same thing. I'm just going to drag in that PDF that we
just downloaded. It's going to get
imported here into Canva. And then when I open
it up, now we're going to see that we have
three different layers. We have the one on top, which should be our frame layer. So if I click on that, yes, I can detach the image,
get rid of that. So that is our frame layer. But then behind it, we
have this yellow circle, And this first one here, if
I come to edit this photo, you'll notice that I'm
getting all the options you get with photographs
where you come in here, you have access to
your blur tool, so you can do things like
come in here and blur. You have access to
that Duotone tool because it's behaving based on the type of image
that we brought in, and this is a roster image. However, if I go to
the blue circle below, Then suddenly, we'll notice, I don't have the
same options here. I don't have those
edit photo options because this is a vector, right? I can scale this up, and the edges will stay sharp. I'm not going to
get those hard edge edges because it's a vector, but it's not going to give me the same options that I have here because this
is a roster image. So I just want you to understand that you can bring in frames, but you can also bring
these other elements in when you export
as a PDF, okay? And so the last thing I'll say, let me just delete
these couple of things. So we just have
our frame in here. Because this frame is an
element you brought in, there's not an easy
way to come under here and move just this
element to a folder. So let's say you want to
organize all your frames. So just a note on organization. What I would do
then is instead of saving this individual
element to this folder, I would save this
file to this folder. And so, maybe I would even build out different frames
on different pages. So this was just a
file full of frames. And then I would
come up here and I would go save to folder. And I don't know if I have one in here called favorite frames, but let's look favorite frames. So I do have one in here. So let me find that
again, favorite frames. So then maybe I would
save it into there. Okay. And so then
imagine you're working on a project and you want
to have access to a frame, then you would just come
under your projects tab. You're going to go
under your folders. You're going to search
for favorite favorite. If I can spell favorite frames. Let's just type that
out and search. There's that folder.
Now, suddenly here, I can access all these
different things. And if I click into
something, suddenly, I can bring that
frame back, okay? So it gives us a
very easy way to access our frames if we
organize those things that way. It's not quite the same as when you go under elements
and you can save off an individual element
and save it to a folder. But you can add
save this file to a folder when you
have all your frames in a file, when you have
these custom frames. So you do have a way to organize frames and get back
to them quickly. Okay? So that's how to
create a custom frame. Of course, we did a
pretty boring one, but now let's work through
some more examples in the lessons coming up and
create some really cool frames.
15. Creating More Complex Frames: Okay, let's look now
at how we can take the technique we learned
in the last lesson, but now we can start to create some more complex frames and
get some really cool things. So maybe I'll start with a
rectangle on this one here. Again, the color is
not going to matter. I'm just going to sort of
drag this out like this, looking at the overall
composition of my page here, but not worrying about
the color at all. And then I'm going to
come under elements, and maybe I'm going to search for something like dripping. Maybe I want to sort of
give an edge to this. So I'm going to go under
graphics here and we're going to look down and find something
that I think will work. Maybe this here,
so let's try this. We'll bring this element down. I'm going to size it up. And again, I'm not worrying
about the color at all. I'm just sort of getting it to line up with
my other element. And if I don't like that one,
I can get rid of that one. And I can keep trying
some other ones until I find something I like. So maybe this element here
will work a little bit better. So again, just keep fooling around until you get
something you like, you're not worrying
about the color here, you're just building
out the shape. Now, I could add as much
to it as I wanted to, but maybe let's just keep
it simple like this. And then the same thing,
I'm just going to export this shape as a PNG
with transparency. So I'm going to come under
here and go download. We'll make sure I check on
transparent background, and I'll go ahead
and download this, and then we're going
to bring it in the photop do the same thing we did. In the last lesson. So I went ahead and I
downloaded it there, and let's jump over to Photop. So here it is in Photop. And then we remember
those simple steps. I'm just going to control click
on my layer to select it. I'll jump over now to
the path tab here. I'm going to click on
this selection to path, and then I'll jump
back on my layers, and then I'm just going
to come up here under layer vector current path. And that's all I need to do. I've done a few simple steps. Now I can export this
back out of here. So I'll go File Export as. And remember, you want
to save as a PDF. We're leaving all
this checked off, and we're going to go
ahead and click Save. And now we can save it off, and then we can jump back
over and pull it into Canva. So, I'm back on Canva now, I could use this upload button, or I could just pull it
from my recent downloads. I can see it up here, so I'll just drag
it right on screen. It's going to bring it on
screen. Process it here. And then, of course,
I can jump into this and we have that new frame. So let me just detach damage so we can see
the frame itself. And then, of course, the great
thing now is we can come up here and we'll just type
something like people. And of course, we can now drag anything at all into this frame, and we've got that
interesting drip effect built in on this frame now. So that's the really cool thing about this is that you can really easily build these assets and have some of your own ideas, and then very quickly, you have something you can use again and again here in Canva. Now, you can take just about anything you want here
and turn it into a frame. However, if you get
super detailed, then when you transition it from being that raster image
to a vector path, then you can lose
some of that detail. Let me just show you
what I mean here just so you understand this
limitation that you do have. Again, you can create
a ton of cool stuff, but if you really get detailed, then you could start to
lose a little bit of that. So let me bring this
splatter image up here. Actually, let me just
go in our graphics and start bringing out some
of these graphics here. Again, just whatever, we're just going to drag a few
things onto screen here. And so in other words, we have something here that because I'm bringing these elements with these little tiny fragments,
these little dots here, that is something that when we export this, then suddenly, we may have trouble
creating a path that really captures all of this
detail as a vector shape. But let's go ahead
and try and see. So we're going to
go ahead and share, and we're going to go
ahead again, download. Remember, you going to
do a transparent PNG. So we'll go ahead
and download that, and then we'll bring that into photopia real quick or Photop. So here's that image and Photop. I'll just control
click to select it, jump over to the path. Now, when I click this here, and we turn this into a path, we'll notice that we don't see our blue outline around all
of these little smaller flex. So if I come back under
my layers panel now, I'll go ahead and do this layer
vector mask current path. And then just to see
exactly what we have here, I'm going to go ahead and fill
this entirely with black. So I'm just going to go
off back space to fill. And then we'll see when I
click off my path here, just to see that we did
lose some detail, okay? So I can bring
this back. I'll go ahead and export this as my PDF. So file export as and we'll choose PDF and we'll save this and we'll bring
this back into Canva. But then we'll compare
it with that original to see that we did lose
some of the detail. So here we are back in Canva, and I brought that
frame back in Canva, and I've sort of put it over top of that original graphic. We export it, and
we see that we have lost all of the little tiny
particles at the edge. Now, this in and of itself is kind of an interesting effect because you could
take something like this and you could bring
it back and then you could keep that original that you
used to create it as well. And even though you've lost
that detail in the frame, you still have an interesting
background element with a splatter behind that
matches up nicely. So I could come in
now under photos and do something like
colorful or whatever, and I could pull
something out of here, and I could go ahead and
add this into my frame. So you could do interesting
things like this, but I do want you to
keep in mind that you can lose edge detail if you have a really complicated shape or pattern sort of with real weird shapes that
are pretty small. Now, this is sort of
an element of Photop. There is other
software where you could do the same sort of thing, creating vector shapes that
you bring here into Canva. So if you use something like
Illustrator and Photoshop, I know those have a little
bit more advanced control, and you can sort of
control how complex you allow your work path to be. So you could create a frame that was more complex in
another program. But that's sort of beyond what
I'm going to talk about in this particular class
because I'm going to stick to this free software
photope and you really, really can do a lot of things. And it's not that
limiting that you lose sort of some of this edge
detail if you get really, really particular
about the shapes that you're creating here, okay? But I just want you
to keep that in mind. That's that one little
limitation you have. When creating this
sort of frame. But other than that, use
whatever you want in terms of the elements that you use
to create your frame. Okay? So in the next
couple of videos, let's look at a few
more frame examples just so I continue to give you some creative ideas
that you can use as you go forward and you start to create your own frames.
16. Enhance and Organize your Canva Assets: Here's the drip frame we
created in the last example. And before we go on to more examples of other
frames you can create, I just want to hammer home what I think the process should be whenever you create something new that you might
reuse in Canva. And that's to make an enhancements that you
think you're going to need, thinking about how
you're going to regularly use this asset. And then organizing it by getting things set up the
way it should be to save you time and then making
sure you save off to a folder so you can
easily recall it later. So let's look at this
example, this frame here. This is cool, but I think maybe I might try
experimenting with duplicating the frame
to make the drip at the bottom look a little
bit more enhanced. I might come up here and
I might duplicate this. This one, I'm going to put
in the exact same position, but let's lock this top one
and then this one here, I'm going to come
down and we're going to slide it down slightly. But let's fill it with a
color. Let's come up here. You can fill any
frame with the color. I'm going to sample just a
color from the photo here. I'll sample this paint here, something like that, and then I can play around with
the positioning. I want it pretty close,
something like that. So it just starts to give it look like it has a
little bit more depth. And then I might go
ahead and once again, I might duplicate this. So come under my menu here. I'm going to duplicate it again. Again, this one here, I will lock the position. This new copy, I'm
going to bring down. Again, we're going to get it in position and lower it down. So again, it comes, but now I'm going to lower the transparency. Let's go for 50%. So let's lower the transparency, and I might need to have
this lowered before I can finalize my repositioning,
so let's move it. Let's have it slide a little
bit farther down like that. Let's do that one more time.
I'll lock the position here. Actually, let's
duplicate it first. Then we'll lock the
position of this one here, and then this one here,
I'm going to move down. And for each of these, I'm
not changing the color. The reason why I'm not
changing the color is because I know if I come in here later and apply a different photo
to my main frame. I might want the drip color for these duplicates to sort of
pull from a color up here. And I know if it's
all one color, I can change it once and then use the change
all feature in Canva to change the
color of all of these even though they're
lowering in transparency. So we'll go through an example just to make sure
that's obvious. But this one here, again,
I'm going to come in here. Let's take it down
from 50% now to 25%. Then I will go ahead and
reposition one more time, so we'll bring it down
to something like that. So these extra layers are just sort of enhancing
this drip effect. But if I like this look
better than the original, and I think I want this when I'm going to
reuse the frame, why not do that work now? Because that way, I'm not going to have to
do it every time I sort of reuse the photo
or reuse the frame. Now, another thing I
might want to do is put a layer all behind this because I might want
the white background. But what if I want
something different? Well, I'm probably going to
want to drop it into a frame. So I'll go ahead and
add that frame now. So I just come under
my elements tab here, and I will search for a frame. Just going to take this
regular rectangle frame, apply that over here. We'll make it fit the
full screen here. I can see that the other
layers behind it leave just a little room Let me drag up for a
second to show you. There's a little room
here at the bottom, so I will be able to just barely fit something into this frame without bringing it
up to the top layer. But again, we'll work
through an example. I'll just put this here,
and then of course, we're going to take this frame here and we're going to move
it all the way to the back. So it's in the back there. And we could fill it
with white if we want. So that's the default. But we can always decide later
that we're going to drop, you know, a texture or
something different in there. Okay. So now that I
sort of have this with the steps I wanted to
do to enhance this, now I would make sure
I save this off to a folder so I can always find it anytime I
want to reuse it. So I will just come
up here and go file, and I'm going to save
to folder and I'm going to save it to this
favorite frames folder. Go ahead and hit Save. Okay? So now that I have it saved
off that folder and organize, I can easily access it
anytime in the future. So let's just go
to the home menu. So we're leaving this project. So let's imagine
sometime in the future, we're launching a new project, but we want to make
use of that frame. And that work we've
done already. So then I could just come
under my project tab here. We're going to look
for that folder. Sometimes you'll see
reason folders down here. But if you can't find it,
you can come under folders. You can search by those
keywords for the folder, but I see it right here,
so I'll click on it here. And so here's that copy of that. But I click see all I can see
everything I have in here, all my favorite frames. And I can just click and
add one to this project. So if I click here, I can
add it to the project. Now, if I look at this, I notice when I saved it off here, I didn't actually unlock
some of these layers, and I want these unlocked, so
I can easily work with it. So let me just hit Control Z to back out of it because when
you click on something, you're just basically
adding a copy of this file. This is sort of
like your template, and we're adding a copy here. So let me just hit
Control Z to undo that. And I just want to show you
anytime you want to get back to that original project, sort of like your template, Of course you could be under
the home menu and go under the projects table
on the home menu and find that file and open it. But also, right here,
you can just use these three dots and actually
edit the design itself. So that's going to open
in a new browser tab. And so now I'm actually
editing the original here. And so I want to go ahead and unlock this because I want it to be unlocked so I can go in and change those colors easily. So I'll just come under my
position menu here and we'll unlock the ones that I had locked when I was
setting up my design, but I just wanted to unlock them so they wouldn't be locked. So now I'm just make
sure this is saved. It should auto save, but
I can click on Save. And so now we have that saved. So now if I come back
here, and again, we're looking at
our favorite frames and then the favorite
frames folder, I can just boom to add a copy, and now if I look at this now, now all my layers are unlocked. And so if I wanted to make use of this and do something new, I could come in here
under the elements tab and let me look under
photos to find a new photo. And let's just try
this photo here. We'll just drag that
into the frame. And then, of course, because I set up all these layers with these extra sort of drip duplicate copies at
the bottom here. I could just come under
my position menu. And so maybe instead
of this pink, I wanted to change the blue. So I could just come under
here and do this color option. Use this color picker and
just select that blue. And then because I
set up all these sort of layers with
varying transparency. But with that same color, I can now use this change all. And you'll notice I changed
all my colors there. And so it's just another
way of saving time. We're just trying to think about smart workflows and
ways we can save time. Now, of course, we have
the background here, too. So, if we look at this, we
also have this bottom layer. That's just a frame
at the bottom, that's just a background color. So if I wanted to come in here and change the color of that, I could also do that very easily since we
have that set up. So I can just come
in here and maybe I'll sample the
yellow from her hat. So you can see how
very quickly now we can make use of these
frames because we've done the work up
front just to stay organized to do those extra
steps to enhance our design. And those are things that may
have only taken 30 seconds. Maybe they only take 5 minutes, but that's time you save every time you make
use of that asset. So think about the ways you can enhance it before you save it off sort of to that place where you're going to
keep it organized. Now, one more thing
I'll show you. Let me just hit plus here
to add another page. If we go back under
where I have my frame. So here I am back in that
favorite frames folder. This one here just had one page, but sometimes you can save more than one frame in one
design if you want to. So if I click on this one,
I can see that there are actually multiple pages in here. So I can click and
apply any of these, or I can apply all three pages. So you can also work
with, you know, It comes down to how
you want to organize. You can organize things by, you know, one file, one frame, or you could have ten
frames all in one file, and then you can still access them all here from the folder. So just think about
what organization method makes sense for you. Maybe you have a particular type of frame like circle frames or some variation on themes and you want to
keep those in one file. Maybe you have other
situations where you want them in separate files.
That's really up to you. And then also to point out if
you notice in this folder, I have designs in here, but
you also have images in here. And so these I'm calling frames, but these aren't sort of canva frames we think of cava frames. This is just really an
element where I could come and frame my subject. So
I'm calling it a frame. Got to be careful,
it doesn't snap into your other
layers like that. But so you can make use of
storing things like that. And so for actual projects
like the frame project, we came and we used this
file safe to folder, But if you're looking up and you find elements like these images, I was just showing you and
you have ones that you like, or maybe photos that
you might reuse, you can just use the three dots, and then you have save add to folder option here,
this add to folder. So this does the same
thing. This will put things into folders. And then when you add elements like that, photos and such, they're going to show up
under the image tab in here. And then you have the design
tab to see your design. If you're looking at
all, you're going to see the designs up top,
the images down low. Sometimes you'll have to
expand out to see everything. But that's just how you take advantage of organizing
your assets. So I really stress how important it is that
you take advantage of folders like this because you can really save a ton of time. All right. Thanks
for watching this, and I will see you
in the next lesson.
17. Frames and Transparency: Before we work through a
few more frame examples, I just want to point
out one more thing with regards to creating
frames for Canva. You cannot export a frame that has varying levels
of transparency built in, like you see the
edge of this circle, how it fades from
solid black to, you know, transparent
at the edges. You cannot have this. So if
I were to take this now, I could do the
same control click where we select our
subject control click, and then I could come over
here and create the path by coming under paths and
do selection the path. But when I do that, it's
just going to create a solid edge. It's
not going to have any transparency
varying transparency within that vector shape. Vector shape cannot have
varying transparency like that. Now, if I come back here under the layers menu and I
come here and I were to go now and do select,
excuse me, layer, and then choose vector
and current path, if I were to export
this right now, since what I have within this vector shape does
have a varying edge, what it would do is
it would take back a graphic. It would
just take back a P&G circle with transparency, because you can export PNGs with transparency roster images
that have transparency. But if I were to
fill this all the way with black,
something like this, back space to fill the
entire thing here, when I exported this now, it would bring back a frame, but that frame would not have varying levels of transparency. What you'd end up
instead is something like this where if I
detach this image, it is just solid. There's no transparency
at the edges. I can drag anything
I want into this, and it's just going to
be solid at the edges. Now, of course, with any frame, you can come in here and
change the transparency level. I could then duplicate this frame and put one of
these behind the other one, so I could move
this to the back. I could make that bigger. And then, of course, I
could come in here and change the transparency
level of that, so you can have different frames with different
transparency levels. But within a single frame, there is only one
transparency level. Hopefully that makes sense. So I just want to make
sure you understand that about transparency
and frames. And before we get back to talking about creating
some custom frames, I'll give you one sort of
work around if you do want something with a feathered edge that's sort of in
a pseudo frame. So I'll give you
one example next, how we can do that using
a different trick, but something that's
different from a frame. So we'll do that in
the next lesson, and then we'll return to talking about creating more
custom frames.
18. Solid Color Overlays: Now, in Lesson of frames, we talked about how you can't have frames in Canva
with a soft edge. So this here is just an image that we brought
back from Photop, but we don't have a frame that has a soft edge. This
isn't in a frame. However, what if you
did want to have images like this where you
could use different photos, and they would be on a
plain colored background. Well, there is a work
around we could do, making use of a photo P
to create an overlay. Let me show you what
I mean. So here I am back on the
Photop home screen, and I'm going to
create a new project. Now, let's just pretend
that I want this sort of blended look of a photo on
a plain colored background. Maybe it's a look
I want regulate to use for Instagram. So I'm
going to come in here. I'll create a new project. We're going to make this
ten 80 by ten 80 pixels, since that is sort of
the standard dimensions for Instagram square post. So I'm going to go ahead and hit that background color white. That's fine. I'll go
ahead and create. And now we have this
new document here, where we have this
background layer. I'm going to go
ahead and click this just to unlock the background. And we're going to go ahead
and we're going to come in here and we're going to
create this overlay, which is then going
to be a Canva asset we can reuse again and again. Now, the color actually
isn't going to matter. Even if you wanted to do a
different color than white, I'll show you another trick
we can use in Canva to make this asset that we create reusable and reusable
as any color. Okay. So in here, what we're going to
do is the same thing. So let's think about where
we want our photo to show. So I'm just going to come
in here and let's just sort of create an organic
shape, something like this. We're not gonna worry
about it to much because we're going to give
it that blended edge. But let's just do
something like that. And then, again,
to create a mask, we're going to come down
here and we're going to hit this mask
icon at the bottom. Now, this is actually
the opposite of what we want because we're
creating an overlay. So with the mask collected here, you can use the
keyboard shortcut Control that's on Windows on
Mac that would be command. So I'm going to do that
now. Control. And now, suddenly, I have
this white area. With transparency,
and this is what we're going to end up
taking back to Canva. Now, of course, we want
to feather the edge. So with this selected, we're going to find our
way to a properties. Remember, you can
come under window and look for properties if
you don't see it up here, but it's this little icon here. So I'm going
to click on that. You want to be on the
mask part up here, and then feather, we're just going to drag out this
feather a little bit. Now, you might see here
when I'm doing this that it's actually not just
feathering the center edge. It looks like maybe it's
feathering the bottom here in here as well,
and I don't want that. And I've noticed in here that Photop is a little weird
with this feather. If I click on my mask now, It's actually not showing
the feathered edge in here, because in photo P, it actually keeps this feather separate from the mask itself. That's different from photoshop. So because of that, I can't
just come in here and paint black on my mask
to hide these edges. So what I'll do instead is
just create a new layer, so create a new layer,
I'll drag it below. And then what I can do is grab this marquee rectangular
select tool. And make sure that up here, this one is set to unite because I'm going to
select this edge here, and then I'm going
to come down here. I'm going to select
this bottom edge, making sure not to go
into that center blend, but just getting the edges there where I can see
that transparency. Once I have that
selection, I just want to fill with my foreground
color, which is white now. So filling with a
foreground color, I believe it's the Alt
backspace keyboard shortcut. So let me try Alt backspace. Yeah, so Alt
backspace on Windows, that would be option
backspace on a Mc computer, but you could also
come up here and you could go edit and
you could go fill, and then you could choose
your foreground color. So we're just
filling with white. So now we have this
mass that we want. Now, this is what we want to
export back to Canva now. So you're just going to go file, you're going to go port
as and just choose PNG, and then go ahead
and click Save. It's going to save this
with transparency. You can leave it
100% transparency. You can call it whatever
you want. So we'll just call this feathered. Frame or something like that, or feathered overlays,
maybe a better one. I'll call it feathered overlay. But you can call it
whatever you want. Go ahead and click Save. When I do that, it's going to ask me,
where you want to save it. So I'm going to go in
here in this course. I have some files. I'm going
to put it in overlays. I'm going to call it
feathered overlay. We'll go ahead and hit Save. It shows up right here
under my downloads. And so, going back
over to Canva now, because I'm working on Chrome, the Chrome browser,
because I can see downloads right here in
my recent downloads, I can actually click on that, find that feathered overlay
and drag it right in, and I find that's a way that
saves even more time for me. Anytime we can find
a way to save time. Of course, we do want
to take advantage. But if you can't find the recent downloads on your browser. You can also, of
course, just come under uploads and to
upload files here, and you can search for
it and find it that way. But let's go now and
make use of this. So this is sort of
a different format. I'm going to go over to
that square Instagram. And again, if I
go under uploads, I have this under uploads now. Of course, you can check it, and you can move it
anywhere you want, and it's good to stay organized. So maybe I'll take this
and move to a folder. And let's see if I have
one called Overlays. So I'm just going to go search for overlays, and there it is. So I'm going to put
it in this folder because it's good to
always stay organized. And then anytime I want
to get to that overlay. I would just have to
come to my projects tab under folders. And if I don't see the overlay, I could search for overlay here. But once you find it, you can just click on that,
you get right in there. And now we can easily
just click on this and apply this to the page here. Now, of course,
it's going to make a lot more sense if we
have an image here. So let me come under elements. And let's just search for let's search for a woman
picture of a woman. Let's just go there,
under photos. So we'll grab this picture here. We'll drag this out. We'll
let that fill the frame. Now let me come back
to position here, position so we can
see our layers. Here's this overlay. We want
the overlay to be on top. So of course, we can
drag this to the edge. And drag it to the edge here, and we now have the overlay
apply to this image. Now, if I wanted to
reposition my subject here, because the overlay is on top, it might be tough to
click on it here, but you could click over
here, so it's selected. I'd probably want to zoom out a little bit so I can
see a little bit more. And then I can actually
resize this photo and I can position it anywhere
I want to in the frame, of course, then
release off of it. Now, something I
would do if I was going to try lots of
different photos with this is I might click on the overlay itself and drag it
down a little bit. And now I could come under Let's fit the screen again here. But now with a little
bit exposed there, that means the problem is, let me just show you
if I have this all the way up and I go
under my elements, and let's just say
I want to grab another photo. And
I want to drag it. I can't really get
to that frame. What it's going to do is it's going to overwrite everything. So if I do that, it's just
going to put it on top. If I look now it
actually went ahead and it replaced my entire
overlay itself. Let me control Z because I don't want to
replace the overlay. Let me just drag this
down a little bit. Now I can get to
that photo below. And so now if I come under
my elements menu again, let's just see all
these recently used. Now I can suddenly
drag something and I can see and get to that
layer just behind it, so I can go like this. And then whenever I want
to just go ahead and size up my overlay
again, I can do that. So what I would probably do is I would do
something like this. And then I'd probably
name this and save this whole thing off as a particular file,
probably a template, so I can get back to
this anytime I wanted to create an Instagram format
with this sort of overlay. And even though the overlay
we created is white, we can really make it any
color we want because of this edit photo,
Detone option. So if you go to
edit photo and then you come under the
Detone option. So let's say right
here, Duotone. If you don't see it, XMn you
might be lower like that, but you can click over,
get this Duotone option. Choose the custom option
or any of these options, and then just go
under highlights. Since this is white, we don't even have to concern
ourselves with the shadows. Just the white option,
click on that, and then you can come in here
and choose any of these, and then you can see
that you can make this frame any color you want. So that makes it even more
flexible and it makes it as an asset you can
reuse again and again. So, again, if you
want to create any of these sorts of
overlays that have some sort of transparency
knockout with them within them, even ones that have sort
of that feathered edge, you can do that in a
program like Photop, and then you can bring
it back into Canva and set it up so you
have a reusable asset. All right. I'll see you
in the next lesson.
19. Creating Frames from Text: Okay, one obvious cool use of custom frames is that now we
can create mask for text. In the past, you had to
individually go under frames in the elements,
find those letter frame. So if I come here under
the frames and I see all and I scroll down or I
search up here for letter, you're going to
get some options. But then if I wanted
to spell something, I have to drag out
one letter at a time, and then I'd have to put the
image in each letter frame, and I'd have to make
sure the images line up across the frames
in huge pin, right? Well, you don't have
to do that anymore. One of the obvious things we
can do with this new method we have is to type text
and use it as a frame. So I'm just going to
type the word love here. And I'll go ahead and make
that all capital letters. And then I'm just going to
size this up a fair amount, and I want to choose
a thicker font. So let me just click on
this and come over here. Let's just look under
these thick ones here. So you can foold
around a little bit, find something that
works for you. I think I did this once before, and I think there was
maybe this one here. This one here. And so
I'll use this here. And then, of course, you can
do all the normal stuff, so I can type out
whatever I want here, and I can come in here and
do any spacing I want to do. So maybe I want to pull
these closer together so I can really have this cool frame. And so maybe I'll create
something like this. So obviously, any
spacing, you know, whatever you're going to type, you can do all that
ahead of time, of course, because once
it becomes a frame, then the text itself is no
longer going to be editable. But we know we can do this frame process custom
frame really quickly, so it does make it
convenient if you want to jump out of here
and create a frame. I wouldn't do it all
the time. But for things that you might reuse
as part of your marketing, your social media, whatever, then sure this gives us
a fun new technique. Okay? So we know how to
do the custom frames now. And so I no longer feel like I need to show
you every step. Here I am over on Photop. You should know I export it
as a PNG with transparency. And then what did I do in here? Obviously, I control clicked on the layer to select it,
went over the paths, path to selection right
here, back to the layers, and then I went
under here layer, vector vector mask current path. So I'm not going to start to
show you that every time. Sometimes I'm going to skip a few steps because
you should know that by now from
those prior lessons. So I want to make the
most of your time here. So let me show you
one more thing that you can do while
you're in here though. Another thing you can do is when you have your
layer selected is you can come under here and choose this effects
button down here. And so if I wanted to add
a simple drop shadow, I could come in here
and choose drop shadow, and then I could come
in here and these are pretty self
explanatory settings. You can change the angle, change the opacity,
how big is the spread, what's the actual size of it? So you can make all these
adjustments in here. Now, you could do some other special effects in here as well. I will say some of these are going to conflict
with your mask, and when you go to export it, it means you'll lose your mask. So, in other words, if you
tried to do a color overlay, gradient overlay, those
aren't going to work. So you can fool around
with these as you want. We're not going to make a
whole course out of that. But I'm just going to turn
on the drop shadow for now, just to show you you can
turn on drop shadow. Actually, I didn't
finalize that. So let me come in
here again and choose drop shadow, and then
I have to click Okay. So now I have the drop shadow, and now I'm going to go file
export as PDF, same thing. So we're still
exporting as a PDF, and then I'll show you
what we get when we export this and bring
it back into Canva. Here we are back into
Canva, and we can see, yes, we have this top layer, which is the mask
that we created. But then if we look here, we also can see that that drop shadow layer came
in as layer as well. So if I just lower the
apacity of my mask, we see that we have
this other layer behind it that is that
drop shadow layer. So it's just something
to keep in mind, it's something we talked
about earlier too, that you can export
back from Photop more than just your frame if you have other elements that you
want to bring back as well. Okay. So now that I have this, I could go under my elements. Maybe I'll search
for something like love, find a picture I like. So go under photos here, something like this,
and you can drag it in. Of course, I could leave it
like this or stylistically, I could do other things as well. So maybe I'm also going to
add a regular picture here, and let's just bring
this one over. Let's size this one up, so it goes all the
way to the edge here, and then let's make sure we
push it to the back position. So come under a position here. Let's make sure we push that to the back behind the drop
shuttle and everything. And then on the layer itself, the mask layer itself,
I need to click in, and I need to make sure
that I expand this photo so that I can push it over and
have it line up exactly, because remember, we push the other one right
to this edge here, So now that should
have them lining up. And so now, let me just
click out of that, fit back the screen here. Now we have this pretty
cool effect where we're using the whole image aligned
because we have the mask, and then we have the
image behind it. But because we have
this drop shadow, we have this really cool effect, where just subtly, the
lettering starts to come out. And of course, you could do
other things as well in here, so I could come on
my background here. I could decide I want to
lower down the transparency. All kinds of things
you could do. Really, you have a lot
of creative freedom. But it is something new that we can do now that
we know this trick. We can create our own text, we can turn it into a mask, and we can bring it
back into Canva, and then we have an
asset we can reuse. So experiment around
with this and see what fun ideas you can
come up with using text in concert with creating a mask for
that text and Photop. All right, good luck. I'll
see you the next lesson.
20. Multiple Frames Example: Let's work through
another example because I really want you to
see and appreciate how creative you can
be when creating your own custom mask
here and when you start to utilize all these different
techniques in concert. I'm going to start by adding
text to the screen here. I just add a
heading. I just have a poster design here that I've started a blank
poster design. And I will go ahead
and I'm going to type out the word surfing here, someone types surfing and then what I'm going to do
is just expand this up, and then from my font, I'm going to come up here
and I'm going to choose this Pacific font,
so I'll choose this. Then I just want to expand this. Actually, because
there's a space between the S and the u here,
I don't think I want that. What I'm going to do is I'm just going to
get rid of the S, and then I'll just alt click
and drag to duplicate this, and then I'm going to put
the S on its own there, and then I'll just position
these together like this, and then I can
group it together. So now I can re
size as one. Okay. I'm get these centered
in my screen, looking for my center point. I'm just going to alt click
to size out from the center. I want to get it so that it just barely touches the
edge of the screen. I'll use my error keys to
nudge this and get it. I just barely goes off
the edge on each side. Then I'm just going to
shift and drag it up here. Again, I'm just
looking for basically that center point
It doesn't matter. It doesn't have to be exactly
in the center of my design, but I want to roughly
in the center. I'll move it up my page
a little bit. Okay. So this is sort of going to be the basic starting point
for our design here, I've seen people attempt
this type of design before where maybe they have a word in the
middle of their design, and then they're going to
come under elements and they're going to search
for some photos, and they're maybe going to
have one photo on the bottom, but it's only going to
extend up to the text, and then there's going
to be a different photo or something
different on the top. But when I see people
try to do this in Canva, they really don't do themselves any favors because
maybe they're going to use something like the
the background remover tool, and maybe it cuts out
just this surfer, but then maybe they'll try
to use the eraser tool, which is not a good
tool in Canada and try to slowly erase out
everything above the letters. And it's just something
that's not going to be user friendly. It's going
to take too much time. And this is where
if you're going to do something and
you have access to these other free tools that
are going to save you a lot of times time you may
as well take advantage. So this is going to be a case where using Photop
and stepping in there briefly to make this
into some assets we can bring back into Canva that's going to make our
workflow a lot easier. It's going to make
a lot of sense. So that's what
we're going to do. We're going to start
with this here, and we're going to export this off. Now in the past,
I've been exporting things off with transparency, but I'm actually going to keep the white space
now all the white. So I'm just going to come under my share here and
we'll download this, and we're going to
do it as a PNG. And we're not going to worry about transparent
background. We're just going to
download it like this. And so we're going
to go ahead and this is called surfing. We accidentally named it
Erfing but that's fine. So now we're going to go
open this up in Photop. Okay, so here we are with
the design open in Photop. Now in the past, we've done
the method where we control, click on our layer, we
select the entire layer. And because we have
some transparency, we're not selecting everything. But if I do that now
since we have white, and so all the
pixels are filled, it's just going to
select everything. So that's not what we want. We're going to have to use some other selection
tools in here. So at the heart of
this masking technique is always a selection, right? So before we've been
typically bringing in everything we want to
select all at once, but now we're going to have
to make a selection in here. This course isn't
going to be about everything you can
do in photo P, but it's good if you're
going to work in Photop some to bring
assets back into Canva that you at least know some of the basic
selection tools. So we'll cover a few of
them in this course. For this, since we
have solid color, I'm going to be able
to come up here and if you go one, two, three, four tools down, you'll
see this magic wand tool. If we click on this here, we can see that there's
the other ones here. So for some reason,
you don't see it, click on this and find this magic wand here. That's
what we're going to want. Anytime you select a tool, sometimes you get a
contextual menu up here. And what happens with
the magic wand tool is if I click on white, it's going to select
everything that's white, okay? But if I were to have some gray in here or something close to white and and I up
this tolerance number, I could start to select
more than just white, okay? So if I have this
tolerance set to zero, then it's only going to
select things that are identical in color tone to
the pixel I select, okay? But as I up this tolerance, it's going to start to
look at close colors. In other words,
something that's very close to the color
we clicked on. And the more we raise this up, the more different colors
it's going to select. Now, we could raise
this way up right now and because this is black at the other end of
the color spectrum or the other end of the
brightness spectrum, I should say, that it's not
going to select this black. Okay? So just know with
this tolerance here, you can sort of affect what
you're selecting, okay? Keep it at zero if you're just
clicking on a solid color. But if you have something
where you have whites, and you also want to
select some, you know, things neighboring white
that are close to white, you might have to up this
tolerance a little bit. Now, the other important thing
here is this contiguous. Without this checked,
it's just going to find any white in here, even if those pixels aren't directly
connected to each other. So you can see that
this black actually divides the white on the
bottom from the top, But since contiguous
is not checked, when I click on
anywhere in the white, it's selecting all the white. Now, let me hit
Control D to D select. That would be command D on a
Mac. Control D on Windows. If we turn on a contiguous now, if I select this white here, you'll notice that
it's just select everything above the
black because this white here wasn't actually neighboring and touching
the white pixels here. Control D again, just
to show you that, I could click inside
here and select the central part of
the F. Control D, again, I could do
the same thing here. That's just this contiguous
coming into play. That's going to be important because
we're going to want to separately select the
white on the bottom. And the white on the top, okay? So in this instance, I'm going to make sure that contiguous is checked because I want to select just the white on the
bottom here to start. So if I click down here now, I can see by the dotted line, the marching ants
here, that it's only selected these
bottom white pixels. Now, anytime you're making
selections in Photo P, it has this menu up here also, where as you make
additional selections, if it starts on this one here, you're just going to
replace the selection. So if I click on the top,
now the top selected. Now, I click down here, we're going to replace that selection. But if I want to select additional items and have them add to my
current selection, well I have an option
here for Unite. There are other ones like
subtract and intersection. But in this case,
we want this Unite. I'm going to make sure
that D is checked, and then I'm going
to come down here, and I have to think about
how I want to do this because I could make a
mask for this bottom area. I could make a
mask for this top. We could just use the
texts we have in there. But I might want to include the lettering as part
of that first frame. So the first frame would be sort of the text itself and
all the white below it. And then the other parts would be maybe the top would
be the other part. And then maybe the
top would also include the central parts
of the letter here. So again, these are just
creative decisions. But what I might
do now with Unite still checked on is I might
now with my magic wand, click on the Black area. Now, when I do, I
see that it's not quite getting the very
edge of the letters. I don't think I should
be seeing a line here. Let me hit Control
D. This is just where you can finagle with
things like tolerance here. So I'm just going
to put this way up. I think I'll actually turn
on the anti alias as well, because that might help with
the edge of the letters. But now I'm going to try
again where I click on this and then I
click on the Black. That looks like a
better selection. It looks like now I'm getting everything from the
lettering on down. And so now if you remember, we're just going
to go on a path. I'm going to turn
this into a path. So right here, this option
here, selection the path. Then we'll jump back to our
layers. I'll add a new layer. I'm going to do at back
space to fill with black, and then we're going to go under layer vector mask current path. Okay? So that takes
care of the bottom. Now, I could use the same
selection techniques to select the white on the top. Or since I have this now, and I know I want to do
the opposite of this. I could just control click, and then I could go select. I could grow inverse, and then we're going to
go back to paths again, again, selection to path. And then we'll come back to
the layers and new layer, and this time, we'll
fill with white. I'm going to do
control back space we will again go up
here under layer. Vector mask current path. Okay? So now, if I turn off
the background for a second, we can see that we
have that layer there, and then we have this
layer here, okay? So these are going
to be our two mask. Now, I made a mistake, didn't I? No, I didn't make a mistake
because I did inverse, I did get the central
parts of the letters. I was thinking I forgot that. But no, I did get that.
Okay? So I could stop there. I could take these
back as my two mask. But you can also get creative
and give yourself options. So, what if maybe I want to have the option of just have the lettering itself
as the frame. So I could come in here now. Again, magic wand tool. We're going to
select that black. Let me hit Control D because I wasn't actually on this layer. That's why I did not
select the correct area. When you're using
the magic wand tool, you have to be on the layer here that
you want to work with. So I'm going to do
it now. Now I have my surfing selected. Now
I'll go under a pass. We'll do a work path yet again, and under layers this time, let's come to the top and let's fill this one
with a different color. So something like red,
and we'll go ahead and do back space to fill
with that red, and then we'll go
under here layer, vector mask current path, okay? Oh, see what we did here. We lost that part of the
eye because I was not using I had contiguous checked
on, so I didn't get that. So let's just do that
again real quick. Let me just throw that out. I could just come
in here and I could just delete the
vector mask, okay? So let's come back here
to the bottom layer here. This time, we'll just turn
off contiguous and boom, now we see we got the top
part of the eye selected. Again, go under paths,
real quick, do that, back to layers here, and now we're going to
come under a layer. Vector mask current path, okay? So now we have our three
different mask here, which we're going
to export back. So I'm going to go
ahead and do that now. I'm going to go ahead
and export these back. So we'll go into our file, and we'll go export as PDF. We're going to leave
all this checked off, and we'll go ahead
and save that back. I'll call it ERFing again. Sure. Put that back there. But now, let's do
one more thing. So since I have this layer here, this current layer
here. Maybe I want to add a drop shadow, okay? So let me just show you here. I'm going to add a drop shadow, and so you can come in here and full with the
different settings. So maybe I want it to
be angle this way. And you can do
some other things. Let me just take this
background layer. At this point, it
doesn't matter. I'm just going to put
another layer here, fill with whites just so we have this white layer underneath. Uh, here's another
thing you can do. Sometimes your drop
shadows will come back, and if you have transparency,
it's not going to work. You're just going to
get a gray layer. Here's another trick you
can do inside of Photop. Anytime you have
these special effects added to your layer, you can actually
get them to show independently of
the layer itself. So if I go on this layer
with this layer highlighted, I can actually take
the fill down, and what that does is it lowers the transparency of
the layer itself, but it keeps that
special effects layer. In other words, that is
still still turned on. We can still see that. And
so then what I'm going to do is turn off these
underlying layers here. So now we have a
layer which we can take back with transparency. So we exported before as a
PDF because we wanted frames. We wanted those
frames. But remember, we learned how to do overlays, And when you take
back an overlay, you want something with
transparency, usually. So, let's just take this back as a PNG file with transparency. So we'll export
this one as a PNG. It's going to have that
transparency. RVing again, sure. So now we got our
RF PNG and PDF, save and we'll save that again. And so now, this is just how we can bring back some
different assets to give ourselves some
different creative options once we're working in Canvas. Let's jump back over to Canva
now and see what we have. Okay, here we are back in Canva. And if I look at this, we
can see as expected in here, we have three different layers
because we brought back sort of a mask for the top and the bottom and then
for the text itself. So with all these, I can
click on it and I can detach the image to just reveal the frame itself. Let's
go ahead and do that. And so now we have these three
different frames in here. And so now we can
start to get creative. Now, remember, we also have
if I go under uploads. Actually I don't have
to go under uploads. I can just bring
in. I remember we also did that drop shadow. So I'll bring that drop
shadow into here as well. And then I can go ahead and start to play around in here and see what kind of
creative results we can get now that we have
these different frames. So I would type
in something like surfing to look for
some surfing images. We're going to go in our photos, and we're going to
grab this one here, and I'll just drop
that into the bottom. And let's find something different and put it
into the top layer. Maybe we'll throw this
into the top layer. And then, of course, the
text itself is also a frame, we can choose to use that or not use that
because remember, we made this text also
part of the bottom frame. So let me just come under my
layers for a second here. And for the moment, let's just turn this top layer off, okay? So now we have
something like this. This in of itself
is pretty creative, but you do lose the text a
little bit at the bottom. Remember, that's why we did the drop shadow or where we can make use of the drop shadow. So let's just click
on that drop shadow, and let's expand it out so that it fits from edge to edge, and then it should
line up perfectly. And again, that's the advantage
of building these assets together in the
same photo P file because if they're
lining up there, when you export them and
bring them back up here, they're going to line up nicely. And of course, we
can come in here and still full with this transparency
even farther in here. But this creates this
really, really cool effect. Where we have lots
of different options now because we can come in here, we can keep trying
different pictures to see what pictures
we like best. Now, you see, because I
brought in this surfing thing, which went from top to bottom, now it's blocking that
frame. But that's okay. We can just use the top
and bottom control handles here just to pull it down so
that it's out of the way. In other words, we
don't want to hide it, but we can pull it down so
we can get to these frames. And now we can just drop
something else in here. And so this is the
beauty of this is that now we have this where
it's really flexible, and we could continue to
try different results. So I could, for example,
just duplicate this page, if I like that first version, but now I'm like, Oh, I want
to try something different. I could start to
do other things. Hey, what if I use
this bottom image, and I actually use
that in both frames. So let me click on
this bottom frame. I'm going to double click to
get into the frame itself. Let's position it
right lined up there. Let's drag it out, so it
goes all the way to the top. And now I'm going to click
into this top frame. First, actually, we got to replace it with the
picture, right? So let's go find this
other surfing picture. Let's add this into
this top frame as well. Let's double click into there, and then we got to
resize it a bunch. Let's get it so we can resize it and get it so it matches
with that bottom corner. And then let me just
get so I can pull this top one down and until it lines up
nicely. So there we go. So now we have it in
sort of both frames. And because we have this
drop shadow effect, we can still sort
of see the text. So that's interesting
in and of itself. But then we could
also do other things like maybe we're
going to come in now. And now maybe here's
when we'd come in here. You could try these
different filters, just to give the top half a slightly different
look so we could try any of these
different filters to give an interesting,
stylized look. So maybe I like that design. So maybe I want to have this option. I want
to have this option. So maybe you'd be showing this to a
client and you're like, I want to show them
different options. So here's option one.
Here's option two. Let's give them another option. Let's duplicate this page. Maybe this time, instead of
using that particular style, let's go under this
Duotone option, and maybe we'll
come under here and choose different color,
something like that. So in other words, you have all the different flexibility, just because we brought back these different
design elements, and now it's something we
can work with quickly. Imagine if we had to each time, use the background
eraser and then erase out to the edge of this text,
that would take forever. That would not be
a smart workflow. But when you have
something like this, then suddenly it's something you can make a lot of
changes quickly. So let's do another one.
Let's duplicate this again. Then also, remember, we have
that original text item, and we also have the
text frame here. So let me come in
here and I could bring this frame
back to the top. Let's bring the
transparency back up. And then, of course,
you could add anything different into here,
anything at all. So maybe you could put type in something crazy like polka dots. I mean, you could do
anything you want here and just add something
different to that frame. So you really can get as
creative as you want. You could also bring
back the original text. So this was the
original text here, so I can hit Control C
to copy this group here, and then let me come back here, hit Control V. And so now I've pasted my original text on top, which could be interesting, or I could position
it behind the frame, so I could slide it behind here. I could give it a
different color. So let's give it a white color. And then suddenly now,
I could bring it out. Let's give it a
different color so it stands out more, maybe yellow. So now suddenly you could
have a little bit of drop shape. That's
a little too off center, there's lots
of different things. I'm just giving you an
idea you could fool around endlessly because you have these different elements, okay? Now, this example, we're just using the
word surfing for fun, so that would make sense
if you were working on, you know, a poster for a surf shop or
something like that. But of course, if you're doing your regular Instagram and you wanted to have this
type of effect, Maybe you wouldn't use surfing. Maybe you would just use like a zigzag line or
something different, so it would be more conducive to more than just one project. So you also always
want to be thinking about what's the best asset I can create for myself in terms of my workflow and
in terms of saving time. But it's also fun just
to go in here and experiment around with something specific like this, okay? So I hope you learn
something. I hope you can take advantage
of these techniques, and I will see you
in the next lesson.
21. Creating a Polaroid Collage Frame: Okay, let's look at
another example. In this example, we're
going to build a frame that spans across multiple
polaroids here, so it's sort of going
to be like a collage. And the reason why we're
doing a bunch of examples, it's just so you really start to think
creatively and you have an idea for all these
different sorts of frames you might
want to create. Let me create a
copy of this page just so we can take
it apart and see. So I have everything grouped
together, but if I group it, then we'll see that I actually have individual
polroid elements, and then I put the red behind it because this was just a
element with transparency, and I wanted to make sure I had that red because I
need to make sure I can make the selection
when we go over the photo pe that I'm going
to need from my frame. Now, I could have
done this a bunch of different ways if we go under elements and we
search for polid. Let me just do
polroid real quick. You have a bunch of
different options here. I think I chose a
graphic element. So if you go to come under
graphic elements here, you can see this one here
has transparency behind it. However, if I chose a different
one, like, one, like, let me go back under all, and let's actually go
under the actual frames. If I chose something like this, I probably would have
wanted to come on here and actually change the color
of the frame itself. So, again, I would have
something easy to select. And then, of course, all I
did was size them down to what size I wanted
to, spun around, positioned them in different
spots on the page, you know, moved them up and
down on the layer stack depending
on what I wanted. I landed on something
like this here. So I don't need
these extra pages. So let's just get rid
of these extra pages. So you know now that you could build out
something like this. There are lots of different
polid elements here in Canva. You could take something, you could build something
out like this. You could even build this
with regular rectangles. You could put four
rectangles together to make the polaroid shape, another rectangle to
make the central shape. You could group them all together and then
take those groups, make copies, and then stack them on top of
each other like this. You could even do a drop
shadow effect of sorts. So you could get something
similar to what I want here. But, you know, There are
lots of elements here, so I figured, why not save time. So I use some ready
made elements, and then I just
put the red behind them again so that I'll be
able to make that selection. Didn't have to be red.
Could have been any color. Okay, so I'm going
to take this now. You know what I'm going to do. I'm going to come
up here, share, and we'll save this off as
a PNG transparency sure. We don't have to have
the transparency here, but it doesn't really
matter in this instance, I'll actually turn it off. We don't need it because
it's the red that we're going to be interested
in selecting, and we'll be able to
do that, regardless of whether we have transparency. So I'm just going to
turn the transparency off? We're not going
to worry about that. So we'll go ahead and
download this now. Give it whatever
sort of name you want and save it off somewhere, and now we're going to go
over and open it in Photop. So here we are. And just
like in the last lesson, we can't just click on this because right now it's
just still one image, and we want to select
this red area. So we're going to go
ahead and we're going to choose this magic
wand tool here. Tolerance is set at
100. That's fine. Everything else is one. We could lower that way down
if we needed to. But we're just going
to click in this, and we want contiguous turned
off because, of course, some of these or all of these really aren't
touching each other because you have the white edge that prevents the red from
touching each other. So we'll leave
contiguous turned off and we'll just boom, click that. Everything red gets selected. So now we can jump over
to the paths panel here. We can choose this one here, turn it selection into a path. Now we have that. We
can jump back over to our layers here.
We'll do a new layer. We don't need a new layer,
but we'll do a new layer. I'll go all back
space. Just for fun. We'll do that and then
we'll go ahead and go layer vector and current path. Now, I could have just
been on this layer, and I could have done my layer vector current path
right on this layer, but I'm just in the habit
of creating this new layer. And so now we have
it right here. So now we have this, so we'll
go ahead and we'll go file, and we'll go port as, and again, port as PDF, and we'll take
this back over to Canva. Okay, so here we
are back in Canva, and here is that file
I just imported. And so let me click on it
now and we'll open it up, and so I'll just
click on this frame. And I'm just going to hit
Control C to copy it. You could also right
click and choose copy. I'm just using the
keyboard shortcut. So once I have it copied,
I'll just jump over here. Again, you could right
click and choose paste, but I'm just going
to do Control V, keyboard shortcut for paste. And it paste right on top. And that's a good thing
about using a file, taking it over to Photop and
then bringing that back and then back to the original file because they have the same
dimensions and everything. Everything's going to fit perfectly right over
top of each other. And now I can right click. I can detach that image. We'll get rid of that. And so now we just have this frame. Sitting over the
background layer here, which is all those groupings
of sort of the white border. And I don't even have
to put this part behind here because it's
fitting perfectly on top. So I can start using
it right like this. So I'm going to come
now under my elements, and I'm just going to
search for models, so we have a model
to put in here. I'm going to grab
this photo here. We'll throw this photo in here. And then I'm going to
double click into this, the re size, so we can
start to size this up. So let's get it so we fit it right at the
bottom edge there, and I'm going to size
it all the way up to the top here and go ahead
and something like that. Then I might choose to add
another copy of that photo. So I'll just click on that
to bring it over here. Let's grab it. Again, put
it in that bottom corner. Again, we're going
to size it all the way up until it
snaps to the top. And then we'll go
into the position, and we're going to move this
one behind everything else. And so now we have that
in the background. And I might do
something like the side to take the transparency
down on that. I could also decide I'm going to sort of separate her
from the background. So maybe I would come in here first and let me go edit photo. Let's do background remove her. And then maybe I'll take that version here
and duplicate that. Again, make sure it's right
on top of the other one. And then one of
those versions here, let me just come back
on the position menu. We should have two versions. So here's the one all the
way in the background, and we have one in the
foreground as well. So let me turn off
the transparency in the foreground for a second. Come to that background one. The background one, I'm
going to lower down, make this more subtle
background effect. But then maybe I actually want some of her hair and
other stuff to come back. So that's why I have
this top layer here. And so for this top layer, maybe I'm going to pull it up and make it everything even to this line here where you
can still see her face. And so we're starting to get these different layered effects. Of course, this is
sort of what we've been doing throughout
this course, and it's really up to you to take this as
far as you want. Maybe I'll just come
in here now and we're going to search for frame,
so I'll type frame. We'll bring out this basic
frame. Start with this on top. Sometimes I'd like to make this full screen here just so it's easy to
add other elements, so I could do
something like that. Let's search for something else. Let's just do
something like water, color, art, something like that. Let's see what kind
of photos we get. Let's just try one of these. Let's just take this,
put this in here, and then we're
going to take that, and we'll push that all
the way to the back. And so now we're starting to get this really
interesting look, and we're taking advantage of
this cool frame we created. I realize now that I adjusted the crop for this top layer, but I never brought
back the transparency, and I also need to move
it down in the layer sax If I bring all the
transparency up now, and I leave it in this top
layer, we have this hard edge. I don't want that
hard edge there. So what we want to do is
we want to move it behind both the frame and behind sort of the polaroid
images themselves. So we're going to
bring it back there. And now that hard edge is
sort of hidden behind things. Now I might come in
here and maybe I don't want it to be
fully transparent, so I'll take it down a
little bit just so it's a little different from what's
in the actual frame itself. But it also just gives some interesting differences in transparency throughout this. You get the idea. I could keep playing with this as
much as I wanted to. I could come under here. I could look for my
favorite textures. Let me just look in here and search for something
like texture, and I have a folder, and so here's some
different images. And then if I go under folders, I would actually have
favorite textures. Here. But actually, if I
go back out there, too, there's some interesting
things here, so I could start to bring in some of these
different things here. And I would probably
use a frame. I wouldn't just put it
like this, but you get the idea you could continually play with this and you could continually
build up this design. Now, I wouldn't
want it like this where I have this hard edge at the bottom, but
you get the idea. So I'll delete that for now, but you could come in,
you could add texture. You could do all
sorts of things. To play with this. Now, we're
going to stop here for now because I think you
get the idea of how to create this
polaroid frame. But in a future part
of this course, when we start to talk
about animation, we're going to return
to this poloid frame, and we're going to
show you how you can take something like this and you can push the design even
farther with animation. But for now, play
with this idea, have fun, see what
you can come up with. All right? I'll see you
in the next lesson.
22. Photo in the Sand Frame: Let's do one more example. In this example, we're
going to create a frame, and we're going to
make it look like this photograph is partially
buried under the sand, but we're still
going to have it as a Canva asset where we can change the picture that's
in the frame very easily. Now, this is the type of thing
where you really do need that complimentary tool like Photop because you could
try to do this in Canva, but it would be
really difficult. You'd have to come
under elements here and maybe you'd
look for something like sand spray or
something like that. So sand spray. Let's
see what we get. We do have something
here. So let's just see what I can do in
Canva real quick. Let me just hit CL and we
do something like this. So I would have to
change the color of this and maybe I would use
something closer to my sand. But you see it doesn't
really look good. So I'd have to duplicate that. I'd have to use a
different color. You could do something,
but it would be difficult. This would be better
for us to rely on the skills. We're now
picking up with Photop, and I'll teach you
something different. And so as your skills
in that program, or if you start using photoshop,
as they start to grow, you'll start to understand
how you can create reusable assets and bring them back here into Canva, okay? So what we're going to do
is the frame itself is the easy part because
we could even describe a rectangular
frame here, reposition it and size it
over where it's black here. But the tricky part
is going to be this overlay of sand
where it starts to look like the corners
and some of the edges of this photo are actually
under the sand. Okay. So to tackle this, what we're going to
do is we're going to export off both the
image of the sand, both the image of
the picture here. And these are just simple assets I found here under
Canva elements. And now what I'm going to do is I'll export them
one at a time. So let me come under
here under position, and let's temporarily turn the
transparency down of this. So now that we're
just going to be exporting this sand layer. So I'm just going to share. We'll download that as a PNG. So just a PNG. Don't have to worry
about transparency. Just download Sure. You could do a JPEG as well, whatever. So we'll
download that. And then, of course, I'm also going to do this
for this top layer. So now I'll come in here
transparency of this. And for this layer, we could even leave the background
sand turned on. It's not going to
matter. So go ahead and share and save this as well. So share download PNG, and we're going
to download this. Again, once again, PNG, and go ahead and download, y? So now we're going
to jump over in a photope and that's where
we're going to create this little sand overlay that covers the edges and some of the corners
of our photograph. Okay, here are the two images we exported from Canva
over in Photop. So we just have our sand layer, and then beneath that, we have just a background layer
that has the sand. Also the photograph on it. So what we're going to want to do is we're going to want to take this background
layer and basically hide all of it except having some sand spilling over the edges. Well, how are
we going to do this? We're going to use masking, and we've talked
about this before. This is what we've
been doing throughout the whole series of lessons
when we're creating frames, we're creating a
selection, and in essence, we're creating a mask.
If you remember a mask, just controls what
shows on that layer. So if I hit a mask now, excuse me, let me
hit this button. Again, if I hit this mask now. You can see it's all white, and so everything is
currently showing. But if I suddenly hit control back space to fill with
my background color, now my mask is black, meaning none of it shows. Now, I could make some of this show just by
coming here and grabbing a white brush and then suddenly painting
over the edges. So you could do something
like this to hide the edges. So we're going to try
a technique like this, except we're not
going to want to just use a hard brush like this because that's not going
to quite look realistic. So let me just hit control back space again to
fill with black, and what we're going
to need to do is be a little bit more creative
with the brush that we use so we get something that we paint
on the mask that mimics the shape of sand grains so we can start to make
this look more realistic. So I'm going to show
you how you can create your own brush
here in Photop, and then how you can
adjust the brush settings. Now, if you ever use a program like Photoshop, you
can do even more. They have a really
powerful brush engine. But even here in Photop, you can do some
really cool things, and it is a really
useful skill to know. So, again, this
tries to be as much like photoshop as it
can. So it's similar. It just doesn't have all the features you
have in photoshop. Okay, so here's what
we're going to do. We're going to
create a new layer. I'll go ahead and turn off
these two background layers. So we just have a
transparent layer here. And then under the brushes here, if you come up here, by default, there are some default brushes
that load into Photop, but then you can create
your own brushes. But so now let's just
choose this second one, this hard brush here, and you can see any brush has
this hardness setting. So we're going to
go ahead and make sure the hardness is at 100%, and then we're going
to come down here and start painting some dots. Now, we could have a
white behind this, so we could have a white
layer behind this, but we're not going
to worry about it. Painting on this transparent layer is going to
be fine as well. So if I just click once, it puts down a white dot, I
don't want white. Let's switch so that our black is our foreground color because when you
paint with a brush, it's going to paint with
that foreground color. So I'm just putting down a dot. Now, if you want to
resize your brush, you can use the bracket
keys on your keyboard, so you have that right bracket
to make your brush bigger, left bracket, to
make it smaller. Boy, Canva ever does
something with brushes, I hope they do this
because right now, the one background racer they have when you come in
and use the brush, you cannot do this, and
this is also helpful. Okay, so don't worry
too much about the size of this because we're going to be able to
scale it down later. But what I want to do is just
come in here and start to put a little scattering of dots, sort of at varying positions, sort of a circular shape, but then I'm going to have some more at the edges that sort
of go out a little farther. Again, sort of trying to
concentrate this in the center. Now, I've made this way
bigger than I intended. Let me hit Control Z
to undo the last one. I've done this way
bigger than I intended, but I still think it's going
to work out just fine. In other words, you
don't have to be perfect with this aspect of it. The other thing I could do
is I could have come in here and I could use
something like 50% gray, and now these dots
are going to be 50% transparent because
when you paint on a mask, which we're going
to be doing here or when you use a brush, when you're defining
something with a brush, anything that you make black, when you use that brush, it's
going to be 100% opaque, you're not going to
be to see through it. But when you use
something that's gray or a shade of gray, then the closer it is to white, the more see through
it's going to be. So 50% gray would be like
50% s through, okay? So now what we're
going to do is you're going to grab that
rectangular selection tool, make sure you go all
the way around it. And then once you have a
selection around all of it, you're going to go
ahead and you're going to define this brush. Now, the reason why
I said you could have white behind
here because anything that shows up as white
here isn't going to show up in your brush because
what did I say White was, that's going to be
100% see through. So now we're going
to come up here, edit, define new and
define new brush. And it says brush added. Well, where is that brush added. So right now, if I go to draw something on screen
with my brush here, I'm still drawing with
this same brush, okay? Now, let me reset my
color here to black. So I'll do that, and
I'm going to hit control A and just delete delete everything
on this layer. So, where do I find my brush? Well, just come up here. It's going to be at
the very bottom, the most recent one you created. So here it is. And now if I draw something boom, I
get something like this. Of course, that's going to
be way too big for sand, but you can scale it down and make it really
small, like this. So that's step one,
you can scale it down, but then we're also
going to want to adjust the brush settings. So, what do I mean by
that? Well, you can come in under the brush settings, which you might see over here. Otherwise, you can come under a window and you
can choose brush. Well, there it is here, so it
popped out from over here. And you have things like shape, dynamics, tip dynamic scatter. So let's start with shape. You want to come in
here and you want to increase this spacing. And if you drag it way out, you start to see little
stamps of your brush shape, and they'll get wider
and wider apart. Well, let's bring
it back so there's just a little bit of overlap
between those, okay? And then if we want this
to be lots of sand and we want to be able to draw
lots of sand at one time, because I don't want to draw out individual grains of sand. I'll never cover my
photo the way I want to. I want to come down here and adjust some of these
other settings. Okay, so I'm not going to
worry about tip dynamics, but I am going to
come down to scatter the scatter setting,
we're going to come in here and we're basically
going to take this count. And as we do, we can
make it so it puts down more and more instances
of our brush at one time. So I won't take it
all the way up, but maybe something like this. And then position
iter is just going to be how spread out, does
it end up becoming? So maybe I'll do
something like that. And then count, again, does it always put
down the same count? Does it put down varying
amount each time? So we'll drag that up. You can look at these settings. It doesn't have to be
exactly like that, okay? Now, if I draw on screen now, we'll start to see I can put down a bunch of
things at one time, and this is starting
to have more of that texture that you
would expect of sand. Okay? So let's just delete that, and now we're going to start
working on the mask itself. So now, because I'm
painting with black, if I paint on my mask,
what's going to happen? Well, nothing,
nothing's going to happen because I'm
painting with black. So let me hit Control Z. Undo that. We don't
need to undo that. But so now let's switch
and paint with white. Now if I paint with white
on my mask, suddenly, I'm bringing back some of
that underlying photo, which is the sand, right? So now I can just sort of
start brushing at my corners, anywhere I want to start
bringing some of the sand back, I'm just starting to brush, and suddenly we can start
to work this photo and we can start to bring back some
of the sand on the edges. So it starts to look like this
is buried under the sand. Now, if I don't like and have gone too far, I can go in there. I can switch to black, right? Actually, I can just switch my foreground and background
colors like that, and then I can start to paint
at that edge where like, maybe that's a
little too strong. I want to get rid of
some of that, right? So you can do it either way. You can add or you can
bring back from this mask. Now, I don't think I've created
the perfect brush here, so you might have
to fold around to get your sand brush
the way you want it. So you really like the
effect that you create here, But this is maybe close
enough for this example. I'm not going to try
to make it perfect. I'm just going to
come in here and work these edges a little bit, put a little sand there. And then I don't want it to
get totally out of control. So it's spilling a little more on the
photo than I wanted to. So what I'm going to do is I'm just going to
paint like this. But then I'm going to come and switch back to white again. So let me make that switch
here, switch back to white, and then just start
to bring back some of those areas where I think it's been a little
too aggressive. Just sort of paint
some of those away. All right. So again, we're not going for a perfect, but you get the idea how you can use this to make it a
little bit more realistic. And the reason why
it's more realistic is because we're
actually bringing back the actual sand that exists
in that photo underneath. So we are getting that real
look of sand and our brush, as long as it's
somewhat reasonable, it's somewhat close to that
speckled nature of sand, then this is going to give
you a reasonable result. Now, I don't think I've
done a perfect job here, but it might be something
we call good enough. I could also come
in here and just carefully start to
take more away. I could play with it more.
I could redo my brush. But I'm not going to
worry about that so much. I think we get the idea of
this spilling over, okay? So once we've done
that, we're going to bring these assets
back into Canva. So we could create a
frame in Canva itself, where we just drag
something out and resize it since it's
just a rectangle. But of course, we also
know we can do it here. So here on this
background layer, I could grab this magic
wand tool that we learned about tolerance
to set to 50. That should be fine because
there's a white edge here. I don't have contiguous checked. So I'll just click
on that and we can see it highlighted
that black layer. So now I can go under paths. I can come here and I can
do this, selection a path. And then I'll come back
on my layers here. Let's add a new layer for this. We'll fill it with
black for now. Sure, and then we're going to
go layer. We're going to go vector mask and
current path, okay? So that is going to
be our mask itself. But before we even do that, let's just take
back independently. Let's take back this
sand layer because this sand overlay layer is going to be something we
want to take back by itself. So for this, we're going
to go file export as PNG. And so we'll save this back. That's going to be
our sand layer. That lies over top. So
we've created an overlay. And now, for this other part, we're just going
to grab this mask, and this mask is
going to be what we take back. So we're
going to go file. And this is the one
we'll save as a PDF. So a PDF because this is going to be the mask,
we'll save that back. So now we have the mask and now we have the sand
overlay we need on top. So now let's go back to
Canva and see what we have. Okay, so here's that frame
that I brought back. So I'll just hit
Control C to copy it. We'll go back to this one
here, the project we started. We'll hit Control
V to paste it in. And then, of course, you
can come in here and detach the image
and throw it out. So now we have our frame
sitting right on top. And so now all we need to do, is grab that new
overlay we created, which is right here,
just drag that in. And so now we have
this sand overlay. So I'll wait a second
for it to load. And then I can just
click on that. And then because we created
it from the same project, if I size it up
corner to corner, it should be
perfectly positioned. And so now suddenly
we have this frame that's looking like it is
hidden behind the sand here. Now, of course, if we
want to add photos to it, we're going to have to drag just so we can see an
edge of our frame, and then I'll come
under elements, and let's just look for family on beach or
something like that. We'll go under photos. And now, suddenly, boom, I can add things to
this frame here, and suddenly we have
this really cool look. So if you want to
add something new, just expose the
edge, and of course, you can reposition
this in the frame. And then, of course,
you can grab this layer on top and you can
bring back hoops. I grab the wrong one here, this one here, and you can bring back all
your sand on top. Somehow, I lost this photo
into the wrong thing. Let's hit Control Za a couple
of times. There we go. There we go. So I didn't do a perfect
job with this example. Like, I think I could
have done a better job, take a little bit more
time with my sandbruh. But the whole idea really is just to get you to
think creatively and get you to understand
that sometimes if you want to reach your
creative aspirations, you might have to
reach beyond Canva and learn a few tricks in other
programs like Photop. If you want to get
into something like photo retouching full time, yeah, then you better
go learn photoshop. But Photop is a
great free solution. You compare with Canva, like we did in this exercise. And of course, you're always thinking about creating assets for Canva that are reusable and can save you time
in the long run. But it's also just
about having fun. So I hope you had
fun in this lesson, and I'll see you
in the next one.
23. Building Ripped Paper FX: Okay, in this video, we're
going to be talking about getting sort of a ripped
paper edge effect. So I have this photo in here. And I'll just show
you under my uploads. I have sort of this
paper edge here, and then I have this
paper edge here. Now, I couldn't find
either of these exactly as I wanted
in Canva elements. So part of this video is we're also going to talk
about now that we're stepping into photope to set up some of those custom frames
we can bring back in. And we're learning some
symbol techniques, how do we can we apply
them to sort of help us manipulate other assets just to get more of the
look that we want. I'll show you what I
mean as we go along. But just for starters
here, let me get rid of this one here on top, and I'll take this one
here, and we could, of course, drag this out
and get a look like this. So this sort of looks like the photograph underneath has ripped into two halves here. But then, of course, what if we didn't want it
to be this white? That's just built into that. So if I wanted to change this to sort of a
different type of paper, I would not be able to do
this as it is set up now. Now, another look we could
go for would be using something like that first graphic here,
something like this. And then if we had
the drop shadow and this cava element and
then a paper texture, then maybe we could. But of course, to
get this look here, you know, how are we
hiding this photo? How are we hiding the
rest of this texture? There's got to be some sort
of frame at work here, right? So, how can we take some of the starting elements that
we have like this edge here, or this edge here and
get this sort of look. So let's work this problem
from the beginning. So I'm just going to start here and let me actually get
rid of this off screen. So we just have a
plain gray background. So let's just start by looking for some of these
ripped paper elements that you have in ama. Somebody is going to go
under my elements tab, and let's just typed in
ripped paper for charters, ripped paper and
see what some of the different graphics
and photos we have are. So if I go under photos,
we have things like this, That's got a little
bit of a drop shadow on it. That's actually
kind of cool. So we have things like
that we could use. Let me just see all
photos for a second. We have other things like
this, different type of paper, and then we have some
other ones here, but maybe nothing
exactly like I want. So let's look under
graphics now. Under graphics, we
have things like this. Okay, that's kind of cool. And I could come
down farther and see, we have things like this. We have things like this here. So again, lots of interesting elements, and you could type in other
things. I have ripped here. You could type in torn paper, so you could vary your search term a little
bit just to see what kind of
different results you get, something like that. Let me just try torn paper edge, slightly different just by
adding that edge keyword. Okay. So I'm not finding
anything exactly like I want, although this is getting in the area in terms of the sort
of shape of the edge here. Let's just hit CL, so we
can see more like this. And now what I'm going to do
is, I don't want to scale it up because I don't want
to be quite this big. I'm going to put a couple
of these together. Let's start with this one here, and then maybe we want
this one to join up. So I'm going to have to do
a little finagling here, so let's you just
zoom in a little bit. I try to get that top edge. Using my error keys just to nudge this one
picks a lot of time. Let's start by
matching the top edge. Using this nudge right and left until we want that top
edge to blend pretty much. Then since when you resize, if I resize from this corner, then it's going to
be moving that away. I don't really want that. I'm going to pick
the opposite corner. I want this to stay the same, so I'm going to nudge
from this corner. It is going to shift the
other one a little bit. But this will let me start
to play around here, and then clicking off
occasionally to see. Again, I'm going to
resize a little bit, clicking off to C. Again, I can nudge it right
and left as well. So we're getting closer.
Finagling around a little bit until I get something that
I feel like is believable. Now, maybe I didn't start
with the best part. So let me just sort
of go like this and sort of nudge
back and forth. Something like that, suddenly, I believe that is
one edge there. So I'll take that.
And then once I have it sort of believable, I'll group those together. I can zoom back out. And then I could continue
to build it out, or I could do something
like take the whole group and I could hit Control
D to duplicate. And then with it
duplicated like that, maybe I'll just try
spinning it like this. So it's one 80. Then I might be able to get these to match up better on
the other side. That looks like it
matches up pretty good. And now I can take this whole thing and group this together. I may not have done
a perfect idea, but you can put different
elements together like this. Then if I duplicated this again, you always would have the
option of spinning it this way and having a
different edge that's just in different because
we'll move it a little bit, so it's not going to
quite be lined up, and of course, it's
flipped upside down. So you can get different
shapes like this. The problem with
this shape here is I want my paper to have texture. The edge of my
paper, I want it to be more of a textured feel. This is just a solid color. Well, this is where we're going to take advantage of
some of the things we've learned in Photop just to help us manipulate this element and combine it with
another element. I'm going to come
under my elements tab. Again, this time we'll
search for paper texture. I'm going to specifically
look under photos. There's some graphics here,
so I could do stuff like that and find some
interesting texture. That's actually not
bad right there. Actually, I'm under A, so
I think this is a photo. If I go under
graphics here, see, some of these just don't
quite have the look I want, but let's go under photos, and we'll try this one.
How about this? We could play around and look at some other ones, but
let's just go with this. This is sort of an interesting
texture that I like. So what I'm going to do is I'm going to export
both this texture, and then I'm also going to
export this layer here. So I'll just create
a fourth slide here. Let me start by just
grabbing my texture, control x, we'll copy it. We'll hit Control V to paste
the texture over here. Make sure it spans the
entire width there. Zoom in so we can see
a little bit better. Yeah, I sort of like that.
So we're going to go ahead and start by just
exporting this as a PNG. So we'll just share,
we'll download this. PNG, we don't want all pages. We just want page
four current page. So page four. Sure, done.
We're going to do that. We're going to download, and I'll just call this
paper texture. So let me find this folder here, and we'll call it
ripped let's call it paper texture paper texture. Okay. And then I'm going to do the same
thing where let me go back now and let me grab
this edge we created, Control C, and we'll
hit Control V. Now, I'm not sure actually. Let's do a test. When I export something with
transparency here, I think it's going to ignore even the color gray because
it is our background layer. So let's just go here. We're going to export
this edge here. Let's go ahead and
share one more time. We're going to do download.
We're going to do P&G. This time, we do want
transparent background. But once again, we just
want this fourth page, current page, page four, done, download, and we'll call this one paper edge or
something. Rip paper. That's fine. Let's
put it images germ. We'll go ahead and
save that off. So now I have those two images, and now we're going
to open these up in Photop and we're going to work on creating a custom frame. And then we're also
going to work on giving this paper edge some texture. Okay? So I'll jump over in Photop and we'll start that now. Okay, so here we are in Photop and I have those
two elements open, the paper texture that
we brought out of Canva, and then also this
ripped edge here. Now, I mentioned that I don't like this just as a solid color. I want to have that
paper texture. So we're going to need
to put these together. So let me just come over
here onto this file. Then if you remember some of
these keyboard shortcuts, we're going to hit Control A. That would be Command
A on Windows, but Command A on a Mac on
Windows. It's Control A. We're selecting
everything, and then we can hit Control C to copy. And then we'll just go back to this tab and I'm just
going to hit Control V, and it's going to paste
it in on a layer above. But let's turn that
off for a second. Now, if you remember before, when we've made
custom mask in here, we start by making a selection which we're then going
to turn into a path, but that selection is something
we can make use of now, and we know that you can
select everything on a layer just by control
clicking on a layer. So if I control click on this paper edge on this
bottom layer here, now, suddenly, we have
the selection that we need for this top layer. Now, on this top
layer, I could just come in here now and
hit this mask button, and then suddenly I have
this paper edge masked out. Let me hit Control Z just to back out of the
keyboard shortcuts. Another keyboard shortcut
is if you hit Control J, it copies whatever is selected on the current
layer to a new layer. So I could also hit Control J. And if I did that now and then turned off
these two layers, we see that we have
this paper edge. Okay, so different ways
to do the same thing, but they're both going
to give us what I want. Now, let me just
go ahead and put a solid background
color in here. So I'm just going to
create a new layer below. So here we are new layer. It's below this layer here. Then I'm just going to go edit and we're going to go fill, and let's fill it
with let's see. Just the gray. So we'll
choose gray here. Okay, so we can see
that a little better. Now, I do want to
bring this dark edge back on top for a second. I can do that, move any of these layers just by
clicking and dragging, and you can just reposition
these very easily. So I'll just drag it
all the way to the top. Of course, turn it back
on so we can see it. Now I have this black edge
over top of all of this. Now, I actually might want
to make a copy of that. So I'm going to go ahead and
just the way we used that Control J keyboard shortcut when we had something selected, and it copied just
a selected area. If nothing is selected
and you hit Control J, it's just going to
copy everything that's on that layer. So
I turn that off. Now, actually have two copies
now of that black line. Now, let me do the same thing
with my gray layer here. Somebody's going
to hit Control J. It just made another
copy of that layer. I can position that up, and now I have the black edge on top of the gray background. I'm going to teach you
another new command here. If I hit Control E, if I hit Control E
with a layer selected, it's going to merge that layer down with the layer below it. So you can also come under layer here and you'll see
this merge down. You can see it says
Control E. So basically, what I do is that's going
to make this background copy in this layer
three, just one layer. So if you hit Control E, now those are merged together, and that's just one layer.
I can turn it on and off. That's just one layer. So
I might want to do that, but actually, let
me hit Control Z to undo that. I don't
want to do it yet. So I'm going to hit Control
Z just to step back through my keyboard shortcuts until I've separated those
layers out again. There we go. Now we have
them as separate layers. Because what I'm thinking about now is I'm thinking about, if I want to create a
ripped paper effect, where do I want it to be? I want it to be sort of in
the center of my image? Well, I think I actually want
it to be a little lower. So again, this
layer is selected. If you want to move something
when it's selected, you have to have this
select tool here. So do that select tool. If you have this transform
control selected, then you can resize it. But it doesn't matter if you
have that selected or not. Even if you don't see that,
if you have this layer selected and you have that selected up here,
this move tool, then you can move stuff with
either clicking and dragging with your mouse or using
your keyboard shortcuts, your arrow keys, shift
plus your arrow keys, just to move something around. So maybe I want
it to actually be right here where I
have the rip to be. And so then if I was using
this in concert with a photo, I would want the
photo to be up here, and this would be the
ripped edge of the photo, and then everything below, I would not want
the photo to show. In essence, what I want
to do is I want to have this B the mask area, this gray part of
the photo here. The problem is, if I go on this background and I use
this magic wand tool, which we've learned before, you can use to select
contiguous areas of color. Let me take the tolerance
down to something like ten. But even with contiguous,
if I select it now, the problem is it selects everything because
on this gray layer, well, everything is contiguous. This black edge is right
now on a different layer. But that is where this hoops. Let me do that. I was trying
to hit control D to D select but when I do that, sometimes it gets into this edit bookmark. That doesn't happen
in photoshop. That's just a quirk
here. So I could also go select de select. You see Control D
is for deselecting, but it doesn't always
work perfectly in Photop. Now it's deselected. Anyways, back to what
I'm talking about. This here, we can now merge down to make it
part of this background. So if I hit that control
E key or shortcut, we've made those one layer. Now, suddenly, if I use
the select tool, now, suddenly, look, we are
now using this magic wan, we've selected
everything, which is exactly the area that we want
to become our mask, okay? So this is one part
of the process. Now, something we've
done many times before. We can come over to pass. We can do here
selection to path, and then we can come
back onto our layers. And with this layer selected, we don't need to
worry about filling with any other colors.
That's not going to matter. All we need to do is come layer vector mask current path, okay? So now, right here, we have the frame we're going
to take back in, but we're also going
to take back in separately, our paper edge. Now, right now, our paper
edge is still up higher here. So what we want to do is take
this layer and this layer. Let's go ahead and
group those together. So I'm just going
to click on one, and then you can either
control click on another or if you wanted to slick the multiple layers that
were all next to each other, you could do Shift click and
click from one to another. But I just really want
this background layer. And then I want this other
layer here. So control click. And then what you can do is once they're selected like this, I can drag and move
them together. More than one layer selected. Okay, so actually, it's because I had the
wrong tool selected. But if I go to my move tool now, now with more than one layer selected, I can
move them together. If I hold down the shift
key when I'm moving, that'll restrict me to moving
just in a straight line. So let's just move it down. And of course, we want to see this here because we want to line it up exactly with that other layer
that we created here. Since we already did that frame. So let me actually just control click to see where that edge is. I could have
positioned everything first, and that would
have been helpful. But since I didn't, I need to sort of have
that visual guide. So again, my select tool here, let's grab these and move them up and we want it to be
just below that, right? So we want it to basically meet at the top edge like that, and that's where we're
going to position our paper edge, okay? Let me get control
D to D select. But then also, I now have
to move this edge on top because I don't
really care about the black part of
our paper edge. I just want that white
torn paper edge. Okay. But actually, the black
part I am going to make use of because let me just
take this black part here, and I will just now suddenly use my move tool and nudge
the black layer down. Move tool, let's nudge it
down using our shift key. Let's just get it so
we can fully see it. And then what I'm going
to do is I'm going to have this become
a drop shadow. So we're also going to take
a drop shadow back in. Now, in Canva, we could just
take back the paper edge, duplicate it, use the
D atone, use the blur. But that's a bunch of
steps we could just accomplish right
here even quicker. So let's just grab
this background layer, which is the black paper edge, and let's just go
under filter, blur, Gausian blur, and then just dial in the
blur amount we want. Maybe something like
this because we can, of course, lower the transparency
and everything later. If we need to, let's just
do something like that. So now we actually have three things we're
going to take back in Canva to work in
concert with one another. So if I turn off that
bottom gray layer, up top here, remember, we have our vector mask here, which is going to
become our Canva frame. And then we have now the
white textured paper edge. And then we also have
this drop shadow. Now, the drop shadow itself, I'm ultimately going
to position sort of behind like this to make
sort of a drop shadow look. But if I put it right
below this now, what's going to
happen is it's going to export this layer as a frame. But then these two
sins are overlapping, it's going to bring
them in as one graphic. I actually wanted to bring them in separately as two graphics. So for now, I'll just
grab this bottom layer, and let's just drag it down
on the page down here. That way, they're definitely
going to be separate, and they're going to be
brought in as separate layers. So again, whenever you have sort of things that aren't masks, so you don't have vector shapes, other things that you're
going to bring in these roster parts
of your image, if they're overlapping and
you go to Save as PDF, then they're going to put them
together into one graphic. So if you want them
to stay separate, you're going to have to export them where they're not
touching like this, and then you can sort
of reposition in Cama. So that's what I'm going to do. So now let's just go file. Let's go export as, we'll
export this as a PDF. We'll hit save, and then I'm going to see
you back in Cama. Here we are back in Canva, I could upload the PDF
via this upload button. Or since I can see it
up here in my browser. I know it's just
beyond your view, but I can bring it open. I can see it right there. I
can just drag it right in. I usually do that.
It's the quickest way. So then I'm going to
have it load up in here, and then we'll open
it up and we'll see that if we look
under the position tab, we have one, two, three layers. So again, now we can
position this because we want that to sort of
be that drop shadow. But because we brought
it in separately, now I can come in here and I
can do things like adjusting the transparency and adjusting the position separate
from this element above. So that is just something that
gives us more flexibility. So I think I might bring the
transparency all the way up, but then let's nudge it way up. So let's grab it and
try to move it just so it's right up and just gives us a slight subtle
edge like that. And of course, this top
layer is our frame so we can just detach the
image, get rid of that. Let me get rid of that, so
that's not blocking our view. And of course, now we can just drag anything
we want in here. So here's that photo boom.
We can bring that in. If we wanted to do something
like the look here, where I had this canva
element underneath. Let me just copy that, copy
that and bring that over, hit Control V. And then, what did I copy and bring it
over? Not what I wanted to. Let me go and make sure
I have this canva logo, Control C, back to here, Control V. There it is. And of course, we would come here and we would reposition it. So position, let's send it backwards behind
all these things here. Then of course, if
you wanted to have a different paper texture
underneath everything, we could easily go
under elements, search for just a regular frame. Bring that frame in, so I'll
just click to bring that in. I will just resize it to fit our whole screen here like this, drag it over like this. But then, of course, you'd
want to push this in the back. Now, even though it's
in the back now, it's still exposed here, so I can very easily add stuff to it. Let's just go under elements. Look for texture, see what
different things come up. Let's just see all here. Now, things, suddenly, I
can really easily come in here and add all these
different looks just to try different sorts of backgrounds that I might
want underneath that, okay? So this is all about a workflow that gives you more flexibility. It gives you better options, and you spend a little time stepping out of Canva briefly, but then you bring something in that just is going
to work better. And so you end up saving
time versus trying to really do things in Canva that
Canva wasn't meant to do. Now, at the beginning of this, I mentioned another graphic. If I came back over here, let me just look
under my uploads. I think it's under my uploads. I showed you this
one here as well. So I could just show you very quickly over in
Photop how we could do something akin
to this look if we wanted something
like this edge here, that would be
something that sort of stretched across your
whole thing like this. So let's just jump
over. I'll show you that real quick and then
we'll end this lesson. So here we are back in Photop
where we were just working and I'm not going to create exactly what we just looked at, but I'll do something similar
just so you get the idea. Let me hit Control Z to
see if I can get back to where before we blur
this black edge. So let me hit control
Z a couple more times. Just stepping back there we go. So I was just stepping back
through keyboards not through keyboard trick but
stepping back through prior commands using the
keyboard shortcut Control Z. So now I have this
black edge again. So let's just turn
off the white edge. And here's this black edge. And so let me just
drag it up somewhere. So I'm just going
to hold down shift. Actually, let's bring it to the top here, so
it's above everything. Now I'll move it around. So let's bring it
sort of up here. Then control J to Copy it. All right. So now
we have a second copy of it. Let's actually rotate
the whole thing. So if I come under the
transform controls here, I'm just going to go if you
go just outside, you know, if you just click
here, you can move it, but if you go just outside, you see how the cursor
changes to that rotate icon, then you can start
to rotate something. And if you hold down
shift when you rotate, then that sort of
constrains it to 15 degree moves at a time, so I can get it exactly back
to something like this. I'll bring it up here.
And now we sort of have this area in
between this gray is sort of what I'm
looking to create another frame where we could put anything
we wanted in there. So again, we have them
all on separate layers, but I know if I group them
all together, then suddenly, I'll be able to do
what we did before and just select that gray
that's in between. So let me select both
of these layers. So click one, click the
other, hit Control J. Now, with two layers selected, I just copy two layers. So I'll just turn off those
top two copies for a minute. Let me just bring
my gray background below these two new ones, and then clicking on
the top one here, Control E, merge down. Control E, merge down again. Now we have one layer that just has all of
that on one layer. Let's grab our magic
wand tool, boom, And now what's happened here
is I think I have one of these edges that's just not quite all the
way to the edge. You see how it's going beyond. So let me just hit Control
D. Let me hit Control Z. You hear me doing Control Z a lot because it's
a great way to step back through prior
commands. So Control Z. Now we have these layers, these lines again on the
same on a different layer. So let me just hit
Control T. Whoops. Let me just use the
transform controls there. I drag it out slightly this way. If I just grab the edge and drag it out slightly,
grab the edge, drag it out slightly
because somewhere, I feel like it was there was a little bit of gray
open space at the side. So let me hit Enter to
commit that change. Now I'll go ahead and hit
Control E to merge down. So now we have them
again on one layer. Let's undo the transform. We don't need to
see that anymore. But now let's grab this
magic wand tool and it's selected
everything because I did not have contiguous checks. So let's turn on contiguous. Let's go ahead and do this, so it's going to be
doing a new selection. We'll click there again with the magic wand tool,
and there we go. So now, this is going
to be the area that we're going to turn
into our mask. So we'll come under
the path icon here, and we're going to choose
this selection to path. And then if we come back over to our layers, we
can come on here. But actually, this time
I'm going to create a new layer, such
as a new layer, at back space to
fill with black, and then we'll come under layer, vector mask and current path. So that's going to take care of what's going to become
our frame in Canada. But now I got to sort of bring
back the other elements. So up top here, I have
these two black things, and I also have them
on this one here. So let me just start by
making those a selection. So again, I can use
my magic wand tool. Again, I'm going
to use this time, I'll turn off contiguous.
I'll click on the Black. So now I have the
Black selected. And if you remember, somewhere
back in this project, if I bring it to the foreground, I still have that paper texture. So what we're going to do is use that Control J trick to
copy just out of that, cut out of this,
just what selected. So Control J, and it's going to put that
up on a new layer. So now that's going
to be our paper edge. And so now we have our mask. We have our paper edge. But then I also want
to have a drop shadow. So let's come here
and this time, let's go back and
again, use this. But this time, we will
turn on contiguous, so I can turn on
just this top edge because I'm thinking actually, I was on the wrong
layer when I did that, so let me come down
here and do this again. So now I have that selected. And I'll just go to a
new layer up top of everything and do back space
to fill with that color. And then if I use my move tool, I can just scoot that
up a little bit. I want to make sure
that I don't push it beyond the image,
but there we go. And so then I can come under
that layer here and I could go filter blur, gaussian blur. So I'm just creating
what's going to be sort of our drop shadow layer. This one I might want
to be really blurred. So let's make it
something like let's go something like maybe something like that,
and I'll click Okay. Now, remember, I'm ultimately going to want to
reposition this, but I want it to be separate
now so that it doesn't overlap with anything so I can bring it into
Canvas separately. So let me just change what
I have turned on here. So we have this layer here, which is going to be
the mask area itself. We have this layer here, which is just our paper edges. And then this color
is black here. So let me just change
that the white so we can better see how our drop shadow is going to
come into play. So I'll just hit control back space to fill with my background
color, which is white. It doesn't matter what the
color is because again, it's just what the vector mask is. That's what's
going to bring in. And then with the
drop shadow itself, I think, ultimately, yes, I'll bring it down,
something like this, and it'll be behind
this layer here. So let's drag it behind so we can see
a little bit better. So it'll be something like that. If the light's coming
from sort of the top, then you wouldn't get a
drop shadow down here. So I think I'm just
going to have it on this one part of our frame. I could put something where I did a drop shadow here as well. But I think for this example, we'll just leave it like that. But again, I am going to move it up out of the way for now. So let me actually
try to do that again. Move it up out of
the way for now just so it gets taken
into Canvas separately. We have these three
layers, and so I'm going to go
ahead and do file, and I'm going to
do export as PDF. And then I will see you back in Campa and we'll take a
look at this real quick. So here we are back in Campa. Here are those three elements
that we just brought over. Some is going to hit
Control C to copy them all. We'll just paste them
into this project here. So paste them. Then, of course, I could come and
reposition things. So let's just go real quick
under position menu here. We'll grab this drop shadow. We know we're going
to bring that down. I also want to make it a
little bit more subtle. So something like that, nudge
it up a little bit, maybe. Whoops, I lost my layer, nudge it up a little bit using my arrow keys, maybe
something like that. And then we could
take all of these. First, let's take
the frame itself. Let's put it on top temporarily, just show you now that we
do have this as a frame. We could get rid of that white. I wanted a different color, if we wanted a
different texture. We'll just go look for
something like antique paper. We searched for that recently.
So we'll do that search. We'll see all photos graphics. Let's look at
photos, and then we could just start trying some
different things in here. This could even be like
newspaper. It could be whatever. Of course, with all
of these things here, we want the frame behind
this and behind the shadow. But then we could
group all these together or select
them all together, move it around. Woops not have them all
selected. There we go. Now we can move this around, so it's positioned
differently on our photo, something like down here. So again, just different
ideas so you can start to take advantage of
this ability that you have now to create
custom frames, this ability you
have now for due working with things like drop shadows and things like that. And actually, let me
group this for a second. I think now because I have a
different thing behind here, I would actually maybe
make my drop shadow. A little bit
stronger. But this is the advantage you have of bringing things in
here separately, because now suddenly that drop shadow layer is its own layer, which I can adjust
independently. So you just have a lot more
flexibility when you learn this process of being
able to step out of Canva quickly to do things
Canva is not good at, and then bring those
in as assets you can work with in Canva and get them to do
the things you want. Okay? So I hope you
learn from this lesson, and I will see you
in the next video.
24. Custom Frame Challenge: Okay, welcome to your
next challenge exercise. And since we've been
creating custom frames in this section of the course, you guessed it, I'm
going to have to create a custom frame in
this challenge. So it can be absolutely
anything you want. You can use one of the ideas we discussed in this section, and you're also welcome to just come up with
your own ideas. So here are a few more ideas, just to help you come
up with something. And maybe you're working
on something already, and you've already
created something you want to share. That's
great as well. But you could do
something where you're playing around with edge
effects on the frame, so you could do something
where the frame has some interesting edges. You could do something
like this here where you create some sort of
grid effect like this. So then maybe I'd come in and resize that up so we
can see your eyes. So you could play around
with something like that. Here's one that is sort
of a torn paper effect, and this actually
has a frame here. And then it also has a
frame here where you can put in a different texture if I actually get to my
position layers and see that. This bottom one here
should also be a frame. So let's see. I
think I just need to move it to the top for a
second, so I can access it There we go, detached image, you can see that it's
actually two frames. You could create something
where you take something into photope and actually
create two frames that you're going to use in
concert with each other. Here's another one that's just this dispersion
pixel effect here, so I can see that yes, this is a frame here, so you could play around with
something like that. Of course, you could take any shape and play
on this theme, or if I took something
like this into Photop, it would be very easy to select just the non white areas
and turn that into a frame, so you'd have something
that had some spacing between the
different shapes. And of course, I might decide even before
I take this out. Maybe I want the shapes
to be a lot bigger, so you can size it up
before you go out of canva into photope thinking about what sort of effect
you're going for. So any sort of abstract
shapes you can play around with come up with something cool that you might want
to turn into a frame. Of course, any photo,
you can sort of use the background
remover and take any photo and cut
out the subject and turn that subject
into a frame. This would be especially
useful if say, I wanted to work with this
person here and apply an overlay just on the person and I wanted to be able to contain that overlay, then I could use
that frame so that I could put the frame
on top of her and then you have a custom
overlay in that frame. So you could do
something like that. Again, anything
with edge effects, which we talked
about previously, something like this,
but you could find some ripped paper or some other interesting
canva elements. Of course, if I take
this out of here, it's very easy to just select this inside a
program like Photop, make a selection
around this and then turn that into the path
and into the frame. What about something like a ripped paper
effect where there's actually a hole where the
frame itself is this, but then you have a hole
in the frame that shows through to a layer below.
That could be interesting. And of course, any
sort of shape, so you could create something
with this butterfly, any kind of shape, any kind of object, you could
turn into a frame. So it really is whatever
you want in this exercise. And then, of course, you know, show us how
you're using that frame. So maybe if I did this
frame here, you know, do I want to
duplicate it and use it to have a background
shadow as well? You know the technique for that. Maybe you want to have some other graphical elements
behind your frame, some splatter effects or
something totally different. So let us know how you're using your frame as well.
I'd love to see that. And then you can come up
under the share menu, and you can come down
here and if you want, you can grab a public view link. This lets people look
at your project. They can't make edits, but
they can look at your project, or if you want, you can
download appropriate media. And then here in Skill
Share just come under whatever challenge you happen
to be currently working on, then come under here and come down to this
discussion tab, and then you can actually
use any of these tabs, start conversation, ask
question share project. Any of those are going
to work. Just come in here and either insert the link if you have
that public view link or if you download
it some media to share, use this ad media and you can
upload your media that way. And that way, we can
check out your challenge. We can all get
inspiration from each other as we share
challenges here. And you can offer critiques,
just keep your critiques friendly and try to be
as helpful as possible. Alright, I'll see
you the next lesson.
25. Advanced Compositing Fundamentals: Section of the course,
we're going to talk about advanced compositing. And all we really
mean by that is starting to put
different elements or different photos together
into one photo one design. Now, this does come
with a word of warning because this is the
area where I most see Canva users go too far and try to do things
in Canva that really they should be attempting
in another program like Photoshop or like at least Photop which we're learning a little
bit about in this course. So when I see other Canva users attempting
this sort of thing, they're either spending way
too much time on something that could have been done very
easily in another program, or they're missing some of
the basic components that should go into creating
a good photo composite. And we're going to talk about some of those basic components, those basic fundamental
principles you should apply in this section
of the course. And then we'll also talk about
what you can do in Canva. And then, of course, I'm
always going to advise you on times when you
should go beyond Canva. Because Canva has
its limitations, so we're going to push
it right to the brink. But then we have to remember, Hey, there are other
tools out there. Let's not spend tons and tons of time on something when we just don't have
the tools we need, and we need to step
outside of Canva, okay? But we are going to see how
much is possible with Canva, and we're sort of
going to push it to its limits in this
section of the course. Okay, so let's continue on, and let's talk about
these basic fundamentals that should go into creating a photocosite when
you're putting different elements together
into one single scene. Okay, so let's look at the
photos I have on screen now. And let's imagine I have
this scene here of sort of a highway through this
foggy forest here, and let's imagine I wanted
to put a car in this scene. Well, which one of these cars of these two choices would
I put in the scene? Well, unless I wanted
to pretend like this car had got into an accident and flipped
up on its side, This car is not going
to make a lot of sense because the
top down perspective that this photo has been shot in just does not match at all
with the scene here, right? So, this car is
probably going to make a better choice. We'll
still have to try it out. But that's the first
thing to keep in mind is that you have to
match perspective. If the perspective is just totally different
between the two images, you're not going
to get it to work, no matter what you try, you're not going to be able to fool the viewer's eye, okay? So that's the first thing to think about is you want to find two different images that have the same perspective so
that's going to match up. You can't have one that's shot with a camera pointing top down, and you can't have another one where the camera was pointing up and then expect those
two images to go together, and for it to work visually
with the viewer's eye. You're just not going to be able to trick the viewer's eye. We're used to looking
through our eyes and seeing something
that looks realistic. If you do something
that's just totally different, that's
not going to work. So perspective is the first thing I want you
to keep in mind. When you're searching for
elements available in Canva, or maybe you're
using text to image, you can keep in mind
that perspective and give it some keywords
that's maybe going to help it. So maybe you would type in
something like top down, if you were looking for
this shot or aerial shot, and if you were
looking for this, maybe you would
type in something like car headlights or front
of car or straight on. So you can try to use keywords
when you're searching, so you're going to
have better results in terms of finding images, they're going to
match up perspective wise for what you're
trying to do. Okay, so you decide you're
going to go with this car, so we're going to place
that car in the scene. Now, if we place
it here at first, well, I can see
several problems. But the first problem is,
the scale is just off. I can see that this car
basically stretches from side of the road to
the center of the road. We know that that's
not quite right. So size wise, it's not
quite matching up. And that's part of
perspective is scale. The scales have to match. So we can't have this car
where it's way too big. We can't have this car
where it's way too small. We have to get to scale right, so you're thinking
about perspective, and you're thinking about scale. Okay, so we'll
size the car down. So here it is size down. Looks like more
appropriate in terms of how it fits between
the lane lines. But if we look at it now, we still have a
perspective problem. Because if you look
at this photo here, it's really shot sort of with the camera right in the
center of the frame. You can tell that
by how straight this line of the road is here. And if we look at the
car, it's the same thing. If this car was actually in the photo of where this
camera position was, you would expect to
see a little bit of the right side of
the car because the camera is positioned
over here in the center of the road and the car is in
the left side of the road. So perspective, you
really have to get right. So that's not going to work
where the car is there. So if we advance to the
next frame and we put the car in the center of the
frame on this road here, we could even move
it over a little bit more so we could move it over a little bit
more like this. Now, suddenly, it
looks like, Okay, perspective wise, we have the car where it needs
to be in the frame. Of course, contextually,
now we have a little bit of a
problem because we have this road line here, and we're not used to seeing a car drive on the
center of the road. Now, could a car be on
the center of the road? Yes, it could, but it is a contextual clue that
works against us. So if I was trying to make a
convincing composite here, I would either look
for a different car, and if I was going
to use for this car, I would try to get rid
of that lane line. So, in Canva, this is
maybe a case where you could use that
magic eraser tool. So if I come in here now
and I select the photo here and we edit the photo
and we use this magic eraser, I could grab a brush. And I could come
in here and just go right over the
center line here. This is the part that I'm
trying to get out of here. And what this magic eraser does is it just goes
ahead and it tries to replace something in your
photo that you brush over using context clues from the
other parts of the image. So if I do something like that, since this is really
pretty simple, a basic pattern
on the road here, it's going to be able to do
a reasonable job of that. Now I'll missed a
little bit here, so I would go on, and you might have to take a
couple of passes of this. And again, this is
not a perfect tool. And again, there are tools and photoshop that work better. But in Canva, you could
do something like that. And so now suddenly we
can have the image. Where we've gotten
rid of that one contextual clue against us. Now the perspective
of the car and the perspective of the
photo are lined up, so we're going to
have a better match. So if we go to the
next image here, you see I'm still tinkering
with the position slightly. But you can see now
I've attempted to adjust the image just so the lighting and
saturation of this car fits a little bit better
with this scene here. So if I click on the photo and
we go in under edit photo, all I did was come under
the adjust slider here, and under this adjust slider, you know, I brought the
brightness and contrast down. I brought the highlights down. I brought the whites down. I did a saturation adjustment. Made all these edits and
attempt to make the color and the lighting of this scene
match a little bit better. Now I don't know if I've
done a perfect job, but it certainly is much better than here where the car is just clearly too blue, too saturated. And so we've made some progress. Now, are we there yet? No. Because if we
look at this car, even though it's a cloudy day and you wouldn't
have harsh shadows, you would absolutely
have some shadows here underneath the car. So you can't have
a situation where the object doesn't interact at all with the
environment around it. It's just going to be obvious. It's just sort of
sitting flat here. It doesn't really sit
in the scene well, so we're going to
still have to do something add some shadows, add some other things to make this really live
in this environment. Okay, so let's attempt to add a drop shadow
underneath this car. Now, word of caution, when we start to do
this sort of edit, this is where photoshop just
has way more powerful tools. Even Photop has a lot
more powerful tools when you start to manipulate
pixels like this. You are very limited
inside of Canva. But I am going to attempt
to do it in Canva. I'm going to attempt
to do everything in this example in Canva, because we're pushing it
just to see what's possible. It's good to play like
this, but then you have to realize at a point if
there is a better tool, sometimes you have to
use that other tool. But so we're going to
try to do this in Canva, and I'm going to rely some
of the old tricks I've used throughout this course,
some of my favorites. So what I'm going to
do is we're going to come in here and
we're going to just start by duplicating this so we'll just duplicate this layer. And now we're working
on this car here. And what I'm going to
do is I'm going to come in here and we're
going to edit this photo, and we're going to do
a couple of things. So first things, the background, we already removed
the background before I started this example. So this car was in
a different scene. So we've cut the car out. But anytime you
remove a background, you can still come back
under the background, remove or tool and you can
make additional adjustments. You can race to erase
more of the subject. You can restore to bring
back more of the subject. And you can turn on this
show original image, which just shows like a
semi transparent version of your original
if you want that. Now, there are
definitely things I don't like about this interface. For one, in my brush size,
I have to adjust it here. I can't do it on the fly with my bracket keys like I
can in other software. I can't click once and shift
click to do a straight line. You can do that in
other software. But we're still going to
see what we can do in here. And the reason why I like
to do this technique this way is because to do
an accurate drop shadow, you have to know where
the car is, right? So, if you want to
attempt this in Canva, I don't want to just search
for drop shadow elements. Sometimes if it's just
a rectangular shape, you could get away with it. Not doing it custom like this, but a lot of times you'd want to come in here
and actually see where your subject is because you have to know where the
shadow is going to be. So I'm going to use
this restore option. I'm going to come here and
I'm going to draw here. And again, this is
where if I could shift click into
a straight line, I absolutely would, but I'll
attempt to bring something, and I'm going to go
a little bit beyond the tires here, we're
not worrying about if it's totally straight because we're going
to blur this, but we'll do something like that to attempt to have
a drop shadow, and of course, you can come
in here and you can erase things if you think
you went too far. Again, not something I would typically try here
inside of Canada, but we're pushing it
as far as we can. So let me just do a little
bit more on the front here. Just attempting to get
something in the rough shape. Again, sometimes if you
do really quick strokes, then maybe you have a better chance to go
in a straight line. If you do have a a walk m tablet or something. You could use that. But again, most people aren't
going to have that. So this is just one
of those things where Canva is not going
to be the best tool, but we are going to see
what we can get done. I'm not going to spend
too much time on that. But then I also have this here. I don't need the
whole top of the car. So I want to definitely erase some of the back of this car, places where I don't want
the blur to show up. We're going to race here. We're going to race
there. We want this to just sort of be
the basic shape here. I don't want it to show
on the sides too much. I'm sort of cut it
inwards like this. Same thing on this side, maybe just cut it inwards slightly. Let's try this. It's hard to
see with the original now. Let's turn that off.
Let's try this. So I know it looks nothing
like a drop shadow, but this is where we're going to use these different tools, these different tricks
we have in concert. Okay, so we're going to do that. Next thing we're going to
do is we're going to come here and we're going
to go under D atone. You've probably seen me
do all this before in the earlier sections of the
course. So come under here. We're going to change
this totally to black, and make sure everything's
totally black. Okay. So now we have a
totally black image there. And then one more time, we're going to come back and we're going to fool with the
blur and the whole image. And this is where we're getting that blurred drop shadow look. So you figure out where and here the intensity is going
to be what you want it. We'll try something
like that to start. And then I'm going
to come back here, and then we're going to
take all of this and we're going to push
it behind the car. And now suddenly, you can
see what I was getting at. So let me zoom in a lot here. Let me grab that
and try to move it into better position
under the car, so it's just under the
car in the wheels. Now, it's peeking out a
little bit at the side, but we're going to call
that good enough for now. I just wanted to give you
an idea how I was able to go in and add this
drop shadow, okay? So just looking at that, even
though it's not perfect, it makes the car sit in
the scene a lot more realistically when you have that when
you don't have that. Now, there is some shadow
creeping out here and here, which you would not
get necessarily. But still, that's a step to just make this fit a little
bit better in this scene. Okay, so now we have
a little bit of drop shadow underneath our car, and we certainly
come a long way. If we just go back
now and look at the very beginning in the
different stages of this, we've done a lot to start
to think about perspective, scale, think about having it
fit into our environment, working on the lighting, okay? So these are all the things
you do to make things better. But we can go even further. I like to think
about atmosphere. In other words, what are
some atmospheric elements that can sort of unify
your scene together? Because sometimes when you're
doing composites like this, you're not going to get
everything perfect. And so, to some degree, it's about adding these
other little elements to unify things together. And maybe also to hide
some of your mistakes. So let's do a few
additional things just to push this even further. So the next thing I did, well, adjustments to my
shadow slightly. So once you have
that shadow here, you can still come in
here, and of course, we can pull this
transparency up and down. And then the next thing I did was using the same technique. I went in and I added
some headlights, because if it is lower
light like this, clearly the car had
head lights on, so we might see the beams of the head lights
something like this. Now, for these, I use
that same technique, you saw me use for the drop
shadow underneath the car. So I've actually
looked at one of these layers and we go in
and we edit this photo. We can see we have
the same things done. So, in other words, this one
does not have a duotone, but there is a blur here. So if I take that blur
all the way down, then suddenly we
just see this white. And actually, if I come in
under the background remover, and we actually restore
the whole image. So let's reset
this. Reset tools. Yes, you'll see that this image here was actually this
image of a post it note. I rotated it the way I
wanted the beam to go. I used those other tools. So it's amazing the little
tricks you can do to turn something into a
different effect using that duotone,
using that blur tool. Now, of course, I do
feel like this is a little bit of a
convoluted method once you start to learn photoshop or Photop if you're just
using the free version. So I'm not saying do
this all the time, but it is something that's
possible here inside of Canva if you just want to play around with
that technique. And then the last two steps
I took to try to make this a little bit more of a
convincing composite was one. I just added some
more clouds and fog. So I just searched under
different elements, and I added some clouds and fog. So if I take the transparency
down on this layer, I was just trying to bring in a little bit more
of that atmosphere. Again, something that's
going to be a little bit of a unifying element
across the whole scene. And then the same idea, I
brought in some texture. So if I take this layer here and I turn the transparency
all the way up, it's actually this layer here, and I brought it down. So it's really subtle. I
don't know if I love it. But again, the idea is to just bring in a little
bit more texture, a little bit more atmosphere and have it be a
unifying element. So that you have that same
texture over the car. You have the same texture
over your background scene. Suddenly, they feel
more cohesive. Suddenly, it's a little
it's something that's a little bit easier to
sell to your audience. It's a little bit
more believable that this could be
the same image. If I was going to do
a final thing here, perhaps I could do
something like this. So what I'll do is I'll
take this whole image now, and I'm going to
download it as a PNG. So we're going to P and G. We're just going to do
this current page. So let me come down here and make sure I have
this current page. And I'll go ahead and
I'll download this, and then I'm going to re
upload it back into Canva, just so I have another version here with all these
elements together, since right now, they're
all on separate layers. But now that I want
to do one thing that affects the whole image, I can just have one layer
that I lay over top. I'm going to let that
download wherever it is fine. And then, of course,
I'm just going to bring that right back in. So I'll just drag it back in. And now I have this whole
image together here. So let me let that
load for a second, and then we'll pop that
back into our scene, and I'll let me fit
to our view again, and we'll take that and have it stretch from
corner to corner. So it's right over top. And then what I could
do is I could come in here and I could do
a couple of things. So one, I could just come
under edit photo adjust and maybe I'm messing with
the temperature or the tint. Or I could also go in
and use that Duotone. But let's just say I'm messing with the tint,
something like this. And, of course, that's
way too strong, but I could come in
here and I could adjust the
transparency slightly. So what you're basically
trying to do here is just give a little bit of a
color grade to your image. Once again, you're
just trying to make a more cohesive element so that it really feels like
the scene belongs together. So let me just go full screen
here and just really quick review just to walk through this here in Canvas present mode. So you're paying attention to the scale and perspective
because those are going to be crucial and getting your scenes
to match together. Obviously, like the
lane lines here, you're looking for
contextual clues, things that are going
to help your story. And then, of course, things
like adding in drop shadows, things like that,
lighting, so lighting and color are going
to play a big role. And then at the end, you're also just looking for
those atmospheric elements. So things like overlays
that you can put on top, just to blend things together, and then color
grading at the end, if you want to do a final step. So just look at the
beginning here, basically, going from this to
going for like this, you definitely have a
more convincing story with this image here.
Now, is it perfect? Of course not, but you get
the idea when you push Canva, you can really take
things a long way. Now, should you always do Canva. That's where I want you to start to think about your workflow, what makes sense for you
and be willing to learn other tools if there's a
better way to get things done. Now, I did one more
example. We're not going to go through
this whole example, but for something
like this, obviously, you'd be looking for a car that fits a
little differently. And then obviously, you
would start to do some of those same things where you try to get to fit better
to the scene. Now, this one, I definitely
think doesn't work totally, but you get some of the ideas, some of the things I
was trying to do to get these scenes to blend together. Okay,
thanks for watching. This has basically
been an overview of the type of things
you should think about when you're trying to combine images like
this in Canva. And then the next lesson or two, we'll work through a
few more examples, so I will see you there.
26. Creative Example Creating a Movie Poster: Once you start to learn some of these compositing techniques, then you can start to put
them to use on fun projects, where you start combining
multiple objects together into one design. It's fun challenging
yourself in this way, and one type of challenge you could give yourself to practice these skills would be a
movie poster redesign. Now, of course, on a lot
of real world projects, you're going to have your
own unique creative brief, and you want to be careful about copying other
people's work. But looking at other
people's work is a great way to draw
inspiration and trying to recreate something
you see can be a fun challenge and a good way to improve your design skills. So, for fun, I've selected
this Dune poster design, which I think is pretty cool. And so I'm going to try to create something
similar in Canva. The Dune book by Frank Herbert has long been one of
my favorite books. If you're a fan of
science fiction genre, then I highly recommend it. And, of course,
as I record this, we're about a month away from the release of
another Dune movie, so it's a good time for doing
something Dune related. But the real point is
practicing your skills. Now, this poster isn't
really complicated. There aren't tons of
elements going on here, and that's a good thing
because remember, I've given you a
warning when it comes to complex selections
and blending. That's not what Canvas
strong suit is. So while it's a fun
sort of project to take on to see how far
we can push Canva, I do also really encourage you if you like this
sort of thing to invest in learning software
like Photoshop or at least Photop
so that you'll start to understand
when you can save a lot of time by stepping
outside of Canva. But for this exercise, I attempted to stay
completely in Canva. Okay, so I ended up creating multiple versions
of this poster. We're going to look at
two of those versions in this video where I just go through my layers
and show you how I broke it down and
how I put it together, so you get some ideas of
the techniques I was using. And then in the next video, I'm going to go on and
create a third version, and we'll do that
one from scratch just so you can see
the whole process. Okay? But so here is the
first version I created here. So again, tried to keep it relatively simple with a main
subject in the foreground. And then I have sort
of this worm here, this drag in here, just for fun. And then I wanted to keep
that element that we had in this of just basically a
big sun in the background. The mine is not exactly
the same, but you can see, I went for a pretty
simple design here, and we have some other things in here if we really zoom in. So let me just zoom in
here to go to 100%. And if we zoom into 100%, we can see that if we really
start to look at that, we have some splatter here. I have sort of a castle here, I have another sort of land
dune or a mountain here. And then, of course,
another range here. So again, I'm just taking
some different elements, pushing them into
the background, just trying to give
this a little depth. But I kept it
relatively simple here. There's nothing
crazy going on here, not tons and tons and tons of elements because
you can easily get carried away and get
to the point where canvas not going to be the best program if you go too far. But let's zoom out here to
fit this back in the screen, and we'll look at some of the different
layers I have here. Just go under a position
here and I look at this position, and
then we look here. So the first grouping here, that is just my border here. Now, the border, the
white edges here, I just created with four different rectangles
that I grouped together. So if I come in here and we turn the transparency
on and off for that, you see that it really just helps push things
into the design. So I was really just
using that edge there just to sort of
frame my whole image. I like to put that sort of frame a lot of times on a poster. I feel like it looks good. And then if we go
through the layers here, a lot of these
layers here are just helping sort of with atmosphere, lighting, texture, things we've talked about before
in this course. So if we look at
this one, this is a semi transparent layer, it's just bringing a little
bit of darkness there, especially on the bottom
of the image there. And then my next layer
there is just a text. Now, this dune text here, A lot of times if you're trying to replicate a movie font, you might have trouble
finding the exact font. You can experiment around, look for Canva fonts
that are similar. You can use websites liked font.com that will help
you look for a font, you can upload a font or an image of a font
to that website, and it will attempt to find similar fonts and tell
you what those fonts are. On there are lots of
websites like that, you can just do some sort of
Google search where you say, find this font or something
along those lines. It's going to bring up font similar websites
that will help you. You can upload a font, and you can look for similar fonts. Now, if I remember correctly, I think I had trouble finding a va font that would
work for this. So I think this is
something I just ended up creating on my own,
this basic shape. And the cool thing about this is the shape is just rotated,
of course, for each letter. So each letter is exactly the same just in a
different orientation. But it does end up looking
like the word doing here. So that's pretty cool. One
note about fonts if you start using other sites
for fonts or images. Of course, when you're
just playing like this, you don't have to worry
about things too much, but if you ever
start using things for commercial projects, make sure you then
pay attention to any usage rights
attached to that f attached to that image
because you do not want to be responsible for
copyright violation. Below my text grouping, I then have a few more layers, which are just sort
of atmosphere. So if I dial these
up, you can see sort of that boca glow
in the foreground. And I have that dialed
back a fair bit. But again, these sorts
of layers are again, just about setting the
atmosphere and sort of adding that unifying element that will start to sort of bring your
design elements together. And again, same with this here, if we dial this all the way up, we can see I only
have it at 15%, and it is just a texture layer. You've seen me do a lot
of this in this course, where we started creating
some of our own textures, but you can find these age, paper textures and other things where you can bring them
over top of something. And if you really bring
that transparency down, then you're just sort of
bringing in a little texture, and it's subtle, but it really does help unify the
elements on the page. Everything behind that layer
is getting that texture. So I don't have it over top
of my text or my borders, but everything else is getting that texture applied to it. So it just sort of does
bring things together. Below those layers,
that's where we have this female warrior in
the foreground here. So let me just zoom
in a little bit so we can see that
slightly better here. And again, with
these layers here, I duplicated the layer. And so I think with this, I actually started
with a Canva image. I think I have it open here. So I started with this image. I actually searched in Canva,
and I found this image. Now, I don't think it fits totally with maybe
the Dun theme. But when you're
having fun like this, creating a poster like this, you really can take your
own creative liberties. So I decided I would go ahead
and use this image here. So I cut her out
from the background, then I duplicated her. And this front layer here
that we're seeing here, this is just showing it 18%, but I actually used
that Duotone trick you've seen me do before, and this is just to bring
a little bit of that sort of orange color sort
of on my subject here, so maybe it fits a little
bit more with the scene. And then this layer
here is just normal. But again, with this
one, this layer here, if I look at this image here, so if I go in her edit photo, and I go under the
adjust menu here. You see, I have adjusted
temperature tint shadows whites. A lot of things here to again, just try to make her sit and fit better with
the background. You've seen me do those color adjustments and talk
about that before. You really have to get
colors to match up at least reasonably if it's going to
be a more believable scene. If I were to just hit the
reset adjustments here, then you can see
that maybe she now isn't quite fitting as well with the scene with the light in the
back, she's back lit. So maybe she would have a
few more shadows up front. So I just felt like
I needed to make some adjustments to make her fit a little bit
better with the scene. If I come back out, I'll hit Control Z just to
undo that reset. So let's see, there we
go. So now we have her back fitting maybe a little
bit better with the scene. But let's come back here so we can see our layers once again. Now, this layer below her
is just a slight shadow, which I applied on the ground
there where her boot is. Now, I don't even know
if I needed this because I sort of have her standing at the very
edge of the frame. I can turn this all the way
down and all the way up, and it's making a
little difference. But since those borders are hiding most of it,
not such a huge deal. But if you remember
from the last lesson in the car example with the
dropshd on the road, sometimes these shadows are
really going to be vital to making your sort of image fit with the scene you're
trying to put it in, so you do have to pay attention
to shadows like this. Now, moving on to
below this here, let's look at this
layer here, 47%. Again, just bringing in
some of that sort of fog in the foreground, just another little
thing to bring some atmosphere to sort
of blend things together. So I do a lot of these little
layers a lot of the time, just to again, help
blend things together. They sort of have
a unifying effect. So I usually do bring in
some different textures and atmosphere like that. Now, this image here, you
have to zoom way, way in. Can't even really see it here unless we're zoomed into 100%, maybe even more than 100%. But if you can see that
there's a horse right here. I was going for this castle idea with a horse in the
background way on the hill. So I was paying attention
to things like scale. And because he's way
in the background, and he doesn't have
anything behind him, I was able to just
take his transparency here and really push the
transparency way down. Because if you're
looking at something like this way off
in the distance, because of all the atmosphere and atmospheric haze that
you're looking through, it's going to have less detail. It's going to have
less contrast. It's going to start to take on the color of the background. So I pushed all those
things way down. Again, both that and the castle, which I have below it here, those are both
elements that don't necessarily fit
with this design, and I probably didn't need them. But sometimes you're having fun, and it's okay to play around. So go ahead and do whatever
you want with your design, especially when
you're just playing, you can always take things out later, so just have fun with it. Below this, actually have a drop shadow layer for the horse, which, again, getting
carried away, I think, because I don't
think you're really going to notice this at all, given how far this is
in the background, but just thinking of something
that's backlit like that, thinking maybe there
would be a shadow. Now, really, if the sun is
that low on the horizon, you wouldn't necessarily
get this shadow. But maybe shadows are
something you have to be tricky with because
it's easy to get them wrong. But it is fun to play around, and they can bring a
realistic element when you're blending things together.
Continuing on here. If I fit the screen again, expand out again,
this layer here. If we turn this one
on and off 100%, you can see that's just the
dunes in the foreground. I needed to have this
foreground element, just to sort of set
the scene here. Below that, we have
our castle layer. So again, castle, and we
talked about how we did that, just pushed it to
the background. Obviously, I extracted it from a larger image, pushed
it to the background, just really lowered
down the transparency, just to make it fit better
in the background there. Then all these layers
here, and this. This are just the
splatter elements that are coming up
by my sandworm. With all of these, I
brought them in here. Some of them are
full transparency. Other ones, I may have dialed back the transparency
a little bit, or at least I changed the size, I changed the orientation. This one here, I lowered down the transparency just
so it wasn't quite as obvious, made it a little bit more subtle. So I
have those layers. And then that brings
us to the next layer, which is this sandworm
creature here. And this element
actually took me a decent amount of
time to find here. So, before you can
search within cama, that's where I found
this female here. But for something like this, you could also turn to AI art. So I think I tried some
text image. Go on here. Some of these text image
options generate your own. I probably tried
something trying to create some sort of sandworm. I was not really looking I was not really getting
results that I liked. So I actually ended up doing a little research and
finding this creature here, which is actually a sea lamprey, so an ancient atlantic fish that has this look
here in its mouth. So this is just to
illustrate that sometimes you do
have to be creative, and so sometimes you're really
going to have to work to define those design elements that fit well with
your composite. This one I thought sort
of fit with the look I was going for that
you see a little bit in the Dune movie with that big circular mouth and something that looks like
it could be rows of teeth. So I ended up going
with this image here, and all I did was I extracted
this from the background. Again, used that
trick of duplicating, applying a duet with an orange
tone to one of the images. And then I overlaid it on top,
lowered the transparency, and I rotated everything
a little bit here, and we ended up getting this
look in the background here. Now, if I come to
position again, and let me click on that again. I'll show you that
this layer here is actually at 83% transparency. So if I turn it way up here, maybe it was getting
a little too strong. I wanted to put it to the
background a little bit, so I started to
lower it down and started to fall with that
transparency a little bit, just to push it
since it's more of a background element and have it blend with the background
a little bit more. So maybe even a little lower than what I have it. Maybe 65. I like that better. But
then because of that, you have to pay attention to other elements of your design. So if I zoom in here,
I sort of had this, if you can see it, sort of this horizon line of mountains here. But because I was lowering
the transparency, they were then showing through. My worm here. So
what I did then is, if I look in the
position layers again, I think I split those. So if I look at
here, if I look at this element here
below that right here, this is sort of that
horizon line here. And then on the other one here, I think that's a duplicate, which I actually forgot to
push to the other side. I would maybe want to do
something more like this, so it sort of blends a
little bit better and looks like maybe the horizon
line is coming along here, Then, of course, you
wouldn't see it below here. If you start to lower the
transparency of something, then you have to be
careful if you have hard lines behind it that
they're not showing through, where realistically, they
wouldn't show through. So that's most of
the elements here. Let's see what
else we have here. Then we have sort of
this one here, which, if I look at this layer here, let me fit this back to screen. If I look at this layer here, all this layer is doing is bringing in again
some more shadows to the bottom of our image. Then we have the dragon
image, which is just for fun. Now, this may have been
a fantasy art one. I can't remember whether
I searched for this or whether I used that
text to image tool. But again, since there's nothing behind it there
except for that sun, which isn't really
showing through, lower down the
transparency a little bit, because that would be a
little too bold there. So just have it fade and really start to fit in
with that background. It would be behind some of these clouds and some of this fog. And then the bottom layer here, this big circular element, All I've really done
there is I've found a few different
circular objects that I could bring in and then
play with the blur, play with the transparency, lay them over top of each other. So if I look here, I
had this object here, which is what we're
seeing here, just enlarged and with
the blur applied. And the same thing down here, I have this object, which
I then apply a blur to. So if we look at that here,
that's all we have here, and these are sort of layered
on top of each other. So this one's at 75%. So if I dial it up, I can get different looks if
I dial it down. You can see I have the
other one behind it. So you can find what works. That's kind of cool
there, but I think I decided to lower it down to 75%. Actually, maybe like
it applied even more. So maybe I'll dial
it up even more. But let's go down so we
get a little bit of that behind texture showing
through. So maybe 81. And then again, here, same thing with this, 100% transparency. It's just adding a little
bit more different color, maybe bringing a little
texture through. And then here on the bottom and the same thing, applying this, which I think we're not
seeing this as much because now we have the transparency
turned up there. And then one more
on the bottom here, which if we look
at this one here, lower down the
transparency, bring it up. You can see if I
bring it up all the way, we get that hard edge. If I lower it down, we don't. So that's sort of just affecting whether we get a little bit more of an edge on our
sort of sunset sun there. So all of these different things you can bring in and play with, but you get the idea of how we're able to take all
these separate elements, bring them together into
this cool design here. Now, I'll show you this and I'll show you my next design as well. So here's my next design. For this one, you can see I use some of the same elements. But again, I found a
different image to make this element here in the
foreground just sort of pop out. I did some different things, but I use all the
same techniques here. So I won't show you all
the different layers here, but the same techniques
I used to create this that I used to
create this poster here. And as a final thing here, I'll go full screen and show you what these look
like full screen. So here's a look at version one. And then if I go forward
here to the next slide, we can see the second
version I came up with. And the next part
of this course, when we get to the
section on animation, I'll show you how
you can take one of these poster designs
and push it even farther into something a little different when we build
in some animation. So we'll look at that later.
But in the next lesson, we're going to do
one more dune poster just where we play with
a different art style. We go a little bit more simple. I'm going to show you
how you can easily take something and just push it in a different
direction just by choosing a specific art style. All right. So
thanks for watching and I'll see you in
that next lesson.
27. Creating a Movie Poster with a Distinct Style: In this lesson, I'm
going to create one more version
of a Dune poster. Now, I have the
individual elements here on screen that
we're going to use, so it's going to be really simple in terms of the
amount of elements. But I'll talk to you about
how I've got these elements, and then you can
watch me take it from this to a final poster. And once again, this is
sort of my inspiration. This poster here, I like
the simple composition. At the same time, style wise, I want to push it a slightly
different direction. So if you type in Dune poster
on Google or something, you're going to get
all kinds of results. So this poster here
is not my poster. This is just one of
the many examples, I found of just
this more simple, slightly illustrative, minimal style poster
you sometimes see. So I want something in
between what I created last lesson and sort of
this simplistic style. So I'm going to start with
some very simple graphics, and we're going to see
what we can come up with. And I'm paying attention the
whole time to that style. I'm going for something
that's a slightly more of an illustrative feel
but very minimalistic, not too much in terms of detail. So I'm going to see what
I can come up with here, and you can watch me create
this from start to finish. I started with the image
of this woman here. I wanted someone
that was going to be a hero of the poster. Now, in the previous lesson, you saw me search for and find a woman within
Canva elements. This time, I knew I was going
for a particular style, and I knew that I
probably wasn't going to find what I wanted
under Canva elements. And so this is where I used
the text to image tool. So if you come under elements and you get rid of
the search out here, if you come under elements,
you have to generate your own AI image generator. So this is what I used to create some of the
artwork you see here. So I used it for coming up
with my sandworm images here. And then I also used it
for this character here. Now, a few things about this. I'll start by showing you a few of the prompts I
used to create this. So if I come over to
this other one here, these might not be
the exact prompts, but these are close
to what I use. So here, dark haired, sun kissed skin, female warrior, loose flowing robes,
knee high boots, sunset light on a plain white background,
digital illustration. Okay, so you really can
start to add in details, but it is about
experimentation because the AI is not always going to nail perfectly what
you're asking for. Some details may get right, other details, it
may not get right. But there is definitely
a learning side to it, where you can start to figure
out what it's good at. For example, for this one here, a lot of times it would be
cutting off the legs of my subject or it
wouldn't give me a full version of the person. But suddenly, if I
describe the boots, what she's wearing on her feet, then suddenly I'm
more likely to get that full image of
the full person. So little tricks like that
also describing the art style. It's very, very
good if you give it an art style for giving you something back in that
style. Now, not every style, But it really can give
you some good variation, just to show you an
example of this. Let me turn to this
other file real quick. So this prompt here, beautiful woman
with the blue with blue flowers in her hair
and a lush green meadow. I use this prompt in the Canva text to
image AI generator, and just by changing
one word at the end, asking for something in
this style, I get this. And then if I ask for
another style, I get this. So look at all the
different styles and how drastically different
they can be just by changing that one word on
the end where I'm giving a style prompt and I'm asking it to do something
in a specific style. Either an art style
or you might describe the mood or you might describe something
else about your image. Just for example here, looking
at these results here, these results are not very
culturally diverse, right? So I may have had have to be more specific with my prompt. So you have to get in there,
and it really is a game, just experimentation
and starting to figure out what works, but definitely starting
to think about what art style, what
look you're going for. If you can describe something you can reference and draw from, then you're going
to get closer to you want in terms
of the results. Turning back to this image,
and this prompt, obviously, descriptors are
important, obviously, describing an art
style is important. And then a lot of
times, you might be describing something specific in the background that
you want your scene. But in this case, when I knew
I was going to cut it out, I usually will do
something like on a plain white background or describe some really
simplistic background. It's not going to
give you back a plain white black background
like it's already cut out. But it does make a
simpler background. So then, usually, when you
come in here and you go up and you edit photo and you use
the background eraser, you're starting from
a better point, and you're probably going
to get better results. So you can think about that too when you're typing art prompts, if you think you're
going to return something where you're
then going to cut out the main subject or
part of that image to use a composite like we're
doing in this exercise. Then for my sand worm images, it was the same sort of thing experimenting around
with my prompting, experimenting around how I
was describing the subject. And then, as I mentioned
in the last video, I found that a lamp ray fish sort of has the look
I was going for. So I incorporated
that into my prompt. But even still, I could not get something that exactly
represented what I wanted. So I ended up with
two images here, and I think I'm going to
be able to take these and put these together
in one image. But again, it is all
about experimentation. And seeing what
you can pull off, you're not always going to
get it on the first try. It's going to take several
tres, but the more you do it, the better you're going to
get at using this tool, this text to image AI generator that you have here in Canva. Okay, so let's return to this
file here and let's take these elements now and let's start to put them
together in one design. Now, I describe
these three images up top, how we got those. The other thing is just a
simple background here. So this is a background texture. This is just something
where I typed in, like sand dudes or something,
got a simple graphic. And then we just have a couple
simple splatter effects, and then just a
plain circle here. These are the only elements
I'm going to use here, but I still think
we're going to be able to create something really cool just using these elements.
Let's see what we can do. Let me just start here by
taking my main subject, what's going to be
in my main subject. Let's go ahead and
create a new page here. So I'll create a new page.
We'll just move it here. Let's go like this just so we
can see a little bit more. I'll go ahead and
paste my main subject. That's not my main subject. That's just some
text I had copied. Let's hit Control
C, again, copy. Let's paste our main
subject over here. And so let's start just by
sizing our subject up here. We're going to place he
centrally in the frame Uh, starting at the bottom, we're going to have her feet
just go just out of frame, and maybe something like
this positioning here. We can always tweak this and
full with a little bit more. But I sort of want her
face sort of centered here and to center of this frame. So we'll
just start with that. So next, let's go back up to this first page. We're
going to grab this circle. So just control C to copy it, and we'll hit Control
V to bring it down. Now, let me take the circle and show you how it can become
something totally different. So we just got a
plain circle here. But what if I want to make it be this sort of
background sun element? So actually, let me
take the circle, Control C. I'm going to bring it all the way
down to this page, Control V. And what we're going to do is instead of having a plain background plain black background
color for the circle, let's give it a gradient. So we'll come in here and we'll go under
the color for this. We're going to apply a gradient. We're just going to stick
with this linear style, but then we're going to add
maybe three colors here. So we'll start
with three colors. This first color here. Let's just pull from
the top of this here, and then let's come in
here and grab this one, something that's a
slightly darker orange, and then this one here, let's go even darker still. And so just like that,
you can take something and you can turn it into
something with a gradient. So let me take
this back up here. And actually, what I want to
do is I'm going to create a new page because when you have a circle
element like this, the problem is, I
cannot blur this shape. Because it doesn't let
me do a vector blur, since this is a vector shape. I'm going to have to turn
this into a roster shape. So what I'm going to do is just create a new blank page here. So here's my blank page. Let me hit Control C. Let
me hit Control V. Now, if I wanted to, I could have
brought my subject down. So Control C, Control V. I'm trying to get a feel for how big I want this
other element to be. So let me size it up in
the background here. I wanted to take up a good
bit of the background. So I can always scale it
up later, too, though. So let me just actually
bring it down to Uh, let me bring it down. Let me hide my subject here. Let me take her and
we'll just make her transparent because I
don't want her to be exported. In fact, I don't even need
her in this frame anymore. Let me take the circle and
I could make it bigger. But first, let me rotate
it because I want the darkest part at
the bottom here. And then what I do is
I want to make sure I get the whole circle because
I can always size it up. So this will give me
more flexibility. I'm just going to
go like that, and then this is page three. I'm going to go ahead and share, and I'm going to go download. We're going to
download page three. I just want page three, just
occur on page page three, and I do want to make
sure transparent. Download. I'm downloading
this circle here. Just so we can bring it
back in and apply a blur. Let me just put it in this Canva images folder, save that. And now we can bring
it right back in. Remember, find it
under your downloads. You can go into the
uploads tab and upload it, or I'm just going
to upload it from right here and
drop it over here. So here it is right here. And so now that we have that, let me get rid of this
one that's just a circle. We don't need that anymore. We don't need the
circle anymore. We've turned it
into this element. The advantage of using this now, let me come and make it bigger, and let me go into position, and we're going to
drag it back here. Well, we'll go like this just
so we can see even more. I'm going to make it
really pretty big. Again, I wanted to fill a
good bit of my frame here. So let's try having trouble
grabbing it now there. Let's try right there. And then what I want to do is I want to come under edit photo. And now we have
this blur option. We didn't have this
option before. But now we have this
option because we've turned this into a
roster PNG image, right? So I can apply that blur. And now, suddenly,
just like that, if I fit this back to frame, we're on our way to a really,
really cool background. It's very simple,
but just adding that gradient that sort of looks like this sun in the background, it really has a cool effect. Now, I also might come
in here and do something like change the color
of my page background. So if I come here
under this here, I'll come in under my
page background color, and let's go under
here and let's find something in sort of
the orange brown range. So something like this. And then really the background of my image is really
coming together. I really think that
looks pretty good. And so I like that.
And so just by using two elements.
The main subject here, and then that circle and then just changing our background color
of the background. Already, we have a great start here where we're creating
something pretty cool. So next, I'll just come back
up here to the first page. We're going to grab
this sand dune graphic. I'll hit Control C to copy it, and we'll bring it down
here and we'll hit Control V, just to paste it in. Now, I'm actually going
to duplicate it as well, so you can right click and hit duplicate or you can
hit Control D to the keyboard shortcut. I'm
just going to duplicate here. And then with the
duplicate copy here, what we're going to do is
flip this horizontally. So now I have two
different graphics here. I'm just going to
sort of line them up here so that they meet
centrally like this, bring them together like
that, and then I'll shift click on the two of them and
just group them together. And then what I'm going to
do is just push this behind my main subject here and we'll bring it
down to the bottom. This, again, is just a very
simple graphic element. And where those two
seams meet together. I might hide behind my
subject there a little bit. But I don't think you're
really going to notice it. So maybe I won't maybe I'll
push it like this here. Again, because I'm going for this very simple graphic look. I'm not too concerned at the moment about this
looking unrealistic. I'm not really
concerned about that. I think it's all going
to come together. So we're going to try
this basic element here. Now, let's come back up and
let's work on our sandworm. So I might create
a blank page here just so we can bring down these two images, this one here, and then I'll shift
click to get this one, hit Control C to copy them, and then I'll go ahead
and hit Control V to paste here on the page. Now, let's start
with this one here. We'll just size it
up a little bit. But all we're going to
do is come in here, and use the background
remover on each of these, so we want to remove
the background there. And then the same
thing over here, we're going to use the
background remover. So edit photo
background remover. And for this one
here, I could use the background remover to
paint out this bottom, but it's just as
easy to do this. For this one here, I'm
obviously going to crop out some of the top
part that I don't need, and I'll crop out some
of the bottom too, but we don't worry about
all of that right now. We'll go ahead and get rid
of some of it, though. And now I want to
figure out where these are going to
fit in my image. I'm going to put them
together as one element, but I'm just going to
move them one at a time. So control C to copy, and then back here,
we'll paste it in, Control V. And then
for this one here, let's position it
behind my subject. And I know this one is one
where I want it to sort of be centrally located
right behind her head. So something like that, we can fall with it
slightly to get it. Exactly what we want.
Maybe the arrow keys just to really nudge
it into position. So it's really central
around her head. Then we'll go up and grab
the other part here, Control C. We're going
to come down again, Control V, and again, we're going to move it
behind our subject. And then we can full
around here with resizing this element and getting it exactly
where it needs to be. I know it's going
to be much bigger, so let's start by
just sizing it up, and then we're going
to come in here and we're going to drag
in this side here. We don't need all
this extra space. We don't need the extra
space over there. Let's start to rotate
this a little bit. Let's bring this down. We're going to maybe have to zoom out a little bit just to really finagle this and
see, something like that, where it's starting to
come from down here. It's coming out on the
other side of her, and then it's joining up here. Let me just zoom in a little bit just so we can fall with
this top a little bit. That's close to what
we want like that. I may just have to make this top part slightly
bigger, like that. Then I'll come
back on this layer here and we'll tuck
it down slightly. Actually, I'm going to
have to do something different to get rid
of this top edge here. If I pull it in from this side, I can just get rid of
it. So that'll work. But some of these little
tweaks that I have to do, this is why I would
caution you not to go overboard in Canva because in things like photoshop
and everything, you can warp, you can
make complex selections. It's just easier to get rid
of some of these things. So you do sometimes
have to finagle in Canva more than you would
otherwise in another program. But that looks pretty good. So let's fit all this
back to the screen here. And then what I'm
going to do is come under my layers,
we'll grab these two. We're going to group
these together now. And then what I
actually might do, I'm going to duplicate
this entire page here. And on this version of the page, I'm going to get rid of all these other elements
just so I have, don't need to get
rid of all of those. I wanted to get rid of this one, but keep the background there. And then, basically what
I want to do is I want to take this top layer
here and I'm going to lower down the
transparency to what I think maybe as close to what I wanted in the final design. So maybe something like that, I want to be a lot more subtle. And I want the color the blend. But I don't want this
with transparency. I think I have enough of
a hard edge here that if I download this whole thing,
including the background, I can then remove
the background again and then keep this image
here with the color, but it won't have
that transparency. So let's go ahead and try that. Soon to go ahead and share, and this is page
four I'm working on. So we'll go ahead and do a
share. We'll go download I don't have to worry about
transparent background, but we just want
the current page. So current page four done, so I'm going to go ahead
and download that, so we save, and then I'm going to bring
it back into Canva, so I can just grab
it right here, bring it right back into Canva. And then now if I come back
up to this version here. Then on this version here, I no longer need this
group to part here, so let me just go in a position. Let me look at my layers here. I'm no longer going
to need this one because now under my uploads, I just brought it back in.
I have this version here. So if I bring this, I
think I should be able to come in here and
remove the background, and I think it
should work since I have enough of an
edge still here. Yeah, that's still
going to stand out. So now what I can do is
position that down here. I can drag that up, so it's basically in
the same position. And now I can go ahead and
I can move that down here, get rid of this other one. So now we have the one here. But again, even though
we've blended it, the transparency on this, it's not going to show through. So I don't have to see
that sand dune behind it. And I also want to bring it up that's the wrong
layer, this layer here. I also want to just bring it up to right here because
we're going to put a splatter effect
and maybe look like that sand worm is coming out of the sand
from right about there. The image. So what we're
going to do now is come back up here and we'll grab some of these
splatter effects. So let me just grab
this one here, control C, to grab this splatter effect. We're
going to come down here. We're going to hit
Control V. Again, we're going to change the
color on all of these. So let me come in here
and take this color, and we're going to
make this color something closer to
our background here. So we can start to
fool around with the colors that we already
have in the image. And let me grab this
other splatter, too. This is going to work
better, I think, Control C. Let's bring
that one down here. Again, Control V
to paste it here. Again, let's go under
our color palette, grab something that's already close to what we have in here, and then we can
come in here and we can sort of spin this around, start to put it in front of where our sand worm
is coming out. Of course, we'll move it
behind our main subject here. So we can start to
fool around with that, and we can start to fool around with these splatter
effects in general. But we want to
think about keeping our subject in the
foreground like this. So we're going to start
to fool around and place a few of these
splatters in here. Again, going for minimal detail, but we want enough in here
to make it interesting, but not so much that it's going to distract
from the simple, nice composition we have going. So all I'm going to do is grab this one splatter effect
that we have here. I'll control C to copy
it, actually control D, just to duplicate it, and
then I'll just drag it up here and let's just give
it an angle like this. And we're going to size
it up a little bit, so let's make it a
little bit bigger. Something like this here, we'll play with the
rotation a little bit. All I'm going to do is make a couple of different
copies of this. I'm not worried that it's
in front of our face because I'm going to push
all this to the background. But first, all I'm doing is I'm making a couple
of different copies, and then I'm going to
experiment a little bit with the size and I'll experiment
a little bit with the color. Again, control D to
duplicate this one, I'm going to flip, so
it's going the other way. So we'll flip it horizontally. We'll have that one coming
off this side of the screen. Again, can play around with the size in the positioning
slightly if you want. Again, control D,
let's copy that again. This time, I'm going to rotate it back this
way a little bit. Let's just have something coming this direction
a little bit. Then again, you can full around with a different size on these different ones here. Let me control D to
duplicate that again. Let me flip it once
again from where it is. So we'll flip
horizontally again. I could flip vertically too. So actually, let's flip that one horizontally
and vertically, just to get some different
splatter coming up. Again, just fooling
around here with the different elements and where they're going to
show on the screen. Maybe I want that smaller. I want it to be more
pronounced up here. Some of these ones on the top, I think I want maybe
to be slightly bigger, but then the color is
going to be a big deal. So again, you come under this
menu here if you want to select the individual different
ones, move them around. And now let's mess with the
color and the positioning here because all of these here are going to be
behind my subject. They are going to be behind
the worm and everything, too, so we'll push
them to the back. But then let's come
in here and let's get the color of these
different ones here. So let's grab this
splatter effect first, and let's go in here and pick a to one of these tones,
it's going to be darker. Then let's pick
this one over here. So again, we might
have to full around here on your position menu to figure out which
one is which. Let's make this one, that
same darker splatter. Then the other ones in
here. Let's go lighter. So let's go to the other ones here.
We have this one here. Let's come in here.
Let's go into color. Let's just dial
it down this way, let's make it much brighter. Again, just giving some
interest here by just varying the different colors in here
and the shades of colors. I could even duplicate
these splatters, maybe even one more time, if I wanted to, but
you get the idea. Actually, what I might do is I might take one of these here, one of these splatters here, and let's take this one, and let's hit control
D to duplicate it. This one, let's really
just make it travel well across the frame here. But then let's push the transparency on this
particular one way down. Let's maybe make
this color white, but let's push it way down. Then again, let's push position it way back to the
background like this, something that's cutting
across the frame. Now, that one
there, if it really does run the whole
length of the frame, I don't know if I love it on the bottom there. Let
me just look at that. Let me just look at that
particular splatter if I can find my way
to that splatter. This one here. Let's
go way out here. This one, I might just change to something
more like that. And then if I were to duplicate that, I would hit Control D, and I might flip that one again horizontally and have that on the other
side of the screen. I don't know if I like these
two yet, fooling around. And at this point, it's
okay to play around. When I include all
those splatters, unless I lower down
the transparency, a lot of these, it's
going to be too strong. But I think I could go
very subtle like that. And then maybe I'll just come down to that first splatter, which was slightly
different than we added. So this one here, control C, control D to duplicate.
This one here, This one, again, I
may come in here and just again, size it way up, so it's covering a lot
of our image here, but not our subject's face, and then we're going to lower
the transparency way down. But again, just to bring a little texture
element into this. So let me just go full screen here to see how this is looking. So not too bad. I mean, I think I need to deal with the edge of
that a little bit. It looks like down
here on my subject, something a little funny
is gone here where she got cut out a little weird.
So I might have to hide that. But we're pretty close.
This is starting to look fairly close to
what I was envisioning. So let's see if we can add a few finishing touches to this. Zooming in just
to take a look at the corner of this dress here,
it's kind of a hard line. I don't know whether that's
the way it originally was. Let's just take a
look at this photo. So if I go into edit
photo back on remover, let me just zoom in on that
part of her dress here. So let's zoom like this. And then if I restore that with the restore
brush here, I can see that It looks like it
actually did a good job. It's just kind of the way
the illustration was, but I could hit control
Z to undo that restorer. And then maybe if I wanted to make it look a little better. Maybe I could just sort of curve it a little bit like that. I hit control Z and
attempt that again. So anytime you're doing
this, you can at least do control Z to redo
your paint stroke. So I'm just doing a
couple of strokes until I get sort
of a shape I like. So maybe I like that better. So if I wanted to, I could
do something like that, just to mess with that edge. And it should apply
that change there. I think it's just
taking a second. Let me go back under
a background remover. Yeah, I think it's
just taking a second to update in my main image here. But there we go. So
now it updated there. So that does look a little
bit better, I think. Over on this side here where maybe I wanted to change
that a little bit, come in under my layers again. Let's grab that one that's
right in front of this guy. Let's just duplicate that. So we have another splattered
layer splatter layer. Let's come in here under
the color for that layer, and let's just make
it a little darker, so let's push it
down a little bit. And then we'll position it
so it's behind that layer. So let's push it
back right here. But then let's just grab
it and let's move it, so it's a little farther
out just so we get a little bit more nice looking
splatter effect there, and we hide the edge of that. Now, that's really all I
would need to do in here. Of course, with these
splatters and everything, we're using the same shape
over and over again. But you get some
good repetition, as long as you're varying
the size and the color, you can't really tell
that it's the same shape. This is the sort of
thing you can really play with endlessly. For example, let's take all these main
splatter effects here. So it's really all
of these here. I could do a lot of things. I could decide, well, maybe I just want to group
all these together, now that I have them like
that, and I could decide that, Hey, I want to
reposition all that. So maybe I want to take
all those splatters and I want to bring
them down even further, or maybe I want to
make them even bigger. So you could do really
endless things. I think I'll push them
back to where they were, but just to show you
that you can come in here and really do
endless edits with this. Now, the last thing I do is, I think I'm just
going to take from another file and bring in
my done text in my borders. So I'm going to go off
screen here for a second. I'm going to copy those borders. I'm going to copy that do text. I'm going to bring in
a little signature, which is just font here. It's not my actual signature. You don't necessarily want to put your own
signature on here, but it's just a little digital
curse of writing here. So I'll grab all of that.
I'll come back over here. I'll hit Control V, just
to bring all of that in. And then we'll go full screen and take a final look at this. So here we are full screen
taking a final look, I think we ended up with
something pretty cool, considering we started with just about seven
different elements. We have that splatter effect. We have a circle that we
turned into a cool background. We had, you know, the images of the sandworm, the
images of this girl. But there's really not
that much in here, but because we had a style in mind and we stuck to that style, we really were able
to play around and create something that
was pretty cool. Now, you could play
with this endlessly. So this is the type of
project where you could just spend hours and hours
if you want to tweak it. But you can also
very quickly just arrive at something
that's pretty cool. So I hope you play around
with this type of thing, this type of image compositing. And again, if you start to
do really complex things, blending and complex selections, you're going to have to
step outside of Canva. But within Canva, you can do
a lot just by being smart, understanding some
of these tricks. So I hope you're
willing to play in Canva and you have fun
with this sort of thing, and I'll see you in
the next lesson.
28. Photopea Blending modes: In the last few lessons, we worked almost
exclusively in Canva, and we were really
able to push it to create some
really cool designs. However, I will
continue to caution you to not be one of
these people that adopts the 100% made in Canva mantra and use that as a
badge of honor of sorts. It's great when you can
do something in Canva. But when you start to learn another tool like
Photop and realize, hey, that's a free tool,
I have easy access to. It does then become a matter of just what is the workflow
that's going to be most efficient for you that's going to make the most
sense and help you accomplish what you're trying to accomplish in terms of the design you're
trying to create. Canva is great. You're
taking this course. You probably love Canva, or at least use Canva for
a lot of things, but we do not have
to feel like it's the only tool we have to use. So let's look at this example. So this is sort of
like a cover slide I created for this course. And if we look at
this image here, it's basically made up of
three different images here. So we have the photo
of the woman here. We have the sort
of graffiti wall, and then we sort of
have this brick wall. And then on my main image here, I'm pretty much blending
these all together. Now, we could accomplish
some of this in Canva alone. So let me just come back here to this layer here,
this slide here. And if I turn off
this top layer, we'll see that I have the
other three layers in here. Let me go ahead and turn off the transparency for this
graffiti layer as well. So now I just have the image of her over top of this brick wall. Now, of course, I
could come into my transparency sliders. And let's say I'm trying to go for that look of sort of like this is a mural on
this brick wall that's made up of this
image of this girl, but then also the graffiti and these three differentlayers. So I could do
something like that. I could come back to
my graffiti layer, and I could start
to bring it back, and we could get a very
interesting result. So maybe this is something
we would use. However, I know that in Photop, there are blending
options that I don't have here that are really easily going to give
me more choices. So this might be a case where I take these
images out of here, and I work in that
other program because I know I'm going to be able to achieve the look I want, okay? So it's not only about deciding, like, what's going to
give you the best result, it's also about deciding
what is going to be efficient and what
meets your end needs, you know, what's
good enough, what do you need to accomplish. So let's jump over to Photop and I'm just going to look
real quick and show you about blending
modes in Photop just so we understand how they work and see that that's another
option that we have. Here we are in photo P, and we have the same three images. So we have the graffiti image. We have the image of the woman, and we have the brick wall. So I'm just going to start with the image of the woman here. I'll leave the graffiti layer
turned off for the moment. And in Photop and you'll
also find this in photoshop, you have blending layers. So with this layer
selected, right here, this drop down here, that shows what the
normal blending mode is. So I said, blending
layers before. I mean blending modes. You
have these blending modes. Normal is sort of the default. When you bring a layer in,
it's going to be all normal, but you can come in
here and you can cycle through all these
different layers. I've selected one, but with the blue sort of outline
around there now, I can use my arrow keys on my keyboard to start to go down and see these
different layers. And so with these presets, if you want to think
of it like that, Very instantly, we
can go through and see a number of
different options. So what these options are basically doing is
it's making a choice, comparing pixels in this layer
with pixels in this layer. Sometimes it's showing the darkest pixel from
the two images. Sometimes it's showing
the lightest image. Sometimes it's doing
some variation on that. So you have a bunch
of different options here and it's going to sort of bland the images together based on what
you've chosen here. Now, a lot of these up top
are making the image darker. A lot of these will make
them light lighter, and then you have some different
options throughout here. It is going to vary
based on the two images. So for example, if I come down
here and I choose lighten, I know that it's
sort of choosing the lightest pixel
from each image. So if I were to suddenly
turn off this layer, and so now it's applying
this layer with the background layer and because the background
layer is all white, it's just showing the
background layer. If I were to change
this to darken here, it's just showing this image because every pixel
in this image is going to be brighter
than the pure white that we have in our
background layer, okay? So you'll start to play around with these
and you'll start to get a feel for what each
blending mode is doing. And you can also go on something like YouTube and
look up, you know, blending modes and photoshop because photoshop
has the same thing. So a lot of times you can
find tutorials and photoshop, and you're going to be
able to follow it exactly here in Photop
because a lot of the file menus and everything
are made to look the same. Now, there are some
features that photoshop has that you will not
find in photo P here, but lots of them are
exactly the same. Okay, so you can experiment
around very easily. And of course, if you
have one you like, you can also still
come in here and do things like
adjusting the opacity. So you're affecting how much
that's being applied by affecting how
transparent the pixels are in one of the given layers. Okay. So I could go in here and choose something
like soft light. Let me actually keep
going down through. Maybe I like this hard
light better, okay? And then you could do the same thing with other
layers above it. Of course, this is
completely showing through. I could just the transparency, or I could again start to play
with these blending modes, and now it's applying this blending mode on
top of the layers below. And so we're starting to get these interesting effects, okay? So I used something
like this when I was working on creating
that title slide that we saw over in Canva. Now, of course, in a prior
section of the course, we talked about creating
your own custom overlays, and of course, we know that if you double click on a layer, you can get in and you
have this blend slider, or you can take
some manual control over how these different
layers are blending together. Okay? So you have more
and more options, and of course, you know, we used that to create
custom textures, which you could take
back into Canva, where there's some
transparent pixels, and other ones are
completely non transparent. So you have all these
different options, and it starts to
become, you know, you making a decision on
to what option is going to give you the results
you want and what option is going to
be the most efficient. I just wanted to let you
know in this lesson that these blending modes
exist within Photop, and that's another option
for you to explore. All right. Thanks
for watching, and I'll see you in the next lesson.
29. Advanced Selections and Masking: So let's look just
a little further at this example from
the last lesson. You notice here that
things are blended, but the eyes really stand out. If I go back from one to the other one slide
to the other, we see that the eyes
don't really change, and that's because they are not blended to the same degree as
the rest of the wall here. Now, this is something you just couldn't really do in Canva, but this is when you
have the ability to make those
complex selections. You have the ability
to do masking and something like Photop. Then suddenly, something like
this is very easy to do. Here we are in Photop and
we have those layers, and you'll notice that
the graffiti layer has a soft light applied
to the blending mode, soft light again for
this and they're both above this layer of
the actual woman. But again, we could
take both of these, so I'm just going to click
on one and then I'll just control click on the other
to select them both. We can put them in
a group just by using this little folder icon. Now they're in a group.
They both exist together. And we can apply a mask,
so we can apply a mask. But when you just
apply a mask with no selection to start with, it's just going to be all white. And what does all white mean? That means everything is
going to show through. So I'm seeing everything here. And if I just click
over on this layer, then I can see the mask itself. I can just click back on the folder itself just
to see the layer again. Now, what if I just
come in here and I grab my lasso tool. So I'll just grab
this lasso tool, and what if I draw
just a rough selection around this eye, doesn't
have to be perfect. And then I could make sure
I have this selected, so it's going to unite
whatever I draw. So it's going to continue
to add to that selection. I'll draw one over
the other eye. And then I could just
come in here and what if I just fill
this with black. So that's our background color. So control back space to fill
with the background color. Control D to deselect. And now suddenly we filled
this area with black. So that's where the blending modes is no
longer being applied. In fact, we're not seeing
these layers anymore. Both these layers inside
this group are being hidden because of this black
mask just around the eyes. Now, of course, we have
a hard edge there. One way we could have got
around that is we could have applied a feather right here
would make in our selection, but you can also do
that after the fact, if we come up here and we go
to our little property tab. And remember, you
can get to this mask and you can apply a
feather right here, so I can drag this out
and just drag it so basically just the eyes are showing through and
everything is blending else. Everything else is
blending nicely. So just like that, very easily, we can make the eye stand out. Now, you really could play
around in here endlessly. So let me just add a new
layer to show you an example. I could do something now like use a big keyboard shortcuts. I'm going to do
Control Alt Shift E. And what that did was take all the visible layers
here and it's merging all those visible layers
onto a new layer, that was control Alt Shift E. So that's on Windows on Mac. It would be Command
Option Shift E. And now I just have everything
up here on a new layer. So then I could come
up here and I could do something like let's
just grab a rectangle. Let's do the lip tool again. This time, though, I'm going to apply a feather to start with. So let's just put in a father
of 30 pixels to start with. And then I'll drag a selection maybe around the central
area of her face here. But then I could
also come up here and do something
like select inverse. So now I just have these outer pixels around this
inner circle selected. And then I could apply a
mask to this whole thing. So let me just hit
the mask down here. And now you see the
white area is what's showing through and the
black is being hidden. So we're just showing the
outer areas on this new layer. Now, of course, it's the same, a copy of everything below. So we're not seeing
anything yet, but now we could come in and play with these blending modes. Now, some of these blending
modes like darken, it just compares pixels and
picks the darker of the two. So this is the same as below, so it's comparing two
of the same pixels. So obviously, it's not
going to be different. But then some of these
have an additive effect. So if we go down to
multiply, suddenly, suddenly it's making everything
here a lot darker, okay? So this is just to show you how you can play
around endlessly. And then, of course,
I could always still adjust this transparency, up and down, this opacity, so I could come in here,
get rid of this completely and then slowly bring it
back just a little bit, just to push the focus more in the face of my subject here. Now, in Canva, you
can't do this. You cannot select
specific pixels and make adjustments when you're dragging those adjust
sliders over your photo. You're affecting
the whole photo. Yes, it allows you to choose
foreground and background. So there's a little bit
of control in there, but not nearly the fine
controls you have in a program like photoshop
or a program like Photop. Now, here's another example. So in this file here, I have
the image of this woman. I have her both on a
separate background and then with the
background itself below, and then above it, I
have this texture layer. This texture layer
is on overlay. Let's just turn it back
to normal for the moment. So I have this texture layer, and let's bring the pacity
all the way back up. So let's imagine
that I want to apply this texture to the woman here. So I could do
something like control click to select that, and then I could
come up here and add a mask on my subject. So now I have it just to her. I could come in here and I
could adjust this to overlay. But let's say I want to apply
it to just really her skin. I don't want it to
be on her hair. I don't want it to be on her clothing here. So,
how could I do that? Well, if we look at
the image of her here, and I'll turn it off
the background for a second, we can see that, like, so what represents
her skin texture here? Well, really, she's got
on this dark dress here, and she's got dark hair.
And then dark eyes. So really, the areas that
we want it to apply to are all the light areas
within this photo. So there are all kinds
of selection tools. We have some over here. We haven't talked
about all of these, but we have tools over here. And again, if you look
up Photoshop tutorials on Photoshop selection tools, you'll find tutorials
on all of these. But you also have
the ability to use the blending sliders,
like we talked about. But then also you
can come in here, and you have some options
like select by color range. So it could come under
color range here, and I could choose
an actual color by actually come in here
and do sampled colors. And so I could click into
photo and actually click a specific photo like I could
click on this ear ring. And then suddenly, if I do that, we're going to see
it adjust down here. So actually, let me do
this replace option, so it's not so it's replacing
the selection completely. And then if I click on
the ear rings there, we're going to see
how this has changed. I kept a lot of her
skin tones because her skin tones are similar to color that we're seeing
on the ear rings. But I could choose
another color. And in this instance, since we're talking about
highlights and shadows, I could also come
up here and say, I want to select the shadows or I could select
the highlights. So let's select the highlights. Since we know the shadows are
the areas we want to avoid. So let's do select highlights. And then in this sort
of image down here, whatever is white is sort of representing
the selected area. Whatever is black is not going to be part
of your selection. So I have high lights selected, but then I could also come in here and you can adjust
them in and max. So you can dial this down, you can dial this up, so you get more colors included
or excluded. So let's do something like this. We don't really want
it on our hair, so something like that. And then, of course,
the fuzziness is how particular being, how many adjacent colors
are we really allowing. So if we dial this down, it gets a harder
and harder edge. But if we dial this up, then suddenly we have more of a transition
area at the edge. So you could very easily
do something like this, get a pretty good selection, and then suddenly we
could come in here and modify this here. Now, of course, we already
have this white part selected. So what I would want
to do is select an inverse dis selection. So I could have done the shadows instead
of the highlights. But I could do
something like that. And now since I have the inverse selected, I want to hide that. So let me find black here. Blacks my foreground to alt B space filling this
mask here with that. And now, suddenly,
we've hidden sort of the cracked layers from things like her hair,
things like her clothing. And then, of course,
we could play around with the blending modes, and we could play around with, you know, how intense
is being applied. But this is just a level
of control that you do not have when you're working
in a program like Canva. But if you come over to Photop, which you should do if you're trying to do
this sort of thing, then you can save yourself
a lot of time and you can have a lot more
creative possibilities. Just one last example. You see this blended image
effect all the time, like this with this
classic movie poster, where obviously this image
in the background of the couple here, Leo and Kate. They are obviously blended, so they blend out and
fade into the sky here. You can very easily
do that sort of thing in a program like
Photop or photoshop, not something you
can do in Canva. So what I would do
is just add a mask here to the woman
that's in the front, so I could just add a mask here, and then having a gradient
that goes from white to black. So foreground to background,
linear gradient, I could easily just
come in here and start playing around with
some sort of gradient. Where I have her just
fade into the background, and of course, I could combine
this with other blends. So let me take this slightly down the page a little further. So again, you can play
around with it all you want, but maybe I would also have. Another black layer.
So let's just fill this with black here. And then again, once again, I'll do foreground
to background. Let me just start by dragging out something hoops,
forgot to add my mask. So I'll add my mask
first on that layer, and then just controlling what shows by dragging
foreground to background. Very easily, we
could have another layer down here on the bottom, just to sort of push
the viewer's eye. And again, you can play
around endlessly here. Endlessly playing around for
the type of look you want. And then, of course, here's
just a little title up top, and we could push that title
two behind our subject. So there are just lots and lots of things you can very easily do in a program
like Photoshop and a program like Photop that you can't necessarily
do in Canvas. So be willing to step
out and use another tool when appropriate and when
it makes sense, okay? Thanks for watching, and I'll
see you in the next lesson.
30. Double Exposure Effects: Earlier lessons in this section, we looked at some
compositing techniques where we were working
just in Canva. Then in the last lesson, we looked at how when
you step over in the Photop or a different
program, suddenly, sometimes you get more options when it comes to
advanced selections, blending and things like that, and we're going to continue
on this theme in this lesson when we're going to
talk about creating double exposure effects. Because as you start
to figure out some of the shortcomings of Canva and
where other programs excel, you have to start to realize that by stepping out of Canva, sometimes you just give yourself many, many more options. So it is always a
workflow choice. You know, it comes down
to what software you know and then how you're
making use of your time. But sometimes you're
really doing yourself a big favor by not trying
to do it all in Camva. So in this lesson, we'll look at creating double
exposure effects. So we'll look at how you
create something like this and how very
easily you could take something like
this and instead create something like this or
something like this. So sometimes by
stepping out of Canva, you just really open up more
and more possibilities. And when doing double
exposure effects like this, you really do have
infinite possibilities if you step into a
program that's really good at blending and creating advanced mask,
advanced selections. And then, of course, we'll
look at how you bring those assets back into
Canva and can make use of them in Canva because there
are advantages to working in Canva on certain parts
of a job like this. But for some of it, it
is really going to be helpful to rely on a program like Photop as well just for some of those advanced
blending techniques. Okay, so here is the
image I started with. Now, this is actually
a stock image I purchased from Adobe, not one you're going
to find here in Canva. Now, Canva has a lot
of great images, but the quality of the
image really does matter. Sometimes they'll see
people start with a not so great image
and they'll try to do lots of cool things
no matter what you do, it's not going to
make a difference if you start with bad assets. So I encourage you to start with the best possible assets, especially if you're working on a project where
you have a budget, and then you can budget that in to whatever you're
charging your client. Just playing around
doing stuff for free, you probably wouldn't go
out and pay for an image. But it is something
to keep in mind that if you want the
best quality results, sometimes you have to
really pay attention and have the best quality
assets that you start with. So anyway, this is the
image I started with. I wanted sort of a
striking profile image. So we'll go ahead and we'll start by just removing
the background, and I'll do that here in Canvas. I'll just come in here
and I'll do edit photo. We'll use this
background remover. We'll take the background off. Then I'm just going
to sort of position this where I want it here. And so I'm going to go
something like this, so it's full screen, but then
let's bring it back over, and we'll sort of position
it towards this side, giving her a little bit
more space this way, but that'll be my
starting point, okay? So I'm going to export this now, and then we're going
to work with it so and Photop because I see people try to do double
exposure effects just in Canva. So if I go under my
elements tab here, let's go under my
elements and find one of these photos I
was going to use here, So they'll come in here
and they'll start doing blending things in here
just by lowering capacity, but you really only
have limited options. And then, of course, how
do you create the mask? There are all these
things where we know now we have a
better way to do that. We have a way to create
custom overlays. We have a way to create custom mask and sort of
all these things sort of build upon each other and work together for a
project like this. And then if you're in a program
where you're just trying to sort of use tools
that aren't quite right, it can be really frustrating and it can be really
time consuming, and it can also lead to
not the best results, and maybe also not give you as many options for the
results you can get. Just by stepping over
the photo P with this, I'll show you how many
different options we can have. All right. So what we're
going to do is export this. I'm going to go ahead and
export this as a PNG, and I'll do that
with transparency, and then I will see
you over in Photop. Okay. So here we are in
Photop with that image extracted from the
background that we just brought over from Canva. So now our goals here in
Photop are really twofold. So we want to create a frame. So we remember how to do that. So we're going to create
the frame so we have this shape as a frame that we
can bring back into Canva. And then we also want
some sort of overlay That's going to show some of the features of the woman here, but then let other areas fade the transparency
so we can see an underlying image and get that double exposure
effect where we're starting to see to see two
images blended together. Okay? So let's do the frame part first.
That's going to be easy. So we're just going to
come over and remember, you're going to click
on your layer itself, and then we're going
to control click to make that selection
around the layer. That would be command on Mac, Control click on Windows. Then we'll jump over
this path tab here, and we'll come down here and
do this, selection to path. Now we have that selection. Let's come back to our layers, and then I could
apply the vector mask right to this
background layer, but I'd like to usually
use a solid filled layer. Just have a visual
representation. I'll just create
a new layer using that little new layer
button down here. Then I'm just going to fill this with the
foreground color. And if you remember,
that's At back space. This would be Option
B space on Mac, Alt backspace on Windows, and I filled with black, and then I'll just
come up here under layer vector mask current path. Now, that's our mask. This
is what we're going to take back to canva to be our frame. I'll go ahead and turn
off the background. I don't need that
turned on. I'll just come up here and go under File, Export as PDF. And remember, this is how
we're going to get our frame. So everything checked off here. We don't need
anything checked on. We'll go ahead and
save, and we'll save this in our
frames folder here. I have a frames folder. And I think I've
done this already, but we'll just call
it profile woman. We'll go ahead and save. You want to replace it here. We'll go ahead and replace that. But so now we have
our frame that we can take back into Canva. That's step one. But remember, we also want to
create some sort of overlay that's going to
have some transparency, so we'll end up
exporting a PNG with some transparency
back to Canvas, so we can start to get that
double exposure effect when we lay that on top of
some other images. Okay, so what I'll do is I'll turn on this
background layer. I'm just going to drag it to the top here in front of this. And then since I'm going to full with the blending
sliders here, and I have some really
dark images here, dark parts of this,
the black and then some parts that
are closer to white. So I think I'm going
to change this here this layer behind it to some sort of
different color just so we can see a
little bit better. Let's just come in
here, find a yellow. Then again, I'll
just do back space to fill that with yellow. And so now I have that
just sort of behind here. Now when I start to
click and blend this, all those areas that show
through with yellow, I know those are areas that I've knocked out the transparency. Okay. So remember how to get
to those Blend If sliders. Now, there are other
ways you can do a blend. And we'll talk about some
of those in this lesson. But let's start with the blend I sliders just to see
what we can do. A lot of times, that is a
good fun starting point. So I'm just going to
double click on this layer itself to get in and bring
up this blend slider here. Let me just bring it over here. Make sure you're still
seeing it on screen. And then I'm going to start
to just fool with this. So the black I might
want to keep her hair and her eyelashes on
some of these details. So I might start dragging
in this side of my image, and I'm just going to
drag this slider sort of way to the left just to see. I'm going to take
it way over there, almost all the way to the black
slider on the other side. But then let's do the trick where we hold down the alt key. That's alt on Windows,
that the option on Mac, and we'll just split
this slider here. If I hold down the lt and
I grab this one triangle, then I can split
this slider here. And what I can do then
is just sort of increase the transition area just for a blend that's going
to be a little smoother. So if we take it all the
way to the left here, you can start to see how it's sort of a rough transition between her hair and
the yellow areas. But if somebody start to
drag it out to the right, then we can make a much
more subtle blend. And that's going to make it look even better when we
put two images together. So flowing around and
splitting this blend slider, a lot of times is a good idea. Okay. Now I'm going to
go ahead and click Okay, and so we have this now. So if I turned this
off, this would be an overlay we
could take back. However, I'm looking
at this here, and we're losing
part of her lips. We're losing some of the
features of her nose. I kind of want to bring back
some of those features. So they're a little
bit more prominent. So what I'm going
to do is I'm going to duplicate this
background layer. So I'm just going to click on this duplicate on this
background layer, and then I could right click and I could find
duplicate layer. But I also like to do
keyboard shortcuts just because they're so
ingrained into my head. So I'll teach you
that just control J to duplicate that layer. Again, you could
have clicked and duplicated as well. That
would've been fine. But now with this layer, I can play around and I can sort of add different areas to bring back along with this
layer below it, because I still have
this layer below it using that blend. But now with this
layer, I'm going to bring back some
different areas. So let's start just by sort of resetting the Blend If
slider on this top layer. So I'll just double
click to get into it. We copied it, so it carried over the blend sliders
being adjusted. But I'm just going to
take it all the way back to normal and go
ahead and click Okay. All right. Now, I only want
certain parts of this. I maybe want to do her
lips here, maybe her nose, maybe around her eyes and eyebrows here and
maybe her ear as well. So what I'm going to
do is I'm going to grab this lasso tool. Again, you have lots of
select tools and Photop. I'm not going to cover all of them extensively in this course, but you can sort
of watch what I do and we'll go over some
of the basic ones here. And so this lasso
select just lets you do sort of any kind
of custom shape. You can drag out any shape
you want onto the screen. And for a lot of things,
it would be a little heavy handed and tough to get
a really good shape. But for something where we know we're going to
feather the edge, we don't have to
be that precise. So I'm going to use
the lasso select tool. Since I know I'm
going to feather it, I'm going to start
way out here and not right in close to
this edge because I want to keep this edge solid. But then I'll sort of loop around the different
features I want to keep. So I'm just going to click with my left mouse button and
hold it down as I drag out. So I'll sort of go around
her prominent features here, something like that, out here,
and then I'll release it. Okay? Now, I also want
to add her ear in. So I'm going to come
up here and make sure that I have this
second option clicked, which lets you just
sort of continue to unite and add
to your selection. Other ones here, if I had it on here and I
dragged out again, I would lose this
initial selection. If I had this one here, I'd be subtracting from my
current selection. So just get to know these
little options up here. But I'm going to use the second
one here, which is unite. I'm going to do the same
thing where I just come over and I sort of
drag around her ear, go around the ear ring as well, something like that, and
then boom. All right. Now that I have these, this is the ear I want to mask. And when you come
down here and you click this mask icon down here, it's going to build the mask based on your current selection. So if I go ahead and click
Add Rostra Mask now, I can see that now I'm adding this part to what is below it. Now, obviously, this
is what I meant, how you can't really
make a good selection, and it's going to
be really harsh if you don't feather it at all. But we can now come on
the mask itself here. We can add a feather. So make sure you're not over
on the layer itself, make sure you are on the
mask here, right there. And then you just have this
little properties window. If you don't find
it, you can go under a window and find properties, but it's usually going
to be right up here, so I can just click on that and then go onto a mask part here. We can see right now there's no feather applied to that mask, but I can just start to drag it out and I can watch my image and look at how it
starts to blend seamlessly into
that yellow area. Okay? So this is just about finding what you like and
what suits your taste. And so maybe I'll go with
something like that, and then I can click this just to close that
out of the way. Now, if I turn this
off, now I have this as my areas I can see. And then we can see we
have a lot of areas where the pixels below are going to
be allowed to show through. So here's my overlay
that I've created, and this is what I'm going
to take back to Canva. Now, hopefully, you can see there really are endless things we could do in terms of what
we choose to take back. I could have ajed those
blend I sliders differently. I could have not
used them at all. I could just take back this. There's really so many
things you can do because there really limitless
selection possibilities when you're using a program
like Photop or photoshop. Okay. But this is what
I've decided to go with. So I'm going to go ahead
and export this back, so I'll just go file. I'll just go export as PNG, and I'm going to
save this PNG off, and then we'll bring
both the frame and this in the Canva, and then we'll see how
now suddenly we have some assets that give us
a lot of possibilities. Here we are back in Canva, and you can see I've brought
that frame into Canva. So now you can put absolutely any image you want
in that frame, so I could drop this
image into that frame. And then, of course,
the uploads, I've also uploaded that overlay. So what I'll do is
click on that overlay, and then I'm going to want
to resize this so it fits perfectly over top,
so I can do that. And then suddenly we're
getting this really, really cool sort of
double exposure effect. And of course, we can try
different images as well. Now, right now, the top
layer is the overlay here, and that's slightly blocking my ability to bring
something into that frame. So I might just drag
that up just so I have an area below where I can
see that image below. And now I could come
under my elements. Let's just search for
something like nature. For nature. We'll see all these. And then very easily now, I could start to try all
these different images. So very quickly now I have an asset that's something I
could sort of reuse in Canva, trying out different
possibilities. And this is what I mean where different programs have
different strength. All these blending
techniques we did, I could not have done in amba. At the same time,
over in photoshop, it would take me a lot more time to bring in all these
different images. If I was in photo Per photoshop. I couldn't just drag and drop and try out different
possibilities like this. This is really a strength
of the Canva interface. So different programs are going to have
different strength, and there's no
reason why you can't take advantage of
both of them, okay? So I'm really likeing that
first one the best because I just feel like the color and everything works really well. So I could hit Control
Z to find that, or I could just sort of
go back out of here. Let's get rid of
this nature tag. See my recently used, hit C all. Here's the one I liked. So
let's put that back in there. Of course, you could do
other things like you could come in here.
Double click. You could resize
this completely, whatever you want,
you can reposition resize it in your frame. And then something I
did. Let me just create a duplicate of this
duplicate this page. So here's a new
copy of that page. And then under uploads. Let me just go back under
my uploads real quick. So if I can find my
uploads tab over here. Here's the uploads tab. So let me create a new page
and just show you here is another overlay I created by taking the image
that we're now using. So we're using this
night sky images. I took that over into photo P. And using that same technique with
the Blend If sliders, I was able to do something like this where I sort of knocked out the
center of this image. And so I could come
back over here now, and now that if I double click back into
that photo again, we see that let's have it, so it starts right
here at the left edge, and then there's
something like that. And then if I made sure
that my photo layer here started in the exact same
position and expand it out, then suddenly I have that matching up with what's
in the frame there. And then, of course,
I could move it behind if I wanted
behind everything. But suddenly, we're getting sort of this totally
different look. Now, at this point, if I
had it the way I wanted it, I would want to drag this
overlay all the way back down. And of course, because the white background is showing through, you could come up here
and you could change that background to absolutely
whatever color you want. So let's click on something and then once we
have it selected, you can really come in here, change it to anything you want. So that's just how I got one of those possibilities that
you saw in my intro. And then let me
duplicate this again. Just duplicate this page, and we have this image
in the background, but we easily now could search for something like abstract,
something like that. Let me get out of uploads. I meant to do that
under elements. So let's go back under elements. Let's search for that term
abstract, something like that. Now I could even drag something
like a video into this. And so now we're getting that. I actually don't want
that to be in the frame. I just want that to be on the
screen behind everything. So let me hit control Z there, and let's actually
come up here and actually I could get rid
of this completely now. Here's a technique where I
don't even need the frame. I just need the overlay. So let me leave this little spot here just while I add a video. So let's go back and
do that one more time. Here's that video I just added. So let's do that. And
we'll position this, of course, behind everything. So we'll just drag
it back down here. We'll drag it down low. We'll make it fit
the entire screen. And then this layer
here, we'll make sure we pull it
all the way down. And then, of course,
this is a video. So, of course, we could play this and let's get to that next. Here, let's play it, and let it get to the next frame here, and we'll see that video play. So it's still looking
at that first one, but there you go. There's that second
one, and this is the other example I
showed you in the intro. I'm just showing you how
you could very easily do so many different things
with this and you give yourself a lot of different
possibilities and more possibilities just by
using a program like Photop. Now, let me show you
one more thing in Photop real quick just to show you really
how you really do have endless possibilities. Here we are back in Photop, and of course, you could have
brought both layers over. So we could have
brought both the woman and the background
over just to really give ourselves total control over how these layers
blend together. So it really is up to
you to decide what workflow is going to make the most sense. Again, I
could have come in here. I could have blended
this. So let's just drag this over
something like that. Again, I'm going to
split that slider, so I'll drag this one back. Maybe drag that one
back even more. So now we're getting
a look that's totally different than
anything we've done before. And of course, if you remember
a couple of lessons ago, we also have the
blending modes in here. So now that I've done that, I could come in here
and I could start to cycle through these
different blending modes modes, and now, once again,
getting something that's totally, totally
different, okay? So you learn these
different tools, you learn these
different techniques, and then suddenly
you're going to have tons and tons of options, and it's really going
to be up to you to decide what option
makes the most sense. Now, something, I don't know if I mentioned that
yet in this course, which I should have
mentioned before. At any point in time, if you're working with layers in here, you can come and
you can do file, save as PSD and you can save
a PSD back to your computer. And then if you
come and open that later that PSD that you saved on your computer and you
open that back here in Photop then you'll
have all the layers, all the edits you made, okay? So, I've showed you before
how you can hit file open and you can
open a JPEG a PNG. And open that up here.
But at any time, if you're doing work
in here and you have layers and you have changes
that you want to save, and you want to be able to
work with those layers again, go ahead and choose file, save it off as a PSD, and then that's
something you can reopen back here in Photop
and work with again. All right, so I hope you learned something
in this lesson. Remember, the creativity really comes down to all those
options you have, and then you get to decide what workflow makes the
most sense for you. All right, thanks for watching. I'll see you in the next lesson.
31. Poster/Double Exposure Challenge: Okay, welcome to
another challenge. I am calling this the poster or double exposure challenge. In other words, you
can create either of these as your
challenge exercise, or even make it more
open ended than that. Doesn't have to be
a movie poster, any kind of poster, basically, any kind of design
that makes use of the skills you've learned in this section of the course,
you're welcome to do. Now, poster is a fun idea. Movie poster is fun,
but also if you want to do a double exposure,
either of those is fine. Let me give you an idea. I I choose double exposure, you can do whatever you
want. Have fun. Be creative. If you choose movie poster, let me tell you how
you might want to approach it because
part of this challenge, too, is also if you
choose to, like, mimic a movie poster
or some other design, It's up to you now to decide how much of that
you want to try to do in Canva and how often are you going to step out and
do some of the work in another program like Photop because one of the things
I really want you to get good at is starting to realize when Canva
isn't the right tool. In other words, we know it's
great for a lot of things. We're going to push it and use it for all
the things where we know that it's a good
tool, it has good solutions. But other times when we come into some effect
where we know, Hey, wait, this is going to be complicated to do in Canva, or maybe I'm not going to be able to do this all on Canva, that's when I want you to have another tool in your tool bag
that you can make use of. So here's another poster that
I created fairly quickly, and so let me just show you how I approached this challenge. So I just went to
Google and started by searching something like
movie poster posters, and then I started
to bring up posters that I thought were interesting. And as I brought those up, it's sort of an
interesting exercise to look at those posters
and start to think about how they were designed and how some of
the effects were done. Now, obviously, you know,
they have big budgets, they have, you know, photographers, they
have illustrators, So you're not always
going to be able to mimic things exactly, but you can start to
look at the effects, for example, look at
this Mulan poster here, the way the sword
crosses over her face. But the way you can see
through to her face here. That might be tough
to do in Canva, because all you can really do
is lower the transparency. But if you start to think
about those blending modes that we talked about in photope, we know we can create custom frames if we
need to do that. So you start to get an idea of how you might create
effect like that. Going through a couple
of other posters, I just thought were interesting. So this poster here, it's
actually quite simple and that we have the image of
this man in the front here. And then, of course, we have the big explosion
in the background. But look at how they're really making use of colors
to their favor. Even his shirt here matches the explosion in the background, and then they're just sort of blending out this image here, so it fades into the
color in the background. And then some of this here looks like maybe they have some of this smoke overlaying on front of them or a lot
of it's behind them. So again, things where
you can start to think about the different
tools and the ability to have sort of transparency
gradients in a program like Photop or photoshop where you can start to think about maybe
how they did some of this. Going through a couple more. So this Star Wars poster here. I mean, obviously, you can see how they're making shape of C three PO here
and using that as a frame and then able to put other things
in the frame here. So again, fairly simple approach and something now
that we know how to create custom of frames, we could certainly take
on something like this. Go through just a
couple more here. So this Hamilton poster. Obviously, a lot of different photographs here of
different people. So laying those together. Of course, some of
these could have been the same photo,
I don't know. But laying those together, and then of course,
they all sort of have a feathered edge. And then, of course, we see the way they're
using some texture overlays over top here and
controlling where it appears, so it's not on its face here. So again, starting
to think about some of the ways they may
have put this together. Here's another one, very simple. So just basically one photo
fades out at the bottom here, but then look at all the texture they're really using they're bringing this poster to life. So we've learned about
texture overlay, so that's certainly
something you could apply in a poster design. And then another one here,
this clockwork orange. Obviously, very
early in the course. We learned about how you can do pop out
effects like this. And now that we know to
create custom frames, you really could make a
frame that was any shape, so we could start to contain
something within the frame, let something else
break out of the frame. You could even have two frames. One could be the shape
of this sort of A here, and then another frame
could be everything else. And then you could
have images in each frame or you size them
so they matched up here. So we start to get a feel for how you could create
an effect like this. Now, ultimately, I decided
to play with this idea here, this Black Widow poster. Again, the X shape here, that's something
where it seems like they could use a frame
for something like that. And then, of course,
there are a lot of texture overlays and other
things going on here. So I thought this would
be a fun one to try out. So let me just walk you through my process real quick
that I did with this. I'm not going to show you
everything, but I'll just show you my basic
way I approached it. So maybe that gives you some
ideas as you go forward. But again, you don't have to
choose something like this. You can choose absolutely
anything you want. So here in Canva, here's the
ultimate poster I ended up creating and I used the
text to image features. So I went under elements.
Let me clear this out. You have this generate your own. That's where I typed in
some different things. I created some hieroglyphics
to be part of my poster. But then if I just go
under my uploads here, let me just come back
under my uploads tab here. If you actually create something
and add it to a project, then under here, they actually make the name of your prompt. Name of the file, your prompt
or you can see it up here. Now, I think it cuts
it off eventually, but let's just see if now, I said it makes it
that, but let's see. It's actually not here.
I've seen other ones in the past where actually I have my prompt in the name here, but I guess that's
not happening. So I don't remember exactly
what I typed in here, but it was something like
female hero, leather outfit. You know, something you
have to play around with your prompting to get the
type of results you want. And I don't think I got great, great assets, but I got
some that I decided to use. So I had this asset here. I chose these two assets here. And I knew these were going
to be background elements. So those are just sized down in sort of position where
I'm going to use them. And I have this one
here. On this page, I was thinking about that
X shape in the background. Now, if we look at
my layers here, this is just actually one
layer that's the letter X. So I sized up a letter x, and then I filled in the
other areas with triangles. Now, this is also something
where I could have used the selection tools in photo
P to create this mask, but I thought it would
be easy enough to create the basic shape here. So I went ahead and used some layers to create
the basic shape here. And then all these files
I'm showing you here, this, this texture layer,
which I pulled in, this Taj Mahal picture, which I thought would be
interesting in the background, this layer, and then this
layer here, this image. These are all things that
I just exported as PNGs, sometimes with transparency, so I could easily select
them and mask them. Other times, Well, I probably chose all these
with transparency, but of course, this doesn't
have any transparency. So I just exported
them all over, and I brought them
all into Photop here. And so we can see here all the different layers
that I brought in. And then, of course,
I put this image together using all the
different photop techniques. Now, this is one of
those decisions where I basically decided just
to work here and Photop, but I could have created
just right here, this layer here, if I
just hit all real quick. I could turn that
shape into a mask and take that back to Canva,
play around in Canva. But since I knew this is the
type of thing that requires a lot of these
blending modes and more complex things
we've learned here, I thought it was better to
just stay and design in here. Okay? So it is one
of those things. Sometimes you're going
to be taking final assets back to Canva. But also, if you have
a project where you know you're going to be
doing this complex blending, you may have to stay longer outside of Canva in
a program like this. So I'm not going to
show you all this, but I'll just so slowly turn off layer so we can see sort
of what they're doing. So just some texture over top of everything there.
This layer here. It's just that background
hypoglyphics there. And I'm using something here on this layer here called
a clipping mask. So if you have a particular shape,
here, I have this text. Now, this text I created
just by typing in Black Widow texts to Google and finding this generator here
and just bringing those in. Again, this is
something where if I were going to use
this commercially, you'd have to make a
donation or payment, but this is just
a fun free thing. So I always be respectful
of copyrights and stuff. But of course, if
you're playing around, you can do a lot
just playing around. It's when you start to
publish or sell things, then you really have to pay
attention to copyright, make sure you're doing
the right stuff. But we're just
playing around here. So I just have a
clipping mask here, and basically what
a clipping mask is. I'll just show you real quick. So let me just create a new
layer over top of everything. I'm just going to fill something
with a rectangle shape. So t back space to fill
with a rectangle shape. Now, if I were to come above that and create
another shape layer, so let's have one that
just partially overlaps, and I'll fill this
with my foreground. So control back space to fill
with the foreground color. Now, when you do
a clipping mask, it's basically the same
as creating a mask, but you're just making use of the layer directly below it. I have this red rectangle
directly below this. And so if I come on this
layer that's over top of that and right click
and choose clipping mask, it's going to constrain
everything that's on this layer just to the pixels that exist
on the other layer, which is that rectangle,
that red rectangle. That's why I'm not
seeing the other part of my white rectangle up here because it's being clipped by this layer below it. I could come in here, turn off that clipping mask and suddenly I see the
whole thing again. So that's all I'm doing
with this layer here is I'm clipping some texture to
my text that I brought in. Then if we go down
past that text, then we have everything in
this group here that is sort of the sort of
masks into that X shape. So just the way we have
frames we can bring in Canva, we're doing the
same sort of thing here in Photop just by, you know, having it be
a roster mask here. It's going through
the different things. I add a little glow to the
edge of her outfit there. Then that's the
picture of herself, a little glow behind her, which is similar to
what I did in Canva, where we blur
something and turn it all black with duotone or all one solid color with
that duotone effect. Here, I'm just
filling with pixels, and then I'm using
the gaussian blur, which we've talked
about in other lessons. Then behind that, just a
little highlight on the edge. There's my two images
in the background, which I just use
different blending modes. So we come down to
this layer here, those two here,
it's normal here, but some of these use
different blending modes. Here's a linear burn for my Taj Mahal images at
the bottom here. Then some different gradients for lighting, different texture. So you get the idea.
But as you progress in Photop there are more and
more tools you can use when you start to get into these complex blending
effects and some of these photo editing effects
and different things you have that are just not
the strength of Canva, and sometimes things you
can't do at all in Canva. So one of the reasons why I made this an open
ended assignment, It's just because I want you to really start to experiment around with when you stay in Canva and when you leave
Canva for something else. And if you only work in
Canva, that's great. That's fine. If it
suits your purposes, that's absolutely fine. But if you start to take on some more complex edits and things that require
blends and things like that, I want you to understand
that there are other programs and software
here like Photop Photoshop, where you're just
going to save a ton of time And so being willing to spend a little time learning what you can
do in that software, it's going to be very helpful, and it's going to
let you stretch what you can do in Canva? Because you can create assets, and then you can take
them back to Canva? You can use them for whatever
purpose you want, okay? So enjoy this challenge, create a poster, or, you know, come back here, create
a double exposure. Whatever you want to
create anything at all, it's all on the
table. Just have fun. I want you to play. And then if you do take on things
that are more complicated, think about, is it something
I can do in Canva? Is it something I should
do in Canva, Again, I love Campa staying there and working there
when it makes sense. But if you need to go over
the Photop because that has a tool that's going to save you a lot of time and give
you the results you want, then that's the route
you should take. And then you can come
up under the share menu and you can come down
here and if you want, you can grab a public view link. This lets people look
at your project. They can't make edits, but
they can look at your project. Or if you want, you can
download appropriate media. Then here in Skillshare, just come under
whatever challenge you happen to be
currently working on. Then come under here and come down to this
discussion tab, and then you can actually
use any of these tabs, start conversation, ask a
question share project. Any of those are going
to work. Just come in here and either insert the link. If you have that
public view link or if you download it
some media to share, use this ad media and you can
upload your media that way. And that way, we can
check out your challenge. We can all get
inspiration from each other as we share
challenges here. And you can offer critiques, just keep your
critiques friendly and try to be as
helpful as possible. All right. I'll see you
in the next lesson.
32. Animation Basics: Lesson, we're talking about
animation basics in Canva. Now, if you're looking at the screen right now
and you're thinking, This is kind of ugly, and this is pretty obnoxious. Well, I tend to agree with you, but this is the first layer
of animation in Canva, and that is the fact
that you can search for and you can find
animated graphics. So at any point in time, you can come under elements here. You can search for
anything you want, so maybe I'll search for
something like fireworks. And if I do that, I'm going to start to
see all the results. And if I look under graphics, I'm going to see some
of these are animated. And if I want to see just
the animated elements, I can come under my filter
menu here, check on animated. And now with that checked on, it's going to show me just the animated elements in Canva. Now, if I find any that I
like, I can come under here, and maybe I'll add
it to a folder, and maybe I have a folder called fame favorite animated assets. So I advise you to do
that, stay organized. If you find things
you like, however, I do not think this is the
best way to animate in Canva. Now, I'm not saying
you can't find some graphics in here
that are pretty cool. But other ones here,
I just think they're not really that
modern or exciting. So I think this is limited. Can you find some
cool animations? Yes, you might find
some that you like. If so, save them if they're
ones you're going to re use? Otherwise, let's
move on to what I feel like is the better
feature in Canva, and that's the ability
to add sort of pre made animations to any
assets in your project. The whole page or single
elements on a page. So you probably know a
little bit about this, but if not, let's just review. So at any point in time, you can click on the entire page. And if the entire
page is selected, you have this animate option
up in the upper left here. If you click on that, then
you have all of these sort of presets that you
can apply to the page. So you can just
mouse over any of these and see what the
animation is going to be. Now, if you click
on any of these, a lot of times they'll
have some options, whether you want to apply
it when this page first begins or when it exits. So sometimes you can apply it to both or
one or the other. And some of these
other ones have different options like
you may have speed. This one has intensity
and direction. So you have to play around with these different options to see. But right now with
the page selected, any one we mouse over, it's going to show
us a preview of how that's going to be
applied to the whole page. So every element that's
on the page, however, if you instead select a single object, then
suddenly you'll know, Aside from page
animations over here. Now we have element animations. And anything that we
select now over here is going to be applied to just
the object that's selected. So again, there are a bunch
of different options. Some are the same or very similar to those
page animations, but you also have some
different ones down here. So again, you can just go
over mouse over each one. Click on it if you want to see what additional options it has. This one has on Enter on exit and speed, and also direction. But you can click on any of these or you can
just mouse over. And then with these
individual ones, you also have some
motion effects. And so you have
this rotate here. Now, you're not going to
see anything with a circle, but if we go to this
square down here, then we'll see with the rotate, suddenly that's going to rotate. Now, we see some other
ones moving around because I still have that
page animation applied. So let me go back and do
the whole page before. And we had applied
this drift before. But let's go ahead and
remove all animations. It's going to take that
page animation off. So we shouldn't have any
page animations applied now. Now, if I select this rectangle and we go back to animate. So instead of the upper
left for the page, if I select the page,
it's in the upper left, single object, then
it's going to be up here sort of in the middle
of this contextual menu. Click on animate again. Now if I apply
rotation or something, we'll see nothing else is
moving because they no longer have any page
animations applied, but I can apply an animation to just this selected
object, okay? So now we have an even
finer level of control. Some of these can
be pretty cool. Now, right now, just looking at a page of shapes,
they're not that cool. But if we start to
apply these animations to some of our other creations, then suddenly it
can become a lot more interesting.
Just as an example. This is a dune poster that we created earlier in this course, and now I've just added some
simple animation over it. Now, we'll walk through a
lot of examples like this as we proceed in this
section of the course. But the take home is just that this animation that we can
add in Canva very easily. Can really allow
you to take some of your designs to the next
level and create some of those attention
grabbing graphics that are going to really
get the attention of your audience when
you're posting to things like social media, and it's just a lot of fun. Now, there is also
one other easy way to add animation to
your canva design, and that is with
page transitions. So here, whenever you
have a project and you have this video
timeline down here, you can go between slides and you'll see this little
transition option. And if you click
on that, suddenly, you're going to bring up these options I'm seeing
to the left here, So let me just click off of
this to get rid of that. But let's see if I go back
under here, click on that. We see that menu comes up. And then suddenly,
just like before, we can mouse over these
different options, and we're going
to see a preview. We can also click on them. And again, sometimes we have some options that we
can play around with. This one here, we can change the colors in the color
wipe, the direction. And also the duration. So you have all these different options that you can go through. And you even have this
match and move option, which is actually
one of my favorites. Let me just illustrate
that real quick. So let's go to
another page here. I'm just going to put
a circle on this page. We're going to control
C to copy that circle. We're going to control
V just to make sure it's in the same place
on this next page. But then suddenly, what if I
wanted to move the circle? Well, I can move it over
here. Let's add another page. I actually, let
me just duplicate this page, duplicate that page. Then maybe I want the
circle to go up here. Let's duplicate that page again. Maybe I want the circle
to come over here. And then suddenly, if I go
to all of these slides here, I'm just going to shift
click to select them all. We're going to come in under them and add this
match and move. I'll apply between
all pages here. So let's apply
between all pages. And then if we come back here and I actually present
this to play this, so let me go full
screen real quick. Now, if I start to go
through these pages, then suddenly we can
see that animation gets applied where it transitions that object from where it was to the new
position on the next page. So it's yet another cool option we have here in Canva for adding some animation to our design or to a presentation or
something like that. So this was just
a quick intro to some of the basics of
animation in Canva. But in the lessons
ahead, we're going to work through
lots of examples, and we're going to see
how this animation, combined with everything
we've learned in the course. So creating frames,
creating texture, adding different images
together in a composite image. We're going to see how
we can bring these all together to create
something really cool and how this animation layer and these animation options
are going to let us take our designs to the
next level, okay? So, thanks for watching. I'll
see you in the next lesson.
33. Getting Creative w/ Match and Move: In the last video, we introduced
some animation basics and talked about
some different ways you can animate in Canva. In this video,
we're going to talk specifically about
the match and move, transition you can use in Canva. And so we're going
to go over some things you should
know and give you a more complex example
just to show you how you can get creative
with this technique. So on screen right now, I just have this text, match and move, and I
have a simple rectangle. And so let's start to
make sure we understand the basics of how this
match and move works. Basically, what it's going
to try to do is when you have two slides and you
use that as a transition, it's going to try to match
from one slide to the next, and that's best just
seen through example. So let's go ahead and
duplicate this page. And this is always a
good way to start with this animation is to start with a page and duplicate a page. That way, you have
the same starting position of all your elements. When you go from slide to slide, and then on the slide
that you duplicate, you can make those
adjustments and start to have some animation
between your slides. So, this match and move here. I'm just going to
come right up here, and I'll just
duplicate this page. And so now we have these
two different pages here. Right now, everything
is in the same place, so I could come up here and add this animation match
and move 2.5 seconds, and I'll have duration turned on here so we can
see our playhead. But as I scrub through here, we can see there's nothing
happening currently because, of course, the slides
are exactly the same. But if I were to come
down here and then I'm just going to grab this
match and move text, and I'm just going to
move it straight down. I'm holding down
the shift key as I move it down.
Now I'll go back. And now, as I scrub through, we can see that that
just slides down, and so it animates from one position to the
position on the next slide. Now, I just moved this
text straight down, but I also slit
it over this way, now we can see it's just going
to move diagonally down. So no matter where you move your text from slide to slide, it's then going to move it in a straight line when that match and move transition
comes into effect. Now, what happens
if we were also to resize it? So let
me just click on it. Let me just drag it
up to make it bigger. And then now we're going
to scroll through here. And we see now, so it's
also resizing as it slides. So again, moving on
a straight line, but now also sizing up. Now, I wonder what happens if we come in here and change
something on this, like this is center aligned. What if we go ahead
and left align it? It's not going to make a
difference or does it? Look at that. Now,
because the alignment of the text is different from
slide one to slide two. Instead of that
constant animation, we get this animation
where it fades from the first position and fades
into the second position. This is a very
important point to make because there are going
to be certain rules you have to follow with this
match and move if you want that constant
continuous animation. Otherwise, you're going to get this fade effect where it fades from one
location to another. Let's look at some quick
examples with this square here, so I could come on this page, and we'll just
duplicate the page, and we'll make sure we
have that match and move transition in between,
so we have that set up. And now, if I go on
the second page here and we'll just slide it
to a different position, and we can see, okay,
that works fine. Maybe now I'll put it over here, and I'll drag holding down
my shift key to constrain the proportions or my alt key
to constrain the portions. Actually, that would
have to be alt and shift to constrain
the proportions. And when I do that, it stays and still a
continuous transition. So, in other words, we're
maintaining the ratio of length to by holding down that shift key when
we do any resizing. But then suddenly, if
I throw off the ratio, so now it's a different
height width ratio than it is from that first one, and now we see we
just get that fade. Okay? So you have
to pay attention to these things as you go along, and continually check your animation just to
make sure you're keeping that smooth
continuous animation, if that's what you're
going for, and you're not going for
the fade effect. So I have that back here
because I've again, have the same dimensions. But what if I come to
this second one here, and what if I do
something like I changed the color? What's
going to happen there? Okay? Now, suddenly,
if you add a color, if you add a gradient that's different on the second
one than the first one, then suddenly it's going to
return to that fade effect. Now, let me just go back
to this example here, and I'm just going to
duplicate this page, and we'll make sure we have that match and move in between. So actually, before I do that, let me just take this text here, put it right on top, and then we'll just duplicate this page. And again, we'll come
in between these pages, make sure we have that
match and move transition, make it a little longer here. But now let's look at the
position of these layers. Match and move the
text is on top. What if on this second slide, I take this match and move
and I drop it behind, How is it going to handle that? Okay? So let's grab our slider and we see from one to the next, it does this fade where it fades from in front
to behind, okay? So that's another situation. Another situation. Maybe I
don't want this red square to move or I guess it's a rectangle to move somewhere on the screen, but maybe I do want
it to expand sort of outward to take up a
larger area of the screen. So let's try that. Let's just
duplicate this page here. I will make sure we have the match and move
transition in between. We'll make it longer like that. But then on the
second page here, we're going to leave
it anchored up here, but let's just drag it out this way and we'll drag
it out this way. And of course, I'm sure I've
changed the dimensions here. So now it's definitely
taller than it was compared to
the width before. But if I drag in between, we can see it handles that, no problem because it's
anchored somewhere. And so it's able to do that
transition seamlessly. So just be aware of
all these things. If you start to
understand these rules, you can start to do
some cool things. Let me show you a couple more complex examples just
to show you how you can make use of this match and move animation because you can do some pretty cool
things with it. So this first
example is something I actually saw
somebody else create. And so you can often draw
inspiration just by looking at the work of others around you and you start to understand
these tools in amaba, you can start to understand
how they created the effect. Okay, so on this
first slide here, and I just have one right now, we have it where
this one picture is sort of featured and
larger than all of this. So if we look at
the layers here, we just have a solid
color background, and then we have a
cutout of a woman, and then we have a
name up top here. But of course,
this one currently is larger than all
these other three. So, what if on the
next slide here, we wanted to cycle through and suddenly make this
the featured slide. Well, this is something that we could do with match and move. So first, looking at
this, I've set this up. So basically, one, two, three, and then this sort of
takes up two columns. So this is sort of a
five column layout. So it might be helpful when we were doing this to
have guides here. And that's what I originally
used to set this up. So let me just come under
here and come under file. And if you go under
sort of settings, you have this add guides. And if you go under add guides, you can add custom guides here. They give you some options here, but usually just want
to use this custom. And so let's make
this a five columns. And then you can click in another thing just to make
sure it registers on this one. We don't want any gap zero. We don't want any gap here,
so everything's zero. So now we can see
that that matches up perfectly with the way
we have the setups. I'm going to go ahead
and click Add Guides. So now we have this visual guide helping us when we go to change these layers and
change the size of things. So I'll just come in here now, and I will duplicate this page. Now, remember, on
the second page, we want this one to grow
now and be the larger one, and we want this one to shrink. So let's just start with
the first one here. Here's this blue rectangle. We're just going to
pull it in, okay? Maybe we want another guide, which I can drag
out another guide to add to our guides
just to sort of indicate where the top of the heads roughly are
for our subjects. So I'll grab this subject here. We're going to scale her
down to roughly that. I'm also going to just
reposition her here, so she's more centered. Uh, where that guide is. So right there is good. And then the text itself, I want to scale down as well. Let me just hold
down my shift key and drag it over here so it's roughly over centered
over this other name here, and then I'll just use the
Alt key and drag that down. So it's basically the same size. And I'll use my shift, and
I'll drag it back over here. And again, I don't know why it positioned her here because, of course, we're
making here smaller. So let's drag her over and
let's size her in like that. We could size her up. Well, we can I think
that's going to be how we have to
do it like that. So something like this. And then this one here, I'm going to click on
this rectangle. This one, we're
now making bigger. This person, we're going
to make bigger as well. So we're just going
to drag her up, reposition her on this
center line here. And the name I should have
kept the larger name as a guide to make it consistent between the different ones, but I'm not going to
worry about it too much. I'm just going to
do something like that and put it like that. And now, if I scroll
between these two slides, now you can see
we have this sort of dynamic transition animation. And so this is the sort of
thing you can start to do with this match and move animation transition that
you have here in Canva. So let me sort to show you a more completed
example of this. So I'm going to go
into present mode. So just give me a
second and we'll jump into present mode here, and I'll show you a more finished version
of this project. So here I am using
Canvas present mode, and you could imagine
maybe a situation where you were giving
a presentation where you wanted to use this sort
of animation and sort of have one area of a slide
featured at first, and then transition to featuring another column and
another column. So now we have it set up, so here in Canva. We could do that, where we're going from one
slide to the next, and then it's making
this dynamic transition. Now, I also set up transitions for it to go backwards here, but it's important to
note I'm not currently going backwards
through my slides. I just have additional
slide set up, and then you could also make it so they're centered out
like this, so it's even. But if I go backwards
using the back arrow now, it's important to note
that this transition does not work when
you go and reverse. Canva doesn't expect
you to go and reverse like this when you're
given a presentation. It would be kind of nice if the animation could play in reverse, but just know that right
now that is a limitation. So if you go forward
through the slide show, it's making use of
that transition that you have between slides. So these are all slides
going forward in my project. I just made some of the slides
sort of reverse in order. But when I go backwards, then suddenly, it's just
this hard transition. You still get a
transition effect from one slide to another, but not that continuous
seamless transition. So that's just something
to make note of. But this is how you
can make use of this match and move
transition to get creative. Now, let me show you one final example using Match and move. Here is a fun project
I gave myself, which was just a piece
of educational content where I was recreating the
animated Netflix logo. Now, of course,
you always want to respect the company's
trademarks. Copyright, so you're not going
to use this for anything. This was just something
where you're just sort of playing around to
practice your skills. And so it is good to look at real world examples and
see what you can recreate. So Netflix has that animated version of
their end that you see them play a lot when you're watching
something on Netflix. And so if I scroll through here, what I did was I just
use the match and move, and I started to take these
basic shapes and then use the match and move transitions to sort of play
out the animation. And sort of recreate this animated N. And then at the end, I exported off finally a
final MP four video version. So let's just play this from the start and see
this video version. So it just plays forward and
it plays back backwards. So this is something pretty
cool that I was able to do entirely with the
match and move here, within Canva and basic
rectangle shapes. Now, something of note with this is when you initially create this match
and move animation, and if I hover over slide, I don't know if
it's going to show, but sometimes let's see
if I switch off here. You can see where it's blue highlighted in blue down here. It does not let you have
this animated part, the transition extend
across the entire slide. So when you first
export this as a video, it's going to play
the animated part, but then you're going
to have a pause where it's not animating. I did not want this pause in
this final video version. I wanted to be more consistent to play almost continuously. So what I had to do was I had to export it once as a video, bring it in and then use sort of the trim options to come in here and trim off the parts that I did not want. So I actually exported
this twice as a video from Canva to get this final
animated version you see here, but I did it all with
the match and move, and then bringing
it back in to use Canvas video timeline to trim out the pauses and the
parts I didn't want, okay? So just another option of where you have to
think creatively think outside the box and
then understand the tools you have in Canva. So this is the Canva Match
and move transition option. So make sure you play around, have some fun and see
what you can create. All right, thanks for watching. I'll see you in the next lesson.
34. Using Rotate to Create a Record Animation: Let's just work through
a simple example. Part of this is knowing what animation options Canva
has, all those presets. Another part of it is
just thinking creatively. I've come in here
and I've searched for record player
under elements. I'll go under photo and under photos and let me
grab this photo right here. Let me just scale this up to fit in the center
of my thing here, and then I'm just going
to grab a circle frame. I'm just going to
type in circle frame. Again, if I go to all, I should see this option here. And then I want to position this sort of over
my record here. And this is one of those
cases where you could use rulers if you want to
get this lined, exactly. So maybe I'll hit something like Shift DR to show my rulers. I could zoom in
here a fair amount, so when I drag out guides, I can really get these guides
right in the center there. Then I'll go ahead and
fit this back to screen, and then I'll bring
my frame over and just get it so
it really snaps. You'll feel it snap
to that grid there. So right there, look centered, and then I'll use the
alt key on Windows, that'd be option on a Mac and just drag out from the center, and I'll basically get this
to fit my record player. Doesn't need to be perfect.
But something like this, now we have the circle frame
over this record player. And now all I'm going to do is come back under
here, clear that out. I'll just grab this photo
here. A photos going to do. We'll put that one in here. And then if we come down and we just lower the
transparency on this. So we'll grab this
and we'll lower the transparency
down a fair amount. So it looks like the
photo sort of is blending into the
record right there. And then, of course,
it's a record player. So, what do we want to do? We want to animate
this and let's come under and find this
rotate option here. And then suddenly,
this is really cool. So if I just supply that here, and then we'll go
ahead and hit play. And just like that, we
have something really cool that we got to very quickly just by
knowing the options, knowing we had that
rotate option, knowing we could bring
a circle frame in here. And so very quickly, we
got to something cool. And then, of course,
you could play with this idea as
much as you want. So here I am in another
project where I'm attempting to be
a Canva DJ here. So if I just hit play bop, bop. So we added that little
scratch at the beginning, just for fun by bringing in some audio tracks
fooling around. And this would be a cooler
way to do a slide show. So you could have
something like this where the pictures change
as the music change. So this would be a kind
of a clever way to show photos as opposed to just
the typical photo flage. I think you can get an
audience's attention if you have something like
this on social media. They're more like to stop. So it is about
being creative and just having fun
with these ideas. But this idea just
came about because we understood the options that
we have inside of Canva. So I encourage you
to get to know these element animate
options within Canva. Allow yourself to
think creatively, and before you know it, you'll be coming up with
some of these cool ways where you can make use
of these animations. Alright, I'll see you
in the next lesson.
35. Record Animation Part 2: Let's look at the
record example we were playing around with
in the last video. Let's look at that
a little further. So we know by now there are multiple ways we can do things. In the last video,
we were sort of lowering the
transparency of an image and putting it on top of that record player so the record player would
show through. But of course, now we know we can create our
own custom frames, we can create our
own custom textures. So let me show you what
else you could do. So I'm going to come in
here under my projects, and I have saved off a frame. So I'm going to come
in here and I'm going to look for folders. And I'll look for my
favorite frames folder. I could search for it up
here if I didn't see it, but here it is right
here, and here is this record frame
project that I created. So let me just bring
this out on the screen. Now, let me break apart
what we're seeing here, because when you save
off a frame like this, you have a file and you save the file that
has that frame, and you can also have
whatever you want in there. So, in essence, what
I just did was I added a page from
another project. And if I break down
what's in this project, I can see that I have one, two, three different items here,
three different things. But these are all
actually frames. Let me throw away
the top couple, so let me throw
away this top one. I'll throw it away
this other one. And we can see that there was actually just a frame there. So if I go ahead and
I right click and detach image, this is
what I started with. This is the frame
that I created. And then once I had saved this to my favorite frames folder, this project, I'd actually added some stuff to it by then. But we can see this
frame here has a little hole in the
center just so it has that feel of a record from our first couple lessons
on custom frames. We know how we can
work in Photop. We can create any
kind of vector shape, Even if we're not
starting with a vector, we can bring in any image. We can make selections
inside a photo pe, and we can turn
that into a path, and then we turn it
into a vector shape, which we bring back as a
PDF here in the Canva, and then we have
our custom frame. So I can come up
here and if I go to my background and I
change it to yellow, we can see yes, that
yellow is showing through. So I do have this
knockout in my frame here where we can see
through to the background. So that's just, you
know, custom frames. Just to review. We can do that. We can create custom frames. Let me change this back
to a white because that yellow is going to drive
me a little crazy, I think. So actually, I just
put the color there in my frame by mistake because
the frame is on top, so let me select the background layer and make sure I have that. I can't see the frame,
but it's still there. Let's add something
to the frame. So this is where I'm going
to add any kind of picture. So let me just come under my under my uploads tab here, and I have this
fantasy art stuff I was playing around with just using the text to
image generator. So let me just drag
this one down. We'll make that our
image. Doesn't matter so much what the image is right
now, but we'll use that. And then I'm going to bring a custom texture and
put on top of this. But I want the texture to
also sit inside a frame. And so if you
remember frames and textures and some of
the past lessons, you know by now that
you can stack frames. So what I'm going to do
is I'm going to come up here and I'll just
make a copy of this, so I'll hit Control
D to duplicate. I could also use these
three dots or right click. Find this duplicate. Now
I have another frame. I'm going to drag
it, so it's snapped, so I make sure it's
positioned right on top. And then I'm going to add something different,
because right now, all I have are two frames
with the same image in each frame stacked on top of each other. I
don't want that. I want my custom texture. So, again, I brought
in a custom texture, which I created in Photop just by bringing in a
photo of a record, and then using those blending techniques we learned in earlier just come here under
my projects tab, go back out here, go back here, and we're going to search
here for favorite textures. So, here it is
down here. I don't even have to search.
I see it right there. Here is this record texture. So this is what
I'm going to drag and put into this frame. And so now I have a
frame with my photo. And then over top of it, I have this frame that
has this texture. But because they
created a texture using those techniques we
used in earlier lessons, we learned in earlier lessons, about how you can make a
semi transparent texture. This is letting my photo show through underneath that's
in the frame below. So now I have this
cool textured look that gives this sort of
the look of a record here. Now, of course, if I wanted to animate this, I could
come under here. I could go to the
bottom layer here. I could come and I could
select rotate if I want to, and I could make
this rotate itself. I actually have the texture
over top rotating as well. So if I go under here now, you can see how
they both rotate. Of course, I could decide I didn't want the texture
to rotate, maybe. I just want to see what
it looks like with just the underneath
layer rotating, so I could come up here under rotate and I could select that, and I could remove
the animation. Now if I go and I play this, now we'll see that the
texture isn't spinning, just the layer below it, so
that might be interesting. But of course, if we wanted this to be the look
of our record, we probably would have
them both animated. So let me just hit Control
Z until we add back that animation on the top
layer, and I've gone too far. So Control Shift to
bring back something. Let's see what I've done now. Do I have my texture spinning? Yes. Now I have my texture
spinning again with that. So this is just to show you that there are
different methods. For getting to the
results you want. And the last one, we
lowered the transparency, and we had to sacrifice some of the photo layer because we couldn't see the
whole photo layer. And this one, we actually
brought the texture in and the texture itself
was semi transparent, allowing us to see
through to our subject. Now, let's take
this even farther. I'm going to make a
duplicate of this here, so I'm going to come
here and I'm going to duplicate duplicate that page. And now on this page here,
let's take all of this. I'm going to come
in my position Men. Just make sure I have
it all selected here, and then I'll just
grab from the side, holding down the Alt key. I'm going to make all
this smaller, okay? Now, let's imagine, I'm going to search for something
like musical note, and you can see I
pulled this up earlier. Let me just pull that back up. What if I wanted to make
this part of my animation? Actually, let me
make all of this in the center a
little bit smaller, drag it in a little bit. Now this musical note actually control Z
because I lost that. I want to make sure
these stay aligned here. Let me grab this up here. I'm going to make this
slightly smaller. But okay, now, I have
this element here. What if I want this
to rotate as well? I want these musical
notes to rotate. So we know I could come
under the animate option, and I could choose rotate. But of course, it's just
going to rotate up top here because what happens is when you have an image
and you choose rotate, it rotates around
the central point of that image. And because
we see the blue lines here, the bounding lines around this, it's just going to rotate around where my cursor is right now, right around that center point. If I click on this here, well, this is the absolute center, so it rotates around there and
we get the effect we want. So for this to rotate, do you have any
idea how we could make these musical notes rotate around the outside of our record? Think about that. We wanted to rotate around
the outside of our record. So really, we just
wanted to rotate around the center of this
document because that is the center
point also for this frame that we
have underneath, okay? So here's what I could do. I'm just going to take
this whole thing. Let me duplicate this
page one more time. And then on this
duplicate page here, I'm just going to get
rid of everything except for these notes up here. Now, I'm going to come
under the share menu. And I'm going to download this? I only want to download
this page as a PNG. So let me go and make sure I only have page three selected. So current page page three, and then transparent background. And then instead of coming up here, I want to
click download. So let's get it right this time. So now it's downloading that. We're going to call
this musical notes. And I think I did
this once before, but we'll call it musical notes, slightly different
spelling. Here it is. So it's downloading up
here. Here's what I want. I can drag it right back in. So it doesn't take much time at all to bring that right back in. But so what have we done?
What's the advantage of that? And we can see that I did not bring it in with
transparency. I don't think. But I did previously. So let me just show you
here it is right here. Here's the one
with transparency. So let me come back
up to this one. We no longer need this note. This notes not going to
rotate the way we want. So let's throw that away.
Here's the newer version, the one we brought in
with transparency. Let's position it in the
bottom corner. So here it is. Actually, I put it in my frame, didn't I? Let's try that again. Remember, you can't click inside the frame or it's going to
want to snap in the frame. So let me try that again. Let's drag it up, so it's
fully space from side to side. So now here's where it is. And so now suddenly the central
point of this is changed. So if I come to
animate this now, and I go under my rotate
option, what happens now? Now, suddenly, we can get this to rotate
around our record. We could even have it go in
the opposite direction, okay? But let's take this even farther because once you start to
do these sorts of things, you really can play endlessly. So here's what
we're going to do. We're going to hit Control
D to duplicate that layer. We'll make sure the notes are
back on top of each other. We'll spin it slightly. Now, let me come up here under the position menu just so we can see our
different layers. We're going to take
both of these, and we're going to
group them together. But then let's
duplicate it again. So control D to duplicate. I'll put it right on
top of each other. Let's spin it again. Okay? You get the idea. We're going to select them both, group them together again. Again, control D to duplicate, position it right on top
of each other, spin again. Okay. You get the idea here. We're just going
to keep doing this until we go all the
way around the circle. I'm just grouping it. I'm hating control D to duplicate it. I'm dragging to make sure
it's in position exactly, and then we're rotating around. Now, at some point here, if I want this to
line up perfectly, I'm not going to be able to
duplicate the whole thing. So let me just come
ahead at this point, select all of these,
ungroup everything. And then I think I just need the top few layers
to let scrab one. Two, and at this point, I can control click
or shift click. So I'm going to
grab those three. I'm going to get
control D to duplicate. I think I just grab
those last four. So there we go, make sure they're right on
top of each other. Again, we'll rotate
and that should just about fill out the circle.
I think I need one more. So let me come up to the top, Control D to duplicate, grab that one, and then
rotate it one more time. And now we basically
have that full circle. So now I probably would grab them all here. So
let's grab them all. We're going to group
those together. So here's my group
option up here. Again, if you can't
see everything, you might have to fit or go 50%. Make sure you can
see everything. But just to show you now I
have all this in one group. But then what I can do
is that entire group, since I have it in a group here, I can animate, I can
choose my option, so maybe I want these to
rotate at a certain speed. These are going to
rotate pretty fast. Let's make them go the opposite
direction pretty fast, But then also, maybe I
want to add another group. So let me just come back
under position here, Control D again, right? We're going to
actually make these spaced a little bit
in between like that, but then maybe let's
size it all in, so I'll use the lt to
bring it in a little bit. And then the let's
change the rotation, so it's going to be
something different. So maybe these will go
the other direction, a slightly slower speed. Maybe these will flicker. Maybe I'll go back to
the other ones here, and let's go under animation
again. Maybe these will this pulse effect, okay?
So you get the idea. You can play around
here and you can really start to create interesting
animations from simple elements just by
taking your time and using all these different
techniques that we've learned and you have
at your disposal, okay? And then when you create
something you like, then you can save
it off as an asset. So if I created
something that was spinning around sort of a
central circular frame, And I thought, Okay,
that's a cool animation. I might want to use that on my social media to make
something pop out occasionally. I could save off this page just like I had the
frame saved off, and then I could bring
this element into another document whenever
I want to very quickly, and I wouldn't have to
do the tedious work you saw me doing it now, copy paste, copy and paste. The idea is you're creating reusable assets that can
save you time in the future. All right? Thanks
for watching and I'll see you in the next lesson.
36. Mastering Custom Animations: Let's talk about a type
of animation in Canva, which we have not
talked about yet, and that is the ability to
create custom animations. Now, I put together
a little scene here, and these are all just elements I was able to find in Canva. So I brought in and grouped some of these flower
layers here at the bottom. And then using basic shapes, I put together this box here with made it look like you had some dirt in here
and some flowers, so this could be
a little garden. That's in the center mycin. Then I just put some
texts on front and found a cool image to
put in the background, and of course, we have this
little animated B here. This was just for fun
putting this together just so we could demonstrate
this custom animation tool. So if you click on
any element in Canva, and then you come under
the animate options. We've seen all these
options down here. We have not yet
talked about this create an animation up top, this first option
you're going to see when you have
something selected, and this gives you the ability
to create animation on a custom path that you defined by moving an
object around in Canva. Let's click on this now
and explore the options. Okay, so it's going to tell
you you can select and drag an element around to
create your animation. If you hold shift, you're going to draw on
a straight line. And you can control
the speed by just how fast you're dragging
the object around, and then you can stop dragging to complete your animation. And then once we do that, we're going to
have some options. Okay, so let's try this out. Let's imagine we
just wanted him to fly straight across the screen. So it says, I can hold
shift to do that. I'm going to hold down shift, and I'm going to drag him, and I'll drag him
across like that. And then it's going to
play the animation, and you can see, It has a little pauses
where I pause my mouse. I didn't do a smooth drag. But if I come in here and
explore these options, then suddenly I can smooth it out using this
option here and he sort of eases into the animation and then eases out of it. So that's got a little bit of
an ease in and an ease out. If we just do steady, then the whole thing is
just going to move in one constant speed
across the screen. So constant speed,
if it's steady. If it's an original,
it's going to keep all the jerkiness you may
have had in your hand motion. And if it's smooth, it's just sort going to ease
into the animation, and then it's going to
ease out of the animation. It's really up to you which of these you like and which is going to work
for your animation. The other options
that you have after the fact is you can
adjust the speed. See, I drag that way down, and suddenly he's moving slow. We still have that
ease in and knease out because we have
it set to smooth. I could switch it to steady, and we can see he's
moving much slower now since we changed this
animation option down here. We could speed it up, and then suddenly he's really
zipping across the screen. So you have all these options. Other options we can explore. But if you don't like your
path, you can delete the path. Let's say we didn't want them
to go in a straight line. You have this path
that's represented by the dotted blue line here. We can delete that and we
can start all over again. So this time, we're going to
click and drag him around, but I'm not going to hold shift. So this time, I'm just going
to have him fly all around, maybe he's doing
some loop de loops, and he's going to
end up over here. So when I release, we go ahead
and we see that animation, that's really cool
that you can create your own animation
path like that. Now, of course, we
can adjust down the speed if we want him
to go a little slower. So now he's moving
in the same path, but a little bit slower. If I want it to be more steady, I could try this one, so he's
just in a constant speed. Now, when I do steady, for
some reason, there we go. It wasn't playing all
the way through before, but there it goes playing
all the way through now. And of course, with a
smooth option here, it's going to have that ease in and that ease out
of your animation. It's going to start
a little slow, pick up a steady speed, and then it's going to
slow down at the end. Um, the other thing
we haven't talked about here is this
orient to path. Right now, this B is just
facing horizontally. He's always looking
at this excuse me. He's always looking to the
left side of the screen here. But suddenly, if I orient to path, watch
what he does now. Now, suddenly, based on how I move my mouse, he's
going to flip around. Now it's not going to make a lot of sense for him to do back flips like that because I went
in all sorts of direction. But if I kept that in
mind and did this again, so let me delete this path. Now I'm going to click and drag, but I'm only going to go in loop de loops like
this, forward motion. Then I do this orient to path. Well, then it's a little bit more like maybe
that could happen. Never seen a B fly like that. But that's what this
orient to path does. That will let your character, your element rotate as
it moves along the path. If you don't want it to rotate, you just leave this turned off. Let's go and try to do
something here where maybe he flies from
flower to flower, and then maybe he stays on each flower for
a little while. Move my background, let me hit control to bring that
background back. Actually let's just jump
out of here and then we can make sure our
background is in position. Okay. So we'll click
on them again. And anytime you leave the tool and come
back into the tool, it maintains the last path
that you however you left it, but you can delete the path
at any time and start again. So let's start
again. So I'm going to have him maybe
stop at each flower. Maybe I'll skip this first one. So I'm going to shift and sort
of have him hop over here. Then I'll pause, but I'm
not releasing shift. I'm going to come over here. I'm pausing, not
releasing shift. I'm going to come over here, pausing, not releasing shift. Then finally, it's stopped because you can only
do this for so long, and then it's going to
stop your animation. So I was just taking
a little too long, so it did cut off my
animation at the end. Let me just maybe I'll have them only stop at a
couple of flowers. So you have some
limitations in here, but let me go ahead
and delete that path, and let's try this again. So we're going to
have them fly here. Maybe he'll do more
of a straight line, and then maybe he'll come over here and then that's going to
be the end of my animation. Okay? So jumping from
flower to flower. You could have
them pause longer. You could do this anyway
you want. But let me lower down the speed here. I'll take it all the
way down to zero. And then let me just
play this for you here. So one thing that's helpful is if you click on this
start duration tap, right now, if I
have this selected, I can see with this
slide selected that it's 7.9 seconds is actually the amount of time this
slide is going to play. But if I do the duration tab, then suddenly, I can see
it right there on there. And I can also actually change the length of my slide just
by dragging out the handles, which I'll do in a second. But I also have this play
button here and this playhead, which can be helpful
because you can just drag this playhead
through your animation. So anytime you're working with something that's animated
or a video like this, it is helpful to toggle
on this video timeline. If you don't see it,
it's hidden down there, you can toggle it up here. There are a few
types of projects. If you start at, they don't have the duration option here. But if you start at any type
of project that's a video or something that expects you might bring an animation, then
you can tgle this up. You can always tgle this up, but then you're going to also get the duration option here. Now, I want to explain this 7.9 seconds related to
the speed of this B. When his animation speed is
all the way at its lowest. And then I come out
here and I play this. Watch the playhead and we'll
notice that it takes him the entire length of the video clip to
complete his animation. That's why when
you have the speed set higher, then suddenly, sometimes it's going to time out because it's timing it out, so if you drag this to the
slowest speed possible, it's going to take up the entire distance of your playhead. But this is also relative to the length of
your video clip. In other words, let's watch
how fast he moves now. When this is 7.9 seconds. He's moving along at You know, reasonable rate, and then it gets
to the other side. But suddenly, if I
don't change the speed, but I come down here and I
drag this clip and suddenly, I'm going to make it so it's
only let's say 2 seconds. And now, if I hit the
play button, suddenly, we'll notice he's moving a lot faster because it's always
going to want it to complete the animation path within whatever time
you have set here. So I have set at the slowest
speed and I made it shorter, and so suddenly he's
moving faster because it still wants to
complete the animation within that 2 seconds. However, let me hit
control Z to undo that. Interestingly enough.
If I do the opposite, we might expect them to get even slower if I drag
it out to the right. In other words, let's play
it here at the 7.9 seconds. Remember, this is the
speed he's moving here, so he completes it by the
time he gets to the end. But now I can come on here and let me just drag this back. But if I drag this
out, let's say I make it like 30 seconds. Now if I hit play, suddenly, let me bring my play head back. Now, if I hit play, suddenly, it's not going to
adjust the speed. It's going to keep it at
about that 8 seconds. It takes him to get to the end. But then we have all this space here where he's
not moving, okay? So it will adjust the
speed if you're making the clip shorter
because it wants the entire animation to
fit within the clip. However, you can make it longer, and then you're going to
have some space at the end of your clip where your
object isn't moving. So just keep that in
mind. It's a little quirk that you just have to
become familiar with. Now, you might be wondering if I make this timeline a lot longer, can I record longer animations? Well, I wondered that as well. And when you're dealing
with this timeline, if you do this slider,
you're zooming your page, but you have this
little icon right here. If you click on this, then suddenly you're zooming in
and out on this timeline. So I can zoom in
so it gets bigger, I can zoom out, so
it gets smaller. You notice the 30.8
isn't changing. I'm not actually changing
the length of that slide. I would do that by dragging
out the sliders on the end. I'm just changing
my view here, okay? So I make it a little smaller, zoomed out a little bit more
just so I can drag out, and let's make this longer. So if I make it sort of
1 minute and 47 seconds, does that mean I can
record a longer animation? Now, let's actually go back here and let's duplicate this B, so I'm going to hit
control D to duplicate. And this one has the
same animation path when you duplicate something, it moves the path along with it, but we're
going to delete that, and we're going to record a
new animation just to see, since we made our timeline
a lot longer here, And it's 1 minute
and 47 seconds. Can we record a much
longer animation. So I'm going to go
ahead and start dragging this guy around, dragging around, and
we'll see whether it lets me record a much
longer animation. So just dragging around
and you'll see that no, it's still going to limit you. So you can't drag out the
timeline and make it way longer and suddenly be able to do an animation
that's a lot longer. It's still going to
cut you off, okay? But let me show you
one other thing. You can still make
longer animations. You just got to get
tricky with it, and there's actually another
feature in here that can be really helpful.
So let me show you that. But first, let's
throw out that path. Let's take this B. Let's
leave here for a second. Let's flip them around this way, and then maybe he's going to be somewhere in
the foreground. Let's just move them down here. Now, I think my flowers here are definitely a little out of scale with what they should be, but we're not going
to worry about that. We're just
having fun here. Okay. So now I'm going
to animate this B. And let me just start by recording a basic
animation here, create an animation,
and we're going to drag him, move
him along here. Maybe he's flying like this, and then we'll just have
them stop by that flower. We'll let that play. I'm not
so concerned with the speed, but here's what I'm thinking. What if I want this B to do all his animation first before
this B ever starts moving? Maybe I just want
him hovering there. Is there a way to do that? Well, there is if you
know some tricks, and I'm going to show you
those tricks right now. There's another option
that's hidden under here. If I right click, you
have this ability. Let me get on my B again, let me right click and choose
this show timing option. If you don't see
this, you may have to change your project
and you could go resize and magic
switch if you have a pro Cama and switch to a video or something where
it expects animation. Because if you have a project
where it expects animation, a project type, then it's going to have this
show timing option. And what that does is suddenly now you see an
independent timeline. So here's our main
timeline down here. But now I'm seeing another timeline for the
object that is selected. If I select this B, now it looks like I'm seeing
the same timeline, but that's actually a
different timeline than what I saw for this B. I could
select this here, and suddenly, I'm going to see
a timeline for that group. So you can start to see
the individual timelines for the things in your project, and that can be super helpful. Let me show you what I mean. Let's bring our playhead all the way back to the beginning. Remember, this clip is 1
minute and 47 seconds. Let me just hit play, and
I'm going to wait until this initial B makes it all
the way across the screen. And when he's all the
way across the screen, I'm going to hit the space bar. What the space bar does is
it stops your playhead. So at any point in
time, if you're playing something and
you hit the space bar, it'll stop the
playhead right there. So I'm going to let it
play a little bit farther. You can hit the
spacebar to stop it, you can hit space bar
to start it again. So the space bar will start
and stop your playhead. Now that I have the
playhead right here. Let's imagine
that's where I want this B to start his animation. Well, I can drag and
move this whole thing. Now, if I try to move the
whole thing right now, I can't because it's already
all the way at the end. But if I scrub through
the end of this, I would see that it's not
even moving past here. If I go all the
way through here, you see that B isn't moving, he's only moving
in the first part. See, there he is moving,
but now he's not moving. Let me get the
playhead back to where that be up top stops. What I'm going to
do is I'm going to drag back because I don't care about all the trimming off all the end stuff
or he's not moving. Then I'm just going to slide it. Now I can slide it because I
have some space at the end. Now what happens is, I don't know if I
got this precisely lined up with my playhead. But again, this is where zooming in and out
can be helpful. Notice I'm zooming in and
out on my thumbnails, not on my frame up here.
I'm going to zoom in. Then suddenly, I can more precisely line this
up with my playhead. Now, there is a
problem with this, but I'll show you
the workaround. So if we drag this back now, we'll notice that, okay, let me first just switch
back and fit this to screen, so we're seeing everything here. Now, if I play it,
this B is flying. The problem is we lost
that B because he doesn't come into the timeline here,
we don't even see him. But then once this stops
here, then there he is. Now he comes in, okay? So the problem is I want him to be just hovering until
this point here, and then I want him to fly. Well, we could do that. We just need another
copy of this B. Let me select him. I'm going to hit Control D to duplicate him. Now I have an alternate version. With this version here, I don't care about
the motion path. He's just going to stay still, so we'll delete the motion path. Let me come in here, make sure I believe I deleted
the motion path. I think I did, and then
we'll bring him down, so he's right over
top of this other B. But then for this B, I just want him to be all
the way back here. Then when the playhead
gets to there, I want it to stop. So let me come here and
let me zoom out on this. So this is where zooming
in and out is helpful. I want to drag this back until we're pretty close
to the playhead there. Now let me make it
bigger just so I can see a little bit
better and be precise, so you can go as far as 500%. Then I'm going to drag
it to right there. That should be where my
other B comes into play. So I could even move this
guy up for a second, just so it's easy
to select both B. Let me just drag this so we can see the beginning of
the time line as well. But now I can go back
and forth between Bs and see where both of their timeline is lining up here in relation
to the playhead. This one looks like it's right on the playhead pretty much. If I come to the one below, it looks like I need to
make a slight adjustment. Let's drag it back. Now they both are really
lining up with that playhead. And so now I could zoom
in or out on that. We don't need to
worry about that, but let's actually play
this through now. So I'll drag this
back a little bit. But now let's just drag our playhead from the
very beginning, and now let's hit play
and see what happens. So the bees hovering, this
bees moving across the screen. We're seeing the
one copy of the B. The other copy
hasn't come in yet, but now it does right there. And it looks like maybe let me just hit the
space part of stop. It looks like maybe there's maybe a second where
we see both bees, but I know what the
problem is. We never realigned our Bs, okay? So remember, they were sort
of in different places. So there, there's one frame
where I can see both of them. What I need to do
is grab this top B, and we want them right over top. That's what was the problem was. So let's go back now. Let's play this one more
time all the way through. So we're seeing that one B, we're seeing the
one copy of the B. But then when he disappears, the other copy of the
B is going to come in, and it's going to start moving. So suddenly now, we've
removed that limitation of only being able to create an animation that
lasts so many seconds. Now, we could fill up this
whole 1 minute and 40 seconds just by making some duplicate
copies of the bees, using that trick
I've just shown you. And so now suddenly, this custom animation tool is just a playground where you have lots and lots of options. So make sure you get in
and play around with this. I think we pretty much
covered all the options. Let me just go under animate for a second back here under
this create animation. This is the one
that's just hovering, but we'll make them
do something real quick just to look at the
options one more time. And we talked about all
these. I think what we didn't mention were these
other effects here, so you can have
them flying along, and you could also have them
rotate as he's flying along. And then that has some settings where you change the
speed of rotation. So now he's just rotating along, and then you can make them flicker, you can
make them wiggle. So there are a
bunch of different options you can play with in here along with all the options
we talked about already. But this is a really
cool feature in Canva, the ability to do
custom animations where you define the path. You have lots of options. And then if you use that
show timing option, you can control where things
appear on the timeline, when they come into your scene, when they leave your scene. If you make duplicates
of an object, then suddenly you're
not limited by the amount of seconds of
animation you can record, you really can make
an endless animation. Have fun with this. You can do some
really cool things, and I will see you
in the next lesson.
37. More Play with Custom Animation: Okay. In the last lesson,
we learned all about this custom animation
option in Canva. We went over all the options, but I always like to give you some creative ways to
think about using tools. So let me show you
one other way you could use this custom
animation tool. So I'm just going to put use this keyboard shortcut C
to put a circle on screen. I'll make that a little smaller. And let me just use Alt while
I drag out this object. So if I click on
it, then hold down the Alt key and drag
out, I can make a copy. Of course, you can always
right click Duplicate. You can also go up
here, choose duplicate. So I'm going to get a couple
of different options here. Let's just give these
some different colors. So I'll make this
one here green. And we'll change
this one to blue. Okay. Now, I'm going to animate these using the custom
animation tool. So I will leave the
size like this, I think, and I'll
start with this one. And then I'm going to again come under this animate option. We learned all about
this in the last lesson. Come here under
create animation, and I'll just drag this sort of across here looping around. Somewhat random, and then I'm going to do this
for each object. Now, I think I'm
just going to choose steady for my animation
style here with all these. I'm not going to worry about
the speed so much yet. Let me grab this next
one. Same thing. Actually, before I do
that, let me leave that. I want to position these first, so maybe I'll put
these two over here. I'll put these on this side, just really experimenting
around here. Experimentation is a good way to sometimes stumble
across new ideas. I'm going to take this one here and I'll do the same thing where we're going to animate
this, create an animation, and we'll drag him across, try and do it at about the
same rate as the last one. We'll do this for each of these, create an animation,
drag him across. He'll loop and come
back to this side. I think I forgot to choose
steady for that blue one. Let me just back out
here for a second. Choose this blue one,
switch him to steady. Those are steady. Then we haven't done the green one.
Let's do the green one. And something like this. Okay, steady. Now we have all of these that play in
this little animation. Now, of course, I might
want to take these and position them
all behind my text. Of course, we could use
a little playhead here, hit the space bar to go through, and so that's cool. Just like this, you can do
things that are pretty cool. But one of the tricks you'll see me use at multiple points during this course is grouping things and also sometimes
creating duplicates. Now I have another
slide here which I don't need. Let me
just get rid of that. But what I'm going to do is
I'm going to group all these, and that's control
G on my keyboard or you could just use
this group button right here, group them together. But then what I'm going to
do is going to make a copy. Control D to make a copy. This copy here, what
I'll do is I'll hold down the t in size
it in a little bit. Then you could even now come in here and adjust the
animation for all these, since you have them
selected as a group now, when you come in
here and animate, and we go under this,
create an animation. Suddenly now, we can come and
do an animation as a group, but they should already
be individually set up. If I ungroup them for
a second and I go now, you can see that they all
have this custom option. If I group them back together, then suddenly it's going
to let me reimate. But I really want to just
animate them all at once, and I want to use this
custom animation. They all have it applied. So I just had to ungroup so
I could see this option, and now I could come in here and now I could adjust
the speed for these. So I can make those
go a lot faster, or I can make these
particular ones go slower. Okay. So it's just given me some different ways to come
in there and adjust that. So that group, again, I might group those
back together because I think they're
now on separate layers, but they're still all selected, so I could group them together. So you could play around by
varying the groups this way. You could also just hit
Control D to create a copy, and then maybe you might
change the orientation. So maybe I'll do this like this because now if I hit play, I'll have some that come through the center of the
screen like that. And again, these are
at that slower speed. Maybe I want some to be
at the faster speed, which I believe is this one
that's behind everything. So I could go ahead and
I could copy that layer, and we could rotate that as well so that we have some
moving at a faster speed. Let's get the play it back to the beginning. We'll hit play. And suddenly, we have
a whole bunch of circles doing various things. So again, I could take
all of these now. Let me take all these groups
and move them to the bottom, and then I'll take all of these groups and
group them together. So you can continue to put more and more things
into groups like this. Now, what I'm going
to do is just resize my screen so I can
really see what I'm doing here. I'm going to duplicate
this whole larger group, hold down the ult key. We're going to push that in. Now, when it's in a group here, it's actually varying the shape. I didn't realize it was going to vary the shape like that, but I think it's
because I'm resizing these handles while I
have a group selected. Now suddenly, I have
a different shape. If I didn't want to vary
the shape like that, let me just hit
control Z to undo it. Now, with everything
like this here, I didn't put everything
in one group. Let's put everything
in one group. Control G, everything
in one group. Now if I re size, I don't know why before
it did from the center. I didn't expect it to
resize like it did there, but let's hit Control D to redo that. Now I'm
going to do lt. I think before what
must have happened is I must have accidentally
pulled from my side handle. So if you pull from the
side handles like this, you can adjust the shape. I'll hit Control Z because I really want to keep
them as circles. But if you do want
to change the shape, you can use those side handles. I actually just meant to
grab the corner handle. Must have accidentally
grabbed the side handle. But now with the corner handle, I can suddenly adjust it, right? And so then maybe I also want to hit controlled D to just
duplicate it again. Bring it back here,
but this time, I'm going to rotate it, right? And then let's just hit
Control D to do it again. But then let's pull this
back out to bigger again. So all these different things. And then when I hit Play, then suddenly, we have all
these circles animating. Now I can grab them
all, pull them down. At any point in time, I can
group them all together. I can grab the transparency and lower the transparency
of all of them. Now if I hit play, let's go let's hit play here, and let's just watch
this whole thing. So let me bring you
the playhead back. Let me unselect things just so we can see a
little bit better. Let's make this a
little bit bigger so we can really see what's
going on and hit play. So now, suddenly,
we're starting to get this interesting
animation because we got so many of these
different circles. Uh, so I have a couple in
here that aren't animated. So I've made a few
mistakes in this, which is okay because this
is really just to give you the idea to think
creatively, okay? It only takes a second to duplicate and duplicate and you get these bigger
and bigger groups. And then suddenly you've
taken something that was just one single circle and
suddenly you could turn it into something totally
different. Here's an example. I could zoom out here and I could grab part
of this animation, and I could just make
it totally bigger. So actually, let me
ungroup for a second. And then if I come
under my position tab, let me just control click to get this one
out of the group. I'm moving this top group out. If I control click, that's
going to be deselected. Now I can group all those
other ones still together. But now this one is
its separate group. So let's bring this
one back up here. Actually, this is a solo circle. So other words, I
didn't grab them all. But this one circle, I could make this one circle. I could make it huge
just like that. Now if I suddenly that
circle is going to be doing its own unique thing because it's moving
across the screen. Now if I hit play now, now suddenly we get a
whole another element where we have this
one big circle. So really, the only
point of this. I don't think I ended up
with a great animation here, but sometimes you
might have an idea, and you might get something that you think is really cool. The only point of this is that you really should play around, be aware that you
have these tricks, you have the ability
to change scale, you have the ability to group, you have the ability to resize. So all these
different things can come into play when using this custom animation
tool and just using different techniques
in concert with each other, you can get some
really cool results. All right? Thanks for watching. I'll see you in the next lesson.
38. Custom Animation Challenge: Okay, welcome to the custom
animation challenge. Since we just had
two lessons all about the custom
Animation tool in Canva. In this lesson, I want you to do something where you
incorporate custom animation. Now, you can create a full
design like this if you want, or it can be much simpler. Anything is fine,
but I want you to add some element of
custom Animation. Now, by custom animation, I mean, you actually want
you to click on a element, and I want you to actually
use this created animation. So actually let me get
outside of this and back out. I want you to come in here and use this create an
animation tool. So this is what I'm
calling custom animation. You actually come in here
and you click on this, and then you're going
to click something. You're going to drag it around, representing the animation
you wanted to take. And then you can play around with all these options in here, which we talked about in
the last lesson, okay? So any sort of custom animation, I'd like to see what you create. Now, just a few
reminders for you. Remember if you click
on this duration tab, then suddenly you
can see the length of your slides here, so
that can be helpful. If you need to
zoom in and out on your timeline, you can
click over on this, and then that lets you sort of switch back and forth
between zooming up here. And if I click again and the timeline is now
selected there. Now I'm actually zooming in
and out on the timeline. Just lets me have a little
bit more precise control. Something else that
is very helpful. Remember, if you have
this duration option, you can also click on
any of the elements in your project and you can right click and choose show timing. And then suddenly,
you're going to have a timeline for your subject, whatever is selected, along
with the main timeline. So that's very helpful because then you can reposition where in a particular slide, that animation is
going to take place. And this is a little trick
we can use, as I mentioned, the last video to get
beyond that sort of recording limit that Canva has when you use this
custom animation tool. Now, for some reason,
you're in here and you don't see this
show timing option. So let me see here
is high timing. But if you don't see high
timing or show timing, and you don't have
this duration option, then you might be stuck in the older Canva editor that doesn't have
those video options. It's possible to
launch a project that doesn't have this
new video editor. And actually, in an
upcoming lesson, if you look forward
in the course to one called forcing the
new video editor, you'll see there actually is
a way to force this editor. Besides just choosing a particular project dimensions, there's a way you can force it. So look ahead to that
lesson if you need to. But in this lesson here, we're just going to have this
challenge exercise where I want you to create some
sort of custom animation. Anything you want, anything
at all, just have fun, And then you can come up
under the share menu, and you can come down
here and if you want, you can grab a public view link. This lets people look
at your project. They can't make edits, but
they can look at your project, or if you want, you can
download appropriate media. And then here in Skillshare, just come under
whatever challenge you happen to be
currently working on. Then come under here and come down to this
discussion tab, and then you can actually
use any of these tabs, start conversation, ask
question share project. Any of those are going to work. Just come in here and either
insert the link if you have that public view link or if you download some
media to share, use this ad media and you can
upload your media that way. And that way, we can
check out your challenge. We can all get
inspiration from each other as we share
challenges here. And you can offer critiques,
just keep your critiques friendly and try to be
as helpful as possible. Alright, I'll see you
in the next lesson.
39. Thinking Creatively - Creating an Animated Sun Burst: In the last lesson,
we were really talking about how if
you're willing to just utilize the skills you
learn here and play around, then sometimes you can end up
with something really cool, even just starting from
a few basic elements. So we're going to go
through another example of something like that in
this lesson right here. And I'm going to create
something really cool just from a circle and one little
animated asset here, but we're going to turn it into something much more dynamic. So I'm just going to start
with this circle here. And then under my elements tab, I'm going to
search for this flame. There is right there, but all
I did was I typed in flame. I went under my graphic CL, and I found this
animated item here, which I think is a pretty
cool little animation, but by itself, it's
not that exciting. So here's what
we're going to do. Let's take this circle. I'm going to get it right
in the center here. I want to scale this
up a little bit, so maybe something like that. Then I'm going to position
my flame right at the top. Let me scale this down ever so slightly, and then my flame. I think I need to scale my flame down ever
so slightly as well. But then going back
to the circle, let's make sure it's centered
exactly in the center. All I'm doing is dragging it, waiting until I feel it
snapped to the center. Then this object here,
the flame itself, I'm going to pull that just
so it's just touching. It's also center aligned and
just touching up top there. Maybe right like that and then bump it back just slightly, something like that. Um. Now, I'm going to change
the color of my circle so that it sort of matches with my flame a little bit better, and I might even add
a gradient here. So let me come in here and we'll go under the circle.
We'll click on the color. Let's switch over the gradient. Let's choose this color picker, and I'll click right
on the flame to get maybe this orange
color at the bottom. And I can see that it's
applying a gradient. Let's take this color
here and we'll select the same orange or maybe the
orange from up top here. But then let's go to
a circular gradient. So one of these is going to be a circular gradient. So
something like that. We could add another color here. So maybe I want one more color. Let's drag this one
back to the beginning. Let's reposition. I'm trying
to reposition it here. Let me click out of that. There we go. Now I can
grab it and reposition it. So let's just put this circle that color at the beginning. And then I'll start
with this tone here, but let's drag it so
it's a little lighter. So it's a little bit lighter
in the center there. So let's just make
it more of a yellow in the center.
Something like that. Okay? So just playing around
with the gradient there, but then it's going to meet
up with this at the top. Okay. Now, if I wanted this to copy this and spin it around the
outside of the circle, well, if I try to
just adjust this now, I would have to spin it and then move it down here and I have
to spin it, and move it. That's going to be a
little bit tedious. I think there's a
better way to do this. So let me make control Z to get it back to this
position up here. I'll make one copy, so let
me hit control D to copy it. I'm going to put it right
over top of this one exactly. I'm going to spin it
exactly 180 degrees. Then I'll hold down
the shift as I drag it out to keep it
in a straight line, and I'll put it
right at the bottom, and then I'm going to
move it back one two. I think that's exactly
the same distance from the circles to
one up top here. Now, if I click on that and
then shift click on this one, I can group those together. And this is helpful now
because now they have the same center point as the
circle itself here, okay? So now if I suddenly take this group and copy this
group, so Control D, then I can position that
right over top of itself, and then I can rotate
it exactly 90 degrees, and now I have it
on all four sides. Now, pull up this so I can see my different groups,
this group and this group. I'll group them together again. So you've seen me do this
type of thing where you continually group just to
save yourself some work, hoops, accidentally
selected the circle there. I want to select this
whole group here, and then here, Control D
to duplicate it again. Make sure once again,
position it right over top. Now once again, I'm going to rotate it and this
time we're going to do 45 degrees because
that's going to be right in the center of
what we have already. And then once again, shift click, group together. So I'm just continually grouping to save
myself some work. Now, I see that my spacing has I've messed up
a little bit here. So let me hit Control Z
to see where I messed up. I can see right here
that these weren't lined up. That's
where I messed up. So let me come on here.
Let me make sure I get them exactly lined up
over top of each other. I obviously didn't
do that before. I think I have them
exactly lined up now. So now, let me spin again. I made a mistake there. Let's
go back and get it now. And so now 45 degrees. There we go. So now they're all exactly spaced at the
edge of the circle. I'll shift click
and group again. And then you've
figured it out by now. That's right. We're going
to duplicate again. Once again, start
by repositioning, and then I'll take
the whole thing and spin and boom, move
them like that. Okay. So look at
how we've created this really cool graphic just by playing around and
duplicating like this. Let's see what it looks like
if we do it one more time. So these two groups, we're going to group together, and then I'm going to
once again reposition, oops, I got to copy it first, so Control D to copy it. Once again, reposition. This time, I'm going to spin. But this time, let's make
these flames longer. So holding down the
Alt key on windows. That would be option on that, so I can size center outward. I could size like that,
or I think I'm actually going to drag them inward,
so it's like that. And then maybe I'll
put these behind the sun so that
they're just peaking out so we get some different
size flames there, okay? So just by doing
this duplication, we're getting this
really cool graphic, okay? This is really cool. So I like this a lot, but I want to keep
playing around. Let me just duplicate
this page to make sure I keep
what I have here. So I have this one protected
now on this first page. But now on the second page, Hey, you know what? Let's
group all this again. Now I'm going to put
everything into a group. So now we basically
have this sun group. Well, you know what?
Let's duplicate that. So I'm going to hit
Control D to duplicate it. I'm going to go to the
one and behind here and I'm going to grab
a corner again and then alt drag out again. And then I'll duplicate again. Control D, I'll reposition it. I don't know if I lined
up the one the one time, but let's see if we
get that centered, and then Alt drag out again. Let's make sure we
push it behind. And then suddenly,
look at this pattern. So look at what we get by
just playing around here. All you have to do is think creatively and be
willing to play around, and you can start with a
really simple element. We started with this basically this simple flame right here, and we were able to turn it
into something like this. Now, you can do even more. Now that we have this, what are the different ways we
might want to use it? Well, here's another
project where I've scaled it up and we're just looking
at a small part of it. So that's kind of
interesting. You could put it over your subject. You could do
something like this, or you could do
something like combine it with the other
techniques we've learned. So here's something where
I've put it into a frame. So if we break down
this here and I just click on this and
I do detach video, then suddenly I put
that sun and I've put that sun into
the frame here, and there are actually a couple
of different frames here. So if I click and look
at my layers menu, I actually have another
one here on the bottom. So if I bring this
one to the top, you can see that once again, I can detach video. And so I've just
taken that flame. I recorded it as a little video. I exported it from Canva. I created this frame. And so if we want to look
at just this frame, Let me just hide everything
else for a second. So let me just hide
this top layer. Let's hide this bottom layer. And so we see let me
just make this white, so the background is
a little bit more obvious. And then
we have this frame. So I went in and you've watched all
those videos on Photop. We know how to
create custom frame. So I created a frame
right like this, and then I was able to
create this cool effect. Let me hit control, to get
back to it. Control Z. Then suddenly you have
something like this, a frame that you could
reuse again and again, if you wanted to do this type of frame effect here that
we see in this video. So, again, the theme of the last several lesson has just been continue to think creative, stack these skills together, and you can start to create
some really cool stuff. All right? Thanks
for watching, and I'll see you in the next video.
40. Spotlight Effect Challenge: Okay, time to put on
your detective cap, because in this lesson, I'm
going to challenge you. I'm going to show you
an effect in Canva, and I want you to see if you can figure out how I created it. See if you can recreate this. Now, I've taught you everything you need to know
if you've watched from the beginning to be
able to figure this out. And sometimes this is what it's like when you're trying
to figure out effect, you may see see somebody posted something and you're like,
how did they do that? Well, once you start
to learn the tools, if you think about things,
a lot of the times you can break it down
and figure it out. Okay, so we have
this image here, and right now, I'm just in
full screen and present mode. So Canva has this present mode where you can
go full screen. Then you can go from
slide to slide. Okay, I'm on slide one here. Watch what happens when
I go to slide two. Suddenly, I bring the
spot light into frame, and I can spotlight her face. Now, if I go to Slide three, I can take the spotlight away. So how am I doing this? Can you figure out how I did this effect? That's
your assignment. I want you to take some
time before you watch the next video where
I go over solution, and I want you to see if you
can recreate this effect. Now, think about this. Let me just go back real quick
to the beginning. First slide, let me
show it to you again. So, how am I doing this? Well, if you think back, we have figured out how you
can move things from one position to another
position from slide to slide from one frame
in your project, or it's not so much a
frame but one page in your project in your
timeline to the next page. So you sort of know
how to do that, but you're going to have to combine that
knowledge if you know what that effect is with some other things we've
learned in the course, because you're not
going to be able to do this just using one trick. You're going to have to put
multiple techniques we've learned together to be
able to create this Okay. Now, if you do figure this out and you want to prove you've really been paying
attention in this course, then maybe you can
take it the next step and figure out how to
create something like this. All right? Put your
thinking cap on, think about everything we've
learned on this course. Take some time to
think about this. I hope you can figure it out. Either way, I will see you in the next lesson when you're
ready to see the solution.
41. Spotlight Effect Solution Part 1: So did you figure it out?
Well, great if you did, but even if you
didn't, we're going to go over it all here. Whenever you're tackling
a challenge like this, it's best to break
this down into steps. I'll just start by putting
a circle on screen. I'm just going to
use my C keyboard shortcut to put a
circle on screen here. Now, hopefully you at least figure it out or
remember from the course. That we can get a
circle and get it to change position from
one slide to the next, if we use the transition
between pages. Let me just duplicate this page. I'm going to duplicate this page now that
we have the circle. You may have been tempted
to come under here and look under animate and
find one of those options. But no, we're not
going to use that. Remember, we learned
this other technique of using page transitions. One of the page transitions
that we have here, if we click on this here
is this match and move, and this is one of my favorites, this match and move here. Because when we use
this match and move, then when you change
the position of an object from one
page to the next. So let me take the circle on page two and move it over here. And now because we have
this transition option, now if I hit my playhead here, suddenly, when it gets to the second page and it
transitions to the second page, we're going to make
that circle move, okay? So that's the first
part of this. We're going to use
the match and move. So maybe you figured
out that part. But then how do we turn
this into a spotlight? Well, maybe you
thought we could make this circle white so we can
make this circle white. We could bring it over her face, and then we could lower
down the transparency. So it would have like
a spot light effect. Well, that doesn't
quite look right. So maybe we'd have to come
in here and edit our photo. Remember, we can make our photo darker so we could go under here in full with the
brightness and lower that down. Well, none of that's
looking quite right. So that's actually
not what I did. And when you have this
circle over top of her, it's just not clear.
We were seeing clearly through to her face.
So this doesn't work. Now, this has other problems,
too, because, well, if I move this off screen to do the match and move because
it started off the screen, well, then suddenly
we lose it, right? Now, if I look under the
position menu, it's gone, right? So if you start with something
off the screen like that, totally, it disappears. So uh, we'll come back to that. Let's just come back
here to this page. What if we wanted to
darken this whole photo? Well, we had a whole section
of this course on overlays. I could hit R to
create a rectangle. Let's turn this rectangle black. We'll make it a lot bigger, so let me just hold down the alt, drag it out both ways, drag it out both ways, and then suddenly
let's lower this down. This is akin to the brightness that we did
before except, wait a minute. We had a hole in this rectangle, then suddenly I'd be
seeing through to face. Maybe we're getting
somewhere now. Let's delete this
rectangle for now. Let me go ahead and
select it, delete it. Now let me hit C again to
add a circle to the screen. Let's just say we wanted
our spotlight to be here. Well, I've told you that
sometimes you have to stretch Canva with a tool like
Photop or photoshop. What if we export this just
so we have a placeholder of where we think our spotlight
maybe we want it to be. I'll go ahead and I'll
save this off as a PNG. This is page two of
my document here, but I actually don't need
both pages quite yet. So let's just go ahead
and delete the first one. That way, I can just export this more easily. So go
ahead and share. We're going to download and
I'll download this as a PNG. Go ahead and download. And then we're going to
open this up in Photop. I'll save it off and
then we'll open it up. So here we are with the
image open in Photop. Now, we want to start by
just selecting this circle. Now, of course, we could
do that multiple ways. We have an ellipse icon here, which we could drag
out a selection. But if you remember
this magic wand tool, since this is a solid area of color, that's going
to be the easiest. We're just going to click
that with our magic wand, and now we have that
circle selected. Now, let me start a new layer. I'm going to come down
here and click new layer. And then with that new
layer in this selection, if I just hit
control back space, I'm going to fill with
my background color, which is currently white. Then let me come below this, and I'm just going to
create a new layer. Now we want to get rid
of this selection. So actually hit control
D that'll deselect. You could also go under select and I think there's
a deselect up here, deselect, if something
is selected. But then with this white
circle layer here, we'll actually come back down to this other layer we created. I'm going to need at
back space to fill with that color black just
so we can see our circle. Because if you remember
that spotlight effect, it did not have a hard edge. I do not believe I believe
we had a slight feather. I at least want a slight father. So what I'm going to
do is come in here, and then I'm just going to
go under filter and blur And gaussian blur. We talked about
this blur before. But if you didn't figure
that spart out, that's okay. This is just little things
about Photop or photoshop. If you use photoshop that
you're going to start to pick up once you spend
a little time in there. Let's just give a
little soft edge like that. We'll go
ahead and click Okay. Now, what we have now is this
circle with this soft edge. If you control, click on a layer, you're
going to select it. I can control click to
select that circle. Now I have a selection
of all these pixels, including those semi
transparent pixels at the edge. However, what I really want is this to be the area
that we see through. I really want the
inverse of this. I'm going to come up
and choose Select. I'm going to choose inverse. Then I'm going to come
and create a new layer. Then let me just turn off
this layer for a second. Now with this layer right here, I'm going to choose alt back
space to fill with black. Now I can even turn
off this layer here, and we see we have this
cutout where it's all black except for where we
want our spotlight to be. No, we learned how you can turn selections here into path
and then into a vector mass, which we can bring back
into Photoshop as a frame. But we don't need a
frame. All we really need now is something that
has this transparency. We just want to
export this as a PNG. We went over that in early
lessons in this course. We're just going to come up
here under the file menu, and we'll go ahead
and do Export as, and we're going to choose PNG. We'll save this off, and then
we're going to bring this back into Canva to see
what we can do now. I'll go ahead and click
Save and I'll see you back in Canva in 1 second. Okay. So we are back in Canva now. I will check under my
browser's recent downloads, and I will grab and I
will bring that PNG of that knockout spotlight that we just created back in here, and then I can click
and add it to my frame. I don't need this
circle anymore, so let's get rid
of the red circle. And let's bring
this to the bottom. And then if we size
it up all the way, it should be precisely
where we wanted it to be. And then, of course, I
can come in here and I can knock down
this transparency. So all of a sudden, this
is looking a lot like the spotlight effect we saw in the challenge part
of the video. That's great. We're making some progress. Okay. We know we can use
the match and move now. So I could go ahead now and just create
a copy of this page. So let me just
duplicate this page. And then on the first page, let's move the
spotlight back here. So let's just grab and
move the spotlight now. Here's another problem. Now we have this hard edge. So I can go ahead
and play this now, and we are going to get that
moving spotlight effect. However, every time we do that, we're seeing the
edge of our frame. So how do we handle this? Well, if you made it this far, maybe this is the most
difficult part of the problem, but it's just about
thinking creatively. Well, what about this? I could do something like
this where I had this. And then if I add a rectangle, just r for a rectangle, and I made it black, I
could bring it up here. I forget what the
transparency is here. Let's look at the
transparency of this. Got it down to 22, but let's just bring it all
the way up for a second. And then let's take this here. Let's make this black, and I could start to expand it out and make it go well
beyond the edge here, and then I could group
these two together. Mm. I could do that. That's one way you
could do this, but then I have these
things grouped together. A cleaner thing might
just be to go back into Photop and redo our frame, our knockout that we brought in, and just make the
circle smaller. Let me show you what
I mean. So here we are back in Photop. What I'm going to do is
I'm going to take and turn on my circle again here. Then I can bring up my
transform controls with the Control Alt T
keyboard shortcut. That would be Command
Option T on a Mac computer. But that's a lot to remember. So let me just click
off that for a second. You can also just go up to
this top select tool here, the move tool, this
little arrow up top. And then once you do that, you have this transform check box, and you can turn
that on and you can also get to transform
controls that way. Then what we want
to do is just grab a corner and start
to pull this in, and we're going to make
this substantially smaller. I mean, I'm going to make it really pretty small like that. Then I'll just grab it
and move it and put it somewhere up here
towards the center. It doesn't have to be
exactly in the center. I just want it to be very small. Then I'll click off that.
And then once again, I'm just going to control
click to make that selection. I can turn off the
transform controls if I don't want to
see those anymore. So I've made that selection, and then remember
what we did before, we did select, we did
inverse, select inverse. Then I'm going to create
this new layer up top again. Then we'll alt back space to fill everything
we just selected. So now we have this
much smaller circle, but it's going to
suit our purposes. Can you start to
figure it out now how we're just going to
have this black area extend beyond our Canvas
that's viewable in Canva. So what I'm going to do
now is I'm just going to go file export as and I'll export
this as a PNG, again. Sure spotlight
effect, that's fine. We'll just go ahead
and click Save. I'll click Save, and then
I'll see you back in Canva. Here we are back in Canvas. I will just grab and bring in that latest
spotlight effect. I don't need this one anymore.
I can throw that out. I can throw out this rectangle, and then I'll just bring
this new one on screen. Now, this circle
is really small, but that's okay
because I'm going to size this up substantially Uh, and I may have made it
even bigger than we need to. But the whole idea is
now it's going to go well beyond the
edge of our frame. So that's getting to
about the size I want. But let me just go even
a little bit bigger, even a little bit bigger,
just dragging at my corners. Now let me fit this back here. So let me just fit back in. And now that's about the size spotlight we're
going to need, I think. So now suddenly we
have something. Let's go ahead and lower
that on the transparency. So let's make this
transparency about like this. And then on the
second page here, we don't have the frame yet. So let's hit Control
C to copy this. Let's go over to the second one. This is the old one. Let's
get rid of this one. So delete that one and hit Control V to paste in
that one we just created. And remember, this
is the version now that goes well
beyond the edge. If I click on it, I
actually have to zoom way out to even see the edges, so let's see. Here it is. I cannot even see it
unless I zoom way out. So I think I created
something that's substantially bigger than I
actually needed to create. But I could come in
now, and I could pull in these handles
a little bit. Actually, let me hit Control Z. Let me hold down
Alt when I do that. That'd be option on the Mac. Just to size it in a little bit. I want to have plenty of room so I don't get that hard edge, but I think this is going
to be plenty big enough. I could even bring it
in farther, honestly. So let's bring it in
farther. Let's bring it in. So it's more manageable
when I zoom in and out, I can see it a little easier because I like to be able
to see those bounds. On the first page, remember, we need to move it back here. Let me just move it back and drag it just off the screen now. Now, suddenly, if we hit play, first let's fit the screen, and now we'll hit play, and then suddenly, look at that. We've created this
spotlight effect. Okay? So we just had to reach
into our bag of tricks and break this down step by
step to create this effect. Of course, if we wanted to move the spot light off
our face again, we would just have to
duplicate or slide here. Then on the next page, we still have to match and
move in place here. If I click see, it still
has a match and move. Then on this third page here, we would just make
sure we select this spotlight layer,
move it off the screen. Now we'll go into present mode real quick just so
we can see this. So here we are on present
mode on the first slide, and if I go to the second slide, we'll see the spot light come in and then to the third slide, and it flies away again. So it was that easy. So that's the first
part of this challenge, but what about the second part? Well, I'm going to
go over the second part of this if we
want to take it to the next level
in the next video, so I'll see you there.
42. Spotlight Effect Solution Part 2: The last video, we went
over the first part of our solution for creating
this photo spotlight effect. What we did was, we were able
to create an overlay with a hole in it so we could
see through to our subject. Then we also made that overlay much larger than the
visible screen itself. If I scroll out, we can see the bounds are way
beyond the screen. I can move this around a lot all the way around
our subject without having this hard edge here that happens if you move
that onto the screen. So that's how we were able
to solve that problem. And we created this
overlay in Photop, but we actually could have done this whole thing within Canva. If I had come under
my elements and search for something like a
circular frame like this, you know in this course that
we could come under here, use Du atone to turn this
black, use that blur effect. We could have added
some rectangles on the edges here
to make it bigger, joined it all
together as a group, and we would have
the same thing. A situation like this, it
just becomes your workflow, what you're most
comfortable with, and what's going to be the most efficient way for you to do it? If you can quickly jump into photope and do
something quicker, then you can and here
in Canva because it takes less steps,
then do it that way. So it's just about what's
going to be the most efficient in terms
of your workflow. All right. So that's
part one of this. But now in this video, how do we create part two? How do we take this now and
move to this effect here? We now we're seeing multiple
spotlights spinning around the screen with this sort of look here. How
do we create this? Well, as you've
probably guessed, we're going to be able
to take advantage of this circular cutout that
we've created already, and a lot of things are
like that in though, where when you create an asset, then suddenly you can reuse it and build things up in steps. We've done a lot of
that in recent lessons. So that's what we're
going to do here. We're going to take
advantage of this. But I'm going to
first go ahead and just delete this first slide and delete the last slide
because we're no longer going to use the
match and move, okay? If you remember that
match and move effect, that only allows you to move
things in straight lines. We need to move this
in a circular motion, so we're going to have to
approach this differently. Because we talked
about it recently, you could be thinking
about something like the custom animate feature. We up here. We can use
create an animation. Well, you could use
something like this, and you could drag
this around here. And then, of course,
you have options for adjusting the speed, smoothing it out,
making it steady. So this could work, but it's really not
the best solution. This will also let you only
record for so many seconds, and then it's going to stop. We want something that's
just going to continue. So I think there is definitely a better choice in
this situation. So let's go ahead
and delete that. Let's come back out here now. Uh, remember, that
animation that we looked at just has these spotlights
moving in a circular animation, so I think we have
another option we can take advantage of. Because this circle that is the spotlight is just
part of a larger cutout. So what if we just come down to the bottom to
this rotate option? What if we use that? Well, that looks like
it's going to work. Now, to understand how your spotlight is going
to rotate around. You have to understand
how this rotation works. And I've talked about
this a little bit before, but let's go over it
again real quick. So let's come down here. I'm going to go and
zoom out just so I can see my bounds
of my cutout here. And remember, we can
change the crop area. So I could crop it in, and we're only going to see
half the spotlight. I'm just going to start by
cropping into the edge. So on the top and the
bottom, just crop it in, crop it in and then we'll
zoom back in so we can see. Let me just make my
screen bigger again. So now if I rotate now, because this is off center, it's going to spin around
this central point. So if I bring up my rulers here, let me just hit
Shift R. Let's see. This is 1920 pixels wide. So I would have to
do some quick math. This is bad, putting
me on the spot. 1,900, that would be nine 50. So basically, nine 60 would be half so
something out there, and it's going to snap to it. So I didn't even
need to do the math, but it's just going to
snap to that center point. There we go. Now, if it spins, it's just going to spin right
around this central point. Now if we rotate now, you'll notice that that
circle is just rotating around sort of that central
point of the image. And we can see that if we
change the crop point here. So let me actually
grab this layer and I'm going to try to
position the spotlight basically right over the center or at least very
close to the center, and then I'll come back
to my crop points, and we're going to
pull it so we have it again to the document bounds. We'll pull it out
on this side here. Let me just go find
the spottom point and pull that up here there. So now, since my spotlight
is in the center, when I do rotate now, it basically shouldn't
move much at all. It might move slightly because
it's not quite centered. But let me go ahead
and do that now. So we'll come under animate, choose this rotate again. And we'll see now the
spot light itself isn't really moving
because we have it in the center of this and because our our crop area matches up
with the visible document. But if I just pull this crop point here
and drag it this way. Now, even though
the spotlight is in the center, if I rotate now, this little spotlight
isn't going to stay exactly in the center because the rotation
is not based on the visible area
of your document, it's based on the crop area of whatever element
the element is. Uh, so let's rotate that and hopefully this
will make sense, and now you can see it spinning
off of that central area. We could exaggerate
that even more. So if I go out and I pull
this crop area way out here, and now we go into rotate, now we see that
it's getting pulled way off of the center, okay? So hopefully you start to
understand how this works. And of course, you can always come on to rotate
and get a preview, so that's always
helpful as well. Okay. So I'm going to want
to use this rotate tool. But I also don't want to
make sure I don't see the edges the way we get the
edge. We don't want that. We're going to have to keep the black area always covering. So what we're going
to have to do is again drag these way out. Let me just move it so it's slightly off
center, maybe over there. Then we're going to grab and
start with it even there. But then I'll grab both
handles, pull it way out. I'll grab both handles this way. Let's just start with
them even for a second. And then I'll grab both handles and use the ult button option
on Mac and drag it way out. The reason why I'm
dragging it way out again is because once again, I'm going to want to make sure that I always see
the black area, and I am going to re size
some of these where I size the circle down so we
have some different sizes. So let's just start by
coming back in here. We'll see what the rotate
looks for this one. It's going to mostly
stay on the document. I don't mind if it
goes off the edge as long as they don't get
the black on the screen. So we'll start with that there. But then let's create
some other ones as well. And this is just going to take
some experimentation here. So I'm just going to
start by coming up here and I'm going
to duplicate this. So control D to duplicate. Now, this is one of the issues we're going to
have to deal with. Remember, this is a
semi transparent layer. So every time we make a copy, it is going to make it darker. So if I hit Control D
to duplicate again, it gets even darker. Control D, now it's even darker. Then what I want to do
is select all of these. We're going to come up
here for the transparency, and we're going to
lower the transparency for all these layers down, so that it becomes
reasonable again. So you're going to have
to make these adjustments so that each of these
layers is just, you know, mostly transparent so we still can get this
spotlight effect, right? Now, what we want to do is start to vary these spotlights. For example, let's
come to this one here, and let's just go and zoom
way out so we can do this. I don't think I need the
bounds quite as wide. But maybe I'll drag them in for some of these here
just a little bit. But that's okay.
Something like that. We're going to rotate this one around so it starts in
a different position. This one here, let's just move it totally, so it
starts over there. This one here, let's
make a different size. So let's take the whole thing. Let's actually pull
in from the side this time, then make it smaller. Then we're actually
going to make another copy of some of these. So let's hit Control D to
duplicate that smaller one. We'll move it around, we'll
rotate it a little bit. This one here, let's hit Control D to make
a copy of that. And then we'll move it around. We'll change the
size of it slightly. And then at some point, it's getting too dark again,
so let's zoom in. Again, I'll select
all of these again, so you can click one. You can control, click another. But if you ever want
to select a whole road that's in consecutive order, you can just click
on one and then shift click on the bottom one. It's going to select
everything in between. And then then we'll go ahead
and do this transparency. And so now each layer itself
only is 7% transparent. So they have this cumulative
effect because we have one, two, three, four, five, six now. So six times seven, that's 42%. But so we're going to
have to continue to do this to adjust
the transparency. But now, if I just hit play
to see what we have here, suddenly, well, I
don't think I've applied the rotation
to all of them, right? So let's come in here.
Let's select them all. Let's go under animate. Let's go under this rotate. And again, now they're all
rotating and we see that for the crop area for
at least one of them is impinging on our frame. Now, which one? I'm not sure. This is one of
those things where you have to come out here. We can see this one
here. So let me see if I can control click. If I'm trying to
select that layer, sometimes if you control click, you can get a specific layer. So I control click, I
see this layer here. This one is going to
cut into the frame. So let's just grab this
and let's size it out. So now it's not going to
impinge on the frame. I'll come back here, full
screen, fit the screen. Let's look at that again. Everything's rotating. Okay. So we've got to
make some adjustments. We're going to have to continue
to play around with this. So let me bring my position up. One thing I want to
do now for sure, is to come in here
and some of these, I want to go in
under the rotate, and I want to change it up. So rotate, for this one, let's have this one go
the opposite direction, so I can just come back to
my position, this one here. Let's go under rotate. Let's have that one spin
in the opposite direction. So again, this way, and let's change the
speed for that one. So you just start to play around and make
these adjustments. So again, let's go find
another one, this top one. We're going to
make that one spin in the opposite
direction as well. So again, rotate, we're going
to come in here, rotate. We'll make it spin in
the opposite direction. I don't want any of them to spin super fast. That's
just too fast. I want them all to be
moving basically at the slowest speed
or maybe at the most at this middle point here. And so then once we have a grouping that's sort of working, we could come under
our layers here, and we could grab them all and we could
group them together. So I'm going to hit Control
G. You can also just hit the group button up here
to group them together. And then we've done this before. Let's hit Control D to
duplicate this group. Now, again, you might have to
grab both of these groups. You might have to come
on the transparency and start to lower it down. Again, just to make sure we're not just making
our subject too dark, but you can play
around like this. And then this new group, we don't want it to move
exactly like the other one. So let's come in
here and let's take that new group that we just
set up, this group here. Let's go way out so we can see the group bounds.
Let's rotate that. Let's reposition it up here, and then let's fit
back to the screen, and let's see what we have now. So now we're starting
to get this effect. Now, some of these,
if you notice that they're just
spinning way off, and I can also make this longer so we can watch
this for longer. And let's go ahead
and watch this now. So some of these are
working better than others, and it does take some practice
just to come in and make sure you're getting enough that really focus on
your subject here. And it's interesting
because as you have multiple spot lights with the cutout pass
over the same area, then suddenly, that's
getting brighter, right? Because all those transparency
layers add together. So when you have
multiple cutouts up here over top of each other, then suddenly you get an even
brighter area on screen. Now, I want a few more that
are sort of around her face. So one thing I could do is
I could come to a group. I'm going to temporarily
ungroup this, so I have this
ungroup option here. If I want to just get this
one out of the group, I can control click
on this top one. It's going to be removed
from the selection. I can group the other
ones back together, but now I'm just dealing with this one layer that's separate. By itself. So let me zoom
way out for this one here, I'm actually going
to pull these bounds in just so it's a little
easier to deal with. And temporarily, I'm going
to bring the transparency up just so I can see
what I'm dealing with. And I'm basically doing all of this just to make
it a little easier. Let's rotate it
back just so I can see more where it fits. I'm actually going to
bring in my bounds a lot just so I can better judge the center of this cutout and where this is
in relation to the center. So if I bring the bounds out, here. Now this is more close
to the center of this. If I bring this bound out more, now it's more centrally located. So I'm just trying
to get one that's not going to spin quite as much. So let me bring it up here and come back to
full screen here. So, I understand that this
can get a little confusing, but you just always
have to be testing, and you have to stay patient. And you often also have to realize when you create
something you like, then suddenly you're going
to have a reusable asset. So even though you do
spend time up front, it's going to save you a lot
of time in the long run, if this is a type of
effect you want to use. Now, I know I still have the transparency
closed off for this, but I just want to
be able to see, so let's come under
the rotate and we'll go ahead and we'll
rotate this one here, and this one should
not rotate that much in terms of
around the center. Let's just speed it up so we
can see what area it covers. Okay, so it does impinge
on the screen here. So if we see that that cutout
is coming on the screen, So let's just make it a
little bit bigger now. But we can hold down the Alt key as we do this and try to go the equal distance there so that we are spinning at
about the same. So that's more centrally
located, okay? So that's going to be one that always sort of stays around her face if we want to
keep her highlighted more. So now I could
come in here and I could dial that way back, and then I could maybe
make a copy of that. So let's hit Control D. Let's
reposition that slightly. Let's re size that slightly. This one will have spin in
the opposite direction. So again, we're going
to come under rotate. We're going to come down here. We're going to take
the speed down. And I don't think
I took the speed down for the other one. This one here, I wanted to take the speed down because we don't want it spinning as
fast as I had it. I just did that for sort of a visual while we're
getting this set up. And now let's come
to all of this here and come back
and see what we have. And so now we're
getting somewhere. Now, at any point,
you can come in here and we can
select all of these. So let's just put them
all in a group now, and then with all
of them in a group, I can play around with
the transparency and decide how subtle I want this. And so it does take
some experimenting. But so now if we come here and
we go fit and we hit play, actually, let me just enter
present mode for a second. And here we are taking a
look at this full screen. So I think some of
my spotlights are going a little too
far off screen, but still this gives you an idea of how I
created this effect, and this really is pretty cool. Now, I do wish her face
is sometimes brighter, and I could have paid
closer attention to that. So what I could do now is I
could just come in here and I could ungroup and then just
go in through these layers. So let me just zoom way out, and then I could just
choose a layer at a time. And what I would do is
I would just come in here now and I'm going
to go in transparency. I remember that it was at five, but I'm just going to
do something like this where I start to
come in and I start to adjust some of these
so that I make sure the spin the rotation is
going to pass over her face. And then, of course,
I could lower the transparency back down. Where it was before,
so that was at five. So I could just come
through a couple layers like this just
making sure that at some point it's passing over her face so I can see
clearly where it is. I can just go in. And
so this one here, if I shift it this
way a little bit, then we're going to get that
rotation through there. So I could just do this
with a bunch of the layers. So again, after you do it, you got to make sure you turn
the transparency back down. And of course, I could
group everything back together once I was finished
doing this sort of thing. This is the type of thing I
probably should have paid a little bit more attention
to from the start, making sure that we
got a few more areas that we knew we were going
to cross over her face. But I could do
something like this, just to make sure
that that remains a brighter area in
the final thing. Of course, again, remember, you're always going
through here and adjusting the transparency
of that layer back down, and then you can group
everything together. You can come back here
to get a feel for it. But that would be
something we could do just to brighten up
her face a little bit. So going back full screen to
look at it after doing that, now I do feel like some of those spotlights are a
little bit more central on her face and pass through the area where her
eyes are during that rotation. So I do feel like maybe this is a slightly better
job than I did before. But I do still feel like maybe I use too
many spot lights. It gets a little
tricky when you have that many layers of transparency
over top of something. So it's just about
experimenting, folding around,
seeing what works. And of course, once
you've done this, you can save something
off as a template because the idea is you want something that's
reusable in the future. And so then it's
a matter of just swapping out this picture
for another picture. Now, other pictures that
might be lighter or darker may behave
slightly different. So you may have to experiment around until you get a
template that works. And of course, you can
adjust the transparency of all these layers together
over top of another photo. So you do have some freedom
to change it around. But anyways, just another fun
experiment here in Canva. So give this a try,
see what you think, have fun, and I'll see
you in the next lesson.
43. Bringing a Scene to Life with Animation: Here's another scene
I created in Canva. Now I'm showing this to
you in present mode. So this is another fun
thing you can do in Canva, where you can use different
elements that you find in Kanva to put a scene
together like this. And I like to try to do something where I have
something in the foreground, the midground, in the background,
just to give it depth. And if you need a little help
with this sort of thing, you can always use a
photo as reference, so you can sort of
take inspiration from another photo or some other piece of
work that you see. To start to figure out
what you want where. And of course, you may have to search for elements in Canva. You can find elements,
other places, but then it's fun
to layer something together like this and Canva. And I'll show you the layers in this document in a minute. But then what I want
to show you is what can be really fun
to take this to the next level is
to then use some of these animation presets to sort of bring your scene alive. So I'll go ahead and here and
advance to the next slide, and then we'll watch
how I've animated this. A little simple animation presets that we've talked about, and we'll go over what I
did for this one here. But just to do some
little things, and I see I have one
mistake here where this ship actually
passed behind that one, it should be in front, so I
can fix that on my layers. But this is just a fun
way you can build a scene inside of Canva and then bring it together
with this animation. Okay? So let's take a
look at this document. Okay, so let's go into the
position tab so we can look at the different
layers in this document. So this first layer here is just sort of a layer
of clouds in front, just for another sort
of something that I can animate and give it
some visual interest. Then I have two
rows of trees here. So that's the front
row of trees, and then I have another
grouping of trees behind that. Now, this ship here,
which appears here, that's actually something
that's out of position. You have to pay attention to
your layer positioning here. Because if I scrub through, I noticed when we were
playing this animation, there's a moment where
this front sailboat goes behind that ship. Well, that's not
what should happen. This guy should actually be back here so we can
easily reorder that. So now we see that that front
sailboat passes in front. He should pass in front. These two might be
out of order as well. So let's just move him there. And now if we scrub through,
did we finally get it right? Yeah, now we have it fixed, so that sailboat is
passing in front. So you have to pay
attention to these things. But so you see, we have
the mountain layers here. We have the two sailboats. This is just a blue rectangle
we're using for the water, trees in the background,
mountains in the background, clouds, and then sky. Okay? So nothing
overly fancy here. We've just paid attention to how we're composing the scene, making sure perspective wise and color wise things at least
sort of match with the scene. And then we're coming through
to add interest to this. We're doing some animation
on the various layers. So if I go through
the animation here, we can see which
ones have animation. So this cloud layer here. If I just click on Custom, we can see that I just added a custom path. So
we can see the path. I just did a straight
line click and drag, holding down the Shift key, and then I switched
it over to steady. So you remember the lessons
in this animation section on using that custom
animation tool where we can create
an animation. I'm just using that to have my clouds move
across the screen, and of course, I can adjust the speed of the clouds there. Now if we go back on to the
position menu, my trees, I don't have any sort of
animation on my trees, but my balloon here, I have again, custom animation. So again, we could take a look at that if we want
to by clicking in. And once again, I just
have a path here. So let's see if we're
seeing the path. Let me zoom in. I'm
not seeing the path, but I don't know if that's just because there it is right there. So just a very small path where I just have it going
straight up like that. So I just wanted to
slowly move up here. And again, I can adjust
the speed of the balloon if I wanted to go
faster or slower. Other layers here. I don't have my mountains doing
any sort of movement. I would maybe go back
and if I did this again at another layer of fog
sort of farther back. So you can keep tweaking
these animations, keep playing with them. Sailboats I have moving
at different speeds. So this one I'm just using
the drift animation, which is just one of
these subtle presets, and I have it moving
left across the screen. And again, the drift is
a very slow movement, but sense this is farther in the background that works
fine for that ship. Then for the other
one, I think I use the custom animation. And again, I just did the straight line across the screen, set the speed, so it would
be moving a little faster. Same thing for this ship here. It was a little more difficult because I didn't do
a straight line. So if I go under custom
here and we see the path, let me zoom way in so we
can see what sort of path. I did something that was
a little zigzaggy because it's hard to sort of do a quick swipe with
your mouse, right? And I didn't want
it to be too quick, so I tried to move slowly, and of course, it's hard to move your mouse in a straight line. But I just smoothed it
out a little bit here, so it works well enough. So again, you can get away
with things like this, especially when you have something farther
in the background. And then I just
have a little bit of movement for my clouds, okay? So this is just an example of how you can build
a scene like this, and then just using
these animation presets, suddenly, you can
make it come to life. And one thing I
didn't mention here, I don't know where
it is in here. This layer right here. I
just have something in here. I think it's a video clip
with a small amount of transparency just so we get a little bit of
shimmer on our water. So again, different technique, but same idea, just using these
ideas we've talked about, these different
techniques we have for bringing different things
to life in your scene, just to give it some animation. Go full screen one more
time just so we can look at this one more time.
Here it is one more time. Again, just very
simple animation, but it's very easy to
add with these presets, and it can make something
much more dynamic. So play around with
this sort of thing. And in the next
video, we're going to look at how we can take
something like this, a scene like this and using some of the other skills
we've learned in this course, make something
totally different. So I'll see you in
that lesson coming up.
44. Staying Creative Vintage Landscape Animation: Okay, here is the
little animated scene we created in the last lesson. And this is pretty cool, but I always like to
train my brain to think. What else can I do with this? How can I get
creative with this? So, how can we take this scene and turn it into
something different? Well, we've learned lots of
stuff throughout this course, including how to make frames. So we know we can take any of these shapes
that we have here. I can take it over into Photop, and I can turn it into a frame that I bring
back into Camva. I'm not going to show
myself doing that because we've been
through that in lots of earlier lessons. You should know how
to do that by now, so I want to value your time. But so here's an example. With these trees, I could
easily have taken them over, turned them into
this shape here, this mask, and then brought
this mask into Canva. So that's what I did for several of the elements in
our design here. So I went through several
of these elements, and I pulled them into
Photop using that process. We've documented
earlier in the course. I created frames. And then those frames, when I
brought them back, they were individual files, but I just copied and
pasted those frames, and now we have them
all in this one file. And I have named this
landscape frames. And also, if I go
under file menu here, I can see where
this is saved off. I saved it off into a
folder favorite frames, which is going to
be important from an organizational
standpoint because now I can get back
to this very easily. But just as a reminder, it's very easy
because if I want to turn any of these
items into a frame, I can just isolate that element, so Control C. Let me put
this on a blank page, Control V, size it up, leave it the same
size, whatever. Now if I export this off
as a transparent PNG, I bring this into photo P, or even if I had
it as, you know, all this white space, I could easily select just
the subject or just the white space and get the selection and then
turn that into a mask. Again, we've documented that in the earlier section of the course on
creating custom mask. So you should be familiar
with that process. So that's just the
process that I used to create all these frames. So I have one for the trees, one for the mountains,
one for the balloons, trees in the distance,
this sailboat, and then also, well, there's
another one of the trees. I may have another one I
forgot to bring in here. I'm not sure. I feel like I had another one,
but that's okay. You get the idea,
you get the process. And the reason why
saving it off is important is because now I have it in this folder called
landscape frames. So that means easily from
any new document in Canva, if I want to access those frames and make use of those frames, I can do so very easily. So here's just a blank document. But then if I went
under my projects tab and I go under my folders, I can find that
favorite frames folder, and then I have the one
called landscape frames. And if I go in here, I
can see all of these. And I can apply any
of these to a page. So if I click on one, it's
going to bring in that frame. If I click on this, it's
actually just going to replace the page with
this current page. But I can put a new page if I wanted a different
frame like this, or you could also apply all
of the design pages at once, and so it's bringing
them all in here, okay? And so then we have
all the frames, and then we could
quickly grab them and compile them into
a new scene, okay? We can't save of
frames like this. So if I grab this frame
here and I come under here, I can't save it to
a folder by itself, the frame, I have to have
it as a design page. That's why we use this method
when we want to organize our frames and bring frames
into a new document. Okay, so hopefully
that makes sense. Now, using this method, once we do this, then of course, the powerful thing is that
we can drag anything we want very easily into the frames before we were stuck with whatever the canva elements are, now we're making
use of that shape, but I can put anything
I want in these frames. So what if I come
under my elements tab, and what if I search
for something like vintage wallpaper. Then suddenly I can search
for just vintage wallpaper. Let me see all the graphics. Let me see all the photos. I can come down
here and say, Oh, I like this photo,
I can drag that in. And then suddenly, I'm
using the same shape, but suddenly I could create
something very different. And suddenly I
could get artistic. Here's a reminder of
that original animation, but then suddenly playing
around with frames, I was able very quickly
turn it into this. Something totally different. I was still able to use
all my normal tricks like animating the
different elements, bringing in a duotone
effect on this, obviously, changing the
brightness on different photos, lowering some down,
and then this one here strategically
choosing to keep it black. So it's the focal point. So you really can't
have fun if you just remember all these techniques and you remember to be playful. You remember to experiment
around and have fun. See one little error over here, but I could easily fix that. I don't have that hard edge coming onto the
edge of the screen. I think that's just a fog
layer that's moved in too far, but that would be easy to fix. Experiment around
with this thing. Taking elements,
turning them into frames, using this animation. You can come up with
some really cool things, give it a try, have fun, and I'll see you in
the next lesson.
45. Animated Barbie Poster Review: Okay, let's take a look
at another Canva project. So, last year, the
Barbie movie came out. One of my daughters
was excited to see it, so we went to see it as a
family, and we had a fun time. But it was interesting
because at the time, everybody was really into
everything Barbie related. At the movie
theater. I remember, there was a cutout,
you could sort of stick your head in
and take a picture. And then online, there were even things like this
Barbie selfie generator, where you could
upload a picture, put it in a frame, But this
didn't do a very good job. So, of course,
naturally, I thought I think Canva could
do a better job, and I thought it
would be interesting to play around and create something in Canva and then
build in some animation. So I created a couple of
different versions of this. And let me just hit play and we'll watch this, and
then we'll talk about this. I'm gonna hit play,
we'll watch it through, and then
we'll talk about it. Okay, I'll just stop it there. And the reason I wanted
to show this to you is because even though
this is review, I think it does just illustrate how it's easy with Canva to take something
that has a simple subject. Each one of these, the simple subject is
just the woman here. But then we've added a frame. We've created that
pop out effect. And then we've brought in
this video, these animations, things we can find within
Canva under the elements menu, especially if you're
a pro user and you have access to
even more elements, more of the pro elements. And then combining that with transitions and some of the other animated
presets you can apply. To any element on your page. We really can make this
much more dynamic. So this is what we've
been talking about throughout this whole
section of the course, how to use these
little animations just to make your
work stand out, especially when
you're looking to grab someone's
attention quickly. So we're not going to
go through all of this, everything in great,
great detail, but let's just walk
through it all just to see the different effects
we're applying to the different pages here. And then also you can
see in between here, we have some transitions. So we'll look at
those transitions. But on this first one here. So if I just play this
first one and we hit play, we see we have the
animated background. We have an animation
within the frame. And so then let's stop that and go back to
that first one there, and we'll take a look at that. So we'll bring up
the position menu just so we can see
what we have in here. So here's all the texts. I just have the text
grouped in this layer here, so I could take that away. So we just have the different
text layers grouped. But then we have here, if you remember from the
early lessons in the course, when we did the photo
pop out effect. So what we did was, we have a layer of
her on top because behind that we have a layer of her where she's in the frame. But before I put
her in the frame, we removed her from
the background, okay? So, this woman was originally on a different photo background. And because I removed
her from the background, now I just have her in the
frame that has transparency, and underneath that, I have
another copy of the frame. And within that frame,
I can put a video clip. So this frame here
just has a video clip. So if I detach video, you can see that we just found this video of these
falling sparkles, which makes for a
cool background, and so we were able to
add that to everything. Of course, here, I have that
again or something similar, slightly different
video that's just in the background of another frame that's the bottom
layer of our page. So we actually use multiple
frames on the page, even though if I
just hit Control Z a bunch of times to get
back to the beginning, really, we see this one
frame in the center, but we also have a frame
that's the entire background. And then, of course,
this frame is stacked a couple of times just
because we want to have the transparency so we can see through to the other
animation within the frame. Okay. So all these
different things we can do just to help
bring this to life. And then, of course,
the text on top. Now, let's scrub through
to the second layer. And on the second layer here, you probably recognize that
in the background now, instead of a video, now, if we look at the position here, I just have a regular element
here, just the photograph. But then if we look
at the animation now, we're adding this
pulse animation, just to make that background
pop in and out like that. I didn't mind having it come within the edges so you
could see the white. But of course, if I wanted
to not see the white, I could have grabbed a corner
and dragged out farther. So now when I did
the pulse effect, we would still get that effect, but we wouldn't see the
white edges, right? So that's just to your taste. And these are all things
we've learned how to use these different tools throughout these different
sections of the course. So that's the second one there. And then in between the pages, we can see now that we just have a simple fade between pages. So things like fades and
things like that can make the transition between
pages more interesting. Actually, it's not even a fade. There is a dissolve in here, which is what I was thinking of, but that is actually right
here, the match and move. And so since we have different things on
the different pages, that's why we're just
getting that fade effect. But you can see all these
different transitions we could use to get a different effect. And this color wipe here, you're actually recognize
that I do use that in between different slide here
later in this animation. And so we scrub through. Again, just her again, same background behind
where we have a frame over a frame and the original subject we've
removed from the background. Then going to the
third one here. This time, in the background, we have sort of a sky photo, but then we have another basic animation
behind everything. So we also have this
animation here, these sparkles that again make a nice effect coming
out from behind the photo. Let me just grab
this whole thing right here because
it's grouped together. So let me ungroup
this real quick. And then I can see
that I have her. I have a drop shadow
or a darker layer, and then if we get rid of that, then she's actually
in the frame, and I did not remove
the background, okay? So all kinds of different
strategies you can take to get a slightly
different effect. Onto the next one here, here's one where again, you probably recognize this
as being the rotate feature. So again, we just have a
background which we looked up. So I probably went and looked up a particular search term to
get this type of background. And then it was
something where I centered it behind my subject. I knew it was going to
rotate around that point. So now when I come in here
and we do this rotate, suddenly, we get that
rotating effect. And then also for
the text itself now, I did that pulse effect. So if we look at this text now, and I think it's because
it's grouped here. Let's get back on it, and I go under effects, animate. I haven't applied
it to that itself. So it must be applied to
a group or something, but we can see that
we obviously had that pulse effect going
on with the text there. And then another page
where this time, I have a couple of
different things. So again, we're using
a page transition. So we have this circle wipe. So the circle wipe gives us
that effect of right here. We get that circle
wipe the transition from this background
to this background. And this is one where I chose
to keep the same picture of the woman just because
I thought it was interesting to have
that all say the same, but then right here have
the background transition. So again, using a
different technique just to get a slightly
different effect. And then finally, on we get
to this slide effect and then the same sort of thing
on the background layer here, where this time, again, I went to using an animation
in the very back. So if you look here,
this very back layer is actually just a
little movie clip, and then we have a frame
with a movie clip, and then we have our
subject and again, the cutout effect, okay? So all of this is just
basically review, but I just wanted to show
you again that there's a lot of variety you can get by using these many
different effects, by just thinking creatively
using these frames, using these pop out effects, using a video for
your background, using animations for
your background, animating text, adding little
sparkle elements like this. There are all kinds of
little things you can do. So on a given project, it's just about finding
what the right path is. And then, of course,
you know, think about how much time
you're spending, You don't always want
to get carried away, but sometimes if it's
appropriate for the project, then sure, go ahead and do that. And also sometimes
when you can create a reusable asset where you have a template then where you can
drop something quickly into a frame because it's something you're going to use
again and again, then that might make sense. Thanks for watching, and I'll
see you in the next lesson.
46. Animating our Dune Poster: Okay, let's return to this Dune poster we created in an earlier
part of the course, and let's animate this
from start to finish. Now, we don't see a playhead
in the upper right, and if you don't see a playhead, that means you don't have any animated elements
in your design. Also, if I click on
anything down here, you notice they don't have
that duration option. I can click on any element
here and right click. And I have that show timing, but we don't have the duration option because we do not have the traditional video
options in this format because we just started
this as a poster in certain formats when
you open in Canva, they're not going to have that traditional
timeline option, even if you expand out the timeline down
here at the bottom, expand out the interface, I
should say at the bottom. You'll see your
different slides, but you won't have
that timeline option. So that's something
to keep in mind. But you can still work
with animation here. Even though I don't have
that duration option. If I click on this, I can see it says 5 seconds and
I can see up here, it says 5 seconds. If I add another slide here, I can see that this
one is 5 seconds, but for any of
these, I can come in here and change the length. So even though they're
showing the same down here, and I don't have that
duration option, I can click on one and
see that it's 5 seconds. I can click on another. I can see that
it's 12.5 seconds. I'm still not seeing
anything up on the right because we don't have any animated elements yet, but if I were to
click on anything, so if I clicked on this here, and then I came under
animate and added any of these options here,
then suddenly, we see that we have
the total time up here in the upper right, and we have a playhead. And that 17.5 just represents the 5 seconds
that this slide is, and then the 12.5 of that one. So added together, we get 17.5, We can hit the playhead. It's going to go through here. So all I did was animate
the border here. Of course, I don't like that, and I'm not going to keep that. I was just showing
you these options that you have in here and how even though we're not in that traditional
Instagram story video, you know, animated option that you can start
with in Canva, even though we started
with something where it's expecting
static content, we can still animate and we
still have options up here. But if you want the full
timeline where you can click and drag out down
here and have the duration, you have to start with one of
those other Canva formats. So that's just something
to keep in mind. So I'll go ahead
and hit Control Z here just to undo adding this extra slide and to get back to where we don't have
anything animated here. So you see, I know
we don't anymore because it disappeared up
here from the upper right. Okay. So let's start. And even though we're not in one of those
traditional formats, where you get the full time line and video
options down here, we're still going to be
able to animate this. So let's walk
through just adding some simple animation to
this Dune poster just to bring it to life a little
bit if it was something maybe we were going to
share on social media, and we wanted it to be able to sort of get a little
bit more attention. Let's start by just
coming up under the position tab so we can see the different
layers in our project. Now, a lot of times you can
tell by the thumbnail what that layer is or when you hover over it and you get
that blue bounding box. But you can't
always easily tell. Like, for example,
what is this here? So sometimes you
have to click on a layer and then bring the
transparency up or down. So this is at seven.
I'll remember that. That's just this texture
we're applying here. So the one thing I'll
say about layers here in Canva is I
do wish they would allow you to name your
layers and then see the name of that
layer because that would make it a lot easier. Than it is now. When
you group these layers, I also wish there
was a way to sort of twirl it open
without getting rid of the group completely just to see all those
individual layers. So I think they can
make improvements here, but this is the current
state of Canvas. So we sort of have to
work with this as is. So these are our
borders. We're not going to animate our borders. The first thing we're going
to animate here is the text. And so I'm going to shift click to select all of
these text layers. I'm going to temporarily
group them together, and I just want to show you that grouping something
and then animating it will sometimes lead to a different
result than if you animate the individual elements
that you put in that group because the animation can get applied to
the group as a whole, or to each single element, and that can affect how
the animation looks. So that's something you
want to keep in mind, and I'll show you an example. So let's just group
these doom letters together for a second. And then we're going to come
under this animate tab. So now we're applying
animate to this whole group, and I'm going to do this
wipe animation here, which basically applies a wipe, and you can come here and
choose which direction. So we'll just start
by going here, which is left to right. And then we see it
play out on screen, and I can adjust the speed, and we can see it starts
from the left and then it works across
letter to letter. So see how it gets
applied letter to letter. Here's something
else I want to show you sometimes for some
of these animations, also is going to be affected by the length of your slide here. This currently has a
duration of 5 seconds. But what if we came
in and we changed the timing for that all
the way up to 30 seconds. And now let's come back under that animate option
for that group. So let me just go
into position again. Let's make sure
we get back under this animation and look
at this wipe here. Now we see it's getting
applied much slower Because now it's
taking advantage of that full 30 seconds that we've told this
slide we want it to be. So sometimes coming
here and changing the length of the
slide here will change the animation just because you obviously can't
have something animate for 10 seconds if the clip itself is
only 5 seconds. So playing around with
that can affect things. And right now for these
individual slides that you have or pages, however, you want
to think of these. I think right now
the max you can push something to is
30 seconds, okay? So 30 seconds and now that's going to give us a slight
different animation. The other thing I was
mentioning is that the animation can also be
affected by whether it's being applied to the
group as a whole or to the individual
elements of the group. So to look at this, let's just
go under the position tab. We'll come to this and now
we're going to ngroup it. And now with the individual
letters highlighted. So we have them all selected, but they're not in
a group anymore. So now we're going to
come under animate. We'll come back to the
same wipe animation. We'll take the speed
all the way down again. And now, if we look at it, we can see that it gets applied to each individual letter. So instead of moving just from left to right
across the screen, now we have it
here being applied to each individual
letter individually, so it is a little different. So let's go ahead and maybe do this top to bottom animation. Let's adjust the speed. Maybe something like that,
that looks pretty cool. So you can find a
speed that looks good. So I think I'm going
to use that as my animation for my letters. Now, let's start to work
through these other elements that we have here just to make this come to
life even more. So again, we'll go under
a position menu here. I believe this layer here, sometimes you have to just
click and see what it is. This has just turned
off completely. I just don't even need
that in my project. Don't know what I
was doing in there. So sometimes you'll find
these individual fragments. Now, what did I actually
just delete there? I deleted one of my letters. We don't want to do that.
So let's delete this here. And then here's
another one again. I don't know how I ended up
with some of these layers. Probably things I was experimenting with
that I didn't use. So if you have anything
that you don't need, now's a good time to clean up, so you don't have all
these extra layers in your project coming
down to this one here. This one, I believe, is that splatter that's just turned way down in
the background. So that is something
we may animate here. Let's turn it down
to what we like. I think all these
layers here are splatter layers that I'm
going through currently. This one's at 22%. That's the little glow
I have behind her head. Maybe we won't mess with that, but maybe all of these
splatter layers above. One, two, and then
I believe three, four, I believe all of
these are splatter layers. Let's select all of these. Let's come under animate, and let's try to do this
breathe is one I like because it just does this low effect
of making things expand out. You can change the scale to make it sort enlarge it
a little bit more. You can go down low and it's going to be a little
bit more subtle, all depends on what you're going for in the different projects. So I'm going to try something
like this just so we start to see that splatter
move in the background. And of course, we have more
splatter layers in here. So let's come down here and see, I believe these are also
ones we just applied it to. We did all of these, but then behind here are some we have some platter behind
our worm also. So let's do the same thing. Let's go into these. And again, we're going to go under animate. And again, we're going
to choose that breathe. And again, we can play around
in here with this scale and see if we want
to go all out or whether we want it to be
a little bit more subtle. It all really
depends. For these, I think I'm going
to go ahead and dial them up all the way. And then let's see what else we have in here that
we can bring in. Layer here, and I think it's just the sand lower
on the ground. Yeah, that's just
my sand itself, and then we have
some other layers here like the sun
in the background. I don't think I want
to mess with that. But the sandworm itself, I definitely want to
do something with him, and I definitely
want to do something with our main subject. So for the sandworm itself, I think maybe I'm going to use there's one in here that I should be able to
make a move up the screen. Maybe this rise here, but then let's lower the speeds way down like that. So
maybe something like that. So it starts to
look a little bit like he's rising
out of the sand. And then our main
subject itself. Let's go to her, and then again, we'll come under animate,
and let's see what we have. So we have these
drift ones here. So maybe if we have removing the opposite direction
from our sand worm, and then we don't want the
intensity on this to be much. So it's very subtle, maybe. So she's moving down slightly. The worms moving up slightly. We have all this
splatter animating. It looks like some of our
splatter isn't animating. So I may have to go
back through our layers here and just click through
the individual layers. As I do, I can look at the
animate options up here. So that's animated. This is animated.
This is animated. This is animated. That's just the glow
behind her head. This is animated. This is animated, this, this. So you sometimes have to take your time going through here. That's just the
sand layer itself. This layer here is not animated. What is this layer that
I'm currently looking at? Let's see. Well, it's
one that's turned off. So we don't need to
worry about that to something else I
was playing with. So I think I do have
everything animated in here. But then, of course, you
can also think about bringing in additional
animations. So I know that I have a folder where I start to put some
of my favorite animations, and it's good to
organize like this. So if I come now under
this project tab, you can see all your
different animated options if you go to folders and find a folder where you're
storing that stuff. So I'm just going to
type in favorite. And if I do that, it's
going to bring up any folder that has the
name favorite in it. Here's a favorite
animated assets. I know I put these two sort
of swirl effects in there. And I can come in now, and I can change these so that they are positioned
in the background. So I want this to be all the way behind my sand worm right here, and then of course,
I can resize it. And I kind of like this
swirl thing because the swirl part is sort
of hidden behind. And so it sort of just
looks like sand spray, and of course, I
don't think I want it to be white the way it is. Now I want to lower it down, so it starts to look like it blends with the scene
a little bit more. So we'll lower it down
a fair bit like that. And then if I come back to
that folder again, so again, under projects again
under folders, and here's that favorite
animated assets. I have this other one here, which is the same idea, but a little bit bigger
particles in there. So I'm going to use
the same thing because it's going to fit well
with the one we just did. Again, I'll bring it
and I'll put it back behind all those other layers. Again, you can really
adjust the size. So if I wanted to scale this up, really a fair bit
like this just to get these bigger
particles, and again, I'm going to lower down
the transparency a lot so that we start to get that in the layer in front of
it that we just added, And so just like this, we have something that we've
added some interest to. So now if I want to see
everything that I've done, I could use this playhead here. And so now we have this
cool animation added. Now, if I see her,
my main subject, if I just go back
to the beginning, I don't like the way
you can see your feet, almost like she's levitating. So I might change her
starting position. Because sometimes when
you apply an animation, it's going to change
the starting position. You see how she's
out of the frame. But then if we play this now, her feet are above in the frame, I think I want her feet to
always be out of the frame. So to compensate and take
account for that animation, I might have to grab her. I might just drag her down
a little bit like this. And now, if I come back
and hit play, see, she starts and still is
just out of the frame, and then she's going
to move down slightly. So there you go. We just did
some basic animation here. Again, I think I still
have some splatter in the background that doesn't
look like it's moving. So I might have to
go back through and forward this a little
bit more because I think I missed
something somehow, but we still have started to bring this to life a little bit. Actually, let me go
back to the beginning. Maybe it is animated
in the beginning, but it just doesn't, yeah. It is in the
beginning. So that's the other thing that Canvas
still limited in right now. Your animations aren't always going to play the full length. You see this rise one
and this shift one. Sometimes some of the animations will last longer than others, and you don't have
total total control over all of those
different things. So it's just something
to keep in mind, and you'll have to
pay attention as Canva gets updates,
what changes, what additional options
you might have, but it is something
that you still can use right now to add some pretty cool animation just to bring something to
life a little bit, okay? So, have fun, and I'll see
you in the next lesson.
47. Forcing the New Video Editor (and Duration Option): In our last video, we were
animating this Dune poster, and I mentioned at one point, how you do not get the
duration option down here if you launch certain
projects formats in Canva, for example, this was a poster
that we launched, and then other times
when you launch a different project because it's a video project or
something like that, you will get the duration
option down here. However, there is a
way I think you can force it to have the
duration option down here. Now, let me just show
you what I mean. Let's just go to our home
screen for a second. Here's the poster format, which is what I am
using in this Dune. This was launched as a poster. So if I come down here and
I launch poster again, so we'll create a blank poster. Then even if I come under my elements and I
search for video clip, sometimes type in video. But we just need to bring up a video, let's drop one in here. Even though we
have a video here, I can see it's 10.1 seconds, and we can fool around with it, but it's tougher
when we don't have the traditional video
timeline at the bottom where we can drag out
from the sides and see our playhead the way we
do in that video editor. So how do we get that
duration option, and how do we get
that video editor? Well, if you're on
the home screen and you launch something that's either a video format or something like
an Instagram reel. So I'm just going
to start to type in Insta Instagram up here. And if I find something
like an Instagram reel, let's just type that out. Completely, so it brings
up some template. So here's an blank
Instagram real. And since it expects you to have animation in
this type of project, suddenly, we do
get the playhead. We do have this duration option. So we have the traditional
newer video editor down here in anva where we did not have that in
our Dune project. So there's no way within this Dune project to just
force it to show up here. However, we could easily copy this over to
another project, and there's usually a way
when you're launching a new project to make
sure you get it. So if I look at this
project here by just going under file and
clicking on this here, then we can see that
this is 18 " by 24 ". So if I just go back to the
home screen here on Canva, we can see that this poster, 18 by 24 ". You know if we launch that, we're not going to
get the video editor. However, what if I just come over to this custom size option, and I type in 18 by 24, and I create a new design.
Well, look at this. Suddenly, we have
the video editor, and we have the duration option. Okay? And then if I wanted to go back to
that Dune poster, since it's the exact
same dimensions, I could just do a control A
and then control C to copy, copy everything, come
onto that new design. Not this one, but this one here, hit Control V. Give it a second? It's pasting a lot of elements, so it's going to take a little while to
paste it all over, but it will paste it all over. For some reason,
I didn't get it, let me just go back again. Again, I could try to right
click Control C to copy, but I could also just right
click here and choose copy, and then I'm going to go
back to that blank design. Here it is right here. Okay, so it did paste it over. Here's the one why
I pasted it before. I took a second
to paste it over, but now it pasted it over. And so everything came over And the only thing we didn't
get was our background, and that's just
because you can't copy a background like that, but we would just come here
under position and then just find our background and come in here and
adjust the color, pick whatever color we want. We can come in here
and dial it down. So it matched what
we had before. And now we have the
exact same project, except now suddenly we
have this duration option. And so now we can click that on, and now we can just
drag out from the end here to make our clip
longer to trim it, and we have our playhead where we can easily scrub through. And so it is just sometimes
easier to work with. Now, as we saw in
the last video, you can work in that other
project format where you don't have the traditional video
editor, but it is helpful, and just know you
have that trick on the home screen of just
choosing a custom size if you want to do something
that's traditionally maybe a format where you don't get that duration, but you
do want to get it. I think when you use
this custom size, it's always going to show
up with that video option. Now, I haven't fully tested it, so maybe sometimes you don't, but I'm pretty sure
this should work. So remember that trick
if you're trying to bring back that duration option, so you have that
traditional video editor. All right, thanks for watching. I'll see you in the next lesson.
48. Utilizing Different Methods Animating our Polaroid Frame Project: Another example. You'll remember this polaroid frame we created
earlier in the course. I've gone in here and I added this floral print
in the background, and then a couple of layers
that have butterflies, just graphics that
I found in Canva, and then one with this
flower over here. Again, just using those
animation effects, we have a rotate on the flower, and then we have some drifts
on our butterflies here. If I go back through and
then let this play through, we can see a very easy
way to add animation. Now, remember, if we
extend our timeline here using the duration option
and just drag this out, we can suddenly slow it down
and get a different effect. Of course, you also
can come under here, and you have a speed
option if you go under the animation here or an intensity option
in the case of drift. However, that only accounts for however long your slide is. And so just by dragging it out, suddenly, we can
make it play slower. So if I take it back
to the beginning now, now suddenly we have a
real subtle animation compared to how
fast it was before, if we drag this back, we can see that it
plays much faster. It's got to learn
these controls and fool around so you can get the effect that
you think is most effective and that
you like the most. Now let's look at
another copy of this. Here's one where we don't
have any animation added. But then if I go to the next one here and let it play through, now we can see we have some animation going
on in the background. Now, in the case of
this, we're not using elements and not using
those animation effects, we actually just have a
video in the background, a couple of different
videos in the background. So if we look at the
position tab here, let me just go to the videos that are
playing in the background. So I believe this
is one of them. Let's see transparency. Yes, let's bring that
up to the top just so we can see we have that
video in the background. And then this, I think
is the other one. Let's see what this one is here. Yeah, so that's just
sort of a grunge layer. So that's not the
video, but there is a second video in
the background here. Let's see if it's this one
here, bring that to the front. Yeah. So we just have some videos
playing in the background. So this one is this
different abstract shapes. And if we turn that
one down and we go to this other one here and
bring that one on top, this is just this boca effect. So let me just hit Control Z to force those back into the background positions
that they were in. And then we can see that
that is what's providing sort of that motion and stuff we see in the background there. So again, different ways to get some animation
into your design. You can use the elements and you can use those animation effects, or you can play with putting
video in the background, deciding where you want
it in your design. For example, in this design, I have it pushed, so it's
behind my main subject here. And so it's behind all
these picture frames and just give some motion
in the background. Another thing I could do here, all these layers that have the photograph frames
and the subject itself. I could group all
those together, and then I could come under there and I could animate those. So maybe I would give
those a simple drift and maybe make them
come up the page, but make it pretty subtle. And then if I play this now and we go to the one that has
animation here it is now. So now we have the subject
animating, move it up, and then we have some movement and stuff in the background. So it really is just about
playing around and seeing what works best for whatever
project you're working on and the
look you're going for. All right? I'll see you
in the next lesson.
49. Limiting your Animation to Part of your Design: Here's another version
of that Dune poster that I created from
earlier in the course. Now I've animated this as well, so let me just hit play and let's watch this for a second. You probably have a
good feel now for the different
methods we have for creating this type of animation. But there's something slightly
different about this one. Let me pause it again
and let me bring it back to the beginning.
Grab this and bring it back. I'm going to hit play again and notice how this
Boca effect really fades out here and doesn't come to the
top half of my image. I'm going to hit play
again and watch how this fades as it meets the
center of the image. This is something a
little different. How am I stopping this animation from sort of covering the top
half of my image? So I want you to pause the video and I want you to think
about this and when you do, I want you to remember all the techniques we've
learned in this course, because again, it's
about stacking these techniques together. So pause for a second,
think about how I'm limiting this one animation to just the bottom
half of my image. Then when you come
back after the pause, I'll go ahead and
explain how I did that. Pause now, and I'll see you in a minute. Okay. Welcome back. Were you able to
reason out how I'm limiting this animation to just the bottom
half of the image? Well, let me show you
what's going on here. So that Boca effect is just
being created by a video. So I have this video down here that's on this layer of
my project right here. The problem is in the
challenge is behind it, I also have this layer here, which includes the sand dunes, and that's kind of a feature
I want to show to just add that element of place
to this image here. If I go here, here's the video. So let's just scrub through
and see this video. So I'll just hit
space bar. So that's the video that's
causing the animation. But you see that goes all
the way up over the screen. And then here behind it. This is the layer that's
behind it that I want to preserve up here the details
of some of the sand dunes. And so if I just apply
it normally over top of this with the video covering the whole screen.
This is the problem. It's going to take
away my sand dunes. I'm no longer going
to be able to see through to my sand dunes. So let me just pause
it for a second. And if I come down
to that layer, I can lower it down. So here's the transparency.
I can lower it down. But then I really start to
lose the animation itself, and I want to keep
that a strong element, so I don't want to
bring it way down. I want to keep it pumped up. But then you see I lose those sand dunes
in the background? Well, if I just drag
the video itself down, then we have another problem, then suddenly, I'm going to
see the edge of the video. So how did I get around this? How did I get around the
fact that I want to have this strong animation in the background that's
being played by a video? I don't want to lower down the transparency of
that video too much. At the same time,
I don't want to lose my background detail
from layers behind it. So how did I get around that? Well, here's what I did. I just exported my
entire image here. So if we go back to
the first thing here, you can export
whatever you want. So I could even turn this
animation layer off, so I could come
in here and lower down the transparency of that. And so what I did was I just exported everything
here as a PNG. Actually, I think I
just export it as a JPEG because I'm not
concerned with transparency. So just download and download
just that page as a JPEG. And then I brought that
JPEG over into Photop. And now within Photop, we know here is
where we can create some transparency and
bring something back. So really, what I want
to do is I want to be able to preserve the
top half of my image. So all I did here was
add another layer. I just brought it
below this layer here. I don't need that,
but we'll just put it on here for reference. So I'll just fill that
with white for a moment. We're going to turn
off that white. But I'm going to just go
up here to my background. We're going to apply a
mask to our background. Remember, that's how we start to control what we're seeing
and what we're not seeing. And right now, it's just white, so we're seeing everything. But if I come up here
to my gradient tool, and it's just got a
simple linear gradient, and right now it's set to go
from the foreground color, which is white to the
background color. So remember, that's
going from what we see to what we don't see. So I could say everything from
right here I want to see, and then I could drag down a gradient to maybe right here, and suddenly, I get this blend. And then, of course,
I want to turn off the white background layer.
But this is all I did. I did something like
this, and I exported this back to my canva project. And then within
that canva project, if we go back to this
first layer here, where that animation
is obscured. If you look at the
top layer in this, here's the top layer once
we get behind the borders, and I'll show you that top layer just on its own page here, I just added this
as a top layer. So now the animation is
playing up behind this. You hit the semi
transparent pixels. It starts to disappear, and then we don't see it up
top because it's obscured by this top layer that we
brought back from Photop. Now, obviously, if I wanted my Dune letters to be animated, then I would not have exported
those as part of that. I would have turned
those off first, and then I would have kept
those separate and above this layer in the
final animation, okay? So you just have to think
about what effect you want, what are the sort of tools in your tool bag that you
can potentially use. And then sometimes
you have to think creatively like this just
to get the result you want. All right? All right. Thanks for watching. Okay.
50. Final Animation Challenge: Okay, since we've
reached the end of the animation
section of the course, let's have one more
animation challenge. Now, this would be
a great time to return to an earlier
project in the course, maybe one that didn't
include animation. Maybe you want to add
in some animation now that you've learned
all these techniques. But it can be anything at all. It can be one of your
old canva designs, so you can create a new design just with this purpose in mind. But what you're going
to do is just add some level of animation
to your design. So I want you to play around,
I want you to have fun. Anything at all works. And then you can come up under the share menu and you can come down here and if you want, you can grab a public view link. This lets people look
at your project. They can't make edits, but
they can look at your project, or if you want, you can
download appropriate media. And then here in
Skillshare just come under whatever challenge you happen
to be currently working on. Then come under here
and come down to this discussion tab and then you can actually
use any of these tabs, start conversation, ask
question share project. Any of those are going to work. Just come in here and either
insert the link if you have that public view link or if you downloads some
media to share, use this ad media and you can
upload your media that way. And that way, we can
check out your challenge. We can all get
inspiration from each other as we share
challenges here. And you can offer critiques,
just keep your critiques friendly and try to be
as helpful as possible. Alright, I'll see
you the next lesson.
 Greg Radcliffe, Photographer | Designer | Entrepreneur