Transcripts
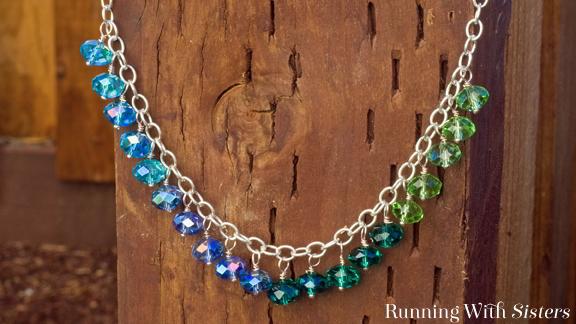
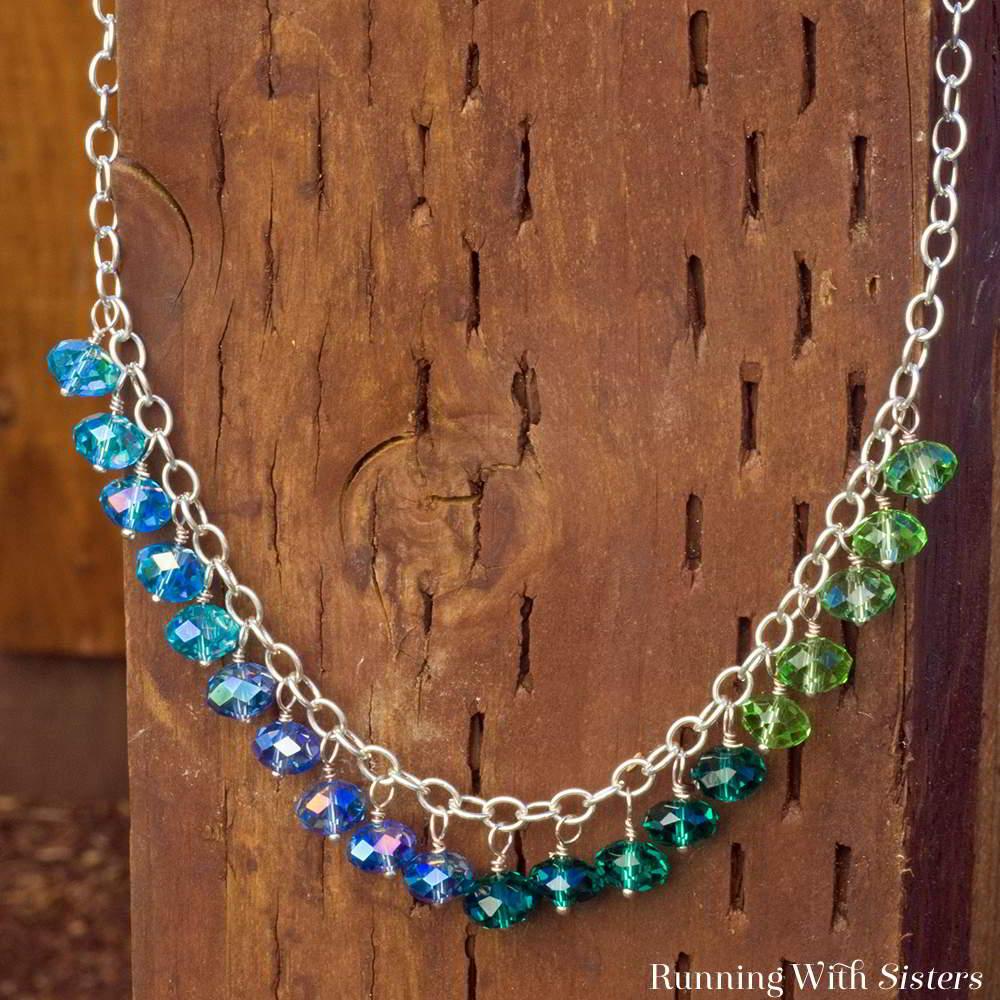
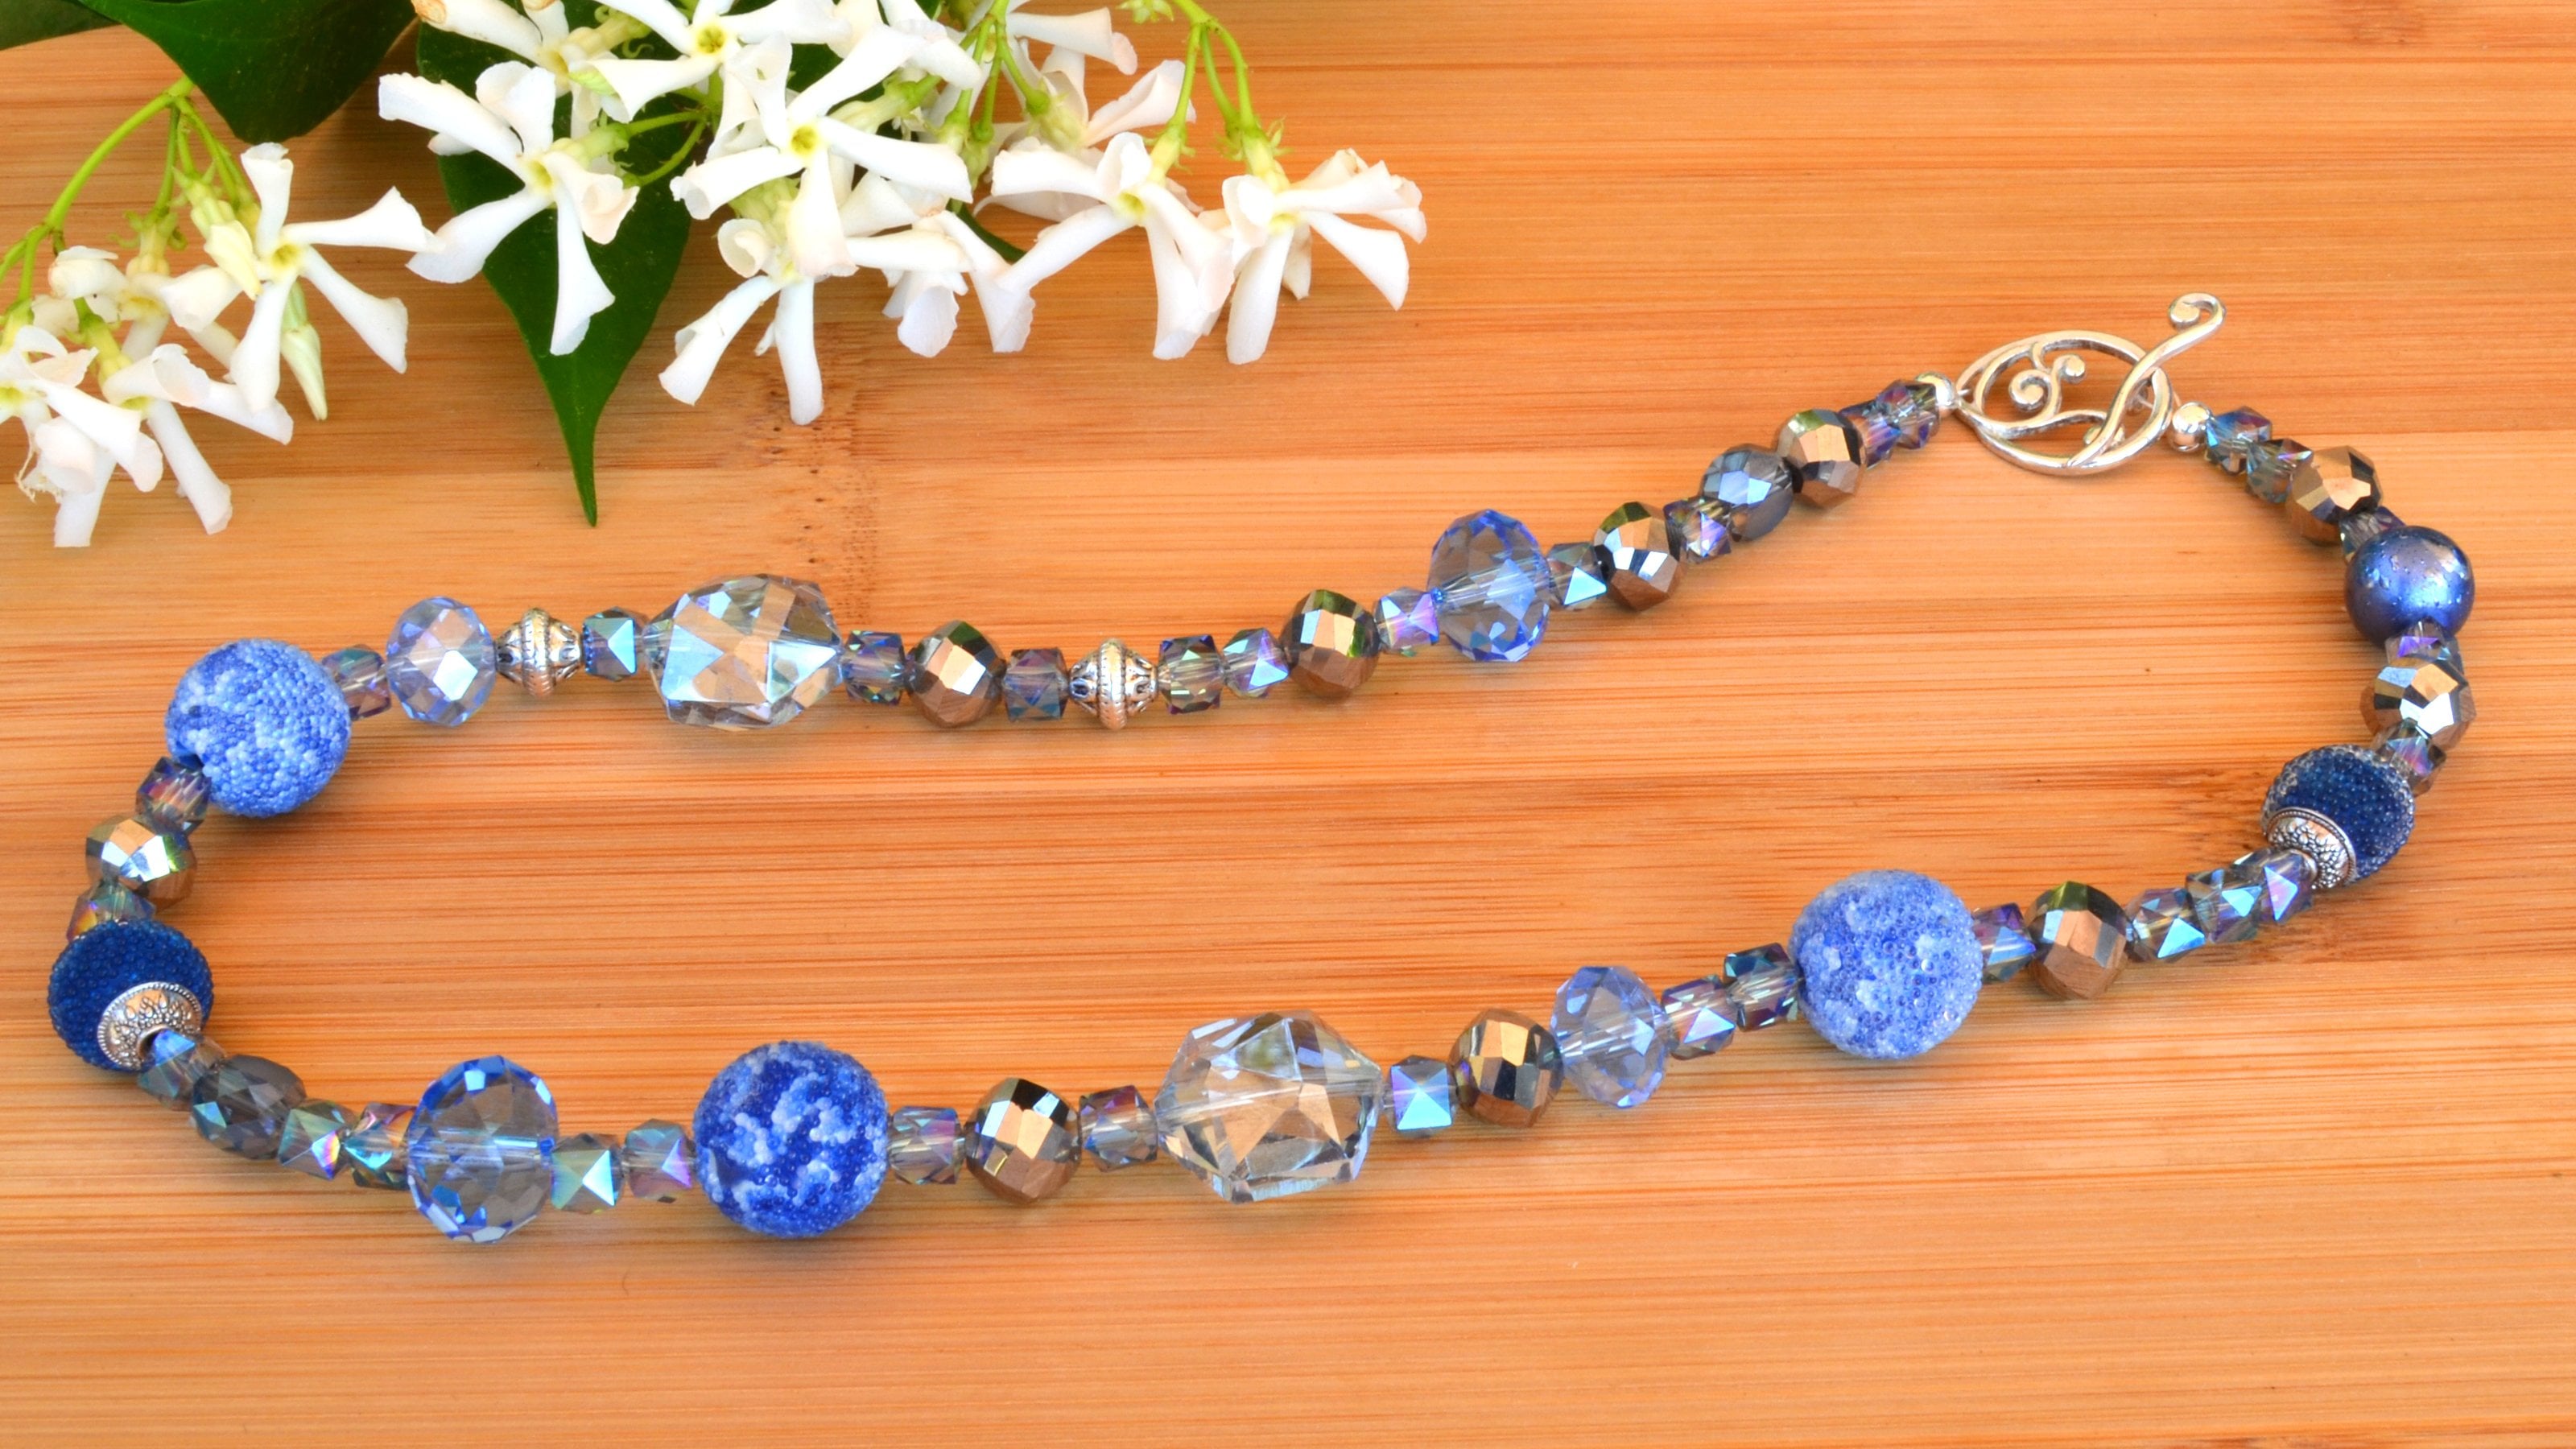
1. Introduction: Ah, hi, I'm Kitty and I'm Jennifer and we're the only all sisters. We're gonna show you how to make this gorgeous dangling bead necklace. What we love about this necklace is that when you wear it, there's a lot of movement from those dangles. We also love this hombre Look, the way the colors go from turquoise to blue, green and light green. We're going to show you all the tools that you need to make the rap loops that hold on the dangles. We're going to tell you all about the materials, the crystals and the head pins, and then we're also going to show you how to put a class onto chain. And if you have any questions or comments, go ahead and post them and will respond, so let's get started.
2. Tools And Materials: here the tools and materials you need to make the dangling bead necklace for tools you need round nose players, chain nose pliers and wire cutters. And then you also need a tape measure, and that's you can measure your chain next, you need chain, and we've chosen what's called on Open Loop chain for this project. Open loop means that the loops air slightly oval and elongated and leaving enough room for wire work to go through the inside of the loop. You don't want a really tight small change for this project. We also need 21 head pins, and these head pins are silver plate, and they have a little ball on the end cause it's cute, and then you also need a lobster class and one jump ring. Then you need the beads, and we've chosen 20 faceted crystal Randalls, and we have them in four different colors. We've got turquoise, peri winkle, this dark green and light green, and the important thing here is that all of these beads air the exact same size and shape the's Rondell Czar six millimeters wide, And that's the amount of space that your bead will take up on the head pin and their eight millimeters in diameter. When you're doing a project that has a lot of beads like this, where you need different colors at the same shape and size speed, it may be hard to find that kind of variety at just a craft store, so you might have to go to like a bead shop. Yet be chops, have a lot more variety and a lot of colors, and you can buy them individually, the beads individually and not on big strands, which can save some money, too. Lastly, you need one by Cone. That's about a three millimeter crystal by cone, and that's for a finishing touch that will show you at the end.
3. Cutting The Chain & Arranging The Beads: The first thing we need to do is measure and cut our chain, and we're going to make a 16 inch long necklace because we measured around our necks, and that's the length we like. You could measure a necklace that you already have and make it that length. We also are going to add one extra inch to the length, and the reason we're going to do that is when you make a necklace with chain and use a lobster clasp as your class. You could make it adjustable so we could make it so we can clasp it at 16 or forgive extra room in the chain. We could class, but it's 17 and make it a little bit longer. That just gives us some adjustment. Then we just cut or chain here. And when it comes to cutting chain, there's really no magic to it and no mystery. You just slice right through one of loops just like that. You want to hold off on that and so it doesn't play off that That's a good idea. Good idea. So you don't get any injuries while you're crafting here so you can see that's a broken link that I just cut out of the chain. And now we have our 17 inch long piece of chain, and we need to find the center of that. The center is important when it comes to this necklace, because our beads are gonna line up on either side of the center. So all I did was fold the chain in half and pinched where the center is. You could also take your tape measure and measure half of 17.5 17 toe find your center. But it's easier just to pulled it in half. And then I'm gonna mark where the center was with the head pin. That's just temporary. But just so we can build out where our beads go and now we're gonna lay out our beads. And to do that, we're just gonna dump out our little beads here in the order that they're going to go and on the chain. And we decided that we like them going and sort of this color merger hombre look. So we're gonna go from this light green to the darker green to Peri Winkle and then to turquoise, and we want to start lining up our beads at the center where this head pin is, we're gonna put a bead on either side of the center, and that's where they line up is important. With these loops, you want to skip a loop in between each of our beads. So the chain has links that will lay flat against your skin and then links joining those links that will be perpendicular. You can see that we want to put the bead on a flat link each time Flat link, flat link, and in between we have a perpendicular link. And that means when you do that, it will make sure that the beads hang the same way all the way across the necklace and stumble. Some don't stick out or poke out the wrong side of 11 like flipping up over the top of the chain. Exactly. It happens if you just sort of do it willy nilly without a plan that can happen. So we're just gonna keep lining these up. And the size of these beads ended up sort of matching the size of the links of the chain spacing. So for this necklace, you're just gonna skip one link in between each of these beads. If your beads were bigger, you might need to skip more than one link, and it's important that you skipped an odd number.
4. Prepping The First Bead: and now we're ready to make our dangling beads that go on her chain. To do that, we're gonna take a head pin and slide our first speed onto the head pin all the way down to the end, and then I'm gonna hold onto the bead, said that it's firmly pressed against that ball, and I'm gonna make what's called a wrapped loop. To do that, I'm gonna use my round nose pliers and I'm gonna grasp the wire of the head pin right above the bead with the very end of my round nose pliers. And I'm gonna make a 90 degree bend in my wire by pulling the wire toward me next time in a reposition the pliers to the top part of that wire. And where I do this next step will indicator or will dictate how big my loops are in the necklace, and it will be the loop that's holding this dangle on. So I'm gonna show you a little trick that we dio we're gonna take a Sharpie, and we're gonna make a mark on a round nose pliers where we want to make our wraps. So she's gonna make a mark. So that all of the wrapped loops on the necklace are always the same size. Because if she made some of the loops at the little tiny end of the pliers and she made, some might be at the fat end of the players than loops are gonna be all different sizes. And this way she's going to make a mark on both sides of both the jaws of the players. And then all her loops are gonna be the same size. It makes it look just a little more finished, a little more professional, all of your loops or the exact same size. So it's a good thing to Dio. And don't worry about marking up your players like this cause you can remove the marks with a nail polish remover, but they're also just gonna rub off. Anyway, I was just about to reposition my pliers, grabbing onto the wire. That's 90 degrees right at the bend at that point where I'm gonna make my first loop. So I'm gonna pull the wire around the top jaw of my pliers all almost all the way. You'll see. I can't go all the way. She's like in the shape of the pliers create the loop. Rather, it's not bending the players or anything to make something round, right. I'm not your It seems like you would go like this or some of the players. Really? You're holding them still the whole time. Now I'm gonna reposition my pliers to the bottom jaw and pull the wire all the way around to finish making my loop. You see, I've got a complete loop there, but before we wrap the loop, we need to feed it onto the chain, because if you finished it, if you went ahead and wrapped it around, it would be closed loop and then you can't get it onto the chain and you'll do that. You'll make that mistake. You'll be like, on a roll, just white rap in, and then you'll close it up. And if you do that, you just cut it with your wire pounders. Throw away that head pin and just do it again. Just start over. It's no big deal
5. Adding Beads To The Chain: Now, here's where it helps that we marked the center of our chain because we want to start this color of our necklace one link over in the chain. So I'm gonna slide my wire of my head pin onto that first link. That's to the right of the centre link. And once she has grabbed the chain with head Pan, she doesn't need to keep track of where the center is anymore, right? She knows the center is the link. Just one over from where she's working. Exactly. So now I'm gonna wrap this loop to do that. I'm gonna hold remove the chain out of the way here, use my chain nose pliers for that. I'm gonna grab across the loop toe, hold it firmly, and so it keeps its shape. I'm gonna grab the end of the head pin wire, and I'm gonna pull it twice around the little neck that I created perfect like that. And now it's closed, and it'll stay on your chain now. And I'm gonna use my wire cutters or flesh cutters to cut this little end, and I want to get it as close to the neck of the wire. It's possible. Somebody use the flush side of the wire cutters. You can see one side is angled on. One side is flesh. If you cut it with angled side towards your project, you would wind up with a pointy piece of wire sticking out. You don't want that. So use the flat side of the brush cutters towards your project and then see here holding onto the end firmly, Someone having going pieces. It's good that off to the side. And then if if you do end up with a little bit of a poking out and you can always use your chain nose pliers to just sort of push the end down and now you can see we've got our first bead on our chain and I'm gonna go ahead and lay that out again and you're gonna want to do this in between every dangling beat component, you wanna lay the chain back out so that you know which links are facing up and which are, you know, the flat ones in which of the perpendicular one you're gonna need to put the each day ling component on the same side. That is the hanging down side of the chain. See here it's on the bottom of that link, not the top of that link. When you pull the chain firmly like that, it sort of lays the links back out. So you can see kind of twisted. Yeah. So my actions going to go on this side of that link? So you just take another head pin site on the same color bead will do five of these in a row, and then she's going to the same thing again with the changes players are with the around. Those pliers is gonna make a little neck grab the wire like that 90 degrees moving up to where we made our mark. She's letting the tool do all the work. It's like a Mandrell, and I'm gonna reposition to the bottom jaw my players at the same mark and pull the wire around to make my loop. That and now I want to carefully feed this and into that link. This is the trickiest part. Is making sure you get in the proper link on the proper side of the link. So and she can chicken double, check or work by holding the chain up and making sure that they both hang in the same place . So I'm gonna do that just to be sure. I think it's great. It looks right. And I'm gonna go ahead and wrap my lip Something to grab my chain knows. Players for that actually gonna switch hands here, grab across my loop, pull the wire around the neck twice. That's her wrapped part of her wrap loop. And then I use my wire cutters or flesh cutters. We don't cut the chain. Yes, it's a careful not to cut the chain. Hold on the end, and we're gonna hold it up and make sure that that looks right. So far, so good. That's great. And we're gonna stretch it back out, and we're gonna get ready to do our next B. She's just going to do the same thing again to put on the third speed this chain. We got this chain at a craft store and it came on a card like wrapped around card, and it was just about as much as we needed. But it also comes. You can buy it on a school. If you wanted a huge amount of chain, you can buy it in bulk like that. That's really nice, because you can get a lot for not very much money. And if you were doing like a lot of gifts, if you're making a lot of presents for holidays or something, that'd be a good way to buy the chain if it doesn't need to be special. So now that we've got all of that dark green on our chain, we're just gonna continue on adding those beads to the right, making sure that we skip every other link in the chain. And then we'll start with the next color, which is this Peri Winkle just to the left of the center and continued beating with a wrapped loops all the way to the end until we're done with the turquoise.
6. Putting On The Clasp: And now that we're done with all our dangles, we just need to put on a class to do that. We're going to attach this lobster clasp using a jump a ring. So we're going to take the jump ring and we're gonna open it, using both suppliers that we have our chain nose and a round nose pliers. I'm gonna line up the opening of this jumper ring. You can see that there's a little cut in the jumping there. I'm gonna put that in between the chain, those and round nose pliers, grasping that, jumping on either side. And then I'm gonna rotate opening this jumping like you'd open a door, and that's to keep it from losing its round shape. Then I'm gonna feed that on to the very end link in our chain, and I'm going to feed on the lobster clasp, then closed this jumper in the same way we opened it with two pliers, holding the jumping on either side of the opening and then rotating it like I'm closing a door and then I'm going to just flatten out that little where it's closing with the chain nose pliers and now that end is done. And we don't need to put a jump a ring on the other end of this chain because the lobster class can hook through any one of these links, but it doesn't really look finished. So we're going to show you a little trick to make your jewelry look finished. To do that, we're gonna add a little beaded dangle similar to these beaded dangles on the very end of our chain. Someone to take the last of her head pins. And I'm gonna feed on our three millimeter by cone if I can get it through the little hole there. Sometimes it helps to have readers if you can't see very well. And then I'm gonna make another wrapped loop just like the rap loops that we made for our beated dangles here. So I'm going to grab the wire at the end, bend it move up to or mark what You're starting to fade. Yes, they are. And I'm gonna make almost finish my loop, and then I'm gonna feed it onto my last link in my chain. You could do this if you're when you make a bracelet, and then that little dangle hanging off the end. It looks super cute. Makes it look really finished. Somebody used my chain nose pliers to grab. Actually want to do it this way? Grab my loop and I'm gonna wrap the wire twice. You'll see jewelry in stores, jewelry stores, especially hand made jewelry. They often have this little finishing touch. And then I'm gonna cut the wire with my flesh cutters and not cut the chain up a tree or myself. And then I'm gonna put the lobster clasp, attach it to my chain at the end, and you can see that we've got a little finished and now
7. Finished Necklace: Here's our finish necklace, and this crystals really sparkle. It's amazing that by learning just one simple technique, you can create such a cool necklace and that you can practice your rep loops and make your own dangling bead necklace. Uh.
 Jennifer and Kitty O'Neil, Running With Sisters: Come Craft With Us!