Transcripts
1. Introduction: The most fun part about
making music is honestly seeing a blank canvas and then just making
something from nothing. The main thing that
matters most is how you feel and how you express
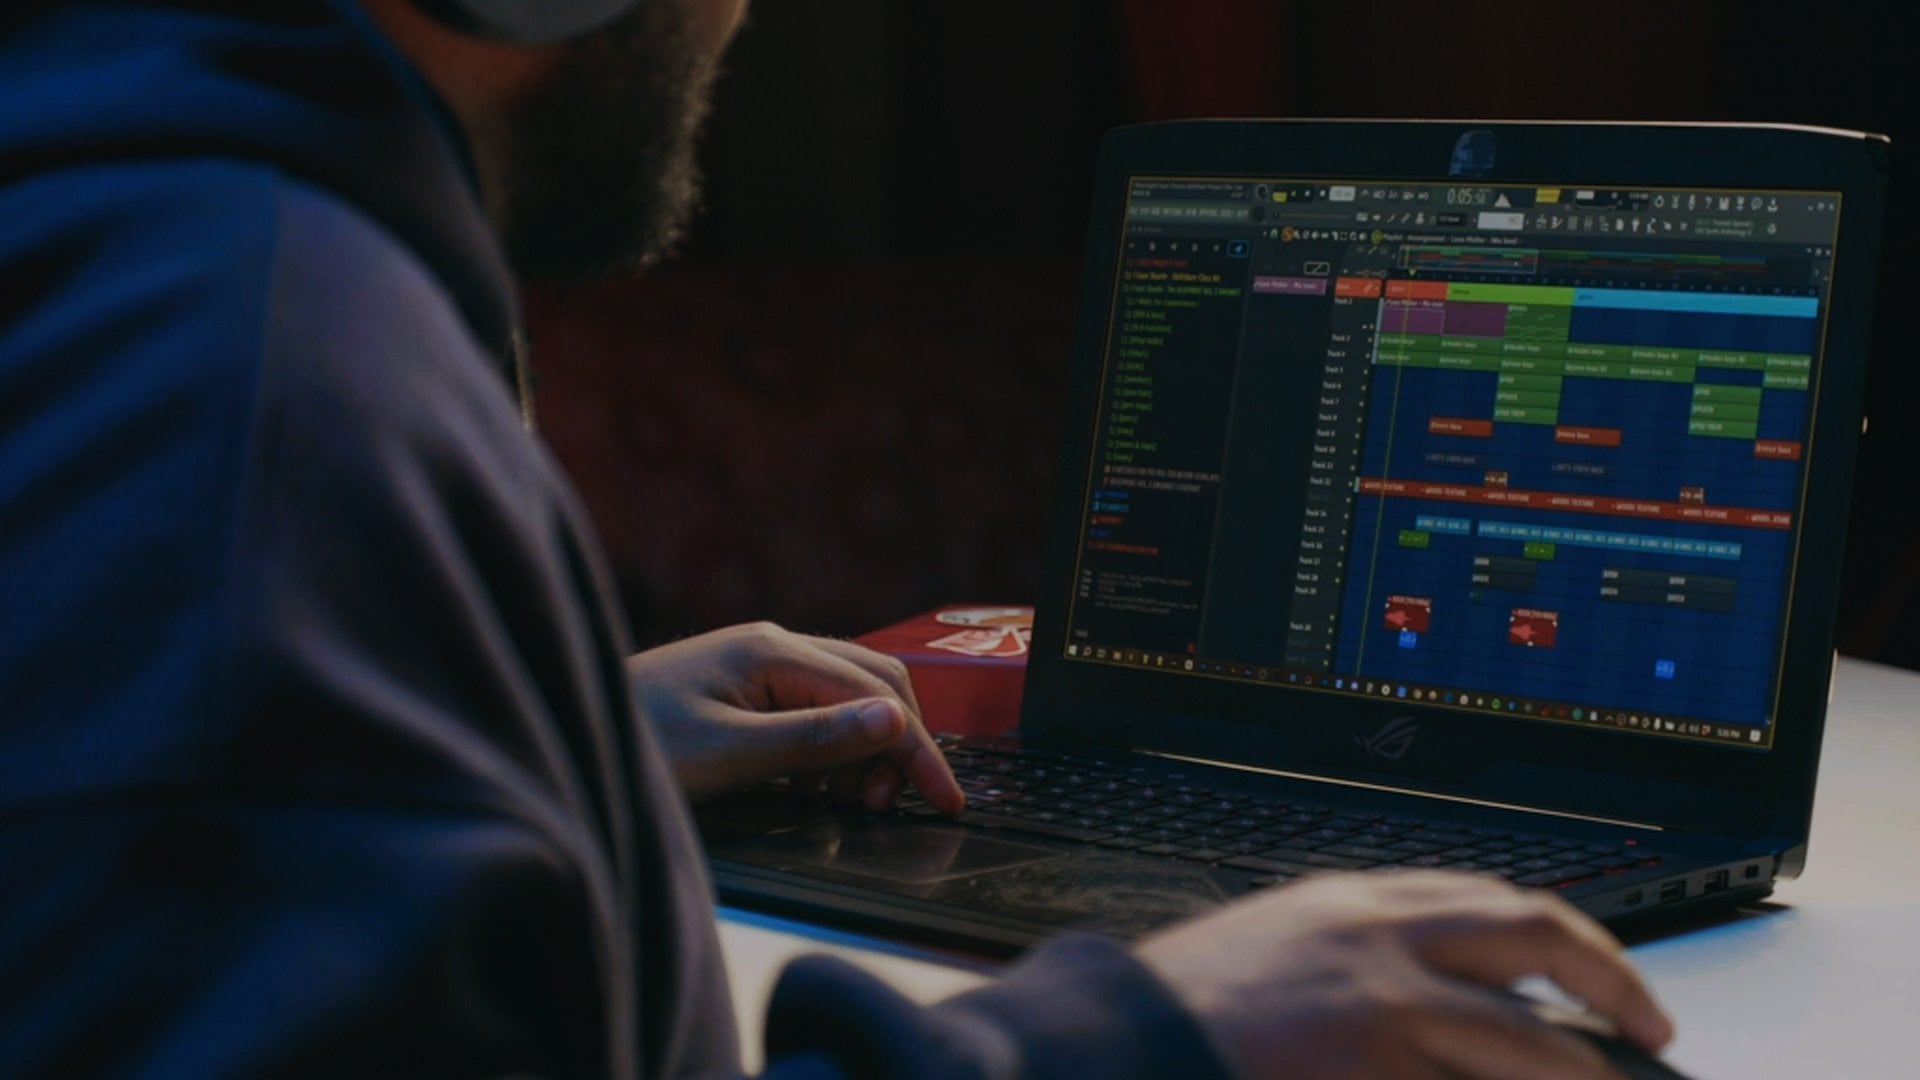
yourself on the canvas here. My name is Isaac Duarte. I'm from Chicago, Illinois, and I'm a music producer
and a content creator. You probably see me
all over the Internet, from Spice videos, to my YouTube channel,
to Instagram. You've even probably
heard me on video games, mix tapes, all sorts of
places where I didn't plan, but I was able to get on. How I developed this workflow was really years of
trial and error. There's some things that
I really wish I knew. It definitely could
have saved me having the embarrassment
of having people in the studio walk off because I was taking too
long to make a beat. So hopefully this
can help you and save you years of
trial and error. I'm going to teach
you guys how to make a beat in FL studio. I'm going to be breaking down
why I chose these chords, why I chose these sounds, as well as how far simplicity can go and
how great it can sound. Now, by the end of this class, you'll not only learn
how FL studio works, but you'll also learn
how to make a track from scratch and if you apply
those building blocks, you're not only going to be able to create your own ideas, but you're going to
get your ideas from your head to the computer
onto people's ears. I'm super excited that
you join this class. Now, let's get to
making melodies.
2. Getting Started: I feel like chord
progressions and melodies are the foundation and the
most important thing because they give you
a sense of direction. If you want happy chords, you can go in a major scale, but if you want something
darker, you can go minor. If you start there
and then create something catchy with
chords and a melody, it'll be stuck in your
head and you'll have more direction to go with
all the other elements. The type of sounds and the
chords that you choose are ultimately going to affect everything
from this point. In this class I have a beat
that I'm going to break down. I'm going to break
down the melody as well as how I
got to that melody, and it's going to be
a pretty simple one. I'm not going to go
too crazy with it. It'll be easy for you to follow. At the end of this
class, you'll have a catchy melody that will be
stuck in your head and it's going to be a type of melody
that you've probably already heard before in various songs
that you listen to today. Now I'm going to share with
you guys the dos and do nots of sound selection
along the way. You're going to have the mitty as well as all the other sounds. Even if you don't use FL Studio, you can drag it and
drop into your door and you can follow
along just as well. Get everything that I'm using in the Project and
Resources tab. Now open your door and
let's get started.
3. Start with Chords : For the first lesson, let's
dive right into chords. But before we get into
the wonderful world of chords and how to
make your own melodies, let me play you the
beat so that way you get an understanding of what we're about to make
today. [MUSIC] Hard. [LAUGHTER] That's what
we're going to be making. Let me break it
down in the chords. I'm going to go to this
pattern over here. Now, don't be alarmed if you see all of these patterns split. I put them all into one pattern, so that way I can illustrate to you what everything
looks like and why I choose to make my melodies
in one pattern so that way I can create this
and then spread it out later. If you don't know, a pattern
is basically its own sound. Each sound has its own
different patterns in FL. If you see up here, you can go from one to pretty
much all the way to 400. You really won't need that many. I choose to make a lot of
melodies in one pattern because of a little trick
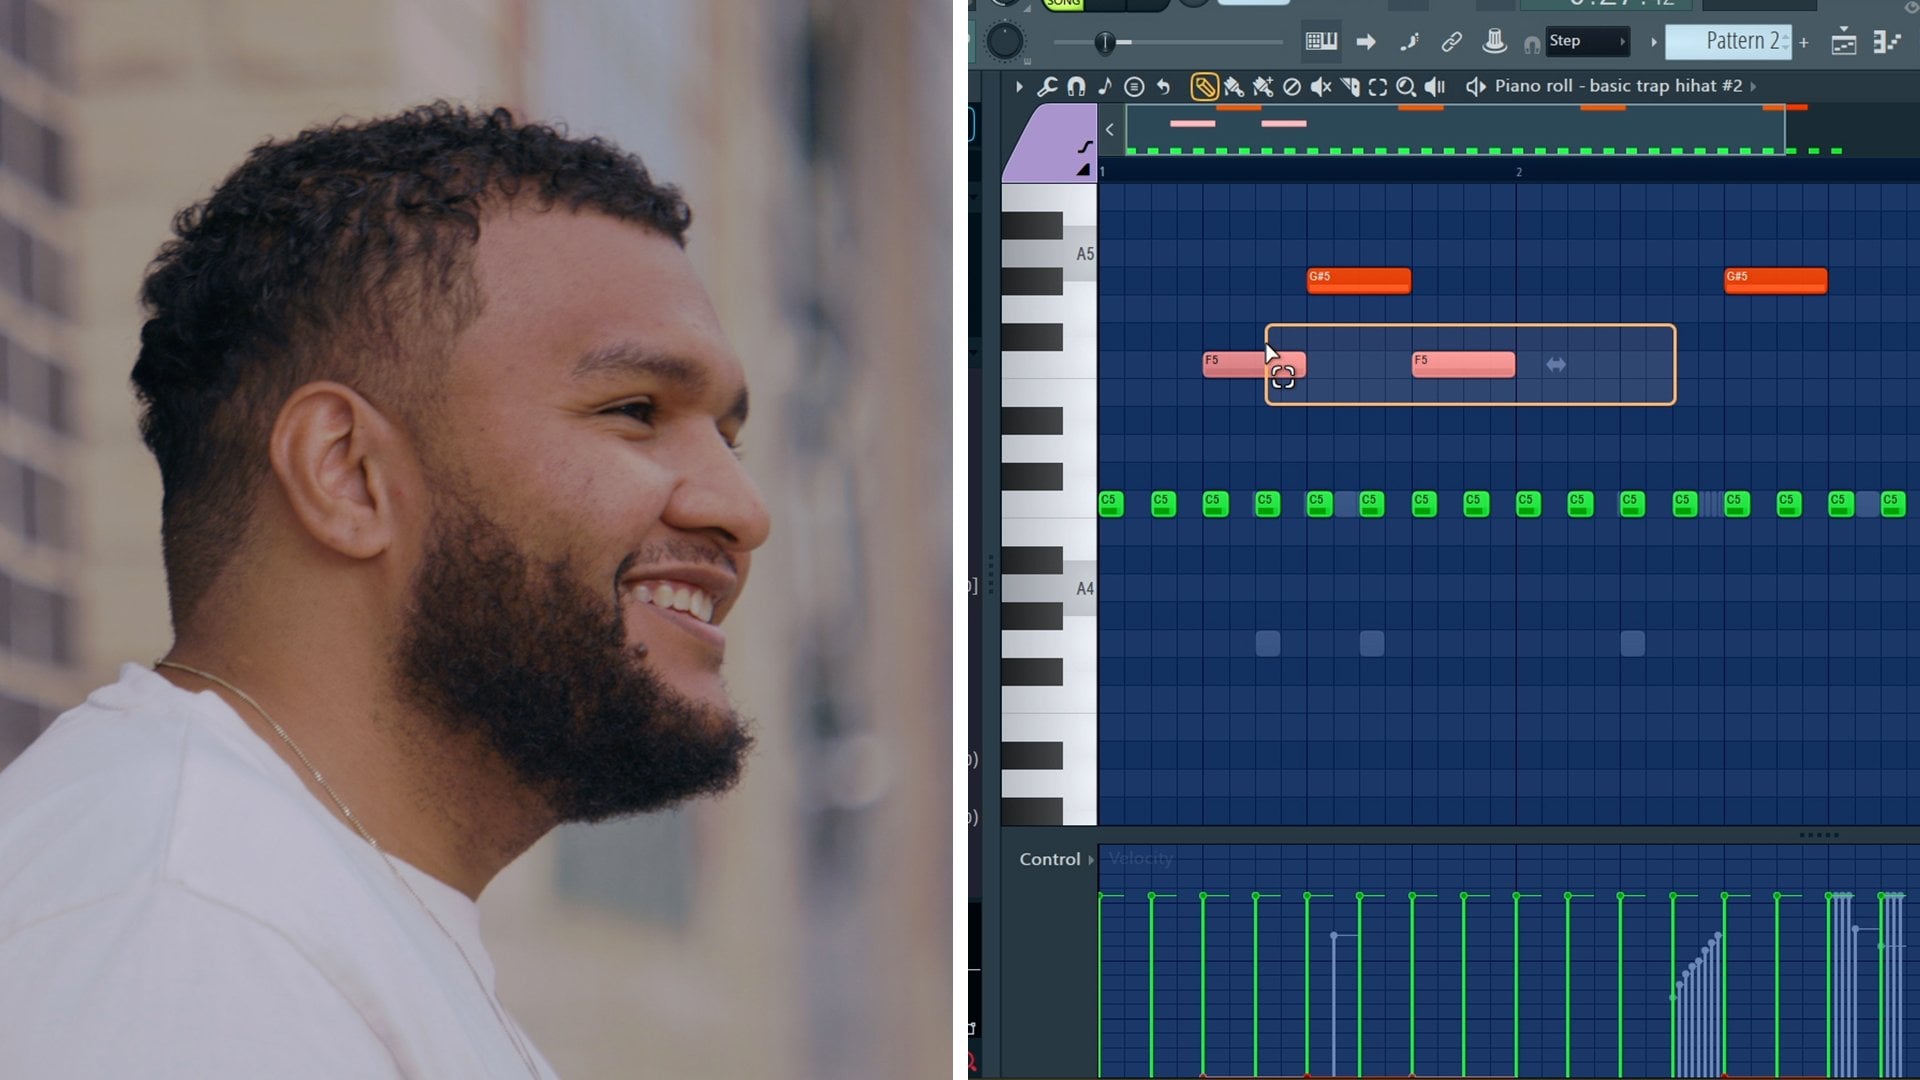
called ghost notes. Let me go right into Pattern 6, and this is the melody
all in one pattern. I've jumped into a sound
with its own pattern. As you can see, the notes all
in this pattern are MIDI. MIDI is basically what you play, it triggers the
virtual instruments. Now these in the green are
the notes of that VST, but these in the gray are the notes of a different
sound actually. It gives me a guide of how
to make counter melodies, as well as the
chords that I use so that way I could build
more melodies on top of, so that way I'm not everywhere. Before we can get to the chords, we have to find a sound
that interests us. This could take some time, but once something peaks your
interest, peaks your ear, that's the one you usually
go with because there's some type of just
naturalness about it, you just spark the idea. There's really no method to it, you just find sounds. If I play this melody out, I'm just going to cycle
through the sounds. That one sounds pretty cool, but it's a little too harsh. That sounds terrible. It's two video game sounding. That's cool, but I don't think that's a main attraction sound. This sound actually
sounds pretty good. It could definitely sound
good for something happier. But I'm feeling a
little dark today. Nothing negative,
but I just have this idea in my head that
has more of a darker tone. I decided to go with
these other keys, which is the ones I
decided to go find along. These keys just sound
like they're from an old analog keyboard, like a Juno or something. Now that I have that sound, I could build the melody off of. Now, how did I get
to this melody? Well, one of the
main things that I do and I feel like
you can do as well, is use a scale that
you know the best. In my case, I know A minor. A minor is all the white notes. They start from up
here to B, to C, to D, to E, to F, to G, and then all the
way back up to A. There's no black notes in there. But for this B, I actually
have a black note. I broke the rules
just a little bit, but majority of time, I'm making melodies in
A minor or C minor, which is another scale
that I know pretty well. Let me delete these top notes, and then let me show you guys
how I got to this chord. It's literally two chords,
it's just these two. All I did was go A, C, E, which is A minor, which is the first
chord of that scale. Then I went to the
fourth one which is D, F, and A. Now, this is a 1/4
chord progression. You hear it in a lot of
Travis Scott type of songs. If Travis Scott actually came to your mind when
you heard this beat, that's a particular
reason why he's definitely known for using
that chord progression. Him and his producers are
most notably known for using that chord progression
because it works and it gives a dark vibe that's very ominous. That's cool, but I
want to switch it up. I took that A, brought it down, and then because it
sounded good to me, I brought that A sharp up,
so it sounds like this. This is another
chord progression that Travis Scott uses as well. When it comes to chords, you really don't want
to add a lot of stuff. You don't want to add a chord here and then another
chord over here, and then another
chord over here, and then another one over here. You don't want to
continuously do that. Because you're not really thinking about the overall idea, you're more so making music with your eyes
instead of your ears, which is totally backwards. Your ears are your guide, that is your compass. If it sounds good, go with it. This is just two chords
and it's continuously looped so that way I have a little bit more freedom
because it's just two chords. You also don't want to add
a whole bunch of notes. Let's just hear what it sounds like if I had a
whole bunch of notes. That doesn't sound good, that sounds like it's
all over the place. The thing about melodies is they have a
sense of direction. This is going this way, and then it goes up,
and then it goes down, and then it goes up again. You don't have to go
all over the place. You don't have to go up down
and then go even downer, and then go all the way up like two octaves or something crazy. You don't have to
do that. You can stay and find a
nice little pocket. Then if you look at the
melody on the top notes, they pretty much mimic
that same thing. Once you have a chord
progression that sounds good, especially when you loop it, and it's not a lot going on, you could add notes that fill in those gaps so that way
it's not too empty. It sounds good, it has movement. Just like these notes, these
notes are part of the chord. As soon as I bring them down, look, E, C, A, it's just descending. [MUSIC] Then now these notes right here are super close together. They're part of
the second chord. But the thing is to
get that dark sound, you want to use
notes that are close together in some capacity. Just like these are
open over here, this chord over here is going to have notes that are
closer together. Now that we have these chords and they're sounding
pretty good, regular musicians,
all musicians, don't play exactly perfect. Not everything is quantized and not everything has the
same note velocity. One thing that we're going
to do is we're going to hit Alt S. It's strong. It doesn't hit exactly at the start of it
like quantized, it sounds a little bit
more natural like this. If I bring it out, it
sounds like a guitar, but we don't really want that. We're going to bring the time and strength ****
out a little bit, and then we're going to adjust the velocity so it's descending. Next thing we're going to do is we're
going to hit Alt R, we're going to unclick
Pattern and go to Levels. Now this is where the velocity
is just going to randomize because not all the notes are going to hit exactly descending, like some of them
are going to go up. Some of them are going to
get hit with your pinky, so they're going
to be super soft. Let's just randomize it. If you hit bipolar, it'll randomize it some more. You could also
click C right here, either left or right, and
move some stuff around. It sounds a little too much, so we're going to bring that up and then let's hear it now. That sounds a little
bit more natural. There's various ways
to create melodies. Some people are amazing on
the keys and they can play it in and all the velocities and all the time
and all that stuff, it's not going to be on grid. It's not going to be quantized
unless you quantize it. It's going to sound
more natural because actual human is playing it. But if you're clicking stuff
in like I am right now, you can use these tools to make it a little
bit more natural. If you want to go
the extra mile, you can lay down your chords and then record them one by one so that way you
get a more natural feel. Now you know how to
create effortless melodies within one scale. You can go over here
into the folder tab and click and drag the MIDI over
just to see how I have it. Now it's your turn to
create your own melody. Start by the MIDI chords, create your passing notes, and then humanize
it by messing with the velocity as
well as the timing.
4. Add Counter Melodies and Layers: So now that we've
added the chords, we need counter melodies. We need something else to
make it sound more unique. So this is where we're
going to add layers as well as other counter melodies to make it just
sound really good. Just like in the chords portion
for the counter melodies, as well as the
layering, you want to find sounds that interest you. But in this case, you
want to find sounds that complement
that main melody. So now I'm going to
show you in context, one by one, each sound, as well as the pattern
and how I got there. So for the second
sound that I added, I added this additional piano. It's the same mitty,
the same thing. The only reason I
added this piano on top of those synth
inspired chords, was to give it a more real feel. A lot of dark music has old busted up dingy
pianos that sound D tune. So this preset in flex, which is the sine wave
D, it sounds clean, but with the effects I added, it gives it a more
vintage sound. I'll dive into the
effects later, but together it
sounds like this. Now I could have added a whole different
counter melody to that, but I really like the fullness
of how both those sound. A good tip that you can
use is find a high piano, and find a mid piano. So that way when you
put them together, they sound unique, and they sound really good. The next thing I added
was these basic pads, and this is from a one
shot from one of my kits. This is what the sound
sounds like by itself. Now this is what the
pattern sounds like. Super simple, follows the
same chords, the same thing. Before I move on
to the next sound, let me explain what
one shots are. This is an audio wave, it's just hitting Middle C. So that way the sound that
I use in a different beat, I've saved it because I
really like that sound, and because I put out
high quality kits, and it's one of my favorites. So why not have that at
my disposal at all times. What you can do is if you find a sound that you really like, just record middle C
as long as you can, and then you're able to play
it like its own instrument. How you do that, is go over
to this little envelope tab, lower the attack,
you adjust the hold. You can mess with the decay
as well as the sustain, the release is basically as soon as you stop
pressing the key, how long will it go on for? So if I move the release
all the way down, as soon as I take
my finger off of this, it immediately stops. But if I leave it
all the way up, it's still going and I didn't
even press it anymore. So when I bring that all
the way out and bring that hold out and bring
that release a bit up. So it sounds just
like the pad we had. Now the next sound that
I used is this pluck. Again, another one shot from one of my kits. It
sounds like this. If you see some of these names, don't feel alarmed, I
name stuff at random, so don't get too ripped
up on naming your sounds, just name something basic. I have a sound called Monte. It's basically like
a synthetic piano that was ran through
a whole bunch of effects and the Opie 1. So I named it Monte, just like the producer,
Monte Booker, because that's what
he's known for. So that way I identify, that type of sound that
I'm looking for now. Now this is the melody. Now why is that pluck doing all that weird stuff?
Let me tell you why. This sound is
following the chords, but I have gliding notes. This right here, if I bring it all the way out like this and put it over here, it glides into a new note, but I had it right over here. So that way it glides into it, but it also fades
into the next note. So it goes from C to E, and then it glides to A, but then it goes all
the way back up to C. All I did was put the note, right click, and then
click this slide tab. You could also click up
here and do the same thing, and it'll trigger a slide note. If you listen to a lot
of drill music from the UK or New York, a lot of those sounds
that go on [NOISE], all that crazy stuff, those are slide notes. But you can get creative and emulate different
type of instruments. I decided to mimic a guitar
pedal by putting slide notes. The last two sounds, this
is another one shot, it sounds like this, but it's literally the same
pattern as the pad. Now the only thing that I did different with this pad was, I went over here to
the envelope tab, and then I adjusted the envelope just like
I showed you earlier, but only this time, I went to the LFO tab and then I pretty much messed
with the settings there. Before it sounded
like this. Once I messed with the
amount as well as the speed, it sounds like this. It has a tremolo effect. I sometimes add this
effect on pads because it gives a different
distinguishing characteristic. If I have one pad, that's like a good foundation, but I want to add a second one, instead of having both
of them interfere, I could make one of them more unique by adding
a tremolo to it. Next I have this violin. It is out of the flex VST. The pack is from the
essential strings, it's the violas staccato, which is another
free pack that's available to you guys and I haven't followed
in the chords, but it's doing
just little stabs. So it sounds like this. The only thing that I did was, I took those middle notes,
and brought them up. One thing about notes in
chords is the melody is sometimes hidden within the
top two notes of the chord. So if I move this C and this D, like I did, and I bring it up, it not only spreads it out, but it sounds like its own melody because I
just moved it up an octave, and it's not occupying that same frequency range
that the other sounds were. It gives it a little bit
of more anthemic vive, but then on this part it brings it back down to
like, no, it's still dark. That way I have a good
tension and release. Or this could be the release, and this could be the tension. However way you look at it, it's all together,
it sounds like this. Those are all the layers. For all these layers, they're all based off the
chords of the main melody. I just literally copied it, pasted it into the keys, and then I copied it and
pasted it into the pad, and then I just started
subtracting stuff. I started adding bass notes. I started just spreading
them to different octaves, so that way it goes from just this narrow sound to
a bigger, wider sound. So I'm looping the
chords and I'm listening to find that main melody,
that pluck melody. But I want to know
what notes I'm using. One thing that I use
is the ghost notes, as I mentioned earlier,
which they're over here. If you don't see
the ghost notes, don't feel alarmed, don't uninstall FL, and reinstall it. All you got to do is go up here, go to view, go to ghost channels, and make sure that is clicked. The R key is alt
V to turn it on, alt B to turn it off. Once I'm hearing those chords, thinking of that catchy melody, by humming, I'm using
the ghost notes to write those notes. If you notice, they
all follow the chords, they all follow
what's in that scale. Even if you're like me, you have that one note that's out of scale to make
it sound darker, you can still use that
to your advantage. So just like the last lesson
to humanize is Alt R, or Alt S. If you have
chords Alt S to strum, and then Alt R to randomize. But if you have a pluck that you just want to have
different velocity, just to make it a little
bit more natural, you can hit Alt R and just
adjust the velocity again. The way I think
about the melody, it's not always constant. There's ebbs and flows. Just like I said,
with playing chords. With the melody, you could sometimes get away with just
having a straight velocity, but to give it a little
bit more like bouncing, just wiggle room, messing with the velocities
always works. If you don't want to
go one by one and humanize the melody or even just like move it
off grade like this, an excellent tab that you can use is over here in
the wrench tool, and that is the time shift ****. So I'm going to play just the
pluck individually to show you guys what this ****
does. It's on time. As soon as I mess
with the shift ****, I turn to mess it automatically
shifts all the notes. So now it's your turn to create your own melodies
and layer them up. But don't be afraid to
use your main chords in other ways and in
other instruments. If you use the same notes
and change the rhythm, or you change them in
different octaves, you can get a bigger sound and a better sound as opposed to coming up with all of
these different notes and rhythms that go against
that main idea. Now, next up is the bass line.
5. Add a Bass Line: Now that we have the codes, the counter melodies,
and the layers, we need something to
glue it together, and by glue I mean baseline. Now, the way I think of base
is it's the foundation, reason being is because
it's the lowest note. Now while everybody is
hearing all the stuff that's happening in
the higher registry, the lower registry
is the foundation. It's the thing that
holds all that together and gives
the direction. There's many different
types of bases. There's synth basses, there's natural
basses, Fender basses. You can even use a roads bass, and I mean like a
roads piano but the lowest notes
could be a baseline. Different genres require
different basses. If you listen to R&B, you'll hear a plucky
bass like a bum, bum, bum, bum, bum, bum, because it just gives that type of groove
and that balance to it. But in rock music you'll
hear a bass guitar, but it won't be as
loud as trap music, hip hop music, R&B music, or even modern pop music today. Just get creative and find
what's best for your track. But in this track, I'm going to show you guys what
type of bass I used. Now I'm going to play
all the melodies, but instead of having
it in one pattern, I'm just going to
show you guys what I have right here in general. That sounds good, but I need that glue. Now here's two different basses that are going to be
available to you. They're my go to basses. The bass that I used is
called a Reese bass, is basically a synth base. Now this is what it sounds like. If you heard any song from
again, Travis Scott, Drake, Kanye West, anybody really, you'll hear a synth bass. Now, this is in the FLEX VST in the Black Octopus Pandora pack and it's called Deep Reese. That's one of my go to basses. I don't tell people a
lot about my sounds, but I'm telling you so now
you feel like an insider. The second bass that I use, because I'm very indecisive and I like to try
different stuff out, especially when it comes to synth bases is my bass and
it's my favorite bass. This is something
that I've been using for years. It sounds like this. It sounds pretty good. If I lower it, it
sounds more aggressive. This is a one shot for one
of my personal packs that I have not put out considering
a gift from me to you. But I use this bass
like all the time. A quick little hack, if you're using one shot basses, if you play a bass, especially one shot bass
and it ends like this, it ends pretty quickly, go over here to the cross
fade and just adjust it. You could also go over
here to the length and then adjust it until
you get a nice loop. Now make sure use loop
points is selected. Now if I press it,
it's still looping. My finger is still on it, it'll continuously loop
until I pull my finger up. That's just a trick
that you can use with one shots, especially basses. Now this is what it
sounds like with the Reese bass and the melody. Let's try the other bass.
Let's see what sounds better. It sounds really good. It gives the melody
a sense of fullness because it covers
multiple octaves; the Reese bass covers
the lower octave, the piano and keys
cover the middle range, and the violin as well as
the pluck cover the high. When you are selecting sounds,
just think of it that way. Now, how do I get
to the bass notes? I literally just copy the
bottom note of these chords. I just select them, copy, and then I go over
here to a new pattern, delete this and paste. Then that's pretty much it. I have a little bit
more freedom with these notes because I'm
only using white notes. Now I can get super
creative and add some passing notes once I have that foundation, so I can go. Side add a note here and here, and then let's bring these up. Other melodies have
basses as well, but they're not going
to sound as powerful as a baseline like this because this is what it
will sound designed for. If you bring this
all the way up, like all the way in the
sixth octave range, it'll sound like this. It sounds like a lead. But if you bring it all the
way to the lower registry, it sounds best as a bass. They used to do
that in the '90s. They used to come up with
those crazy lead lines just by shifting the bass
octaves all the way up. But the reason why they sounded so good is
because it was a bass. A bass is mono, meaning it's only playing
one note at a time. It's not playing all
these other notes like chords or synthesizers are. If you want to get
to any baseline, copy the bottom notes and
then go to your pattern, go to your sound,
Reese bass, and boom. I can turn this up too. If I really want to get
aggressive with it, I can go to the filter ****
in the FLEX VST that I use, and go to the cutoff
**** and bring it up. I'm going to play it and
I'm just going to mess with it. It sounds aggressive. Just bring it down. It
sounds like it's next door. If you've heard Sheck
Wes's Mo Bamba, that song has the cut
off all the way up, which makes it sound aggressive, but that's what it was
intentionally used for. I highly recommend you find a sweet spot that
sounds good to you. Now you know how to
make a baseline, so in your track, create a baseline and get
creative with it. If you want to go up an octave or down an
octave, it's up to you. But as long as it
sounds good to you, then you're making magic. Next up is my favorite
part, creative effects.
6. Use Creative Effects: Now that we have all
the elements together, we need something to
make it more unique, and that something is creative effects.
Let's dive right in. Now, there's unlimited ways
to use creative effects, that's why they're
called creative effects. But two that I'm going to
show you today is one, individually and two, on a bus. I'm going to explain
what both of those are and how I use them in this track to make some of these sounds a little
bit more unique. If you don't know what a bus is, it's basically a mixture window that has a whole bunch
of effects on it, and if you route other
mixer windows to it, those that are routed get affected with the effects
from that mixed bus. That way you don't
have to put all of these same effects on each
individual mixture track. You can only have
it on one and it affects all of them the same, so you have a more
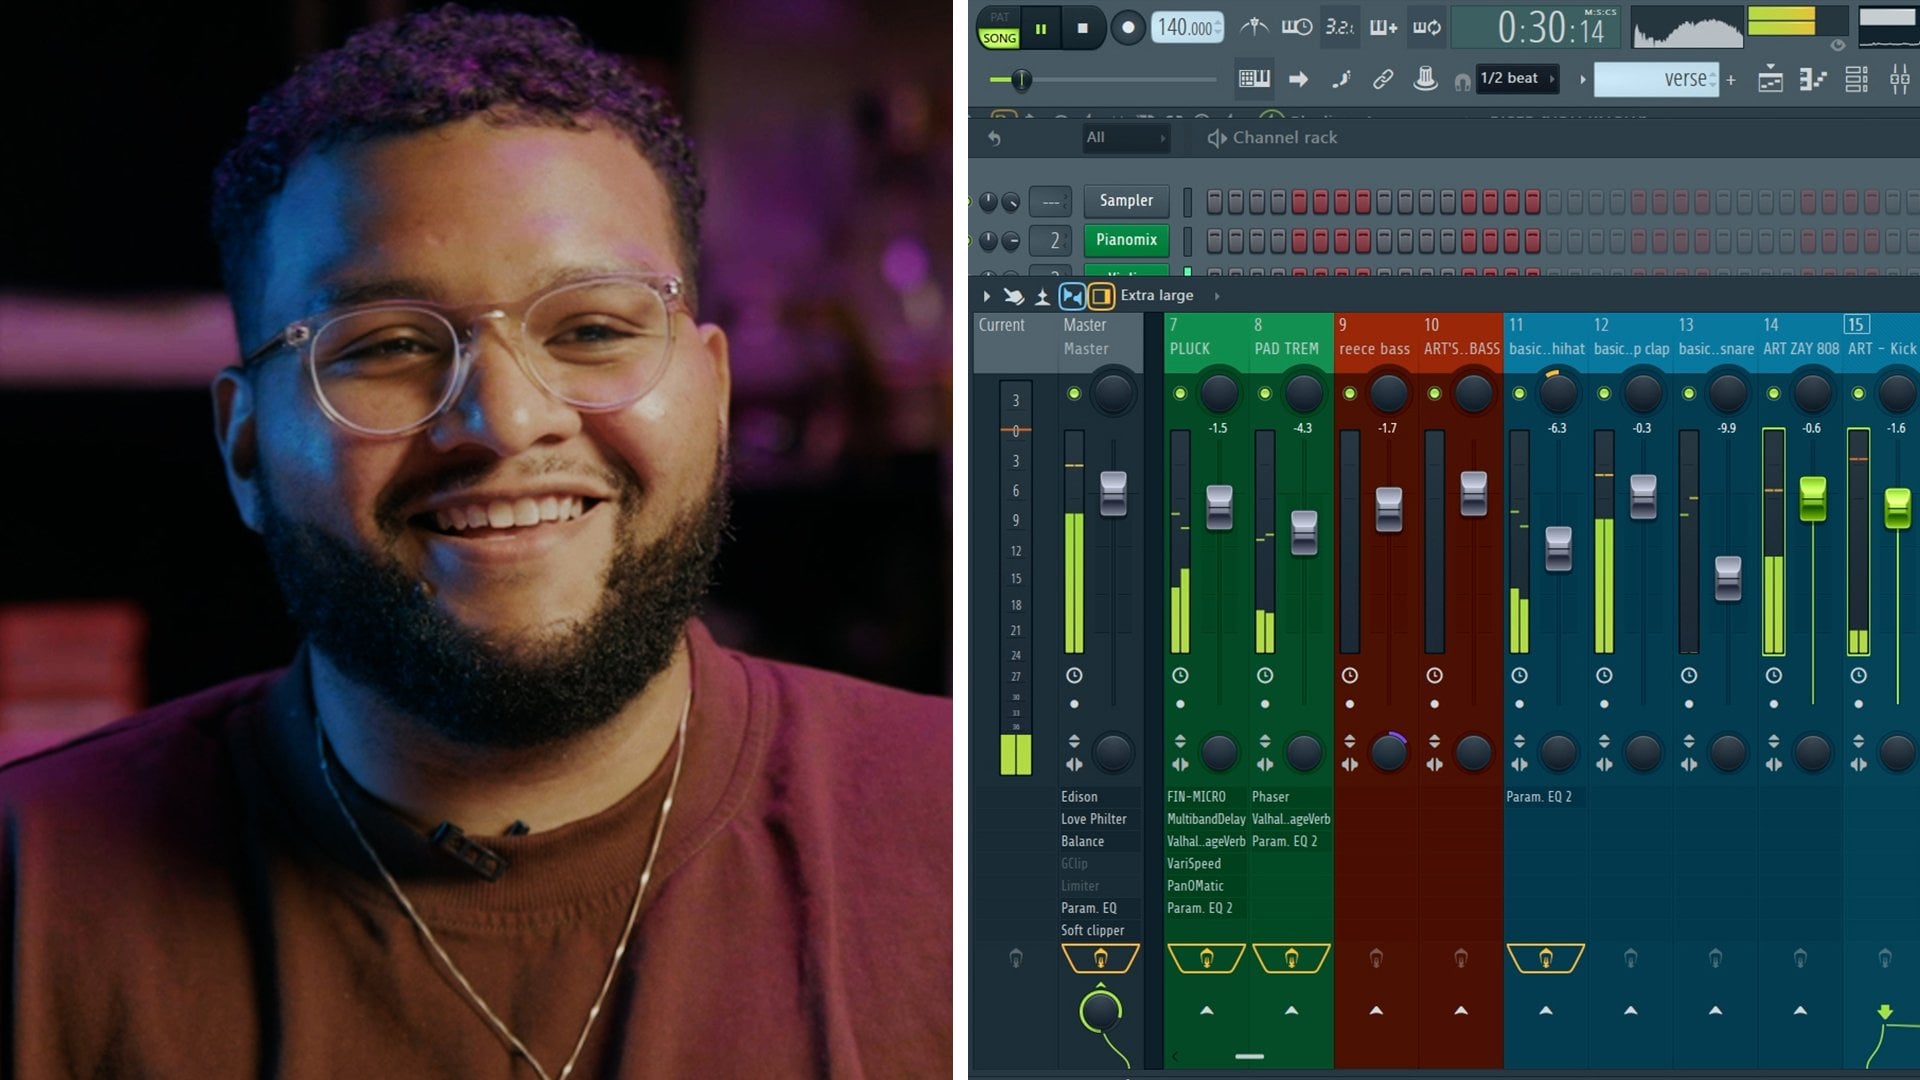
cohesive sound. All of these sounds
in the green, which I color coded them so they're more
easy to understand, are linked to this
purple bus right here. This purple bus is the main bus that has
these effects in it. I'm going to explain
these effects, and these are the
instruments that I have that are routed to
this mixer bus. Now, I'm going to
undo all of this, which if you don't know how to select multiple mixer tracks, hold control, and then
just click and drag. All of them should look
like this as soon as you route whatever instrument
you have to the mixer. But if you want to
route it to go to the instrument bus with all the effects first before
it hits the master bus, drag all the instruments, then right click
all the way here at the bottom where
you see this arrow, and then click route
to this track only. Now they're going straight to this instrument bus where
I have all these effects. The first effect that
I have is RC-20. Now, if you've watched any genius video or
anybody producing, you've seen RC-20 probably
a gazillion times. If you don't know what
RC-20 is or retro color is, it's basically a fake
vinyl emulation. Just like the vinyl
that's behind me, this is in digital form. It's emulating that. Now, if you don't have this, you could use this free VST by baby audio called Pitch Drift, gives the same effect. Let me show you, it sounds like RC-20 first on the routes. Sound sick. But when you throw Pitch Drift by baby audio on there, pretty much
the same thing. It gives that D tuned sound. If you've ever heard, again, Travis Scott's Maria I'm Drunk, that little weird
vintage piano sound that sounds wobbly, that's
what that effect is. I'm going to give you
guys a document with a whole bunch of free
VSTs so that way you guys can have
access to this and know exactly where to go to
download this for free. The next effect I have is a Valhalla shimmer.
Now, this isn't free. I just threw it on there and
it just sounded cool to me. But it works though. It gives this little texture
in the background. That's what it sounds
like all the way up. But if I bring it up to 10
and then I stop the track, you still hear that.
That sounds good. Now, all these instruments are linked to the
instrument bus. That's one way to use
creative effects. Another one is to use different
type of effects on one, just to emphasize what type of sound you're trying to get. Remember I was saying
in the pluck section, I was trying to emulate
a guitar pedal. Well, I took it from
this basic sound, let me take off the
instrument bus. It sounds very basic,
sounds out there. Still sounds unique, but I could dirty it up a little bit more and make it fit
within the track. I'm going to enable
all the effects. You hear that? It's a
lot of stuff going on, but it's pretty simple. The first effect that I
have is finish your micro. This is the very first preset. I actually only use
the very first preset. But basically this VST
has a whole bunch of different type of
effects, filters, reverbs, choruses, shimmers, all that type of stuff just
by clicking left or right. This is also free, by the way. The next one is a
multi band delay, which is stock in FL Studio 21. If you downloaded FL
Studio 21 and you own it, you have access to this plug in. This one was more so like, I don't know, I put it on there and I didn't hear
much of a difference. But when I took it off, I instantly noticed it
sounding different. This is before and
this is after. I don't know how to
explain it, but it just sounded a little bit
more fuller to me. The next thing I used was this reverb, Valhalla
vintage reverb. It's not free, but
you could find other reverbs. Now
it sounds like this. Sounds pretty good. This next
one is called Vary Speed. This is a free VST. It's emulating a old delay. This next plug-in is what's
going to give you guys that just a little bit
of ear candy feeling, and that is a stock VST
called Fruity PanOMatic. Basically, all I
have it doing is, since I have that shimmer, that crystallizer effect and
that delay in that reverb, I'm having it go left and
right in between your ears, so that way it sounds like it's like moving
like this to you. It sounds like this altogether. Then when I put on the master bus effect,
it sounds like this. It has all these textures. When it comes to
the pad, I added a phaser stock fruity phaser. Just cycle through the presets. Which presets are
not a bad thing. Cycle through the presets, because if you try to learn
the intricacies of every VST, you're going to get lost in the detail and you
don't want to do that. All of these effects,
when I use them, I'm thinking of
different things just to make it not super unique, but have its own character within the context of
the other melodies. Because if I have everything just going regular, that's cool, but I love texture, I love different things that don't sound like they're
supposed to sound. It's almost like if you
threw something in dirt, like some new Air
Force ones in dirt, and you intentionally did that, because you love how brown they look or you love that
dirty grunge you look for, I don't know, a certain
type of fit or whatever. It's just that's the way
how I look at effects. I have a phaser for the pad, a basic phaser, a basic reverb. This is what it
sounds like before? That's cool, but
with the effects, it sounds like
it's sitting back. Then with the extra
pad to give it a little bit more distinction or to separate it
from the other pad, all I did was I
just use this gross to be the side chain preset, and I just messed with the settings and it
sounds like this. That's all it's
doing. Just bringing the volume down and up, like another tremor a little
but not as aggressive. It's just more so
felt than heard. The last two things
I did was I added Vary Speed to my
Routes instrument. This is what it sounds
like before but now after. A little bit more texture. You're going to hear
me say texture a lot, which brings me
to my next thing. With creative effects, you don't necessarily have to
always use effects. You could use stuff in nature. I have a recording of some
woods. It sounds like this. It's literally water running
and birds in the back. You could tell somebody
is in a rainforest. But if I put it in the background
and I put it real low, it gives it a little
bit more fullness and a little bit more intention. This is what it sounds
like all together. With these mix of tracks, I have different effects to give each individual sound
its own character. But I have them all routed to the effects bus to affect
it with these main effects, RC-20 and shimmer, so that way it has more of
a cohesive sound together. Let me let you hear
the before and after. I'm turning off all the effects, and this is what it sounds
like bare bones, no effects. Now, let's hear what they
sound like with effects. As you can see, it gives a little bit more flavor, a
little bit more character. When it comes to effects, I really emphasize
sound selection first because once you
have a good sound, you won't need to throw all of these other effects to make
it its own individual sound. The creative effects add to it, there's no right or
wrong way to do this. But you could definitely
add a whole bunch of stuff that you'll later regret adding, because you have
to either trim it down or you might have
to find the sound again. But you put so many effects
on it that you don't even recognize where
the sound is from. There's no right or wrong way. But just be mindful that they're supposed
to add and enhance. Now you know what
creative effects are, how to use textures, as well as setting
up your effects bus. Now it's your turn to
use creative effects. Add creative effects to
your instruments and your melodies to make them sound more unique
and enhance them.
7. Final Thoughts: Congratulations. You guys made it to
the end of this class. You now know how to make
melodies, core progressions, basslines, use creative effects, and you learned something
about textures as well. That's only half the battle, the other half is drums, and that's my favorite part. I can't wait to see you
guys in the next class, because I'm going to
show you guys how to make your drums slap.
 Isaac Duarte, Creating music & helping music producers