Transcripts
1. 1 Astra Intro: Welcome to the course and my name is David. I'm going to walk you through step one to step done, and how to create a blog and website using the Astra Theme. Astra is a completely free theme in one of the most downloaded demes for WordPress is designed to be responsive lights in fast. In this tutorial, I'm going to show you how to use the default Gutenberg editor and the free version of Asherah to put those two together to design any type of website you want. This course is perfect for anybody who's wanting to create an informational style website and blog. As this is a step one to step down tutorial, I'm going to walk you through all the steps that you need to know. We're going to get a domain name at a domain name register, we're going to get a shared hosting account. Then we're going to install WordPress InDesign or website. So if you've been looking for a crash course in how to design a website and blog using the Azure theme. This course is for you. Click that next video and I'll see you on the inside.
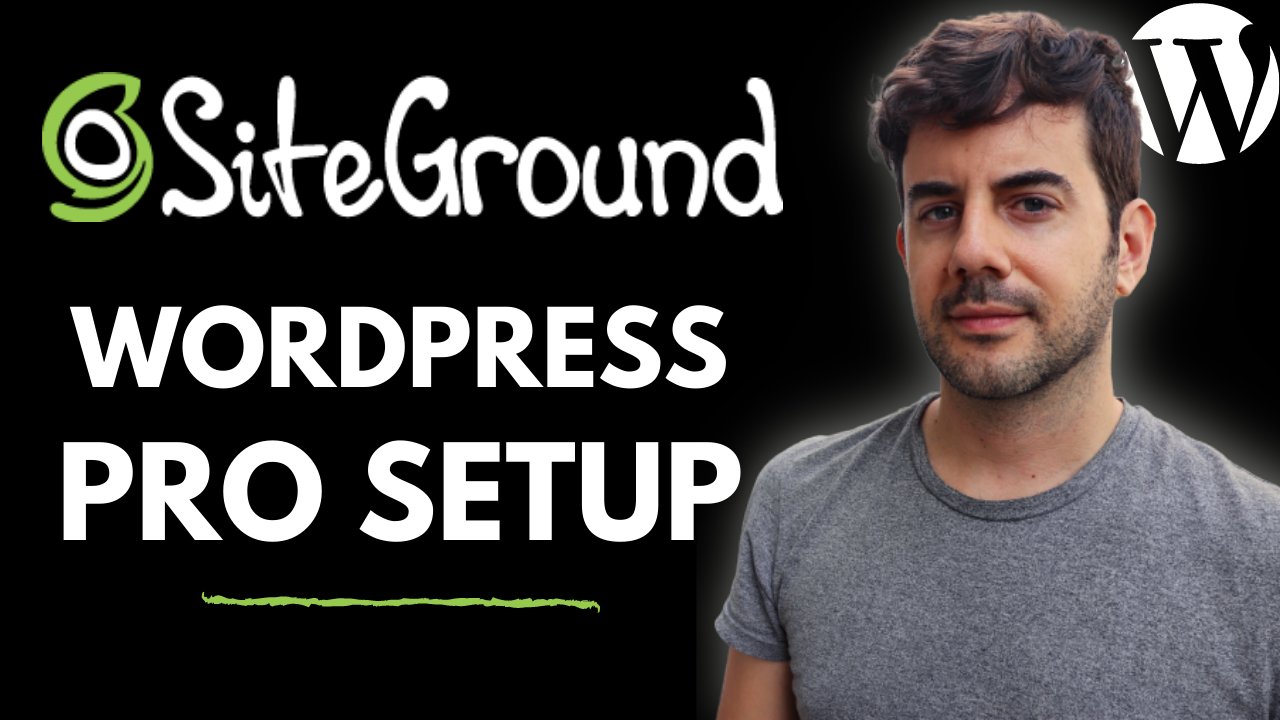
2. 2 Site Introduction and Setup: All right, welcome to the tutorial. So this is the website we're going to be building. We're going to be making an information oriented website. And I'm going to show you how to design this specific website using just Astra, literally just Astra and just the WordPress default editor. You can actually do this pretty impressive. Anyways, I'm gonna show you how to obviously create a nice-looking hero image. How to add a text overlay buttons, welcome message, how to add these in-depth guide. So it, when you mouse over it, gives a little bit of texts going along with it, how to add in a section right here and break it up, and how to make it super wide like this. So it's kind of visually stands out at text overlay over. That's how to add in your latest blog posts. Had to have an email opt-in forms severity at the bottom. How to change the footer and add a privacy terms and disclosure page, actual blog posts, how do we, how do we add in bread crumbs like this? How do we add in this default disclosure that's going to be on every single blog post. How do you link to disclosure like this? How do we add in a nice little box like this to promote products? How do we add an email opt-in form to sit at the bottom of every single blog post, et cetera. So if you're ready, let's get started. Welcome to name cheaper.com. So this is the spot where I recommend that you register your domain name. Now you can totally register your domain name at a web host, but it's going to be more expensive ONE term. And so I personally use named Sheep, I keep all my domain name, split them. Domains can start at 80 a year and just that's a fantastic price. So anyway, so you can start with named Sheep is very simple. So you just come to the search box, put in the domain name that you want to register. So if I type in my super amazing blog.com, all right, we'll click the search icon. Okay, So my super amazing blog.com is available, so it's added to your cart is very simple. It just could be Add to Cart button. There we go. Okay, so we'll go ahead and view item and let's go ahead and check out. Okay, so this is the checkout page for name it cheap. And so you're going to have to create a new cheap account obviously. But here you have your domain name registration. You can register a domain name for one year up to ten years in advance. I do recommend registering for a few years because you do walk in that low price domain names. Do burr knew about $12, so it's not that expensive, but if you want to walk in that low AAT price, then just go ahead and select like five-years are whatever you think is best for your project. Now, who is guard is fantastic. It's free to get it completely for free. Web hosts and other domain name registers. They charge extra for this if you're like, What is this? Well, who was God keeps your information private because part of I can't rules is that you have to disclose a contact information. So who is goes really nice because it keeps just everything private and it's free forever. That this basically it's all you have to do is go ahead and click Confirm Order, pay, and create a name sheep account. And you're good to go. Welcome to siteground.com. So say ground is one of just three web hosts that are recommended by WordPress. And they are one of the fastest, highest performing web hosts around the definitely outperform a dream hosts and Bluehost in terms of speed, but their price point is a bit higher. But what I really like about SiteGround is that they have a great introduction rate for beginners who don't even have a website to get started. Now on the homepage, you're going to see a bunch of different options. We don't want this one that says managed because we had to have access over the backend of our accounts are not starting a store. Cloud hosting is for high performing sights, high traffic websites, which is not us. We're starting a brand new website. So just go ahead and click on web hosting. Now we have three different options. Startup, grow big, and go geek. I really like the grow big one the most. And it's unlimited websites, 25 thousand visitors a month or so, 30000 visitors, et cetera. That's like a 1000 visitors a day, which is a good amount of traffic. Startup. You can only have one website. So I'm telling you like once you understand how to create a WordPress website, you are definitely going to want to have unlimited websites. Anyways, go ahead and click on it, get plan. Okay, so now in this page, we have to put in our domain name so we can register a domain name through sake round, which I do not recommend because domain name registration is 1595 a year named cheap, it's AAA, which is why I had you go through named sheep. So you should have gotten your domain name sheep. So go here. I already own this domain name. Okay? Now put into domain name that you registered. Then click on Proceed. And there you go. So now you just have to review and complete your payment information and create a site ground accounts. I'm not going to insult your intelligence and walk you through like how to pay for something online. It just felt the information as appropriate. And you want to just come down here to make sure everything looks good. So you have your choice of datacenter over here. So if you want to change the datacenter, we have USA, Australia, Germany. So what this is like, where, where is your traffic primarily going to be coming from? Okay? So if you have like an American audience, then you probably want USA, okay? If you have a European audience, maybe you want like Europe or Germany for example. And that's it. Okay, then come down here, say I would like to, I would like to achieve sacred news and updates maybe if you want, and definitely you have to click on this one where I can form. I've read and agreed to cite grounds, terms of service, and then that's it. So go ahead and click the pay now button and you are good to go.
3. 3 website setup: Welcome to siteground.com. So after you submit payment, you're going to be presented with your SiteGround web hosting account dashboard. Now we have this setup, our website, I'm going to show you how it's done quick and easy in like five minutes. So you can just go ahead and click on this setup site there. Or you can click on the tab up top there and you click on do website there or this one, create a website there. Whatever, they all drive you to the same exact page, which is this page right here where we can add a new website. So we can add a new domain name. And so what that's going to do is going to register a domain name through Sacre, which I don't recommend. Temporary domain name means a box 1, 2, 3 dot siteground.com, whatever. Literally just a temporary domain name for like just practice something or whatever you wanna do. We want this one an existing domain name. So now we want to come down here, enter in your domain name. So we want to use the domain name that we used when we signed up to siteground. So let me just go ahead and put that in right here. They would go and go ahead and click on continue. Okay, So the domain name you use is not registered with your sacrum and accounts. Now to proceed blablabla. Okay. All this is saying is that you're gonna have to set up name servers. Not a big deal. Don't worry about it. Click on continue. Okay, so now we want to click on this one where we can start a new website because we're starting a new website, we're not migrating a website from another web hosts, et cetera. But if you do have a different hosting account and you want to move over to siteground, you can just go here and migrate your website, but let's go ahead and click on start a new website. Okay, so now we can click on WordPress, WooCommerce, Wembley, other, we want WordPress. So let's go ahead and do that. Okay, now WordPress settable login. So this is going to be how we log into our website. So let me go ahead and click on an email address. So let me just put in my email address here. Okay, and then let me go ahead and put in a password. Okay, and let's click on Continue. Now we can install sacred scanner, which we're not going to do. And go ahead and click on Finish. And there you go. So now the SiteGround is creating our website. Okay, so it says we are all set, but one thing we have to do is we have to point the domain name. And so what that means, we have to go into our name cheap account and update the name servers to point to our SiteGround account. So very, very simple. So you just want to jump in here and you just want to take whatever your name servers are that you want to navigate to your domain name. Okay? We want to come down here and we want to go click this drop-down and you want to go to custom DNS name server one. Paste that in. Boom. Ok. And now go to Name Server to take it. Copy, boom, right there. Paste. Then click on the little checkmark. Okay, So now you've just successfully updated name servers. It says it'll take 40 out could take 40 hours. Is I've never seen that. It usually takes like five minutes. So what you need to do now. Just wait a little bit. Okay, so just wait like five minutes, six minutes for everything to propagate properly. And then your website should be all set. Once you've waited about five minutes or so, come back to your websites tab and this will have your website details. You want to click on WordPress kits and then you want to go to WordPress admin because we want to log into our website. So your admin for your pages, so there's going to be your website.com, whatever it is, slash WP admin. Now you should probably see something like this where a big scary message. The reason is because this website doesn't have an SSL certificate activated. And so we can go ahead and quickly and easily do that ourselves right down here. So with the SSL, come down here and click on Add. And so in SSL does it adds a little icon up top there. Now we can use, Let's Encrypt and Let's Encrypt is completely for free and make sure that's selected. Come down here and click on activate. Alright, so now we're in our SSL manager. Select domain name, select the SSL certificate we want. Let's Encrypt and go ahead and click on Get. All right, so now it's installing the SSL certificate. It does take a minute, maybe two minutes, not too long. Fantastic. So let's encrypt is installed for our website. Fantastic. So all we have to do now is click on Go to my accounts. And so that will navigate us back to where we were. Okay, so let's go to websites. Okay, go again, go to WordPress kit, go to WordPress admin. And there you go. So now your website should be secure, and this is your WordPress admin. So what you need to put in here is the credentials that you use when setting up the website. So just put in your e-mail address that you use, as well as your password, and then click on login. Welcome to WordPress. So this is your WordPress dashboard and there's a couple of little back-end settings we need to take care of quickly into before we begin at designing our website. So let's just get to it. All right, So first thing I want you to navigate over to where it says plugins. Now plugins, you get the WordPress starter plugin. This is from site ground. We definitely don't need it. I definitely leave Saigon optimizer this a fantastic proprietary plug and by siteground, that makes your website load faster for the end-user. So let's go ahead and delete that. Okay, So the first plugin I want you to add, and now it's good to add. And I want you to add something called Yoast SEO. Alright, let's go ahead and click on Install Now. And let's click on Activate. Okay, so what Yoast SEO does is it just gives us a little bit more control over our on-page SEO, like our page titles, Meta description allows us to have bread crumbs on our website. A lot of really helpful things. So you're like, What are you talking about? We'd say been website creative pro.com. So like a Meta description is this section right top right here in the page title. What Yoast allows us to have all that little granular control over how this appears to search engines, et cetera. Now the next Bogan I want you to go ahead and add is called smush. So type in smush. There we go. Now what's much does is it allows us to optimize your images that we upload to our website. And so for example, if we come to website create pro.com, this is a hero image. It's a big image. It's optimized so it loads quickly. If I reload, this will cover just boom, lodes really fast. Okay? Because and that's smush helps does that because it optimizes your images by making it made making a smaller file size, but still not reducing the quality. Okay? And then the last plugin I want you to go ahead and install is called jetpack. Now jetpack is actually from a WordPress. And I like jetpack because it allows you to have primarily what it does die like. The main thing that I use it for is related posts. So if we come down again, so a website great pro.com was just jump into the Dominion registered blog post. If I scroll all the way to the bottom here, you're going to see a bunch of little. You may also like boom, boom, boom. This is being powered by jetpack. It's on jetpacks servers, not my service. I'm not like deal. It's not taking up any bandwidth. It's just a helpful little thing that increases. People are clicking around your site, internal links in Pete's, more time on your website, et cetera. And so just leave it there. And so we're good to go. That's all we need to do. Now, I want you to navigate over to where it says users. Click on that. All right, so now we should have one user over here. Now was opened up this user and there's a couple of little things you need to know. So we come down here. So right down here, biographical information, this is where you can put in like David likes to drink coffee and likes long walks on the beach, et cetera, blah, blah, blah. You know, you see a blog post, you see an author bio at the bottom of blog posts. That's where it's being populated from. Now you have your profile picture right there. You can click on this and it's going to take you to a website called gravity. So gravity is a website that allows you to associate a picture with an email. So when you leave a blog comments or your own website has an image to be associated with the email. Okay, and so now here, the account management here we can set up a new password. And so if you want to change your password, this is where you can just do it quickly and easily. Okay, and now one other little thing to, let's go back to all users. We can also add new users. We click on this. Now when you see the role right here, so you can create a new username, e-mail, first name, et cetera, that you can set the role. And so right now we're in their admin accounts, okay, So it has full access. So for example, if you were to hire a blog writer, for example, you could just have someone come in here and women them to being an editor. So they only have access to like say, the blog post for example. And so it's a good idea also just to create an editor account for yourself and login to your own website as like an editor or an author yourself. Okay, and just leave the admin account for just editing the website, et cetera, totally up to you, but it adds another layer of security. Okay, Now, last let's come over here to settings and I want to come down to promote links. Okay, so now we want to come over here and we want to click on Custom Structure. Now for blogs, I personally like the structure of slash blog post title. Now you can use either post name, which is good, or you can do the custom structure that I like. There's no right way. It's not that big of a deal, but I definitely prefer this type of structure because it provides a nice site architecture for the website. Organizes everything appropriately under the blog. But it's totally up to you. But you definitely don't want plane because it's p equals 1, 2, 3. That gives no indication what the blog post is about. And we want to shy away from anything with dates because dates are great if we're producing time sensitive content. But if we're not like a news website that we don't need dates in our euros. So anyways go to custom structure slash blog. Ok. And there we go. And now you want to click on save changes. Fantastic. Okay, great. So now we have our plugins installed. Now it's time to install the Astra Theme. So let's go over to Appearance. Let's go to themes. Now, by default, WordPress comes with a bunch of them's already installed. And I have tutorials honestly on this channel of each one of these, if you want, check them out. But again, let's just go through this and we can just go ahead and delete each of these themes. But let's go ahead and first install the Astra Theme. So go ahead and click on add new at the top. Search for themes. Astra. Answer. Boom, right here it was. Click on Install. And let's go ahead and click on Activate. Greats. Now the next thing we need to do is for security reasons, we want to go ahead and just delete these other themes that are installed. We don't need them on our website. We're not using them. There's no need for them to be. So let's go ahead and do this. Click on the little icon. And boom, there we go. One last little thing that I want you to do is to enable HTTPS. So we went ahead and install an SSL certificate on our website through our SiteGround dashboard. Now we just need to enable it. So you just have to navigate over to where it says psych run optimizer. And then you want to go under environment and optimization. And then you'll just want to make sure that you enable HTTPS. And what this does is it forces a secure connection to your website. So functionally speaking, you actually have two versions of your website. You have an unsecure version, which is the HTTP version, and you have the secure version which the HTTPS version. And so just by enabling this, it will force anyone who tries to access the unsecure version to the secure version. It's just something that really makes your website just more secure and better for the end user. And you have any type of issue just come down here and enable fix insecure content. If you're having any type of issue.
4. 4 begin design website: Okay, so our Wednesday is setup and ready to go. We're finally ready to design a website with the Astra Theme. So I just wanted to give you some context about my approach, about how we're going to be doing this. First off, we're going to be focusing on the homepage, and we're going to make the homepage into a beautiful visual menu for the website. Then I'm going to show you how to customize the individual pages of your website as well as your specific blog post and your legal pages. I'm going to show you how to set up a logo, a fab icon, and add various sections to your homepage to make a really impressive looking website that looks great on mobile devices. So let's continue. Let's begin designing our website. So if you take a look at a website like what's a career pro.com. What you're going to notice is that this is the home page and this is literally a page within WordPress I created to be the homepage, and then you have a bunch of other different pages. So for example, if we navigate over to the blog page, this is the specific blog page for the blog archive. Now within WordPress, if you want to have a homepage for your website, which is what we're going to be doing. You have to create a page and have it be sets as your homepage and another page, and have it be set as the blog. So let's just navigate down here. We'll go to reading and we want to go to a static page. Now we have to select the homepage and oppose page, but you'll notice something. We only have sample page. That means like we have to literally, literally create these pages. So go ahead and click on pages, and then we want to click on add new. Okay, so go ahead and just type in homepage. Okay? And so we want this to be our homepage, so that's what we're going to call it that. Now, go ahead and click on Publish. All right, There we go. Now, next I want you to scroll down here, and I want you to jump down here to your Meta description. And this is where you can give your site title. So you want to have something where it's a site title, page separator, and then a keyword description of the website. For example, if we take a look at website career pro, page separator, it plan, bill, promote profit, whatever you wanna do, something similar, have a keyword phrase that describes what your website is about, then this is your Meta description. So your meta description should contain various keywords and phrases and she just describe what the website is about. So for example, if I tape it was a creative pro. Right here, create a website, start a blog launched online store. Why do I have those words? Because this is helps describe to search engines and end users like what the website is about. It's about creating websites, starting blogs, online stores, free tutorials, that sort of thing. So it's a kind of art and a science with your Meta description, but you want to put something in there and that's it. And so next, once you have your homepage launched, we have to go back and go to Add new. And now we just want to do the same exact thing for blog. So go ahead and type in blog. And it makes sure that the URL structure right there is your domain name.com slash blog. Go ahead and click on Publish. There we go. Okay, so again, come down here and we want to come down to the Meta description. And this is where you want to put something and you don't want it just to be this default structure. So we want to just give it something. For example, with webs degree program, I call it the website Greer pro blog, case studies, tutorials and more like you could just whatever you say, is it low? So if you have like a coffee oriented blob for example, the like the coffee, the coffee house walk. Okay, so page separator, whatever advice, advice, advice and guides, whatever, you know, something like that. Just have some thoughtfulness to your page description for your blog posts and the homepage. Alright, so now we can navigate back to our pages. We have the homepage, we have the blog. We're good to go. So once you set up the page titles and Meta descriptions, then those pages are functionally done. And so we can just come down here, go back to reading and click on static page, homepage, boom, homepage, post page. I wanted to be the blog page. And then go ahead and click on Save Changes. Fantastic was take a look at our website. And there we go. So now we have, now we have this homepage is now set to be our homepage and we're ready to customize the look and design of our website.
5. 5 Hero Image and the Call to Action: Setting a hero image and a call to action. So let's get started designing our homepage. And so what I mean by a hero images, this type of image with this text and a call to action, et cetera. You can totally do that with Astra. It's very, very simple. And so the first step in the process is to go to your homepage and you want to edit the page. And so you want to edit your homepage, okay? And so right here in the sidebar, we have Asherah settings, okay? And so over here is where you can have specific settings for this specific page. And so we want to disable the title. Okay, and so what that does, that turns this off. Now, the sidebar right here, I don't want to sidebar on the homepage. So we go here, customers are setting and we can say no sidebar. Now, content layout, we can have Box content box full width in full width stretch. So we want the image to stretch the full length, right? So we're going to want full, we're going to write here full with contained. Okay? We don't want stretch because what stretched does is it eliminates padding, so everything just gets stretched all the way from left to right. Look super weird too. We don't want that. We want it to be contained a bit. And there we go. And so let's go ahead and now upload an image. So we come down here and then this is your block. So click on the plus sign and you want to type in some cases cover. Now this is a cover block and now you have to upload an image so you can find free images copyright free here at Unsplash. So for this tutorial, I'm going to be making a coffee blog, okay? And so let's just go ahead and upload an image. Okay, So I download this image from unsplash right here. I think it looks really nice. Now one note about images. You want to decrease the size of them when possible. For example, like this image right here is one hundred five hundred by one hundred five hundred. It's big, but it's not too big because if a big image will wooed way to slowly, okay? All right, so right here, it's very simple. So now over this image you can start typing in Europe called actions. So I'll say Coffee, coffee house, okay. Then we'll just say advice and guides for brewing coffee. There you go. And so I want this to be centered, okay? And we'll leave it like that for now. So let's go ahead and click on Update. There we go. Okay, so let's reload the page. Okay, so that looks okay. So there's a couple of different things. So first off, I want the image to stretch from left to right. I don't want this whitespace in. Also, I want a transparent header like this. So it looks like on the image behind it instead of the white header. How do we do that? Very easy. So again, we have to click the homepage. Now we're editing the page. So come down here. Transparent header customize what's enabling. Okay, and next we want to adjust this image. So how do we adjust his image? Click on it. Okay, that's it. Now when you click on it, it gives you a bunch of different options to edit this specific block. So we want to come here and we want to change it to full width. There we go. Now it doesn't change it on this end, but it changes on the front end. So let's go ahead and update this, and let's reload this. Okay, so now we have a transparent header greats in the image expands from left to right. Looks good. Now you're like, why is it dark? Like I don't get it. Like why is this so dark? Well, it's called an overlay. Okay, So you have to come down here to the opacity, and so you can turn this down. You can turn this to whatever you want if you wanted to be like a little bit dark or whatever. And so just I would, you know, if you're going to be putting texts in general, you need in overlay over an image to make the text readable. But again, it depends on the image. So for example, maybe I'll make this text black or whatever, but whatever. So this is kinda like what you have to come down and change the opacity. So if I turn this down just a little bit, we'll say, we'll say like we'll give it to 0 right down there. Okay, So we like that. Let's go ahead and update them. Okay, and so that looks a lot better, That's a lot more readable and it's not super dark, but it's really that simple. Okay, so that's all you have to do to add a very beautiful hero image to your Azure website. Okay, so let's go ahead and adjust our call to action. So again, this is going to be your logo up over here on the website. And your call to action should be a call to action like telling people to do something that should be welcoming people to say you should quickly and easily explain what the websites about and tell people what to do, where to go. Maybe provide a button, e-mail, opt-in form, or just introduced the site and have some keyword rich title on the homepage. And so that's what we're gonna do here. So let me just adjust this. So let's just jump back into our homepage and let me just get rid of this. And so calling it a coffee house, I'm going to say, we'll say make amazing coffee. Okay? And so that kinda helps describe what the site's about. And then we have advising guides for brewing coffee. That looks good. Now if you want to change the colors, you can just come over here and under here is where your core settings is. So if you ever, like, if whatever your design is you watched, you need to change the text of black or gray or something else. That's where you do it here, but I'm going to leave it white for me because I think white looks really nice. Let me go ahead and just click on Update. All right, so now the thing that I want to make sure is that make sure that this is H1. So H1 just means header, header, one header, header 2, header 3. Your H1 tag to show only be one sentence, that's H1 because this should be the page title. Now this is a subheading, so we can go ahead and make this into a heading, and we can make this into an H2 heading. And then we'll center the text right there. And let's go ahead and click on update. And let me reload the page. And that's looking better. Okay? And so now if you want to change the font style, we're not. That's very simple with Astra. We just go over here to the customize option. And you want to go navigate to where it says global. Okay, so then you have to click on typography, and then we want to go to headings. Okay, so now we have the default setting for all headings. So here is where you can change your header font family to something else. We have a lot of different options. Again, you can play around with it as you see fit. I'm just going to use Poppins. Very simple. There we go. Okay, so that looks good. So now I want to customize the H1. So what's come down here to each one? Font family set to inherit. Inherit just means like it's inheriting the settings that we have up top there. So we can leave that as is. All right, So now I wanted to kinda change the line height so we'll make it a little bit better like that. That looks at the actually looks a lot better. We'll leave it right there. It looks good. Okay. So now normal maybe I want to have this be like semi bold, that looks good. And next we want to make the texts really big. So maybe I'll do something like 70. And now that looks really nice. So we have a really strong call to action right there. Make amazing coffee. It looks nice with the subheading a little bit smaller. I like the way that this is looking in. So I'm just gonna go ahead and click on Publish. Okay, Great. And so let's click on the X. And that looks really nice. And so we can just leave it as is. One little thing you could also do is right-click and go to Inspect. And now when you inspect, you just want to make sure that you have it set to like be like what it would look like on a phone. Okay. And so you always want to make sure with the Azure team to just load your website on your phone to make sure everything looks good. Because sometimes when you make the texts too big, it'll look nice on say, a tablet or a laptop, but when you're on your phone, it could be a little bit a weird-looking, so just make sure everything looks okay. Both your laptop as well as your phone. And that's really all you have to do to customize the text up top here. Now in order to add a button that's super-duper simple as well, just click the plus sign. Then you type in button, okay? And then there's a button, boom. Okay, and then right here you can customize the text of the button. So shop, I'll say shop now. Okay, great. So now I want to kind of adjust this and have this be a little bit centered. Now to add a boundary here is very easy as well. So we can come over here and we just have to navigate back here. It's click the plus sign, and then you just want to type in something that says button, Okay? And then click on button. There we go. Now the button, you have two different options. So if you click the one, you're editing the specifically the button. If you click the block area, now you're editing the block. Okay, So just wondering how everything works. So if I click the block right here, I can say something like subscribe, Okay? We'll say subscribe, boom, like that. Now you're like, I want to center it a block. You have to click the block section. Okay, Don't quit the bun because you're going to be like, Where do I sent to you? I don't get it. What's Because you have to click the block section. Then we go move here, then we can align center, and then that's it. Okay, so when you put the block, then you have a bunch of different options for how you want to change the look and the feel and the style of the this button right here. So if you want to have a default style not set outline, you can just change things as appropriate rate there. So I'll click on Update. Let me reload the same. Okay, so now I have a transparent button. So why is that transparent? Because I've set the default style is outlined so quick and make that fill. So then right here we can change the color sings for the button itself. And so again, what color is this background image? You need to pick something that kinda matches a little bit. Maybe I'll go with a black a little bit. Our, you know, our LED, the text white. I'll make the button black. There we go.
6. 6 Welcome Message: All right, so now what I wanna do is continue building out the body of the website. So I'm going to lead off with a nice little welcome message that kinda explains what the websites about. So this is just something that I personally like to do. I like to have a call to action at the top of any of my information websites. Then right underneath here, a quick little a to three sentence paragraph that explains what the website is about and a little bit more detail, but just helped again, scannable helps grab people's attention and people who know instantly if this say is for them or not, etc. And so with WordPress and astra, this is super-duper simple. So again, we just come back to our page and all I have to do is add in a paragraph. So you just have to click this plus sign and you just want to add in a paragraph. And then all you have to do is just literally just write something. That's it. So I already went ahead and wrote something. So let's just go ahead and do that. I'll paste that in there. Okay, so now I want this right here to be the title, okay? And so I don't want this just to be a standard paragraph, so we'll make it a heading. And I want that to be H2. Then I want this to be censored. There we go. And let's go ahead and bold that. Alright, let's go ahead and update and see how this is looking. Okay, so let me reload the page. Okay, so that looks okay. So you're, if you're wondering, well, how do I add speeds? How again, how do I make it? So it's not so wide. There's a couple of different options that you can do in order to change that. Okay, so first off, again, to add any type of space, again, you just have to add in another spacer. So again, let's go here. We'll just do this and we'll add in a spacer. And there we go. Move that up and move that up right there. What's update that, see how that looks. Okay, so that's kinda given us a little bit more. We'll just reduce that just a little bit, maybe like that. Okay, let's go ahead and update that and take a quick look at it. Okay, so that looks nice. Maybe, you know, whatever, you know, you can adjust as you want, but that's how you would add space to different elements. Okay, So now in terms of the width of the website, where do you go to change that? I'm just reload the page quickly. Okay. The change the width of the page. A couple of different things. First off, me go back to this. Okay, so we come over here to Ashley settings be a full width in contained. So if you go over here and you go full width stretched and we'll update it. You'll see what happens as what does the Texas stretch from all the way from edge to edge? That looks really weird. So first things first, make sure it's full width contained. And then that means that it's activated that container. Now, you can adjust the width of the container for the page. To do that, again, easy, we have to go to customize. And once you click on customize it, it's going to open up. And we can come over here to global. We want to come over to where it says container. If you're like, what's a container? A container is just means like the width of the page. Okay, so now it right here we can kind of play around in change as we want. So if we want it to be really wide, we can do that. If we wanted to be a little bit more narrow, we can go ahead and do that. I would recommend something that's not too wide, not too narrow, just something in the middle like that looks okay right here. We could always make the text bigger if we wanted to do something like that. But again, it's your website totally up to you, whatever you want to do. So if you want to like minimize as much as possible. And so with this container option, you can change the container for different aspects of your website. Like we have the Page, blog posts, layout, archive layout. And so you can change the width as you want right here. So that's all you have to do to change it. So let's go ahead and publish that. Kinda like glue that looks. So if I go, a default actually defaults quite wide, so it's one hundred, two hundred pixels. I do like to keep it a little bit like we'll just keep it like 900th of a straight and 900, I think that's nice. Okay, so we'll go ahead and publish that. And so that makes, that makes the width 900 outright will click on X. Okay, so there we go. So now we have our little message setup right here. Okay, So it's come down here. Okay, So now if we want to change the text size, It's very, very simple, so we just highlight what we want. And over here, it's going to have typography. And then you can just come over here and change to what you want. So if you want it to be medium, you can just do that quickly and easily or you could just make it a custom size as well. And so what's make this a little bit smaller? We'll say 18. All right, let's go ahead and update that. All right, let's reload this and see how that looks. Okay, so that's coming in quite nicely. Okay, so I think I actually I'll make that a little bit bigger. 22. Okay, good. All right, so we've got that all set widths make this a little bit bigger. Okay, let's go ahead and update that. And let's just take a quick look to see how this is coming together. Alright, so that's a little too big actually. So we'll come down here 18, update that. And there we go. Okay, so that's looking good. Okay. So I like that. Say, you know, similar kind of readable, not too small, not too big. What looks weird. And so we're good to go. So now let's continue adding elements to our homepage.
7. 7 Visual Menu: All right, So what I wanna do is make the homepage into a sort of like visual menu. I think of visual media is a nice layout for any blog, information oriented style website. It's kinda like what I do here on website career pro.com, where we have the best in pieces of content that growing after very competitive terms, tutorials, latest blog posts at the bottom became email opt-in form, et cetera. This is a nice layout for the website because it introduces the website and introduces the content. So how did we get started? So the first thing that we need to do is we need to add in a new plugin. So go to your plugins, good, Add New and you want to find some of this is stackable. There we go. Okay, So stackable page builder, Gutenberg blocks. Let's go ahead and install it. Now if you're wondering what the heck is Gutenberg? This is Gutenberg. This page, this block editor that we've been using, it's actually called Gutenberg. All right, fantastic. So Gutenberg's installed. Let me go ahead and reload the page. Reloading the page just because then the blocks are activated or an axon to this. Okay, so let's get started. So I'm going to add in a little title like this. Okay, so I like keeping my sections a little bit of a title right there, so it's, it's scannable, it grabs your attention, et cetera. So go ahead and click the plus sign. And if we click on Browse All these are all your blocks, you're gonna know. Notice it's bright colorful blocks. These are coming from stackable. Now, the one that I want is columns. And so what columns do is it just breaks it up, okay, breaks up into little blocks. We can add content. Now the column width over here, I'm going to pick this one in the middle. I'm going to make this a button and then this the title. Alright, so let's go ahead and add in content. So there was click on paragraph and then we'll say buying and brewing will say something like that. Okay, Then underneath it's in our in depth. In depth guides. There we go. Now I'm going to make this a H2 tag. So we'll go here. And heading H2 looks good. And I'll keep that one just the way it is. And let's go ahead and add over here a button. So type in button and I'll add the stackable button right there. Okay, so now that our button is black up top there, we want this button to match. So we want this button to be black as well. And so right here, first off, we can change the button text and says any button to access, say we can say View, all guys. Okay, they may be right with this button. You could link to a category page or you can have a dedicated page on your website, however you want to set that up so you can just add this. Then right here you can put in the Euro that you want. All right, so now let's change the color of this. So we have the button color right there. I'm going to make this black. There we go. That looks good. Okay, so now we can change the typography. I want the typography to match the website, so I've been using pop-in, So just change it to whatever type, whatever font style you're using so it matches. So because you want to have like your fonts to all match, you want a font to be the body and then a font to be your titles. So you want to fonts, you don't want three or four. You don't want things to be like a different font style, et cetera. Okay, so let's take a look at that. So I'm liking the way that's looking. Let's see if there's anything else we can do in terms of the style right here. So if we come over here, we have hover fat and like what happens when people mouse over the button. Alright, and so we have here vertical padding, border radius. So if you want to make the button a little bit more round, we can come over here maybe like for a little bit. Alright, so let's go ahead and update this. And let's just take a look, just eyeball it. Let's see how it looks. All right, so that looks good. So I would prefer there to be a little bit more space above this element. I'd like this to be a little bit more bigger, bolder, just stand out a little bit better. So let's go ahead and fix that. All right, so first things first, I want to go right here and we're going to add in a spacer. Alright, so adding our good old handy-dandy spacer, minimize that just, we just need a little bit of space, not too much. Give some breathing room between the elements. There you go. Okay, good. All right, so let's go ahead and make this bigger. So the default text size, maybe I want to have this be bolded in default. I want this to be maybe large. I can come over here and have a custom size. Maybe. We'll change this to something like 45. All right, There we go. Alright, and so we can maybe bold that, see how that looks. Let's go ahead and update that. And let's reload this. Okay, So that's, it looks nice. I think maybe I'll get rid of that bowl that doesn't really match. We'll just leave it like that. Let me just go here to get rid of that. And we'll change this color setting to maybe a gray, and then I'll go to custom color. And so I maybe I wanted just to be slightly gray, just a pinch Grey. So just, you know, stands out just a little bit. Let's reload that. Okay, so that's looking good. Maybe I can make this a little bit bigger. We'll go with, we'll go with 50. See how that looks. Okay, So I kinda want this to fill up a little bit more of the space, so it's got 54. All right. Let's take a look. Alright, that looks good. Okay, so now we have a nice little welcome message and we have a little introduction for the title right here about what this section is going to be underneath here in adding a button, right here, this is Lincoln to the homepage. But again, you can change wherever you want this to link. So I'm having this eye view all guides. So maybe you can create a whole dedicated page on all the guides you have, or you could link to a category page or whatever you have that flexibility. So now let's add in some images underneath in the link to in depth guides. Okay, so now we're going to be adding specific images for a website that have a little bit of a description to go along with it. So first thing I want you to do is come down here, not here, okay? Because this one is associated with this block right here. So make sure that you select a new block where it's in its own section right here. The reason is because this is split in half. So we don't want to be adding images only under this one section right here. Want to have it be the entire section. Anyways, with stackable because we install bat makes it very, very easy. So we can come here and we can go to say Image box. Alright? And so what image box does is it allows you exact literally what you see. You mouse over it and it gives a nice little title and description. All right, So how do you add images? So just click on the square and now you can select the image that you want. So I already went ahead and selected, already installed a bunch of images on my site so you can go ahead and on your own time and do that. So I'm going to add these images quickly and easily. There we go, and there we go. Okay, so let's go ahead and do a quick update. See how that looks. Reload the site. All right, so that looks okay, so that's looking really nice. We have in-depth guides. Boom, we have different images right there, and we can just start throwing in a title right now, right here. Okay, so, okay. Buying will say buying, brewing. And then we'll say fun facts on our fun facts, good or not exclamation mark. All right, so now over here on this section is where you can edit the way each block looks okay? And so we come, I'll click on this one for example. Alright, so right here you can change it to the blocks to be plain or basic. You can come over here to the style. You can change the way the columns work. So if you want two or three, So for example, like if you're like, I don't want three, I want to, well, that's where you can come in here and change it. You can change also the height. So if you want it to be a little bit more square or longer or whatever. So I think I would like it to be a little bit more square-like to 95. Ok. Now the border-radius, okay, So here you go. You can change things slightly. So maybe just a little bit rounded, not too much shadow outline. So if you want these things to kinda pop off the page a little bit, you can give it drop-shadow. And there you go. So you can change the way things are aligned, et cetera. Okay, So now with the image section, so the image large default here, you can change specific things like hover overlay color, so over overlay color, obviously what happens when you people mouse over the image. I personally like the way it is by default where it gives a nice shadow, dark overlay, looks great. And so, you know, then you can come over here and change the subtitle and titles. For example, right here we have the title, so all the titles are H4. And so again, you have to pay attention to that because this is H2, this is H2. So what should these be? These are a sub-heading of this section. So honestly like these should be h3, to be honest with you. So we're gonna go ahead and change this, change these all to H3. Here. We can change the size if you really wanted to be obnoxiously big or small. So we could change it just like it will be get 28. That looks nice. Okay. We can change the color of the font as we want over here. And so again, on your own time, you can count and just jump in here and edit things as you see fit. And so it's really simple because right here you click this, then that's right down here is where you can add in a URL. So for example, if you have a category page on buying are brewing or whatever, or you just have a specific blog posts you want to link to. That's where you could do this right here. And so we can get rid of me. Just go ahead and update this. Let's just take a quick look. Alright, so now at movie mouseover CSS subtitle description. So we do have to get a give yet we do have to give a quick little description in a subtitle if we want orbit. Delete that too. If you really don't want to put anything in there, that's okay too. So you can come over here and just backspace this all out and update that. And every load it. And we'll see, boom, nothing. Okay, So totally up to you. I kinda like that description comes up. I'm not crazy about the subtitle, but I do like the description. So totally up to you, whatever you wanna do if you just want to leave it plain old like this and people mouse over it and then it can link to something. Didn't go ahead and do that. So, you know, it's your design, your website, totally up to you. That's how you can add in these helpful little blocks to make your website more visually appealing.
8. 8 Blog Post Homepage: Now the next thing I want to add in is our latest blog posts book from a design perspective, I think would be really nice just to break up this section and then have a like a image separator. And then our latest blog posts, I think that would be a little bit more visually appealing. So let's go ahead and do that. So it's gonna be kinda same way that we added the image up top here. We just have to do the same thing. So we come down here, okay, so underneath our blocks right here, we want to come to the plus sign and you want to navigate to where it says cover. Now you want to upload a new image, okay? And so I already went ahead and did that. So I have this image right here. I got this image from unsplash. I resize it to make it a little bit smaller. So I'm going to go ahead and click on select. There we go. Now again, click the image itself. Quick here, go to full width. There you go. Now it's full width. And so personally what I would do this section right here is like maybe linked to a specific product or course, or maybe you have, maybe you have, are going to have a resource page or a course page on your website. We like list out the best coffee courses on Udemy, Skillshare, etc. As an affiliate, whatever, or your own product, whatever. So let's just type in I'll type in breach their pro learn more. Okay. So again, I want this make sure that this is not just a paragraph. I want this to be a heading, and I want that to be H2, and I want that to be centered. Default size normal, okay, so we'll just say normal. All right, we'll make this a little bit more visually appealing like that. Okay, And so right here I could highlight this and then I can make this into like a specific link and link to a page. And so not done. Yeah, we definitely want to add in a little bit more. All right, so learn how to brew great coffee with our, BY, by learning with our favorite courses on, by learning with our fav or it courses, we'll just leave it simple like that. Okay, let me go ahead and click on sensor. All right, so that looks good. Let's go ahead and update that. And let's see how that came outs. So let's reload the page. And there we go. Wonderful. So that looks fantastic. So maybe these overlays a little dark. I think I would like to change that. So again, how you change that? You have to click the image. Okay, navigate down. Go find where it says opacity. Let's bring that down from 50. Let's maybe make that like 15 or 14. Okay, let's go ahead and update that once we vote. All right, so that's looking amazing. So there we go. Okay, so now we have our in-depth guides. We have a section where we can link to maybe like a course as an affiliate or something. And now it's time to add in our latest blog posts. Alright, so now it's time to add in our latest blog posts. So I personally went ahead and published a bunch of blog posts I published for right now. You probably don't have any blog posts, so you can go ahead and do that at a later time, but I just wanna show you how it works when you're ready to add blogposts to the homepage. So first things first, we need to add a title. So this, we have our little title there. We need to do something similar right underneath there, so it kinda matches on the website. So again, just go here. Plus sign. And I'm going to go to columns, okay? And so advanced columns and grids in, and I'm going to select that one again. I'm going to leave this empty this time, but over here I'm going to add in text, okay? And so latest lately, okay, latest, latest content, whatever. Okay. So there we go. So from what I see from the block, okay, there you go. Whatever. Now, you can change that to whatever you want, whatever matches your site. So again, H2. Now let's have it match. So let's come over here. Custom size 54 and it's bold. Okay, so let's just go do that. So I'm gonna go ahead and bold is Boehm. I'm going to say large, we're gonna make this 54 so the font matches the one above. There we go. Okay, and so now I want to come over here and add change this. Okay? And so what did we do over here? We kind of made this a little bit lighter, gray like a not black, not jet-black, but just something a little bit lighter. So come over here, go that custom color. There we go. And just do something like that. Okay, there we go. So now let's reload to say make sure everything's in place. Okay, So that's okay. So again, like if you want to have more space between this element or this element, you can go ahead and do the separator. I think that looks nice. So anyways, I'm going to add in the latest blog posts. So again, we don't want to put this one because this block, okay, this, this is adjusting for this section right there. We want the brand new section right there. Okay, So now what's actually add in our blog posts? So again, make sure you're on a new section and new block. You don't want to be editing this section only. So let's go ahead and click the plus sign and you just want to type in post. There we go. Posts bone. There we go. Looks great. So let's go to style and I'm going to change this to maybe a column of four, okay? And I really like the way that's looking. Okay, so this is all demo content I just uploaded quickly and easily. And so I definitely recommend getting rid of most of this stuff. So let's just get into it. All right, So feature image, feature image is this. We want the feature image category up top there. Yeah, that's kinda helpful. I mean, totally up to you if you want to have the category displayed or not. So I think I'm going to leave that, but I wanted to category to be black, not blue. All right. And now we have the title right there. Yes, we want to title it to be displayed. Absolutely. Come in here, change the typography, make it so it matches your website. 25, that's fine. Okay, So let's just get rid of that. Okay? Okay, Now, next thing we need to do is h3. So that's good because that's our h2 tag right there. So these should be h3 is okay. So let's go back and click on the block again. And Okay, so now we minimize that excerpt. I don't want an excerpt. Excerpt means like the text that comes underneath, that's completely useless. That's minimize that meta-description. Show author, no show date, No Show Comments. No, I don't really care about any of that. All right. So now we want to change the text color to black. Okay? All right, let's minimize that. Sorry, What's comes to the title? It seems it's I don't know, black. There we go. Okay, and so then we have the Read More link right there. So customized read more link. So we can say Click to learn more, read more, whatever. Or if you don't want anything, you can just get rid of it. You can just click that off and then people can click the title of the blog posts to view the feud piece of content. So anyways, let's go ahead and click on update. And let's reload the same and see how that looks. All right, So great. So now we have links to a specific blog posts. So again, if you want to get rid of the category totally up to you, I think I am going to get rid of the category I typically, as you can see over on Web, say create protocol, I personally just like to keep things super-duper simple. So I just like to have, for me, I like just have the image and the title people who click on the piece of content and get more into it. So we load them. And yeah, I think that looks great. So maybe if we can make this font a little bit heavier, it's like thin and just doesn't match as well. So it was just jump back into the title. Okay. So the size, maybe we can make it the size a little bit smaller. Okay, and let's go to typography and the weight default will say bold. Let's see how that looks. Make the text a little bit smaller, bold it. Oh yeah, that looks much better. Okay, so there we go. So now we have our in-depth guides. Boom, we have our little section where we can promote like a link to an affiliate product, et cetera. And now we have our latest blog posts. And so let's finish off the homepage with I can email opt-in form or some final call to action.
9. 9 Email: All right, so let's go ahead and add in a final call to action and image right at the bottom, sitting right above the footer. So this is definitely where the highest converting spots on a website because people hit your website and then they scroll down and then it gets to the bottom. Have something for them, have a call to action, direct people somewhere, whatever. Okay. It could be an email opt-in form product about me, whatever. It's just give people something to do when they hit the bottom. You could leave just the blog here, that's okay, but definitely it's better to just have something. So the process is going to be exactly the same as adding this image and adding this image. Okay, so let's get to it. So we'll jump back into our editor, click the plus sign, and we want to add in a cover. And so I already went ahead and downloaded this image of coffee beans I got from Unsplash. And so just get your own image again, like resize it. So it's a 2000 by 2000, not too big. All right, so let's make sure that this is full width and now we can write our call to action here. So I'll say like get our 377 day course on how to make the best cold brew you ever had. From there we go. Maybe it will, maybe it would take this seven day free seven-day course. I'll take that and I'll bold that. So that kind of pops a little bit. All right, let's go ahead and click on up D. Let's reload the page and see how that looks. Yeah, that looks fantastic, Great. So I actually really liked the way that this overlay looks at the coffee beans where it's dark and just looks really nice. Now we need to add an like an email opt-in form, whatever. So whatever service provider you want to use, this is just my demo account for convert kit, but this works the same with any type of provider be at Lake Miller way, MailChimp, a weber, et cetera. And so we just need to get a form. So I'm going to use the inline form right there. And then I'm going to go over here to Claire. I'm going to choose this one. Okay, So now here within your e-mail editor, you can change things as you want it. As you see fit. You know, you can come over to settings and just play around with everything. This is not convert kit tutorial, so I'm just going to leave it as is like this. And so anyways actually let me just go ahead and change that button color will just make it something a little bit more. There we go. Okay, so I'll go to embed. Now we want to eat me on HTML. And I know you say, Oh, but there's WordPress, well, you have to download the convert kit plugin. I'm just going to use the HTML. All right, we'll click that. Copy. There we go. All right, so now we want to jump back in here. Alright, so what do I want to add in plus sign? I have HTML, type in HTML foam, right-click paste. All right, let's go ahead and preview. Then you're like, Well, David, it's a off to the left. Like how do you make it center? Like what the heck? Okay, easy. And go here. And we go to, we'll go back to the form HTML. All right, so I'll have to do is type in sensors. So okay, triangle looking thing center. Alright, there we go. And then the last tagged, so these are called tags guys. Okay, so that's the center text. So we have center right there, come to the very end, collective end at in a closing tag. Okay, there we go. Click on Preview. There you go. Now it's centered. Let's go ahead and click on Update. Let's go back here and reload. And that looks great. So yeah, the homepage looks fantastic. Well, welcome message guides. Boom, like a affiliate marketing right there perhaps from the blog, then email opt-in form sitting pretty at the bottom of our website.
10. 10 Logo Favicon Menu: Okay, so now we generally speaking, have our homepage design properly. So let's fix the header and let's fix the footer now. So we're going to start with the header. So what we need to do is we need to create a logo for our website. And one website that I personally like to create simple quick logos is actually canva.com. And so I'm going to be using deep link YouTube thumbnail template. You could use whatever template you want. It's not that important. So we want to just come in here and just use the tools available to you to create a logo. So I'm gonna go to text and I'm gonna go to heading. And I'm gonna be calling to say like coffee house, like let's pretend I had like coffee house.com or the coffee house.com, whatever. All right, so we have our title here. And first things first, we want the Fontan match. So I wanted to do Poppins bold. Okay, there we go. So I'll just make this a little bit bigger. There we go. Alright, so now we can just leave it as texts, but we could go add something. So go to elements. I'll type in something like coffee and see what comes up. Okay, Let's go through this and just take a quick look. Oh, that looks fantastic and it's free. Fantastic. So some of these you do have to pay for it and when they cost like a dollar, so, you know, it's your logo. So if you think it's important, crack open the law and spend a dollar to get the graphics that you need. But this one's actually freed, so I can just go ahead and use that. So make that look like that. Okay, good. And so one thing I want to add 2s, maybe like a line underneath that. So let's go here and go to line and see what comes up. Great. Okay, So I think I'll actually add in this free one right here. I mean, I'll make it a little bit smaller so the mindset not so thick and heavy. Alright, so mashed out to the left. All right, so let's expand that all the way to cover the word. Alright, so let me just minimize that. I think I would like to make that just a little bit bigger. There we go. Okay. All right. So we'll move that up there. And good. So I like the way that looks. So just reduce that there. And we've reduced that to maybe there. Yeah. Okay, so that looks all right. So first thing we need to do is now download the image. So download as a PNG. Png means that's going to be the highest quality image saved. Okay, so let's just drag and drop that to our desktop. Now the first thing that we need to do is we need to cut out all that whitespace. So we'll go to Edit picture. Now again, you could do this with any picture editor that you want. I'm just going to crop the top down right there. We don't need all that whitespace there. We don't need all this whitespace over here. Same with this area over here. Boom. And we'll get rid of that right there. Okay, So take a little bit more, That's hop right there. Okay, Good. Okay. Now go to resize, and we want to resize our logo. And logo should not be that big. Like this literally means to be like 200 and something pixels like logos are small, okay? You don't need some big complicated logo. Okay. It's 260. Okay, great. Yeah, Literally that's that looks great. So the quick the x I'll click on Save. Now the issue is the logo is like has a white background. So we're going to use a service called Remove BG, removed RBG, so remove background. Easy. Let's go here. Upload your image. Boom, boom. Done. Okay. Now this uses machine learning to automatically remove the white space. There we go. We can download our logo, okay, and the drag it and drop it there. Let me go to Rename coffee house logo. There we go. Okay, so now let's actually add our logo to a website so we have to go to Customize. Oh right, and we want to go to Global, and then we want to go to up not global. We want to go to header. There we go. Okay, so we want to navigate to site identity, and right here is where we can upload a logo. So let's go ahead and select Logo and drag and drop or logo into place. So we got 260 by 53. That looks good. Alt texts would just say that is the logo. Click, click on Select. All right, let me just get right there, Crop Image and see how that looks. All right, so that looks really nice. Now you're like, Wait, why does it say My WordPress? Well, just gotta remove that. So come over here, displays a title. Nope, There we go. So now the logo has been removed. All right. So now if you want to like make the logo smaller, et cetera, what you have to do is again, just come back in here. And again, just edit your image again and just make it smaller as you see fit. So if I wanted to change that and make it even smaller, like we'll say, we'll say late to 26, okay? You just have to come in here, edit the image. And so again, play around with that until you're happy with the way that your specific logo looks for your website. I think that looks nice. I'm going to leave it the way it is just like that. And that's it. So that's how you add a logo. So next we're going to be editing our menu. Okay, so let's go ahead and adjust our menu now because this is okay looking, but we can make it a lot better. So Let's go into our WordPress dashboard, go to Appearance Goodson menus. Now we actually have to set a new menu because right now we have a primary menu and a footer menu. We have those two sections where we can add a menu, but we don't have a menu. So what's great one? So I'll just call this primary menu and make sure that this is selected primary menu right there. Go on, go in click, click on Create menu. There you go. Okay, So view all. And I'll add in the blog page. And I'll go ahead and save the menu. And let's reload this. Okay, looks fantastic. All right, so let's continue on. So let's customize this a little bit more so we can go over here and click on customize. Alright, so first things first. So if we come to header and then the primary menu, this is where we have additional options for the menu. So for example, Asch's really helpful because the last item in the menu, if you want to add in a button, there you go, then you can change the color and play around with it as you want. Or you can add in a search function, okay? Or you can add in a widget whatever you want. So I'm going to lead to the search function there. Now you may notice that it's blue. The reason it's blue is that because all hyperlinks on the website are set to be the color blue. And so you can change link colors, but that this item is going to be blue all the time depending on what color you choose. So anyways, let's navigate over here. Global, underneath colors, base colors, link color, so that when color is blue, so if you want to change it to something else, this is where you kinda can jump into your own website and kind of change colors around. So maybe I'll make something a little bit more. See, you want something that blends in a little bit so that doesn't really match. So just keep it okay, I'll just keep it blue like that. That's subtle, that's okay. So let me click on Publish, right? So the next, next thing is, I don't like how thin that text is. And so this is a kind of an Astra Pro setting personally in order to make the menu items up top there bold. You know, CSS, you can actually just coming near in, change it yourself. And so I have a little bit of CSS I just wrote out. So its main header, menu, menu item, font size, font weights. And so we can just add this into our custom CSS. Now, if you pay for Astra Pro, you can adjust the menu Just quickly and easily. If you don't like you have the free version like I do, then you have to just do this in order to make the menu item a little bit more WordPress. Interesting, little ahead and add in their own brands R1 ended. So let me just maybe this when opening my logo and right there, I'm going to make the coffee cup. I have the fabric on so we'll minimize that. So that looks like, okay, that looks good thing an outcome. And you actually see that something else, like say that as the icon, There we go, okay, and I'll save it to my desktop. There we go. Don't Save. All right, so next all we have to do is go to customize. And you just need to navigate back to where you changed your header. So we go to Header, say identity. So we have our logo there, say icon right here. Click on that, drag and drop it into place. Okay, click on select. That looks good. Okay, we'll click on Crop Image. And there we go. So now we have a nice little icon to associate our brand.
11. 11 about contact page: Reasonable page for your website. So your website does need an about page. A link to the About page should go in the main menu at the top or in the footer at the bottom of your site D About page is about the website. It's not about you. You should incorporate why you personally have the authority to write this website, but nobody cares about you double-page, is it like what is this website about? So anyways, let's go ahead and create an about page. So go to add new. Alright, so again, as you can see, like, I like to say something like welcome to the website, et cetera, et cetera. So let me go ahead and do that. Welcome to the coffee house. Okay. All right. So now we want to make sure that the document is the says about. We don't want that to be like a long URL. We just wanna change that to be about, okay? Okay, so let's go ahead and click on Publish actually. So I want to show you a couple of different settings. So let's just open it up. Alright, so right now, by default your pages have a sidebar. I personally, It's totally up to you whether or not you want to have a sidebar on the pages, I personally wouldn't. And so with Azure, you can kinda custom-designed each page just like you did the homepage, which I would recommend personally just following the same process. So I come down here to page attributes, for example. And you want to come here to the sidebar. You might have it be no sidebar, Okay, Then transparent header, you want to enable the transparent header. And then this, you want to disable the title just like we did, exactly like we did for the homepage. So disable the title, okay, then come over here, click the plus sign. Go to cover. Now go to our Media Library for example, let's use that image that we use previously. Okay, let's click on that one. And again, go to this, go to full with an annex, say like welcome to the coffee house. Okay. And so, you know, come back over here, maybe I can change this overlay to something a little bit like different or like a green color or whatever, just give people like that they're on a different section of the website, maybe a little bit more orange, something like that. And so, and then it right down here, we can continue adding in text, like text goes, goes here. And let's click on Update. All right, and then let me open this page up. Okay, so now we can have a welcome to the coffee house and then just follow the same process that we did for the homepage. Now would recommend doing this for each one of your pages, like your about page, contact page, et cetera. Because you can make it really beautiful, impressive looking website quickly and easily by doing this a contact page for your websites. So I went ahead and already kinda skip the header for our Contact Us page. Again, just follow this tour for the homepage. Sending up the image, et cetera. So the thing we need to do now is I want to add in a form right here that people can just quickly and easily fill out. And so how do we do that? So first things first, let's go through the contact page. So the contact page, you absolutely need a contact page. The point of a contact page is to provide a way for people to send you a message. So you should link to like your Facebook page or Instagram. You give a quick little bio about like what people should expect. You should provide a form. All that good stuff should go within the contact page and also the URL structure. I personally would leave it as contexts slash contact. Okay? And so we come in here again. So you can again, so I have the page title hidden and let's go under here to permanent, so okay, just change it and make it say contact. Now you want to make sure that you come down here and adjust your information as appropriate. So I would change this to something like the the coffee house contact page. Then I can paste separated like I need to get in touch, question mark, whatever, something like that. So let's go ahead and update that. Okay. So when you're just follow along, felt set set up this page as appropriate. Okay, So let's add in a form right underneath here. Alright, so to do that, I'm going to have to navigate back to WordPress. And let's go to Plugins and then add a new plugin I want to install is called WP forms. Okay, so WP forms, it's good to install. And let's click on Activate. Fantastic. Okay, so let's create our first form. And we want to go to simple contact. Create a simple contact form. Okay, great, so now we can edit each of these sections. I'm going to change this and just make this simple. Okay? There's no need to have first and last name. We'll just keep it simple. I liked the way that looks, that looks fine to me. Alright, so you want to navigate to where it says Settings, and then you want to navigate to notifications and a notifications right here, send to email address. This is where you can change what email that gets sent to you. So right now it's sent to, send to the admin email. If you want, change this on mouse, just jump in here and change it as you want. And that's pretty much it. So do is click on Save and go to embed. All right, so now wb forms of has this, these two buns kinda walk you through it. I think it's a little bit annoying. I personally just like to use a short code. So click on Use short code. There we go. We've got our short code. Right-click. Copy that. Okay, so let's navigate back to our contact page. We can go to edit page right here. All right, so right here again, I would give some contexts like hey, thanks, thanks for your interest in the site, et cetera, et cetera, et cetera. Okay, so now we want to click the plus sign and you want to type in short code. Now, short code there. Then right-click, paste. That simple. Click on Update. All right, so let's go ahead and reload this page and see how this is looking. All right, Great. So, you know, again, develop this a little bit more appropriately and then the form looks good and it works. So again, let me just show you the contact page for a website create product com. Again, that's just keep it super-duper simple since I have o friends, blah, blah, blah. You can also contact us via our Facebook page. Questions, affiliate, affiliate partnerships, etc. Here's the form, philadelphia, and you're good to go. You could do the same thing right here. So, you know, again, like, if you're like, Hey David, as too close to the top, how do I, again, you have to add in your spacer. Ok, so we'd go to spacer, then boom up, up right there. Okay, So if you want to have a little bit more breathing room between your text paragraph in this image right here. You can just do that quickly and easily like that. And that's pretty much how I would approach the contact page. Just follow suit. Quick little introduction paragraph linked to Instagram, Facebook, whatever way other way people can contact you. Your email, phone number, whatever you think is important. And that's all. That's all you have to do to throw in on the contact page.
12. 12 footer design: Okay, so now it was adjust the foot or on our website. So the footer is a section where like disclosures go, privacy policy Terms of Use, those kinda pages. So let's get into it. So first off, what's click on customize? And when you click on Customize with Astra, you actually have a lot of different options for your footer. So first off, we have footer widgets. So right now footer widgets are turned off. But if we want to turn the footer widgets on, we can go ahead and do that. Then right here you can add in different items if you're like, whoa, where the heck is this being controlled from? Personally, you have to go to appearance widgets and then a footer widget area 12341234. So if you want to go ahead and add stuff in here, you can go ahead and do that. I'm personally not going to be using widgets by just want to instruct you. So you just have full control and options over what you wanna do. Okay, so let's go to Footer Bar. Now. I like this, you know, I personally keep them. Again. I everything I keep my footer is simple as possible. So first up, I want change this background. So I'm not crazy boat. I want this to be a nice black color. Okay. I don't want this to be like a weird color. Black, gray black. All right, So right up top here is where we can kinda change things. And so let's back out. Let's get rid of all this C. See, so we can say copyrights. We can say copyright, coffee house. Okay? And then what I personally wanna do is I want to add in my privacy policy Terms of Use all those miscellaneous illegal pages. So we got to navigate back to our pages and we have to go ahead and create those pages. But I want to create those links to those pages first. So let me just come in here and I'll type in privacy policy. They GO terms. There we go. And we'll say like this, closures, whatever. All right, so let's go ahead and highlight this and I'll fold it. And then we'll add in a link and let's create a new link. Okay? So you can just add it in our sites. And I'll call this page privacy. And then I'll do this again for this page right here, bold, and then this terms. There we go. And the last is disclosure. Awesome. There we go. Okay, now we have our links. So now we come here and we want to edit as HTML. There you go. Then you just take this up. There we go. There we go. There we go. Okay, copy BOM, come back over here, paste. And there we go. So now we have a nice-looking footer where everything's just added in subtly. Looks good. Maybe we can come over here in, get rid of this separator at there. Alright, so yeah, I think that looks nice. So now we have our privacy policy terms in disclosure. Let's go ahead and click on Publish. And there we go. So for a brand new blog, that's what I definitely would recommend starting, I'll just create something quick and simple to the point as your site develops over time, if you want to jump until they can create multiple widgets and have a variety of different pages links in the footer, you can go ahead and do that. But for a brand new site within that doesn't have a lot of content. I would just do something like this. Keep it super-duper, simple.
13. 13 Legal pages: Your legal pages. So now that we've set the legal pages in the footer, you do actually have to go ahead and create these pages because it's going to come up as page not found. So these are actually pages that you need to come in and publish it. So go to Pages, good, Add New. And then I just want you to make sure that the page that you're going to add. So for example, let's go to, let's go to the privacy policy here. Okay, So by default, WordPress comes with his own draft default privacy policy. And so the link that I use was privacy in the footer right here. So let's just go ahead and change this. Back out the URL Slug, make it privacy. And then we can just leave it like that. I'll click on publish. There we go. Okay, so for example, now reload to say and we have a privacy policy, okay? And so you just need to go through and do that for each one of those pages. You definitely need a privacy policy in a terms and terms of use page. Okay. And so the goal of the privacy policies just to disclose how your websites collected data and information. And then the terms is like, what are the terms of service that people agree to abide by when visiting your site. And then disclosure should be about anything that, you know, how your essay makes money, for example, with any conflicts of interests, that sort of thing would go under the disclosures. But at a minimum, you definitely need privacy in terms. That's pretty much it. And then you have to just go in here in manually creates these pages it yourself. Okay? So again, go back and go in here, Add New, and again, check the link, check the link that we created. So this was called terms, okay? And so it's called terms there. So you can collect terms, terms of service, okay? Terms, dash conditions. People also call this page, whatever. Okay. Then you have to create a page. And I have another guide on my website, creative pro that you can check out just Google legal pages, web say creative, bro. And you should be able to find it, how to write your legal pages and the real beginner's guide, again, I'm not a lawyer and that definitely want to consult with a legal expert as your business grows. But just to help you get started, you know, it just creates something. Again, it's not that important with a brand new website that has no content, but long-term, it's something that you definitely need to take care of. So just want you to be aware of that.
14. 14 Blog Design: Okay, so now it's time to edit our blogposts and the blog archive page. So I went ahead and add, just add it the about page and the Contact page to the menu and go ahead and do that too. So that looks good. So anyways, let's jump into the blog archive page. All right, so this is our blog archives. I think it looks quite nice just by default, but there are a couple of things that we can change. For example, like this text right here coming up. So anyways, go to customize. And under customize you have the or block section, okay? And so you have archive in single posts. So Archive means like you're slash blog page. So go to archive. Here is where you can change things. So for example, if you don't want to have the category displayed, just click that off. Author. You don't want the author displayed, just click that off and there you go. Okay, and so post content excerpt, full content. Unfortunately, you have to display an excerpt which is this. There's no other options, super full contour excerpt. So I'll just leave it as excerpt. And that's pretty much it. Okay, and so let's go ahead and click on publish. There we go. Awesome. Alright, so now we can edit this specific page itself. And so now I'm currently editing the slash blog page. And so right under here we have different Astra settings. So if you want to, again, if you want to have, have disabled the header or you want to remove the sidebar, you could do that. But personally, I like the way it looks natively right out of the box. I think that looks decent for a blog doesn't need to be super-duper complicated. Now, this section is being powered by your widget section. So again, go over here and go to Appearance and goats, you widgets in red over here, main sidebar, this is where you have everything over here. So what should go in the sidebar? Well, we definitely don't need a login buttons for our website here. And so we would just want to go here and we just want to remove a couple of different things. Really, the only things that I would personally, when including the sidebar, would be to make links to your archive pages, category pages. And that's a recent post categories and then any type of display advertising an email opt-in form. Okay. That sort of stuff is what I would incorporate. So let me just see how that looks now. Okay, so there we go. So you can have your categories are at their recent posts, email opt-in form right there, and advertisement, whatever you want. So that's roughly speaking how you adjust the blog page. Let's add breadcrumbs to our website. So breadcrumbs are really helpful for blog posts. It gives a nice site architecture to your website, helps search engine spiders kind of crawl and index different pages and just helps people understand where they are on your website. So for example, website creative pro.com right here, this, these are breadcrumbs, okay, so it's just helpful for the end user and it's not that difficult to add. So anyways, we're going to be adding breadcrumbs to a blog post. So the first thing that we need to do. Let's navigate back to a CEO tab. All right, so I wanna go to search appearance. And we want to go to breadcrumbs, and we want to enable breadcrumbs. There we go. Alright, so show blog page, Yep, bold, last page, bold, yep. Taxonomy to show in breadcrumbs. I want to show my categories, okay? So I want the, I want the categories to appear, okay? And so the categories appear there. And now we can go ahead and click on save changes. Now if we go back to our posts and reload it, you're going to notice that nothing changes. That's because we actually have to add the breadcrumb. So, okay, so let's go to Yoast bread crumbs all if Google use breadcrumbs should be the first result page. All right, so now the thing that we just need to grab is the short code, okay? And so right here, WP SEO, breadcrumb bone, right-click Copy. All right, so let's go ahead and add in a new plugin. So it's good appearance. And let's go to Plugins. Let's go to add new. All right, so let's go to PY, RC now PRC, where we go PR, why CWP? There we go. So go ahead and click on Install. There we are. And go ahead and click on Activate. Fantastic. So what this does is adds a little section right above the blog posts. So let's go to settings and then PR, YC, WP. Now constant at the top, copy and paste in our short code. There we go. Take that to be P-I-C-O was jumping to here. Boom, there we go. Okay, and click on save changes. All right, so let's just take a quick look. What's reload the page. All right, so that looks good. So let's get rid of all this other stuff. So now I'm going to go into customize. Oh, right in. So I want to go to blog and I want to go to Single Post. And it will say I want to hide the category. Let's say I want to hide the author. I want to hide the comments. There we go. So that looks, that looks quite nice. Okay, so let's go ahead and click on Publish. Okay, Good. All right, so now we're good to go. So now we could also add in Lake a disclosure. If you wanted to do that. You see some websites that are engaged in affiliate marketing always have like a disclosure at the top, you can say something like, we are reader supported, supported links, links to product we may earn, like we may, we may earn from links to products. Thanks for read more, read, read our disclosure for more. You. Something as simple as that. Let's go ahead and click on save changes, and let's go ahead and reload the same. Okay, so that looks terrible. So how do we, how do we adjust this? Okay, so first things first, we want to have some space, so we want to use something called break. Br slash. So we just have to break it up. That's called just a break tag. And so let's go ahead and click on save changes. And let's reload the site. And so what that does just gives it a little bit more space. Okay, so we can add in another one. B are slashed. There we go. And one underneath as well. Br slash. There we go. Br slash, there you go. And click on save changes. Let's eyeball this and just see how this is coming out. Okay, So I don't know how okay. So I kinda, I kinda like this one to be a little bit closer. Let's click on that. There we go. Great. Okay, So now I kinda want this text to be a little bit smaller, so we can add in something called a small tag, okay? And so we just do this small and then close the tag with slash small. And what that does is it makes the text smaller so it doesn't blend into the paragraph. We have seat. That looks really nice. Okay, So now it's like, well, it's all off to the left. There's any way we can make centre everything like, Sure, No problem. So again, which is a goat up top there and we type in sensor. Okay. Then come to the end and closed the whole thing off with sensor. So slash center. There we are. Okay. And then click on save changes. And then we can reload. And there you go. So now you have a nice little bread crumbs, add it to the top, gives and I say architecture, and you have this little disclosure. And so again, it's like if you want to link to your disclosure page, how do you do that? Well, you have to use HTML in here. Not too hard. Okay, I just showed you, I just showed you everyone how to do it. So it would just go to pages. Okay. You just jump into pages. Whoops, wrong one. Okay, let me just go to add new. Alright, so we'll just go here. We can type in like this closure. All right, let me bold is highlight this. Okay, let me put my website in. There we go. Boom. And then click here, edit as HTML. There we go. Then we can just take this right here. Just we don't need the paragraph, we just need this. Okay, the strong section right there. There we go. Oh, alright, there we go. Copy. And then we can come over here and we can just back this disclosure and just copy and paste everything in bone. So you have a strong tag right there. There we go. So click on save changes and reload. And now our disclosure is a linked appropriately to our disclosure page. Now please emphasize do not copy the P the paintings paragraph. We don't need that. Don't copy that in. Just copy just this middle section. And there you go. Okay, So not too technical. There's a little bit to it, a little couple of things you kinda need to understand what the break tags and center. Now it's super complicated, but like once you're done, you're done. And so now that looks really nice. So we have breadcrumbs and we have a nice little disclosure that say, hey, you know, whatever, you know, to comply with any laws and regulations. And there you go. Okay, So some blog posts, tips. So I want to just finish off this section with just covering broadly speaking, what, how to approach your blog. Okay, so first off, you have a blog archive page. I definitely recommend displaying the feature image on the blog post page. Now, to add a feature image is very simple. Let's go to Edit Post, and let's just jump into it. All right, so let's just minimize all of these so it's very easy to look at. Okay? So now underneath here you have something called feature image. Right here is where you can upload a feature image and what the feature image does. It associates the image with the blog post. Now it's really nice to do that within the blog, okay? Because that makes it more visually interesting and easier for people just to navigate the website quickly and easily with these specific images. It's also helpful because at the very bottom right here against you have images being displayed or feature images. But as you notice me, for me personally, I don't have feature images on the actual piece of content and I recommend you do the same because you know this the blog post. I mean, if you want, It's totally up to you, but I personally don't like to have the image because just pushes all the content down, it's not particularly helpful. And so again, we can just jump in and go to the blog post. And then right over here, you can go to astro settings and you can disable, disable the feature image, okay, click on update. And so what that will do is it's only Hidden, okay, It's only hit and when people actually open up the blog posts, but it's still available when people are on the slash blog page. So we have a nice visual, appealing blog archive. And then when people actually open up the piece of content, boom, they get right into the content as well. Okay, So anyways, now it's you adjust the texts and whatnot within a blog post is simple. Okay, again, with an Azure, you have to go to customize. And then you have to go to Global and then topography, okay? So base topography right here. And so right here's the font size. If you want to make the font size bigger, you can do that. If you want to change the line, hang in separate things just a little bit more to make it too much. Just a little bit. That's still too much. We'll come down to there. Okay. Something like that, whatever. Okay. And so you can kinda just play around with the way the content looks as you want. So maybe I'll make it 17. Okay, that's nice and big, nice and readable, et cetera. So let me go ahead and click on Publish o k. All right, so that's going to occur. You adjust the text. Now with blogging, you have to organize everything under a category. It definitely don't recommend uncategorized. And so when you publish a piece of content right over here, It's come down here. Categories. You can add a new category. I definitely recommend it with a blog. Just start off with four categories. That's it only for pick four. So I get this is a coffee blog. I would pick like, you know, buying guides, brewing guides, facts and then something else, you know, our equipment, whatever, you know, pick four categories that you can fill out with constant quickly and easily. You don't want to, you don't want to like create a different category for every single blog post. That's crazy. Yeah, like with website crave pro.com, I only have seven categories on this. Websites like website builders, domain names, web hosting, content, marketing, that sort of thing. So things that are keyword rich and relevant to the website, That's what you want, okay, like one to two word long category titles. And that's all you have to do. Okay? And so let's just come over here. Let's just jump back in here. Another thing you can do too is go into your posts and go into your categories. And so right under here categories, this is where you have all your categories and you can add new categories from here as well as within the blog post section. So anyways, for example, if I had like coffee beans, I'll create a new category. And then I'll call this beans whatever. Click on add new category. I can open this up. And then like here, I can come in here in like heavy description of this specific category if I want. And then down here with Yoast, you can change the way that this actually looks. Say, coffee bean archives. That's okay. So like the best ick, all, all content, all content related are all about, are all about coffee beans, whatever you know, you can give it a nice SEO title. And so just being a category archive page, blah, blah, blah, like very robotic. You have a little bit more personality, okay? And that's all you have to do with regards to your categories, etc.
15. 15 Blog Post Structure: So I went ahead and update the category from uncategorized to coffee beans. Okay, so what I did functionally is we just navigate, minimize style, permalink. There we go. Categories, okay, So I just have it checked off as coffee bean and also with categories, make sure to add it to one category only you don't want to add a piece of content to 23 categories, one blog post for one category. And so now if we click on coffee beans right there, boom. Okay, so we're now we're on D category page for this. Let me just reload this page. There we go. Coffee beans description goes here. Okay, So this is being powered by this right here. And so like you can hyperlink things as you want, et cetera. And so this is really helpful because now when people visit your site, they can click on this category than there are on this dedicated page is only related to this category. And you can create a nice hopeful description for this category page right there. Now in terms of the actual content for the blog, Don't forget, like you're using the WordPress editor, so you have access to all the different blocks that we've been using this tutorial. And so I definitely make sure to break your content up into different sections. Okay, So for example, I make that an H2 right there and you can check the structure of your blog posts up top there, see how it says title H2. Okay, and so pretend like this is another piece of concentrate there. And we'll just say I'm going to break this up and make this maybe its own little section right here. So, okay, I'll take this and I'll make this an H3. So heading then H3, okay? And then we can take a look at this in so you just want to make sure that your document outline has a logical structure. You don't want to have this H2, then this is one. You know, you don't wanna do that. So H2 again stands for header. Okay, so let's go ahead and update that. Let's see how that looks. Me reload the say, yeah, there we go. Okay, so that's how you kind of break things up with different specific titles. Now, because we installed stackable, we also get access to a water really helpful block. So let me go ahead and add one of those blocks I really like. So we come over here, you can type in something called a feature, and then we have a feature box right here. And so this is really helpful for like affiliate marketing. And so I'll just say like product title goes here, then we have a nice description and you can add an image of the product over there. So I can make this basic style. We can come down here and just change things as you see fit. Okay, so come over here to cell, let me come down here to container. There we go. So border-radius shadow outline. And I think that looks really nice. And so I'll just click an image and let's just add a random picture. I'll add this one in. Okay, let me go ahead and select that. And Okay, So that looks good. And we come here to the image. Okay, so let me go make that square or circle or a blob, whatever you wanna do. So anyways, let me go ahead and click on update. Okay, It's reload the page. Okay, so there we go. So now we have a nice little product box. Great for like recommending like products and services by having something really, really stand out. Now one last little thing that we can do is we can also add in related posts. And so let me just quickly go back to your website, create a product, come and just show you what I mean. So if we go here and we just open up this website builder blog posts I have. So if we come down to the bottom here, this is related blog post. To add that, I use something called jetpack, which is a plugin by WordPress. So let's just go to plug-ins. And let's go to add new OSEP in. Jetpack up there it is jetpacks right there. Jetpacks already active. Okay. So make sure you have jetpack installed. And so we come over here and you're going to have to set up jetpack on your own. So let me go ahead and do that. All right. So let me go ahead and approve. Okay. So once you get everything set up a jetpack, you're just gonna have to create a WordPress account. You will probably be presented with a page where you can like paid upgrade, et cetera. But like once you just create an account, jetpack is already installed. So anyways, you should just navigate back to your website. Jetpack will be good to go. And all you do is click on settings. Okay, and then we want to go to, I believe it's traffic. There we go. Yep. Traffic. Then related posts. Then you want it just make sure to turn this on. That's it. Okay? And so here we go. The really opposed who will take this? And we want to highlight related posts. And we also want to show the feature image that goes along with it. That's it. Okay. All you have to do just installed jetpack, navigate to traffic. Click this button, click these buttons on. And as your site grows and has content, this will just be automatically populated without you having to do anything. Okay? And so then you'll have really nice, attractive blogposts located at the bottom of your blog posts. Okay, and so that really helps. Internal linking gives people something else to click on, etc. Now, one last little thing I just want to bring up is because we also have an additional plugin. Let me navigate to where is that sittings, there we go. Pr YC. One cool thing about this is we can also just add content to the bottom. So if you want to throw in like an Adsense ad here, then all and Adsense ad will appear at the bottom of every single blog post. Or you can add in an opt-in form or, you know, Amazon Associates display ad, whatever. So anyways, let me go here and let me just add a form really quick just to show you what it's like. So I'm going to do inline. All right, so come down here, I'll add in a Mills right here. Okay, that looks good. Let me go to embed and let me go to HTML. Go ahead and copy, take that's all right, so let me navigate to this content bottom. Copy and paste that in. Literally like that, just the HTML. Go ahead and click Save. All right, so now if we reload the blog post, we're going to have an email opt-in form sitting at the bottom of every single blog posts. And so that's what this, that's why I love this book. It's very, very simple in underrated because it's just so helpful. You can put stuff, read the top and the bottom of your blog post with ease. And that is, it's in, that's how I would recommend you go about customizing your blog posts quickly and easily. So there's not much to it. Okay, so that's how you install breadcrumbs. That's how you add this little disclosure underneath h2, h3. Title tags take advantage of the different blocks you have with your WordPress editor and stackable add in related blog posts at the bottom. And that's also how you add in like an email opt-in form or an ad at the bottom of your blog posts.
16. 16 Analytics and Search Console: It's only in Google Analytics on your website. So Google Analytics is what's going to tell you what pages are getting viewed, how long people spend on your site, et cetera. And once you have analytics installed, then you're able to then verify your website with Search Engine console where it is, okay? And so first step is to install Analytics. Then you can come over here and log in and verify your website and it'll, it'll detect that you have analytics installed. And so then you'll be able to guess that with search console, just make sure you use the same email when you're wagging its analytics that you are With Google Search Console. Anyways, now I'm not going to walk you through how to get set up and analytics. There's other tutorials on now, so we're going to just go and get right to the point once you get to this section where you actually have the script, you want to copy it and then it says you have to put it in the head of every web page you want to measure. Okay, So with Astra, how the heck do you do that? Very easy. We have to go to Plugins again. And the plugin that we're going to be installing, what's go to add new. Okay, now we want to type in header and footer, okay? Very, very simple plug-in. There we go, 1 million plus activations. There we go. It's install it and click on activate. All right, great, So navigate over to settings and go to insert headers and footers. And now we want to insert the script and the header. Why? Because it tells us too literally. And so this is just going to allow us add Google Analytics. There we go. Then go ahead and click on Save right there. And that's it. Okay, and so now Google Analytics is installed, give it a little bit of time for it to start collecting information, and then that's it. Okay, Then you're ready and you're going to start getting data from Google Analytics. And then you can go ahead and go over to Google Search Console, okay? And then once you go into Search Console over here, you can click on Start now, then all you have to do is verify your website. So you just have to put in the website and make sure you're logging with the same email. Just put in your domain name here, it'll detect that you have analytics installed and then it will verify the property that way in Search Console is very helpful because it tells you how your content is ranking within Google and what, how much impressions you're getting, et cetera. And so it's very helpful. So that's why you want to go ahead and install Analytics. And so that is it.
17. 17 conclusion: Okay, that's it for this course and how to design a website and blog with the Astra Theme. I hope you found it really helpful and I hope you have a strong understanding about how to use asteroids who create any type of website you wants. Anyways, I just wanted to say a quick thank you for enrolling and have a good day. Bye bye.
 David Utke, Web Pro and YouTuber