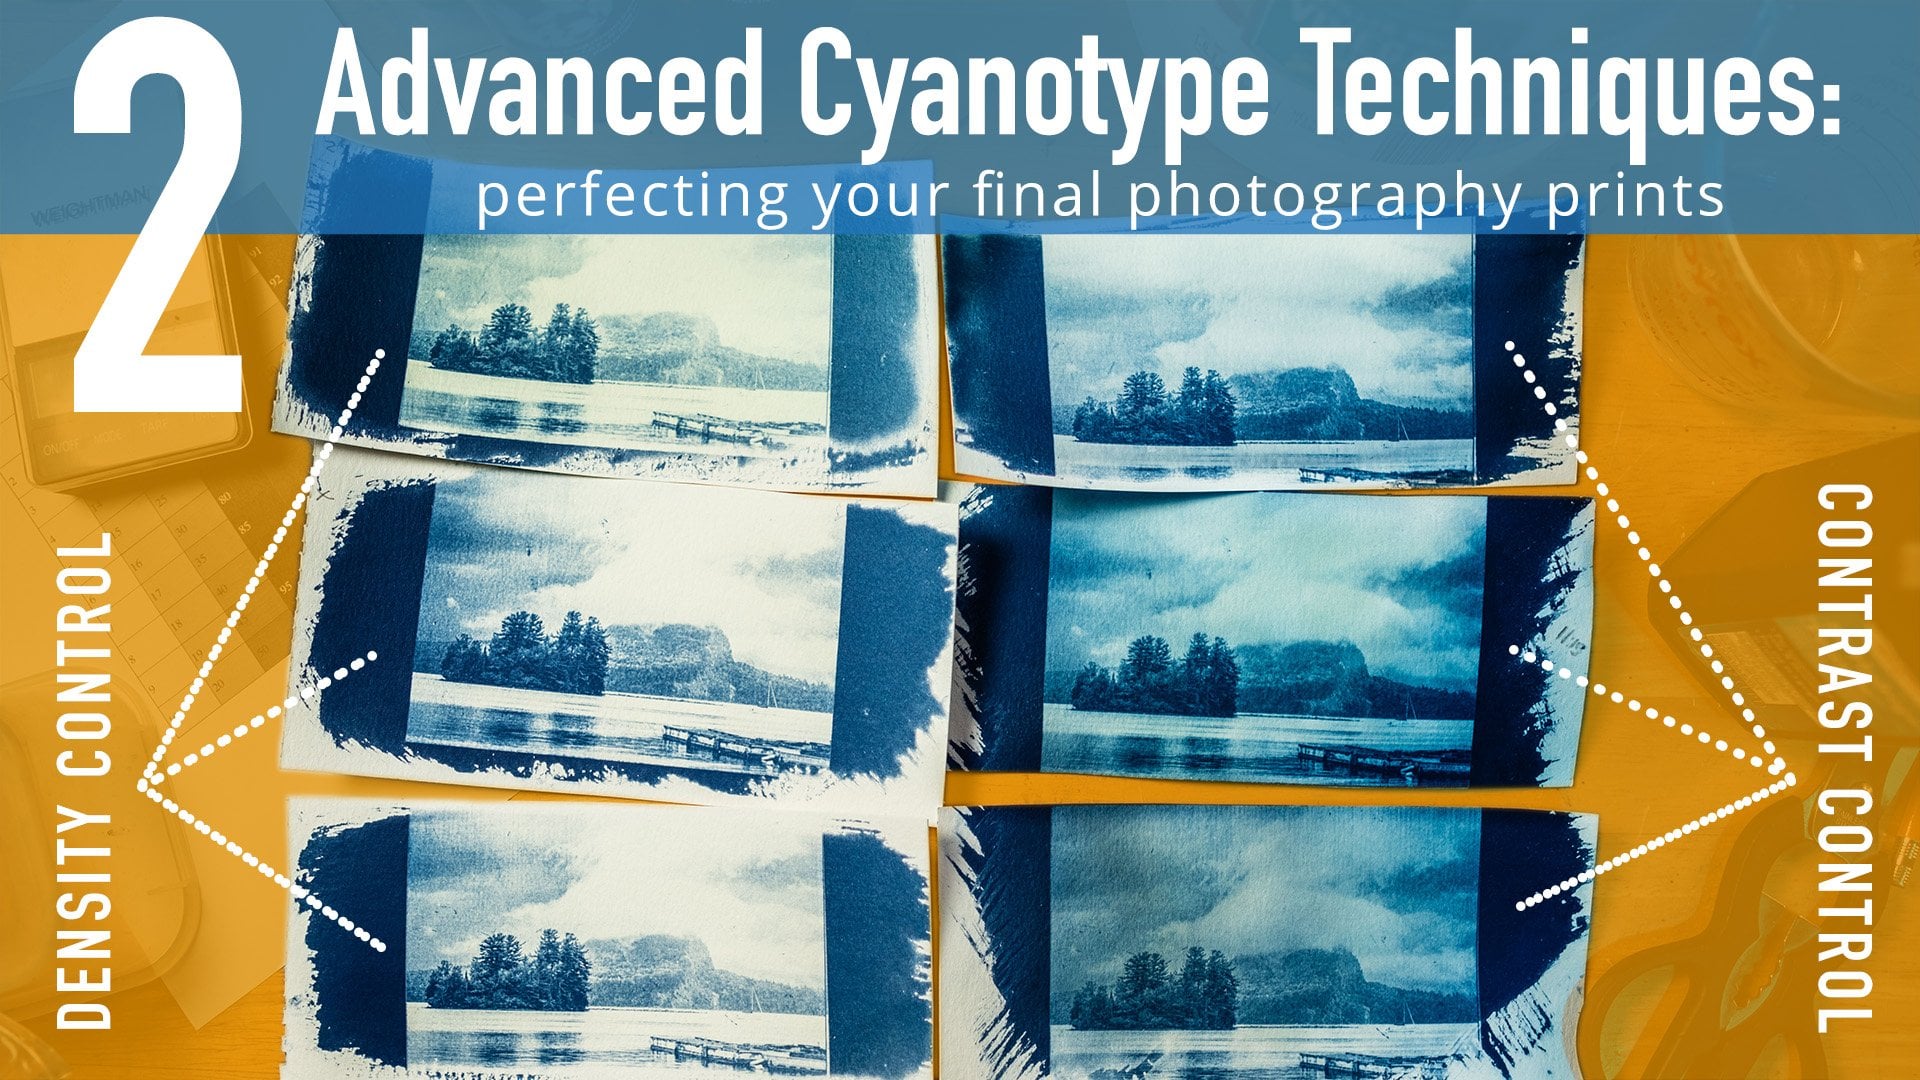
Transcripts
1. Intro: Hi there, my name is Ben. I'm an artist and educator and welcome to this class, sinusoid photography, make your own indoor UV printer. In his class, we're going to be going through two different methods of making an indoor UV printer for your Sina type photography. Why would you want to make an indoor UV printer? Well, just think about all the times that it's been raining, cloudy, freezing cold, the wrong time of year for you to be doing sanitized photography, you need that UV light. I love getting outside. I love the process. That Santa type allows you to be outside while doing the process. But there's a lot of times when the weather just isn't cooperating with me wanting to print or maybe it's just my only time to print as that night. And so I'm not able to do it. Well, having an indoor UV printer can fix that. And they're actually pretty easy to put together and very affordable. So in this class we're going to be walking through two different printers that will sort of meet different needs depending on what you are desiring. The first one is really simple, just using a bulb in a standard clamp on like the other one is going to require a bit more putting together, but it puts out a lot of light and it puts it out really early even. We're gonna get into the details. We're going to walk through how to do it step-by-step. And you'll be able to follow along so that at the end, you will have your own UV printer. So you can be making Santa type photography anytime you want. In the next class, we're going to look at the supplies you'll need. I'll see you there.
2. Supplies: Hey there and welcome back. In this video, we are going to look at the supplies you'll need for these two methods of indoor UV printers. And these two printers, I would break into two categories. First, one is very, very easy to put together, but there's some drawbacks in terms of functionality. And the other one is harder to put together. It's a little more expensive, but you're gonna get great results that are very consistent. So it's up to you after looking at the supply as it's needed and after seeing what it takes to put together to decide for yourself which one will fit your needs best. I'll say I started with the most basic one. And from there then I realized I really wanted something better. And so I wound up with the second one, which is a little more involved. So let's talk about the easiest 1 first. I have it right here. This is simply a little utility clamp on work-life frame that I have. And the bulb is what matters. So this is a grow light that I ordered off of Amazon, 30 watts. And the most important thing is that it puts out UV light. So these little lights have certainly become far more accessible and they're really not expensive at all. This one I got for about 12 bucks, showed up in a day or two on my doorstep and puts out a pretty amazing amount of light. The drawback is, you know, these are from companies over in China. There's really no way to be certain that you're getting a certain quality unless you're willing to spend a lot more. But to me, the whole point of this method of printing is that it's very cheap, very easy to throw it together. That's why I just have one of these cheap clamp on lights that you can get for a few bucks at Home Depot. And then that's why I decided to go with this light. And now I will have this specific light or as close as I can find it on Amazon again, linked in the comments below. But there's a million different options you could try. So a little bit of this is experimentation of finding what's easy for you to get a hold of. I know I've seen form factors of these kinds of lights now that are in bars instead of as a screw in bulb. So maybe that would work. And I've also seen that ones of these bulbs that are up to like a 100 watts. So they're going to put up more power, which can be a good, It's up to you how much you want to spend. But the most important thing again, is that you see that it says it puts out UV light. Now when I first started out trying to do indoor printing with sanitize, it was before these kinda lights were readily available. And it was actually, what I wind up having to do was get one of those really large four-foot shop lights with the fluorescent tubing. I got black light tubing in there. And at the end of the day and then I'm being really, really slow print because the amount of UV getting put out by them was not that much. It was really inconvenient because of the size. But now all that has been reduced down to these really small bulbs that can go into any outlet. And it's just so much easier. And so. That's really all you'll need for this method. The only other thing I would say is you're going to need somewhere to clip this where you can get this a few inches above your sino type print. And you'll see the method that I use once we get there. Something like a chair or a small school or something like that will work well. Alright, so that's method one. Very simple, right? It's really just one thing to order. You probably have something like this at home already. Okay, now onto method two, which is definitely more involved. So in a break this out with kind of a one piece at a time and then tell you how it fits together. In the next video, I'll actually show you how it's going to fit together. So we'll go through a step-by-step, don't worry. So first we have the LED light tape. Let me open this up for you. We have a power cord and then the UV LED light themself that comes in this little bag. Nice and sealed. Practice open. And we have this nice little neat role of LED lights. And let me read off what this is. This is a UV black light strip, 60 watts, 12 volt. And if I remember right, is about 16 feet of it. So once again, I will have this specific item linked to Amazon where I bought it from. But there's gonna be a whole lot of variety of other options you can buy. Really. Most important thing, of course, is that it says this is putting out UV light. A lot of times it'll get talked about in terms of black light. And then two other things you should be looking for are the wattage and the specific nanometers that is putting out. Ok, so first wattage, you can buy these in lower power output, so you can get them in. And I think 30 watt output, which probably would work fine. But basically what that's gonna do is it's putting out less power of lightens. So you're going to have it longer print times. Something like this. This is 60 watts, actually puts out quite a bit of power. And so we're going to be getting close to like 10-minute print times, which is really nice that it doesn't take too long. And the second thing is the specific nanometers wavelength. And this specific item puts out between 354 or five nanometers, which is right at the upper end of the UV spectrum. And the only reason I'm sharing that with you is to make sure that you get something that's within that range. There's a broader range of UV light. I think it would probably work at the same time adds one more variable that you don't want to have to mess with. So if you're looking for something, trying to get it with that 395 to four or five nanometers range. And you're going to be getting the same type of light that I'm showing you here. Ok, so we have the light or not just going to dangle this over the print, we need a way to organize it to get it into a flat plane. So to accomplish that, I got this. Okay. So this, I'll admit might be a little bit overkill. It's overkill because I went in for the ultra heavy duty. I got large enough that can print a 11 by 17 piece of paper in here and fit a frame that size in here. So if your needs are smaller than meant, then you can definitely go with something smaller. The other thing to consider is the height. Now you can see the height here. We're talking about 12 inches or so. You don't want it so high that you're losing a lot of light power because of the distance it has traveled. But you don't want to solo that the, the lights are practically right on top of the paper. You need some gap there for the lights to get diffused. So somewhere in this sweet spot, you know, 1218 inches is really where you want to be. The reason I opted for something heavier like that was because I didn't want the sides or the top to be flexing too much and a lot of the standard like $5 totes that you can get from any store. There's a lot of flex in all the plastic. So aptly for something that isn't going to flex. But honestly, I think the flexible ones would work for awhile. You know, you might have to do some repairs, occasionally fix some glue and stuff like that. But I think if you have something like that on hand, it would probably work. The other thing to consider is the color. And this is not a deal breaker by any means, but I had the option of choosing gray, black, or white. And I chose white because I want as much of that light reflecting around the inside as possible so that it's really nice in the fused and the white sides are going to do that for me. Next. I'm going to use a combination of the, these are built-in sticky LED tape. So I'm going to use that sticker quality to stick it to where I want. But I'm also going to use some hot glue to reinforce it. You are really worried about it falling off or it doesn't seem like it's going to stay, you would opt for something like a plastics glue that is really going to make sure stuff stays permanently. And then last thing to consider is, as I am mounting this to the lid of that box, I'm going to be kind of weaving it back and forth. And, you know, you can do that without cutting this at all if you want to. But you're going to lose some of the light because I'm the turns the table bend and it's gonna be pointed to the side as opposed to pointed straight down. So to avoid that, to make as much use of these lights as possible, I got something else. These are little pre-made LED light connector strips. And essentially what this allows you to do with this kinda tape. If you can see it, is there's little contexts right in the middle, all along this tape. There's those copper contexts that you can cut. And then you can use these in order to connect them back together. So I'm going to be able to do straight strips of this tape and then use these to make the bends that I need. You'll see how it works later. Don't worry. Just note that these are optional. This is something that maybe complicates the process a little bit, but I'm gonna like the result for myself better. And it's up to you if you think it's worth it at the end. Okay, and last but not least, you're going to need the standard assign genotype chemistry. If you haven't done the sine attack before, I really recommend you check out my other classes. I have Santo type 101, one hundred two hundred three, that walks you through making your first son print, all the way through mixing your own chemistry, dealing with paper and making negatives, printing from negatives. All of that type of stuff is covered in the earlier classes. I'm going to really graze over that stuff in this class because really here were all about building these UV printers. But just as a refresher, you're going to want something you can get pre-coded papers like this that are really easy to deal with and they'll certainly work in these printers. You can also get the Royal chemicals like this and mix it yourself so that you'll end up with some your own papers like this that you're going to be able to use. Of course would both methods, you're going to need some version of a frame that you're going to be able to sound together your subject with the paper you're using. And depending on the size of the box you're using, naturally it has to fit inside the box. Other than that, you might need a few assorted items, tape, a drill or something sharp to maybe drill a hole into the box where you're using little standard household items as well. And you'll see how it all works together in the coming video. If something is unclear or you're not sure what it is that I said, just check out the description of this class and you'll see the links to buy the specific items you need or to be able to read more and understand what it is you need to complete these printers. In next video, we're actually going to start with building the easiest version of this UV printer. So let's go ahead and get started. I'm excited to start printing with you inside.
3. Grow Light Method: In this video, we're going to actually walk through UV printer, what it will take to setup and make a print with it. Now, really can't get any easier. I already have the UV bulb in here. And then you'll see I have this contraction setup. This is actually one of my tripods and have a setup on top of the table. Of course, you can use something like a stool, a chair, and a thing that you can clamp along the edge of at different heights. And it's really convenient to be able to use something like this. Of course, you don't have to set it up on the table. You could set it down on the floor. There's really no issue with that. The one thing to keep in mind is that this is the area where this method could be a little bit more finicky. And that is because the specific height above the paper that you are printing will change the amount of time. One of the advantages to printing inside is consistency. But if every time you're done printing, you take this off and the next time you clamp it again, it's going to be a little bit of a different height. You can see mine is wanting to like angles sideways a little so I have to get it in place and make it stay there. It that's all gonna make things a little bit less consistent. So that's not a deal breaker. You know, it can be as simple as you making a mark on the leg where you clamp your light. It can be as simple as saying, you know what, I'm gonna clamp it in a way that it's not going to move up here. And then, you know, get a box or something and prop this up. So kinda move things the other direction so that the light is always at the same spot. And you have a standard way of propping up your, propping up your print so that it will be at the same spot. There's lots of ways you could work around and make it so that small hurdle isn't that big of a deal, but you should know about it ahead of time. In my case, I'm not planning on using this printer very much, if at all. And so I'm just going to clamp it to the side of the leg of the way I had it before. So before we get anything ready, let's just go ahead and turn it on to see what the flow of the light looks like. Alright? And you can see it's lighting up this whole area. And this is an example of another area where this specific method, we'll take a little bit of playing things by you're figuring things out. Then the method we're going to be going over later, because the fall off of the light, you need to make sure that it is covering the entire paper. If you put it too high, you'll certainly cover everything, but you're gonna make your prints take a lot longer. If you have a too low, you're gonna kinda cut off the printing on the edge of the print. For me, I'm having it somewhere in here. It looks like it's about six inches from the surface. That's where I'm going to start. It kinda seems like everything is pretty well covered in the center of this frame. Let me turn this off for now. It's, it's bright. Alright, so now we need to just prepare our print. And the first thing we're gonna do with this UV light is make a test strip, because right now we have no idea of knowing how long it is going to take to make a standard print. So we need to set up for a test print. And then again, the advantage of doing indoor if all of our variables stay the same is that from now on you'll know if you want to make a print, it will take this much time. No more looking at the weather and, and we're looking at the time of day. This is great. So let's get set up and make a print. Open up the back of my frame. Glass is a little dirty, but it's good enough for printing. Alright, 4D printing. Today we are going to be doing a print of this nice leaf. Put it right in the center. Take my prepared Sina type paper, put it down. But this all back together and get it nice and sandwiched. And so now we need to setup for a test print. And if you remember, the method for a test print is really very simple. You're gonna take something like a thick piece of cardboard that's not going to let any light through. And we're going to cover up everything except for one little portion of the print k. So you can see, we don't have to worry about what's going on the edge, that doesn't matter. So right up at the top here I'm leaving one little sliver. Okay. And so we pick an amount of time, let's say three minutes. And after three minutes, I'm going to then move this down. And we're going to print for another three minutes. So what happens then is that first section is now being exposed for six minutes. Sx, second section being exposed for three minutes. After three more minutes than I move it down once more. And you keep going down the full length of the print. And so you end up with kind of this, this nicely delineated gradient of three minute increments. And you can look and see exactly what type of print or what color you prefer. So let's go ahead and do that. We're going to use three minute increments for this and hope for the best. Alright, so we just did a test strip of three minute increments for 15 minutes. Now we need to take this and develop it just in regular tap water as usual. So let's go do that. Let's take a look at what we got. Alright, so as you can see, that test script did not work at all. So let me show you exactly what I did to fix that. Okay. So that test strip was a failure. Let me take you through the progress of what I noticed and how I went about fixing it for the final version. And full disclaimer, I made some mistakes in here and I'll explain to you what they are because there were some rookie mistakes that I think I can help you avoid. So the first test strip we made ended up like this and as you can see, there's almost nothing there. There was a slight mark, but nothing that's useful at all. And that was basically 15 minutes of exposure in three in three minute increments across the test strip. And so from that and we see that 15 minutes is nearly enough. And so after doing that, I went back to the drawing board. First thing I did was I actually lowered the light by a couple more inches. So we're talking, you know, 2.53 inches from the surface. I know that's getting into a sort of a tight ring of light, which means the edges aren't going to be getting perfectly exposed. But I needed to keep that exposure time down as much as possible. So getting it closer is going to shorten the exposure time a bit. So then I went on to my next test strip and that came out like this. Okay. So you can see I did 15 minute increments and I did three increments. So 153045. And so this seems pretty clear cut. 15 obviously is nowhere near enough, and the 30 is doing better. 45 is definitely the best in terms of the richness of the blue and everything is looking really good. However, I made, this is where I made my real rookie mistake. As I was developing this up in the water. I developed it for about five minutes, just under running water like normal. And the 30-minute and 45 looked pretty much the same. And since I don't want to have 15 extra minutes for no good reason, I decided that a 30-minute exposure would probably be pretty good. However, as we look at it now, it's pretty easy to see that there's a significant difference between the center portion right here and the end portion, which is 30 minutes and 45 minutes or so. I couldn't see that because remember that as a print develops, it's still not fully developed. It takes oxidation in order for it to reach its final blue stage, that really rich blue. But there is a way to get around that to speed up that process. Normally it takes a couple of days if you just let it air dry. But you can speed up that process with some trusty old hydrogen peroxide. Okay. Just the standard stuff from a CVS or something like that. And so I would recommend to you when you're doing test strips, keeps some of that handy. So as soon as you develop it normally, you just squirt a little bit of that on there. It doesn't take much at all, and it instantly turns into its final color of blue if it makes it much better to grade your test strip. So let's look at the mistake I made first, right. So I said 30 minutes. I was looking at that center section and I didn't notice enough of a difference. So I went ahead and did a 30-minute exposure and that ended up looking pretty much exactly like this, which is what you would expect. Okay, you can see eight is definitely under developed, not that rich blue. So I went back to my test strip. At that point. I could see the clear difference between 30 minutes and 45 minutes. 45 looks great. So I went back to my printer once again, put it under there, that exactly the same process except that it for 45 minutes. And now I finally have this result. Okay? And so what you'll see is the center is that nice rich blue, but the edges do fall off, right? The exposure is not even across the whole thing. That is sort of the natural disadvantage of this style of printing. You have a pretty small light source. We have a pretty close to the surface of the print. And so the edges aren't going to be quite as dark. There's not as much light hitting that area. But at the same time, once I figured this out, alright, now I know it's a 45-minute print. Every time I want to print something like this. If I was going to use a paper negative, it would be longer because the surface of the negative is going to block some of that light as well. So I'd have to compensate for that. But it still allows you to print inside when it's rainy, freezing, cold, cloudy night, all of those things. So if this is the amount of sort of investment you want to make into indoor printing. This will work, especially if you're not doing prints any larger than this. Once you get to eight by ten or something like that, you're going to need to get a larger light source. One possible option would be to go for a stronger power of light, right? I have a 30 watt bulb. They make them in 60, they make them and a 100. So those are other options to kind of up your UV light output. So this has been the first easier method doing UV printing. Now that we've worked out the kinks is going to be really easy to move forward with this indoor printer. Now in the next video, we're going to talk through the upgraded version using that UV LED tape. That's going to allow us to do larger prints, gonna give us more surface area of the light, have a more output of that light. So we're gonna go ahead and jump right in to that process of building that, figuring out how to use it. And you'll join me along the way. So I'll see you then.
4. LED Tape Method: Hey there and welcome back. In this video we are going to be tackling the second of the indoor UV printers, which is a little more complicated, a little bit more expensive, but going to give us better results in the long run. So this seems like something that's up your alley. I recommend following along with this video. I'm going to be going through step-by-step what it takes to build us. So we can see I have the supplies out, I have my LED tape, I have my container, my plastic box right here. I've got the lid, I've turned it upside down, and I'm good to go. So the first thing I wanna do is actually figure out how many strips of this LED tape I want to make. How many do I want? So I have evenly spaced lighting and now this is something that I'm going to guess that many of you aren't going to have the exact same boxes. So I'm not going to stress about giving you the exact dimensions I have. I will say I'm planning to do 14 in strips of LED tape. And I actually have 14 pieces of that that I'm going to spread out three quarters of an inch. So every three-quarters of an inch, I have another strip of LED tape. Now with your box. You're going to have to adjust that probably in that's okay. The idea is you want it pretty evenly spaced so that at the end, you end up with even distribution of these, of this LED tape. Okay, so one disclaimer here is that I am doing some extra steps that aren't a 100% necessary. It's the way that I want to build mine, but you could take some shortcuts and I think wind up with a pretty good product. And so one of those is I am choosing to be cutting my LED tape and using these connectors so that I get every inch of my, my LAD down flat. So it's using as much power as possible. But if you didn't want to go through the cutting and they're reattaching and all that process. You could just take this tape, put it down flat, and then bend it around and come back the other way. I don't think there's anything wrong with that. I think that eventually maybe there would be some stress on the LEDs. Maybe they won't stick quite as well. But honestly, if you want to go that route, I couldn't blame EA and I have tested that out myself and it does work. But what I'm going to be doing is taking this tape and cutting it. And you can't just cut it anywhere on this type of tape. You wanna make sure that you get taped that's cuttable. And there's little lines in this case marked about every two inches on this particular tape. And I can cut there and that spot, there's little copper contacts. Let me see if I can get this to focus there. Okay. There's little copper contacts right there at the line and say you're cutting those contacts apart. And that allows you to then attach these little connectors. These little connectors just kinda pop open. Hypothetically, there we go. Ok. And again, inside all it is really is just pre-done wiring for you. And the end of the ellie tape, LED tape sits right in there and makes contact and you seal it up so it's nice and tight and so you'll see how I'm going to fit it all together. But again, this will allow me to have 14 separated strips and then I reconnect them with this wire. I'm going to be using the built-in stickiness of this tape to do the initial sticking. And then after that I might touch it up with some of my own hot glue just to make sure nothing's gonna move or get caught on anything and stuff like that. I'm going to let you watch me doing this slowly through the first one and then we'll speed up because it'll be kind of a repetitive process after that. The first little section, I actually already cut off. Again. I'm cutting my 14 inches about. And I cut right across the LED and just so we're all sure that it's all working, we can turn this on and yet there's the LED. Ok, so now going to be making sure this is the right length. Yes. I'm going to cut my next length of the LAD. Take again, just cutting this. Here. I have my piece that I'm going to attach and let's just go through the process of attaching one of these. So you can see, I have noticed that when attaching these connectors, It is a good idea to go ahead and pull back the sticky part on the underside. That way you can get to the contacts on both sides. So I'm gonna go ahead and attach this and you kind of slide in. Slide it in. And you really just need to make sure everything is touching. Okay? Now, catching this side to the original side, make sure everything is facing the same way. You don't want to accidentally flipped things over. Same thing. Make sure I have my tape. They're sliding this in, kind of slides underneath the contacts. There we go. It's touching. And you just wanna make sure this seals up. So it's not going anywhere. There's like little little pins that kinda hold this in place so they're not going to slide down. So now let's just make sure that's a good connection. Okay, so my original section of course is lit, but then on the other side of that, I also have the connection. Okay, that's perfect. Unplug this. Move this out of the way. Alright, so again, let's take a closer look at now how I'm going to connect this to this live. Okay, I've already measured out 14 inches across and 14 dots across the top and the bottom. So I'm just going to be kind of splitting the difference and putting these down in the middle, like so. And I'm sure there's not too much dust or dirt or anything like that on there. And go ahead and pull the adhesive backing off and go ahead and stick that down. As with anything, it's kinda good to start from the center and then work your way out. And I'm just gonna go ahead and kind of data down. I can always go back and push this down better later. But getting it kinda in-place roughly now. Okay, and I'm going to twist this around, right? And then I will come back the other way once I get some more attached. And at the end, what I plan to do is go back and at these connectors, get some hot glue on them. Maybe get some hot glue on this loop up here so that none of us is flopping around, are getting in the way. And that's basically the process. So I'm gonna go ahead and speed up through this so that you don't have to watch me do the boring work. And then at the end you'll kinda see what the end results are. So I'm going to go ahead and jump right into that. Ok. Alright. So that was it. It took me about 15 minutes maybe to cut and connect all these. And we have the final version right here. Now, I'm not gonna bore you with the hot glowing process that I am going to do just to make sure these don't eventually pop up. I do see that some of the sticking just because of the connectors pull up the stickiness from the plastic. It does seem like eventually it might work its way loose. So if you're doing this, I would recommend probably going ahead and doing the hot glowing process so that everything gets held down a little extra securely. The last step that I'm going to do, actually drill a small hole in the top of this so I can put my power connector through and easily connect and disconnect from the top of the box. So let me go grab my drill real quick. Not quite big enough. That goes through. And we're all set. Which means once I plug this in, it will light up. Alright. So there you have it that was building the actual light element. From here on out, we're just messing with psi genotype, starting to learn the specifics of this particular printing box. So we're going to start with some, you know, some test strip printing to find out how long it takes to print something and then move on to our final print with this indoor UV light printer. So I'm excited to get to this next step. Let's go to the test strip. So get out your signer type supplies now. Alright, so now we have this second version of our indoor UV printing box ready to go. All that's left for us is to do some initial testing. And then we'll be ready to print. And actually, for me today is kinda of a overcast rainy day. And so this is the perfect example of why I would want this printing box. So let's go ahead and get started. Ok, so what we have here is my frame. This is just a fairly cheap one familiar craft store, Nothing special. The only thing to remember again with a frame is that it shouldn't be specially treated glass. Sometimes you can get UV resistant plexi or glass, especially in higher end frames. So something cheap is actually pretty good. So we have this frame and I actually bought this one specifically to fit inside the printing box that I had just made. Let's open this up and we'll get our Print Setup. If you have like a little sheet of foam or something in your frame, I'd actually recommend leaving that in there. And sometimes that can help push the, your plant or even your negative more firmly against the paper you're printing on. Test strip and I'll be using the same plant will use the other day. Centre. Line it up. You can see I've got everything, all the light setup. And it's really as simple as just putting this down on the inside. Like so. Alright, so now I'm going to need to do is actually do the test strip aspect of this, which is I need to cover up most of it and then be doing increments. I know that this is definitely more powerful than our other light. So what I'm going to want to do it this is do probably shorter increments. I actually think the three minute increments should give us a good gauge of how long of an exposure to do so, I'm going to use three minute increments, which means every times three minutes passes. I'm gonna open this up, move the little piece of cardboard over another inch or so. And so at the end I'll have even 3691215 minute gauges for what each of those exposures looks like. And then I'll be able to say what a finished exposure should be for this particular box. Again, this is for my box. Your box may vary depending on the specific dimensions, all that type of stuff, even the color of the box may make a difference. So make sure you experiment with your up. I'm gonna go ahead and get started and I'll see you on the other side. Oh, alright, welcome back. Our test strip is now done. I haven't rinsed the saw. I even used the hydrogen peroxide to speed up the oxidation process. So we have our finished print now this is not even dry it, so it will look a little bit different. Ones that completely dries. But my my reading this is looking like 369121515 is still noticeably darker than the 12. And so I would say that means with these conditions, with this box, we have a 15-minute exposure time. So I'm gonna go ahead and do one more print with a 15 minute exposure and we'll see what our final results are. Judged.
5. Final Evaluation & Thoughts: Okay, so welcome back. In this final video, we're gonna talk about some review of what we've done to make sure we really understand what's going on here as well as from Awesome some things to remember or ways we might improve our processing in the future. Because at the end of the day, it's all about getting good prints. And these projects of making these indoor UV printers are a means to end right away of helping us get good prints. So even when it's rainy, cloudy, cold, we're still able to be making some nice sign of type prints. So let's start by looking at the two prints that we ended up with, one from each method. So you can see there's a noticeable difference, but at the same time they're both able to be worked with. But before we get into the specific methods, I want to talk about a couple review of cyanotic principles that I think are worth talking about. Things that I remembered through doing this project that I wanted to help you remember. Number one is hydrogen peroxide. Hydrogen peroxide. I remember way back, I used to always think hydrogen peroxide was just for impatient people in the genotype process, right? It was just for the people who couldn't wait to see what the final result was or they really didn't understand exposures, so they didn't know what the end results would look like. But once you've got good enough, you wouldn't really need it. Well, maybe if you're used to printing exactly the same way, time after time, hydrogen peroxide would eventually be something that's not necessary. But when you're learning a new printing method like this and new printing, UV light source, or when the sun is changing outside constantly from day to day or even hour to hour. The, the hydrogen peroxide allows you to have that instant feedback. So you don't have to wait for it to dry for a day, right? Because if you wait for a print to dry for a whole day, then the light will be different the next time you go outside. Or if you wait for it to dry for a whole day, you've just lost a whole day of printing even if you're using an indoor method. So this lesson to myself is just that using hydrogen peroxide is actually a huge help. It's not just being impatient because you can instantly see what the final blue will be and make your decisions, especially when using a test strip of seeing exactly where that gradation is. So that's tip number one about genotype in general. Tip number two is remember, the paper quality does matter. I accidentally in setting this up, I accidentally grabbed some very, very bottom shelf watercolor paper. It's watercolour paper. So it held up. Okay. But I noticed while watching, I was never really able to completely get the yellow out. I don't know if you can actually see that in there. There's still a yellow tinge to this. Even though I rinse this for like what feels like a long time, right? There's still a yellow in the white areas that I'm having a hard time getting rid of. And I think that's just because it's a very cheap watercolor paper. And so it's getting deep into those fibers and it's not able to come out. Using a better quality watercolor paper should avert that issue. And so it's just a reminder that the materials you use don't matter, they do affect the final print. You might be fine with that or maybe if I watch this for another 15 minutes. It would be fine, in which case that's just something I need to get used to. But think about the quality of the materials you're using as affecting the final result. So those are just two things that through this process, I kinda refreshed in my memory. And I love this process of sino type because it's something you can constantly be learning and improving your process to get the results you want. So now, let's talk about these specific printing methods. The first one is this, just this cheap grow light that you can get off of Amazon or get from a store and putting it inside one of these industrial clamp lights and using it again. And so putting this side-by-side, you can see the results this gave. And It's very usable. But it is that, you know, that was a 45-minute print and it's still not quite as dark as I would like it to be. The other thing I notice with this is, you know, the edges are noticeably later then the center. And so what that means is, you know, it was not an even wash of light. The center was getting more, light in the outside was getting less. So what would I learn from this? Well, really what you would want is more exposure. So you have a few options, right? You could do more time, so you can bump it up to an hour and you would definitely get more exposure. You could get it closer to the surface of the paper they issue is your the unexposed outer ring. Would it be more noticeable? There would be more follow up because the closer you get to the center, the smaller that pattern of light will be. So that's probably not a good solution. The other ones are the technology, right? I, this is a 30 watt UV bulb, but I could opt for 60, or they even make a 100 watt UV LED bulbs that would put out a lot more power and that would lower the amount of exposure. So were I to go back or where I just say, this is really the amount of investment I want to make in terms of building something. Then I would probably myself go back and say, alright, let me see what's available in the 60 or a 100 watt options that I could give a try. Other than that though, It's a really user-friendly way to be printing inside, there's nothing that's tricky about it. And I think it would be very repeatable. So if you just want to be able to print inside on rainy days or you really enjoy the process of printing outside mostly, then maybe something like this would be a good way for you to get those Sina type prints in, but not really invest all that much money or time and making something. Alright, so let's talk about this LED tape, an option that we made. One, I'm really happy with how this went together. The stickiness of the tape made putting it together well. But especially the method that I use with these little clamps on the outside, I can already see where some of the edges are starting to pull up. And that's just natural because even though LED lights don't put out much heat, that you put out a little bit, which would soften up that adhesive. And so the edges are just starting to pull up a little bit. So I am definitely going to go back after this video and just use a little hot glue and put these down so that they're not moving around as much so that everything stays a little flatter. So that's number one on my to-do list and I'd recommend you do the same. So things aren't falling apart. And the other thing is make sure you're getting a box that has a flat surface. I know I was looking for that when I was shopping for my I don't know if I mentioned that before, but if there are many boxes that have grid patterns on them and all kinds of different things. But having this flat surface to stick it to really, really helped in the construction. And it certainly made it a lot more stable. And I felt like it was easy to put together these little connection wires, right? The ones that I made it so I can put all the LED tape flat worthy necessary. I think the jury is still out. No, they weren't necessary, I guess I'll put it that way. But they, I do like that. I'm getting the most light output possible from this amount of LED tape. It was certainly took a little bit longer to put together then it would have had I just glued and twisted around all the corners. But, you know, that's something that I think it's sort of preference. And I would still say that after using it, it certainly works what I did, but I think the other method would have worked as well. So what are the variables here? How could we improve the prints? Because we ended up with a really nice print. It's really even in terms of the whole paper, looks perfectly even blue. And the exposure time is 15 minutes. So how could we improve it? Well, one thing that would be nice would be, is there a way we could get that to be a 10-minute print that feels a little bit more manageable. And so there is, well, there's really two methods you could do. You could add more light, okay, so if you wanted to, you could get another of these LED tape spools and you could add more lights or M, that's going to be more output and would shorten the exposure time. That's of course a little bit more investment of money. The second thing you could do is decrease the distance between the lights and the print k. So in my box, I have approximately, let's get the ruler here. I've got about ten inches, we'll say ten inches of height difference. And I actually did some tests prints where I put a small box that raised it up. So it was more like seven inches of the height difference and that did lower the exposure time. But there's a sweet spot between getting closer with a lower exposure time. But if you get so close, it's not going to be an even wash, right? You have to remember that this is not like the Sun that is evenly lighting everything. These are each individual little light sources. So if you get so close and eventually you'll get hotspots in like directly below each one of these little dots. So that's something that I'm going to be experimenting with of how high can I raise my my holder off the bottom of the box where I'm still getting even lighting over the whole thing. But I can decrease my exposure time a little bit. And other than that, I'm really, really happy. So I want to thank you so much for joining me in this process of figuring out sort of the best method for you of how to make an indoor UV printer for a signer type photography. And hopefully one of these appeals to you, and now you know what you want to make an excited to see that prints that you've made, Of course, in the projects, I really want to see your finished box. Did you did you follow the directions for the LED tape? Did he just use one of the grow lights? They're both great options and I wanna see the box you made. I wanna see the prints you made with it and share that with the rest of the class. That's all I have for you today. Thanks so much for joining me in this class. I'll see you in the next one.
 Ben Panter, Alternative Photography & Game Making