Transcripts
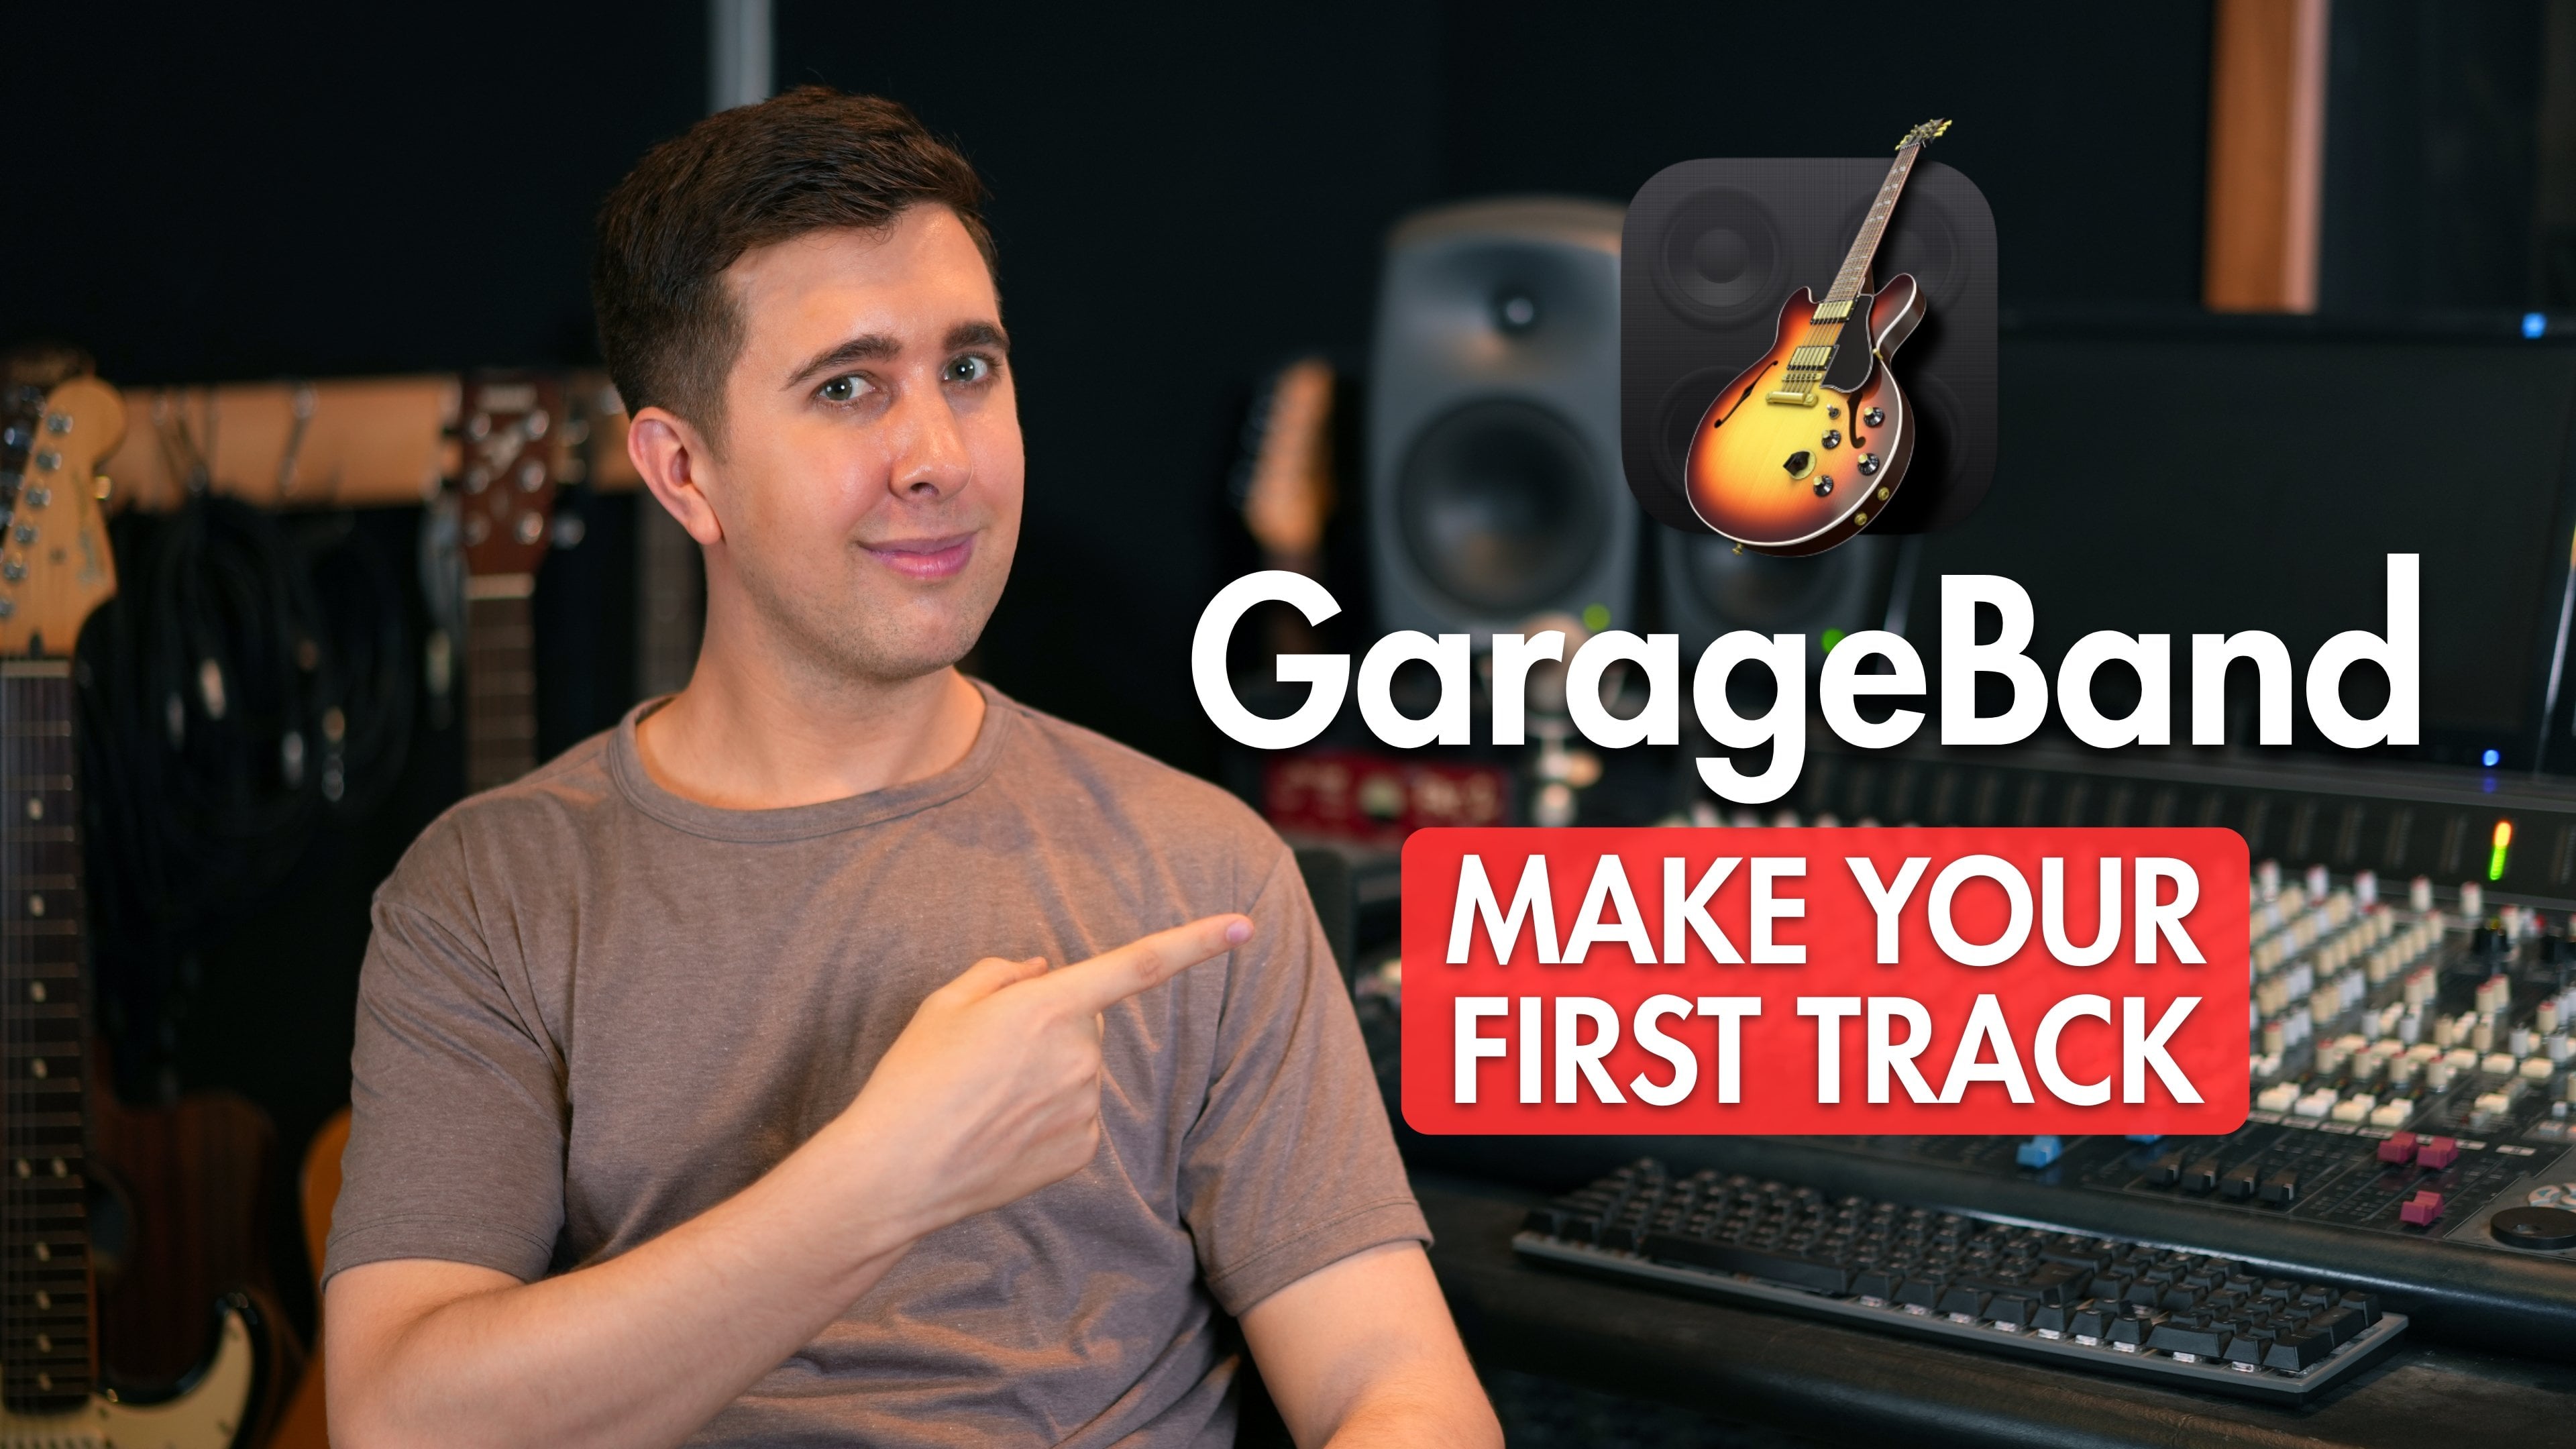
1. Welcome to the Logic Pro Quick Start Class: Hi there, and welcome to this Logic Pro Quick Start course. In this class, I'll guide you through the very
basics of Logic Pro. So even if you've never
opened this software before, you'll be able to quickly understand how it
works and start making your own music in no
time. My name's Tomas George. I'm a music producer
and educator, I've taught hundreds
of thousands of students music production, mixing, and songwriting
around the world. Logic Pro is an incredibly powerful digital
audio workstation. When you first open
it, it can feel a bit overwhelming with
all its tracks, instruments, and features. That's why in this course, I'll show exactly where I
need to get started. I'll walk you through
how to create a new project and how
to create tracks, how to record and
edit both Midi and audio and how to use Apple
Loops and live loops. I'll then show you
how to arrange, mix, and export your first
song in Logic Pro. So by the end of this course, you'll have a solid understanding
of Logic Pro's workflow and have the confidence to start building and producing
your own song. This mini course is perfect
for beginners wants a fast, hands on introduction
to Logic Pro. So when you're ready
to get started, hit the enroll button, and
I'll see you in the class. Oh.
2. The Track We Will Build in This Class: This course, we are going to build a complete
track from scratch, using Logic Pro's core tools. This is the finished track
we will be working towards, and I'll show you how every
part is created step by step. The goal here is not to create a perfect commercial
release but to understand the
Logic Pro workflow and learn how to finish a
complete piece of music. Now, I'll play you a short
section of the track. I. I have been producing music for a long time. But the techniques taught
in this course are designed so that you can create something similar by following along. You can also take what
you learn here and apply it to any genre
you want to work in. Attached is the Logic Pro
project used for this track. So feel free to download
it and open it yourself. You can listen back, explore
how the session is set up, and move or adjust
any parts you like. With that said,
let's get started, and I'll see you in
the first lesson.
3. Opening Logic Pro and Choosing a New Track: Opening Logic Pro and
choosing a new track. When you open Logic Pro for the first time, you'll
get this screen. To this, let's hos an empty project. So under new project. Let's select Empty Project,
and then select Choose. Or you can go to File and New. Now this pop up will appear where you can choose
your track type. If you want to record or
program in MIDI notes and use virtual or software
instruments to play about this midi, choose
Software Instrument. If you want to record audio, so maybe singing
into a microphone, a guitar, bass or external
synthesizer, choose audio. If you want to record
in a step sequence or style midi pattern,
you can choose Pattern. This is most commonly used for
programming in drum beats. Or you can choose
a session player. Logic will give you a
variety of virtual drummers, bassist, and keyboard players, which you can adjust
and manipulate. For this first example, though, let's choose MIDI
Software Instrument. We can choose that
instrument down here or we can
change it later on. For now, let's click Create.
4. Musical Typing: Musical typing. Right now, I have a MIDI keyboard
in front of me, so let's play some notes on this and you'll be able to hear
the software instrument. If you don't have
a mini keyboard, then you can use musical typing. So you can use your
computer's keyboard to play mini notes that software
instrument will play. You can enable musical
typing by going to Window, showing musical typing or
by using the key command Command K. Now I can play some keys on my
computer to play about notes. However, I do recommend
using a mini keyboard, as it is a lot
easier to play than musical typing,
especially for chords. Okay, let's now close musical typing by pressing Command K, and let's now choose a
different software instrument.
5. Changing the Software Instrument: Changing the
Software Instrument. We can change the instrument via the inspector and we
can show and hide the inspector by
pressing this button here or by using
the key command I. You should be able to see
the instrument name here. And if you can't just click on these raw buttons here
to close these areas. Now let's hover over to the right of this instrument name, and you'll see
these raw buttons. If you click on them, a
drop down list will appear. Here we have a list of different software instruments
we can select. For this example, let's
choose retrosynth. So let's hover over
this and select stereo. Let's hit this back. We can also change the software instrument in the mixer as well. The mixer is where we can
change the levels and add effects for the different tracks and other things, too. Let's just close the SIP and I'll show you how
to open the mixer. We can open the
mixer by pressing this button here or by
using the key command X. So you can see here we can see the name of the
Software Instrument. We can also click
in the middle of this to open the
Software Instrument. So here we can change different settings
for the instrument. For this SIP, we can change things like the
oscillator shape. The filter, and the LFO. If you're new to synthesis, I recommend checking out my
complete Logic Pro course where I cover
synthesis in detail. We can close the instruments by pressing the red X
button in the top left. If we close it, we can
still hear the SIF. We've only closed the
SIMPSEditor window. Let's close the mixer now so
we have a bit more space. We also have the library
on the left here. The library, let's just choose different presets,
instruments, and sounds. But for now, let's close this, too, so we have a
bit more space, and we can do this by pressing
the library button up here or by using
the key command Y. Okay, next, let's have
a look at Quick help.
6. The Quick Help Tool: Quick help. By the way, if you ever get
confused about what something does or you
simply have forgotten, you can turn on Quick help by
pressing this button here. You can also show in High Quick help with this arrow button. This gives you a
brief description of many buttons and features
when you hover over them. For example, if I hover over
to the Loops browser button, you can see it tells us
what this button is called. It also shows us the key
command, which is O. It then gives a
brief description, which is add pre recorded
loops to your project. You can also press
Command and slash, which will bring up
Logic Pro guide and will show the relevant section that appears in the
quick help area. Don't worry. We'll be looking at a Loops browser later
on in this course. I'm going to close quick help now by pressing
this button here. But if you're new to Logic Pro, or you might have forgotten
what a few things do, I recommend leaving
Quick help on, but I'm sure soon enough, you won't need to use
this feature anymore. Okay, now let's have a look at the time round Ruler and Tempo.
7. The Timeline Ruler and Tempo: Timeline Ruler and Tempo. Up here, we have the timeline, and this is measured in bars. If I turn on a click
or metronome by pressing this button up here or by using the key Command K, then I can play this
back by pressing the play button or by
using the space bar. For this example,
and in most cases, four beats will
make a 1 bar unless you've chosen a time
signature other than 44. If you're new to music
production or music in general, I recommend leaving this and 44. Later, you can experiment with different time signatures or
how many beats are in a bar. We can change the Tempo
of the project up here. You can drag up
to make the Tempo faster or drag down
to make it slower. When I increase this, you can hear the metronome run faster. And when I decrease this,
you can hear it slow down. You can also double click and
type in the Tempo you want. For this example,
let's set the Tempo to 115 BPM or beats per minute, as I want a slightly slower vibe for the song, I'll create. We can also see what bar and
beat we're in or appear, which links to the
Timeline Ruler. We also have the key signature. You can click here to choose
a different key signature. For this example, though, we're going to keep this in C major, which is all the white notes
of the piano keyboard. Okay, so that's the
Timeline Ruler and Tempo. Next, we're going to look
at recording in and wept.
8. Recording in a MIDI Part: Okay, let's now start making some music and record
in a midi part. For this example, I'm going to record in some chords
on my midi keyboard. If you don't have
a midi keyboard, you can use musical
typing or you can program midi notes into
the piano roll Mi Editor, which I'll show you soon enough. Before record, I'm going to make sure I have the
metronome enabled, so I play in time,
and I'm also going to make sure I have the
counting button enabled. If I have this enabled,
then by default, it will give me 1 bar or
four beats before record, so I can prepare myself and give myself a feel for the
Tempo before record. We also need to make sure the
track is recorded enabled. We can do this by
clicking this R button on the track header
so it lights up red. Let's now make sure the
playhead ruler is at the start. We can do this by clicking
and dragging the roller to the start or by using
the key command Enter. Okay, so now I'm going to record in some chords on
my mini keyboard. We can record by pressing
the record button up here, or by using the
key command R. I'm going to keep it really simple and play the chord C major, A minor, G and F major, all in root position,
and one chord per bar. So we can stop recording
by pressing Space Bar. If you want to do another
take, you can always delete what you just did
and recording again. But for now, I'm going
to use this part. I'm also going to
disable record enable, by press and this
small R button again. This is not about recording in the best possible
song at this stage. It's about getting
used to the recording and editing process
in Logic Pro. Once you have this down,
you can experiment with more complex parts.
Okay, so there we go. I did make a slight error during the recording, but don't worry. I'll show you how
to edit and fix minute information soon enough. Okay, let's hit
this back. So let's press Enter or Return
to go to the start. And now let's press
Spacebar to playback. And we can press Space
Bar again to ports. Now let's have a look at what we recorded into the piano
roll MIDI Editor. We can show and hide
the midi Editor by pressing this button
here or by pressing the key command E. Just make sure you have your
midi region selected, and now you can see the MIDI
notes that are recorded it. Okay, now let's have a look at some basic editing that we
can do in the midi Editor.
9. Basic MIDI Editing and Quantizing: Basic midi editing
and Quantizing. In the piano roll, we have a piano keyboard
flipped on its side, and these blocks here are the midi notes that
were recorded in. We can click and drag these
up or down to move the pitch. So vertically, we have pitch, and horizontally, we have time. We can also edit multiple notes by clicking and dragging
over these notes. We can also undo any
changes by pressing Undo, which is Command D.
For this example, I want to delete this note here. As you may remember,
I did play a mistake. So let's click on this note
here and press delete. The notes are played
slightly out of time, so we can snap into the grid so they're
perfectly in time. We can do this manually by clicking on the notes and making sure they're on the grid,
or we can quantize them. Quantizing is a lot
quicker, so let's do this. So let's select all the
notes by pressing Command A, and then we can press
this cue button here, or we can use the key
command to quantize. So you should have seen there, they're now perfectly
on the grid. Let's play this back so you can hear that they're
perfectly in time now. We can choose the
Quantizing amount in this drop down list here. If you're playing
long held chords, you might want to change this to one quarter note, for example. So this will snap the notes to the nearest quarter
note or crotchet or beat when you're in 44. If you're playing
really fast notes, you might want to use
faster quantize settings. For example, you could
select one 16th. So this will snap the note to the nearest 16th
note or semiquaver. For this example, though, it has actually snapped it
perfectly on the grid. But, for example, if
it's snapped here instead and you want it
exactly on bar four, you can swap this to
one quarter note. And you can see now it's lined up perfectly on the
grid for bar four. We can also move the notes
up or down at octave by using the key command shift option arrow up to move up. Or shift option arrow
down to move down octave. If you're unfamiliar
with octaves, you can see this pattern
for the keyboard repeat. Two black notes, then three
black notes, and it repeats. On octave, it's 12 notes or
where the pattern repeats. So, for example,
this note A here, an octave above will be this A, and an octave below
will be this A. We can also type in our own
notes with the pencil tool. You can see that the pencil tool is currently a
command Clic tool. We can change a command
click tool here. But for now, let's leave
this on the pencil tool. So now let's type in
a few more notes. Let's add an octave
above the root note. So an octave above the C here, which is this one here, C four. Let's do the same
for the next chord. So this A here, an octave
above will be this A. The next chord, we have this G here and octave above
will be this G. The last one, we
have this F here, and octave above will
be this F. Okay, let's play this back now and
hear what this sounds like. There are many other notes
we could have added, but just to keep it simple,
I wanted to add an octave. We can also draw in all of
the notes in the midi Editor. We don't have to record
anything in if we don't want. What I often like to do is record in notes on
my MIDI keyboard and then edit them
and add new parts or notes with a pencil
tool when needed. For this example, let's
draw on some new notes into a new midi region directly into the midi Editor. So
let's do this now. We can create a new media region by right clicking
on an empty space in the track workspace area and selecting
create Midi region. So this midi region
is now 1 bar. I want to have
this a bit longer, so if you hover over the
bottom right of this region, we can see this
arrow button appear. Let's click and drag this
over so it's 4 bars long. Now you can see this
midi Editor is empty. Let's make the midi editor a bit bigger by clicking
and dragging up. So now we can add in our
own parts if you wish. We can resize the midi notes. They don't have
to be 1 bar long. So I'm just going to play the
C major chord again here. But break up some of these notes here to
make an arpeggio. Let's now add the notes
for the next chord. So the next chord was an A
minor. So we have this A here. Let's put this in first. And that's full of
the same pattern, but change the notes
so they fit this cord. Okay, let's hit this back now. Let's now add a next chord. Remember, it was a G major. And let's follow
this same pattern. Let's hear this now. And now let's add the notes for the
last chord, which was the. Again, let's use the same
pattern to keep it simple. Okay, now let's hear all four of these chords for
this new pattern. We can also duplicate regions. So let's actually duplicate this first region and
then change it slightly. Let's hold down Option,
click and drag, and this duplicates
this first region. For this region, I'm going to
delete the high notes here. And I'm going to make
some inversions. Inversions is just when you change the
order of the notes, so they sound a bit smoother
going from one to the other. Remember, we can change
octave by pressing Shift, option, and up and down arrow. So I'm going to put this
first note down octave. Let's put this note
here up and octave. Okay, let's hear this back now. It will sound slightly
different to this first region, as I've got rid of these
higher octave notes, and I've also added
some inversions. Also change the velocity
of some of the notes. This is midi velocity
and higher values. Sound like the notes
are being played harder and lower values. Sound like the notes are
being played softer. So let's do this for
the second region here. So you can see it's
all the same color, which means they're
all the same velocity. Adjusting the velocity can also make the notes
sound more human like. As when a person plays a
keyboard or instrument, not every note will be
played at the same strength, but when notes are programmed
in on the computer, the velocity can be identical, so it can be a good idea to add some velocity
variation if you want your song to sound less robotic and more like
a human played it. Okay, so let's do this now. So we can click on the notes and change the velocity down
here with this slide. So I want to have the first
note being played quite hard. And then the other
one's a bit softer. Mm. I'm also going to select
multiple notes here, but holding down chef
when I'm clicking. And you can see now
the colors have changed as we have
different velocities. Let's play back and
hear the difference. I'm going to add a
few variations here, so it doesn't sound identical. Okay, great. Let's
say this once more. So I do recommend adding some velocity variations
to your parts. For these other regions here, I did play the part in myself, so you can see it already
has some velocity variation, so I don't really need to
add need for these parts. However, when programming
in your parts yourself, I do recommend adding
some velocity variation. Okay, so that's some
basic midi editing. Next, let's have a look at adding some drums
to this synth part.
10. Apple Loops and Cycle Region: Apple Loops, Pattern
Loops and Cycle Region. There are a few ways we can
add drums and Logic Pro, but one simple and easy way
is to add an Apple loop. These are royalty free loops that you can use in your songs. We can view the Apple
Loops browser by pressing this button up here or by
using the key command. Oh. Here we have a lot of
different types of loops. If you don't have many
loops and you want more, you can download additional
content by going to Logic Pro and Sound Library, and choosing download all
available sounds if you have enough hard drive
space or download essential sounds if you don't
have much space on your Mc. You can also open the
Sound Library manager and choose exactly which
packs you want to download. However, I have all of
these downloaded already. Okay, going back to
the Apple Loops, you have these tabs
up here where you can narrow down the loops in
the Apple Loop browser. Let's first of all
click on Instrument. For this example, let's
choose all drums. And then for genre,
let's choose electronic. And then for descriptors, let's choose dark and intense. So you can see now
we have fewer loops. We can click to preview
different loops. We also have different
loop types as well. We have audio loops in blue, midi loops in green,
pattern loops in purple, and session player
loops in yellow. I personally prefer
using MIDI loops, as you can easily edit the
MIDI notes in the midi editor, and it's a bit harder
to edit audio and you can't edit as much as
what you can do with MIDI. Okay, let's have a listen to
a few more of these loops. Okay, I think this one called Go ahead space beat
two sounds fine. If you're following
along and you don't have the exact
same loop as this, don't worry, choose
one that's similar. Let's now click and drag
this below the track, and you can see it's
made a new track and it's added a
drum kit instrument. You can see that this
loop is 2 bars long and the midi region for our
keys part is 4 bars long. So if we hover over to the
top right of our loop, we can see this
loop icon appear. Now let's click and
drag to the right of this loop to make
it 4 bars long. Okay, let's play this back now. And you should have noticed
there that it looped. Now in the MIDI Editor, we can edit some of
these midi notes if we want to customize
the part a bit more. So we can open up the
midi Editor by pressing this button or by using
the key command E. Let's now find the
original loop. So we can click on
these different mini notes to hear
what they sound like. So just for this example, I'm going to edit some
of these midi notes here so we can
hear a difference. And we can zoom in with a
shortcut command right arrow. And we can zoom out with a
shortcut, command left arrow. So I'm just going to move
some of these high hats here. Okay, let's hear what
this sounds like now. Let's go back to the start
by press and return or enter and play this
back with Space Bar. So you can hear there, I quickly made the beat sound
very different. For this example, though, I
want to find another loop, so I'm actually going
to delete this loop. So let's click on the
loop and press Delete. I'm also going to
delete the track. So let's click on this
and press Delete. Now let's find
another Apple loop. For this next example, I
want to use a Pattern loop. So in the Apple Loop library, let's press the loop type button here and select Pattern loop. Now, only display
the pattern loops. Let's have a listen
through some of these. Okay, let's try this one
called Glass Spikes Beat. So let's click and drag
this below the track. Again, let's loop this
so it's 4 bars long. So this now has added
a pattern loop. This is in a step
sequence of format which many people like to use
for programming in drums, so you can click on a block
to add or remove a step. You will notice that affects both the loop pattern and
the original pattern. This is because the loop
is an exact copy and includes any changes or edits made to the
pattern or region. Okay, now let's adjust some of the steps in the
step sequencer. Vertically, we have different
instruments or samples, and horizontally, we
have the beat divisions. In this case, each step
is a quarter note. You can adjust the steps in
the pattern drawing playback, so you can loop your part and
adjust it drawing playback. You can loop the
area by pressing the cycle button up here or
by using the key command C. You can also click
on the area up here, so it's yellow, and
this area will cycle. You can then click
and drag the edges of the cycle range to
adjust its length. And if you hover over it,
you'll see a hand icon up here. This allows you to move the
position of the cycle region. Okay, so now let's play this
back and draw and playback. I'll adjust some of these
steps in the step sequencer. Okay, something like that. I did make the part
a lot simpler, but I think it works better
with our keys part now. Okay, now let's
add an audio loop. This time, I want to
add some percussion. So let's reset the Apple
loop search up here. And in the loop type, let's change this to just audio loops. And now let's type and
shake it in the search. Okay, now let's listen to a
few of these audio loops. For this example, let's choose this one called
Endless Drive Shakers. Let's now click and drag
this below our tracks. And this time, it's
an audio region, and it's open to audio editor. Again, let's loop this
so it's 4 bars long. Let's now have a
listen back to this. For now, I'm going to
mute the pattern loop as I think this is
a bit too intense, and let's now hit this back with just the shaker
and the keys part. You could just delete
the region and track, but it can be a
good idea to mute tracks just in case you
want to use it later on. Okay, so that's a basic
overview of the Apple Loops. Let's close the loop
browser by pressing this button here or by
using a key command. Oh. Next, let's have a look at setting
up to record audio.
11. Setting up and Recording Audio: Setting up and recording audio. So to record audio, you will need an audio
interface or USB microphone. You can use your
built in microphone on your Mac, but
it won't be great. If you want to record audio, I recommend using
an audio interface and Exile microphone. You can also record
guitar bass and external synthesizers
in Logic proro two. But again, you'll need an
audio interface to do this. Before we record audio, let's
set up an audio interface. We can do this by going
to Logic proro in the top left and then go to
settings and then Audio. Then in an input device, you can select your
audio interface. If you don't have
an audio interface, you can select your Mac
microphone if it has one, but it won't sound good,
but you can choose this if you want to test that recording audio
and lodge it Pro. We can also choose
our output device. Here you can select your
audio interface if you have studio monitors or
headphones connected to it. You may notice that
I have a lot of different input and
output devices. That's for making videos, so you probably won't
have as many as these. Next, let's talk about
the buffer size. For recording audio, I recommend using a
smaller buffer size. This will give you less
latency or recording delay. For this example, let's
choose 32 samples. However, smaller
buffer sizes will use more CPU power
or computer power, and if you experience any clicks or pops in your
audio recordings, you should increase
your buffer size. Also, for arranging and mixing, I recommend using a
larger buffer size. For recording, though, I would
use a smaller buffer size. Now when you have this setup, press apply and close settings. Okay, now let's create
a new audio track. We can do this by pressing the new Tracks button here
and choose an audio track. For this example, let's
choose Markle line. I have my microphone
plugged into input one, so I'm going to make sure
input one is selected. And now let's press Create. Now let's record
enable this track by pressing this R button here, and you can now see the
audio level coming through. If you want to record
audio from a microphone, I recommend wearing
headphones so that audio from your computer or speakers is not picked up
by the microphone. Let's now make sure
the audio level isn't too loud and doesn't clip, and now I'm going to record
in a part of me talking. So we can press
the record button up here or press
the key command R. And slower, we rise. Rich and we do. Then when you finish your
recording, press Space Bar. Okay, so that's how
you can record audio. As I said, it's not just a microphone that you can record. You can also record
a guitar or bass or external synth if you have them plugged into your
audio interface. Next, we're going to have
a look at Live Loops.
12. Introduction to Live Loops and Creating a Keys Part: Okay, so now let's have a
look at the Live Loops. So in Logic Pro, we
have the Tracks Area, which is what we've
been looking at so far, but we've also got
the Live Loops area. The Live Loops area is a little different from
the Tracks Area. It gives you a grid based way to create and perform music, similar to Ableton
Live Session View, if you've used that before. You can show and hide the live loops area by
pressing this button, and we can show and
hide the Tracks Area by pressing this button. I personally really
like using live loops, and most of the ideas for the electronic music I create are made in a live loops area. What I usually do is
use live loops to record my ideas and build
loops and patterns, then create an arrangement
in the live loops area. After that, I record the
performance of the arrangement into the Tracks area for
further arranging and mixing. Okay, so now let's have
a look at how to set up to record your own loops
and a live loops grid. Here we can add loops
into the cells, and we can place multiple
loops on the same track or instrument by using
different cells on that track. We can also add Apple loops or our own samples into
the cells if you wish. It can feel a little clunky
or messy having tracks play back in both the live loops area and the Tracks Area. We can press the Tracks
activator button up here to switch the tracks
between the live loops area and the Tracks Area. So for now, let's select the
arrow button on the left, so we only hear the
live loops area. We can click and drag loops from the Tracks Area into the live
loops area and vice versa, so let's drag over the loops
we want to use for our song. So let's show the
Tracks Area now. For the retro symp track, I want to use this
second region here. So let's click and drag this
over to the Tracks Area. I also want to use the
Shaker Apple Loop. So again, let's click and drag this over to the
Live Loops area. Later, I will show you how to record your performance from the live loops area into the Tracks Area, as
I mentioned earlier. You don't have to work in
the Live Loops area, though. You can just work in the
Tracks Area if you prefer. We can play about the cells
by clicking on them here. We can click on the
Magen to pause, and we can press Space bar
to pause the playhead Ruler. We can stop all the clips
with this button here, and we can play
about the column of clips with this
button down here. So if I press this
here for Row one, it's going to play about the retrosynth part
and the shaker part. Let me show you now. If
I press the space byte, it will pause playback, you can see the cells are
still flashing or cued. To stop these completely,
press the stop or sales button down here in the bottom right of
the live loops area. Okay, so now let's add a
new software instrument, and we can do this by pressing the new
Tracks button here. And for this example, let's
choose software instrument. For this example, let's
add a piano instrument. So in the instrument here, I'm going to choose studio piano and stereo, and
then press Create. Now I'm going to play some
notes on my midi keyboard, so you can hear that
this is a piano sound. Now let's record
enable this track, and if you hover over one
of these empty cells, you can see this
record button appears. For this example, I'm going
to play some simple chords. See if you remember
before our chords were C, Amna G and F. So let's
record this in now. And then press Space bar
to finish recording. Let's press the
stop clips button, and let's press
the small R button again as we don't need to
record enable this anymore. Let's close the Tracks Area
by pressing this button here, and let's close the
library by pressing Y, so we can just see
the live loops area. Now we can double click
on the cell to open the Media Editor and we can edit the MIDI information
I've just recorded them. So what played there
was a lower octave, octave above, and then
the free note chord. I did the same pattern for
all four of the chords. I'll solo this by pressing S, and I'll play this roback
so you can just hear this. Okay, so first of all, it
was slightly out of time. So let's actually
quantize this now. Let's select all the mini
notes by pressing Command A, and let's go to quantize here. Let's change just
to eighth notes. As 16th notes may
be a bit too fast, and it may snap to the wrong
16th note on the grid. The eighth note should be fine. Let's play this back again. Okay, the next thing I
noticed was this note here. It's very, very low velocity. It's at five, where the
other note below is at 59. So let's increase this to
about the same amount. And now let's play this back
again to hit a difference. M. Okay, great. I might just drop the velocity
for these two notes here. Okay, that should be fine now. Let's now unsolo this by press and S and hear this back
with the other tracks. Again, let's stop the
play back by pressing Space Bar and stop all the
cells with this button here. Okay, now let's add a drum part.
13. Creating a Drum Part in Live Loops: Okay, now let's add a drum part. So for this, let's create
a new Software Instrument. So let's click on
this plus button here and let's choose
MIDI Software Instrument. And in the instrument
dropdown list, let's choose drum kit
designer and stereo. And now let's click Create. So I have my mini keyboard
in front of me here, and the kick is C one. The snare is D one, and the closed high hat
is F sharp one. Now I'm going to create
a simple drumbeat with just these free drums. It's also a good idea to loop a few bars in
the tracks area, so the playhead always
starts on a downbeat, and we don't lose
the playhead ruler. So for this, I have the
first 4 bars looped. Let's now play this back and get a groove
for the drum part. Draw and playback, I'll
experiment with some ideas. Okay, something like
that. So let's arm this track and then press the
red circle for this cell. And this will give me
a 1 bar counting and I recording a drumbeat.
Okay, let's do this now. Okay, I think that
should be fine. Remember, we can press
Space Bar to stop the recording and this button
here to stop all cells. Now let's just quantize
what I just recorded in. So let's select all by
pressing Command A. And the fastest notes are
played here we 16th notes. So let's change the
quantize to 16th. And now it's snap the notes to the grid. Let's
hear this back now. Let's now record in another drum part on a new empty cell. So we're going to use
the same instrument, this drum kit designer, but I'm going to record
in a different part. So the shaker and retrosynt
part will play back. I'm going to record
in a new drum part. Okay, let's do this now. For this, I changed
the KitrnPattern, and I didn't add the snare. Again, let's quantize this, so let's select all with Command A, and then press this button
here or Q to quantize. So this part here with the high hats isn't quite well wanted. So let's zoom in here by
pressing Command and right arrow and change this first
bar for the high hats. The second bar looks
fine, so let's copy this with Command
C, and the first bar, let's drag over this and
delete this and then make sure the playhead rule is
on bar one and then paste this with Command V. Okay, looking at this now,
this should all be fine. Let's now press Space bar to play this back and hear
what it sounds like. So that kick drum here isn't
quite in the right place. So let's just move
this over here. And this one here
should be there. So when you're recording in,
it might not be perfect, and when you quantize, it may actually snap somewhere else. For example, there, this
part may have been closer to another 16th note,
not the one I wanted. So after Quantizing, I
do recommend playing your track back to check that the notes
are in the right place. Okay, let's hear this now. Okay, great. That's exactly where
I want them now. Let's close a library over here, as we don't need it
right now, and it is taking up unnecessary space. So we can close
it by pressing Y. Now let's close
Editor by pressing E. Let's now stop all the cells by pressing
this button here. And now let's copy over this piano part to the second cell. We can do this by holding down option and clicking
and dragging. So now we have this
first scene here, which has its first drum part, the piano part, the shaker
and the retrosynth part. Then we have the
second scene here, which has this new drum
part and the piano part.
14. Creating a Bass Part in Live Loops: Now create a bass part. You can also create audio
loops if you want to play a real bass
guitar or record a bass part from an
external synthesizer, but often it is much simpler
to create a Mi loop. So let's stick
with MIDI for now. Okay, so now let's
create a new track. So let's click on this
plus button here. Then under MIDI
Software Instrument, let's click this
instrument dropdown, and let's choose Studio bass and stereo. Now let's click Create. You can, of course,
choose a synthesizer, but for this example,
I want to bass sound that's closer to
a real electric bass. Okay, so I'm going to play some notes on my
MIDI keyboard now, and let's hear what
this sounds like. Before I do this, I'm going to record, arm this base track. Okay, that sounds
quite realistic. Okay, let's now record
in the bass part. So for this first cell, I want the bass part to have
a bit more movement. And for the second part, I
want the bass part to play long held notes using the
root note of each chord. The root note is simply the
main note that the chord is built from. Okay,
let's do this now. So for a press record now, it's not going to play
about the other tracks, it's just going to record
the MIDI into this cell. So let's just play about this cell and then
press Space bar. So these other tracks are
flashing and are cue. Now in the press record,
it's going to play about the other tracks. Okay,
let's do this now. Okay, just that. A
really simple part. Let's stop all the cells. And let's double click to
open immediate Editor. Let's also close the
library by pressing Y. And I just played
one mistaken there, which we can delete. And now let's
quantize all of this. So command data select
all and to quantize. You can see now it's
perfectly on time. Let's now record in the second
cell for the base part. Again, I'm just going to play about the
scene and pause it. So these other cells
are flashing and cued. So now we're in a
press record here, it's going to play about
these other tracks. Okay, something like
that should be fine. Let's now stop all clips and double click
on this cell here. As you can see here,
I played it quite good, but it's not
perfectly in time. So again, let's selectol
and then quantize this. You can see now it's
perfectly in time. Let's now playback scene one a couple of times
and then scene two. So you could hear their
drawing playback, the cells were looping.
15. Arranging and Organizing Your Live Loops: Okay, let's now copy over the cells from scene
two to scene free. So let's click and drag
over these scenes here, then hold down option and
click and drag the scene free, and you can see it's
copied these over. To keep things organized, I'm just going to
name these tracks. So down here was the bass. Above is the drums. Above this was the piano. And then we had the shaker and above this was the SEP.
Let's move the SIP part down and also the shaker and we move this audio part up as we're not going to
use this right now. We can delete these tracks we're not using later on, though. I just want to make this a
bit more organized for now. This drum part here
was a different part, so I'm actually going to choose a different
color for this. We can choose a color with
the key command option C. So for this, let's just choose a different
color as I know it's a different part. The
same with the base part. Let's choose a different color. As this was a different
part as well. Now if it's scene
three, let's drag over the shaker and also
the Senth part. So let's hold down option
and click and drag. Okay, now let's go from
scene two to scene three. Okay, so it's very simple, but we're starting to
create an arrangement now. Next, we're going to
look at recording from the live loops area
into the tracks area.
16. Recording Your Live Loops into the Tracks Area: Record from the live loops
area to the Tracks Area. Let's now perform these clips
and record them over to the Tracks Area
where we can arrange fervor and mix. It's
really simple to do. First of all, make
sure you disable the socle region in
the Tracks Area. So let's open up the Tracks
Area by pressing this button. Now let's disable
the Cycle Region by clicking on this yellow
bar up here or by using the key command C.
Just be aware that when we record from the live loops area into the Tracks Area, it will record over any regions already
in the Tracks Area. To keep things
simple, let's just delete the regions we currently
have in the Tracks Area. So let's click and drag over
these and press delete. Now let's make sure the
play heads at the start. We can click and drag
this to the start or we can use the
key command Enter. Now we need to enable the
performance recording button by pressing our grid button
so it lights up red. Now all we need to do is
hit the record button up here and play about
the cells or scenes, and it will record it from the live loops area to
the Tracks Area. So I'm going to let each
scene play a few times, and then when it feels
like it should move to another scene, I'll
trigger the next one. Okay, let's do this now. So I'm going to start with
this first scene here. Okay, let's press space
bar to stop this. Okay, now let'
stop all the clips by pressing this Stop button, and let's disable the
performing record button. Okay, now we should be able to see our parts in
the Tracks Area. If it's grayed out, just press this right arrow button up here. Now we can play back what
recorded into the Tracks Area. Okay, so that's the
live loops area. Logic Pro gives you
a lot of options. You can record in this
grid format or in a more traditional
linear format in a Tracks Area, or
you can use both. I personally like to
use the live loops for a lot of my initial ideas, and then I'll record
these ideas into the Tracks Area and expand
on them further in here. Okay, let's now close
the Live Loops area by pressing this button up here. And now let's continue
working in the Tracks Area. I do cover the live loops in a lot more detail in my
complete Logic Pro course, so I do recommend checking
this out and watching the Live loop section
in the course if you want to deep
dive into Live Loops. Okay, next, let's have a quick look at the
Session Drummer.
17. An Overview of Session Drummer: Session Drummer. In Logic Pro, we have the session players. These are AI powered
virtual musicians that can play drums, bass, and keyboard parts
in your songs, and they're easier
to program while quickly letting you
change style and feel. For this example, I'll quickly show you the
Session Drummer, and you can apply
what I teach you to the session basis and
keyboard player, too. I also cover these in detail in my complete Logic Pro course. So for this example, I will meet the drums that I
previously programmed, and now let's add
a Session Drummer. This allows you to
create great sounding and realistic drum
parts very quickly. So let's create a new track by pressing this button up here, and let's choose a
session player drummer. You can see here we can choose the different drumer styles. For this example, let's choose
an acoustic drummer style. Let's choose the
first one pop rock. By the way, we can change all of this inside the drumer editor. Okay, let's press Create. And you can see here it's
created this drummer region. Let's just drag this
back to the start, and let's also mute the
Shaker for now as well. Up here, we have the waveform of what the Session
Drummer plays. We also have this in
the editor as well. Okay, so let's go back to
the start by pressing Enter. And now let's play this
bat by pressing Space bar. So as you could hear, it
sounds quite realistic. Let's also turn off the metronome
by pressing this button here or by using a
key command K. Okay, so now let's have
a look at some of these controls here for
the Session Drummer. First of all, we can change the complexity and intensity
with these sliders. So I'll play this
back and I adjust these sliders so you
can hit a difference. Let's actually turn on the
cycle region by pressing C, and let's drag this out
so the region is 8 bars long as this drumer region
here is also 8 bars long. Okay, let's play this back
and adjust these controls. A. We can also choose if we want
to have high hats, symbols or toms in the
pattern or none at all. Again, I'll play this back and turn this on and off so
you can hear difference. We also have these different pattern presets we
can choose here. So let's hear a few of these and also swap between the Toms, symbols and high hats
drawing playback, as well. We can also add and remove
the kick and snare as well. And again, we have different
patterns we can choose from. Again, let's play this back, and I'll turn the kick
and snare on and off and choose a few different patterns so you can
hit a difference. We can also have the
kick and snare follow the rhythm of the chords
or a certain track. So it could be a
good idea to have the kick and snare follow
the bass, for example. But for now, I'll turn this off. Then we can choose the amount
of fills with fill amount. And we can choose the fill complexity
with this style here. We can also choose a swing amount with
this doll, as well. And drawing playback, I swap between eighth note
and 16th note swing. But for this, though, I don't
want to have any swing, so let's put this
back down to 50%. We can click on
this drummer icon Here and choose another drummer. We have these in
different dramres rock, songwriter,
alternative, and R&B. We can also choose an electronic drummer as well, if you wish. So if you click on Type here, we have this drop down list. We also have percussionist,
bass player, and keyboard player, but I'm
not going to cover this now. Let's have a quick look
at electronic drummer. So we have these
different categories, electronic, hip hop
and alternative. For this example,
let's try Synthpop. You may get this
pop up box appear, which basically says
you're going to have a new session player region
with different settings. So for this, I'm going to click
on Change Session Player. Okay, now let's play this back so we can
hear a difference. Okay, let's try another drummer. Now let's go back to
the acoustic drummer. And now let's try Indie pop.
Okay, let's hear this back. Okay, I think this one sounds
suitable for the song. Now let's have a look
at this details tab. This allows us to adjust more details such as ghost notes. These are soft subtle hits that are played
between the main beat, which can help
groove in realism. So I'll play this
back and adjust this style so you can
hear a difference. If there's st, it can add a bit more groove and
realism to your part. Drawn playback, as well, a solo the drum track by
pressing S. Okay, then we can choose what
type of snare you want, what type of percussion, and
also what type of symbol. Then we can adjust
the feel so we can have the drummer play
ahead or behind the beat. So if we drag it
back, we have it play ahead or we can drag it forward and have it
play behind the beat. We can see the waveform
shift when we adjust this. Playing ahead of
the beat can make the part sound
more energetic and driving and behind the beat can make it sound more
laid back and relaxed. Again, though, let's
go back to 0%. And we can double
click to go back to center, which is 0%. Then we can adjust the dynamics, which allows you to
adjust the volume ranges. So if we drag it back,
there's less volume ranges. So you might want
to do this for a tighter, more polished sound. Then if we drag it forward,
there are more volume ranges. This can make the parts sound
more natural and human. Again, it can be subtle, and let's go back to default
by double clicking. Then we have this
humanized control. If you increase this,
it will move some of the drum hits that are not perfectly in time or quantized. So this can make the parts
sound less robotic and more human as humans don't
play perfectly in time. And if we drag it back, it'd
be more perfectly in time. Again, let's double click
and go back to default. Okay, then we have this
Tempo control here. This allows us to
change the timing, where we can make a half
time or double time, but I normally
just leave this on automatic as Logic Pro
does a good job of this. Okay, that's a quick
overview of the details tab. Now let's have a look
at the manual tab. With this, you can
type in your own pattern for the kick and snare. For this example, I'll type in a simple pattern so you
can hit a difference. So I'm just going
to have the kick on every beat and the snare
on beat two and four. I'll just add a few more notes as well, so you can
hit a difference. But for this example,
let's leave the kick on every beat and the snare
on beats two and four. Then if we go back
to the main tab, you can see the
pattern has changed the manual tab for
the kick and snare. However, we can click
on this again and change it to one of these
pattern presets, if you wish. But let's leave this
on manual pattern.
18. Creating Regions and Converting to MIDI with Session Drummer: Okay, let's now create another
Session Drummer region. For this region, I want
to have the drums, but no snare or high hats. Let's move the cursor to the right of the
Session Drummer region, and you can see this
plus button the peers. Now, let's click on
this and it will create a new Session
Drummer region. This makes a copy of the region. For this second region, I
want to have the drums, but no snare or high hats. Okay, so now let's remove
the snare and high hats. So in the main tab of
the Session region, let's click on the snare and
high hats to deselect these. Now let's turn off the
cycle region by press and C. And you notice when you go from Region
one to Region two, there won't be any snare or high hats in the second region. Et's also hear this with the
rest of the instruments. So let's unsolo the drums by pressing S. Okay, now let's add another
Session Drummer region. Let's go to the right
of the second region and press this plus bottom. And now you can see we've added a third Session Drummer region. For this, I want to add the kick again and also the high hats. This time, I want to
increase the intensity, and I'm also going to
increase the film out. So region one and region
three are very similar, but there is some slight
variations in there. I'm also going to
change the kick and snare manual pattern
slightly as well. I'm just going to add
one more kick drum here just to make the
parts slightly different. Okay, so let's hear Region
two, going into Region three. So as you should
have heard, region one and region three
are quite similar, but Region three has
this extra kick drum, a bit more intensity in fills. You can also convert the
Session Drummer into MIDI, we can change the
part even further. Just be aware that
you can't change a midi region back to a
session player region, so it'd only convert it to MIDI once you're happy with
what you've done, or you could make a juplica of the session plower
region and mute this as a backup just in case
you need to go back to the Session plower region
and change a few things. Okay, so for this example, let's convert these
regions into midi regions. So we can do this by
right clicking on the region and then go to
convert to midi region. Now you can see
the MIDI notes in the piano roll MIDI Editor. Again, let's do this
for Region two. Right click, convert to Midi Region, and
also Region three. Now we can go into
the MIDI Editor and change some of these
notes here if you wish. Let's now close
Editor by pressing E, and let's hit back from the start with our new drum parts. Oh Okay, so that's a quick overview
of the Session Drummer. As I said, there's also
the percussionist, session bassist, and
keyboard player, too, which also
recommend checking out. Next, let's have a look at some arranging and
structure basics.
19. Arrangement and Structure Basics: Arrangement and
structure basics. Okay, so right now I have
these parts that are recorded in from the live loops area into the tracks area. However, arrangement wise, there's still a lot
more we can do. Let's first of all,
make another 8 bars. The easiest way to do this
is to loop these regions. If we click and drag over
all of these regions here, then we can hover over to the top right of one
of these regions, and this loop icon will appear. Now, let's click and drag
this, so it's 8 bars longer. You can also use the key
command L to loop and unloop. This will loop to the
end of your project, but I often find it
better to click and drag the loops so you can choose exactly where you want to loop. So I'm just going to undo
this now with Command Z. I also like to name tracks so I know
which track is which. I did do this
previously, but I just double click on the track
header here to rename. I also like to color regions differently if they
are different parts. So I quickly know if
it's the same color, it's a repeat or a loop, and
if it's a different color, it's a different
part of variation. So let's just zoom out now
by using the key command, command and left arrow. And let's now change the color of these
drummer regions here. You may remember these three
regions are different. So let's color
these differently. To change the color, we can
use the key command option C. So let's just choose a different color here,
and the same for this one. Now, I quickly know that these three regions
are different. Same with the bass part, I know this region is
different to this one. Let's also tidy up our
project a bit more. I'm going to delete
Audio two here and also this drum track here and also this
drum track here. When you try to delete a track, you may get this pop up appear, delete tracks and cells. This basically means,
do you want to delete the track and all the
cells or regions. So for this, I'm going
to press Delete. I may add the Shaker later, so I'll leave this track here. Okay, so you can see now
it's a lot more organized. Normally, when arranging, think of taking your
listens on a journey. In pop music, there's often a very typical
structure for a song. Often intro, verse, chorus,
verse, chorus, bridge, double chorus atro or sometimes
with a double verse one, or a third verse or a
variation of the chorus, but generally pop music has
quite a typical structure. Other styles of music may
have different structures, so study the structure of the musical genre
you're working in. You do not have to
follow it exactly, but it can be a good
starting point. Try and make your music move and evolve and not be
too repetitive, or it can be quite
boring for the listener. So think of adding new sections
like verses, choruses, bridges, and also adding
variations for different parts, maybe adding more movement
and variation for the chords, bass part, melodies, or drum parts for the different
sections in the song. I wouldn't just copy and paste everything as it can get
a bit too repetitive. I haven't touched on
melodies, but of course, using a melodic instrument
like vocals, saxophone, or a lead symph can make the song much more
exciting and memorable and can give the listener
something to sing or hum in the head after
listening to your song. So for this example, I'm
going to add a melody. This time, I'll add a lead SIP. Again, let's oe the
retro synth instrument. So let's click the Ad
Tracks button up here, select software instrument, and choose retro synth
from the drop down list, select stereo, and create. By the way, you can also change your instrument
in the inspector, hover over to the right where
it says the instrument and click this drop down arrow here where you can choose
a different instrument. You can also do
this in the mixer. So I'll open and close the
mix now with a key command X. Okay, now let's open the retro synth editor by clicking on the middle of
the instrument name here. Now, let's choose
a preset sound. We can browse through these presets using
these Arab buttons here. Or we can open the drop
down list by pressing here. And for this example, let's
go to the Symphony presets. Now let's have a listen
to some of these. We can also use the
Arab buttons to scroll through the presets
in the drop down list. O Let's use this one
called Bright Cycle, as I think it will work
well with our song. You can adjust the controls down here to change the
sound of the SEP. I will not cover
this in detail now, but we do go through
retro synthh and my complete logi procs. But here is one quick and
easy change you can make. You can adjust the
filter cut off by moving this filter control
here in the graph. This controls where the
frequencies begin to be filtered. If you move it to the right, fewer high frequencies
will be cut, so we hear more of the
brighter sounds in the SEP. If you move it to the left, more high frequencies will be cut, so the sound will be
darker with less high end. But let's have there
somewhere in between. This is just a quick way to
shape the sound of the symph.
20. Writing a Melody: Okay, let's continue. So let's close the retro synth Editor. Now I'm going to
record a part in using my mini keyboard. So
let's do this now. I'm recording melodies, knowing so music theory
can really help. But if you're new to music
theory, don't worry. A great place to start is by using the notes from the
chords you are playing. These notes will always fit and give you a
strong foundation. Another useful technique
is to listen back to your track and try singing
ideas that come to mind. Then work out these notes on your midi keyboard or
on the piano roll. This can take some
trial and error, but it's a very natural
way to find melodies. Actively listening to melodies
and songs you like and practicing regularly will help strengthen your musical ear. Also learning even a small
amount of basic music theory over time will make it easier to create melodies
that sound great. Okay, so let's move the
playhead rule to the start. You can do this by pressing
the key command Enter, and now let's press record
to record and the part. Okay, I think that worked, but I didn't play it
perfectly in time. So let's now quantize this. So let's double
click on this region to open up the Media Editor. Let's also close a library
so we have a bit more space. Remember we can do
this with a KikamanY. And now let's selector
by pressing Command A, and let's quantize this with Q. So all of these notes
are in the scale of C major or all of
the white notes, and they are mostly using
notes from the chord. So you may remember the
first chord was C major. The second chord was A minor, the third chord was G major, and the fourth
chord was F major. So they're not just
notes from the triad, which are the free
notes of the chord. I do have other notes as well. But for this first
chord, the main notes that are on the beat
are from the triad. The first chord here is C major. The triad of C major
has the notes C, E and G. And the main note here that's
on the beat is this E note, which is in the C major triad. Then they play this E again and have some other notes
here, which are in key, but aren't in the triad, but this adds a bit more
movement and interest. Yeah. And then we have the chord A minor and a blank E note here. So the chord A minor
uses the notes A, C and E. So that note
E is in the triad. Next, we have the G.
And when the G plays, it plays this note here,
which is a D. So in G major, we have the free notes, G, B, and D. Again, this note is
in the free note triad. Da play some more notes here
that aren't in the triad, but again, add a bit more
movement and interest. Then we have the F
chord. And I'm playing the note C. So the chord
F has the notes F, A and C. Again, when this chord
plays, the melody is playing one of the
notes from the triad. Denis pattern repeats, but I do have a slight
variation here. So the first part with
the C is the same. But then when this
A minor plays, I am playing a G. So this actually turns the chord
into an A minus seven chord. So I'm adding an
extra note on top. This is just to make it sound
a bit more interesting, and it's actually a note
that I heard in my head. So just repeating the
pattern again and again, can be a bit boring
for the listeners. So adding a bit of variation can make the part a
bit more exciting. And now when the G plays, I'm playing a
different note here, which is an E. So this is
the sixth note of the chord. G, A, B, C, D, E. So for the second
half of this melody, called two and three,
don't land on the triad. These notes are in key, but
they're not from the triad. Again, it's to make it sound
a bit more interesting and add some variation from the
first half of the melody. And then for Cord four,
which is the F major, I land on C, which again
is part of the triad. So this melody adds a
slight bit of tension, introducing these new notes
that aren't in the chord. Then the tension
resolves itself in the last chord as
it goes back to one of the notes
in the free note triad. Okay, let's
hear this again. So you should have heard
there, especially this Gino. It does add a little
bit of tension. But in my opinion, it makes the part a bit more interesting.
21. Continuing and Finishing the Arrangement: Okay, now let's continue
with the arrangement. Let's close the
editor by pressing E, and let's zoom in by using the key command, command
right arrow. So I want to duplicate
this melody part, so it plays on bar
17 and bar 25. So let's hold down option and click and drag
this over to bar 17. I want to have this twice the
length, so let's loop this. Also at bar 25, I want
to have the shaker play. So let's click and
drag this loop back, and then click and drag
this region over to bar 25. Now let's delete this first
region here mute the Shaker. So let's play this
back from bar 17. And you notice at bar
25, the Shaker enters. I just wanted to add a new
part here so the song's not too repetitive.
Okay, let's do this now. Okay, now at bar 33, I want to add a breakdown. So I want to have just a kick drum and the chords play here. So let's tuplcate
this drum part here. Let's hold down option
and click and drag. And let's also do the
same for the chords part. So this piano part here. Again, let's hold down
option and click and drag. Let's turn up the
loop by pressing L, and let's now have
a listen to this. Do you notice the drum part does have some fills in there,
but quite like that. Then at bar 37, I want
to add the bass part. Again, let's duplicate this by horn down option and
clicking and dragging. Okay, let's hear this
now from bar 33. I want the loop to continue for the piano, so let's loop this. And for the drum part at bar 41, I want to add some high hats. So let's duplicate
this drum part by holding down option and
clicking and dragging. And now let's double click on this midi region and
add some high hats. We have the names
of the different drums in this drum kit here. Let's select the drum track
so we can hear these notes. And let's just select
this last region here. So this is what I want
here. The high hat closed. Let's just zoom in
on this region by using the key command,
command and write arrow. Now, every second beat, I
want to add a closed hi hat. Let's use the pencil tool, which is currently set
up as the command tool. So let's hold down command and draw it in a high
hat here on beat two. There it is. Let's resize this. And again on beat four. Again, on beat two,
and on beat four. And we can click and drag over this and hold an option
to duplicate this. Again, let's do this again.
Let's duplicate this. And again once more. Okay, let's now close the editor by pressing E, and let's hit this back. And then on bar 45, I want to add even
more high hats. So let's open Editor again. Then we want to have a
high hat every beat. So again, let's hold on
option and click and drag and put this on every beat. Again, we can click
and drag over this and hold option
to duplicate this. Okay, let's hear this
now from bar 41. And then I want to add
even more high hats. So let's duplicate
this region again. And now let's open
up the editor, and I want to have two high
hats per beat now. Like so. I also want the
velocity to be a bit louder and delete
these high hats here. So let's click and
drag over these and duplicate this by hon down option and clicking
and dragging. And again, let's copy this over. Let's do the same now
with the second half. Let's just Sumo,
and I'm going to drag over and duplicate
a few more of these. Okay, so what's happening now is we're building
up the high hats, which builds up the
momentum of the song. Let's hit this from
the breakdown by 33. So here we had the bass. Then we had the high hats on
every other beat. Then the high hats
on every beat. Then we have two high
hats every beat. We can make it even
more extreme here and have four high hats playing
every beat if you wish. I might not normally
do this, but let's do it now just
for a bit of fun. So let's click and drag
over these four beats here, drag it back, and jupica
over the new part. Let's delete the other high hats here. Click and drag over these. Then hold down option
and click and drag. Let's do the same
for all of these. Speed this up. Okay, let's
hear this now from about 49. That can make it a
bit more interesting. But for this example,
I just wanted to have two high hats
play every beat. So I'm going to undo this
by pressing Command Z a few times. Okay, there we go. Let's now close
Editor by pressing E. And I want to add some more
instruments here as well. So during this
breakdown, it's not just going to be the pianos
bass and drums. Let's add some of
the SIMPS as well. We have the CIMP part
we had previously. And Ah. Let's add this part from before, and let's have this
enter on bar 41. And let's also have this new if, this melody, enter on bar 49. Then bar 57, we're going to
have these drums here play. So again, let's hold on
option and click and drag. And again, let's
loop all this over. On the piano, let's
have it end on bar 73. So let's turn off
the loop by pressing L and track this over to bar 73. Okay, let's hit
this breakdown now. I L Are you. Then drawing playback, added the shaker part for
the last 8 bars. The shaker part is a bit loud, so I'm just going to
turn it down here. We're going to look at basic
mixing later on, though, but I just wanted
to quickly turn a level of this instrument down. Okay, something that's
a bit more suitable. Now for the ending,
it just stops, which sounds a little strange. So I actually want to
have this symph part for 4 bars and also the piano part for 4 bars. Let's
just hear the ending. Okay, that feels like
a more natural ending. There is still a lot
more we could do. For example, I may add
some snares at bar 49, so I'll just quickly show
you how to do this now. This is the snare I want to
add to every other beat. So on beats two and four,
there'll be a snare. Let's just zoom in by using the key command,
command write arrow. Okay, something like that.
Let's hear this now. I. This is just a really
basic arrangement, but hopefully, there's a few
ideas there you can use. So B 57, we go back to this
drum part from before. This drumbeat has more going
on and has some ghost notes. So I thought it'd be nice to go from the simple drumbeat into the more complex drumbeat to build up more momentum
and interest. One last thing I'm
going to do is just color the tracks
of these drums. Remember, these are
different parts. So let's change the color by
using the key command option C. So I'm just going to
choose a different color, so I know it's a different part. And the same for this one. So quickly, I know we have
these different drum parts. I do recommend spending more
time on this for your songs, but I hope now I've taught you a few arrangement and
structure techniques. Okay, next, let's have a
look at some basic mixing.
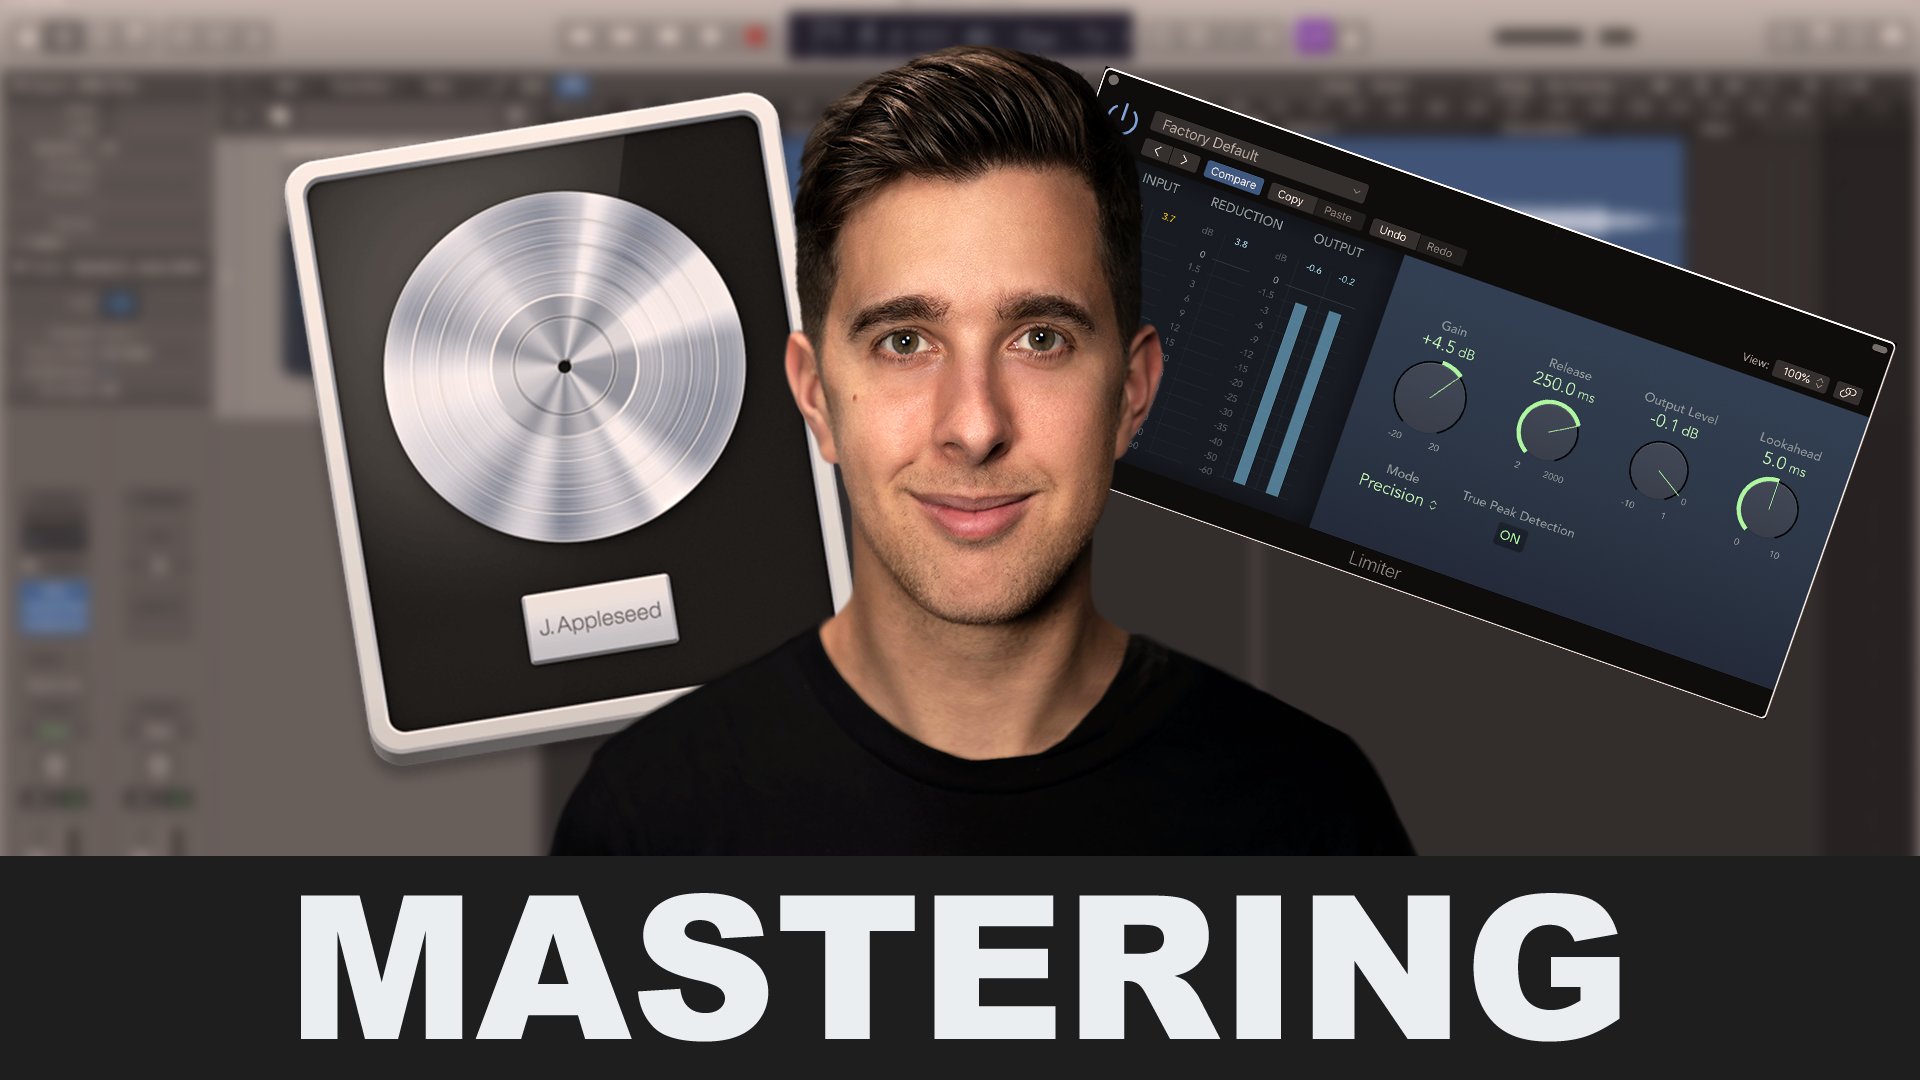
22. Level Balancing for Basic Mixing: Basic mixing. Right, let's
start with level balancing. So let's adjust the levels of the instrument so they
fit best in the mix. Let's first of all,
open up the mixer. We can do this by
pressing this button here or we can use
a key command X. First of all, let's pull all of the faders for
the tracks down. So we're not going to pull down the stereo out or the master, just the faders for the tracks. When we increase the faders, this allows you to easily focus
on what you want to hear. Also, when you begin
to build up the mix, make sure you leave
plenty of headroom. Aim for the loudest parts of the song to peek around -12 DB. We can see this in a
stereo meter over here. Right now it's peaking at 3.5
dB, which is far too loud. So if we aim for around -12 dB, this will stop any clipping
and will give space for any loudness changes that we
do when we master the song. Now, choose the most important instrument or element
of the track. This will normally be the
vocals if your song has vocals. For instrumental music, this might be an instrument
or the drums. So for this song, it's
going to be this loop part. I'm also going to rename
this in the mixer lead. Okay, now let's close
the mixer of X, and now let's cycle
a part of the song. I'm going to choose
this part here as it has everything playing. Again, let's open up the
mixer by pressing X, and I'll play this back, and I'll set the level
for the lead part. Remember, I don't want
it to be too loud. Let's now click on the peak
level here to reset it. So when I play this back, we can see the level of the stereo out. Okay, I'll play this back
and set this level now. Okay, now let's add the drums. So I'll play this back and I'll increase the fader
for the drums. This will give the track weight. It's important to
use your ear and try to set this at an
appropriate level. This may take a lot
of trial and error, you can always use
a reference track or songs that you like mix of. You can listen to the
level of the track in the song and try to level
your song similarly. The drums is this one here. Again, I'm going to rename this. Okay, let's play this back now. Hi So drawing playback, when I increase the level of the drums to match
the lead part, the peak level is a lot
higher than -12 DB. So I turn down both the
lead and the drum part. You also want to level match the different drum instruments, including the kick,
snare and hats. So you can put the different
drums onto different tracks, or in some drum instruments, you can change the
level in here. For example, in the
drum kit designer, you can change the level of
the different drums in here. But for now, I think the level of the
drums is quite good. Now, once you're
happy with the level of the drums, add the bass. So bring it up, so it
locks in with the drums. Okay. I think there's
about fine for now. You may need to
adjust this later on, so don't worry if it's not at
the perfect level just yet. Okay, now let's add the
main harmony instrument. This could be the chords, maybe the piano,
synth or guitar. For this track, it's the piano
part and the synth part. So let's play this back
and I'll set the level of the piano first
and then the SEP. I Okay, so that's all the
main instruments. Now let's bring in
any secondary parts. This could be pads,
extra instruments, backing vocals, or effects. For this simple song, the only extra part
is the shaker part. So let's level match this now. With these, try not to take away the attention from the
main elements of the song. Now let's have a listen to
the whole mix from start to finish and make these small adjustments to the
fader if needed. Tiny changes can make
a big difference, so take your time
and trust your ears. So let's turn off the cycle
range by press and see, go back to the start
by press and enter, and then play this
back with Space Bar. Oh. Okay, I think about
theirs, correct? So drawing playback, I was adjusting the
faders very subtly, and I was also trying
to make sure that the stereo out didn't peak
much higher than -12 DB. Later on, when you add different
processes and effects, you may need to
change the level of the tracks as well. So
just bear that in mind. Again, this all takes practice, but I hope now you
understand the basics of level matching and you can use a simple method when
you start a mix. Next, we're going to have a
look at EQ or equalization.
23. EQ for Basic Mixing: Sic Mixing EQ. Okay, so now have a listen to any instruments or tracks that need a bit of
tightening or clarity. This is where we can use
some EQ or compression. Let's first talk about
EQ or equalization. This allows you to raise or
lower certain frequencies. Let's open up the channel
EQ and Logic Pro, and I'll explain
the basics of this. We can add a new
plug in by going to an empty plug in slot here and
clicking on an empty slot. For the channel EQ plugin, we will need to go down to EQ, channel EQ and stereo. I'll show you this on the drums just so it's really
obvious to hear. Our drum preset currently
has a channel EQ, so let's click on
this to open this up. We can also access
the plugins and the inspector, not
just the mixer. In this EQ plugin, we
have different bands, and this allows you to adjust which part of the
frequency spectrum. On the left, we have the
lower sounds or frequencies, and on the right, we have the higher
sounds or frequencies. If it's sounding a little muddy, you can remove some of
the lower frequencies, and if it's sounding
a little dull, you could boost some of the upper mid
frequencies, for example. So we can click on
some of these nodes and move the
frequencies up or down. You can also move
them left or right so you can adjust the exact
frequency you wish. I'll solo the drums
by pressing S, and I'll play this
back now and adjust some of these nodes so you
can hear the difference. Before I do this,
I'm just going to turn on the cycle
region by pressing C, so it's going to loop
this section here. Okay, let's play this back now. So you should have
heard a difference when I was boosting and
cutting the frequencies. We also have these
controls down here. I'll explain these now quickly. The one in the middle is gain. This allows you to choose how much we boost or
cut the frequency. We can control this by
clicking and dragging on the node or we have
this control here. At the bottom here we have Q. This allows us to control how wide or narrow the
EQ adjustment is. Wide settings can sound more subtle and musical at times and narrow cue settings
can be used to fix specific problematic
frequencies. We can also adjust
the cue settings by clicking and dragging on
these vertical lines here. For example, in a vocal, if there's a harsh ringing
or whistling tone, you can find that
problematic area and make a cut at that
specific frequency. So you can sweep through the frequencies
using a narrow cue and then find an
exact point which the issue is the
strongest and cut there. You could also use a narrow cue setting for a snare drum or guitar if there's
any unwanted ringing or resonance that stands out. So with a narrow cue, you can remove just the
unwanted frequencies without adjusting too much
of the overall sound or tone of the instrument. And the top setting
here is the frequency. Lower numbers are lower
frequencies or lower sounds, and higher numbers are higher frequencies or higher sounds. And we can turn the bands on and off with these
buttons up here. Also, sometimes
when you're trying to select these bands up here, it can select another band, which is why using these numbers
down here can be useful. We also have these shelves here. So here we have a low shelf, and this boosts or cuts
all the frequencies below a chosen cutoff point. This is commonly used to add or reduce base and
low end weight. Then we have the high
shelf which boost or cuts all the frequencies above
a certain cut off point. This is often used
to add brightness or tame harshness
in the top end. I'll play this example
back again and adjust a low and high shelf
so you can hear a difference. It can be useful to start with
some extreme EQ settings, so you can clearly hear
what the band is doing. After that, you can
dial it back to something more subtle
and usable settings. And then we have a high pass filter and a low pass filter. A high pass filter removes the low frequencies below
a selected cutoff point, and this is commonly
used to clean up rumble or unwanted low end. It's called a high
pass filter as it allows the high
frequencies to pass. Then we have a low pass filter, and this removes the
high frequencies above a certain cutoff point. This is often used to reduce harshness or to make a sound
sit further back in the mix. And this is called
a low pass filter as it allows the low
frequencies to pass. The resonance control
for these filters allows you to boost or cut
around the cutoff point, and we also have a
steepness control that lets you set how
steep the slope is. These allow you to shape the
character of the sound and decide how gently or aggressively frequencies
are removed. Again, I'll play this
back and turn on and off these filters and adjust some of these settings so you
can hear the difference. Okay, so that's the basics of using the channel
EQ and Logic Pro. Just be aware that
software instruments often need less EQ
than audio recordings. This is because they're
usually well balanced and free from unwanted
noise or room resonance. So don't recommend using EQ
just for the sake of it. Use it to make the
mix sound cleaner. Let's now close this
channel EQ plugin for now, and next let's have a
look at Compression.
24. Compression Basics: Basic mixing, Compression. Compression helps us control
the dynamics of a sound. It basically turns
down the louder parts of the signal and turns
up the overall level. This makes the signal
more even and controlled. For this example, let's add a compressor plugin
on the drums. You can see here
we actually have these two compressor
plugins on the drums, and we also have this
chromoglow and limiter plugin. So I'm actually going to remove all these plugins and add
a new compressor plugin. We can remove a plug in by
hovering over to the right of the plugin and clicking on
this arrow button here, and then select no plugin. Let's do the same for the
other plugins as well. Okay, so now let's add
a compressor plugin. So let's click on empty slot
and then go to dynamics, and then compressor and stereo. Okay, so now let's have a look at the main controls
for this compressor. The first main
control is threshold. This tells the compressor
when it should start to work. So when the signal goes over the amount you set
on the threshold, this is what will be compressed, and you can see the compression
in this meter up here. I'll play the drums back now and adjust this
threshold control. So when I have the
drums on -3.5 dB, it's only the loudest parts of the drums that
will be compressed. When I change this to -50 dB, anything above -50 dB
will be compressed. For this example, it's all
of the drums the whole time. For this example, I just want some of the louder
hits to be compressed, so I'm going to adjust the
threshold control now, so just the louder
hits are compressed. But later, I may change this to some extreme settings so we can hear the
compression a bit clearer. The next main control is ratio. This sets how strong the
compression will be. The ratio is written as
a number to a number. For example, a ratio of
two to one means that if the signal goes four
dB over the threshold, only two DB will come
out above the threshold. A ratio of ten to
one means that if the signal goes ten dB
above the threshold, only one DB will
come out above it. So the higher you set the ratio, the more the peaks are reduced, and the stronger the
compression will sound. Let's play this back and
I'll adjust the ratio and threshold control so you
can hear the difference. So for this example, I'll
leave it around three to one. So this means if the signal goes three DB over
the threshold, only one DB will
come out above it. Okay, now let's talk about Tech. This controls how
fast the compressor starts working once the signal
goes above the threshold. A slow attack allows the
initial hit of a drum or a note to pass through
before compression begins. This can make the sound
feel more punchy. A fast attack means
the compressor reacts almost instantly. So the entire signal above a threshold is
controlled right away. A fast attack can be useful when you want to
tame sharp peaks, smooth out aggressive
transients, or keep the sound more even
and controlled in the mix. I'll play this back
and adjust as control, but just be aware these
changes may be subtle. We can also see these changes
with a needle in the meter. I'll leave this at
20 milliseconds, as this is a good
attack time for drums, as it controls punch while
controlling the body. Now let's have a
look at release. This controls how fast
the compressor lets go after the signal falls
back below the threshold. A faster release means the compressor stops
working quickly, which can make the sound feel
more energetic and lively. A slow release keeps the
compression active for longer, which can smooth at
the performance, but may also make it
feel more controlled or even slightly
flattened if set too low. The aim is to choose
release time that matches the rhythm and natural movement
of the instrument. A good starting point for a
drum Compression release is around 50 to 150 milliseconds adjusted so the compression recovers in time of the groove. Again, I'll play this back
and adjust this control. The changes can
sound very subtle, but be sure to have a
look at the needle in the meter up here when
I adjust these changes. Okay, I think around 97 milliseconds sounds
fine for this example. This gain reduction
meter shows how much of the signal has been
reduced by the compressor. When the compressor is working, you will see the needle move. I recommend playing
the track and watching how much gain
reduction is happening. In most cases, aim
for only a few dB of gain reduction
on the loudest parts, usually around three to six dB. This keeps the dynamics controlled while still
sounding natural. Okay, then we have makeup gain. This lets us turn
the level back up, so the signal of compression and the signal of out Compression are roughly the same volume. When we add compression, the
louder parts are reduced, so the overall level
becomes lower. Makeup gain allows us to bring
the level back up again. When mixing, it's important to match the level of
the plugin on and off so you can judge the sound based on what
the compressor is doing. If the compressed
signal is louder, it can trick your ears
and change your judgment. So for this example, I'm
going to set auto gains off and adjusts makeup
gain drawing playback. Then I'm going to
bypass the plug in with this button up here
and try to set this so it's the same
level with the plug in on and off. Okay,
let's do this now. Example, I think I need a
round two dB of makeup gain. There are more controls
for this compressor, but I've just covered the
essential ones in this video. If you'd like to find out
what all the settings do, be sure to check out my
complete Logic Pro course. So when using Compression,
the goal is to have the track feel more controlled
and consistent, but still sound natural. If the sound starts to feel
squashed or too lifeless, adjust a threshold or ratio. It is also more common
to use compression on audio recordings than on
software instruments, as recorded performances
usually have more natural volume changes
and need more control, while many software instruments are already very
steady and level. Okay, so that's the very
basics of Compression, and I recommend testing
this out for yourself. Let's now close compress a
plug in and move on to panic.
25. Panning Basics: Basic mixing, panning. Panning allows us to place each instrument or track
in the stereo field, so we can have it
more to the left, more to the right,
or in the center. This helps create
separation and space and stops everything from sitting directly on top of each other. By default, most tracks
will be center panned. For some instruments,
this is perfect. For example, vocals, bass, and a kick drum
are almost always kept in the center as they
form the core of the mix. Other instruments can be panned to help everything fit together. For example, you can move
guitars, sips, percussion, or backing vocals slightly to the left or right so they
have their own space. Even a small amount of panning can help clean up
the mix and make it feel wider and more interesting. Okay, let's try this now. So let's choose a supporting instrument and pad
it to one side. For this, let's
choose the shaker. Let's unslo the drums
and solo the shaker. Then I'll play it
back and move it from the left to the right channel
with this pan DL here. And then drawing playback.
I'll play it back in the mix. This will be easier to hear
if you wearing headphones. Okay, so let's do this now. So you should have heard there this opened up the
space a little. I don't want to pan all
the way to the right, so around here should be fine. Now we can pan
another supporting instrument and pan
it the opposite way. In this case, the left. I don't have many instruments
or tracks here, but just for this example,
let's pan the SIM to the left. Let's now play
this back and draw on playback. I'll
pan the Synth part. Also draw on playback,
I'll solo the symp and also the shaker part.
Okay, let's do this now. I I would pan more supporting parts, but this song only
has a few parts. But just for this
example, I'll leave the synth part pan to
the left slightly. If you have too many
instruments on one side, the mix can sound unbalanced, so try to spread
things out evenly. There are no strict
rules when panning, but I recommend keeping the
most important elements in the center and using the
sides for supporting parts. Also, try not to pan too many similar sounds to
the exact same spot, as this can make the
area feel crowded. Panning is a simple tool, but it can make a huge
difference to clarity and width. Use it to help each
instrument sit comfortably in the mix and give your song a more open and
professional sound. I also recommend checking your mix on both studio
monitors and headphones when you pan because
each one gives you a different picture
of the stereo image. We can also pan each track in the inspector and also in the track header, not
just in the mixer. Okay, so that's
panning. Next, let's move on to reverb and delay.
26. Setting Up Reverb Sends: Basic mixing, reverb and delay. Okay, so now let's look
at reverb and delay. These effects help create a sense of space and
depth in your mix. Without them, everything can sound very dry and very upfront. With the right amount
of reverb and delay, your track can
feel more natural, more spacious, and more musical. Let's start with reverb. Reverb simulates the
sound of a real space. When you colla up in
a large room, a cave, or a cathedral, you hear the sound bounce off
the walls and surfaces. Those reflections
are the reverb. In Logic Pro, we are
recreating that natural space. Even a small amount
of reverb can help a vocal or instruments sound
more natural and spacious. You can add a reverb plug
in directly to a track, but I recommend using a
send and return track. This allows several instruments
to share the same reverb, which helps glue
the mix together and also saves computer power, since you are using
one reverb effect instead of adding it
separately to every track. When using reverb, the
aim is to add just enough to create space without
washing out the sound. Too much reverb can make
the mix muddy or push the instrument too far back,
making it feel distant. A good starting
point is to bring the reverb up until
you can just hear it, then pull it back slightly so it fits naturally in the mix. Let me show you how to
set up a reverb send now. I would create
ascend and then load a reverb such as Chroma
verb on the return track. Then I'll quickly go over some basic controls of this reverb, so you can hear how they affect the sound. Okay,
let's do this now. So in the mixer, let's choose a track I want to add reverb to. So for this example,
let's add reverb to the lead synth part.
That's this part. Now let's go to the Sends
area, which is this area here. Then click on the empty
Send slot and go to BS, and you will see a list
of available buses. A bus is like an internal audio
pathway inside Logic Pro. It lets you send some of
the audio from one track to another track without moving or copying the original audio. Think of it as routing
a small portion of the signal through a separate channel where you can add effet. Okay, so let's select one
of these available buses. For this example,
let's choose bus one. When you do this, Logic
Pro automatically creates a new auxiliary track on the right. And we
can see this here. This c track is also called a return track because it receives the signal that you
sent to it through the bus. All the effects that you place
onto this ctrack will only affect the signal
that's been sent into it, not the original track. On this c track,
let's now click on an empty plugin slot and
add a Reverb effect. So let's click here
and go down to Reverb. And for this example, let's
choose Croma verb and stereo. Logic Pro does offer many of our reverbs that it
can test out as well. But for this example, I'll
be looking at ChromaVerb. Now the reverb is set
up on the return track. We can now use the Sen Dial
on the original track to control how much of that track has been sent into the reverb. So let's do this now. Let's
close this reverb plugin. Now the reverb is set
up on the return track, and the Sen Dial on
the original track controls how much of that track has been sent onto the reverb. So now we can turn
the Sendal up or down to add more or less
reverb to the sound. I'll play this back now
and draw on playback, I'll adjust the sendal so
you can hit a difference. Hi As a general rule, I recommend keeping
the wet control inside Cromaverb at 100%. This is because on
a return track, we only want the wet
signal, not the dry signal. The dry signal already comes
from the original track. If you add any dry signal
in ChromaVerb as well, you will just make
the track louder, which can confuse
your level balancing. So keep Chroma verb on a fully wet signal and let the send amount decide
how much reverb you hear. So let's play this back
and draw and playback or unsolo this so we can hear this with the
other instruments. Okay, I think about
there is fine. The great thing about
using Sends is that you can add the same reverb
to multiple tracks. This makes your mix sound
more consistent and more natural as if all the instruments
are in the same space. It also saves CPU power
because you're using one reverb effect instead of adding several separate
reverbs on every track. So for this example,
let's actually add some reverb to the
synth part as well. That's this part
here. Let's click on this drop down
list next to SNS, go to Bs, and again,
let's choose Bus one. Now we can move this
Sendal to control how much reverb you're going
to have on this track. So let's play this back and
I'll adjust this Sendal. So I think that's about the right amount of rebb
for the synth part.
27. Using ChromaVerb Basic Controls: Now have a look at some basic
controls inside ChromaVerb. So let's open up the
Chromoverb plugin, which is on cs one. This is quite a deep plugin, but I'll go over the main
controls quickly now. However, I do cover this in more detail in my complete
Logic Pro course. At the top here, you can
choose a reverb space. This includes different
rooms and halls. Rooms tend to sound
natural and realistic. Let's just hear this one
now called dark room. Draw and plowback, increase the send amount just so we
could hear this more clearly. Halls sound bigger
and more lush, often use of pads, strings
and ambient sounds. Let's have a listen to this
one called Concert Hall. And drawing playback, we'll have a listen to reflective Hall, and then finally
go back to room. Okay, let's now have a look at some of these
controls down here. Okay, let's now have a
look at the size control. This lets you set how
large the space sounds. Bigger sizes create longer, more open reverbs, while smaller sizes sound tighter
and more controlled. Let's just play this back and
I'll adjust the size dial. We also have the decay time. This sets how long
the reverb te lasts, meaning how long it takes
for the reverb to fade out. Shorter decay times help
keep the mix clean, and longer decay times can give you more atmospheric
or dreamy effect. For example, a short decay
might suit a pop vocal, while a long decay might work nicely on a pad
and ambient track. Again, let's play
this back and I'll adjust this control so
you can hit a difference. Another important
control is pre delay. This adds a small gap between the dry sound and the
moment the reverb starts. A small amount of pre delay can help vocal stand out because it gives the initial
part of the word some clarity before
reverb arrives. With no pre delay, the
reverb starts instantly, which can make the
sound feel closer and more blended but
sometimes less clear. Let's play this back and
adjust to pre delay. We can also choose
musical beat divisions. Or we can choose milliseconds. There's also an EQ section
inside chroma verb, although not all
reverbs have this. This allows you to shape the
tone of the reverb itself. Removing some lower
frequencies is usually a good idea as low reverb
can muddy up the mix. You can also brighten
the reverb by boosting the highs if you
want a more airy sound. These changes can be
quite subtle because this EQ only affects the
reverb, not the dry track. Let's play this back again, and I'll quickly adjust this EQ. Once you've created a
reverb sound that you like, go back to the Sendal and
mix it inappropriately. I recommend bringing it up until we clearly
hear the reverb, then pull it back slightly. This usually gives you a
natural and musical result because the reverb supports the sound without
overpowering it. The idea is for the
listener to feel the space rather than
be distracted by it. So let's do this now
for the symp and lead. Y. Hi Hi. Okay, I think these settings
are fine for this track. So that's a quick
look at reverb. Next, let's have
a look at delay.
28. Delay Basics: Now, let's look at
delay. Delay repeats the sound after a very
short amount of time. You can use it very subtly
to add width and space, or you can make it
more obvious for rhythmic interest
and special effects. A short delay can
help create space without being as
noticeable as reverb. Longer delays can
create vocal throws, echo effects, or movement on instruments like guitars,
pianos or simps. Like reverb, delay
can build up quickly, so I recommend using
small amounts. Keeping the feedback low and
blending the effect gently into the mix usually gives you a cleaner and more
controlled sound. Delay is also great for
placing instruments in the space and adding
front to back depth. Try different delay
times and mix levels to hear how the groove and
energy of the track changes. Let me show you how to set up delay as ascend
effect and logic pro. In the mixer, choose the
track you want to add delay to and look
for the Sends area. For this example, let's add
delay to the piano part. Now, click on an empty send
slot and choose a free bus. So let's click on
here and go to Bs. And for this example,
let's choose Bs two. So when you select a
bus, Logic Pro will automatically create a new
auxiliary track on the right. So you can see now it's created an auxiliary track on the right. This orcs track is our
delay return track because it receives the delay signal that we sent from
the original track. Now, on this xtract, click on an empty plugin slot
and go down to delay. For this example, let's select
Stereo Delay and stereo. This is a very simple
and clean delay effect, perfect for learning the basics. There are many other delay
plugins and Logic Pro, and many of them share
similar controls, so I recommend experimenting with these once you're
comfortable with this one. Because we're using
this as a send effect, make sure the wet control inside stereo delay is set to 100%. This means we are only hearing the delayed signal
on the return track. The dry signal already comes
from the original track, so we don't want any extra dry signal added inside the plug in. Now, the Send dial on
your original track controls how much of that
send you feed into the delay. Turn it up slowly until you hear the repeats coming through. So let's solo this
and do this now. Mm Let's now look at the essential controls
inside stereo delay. At the top, you will see the
left and right delay times. You can set these
in musical values such as quarter notes
or eighth notes, which keeps a rhythm perfectly in time with your
project's Tempo. You can also switch
to milliseconds for custom timing by pressing
the custom sync button here. Now this went sync
to your project, so this can be
useful if you want to looser or more creative feel rather than
rhythmic delays. For this example, though,
let's Tempo sync this. We can change the delay amount of the note with this dial here, or we can choose it from
the drop down list. You also notice I
set deviation to 0%. So this means it's perfectly
locked to Tempo or grid. If you want a very tight
or clean delay time, I recommend having this at 0%. But if you want more
of a human feel, you can add some deviation. Let's now have a look at
these feedback controls. This sets how many
times the echo repeats? Low feedback gives you
one or two clean repeats. High feedback creates more echos and can be great for
creative effects. Just be aware that
too much feedback can clutter the mix quickly,
so use it with care. I'll also mention these filters. These let you remove the high or low frequencies
from the repeats. High cut filters make the
repeats softer and less sharp, while low cut filters prevent the delay from adding
muddiness to your low end. Again, I'll play this back
in the justice controls. Just for this example,
let's increase the send, so it's easier to hear
the delay effect. Shaping the delay with
these filters helps the repeat sit nicely
behind the main sound. For this example, I'm going to cut out some of the
higher frequencies. Now let's blend this delay
effect into the mix. Let's first of all,
set the center zero. And then when you
play the trap back, raise the send
level gently until you hear a delay sitting
behind the sound. I recommend adjusting the
delay time and feedback to create the fill you want.
Okay, let's do this now. About there seems suitable. Let's now hear this
with the other tracks. For this example, the delay
effect is quite subtle, but a little delay
often goes a long way, especially on vocals,
guitars, and lead simps. Okay, let's now close this delay plugin and move
on to Automation.
29. Automation Basics: Automation. Automation
allows you to change settings over time so your mix can evolve
and feel more dynamic. You can automate
almost anything in Logic Pro, including volume, panning, plug in controls, and even instruments
or effects parameters. One of the most common
uses is volume Automation. This lets you raise
or lower the level of the track at specific
parts of the song. For example, if a vocal gets a bit too loud
in one phrase, you can automate the volume
down just for that word. Or if you want a
section to lift, you can push up the pads or backing vocals as
the chorus arrives. Often the chorus is automated slightly louder than the
verse to help it stand out. Okay, so let's set
up Automation now. First of all, let me
unsolo the piano part by pressing this S button and
close the mixer by pressing X. We can show the Automation
lanes by pressing this button up here or by
using the key command A. Now let's choose a
parameter to automate. For this example, let's automate the volume
for the piano part. Let's have it gradually
fade in at the start. So we need to click
down here to activate the Automation then click to add a node or multiple nodes. For this example, let's
have it gradually fade in. So let's click and drag down,
so it gradually fades in. I'll just zoom in
now with the key command and command we arrow. Let's make sure we turn off the cycle region by press and C, and let's go back to the
start by press and return. I'll just so at the piano
so we can only hear this. Let's now unsolo this and hear this with the
rest of the instruments. Let's also add some volume Automation for the
end of the song. This time, let's have the
synth part gradually fade out. So I'm going to click on here
to activate the Automation, and again, we're going to
use volume Automation. So let's click to add
nodes and then drag down, so it gradually phase out at the end. Okay, let's hit back. We could also click and drag and make it
louder if you wish. It's not just for fading out. We can also make parts
louder over time for volume Automation as well.
So let's do this now. But for this example, I'm
going to have it gradually get louder and then gradually
get quieter, like so. Automation is also
great for effects. You can automate a volume swell at the end of a vocal line, automate a delay throw
on a single word, or automate a filter sweep
on a Sym to add movement. These small touches
can really help your mix feel more
polished and professional. So for this example,
I'm going to add a Bitcrusher effect
onto the SIM part. So let's click on the
track header for the SIP and in the inspector in the
audio effect slot here, I'm going to add a
bit Crusher effect. So let's go to distortion
and then go to Bitcrusher. A bit crusher effect and Logic
Pro deliberately reduces the audio resolution by lowing the bit depth
or sample rate. This creates a gritty or low
fi digital distorted sound. This can be great
for adding texture, character and give
you a retro vibe. So what we're going to automate
here is the mixed dile. So I'll play this back so you
can hear the mix on 100%. Let's just solo this. And
just for this example, let's make it a
bit more extreme. So let's increase the downsample and decrease the resolution. Okay, let's try
something like that. So I'm going to
have the mix on 0%, and then the last 8 bars, I'm going to gradually
increase this mixed dile. So it down like this. So the Automation will
control this dile. So let's put this back to 0%. And now let's click on this Automation
dropdown list here. Now let's go to Bitcrusher in this list and then go to mix. Remember, we're
going to start on 0% and have it increase here. Okay, so let's play this
back and hear this. Let's now hear this
with the piano part as well. So let's unsloo this. Okay, great. You can also automate Panning effect
or any other parameter. Again, just for this example,
let's pan the piano part. So in the Automation
drop down list here, let's go to Main
and then go to pan. So just for this example, let's have it pan left and then right. This will be easier to
hear with headphones. Okay, let's hear this with
the and the piano part. The synth part has
volume Automation and a bit crusher Automation, and the piano part has
the pan Automation. The panning is a
bit too extreme, so let's just low this
slightly around that. M I'm just quickly going
through these examples, but I recommend spending
some more time than this and add some Automation to add movement and interest
to your song. We can also automate some
parameters in the synthesizer. So for this example, let's
open up the retro synth, and I want to automate
the filter cutoff. For this example, I'm
going to gradually open the filter so you
can hear more of the high frequencies
as the part plays. This is a common technique in electronic music
to build energy. So let's close a retrosynth and in the Automation
dropdown list, let's go to Retro synth. Let's go to filter, and
let's go to Cutoff. Now let's create some
nodes and drag this all the way down so you can
clearly hear a difference. I'll solo this and
play this back now. So I think something
about this. So it starts off with a lot
of the his cut out. Then they gradually enter,
and then we have more his, and then some are cut
out or filtered here. If I play back and
open up retrosynthe, you'll be able to see
this move in real time. Let's now hear this. We
have the other tracks. So I just made it a bit
less extreme at the start. And it also felt like it
lost energy around here when we cut out some
more of the highs, so I kept it going. I dropped it back
down to where it was previously. Okay,
let's say this again. You can also record
live Automation. Well, I'm not going
to cover this now, but I do cover this and my
complete Logic Pro course. Just be aware that once
you add volume Automation, moving the volume
fader and the mixer will jump back to
the automated level. For example, we have volume
Automation for the SEF part. But if I try to increase
this and play this back, you'll notice it will always go back to the automated level. So if you have volume
Automation added to your track and you want to
change the level of it, you'll need to do this
in Automation lane. So in Logic Pro,
you can automate many different
aspects of your mix. Automation doesn't
have to be extreme. Even small movements
can make your mix sound more controlled,
musical and engaging. So I recommend
testing this out and apply this to your
own musical tracks. Okay, next, let's have a look at Mastering with a
Mastering Assistant.
30. Mastering Assistant Essentials: Mastering Assistant. Okay, so there's still a lot more
we can do with this song. I've quickly mixed it with some essential mixing
tools and practices, but let's now have a
look at Mastering. This is the final stage
of your production, where you get your song to the correct level and
sounding polished, ready for distributing online. All the latest versions of Logic Pro actually include
the Mastering Assistant. This uses AI to
analyze your mix and applies a set of Mastering
processes instantly. It also gives you a few simple controls inside the plugin, so you can tweak
the sound and make small adjustments to the
overall tone and loudness. Mastering Assistant
is not meant to replace a full professional
Mastering chain, but it can give you a
good starting point, especially if you're
new to Mastering, where you just want to quick Master to share
your track online. Okay, so now let's add
the Mastering Assistant. On this stereo Out on the
inspector and also the mixer, you will see that
Mastering Assistant is already loaded by default,
but it's grade out. So let's click on
this to open it now. Now it will begin analyzing
and scanning your track. I recommend choosing a loud
or busy part of your song, usually the chorus, and
then press reanalyze. Logic needs enough information
to understand the balance, tone, and energy of the mix. So let's do this now.
Let's find the chorus. We'll use this
section at the end, and let's play this back and
press reanalyze section. After the analysis, logic will
suggest a starting point. This usually includes a
gentle EQ adjustment, some compression,
a little limiting, and a loudness target. Small and subtle adjustments
usually work best here because their aim is to enhance the mix rather than
completely reshape it. Okay, now let's play this
back and draw and playback. I'll bypass the Mastering Assistant using
this button here. So you can instantly here there, the track was a lot louder. It may also sound clearer or more controlled, depending
on the settings. Okay, now let's go through
some of the main controls. First of all, we
have the EQ section. You can adjust these nodes to boost or cut certain
frequencies. So I play this back and adjust these nodes so you
can hit a difference. You can also make
the iku changes more subtle or extreme
with a slider. You can also turn ikuO and
off with this button here, which is useful for
quickly comparing the process version
with the original tone. Then we have the
character settings. This lets you choose
a different tone or flavor for your master. For example, you can choose something more open and natural, something more punchy, or
something more smooth and warm. These can be subtle,
but play this back and switch between them so
you can hit a difference. Next, we have
loudness. This allows you to increase or reduce
the overall loudness level. You can also see the
LUFS reading here. This measures how loud
your track actually is. Here's a quick
explanation of LUFS. LUFSM is momentary. This measures the very
quick changes in loudness. LUFSS is short term, and this measures the loudness
over the last few seconds. And then we have LUFSI
which is integrated. This is the average loudness
across the entire song. For uploading to
streaming platforms, a good target
loudness is usually around -14 LUFS integrated, as this is close to what many streaming services
normalize too. Some grmres may aim slightly
louder or slightly quieter, but -14, LUFS is a
good starting point. We also have the excite control. Excite adds saturation, which is a subtle form of
harmonic distortion. This can make your track
feel a little brighter, fuller or more energetic. In Mastering, saturation is
usually used very gently, just to add a small bit of character without
distorting the mix. So I play this back
now and draw on playback and enable and
disable the excite control, but just be aware the
differences are quite subtle. Okay, now let's have
a look at spread. This adjusts the
stereowidth of your master. Increasing spread
can make your track feel wider and more open, while reducing it can
tighten the image. You want to be careful
not to overdo this as too much width can make your mix feel hollow or unfocused, but small adjustments can help a track feel more polished. Again, I'll play this back
and adjust as control, you may be able to
hear this a bit clearer if you're
wearing headphones. Now let's talk
about the loudness compensation button down here. This is extremely useful. When this is enabled, logic matches a level of the process signal to the
level of the bypass signal. This means you can
compare your mix fairly. Louder audio often sounds better simply
because it's louder. Loudness compensation solves
this issue and allows you to focus on the actual tone and dynamic changes rather than
the volume differences. Let me demonstrate this
now so you can hear the more subtle
changes and not be distracted by
loudness variation. So let's enable loudness
compensation and draw and playback or bypass and unpypass
the Mastering Assistant. So you should have
heard there, it does sound brighter with a
Mastering Assistant. But for now, let's bypass
loudness compensation. So when I play this back again, the track will be much
louder and you'll also be able to tell it's louder
from the stereo outmeter. Another important thing
to remember is headroom. Before mastering, you want to make sure your mix doesn't peak. There's no set
number, but between -12 and minus three
DB should be fine. This means the loudest part of your mix should
not go above this. Having good headroom gives the Mastering Assistant
space to work cleanly. If your mix is peaking
too close to zero DB, the limiting stage can cause distortion or clipping,
which can ruin your master. So always make sure
your mix is not too loud before you
start mastering. Okay, so that's a
quick crash course into the Mastering
system and lodge it Pro. I recommend experimenting
with these settings yourself. Think of this tool
as a way to add polish rather than
fix mix issues. If something sounds wrong
at the Mastering stage, it's always best to
go back to your mix, fix it there, and then run
Mastering Assistant again. So once you're happy
with your sound, move on to the exporting or
bounce in the final track. Now let's close the
Mastering Assistant and move on to exporting or
bounce in the final track.
31. Exporting or Bouncing Essentials: Exporting or bouncing. Okay, now let's look at exporting or bouncing
your final track. Once you're happy with
your song or master, you'll want to get
it out of Logic Pro as an audio file so
you can share it, upload it, or listen
to it on any device. Before bouncing, make sure the start and endpoints of
your project are correct, and you don't
bounce any unwanted silence at the beginning or end. You can set this by
adjusting the cycle range. You can turn the cycle
range on and off with the key Command C and drag to make the cycle range the full length of your song. So for this song, it
starts on bar one. And ends on bar 77. Just be aware of any
reverb or delay tales at the end of your mix and allow
them to fade naturally. If you're unsure how
long the tale should be, listen to similar
songs and notice how much silence they leave out after everything fades out. So let's just turn
off the cycle region and listen out for any
reverb or delay tales. So I believe the
song finishes around here. Let's listen again. Just to be safe, I'll have a slight bit
of silence at the end. So let's drag this
to around here. Okay, now the cycle region covers the full
length of the song. We can zoom out with
the slider here or the key command,
command left arrow. Let's just zoom
in slightly so we can see the full length
of the song clearer. Okay, now let's export
or bounce the song. To export your song, go to
the top menu and choose file, then bounce, then
project or section. This will open the
bounce window. Here can choose
your file format, sample rate, and a few
other important settings. For most situations, I recommend bouncing as a WAV
file at 24 bit. This gives you a high quality
uncompressed audio file. P three is are much
smaller in size, but they use compression, which reduces the audio quality. So if you're exporting
a final master for uploading to streaming platforms or for long term storage, I recommend choosing a WAV. So I'm going to unchNPF
and just export as a WAV. For sample rate, if you're
uploading your track online or releasing it as
a standard audio file, I recommend choosing 44.1. That is the standard
sample rate for music. If you're bouncing
your track to use in a video, choose 48. Most video formats
run at 48 kilohertz, so choosing that
sample rate helps avoid playback issues or
extra conversion later. But I just want to
have this track as a standard audio file. So I'm going to choose 44.1. For format and diving, you can usually leave this on
the default options. Diving is a type of noise
added when reducing bit depth, and it helps prevent
unwanted digital artifacts. Logic, we only use diving
if you lower the bit depth, but because we're
exporting at 24 bit, you normally don't need
to touch this setting. Also, make sure
normalize is set to off. Normalizing automatically
adjusts the volume of your bounce file so the
loudest part hits zero DB. This might sound
helpful, but it can ruin your master as it
changes the levels. Leaving normalized set
to off ensures you export your mix exactly the
way you hear it in Logic Pro. Once you've set
your options, press Okay and save the name and
location for your audio file. So for this example, I'll
save it on my desktop. For this, I'll call it Project
LP example Master one. And then click Bounce. Don't may take a few moments to bounce. Okay, so that's the
basics of bouncing. You can now listen to your
track outside of logic, or bload it, share it
or send it to others. Let's now have a listen to our song outside of Logit proro. So I saved it on my desktop,
and it's this song here. So, let's listen
back to this now. Ah This is a very simple song, but I hope now you
understand the basics of LodgerPro so you can start
to make your own music.
32. Class Project and Conclusion: Okay, so we're now at
the end of this class. Thank you so much for watching, and I really do hope
you found it useful. For your class project, I like to create your own
song in Logic Pro. Doesn't have to be too long, but it should
include a drum part, bass part, chords,
or a lead part. You can build your
project in either the Live Loops area or Tracks Area. But if you build it in
the live loops area, make sure you record your performance into
the Tracks Area. Once you finish your song, take a screenshot of the arrangement, and post this as
a class project. I'd also like you to
write a short paragraph, explain how you made the
song the way you did. Okay, so thanks
again for watching this class and hopefully
see another class.
 Tomas George, Music + Audio Production Instructor