Transcripts
1. Class Overview: Hi, I'm Sue Gibbins, a surface pattern designer
creating for fabric, wallpaper, and home decor. Linear patterns are
some of my favorites to design and are always in
demand for interiors. They range from
simple stripes to intricate prints built from many details that somehow line
up perfectly edge to edge. In this class,
you'll learn how to build a reusable template in Procreate to create your own
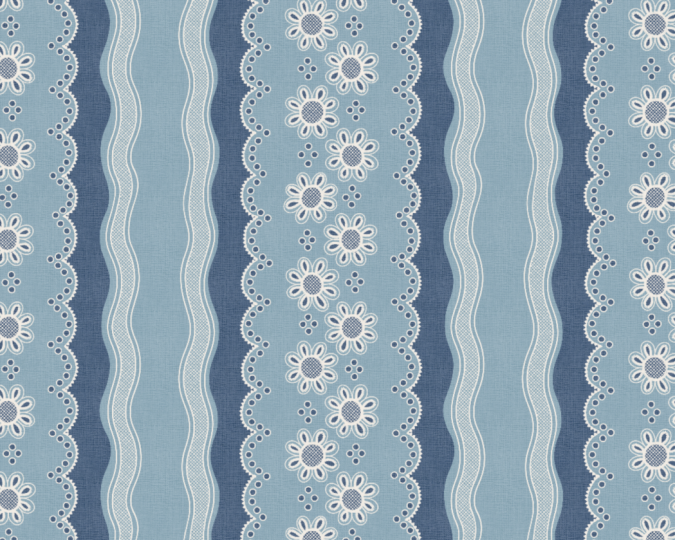
seamless linear repeats, including a lace inspired decorative stripe as
your class project. I'll walk you through my
entire process in Procreate. Every step is fully
demonstrated. So if you're new to pattern design or the app,
you're in good hands. If you're already experienced, there's still plenty here
to enhance your workflow. For the class,
you'll need an iPad, an Apple pencil, and
the Procreate app. I'll provide a set of resources, including custom
brushes, layout guides, colour palettes, and more. By the end, you won't just
have one finish pattern. You'll have a whole process for designing linear patterns. Grab your iPad and
let's get started.
2. Project Preview: L. After we've covered some basics of pattern layouts
and set up a template, the main class project will be to create a stripe pattern. I'll be demonstrating a
decorative lace like stripe. You're welcome to join me on that theme or choose
a different one. To help you get started, there's a design guide
covering style direction, color, motif, and
layout suggestions. Alongside it, you'll find other resources to
support your project, including palette files, wireframe layout guides,
and Procreate brushes. You'll build your template
and then use it to create a seamlessly
repeating linear pattern, such as a lace stripe. Once it's ready, you'll use the pattern previewer
tool to see your seamless repeat
pattern at different sizes. Download an image of it and share that in
the class gallery. To post your project
from a web browser, go to Projects and Resources
and click Submit Project. Add a project title and then upload your image or
several images if you like. I'd also encourage you to add a few notes reflecting
on your project or ask questions
here if you'd like specific feedback from me
or your fellow classmates. Once you're ready, scroll to the top of the page and click Publish or save draft if you'd
like to come back later. After you've posted, take some
time to look through what your classmates have made and consider leaving some
positive feedback. It's a great way to connect and learn from each
other's approach. I'm sure you're keen
to get started. In the next lesson,
we'll make sure you've got all the
tools and resources you need close at hand before we begin.
I'll see you there.
3. Tools & Resources: First of all, a quick reminder
that you need an iPad, an Apple Pencil, and the
Procreate app for this class. I'm using version 5.4 0.11, but so long as your version is fairly recent,
it should be fine. Alongside the device
and software, I've also put together some resources to
support you in class. There are three wireframe layout guides we'll
use in class, the horizontal stripe,
the decorative stripe, and the diagonal wave. There's a design guide for the ace stripes project with suggested
motifs and palettes. There's a Procreate
swatches file with the suggested
colour palettes inside. There are six free
Procreate brushes, plus a PDF with links to my color palette Maker and
pattern previewer web tools. As an extra thank you
for taking this class, I'm offering some
bonus resources. They're completely optional, but yours if you'd like them. I've added the pattern playbook, an eBook guide to layout frameworks for
surface pattern design. There are also three additional
wireframe layout guides, the horizontal wave, the vertical line,
and a border print, plus a Procreate canvas with seamless fabric
texture overlay. I'll put the link
in the description. When you claim the
bonus resources, they'll be sent to you by email. For your convenience,
the email includes both the class resources and the bonus resources
in one handy pack. If you'd rather not receive
emails, no problem, everything necessary
for the class can be downloaded directly in the resources section
if you prefer. Once you've downloaded
the resources, you can use your
iPad share options to send them over to Procreate. The brush set will load automatically in your
brush's library. The palette will appear at the
end of your palettes list, so you may need to
scroll down to find it. The other files will be
added to your gallery, and I suggest you make a stack to keep them
together for class. Make sure you have everything. Then in the next lesson, we'll take a quick look at some different types of
linear pattern layouts.
4. Linear Pattern Layouts: Welcome back. In this class, we'll be focusing on linear
pattern layouts where motifs are organized in lines that create a clear
sense of direction. These types of designs
are well suited to wallpaper, bedding
and upholstery. We also see them on clothing, kitchen textiles and as coordinates that balance
more complex prints. Let's take a look at various
types of linear layouts. When we think of layouts
based upon lines, stripes immediately
spring to mind. Stripes can be simple or
complex bands of color or motif running vertically,
horizontally, or diagonally. Plaids are made up of both vertical and
horizontal lines or thin bands crossing
over each other. Zigzags have angular
rhythmic lines that create more
movement and energy. Waves also create movement, but the lines are
curved and flowing, and so they soften
the linear structure. Directional vines are
composed of organic wave like lines leading the eye
in a particular direction. The linear backbone usually
has extra details attached, such as leaves or flowers, which give this type of
layout a natural rhythm. Decorative stripes
and borders are elaborate linear
designs built from multiple motifs or
ornamental bands. A stripe repeats its band continuously across the surface, whereas a border uses one
band just at the edge. Linear layouts are
fairly simple to construct yet offer endless
possibilities for variation. Interest and character can
be introduced in many ways, combining different line widths, clustering lines together, or adjusting density
and spacing. A free hand approach feels
looser and more organic, while precise linework
feels clean and structured. Breaking up the
lines through gaps, distressed texture or fading
adds further variation. To begin with, we'll be making
linear patterns that run vertically or horizontally
and cross two opposite edges. Later on, I'll show
you how to handle designs that cross
all four edges, such as diagonal stripes. But in the next lesson, we'll start by creating a simple linear pattern template in procreate. I'll
see you there.
5. Prepare a Linear Template: Mm hmm. Here we are in the Procreate app, and this is my stack where
I'll keep my files for class. We're going to make a
linear pattern template. First thing to do is
create a new file with the plus icon and choose
new Canvas from the top. For color profile, I'm going
to keep it in RGB mode. Now for this lesson, I recommend you follow along
with my dimensions. But after you learn
the technique, you can make a template
any size you like, and it can be square
or rectangular. I want my template to
be 3,600 pixels square, which is 12 " by
12 " at 300 DPI. The important thing
at this stage is we actually create a file that is half the width of what our template
will be in the end. I need to make a 6 " by
12 " file at this stage. I'll make sure it's 300 dpi, then tap the blue check
icon to create the canvas. Once the file is created, I'm going to add a color fill. The color we choose
here doesn't matter, but we need to be
able to see it, something other than white, I'll select this blue
from my palette. Now, tap the layers icon, tap layer one, and
choose a fill layer. Now that we have that filled, I'm going to double the
width of the canvas. To do this, tap the wrench icon, open up the actions menu, then choose Canvas, crop and
resize and go into settings. I'm now going to set
the width to 12 " since that's the size I want my file and my template to be. Leave resample canvas
and snapping off, check its 300 DPI and then tick this icon here to
commit that change. Now we can see that
the color fill is exactly in one half of the
canvas, the left half. We'll use this half
Canvas color block to create the template. For the template to work, we need to add a layer below the color block and fill it with a different color such as white. Tap in the layers menu
and add a new layer. Then when you get layer two, hold it and drag it below
layer one. There we go. The color picker choose a
different color, for example, this off white and then fill the whole
layer with that color. We can now turn off
Procreate's own background. The next step of creating our template is to group
these layers together. Layer two already has a blue highlight showing that
it's currently selected. If we nudge right on layer one, that layer will
also be selected. Now that both layers are
selected, we can group them. In my version of Procreate, the group option is underneath
this layers menu here. I remember in older versions of Procreate though that when
you selected multiple layers, the group option would appear
somewhere up top here. Either way, once you've
selected the layers, you should be able to find
a group option, tap on it, and then you'll get new
group with the two layers slightly indented showing that they belonged inside that group. Now we want to create
the selections that allow us to use this as our
template for repeat patterns. First tap on layer one
with the color film and tap again to bring up the
menu and then choose Select. With the color blocks selected, the selection tool bar will appear in the bottom
of the screen. Tap on the heart icon
with save and load, then tap the plus icon to save the left half of the
Canvas as selection one. Tap the selection button
at the top to deselect. We now want to do the same for the right side
of the canvas, so we'll need to flip
the whole thing over. To do this, open up the layers panel and
tap on new group. This makes sure that
both the color block and the base layer are in play. Tap on the transform icon, which is this arrow here, and you should see that
the whole canvas is selected with these dotted marching
lines around the edge. In the toolbar at the bottom of the screen, tap flip horizontal. The color block is now exactly in the right
half of the canvas. If the color block
doesn't flip over, then it's usually
because the group isn't selected in
the layers panel. Tap the transform button
again to deselect. We'll repeat the
procedure from earlier, but this time for
the right side. We'll open up the layers panel and select the
content of layer one, either via the menu like
before or to be a bit quicker, we can hold down two fingers on the layer to select it like so. Once the selection
tool bar appears, tap on the heart icon
for save and load again, tap the plus icon to save the right side of the
canvas as selection two. Tap the selection at
the top to deselect. Now we just need to tidy this template up to
make it easier to use. Make a new layer at the
top above layer one, and I'm going to rename that something like
artwork or draw here Woodwork we can also rename some of these
other layers as well. This is our template
group, color block. And this is our base. Now, optionally, we can also
add a text layer right above the template group to write some helpful information
so that when we see the file in our gallery,
we know what it's for. So with that template
layer selected, go to the Actions menu
and tap Add and add text. I'm just going to make this box bigger and I'm going to change the color to something
that's going to show up, so I'll choose
something dark and tap in the text a couple of times
to bring up the keyboard. I'm going to call this
a bilateral template, which just means it's got two sides and it's for
making linear patterns. I'm going to write the size. I like to work in inches, I'll call this 12
by 12 " at 300 DPI. But if you prefer
working in pixels, then you can just write 3,600
pixels in here instead. We'll tap off the
canvas to get out of the text mode and we can now exit out of the file into the gallery and give
that file a name. Bilateral template. Whenever we want to use this template to make
a linear pattern, what we'll actually
do is duplicate it. We won't use this original one. We'll keep that for future
projects and we'll just duplicate it each time
we want to do a project. In the next lesson, we'll use this template to make a simple stripe.
I'll see you there.
6. Simple Stripes: Okay, so we're ready to
make a seamless stripe. A left swipe on the template we made in the last lesson
and duplicate that. Then I'm going to rename
that to something like simple stripe and
go inside the file. We're just going to experiment with some basic stripes here. Now, in this orientation where the color block
is at the side, it's set up for
horizontal stripes. That's what we're
going to start with. In the layers panel, we can
now turn off the visibility of this color block and
the text layer at the top, and we can tap in the draw here layer or artwork,
whatever you've named it. I find it's quite
helpful to have some sketch lines on a separate layer to guide where I'm going to
put the stripes. Wireframe guides are like
ready made sketch layers, and I provided a few
in the resources, including a horizontal stripe. Now if you didn't yet send them over to the Procreate app, then you can insert them as
images via the Actions menu, tap on the wrench icon, add, and then if they're in
your photo library, you can choose Insert a photo. If they're somewhere else, for example, still in
your Downloads folder, then you can choose
Insert a File and navigate to that folder. However, what I prefer to do is send all my wireframe guides over to Procreate with the share option and keep
them together in a stack. When you want to use one, go to that file. Here are my wireframe
guides in this stack, and there's just one
layer in that file. It's just a PNG and you
can just copy that layer, go back to the file
you're working on. And then we're going
to create a new layer and use the three finger swipe to bring up the copy paste menu, and then we're just
going to tap paste and that will come
into the document. Now, before you commit that, you have the option
to resize it. The IFrame guides I
provided are 3,600 pixels, which is the same size
as my Canvas here, so it fits on perfectly. If you have a smaller
square canvas, it will scale down to fit. Otherwise, you may
need to pull on the blue dots at these
corners to resize it, and I recommend to have
snapping on when you do that so that you are able to
snap it to the corners. When the wireframe
fills the canvas, you can commit that by tapping
on the arrow icon here. And I can name that layer
something like guide. Okay. Now, I like to have the wireframe on the top layer
within the template group, that's going to be
above my drawing layer. Then I'm going to
use a blending mode to be able to see my
drawing through that. I'll tap on the N and
scroll up to multiply. And that will allow me to
see my drawing through. Then also, I'll just bring
that opacity down a bit, somewhere 25-30% is
what I go for normally. That just means it's
less distracting, but I can still see
the guide and then tap on the M to just come
out of those options. And then I'm going
to tap in the draw here layer ready to
begin the artwork. I'm going to choose a brush that's solid but with
a textured edge. I'm going to go into the
Procreate classic library and the organic organic brushes has this red brush in which
has a nice textured edge. Let's select that I'm going
to have it full size. Now, I like to start off the canvas and finish
off the canvas. That just means I'm not
going to get any funny. I'm going to actually choose I don't want to go that dark. Let's go for a navy blue. Start off Canvas and
finish off Canvas, we don't get any funny edges. Now, did you see it snapped straight and that's because
I'm holding my pencil down, it's making it a straight line. I'm not quite horizontal, I can also make it horizontal
by touching my finger down on the screen, and that just snaps
it into place. And if I keep my finger down
and lift the stylus off, then that will commit that to a perfectly horizontal
straight line. Now free hand lines
are also nice. They add a little bit of extra liveliness and interest to the stripe and of course, hand drawn, things are
all rage at the moment. So to do a free hand one, you just use the guide so you get it more or
less in the right place, but don't hold down, so it's a little bit more of a relaxed look to the stripe. Let's do another one of those. Just using the wire frame as a guide to where I
want to start and stop. Let's do another straight one, so I'll hold and just make sure that's
perfectly horizontal, and let's do one more
free hand one. Okay. Let's see about getting
these stripes to repeat now. What I need to do is flip the edges of the
canvas into the middle so I can work on them and make the transition of these
stripe edges seamless. We'll use the bilateral
template for this. First, make sure the
whole group is selected. Go into the layers panel and tap on the group so it
highlights in blue. Tap the selection button with
the ribbon icon at the top. If you have any trouble getting the selection to work
with the template group, then it's probably
because you have automatic or color
fill activated here. If that's the case for you,
then tap on a regular layer and adjust your
selection settings first before
selecting the group. My settings are okay here. I'm on free hand selection
and color fill is off. So once the selection
options appear, choose Save and load
with the heart. Now tap on selection one. Get the transform option up. With that transform activated, we can see that that
left side of the canvas, that selection one is,
in fact, selected. Then what we need to do is just tap flip horizontal
to flip that over. Tap the ribbon icon
again to deselect. Now we're going to repeat this for the other half
of the Canvas. Selection button, save and load. Then now this time we're going
to go for selection two to activate the right half of the Canvas and when
we tap on transform, we'll see that half is
selected exactly as we want, and then we can flip that one horizontal as
well and then deselect. Now the edges are
in the center of the canvas and we're able
to do some work on them. So what I'm going to do
is I'm going to zoom in and start working
on these stripes. So what I'll probably do is just turn that wireframe off for a minute so it's
not distracting me. This first stripe here, this was the one we did
perfectly horizontal and it's actually quite hard to
see where the join is. One thing we can do is momentarily turn on
this color block, and we can see this
is where the join is. That's actually
pretty good actually. Sometimes the texture just
causes some problems. There's a little bit there. What we can do is either
add a little bit more, maybe a slightly smaller
brush just to here, Procreate is telling me I have not selected which layer
I want to work on. These are my options. I'm
going to tap draw here. That's where my stripes are, and then I can just
do a little bit of work on that adding. If I want to take away, then I can hold down
on the eraser and that will become the same
red brush as I was using. I'll get the same textured edge. We can just add and
remove until we get the texture and the
edge looking right and there's no strange
lines in there. Okay. And then this one's
going to need a bit more work. This was our free hand line. So again, just remove and
re draw here as well. Just going to do
these quite quickly. This isn't going to end up
being a finish pattern. This is just really
a demonstration, so just give you an
idea of how to do it. And then, again, this one,
this was a straight one, so we're going to need a bit
of guidance where that is. Yeah. So this ones a
little bit more where. You can see that's got
quite a straight piece in there, which
doesn't look right. It looks like a mistake,
so we're just going to fill that in. Maybe take a little bit off. I'm not happy with
how that looks. Okay, that's better.
And then this one. Again, let's see where that is. But it's all the way
over. I thought it was a bit more in the middle
of that one. Here we go. Okay. So there we go. Okay, so that looks good now. There are a few techniques for simple seamless stripes
in the next lesson, we'll be preparing
for the main project by gathering inspiration.
I'll see you there.
7. Project Inspiration: It's time for the project, and I've decided to make a
lace like decorative stripe. These lacey samples are
from my local fabric store. I'm feeling especially
inspired by Broidery englaze which features open eyelets and cut
work reinforced with embroidery on a lightweight
cot and a linen base. As well as the Broiderglaze, they also had this
sweet net lace and also some chunky
bobbin lace trims as well. If you decide to
make a lace like surface pattern design
for your project, here are three options of styles you could
try to recreate. Of course, we don't want to copy these actual lace designs because they are someone
else's intellectual property, but we can be inspired by the type of openwk and stitches. I also took some quick
snaps in clothes stores. Many examples are
white or cream, but they also had some
more colorful ones too. If you wanted, you could
use color as a way to give a lace like design
more of a modern twist. In the class resources, you'll find a design guide
for lace stripes and borders. You can think of this a
bit like a mood board, so it gives you some
style direction, colour palettes ideas,
motif suggestions, and even some layout
suggestions too. For style direction, I'm
suggesting delicate and refined with heirloom elegance and intricate feminine details. My own style is usually a bit less detailed and
more chunky than this, it's okay to put
your own spin on the direction or head off on
a tangent if you want to. This guy just offers suggestions to help get
your project started. There are four colour palettes here and they're
all quite tonal, but you could mix them if you
want to do a piece that's more colorful or develop
your own palette. Most of these palettes are quite low contrast
for soft look, but the midnight bloom one goes from light to dark if
you want more contrast. You're also welcome to
use my colour palettes Maker web tool to
build a palette from one of your own photos where you love the color mood. The link for the palette Maker is in the class
resources as well. So that's the colors. For motifs, I've listed organic and more
structural types separately in the design guide. If you want to show where to
start with a lace design, picking one organic
motif from the list on the left and one
structural motif from the right and
combining them in one of these suggested layouts here
should get you a good start. I've included a wireframe for this decorative stripe
in the class resources. If you'd like to use one of
the other three layouts here, you can get the extra
wireframes in the bonus pack or just sketch an outline for yourself to
follow if you prefer. For the border print, which runs along an edge, you design it exactly the
same way as you would a decorative stripe using the bilateral template to get the edges of the band to repeat. Get ready for the project, you'll want to duplicate the
bilateral template again. I'll call mine Lace stripe
example and go into the file. Earlier, I was making
horizontal stripes, but the decorative stripe I'm going to do runs vertically. I'm going to turn
the canvas round by 90 degrees using two
fingers to twist it, then the color block
is along the bottom. At this point, we can turn off the color block and
the text layer. So I've suggested the decorative stripe
layout for the project. If you want to use it, then input the file
or copy and paste the wireframe layer from the file you sent
over to Procreate. I'm going to add a
new layer above draw here and then go and get the one I've
suggested for you is linear decorative stripe one, and I'm going to copy that and paste that
in to that layer. It's the right size already, so I'll just commit
that rename the layer. And make that multiply and
a little bit less strong. Now, let's talk a
bit about brushes. These are the lace inspired brushes I've provided in
the resources for you. There is an inking brush, a lace like pattern brush, a simple edging brush, a more decorative edging brush, and to shape layout brushes. So I recommend to use
the shape layout brushes to add to and augment the wireframe guide
that you've already got. And you can use these brushes, first of all, like stamps. So if you wanted to
add, for example, a flower shape here,
you could tap once. I mean, that's not the
perfect place for it, but this is just an example. You wanted it larger or smaller, then you can adjust
that and there's a preset suggested size to start off with if you want
to use a suggested size. You can tap those to
make them stamps. Another way you can use these shape brushes is to
draw a line of shapes. You could add to the wireframe, for example, by drawing a
line of arches along here. And you could make that
edge a bit more decorative. If you turn the canvas around so that you're drawing
along the horizontal, and that's the best way to
get a line of those shapes. Okay. Now, of course, the wireframe layouts shape
brushes are totally optional. You can instead just sketch out motifs of your choice
on a sketch layer, and the inking brush at a small size would be a
good choice for that. You could even go a bit
smaller. Fine lines for that. You probably have lots of ideas for different motifs
you want to include, so definitely don't
limit yourself to these two shapes if
you have other ideas. Now for the actual
pattern itself, you'll want to work on the drawing layer or multiple
layers below the guide. I'm going to switch
onto that one there. One thing you could do with
these brushes, for example, you could use the buttonhole
stitch to edge some shapes. This works well for lace, we could draw in an
edge for our leaves. You could do that.
Again, it's adjustable. It goes quite big
and quite small. I've got these two sizes
here and sometimes it's quite nice to
have a wider edging and a narrower edging. There's two suggested
sizes there for you, but play around and experiment, see what looks right for you. Now, the pattern brush is very useful for making
a lace like background. I would put it on a
separate layer though, so you can add a new layer
here and you can have multiple layers in
here as long as you keep them inside
the template group. So with the pattern brush, the way I would use
this, say, for example, I want to fill in the
middle section here. I'll just do a part of it because it's just
an example demo. Keep the brush the
stylus on the screen on the canvas and continue sweeping it across until
the area is filled. I'd say go over where you
want to be rather than do too little because
then it's quite easy. You can just take
the inking brush out a bigger size and just remove
any that you don't want. That's easier than trying to get it exactly in place I found. You can just tidy
up those edges. Another thing you can do is
carve out some eyelet holes. So this is a good way of getting
that sort of eyelet look is to edge them with the
buttonhole brush and then remove some of the
background out of there. If you prefer, you
can use a mask layer, but I'm probably just
going to go ahead and erase and then the
decorative edging brush, this is great for finishing
off your edges of your lace or in between interfaces of
sections of the lace. I like to start a
little bit earlier with these brushes
and give myself a runway because the first shape doesn't know which way to sit. If you start off quite slowly, it doesn't necessarily sit the
right way. Just undo that. If you go a bit faster, it tends to sit the right way, but in case your first shape goes the wrong way like that, if you start earlier, you have the option to
erase that first shape. I would suggest maybe
just start a bit earlier and you can do straight lines and they're
good for curves as well. They're quite a nice way to put edges on things that
look a little bit prettier. So if you haven't
done so already, go ahead and download
these free brushes and experiment with
them for yourself. The free set is supplied
with a commercial license so you can use them for work as well as personal projects. So make your preparations for the project and then meet
me in the next lesson.
8. Decorative Stripe Design: M. For my project, I'm making a delicate stripe in white and soft pastels that would be suited to
wallpaper and home decor. I'm going to be using the
techniques we already covered. So at this point,
I'm not going to describe every technical
step in detail. Now, I'll focus on creative decisions and
developing the design. So let's just start by
duplicating this template again. And I'm going to call
that lace stripe. H. Now remember we're making stripes that
run vertically now, so I'm going to turn
that canvas around and turn these two layers off and add another
layer for a guide. Now, I am going to be making or using this linear
decorative stripe two, which is a different guide to the one in your
resources pack. Now this is on purpose
so that you can practice the techniques while still making your own
creative choices, which is what the
projects all about. Let's get that copied. And also, if you want to commercialize the pattern that you create in this
class, for example, you might want to sell it
through POD sites like Spoonflower or license
it to clients, then it's important that
the design is your own. Okay. Let's get
that layer set up. So for brushes, I'm going to use some slightly different
ones to you as well. And I'm going to get this eight petaled flower instead of the 61 from
the full brush set. I'm going to add some details
on to my guide layer. So I want to put a flower in the middle of each
of these circles. They're going to be my main
design elements, the flowers. So I'm going to
use it as a stamp and just tap in the center here. I don't want them to touch, though that's about
the right size, actually. That's good. So we'll keep that. I want them to be close, but not quite touching. Now, these ones obviously
going over the edge. If I use the stamp, they're not going to repeat, but it's only my guide layer, so it's not my actual
artwork layer. So I'm just going to pop them in roughly where they should be. For now, I'm not going
to worry about it. Okay, so I think I also want to add some geometric shapes, and let's see about maybe a diamond would fit in here and between the flowers. Let's see about
the size of that. Just quite a small one. So I'm just going to
put those in there. As well, and we'll
want some on the ends. So I think that's
enough details on the guide layer added to
it just to make it my own. Now, in terms of colors, I'm a little bit torn between the light blue and the
pink palettes here, but I think I'm going
to go for the blue one. So let me pick the
pastel blue there. I'm going to start off by
putting some shapes down, the main shapes of
the lace areas. So I'm going to go in
the drawer here part, and I might rename that actually because I'm going to have
multiple layers in here. I'm going to just call
this main shapes. And I want to use
my inking brush. This is the same one
that you've got. And I think I'm just
going to go through and free hand these shapes. I want to have a hand
drawn look to it, so I don't want things to be perfect arcs and
things like that. I'm going to choose
not to use symmetry. Obviously, this these
shapes are in symmetry, so I could use a symmetry tool, but I feel like the hand drawn look is what
I want to go for. Symmetry might just
spoil it a little bit. I'm going to go and
follow him a guide, but I'm going to have
free hand look to that. And of course, I will have to do some work on the ends later. But let's just get
something down for now. Okay. I can go ahead and
color drop that in there. I'll also have some shapes at the sides and I can fill
those with solid color, but I have to
remember that I can't put any details on
the side edges. Again, I'm just free handing in, not using symmetry to
do both sides at once, to give it a hand drawn look and we'll come back
and make these ends repeat a bit later
on as long as we get close for now. Okay. So that is the shape area. And I know I'm going to have the embroidery parts in
white. I want that look. So that means I'm going to
need a darker background. So I'm going to choose this slightly darker blue
to go on the base layer. So on the base layer, I'm
going to fill that layer. And then I'm going to make a
new layer for my embroidery. It's important to
have a new layer for each color so we can recolor easily and pick the
white from that palette. It's a slightly off white. And then I'm going to use
buttonhole stitch one. So you've got
buttonhole stitch two. I'm going to use
buttonhole stitch one. And I think we're going to go in and see how the
flowers look in that. Let's do a flower first. So I think this circle is a little bit too
small from my guide, so I'm going to go
bigger than that. I need to be on the brush. And that is very small. So this brush goes quite big and I've got
two presets there, and I think the bigger ones probably what I want for this. So it keeps going
back on the so I'm going to go overlap those ends. I've overlapped the ends
and I've held it down, so the shape snaps. I'm not doing a perfect circle. That would be a perfect circle with a finger on the canvas. I'm going to do a slightly
off sender circle. But the stitches
are looking good. I'm happy with that, so
I'm going to let that go. It actually might be a
little bit on the big side. I'm going to go a little
bit smaller than that. So let's do that again, circle with a bit of an overlap and just let it
snap in to place. Yeah, I'm happy
with that one now. So now I want to do the petals, and I'm going to have a
little bit smaller lines to do the petals with
still the same brush, and I'm going to free
hand it because I want to have that handmade look, which traditional lace would be. So I've got that in,
and then I'm going to go back to the larger size and put some more petal
shapes inside here. Might actually go more like
to a point there, like that. That's better. I like that more. To a point. Like a teardrop
shape. That's kind of cool. Okay. Now, it's a
good idea to just keep looking at it without
the guide sometimes. And I think I need something
inside that circle. I'm going to use
a pattern brush, and I'm going to do that on a
new layer so I can lay down my pattern and then erase it without taking my
embroidery away. So let's rename that
to pattern, lace. And let's see. I'm
gonna go for the mesh. You've got the net. I'm
gonna go for the mesh. And how bigs that? Size, put it down in the
middle layer on a new layer. Right. Now I want to carve out some holes because Bodrnglaze
has the eyelets in. I I carve holes out of
this light blue layer, the dark blue layer
will show through, and that will give me the
look I'm after, I think. Going to go on the
main shapes layer. As I said before, you
could use a mask to do this if you want to
be nondestructive, but I'm going to just go
for it and erase these Holes where I want them in
the shape of the eyelets. And yet, they're
different sizes, but I like that handmade look. That's what we're
going for here. That's what I'm going for. A
bit bigger. Take that out. And I think that is the
flower that I want, the style of flower that I want. I'm going to I'm
going to do more of that with the rest
of the flowers. Now, I could copy and paste the flower another seven times, but I'm not
going to do that. I'm going to draw each
one individually. So I'm just going to
make sure I'm back on that embroidery
layer before I start drawing again with my
buttonhole stitch. So I'm going to go round and
do all of the flower shapes, and I'll speed it up. So, yeah, I'm going to
draw them all individually because I do want that
natural variation. I mean, the human brain and eyes do pick up these
small differences, and having things not be all the same definitely gives patterns more of a kind of hand drawn charm with that bit of variety. So I want to have eight
different flowers on here. That's what I'm going for. Okay. So that's the seven
flowers done. I'm not going to do
these end ones yet. I'm gonna do those afterwards. So I also want some
holes here as well. And then I will on
the embroidery layer. I've got a lot of these to do in this design because I know I want them around
the edge as well. So what I've actually done
is I've created myself some stamp brushes
just to do circles because I do suffer from
carpal tunnel issues. So I try to help save my hands a little bit
and speed up pattern making. So for the holes, instead of doing them
like this by hand, I am going to stamp them out with my circle
outlets like this. So let's see they're
about the right size. I think maybe a bit
bigger, actually, just go a little bit
bigger on the preset. And I think maybe I want
them a bit closer together. I'm going to just keep them inside that diamond like that. Okay, so I'll just go
round and do those. I'll probably go
over these ones, make them the same size. And I'll do that one afterwards. Okay. And then we'll go
on embroidery layer. I'm just going to
take that one away. That not copy. Sorry. I
don't want to copy that. I wanted to. Cut that off. And then let's make sure
we're on the right layer. And I'm going to use a
stamp for this, as well. Just to speed things up for
myself, save my wrists. I was watching a lady on YouTube make eyelets holes for
real in actual fabric. And I was surprised that
for the small holes like the ones I'm
designing here, she did not cut the fabric. She stitch first round quickly to stabilize the area
just with a running stitch. And then she used a
tool called a stiletto, which is like a point
and then it gets wider. And she put it between
the warp and weft of the fabric and then
slowly made the whole bigger and then stitched
around up and over like this buttonholing effect once
she'd made the gap there. So that's how they're
made in real life. So I'm going to have
lots of these eyelets along the scalloped edge, too. So let's go in and do this scalloped edge
now around here. I'm going to use the same brush because I've got a
lot of them to do. I could stamp in like
I've been doing here, but I can also use this brush. Let's make sure I'm
on the right layer. No, I'm not want to be on
the main shapes layer. And you can do an arc of them
like this with the brush, which is quite handy. So I think I'm going
to do some peacot edging as well around. I'm going to turn that wireframe off so I can see
my actual edges. I'm going to go around
these edges as well. So let's go and find
a peacock brush. I'm going to go for
Peacot edging one here, like a decorative brush. I think I'm going to do
this on a new layer because I'm very close to this
other embroidery. I want to be able to
tidy up the corners. These brushes are really super on curves and straight
lines, but corners, well, any brush that is
made up of shapes that are directional will
be a bit odd on corners. There'll be a deny wee bit
tidying up to do there. This one I could do with
making a few changes here, so I'm just going to take out probably these ones
here. I'll redo those. A Okay, so I think I'm going to do
something on these sides now, and I think we'll do
like two rows of I mean, I could use the
buttonhole stitch. The double coordinat is just a double version of
the buttonhole stitch, so you could just draw it twice. But I'm going to do this
on the embroidery layer. Of course, I am going to have quite a bit of work to
do on the ends there. I get it close to at least
being the right sort of angle. There we are. It's a bit better. Okay, now, what I'm going to
do is I am going to put some of that mesh pattern
in between here. I'm probably making life harder for myself than
needed because it's going to be quite hard to get
that lace to repeat at the end at the ends here. But one trick or tip I can give you is to get your canvas
lined up straight, not have it at an
angle like this, but have it straight as straight as you
can get it because the pattern itself
is going to lay down depending on the
orientation of the canvas. So put plenty of pattern
down and go to the edge, but there will be a little
bit of work to do later. I'm going to show
you how to do that, but do more than you
need so that you have you actually go to the line and a little bit over and then we'll
just tidy that up. You may not want to do this type of thing on your pattern anyway, but this is what
I'm doing on mine. I think it's nice
to have elements that appear in different
parts of the pattern. So if I've used this mesh
in the middles here, it's nice to also have it somewhere else in
the pattern, I think. So that's laid the pattern down hopefully in quite
a straight way. And I'm just going to go in
and tidy these edges up now, and I'll just speed
this part up. So in the next lesson, we'll be using the
bilateral template to put this design into a repeat
pattern. I'll see you there.
9. Seamless Repeat Pattern: Okay, so I think we're
ready to flip it over and work on the seams now. This is where our bilateral
template comes into play. We need to be on the
template group and tap select my settings
are good here. I've got free hand and
color fillers not on. Remember that can sometimes
stop this from popping up. This has popped up,
so that's good. I can do Save and Load
Selection one, transform. This time we want to flip
vertical because we are making a vertical pattern or a vertical stripe and then
tap off that to deselect, repeat for the bottom half And then we are going to flip that
one vertical as well. And now we have got the edges in the middle and
we can work on these seams. Okay, so at this point, I'm going to want to
have my guide back on. And I'm going to be
drawing in my new flower, so I want to be on
the embroidery layer. Now my flower on the template on the guide
layer isn't in perfect repeat, and I don't mind that I
can still work with that. But if you did want your wireframe and your guide or your sketch layer to
be in perfect repeat, if that was something you needed for the particular
design you were doing, then you could do the flipping at the
sketch stage as well. There's no limit to
the number of times you can flip the canvas over. So if you wanted to do that at the sketch stage and get that in perfect
repeat, you could. Haven't don't need to. I'm going to go ahead
and draw this flower in now with the
buttonhole stitch. This is where these
preset brush size is useful because you can get back to the same size
as you had before. You can take my sizes
out if you want to. Just use this minus
icon up here. If you on a size where you want to save it, you can
tap on the plus. Then let's do these
blue parts here. So I'm going to go back
and get some blue kinking. Let's make this a bit
of a nicer shape. About there and do
this one as well. The other side. One's not bad. That's a good thing about
having the wireframe guide. You can get quite close
to it being right. All right. Now, these
are a bit funny in here. I think I'm going
to fill these back in and try again
with those ones. I'm not keen on them. And I'm just going to take
these off. Cut those out. Let's have another
go with those. Better. And I'm on
the embroidery layer. That's better, isn't it, right? Let's do the peacot
edges. Peacot edges. I think I will just
take that one off. Pops using the wrong eraser. Take that one off.
Probably that one as well. It's all bit awkward that one. Right, let's try and get
some peacot edges in here. Let's see how we
go. That's not bad. We'll go with that.
And then this side. I think we'll take this one off. And good. Just have a few goes at
it till it looks right. I think we are quite
satisfied with that one. All right, so
that's those parts. We just need these
bits in now and the pattern area that I'm
probably going to regret doing. But anyway, yes, I've got
quite far off on that side. They're a little bit far off. Anyway, let's have a go. So this one, the embroidery,
I'm going to do first. So we're going to have to
make these inside lines join. So I think I will go to erase the parts a little bit. I get close to that. And this one I'll
just take part of it off and then just meet them up again with
the cordont brush. I actually think I'm
probably going to use a regular buttonhole one just to join them up because I just need to get
the size a bit right. Just a little bit bigger in
between those two, I think. It's still not quite right. Let's just go a bit smaller
and do it on twice. And just brush over that again. And just to raise that perhaps also with the buttonhole brush just to get that textured edge. So we've done it a bit there. Okay. Okay. So that's those. And then the mesh,
the pattern, lace. This could be a bit tricky. So it's actually not
bad on the join. We just have a bit extra, and I'm just literally
going to draw that in, or you can copy and
paste a little bit of the lace into place if
you've got a bit missing. So let's just take off the
bit we don't want down here. And I'm just going to make
this brush really tiny just so I can get in and just suck those funny
little pieces out there. And then I'm going to use this buttonhole
brush quite small. And I'm just literally
gonna draw it in. I think you could copy and
paste a bit of bit across, but I think I'm just
going to draw it in. It's quite an easy one to draw. It's just lines. And because I drew it with
my canvas straight on, it's actually lining
up quite well. So that's that definitely
helped, I think. Okay, so I think that
looks pretty cool. It's nice and lacey. And so I think that's where I'm going to leave it
for this lesson. In the next one, we'll test and preview this pattern.
So I'll see there.
10. Testing the Pattern: I'm quite confident that this tile is going to
repeat seamlessly. But let's just check that. Swipe down with three
fingers to bring up the copy paste menu
and choose copy all. This grabs a single image of everything visible
on the canvas. I'll tap the layer right at the top and paste it
in above that layer. I'm going to get four more
copies of that by duplicating. I'm going to shrink these down into each corner of the canvas. With the top layer selected, check the transform tool. Just make that a bit smaller so you can see what's going on. Then tap the blue circle
in one of the corners and check that the
dimensions lock is on so that this little
lock icon is blue, and then type 1,800 pixels because that's half of
my 3,600 pixels canvas. The contents of the
layer will shrink down into that corner
that I tapped on. Tap the transform icon
again to deselect. Now go to the next layer down
and we're going to choose a different corner to transform from. We'll go for this one. Again, half of the
Canvas dimensions, and it will shrink down and I tap twice on that
to deselect it actually. The next layer down, we'll do another corner and
shrink that one down. And then the final layer
to do this one up here, and we will shrink that down, and then I can't see that to, so I will just tap
somewhere else. Now we can zoom in
to the seams down the middle and check that
everything is seamless. I am expecting this one down the middle definitely to be seamless because there
were no details on here. I was just solid color because
we were doing a stripe. And for the middle, you might find it difficult
to actually see where the seam is because
it is seamless. So what you may want to
do is just momentarily turn that off just to see
where you should be looking, and then you can go across
and make sure nothing has moved out of place and
there's no funny areas. And then this other side
is just the same thing, but just go across the whole of the middle and have
a look at the seams. So I'm happy with that.
That is seamless. So yes, this repeats, but I feel like I want to see it a little bit more
zoomed out than this. It really helps to
see the spacing and the flow and make sure it's going to look good
from a distance, for example, on wallpaper, if you can see a little bit
more of a zoomed out view. For that, I like to
use pattern previewer. Pattern previewer is a
free tool on my website. And that's at rocket
and indigo.com, forwardslash Patent
hyphen previewer. This works right in your own
browser, on your own device. You pattern tile isn't going
to be sent anywhere at all. It's just going to
be on your device. What you can do is you can tap here and find an image
that you've saved in your photo library
or you can choose a file from somewhere
else in your file system. But you can also drag a
whole Procreate layer straight in and
that can be really handy if you're
working in Procreate. Let's have a look
how to do that. Bring your layers panel up and we don't want to use
these shrunk down ones. We want to use the whole tail, which is this bottom layer
that we did not transform. You're just going to
literally take it, hold it, and drag it in here. And I'm just going to
make this whole thing bigger now so we can
see what we're doing. So when you've pulled it in, if you've worked at
a size 3,600 pixels, then the pattern might look really big in the
browser at first. So what you want to do is use this slider here to make it smaller and it goes
all the way down. So as I said, you can
really get a view, a really zoomed out view. Of how the pattern works at a distance and how the spacing and the flowers for the pattern. And that obviously
is very small, so you might want to have
something a bit more like this and just make sure you're happy with all of your spacing. So the pattern previewer has some advanced
options as well, so it can also be used
with half drop, brick, and mirror repeats, but today we just have a
basic repeat pattern. It's also possible to load in a PNG file without any
background with transparency, and then you can try out different background
colors up here directly. You can choose those
and see how it's going to look in the previewer
if you want to do that. Okay. I'm happy with the
balance of this pattern. I think it all flows nicely. But if I notice that there was something
I wasn't happy with, there was a motif a
bit out of position, perhaps, I could go back and
change that and Procreate. You could even use this tool at earlier stages of your pattern design process if you want to. For example, you could drop a sketch in here
to see if you're happy with the spacing and flow before actually moving
forward with the design. That's another way to use this. There's also an export option where you can download
your preview. And you can do that at
any scale you like, and you can download
multiple previews at different scales as well. And we'll do that so that we can share an image of the pattern we made in the class gallery
when posting our projects. So if you download that, you
can just tap on Save Image, and that will be saved
now to my photos library, so I can add it to my project. In the next lesson, we'll
look at a couple of optional extra steps after
your pattern is finished, which is making
additional color versions and adding texture. I'll see you there.
11. Recolouring & Texture: Now that I'm happy
with my pattern, I want to create some versions
with different colours. This is optional,
but I think it's good to offer a
choice of colorways. First, I'm going to go out into the gallery and I'm going
to duplicate this pattern, I'm going to put some
color information on the end and I'm going to
make this one a pink one. Let's go inside that file. We can delete these testing
layers, first of all, we don't need those anymore and I'm going to start by
recoloring the base. Now, if we have created all of our different colors
on different layers, then the process of recoloring
is going to be easy. So for my base, I'm going to select the darkest pink
in the pink palette. And since this layer is
completely filled with color, I don't need to do
anything other than just fill a layer
with the new color. Then for the main shapes, I'm going to choose the
lighter pastel pink. Now, this time, I can't
just fill the layer because not all of
it has the color in. There are areas
that are cut out. I'm going to need to turn on alpha lock before
I'm able to fill it. You may just be
able to see there's a very slight dark grid pattern in the background
which indicates that that alpha lock is on. With Alpha lock on, I'm able
to now fill the layer and it only fills the parts of the layer where
there are pixels, not any transparent areas. So we're going to now
do the lighter layers, and that's going to
be with this white. Again, I've got
three layers here to do and they're all white, and I need to alpha lock them. Now a quicker way
to do that is to nudge right with two fingers on the layer and I'm going to alpha lock all three
of these layers. Can you see that
checkerboard now, it's probably easier to
see on these layers. Once they're alpha locked and
I've got my white selected, I can literally just go and fill the layer and it'll
just make it that slightly lighter white color, which goes better with that
pastel pink. That's it. We have a second color way. I might just do the
other two palettes with the warm yellow and with
the indigo as well, but I will speed that up. So once I've got
all my colorways, I like to export a PNG
file of each to use, for example, to upload
to spoonflower. If you just have a single file, you can swipe left
and then choose Share and then choose the
format that you want, so I'd probably choose PNG. If you've got multiple
colorways, though, you can do that in
one go by tapping select and then choosing
all of the colorways. Can you see they've got these
little ticks in the top, and then tap Share
and then tap PNG. At this point, you can choose to save those images to
the photo library. You can save them
to files, a folder. But what I'll probably do
is send it to my MacBook since that is usually where
I do my uploading from. So once that's done, we can close that window and uncheck to exit the
select options. Now, sometimes I also
create a version of the pattern that has
texture added on top. For my Broider
anglaise lace look, I would like to have a subtle cotton or linen
texture, I think. If you'd like a fabric texture on your lace design as well, then you can get the
Procreate fabric canvas in the bonus resources pack. I'm going to make a
duplicate of that. I think I'm just going to
drag it up here so it's with all of the other patterns
that we've been making. I'm going to rename
this to lace, stripe. Fabric texture. I'm going to go in and
get my pattern tile. I'm just going to copy that
tile that we have there. You could also
swipe down and copy all if you had the other layers. Then I need to be on
the artwork here layer, and then I'm going
to paste that in. Okay, and that's where
it's gone, so that's good. And it should be
exactly the right size. So if I zoom in, you should be able
to see the texture. It is quite subtle. Now, the strength of the texture really depends a little bit on the colors and the tones
you've got in your design. If you want more texture, then you can check
this and it will basically double up
that fabric layer. If that's too much, then you can reduce that
down a little bit. You've got the choice to
have a bit more texture. Now, the extra texture will darken the colors a little bit. If you were to turn this off, you'll see it is
quite a bit darker and a little bit more
saturated as well. So what I've done here is I've got some
adjustment layers. So if you want to reduce
the brightness a bit, you can turn that
on and you've got the option to move these
slides up and down until you find a place that
you're happy with the saturation as
well if it's just given you a little bit
too much saturation. You don't need much of this. You don't want to take
it all the way up here. It's just going to go gray. So just keep it down low. Until you find something
where when you turn off the fabric texture, it's quite similar to what your original
colors were like, I think I'll just go brighter, but I won't do any desaturating. So that's about where I want to be with that fabric texture. Okay, so this should
all repeat seamlessly, but just in case anything
got nudged out of place, you could use the testing
method I showed in the last lesson just as a final check to make
sure it's all good to go. So that's my ace strap
project finished, and I'm ready to share it
in the project gallery. When your own
project is complete, add it to the gallery too, and then join me again for a bonus lesson about
diagonal stripes. I'll see you there.
12. BONUS: General Template: Welcome back. For making patterns where the design
crosses on all four sides, such as diagonal stripes, we need a different
template with quadrants. I'm going to be making my
template 12 " by 12 " again. But you can choose any
dimension that you prefer. I've created a new file. The important thing for
this particular template is that we actually
want to create the file half the width and half the height of
our template in the end. That means I'm going to make
it 6 " by 6 " this time. That's at 300 DPI, that will be 1,800
pixels square. Once the file is created, I'm going to add a color fill
just like we did before. I'm going to go in
and select something there and just go ahead
and fill a layer. Now it's time to double the width and also the
height of the canvas. I'm going to go into the wrench
icon in the Canvas menu, crop and resize and
get the settings up. Now we're going to change
this to 12 by 12 ", 300 DPI, and we're going to have resample canvas
and snapping off. Then we're going to tap
that to commit the change. Now we have a square in one corner of the canvas
and that is one quadrant. And we'll use this quadrant of filled colour to
create the template. Now, remember, we need
to have another layer below the color block
layer as our base, and we're going to fill
that with a light color. So I'm going to add
a second layer, hold and drag it below, and then I'm going to
take a lighter color and fill that layer. And now we can turn off the visibility of Procreate's
own background color. So the next step of creating our template is to group
these layers together. This one's already selected, so we're just going to nudge
to select both layers there, and then we're going to go
ahead and group those layers, and now we've got a new group. Now we want to create the
selections that allow us to use this as a template
for repeat patterns. I need to tap on the
color block layer and tap again to bring up
the menu and choose Select. With that selected, we
can tap Save and load, and we're going
to choose plus to turn that bottom right
quadrant into selection one, and then we can deselect. Now we need to flip this quadrant into a different
corner of the canvas. Remember to do that,
you have to have the whole group selected
with the group selected, we can transform that
and I'm going to go for bottom left this
time, bottom left. I'm going to flip horizontal. That's in the other bottom
corner and deselect. Then go back to the color block. Select, and we're
going to save that as selection two and deselect. Now we need to flip upwards. Let's highlight that group. The whole group
needs to be selected to transform the sections, and this time we need to go
vertical so it goes up to the top and then we're going to go back into
our color block layer. Remember you can hold with two fingers if you want
to do quickselect, save and load and
save selection three. Turn that off and
then we need to do our last flip over to
the top right corner. Make sure your group is
selected before you transform, and then we're going
to go horizontal again to bring it over there. Finally, we can select this quadrant and save that
quadrant as selection four. Okay, so I'm just
going to go ahead and tidy up this template now. So remember, we're going to
want a layer for our artwork, so I'm just going to add
that layer and rename it. So let's get my keyboard up, and I'm going to go for
draw here that layer. And let me just rename
all of these other ones. Template group, and color block. And getting too quick, and this is our base. I'm going to put in
that additional layer on top with the text. I'm going to add a text layer. I'll make that dark colour, I'll make this box bigger. This one is a quadrant template. This is for making
general patterns. Yeah, it's good for
diagonal stripes, but you can also use this
for lots of other things, scatter patterns, all kinds
of patterns with this one. It's quite versatile this one. Okay, so I just tap off the cavas to come out there
and come out the file, and I'm just going to name
that quadrant template. In the next lesson, we'll
use this template to make a diagonal stripes
pattern. I'll see you there.
13. BONUS: Diagonal Stripes: Now we're going to use the
quadrant template to make a diagonal stripe with the
design crosses all four sides. Start by duplicating
the template, and I'm going to call
that diagonal stripe. I've chosen the diagonal
wave wireframe, which is in your class resources to help me get the
positioning right. I'm just going to
copy that and go back and set this file up so I can turn off the text
layer and the color block, and I'm going to add
another layer in here above the drawing layer
and call that guide. And add in the wireframe. That's the correct size, and then I'm going to
set it on to multiply, and I'll turn that down a bit, not too much because I want
you to be able to see it. And then I'm ready to go
on to the draw here layer. I'm just going to choose a simple brush for
this demonstration. I'll choose the inking brush. We've all got that. I'm going to go for that navy blue again. I quite like that when we did the horizontal stripes at
the start of the class. And now I'm right
handed and I like to draw continuous lines slightly up and across from
left to right. I'm going to turn my
cams around just so it's easier for me to draw
these continuous lines. But you do whatever
works for you. So I'm just going to turn that brush right up
because it's not that big. Anyway, I'm going to
follow these guidelines, trying to get the
angles roughly right, so I've got a little
bit less work to do later on putting
the edges into repeat. I'm just going to fill that in. And then go to the long one. This one's a bit hard.
I might have to have a few tries to get
this looking right. We'll just go for it. Yeah, you see that
end is quite off. I'm going to have
another go at that. Don't be afraid to
have a few tries at it to get the lines
the way you want them. But we can always do
more work on them later, so don't worry too much. And then the short one I could add more things
in here, of course. I could put things in
between the stripes, flowers, dots, whatever
you want to do. But this is just
a demonstration. I'm just going to keep it
simple with the lines for now. We're now going to put the edges or the corners
particularly into the middle, and then we can work on them and get these edges to repeat. So using this template is very similar to using the
linear template, except that the quadrants can be flipped both
vertically and horizontally or just in
one direction depending on which part of the
tile you want to move into the center to work on. But either way, we
need to consistently flip all four quadrants
the same way. So to begin, make sure the whole template
group is selected. So tap on that so it
highlights in blue, and then go to the selection
button with the ribbon, go to save and load and
choose selection one, and then we can go
to transform and flip horizontal and
vertical, and then deselect. Okay. So same again
for selection two. Transform horizontal
and vertical, deselect. Now we're on selection three, Transform horizontal
and vertical, deselect, and then selection
four in save and load, and again, horizontal
and vertical. We've done all of
them the same way. Now we've got those
corners into the middle. We're going to work on
this middle section, so it's incomplete
at the moment. We need to complete this motif, and we should be working on the drawer heals so
we need to select that and just begin filling
in that missing part. I'm going to make this brush a little bit smaller for this, so I got a bit more
control over it. Okay, so just fill
those missing parts in. I'm not quite happy
with that shape though. I want a bit more of
a smoother there. So you can just finnes it
as much as you want to. Okay. Now I can see these parts at the
edges here need work. But the danger of going in and working here is that if you do want to go right to the edges, it's going to cause
you problems later. It's going to take anything that is in repeat out of repeat. So what you want to do is instead of working on
these parts at the edges, you want to get them into
the center to work on them. Now the issue with
having things in the middle of the sides halfway down the side is that if you flip it horizontal and vertical, it's going to end
up on another edge. So we need to do something different with this
round of flipping. We need to flip it one way. So for example, if
we flip horizontal, these edges will come
into the middle. And then later on,
we'll come back to these edges because once
we flip it horizontal, they'll be in the corners,
and then we can do the same as before to get them
back into the middle. So you can choose how you flip the canvas each time depending on what
you're trying to achieve. And if I want to get these
sides into the middle, I just need to flip it one
way, which is horizontal. So we're going to do that now and remember that you need to have the template group
selected to do this step. Then with that selected, we're going to go in and
do our four saving loads. And when we transform it, we're going to transform every time horizontal only for this round and saving
load horizontal. Saving load three, horizontal, and then the last one, saving
load four, horizontal. So all four selections
transform the same way. So now those edges are in the middle and we can
just do what we did before and go ahead and
fill in the missing parts. And Procreate has reminded me that I need to choose
a layer to work on. So I'm going to
choose draw here. Thank you for that
reminder, Procreate. And Let's fill that in. I'm just seeing the
wireframe guide there. I'm going to turn that off
because it's just giving me a funny impression of my
lines, seeing that underneath. I actually think I might
need to take a bit out here. I'm gonna make that brush, the same type of brush. That arrays are the same as
the brush by holding down and just carve a little bit out of that bend there looking
a bit too chunky. Right. Okay, so that's those edges
that we had there before. Now, these tiny little bits in the corner we need to get those into the middle
now and work on those because everything
else is looking good. But these corners there
might be a problem. This time we're going to go back to going both horizontally and vertically because that will give us the transformation
that we want. Go in and make sure the
template group selected, same procedure as before. We just go through
one, two, three, four, and make sure we do
the transformations in the same each time we do it. Three, horizontal
and vertically, and finally, selection four,
horizontally and vertically. Okay, so deselect. Now those corners are
in the middle and yes, we do have a little
bit more work to do. So let's go for that. We need to be on the
draw here layer. Okay. That curves about
where I want it to be. Okay, this should now be
in repeat because we've tackled all of the parts that were at the
edges earlier on. So let's test it now, and we're going to want to put our test layers
right at the top, so I'm going to select
the very top layer, and then I'm going to copy all and paste that
in on top there. Then duplicate it I want to have my original one
and then four duplicates. Then we're going to shrink each one of these
down into the corner, we will transform each one, and I'm going to take this
one up to this corner. Half of 3,600 is 1,800. Let that shrink down. Choose the next layer. I'll go down to this corner
this time and shrink it down. Next layer, I'll go to the
top, shrink that one down. Okay, and the final
layers just undo that. I need to deselect. Then I can move the cameras up so I can see that
corner to transform. Now I can get to the bottom left hand corner to
shrink the layer down. I deselect those. I'm going to go in and check
that this repeats now. I'll go across the middle first, so I'm going to turn off a layer to see
where the seam is, then go across and make sure
it looks good at the seams. I'll do the vertical
seam as well. Okay, I'm happy with that. That's how to use the
quadrant template for making repeat patterns
where all four sides have elements
crossing over them. Before you go, please join me in one more short lesson
where we'll wrap things up.
14. Thank you: Thank you very much for
joining me in this class. I hope you've learned lots
of techniques that you'll use for designing many more
patterns in the future. If you ever have any questions, you can post in the discussion
area or reach out to me by email at hello at
rocket and indigo.com. If you haven't done so already, I encourage you to also join the email newsletter with monthly design resources
delivered to your inbox. Also, be sure to
follow me here on Skillshare to be the first to hear when a
new class launches. And if you've
enjoyed this class, please consider
leaving a review, which may help others find a
class that they like, too. That's all for now. Happy designing, and
I'll see you next time.
 Sue Gibbins, Designer at Rocket & Indigo