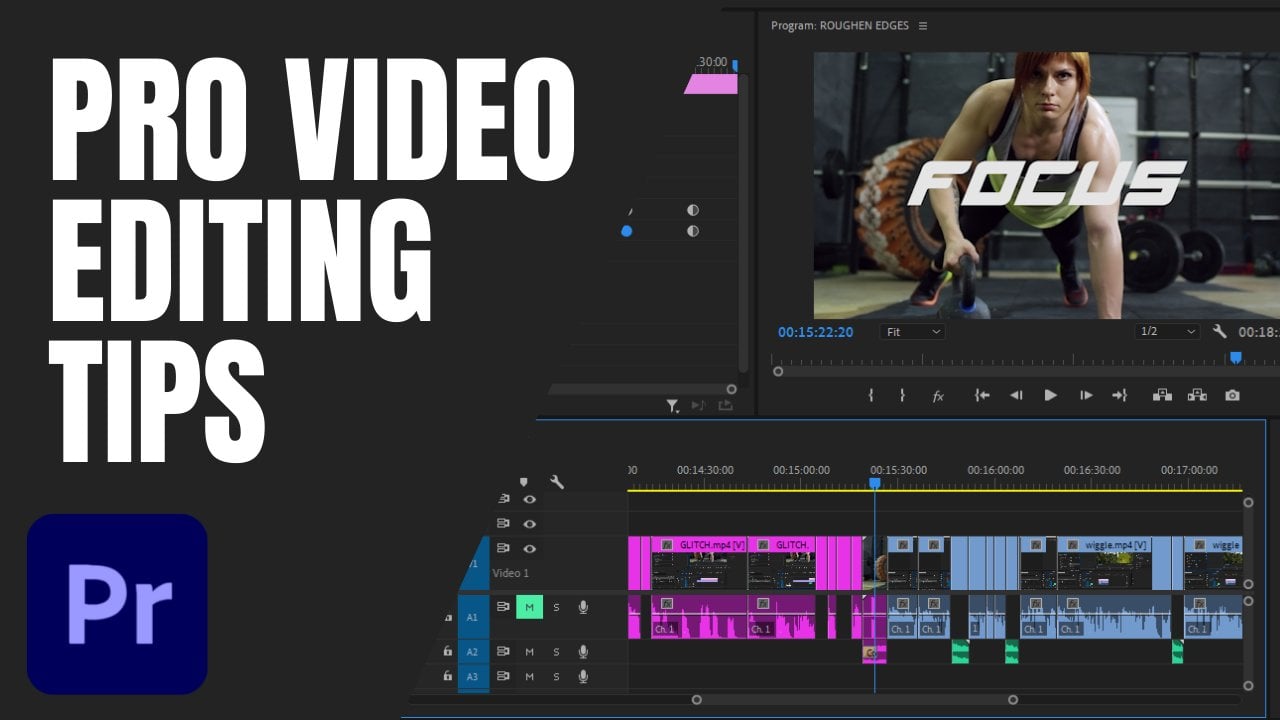
Transcripts
1. Introduction: Hello everyone and welcome to Adobe After Effects
for post-production. My name is Adam and the professional designer and video editor based in
Casablanca, Morocco. And I've done work for
brands such as wander share, flex lip, and adding maker. Currently I work as a video
editor for news channel and I use After Effects a lot and
my post-production workflow. So I said to myself, why not to make a
glass about it? So you're probably
asking yourself, why not just do everything
in Premiere Pro? So when it comes to rough cut in and moving clips
in the timeline, premiere Pro is a great choice. But when it comes to things like animation of texts and videos, after we faked is
the best choice. This client, e.g. I. Work with. They are really picky when it
comes to animation, like this is not too
fast, this is too slow. This looks generic. So for me personally, if I want to control
the keyframes and the speed of the animation, I have to do that
in After Effects. So overall, when it comes to visual effects like
rotoscoping or masking and animation after
effect as the go-to software. This class is for
beginners by being familiar with After Effects
and may really help. So what are you going
to learn in this class? You will learn the
best way to make a round trip between Adobe
Premiere Pro and After Effects to track moving
objects, surfaces, and screens. To professionally
replace green screens, black and white screens to remove anything that you
don't want from your footage. And finally, how we can place the text behind the subject, duplicate it, or even
replace any background. And I'm also going to be sharing with you
guys my favorite built-in effects that you can use and your
post-production journey. By the end of this class, you will be able to
create magic by combining After Effects and Premier Pro and your video
editing workflow. Now, if you already see
you in the first lecture.
2. Class Project: For the class projects, each lecture has
its own projects. So I want you to go ahead and download all the
files that you're going to need for this class. And also, I want you
to after each lecture, go ahead and share a
picture of before and after you apply the techniques
and the projects gallery. And my advice if you want to
complete this class is to do one lecture, one lecture. So you'd have e.g.
one lecture today you complete the projects you
posted in the project gallery. You take a break
and if you can do another lecture, Today's fine. If you can now, you can
come back tomorrow. And another lecture. Just make sure that you
pose the projects in the project gallery you post
like before, after picture. And if you have any questions, you can go to the
discussion tab, ask me any question
that you want. And I usually reply
within a couple of minutes if I'm not sleeping. So go ahead and now download
the files that gets After Effects ready and see
you in the next lecture.
3. Dynamic Links Round Trip Between Premiere Pro and After Effects: In this class we'll be
talking about dynamic links, which means how we
can move between Premiere Pro and After Effects
and a comfortable way. Let's say e.g. I want to export this clip and this clip
Enter to be After Effects. Now there are couple
of ways to do that, but I want to show you the best way that will
make the workflow easier. The first thing you wanna
do is select both clips. Then you want to right-click, and then you can choose replace with After Effects composition. Or you can go to File
Adobe Dynamic Link and you can click on replaced with Adobe After
Effects composition. This window will prompt
to save the project. So I'm just gonna
give it a name. Now as you can see right here, we have two layers that represents the two
clips that were exported from Premier
Pro to After Effects. Now let's go ahead and
apply some effect. So e.g. I. Want to apply the cartoon effects
to the break dance. Increase the threshold
a little bit. Right here for the cats, I want to apply some glue. I'm going to reduce
this a little bit and increase the glow
radius a little bit. Now let's go ahead and add
a text because I have this presets that's only available
on Adobe After Effects. Here I'm going to type in cats. Then I'm gonna go to
Effects and Presets. Type in motion array. Okay, Now this one, I'm gonna look for
presets in here. And here we have it. I'm going to click on you here so I can have the keyframes. Then I'm gonna select
all the key frames and then bring them a little
bit to the beginning. So the animation starts
at the beginning. I'm just going to
just dislike. Anyway. Now, I'm going to
save everything, close Adobe After Effects. And as you can see immediately, the changes will apply
to Premiere Pro. Now, the play them is gonna be slow because you can
see that red line. It means if notch rendered. So to render the clubs
and the timeline, press Enter plus Backspace. Once the rendering is done, you can see that the
red line turns green. And if I play, it's going
to play smoothly this time. You can, of course, go
ahead and adjust color, grade, whatever
you wanna do here. Now let's say for
any x, y reason, you want to go back
to After Effects, tweak or change something. You can see right here under
the project's window we have this untitled link that have been generated once
we opened the club. And After Effects. You
can right-click on it. And then you can select
its original. Okay? And it will open everything
as you lift it up before. Now let's say I want
to remove the glow. I don't like it. And
I want to switch it with CC blast effects. Okay, Let's say I
want cats to start here. Okay, here we go. Click on Save, close everything.
And here you have it. You can see now that's
everything has changed in here, but we have to render again. So enter plus Backspace
and it will render again. So as you can see,
guys do workflow is pretty easy that way. So in this lecture we've
talked about Dynamic Links. You saw how we take the
clip from Premier Pro, we play effect into
After Effects, and then the effects are applied automatically
to Premier Pro. Up next, we'll be talking about 1D track and,
and truly track them.
4. Track Motion-1D &2D Tracking in After Effects: In this class we'll be
talking about tracking. So we'll see 1D tracking
and Tuesday tracking. Okay, so let's play the footage. Now what we wanna do is just find a nice car
that we can track, something that won't
give us any problems. Okay? So this one right here, this black car does
look promising. There we go. I wanted to keep in mind
gathers that you have to find the footage that will
be easy to work with. Because we have some footage
is going to be hard. Maybe something will
get in the way and then we have to do it manually, and then the results won't be as good as if it was
done automatically. And so we're going to be
spending a lot of time on a small staff on
the technicalities. By the time we get
to being creative, you will be so tired. This is why you have to
find the right footage. Now let's go ahead
and find the tracker. So it's right here. But if you cannot find it, you can go to Window
and find tracker. I'm just going to undock gets. Now click on the clip
and then Track Motion. So now you can see that we
no longer only composition video layer on the layer window. Now, here's the thing. Once you click on Track Motion, you will get distract bonds. And the job of this
track point is to track a specific object and a
video. It could be anything. It could be a car,
guy, a bike, whatever. So I'm just gonna go
ahead and put this track points on top of the
car that I want to track and make sure
you move everything. Because here we have
three elements that can be separated accidentally. You have the points
and the middle, The small dots, the plus sign. We have the small
bounding box and we have the big bounding box. Basically, small bounding box is going to go
ahead and track the objects frame-by-frame. This is why we're
doing right here. Okay. We tell him the
small box to track the car frame by frame, track the pixels of this car C. I just move this
point to the middle. And the big bounding
box means that the small one will
trace the pixels. But within the limitation of this area that
we just defined, like it's telling it to
trace or travelers pixels. But within this lemmatization. Okay, now let's go to Option
and y here I'm gonna show you the best options to
get best results, okay? So first thing
first we have RGB, which means you
want to track the red, green, blue colors. You don't want to track the luminance and you don't
want to track saturation. Luminance means lights. Saturation means the
most saturated color. And the video down here you want to check and has before match, and you want to check
subpixel position n. And this one adapts feature on every frame you want
to check it as well. And down here, you
want it to stop tracking if confidence
is below 80%. So if the AI doesn't feel too, confidence is going to
stop and then you can continue or just
things manually. Click Okay. Now let's go ahead and click on play right here on a tracker and
that's on its own line. I'm going to click
on space to stop. But just the clip. And then click again, play
on the tracker window. You can see it's
done. Alright, cool. So the car disappears right now, right-click on this area, New Null Objects,
click on a video, then go to edit targets. No one, click on one, and then click on apply. Apply dimensions x and y. Now, if we select both
layers, click on you, you can see all the
keyframes, the tracking. Now let's go ahead and bring in our titles. Put it on top. Let's position it accordingly
within our vehicle. S for scale, scale
it down a bit. The position and then
position is here. And then mode, we're
going to change it to screen k. And now the final thing is to parents
the video with the null. And of course you can have as many of these
nodes as you want. So you can track pretty much
all of these curves in here. If you want to have
like, you know, create some sort of seen like watchdog games if you
played that game. Okay, We have a
small problem here, but that's because
the car disappears. Okay. So for me the easiest way would be to just cuts
the clip short here. Or you can of course, just manually
adjust the position of the title. I'm
going to click here. Then. I don't know, just it down here a little
bit. Okay, It looks better. Fine. Click on Play again. Now let's go ahead and try
a more advanced tracking. So again, select the clip to the timeline and the
beginning track motion. And this time I'm gonna
check rotation and scale. You can see that's now I have two tracking points
down and we're gonna go ahead and adjust. This one. I want to put it
on, it's up here. Okay. Here we go. This one on top. So basically these
two track points, we will go ahead and make
our graphic looks like it's belongs and background
It's belongs there and not moving with the camera is you see
when I click Play, the camera is like moving in. So if we add something in
the background like logo, something that's
gonna move within the camera and we want
it to stay fixed, wanted to stay still. Let's go ahead now
and add the logo. We go then scale,
scale it down a bit. Here. Okay, cool. Now we can leave
it for a second. Let's go back to later video. Click on video, and
now let's go ahead and trace or track these
two track points. Analyze forward. You can see it stopping
to check the options. Continue. Erythro, looks good. Let's go ahead now,
add a null object. Same thing. Select the video. Edit targets. No, number two, okay? Select small number to apply. Xy dimensions. Select the logo,
make it visible. Parents to know
number two as scale, maybe make it bigger little bit. Position adjusted
to the Left's more. Now if I click on Play, you can see how the
logo is not moving. So actually what the tracker is doing is that it's adjusting the position and the scale of the logo to make
it look that way. So to recap everything
in this lecture, we've talked about the
1D track and until the track and we did track
of texture moving car. And we did stick logo to the background of the video to make it looks like
it's belong Vera. Up next we'll be talking
about camera tracking.
5. Camera 3D Tracking: This lecture will talk about a more advanced
type of tracking, which is 3D tracking. Okay, so now I'm gonna put
the footage and a timeline. Just visualize the
clip real quick. So I'm gonna cut it
here around 8 s. Select the clip and then
Alt plus right brackets. And then I'm going
to bring this thing here, the work area, I'm going to trim it and then right-click and then
trim comp to work area. There we go. Now with the clip selected
again and go to the tracker. And this time, let's go
ahead and track camera. Now, as you can see, it's going to work as the Warp Stabilizer
is going to go ahead and track the
footage frame-by-frame, as you can see here, take some times, but you have to wait. Sometimes the tracker may
stop on that totally normal. Maybe you didn't purge your cache or sometimes the
computer is installing, updates are doing a quick scan. That's may affect
the tracker as well. But most of the time is due to students or editors not
purging their cash. So go to Edit, if it stops, of course go to purge and then
all memory and disk cache, and then make sure you purge
all these cash right here. Oh my God, that's a
lot too tiny to purge. Sometimes I have a very
interesting number in here. So that will affect After
Effects performance. I'm sure you purge
from time-to-time. Okay, It's very
important and helpful. I was almost done
with just a little bit solving camera
and here we go. So now, once that's done, how do we make sure that
everything went perfect, that the analyzer was good. We come over here to Advanced. And then right here,
average error, we have 0.42, okay? Which is fine because
it's below half a pixel. So if it's below half a
pixel is pretty good. If it's below one
pixel, it's good. If it's above, then
maybe you have elements move in right
here and a video. And that's fine too, because once you have elements move in, what you can do is e.g. select these track points from the moving elements and then just click on
delete as well. We analyze the footage and
give you better results. Or you may try to check
one of these boxes like detailed analysis or hide
one in Banner an hour. And we're not gonna
do anything because it's perfect as
below half pixel. So now let's move
into the next thing. As you can see right here, we have two important
things to keep in mind. We have attract pounds, which you can select
individually, and we have targets size. So both of these can be used for difference
or similar purposes. Okay, I'm going to
show you now how to use the targets points. Then I'll show you how
to use one track points, in which case you can use one
track points individually. So let's hover over these
points and let's find a perfect targets that will look good within
our perspectives. Looks realistic like
this one right here. So as you can see,
a target is made of at least three points,
three point trackers. If you hold Shift, you can
select more like this. If you want to
unselect, again hold Shift and deselect this one. Guys. So once you're happy with this, right-click and then set
ground plane and origin. So basically what it
does do is dance. I'm just telling the
AI of After Effects. That's I want this
to be the plane. Then I'm going to right-click, create solid and camera. There we go. Now click on Solid, and then right-click generates. And then grid. If we play, we can see
that it looks good. Of course, you can adjust the size of the
grid as you wish. So we add on the grid to help us position our elements
and footage. Okay, it's very helpful
to do it with the grid. And now I'm gonna go
back to projects. And then I'm going to
bring in the logo here. Make it 3D into 3D space
by checking this box. Then what you're gonna
do here at first, it just position the logo
so we have the x, y, z. We can use to position the logo within our
perspective like this. The most important thing here
is just the x, y, and z. We need to adjust. Okay, it looks fine. Now what we're gonna do is go
to Track solid, click on P, and then, and then
Control or Command C to copy the position
and go back to our logo. Click on P and paste
it right here. Okay, so we paste in the
position of the track solid to the position
of the image. Yes, it's huge, but
we can adjust it. So e.g. you can see
this bounding box. I will click drag
and hold Shifts. So I can drag with proportions. Now we have the size, okay. Make sure that you don't
adjust the position because we already copied the
position of the track solid. Now if we click on Play, you can see how it
stays in place. It doesn't move a notch. Okay, so let's go
ahead and change the blend mode real quick
and maybe transparency, we will decrease it to 70. That will look more realistic. Let's go to the track
solid and just hide it. Now you can see
that it looks good. Of course you can redo the
same process if you want to add another logo right
here on the ground, okay? Okay, and so now if we
click on the image, we can always adjust the XYZ. Just make sure that you
grab from the points. Of course, if you want to add another logo to the
ground, you can do it. Same procedure again. Just click on the clip. Right here. Go to Effects, select 3D camera. And you can find
another spot like this. Maybe you handle not a big
fan of this perspective. But just to show you how like
if you go here right-click. And this time what
you're gonna do is just create solid and then copy paste position,
same procedure. Another way to use the track points individually is that if you guys
remember the dates, announcements for three
reasons why there was like those images still in
the camera's moving. Just to show you e.g. are they the same
thing with this clip but just went ahead and tracked it's where you go like
this. Let's go ahead. Selects our plane. We have to select the
plane first. 3d camera. Let's just select
the plane here. So we have to generate
the camera first, okay, the trucks smaller
than the camera. And then we can add our
images to the track bunch. So this point is e.g. right here. I know it's small. So right-click and
then create solid. Now if I click on Solid, we can find the
truck that we added. Next, I'm gonna go to
projects and then I have this image, 3D. Just put it here. Let's adjust the
XYZ space just to make it look good within
the perspectives like this. Okay, Now, same procedure. Copy the position from
track, solid to image. Here we go. Click on Play. You can see
what I'm talking about. Okay, we can do that here, here, here, whatever we want. So to recap everything. And this lecture is talking
about camera tracking. And you saw how using
the track camera, we were able to
stick the local to the background and make it stay there even if the camera is moving away from the background. Up next, we'll be talking
about moca tracking.
6. Mocha Boris FX- Advanced Tracking Method : This lecture, you will
learn how to track screens using the moca FX track N. Okay, so first thing first, I'm
gonna go ahead and trim the video around here, 10 s. So again, Alt Option plus writes brackets, and then I'm going to click N on the keyboard to
reduce the work area, and then I will trim it. And here we go. Now, or the clip selected
go to effects controls. Then I'm going to right-click
and look for Boris, if fixed smoker, and
then choose mocha. A click here. It's going to open
a new program. Just going to close this. And then right here, we should have work essentials. So keep in mind gas that we use in the free version of moca, the ones that comes in
with After Effects, there is a pro version, which is quite
expensive to be honest, but it's allows you to make
more selective tracking, e.g. we can track faces of
makeup and touches to it. It's actually pretty good, but the cost is
expensive as well. So what we wanna do here, first, I'm just going to select
this zoom tool and zoom in a little
bit. Click and drag. Now I'm going to
select the S plane. So we have the pen, the rectangular, and then we have the elliptical as planned. I'm gonna choose the
rectangular S line, obviously because we have a rectangular screen.
So click here. Then I'm going to
trace like this. And the spline is to actually tell the program that
we want you to track. This area. Can of course, always
adjusted like this. From this point, it's
pretty easy to adjust. Next thing we want to select the show planner surface click. And then we will adjust
it to the current screen. Now this says to till
the program that's, this is the area where we want
to put our image or video. So basically this blue fin will give us the
corner pen data. I'm just doing my best
right here to adjust it. Once you're happy
with the selection, make sure you have
Track Motion options all checked, even perspective. Then we have the play head not in the beginning,
we have it here. So we can track backward. Once it's done, we
can track forward. So once the tracking is done, you can tell about these
blue keyframes are here on the timeline Control Command S, or click here to
serve the projects. Then we can close this. Okay, now let's go
ahead to the project and add our footage
to the turn lane. So we can see right here that the video is not the same
size as the composition. We can right-click transform
and then we can fit to comp. You can see right here
that the video is distorted and
that's totally fine because sometimes even
though it distorted, once we put it on the screen, it goes back to normal
and sometimes nuts, okay, so we have to try, right-click here
the first method. Then we want to pre-comp, okay? We always have to pre-comp
in order for this to work. Click on move all attributes
into new composition because we want to
move everything as we just said it here. And now, go back to the video, effects controls,
open tracking data, creates track data early
and number one, okay, then right here where
it says Export, option, select corner pen. Okay, this is the blue area
that's remarked earlier. Layers to exports. We want the pre-comp
that we just created. And of course right here, you can leave it sauce. Apply exports. You can see that it
looks good right now. Okay, it looks perfect. Now for the other method, as we just click on S for scale, scale the video like this. And again, pre-comp. Select the video,
go back to effects. Track data, okay. Kind of pen. Election, apply exports. So it works fine as well. So it's going to depend on the type of footage
you're working with. So now we have two techniques. Now if we click on a
precomp, we can of course, adjust the corners
as we wish, okay. In case we want to, in our case it looks
perfect, no need to adjust. So if we click on Play, you can see it's working fine. And of course, we can
do this for everything. We can track everything, e.g. if you want to add a text
to the screen, it simple. Let's go back to projects. I'm just going to create a null. Then I'm going to add
a text right here. Now go back to the video. Two effects, click on
Create Track data. They number one, okay? And then this time
we're not going to do kind of pen because we want to track the
text to the screen. We don't want to put it
inside of the screen. So we will choose transform. Then right here, nor number one, click on Apply exports. I'm going to go to
the text T or P for position adjusted here. And then pick whip
it to the mall. Comply. Okay, you guys, and
here you have it. So to recap everything
in this lecture, you've learned how to
track a video N side of the screen using the
moca FX plugin up. Next we'll be talking
about green screen.
7. Green Screen: Now I want to show you
guys my best tips and techniques for removing
a green screen you using the key lights. So this has e.g. a,
good green screen. Everything is perfect. Height pixels, wavelets. It's very professional. So I'm gonna come
over here to Effects. Look for key lights. And I just want to show you
guys how easy your life can be when the filming
is done properly. So with the key lights, but it's on a clip. Now, what I'm gonna do is just play everything real quick. Okay, so click on the eyedropper tool and then just select like this,
the green screen. Now you can see that
with just one click, we have a pretty nice results. You can leave it like
this if you want. But you can see it's a pretty
nice, amazing results. Even the hands they're
moving and they look clean. Now let's go to View and then we can change
that to screen mats. And this is how you know that
the key was done, right? So you want to
have the subjects, you're white and you want to have the
background pure black. You don't want to have I don't
know, something like this. You want to have everything? Perfect, just like this. Okay, Let's go back
to final results. Now if I zoom in, you can see that we still have just a little bit
of green edges. We can fix that easily. So again, go to effects
and then we want to look for Advanced Spill Suppressor. This one, not this
one, but this one. Okay. It has to say advanced Spill Suppressor.
You put a here. And then it's gonna
go ahead and pretty much remove everything
automatically. Can see that we have
already better results. One more thing we can do
if I go to screen mats, right here, we have
clipped black. If I increase this a little bit, you can see that it removes also the green from the edges. Here's without Clip Black and here's the
width, clip black. Because there was too
much the dial it down. Make sure you guys have
transparency checked. Okay. And I think we have right
here a pretty nice. Now we can click here projects. So we can add the background S for scale and add
a keyframe here. Here. Then here like this. Okay? Click on F9
for the easiest. Adjust the speed graph. I wanted to start fast
and end up slowly. Okay, I think I
did the opposite. So this one here, this one here. Then right here we can add the other one, the
other background. This time I want to adjust
the position a little bit. We're just going to scale.
It's a little bit up so we can play with the position p. Same thing. Select both F9. Easy, Ease n. Let's look at another example. Bandwidth, a very bad,
unprofessional green screen. Now, I know what
you're thinking. You guys, we like.
We're not going to always get a professional gig, professional green
screen like this. But if it's too
bad to work with, we can use another technique. So now with this green screen, you can see that it's not professionally
done to first-time. First one I'm gonna do
is select the clip. And then I'm going
to mask from here, at least got this area. Now, same thing. I'm going
to go look for key lights. Okay, So key light, wind
point to put it here. Now if I click here, pick the colors and technique. Let's go to View Screen max. And you can see that
this is a bad selection. You can see that the black
background is not perfect. It has some whites stains on it. And you can see that the
subject is not pure white to still can see some
gray and this area. So let's open Screen
Matte electron to fix that. So e.g. I. Decrease the clip
whites like this. Okay, You can see it
looks perfect now, but we have more whiteness
on the background. So we can do to fix that is
click on the screen color, then maybe adjusted like
this and we go click. Okay, Let's go back
to final results. You can see that it's
not that perfect. It's the skin looks like it has some noisy shadows on it or
some noise like a too much. Let me just add a new solid
color and make it. And blue. Here. You can see this right here, will remove the parts
of his chest as well when we were doing the key. And that's because
it's T-Shirt has almost a similar color
to the background. This is why you have to be very considerate of the footage
you work in waves. So there is nothing pretty much all we can do to fix that, besides maybe play a
little bit, I don't know, we can bring back the whiteness
little bit like this. Can maybe change the color here, Bring it back a little
bit on the shadows. But anyway, the results
are not gonna be perfect. So I know what you're
saying. Okay. We're not going to always get
the perfect clip. So if the client doesn't
give you a perfect footage, you have to explain
to them to not expect a perfect
post-production result. And also for this case, what I would do personally
if this doesn't work, is that I will go ahead and
use rotoscoping and we'll talk more about rotoscoping
and the upcoming lectures. So to recap everything
in this lecture, you've learned how to
use the key light to remove green screen
from a video. Up next we'll be talking about removing black and white screen.
8. Removing Black and White Backgrounds: This lecture, I want to
show you guys how to completely remove a
black and white screen. I'm gonna go ahead now
and viewer footage, because you always need to view the footage before editing it. Here we have some
reflections in here. So there are two ways to
remove black background. The first one is using
a blending mode with a combination of curves. So e.g. here, if I go to Mode
and Tunisia to screen, creates new and add a solid. So you don't see anything because we don't have
something to blend its width. This is why I need
to add a solid. You can see now that we
have a pretty good results. Try Linear Dodge. Okay, I think I'm gonna
leave us with scream. Your choice. Then
we can add curves. From color correction. Maybe adjust this
thin little bits. Okay? The only problem with this is that you don't really have a
transparent background. You don't have an alpha channel. Because if I go ahead
and remove the solid, it goes back to black. Okay, so how do we really
creates transparency? How do we make this
video transparence? And let's go ahead first and delete the background and then deletes the curves effects. Now under effects and presets, I'm gonna look for shifts, channels here, right here, what it says, take alpha from, I'm going to switch
to luminance. You can try lightness as well. But I think that luminance
works best and it also depends on the type of
photo you're working with. So always we can try some other options to see
which one works best. So now as you can see, we're really do have a
transparent background. Now I know what you're thinking. That's not a good
results. We're not done. We can always add or
remove color, matting. Then Y here, if I click, I can change this a little bit. Maybe like this. Now if I go back to projects, I can go ahead and add this
image as a background. I'm going to scale
it down like this, and then I'm going to scale
the video down like this. And as you can see, the black
background is really gone. Okay? There was just
the alpha channel. You can barely see the difference between the
background and the foreground. So now what I'm gonna
do is just positioned a video on top of
this glass thing. And then I'm gonna look for another effect called
Optics Compensation. Board is on top of my video. Increase the field of view. Because I want it to
look like it's inside. It's happening inside the cup. Just the position. Now, if you think that
this is too transparent, of course we can
always go ahead and duplicate the
background like this. Okay? Then we can count the
background pre-comp. It looks better now that
is pre-comp position. We can always adjust
it like this. Okay? And as you can see
this as an OKR results, of course now we can add
curves to the pre-comp. Maybe let's see how
we can adjust this. Okay, so of course we
can do more work on this and make it looks
perfect, etcetera, etcetera. But for now, I'm just
going to leave it in here on probably cuts here. Because right here we can
see transparency throughout lemon. Just cut it here. So let's both clips
and then Alt Option plus writes brackets because
it's going to cut the clips. Leave it here. You can see that with just these random footage and images, we were able to create
something beautiful. And usually this thing
is done with 3D to make it look more realistic,
but you get the idea. Okay, So now let's see how we can work with the
white background. I'm going to bring
this butterfly, but it's up here. Adjusted here. Escalate down a little bit. Again. Two techniques
that we can do. We can either go to Blend
Mode, then multiply. We can adjust the color with
the curves distributors. The easiest, simplest way. There we go. Now you don't see the edge
of the white background. It does look blend N. Or of course, we can do the same
technique that we did with the black background. So let's start with
Shift Channels. This time I'm going
to choose u and then remove color of Marin. Click here on background color. And then play it a little
bit with the spectrum. See which one looks better. Okay. Maybe we can duplicate as well. Let's see in pre-comp
them. Then you have it. Of course we can add now curves
and adjusted as you want. But again, I'm showing you these two techniques
and of course, it's going to depend
on your needs, okay, maybe you just need to blend, maybe really need to
remove the background. So to recap everything and this lecture
I've shown you guys best options to remove a
whites and black screen. Up. Next we'll be talking
about rotoscoping.
9. Roto Brush & Refine Edge Tool: This lecture we're
gonna be talking about my favorite tool so
far in After Effects, which is rotoscoping and you can do amazing things
with this tool. So let's see how you
can work with that. So the first thing
you wanna do when working with the Roto Brush, as you want to double-click
on the clip in the timeline. It's very important because
then you will enter the layer mode or
the Layer window. If you don't do that, if you don't double-click
on the clip, on the timeline, the Roto Brush. It's not going to work. Even if you selected, you see that it doesn't
show on a screen. So you have to double-click
on Eclipse to be only a mood. Once you are in a layer mode, you probably want to resize your brush dependent on
a subject that you have. To do that you need to
press Control or Command on your keyboard and then
left-click and you can either drag to
the left to make it as small or to the right
to make it bigger. Now you can see
right here that we have a pretty tough
video to work with, because first time this is a fluffy cats and it's
very hard to trace, or Toronto's cook fluffy objects or things as second thing, you can see that the
color of the cat is a little bit similar to the
color of the background, which can confuse a
little bit the system. Let's see how we can do that. Now first thing first, I'm gonna drag the timeline because I want to find the
perfect position for the cats. I want to find something
where probably the cat is looking straight at the camera so I can
select everything. I think probably here, we can clearly see the ear. Now I'm just going
to resize the brush a little bit smaller and then select the
cat, just like this. Okay, just left-click
and select the cats. Now Here you go. Nice selection. I can zoom in, reduce
the size of the brush, and select this area. There you go. You can hold Alt or Option. The brush will turn red and
then we can delete stuff. So anything that you don't
want you can delete by holding Alt or Option and deletes
in just like this. There we go. A little bit here. So this is pretty
much like painting. If you are used to
working with Photoshop, this is like the same thing. It does take a
little bit of time, but the results are totally worth it if you're
not using a green screen. So this has, this tool is
pretty good for memes. We feel it's composite
and stuff like that. So right here, we can
delete a little bit. So the goal here is to make
it look as good as possible. Only using the Roto Brush tool without using the
arrow tools yet selects the tail. Right here. I'm gonna make the
brush smaller, hold Alt, and just drag here. Now to check that the results, you may want to go ahead
and switch to transparency. Okay? So let's just
toggled transparency grid. Sometimes even though it's
on at not going to work. So I have to toggle
this back on and off. And you can see that we have
some pretty good results. This is not perfect,
but it's really good. Now the next thing
we're gonna do here because as I said earlier, this is such a fluffy cats. We need to refine the edges. And the way to do
that, we can come over here and then select
Refine Edge tool. And then probably I'm just
gonna go ahead and trace my cats because it's
all fluffiness. So just to let you know, guys, I'm used to paint it in Photoshop because I started and I'm still a
graphic designer. This is for me is like a
normal day in the office. You see e.g. right here. We can switch real quick to Roto Brush Tool and
select this area. Go back to the roughen edges. Basically the refined edge, it does exactly what it says. It just gonna go ahead and make the edges more smooth
and more refined. Okay? If you make a
mistake, you can just Control Command Z or
you can again hold Alt or Option and deletes a little bit
of the Refine Edge. Okay, let's see how it looks now with orphanages. So as you can see, I'll
switch to mask and then afterwards through
water brush and refined edge so I can
see the transparency. You can see that now that
will use the Refine Edge. We have a pretty good
selection actually. Okay, I think the
results are almost like if you are using a green
screen or this cat. Pretty good. Now real quick, I'm just
going to go back to the Roto Brush Tool
and I'm going to look and try to just fix the areas where I see
like too much green like this I can fix here and I think we've
pretty much ups. I think we're pretty
much done here. The results are amazing. Now, while we can do is just
hold Control or Command, and we can move like
frame-by-frame. Just to see if everything
will play nice. I know it's going to
take like a lot of time to check dad's. If you're doing
this for clients, you know how to check frame by frame to see if it looks good. You don't want to get
humiliated with the client. So even though it is tedious
and very long process, you have to do it because
your pride is more important than the
tedious process. And also, if you're
a video editor, what do you expect you notice as you live, frame-by-frame? Life is not easy actually, you don't even have a life spent the whole day doing
this kind of stuff. And also you can see right here, when you move frame by frame, you have this green thing. That means it's
processing as you move. And also you see right
here the solid color. This is the duration of the
club because the clip is 45 s and we cut it short
for this tutorial. So once you do that and you're happy and everything looks fine, you can go ahead and
click on Freeze. That was important to click
on Freeze because it's kinda stopped Aurora brush
from analyzing the footage. Every time you move the
play head in the timeline, For every time you add or
just any effects right here. Go ahead and take a look
at the final results. Okay, it looks good, not bad. It looks really good. Now, one thing to
keep in mind is that you cannot make
adjustment right now with the Roto Brush or the refined tool brush
because it's frozen. Okay. If you want to
make adjustments, you need to unfreeze. And to do it as you just click here again and it will
unfreeze the brush. And let's go ahead and adjust the brush options right here. Okay, So let's add
little bits of feather. Then we can smooth the
edges a little bit too. We can decrease the shift edge. And you can see as we do that, we have a nice edge.
No more green. You can check, use motion blur. So it's blurs any sudden
movements of the cats. And you can also check
decontaminate edge colors. And I think we have a
pretty good result. Now we can literally put
this cat everywhere. So let's go back
to the projects. Double-click on the camp
and what you can do, e.g. as you can, duplicates the clip like this.
And we can e.g. bring some background
like this behind the cat's beef or position. Adjusted scale, increase it. Use a blend mode.
May be animated. If nine for the ECNs. And here you can see have
a beautiful animation. You know, it looks
like a holy cats right now. It's still rendering. It's slow because we are
recording and everything. You can also add a text
behind the cats like this. Select the type layer, but it's behind the
cards P for position. Just make it look like
it's on the ground. You can also add
a drop shadow on a text to make it
look more realistic. Scale. Let's just increase the space between the
characters like this. Okay, so you guys get us, can be as creative as you
want. You can also e.g. take the clip of the
cats, duplicate it, Control Command D, and make it look like
there are two cats. If you upset the clips, the cats will have
offsets movements. So it looks like
it looks like we have two twin cats
also Q2 in cats. So to recap everything
and this lecture, you've learned
about rotoscoping. You saw how with the
Roto Brush you can remove anything from the
background no matter what kind of background you're working with and
how we can place things behind the subjects and video using the Roto Brush Up. Next we'll be talking about
the constants are where fell.
10. Content-Aware Fill: So let's say e.g. you shot a
video of a beautiful scene, but you have people in it are objects that you
shot by accidents. And you want to remove that. So in this lecture, I'm going
to show you how we can do that using the
Content Aware Fill. We have the clip right
here and let's say e.g. we want to remove the people
and just keep the view. So first thing first, to make sure that you get
the best results, you must make sure that there
is no color grading change. And the globe, e.g.
it's one color through the entire globe. There is no color
change whatsoever. The second thing is that
you need to make sure that the objects you trying to remove or the subjects does have
enough contrast from the background of
the subjects in Mather is true blended
with the background, it's may make it a
little bit difficult. You can see here e.g. her coat is a bit of the same
color as the sands, but that fine because her
man is wearing all black. Now the first thing here to do would be to check the pen tool. And then you want
to trace a mask, make sure you have a roto
busy checking, okay, this will help with the curves, is going to create
curves naturally instead of adjusting them
with the anchor points. And you want to make
sure that the mask is super close to the subject. Something like this.
The bounding box. I'm going to change the
color of the mask because I can see, okay, this is better. You want something very
close to the subjects. I'm just going to change
this thing, add to none. Now we're gonna go ahead
and open the tracker. Make sure you have a mask path selected and where it says method you want
to have position. So we have lot of options. Position, rotation,
blah, blah, blah, blah. Face tracking. We're not doing any
face tracking here. We want to track the position. Now, click on track
selected mask forward. Okay, I'm going to stop
right here the tracking, select the selection tool, and then just adjust
the mask a little bit. So every time you see
that the subject is about to leave the masking area, you stop with space and
you would just the mask. Once you do that
is click on Play, dumped click on space because it's going
to play the video, it's not going to
play the tracking. Right here, stop again, adjust. Stop here, adjust. Okay, and it's pretty much done. Now, I'm going to bring the play head to the
beginning of the clip like this right here. I'm going to change
none to subtract. And then we're
just going to play the video to see if there is something coming out of the
mask in area that we can fix. Right here you can see a
little bit of the hand. So what I'm gonna do is bring the play head
to the beginning. Add a keyframe for
mask expansion, and go back to the
area where do you start seeing the arm? Not to hand it some
arm so the case, and then expand the
pixels a little bit more. Then you play, you play. Good. Okay, this is great. And again, you have to
make sure that you switch the mask to subtract super important before you apply
the Content Aware Fill. Now let's go ahead window
Content-Aware Fill. So right here we have
dwindled Content-Aware Fill. We have Alpha expansions, which means if I increase it, it's going to
increase the size of the hole that we
have right here. So in this case we
don't need to increase as much, maybe leave it at one. Right here under
fill method we have object surface and edge blend. While we wanna do is
fail the objects. I'm not going to check
lightened correction because they're going
to take forever. And also we don't have a
lot of corrections to do. The clip has the same color
gray then and then range. We want to work area, we want the entire work
area to be included. Once you finish, you want
to generate fill layer. You can choose a folder and
then just give it a name. Save. And then you just
have to write here. Now here you have it.
A nice clean shots. You can see when I move you see the whole data because
it's still rendering. But overall, once
they're under that, we're going to have
a clean sharp. So now it's done. And as you can
see, it did create around 246 images to
replace the whole. So now if we open the
folder of the tracking, you can see that
it's created frame by frame fills to
replace the whole. So to recap everything
in this lecture, you've learned how to remove
people from the background. And you can use the
same technique to remove object as well, using the mask and the
contents are where fell. Now congratulations, That
was the last lecture.
11. Final Thoughts: Congratulation you guys, we finally made that's now
there'll be able to create amazing magical videos by combining Adobe Premiere
Pro and After Effects. So of course, I
have a Premier Pro course right here on Skillshare. You can check it two. And I want you guys
to go ahead and share your projects in
the project gallery so I can give you my feedback. Also, make sure you follow me in case you liked this class
and leave a review. So you have a notification
when I post a new class. And also when you
leave a review. It helps to show this class to other students that
may be interested. So we covered everything from
Dynamic Links, tours, cop, and to Content-Aware Fill and
all that stuff that you're going to need and your
post-production workflow. Thank you so much for
watching and see you soon.
 Adam Chraibi, Designer and animator