Transcripts
1. 1 Typography Class Intro 10: Have you ever wanted to
explore more than just illustrating and drawing
in Procreate on your iPad. Well, in this course, I'm going to show you
just how to do that. Hi, my name is Danielle burner. I am a graphic designer and illustrator from
Pittsburgh, Pennsylvania. In this course, I'm going to show you the tools and tricks needed to level up your
typography and procreate. We're going to create a fun
dessert themed project. And once you complete
your artwork, you can take what
you've learned to make your own theme to
type four posters, birthday cards, social
media posts and more. And as a bonus, I will be showing you
how to create the candy sprinkles brush that I've included for you in this course. Let's get started.
2. 2 Project Intro Downloads Resources: I am so excited to begin
this class focused on my two favorite subjects,
art and desert. But before we begin, you'll want to
download the resources that I provided for you in the projects and resources
section below this video. Make sure you are using Skillshare's website
and not the app to access these files. You will be downloading the
desert topography file of the brushes and the desert
palette file of colors. When you click on these, always choose the option
open and procreate. And then you will
find the new brush set at the very top of
your brush library, and the color palette will be added to your swatch library. Last, I want to show
you how to access the two free fonts that we
will be using in this class. Head on over to
fonts.google.com, LinkedIn, the About
section below this video. Here, you'll search for and download happy monkey
and Erica, one. If you want to choose your own typeface or use
the ones you already have, just be sure to use two
contrasting options. One thicker san-serif
block type, and one with either a script
or general lighter weight. You can use font
properties to narrow down your searches in
fonts.google.com. Now that you've got
all of your resources, we are ready to start
building our canvas.
3. 3 Canvas Prep and Font Layout: Our first step is
going to be building our canvas and
prepping our fonts. Open up your Procreate app and we're going to
make a new Canvas. So you'll tap the plus in
the top right-hand corner. And we're going to go with a
4,000 by 4,000 pixel canvas. This is something
I've already created, but if you don't have that in your previous Canvas library, you'll want to tap this plus up here and make sure
it's set to pixels. You can see that here your
options are on this side. So we're going to type
4,000.4 thousand. And you'll see that if we're at 300 DPI or maximum
layers are 29. So we can have 29
layers in this piece. If you increase the size
or layers will go down. So just pay attention to that when you're
making any project. Tap Create and we're blank
canvas is ready to go. Next. We're going to add
our background color. So go to the Layers menu and
select background color. With the desert palette loaded. I'm going to select
this dark blue shade. Now, we're going
to add our text. Go to the Wrench icon, which is the Actions menu. Make sure you have
selected add and add text. We're going to start
with the word sweet. Double-tap and select
the font selection. I'm already on Erica won. But if you were on
something else, make sure you go to Erica won or the block text that you've
chosen and hit Done. Select the arrow to resize. You can select Snapping if you want it to be
exactly in the middle. And it will snap to the
spot that you want. To make it more exact. You'll see Suite has been
added to its own layer here. We're going to add
some more text. So first we're gonna
do have a and I want to change this font to the Happy Monkey font
that we've chosen. It done. I make this a little smaller. I'm going to make
sweet even larger. Center that. And we're going
to add the bottom part, which is going to say birthday. You can select all
three layers of texts by making sure they're
all selected here, birthday. And then we're going
to swipe to the right. Swipe to the right again, and you'll see all
three are highlighted. You can go to the arrow
and then move all of them at the same time once
you have it all set up. And that way, if
you're snapping is on, you can put it all
in the center. Okay, that looks pretty good. So next we're going
to start drawing to enhance the word sweet and
turn it into a desert.
4. 4 Inking to Add Depth: Next, we're going to use some
drawing skills to create our very own block
type lettering in 3D. We're going to start
here by making sure our fonts are and the color
that we want them to be in. Mine are already set. But you'll see this is the dark pink that I have
chosen as the icing color. If you are not on that color, you can double-tap the font
that you want to change, to select it, tap your
color and change it. What we're gonna do
now is make sure the sweet font is selected. Swipe to the left and duplicate. Select the bottom
sweet color and tap. We're going to set
it to restaurants. This will allow you to make
changes in the decoration, but you cannot change the type. So makes sure once
you rasterize, You already set the word
to, you wanted to say. Now we're going to
choose Alpha Lock. And you'll see this
checkered background. That's how you know
alpha lock is on. This is going to allow us
to change just this word, just what is selected here. We're going to choose
the cookie color. Tap this bottom sweet layer that is on alpha lock fill layer. And now you can see it has changed to this
ten cookie color, which is a really
easy way to do it. Tap and take it off alpha lock. You shouldn't move tool and
we're going to move this. I'm actually going to
take the snapping off. And we're just going
to move it a little bit to give it a 3D effect. I'm moving it down and to
the left a little bit. And now we're ready to start filling in
with our Pen tools. I want you to go to your
Layers menu and create a layer below the Sweet layer. So you're going to tap this plus and it
automatically puts it above. So just take it
and drag it below. Here. We're going to use the
desert topography pen set. And we're going to use the
technical pen because it's smaller and easier
for fine details. And making sure you're
on that new layer below. Zoom in and we're
just going to add some lines to create
block lettering. So you'll want to draw. And if you hold your pen you can see it makes
a straight line. And you want to fill that
in so you can color it in all the way or make sure it's a solid shape by filling
in all three sides. You'll see if we take this
off and take this off. I've made a triangle. That's how you know that
you've filled it in. And then you can use color
dropped by tap and hold, and drag and drop to
fill in the layer. Some given to you that quickly. And I'll see you when working on something you want
to try to do is take your cookie layer and the extra drawings that you've created and you want
to merge these layers. You pinch them together. Or you can tap one swipe
right on the other. This selects them both. Group this group,
tab and flattening. So that's a longer way to do it, but there are two
options there for you.
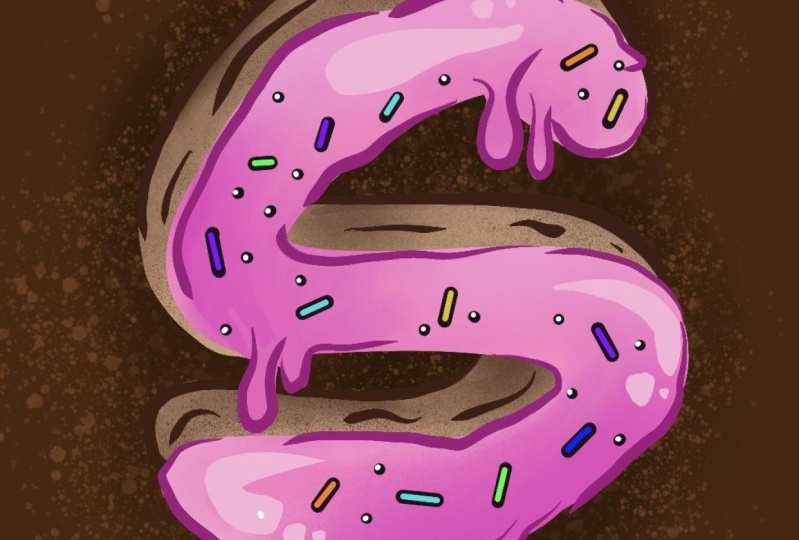
5. 5 Decoration and Enhancement: This is my favorite part of the project where we
decorate our cookie with, I think, swirls and sprinkles
to really bring it to life. Now that we have our
cookie base all set up, we're going to take some
bite marks out of it. Go to the eraser and in the desert topography
set, choose monoline. We're going to make sure
we're on the top suite layer. We want to rasterize
so that we can make edits on that layer
with the eraser. Zoom in to a spot and
we're just going to tap a couple of taps that
might look like teeth. Then you're gonna go to
the cookie layer below, tap back to your eraser. And then you can just erase. Now, I want to add
some extra elements by adding some crumbs for
the bite was taken out. Go to your layers and
make a new layer above everything else.
With your brush. We're going to choose monoline. And we're gonna be
using the icing and colors from your palette. You can go ahead and
just tap a few crumbs. However you see fit. If you ever do something
you don't want to do. Two finger tap will undo. And then if you
change your mind, three fingers will replace. It. Looks pretty good. Now we're going to go to our sweet hello. Swipe left, duplicate. Tap the bottom one, alpha lock. And we're going to fill it
with black to get pure black, just double-tap anywhere
near black and it'll snap to alpha locked layer. And we're going to
fill the layer. Tap again, undo Alpha Lock. And we're gonna go
to this magic wand, which is the adjustments menu
and choose Gaussian blur. Here's our size.
Slide to adjust means take your pen and just slide. I'm just going to give
it a little bit of a shadow on that
and be like 13%. And go back to your layers. Tap this n, gives you
some options here. I'm going to turn down
the opacity a little bit. You can see how that
changes a little bit. We just want a little
bit of a shadow. Okay, now we're
ready to decorate. Go to your sweet layer with the pink icing and tap the Plus to create
a new layer above it. Tap again, and now we're going
to create a clipping mask. This will ensure what we
do is only on this layer, but instead of where alpha lock goes
directly on the layer, it's creating a mask
above it so that we're not making the edits
directly to this layer. I'm going to choose
a lighter pink, maybe this next one
down from the dark. For the brush, I'm going
to choose the soft brush. We're going to create
some icing swirls. Gently. Swirl, not
quite figure eights, but think about icing a cake, how you may put the icing on
to create some dimension. So you can see where
we're at there. You can go even
lighter or darker. And just, you know, it helps to add a
little bit of dimension with some highlights in
there, like that one. And it creates an
effect that gives more dimension to our icing. Next, I want to create another
clipping mask above those. So it's only going
to go on knees. And I want to put some
of my sprinkles on. I'm going to start with
this golden, yellowy color. And I'm going to choose
the plane party sprinkles. There's a rainbow And a regular. So choose the regular for this. And we're just
gonna go over top. Now I also want to
add some purple. And again, just however
you want to see them done, you can add even more
colors or less colors. You can tap or you
can swipe your pen. Now, I want to add a layer
underneath everything. So go to your bottom layer, tap and drag it till the bottom. I want to do some
of these rainbow sprinkles around,
want to underneath. So in case we're not going
over top of our texts. And with this, this is
pressure sensitive. I'm pushing and picking
up and it's directional. So like the color will change depending on
what you're doing. So we just want a
fun border play with this to do whatever you want
that you think is nice. Once you pick up your
pencil with this link, you can go over top like that. But once you pick it up
and put it back down, it's going to layer it. So just be mindful of that. But some sprinkle look. That way. It's kinda fun. You can, you don't have to
use the rainbow. You can choose your color, but I like the spontaneity
of the rainbow look. Now you have your completed
birthday message. While this project is done, stick around for the
next video for a bonus, where I can teach
you how to make these candy sprinkle brushes and maybe enhance it with
your own shapes. Sprinkles.
6. 6 BONUS Make Your Own Candy Sprinkle Brush: For the icing on the cake
or the icing on the cookie, I bring you this
little bonus lesson of how to make your
very own brush. The possibilities are
endless when you can make your very own brushes for use in Procreate on all your
future projects. Okay, we're going
to start with a ten by ten Canvas at 300 DPI. I've chosen solid black. You'll want to make
sure you do the same. And I'm going to be using
the monoline brush. All we're gonna do is draw our sprinkles or whatever type of candy or topping
you want to draw. Just a bunch of
different direction. Help whatever size you
think might look nice. To make this a little bit different than the one
we've already created, is I'm actually going to
make this a little bigger. And have you seen those little candy balls that they have in the sprinkled
section for baking. Add some of these variation. Again, this is your brush, so make them the
size that you want. Spaces. Once you have your
patterns setup, I want you to three finger
swipe down on the canvas, copy all creating new layer. This is where we're
going to test our brush. We'll go ahead and turn away
along to your brush library. And make sure you're in your
desert topography brush set and tap this plus
to create a new brush. Within that library. We're going to choose Grain, Edit, Import, tap off to the side to
get rid of this menu. And you're actually going
to two finger tap to invert white equals your brush. Whatever is, white is what
your brushes going to be. Another time you could actually
keep it the other way. And the co-owner would
be this background film. Maybe there's something
you create that may call for a brush like that. But for this one, we want it to be the actual
sprinkles or the brush. So hit Done. And you can see this is where
you can test your pattern. We are going to go to this menu. You'll see there are so many options I highly
suggest as you move forward, just play, play with all
these options to see what you like as you start to learn to create more brushes. Turn off the offset jitter because we want this
to be more precise. This Zoom where it's cropped. Take it off because
we want whatever size we decide this is going
to be to be that size. If it's all the way up, no matter what size you make it, it'll will always be that set to that size
or the largest size. I want my scale to
be around 35 is 36%. For this particular brush. Next, choose Properties. We're going to take a look
at the brush behavior. For this particular brush, I want to move up the
maximum size. In the 300s. Something. This preview is the preview that you see in
your brush library. I don't want it
to be about maybe 5% or so percent done. And you can see this
is what we've created. You can test as you need. Undo that. You can always go
back in and edit by tapping. So we have one more thing to do here with the actual brush. Good Apple pencil. For my brush, I'm
going to turn down the opacity to turn it off. If you want it to be pressure sensitive, you can
mess with that, but I want it to always
be a solid sprinkles. So I'm going to turn mine off. Then make sure you name it. About this brush tap up here
where it says Untitled. I'm going to name my dancers, sprinkles it done. There you go. Now you can choose whatever color you have in your palate, your
favorite color. And you can add this as needed. For your project. I hope you enjoyed
this bonus lesson. I love making brushes. It makes life so much easier
when there's something you want to create that you want to create over
and over again. You can do it once and
then always have it.
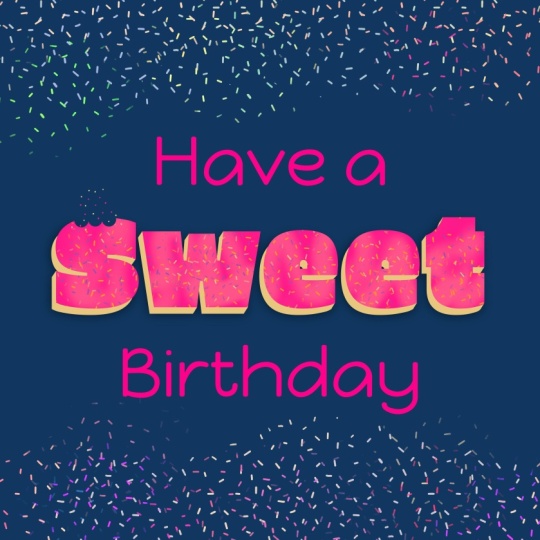
7. 7 Final Thoughts: Well, we did it. Your finished project should
look something like this. Or maybe it's a
little different if you decided to customize it. You can now take this art and posted on social media
for someone's birthday. Or maybe you want to put
it on a birthday card and have it printed for a
friend or family member. In this class, refocused on layers and how to apply
clipping masks and alpha lock. And the difference
between how to install fonts and color
palettes and brushes, as well as how to make
your very own brush. You can take these
basic tools and apply them to all your
projects moving forward. For this project, please don't forget to share
in the projects below for me and everyone on Skillshare to
see what you've been up to. Well, I've had so much fun
drawing with you today. I look forward to seeing
you all in the next class. So happy art-making.
 Danielle Brunner, Illustrator, Designer, & Dog Mom