Transcripts
1. Introduction: hi and welcome to getting started with cold wax medium. I'm BJ lamps, an artist primarily known for my ethereal landscapes, subtle colors and richly textured surfaces. It's been said that my work is a completely different experience when viewed close up or from afar. You can see my work as well as links to a couple of galleries where you can see my work in person at www dot BJ lance dot com. You might have heard of this increasingly popular medium and wondered what the heck is cold wax, and what would I do with it? Well, today you're going to find out in this class you'll learn what cold wax is the best substrates to use the basic tools you'll need. How to properly mix the cold wax meeting with oil pain, a variety of ways to apply the mixture to substrates and mark making. At this stage, while the pieces you start in this class project won't exactly be works of art, they will be the perfect foundation for moving on to the next class in this Siri's, where walks for using mortals and more ways to work with the surface once it's tried a little bit further. But today, let's start with the basics
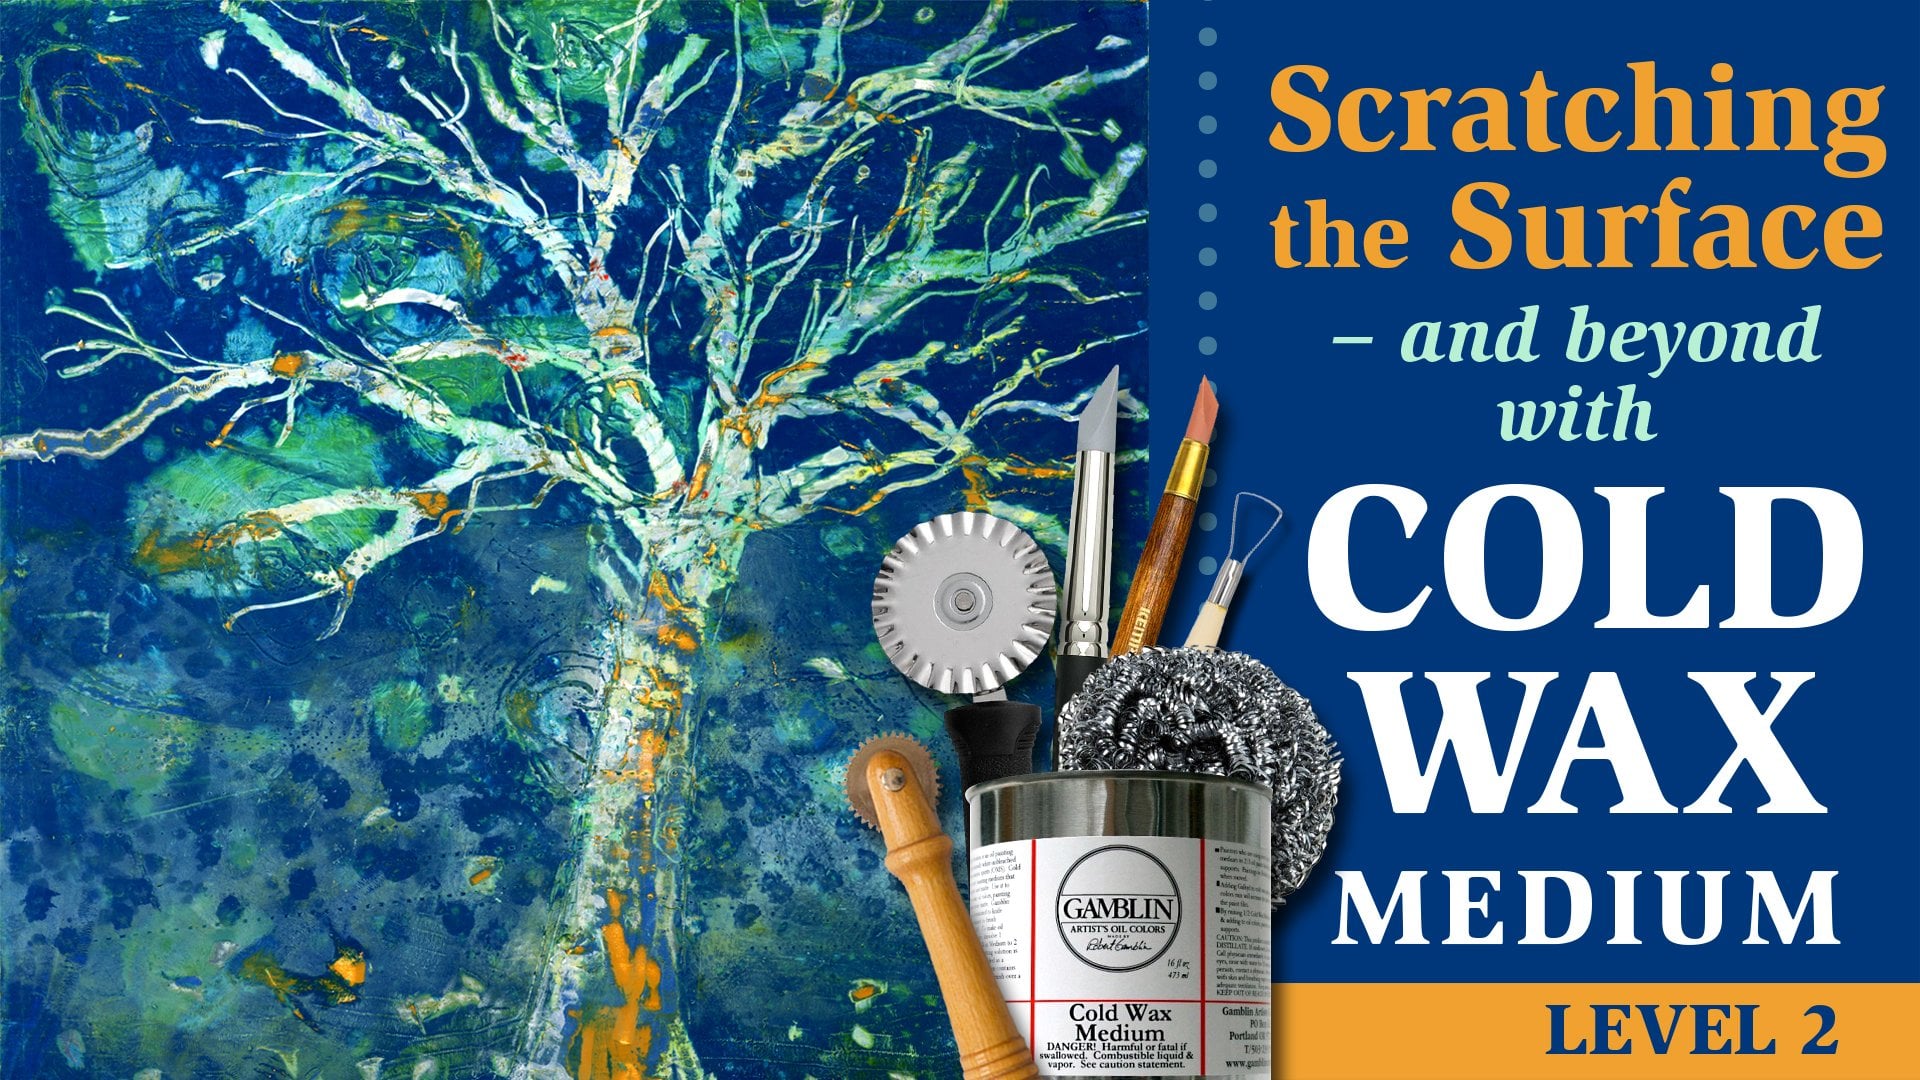
2. What is Cold Wax: So what is cold wax medium? When I tell people that I work in cold wax very often, they think I mean and caustic, and that's not the case. And caustic is a process that works with hot wax, while cold wax is just that cold. In fact, if you heat up cold wax, it can get toxic and flammable, so don't do that. So working with cold wax is not as toxic a process as encaustic is. And while you still need adequate ventilation, as you would working with oil paints in general, you don't need the elaborate set up that you do for encaustic painting. Cold wax is made up of bees, wax, resin and solvent. It's actually the solvent that helps the wax and the paint to dry as opposed to the wax cooling. I like to tell people that cold wax has the consistency and appearance of Crisco or coconut oil. So the two most popular brands of cold wax our door lands and gambling. I myself prefer gambling, but either one is fine. If you really industrious and you want to make your own, there's lots of recipes online. Just let Google do the searching for you. I myself prefer to buy it in a can much, much more convenient. This is a 16 ounce size, which is probably a good size for you to get started with the medium. I myself have graduated to the honking gallon size because I often paint large and I don't like running out. Cold Wax is available from a number of sources, including Dick Blick. I'll leave a link in the resource is section.
3. Substrates & Supports: Let's talk substrates and supports cold wax paintings can get a little on the thick side sometimes, and some of the techniques that you're gonna learn in future classes can get a little vigorous. So choosing a stiff support is really a better idea than choosing something flexible like canvas. There are artists who work on canvas with cold wax, medium and oil paint. However, there mixture of oil paint toe wax tends more to the oil paint side than the wax side, and they also put on much thinner layers. The reason for this is that canvases flexible, and if you get a lot of layers of wax and paint on it once that dries and the canvas flexes , it's very possible that your painting could crack and we really don't want that. So choosing a rigid support is a much better idea. Let's go over some. My favorite support is a cradle panel, and basically all the cradle panel is is a wooden box that you can paint on. You don't have to frame it if you don't want to. When you're done, you can just finish the sides with something neutral and you're done. Or if you want to work on a flat panel, then you gotta frame it afterwards. I myself am lazy, so I prefer a cradle panel ampersand. Brand makes a variety of prepared hardboard surfaces. They make him either flat or cradled. They make adjusts aboard a clay board and caustic board, just to name a few. I've tried all three of those, and when working with the cold wax, I don't particularly find much difference in them. So whichever one appeals to you is fine. You can also buy a variety of bare wood panels, either cradled or flat from a variety of online sources, such as Dick Click. I will again put a link in The resource is section. You can also make your own panels if you really want Teoh. I've done this for years. I don't particularly think it's my idea of fun. I'd rather be painting, but it has been more cost effective when I start getting into the larger sizes of the panels to make them myself. But I do also have the resource is of a husband with a woodworking shop, so if you have, the resource is than making them could be very cost effective if you're going to go the unfinished panel route or make your own panels your going to need to just of them before you work on them. I use three coats of gesso, and I don't bother sanding between coats as I would if I were doing a normal oil painting. Because the cold wax has texture and so does suggest so. So I don't really mind that so much. You'll need to let it dry overnight as well before you start working on it. Arches Oil Paper. This is a really nice substrate if you're traveling, if you want to do some exercises to loosen up or if you just want to do some small study paintings, it's got a really nice texture. It can hold up to a lot of abuse, and there's no just so needed. You can just jump right in and start painting Multimedia Art Board. This is a really nice substrate made from paper and thermal set epoxy resin. It's pretty thick. Let me show you how thick you hear that you can see that thistle is a painting I did in my very first workshop that I went to many, many years ago, when I was flying to this workshop and I didn't have room to take cradle boards with me. So I invested in several sheets of the Multimedia Art Board. It could hold up to a lot abuse without buckling or warping. It's got a smooth side. It's got a textured side. You can use either side. Um, it's also less intimidating, I think, then cradle panels because it costs a few dollars a sheet rather than a few several dollars four panels. So it's a little less precious to work on, and it's a good place to start. If you want to try a paper substrate in preparation of your class project, you mean to choose one or more of these supports in order to create your foundational paintings on, I would suggest not going above 12 by 12 yet, and feel free to start as many as you'd like. However, you will need at least three in order to have the foundations to move ahead to the next class. If you're able, I would also suggest that you try both prepared panels as well as one of the paper substrates as well. They do have a different feel and it would be nice for you to try them and see which one you like best. Also, as part of your class project, you'll need to prepare the edges of your panels with painter's tape in order to keep them clean and protected. If you're using the arches, oil paper or the Multimedia Art Board, you might want to run some tape around the outside of the paper in order to have a nice, crisp edge when you're finished. I don't recommend using masking tape for this step because it's much stickier than painter's tape, and it will often tear the paper when you try to remove it. And if you're working with a known prime surface, such as a bare wood panel, you'll need to prepare that first a swell with Jess. Oh, remember three coats. You don't need to sand in between, and you need to let it dry overnight
4. Basic Tools & Supplies: Besides your support and wax, you're going to need a few other basic tools. All provide links to most of them in the resource is section, so you're going to need oil paint to mix with wax. The brand doesn't matter. I have everything from pricey centrally A in my studio to gambling to student grade gambling to the really affordable Artists law from Michael's Craft Store. The longer you work with different brands of pain, you're going to find your favorites. For instance, I have tried just about every white out there, and for some reason I keep gravitating back to the artist's loft brand of titanium white. For some reason, I just really liked the feel. In the density of it. You're gonna need a palette knife to mix the paint and the wax together palette. Knife's come in a variety of different sizes and shapes for different purposes, but for now, you just need one that's not too big and not too small. I myself used this one. That's my favorite, but whatever one you happen to have is probably just fine. Next, you're going to need a power to mix your pain and your wax together on. Some artists like to work on a glass palette, and if that's your preference, that's just fine myself. I'm a big fan of the disposable paper palette, and one of the reasons for this is I often have many pallets going in the studio at once, and it's easy to just grab a new tablet and start a new power, and they move around the studio pretty easily with me. Paper pallets are available from a variety of sources online as well as your local crafts store. I prefer the Strathmore brand, which I stock up on it Michael's when they're on sale. The reason I like this brand in particular is because it's attached on two ends of the tablets. So when I'm mixing the paint in the wax together, the ends of the paper aren't pulling up. That's very annoying, so now you're gonna need a tool to apply your wax mixture to your substrate or support. Let's start with squeegee. My favorite squeegee is actually a bull scraper that I bought on Amazon. It's pretty good size, and it's flexible. Catalyst Brand also makes a variety of squeegees in different configurations. Their smaller, harder and more rigid than my bowl scraper, but that's a personal preference. You can even use old gift cards or room keys as a squeegee. Let's talk prayers. There are a lot of different kinds of prayers out there. They range from very hard to downright spongy soft, but my personal favorite is thespian ball soft rubber. Breyer. It comes in a variety of different sizes. This is a three inch, and it's good enough to get started in this class. I would encourage you as you continue to learn this medium and play with it to try a couple of different breakers out there just to see what you like best. I know there are a lot of artists out there that would never dream of working without their glove song. I personally use my fingers far too much in my work to make it feasible. Toe wear gloves. They just really bother me, and I kind of feel about gloves the way I feel about aprons hot so I don't like toe wear them. There are barrier creams available that are designed to protect the skin without gloves and to make clean up easier. I use a product called Invisible glove, which I have found in Ace's Hardware hanging with the rubber gloves, and I have bought it on Amazon. I can't speak for other brands, but I know that gambling in particular pays close attention to producing their products with safety in mind. So I don't worry about this issue to too much. You're gonna need paper towels and lots of them. The cheap brandis Fine mark making is one of the best parts about working in cold wax medium. But at this stage, when the painting is pretty wet, there's certain things that work better than others. And some things just kind of pull the pain up and make a mess. So we're going to keep it simple. For now. Grab a few things, like wooden skewers from the grocery store or the dollar store knitting needles. I bought them at thrift stores. Empty TP rolls, empty tape rolls, spent pens in plastic caps of all sizes
5. Mixing Cold Wax & Paint: So what exactly happens when you mix the oil paint with the cold wags it extends. The volume of the paint shortens the drying time of the oil pain, and it creates body for making texture because the wax and oil mixture has different properties as it's drying their variety of different ways to work with a painting in all these different stages. And while we'll get into a lot of different methods and future classes in this class is, I've mentioned before, we're just going to focus on the beginning wet stage of our painting. When it comes to mixing the paint and the oil wax together, there's no set in stone ratio. However, 11 or 50 50 is a good place to start. You'll find over time, working with different brands of paint and pigment colors that sometimes you need a little more wax and a little less pain or a little more pain in a little less wax. That's just something you learn as you work with the medium. So the next step in your class project is to mix up some pain and cold wax. Start by scooping out a pile of wax onto the corner of your palate. Now squeeze. Have little pain about this much and grab roughly the same amount of wax. Mix them together with your palette knife. We're not working on huge pieces here, so we don't need to mix up a ton. See how the oil pain is shiny to start with, and as you mix it, it begins to lose that shiny nous and viscosity. It's thickening up, and it's becoming more Matt in appearance. Once it starts to take on the qualities of cake frosting, you'll know you've got a pretty good megs for your class project. You'll need to mix up three different colors. For now, let's stick with straight out of the tube colors rather than mixing special colors. You're of course, welcome to choose your favorite combination of colors to use, or you can use basically the same colors I am to follow along. I'm going to mention the colors that I'm mixing up, but if you have something close to that, it's just fine. Today I'm gonna be mixing up light blue cadmium, orange and yellow green. - What's that I hear you asking. Can I mix acrylic paint with cold wax? No cold wax is an oil based medium and needs to be mixed with oil paints. You can't mix it with acrylic panes or watercolor or wash or any other kind of water based paint. Now, what about layering the cold wax with acrylic paint? Well, that could be done if you think in terms of the old adage of fat over lean, the fat being, the cold wax and the lien being the acrylics. You can put cold wax over acrylic, but putting acrylic over cold wax makes it less stable.
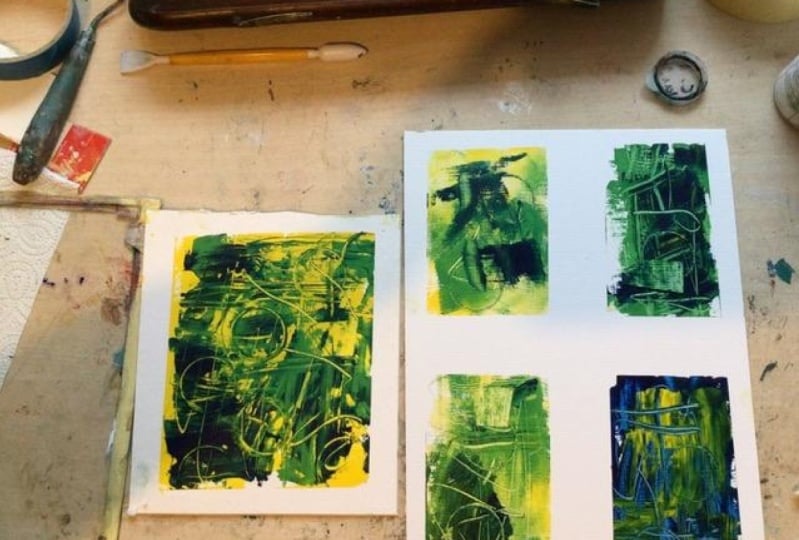
6. Applying Cold Wax/Paint to Substrates: So now that we have our supports, all ready to go our tools handy and are painting are wax all mixed up? Let's move on to the next part of our class project. We're going to apply the paint and wax mixture, using the following three tools to build our foundation. A squeegee, a Breyer and a palette knife. We're going to try all three here, but over time you'll gravitate to your favorite tool to start a painting with when I started painting. I have no idea where I'm going with what it's gonna look like in the end. How I wanted to look. I have no preconceived notion of that. I just dive in. I apply the pain. I make marks. I play. I'm not too precious about it at this stage, so you try not to be precious, either. First, let's grab our squeegee and get some pain on it. Don't be shy. Scoop up a good bit now drag it across the surface. Using a light touch, you'll find that by controlling your pressure, you control how much wax covers there is. See what happens when I really bear down, or if I barely have a grip on the tool. With this tool, you can pull everything around a little flat, a little smooth. Or you can use the squeegee as a mark making tool, making the surface more textural. Let's not get too, too thick with our layers at this stage. There's really no need to, and it's just going to increase your drying time, and I will talk more about drawing time before we're done. I promise. Okay, let's set that one aside for a moment. Okay, let's move on to the Breyer. I generally used the Breyer at a later stage of the painting. However, at this stage it's useful for building up somethin transparent layers, if that's what you're going for. I like to take my palette knife and spread the pain out a little to make it easier to get on the Breyer. I dad been do it getting about this much on it, and then I roll it back and forth until the entire roller is evenly covered and then you just roll it on the surface. I'm using paper to demonstrate this. Don't worry too much about Bre Airlines on this stage unless you want to create a super smooth Look, then you can just keep working them over and smoothing them out as much as you possibly can . Okay, we can set this one aside and move on to the third panel. Okay, let's grab our palette knife. Now with this method, unless you're using a larger palette knife than this is not gonna be particularly practical for covering a large panel. However, you can use it to create more texture and depth over. Say, what you've put down with the Breyer or the squeaky.
7. Mark Making & Adding Layers: Now that we have a layer of paint wax down, we can start doing some mark making with those skewers and bottle caps and so forth. I like to obliterate bits of the marks here and there. This is not the stage to get precious with. And even though you won't be able to see some of these marks in your finish painting, they all build on one another to create a history that makes for an interesting painting. Now let's apply a second layer. - The biggest problem I see for beginners in this medium is they often end up with a muddy mess, and this happens when they're applying their layers to thickly. They're pressing down too hard as they're adding their next color on top of their first color, and they're just overworking it in general. And I know this is really frustrating, and you can't understand. Why can't I get this right? This isn't working for me. I don't understand. It really is something that takes practice and a feel for, and everybody who works in cold wax has had to go through this and learn this. It's not just a magic bullet that you're going to get it right off the bat. So if you start seeing that you're getting a little bit overworked and a little muddy, just set your panel aside for a little while. You know, maybe in our let it, you know, just harden up just a little bit. And then it's easier to go back over with. And I suggest using a lighter touch when you're adding that second and third layer down. Because if you push down too hard than you're getting into the layer below it, which is still damp and wet and you're making a muddy mess. And at this point, we really are just playing this. This is not the time to be precious. I know I've said that a few times, but I can't say it enough. This is not the time to be precious. It's the time to play. You're creating the base and the beginning of the history of your painting
8. Drying Time: okay, I promised I would talk about drawing time. This medium will teach you patients. It needs time to cure between stages, sometimes working on it. And sometimes it's only a day. Sometimes I let it drive for a month before I come back to it. I have several paintings going at one time in different stages of drying, so I can always be working on something. Drying time depends on a variety of different factors, such as the substrate. Paper will dry faster than a wood panel. For instance, the thickness of the paint mixture applied to the surface. The paint toe wax ratio, the pigment and or brand of the pain. Some colors dry, faster or slower than others. It has to do with the composition of what makes up the paint and the climate. If it's warm and humid, it's gonna take a little longer to dry. I I live in Florida, and when I first started working with this medium, I had applied a probably too thick layer of blue, and I probably had a little too much paint mixed in and not enough wax, and I just thought it would never drive. It does take some experimenting, usually a pieces transportable in about a week again, depending on all the various conditions. If you're planning to ship a piece, I would wait at least three weeks, or until the surface is no longer tacky to the touch.
9. Clean Up: so a few notes about cleaning up. While, of course, it's possible to clean your tools later. Trust me, it's a lot easier to just wipe them off with a paper towel while they're still wet. But if you do, leave him sitting around for a little while and there's some dried paint on your Breyer your squeegee and we all do it. You're gonna need something a little stronger than a paper towel to clean it up. I use GAM salt, which is an odorless mineral spirits made by gambling. You can read all about it on Gambling's website, and I will give you a link to that in the Resource is section, But it is one of the safest solvents out there. And even though that's the case, usually when I'm cleaning up a lot of dried tools at once, I'm using quite a bit of it. So that is one instance that I do wear gloves. Some artists used cooking oil to clean their tools. I simply prefer gam Sol. I find it quicker and less messy, but if you want to be a little more organic than cooking, oil does work. If you have left over paint and wax mixed up together. Put a bit of plastic wrap over it, and this will keep it for a day or two, depending on the pigment. Um, every now and then, I'll find one that lasts a little bit longer than that. But usually about a day or two is all you're going to get out of it while we're not using mineral spirits or linseed oil or even straight oil paint, which, you know they could be flammable and they should definitely be disposed of properly. But since we're not using those gams, Sol does not have that kind of danger. But it's still a good practice to properly dispose of your paper towels. At the end of a work session, I simply wrap them up in a garbage bag and deposit them in a dumpster or an outside garbage can
10. Conclusion: If you have any questions about what we've covered here today, please feel free to comment and I will do my best to answer all your questions. Now you have the base paintings to move on to the next class. I do hope you've enjoyed getting started with this exciting process. There are so many ways to work with it. But in this class we've laid the foundation of learning the basics so that we can move on in future classes were all introduced. More tools, more mediums and more techniques. I hope youll follow me here on skill share and stay tuned for those upcoming classes. You can also follow me on Instagram at BJ Lance Studio. Thanks against so much for watching. And please don't forget to share your projects.
 BJ Lantz, Artist