Transcripts
1. Welcome! : What's up, guys?
Welcome Dave Reed Here, AKA drug-free Dave, and I'm so glad to
see you back for another 2D procreate class
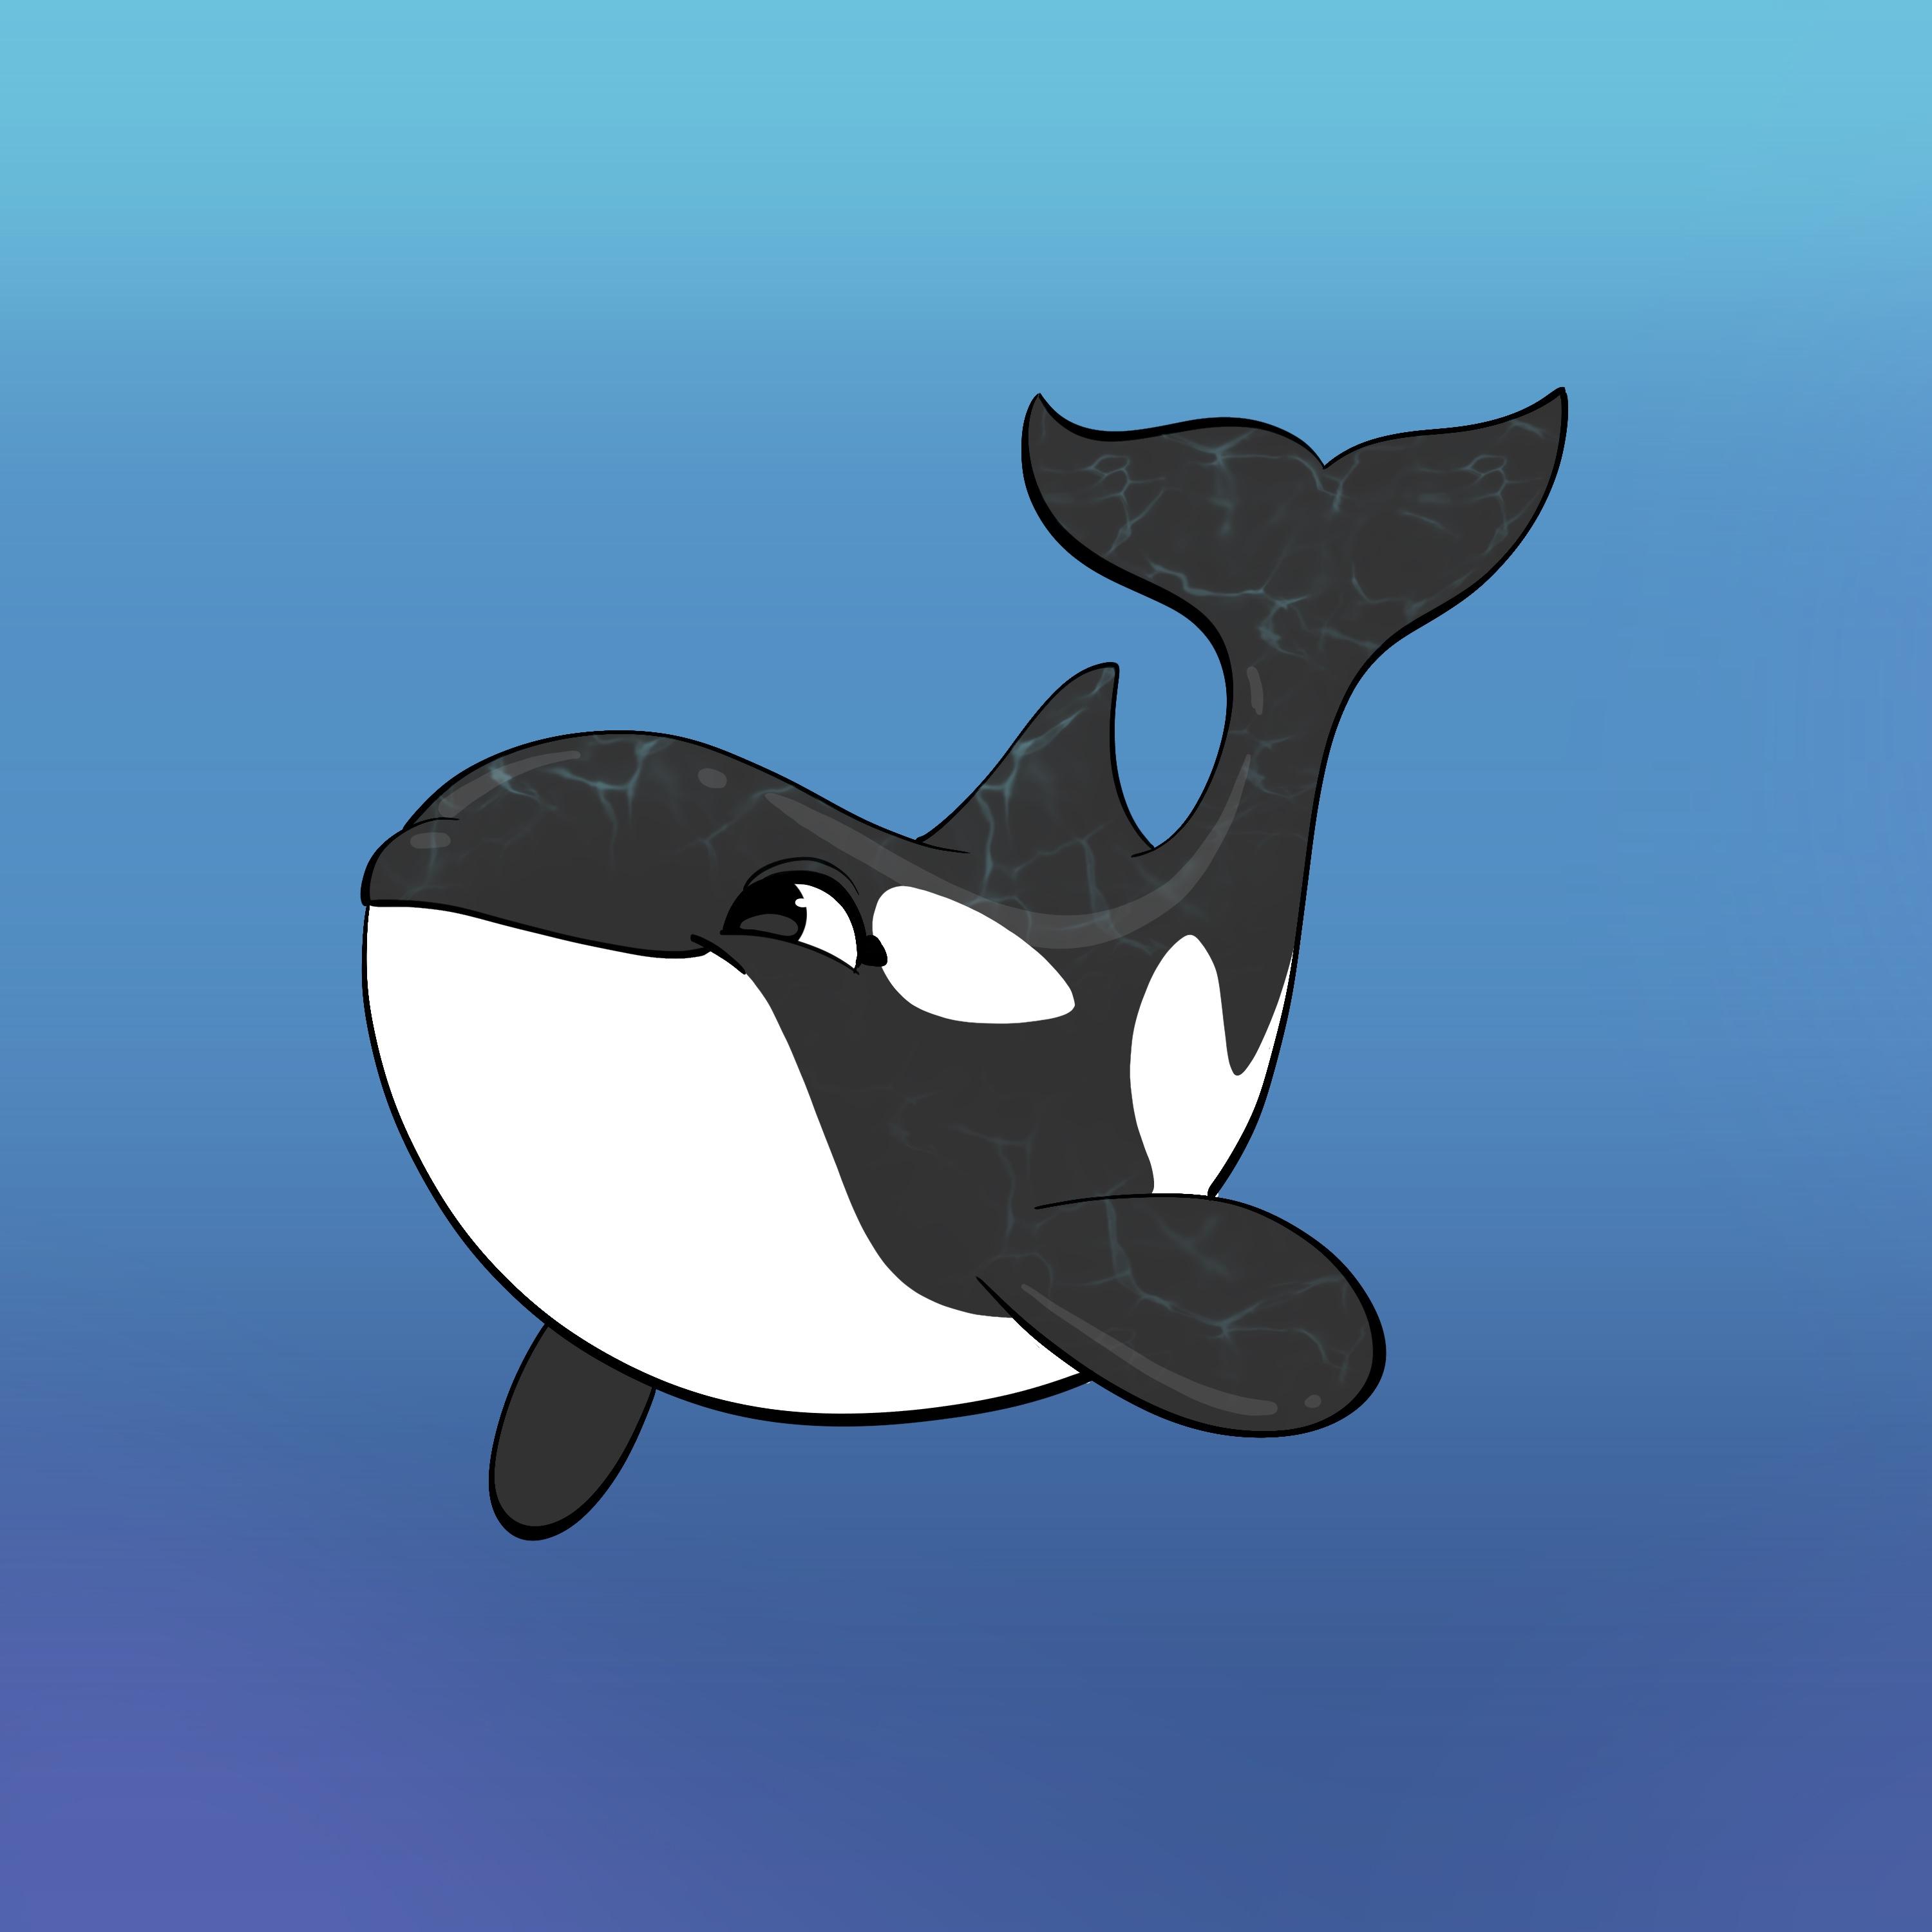
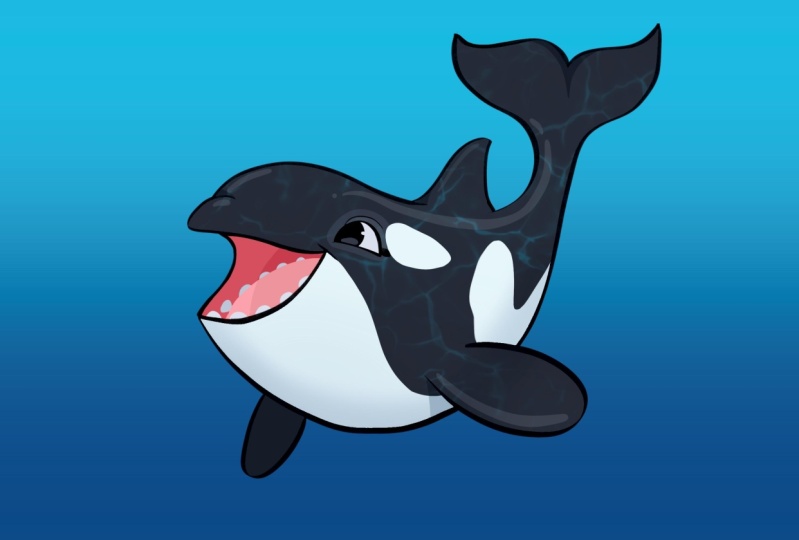
about drawing animals. So today we're going to draw a cute little pudgy
orca, or killer whale. I really love to draw them. They have such majestic
shapes and the patterns. I just think they're
really beautiful. And of course, I put my
little cartoon spin on it because I always
do, I can't help it. So that's what we're
gonna do today. We're going to mainly
concentrate online work on mastering your line work and
also digitally painting. This little Orca is just gonna
be a fun relaxing course. You can be as
creative as you want. And we're just gonna go
over some techniques. And actually I'm gonna
use a clipping mask, something I never use. But we're gonna do it in this
tutorial because, why not? I'm always open to eat to
doing things a different way, doing things a new way, because that's how
we learn and that's how we get better at our craft. All right, so
without further ado, let's get on to the next
video, the class project.
2. Class Project : Okay, As I always say
with my class projects, this art is for you, this class is for you and for you to grow and get
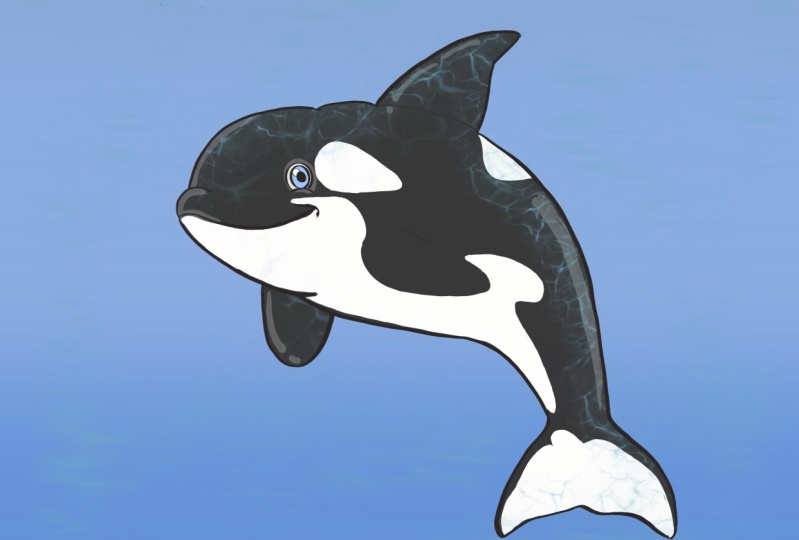
better as an artist. So we're going to create
acute Orca of course. But you can be as
creative as you want. You can change the eye color, you can change the skin color, you can change the pattern. You can do one
following the tutorial. And then maybe you want to do a different one with
different colors and bigger eyes and different
patterns, things like that. Just be as creative
as you want to be. There's no rules, there's
no right and wrong. There's just growing
and getting better. It will be due. So be sure to upload it to
the class when you're done because I lived to
see you work and I'm sure all the other students
would love to see your work. And it's just gonna be a
nice fun, relaxing class. So no stress. Let's get onto the first video. Getting Started slash line art.
3. Getting Started: Line Art: Okay, so let's draw our
little killer whale. Our canvas is 3 thousand by
3 thousand pixels, 300 DPI. And we're going to use the
Disney ink brush at 12, size 12, 100% opacity. And also note that you
can change the opacity of your reference layer to make
it as light or even darker. Whatever comfort level you are. I'll keep it around here
just so you can also see the base rough sketch. Now on a new layer, I'm gonna
make sure I have my brush. And we're going to
start with his eye. We don't want to press
too hard with this line. Then we just make a
half circle, like so. And then just take
your brush and make another thicker line right on the backside of
this half circle. Now let's draw his little mouth. We have a line there. We bring it up just
a little bit of a little bit of a curve. So we know that this
part is extending from his head. Now I'm
going to start here. I'm gonna go all the way around. And then I'm going to
sort of just abruptly stopped my line here because
we're going to do the fin. And I sort of, I sort
of let the line go. That's what gives
it that nice taper. It makes it nice and small here. Now I'm going to go
up in one stroke, down and do the
same sort of thing. Just end our line. I'm going to start further
back from this line. And then I'm going to come
all the way up to here. You can see I press a little bit darker once you get around here, just to make this
nice thick curve. I always start lighter when I'm at a point
that I start light. And then I can
press a little bit harder and then
come light again. Once we get to this
middle section. As you see, it doesn't
have to be wanted to present perfect with the sketch. The sketch is just a template. Onto this one. A little
lift. It was one again. I always like to be able to do as much as I can
with one stroke. That takes some practice. But the more you do it,
the better you'll get. And it just, it just makes
everything more cohesive and clean when you can do things with less
stopping and starting. Let's try to get this
whole flipper. One swoop. Not bad. I'll start at his mouth
and I'll come down. That will make his
other one here. That looks pretty good. If you want to do the
sketch with a mouth, what you can do is just bring that layer should be in
the same exact position. Make sure you hide the
original sketch layer. And then just duplicate your
line layer and turn one off. And then you can actually drag the mouth layer up so
that you just have these. You have the new line layer
above the new sketch. Now I'm just going to erase. Oops, let me turn my
eraser down and to erase them just using
Disney G brush. But you can use any
brush to erase. I'm just going to erase
where the mouth is. Our linework. I'll go back to Disney ink. Then I'll just draw
in the mouth shape. I'm not going to worry about the teeth and the
tongue for now. I'm just going to draw
the lines of the mouth. Something like that
looks pretty good. I don't like how
thick it is up here. So I'm actually going
to do it again. Just wanted to be a
little more even. Feels a bit better. We'll get to the teeth
and the tongue later on.
4. Coloring: Okay, so let's color
this really easy way. We're going to tap
on our layers. We're gonna make a
new layer above. And let's go ahead
and rename it color. Now that we have our new layer, we're going to take the
whale layer, tap on it. And we're going to
tap a reference. Essentially. Since we have our lines here, we can go to a layer
above the color layer, and we can drag, and it will reference
these lines and it will color fill only
inside these lines. You do have to be
careful using reference because one of two
things might happen. So if you're on your new layer, above your reference
layer are lines. If you're on your new
layer and you try to drag a color in,
and it does this. Then the first thing that you should check, I'm
just going to undo. The first thing we should
check is your reference layer. Just zoom in and make
sure there aren't any spots that are not touching. If you find a spot not touching, just take your brush, your ink brush again, and just join them together. Now, go back to your color layer and then try to drag it
in and it should work. The only other reason
that it might not fill on your new layer is if you drag
it in and your threshold, your color drop threshold
is up really high, then it might fill
the whole screen. If that's the case,
you can bring it down until it only fills
what you want to fill. Then you can just lift
your Apple pencil up. We still have this
little spot here. Of course, we'll
fill that again. Now one thing that I'm
gonna do with this color, so I'm not going to use black
because when you use black, it takes away from all the beautiful line work
that you did before. There's a couple of
ways that we can do it. Of course, we can
alpha lock this. We can choose a different color or a lighter color and then
you can color drop it. That's one way to do
it. But you can also just go to the Adjustments,
Hue, Saturation. And you can also just
make it a little lighter. You definitely just want
to see your black lines. Okay, so let's go ahead and turn our sketch layer off since we're not gonna
need that anymore. And also, let's tap on
our reference layer. And just tap
reference because it doesn't need to be a
reference layer anymore. In order to make the
white shapes on our orca, Let's tap on the color layer. And we'll just make a
new layer above that. And we can read, we
can rename that. Will just rename it white. I don't usually use
clipping masks, but in the spirit of just using new things and just
using different methods. Let's go ahead and make
the white a clipping mask. Basically. Now anything that we color the mask that's
a clipping layer, it will only color in. What is selected in
the layer below. The layer below is
our gray color fill. So if we use the, let's see, let's just use Disney G
brush and the color white. If I make a line,
it's only going to show up where that gray is. So we'll use that for now. Let's make sure we're
on our white layer and we're going to go
ahead and color him in. Once you kind of know
how to color work is in, it's actually quite fun
and they're coloring is, so it's really, really pretty, I love coloring them in. We're just going to make a
line from where his mouth is. We're gonna come around here
and then we're going to go up under his little fin. We'll just start
with our line here. We go up under I'm using, I'm using Disney D brush. You can really use any brush. But probably, maybe Disney butter is a
little bit of a better brush. Let's use Disney butter
at ten, I think. Yeah, There we go. But it is, it's not
really a big deal which brush you use. But I'm very particular
about using brushes. Now we're just
going to trace this underneath his mouth
because you don't want it. You don't want it to go
over the mouth line. You want it to be underneath
is his mouth line. Now we're going to color
fill just the bottom part. I'm just going to trace
inside the lines here. I'm just going to drag
and drop, fill that. Now we're gonna do the
back part of the color. This is where it
gets interesting. So it's almost like this white comes underneath
his little flipper. Then it's going to
come up, come out. And it's going to
go back around. Something like that. We'll just trace down on the outside of
that flipper line. Then we'll just fill that. Perfect. It also has a round spot
right behind his eye. So I'm going to start here and
just do a nice round spot. The kind of comes to a point, little bit of a round
cube point at the end. Something like that. If you find that your
lines are a little, you want to be a
little bit smoother. And you can just take erase and you can take the same brush. You can sort of clean
it up a little bit, depending on how many, how
many you want it to be.
5. Eyes & Details: Okay, so let's make a new brush. A new brush. Let's make a new layer underneath
our line layer. And let me just
rename this line. Minds will make, make a new layer
underneath our line layer. And let's switch to G brush. It does need G brush.
Let's use white. Let's color ran his I make the
brush a little bit bigger. And just color in his eye. You can just take a black and you can actually color
right on this layer. You can just figure out if you want where you
want his eye to be. If you want to xy
to be in the front. You want to xy to be towards the back or right in the middle. You can go ahead and figure out where you
want the eye to be. And you can also
use happy circle. Get a good size here. Something like that. But
of course you can just experiment until you find a position that you
like for the I, you know me, I like
to do little extra, nice little details for the eye. So I'm actually going to make, I want the eye to be a little bit thicker, this black line. I'm just going to
use Disney ink. I'm gonna make a
new layer above. And I'll just call
this one Details. On the detail layer. I'm gonna use Disney ink. And I'm actually just going
to make this a little bit darker here, little bit thicker. Then on the end, I'm
just going to make a cute little extra thing that I do with all
my characters. I'm sure you've seen it by now. Then. I'm also going
to make another line, not that thick,
something like that. Just to give his
eye a little bit of a little bit of character. Worker one is
looking pretty good. Now, if you're doing both or
if you're doing Orca Two. This is how I would just make just make it a
little bit easier. So I'm gonna go to Orca Two. You can see I have the
lines here that show up. I'm just going to hide Orca One. I've turned this
sketch layer off. We don't need this
sketch layer for K2 yet. We've done these nice
details for Orca One, I'm gonna duplicate
the details layer. Then I'm gonna bring it
up top into Orca Two. I'm gonna do the same
thing with the white. I'm gonna duplicate it. Then I'm gonna long
press and just bring it up so that it's
at the same spot. I'm gonna do the same thing
with the color layer. Duplicate. Bring it up. Same spot. I'll do the same
thing with the I. Duplicate it and bring it up right over the sketch
layer of Orca Two. Now it looks messy.
Now. Of course we'll have to go up
to our white layer, tap it and do clipping mask. Then it will clip
to our color layer. Now the next thing we have
to do is just change. We have to because
I actually have to change the color layer. So I'm just going
to hide the white. And let's go to color
and just change the opacity down to about 75%. Make sure you're on
your color layer. And now we'll just erase. And I'll use, I'll
use G brush to erase, erase, erase, erase,
erase this excess color. Now we can go ahead and
raise the opacity backup. Then we can also, we can bring our white
backup so we can see that the light that the white
layer is over our lines. And we don't want that. I'm gonna go to our line layer. I'm gonna hit Select. I'm going to tap on the layer. Hit Select. Then I'm going to go
to the white layer. Three fingers swipe
down and cut. Then the lines have cut
through any of the white area. We can see our lines
nice and clearly.
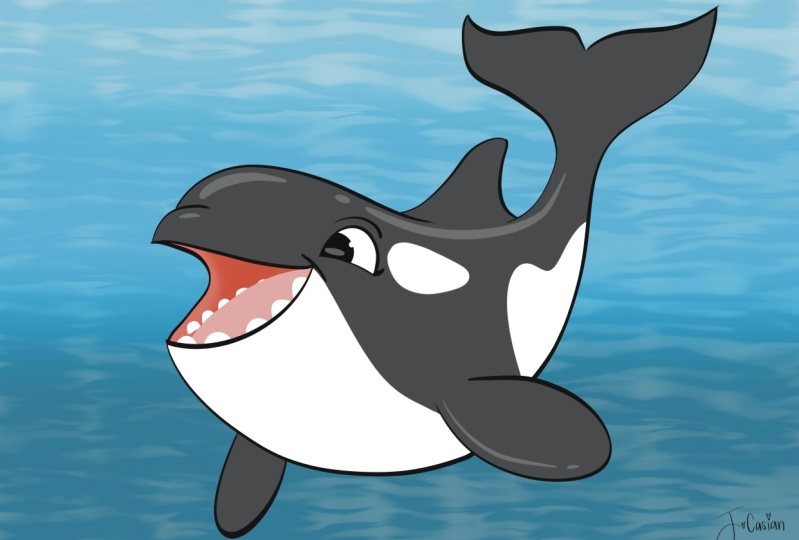
6. Mouth Details: Okay, So let's give him
an inside of the mouth. Let's make a new layer
underneath, underneath his eye. You just want to choose
colors similar to this. Not really read, not too gray, just sort of in the middle. And I'm going to use G brush. I'll use Disney butter. I'm on that new layer below. Now I'm just going to color
in the inside of his mouth. Color drop. Just erase this little
bit that I made. That's the first step. Second step, add a new layer. Now we're just going
to use a lighter pink. Can probably just
go up from here. And just use a lighter
pink that looks good. Doesn't have to be
a specific pink just wherever you
think looks good. I'll bring our, make
our brush a little bit bigger and we'll just make a line down like that. Nice and round. There we go. That's better. I don't want to put it
too high up in his mouth. That feels better. Now for the teeth will make a layer above that
will go with white. We can use the same brush and we can just make some round teeth. Now that we have
the front teeth, Let's actually make a new layer right above this
darker red layer. And we can sort of make the
teeth look like they're going back into his mouth on the
other side of his tongue. You know what? I
actually want to just extend the tongue a little bit and just make the tongue
a little, a little rounder. I'm just going to
make it a little bit little bit
rounder like that. I'll go back to white. Now we'll go to our new teeth layer. Not the original one
will go to the new one. We'll just make some
teeth behind here. Maybe one here. One here. There's some nice teeth. Actually, they don't need
to go that far back. Let's make this one a
little bit smaller. Perfect. Here's another little tip. The reason why I didn't
make the teeth right on this red layer is because you
can alpha lock this layer, so I'll just tap on
it and Alpha Lock. And there's a lot of
options that you can do. If you want to make the give them out a little
bit more depth. You can color, pick it. You can just make it
a little bit darker. You can do something
like using airbrush. So we just choose
our Disney airbrush. You can do something like this. As long as it's alpha locked. And you can sort of shade it in like that and just give
it a little bit of texture. You can even make it a
little darker if you want. Something like that. Or you can color, pick it, go a little bit darker. You can just do it with
Disney with the G brush. Something like that. You can just make
something like that. Like it's the back of his
mouth or something like that. Lots of options.
But it just leaves the leaves this available if you wanted to do
something like that. And so I will try to keep my layers empty in case I decided to make
something like this. Later on.
7. Extra Details : Okay, so the next steps you
can do with either layer. Let's make a new
layer above details. Let's bring the opacity down. So we'll click on this little n and then we'll bring the
opacity down to about 10%. Will use the color white
or lack of color white. I don't know, we'll use white. We will use Disney butter. Maybe like 45% size. Now let's just do some something to make him kind of
glycerin a little bit. Just to kinda give, just to kinda give them a
little personality. And his skin texture. We'll just start up here
and just make a nice swoop. You can make a
little circle here. Maybe a little circle at the
end, a little bit longer. Something like that. Maybe we'll do another one here. Then around BOP. Whereas noses. I think something like
that looks pretty good. There is another, another
little aspect that I want to do to sort of bring
out his eyes a little bit. Let's make sure we're
on our color layer. That's the layer with
the really dark gray. So let's just color pick this. We have the same color and
then we'll make it lighter. Maybe a little bit
darker than that. We don't want it to to light, but we want it lighter. There you go,
That's pretty good. Let's go to our color
layer and alpha lock it. That way we're not coloring
over everything else. Let's just add some light
gray right around his eye. Just a nice circle
of light gray. I'm going to make the
brush a little bit smaller like that just to
sort of bring out his eye. So it's not so hidden. You can see that I kind of
touched my highlight there. I'm just going to go
to the highlight. Erase. I'm just
going to erase it. I don't want that to touch where AI is getting some light there. Let's make a new layer above it. Let's bring the
opacity down to 30%. We use Disney butter again. It should only show
up on that layer. It might be a little
light, a little too heavy. But now I'm just going to make another little circle here. But I want to lower the
opacity a little bit more. I think 20 looks good. Then I'm gonna make a new
layer above that, 100% white. And I'm just going to add a
little round pop right there. I'm going to merge those layers. Merged down.
8. Nix Clipping Mask: So of course, depending on which worker you
are working on, you can copy the
little light pups. You can duplicate that layer. You can bring it
down to orca one. You can drop it in there and just put it right above the eye. And you can bring the
little the highlights. You can duplicate
the highlights, do the same thing. Bring them down right above. Orca One should have all
the same highlights. Wrong worker. That was the wrong Orca one. This was one of my practice. Orcas. This worker one. Now what worker one has
all the same highlights. You can go ahead and adjust
them as you need to. Also remember, I have to
do clipping mask again. That's one of the
reasons that I don't usually use clipping masks. I don't like I move
things around a lot. Sometimes I don't
want to have to always click the mask back. I'd rather be I'd rather
just be what it is. That might be a nice
tip to do to figure out how to get rid of the
clipping mask and just, just so it stays what it is. Okay, so if we want to fix
this clipping mask thing, I've turned the
clipping mask off. And since it was clipped to
this color layer beneath it, that's the area that it's showing up on and it's
overlapping our lines. Let's see, is there is a couple of ways
that we can fix that. But let's take our
line layer, select. And then let's go up
to the color layer. Three finger swipe and cut. That will go least cut, will cut into the white. The lines will show. We can also bring
the lines layer, bring the line layer up
so that it's on top. The only problem now is
anything that was outside, you have to erase,
oops, wrong layer. Go to our white layer
and just erase it. So if you don't want
to use clipping mask, which I'm not a huge
fan of clipping mask. But it's a tool that I think
is important to also show. I'm not always doing
everything the same exact way. But now you can see why I
do things a certain way. This details. I'm just going to
merge that down with the lines. Because why not? I think everything
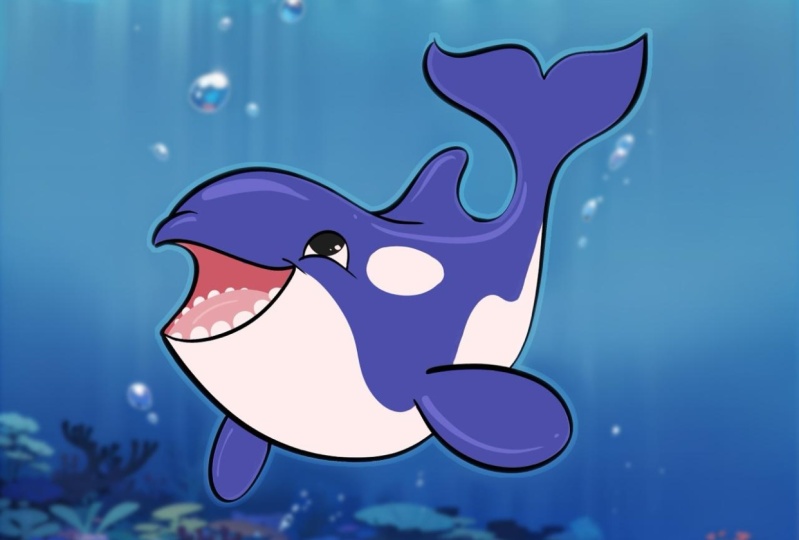
else looks good. Now I think we need a
different color background for this, for this guy. So let's, I'm just gonna
make a new layer beneath. Let's try. Let's try
a different color. I think that's much nicer. If you want to cycle
through colors, just go to Adjustments,
Hue Saturation. And you can cycle through any car that you
may want to use. But I think I like that
sort of bluish color. Raise that up. I
think that's nice. Make it a little more saturated. I think that looks pretty good.
9. Simple Background: Okay, so I'm pretty happy
with this little Orca. But there's something that I do whenever I'm doing
characters like this. I just think it's kind of fun. I'm going to add a layer
above our background color. You can do this
with whatever color you, you've, you've chosen. Just to sort of shake
it up a little bit. I've added a new layer, and now I'm going to color
pick our background layer. I'll go to the color
and I'll just make it darker. Maybe a little bit. Just a little bit darker. And sometimes you can adjust
the color a little bit. Now, remember we're
on a new layer. I'm going to choose the
selection tool rectangle. I'm just going to make
a rectangle that's sort of kind of meets up with him a
little bit like so. And I'll drag that new color in. Now I'm going to tap on
selection tool to deselect it. Go to the adjustments,
Gaussian blur. Then I'll just slide
the Apple pencil right? And just get a nice, nice blur the bottom
of our frame. Now, I'll do the
same thing again. I'll color pick. But this time I'll
go a little bit lighter and I'll
actually make it a little greener or a little
bit more towards green. Same thing, selection
tool, rectangle. I'll just make a
rectangle up here. Fill it. De-select
adjustments, gaussian blur. And you can see when
I do this on my own, I do a super, super quickly because
I just do it a lot. Then I'll just blur it. I think that it just gives
it a nice little, a nice little touch. Sometimes it's nice to go
to some different colors. You can even use the airbrush. You can just softly, I'll lower the opacity. Sometimes sauce
softly, just like touch in some different colors. Just to kinda, just to
kind of shake it up. But honestly, I'm
happy with the Soga. I hope you guys are too. I love drawing orcas and I'm
glad that you guys joined me to draw this at all
acetal Orca today. Here's another little tip. I don't do it all the time, but I have utilized it
every now and again. Okay. So I'm gonna take the color of our water and then I'm
going to make it a little more towards green
and a little lighter. Now I'm going to take
the brush and I am an elements and water.
That's the elements. And then water color layer
I'm going to hit Select. And then I'm gonna go
back to layer and make a new layer above the
top of our details. Over details. You can
still see the little lines because it's still the ice we made our selection
for the color layer. Now, I'm gonna put it at
like about 18, maybe 20. Now I'm just going to
lightly do it over the fin little bit on the back and then maybe a
little bit on this two here. Right here. That just gives it a nice
cool like water effect, like the water is kinda
glistening on him. And you can change the
layer mode to screen. That way if you have a color, it won't show upon the white. You can lower the opacity
until it's possible, until it looks a little
bit more natural. Something like that.
I'll do it all the time, but kind of just gives
it a nice little touch. So that's just another tip and trick that I wanted
to show you guys. But anyway, I still
love this guy. I think he's cute. We need
to come up with a name form.
10. Thank You! : All right guys. Well,
thank you so much for joining me for this class. This is one, this is a real treat for me in
I've really grown to love teaching and to love
teaching here on Skillshare and just
sharing my art, ensuring my techniques and my knowledge with you as sort of can't talk
for some reason. But yeah, this one was fun. I loved drawing orcas and I hope that you
enjoyed the class. I hope you got a lot out of it. And I hope that you share, if you share it on Instagram, just hashtag, Skillshare
with drug free. Dave? Once again, that's hashtag Skillshare
with drug-free Dave. That way I can see it
because I love to see your work and hopefully you
upload it to the class two, because all the other
students want to be able to see it as well. Of course, you can follow me on Instagram drug-free, Dave, and you can follow
my 3D work at drug for Dave 3D, YouTube. I have tons of
videos, 2D and 3D. I also do live videos. So if you want to
come on and say hello to me, I'm happy to do that. That's youtube.com
slash trouble-free. Dave, I'm on Tiktok. That's a big one. Tiktok is blowing up these days. So please, in me on tiktok, I'd love to see what
you're making there. I have a Facebook
group specifically for Procreate procreate
tutorials and guidance. You can find me on Facebook.
I think that's it. Yeah, I think that's
it. Alright, so thanks again guys. It's
always a pleasure. Keep drawing, keep sculpting. And I will catch you
all in the next video.
 Dave Reed, 2D & 3D Illustrator - Brooklyn, NY