Transcripts
1. Welcome to Class!: [MUSIC] I'm obsessed with making mirrored and other symmetrical
patterns in Procreate. Not only are they super
fun and easy to make, but they are also a very versatile and a
classic pattern type to add to your collections, and to your portfolio
as a whole. You can create
symmetrical patterns in so many styles from
whimsical to traditional. Thankfully, I have
also heard from clients that these types of patterns are really popular too. It's a win-win. In this class, let's make mirrored and symmetrical tile
patterns in Procreate. I'm going to be introducing
you to the wonderful world of mirrored and symmetrical
tile pattern making. I'll be sharing with
you three types of patterns from start to finish, starting with a classic
mirrored pattern where the pattern is repeated from
the left to the right side. Then we will move on to find quadrilateral and radial
patterns that easily buildup to be really interesting and unexpected unique patterns. We're doing this all from
the comfort of Procreate. Well, we'll use a
little Photoshop too, just to professionally finish
the patterns at the end. Hello, everyone. I'm
Kristina Hultkrantz, an illustrator and surface designer from Mariefred, Sweden. I've been a full-time
illustrator since 2010 and have been underrepresentation
by the agent pink like studio for
the past four years, I've had the pleasure
of working with huge companies like Hobby Lobby, Joann, American Greetings, and Paintbrush Studio
Fabrics to name a few. I have filled my surface
design portfolio with hundreds and hundreds of illustrations and
pattern designs. I played around with so
many different styles and my own thing that I love to do but my latest obsession is making these
symmetrical patterns. I just think they're
really fun to me. I'm so excited to share
with you in this class everything I know about making symmetrical patterns
in Procreate. This class is great
for anyone who loves playing around
in Procreate and just wants to enjoy making some soothing meditative
tile patterns for fun or for professional
pattern makers who want to level up their surface
design portfolios. Let's get started. [MUSIC]
2. Supplies & Class Project: To follow along in
this class exactly, you will need an iPad, pencil, the app Procreate, digital
brushes of your choice. It's totally fine to use the native brushes
from Procreate or any of your other favorites. I will also be using Photoshop
at the end to finish off our patterns so that they are professional and ready
to send out to clients. For the class project, we'll be creating one, two or all three of the class projects by following along the videos in this class. Feel free to do
all three or just one or as many as you like. If you're anything like me, you're going to find making these tile patterns really fun, and it's going to be hard
to stop at just three. I'm really looking
forward to seeing all of your class projects in
the project gallery. Be brave and put yourself
out there and make sure to upload your class
projects for this class. I'm always here to help, so if you have any questions, add them to the
discussion board, or when you upload your project, I'd be happy to give you
any feedback if you'd like.
3. Intro to Symmetrical Patterns: [MUSIC] Have I told you that merit and symmetrical patterns are really fun to make? I think I have already
like three times, but they really are, but they're also
super versatile, and a great addition
to your portfolio. Before we get started on the technical pattern-making
aspect and getting drawing, I just want to show you
a couple of examples from my portfolio to give
you some inspiration, as well as show you some
other inspiration from Pinterest to show you all
the different styles that you can create with these
types of symmetrical patterns. Let's jump into the computer. Welcome to my computer, and I thought we
could start off by looking at some of my work. Let's do that. I want
to really show you how versatile these types
of patterns are, and can be so that
you can realize how easy they are to
include in your portfolio. For this collection, I went all out with creating
tile bold patterns, all of them except for
the pink one here, are using the procreate
symmetry tools. The first one is a
placement illustration using the mirror tool, so everything that is created on the left is
repeated on the right, and the rest of the patterns, this one and this gray floral, and this really intense. All of them are created using
the quadrant symmetry tool. You can really intricate with your designs and create these really elaborate design, so it'd be great
for wallpaper or for fabrics and closing
and all things. You can also keep
things relatively simple and create something
a little bit more graphic. Doesn't have to be
all this much detail. Again, like my placement here, it's quite graphic and simple, but because it has
that mirroring, look to it looks really
professional. I like that. I don't plan out these
types of patterns because they find it difficult to
figure out how to plan them, and how they would turn out, so I just jump in
and get started on the drawing and see what happens when I put it together, where it looks like it's
always a surprise when I put it into repeat to see
what it's going to be like. But I think that's
really exciting and fun. As long as you have a color
palette that you are using, the collection is going
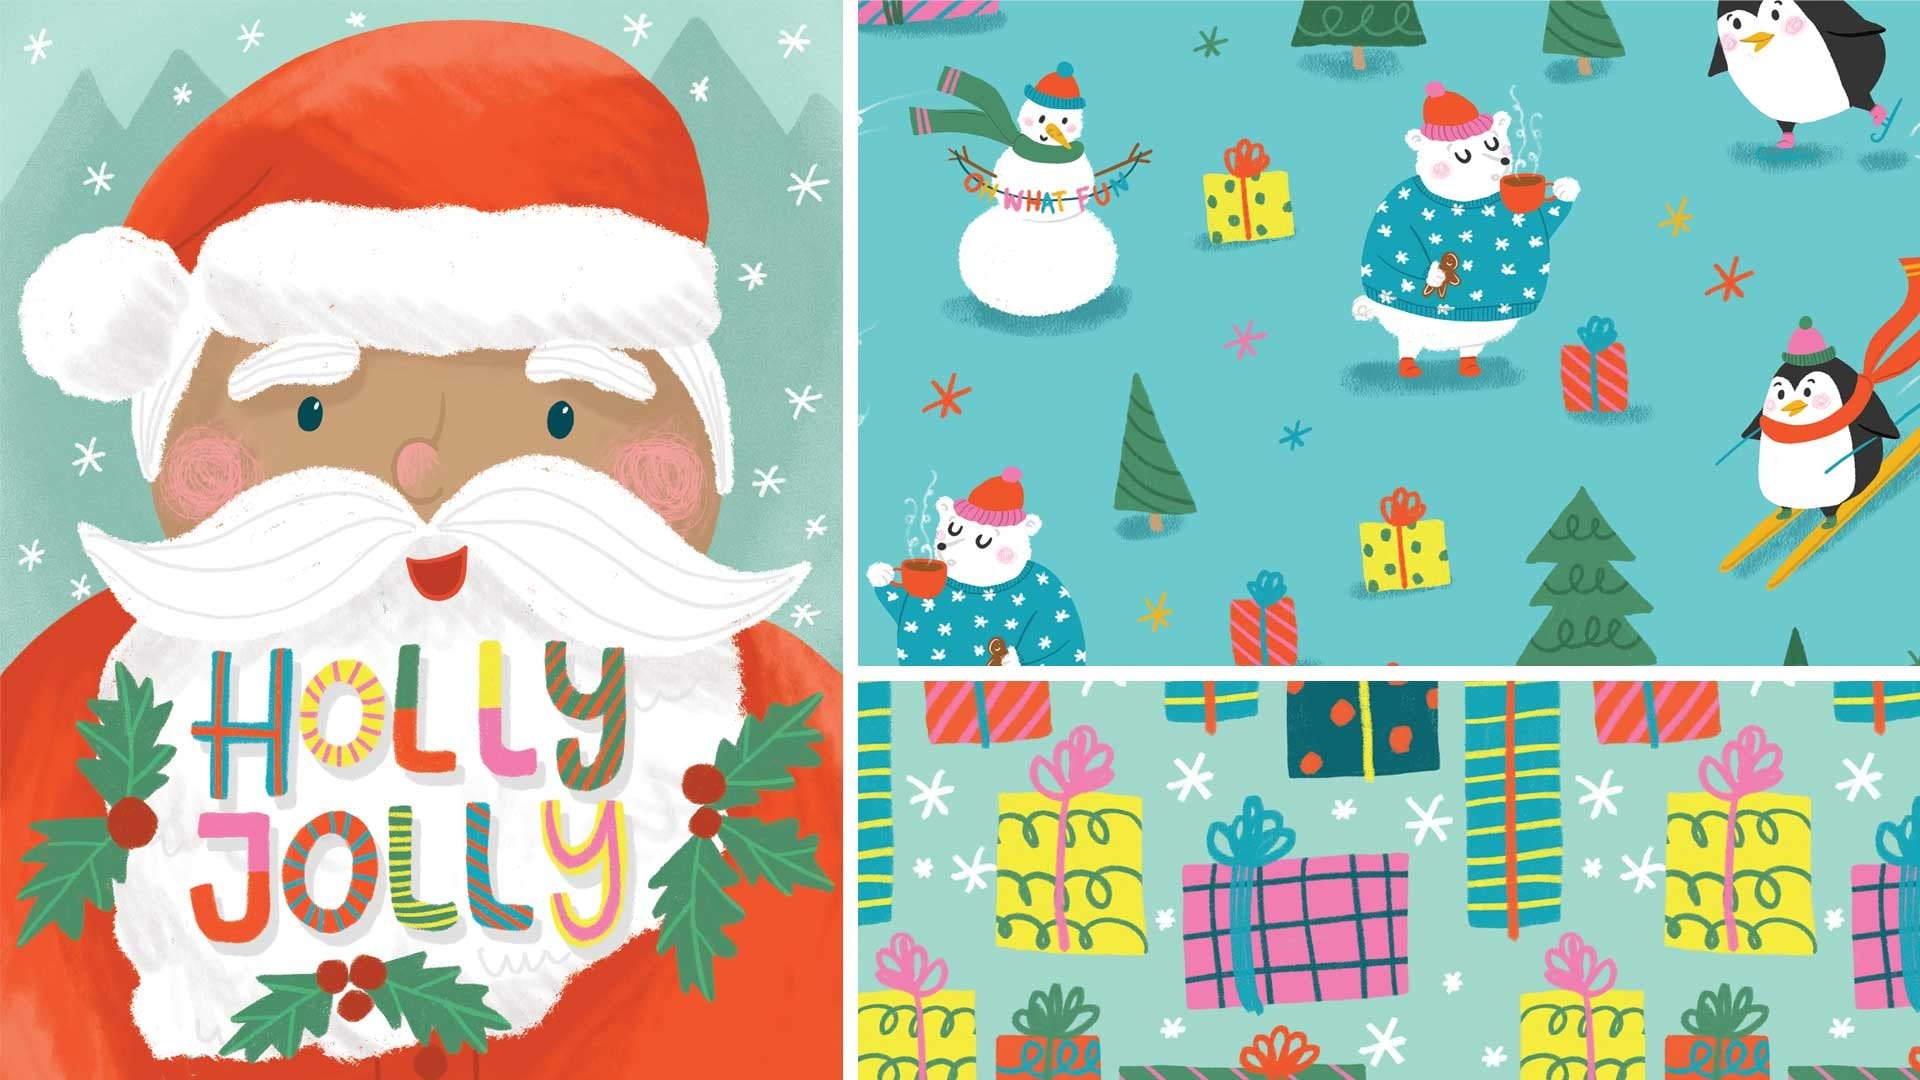
to look good together, especially having some theme like this one was with flowers. Another collection
type here is this one that is a Christmas collection. Again, I did three mirrored and symmetrical
patterns to go with these placements for
Christmas designs. You don't always
have to think of these tile bowl
symmetrical patterns as having to be geometric
or just shapes or florals. They can be whimsical with
different designs such as here I had reads
and mailboxes, and packages and things for this collection which was
called with love from Santa. Another example here is my
collection called forage, where I have combined several different
types of patterns to make one collection because they have a similar
color palette, I think that they
are united by that. We have a theme of mushrooms
for two of the pieces, but these graphic coordinates really bring it together
with some interests. I really like these
two together with the orange colored flower and this orange colored pattern, and this other blue
mushroom print, I think, is complemented really well with this geometric tile pattern. That's a great way of
bringing some interests into your pattern collections
without doing something really
simple, like a stripe. Like these two are very simple. This is just a tweak that
I've repeated several times. Here's the terrazzo print, which is a little bit
more exciting than your traditional Polka dot. But I much prefer making these more ornate
patterns that are really unique and different. A couple more examples
from my portfolio, I can show you, this really
like spring palette, and I have turned the square to make it
a diamond instead, and that also is something
that you can use to make it a little
bit more dynamic, rather than being a
traditional grid repeat. Again, I did the same
thing with this, I put the square on an angle so that it has
the diamond look instead, which I think there's a lot
more interesting patterns and having the grid instead. Again here, I'm
limited color palette, so it looks really
sophisticated. This will look beautiful as a wallpaper and
really fun to make. We can zoom in a little bit, so you can see some detail. But because it is such a
limited color palette, even though there's
a lot going on, it's still quite
subdued. I think. Go, another way that you can
use these mirroring tools, here I've used the
mirror tool to create these rounded scallop design, and I put that into repeat, that's a really cute fun look. You can also go into
traditional tile. Here is with the grid repeat. But because it is painterly, and it's a classic
pattern style, it repeats really beautifully, and this could be in
any color palette and work really well for many different kinds of
collections as a complement to your more complex designs, just to add some interests. These could be used to
create beautiful tiles, actual tiles, or different
rugs and things like that, so they're very versatile. I love making these designs if you haven't understood already. Then here's another simple
example of a mirrored pattern, where I've just used
two colors, two tones. Again, it's really simple, but there's still lots of
design elements going on here. You can make any style design with these symmetrical tools. I hope that you've understood that and that's been inspiring. It's not all about just
making geometric designs. Here I haven't really shown
you any geometric designs. Maybe these are the most
geometric that I have, but I like to use organic
things like flowers, and things in my work. Now it's thought
that we could jump into Pinterest just to get even more inspiration. I have a board here called
Abstract Design Accents. Because sometimes in your
design work you just want a little abstract
geometric designs, and I have strangely
a difficult time coming up with those
kinds of designs, so here I have lots
of inspiration. Again, these types of
designs for tiles, look at classic
Moroccan tiles or Spanish tiles or
Middle Eastern tiles, and you can get so
much inspiration for different patterns and shapes to create within your patterns. To start off with, never full-out copy something, but take elements from
different patterns like this. Like thinking about
a shape like this, but making a different
petal shapes, and different colors and then adding another
element like this. There's so much
inspiration just in this one image that we can
work so much with that. Again, here's more
geometric tile patterns that you are happy to work on. Again, this tons
of inspiration for a very geometric types of
patterns in this style. Here again, if you just
put it on the side, you can get a diamond shaped pattern that's really beautiful, so I will leave the links to my Pinterest boards if you
would also like to check them out and look
for inspiration in these that I've
already gathered. I also wanted to show you I have a surface pattern
design inspiration board, and within this, because
mirrored another symmetrical patterns
are so popular. They have a lot of
examples in here, even though I haven't put
them in a specific section. Straight up we have this pattern that is a classic
mirrored patterns, so the birds are
mirrored as the pattern. From the center line, which is really beautiful
here's a William, no, this is not William Morris, but William Morris works a lot with mirrored
patterns as well. This I believe is
how no bend and bow. Yeah. She's a Swedish
pattern maker and creates lots of
wallpaper design. She also loves to work on
the mirrored pattern type. That's a classic design that you could use using the mirror tool. Let's keep going. Here's another example of a beautiful mirroed design that is repeated on the
left and right side, houses a beautiful limited
color palettes who's really soothing and
sophisticated to look at. Then I have some examples
of some tiles here, the classic tiles, but here
they're not very graphic, the very painterly, and if that's your style, you can add that kind of
texture into your artwork, which will be really beautiful. Again here, tons of different examples
of different tiles. These are so much fun to make. You can create different tiles
that are similar in style, but just by tweaking
some of the lines, they're going to be
repeating different ways. Once we get started on drawing, you're going to
understand what I mean about the versatility
and how it just that comes to life without you understanding how it's
going to look in the end. It is so exciting to
put it into repeat later and see what's
going to look like. This is a very, very intricate
mirrored pattern that makes my head spin to
understand how it's being made, but I assume it is mirrored
here in the middle. That's very intense
mirrored pattern. Look at a couple of more. Here's another really textured
pattern with a title. Here you can have the line
in the middle so you can see what the original
tile look like. If that gives you
inspiration for how the pattern could
be made up by having a larger detailed stripe in the diagonal and then
to corner pieces, it will turn into
this lattice print, which is really interesting. Now I pressed the wrong button, but anyways, I hope that
this little rundown, quick rundown of patterns in the mirrored and symmetrical
pattern type has given you some inspiration
for what kind of patterns you would
like to create, and have some reference for some design ideas that you can bring to your artwork. [MUSIC]
4. Project 1: Sketch: [MUSIC] Now that we've
gathered some inspiration for the types of patterns
that we would like to create, it's time to get started on
the first class project. That is going to be to
create a mirrored pattern, so let's get started. Lets get started on our
first symmetrical pattern. I'm going to open up a
new file in Procreate, and I'm going to use
my Instagram template, which is a 4,000 by 4,000
pixel square canvas. That's it set at 300 DPI with
sRGB as the color profile. Just you know large square
that can be used to create a professional pattern in a big size so that
it's high-quality. Then we're going to go
in to the wrench icon, Drawing Guide and
press Symmetry. Right away you get
the vertical symmetry and that's exactly what we want. Now, we can just get
started drawing. I hope that you have
gathered some ideas so that you have figured out
what you want to draw. I'm going to change
the background color because white sometimes it's difficult for filming. I'm going to choose this
gorgeous like brownie color. I'm going to start
sketching now. I'm just going to choose a darker color so that you'll be able to
see what I'm doing. I'm just using a pencil brush. I have in the layer here, you'll see that it's
assisted is clicked on, because we made sure
that when we went into the symmetry tools, that is what's going to happen. If you create a new
layer and you can see that it doesn't automatically
go into assisted mode, you can click on the square and right
drawing assist or unclick. I'm actually going to have one layer now that
we're going to use that unassisted for the
beginning of this sketch, because in the middle
of my mirrored pattern, I'd like a strip of designs that aren't
mirrored on both sides. I think that makes the
pattern a little bit more dynamic when not everything is completely mirrored and perfect. I've heard that for my pattern. I've been enjoying mushrooms
season, it's October. I'm going to be drawing
some more mushrooms. I'm going to start off with, and I'm just drawing
for a memory. Let's do a gorgeous. In Swedish, they're
called Galileo 1, Italian, you might
know them as porcine. [LAUGHTER] That's
my little mushroom. He's quite symmetrical but
he'll be slightly not perfect. We can add in, in the center also another cluster
of mushrooms. Then here we can have a little
bit more variation here, so you understand that it's
not perfectly symmetrical. Then, because I want this pattern to look good
from many different ways, I'll do another mushroom, but this time I will
have it upside down. [NOISE] Here we go. That's the start of my pattern
and the middle section that's not repeated
in a mirrored wave. Now I'm going to go back to my layer 1, that is assisted. Now I'm going to start
doing the mirrored parts. As you see here, as I start to draw a mushroom, it is automatically
drying on the other side. I'm just going to go
ahead and make up some cute mushrooms
to add in here. Different sizes and shapes, like that one. Let's see. You can
decide to have little bugs and critters
too, just to mix it up. It's not just mushrooms
everywhere and it can be a little twigs
and things like that. As you see here, because this wasn't symmetrical
this area, this overlap. I would have to
consider that, see. You can have a big toads stool as they're called in English. Classic mushroom because they're so cool looking, very poisonous. The Swedish, they're called
flukes funk, fly mushroom. I don't know, do
they attract flies? I love the red and white. I'm just going to keep
going and adding as many Mushrooms as
I can think of. I can do some. Another Swedish classic is
the chanterelle mushroom. My new favorite mushroom is
the black trumpet mushroom. They have really
cool look to them. [NOISE] Then I want to do some more mushrooms that
are in a little cluster, because they think that
they add something. Again, you can fill
out the areas with other little twirly
is a little like a dealer leaves and
things like that. Again, see, you have to make sure to look at if
it's not symmetrical, you can have to look at the area that is smaller there, but I can fix that again when I am doing the final illustration. Then we just continue a
little bit more details. That is great for now. I think that we're
going to understand, how this pattern is made up. I'm going to start here. We'll work on the centerpiece
and then we're going to switch it around so we can
work on the edges later. But for now, this
is how we're going to set up our mirrored pattern. In the next section
we're going to start on the final colored
illustration. [MUSIC]
5. Project 1: Color: Now we're going to
do the same thing, but now we're going to
color in our illustration. So we are going to just reduce the colors of our lines so that they're not
too distracting. Bring them down to 35
so you can still see. Then on a layer
underneath my sketch, I'm going to again
not have it assisted, so I'm just going
to draw regularly the first ones that I
have in the middle here. I'm going to just use creamy. I'm going to use a
pastel type pencil brush and get going on this. I like how it has
a rough texture. I'm just going to simply draw
all my motifs on one layer. I'm not going to think
about different layers because I think that
these are quite simple. I'm going to keep them simple. I'm going to turn
off my sketch there just so I can see what I'm
doing a little bit better. I'm going to add a
couple of shadows to it to make it a little
bit more interesting. I'm going to turn it
on to Alpha lock. I'm going to choose a
darker color of this green and another
brush that I like, this one is from Lisa Glanz, and just add some
quick texture there. With the white, I'll also
add in another texture just to give it some shadows, something is happening here. Same thing on the top
of this mushroom, just to give it dynamic. Also to give it the
look of the porcini, then you have to have
a lighter edge here. Maybe even lighter. Then I need to give this
mushroom some shadowing. Go back to my brush. Go back, I think this
is a little too thick. I'm just going to
reduce my lines to make them a little
bit more delicate. Last, I'll give this
one a little bit. Then we have our first mushrooms
in the middle designed. I'm going to create another
layer on top of that and I'm going to
make sure to press "Drawing Assist" so it's
going to repeat on both sides so that we have the perfectly
mirrored pattern here. I'm going to do the same thing in coloring these
other mushrooms. Let's see if this shows up. Controversy is so fun to
see them in the woods because of that gorgeous
yellowy orange colors. They're so easy to find because they just glow on top
of the green moss. There are a little
tricky sometimes they like to be under
bushes and things, but if you lift up
and look inside, then you can easily find them. Well mushroom hunting tip, so I becomes such
a mushroom nerd. I've read so many books and every weekend we're
out in the forest looking at different things, were really careful
to just so you know, I never pick anything that has a very similar
poisonous look alike. I just don't want to go there. I like when poisonous
mushrooms like this one, the toad stool, flux one is so obviously poisonous
because it's bright red. It's not so difficult to
understand that it's poisonous. Red and a little
bit more orange. Before I go into the white dots, I want to do the texture on top. I'm going to press
my texture brush, swipe with two fingers to the right to
make it Alpha lock. I'm just going to go in and bring a texture
in there first before I then
un-Alpha lock it by again swiping to the
right with two fingers. I'm getting my whites and
then I have some texture underneath my white dots. I'm going to go back into
drawing my other ones and then I'll add
texture to everything. Now I've added the
first layer of colors. I'm just going to go in and
do some texturizing here. I'm going to turn off my sketch because I don't
need that anymore. I'm going to Alpha lock it
with two fingers to the right. Or you can also go in here
and press "Alpha Lock." I'm going to add my
different textures here. There are some dynamic
texture in here now. We've done the centerpiece
of this illustration. I want to of course, make sure that we're filling
out the entire pattern. To do that, we're
going to have to do some little switch
things around. We want to make sure that
we're not going to touch this. I want to make a copy of this
so we can mess around with, but keep this original
in case we want to go in and change colors in the future or do something else with this. I'm going to highlight these two finished layers
with the color on them. Then these fingers
down, copy all. Then three fingers
down and then paste. Now I have the finished
artwork with the background, which will be helpful so that we can easily
switch this around. Now that we have that, it's okay that we
have the copy here. Making sure that snapping is on. Snapping. You can also have magnetics on. We're going to pull
this to the center and you're going to see
two yellow lines that it snaps onto the exact
center line of this. Then I'm going to
duplicate this image and move that to the right
and make sure again, you can see the two
yellow center lines that it's snapping to. Again, we're going to duplicate that and we're going to pull that one down to
the bottom edge. Again, you saw that
there was a yellow. Then duplicate one more time. What's important
here is that we now know what space we
have to fill up. I'm going to zoom in
here so you can tell. This is the space where we're
going to have to fill up in the rest of the illustration. To do that, I want to make sure that I'm
drawing this as big as I can. Because it doesn't
matter if the quality is bad on these four, I'm going to merge
them together. You can smooch them together. I never feel like this works. But it did. I'm going to resize this so
that we have this section. You see where it's repeating and this section in the
middle is all we have left. Make sure that you're
on that merged image. We're just going
to make it bigger. I'm going to zoom in
until you see this. You can see that
I'm going to keep making patterns until this edge, and up until here. This is the whole area
that we need to fill out. We're going to start working
on illustrating in here. I can take away my
two sketches for the other ones now since
we're not using them. We have already move
down to the artwork. Again, in this middle section, it can be nice to have
items that aren't perfectly repeated though so I'm going to start with that. I'm going to start a sketch with my sketch pencil
in the center here and create some mushrooms. Again, I haven't been doing so many that are upside down so I think it's time to do
another that's upside down. I'm going to make sure
that it's really off and asymmetrical so you can really see that
it's not mirrored. Another one over here. Pointy mushroom there. Then maybe one last
mushroom in the center. What else should we do? There's so many different
kinds of mushrooms and I'm just trying to
do this from my head so that it's really
unique and my own. What else can we do? I like these clusters so let's
do another random cluster . Enter the color. Big cluster of little mushrooms. I think this would be nice
if they were light in color. Again, we have those
that are not mirrored, just to make this
mirrored pattern a little bit more interesting. We have that. Then I'm going to do
another sketch layer. This time I'm going
to make sure that it's on Drawing Assist so it will help me
with the mirroring. So here we go again. We're going to start adding
in mushrooms this way again. Do another trumpet mushroom. Maybe another chanterelle. We'll do some more a
little swirly things. I need to get more bugs in here. So maybe it's time for a little
lady bug over here again. That one is going to only
be mirrored one time so I might have to adjust
that later in Photoshop or I know that I have to adjust
that later in Photoshop. They are called finger
mushrooms in Swedish. I don't know what they're
called in English. That could be nice to add. I'll add another. It's difficult to do, I think, perfect. They become too perfect this
just looks weird to me. I'll do a little leaf. Another beetle. Maybe it could be
a different color, doesn't have to be
the ladybug colors. It can be another color. This one maybe is
slightly too off center because it's messing things up. I'll just move that, there. Here we have the second sketch. Again, I'm going to go in and just color this really
quickly so in two layers because we have the
ones that are mirrored and then there were the
one that isn't mirrored. I'll start by reducing these so they're not too in our face and distracting when
we try to draw. I'm going to start to
color these in quickly. Here we go. Here's the final pattern. It's going to need some
tweaking in Photoshop later because this is not tillable. We're going to turn that dye
for the second layer away and now we're left with these
two clumps of illustrations. Then we're going to
bring into Photoshop to make it into an actual
repeatable pattern. That's all going to make sense
when we get to Photoshop. But for now, we've made
two beautiful sections that we're going
to put together in Photoshop of this beautiful
mushroom pattern.
6. Project 1: Test and Finish: [MUSIC] Welcome to Photoshop. It's time to get this
pattern finished. For the final pattern swatch, we can remove anything
that we don't need such as these Sketch Layers. It's just a sketch,
so we definitely don't need these anymore, so I'm going to delete
that and the other one. I'm also going to
delete this guide that we used to figure out the empty space
that we need to fill up so we don't
need that anymore. We're then left with
these different layers. I'm going to close
up the first top two because those are
the middle space. And I'm just going to
start off with this, the original mushroom
pattern that we created. I see now that they're upside
down from when I created, how I envisioned it. But I think I'm going
to rotate everything. There we go. It's more
how I had envisioned it. In the recent
Photoshop versions, they have a new thing
called pattern preview. So you You into view, pattern preview and
you're going to start making your swatch. It's really easy to use. Now we're going to see how
well everything matches up, but it should, because we
made a guide and everything. I'm going to move so that we
have this other space open. I'm going to bring in this
other section, these two. I'm going to make sure
to highlight them. We could group these
to make things easier. I'm going to highlight those two command G to group that, and I'm going to group
the other one as well. This becomes slightly
less confusing. I'm going to make
sure that auto-select is on group instead. Now when I pull this over, it's going to fit perfectly into the space that we created. Let's see, fits perfectly. The only thing that I want
to adjust is this at all. Where they got ladybug
because it became two. I want to go in and just
make sure that there's one. I'm going to zoom in
here and I'm going to Hello and not
zoom in that way. Here we go. Make
sure I'm going into Group 1 and we're going to
figure out which layer is on. I'm going to erase by
pressing the E button. Then I have my
background on white. I have to make sure that
this is placed there. Again, E, make sure that your background color
is your eraser white, so it's at the bottom there. Now when I go into erase here, it should be the same. It doesn't even look
like the same color. This is not working out. Press E again. Now we have this
correct color as weird. Then I just have to
take my lasso tool and select this
beautiful ladybug. It looks weird here, but that's because we're in
the Pattern Preview mode. So it's selected there
and at the bottom. But don't worry, press your V button to get
this selection tool. We're just going to
move it to the center. Please select there. Now our pattern is done. I think there's a little
empty space here that I would love to put one of
these ladybugs. I'm going to lasso that as well. Press V to get the
selection tool and you see that there's a little scissors here now
when you hover over it, I'm going to press
option and pull it over. While it's still selected, I'm going to press
Command T to transform. I'll zoom in so you can
see better. I'm going to Flip Vertical. It's facing the
other way around. I'm going to pull
it down over here. Press Enter and De-select. Now, we have filled up
all the empty spaces. We can see now that
we zoomed out how the pattern's looking and
repeating beautifully, it has that grid repeat with the mushrooms that's fun to see. When you zoom in it's really
intricate and beautiful. Here, we have our Swatch. In Photoshop here we
can create, Edit, Define Pattern, press Okay and then we can turn
off Pattern Preview. You will have your
swatch right there. It's all ready to go
and you can send that off to printers or you can save that and download
it and upload it to Spoonflower,
anything that you want. It's all ready to go as a perfectly repeatable
grid swatch. If you want we can
create a new file. We just came as an example, we can do an A4, Create, and then I
can make a fill box, it doesn't matter
what color it is. I'm going to create
three of these. It's going to make
sense in a second. Let's just rotate. Here we go. I'm going
to make three of these. Then I'm just going to select all of them and transform them slightly so that we
have an equal amount. There we go. Now I'm going to
select this for a top one. I'm going to go down to
here Function, Pattern. It's going to fill with
some other pattern. I'm going to go in here and take the last
one that I created. It's going to be really large. Here we can scale it down. Going to scale it
down quite a lot, maybe 45 is good. Then we're going
to see in-between this rectangle and then the pattern fill we have this hand and I'm going to
press the Option button. It becomes this square
with the little triangle. Press that and it's going to
put the pattern in there. Now we can move the
pattern around and adjust it so it looks good
in this little swatch. Now we're going
to be able to put our patterns side-by-side
to see how they look. If you think this scale is
still a little bit too big, we can double-click on the
pattern again and reduce the scale again. Here we go. Maybe that's better
so that we can see there's really
repeating a lot. That is our first
mirrored pattern. It wasn't that
painfully hard, was it? Now I realized that I was
going to make this into a toadstool and I
forgot the dots. We could do that in
Photoshop if we wanted, but I'll leave it like this. It was meant to be it
was meant to be. [MUSIC]
7. Project 2: Sketch: [MUSIC] Mirrored
pattern-making was fun but we're going to have even more fun making
quadrilateral patterns. It sounds a lot more complex
than what it really is. Let's jump right into the second class
project. Here we go. The previous section we
did a mirrored pattern and possibly that was
a little complicated, but I swear that was the most difficult pattern out of these
symmetrical patterns, and we started with that first. It's just going to be
super easy from here on. We're going to create
another square canvas. Again, I'm going to use the 4,000 by 4,000 canvas
that I did before. This time we're going to
go into Drawing Guide, we're going to turn on symmetry, but then go to Options and
choose the quadrant option. Now, we have four quadrants. Everything that's going to
be drawn on this quadrant is going to be repeated
on the other quadrants. This time we don't have to
think about any blank space, we can just fill up the entire title as
much as we want to. To make sure that it matches
with my other pattern, I'm going to use
the same brushes and the same color palettes. At the end, this can be a little minicollection of three patterns together
with the same theme. Again, I'm not going
to do something completely similar but
I thought it would be fun to keep the mushroom
theme going by including at least one mushroom
in this pattern. I'm going to keep
it quite graphic. Again, I want to choose
a background color to make it interesting. Last time we had a
beautiful browny color, so maybe this time we'll
do a slimy green color. I think that could be interesting
or really make one of those fluke swamp pop. We're going to do
some sketching here, and we're going to
be on Assisted. I'm going to choose
a dark color, my sketching pencil, and I'm going to start
sketching in stuff. I told you, I don't
plan out these patterns because I can't really visualize how they're
going to turn out. I find it exciting to just see how they'll turn out later. But I know that if I create a pattern like this
or a shape like that, it's going to be some sort of diamond in the middle
of my pattern. Same thing if I do a
round thing like this, it's going to become
like a clover. If you do a round circle, you're going to get a
wonky circle on the edge, which is fun too. I like all that stuff. What should we do? I
definitely wanted to include a mushroom or two. So maybe we'll start with that. I'm going to start off with the main mushroom
that I want to include, and that's going to be one of
those toad stool mushrooms. Maybe this is the only
mushroom I'm going to include in the entire piece. I think it'll be fun to
include some nice, organic, geometric shapes and just create lots of patterns
like that within that. I think we need to have
some sort on the side here. It needs some
companions like that. I think that's enough mushrooms
and the rest can be lots of organic lines and shapes
and things like that. You can do circles
and some line work. You could put in some
grid if you wanted to make things really
line up perfectly. But I am all about things being wonky and hand-drawn looking. If I have to adjust a couple lines and draw in some things
in Photoshop later, I'm totally fine doing that because it's
just going to make it look a lot more
organic and hand-drawn. I keep choosing another
color. Here we go. See what pattern that's going to make at the edge there
could be really interesting. For the most part, I've
noticed that they end up matching quite well anyways, so I don't worry
about that too much. Sometimes you can go in and
add other details later when you come into Photoshop
that will look nice. You can always choose items that you have
drawn to add in there. I'm not really sure
what to do here. [NOISE] I think that
is good enough for me. You could test the pattern
now by duplicating and doing the four
small quadrants to see what it's going to
look like if you want to. But I like to just wait and be surprised by what is
going to happen. [MUSIC]
8. Project 2: Color: [MUSIC] Now it's
time to add color to this, this one again, I think I want to use not quite as many colors
as the last time, but still introduce some colors. So I'm going to use
another assisted layer. I'm going to start off with
this beautiful brown color, if it looks good to
the screen, let's see. I'm going to also reduce my
sketch layer so we know. Got distracted by that, I get my pastel pencil
again and start drawing. Could be okay. It look good? I don't know. I think it needs to be a little darker. Maybe we try this
one. I'm going to place my layer that I'm coloring
underneath the sketch so I can continue to see
the sketch in all areas. Now that I have this, we also decide maybe it's easier if I do want to go back
and re-color this, and I should add more
layers this time than I did on the other
one where I just created mushroom icons that I
might not necessarily want to re-color
or they're pretty easy to recolor also later. I'm going to create another
assisted drawing layer that I can layer on top of this
just to do the details, just to make it easy on myself. I'll make a clipping
masks on this layer so I can add stripes and
things like that. I'll go back to my original layer and
draw in my mushroom. Again, because I want to draw on top of the
other stripes, I'm going to go to my
clipping mask layer just to add these dots. Maybe I'll use the
lighter green. Since this is a clipping mask, I can do my textures of
the mushroom using that. I'm just going to turn
off the sketch layer. I'm also going to add some
background texture as well, just some subtle in the center, just to give it some variation. I didn't put that on assisted,
so that didn't work. Let me just do that
one more time. Now I can draw and then
it will be everywhere. There we go. I added a
little bit more dynamics to the background. I'm going to go back and add that one last detail
that I didn't try it. I'm going to put
that on this layer, I'm going to Alpha lock it. Then what color should I do now? I've done this nice pink before. This is coming from that layer. I could go in and delete
that from this layer. I think I need some
lightness in there. I'll do the white
to make this pop. Here we go. There's the
final tile for this section and we'll meet in the next section and
create the table patterns. See how it turned out that this is the part that I
think is so much fun. It never turns out
horrifically ugly. I always just think that it's exciting not to totally
plan it out and see where it looks
like so you can be pleasantly surprised. [MUSIC]
9. Project 2: Test and Finish: [MUSIC] Now it's time to create a tileable pattern
with this one, and this is going to be even easier because we
pretty much just have to turn on Pattern Preview and see how it turned out. Before we do that, I'm
getting too excited, let's also clean up our file so we remove the sketch because we don't need
to send that ups. For example, if we were
going to send this off as a final file to a client, they don't need to have the sketches or
anything like that. Now we can go to "View",
"Pattern Preview", and this is our final pattern, and we can zoom out
to see how it looks. I'm really happy with
how it's repeating. I think I want to add one little line here just so that it looks a little
bit more finished there. But otherwise, I really
like how this turned out. I think it has a nice dynamic
and things like that. Just to add that
extra line there, I'm going to zoom in to one of these sections where
it's within the blue line. I'm going to zoom in even more. I'm going to select
this orange color. I'm going to get a brush. I'm going to make it
a little bit smaller. I have no idea what
brush this is, but it mimics this. It doesn't have to
be exactly perfect, that's not my style. Let's see. I'm on this layer. I'm going to have it
on all the lock too. Does that work?
Nothing's happening. Was to light this pen. Good. I was using too light, the color. Here we go. Doesn't quite match that pencil, but I don't want to spend
an hour trying to find the perfect pencil
with you on camera. But that's good enough for me. Now when we zoom out, it's not repeating, obviously, because we don't have that here. I need to remember
that, of course. So I have to do the
same thing over here. [NOISE] See? Here we go. Now we have the final pattern finished and it looks great. Again, I'm going
to do this "Edit", "Define Pattern",
so it's saved to that pattern library,
press "Okay". We're going to turn off Pattern Preview and I'm going to make sure to
save this, watch. "Save As" project 2, [NOISE] "Save". Then I'm going to go into this and above the middle
triangle, again, I'm going to press this
function "Pattern", select the last one, which is my mushroom pattern, and I'm going to reduce the
scale again to, what was it? Like 34 for the other one, could be good for this too. I'm going to hover
in between this line between the rectangle
and the pattern fill, press "Option" to get this
little symbol, and click. Again, make sure that
you're on the selection. Now I can move this to
decide where I want it. I don't know if I want
to have this part. I liked this part better, so here I go like this and
decide where I want that. These look quite
cute together too. This is quite busy, this
one's quite busy too. You can play around with
the scale to make this even smaller or bigger
to make it look better. But that's our second
project finished and the second type of symmetrical
pattern learned. [MUSIC]
10. Project 3: Sketch: [MUSIC] Last but not least, it's time to get started on
the third-class project, which is to create an
intricate radial pattern. Let's go. Last but not least, we're going to get started
on our final project, which is a radial pattern. We're going to open
up another 4,000 by 4,000 square Canvas. Go open up the drawing guide
and we're going to edit it, this time I'll press
symmetry options, radial. This time we're going to
sketch out our design, it's going to be
repeated eight times. It's going to be really
intricate and you can really get some fun
details in there. You can make really
beautiful medallion patterns in this tool, it's
really versatile. If I'm thinking about this
being a third pattern in this mini collection and the mushroom pattern at the
beginning was my hero print, then I had that tile
pattern is quite graphic as my secondary print, I want to make this an
interesting blender. By doing so, I want to
not make it too boring by having it just
be really simple. I want to make this
interesting but still calm for the eyes. I'm going to choose to
do this as a two-tone. I'm going to pick
a background color right now. Let's see. We did a red green color. Let's do this like [inaudible] reddish peach or should
we go for the pink? I'm not sure which one
would actually look good. This is something that we
can adjust later because previously we had this
color, this too similar. We had the Green. I think the pink could be Q. I'll try it at
least and we can always adjust it
later because we do yellow but I'm
not feeling it. In this assisted layer, I'm going to start
my sketch so we can figure out what we
want this to look like. I'm going to choose
again a dark color and we're going to start
to draw this in. Again, I don't like
to use a grid. I just use these as
guides, the radial lines. I want this to be just
quite simple I guess, but also what's going on. I'm not afraid to add
in lots of details, especially since this is
going to be two colors on me. It's just going to be one line. You can get away with adding a lot more details if it's
just going to be like that. I'm going to remember
to add in some of the design elements that
I had previously used. We have some continuity
in the collection. Again, I also want to have some mushroom element just so that we can bring
these parents together. I'm going to make sure to use
at least one mushroom here [NOISE] Maybe I'll even include my
little ladybugs from before. Just to add in
that a lot detail, sprigs to bring those in here. Now we have a really
complex pattern here, but it took a couple
of minutes to create, seconds almost. Here we go. This super
complex we can say pattern, but it didn't take much
effort and it's going to have really beautiful
results [MUSIC]
11. Project 3: Color: All right, It's time to
bring this to life in color. It's pretty much there. We're just going to refine this. I'm going to, again, reduce my sketch so
it's not so intense. I'm going to use I think a lighter pink color
to do my lines. I'm going to use my
pastel pencil brush here. I'm going to create a layer. Make sure that it's
on drawing assist. I'm going to place it
underneath my sketch so that I can still
see what I'm doing. I'm going to choose a pink color that's a little bit lighter. Let's see what that looks like. Make sure that I'm on
not the sketch layer and I can start to draw. That's pretty contrast. I think I need to reduce my
sketch a little bit more. Otherwise, it's going
to be difficult to see. Now I'm just going
to fill in my lines because I'm just using one
color to fill everything in. I have to remember
and just to use lines and fill in certain areas. Certain areas are just lines
and using line details. Here we go. To bring these dots back, I'm just simply going
to use the eraser tool just to erase using
the same brush. That's my pattern complete. How quick and easy was that. It's quite flat at the moment. I want to consider adding
a little bit of texture just so it's a little
bit more interesting. I'm going to create
a clipping mask that's also going to
be drawing assist. I want to pick I
think a lighter pink, even lighter, just to
add a little bit more. It's glowing a little bit. In certain areas,
like the mushroom, we're here in the center. You can see that it
just lifts it slightly. It's a very subtle
but you can tell that something's happening
in certain areas. I think that looks really nice. There we go. There's my final illustration. A radial pattern
is super complex and people are going to wonder
how long that took you. But seriously, I don't know
how many minutes that took, but it wasn't very many. That is something that you
can add to your portfolio as a blender print that's
way more interesting and exciting than a polka dot or a stripe or a
simple tossed floral. I'm so excited to share
this with you as well.
12. Project 3: Test and Finish: [inaudible] it's
time to test out this final radial
pattern that we created and see how this turned out. The same thing, it's
going to be really easy. We just need to take
away the sketch layer. I'm just going to
delete that so we're left with these two layers. We're going to open up
View Pattern Preview. This one I don't think
needs any adjustments. As you see, I didn't
use any guides, but it still lines up because of the way that one of these
mirroring tools works. I think this looks incredible. Look how fun this looks. It looks so complex and
so difficult to create. But you saw it only took me a couple of minutes to make
an entire pattern like this. That's why I think these
kinds of patterns are really interesting
that they're quick and easy to make and they bring so much
to your portfolio. I don't need to do
any adjustments here that I can see at all. I really like this. I'm going to go Edit,
Define Pattern, just going to save it like this. I'm going to go out of
our Pattern Preview. Again, this is our
perfect swatch as it is. I can save that. I'm going to save this
as Project 3 on the PSD so it's editable later. That one is finished as well. That took us seriously
a minute to do. It's ready to be sent off
to clients and everything, and sold for $100. Same thing here, we're going
to take the last triangle, and on top of that
we're going to add one of these pattern layers. We're going to go and select
the last one we did here. Again, we need to scale it
down so it fits in here. Thirty-four, I will test out. I'm going to press
Option between the two layers to make
a clipping mask there. Then I'm going to
just adjust this. It looks nice. I'm not sure I like this parch. Here we have a mirrored and
symmetrical pattern collection that we created really
simply, quick and easy. It was really fun,
don't you think? You can see because they have the same mushroom theme they're drawn with the same
brushes and color palette, and they have that
mirrored look. It really works well together and it's really dynamic and
interesting collection. You could move on to add placement illustrations
to this collection to make it even
more interesting. You can learn more about that in my other classes that I have. Check out my profile. Other than that, these three
projects are now finished, and you've learned
how to create simple and easy and fun
symmetrical patterns.
13. Next steps: [MUSIC] My hope is that
after taking this class, you feel a lot more
comfortable creating symmetrical patterns and have fallen in love with making
them just as much as I have, because they really are so fun, they're meditative and you never really know what the
outcome is going to be. It's really difficult
to plan them and they just come to life as
you're drawing them, which is really exciting and half of the fun or
all of the fun maybe. I really hope that
you've gotten tons of ideas for different kinds of symmetrical patterns
that you can add to your portfolio in your
art-making practice. But here are a few
other things that I'd like you to
do to keep going. First step, I would love for
you to keep playing with these symmetrical tools and
the different types to see what different styles and moods and textures
you can play with to make really versatile
and unique patterns to add to your collections
and your portfolio. Second step, I would
love for you to play with old pattern
collections and illustration pattern
collections to bring them new fresh light so that you can revive them and make them
more popular possibly. Can you add a new fresh
symmetrical pattern to your collection to give it
a little bit of a boost? While you're at it, you
can always consider giving it a new color palette as well. It might bring new life to
that pattern collection. You can send it off to your
clients for a second look. Lastly, if you
still feel like you need a little bit more
design to help for your patterns and collection
and illustration work, I have nearly 30 other classes here on Skillshare that I would love for you to check out. Please go to my profile
page to view all of my class offerings from
my illustration classes, surface design classes,
sketchbook classes, to other creative
business classes. I would especially
like to recommend my elaborate hand-drawn
half drop pattern classes, as well as my design collection
for art licensing class. I think they'll be
really helpful for you after this class.
14. Final Thoughts: [MUSIC] That's it. Thank
you so much for taking this class with me and learning all about symmetrical
pattern-making. I really hope that you're as in love with making these
types of patterns as I am, and I hope that my
class has made you feel really inspired
about creating and adding these patterns
to your portfolio. I look so forward to seeing
all of your class projects, either one or all three
in the project gallery. Please let me know if you'd
like any specific feedback. Because I would love
to help you with that, if you'd like to grow
your work even more. If you'd like to hang out with
me outside of Skillshare, you can find me on
Instagram @emmakisstina, my website is emmakisstina.com. I also have a very supportive
Facebook group link in the description where I
have lots of prompts to really support other
fellow illustrators and pattern makers as
they are starting on their journey to
full-time careers. I'd love to see
you there as well. Thanks again so much for
watching this class with me. I hope to see you in
my other classes. Follow me here on Skillshare, so you know when I
will post my next one. See you then, bye. [MUSIC]
 Kristina Hultkrantz, Illustrator & Surface Pattern Designer