Transcripts
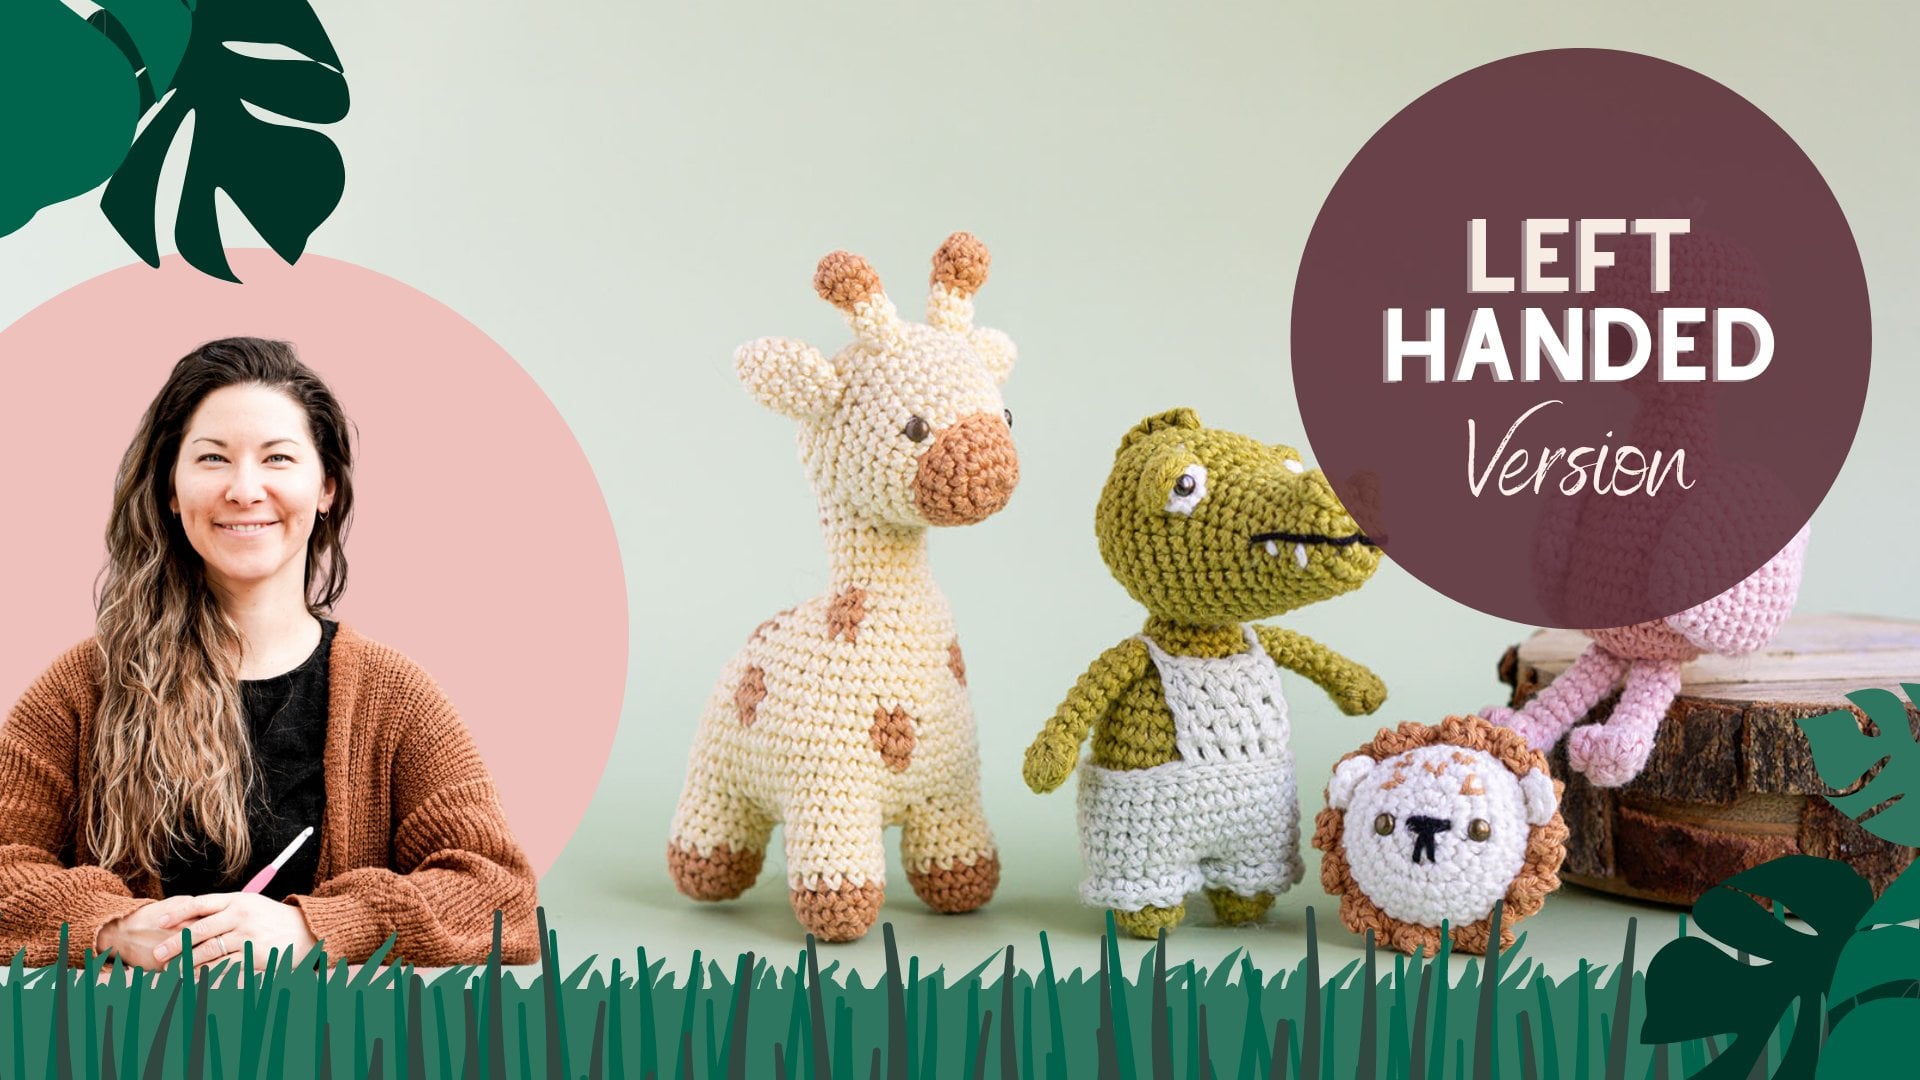
1. Mom-to-Be Essentials Preview: If you've ever dreamed of
making something special with your own hands for
your baby or any baby, you're at the perfect place. Hi there. My name is Emil, the crochet behind
roche Mi's brand, and I'm so excited to share with you my mom to be
Essentials class. To be able to follow the score, she will need to know
the crochet basics. You can learn all of
this by following my crusher course for beginners
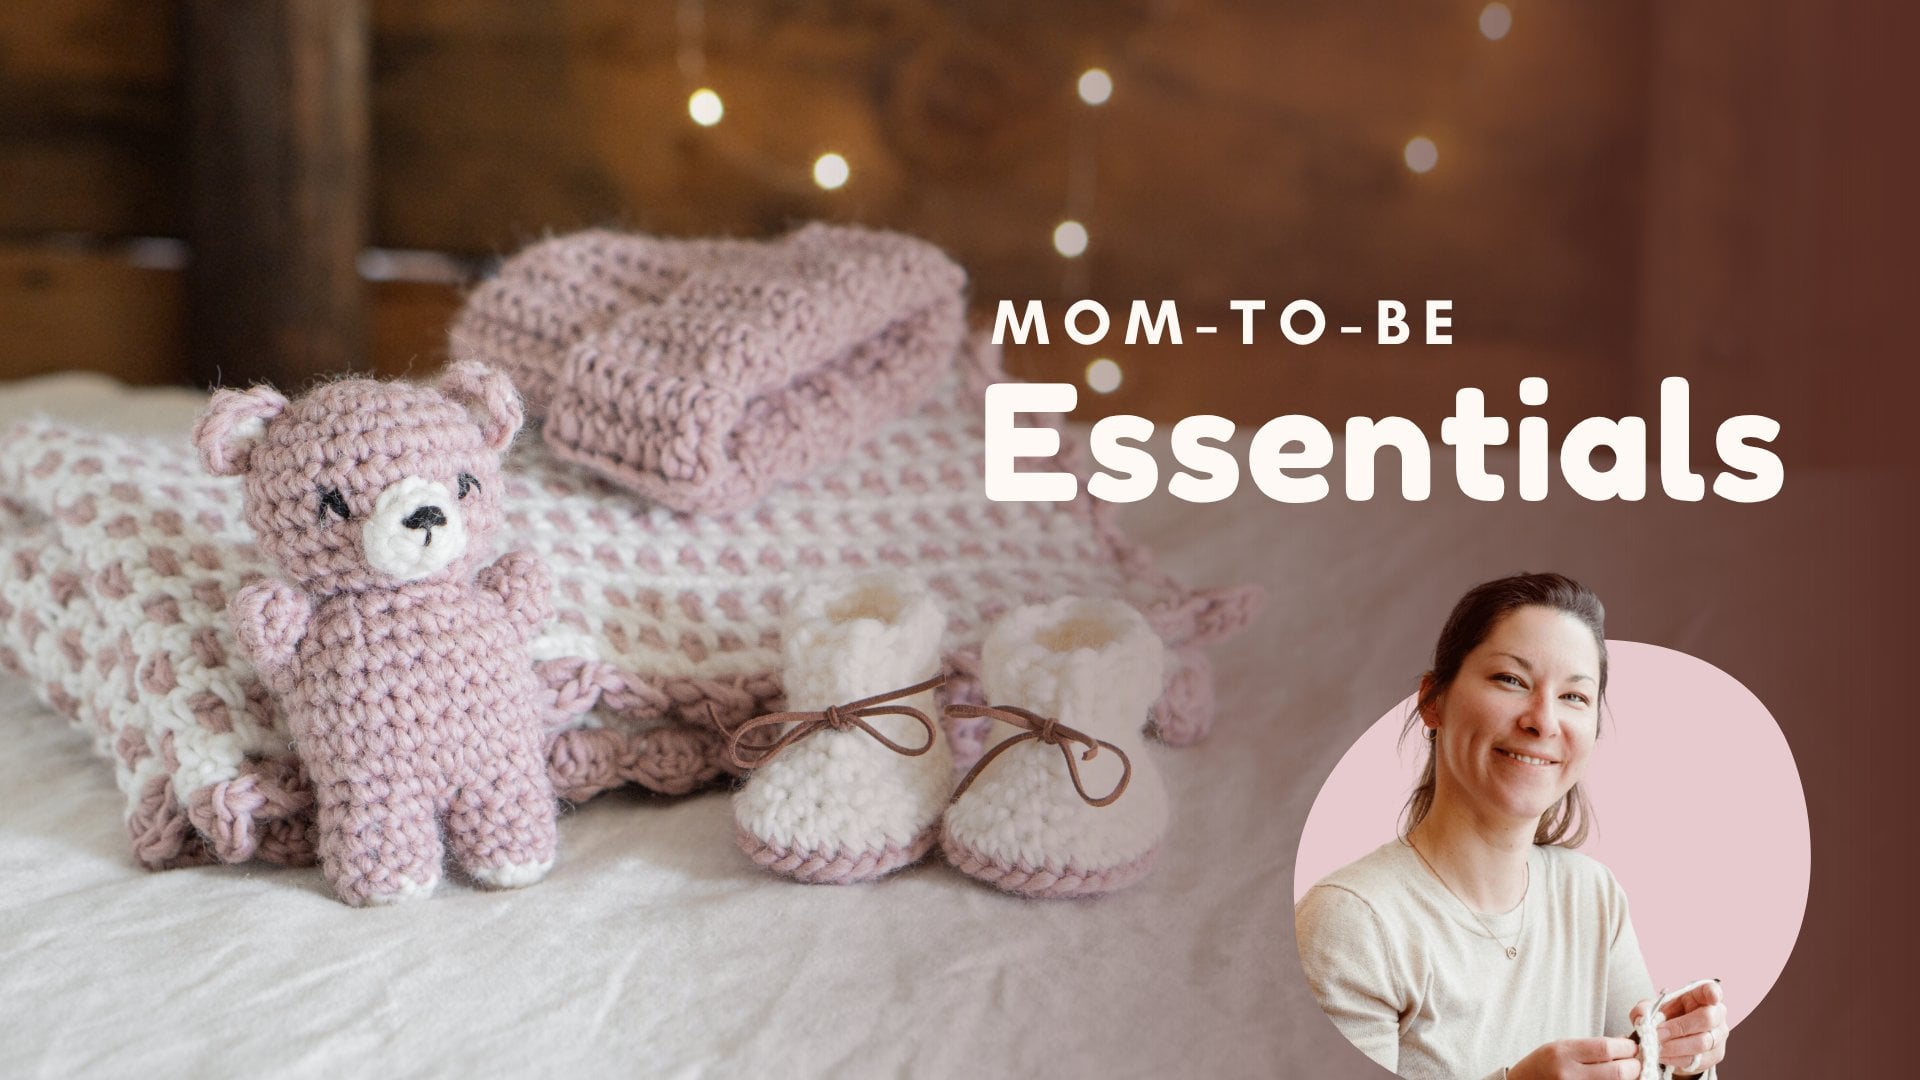
here on this platform. In this step by step tutorial, I guide you through four adorable and useful
baby essentials, a cuddly blanket,
a soft little hat, the cutest Bodies, and a
beginner friendly teddy bear. You'll learn several
techniques and a lot of tips to customize some
projects for any sizes. Always with clear
video instructions for both right and left handed. By the end of this course, you'll have made treasures for your baby in a
reasonable working time. So grab your hook, make yourself comfy, and
let's get started.
2. Projects Intro: In this course, you will
be able to make a blanket, a baby hat that you can easily adjust to
make it any size, little booties,
and a teddy bear. No matter which yarn you choose, I will guide you
through each project to ensure a beautiful result. I can't wait to
see your projects. Don't forget to share them with me in the project gallery below. Let's now start with the
materials and techniques.
3. L-H: Materials & Techniques: To corte the entire set, you will need
approximately 600 grams of superbowl konn
in a neutral color, along with 450 grams of Super Bowl konn in the
color of your choice. In a few seconds,
I'll tell you about the yarn I chose and
some alternatives. You will also need a
six millimeter hook, scissors, a yarn needle, stitch markers, some stuffing and black yarn for
the little bear, a measuring tape, and sued
laces, which is optional. I chose snow wool from
the European company drops for its soft natural fiber and its wide range of colors. I tested it with my washing
machine on a delicate cycle, and the fiber remained the same, so it will be easy to care for. Just don't put it in the dryer. Otherwise, the blanket will
turn into a hand towel. I use white and powder
for the tutorial. Since I'm running
out of space in my workshop and my house
to offer you this yarn, I found a lovely boutique
in Quebec Igi yarns, which will make sure to have
it in stuck and we even offer you the complete kit
with the hook and accessories. I've put the link
just below the video to buy it directly
from her website. All the patterns
can also be made in a super bulk yarn
of your choice. I've put some suggestions
below the video, as well as in the
written pattern. But you've probably
noticed that the thickness varies significantly from
one yarn to another, which each pattern, I'll
guide you on what to do and what to adjust if your
yarn is thicker than mine. And if you prefer a particular
worsted weight yarn, you could always try
doubling it to see if it matches the swatch we're going
to make in a few seconds. Here are the abbreviations I will use throughout
the tutorials. We will do chains,
single crochet, decrease and increase
of single crochet, half double crochet, decrease
of half double crochet, front posts and back post
half double crochet, double crochet and
slip stitches. If there are any terms or stitches you're
not familiar with, I'll show you everything
in the tutorials. If you don't have
the same yarn as me, the swatch will be super
important to achieve a similar result and
know what to adjust. It will only take you
five to 10 minutes. You can start by making a
slip nut and 15 chains. Let's practice the
baby blanket stitch. This is the mass stitch. When your 15 chains
are completed, you can make a single crochet in the third chain
from the hook. Chain one, skip one chain and make a single
crochet in the next one. And repeat throughout chain one, skip one chain, single
crochet into the next one. You should have made
seven single crochet and total in row one. Chain two, turn, and you'll make your first single crochet in the first chain space,
which is right here. And you chain one and make the next single crochet
in the next chain space. And repeat chain one single
crochet in the next space. No. And your last single crochet will be in the chain two space, the turning chains of each row. Continue like this until row 12. Do exactly the same thing. You can pause the video, we'll meet again at the end. When you have finished
your swatch, measure it. It should measure four by 4 ". But if you have larger
measurements, don't worry. In each pattern, I'll
tell you how to calculate from your gauge so you can
modify the pattern slightly. Here, I followed the
same instructions, but with a slightly
thicker yarn. It makes a significant
difference, but it's easily adjustable. And here are the
usual tips for when the gauge is either too
small or too large. In this case, the best
solutions might be to adjust your tension
and adjust the pattern. Now it's time to get to work. We'll start with the
baby blanket. Oh
4. L-H: Baby Blanket - Main Part : Let's start with
the baby blanket. The standard size is 30
" wide by 36 " long. So you will need 500 grams of super bulky yarn
in a neutral color. 300 grams of Super Blkyarn in the color of your choice
as six millimeter hook, scissors, yarn needle,
stitch markers, if needed, and a tape measure. The stitch I will be using is the one we did
for the swatch, the ustitch, which is a combination of single
crochet and chain stitch. Every third time, we'll change colors to
create the pattern. If your swatch was
larger than mine, here are some tips for knowing what to adjust
to get the same size. Also, you could use the same mathematical
rules if you want to make a larger
or smaller blanket. Without the border, the
blanket measures 28 " wide, and this measurement
is important to get right the first time so you don't have to undo
all your work. The length is easily adjustable by removing
or adding rows. Okay, we're going to have
a little math lesson. If in your swatch,
you have a total of seven single crochet per row
that measures 5 " in total, as in the example, and the
blanket needs to measure 28 ", we'll apply the rule
of three to know how many single crochet it
will take to make it 28 ". I've given you an
example of calculation. We multiply a diagonal and we divide by the number next
to it, divided by five. That will give 39.2. And then for the
pattern purposes, you will round the result
to the nearest odd number, and it really doesn't matter if there's one more or one less. And finally, to know the number of chains you will make
in the starting chain, multiply this number
by two and add one. In this example, you
will make 79 chains to get the exact width of the blanket according
to your gauge. And it works with
any measurements. To adjust the length, we won't have to worry about it. You'll just have
to measure as you go to make sure you have 34 " long and finish with two
rows of neutral color. And here's the general rule
if you'd like to reproduce the same style with
any blanket size. There are two rules. The starting chain must be a
multiple of four plus three, add three to the
multiple of four, which will give you
an odd total number of single crochet in a row. The importance of it being odd is that the
border is uniform. And the second rule to follow
is that the first two and the last two rows should be made with the
neutral colored yarn. If you follow these two rules, you'll be able to reproduce
the same blanket in any size. And I've put all this information
in the written pattern. Now it's time to
really get started. With a neutral color, you can start with
a slip nut and chain 99 if your gauge
was the same as mine. Otherwise, go ahead
with your calculations, and this is the only time you have to memorize
numbers in your head. I'll let you concentrate. We'll meet at the end
of your starting chain. And if you haven't
made your swatch yet, it's always better to make the chain too long
rather than too short. Once your chain is complete, you'll make a single crochet into the third chain
from the hook. Chain one, skip the next chain and make a single crochet
into the next one. And repeat throughout.
Chain one, skip the next chain and single
crochet in the next one. If you need to, you could
place a stitch marker in the space between the two chains you skipped at the beginning. Also, a little tip if you're having trouble knowing
which chain is next. When you pull up the
stitch you just made, if the chain moves, it's
already been worked. So continue until
the end of the row. You should end with a single
crochet in the last chain. I'll let you work. We'll
meet at the end of the row. It should look like
this, but much longer. If you chained 99 like me, you should have 49
single crochet stitches in total in row one. Otherwise, the calculation is to subtract one from your starting
chain and divide by two. You will have the
total number of single crochet you
are supposed to have. If you need your stitch markers, you could place this one
in the space created by the chain made just before
your last single crochet. And just a quick aside, if you made a starting
chain that was too long because you were unsure of
your blankets measurement, you'll just have to undo the excess chain stitches
with your yarn needle. This way, you won't have to
start your first row again. You'll just have to continue with the correct
number of stitches. And we continue with
the second row. Chain two, turn and make your first single crochet into the next chain one space. You can use the fingers of your other hand to guide your
hook into the chain spaces. Chain one and single crochet
in the next chain one space, and repeat this
sequence until the end. We met just before making
the last single crochet. The last single crochet will be made in the chain to space, the turning chain space. Before finishing
your single crochet, we'll join the new color. And we'll be ready
to start row three. You're going to chain two. Turn, and it's going to be super important to carry
your white yarn while crocheting row three. We carry it forward, so it's available
for the next row. To include the yarn, pass
your hook under it and enter the next chain one space and work your single crochet
including the white yarn. Make your chain one and
work a single crochet into the next chain one
space and repeat this throughout and follow the thread in front of you like this. It's easier. So you continue this
way until the end. You can pause the video. When you get to your
last single crochet, it will be really important to stretch what you just did so that the white yarn
that you carried adjusts to the correct
size of the blanket. Otherwise, it will make
it very tight and uneven. Replace your hook in
the loop and make your last single crochet
in the chain to space, including the white yarn. And at the last step of
your single crochet, join this one to continue
with the white color. Chain two. Turn the blanket pattern
design will always be two rows of neutral colors followed by one colored row. So for each colored row, you will need to
follow the white yarn. But you don't need to
follow the card yarn since we're going back and
forth with the white yarn. So you can make your
first single crochet in the next chain one space. And if you want to hide the white yarn that followed
you in the previous role, you can include it when
making your single crochet. But if you find it
annoying or miss it, it's really not big deal.
It's just a detail. And continue with
the same pattern, single crochet in the
next chain one space, Chain one throughout. I'm showing you here
what it looks like if you don't want to include
the white yarn thread. It's a very subtle difference. So you can really do
whatever you want. I'll let you continue the
row. We'll join at the end. At the end, you'll
make a single crochet in the chain two space, and no need to join colors because we'll continue the
next row with the neutral one. Chain two, turn and
continue the pattern. Do the same thing.
Single crochet in the next chain one space, chain one, and
repeat throughout. I wanted to show you
a very common mistake if you're distracted
a little bit, which would be
forgetting to make the chain one between
two single crochet. But I'm showing you here
that you don't need to undo your entire
row to start over. It's almost not visible. So if this happens to you from
time to time, don't worry. Just make a single crochet between these two
single crochet, and you can continue
without feeling guilty. And a tip to avoid forgetting as often
as possible is that before doing anything else like pulling the yarn or
joining a new one, make sure you always finish the movement with
the chain stitch. You can pause the video. We'll see you at the
at the end of the row, you will make your
last single crochet in the chain two space. And join the color at the
last step of this one. You can just pick up
the yarn as it comes. We'll hide everything with
the border at the end, and continue with the next row. Chain two, turn, and don't forget when you're
working with the color, you'll be following
the white yarn. And continue with the pattern. We'll meet at the
end of the row. Just before making your
last single crochet, remember to stretch your work
well so that the yarn that follows you fits properly to
the width of your project. Give it a good thug
when you stretch it. And you add the white color to the last step of your
last single crochet. Count from time to time
to see if you still have the same number of single
crochet in each of your rows, so you don't get any unpleasant surprises when you get too far. And I'll show you one
last little trick when you've reached
the end of your skin, how to join the twoth threads so that is as
subtle as possible. Just for the sake
of illustration, I used two different colors
so you can see it clearly. The idea is to tie a knot
around each of the threads. So I'll tie a knot with my pink thread around the white one, and I'll
do the same thing. I'll tie a knot with my white
thread around the pink one. Then you pull on the
two threads to join the knots and you
cut off the aces. And pull hard to see if it's secure and continue as
if nothing happened. The little nut will
blend into the blanket. I'll let you continue until
the end of the pattern. I'm putting the
information here along with all the little tips to
keep in mind while you work. Continue your rows
until they reach 34 " long and make
sure to finish with two rows of the neutral color and always alternate two neutral rows with
one colored one. We'll meet again in
the next video where we'll do the last step
together the border. See you in a couple
of hours or days.
5. L-H: Baby Blanket - The Border: Now that you have completed all your rows that your
blanket measure is 34 " long and you have finished with two rows
with the neutral color, you will join the other
color with your last ditch. Chain one, do not
turn the blanket, but continue working
down the side. We're going to
crush small shells at each color row on the side. You can insert your
hook to encompass the last ditch of the
color role like this. Make a single crochet followed by two double crochet
still in the same space. And finish with a single crochet
still in the same space. This will create a small shell. You can take the opportunity
to cut the white yarn. We won't need it anymore
and continue by making the same shell in each row of colors on the
side of the blanket. Each shell will consist
of one single crochet, two double crochet, and
one single crochet. M. I'll let you continue working along the
entire side of the blanket. We'll meet at the first corner. When you finish your last
shell on the first side, we're going to do
a small variation of the shell in
the first corner. You're going to enter
the first space of the skipped chain of the starting chain,
which is right here. You'll make a single crochet, followed by two double crochet. Chain one and still
in the same space, make two double crochet. Followed by a single
crochet to finish. So the shell in each corner will be just a
little bit bigger. Continue on the next side, the side of your starting chain. Skip the next space and make
a shell in the next one. So you make one single crochet, two double crochet, one single crochet,
in the same space. You skip the next space and you'll make a shell
in the one after that. And continue like this all
the way down the side. We meet at the second corner. You should arrive
just so that there's one space left before
the chain to space. If it isn't. I
won't show at all. So in the second corner, you repeat the same
shell a little larger, which consists of
a single crochet, followed by two double crochet. Followed by a chain, and you finish with
two double crochet and a single crochet, still in the same space. And continue on the second side. Make a quarter turn, and you
will cushion the shells in each color row in the same way as you
did on the first side. I'll let you continue.
You will make a shell in each of the
color rows on the side. When you reach the third corner, you will make the shell in the chain to space
of the last row. When you reach the last side, you will skip the
next chain one space and begin the shell
in the next one. And repeat. Skip the next space and make the shell in
the one after that. Let's meet up to complete
the fourth corner. Once again, you should have a free space before
the corner space, but it's really
okay if you don't. So make your last shell in the last chain one
space of the last row. H And you won't need to join with a slip
stitch in the first shell. Just leave it like that. You can cut the yarn and secure it. All you have to do is
weaving all your ends on the back of the blanket
behind the border. Congratulations. You've
completed your first project. I hope you're very
proud of yourself. The little blanket
is still heavy, so don't leave it
unattended on the baby. But it will definitely bring comfort when he's
a little older. If you want to continue, we'll start the boodies.
6. L-H: The Beanie: Now let's move on
to the little hat. In this tutorial, I'll be making size three to six months, but it's super easy to
adapt it for any size. You can even make
one for yourself. Here is the table of actual head circumference
measurements and the height between the top of the head and where the
hat is supposed to end. And here is the table of measurements that the
patterns hat should have. You can then adjust it to
make it fit the desired size, either by adding or
removing stitches from the starting chain or by
adding and removing rows. I've included this chart below the video as well as in
the written pattern. Make size three to six months, you will need 70 grams of super bulky yarn in the
color of your choice, a six millimeter hook, scissors, yarn needle, stitch markers,
and a tight measure. Let's get started. Start by making a slip nut and chain 24. If your yarn is
thicker than mine, or you'd like to make
a different size, it's always better to have too many chains that not enough. At the end of the first row, you can measure it to determine the correct number of stitches
you should have made, and it will be easy to
undo the excess chain. Once your chain is finished, you can work a half
double crochet in the third chain
from the hook. And continue by working half double crochet in all
the following stitches. The rule should measure 7.5 ". So you can stop working your half double crochet when
you reach this measurement, which correspond to
the height of the hat. I'll let you work,
we'll meet at the end. So your first row should measure 7.5 " if you're making size three to six months and 6.5 " for size zero
to three months. You can therefore adjust your first row by adding half
double crochet if you have any remaining chains or remove any excess half double crochet
and any excess chains. And count how many half
double crochet you made to keep the same
number throughout the rows. For the second row,
you will chain two, turn and you will once again
work half double crochet, but this time in the
back loops only. So this is the loop
furthest from you. And you remember the
half double crochet has a post loop
that's right here. So don't be fooled into
thinking it's the front loop. The front loop is right here, and the back loop
is right above it. So you're going to work
a half double crochet in the back loop of
the same stitch, which is the last stitch
of row one that you made. This is the loop immediately
after your turning chains, and continue like this, making a half double crochet in all
the following back loops. I'll let you
continue. We'll meet again at the end of the row. At the end, it might seem
confusing where to go, but you'll make your last half
double crochet right here, which is actually the first half double crochet
you made in row one. So we'll ignore the
turning chains. We will always start
in the same stitch and end in the stitch just
before the turning chains. It can help to put a stitch marker right on the first
half double crochet you made. And you can continue with
the next rope. Chain two. Turn. And do the same thing. One half double crochet in the back loop of
the same stitch. And continue by making a half double crochet in
the back loop of each of the following stitches.
I'll let you continue. We'll meet again at
the end of the row. If you place your marker, it will be easy to know
which stitch is the last. Otherwise, it's right here, immediately before
the end of the row. You can count if you still have the same number of half double
crochet as your first row. And all subsequent rows
will be identical. You can therefore
repeat what you just did until you have
the desired width. Entering into the back
loops of the stitches will create a slightly
waffle effect on the hat, which will be very stretchy. Here's a table of
different hat sizes. We'll meet up when
you've reached the required width and try to have an even
number of rows. The seem will look better. Once your rows are finished,
it should look like this. Laying it flat on the table
without stretching it, take your tape
measure and check if the desired width is acceptable. I have 12 " wide. In this example, I made
size three to six month. You can also check the height, which should be roughly the same as you measured in row one. So here I have about 7.5 ", which corresponds to the height of size three to six month. You should also have made
an even number of rows, and I will help you count them. So we have the first row here. Then do you see the
little bumps it makes? Each of these bumps is
made up of two rows. If you want to make
the hat seal times, you can note the number
of rows you have worked, so you can reproduce it. In this case, I did 22 rows. When everything looks good, we'll close the hat and sew it. I strongly suggest you place a stitch marker in the last
half double crochet you made. And place another one
in the chain stitch of the starting chain that is right next to your first
half double crochet. It's actually in
the bottom corner. With these reference points, you won't make a
mistake when you get to sewing the last row on
the starting chain. But just before that, we'll do one last row to close
the top of the hut. Replace your hook in the loop, hang two, and we'll work on the side of
what you just did. You'll work two half
double crochet together, one decrease over two rows. So you can work into any
loop on the side of a row. After making your yarn over, enter a loop of the next row. Yarn over, pass
through the loop. Yarn over, enter one of
the loops of the next row. Yarn over, pass
through the loop, and yarn over, pass through
all the loops on your hook. So we've made a half double
crochet including two rows, which will close the hat. The next two rows are in the next little
bump that you see, which is made up of two rows. So you can choose
an outer loop of these two rows to make your
half double crochet decrease. It really doesn't matter
which trend you choose, as long as it's facing the row. And you continue like this
all the way down the side. And if you had un
even number of rows, you'll finish in
the last two rows. Otherwise, you can make a half double crochet in the extra one. You have now finished crocheting the hat. We're ready to sew it. You can cut the yarn, leaving
a very long length because we'll be sewing the top side
of the hat and secure it. Put the yarn through your
yarn needle and we'll close the top where your half double crochet decreases are. Insert your needle
from front to back to exit the next ditch and do
this all the way around. At the end, join
into a stitch on the other side and pull your yarn to close
the top of the hut. You can insert your needle around the closure to secure it. Next, this is where your stitch markers will come in handy because it's very hard to see which stitches are
facing each other. You can start sewing to
close the side of the hut. Make sure your stitches
on both markers are facing each other
and start to sew. To make the seam as
beautiful as possible, you will enter both loops of the stitches
from the last row, which is right here, and you will enter into the
corresponding chain. And the seam will be made with
the whip stitch technique. You always enter
from the same side and exit through the chain. And by the way, there was no right or wrong
side for the hat. Even the sin will be nice
enough to be on the right side. So you can choose which
one you prefer at the end. If it ever happens
to you that it looks like on one
side or the other, there is one such too many. You can simply go
through the same one twice and it
won't show at all. All you have to do is
weave in the ends. Choose which side of the hat you prefer and tuck the
ends to the right side, since we're going to fold
the edge back on itself. And that's it. You can fold the edge back on itself
to form your little hat. Whether it's a summer
or winter baby, you'll have all the sizes at your disposal to
make one for him. Now, let's crochet his
first teddy bear together.
7. L-H: The Booties - The Sole: To crochet the little booties, you will need 50 grams of Super Bowl kon in
a neutral color, 10 grams of superbowl kon in
the color of your choice, a six millimeter hook, scissors, a yarn
needle, stitch markers, a tape measure, and suede
laces, which are optional. The size will be for
babies 0-6 month, which is perfect because
they won't be able to walk on the sole which
is not at all non slip. You can make sure the booty is the right size by measuring
the sole before continuing. It should measure 3.5 to 4
" long and 2.5 to 3 " wide. And with super bulky yarn, it's very easy to
get the right size by adjusting your tension. If the yarn you've chosen
is much thicker than mine and your swatch looks much more like
the one on the right, I have written a
specific version for this yarn thickness. You can follow the
pattern instructions written below the video or in the document and watch the video to make sure
you're stitching correctly. Let's get started.
Using the colored yarn, make a slip nut and chain seven. Make a half double crochet in the third chain
from the hook. And make a half double crochet
in the next three chains. And make five half double
crochet in the last chain. You will now work on the opposite side of
the starting chain. You will make a
half double crochet in the next three chains. And make three, half double
crochet in the last chain. It should look like
this. And you'll finish by joining with a slip stitch over the first half double
crochet you made. It's right here. If
you're not sure, you can count backward to 15. Basically, we've
made 15 stitches. So you can find out which is the first one by counting
from the last one. And you make your slip stitch by entering through both loops. Chain one and then make two single crochet
in the same stitch, the one where you made
your slip stitch. If you wish, you could place a marker on the
first one you made and continue by making one single crochet in
the next three stitches. Then you will make
two single crochet in the next five stitches. One single crochet in the next three stitches. And finally, two single crochet in the next three stitches. And pay attention here. This is a very common mistake. The next stitch is the
connecting stitch. The slip stitch you made
earlier, it doesn't count. So you ignore it,
you go over it, and you're going to make
your slip stitch and your first single crochet of round two. Where is your marker? You should have a total of 24 single crochet in round two. The chain and slip
stitch do not count. Chain one and single
crochet in the same stitch, where you made your slip stitch. You can replace the
marker on this one. Make two single crochet
in the next stitch. Followed by a single crochet
in the next four stitches. Then you will make two single
crochet in the next ditch, followed by a single crochet in the next ditch and repeat
this sequence five times. Then make a single crochet
in the next three stitches. Make two single crochet
in the next stitch, followed by a single
crochet in the next one, and repeat this twice. And finish by making two single crochet
in the last stitch. This time for purely
aesthetic reasons, join with a slip stitch
in the chain one, the one just before
your stitch marker. And at the same
time, you will join the neutral color just before
finishing your slip stitch. And you should have a total of 33 stitches in round three, not including the chain
and the slip stitch. And just before continuing, take the time to measure your little soul to see
if it's the right size. If it's too small,
unfortunately, you'll have to redo it
with a looser tension. If it's a little bigger,
it's not a problem. The baby will just
have more room to put their little foot in.
8. L-H: The Booties - Foot Part: Now that you've added
the neutral color, you can chain one and single crochet in each of
the following stitches, entering in the back loop only. You can pause the video, we'll meet again at
the end of the round. At the end, be
careful once again, not to enter the strand of
the joining slip stitch, but to go directly to join with a slip stitch in the first
single crochet you made. You will skip the slip stitch, the chain to go directly into
your first single crochet. You could take this
opportunity to weave in the beginning thread and
secure the color change. By the way, you can cut
the colored thread. We won't need it anymore. And you'll see that
it's easier to weave in it now than at the end. We have more space. I
like to go all the way to the other end to tighten the small hole
made by the increases. And we continue with
the fifth round. You will chain one and make a single crochet
in the same stitch, and this time we'll go back to normal inserting both loops. Then you'll make a decrease, which is to make
two single crochet together and use the
invisible decrease technique, which is to insert
into the front loop of the next two stitches to
make your single crochet. This will give you a
more aesthetic finish. Then single crochet into the next seven stitches and be careful not to enter the stitch that's already been worked. To be sure, you can
pull on your hook. If the stitch moves, it's not this one. It's the next one. Next, you'll make five
decreases in a row, always entering the
front loop only of the two stitches where
you make the decrease. You will see that the little
booty will have rolled up. So just turn it right side out to always work from
the outside in. Then make a single crochet
in the next seven stitches. You will then make a decrease
entering the front loop of the next two stitches and finish by making a single crochet in the
last four stitches. And join with a slip stitch
in your first single crochet. And you should now have a
total of 26 single crochet. Round six will be a
very simple round. Chain one, single crochet
in the same stitch, and single crochet in all
the following stitches. And you will still
have a total of 26 stitches in round six. I'll let you work. We'll meet again at the end of the round. Again, at the end, do not enter the slip stitch
that connects the rounds, but skip it, as
well as the chain to make your slip stitch into
the first single crochet. And before moving on
to the next round, take the opportunity to weave in the colored joining threads. It will be easier to do it now. On round seven,
you can chain one. Make a single crochet
in the same stitch, and a single crochet in
the next six stitches. Then you will make five
decreases in a row. Then single crochet into
the next nine stitches. And join with a slip stitch
in the first single crochet. You will have a total of 21
single crochet in this round. Chain one, one single
crochet in the same stitch, and one single crochet in
all the following stitches. I'll let you continue.
We'll meet at the end. At the end, join with a slip stitch into the
first single crochet. And you should have 21 single
crochet in round eight. Round nine, chain one, single crochet in
the same stitch, single crochet in the
next three stitches. And you will make six
decreases in a row. And make one single crochet
in the next five stitches. No and join with a slip stitch in the
first single crochet. You will have a total of 15
single crochet in this round. We finished the foot section. Now we're going to work
the ankle section. This will be done in
half double crochet. You can chain two,
half double crochet in the same stitch and half double crochet in all
the following stitches. There will be 15 half
double crochet in total. I'll let you work. We'll meet again at the end of the round. At the end, you can join with a slip stitch on
top of chain two. The last round will be
worked alternating with front post and back post
half double crochet. I'll show you how. First, make your
chain to yarn over, and you're going to crochet around the half double crochet, inserting your hook
from front to back, from outside to the inside. And you come out on the
other side of the stitch. Yarn over, pull
through the stitch. Yarn over and pull
through the three loops. So you've made a front
post, half double crochet. The second will be
made in back post. This time, after
making your yarn over, you will pass from
back to front, from the inside to the outside
around the next stitch. And you will bring
it to make your yarn over and pull through the stitch you will make
your half double crochet. You continue like
this, alternating front post and back post
half double crochet. I'll let you continue we'll meet again at the
end of the round. You should finish with a front
post half double crochet. Then you will join with a slip stitch on
top of chain two. And that's it. You can cut
the yarn and secure it. All that's left is to
weave in this thread. For more aesthetic finish, enter your needle not
into the next stitch, but into the second
stitch of the last round. Then work from the outside in through the back loop
of your slip stitch. This will mimic a stitch. This gives a more subtle join. And you weave in the
thread as usual inside. It will be easier if
you roll the edging to the other side and try to secure the thread a little
lower at the foot. And that's it. You finished
the first little boot. If you want to add laces, you can cut off a thin
layer of suede about 12 " long and insert your yarn
needle here to attach to it. You can tie a double
knot before making the loop so that the
baby can't untie it. All you have to do is make
another identical one. And I recommend doing it now
because attention can vary from day to day depending on the temperature
or your stress. So if you want to have two
identical little feet, it's good to do them
at the same time. And if you don't have
sweet laces on hand, you can simply use a colored thread to make the small loop. If you'd like to
make the baby hat, meet me on the
next tutorial. No.
9. L-H: Teddy Bear - The Head: Now we're ready to
crochet the teddy bear. You will need about 50 crams of super bulky yarn in the
color of your choice, a bit of neutral yarn, six millimeter hook, scissors, yarn needle, stitch marker, polyester stuffing, and a bit of black thread to embroider
the muzzle and eyes. Please note that to
make the little bare, you can use any yarn, any hook. The pattern will always
remain the same. Only the size and the
texture will be different. Just make sure you use the correct hook size with the yarn you've chosen so you don't see any holes between
the stitches. Let's get started. Using the colored yarn, you'll start by making six single crochet in a magic ring. You could also chain two
and six single crochet in the second chain
from the hook. When you have completed
your six single crochet, close the ring and
continue with round two. We will increase in each
stitch of round one. Skip the chain you made
at the beginning and make two single crochet in the first single
crochet of round one. Place your marker
on the first stitch you made and continue by making two single crochet in each of the next five stitches. We'll make increases
in each stitch. So you'll have a total of 12
single crochet in round two. At the end, count whether you've made 12 single
crochet in round two. In round three, we'll make
an increase out of two. So you'll start by making two single crochet
in the next ditch. I place your marker on the first one and continue by making a single crochet
only in the next ditch. And repeat all around. One increase, one
single crochet, two single crochet
in the next ditch, and one single crochet
in the next ditch. This will give you 18
single crochet stitches and total in round three. You can pause the video, we'll meet again at the end. Count if you have 18 single
crochet in round three. For round four will increase
once every third stitch. So you'll start
with an increase, followed by a single crochet
in the next two stitches. Remember to always replace your marker on the first
single crochet of the round. And you make a single crochet
in the next two stitches. And repeat this sequence
all the way around case, a single crochet in
the next two stitches. At the top of the screen, you see a very simplified
way of writing the pattern, often used in amygyy making. The sequence in parenthesis
is repeated six times. An increase, which means making two single crochet
in the next stitch, followed by the number of
single crochet to be made. In this case, you
will have a total of 24 single crochet at
the end of round four. I'll let you continue. We'll
meet again at the end. Count if you have 24
single crochet in total. Round five to eight
will be very simple. You will make one single
crochet in each of the following stitches
for four rounds. Remember to always
replace the marker on the first single
crochet in each round. And if you ever forget
to put it back on, I'll show you in
a few minutes how to count the rounds and
know where they start. I'll let you go. We'll meet up at the
end of Round eight. At the end of Round eight,
it should look like this. Make sure the single crochet
are on the right side that you are always working from the outside to the inside. You may need to
turn your work over to the other side so that the
right side is facing you, as shown on the screen. Now we will count
the rounds together. We have the first one here, the small circle, the
second one starting above. The third one, starting
here, the fourth, the fifth, six,
seven, and eight. The first stitch of a round is always on the first stitch
of the previous one. We will now begin to close
the little bear's head. In Round nine, we will begin to decrease to slowly
close the head. We will use the invisible
decrease technique. I'll show you how. You will insert the hook into the front loop of the
next two stitches. Yarn over and pull
through both loops. Yarn over and pull through
two loops on the hook. Place your marker on this stitch and continue by making a single crochet in
the next two stitches. And you repeat all
around a decrease, followed by a single crochet
in the next two stitches. You will have a total of 18
single crochet in round line. The little head is
starting to close. Now we will work the last round. Round ten, you will decrease
every other stitch, starting by making an
invisible decrease while entering the front loop
of the next two stitches. Replace your marker and
make a single crochet into the next stitch and
continue all the way around. One decrease, one
single crochet. You will have a toll of 12
single crochet in round ten. At the end, remove your marker and make
a slip stitch into this stitch just to even
out the end of the project. Cut the yarn and secure it. You can now add some
stuffing inside. Make sure it's firm enough without showing the stuffing
through the stitches. Set the head aside.
We'll continue with the little bear's body.
10. L-H: Teddy Bear - The Body : With neutral yarn, make a magic ring or the
technique of your choice, and eight single
crochet inside it. At the eighth single crochet, you will join the color. It's okay if you've
already done it. You can tighten the
circle and simply undo your last single crochet to join the color in the last step. The next three rounds
will be identical. You will make a single
crochet in each of the following stitches for a total of eight single crochet. You can pull the yarns from
behind to tighten them. Since we're not making
our circle any bigger, it will tend to roll
to the wrong side. So just turn it over after the second round so that
you always crochet from the outside to the inside so that the right side
is visible facing you. Continue with round three
and four in the same way. You will make a single crochet in the next eight stitches. We'll meet again at the
end of the fourth round. We'll count the
rounds together to make sure you've
completed four rounds. We have the first round,
which is all white. The second, where
the color begins, the third and fourth. You can slip stitch into
the next stitch to finish. Cut the yarn and secure it. Tie a double knot with the threads on the
inside of the leg. You can set the first leg aside. We will repeat the same
thing for the second leg. Only you will not cut
the yarn at the end. I'll put the
instructions right here. The fifth round will
add the first leg. You will begin by making a single crochet in the
next eight stitches. Don't forget to add your marker. It's going to be
super important to know where to continue after
joining the first leg. After making your eight
single crochet stitches, bring the first leg together and continue crocheting on it. I like to start in the stitch where you made your slip stitch. So you're going to
make a single crochet in the next eight stitches. And be careful to actually
make eight single crochet. Don't enter the same stitch twice where the slip stitch is. And this is where your marker is important because it's very
mixed up in this corner. Round five is truly finished. We're going to skip
everything you see and start the sixth round. You will make a
single crochet in each of the next 16 stitches. Place your marker
on the first ditch and continue making
your single crochet. The bear's two little legs are now firmly joined together. We'll continue with
its little belly. On round seven, we'll
increase every other stitch. So you'll make two single
crochet in the next stitch. Replace your marker on the first one and continue by making a single crochet
in the next ditch. And repeat all around. Increase one single crochet. You will have a total of 24 single crochet
in round seven. You can pause the video, we'll meet again at the end. At the end of the round, take the opportunity to weave
the ends inside the legs. Leave one out so you
can sew the croch. With your ar needle,
just pass through the strands to close the
junction between the two legs. And secure your small seam by tying a double knot
with any other thread. We're ready to continue
with round eight. The next four rounds
will be identical. You will make one single crochet in each of the
following stitches. 24 single crochet per round. I'll let you get to
work. We'll meet at the end of round 11. We can count the rounds together to see if everything looks good. So we have round one
here, two, three, four, five, six, seven,
eight, nine, ten, 11. And a little tip to know if you finished in
the right stitch. You remember in Round seven, we started with an
increase right here. So follow the stitches on top with your eyes until round 11. We'll continue with round 12 where we'll start decreasing. You will alternate
a decrease with a single crochet in the next
two stitches, six times. So you start by making
an invisible decrease. Followed by two single crochet. And repeat all the way around. A decrease, a single crochet
in the next two stitches. You will have a total of 18
single crochet in round 12. On the last round, you will
decrease every other stitch. Start by decreasing in the front loops of the
next two stitches. And make a single crochet in the next stitch and repeat
all the way around. One decrease, one
single crochet. You will have 12 single
crochet in toll in round 13. And at the end, as usual, you can finish by making a slip stitch in
the next stitch. Cut the thread, leaving a
good length because we'll be sewing the head with
this and secure it. You can add the stuffing to
the little body of the bear. Make sure you feel
the legs well. You can use your hook or
your finger to help you. Check that everything looks good and set the
little body aside.
11. L-H: Teddy Bear - Paws, Muzzle & Ears: For the pause, you
can start by making six single crochet in a magic ring using
the colored yarn. Pull the beginning thread to close the ring and continue with the
first single crochet. You will make one
single crochet in the next six stitches
for two rounds. You don't have to
place your marker. Just count either up to
six twice or up to 12. At some point, you can turn the little paw
inside out so that the right side faces you to crochet from
outside to inside. And at the end, as usual, you will make a sip stitch
into the next stitch, which happens to be the first single crochet
of round three. Cut the urn, leaving a
good length and secure it. Repeat one more time. Set
your two little paws aside. With the natural color, you will make eight single
crusher in a magic ring. Continue with round
two by making one single crochet in each
of the next eight stitches. Turn the muzzle right
side out and finish with a slip stitch into the first
single crochet of round two. Cut the urn, leaving a
good length and secure it. Start with the neutral color and make five single crochet
in a magic ring. In the fifth single crochet, join the colored yarn. Tighten the ring and
pull all the threads. Chain one and turn. You will make a single
crochet in the same stitch, the one that is right
after the chain, and you will make
a single crochet in the next three stitches, always picking up both
loops of each stitch. And finish with a slip
stitch in the last one. Cut the yarn, leaving a
good length and secure it. Now, you can make
the second ear. And there you have it. All the little bare
parts are done. Let's move on to
assemble everything.
12. L-H: Teddy Bear - Assembly : Assembly is the least fun part, but the most satisfying. We'll start by sewing
the head to the body. Enter the thread of the
body in your yarn needle. And begin sewing by inserting your needle into a
stitch on the head. You can start in the stitch
where your slip stitch is. Insert your needle into
the first stitch of the body and bring it out
through the next stitch. Insert the needle into the
same place where you brought it out of the head and bring it out through
the next stitch. So we'll always bring our
needle in where it came out. This will make a
very strong seam. And if you're using
the same yarn as me, be careful when you pull it
because it's very fragile. So you can always pull it a
little bit with each stitch. You can also try to push
the stuffing away with your index finger so that your needle sticks out
as little as possible. But we'll clean
everything up at the end. Join the two threads together. You can remove or hide inside the small pieces
of stuffing that have come out and be very careful
when using your scissors, not to cut too close. Tie the threads in a double knot to secure
them and hide them inside. Now we'll sew the
muscle onto the head. Ter the starting thread in
your needle and bring it in here between round seven and eight in the
middle of the head. Place the muscle so that one
of the stitches is centered. Start sewing with the end thread between rounds nine and ten. Make sure to match the stitches of the muzzle with the stitches of the head so that it stays
in its original position. When sewing, you can
always work through the stitches of the muzzle
from the inside out, and you insert your needle into the head at the same
point where you came out, and you come out through
the following stitches. Check from time to time that your muscle is still
in the right place. The top of it should be between rounds six and
seven of the head. Make sure your stitch is still centered on the
top of the muzzle. This will be important
because we'll embroider the snout right after. And finish the scene by weaving
through the first ditch. Join the end thread to the beginning one to
secure and hide them. Now we'll embroider
the little snout. You can cut about two
feet of the black thread, enter it through the needle, insert it anywhere
along the head, and bring it out right in
the middle of the muzzle. Put it through the stitch
that should be in the center of it and come out through
the one next to it, and embroiter the snout
as shown on the screen. After three or four rounds, come back up through
the head into a stitch that is right next
to it to embroider the eyes. The top of the eye should be even with the top of the muzzle. And it's important to
embroider the eye with thread so that it's as safe
as possible for a baby. Avoid plastic eyes or
anything that can come loose. To make the other eye symmetrical, since we don't have many
stitches on the head, you can cheat by entering
between a strand like this for that the two
eyes are symmetrical. When you are satisfied, you can join the thread to the beginning one to
secure and hide them. No. We're going to sew the
little ears onto the head. Make sure the right
side is facing you, the one where you
can clearly see the little braids
from the last row. Wrap the three
metal strands into your yarn needle and insert it between round four and five on one side of the head. Check that it's centered and bring the strands out at
the back of the head. Place the ear the right
way up and start sewing it between round four
and six inclusively. Repeat the same thing
for the second ear. Congratulations.
You're almost done. You can secure and
hide the thread. And we'll finish by adding
the two little paws. Enter the beginning thread
through your needle and you'll bring it in between rounds 11 and 12 on one
side of the body. So here you have round 13, round 12, and you insert the needle between
round 11 and 12. Check that it's centered
with the side of the body and bring the
needle out at the back. And you the paw between
round 11 and 12 inclusively. And do the same on
the other side. And the final step, secure and weaving all the ends. Congratulations. You
have just finished the first life companion
for future little Treasure.
13. Final Words: I hope you enjoyed creating
these adorable pieces. Whether you're the m, the
aunt or the best friend, there's always a little one who will love your
handmade gift. Let me see what you've crocheted by sharing your creations with me in the project gallery below
or on my social networks. I'll be working on new
courses, so see you soon.
 Emilie Bolduc, Crochetmilie - Modern Crochet