Transcripts
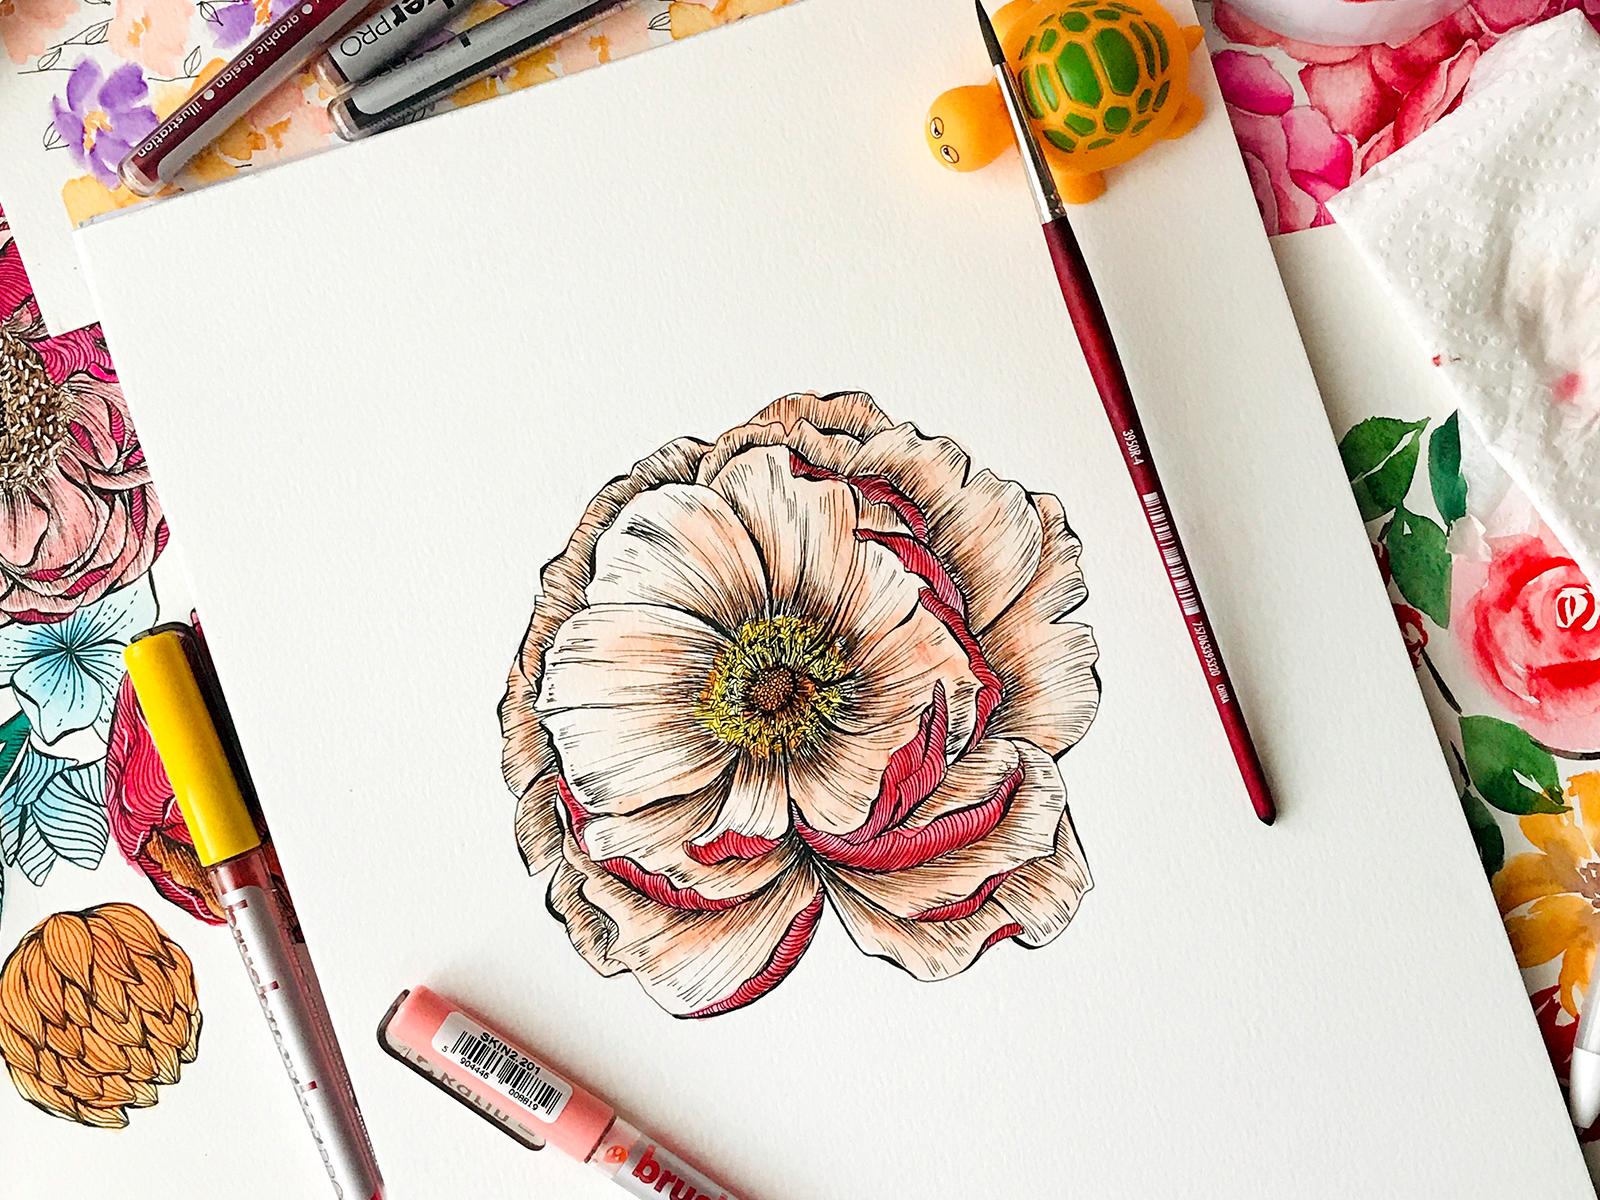
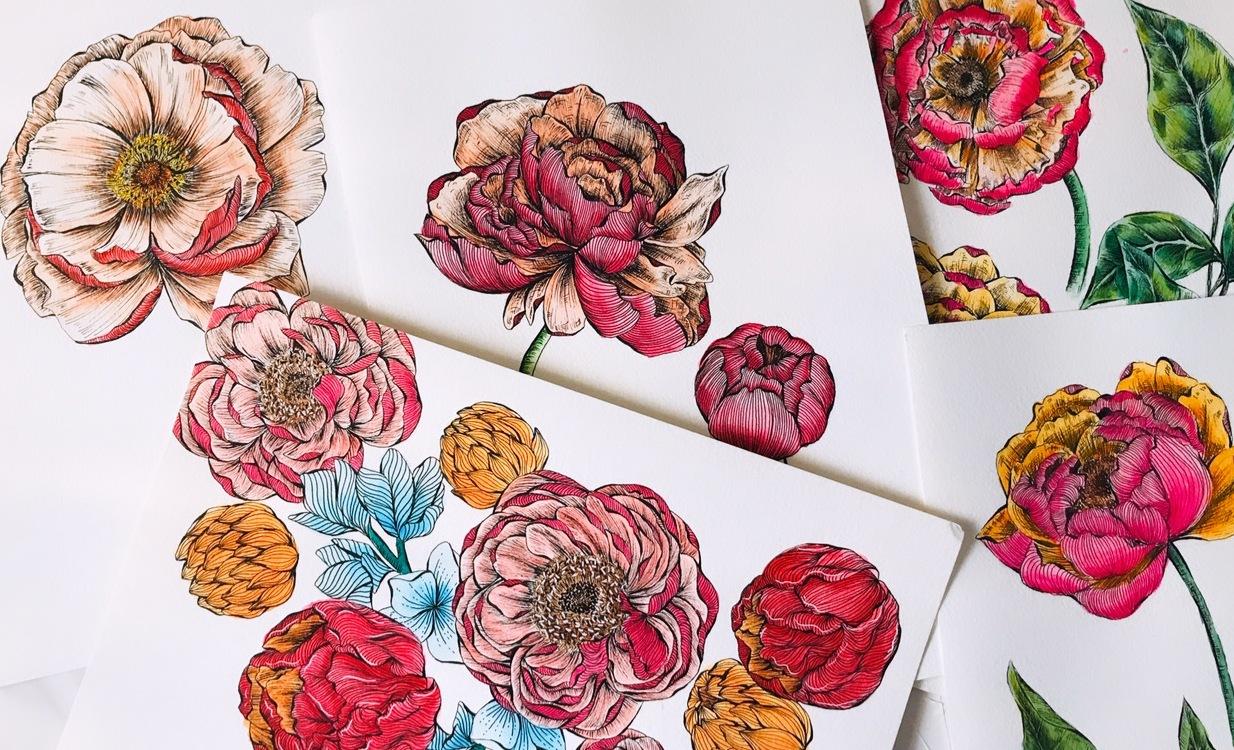
1. CLASS INTRODUCTION: Hi friends. How are you? Welcome back to my another Skillshare class this is Nikhat Sheikh and I'll be taking you through how to develop peony flowers using just the basic shapes today. Today we are not focusing much on the basic construction of the line illustrations or the techniques that you might need in creating those line botanicals. But instead, we are going to focus more on the complex construction of the flower using just the basic shapes. In this class, we are going to illustrate these peonies in this style, which is one of my favorite styles. And I'll take you through each and every step in detail from starting with the very basic shapes to creating a masterpiece in a very neat & tidy format. This class will help you in taking challenges of drawing more complex flowers, but will also teach you ending with a peaceful mind. We will learn to work on layers along with adding different line styles at each layers. Along with that. I'll also take you through a complex looking center parts or the stamen area of the peony flowers. By the end of the class, you'll be asked to submit your drawing of a peony flower in at least one perspective, multiple projects are also allowed. If you're interested in to submit a project, you can go to the projects and resources section at the bottom of this class and click Create Project. You'll only see this option when you're logged into your computer or you're using a desktop mode in your mobile phones. So let us start creating beautiful flowers.
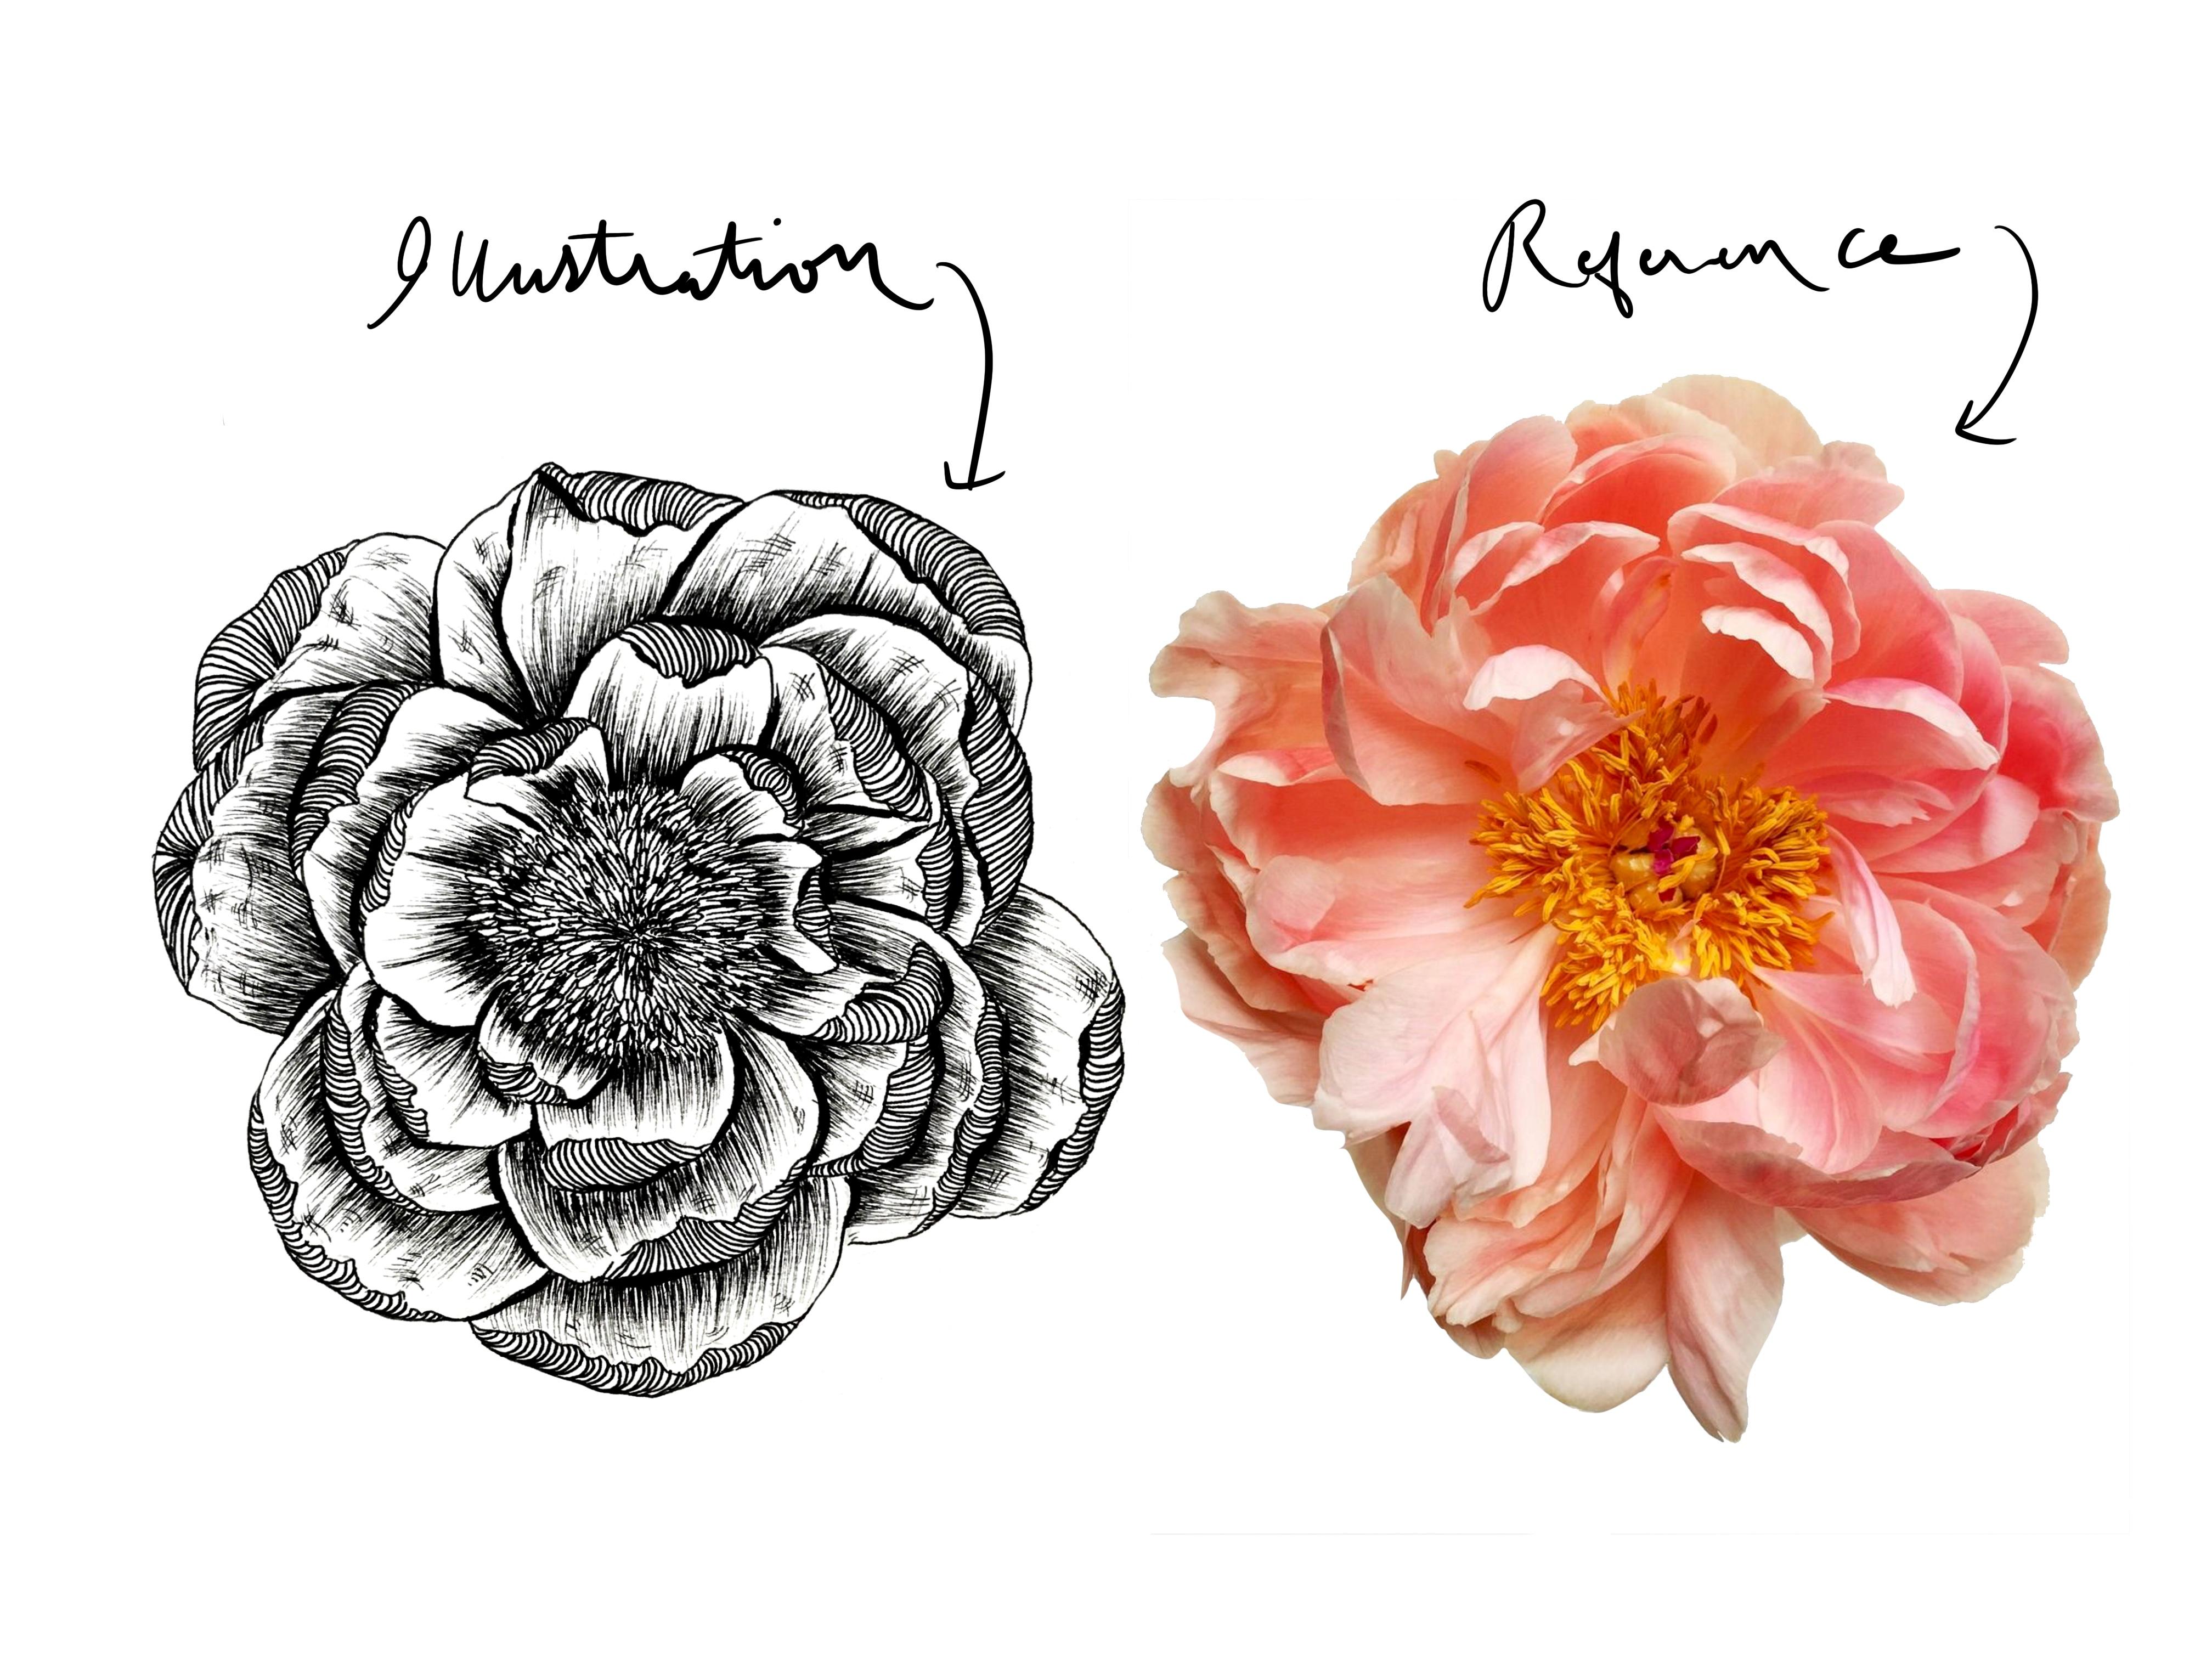
2. UNDERSTANDING THE BASIC SHAPES: Okay, so as this class is all about constructing the Peony flower and how it is formed. We will learn everything about how this flower is constructed. When I just began with illustrations or the botanical illustrations, I always found this flower really complicated and I always ignored illustrating this flower. But ever since I have learned how this flower is constructed and what are the basic techniques to use to construct this flower? It is very easy for me to, you know, construct or illustrate this flower on any kind of surface or using any kind of media. So the best thing about this flower is this has no perfect shape. The petals of this flower is always freely flowing. We need to just follow one basic shape and that is circle. So basically this is my procreate, I've just upgraded my iPad into IOS 14. I'm really loving the update. And obviously the 5X Procreate, it is giving us some new goals. I'm going to quickly insert a few images that I have downloaded from Pinterest. So as you can see, this is the really top angle of the flower, This is the top view, and we can see each and every petal very clearly. In fact, along with the Petal, we can see the basic construction of the stamen area and the center portion very clearly. So it is, it will be very easy for us to define each and every petal individually. And then we can, later on, retrieve all the basic shapes from this flower and then put it down in our illustration. So what does the main basic shape that you see here in this particular flower? I know most of you say circle and that is it actually, it is having like a really big circle. If you can retrieve the first circle from this illustration, I can just show you here. So this is the very first circle that we can retrieve from this reference image. As you can see, the circle totally fits our flower. The next thing, what we have to do is we have to just divide the whole segments of retrieving the basic shapes from this flower into very different stages. So the first stage is to retrieve the big basic shape from the element that you want to draw. But the next thing that we can retrieve from this basic flower is the center portion. This also seems very circular to me. This is also the circle. The whole construction of the flower is circular only. So the next thing, the first shape that we have retrieved is a bigger circle. And the second one is the second or the middle circle that is a bit smaller in size as compared to the bigger one. Now, what we can do is we have to just divide the segments into four or five segments or whatever ratio you might like. So I'm going to take a new color here. I'm gonna take some light green and I'm going to just draw some circles over here just to understand the construction of this flower very easily. So you can see, I'm just drawing a few tiny circles around the center of the circle, the small circle that we just drew. And I just drew few circles around here. And as you can see, we have already formed a Kind of flower here, if I hide this, we already, have one small circle, the centre of this main circle. So this can be the blooming part of the flower where petals have just started blooming out or coming out of its origin. So the next thing that we can see here is there are so many petals at the backside. So we can retrieve basic shapes, all of those petals as well. So I'm just going to draw few more circles around those like this. Now we have to follow just one basic circle, that one is the smaller circle and we have to just draw circles around that particular one. So I'm just going to draw a few more circles around here. If you want your petals to be bigger, you can obviously go and create some bigger circles. So as you can see, I know this looks really complicated, so I'm gonna just hide a few layers so that you can see the whole illustration properly. So as you can see we have already constructed the basic flower. The flower shape is already now visible here. So the next thing we can do is if you want, if you really want to add some more petals around basic shapes onto this flower, I'm just going to hide the bigger circle for a minute just to give you a glance at how the flower will look. So this is how basically this specific perspective of the Peony flower that we just took as and reference is created. And if you really want to add some more petals, you can just simply make a few more circles. Let's see here. Yeah, I'm just going to follow this one. Well, this will be the center, this will be the basic origin of the flower. And then I'm gonna continue making the petals around this particular small circles. If I add some more circles around here or something like this one. So this can be the bigger petal at the backest side of the flower. So let's say these are the petals that are really big at the backside. This will be just for our reference because I'm just explaining to you how you can be creative in forming your own kind of circles. This is actually not in the reference picture. As you can see, The view of the flower is very limited. If I hide, this main circle or the bigger circles, it will look exactly like how it is in the reference. So if you want to get obviously create more circle, then you can divide the shapes into more different kinds of shapes. So if I hide the reference image, you can see the picture a lot clear that, anyone can see that this is the construction of a Peony flower. So for a quick revision, I'm going to again quickly insert one another picture of a Peony flower. So this is the flower. It is not necessary that you have to have a procreate to understand the basics, you can obviously just look at the image and look at the reference image and extract the basic shapes onto the papers. So I'm just using this software just to explain you all a bit better. As you can already identify the basic shape of the flower. is the bigger circles. So I just added a bigger circle over here this one is the basic shape just added new circle. And you can see clearly that the flower absolutely fits in this circle. So the next shape that we can retrieve from this illustration or this reference image is this is the second shape, here. This is the basic shape that we can retry. And if you can already see it has the flower has an angle, that flower as the perspective and this can be more clear in understanding that the distance between these two lines as a comparison to these two lines is a lot different. And that's why we can say that this flower is at a specific angle. So when we finally, constructor a flower. If we moved the center circle to anywhere around the circle, the flower will form or take the exact angle as we want the inner circle to be or we want to specific perspective it to be. So as you can see, our inner circle is shifted from the center a bit. And that's why in flower that will be finally constructed, will have a specific angle to it. So now let's retrieve a few more shapes around here quickly and I'm going to quickly form a new circle around here. This can be the smallest circle, and then I'm going to retrieve all the petals. And then again the rest of the petals here. These are the petals, two more petals. Okay, so for a really quick revision, this is reference image, and this is the basic shape that we can retrieve from the reference image. The next one that we retrieved is the smaller circle that is inside the bigger or the main circle, that third shade that we retrieved is a really tiny circle around inside this particular flower that can be the center portion of the flower. And then the rest of the shapes that we have retrieved is these three main petals. As you can see, we have a perfectly retrieved the shape around here. And then the last one is we have retrieved All the basic shapes from the petals around the bigger one. So that when you hide the basic main shape, the bigger shape and the reference image, you can see that the flower is already reflecting that it is at an angle. So I hope this basic as clear. And now I'm going to shift the whole designing process from my iPad to my paper. And then there we can understand how to retrieve the basic shapes from the flower just by looking at it.
3. STARTING WITH SKETCH: Okay, so I hope by now you already know how the ponies are actually constructed. So the first rule of drawing any flower will be retrieving the basic shape, the basic main shape that will be circle. So we are done with making the basic and the primary shape of a flower, that is the circle. So the next shape that we are gonna retrieve from the reference image is the center circle. That will be a really small circle that can be inside or at the exact center. You have to be very sure while drawing this particular circle. If you want your perspective or if you want the flower angle to be exactly on the top position or exactly on the 90 degree position. Make sure that your center circle is exactly at the center. Because if you shift this particular circle, the whole angle of the flower, the whole perspective of the flower will change in the end. So be sure, very sure about making the inner circle where you want to put the angle of the specific flower. So I'm going to keep the whole flower at those very center area, at the very top position. So let's keep the center circle at the very center of this whole image. So now what we're gonna do next is we're going to just start making few circles around this small circle, overlap the circles around here. And let's not be very particular about the sizes of these circle as well because the peony has petals of almost every different sizes. So let's experiment and be creative here. So I think we're done with making few circles around the center circle. And now I'm gonna make few circles for the back petals and that will be a bigger, a little bit of bigger as comparison to these particular circles. So I'm gonna make a few more circles around here. Few more. Again, we're not going to be very specific about the size. If you want, you can use a rounder or anything that gives you a perfect circle or if not, loose hand drawing is always good for the natural look and the natural results, as flower is not constructed perfectly with the geometrical shapes and proportions, you can obviously go with making a free hand drawing. So I think I'm done with making the circles of the outer petals here. So yeah, so basically I am done here constructing the flower, main flower or the basic shapes of the flower here. So now I'm going to slowly darken the lines where I can see each and every petal clearly in the folds and everything will be given afterwards. Once we are very familiar with where the petals are coming from. So I'm gonna just slowly go and start adding few more shapes here. Each and every petal of this peony is in this shape. So when you want that one specific side of this petal is folding, so you can obviously give a folding twist to it. So it will automatically appear that petal is folded from that specific area. So yeah, we will keep this in mind. You can change, you can shift this particular shape to any direction you want, if you want, you can give folding from here, here or anywhere you want, it is not fixed. You can obviously play around, but you have to be very specific that the foldings is always mainly focused at the center itself so that if the flower blooms, the foldings will be focusing at the center origin, there will be few petals that might be folded on the other direction, but mostly at the center only. So I'm going to quickly retrieve the basic shapes around here by giving some folds and also throughout the whole process, I'll start adding a few more tiny circles and tiny petals around here so that our flower will look as if it is having a lot of petals. So as you see, I am slowly sketching out the design or the construction of this flower. I'm slowly illustrating actually. I'm just sketching, but I am keeping that thing in mind that I have to illustrate it and have to be very specific with the lines because when I'll start inking, I don't want to be confused with that where this specific petal is going or coming from. And I have to be very sure that, yes, this particular petal is of this side or this angles. So I'm just keeping the center circle untouched because we want to draw the center portion of the stamen of this flower in a very detailed form. And we don't want it to look exactly like circle. We will define this in basic shapes as well. But first, let's compete with the florals with the petals first. So we will just do some final finishings for the inner petals only for now, because when we go for the outer side, we don't want to mess it up and we want it to look more natural. And very formatted, you can start erasing the unwanted lines that might distract you from retrieving the basic or the main shapes of each and every petals. So just to make it less confusing, you can parallely use your eraser and erase all the unwanted lines. I'm going to erase these lines because this is like disturbing me a lot. during the process. So, I've just erased the basic unwanted lines and I'm going to continue using the guides that we just made as a reference. So here you can obviously experiment with the shapes and angles and whatever you like. If you want, you can make the edges or the foldings really smooth. Or if you want you can just give some crisp to the edges, like some uneven, cracky edges. Because ultimately I'm gonna do that by inking only. But just for the sake of a better understanding, we can just simply use an uneven, broken lines at the edges or the foldings of these petals. So it will be very clear that this flower is a peony. So using the same technique, I'm going to quickly do all the rest of the petals. And later on we can proceed with the inking procedure.
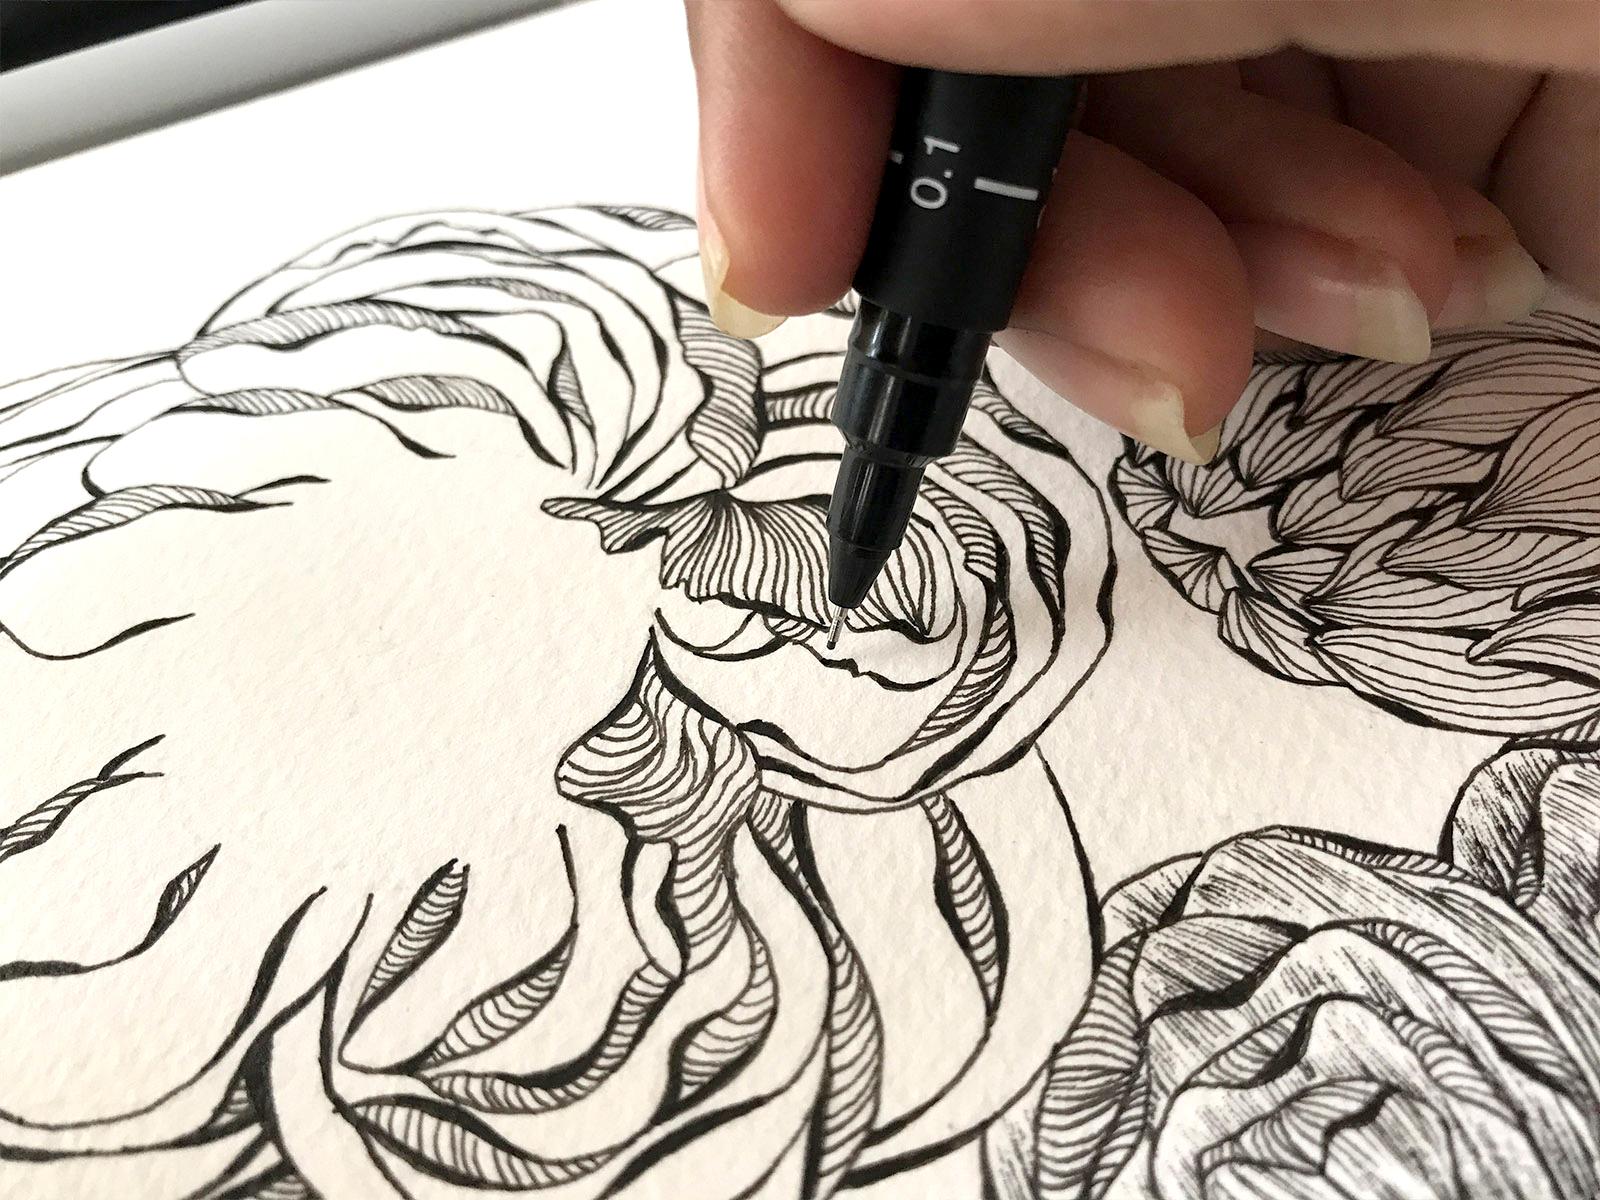
4. PREPARING FOR INKING: Okay, so now as you see that I have almost constructed all the petals here. And the next thing what we're gonna do is we're going to just erase the main circle that we did earlier as a guide and we don't need that guide. So I'm just going to erase that and other few lines if needed because we don't want to be very confused during the illustration process. So see Now we don't need any kind of reference because the illustration is around on our hand only. And we know that we can make the rest of the illustration from this particular process itself. We don't want to make the whole illustration look exactly like the reference. And we want to be creative and we want to have our own unique feel to it. The most of the part is already constructed here. And now the next thing we're gonna do is we're just going to lighten up the whole pencil sketch so that while inking, we will not get confused and ink properly. So I'm gonna just quickly erase the whole illustration. And also by erasing it gives you a free mind to be creative actually, when you start inking and you don't see a line, a line, specific line there which you have already sketch to, you know, use it as a guide and you, you've been, you don't see that line. You start drawing it by our own imagination. So it's a very good practice to, You know, sometimes you can, erase a bit harder so that you can miss out some lines and you can experiment with those by making some extra additional lines to that. And we don't end up drawing the exact same sketch. Erase it a bit harder. Just hard enough that you can see most of the lines. Not few lines, but yes, I think you but my point here, there is no specific material guide here. You can use any pen, you can use any paper. this is just for practice purposes. But in case you're wondering what paper I'm using and what pen I'm using. I am using this very inexpensive watercolor paper. This is from a local stationery shop Because I don't want to waste any kind of high-quality paper in my practice. And this is the very best way to use these supplies for practice purpose because this comes very handy, this comes very cheap. Sometimes I use document paper to practice out the illustrations. And for the pen purpose, I am using this Uniball fine liner pen because these are my favorite and these really end super, super long and comes very inexpensive as comparison to the other pens, there are. Winsor & Newton is my another favorite pen, but it runs out so fast that, and also it's very expensive to use it in that regular way. So I prefer using Uniballs because these are very versatile. So I'm using a very basic watercolor paper and a Uniball fine liner. So I'll be using the Uniball fine liner in 03 because I mostly prefer this size in my outlines because this particular size not as thick & not as thin. It has a very subtle kind of thickness to the nib, which I think is perfect for my illustration purpose, I'll quickly start outlining or inking the whole illustration. now. Again, we want to be very specific that we should not touch the circle unless the outer petals is completed. Because if we touch the petals or either way you can do it either we basically so I just prefer to not touch the center unless my whole gets completed because I find that very, in a very unique way to present the center portion of the centers stamen area in a very natural way. So let's start inking and I'll just start drawing basic broken lines. See, I don't see the line guide here. I don't know if you can see or not, but I don't see. And now I am free to shift this petal at the back and this petal at the the front, I can do whatever I want from this particular line. So basically, I will just add some extra line to it. I don't know, I'm just now illustrating or inking the design freely because I can only see a few parts of it and most of it I have erased. So the output will be a lot different than we have illustrated. In a very light hand...please make sure to not overdo the lines because ultimately it will ruin. the perfection of the lines And the beauty of lines is mostly in very single and confident strokes. So if you're not really good in drawing lines and you have just started out making line illustrations. Make sure to check out my other previous class. Because I have taken a class on line botanical where I've explained all the basic rules and all the important things that you might miss while practicing. So make sure to check that and perfect your lines first and then you can, you know, practice out these flowers and it will give you a very different results as comparison to what you are achieving rite now. So the results would be very different. Once you attend those class.
5. INKING BASE LAYER: Okay, so as we see, we are completed with the inking process. So now I'm gonna quickly erase the rest of the pencil mark because now it's time to give the finishing and do the detailed work. So we want to clear everything. We have to remove all the pencil marks from this illustration. We have to be very careful that whatever we draw you have to be very particular about cleanliness, your painting has to be clean from all the four sides of the paper. And this shows the quality of your work. This shows how dedicated you are and how patient you are towards your work. So it is very important to keep the surroundings of your main illustrations very clean & very tidy. So if you've already watched to my earlier class that was totally based on starting with botanical illustrations. And as this class is for intermediate students, so I'm going to just skip the basic parts about what we're gonna do and how we're going to do. So here, I'm going to do some line experiments by drawing some lines, like two dots, some hatchings, and maybe some straight lines, or wavy lines. Something like that. So we're gonna do some various line stylizations in this design. And again, I'm going to keep the whole center blank as is. And I'm going to also keep these tiny petals that are touched with the center portion untouched until we fill all the rest of the areas of the flowers. So let's decide where we're going to use, what kind of line stylization. So as my favorite thing is to mix it up the hatching and straight and wavy lines in the floral. So I'm going to keep all the inner portions or all the insides of the petals, each and every petal in a hatching form and all the outer portions of the petals, each and every petal in a very curvy lines or straight line, something like this one. So starting with any kind, you can pick any leaf here, and start with the hatching. So I'm gonna start hatching from here. So again, we have to keep the thing in mind where we have to, you know, give the highlights and where we have to give the shadows because as this particular petal that is underneath this petal, this petal will definitely make its shadow over there. So I'm going to slowly make and slowly hatch all the lines, all the shadowed lines actually. So, I'm going to quickly do the hatchlings around specific petal. So I'm gonna use the same hatching technique. I'm still using 0.03. If you want, you can switch to 01 because the 01 size will give you a different result. So quickly do some hatchings again, see the results as comparison to this, the results over here are completely different. This is more lighter as comparison to this. And I think I'm gonna to continue with this one only and pull the rest of the areas by just giving some hatchings on the shadows. We don't want to touch any other areas of the petal because we want to keep it very light and delicate flowers. So I'm just going to give all the details are all the hatchings to the shadow part itself, if you want, can obviously go crazy here and give some extra waves to it and do some extra hatching, some crosshatchings. If you are already aware of the technique, then you can definitely go in some hatchings, cross hatching or whatever lines stylization you have came up with.
6. WORKING ON LAYERS & LINE STYLIZATION: Okay, so as you see, we are done with the basic hatching or basic sketching of the lines here. But if you can observe here, there is the depth that is missing in this illustration. And the design still looks so flat because of the straight lines. So the next thing that we can do here to enhance this illustration is we can add another layer of the basic hatching that we have just done. But the thing that we have to keep in mind is we have to just keep the dark hatch layer in just at the edges itself so that it can add up little bit of enhancement to the illustration. So I will just add a little bit of dark layer at the edges. Because this is the part that most people miss out in there illustration, and they think that why is my illustration not popping out & why it is not looking in a really good way. So this is the thing that you can add. You can add a second layer to it and give darker values to only some of the specific points. As you can see, this does have that darker effect. Now it's very clearly visible that there is a depth in this, in the formation of these petals. So I'm gonna just give the depth of the second layer of the hatching to the entire illustration quickly and just for a quick revision, don't go straight up to the end. Just add a little bit of flair, add some effects, and give the dark layer, again, make sure to not give the darker edges too dark, but yes a bit of the darker values to it to give a little bit of enhancement in the design. See now we have covered the darkness around here, and we do have some darkness around here as well, but still I'm gonna enhance it a bit. Okay, so as you can see, we are done with the second layer of the hatchings and now our illustration is popping out. The next thing that we're gonna do here is we're going to add a third layer to the hatching itself, and that can be the top foldings shadow where we can just experiment with our hatchings, a random hatching so that can give that natural effect and the natural look of this illustration. . . Okay, so we are done with the center or the inner side of all the petals. And the next thing that I'm gonna do here is I'm going to just quickly draw those wavy lines in the outer portions or the outer side of each & every petal. And I'll make sure that if my petal is going in something like this direction, for suppose, if the fold is like this, I'm gonna make sure that the lines will be starting from here and will go from here to here. So we have to create that transition that our lines will follow this center rule and follow along the area. So I'm gonna quickly draw lines using the same technique, but I'm going to expand the center here because I don't want to create a darker effect at the centre here. So I'm gonna just give a little bit of space in the front and widen up the line as I go back. So yes, I'm going to quickly draw the next things over here, with a very light hand, I'm going to quickly draw the rest of the lines. As you can see the fold is proper here. We don't want to give any specific angle or specific location. So I will quickly go over to the point number three because I want the outer portion to look a little bit of darker as comparison to the inside. So in my previous class, I have already taught how you can experiment with these lines and how you can give different values using these lines. You're using any kind of lines. So basically I'm using the same technique over here as well. The more slowly and go while making these lines, the more beautiful your artwork or illustration will be. So you have the most important factor in this whole procedure is to be very, very patient. . where we are. Okay, so as these three petals have an upward direction, but this petal has a downward direction. So I will draw the lines from top to bottom in a circular motion like this.
7. ADDING DEPTH: Okay, so we have completed giving all the different values and different kind of lines in this illustration. And now the next thing that I'm gonna do is I'm going to play with different thickness at all the overlapping sides of this illustration on all the possible areas where there might be the darkest shadow in this illustration. So I'm just going to add an extra thickness or an extra line of the shadow. I'm just enhancing the drawing a little bit more by giving the extra depth or definition using my fine minor. Again from Uniball itself We don't want to fill the whole illustration with the thick lines because ultimately we don't want that Okay, so we are done with giving all the extra depth or all the extra dimensions that we are looking for well in our illustration. And I think this is good enough to stop now. And the most important thing is we should know when to stop because or else we can end up ruining our illustration. So here I'm stopping and now I'm starting in with making the center portion of this illustration. So for that, I don't want to give the center portion exactly a geometrical circle shape, but in fact, I want to go in a very free form. We want to give that natural looks. So for that, I'm going to quickly take 03 pen and start making the design.
8. WORKING ON CENTER PART: Okay, so as we are about to draw the centre portions without any guideline and without any reference because the center portion of every flower is very natural and is imperfect in its own way. So for that, I'm going to just quickly draw some of these like a little bit of long curves. And we don't want to go like this. This looks very symmetric, but we want to go in a very odd manner, so we don't want to make it look like really geometrical or symmetrical way. We want to go in a very loose and free form view. So I'm just gonna quickly follow the same rule and draw the details over in the central portion of this flower. So again, we want to keep that in mind that this is the centre and we want our whole design to be surrounded by this circle only. So when we go here, Our design follows this direction, if we go here our design has to follow this direction , likewise here, here and here. So we have to follow that specific rule and fill out all the spaces. So the reason why we have left the center area blank while illustrating the whole flower is because as you can see here, the centre portions or the center details are not in a very specific curved circle. And that is what we are needing for our illustration because the center of the flower is not exactly in the circle shape, but yes similar in circle shape and in a very uneven circular format. So I guess we have to stop now because I think I'm pretty much satisfied about the results here. So the next thing I'm gonna do in the center is I'm just going to quickly give a little bit of hatching just to give that natural effect and don't want to continue the same detail throughout the center also. So now to give the extra dimension or to give extra depth to the details here, I'm going to double layer the few areas at the end so that it can give the extra, depth or extra definition to our design. I really enjoy this process because this is the process where I see my illustrations coming to an another level. Basically, it all depends on the highlights and the shadows only and how much time and effort you can put in giving all those details. .
9. FINAL THOUGHTS & PROJECT: Okay, so finally we are done with learning the new secret or creating a complex line illustration. I told you it's not as complex as it looks like. So now your project is to create a blooming Peony flower in at least one perspective using the line stylization that I just taught you in this class, looking forward to what you create. Till next, See you soon!
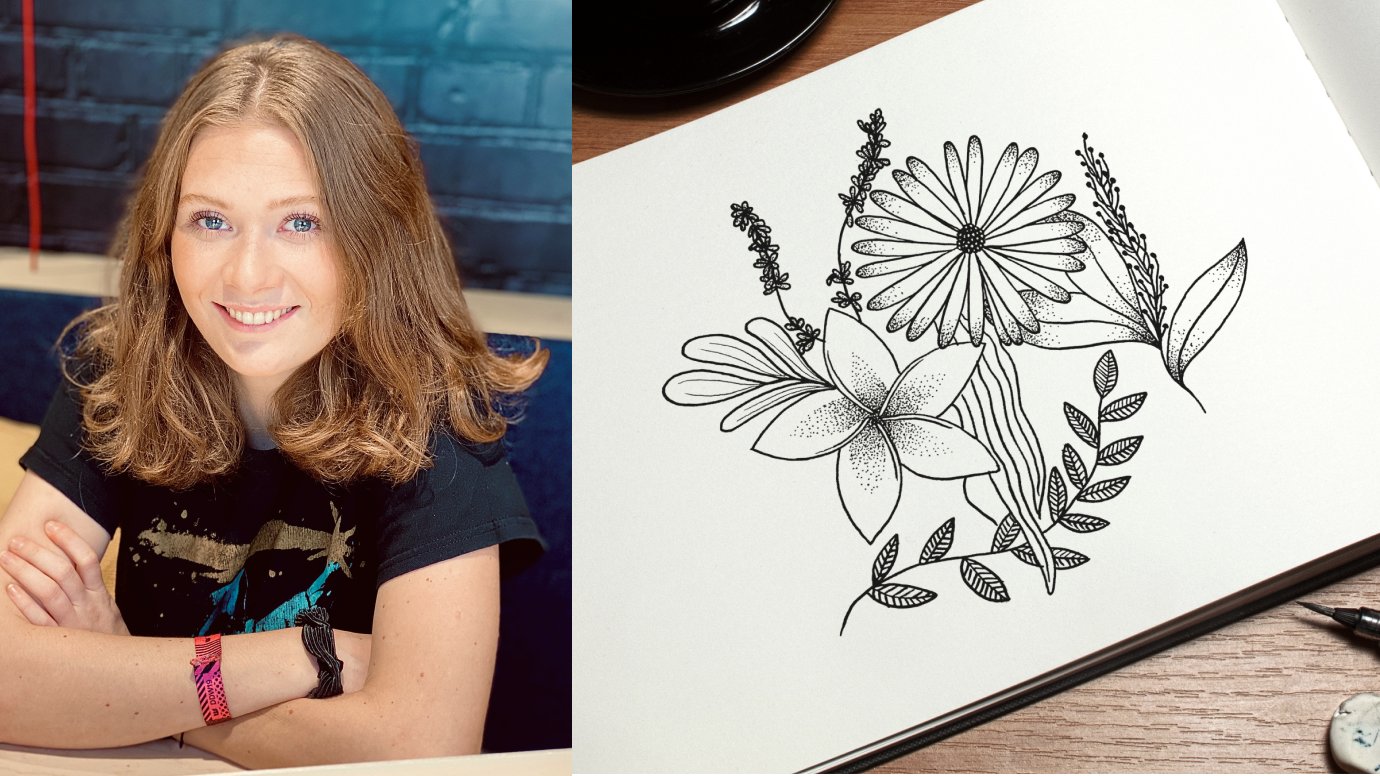
 Nikhat Sheikh, Freelance Illustrator