Transcripts
1. Course Introduction: Hi, I'm Jen Lazan. I'm a top teacher
over on Skill Share, but you may have seen my work on my YouTube channel,
the Creative Studio. I've been a freelance
graphic designer, illustrator, and educator
for the last 16 years. I'm based out of the
Midwest and I love helping others take their creativity
to the next level. You can find my work over on
bella Sophia creative.com, and I'm looking forward to
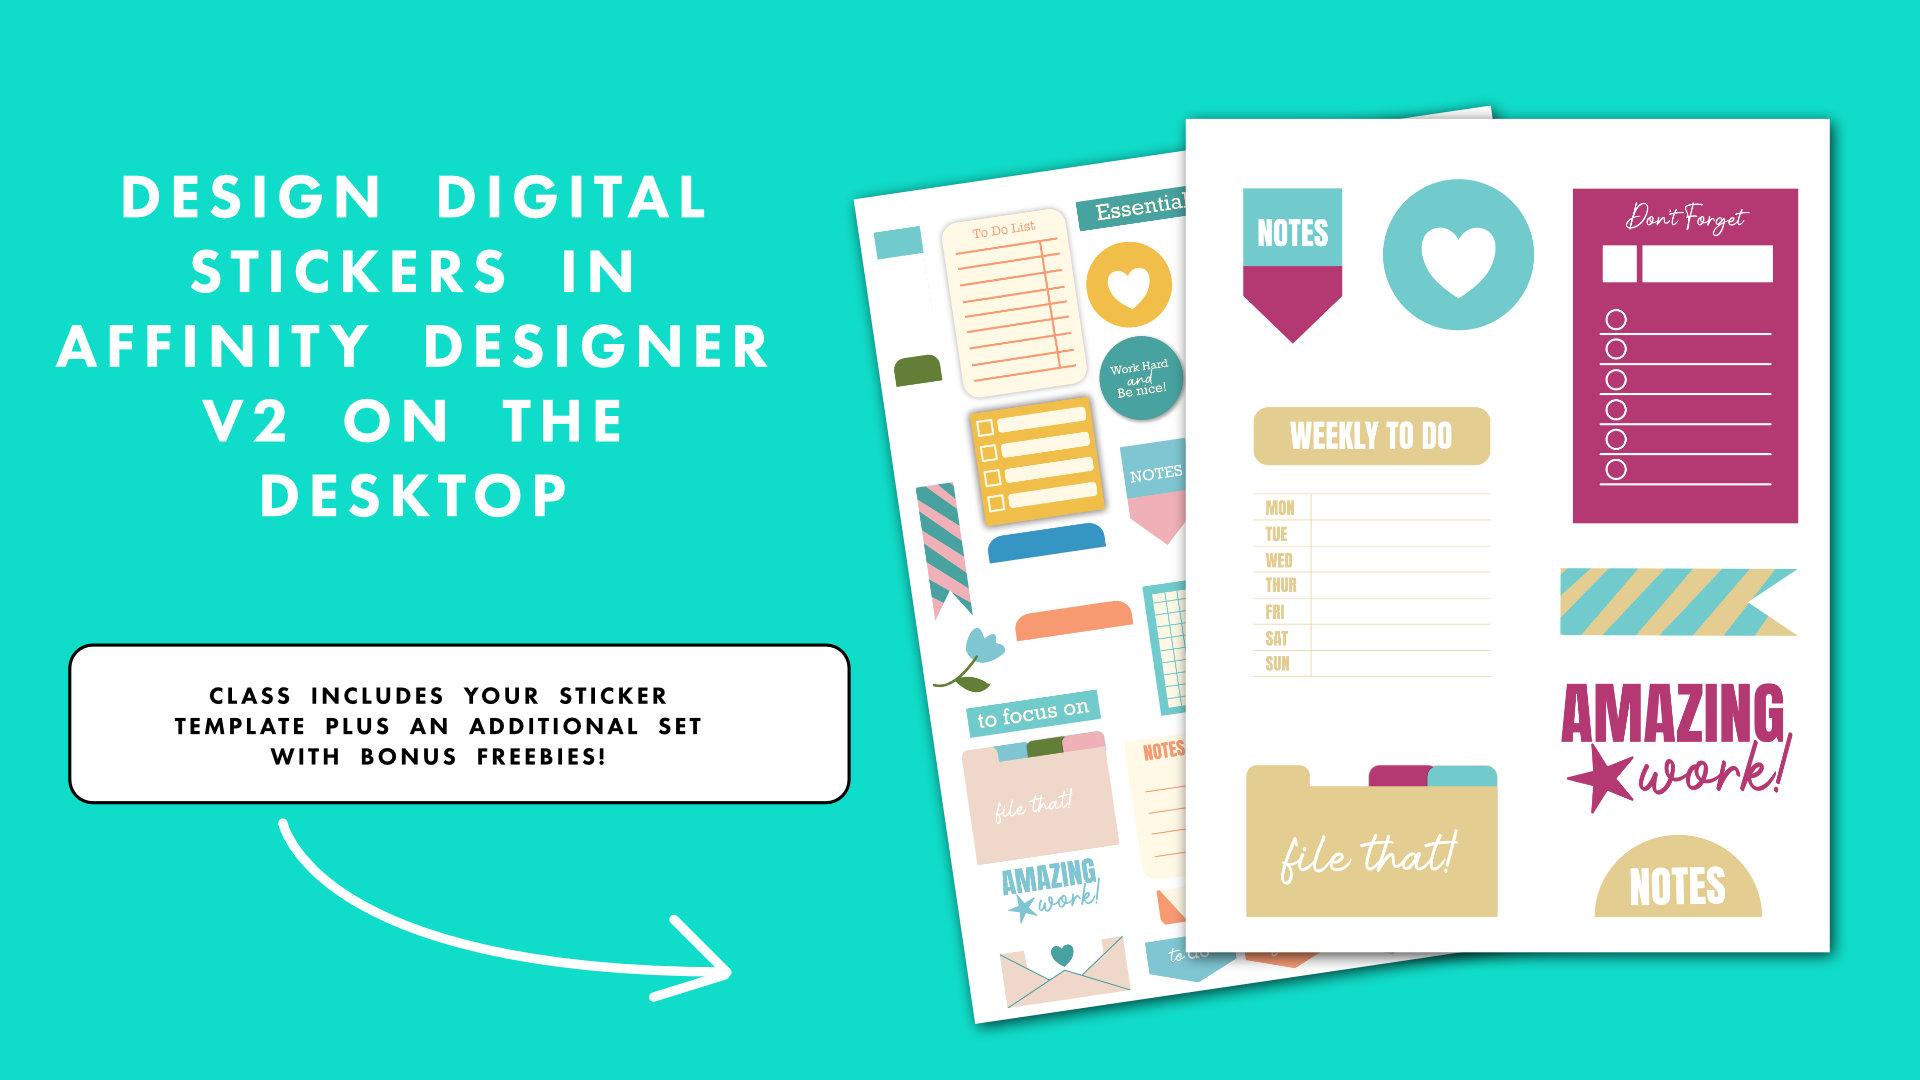
creating with you all today. So digital planning
and sticker design in general has continued
to grow in popularity. From the hobbyist to the
professional creative, making your own digital
stickers has become a popular way to channel your creativity or turn
it into a side hustle. One software that I am a huge supporter of and
that I have found to be a great alternative to the traditional Adobe
Suites is affinity. There are three professional
apps in the Suite, designer, which is
a vector program, photo, which is raster
based and publisher, which is meant to be
for layout design. I prefer designer for
sicker design because it allows you to simply and
quickly create precise shapes, align and space items easily, add actor effects to the shapes, and explore your
images as slices to PNG files without
a background. The beauty of the affinity
programs is that all three are both on the
desktop and the iPad. With Cava's recent acquisition, I'm sure more and more people will want to learn about them. This tutorial today,
we will be working in Affinity Designer
to create stickers. We will be working in
the desktop version. These can be used as
either digital stickers for use in digital planning, or you can export them as a transparent PNG for use in something like a sticker
cutting machine like a cricket. I'll walk you
through the process of creating the stickers in the program while giving you a rundown of the
basics of designer. Then I'll show you a
quick way to export your individual stickers
for use. Let's get started.
2. Setting up your File: So we're going to
start this project by launching Affinity Designer
two on our desktop. So first things first,
we'll want to go and kind of acclimate ourselves
to the menu bar. So at the very top here is our main menu bar where we
can do things like file, save ads, edit, copy paste, add text, adjust layers,
and things like that. On the left hand side,
these are our tools, and on the right hand side, this is all of our studios. So you'll find things
like our swatches, colors, transform studio, or
layers and things like that. So let's go to the top menu. We're going to select File, and then we're
going to select new I just set up my
file on a basic 8.5 by 11 page setup.
Nothing special. I want it big enough
so that when I import these digital stickers
into an app like good notes that I still
have good quality. But if you use an app like
good notes or Zoom notes and their specific size parameters, I would highly suggest
you visit their websites, check out the app information, see if there is a
section with a Q&A and look for specific
dimensions for those apps. But we're just going to
select a letter size, and then for our layouts, we want to make sure that
it is vertical format. So in half is your width
and 11 is your height. I'm going to keep my DPI at 300 and then I'm going to
select Create Artboard. I'm going to go into color,
and this is really important. You can adjust your color format if you are planning to print. Typically, I'll opt for RGB when I'm working
in digital format. Again, I want to make sure I
could possibly print this. So I'm going to select CMYK, and then the next thing
we want to do is make sure we select
transparent background. And this is vital to ensuring that when
you export your PNG, you're going to have transparency
around your stickers, and then we can just hit Create.
3. Importing Your Sketch: Now that we have our file setup, I want to place my
sketch that I created. So I'm going to go
into my file option here in the top
left hand corner. I'm going to scroll
down to place, and I have a project file here. So I'm going to select my file, and then I'm going
to get this little, like down facing arrow. You need a tap on your
artboard to place your file. I'm going to place it
right in the center. And what I want to do is
adjust how transparent this layer is so that
it makes it a little bit easier for me
to work on top of. So I'm going to select
my JPEG of my file here. You'll see it on the
right hand side. I'm going to pull
my layers up just so you can see it a
little bit better. Also, if you're
noticing that you don't have the same
layers that I have, you could always just go up
to your menu, select window, and then go into your
studio options here, and you can show
your left studio, show your right studio, and
then you can also scroll down and add these
additional options here. And I'm going to tap on where it says untitled
artwork dot JPG. That's my sketch. And I'm going to select the opacity here right next
to where it says normal. And currently it's at 100%, but I'm going to drag
this little bar over to the left to decrease the opacity just a bit so it's easier for me to
see what I'm doing. So the first thing we'll
want to do is kind of play around with some
of our shapes here. So the first thing
we'll want to do is play around with some
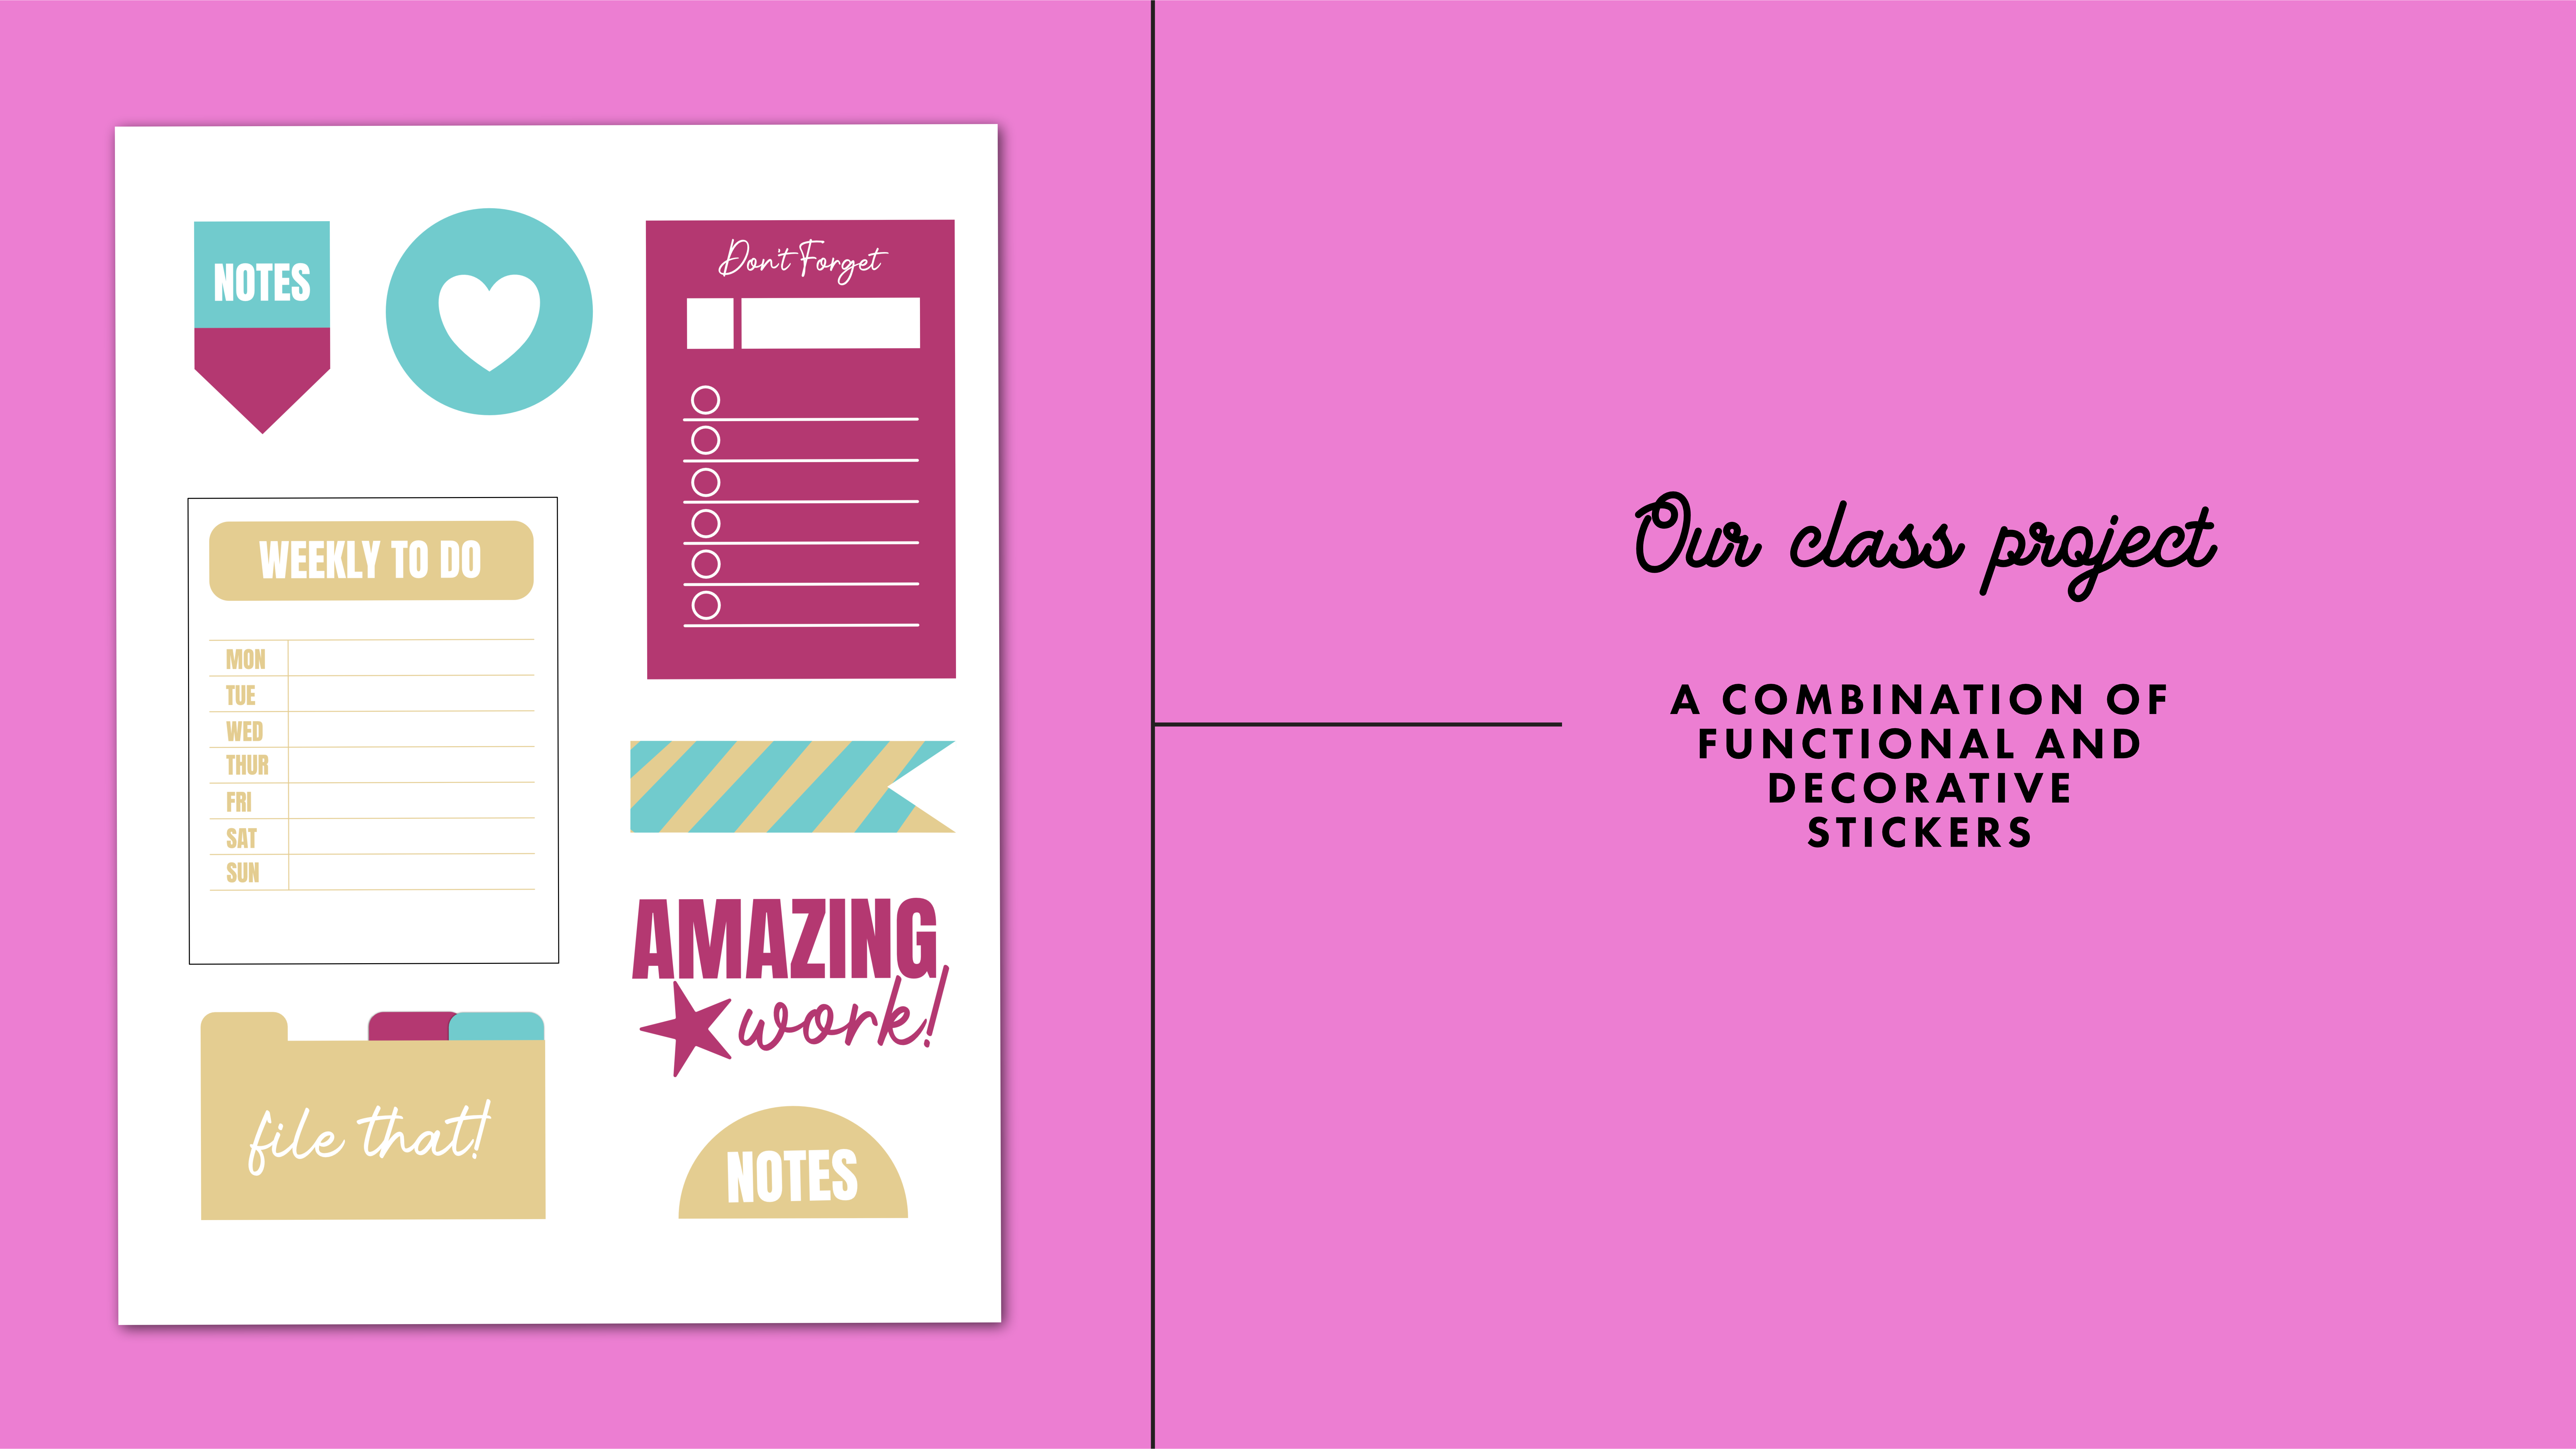
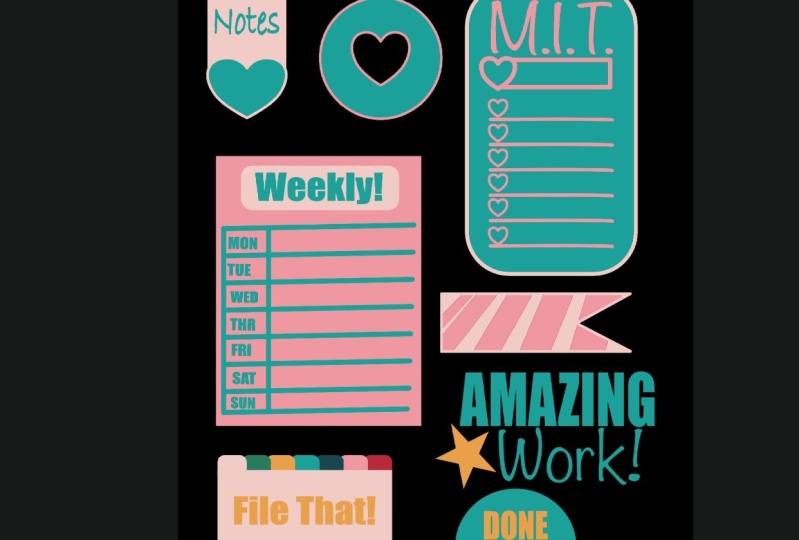
of our shapes here. So some of these designs, these are pretty much like
functional digital stickers. I have some fun
little creative ones, but for the most part, I wanted to add in some really functional
ones that you can use when planning out and mapping out your
day or your week
4. Vectorizing your Stickers Part 1: Tool. So if we go to our
left hand tool bar here, we go all the way down
towards the bottom, you'll see different shape, and then you have what looks like a rounded
rectangle tool. If you tap on it and then hold, you'll see that you get all
these additional options. And these are what I like to use when
building out my shapes. I'm going to add a layer on
top of our current drawing, so I'm just going to go into my layer options menu here and I'm going to scroll
down to new layer. And it's just going
to give me a layer right on top of my sketch here. And I'm going to change this
layer's options from pass through to multiply so that whenever I add something
on top of that sketch, you're going to be able to
see it still underneath. So I'm going to go back
to that rectangle tool. I'm going to go and
update my colors as well. So I'm going to go
to my color options, and I'm going to do this in
a color that's easy to see. So I'm going to use that rectangle tool and
basically follow this shape. And this sketch, you don't
have to follow it exactly. The idea is just
that it's kind of giving you a guide
to work through. And then I'm going to go
into my shape options here and I'm going
to tap and hold, and I'm going to go
into my triangle tool, and then I'm going to zoom in, and I'm going to create a triangle underneath
this rectangle. If we zoom in, you'll see that you have
this little kind of, like, arm that's sticking
out of your bounding backs, and this allows you to rotate. So I'm going to hold shift, and then I'm going to
rotate this so that it rotates in 15
degree increments. And that way, I can get
a perfect 180 rotation. And then I'm going to zoom
in just so that I can see match up my edges
and my corners here. And you'll see that
it matches up when I get this kind of green
little pop up line, and that's because I have
magnetics turned on. So if you go to the upper menu here kind of towards the right, you'll see what
looks like a magnet. So when you turn on magnetics, it allows you to line up shapes much more precisely that
everything is lined up. And what we're going
to do is essentially take these two shapes and
combine them together. So we're going to select
this black arrow tool. We're going to drag
over both those shapes. And then we're going to utilize
the geometry functions. So I'm going to go
up to my layers menu here and I'm going
to select geometry, and then I'm going
to then select Add. And basically, this adds both of those shapes together
to give us one shape. And if we go to our
right hand side here, you'll see that these two shapes have now been combined into one, and then we can even
select our node tool, which is a little
white arrow tool, and we can adjust the nodes
if we need to we can also utilize a shortcut to do the same process in this upper menu bar
towards the right. You have all of your
geometry functions really easily accessible. And then what we'll
want to do say we want to add a different
color on top of this, we can do that by just adding another rectangle uptop and
then updating the color, going to our full fill, and then we can update
the color here as well. Now, so you want to
add text on top, we just need to go
into our type tool. All the way towards the bottom, you'll see something that
says Frame text tool. If you tap and hold, you'll also get something
that says artistic Text tool. I like to use the
Frame text tool just because it's
easier to kind of give me a better idea of where things are
going to be placed. I can go on top of the little
flag that I've created, and I'll create a frame by
tapping on the screen and dragging out and that little blue frame will essentially be where
we're going to write. So then I can go into
my upper menu bar. You'll see your type options where you can change your fonts, change the size of the font, and I'm going to make sure that the color I'm using
is easy to see. So right now, if I go to my
color studio, it's black. I'm going to change it to white, and then I'm going to hit Capslac and then
just write notes. And then I'm going
to adjust the frame. Going to select everything
within the shape, I'm going to drag over it, and then I want to make
sure I group it. Shortcut for this is
just to hit Control and then right click and
then you can select group. It's really nice with
Affinity Designer, you're able to toggle between
three different personas, the pixel persona,
which gives you some of the options that you'll
see in Affinity Photo, and then the Export persona. We'll be utilizing the
Export persona at the end of this tutorial I'm going to select my Ellipse tool,
which is the circle tool. And I'm going to hold
Shift so that I create a perfect circle So now that
we've added the ellipse, we can go into our
full shape options, and I'm going to scroll
down to the heart tool. So now I'm going
to create a heart that goes right in
the center of this. I'm going to update the color
to white for right now. And this time, instead
of just keeping it a color shape on
top of the other, I want to knock this heart
out of this circle shape. So I'm going to
select my circle by clicking on it with my mouse
and then go hold shift, click on the heart and
then I'm going to go into my geometry functions,
those shortcuts. And when you hover over,
it'll say subtract. I'm going to click on that,
and it's going to knock out that heart shape
from the blue circle. I like creating fun
little washy tapes. So what we'll do is utilize our rectangle tool once again, and then we're going
to update the color. And then we're just going to basically kind of
follow this shape. We're going to utilize our
shape options to select a triangle so that we can
cut out a triangle shape. And then I'm going to tap on my screen and create a triangle, and then we're going to zoom in so you can see
that little arm, and then we're going to rotate it using the Black Arrow tool, I'm going to click on
my black triangle, hold chif and then click
on my yellow rectangle. And I'm going to go up to
that Geometry quick menu and I'm going to
select, subtract. So now what I want
to do is make it so that we have like these
little like candy stripes. So I'm going to select
my pen tool for this, and I'm going to
create just like shapes that will
mimic the stripe, tap on one end. I'm going to hold shift to
create a straight line, tap on the other end, and then just kind of follow the shape that I've
created here in my sketch, and then I'm going to close it. And you know I'm
closing it because you'll see there's
a little circle next to my pen tool Hearsor that means that
we're closing the shape, and it'll also outline in red. Just going to go into
my color studio, select that blue, and
it'll fill it with color. So I'm just going
to kind of repeat this process for the
rest of these stripes. Once you've created the shape, say you just want to repeat the same kind of shape
throughout the rest of this. You could also just select
that curve that you just made with your pen tool
and go into our edit menu, select copy and then
edit and select paste, and then you can
just drag it over. Now that we've created each
of these little stripes, what we want to do is embed
them using a clipping mask. What I'm going to want to do is right click on top of that, and then I'm going to
group them so that they're all together as one. And what we want to do is
select that group layer, drag it so that it
goes right on top of the washi tape,
and then let go. And then it'll essentially embed those shapes into those curves
in a non destructive way. Then we're going to complete our last kind of
creative sticker here. We're going to asm
typography and then add a star shape just using
our text frame tool, and I'm going to kind of create traditional type and then add some script type underneath. I'm actually going to select
the same font that I used earlier when I added the notes just so that
everything is kind of cohesive. So I'm going to
select this Anton, and I'm going to tap on
where it says font size, and then I'm going to increase the size of this to, like, 64. Actually select amazing. I'm going to copy it. I'm going to go
into my edit copy, or you can do the
shortcut or you can just go into edit,
copy, edit pace. I'm going to drag this
underneath the first amazing, and I'm going to
double click inside of this so that I select
the entire word. And I'm going to change the font to something more scripty, and I'm going to
decrease the size. This. And then I'm going to just kind of play around
with the placement. So I'm going to go into
my shape tool now. I'm going to tap and hold, and then I'm going to scroll
down to the star tool. And then I'm going to hold shift so that I create a perfect star. And then what you'll
notice is that you have these different
options here. You'll see these
little red dots. This allows you to adjust that angle or curve
it on the inside. And then this allows
you to adjust the curve or the point of
the top of the start point. And I'm going to zoom in again so you can see that little arm, and then I'm going
to adjust the angle. I'm going to go into
my color studio here and tap on that magenta. Alright, so now that
I've done that, we can start on our more
functional pieces here. We'll go into our left
hand tool bar here, tap on the star,
and we're going to scroll down to our segment tool. This basically allows us to
create segments of a circle. So once I've created
that segment, I can update the color. So this is more
of a half circle. So to adjust that so that
we have a half circle, we're going to zoom
into the shape, and you'll see that there is a little red dot at the bottom. If we drag this up, this gives us more of a half circle here. I'm going to actually kind of utilize the text
that I already made. So I'm going to go into
that little notes flag. I'm going to select
the word notes. I'm going to copy it,
and then I'm going to go down here and I'm
going to paste it. I'm going to drag across
both the shape and the text. I'm going to right
click and I'm going to select group so that
everything stays together. To create kind of like
a file concept here. So what we want to do is
first create the rectangle. We're going to select
a rectangle tool, and then we're going
to create a rectangle that is the size and shape, similar to what are sketches. And then I'm going to create a rounded rectangle
to create these tabs. So I'm going to go into
my shape tool here, groll up to my rounded
rectangle tool that will go on top of this. Once I've done that, I'm going
to select that tab shape, and I'm going to copy it and I'm going to paste it
off to the side, and I can utilize it
for the rest of these, but I'm going to
update the color. And then I'm just going
to kind of place these
5. Vectorizing your Stickers Part 2: Now, to give some kind of depth, what we're going to do is select these shapes and add shadows. I'm going to select the middle
one because we're going to want to have a shadow that goes kind of, like, to the left. So I'm going to
select the pink one. And then I'm going to go
into our effects function. So if we tap on that,
we'll get this pop up. For this, what we'll want to
do is select outer shadow, and we'll want to
adjust our angle here. It's that little circle. You can tap on it
with your mouse, and then you can
rotate it around. And then you can adjust your settings for radius,
offset intensity, and then you'll
start to see as you drag these sliders to the left, it will create a
little shadow for you. Copy this election, your tab, so you can go into it, copy, and then you can tap
on your next tab and we can just go into
Edit and paste FX, which will give you the
exact same settings as the original one. Alright, so once
we've created this, then we can add the text. Alright, so what I'm going
to do is I'm going to use the same font that I used for the word work here and
I'm going to add that to our file here and
increase the size a bit. I think 30 is good. And then I can adjust
the placement. Once I've done that,
I'm just going to select my Black Earl tool and then drag over the entirety
of this little sticker. I'm going to right click and
I'm going to select group. Right. Now that we've
done that, let's create kind of like
our weekly schedule. So I'm going to select
my rectangle tool and I'm going to
create a rectangle. And then I'm going to
add a little kind of, like, call out at the top
using my rounded rectangle. So I'm going to tap on
my rounded rectangle in my shape tool here. And then I want to
update the color of it. I'll use that yellow again, that kind of, like, Biji yellow. Little window on the top. I'm going to actually change
my sticker layer from multiply to normal so I can make sure that everything's
kind of lined up. And I'm going to select
that notes text again by just selecting
my black arrow tool and then double clicking
inside of the shape, and then I'm going
to hit Command C, or you can go to Edit Copy, and then I'm going to paste it. And then I'm going to adjust
the size of my frame here so that I can update the
words to say weekly. To do. And then I want it all in one
line so I can just adjust the frame by pulling
my side out. Now what we're
going to do is add some lines to create the
sections for each day. And I'm going to
select my pen tool, and I'm going to start creating these lines to give me my
kind of, like, not space. So I'm going to
tap on one side of my rectangle here so that it lines up with
this weekly to do. And you'll see that it's lined up because you'll
get this kind of, like, green cross hairs because we have magnetics turned on. So I'm going to tap on one end, whole shift on my keyboard. So that I get a straight line and you'll see that
it's a straight line, and it lines up you get
this little yellow line, and then you get that
green cross hair again. So once I've done that, I'm going to tap on the other end. And then I'm going to go into
my color options here and I'm going to click
on my outline, my stroke, and then I'm
going to give it a color. I'm going to just
use that yellow, so this kind of matches. And then I'm going to go
into my stroke options, and then I can increase
or decrease the size. So I'm going to
keep this at z 0.6. I'm just going to copy and paste this line over
and over again. Alright, so once I've done that, I want to make sure that these
lines are spaced evenly. So I'm going to go into
my black arrow tool. I'm going to select all of the lines by dragging over them. Once I've selected everything, we are going to utilize
our align tools. So if you click on where
it says alignment, you'll get this pop
out, and you'll be able to align horizontally
and align vertically. And if we go down to
align vertically, it'll allow you to
space vertically. So if we click on the
space vertically, it'll re adjust the placement of these lines so that
they're spaced evenly. Then I want to
create another line that is going from the
top to the bottom. Alright, so once I've done that, I'm going to group all
of this once more. Now I'm going to
select my weekly todo. I'm going to pull
this off to the side, and I'm going to select it
and decrease the size of it so that it'll fit inside
of this squared off area, and then I'm going to change it so that it's just going to be the three litter abbreviation
of the days of the week. And I'm going to
update the color. Once I've done that,
I'm going to copy it, and then I'm going to paste it, and I'm going to drag
down to each section. So now I'm going to go
in and update this by just like double clicking to select everything and
then changing it. Now our little kind of, like, day of the week setup is done. Now I'm going to select my black arrow tool and I'm going to drag over the entire thing here so that everything
is selected, I'm going to right click and
I'm going to select group. Alright, so that is done. Now let's work on
our final set here. So I'm going to select
my rectangle tool. And I'm going to update the color so that
it is that pink. So I'm going to go
into my color studio on the right hand
side so that it's that magenta that we've
been using so that we just have something else
that's kind of like bright and
fun to work with. So I'm going to select
my rectangle tool now. Then I'm going to create
my rectangle over this. I'm going to create another
rectangle in the center here. I'm going to update the
color though to white, and then I'm going to
create the rectangle here. Once I've done that, I'm
going to give myself a separation here by selecting my pen tool and then updating the color I'm just
going to create a line, and then I'm going to go
into my stroke options, and I'm going to increase
the size of that stroke. Going back to my pen tool and ensuring that I have
my stroke turned on, I'm going to update the color from none to the white that I've
been working with. Making sure I have my
pen tool selected. I'm going to create
my first line by tapping on one side of the shape holding
shift so that I get a straight line and then
tapping on the other side, adjusting the width
of this so that it's easy to see our line here. And once I've created
that first line and I've placed it
where I like it, then I can just
copy and paste it. I'm going to select all
of them by tapping on my black arrow tool and then
dragging across all of them, and then I'm going to go into
my quick options here for my alignment tool and I'm going to distribute my
centers vertically. And then I'm going to right click and I'm
going to group this, and then I'm going to
add my circles here. So I'm going to go
into my ellipse tool. I'm going to make
sure I still have my stroke turned on
and that it is white, and then I'm going
to hold shift so that as I click and drag, I'm going to create
a perfect circle. I'm going to edit,
copy, edit paste, and then hold shift to drag it down in a straight line
and repeat that process. Once I've done that,
I'm just going to then select my black
arrow tool and then drag across everything
and then I'm going to right click and
I'm going to select group. Now I just need to add
the word don't forget. And then I'm going to
double click file that, and then I'm just going
to select Edit Copy, and then I'm going to paste it here so that it goes
above that group. Now we're going to want
to adjust the size. We can adjust the size by
going into our fun options, or we can just
adjust the size of the entire frame
by holding Shift and pulling in from
the corners here. Alright. Once I've adjusted
the placement of everything, I'm just going to select
the entire sticker here, that whole layout, right
click and group it. I want to show you what
this looks like with our artboard turned to normal, so you can see, and I'm going to turn off our sketch here. I'm going to tap on the sketch. I'm going to turn it off by
toggling the visibility of
6. Exporting your Stickers: Ding. You could export this entire thing as a transparent PNG to cut as kind of like a
print and cut file. So what you'll do for
that is select file. And what we'll do
for that is that we'll export this as a PNG. This is why it was
so important to create a transparent file. We're going to select export. And then we're
going to select P&G because this gives us that
transparency that we want, and then we're going
to select Export. So we'll name this and I'll
save it in my creativity the pays file in my
project and then hit Save. This is where the magic happens. We can export them individually using the slices functions. What we'll do is go into our Export persona. So we're
going to click on that. So we're going to select
our slice selection tool, which is this black arrow, and we're going to drag across our Rboard so that
everything is selected. We can go into our
slices studio. You'll see your layers studio, and then you'll see your slices. So if you tap on the
tab that says layers, all we want to do is
right click on top of that selection we just made
and click on Create Slice. Now when we tap on
our slices tab, all of the stickers that we just designed are now included. So before we export, though, we'll want to just
kind of look at our export options so that
we have the highest quality, make sure that our
options are set to PNG. You're going to
change your resample from bilinear to bicubic. Finally, what you'll want
to do is then select all of the different slices
that you want to export. So select slice eight. Hold Shift and then
select slice one, and that'll select everything. So once I've done
that, I'm going to then hit Export slices. One I tap on that, I'm
going to get this pop up, and it's going to ask me
where I want to save this. So I'm going to save
it in my project file. So I'm going to select
my project folder and I'm going to hit Export. I'll go into my creativity
that pays folder, and then my project folder, and all of my slices should
be in this setup here. And then each individual sticker as an individual PNG file, and then you can utilize these in something like good notes or Zoom notes or any digital note taking app that
you might prefer. Once you've exported your file, might want to save
it for future use. So my suggestion is
always to go into file, save as, and then save
it as an editable file. And then you can also
export this as a template. I will be including
this template, this whole file setup in
the creative success kit. The organizers of the
summit are coordinating, then you can export it
as a template, to file, export as template
and then save it in your specific project
file and then hit Save. Then you'll have a
file that is saved as a dot AF template so that it's easily accessible
and editable by others.
7. Course Outro: Thank you so much for
creating with me today. I hope that this tutorial has helped you get
comfortable with the Affinity Version
two interface and gain the confidence that you need in creating
digital stickers. I also hope that
it's inspired you to experiment with designing
your own stickers more often. If you enjoyed this tutorial, please share your project
with me on social media. You can tag me on Instagram
at Bella Sophia Creative. I'd love to see what you made. Remember, you can find me and my work on
www.belllasficreative.com. If you enjoy tutorials
like this or you're looking for other more in depth
creative classes with me, you can find my classes
over on Skill Share. I'll leave links for
you all to access. Finally, if you want to stay up to date with my work
right in your inbox, please consider
joining my newsletter. I send an email about
every other month with content and course updates, as well as a freebie for everyone to download
as a thank you. So for those of you who joined
through my Links today, I'll send over a
free digital sticker set focused on
creative businesses, and I hope that it inspires
you to keep creating. Thank you so much for
creating with me today. I hope to see you around. Bye.
 Jenny Veguilla-Lezan, Latinx Designer & Illustrator