Transcripts
1. Introduction: Have you ever
wondered how to turn a few simple croce squares into a stunning handbag?
Hi, everyone. Welcome to my Skillshare class
Royal teacher how to croce a creative and practical
handbag using one of the most classic and versatile crochet techniques,
Granny squares. My name is Mahome and I work full time as a crochet
content creator, sharing my love for
the craft across social media and
tutorials on YouTube. I've hosted multiple crochet
clubs for beginners, guiding them through
the process of creating their first
ever projects. You can usually
find me crocheting outdoors or in bed
with my crafty cats. My favorite thing about
crochet is that we can design, customize, and create
practical items to use in our daily lives. Nothing compares to
the satisfaction of decorating your room with handmade pieces or bearing a bag that you made from
scratch for a day out. So in this class, I'll walk you through each step from choosing the perfect color
palette for your handbag to assembling all of
the pieces together. By the end of this class,
you'll have a completed handbag and the skills to make many more projects using grafti squares.
2. Class Project: For this class, you can use any cotton acrylic yarn that
is medium worsted weight. You can pair the yarn with a
four or 4.5 millimeter hook. This will ensure
that your bag turns out sturdy and holds its shape. If you're unsure about the
size and weight of the yarn, you can check the label
for all the information. The label usually
features the weight of the yarn over here and the
recommended hook size. You'll also need a needle that can fit the yarn
that you're using. Make sure that the
yarn can comfortably fit through the hole of
the needle like that, and of course, a pair of
scissors for cutting the yarn. I use cotton yarn
for the center of my square and acryl
yarn for the borders and the straps with a
four millimeter hook. Acrylicn is slightly
fuzzier than cotton yarn, so it creates an interesting
texture in my squares. You can also play
around with yarns with different textures and
incorporate them in the squares. This class project,
you can bring the color scheme
for your handbag to life using the
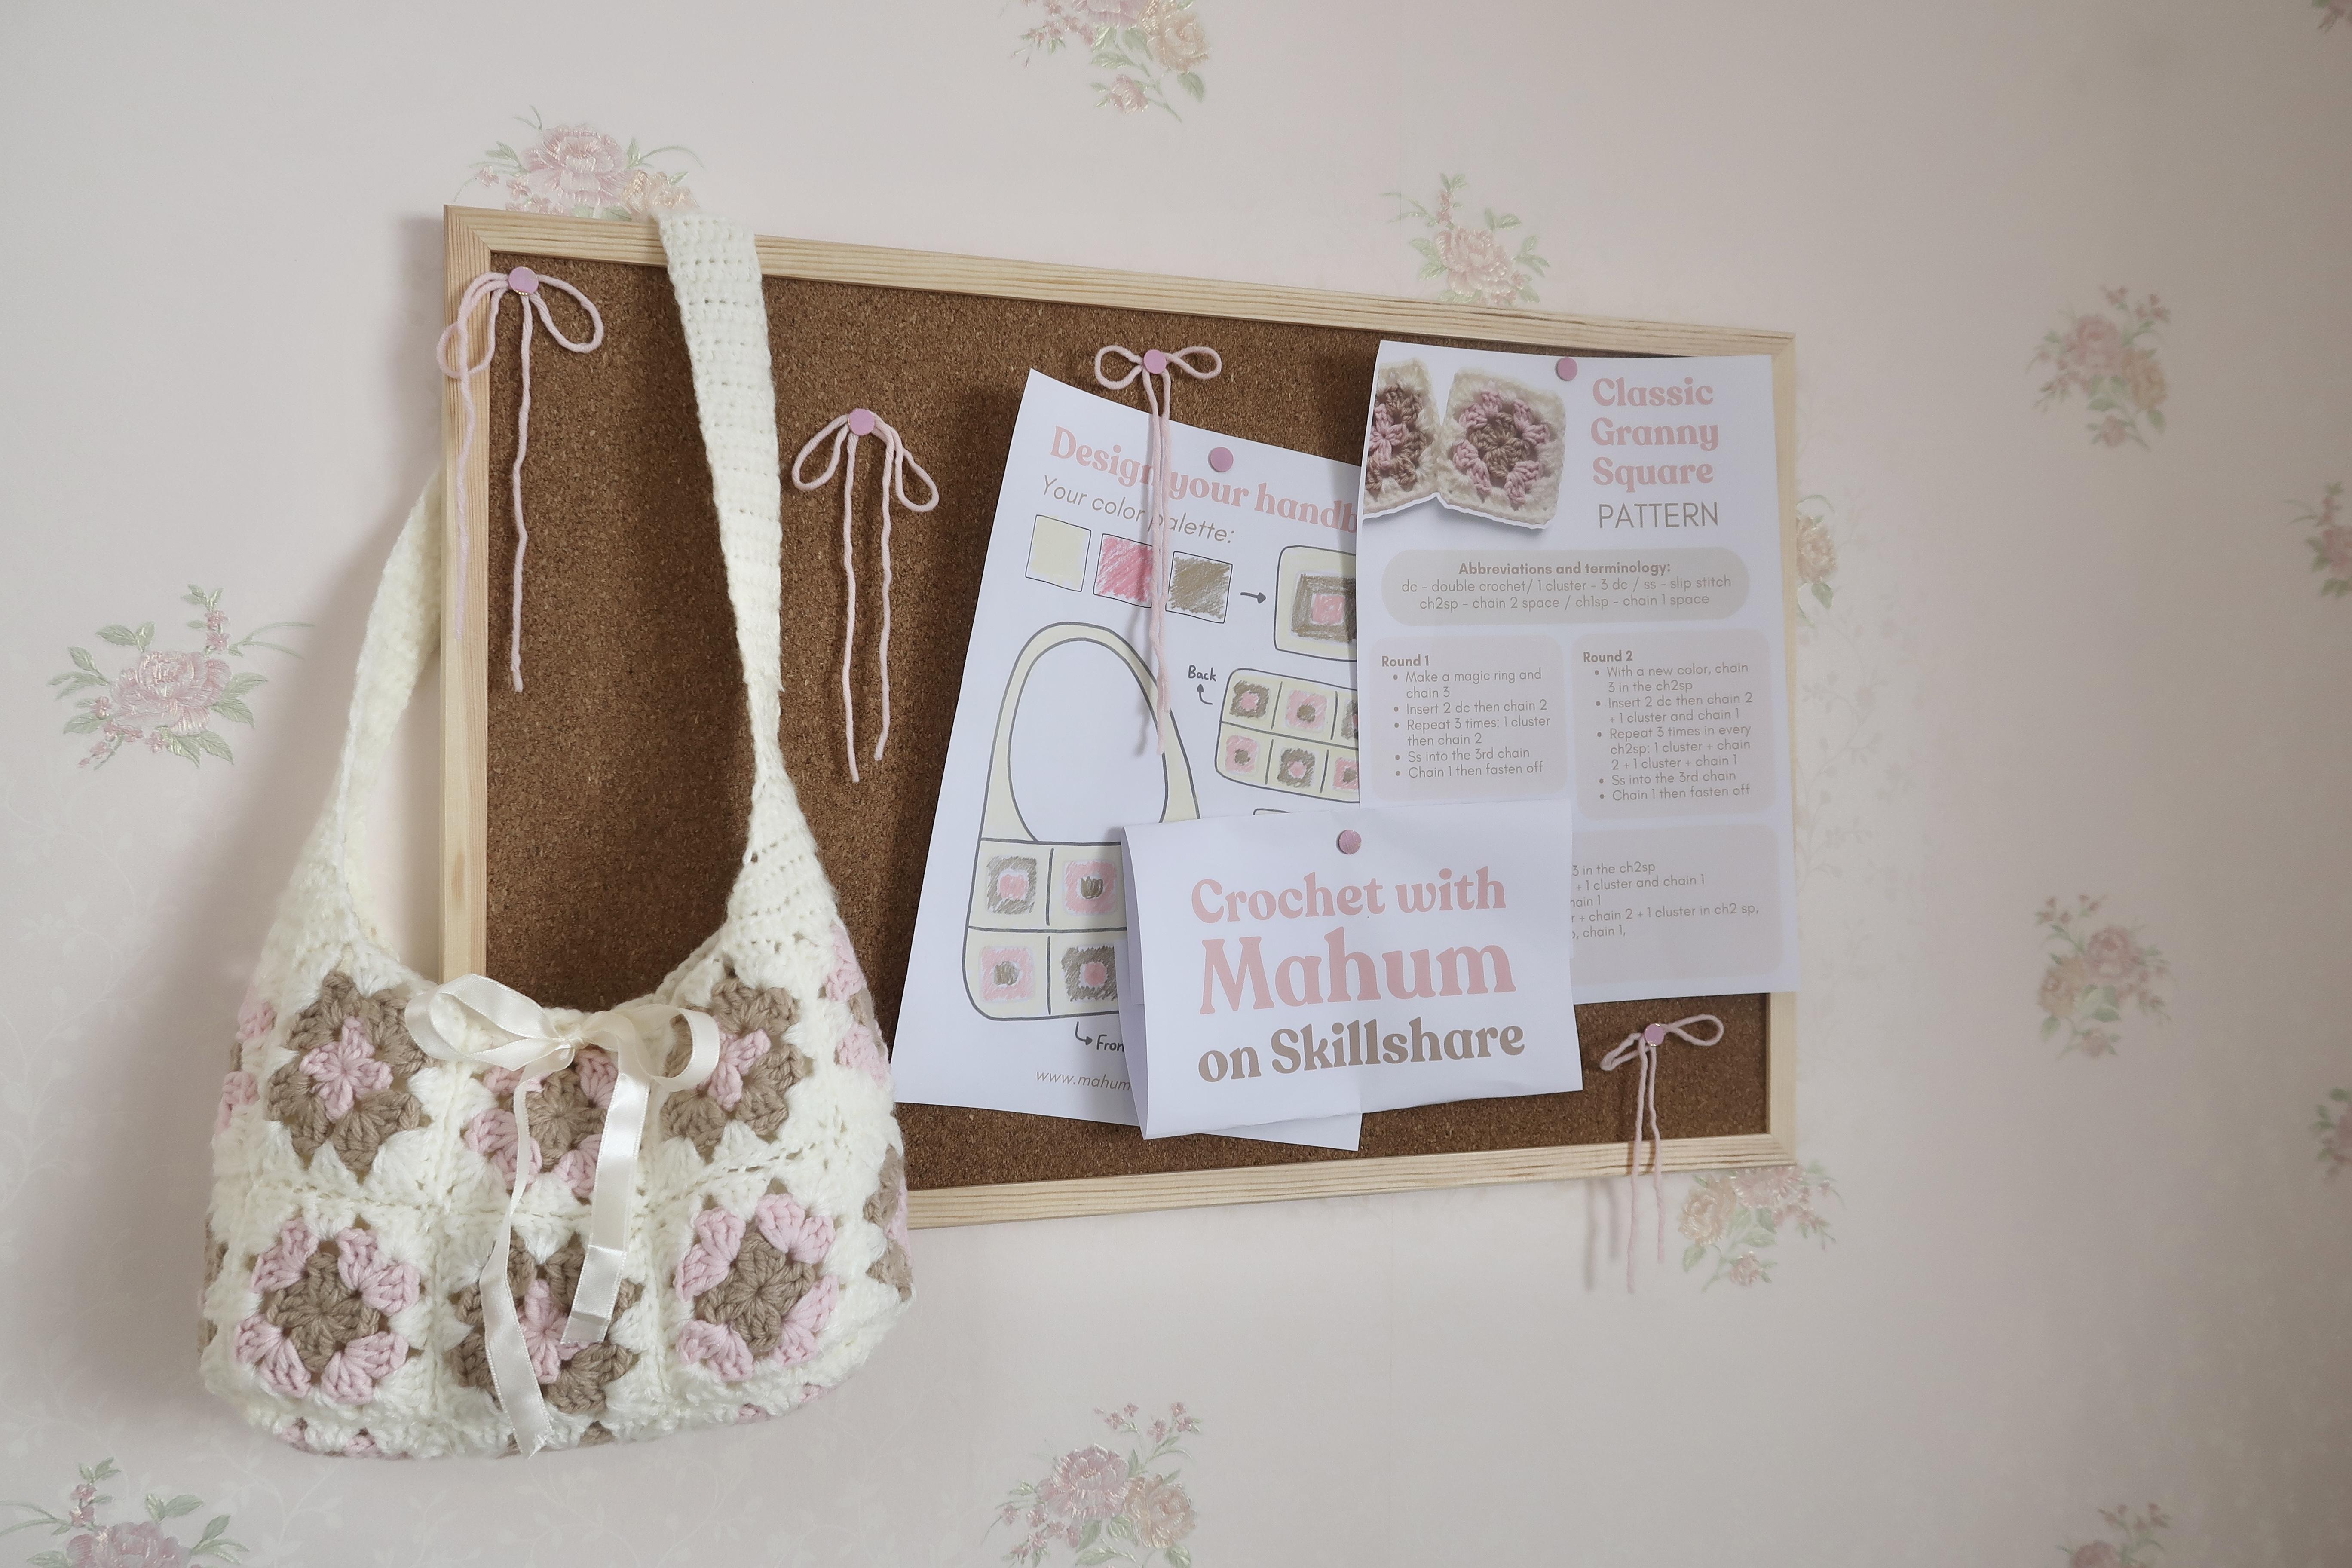
handbag template available in resources. Download the file, print it
out and start designing. You can create a back use in colors associated with
different seasons. For example, orange,
red and brown for fall, or pink green and
yellow for spring. My color scheme is inspired
by classic brise and dessert, Napolic and ice cream. Once you've selected your colors and you're ready to
start crocheting, don't forget to download
the digital pattern available in resources. It's a useful
resource to have with you for reference as
you're crocheting, and it's also great
for learning how to read and follow
crochet patterns. Now let's dive into the
world of granny squares.
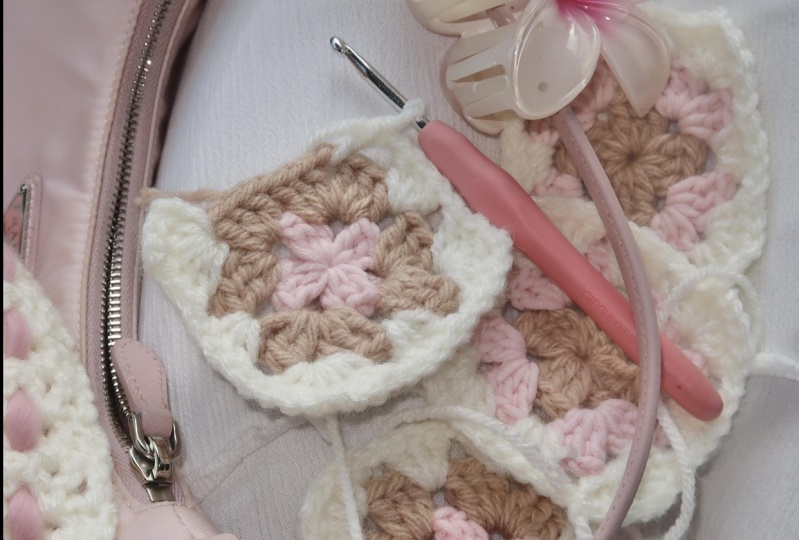
3. Crocheting Granny Squares: Let's begin by learning how
to crochet a granny square, you can choose to change
round every color or continue crocheting
with the same color. We're going to start by
making a magic ring, so make sure that the
tail of the yarn is facing you and hold onto
it with your thumb. Then wrap the yarn around
your fingers, making an x. Hold it in place with
your ring finger. Insert your hook under this loop over here and
grab onto this end. Pull it up and twist your hook, making sure that
you're still keeping this part tight with
your ring finger. Now, while the yarn is still on your fingers, we're
going to chain one. So you're going to grab
onto this loop over here and slide it through
the loop on your hook. Like that. Now gently remove the magic ring from your
fingers, and there you go. Now, this is our first chain, and we have to chain
two more to make a total of three chains like
it says on the pattern. So yarn over and slide it
through the loop on your hook. That's your second chain. Yarn over again, and slide it through the loop to
make your third chain. Next, we have to make
two double crochets. To make a double crochet,
you're going to yarn over, insert your hook
into the magic ring, making sure that you're working over both of these
ends over here. Yarn over and pull
up a loop like that. You should have three
loops on your hook. Then you're going to yarn over and pull through
two of the loops. Then yarn over and pull
through the other two loops. That is going to be your
first double crochet. Let's do this one more time. You're going to
yarn over, insert your hook into the magic ring, pull up a loop, yarn over
and pull through two loops. Then yarn over and pull
through the last two loops. Now, another thing to keep in mind before you continue is that a set of three chains counts
as one double crochet. Technically, we've got
three double crochets. One, which is the set of
three chains, two and three. So a set of three double
crochets is one cluster. So whenever the
pattern says that you have to insert one cluster, that means that
you have to insert a set of three double crochets. Now, here's the pattern
that we're going to repeat three more times. So you're going to
chain two, yarn over, and slide it through year and over and slide it
through one more time. And now we have to
insert one cluster, which is a set of
three double crochets. So yarn over, insert your
hook into the magic ring. Pull up a loop, yarn
over, pull through two. Year and over, pull through two. Let's do this two more times. One more? And there you go. Now we have to repeat
this two more times. Once again, we're
going to chain two. Now we have to insert one
cluster or insert a set of three double
crochets. That's one. Two and three. Now go ahead and do
this one more time. As you're working, you can pull this end tighter to make
the magic ring smaller. That will make it easier for you to insert your double crochets. Once you're done, this is
what you should have so far. We're going to change
to one last time. And now we're ready
to end round one. Before you end your round, I recommend pulling the
magic ring in tighter. So pull on the end
as tight as you can, and that's going to close up the hole in the
center like that. Now, I want you to
identify the third chain. Remember, the three chains
that we did at the beginning, that's our first,
second and third. You're going to end
your round by inserting your hook into the middle
of the third chain, grabbing onto just
one of the loops, and then you're going
to slip stitch. So you're in over and slide that loop through all of
the loops on your hook. Like that. And there you go, you're done with round one. To fasten off, you're
just going to chain one. And then you can cut the yarn, pull and tighten to secure. Before we continue, I want
you to take a moment to identify all the different
parts of the first round. These are the chain
twos that we did, and these are called the
corners of your squares, so you should have one, two, three, and four corners. The space in between them is referred to as a
chain two space. In the next round,
you're going to be inserting your hook through the chain two space or the hole that's formed in between
your two chains. Now I'm going to show you how to attach a new color
onto your square. Go ahead and pick any of
the chain two spaces. It can be either of them and insert your hook
into it like that. Now make a loop with the
yarn that you want to attach and slide that loop
into the chain t space. Hold it in place while you grab the yarn that you
want to work with now, and then you're going
to chain three. Remember that your chain three counts as your
first double crochet. Now in each of the
chain t spaces, we have to repeat
the same steps. So that means that in
every chain to space, we have to insert one cluster, chain two, and then insert another cluster back into that
same space. Let's do that. We've already got our
first double crochet. We're going to insert
two more double crochets into the same chain space
to make one cluster. That's our second double
crochet. That's our third. That's our first cluster. Now we're going to chain two. And now we have to insert another cluster back into
the same chain ta space. So and over and
insert another set of three double crochets
into that chain space. That's one, two, and three. There you go, you're done
with the first corner. Before you start
the next corner or before you move on to
the next chain space, don't forget to chain one. After every set of corner,
you have to chain one. Now let's repeat the same
steps into this chat space. So n over and
insert one cluster. When you're done inserting one cluster, you
have to chain two, and now we're going to insert another cluster back into
that same chain space. Two and three. And that's going to
be our second corner. Once you're done, you're
going to chain one. Before you move on and repeat the steps into this
chain to space, then chain one again and repeat the same steps into
this chain to space, and I'll meet you
back over here. Once you're done with
all four corners, we're going to end
our second round. So don't forget to chain one after you've completed
your fourth corner. Now, once again, we're going to slip stitch into
the third chain. That's your first,
second, third. Now, insert your hook
right in the middle of it grabbing onto just one
of the loops like that. And then you're going to slip
stitch by sliding the loop. Through all of the other
loops on your hook like that. And now we're going
to fasten off, so you're going to chain one. Cut the yarn, pull and
tighten to secure. Now, the third round will
be a little bit different, but also a bit similar to
your first and second round. Before you continue,
take a moment to identify your chain one
and chain two spaces. Your chain two space are
the corners of your square, and then your chain one spaces
are the ones in between. Chain two space,
chain one space, C chain two space, chain
one space, and so on. Always insert your hook
into the hole that's in between your chain one and
chain two spaces like that. Once again, pick any
chain to space to attach your yarnin Make a little loop with the yarn color that
you want to attach. Insert your hook and
pull it through. Now you're going to chain three, which will count as your
first double crochet. Now we're going to repeat the
same steps for the corner. So let's go ahead and insert two double crochets to
make our first cluster. One and two. That's going to be
your first cluster, now chain two, and insert another cluster back into
that same chain two space. One, two, and three. After you're done
making a corner, don't forget to chain one. Now we've reached
our chain one space. So in every chain one space, you're going to
insert one cluster. That means that you're
going to insert a set of three double crochets. One, two, and three. Once you're done, you're
going to chain one again. Now we've reached
our chain to space. That means that we're
going to repeat the steps for the corner. So you're going to
insert one cluster. Then you're going to chain two. And then you're going to insert another cluster back into
that same chain to space. Once you're done, don't
forget to chain one. Now you've reached another
chain one space over here. Once again, we're going
to insert one cluster in there. That's
going to be one. Two and three. Once you're done, don't forget to chain one, and now I want you to repeat these steps all the way around, and then I'll meet
you back here. So in every chain two space, you're going to
repeat the steps for the corner, C chain one, and then in every
chain one space, you're going to insert
just one cluster, chain one, and continue. Once you're done with
all four corners, and all four sides, we're going to end our
third and last round. Don't forget to chain one after you've made
your last cluster. Once again, we're going to
find that third chain, one, two, three, and insert your hook right
in the middle of it. And then you're going
to slip stitch to join. Now we're going to
fasten off chain one. And this time, I'd
recommend leaving a slightly longer tail so that you can
weave your ends in. So maybe just slightly longer than the length of your
hook and cut your yon. Pull and tight into secure. Now, I highly recommend weaving
in your ends as soon as you're done with
your square instead of leaving it for the very end. So here's how to weave in and hide the ends that
are left behind. We're going to get
your needle and insert the yarn through the hole and then secure it onto the needle
with a double knot. So that's going to be 1 knot. And let's make another just to make sure that it's
really secure. Once that's done, turn your griny square to the back side. So the front side is
a little bit cleaner, and then the backside looks
just a little bit messier. Insert the needle
through the stitch in the back and pull the
yarn to the backside. Now, to even and hide your work, just go up and down and up
and down the yarn like that. And then pull it through. You can do this a
few more times. So you're just inserting your
needle through the loops at the end and then
pulling it through. Once you're done, you can
just cut off the extra, and you should have
a nice clean square. In the next lesson, I'll cover the classic handbag layout.
4. Classic Handbag Layout: That you've mastered
the construction of a classic gran square. It's time to understand
the layout so you can easily assemble all of
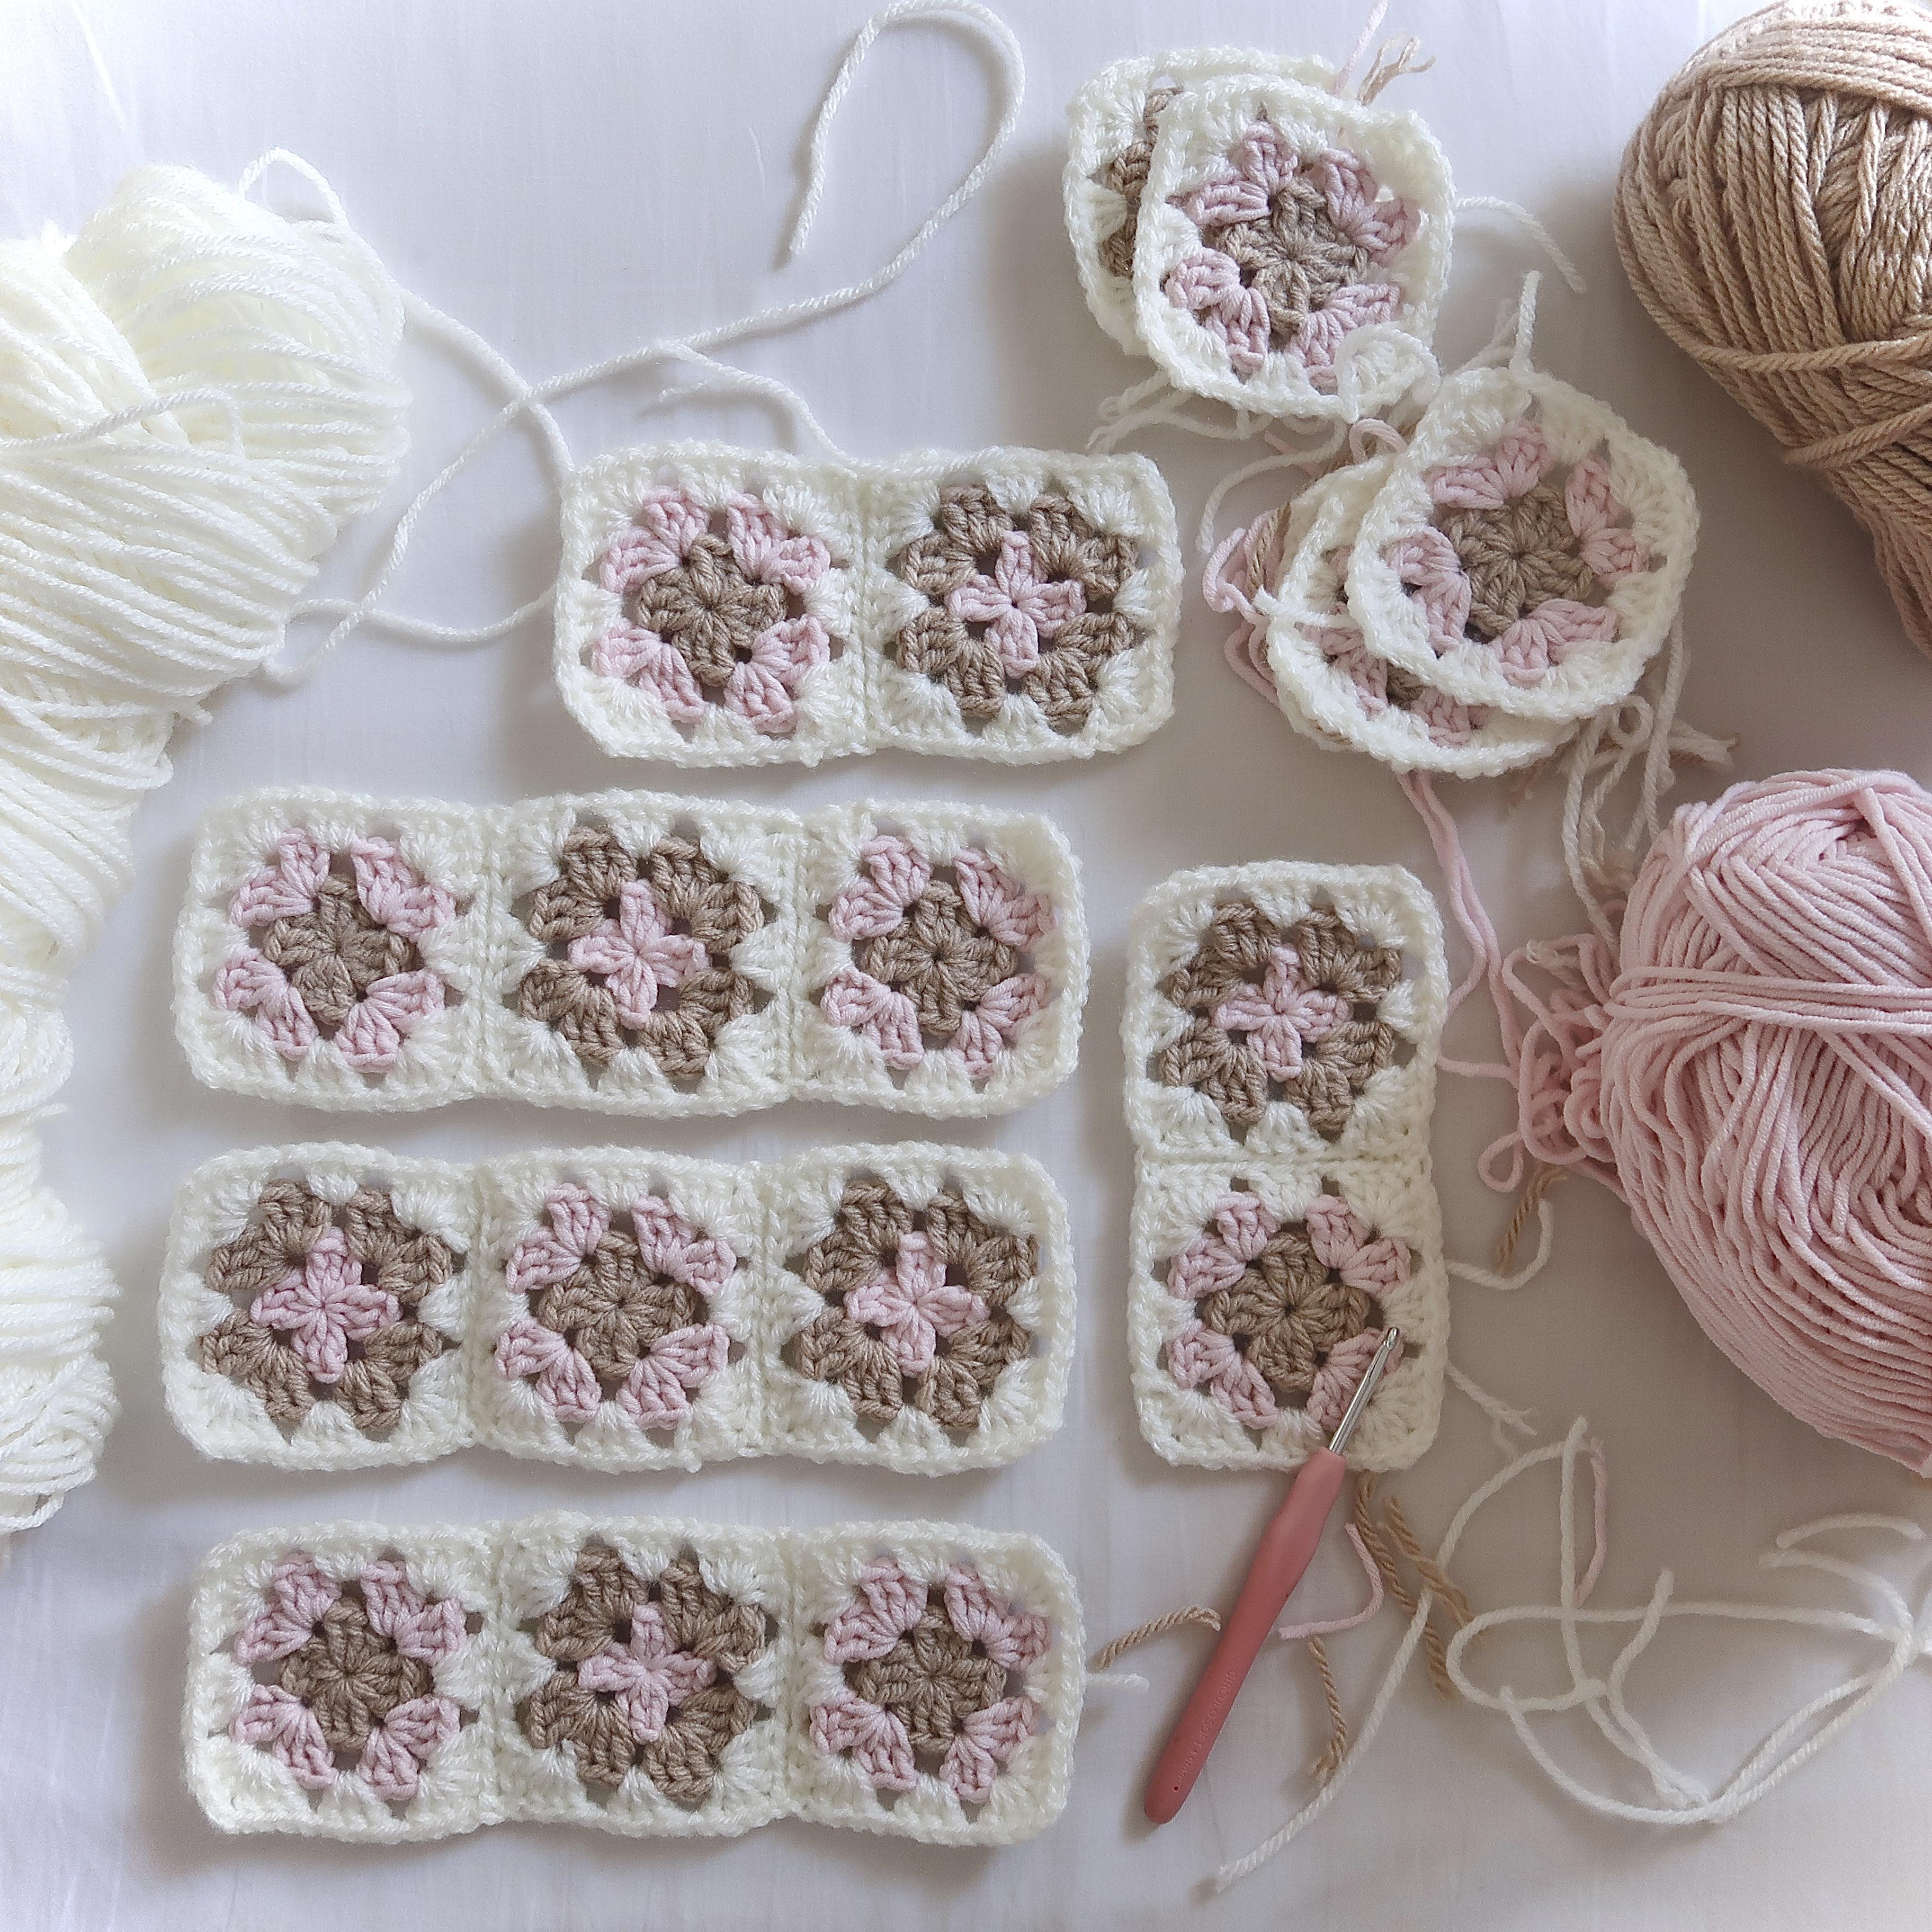
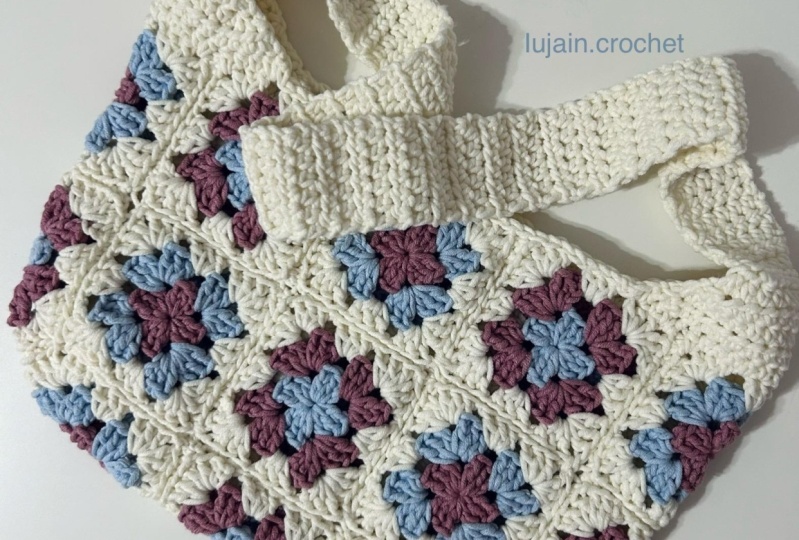
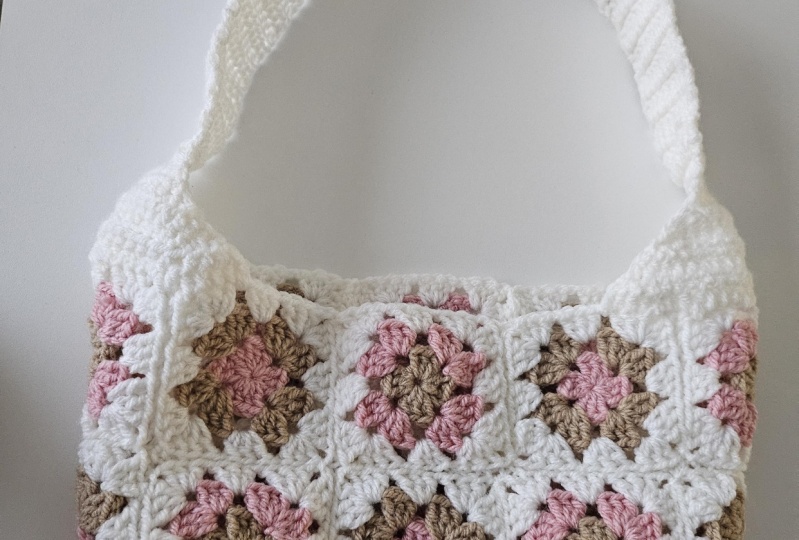
the pieces together. The bag is made up
of five panels. You've got your front panel, which is made up of
six squares each, and then an identical
back panel, which is once again made
up of six squares each. Then you've got the corner
sides, the right panel, and the left panel made
up of two squares each, so in Total four for the sides. Then finally, you've got a
panel for the bottom side, which is made up
of three squares. This means that you'll
crochet a total of 19 gran squares for the bag. Once you have the total
number of grand squares, I recommend working section by section for a seamless
joining process. So before you start joining, take a moment to
plan which pieces you'll be joining together. For example, for the
front and back side, I recommend joining all of
the squares in one row first. So join the first square
to the second square, then join the second square
to the third square, which will complete one row, and then you can join row one and row two together
in the middle like that. The next step is to join all of these different
pieces together.
5. How to Join Granny Squares: The assembly, we'll be using basic sewing techniques
to go ahead and grab your yarn needle and attach the yarn to the needle
with a double knot. Before you start sewing,
take a moment to identify the front and back
loops of your stitches. So the front loop is the one that's closest to you and then the back loop is the one right next to it on the
outside of your work. So if you look at it this way, the loops on the outside
edges are your back loops. So when you're working
with the needle, you're going to insert your hook right in between
the stitches and only grab the back loops
of each stitch like that. So you're not going
to go through and grab onto both of the loops. You're just going to grab
on to the back loop. Start by making sure that
your granny squares are facing the right side
or front sides upwards, and then you're going to
fold them together so that the wrong sides or the slightly messier sides are facing us. We're going to be aligning
all the stitches on one side to the stitches on the granny square on the
other side over here. Once again, place your squares, right sides facing inwards, and then you can
look at it like this and insert your needle right
through the back loop. Of the first chain and then identify the first chain
on the other square. So that's the chain two space. This is chain one,
and that's chain two. So we're going to go through and grab onto the back loop of the first chain on
the other square as well, and then pull. Keep pulling until the yarn is double the size
of your square. And then you're going to tie a knot to secure it in place. That. I recommend
doing a double knot just to make sure that
it's extra secure. Now we're going to be working
into the second chain. So let's look at it this way. We've got our second chain here. You're going to grab
onto the back loop. And you're going to do the same thing on
the other square. That's your second chain,
so you're going to grab onto the back
loop like that. And then you're going to pull. Now, the yarn is
facing the right side, so that means that
we have to insert our needle from the
right side as well. So we're going to grab onto the back loop of the stitches. And then the back loop of
the corresponding stitch. Here's another angle
to see what I did. And then you're going
to pull the needle out. Remember not to pull too tight, we want this to be
a little bit loose. Now, our needle is
facing the left side, so we have to insert it
from the left side as well. So we're going to grab
onto the back loop, and the back loop of the
other stitch and pull. Remember not to pull too tight. Let's do this a
little bit slower. So right now, I'm working into
this double crochet here. That means that I have to
make sure that I'm working into the same double
crochet on the other side. Since my needle is
on the right side, I'm move to grab
onto the back loop. Then I'm going to grab
onto the back loop of the other stitch as
well and pull through. So remember that you
should only be sewing the back loops of the
stitches together and make sure that they're lined
up and that you're going through the same stitch
on both the squares, whether that's the chains or
the double crochet clusters. Once you're done,
and you've reached these two chains over here, we're going to do
the same thing and insert our needle
through them as well. So let's do this one more time. I'm going to go into the back
loop of that first chain. And then the back loop of that first chain on
the other square. Pull, and now we're going
to do our last chain. So once again, just
the back loop and the back loop over here
as well. And pull. Before you fasten off, make sure to pull
this a little bit looser so that it's
not too tight. Now we're going to ender work,
insert your needle through the chain tepace or through
the hole of both the squares, and now we're going
to tie a knot. So don't pull this
all the way through, make sure there's a
little loop over here and insert your needle
through that loop. And tight in to make a knot
and secure it in place. To make it even more secure, you can do this one
more time to make a double knot. And there we go. Now we can weave in
to end our works. I'm just going to insert
my needle through a few of the stitches on
any one of the squares. We're just going
to seamlessly hide the rest of our yarn so that
it doesn't unravel later. You're doing the
same thing that you did for weaving in the squares. And once you're done, you
can cut off the extra yarn. Now we have to weave in
the end over here as well. So I'm going to
cut this yarn off. But it's not attached to
my skein of yarn anymore. And then I'm going to attach
the yarn to my needle once again so I can weave
it in. And there you go. That's how you can join
the sides of the granny squares together to
make one complete row, go ahead and repeat these steps with another granny
square on the other side. So once again, you're going to make sure that
the right sides are facing upwards and fold the
granny square in like this. And then you're going to
start joining the sides over here by repeating
the same sewing steps. Once you're done joining
one row together, you're going to repeat the
steps to make another row, and now we're going
to join both of these rows together
in the middle. Fold your work with the
right sides facing inward, and you're going
to attach the yarn into the chain two
space over here. Insert your needle through the back loops of a first chain. This time, you have to make sure that the length of the yarn is approximately twice as long
as one row of granny squares. And then you can secure
it in place with a knot. Once again, make sure
that you're working into the back loops of the
corresponding stitches. So if it's the loop of
a chain on one side, it has to be the loop of the same chain on
the other side. If it's a double crochet
that's part of a cluster, make sure it's the
first, second or third. And that's just about it. You're going to continue swing until you reach the
end of the row. Once you're done sewing
to the end of the row, and you've heaved in your ends, you're done creating
your front panel. You're going to go
ahead and repeat this one more time to
make the back panel. The next step is to join all of these different
pieces together. Here's the order I would
recommend joining in. First, I'm going to join the left panel to the front panel. I'm going to fold
my work inside out. And then I'm going to join
it together over here. Keep in mind that
we're going to be using the same sewing technique. Once again, you
have to make sure that you find the chain ty space and insert your
needle only through the back loops of
the front chain. Make sure that the
yarn that you take is twice the size of the row or
length of granny squares, and then you can
secure it with a knot. Once you're done securing your
needle and yarn in place, just go ahead and repeat the same steps that we did for joining the
squares together. You're just going to
sew the back loops of all of the stitches together. But make sure that you're
sewing a bit loosely so that your work doesn't
bunch up together. You're going to do
this all the way up until you've joined
the sides together. Once that's done, I'm going
to attach the right side onto the other side of the
front panel like this. So fold it in, and once again, I'm going to repeat
the same steps and sew the side together. Once that's done,
we're going to attach the back panel onto
the side over here, so I'm going to fold
it in like that. And then join this end over here with the sewing
technique that we learned. Once you're done joining the back panel to the
rest of the pieces, you should have a really
long panel like this, and now we're going
to close it up. So you're going to
join this side of the back panel to the
other side like this. So you can fold your work
in half just like that. Now you're going
to use the sewing techniques that we
learned to join this side together and close
up the sides of the bag. Once that's done,
you're going to have the main body of the bag, and it's going to look
something like that. So you've got your
friends panel, you've got your sides, and then the back panel as well. Keep your work turned
to the wrong side. Don't turn it to
the right side yet because we're going to be
joining the bottom side. This part's going to be a little bit tricky, but don't worry, we're going to be using the same assembly technique
that we learned. So you're going to
turn the bottom side to the wrong side or
the messy side as well, and we're going to be sewing it together all the way around. First, I attach the yarn with my needle into these
chain two corners. So the corner of the body of
the bag with a double knot. And I'm going to take
the bottom side, make sure that the right
side is facing inwards, and I'm going to go
through this chain to space at the corner and pull And then I'm going to insert my hook
through the back loop, and just to make
it extra secure, I'm going to tie a knot. I'm going to insert
my needle through the loop and keep pulling, pulling, pulling,
pulling, and it's going to tighten into a knot. After that, it's pretty
much the same steps. You're going to grab onto the back loops of the stitch and the back loops of the
corresponding stitch on the body of the bag, and you're going
to sew it closed. So the same rules apply. If your needle is
on the right side, you have to insert
your needle from the right side and only go through the back loops
of all of the stitches. The sewing steps are pretty straightforward until
you reach the corner. So when you reach this point, just take a moment to identify your chain to spaces on
the body of the bag, as well as the chain to
space on the bottom side. So here's what I like to do. I'm going to go
through the chain to space on the bottom panel. And then I'm going to
go through the chain to space of one corner and pull. Then I'm going to go
through the chain to space in the other corner, and then the same chain to space that's in
the bottom panel. And then I'm going to pull. And that's how I secure
the corners together. After that, we're
just going to go through the back loops
of every stitch. Once again, making
sure that we're grabbing the
corresponding loops, and sew it all together. This is what you should
have once you're done, like a little paper bag, and now we're going to
turn our work inside out, so just reach into your back
and pull the insides out. This is what the
completed handbag will look like
without the strap. Next, we learn to
crochet the strap.
6. How to Crochet the Strap: Before you start
crushing the strap, keep in mind that
the thickness and length of the strap is
completely up to you. As you're crushing the rows, you can adjust the
thickness of the strap by doing more or
less decrease rows. Similarly, you can
adjust the length of your strap by doing more
or less repeat rows. This way, you can make
the strap longer for a cross body bag or a little bit shorter for a shoulder
bag like mine. The strap is crocheted
along the top edge of your back and it's
worked in two sections. We start off by making a
border of half double crochets and then decrease the number of half double crochets
in every row. Until the row is the desired
thickness for the strap. I've crocheted this side
to show you as an example, but once you're done
crocheting one side, you're going to repeat the
same steps on the other side. Start by identifying how thick you want the bottom
of the strop to be. This is my right side panel, and then this is the corner of the front panel and the
corner of the back panel. I want my strap to start
from here and end over here. This means that the bottom
thickness of the strop will be from this space to
this space over here. Make a loop with
the yarn you want to use and pull that loop up Now we're going
to chain one to secure this yarn in
place and tighten. Now we're going to
have double crochet into each stitch and each space until you reach the part where you
want the strop to end. To have double
crochet, yarn over, insert your hook back
into that same space. Pull up a loop and you should have three loops on your hook. You're going to
yarn over and pull through all three loops
that are on your hook. That's going to be your very
first half double crochet. Now we're going to
repeat yarn over, insert your hook into
the first stitch. Pull up a loop and
then yarn over and pull through all three loops
that are on your hook. You can tighten this a little bit to secure that
chain one more, and now we're just going to continue half double crocheting until you reach the
place where you want to end the
bottom of the strap. Insert your hook into
the stitch at the top. And half double crochet. Once you reach the
chain two space, you can insert your hook
into the space rather than the stitch and
half double crochet. You don't have to
have double crochet to this middle part over here. Instead, I recommend
just going into the chain two space
in the next corner and then have double crochet. Let's do this all the way
until you reach over here. This is what the
first row looks like, and now we're going to start
decreasing on the sides. Here the steps that you're
going to repeat for every decrease row until you have the desired
thickness for the strap. To start a new decrease row, you're going to chain one and then you're going
to turn your rick. After that, you're going to skip the first stitch and you're going to have double crochet the next two stitches together. Yarn over, skip
the first stitch, insert your hook into
the second stitch. Pull up a loop. Then insert your hook into the
third stitch over here. Pull up a loop, and then you should have four
loops on your hook, yarn over and pull
through all four loops. Half double crocheting those
two stitches together. Now you're going to
double crochet one in each stitch until you have two stitches left at
the end of this row. Yarn over, insert your hook
into the stitch like that. Pull up a loop, then
yarn over and pull through all three loops making
your half double crochets. Now I've reached the
end of my first row and I have two stitches
left, one and two. Once you have two stitches left, we're going to have
double crochet these two stitches together. Yarn over, insert your hook
into the first stitch. Pull up a loop, then insert your hook into the
second stitch. Pull up a loop, and then once you've got four
loops on your hook, yarn over and pull through
all four of those loops. That's going to
have double crochet those two stitches together. Now you'll notice
a slight decrease on both sides of the row. Now we're going to
repeat these same steps to make another decrease row. Once again, chain one
and turn your ick. We're going to skip
the first stitch, and we're going to
double crochet, the next two stitches together. Yarn over, insert your hook. Pull up a loop, insert your
hook into the next stitch, pull up a loop, once you've
got four loops on your hook, yarn over and pull
through all four of them. Now you started your
next decrease row. Go ahead and insert one
half do crochet into every stitch until you have two stitches left at
the end of your row. When you reach the end of
your row and once again, you should have two
stitches remaining. We're going to have double
crochet these two together. So 'n over insert your hook. Pull up a loop, then insert your hook into the next stitch. Pull up a loop and
then yarn over, pull through all four of the
loops that are on your hook. And that's how you
would have completed another decrease row. Now I'm going to go ahead
and repeat the stops to crochet decrease rows until you have the desired
thickness for the strap. I'm going to show you
the side as an example. So I crochet decreased
rows until I had only six half double
crochets left in the row, and then after that, I
stopped doing decreases and continued crocheting six half double crochets in each row. I'm going to repeat the same
thing on the side as well. I'm going to keep
crocheting, decrease rows, until I have only six half
double crochets left in a row. Chain one, turn your work, skip the first stitch, and then half double crochet the next two stitches together. After that, insert one half double crochet to every stitch until you have two stitches left at the end of
the row and repeat. For reference, I crocheted a
total of five decrease rows, and then I had six
half double crochets left in the sixth row. So now we're going
to start crocheting the rest of the strap. There's going to be no
more decrease rows. You're going to chain one and turn your work
to start a new row, and then you're going to double crochet into every stitch, including the first one. For this next step, you
have to make sure that your stitch count in every
row remains the same. For me, I want the
thickness of my strap to be as wide as six
half do crochets. That means that I have
to make sure that I have a total of six half do
crochets in every row. Insert one half double
crochet into every stitch, making sure that you don't
accidentally miss one. There's my six half
double crochets, and now I'm ready to
start my next row. Once again, you're going to
chain one and turn your rick. Half double crochet
to every stitch, including the very first one. Now you're going to
continue crocheting rows until the strap is the length
that you want it to be. The length is
entirely up to you, and it depends on how many rows you crochet for the strap. Here's a look at my
completed strap. I did a total of 50 rows with six half double crochet
stitches in each row. Once you have the desired
length for your strap, we can end our C. To fasten
often end your, chain one. Grab your scissors and cut a slightly longer
tail than usual. This can be twice the
width of your strap. Cut the yarn, pull and
then tighten to secure. Next, you're going to repeat
the steps that you crocheted on this side of the bag on
the other side as well. This includes your first
row followed by the rest of the decreased rows until you have the desired
thickness for the strap. After that, you can crochet
three to four rows of one half double
crochet every stitch to build some length for
the strap on this side. Make sure that you
have the same number of stitches on both the sides. Once you're done and you
fastened off your work, we're going to
attach the yarn to the plastic needle so we can sew these two sides together. To sew this end of the
strap onto the other end, insert your needle through
the stitches and pull. Go back through the
corresponding stitch and the stitch on the
other side as well, making sure that you're
grabbing both of the loops and pull
the needle through. Repeat until you reach the end After you've
sewed till the end, we're going to secure the knot. Insert your needle back through this Leave a small loop and then insert
your needle through that loop and tighten to secure. Turn your strap to the
back side and then weave the rest of the yarn through the stitches
in the back. After that, you can cut
off the extra yarn. Here's a look at the
completed strap.
7. Final Thoughts: You did it. I hope you love
the bag you crocheted. For a cute finishing touch, you can grab some ribbon and tie bows through the squares. These ribbon bows can also
work as a closure for the bag. Now you can experiment with
different layouts and create various other projects with
the classic granny square, not just bags in
different shapes, but also cushions, blankets, clothing, and lots more. If you have any questions,
please feel free to leave them the discussions page and I'll get back to you
as soon as I can. Thank you so much for
crocheting with me. I hope you'll join me for lots
of more creative projects. So don't forget to follow
me here on Skillshare, YouTube, and Instagram to stay
in touch and get expired. Now, let's see your handbags. You can upload pictures
in the project section of this class and I can't wait
to see what colors you chose. You can also tag me at
Mahome Crochs or use the hashtag crochet with
Maham to share your work with me and my community
on Instagram and TikTok, and I'll see you next
time. Bye everyone.
 Mahum, Crochet Artist and Educator