Transcripts
1. Course Introduction: And if these are on
trend right now, everyone is looking to buy a
unique and profitable NFP. And creators and
developers all around the world are taking advantage
of this opportunity. A non-fungible tokens
means that it is a unique token that has
no other token like it. This is different from the ERC throwing these,
which are fungible. Fungible means replaceable,
are interchangeable. Nft is bringing Blockchain
into the public eye. Now is an excellent opportunity
to understand the hype yourself by publishing
your own NFT on the Akkadian blockchain. In this course, we
will learn to create and deploy and ERC 721 smart contract on their rink a bit test
network using MetaMask, solidity, hardhat,
Grenada, and alchemy. We will do everything
from scratch so that you can understand all the
necessary concepts precisely. From setting up a new project, deploying your smart contract, maintain our NFT,
and then finally, listing it for cell in
a benzene marketplace. At the end of the course, you will have your
very first NFT to show off to your friends and in your resume without wasting any more time and roll now
and let's get started.
2. What is NFT and its use cases: Hi, welcome to the very
first video of this course. So before moving towards the
implementation of an NFT, I would like to discuss
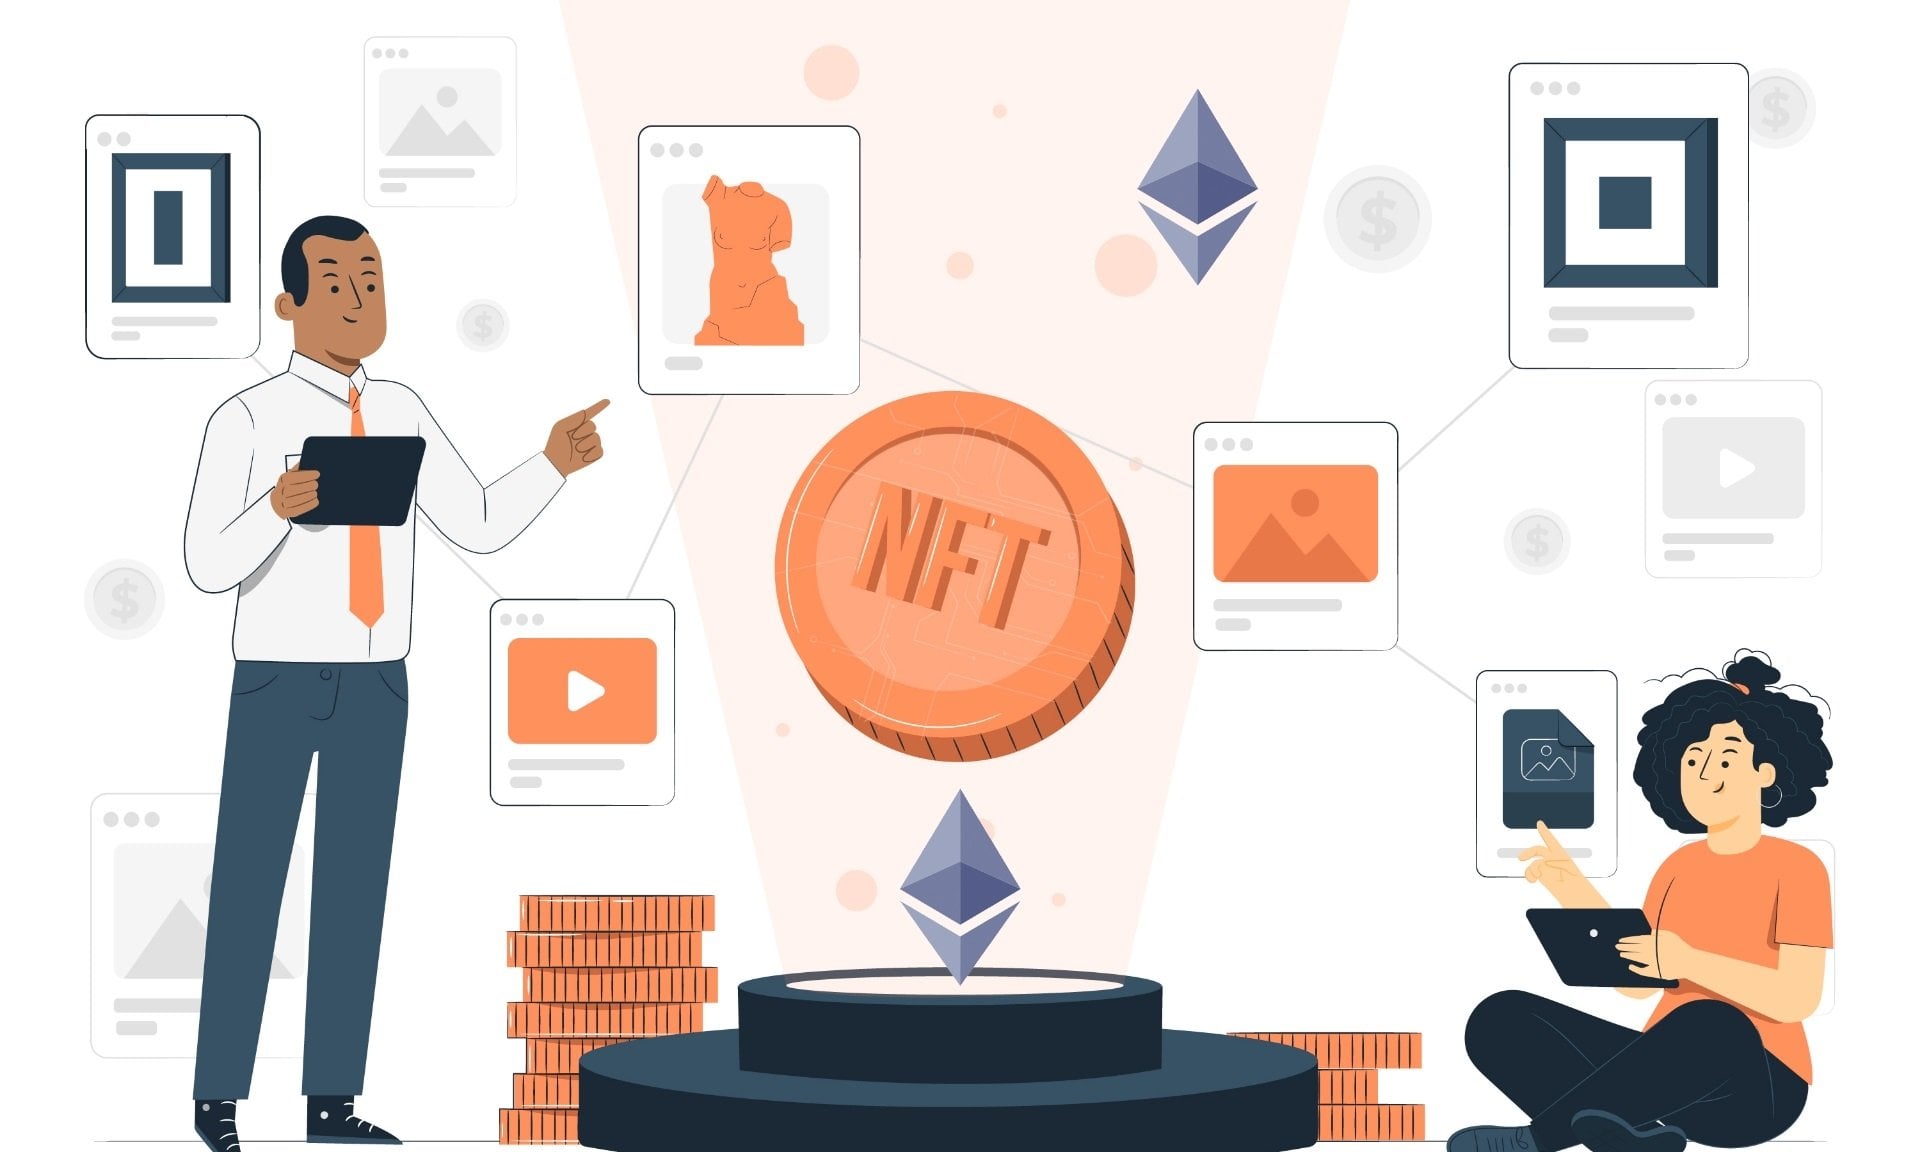
some 2D part of it as well. So what is an NFT? An NFT is a digital asset that represents real-world
objects like music, in-game items and videos. They are bought and sold online frequently
with cryptocurrency, and they are generally
encoded with the same underlying
software as many crypto. So definitely you have heard a lot of hype of this interface. People are buying some, that is the very first tweet as an NFT or some
kind of signature, cricket moment, whatever,
which is unique. And one of the kind you
can make it as an NFT. Nf2 stands for
non-fungible token. It's generally built
using the same kind of programming as cryptocurrency
like Bitcoin or Ethereum. But that's where the
similarity ends. That is both NFT or any
kind of cryptocurrency. I basically different only the way it's built
on a blockchain. That is the similarity. Physical money and
cryptocurrencies are fungible, meaning they can be traded
on exchange for one another. There are also equal in value. $1 is always worth another $1.1 bitcoin is always
equal to another Bitcoin. So that means those fungibility make it a trusted means of conducting a transaction
on the blockchain. In simple words, definitely $1 or one
rupee can be exchange, but one NFT cannot be
exchanged with another NFP. If these are different. Each has a digital signature
that makes it impossible for NFV is to be exchanged
for or equal to another. Hence, non-fungible. In simple words. Think of what one painting cannot off as an NFT cannot be exchanged
to another painting. We can just say like DID, obviously you can
buy and sell it. But the basic definition
of NFT is this. Okay? Now, now we
have understood what is NFT and it is non-fungible. Fungible. What are
the NFP use cases? Obviously, there has to
be some use cases in order to get so much attention. So few of those Use Cases
are number one, gaming. Majority of their games have their virtual
currency within the ecosystem that helps users make their
progress easier. The different uses of NFT is
will allow players to easily trading game collectibles with proper validation or
security example, some skin, some kind of sword, fighting, some kind of clothes. These all can be turned into NFP is and can be bought with there any cryptocurrency or that game allowed
cryptocurrency. Second is digital asset. For these assets
like houseplants, mockups, teams, as
well as domains. And it is certainly
a perfect match. Moreover, digital
real estates in games like the central land is getting popular these days. You can just google
these two hinterland and just check it out. You can buy virtual
land and trust me, they are very expensive,
very expensive. So it's like you can just see how people are
using these NFP is, or you can say the
blockchain ecosystem. Nowadays, they allow
players to purchase and develop a set of
spaces in a virtual world. Just like you can sell Nike or any other clothing
brand in the Central. And you can conduct events. And a lot, you can
conduct a Games, movie halls, movie theaters. Lot of things you can do in that the central land,
it isn't my towers. You can see number three. I didn't identity teeth that things that represent
identity and can be this, the digitalized, such
as medical records and academic qualifications
can make use of NFV is to prevent
that identity tiff. This makes them a perfect
match for issuing certificates, qualifications,
and licenses. It helps in separating
counterfeits from the original. So obviously, it
helps to make sure our habit trust that
particular document or that piece of information
that it is true. We can use NFT selected. And the fourth one is
delta elective words. It's a no-brainer that NF, these are rare and
they find their major using
collectibles and art. With the addition of this token, the authenticity
and ownership of a collectible or an artwork
can be easily verified. This allows artists to prevent their work from
being misappropriated. Are I edited? And if this has
already started to be used in cards and merchandise. So obviously, some
kind of painting, some kind of unique art. These all are part
of an FTEs and people buy and sell it
on different platforms. So that's it. This was a brief
introduction to LFTs. In the next upcoming videos, we will learn more about
the implementation and how we can build
our own NFP as well. Thank you.
3. ERC 721 vs ERC 1155: In this video, we will discuss about that
token standards, that is ERC 721
and the ERC 1155. If you search about NFP is
these two tokens standards, you will get in the internet. And no doubt we will be
using the first one. But at least you should
know that difference. The ERC 1155 tokens
standard could see much more prominent
used in the ER is 721 token standard
in the near future. Thanks to its
additional features, we will be using ERC
17 t1 in this course, as I said earlier. But both tokens standards
have their applications. And it's worth knowing their
individual properties to help decide which to
implement in your project. Both allow you to
maintain new NFS. But there are some
key differences such as number one Point. C, 1155 permits the creation of boats, semi fungible tokens, non-fungible tokens, where ERC 721 permits
only that letter. That is the non-fungible tokens. So this is the first difference. The second difference
is ERC 115 5s. Smart contracts support an
infinite number of tokens, whereas years is 721 needs a new smart contract for
each type of token. So definitely if your use case, create infinite
number of tokens, you have to use the
ESC double one, double five tokens standard. That title one is ERC 1155, also allows batch
transfer of tokens, which can reduce
transaction cost and time. With 721, sending multiple
tokens is done individually. So this is another benefit
with the ER is C 1155. And the last point here is 1155. Token transfer can
be rewarded in the event of a mistake due to its safe transfer function and other rules in place to
provide exploitation. On the 721 standard, you can't reclaim assets if they are sent to
the wrong address. So this is a very big
advantage, I can say. But this will happen. Obviously very rarely
dismiss thick, but it can happen. So this keep in mind
these differences and also apart from ERCC1 21 gear is another standard
called ERC 1155. And if you want, you can google it later on. I may also create
course on that as well. In the end, I just have to say, although ERC A11 55
is quickly gaining popularity due to the low
gas fee and transition time. Erc 17 different standard
will also not be soon forgotten because
right now all the NFT is, you see, are returning ERC 721. So this was a very
small differences. Obviously, there are a lot
of differences between them. I just want you to give
a brief overview of it. In the next module, we are going to do the practical portion that is set up our environment
and everything. So I would just like you
do see the horse roadmap, how we are going to
do it step-by-step. First step will be to set up development and
harmony with hardhead. Our second step is to create ERC 721 NFT smart contracts using the append Zeplin library. You can see because make sure you know how
to use hardhat, you know what is open Zeplin, at least we don't
have to remember the code because all the
codes are predefined in it. The third thing we will do is create an estimated at that
and upload it to IPFS. Are four. Tasks will be
deployed as smart contract with the Italian designate
using the alchemy portal. Then our fifth tasks will be the mint NFT and view it
on our MetaMask wallet. So definitely you have to
install on my traumas as well. Our last thing is
to list NFT for cell on OpenShift platform. So this is how we will
complete this course. You don't have to
think too much, but you should know the
basics of solidity. Hard hat. What is my Thomas, what is alchemy? At this? These are the basics you have to know in order to continue
with that course. That's it for this video. Let's get started working on that code in
the next session. Thank you.
4. Install hardhat and its dependencies: Hi. In this session, we will set up that development environment
for our project. So just simply go to any
directory of your choice and create a folder called my first NFT. Okay? We will be using a
tool called hardhead. Hardhat is an environment developers use to test, compile, deploy, and the work decentralized applications
based on titanium blockchain. It helps coders
and developers to manage many of the
tasks that are required to develop depths and smart contracts and make
the process easy and fast. So you can just
Google it as well. Hardhat. See, this is
what I'm talking about. So get started. You can see how this is done. This is the command line
which we have to use. The first thing, go
inside our folder, that is my first NFT
and open up a terminal. You can see it, or you
can open up a terminal here on I will just append this folder into VS
code. Like this. This. Okay. I am using VS Code if you want, you can use any text editor. Now here, just
write new terminal. And then to install
hardhat, first, we have to create an empty npm project
with this command npm. See, our NPH NPM
package is ready. Now we have to use
this command to install hardhead as a
developer dev dependency. Like npm. Install save dev. I'd had just wait till it executes. You can see here, if you want, you can read this
documentation as well. It will help you to
understand a lot better. Then. Quick study this, this with this command
and px hardhead, we will get a bare bone
installation with no plug-ins, but we will get the
hardest project in our we will get the folders are the folder
structure of a project. So in the same terminal, just simply write
that command and px, I'd had press enter. Then you can see this
hardhead stuff coming. What do you want to do that is create a basic sample project. We will use this. Press enter, then press
Enter, and then press Enter. Like this. See,
all these folders and files have been
created by a hardhat. And I'm just hoping
that you know, the basics of Hardhead
because definitely that you must know because
they are only two tools, hardhead, all the truffle. These two tools are
being used to debug, deploy, test our smart
contracts mostly. Now, you can see
this line of code, that sample project as us to install all these
dependencies as well. Which makes hardhat
compatible with tech test. Well with waffle or Chai and ethers library to interact
with the smart contract. So simply just copy all this, paste it down here,
and press Enter. Let those dependencies
installed. Here. You can read about
these as well. That is a sample project asked us to install way
for terrorists. See you miss, you can stall
all of these dependencies. Simply. You have to install these dependencies in
order to make it work. That's it. It may take some time. It will just wait
and let it finish. See if you don't if you
don't know hardhead, you can just read these
documentations are simply watch videos on hardhead and then continue with this course so
that you don't get confused. But I will say hide it. Hard hat is not a very big deal. You must know
solidity, at least. Because hardwired
commands, you can just write it down
or learn, That's it. Everything is now
being installed. You can see the package
JSON file, hardhat, eat her GI, dev dependencies. Yeah, everything is now
installed properly. In the next video
we will work on. That is my Thomas or alchemy. That's it for today. See you in the next video.
5. Alchemy and Metamask account: Hi. In this video, we will
learn how to create. We will not learn.
You have to create an account in alchemy
and MetaMask. So in the previous video, hard hat gives us few
folders and file. As you can see, we will understand all
those step-by-step. But first let's go to hard
hat dot config dot js file. And make sure we, our v are pointing
our network to drink to be Italian
test network. And for that to work, we need to be itanium node
URL, a valid address. So as I already have an account in Alchemy as well as my Tamas. I won't be creating
any new account in it. You can just Google it
and do it on your own. It's very simple and
straight forward. You can just see right alchemy. Here. Click on login. First. I am logging in, but you will get an option to sign up with
your Google account. So simply, after you
successfully sign up, you will be redirected
to this dashboard. You can see here already, I have one app. You won't be seeing
this in your dashboard. Simply, our task is to create
a new app. I will name it. What? I will just name it. My first NFT, n Here
chain will be okay. But the network I
will be using rinky. You can see depreciate it, but it is not
completely stopped. If later on in the video, if we get any issued, then I will switches
to discuss shortly. But right now I am
using rink, Maybe. Just click on Create App. See, your app is being created
in less than a second. Then in this view key, after clicking, you will
get your secret key. Like you can see. This is the STDP URL key. Now the secret key, it is
just the alchemy and point. And I will delete this app. So it will be a waste of time for you to try to
copy this link. And then next thing
you have to do is to get private and public key
from your MetaMask wallet. You can install my thalamus
by going to my Thomas.io website and install
the extension from a four-year browser. I'm not going to set again. It will take, I think five to eight minutes
or ten minutes. I guess. You just simply watch a video in the YouTube on how to install
and set up my thalamus. Then get back to this course because
definitely you will require a MetaMask wallet and also some tests eaters
in your account. After installing it, just
click on this Madame us. Login to your wallet. Then change the network
during COVID test network. Here I have all these, fake it till I got
from the faucet. That is rinky be faucet. You can also paste your
address and get it for free. Then after here,
just study here, click on account details. Export private key, type in your password and you
will get a private key. Just copy it. Okay? And public key is this key. That is your account key. This is the public key. Now, we will use
this alchemy URL and our my Tamas private
and public key in our hardhead configuration, mainly met damask private key. For that, we will install
and use a dependency called dot ENV by using that
command, npm install. In which just simply write
npm install dot ENV. We are using this E and V
dot ENV packet because it is not recommended to paste
those sensitivity, sensitive keys directly in your code that is hired
hardhead configure anywhere directly because it might get pushed to the GitHub
by mistake or whatever. Now, this is then
go to package.json. You can see this dot
ENV being installed. Now in the root directory, create a file
called dot e and v. Ok. And now create this
variable was alchemy. Url is equal to like this. Then enter. Wallet. Private key is
equal to like this. Public key is equal to this. Now, simply go here, copy and paste it here. Then copy. Public, paste it here. And same as export
your private key. And paste it here. Let's just save it. Remember there is no comma D and directly and then
go to the another line. Now, we have our keys ready. We just have to configure our hardhead to work
with those key. In this module
that exploit code. Just go down to solidity
and write these changes. That is networks. Then it could be. Then URL will be processed. This. But for that to work, you have to require
the dot ENV package. It is dot ENV dot config this line of code you have to write in order to make it work. Here we go just says process
dot ENV and gamey URL. And second thing yet,
right, accounts. Then this square brackets. Within the square bracket, you have to write process that ENV wallet, private key. That's it. Then. Now our project is ready to
work with dialing cubit, test net off our
alchemy. Thank you.
6. Understanding ERC721 Contract: Hi. Before moving forward,
in this video, I would like to talk about the ERC 721 token and
spatially the functions and code related to the
open Zeplin library. So if you know all the basics and if you
know **** NFT minting code, then you can directly skip
this video and move forward. Or else just watch this
video and understand the small and small details of the ER C7 to T1 contract
given us by open Zeplin. For that, I will
just simply create a new project because
I don't want to do anything with the
already NFT project. You don't have to do it. You can just watch
it if you want. I'm going to explain the code. And what is the NPM in eight. Then I will simply write
npm install hardhead. Then I will simply create a
herd ahead project and Px, how great the basic
project, that's it. And then I will install open Zeplin slash tracks. Okay, now, open the folder. Okay, now let's go to the pen. That plane website. Here you can see contracts. And then just click
on Get started. So we have installed
this NPM package. Now click on years is 721. Now here you can see this basic NFT maintaining
code we just copied. So here they're using this ERC 17 D1 to track
items in their game, which will have their
own unique attributes. Whenever one to be
awarded Web Player, it must be maintained
and sent to them. Okay. So that's it. I will just copy it. Create the file. Yeah, 721, demo dot soda. And basically this is just should
be solely the D O k. Now, here we can see the functionalities
of an ERC 721 token. Functionalities are
transfer tokens from one account to another. Get that current token
counts of an account, approve whether it's
third party account can transfer tokens and get the
honor of the specific tokens. So these are the
functionalities given to us by the year 21. So now, simply, if I
go inside this year, see 17 given URI storage. You can check out those
code in the node modules. Then added it up in Zeplin. Here you will find token and C7 don't even
token like this. So here you can find everything, all the functions and all. So simply, when we are creating and deploying
our project, we have to send his
name and symbol. So this name, this
name is used to tell outset contracts and applications that
use of this token. And that symbol also
helps in providing compatibility with the
ERC tokens standard. It provides outset programs with the tokens shorthand name. So these are coming from here. That is, this constructor initializes the
contract by setting a name and operator
token connection. Then we have this
owner state variable. That core of an ear C7 to T1 token is the owners
private variable, which is a map of that token
ID and its owner address. You can see here, the owner's state variable
contains that token ID and its owners address. For example, here, the Alice has the NFT id one and
above has NF DID to. The owner state variable will contain these
following and j's, that is token ID and to which
the address belongs to. So this is the owner's radio, but India is a function
called Owner off. Let's see if it's not there, but we hate this one. We have this function
called owner of which looks up this variable, that is this owners variable, and returns the corresponding
entry if it finds one with respect to the token ID which is
sent to this function. The next thing, which is an important state
variable is that balances similar to ERC. 20 years is 721
has their balances private variable that keeps track of the whole
length of each account. So for example, when
Alice and Bob has an NFT, each variable would contain the entries like this that is addressed and
that token count. How many tokens or NFT
does this address half, we can call it through this balances state
variable which is here. So these are all inside
this smart contract. We will be using only the ones which are
required. If you want. You can explore as
much as you want. Then in these balances, we have this balance of methane, which looks up to this variable, that is balances variable and returns a corresponding entry. These are, this is another
function which you can use. Then we have this main thing, luncheon, which will help
us to create a new token. That means internal
function helps us to updates the owners
count in their balances variable adds the owners of that token ID in
the owner's variable. So this is what Mint does. That is, if Alice means
a new NFT token ID tree, the owners and balances
variable are updated like this, as shown in this diagram. Then then after we have another way to maintain
that is called a safe mint, which additionally verifies that the new owner can receive
ER's is having 212 or not. So this is another way
to use the main thing, which is also preferable
in most of the cases. This safe means you can find C, safe mint. So these are all functions which are returned
inside this contract. This is the main function
which we will use it in our code as Vince
here in that demo. So you can see this mint
function being used. So this main function
takes an address to which the NFT should be
maintained and that token ID. Then it checks that
the address should not be null or empty,
something like that. And whether this token
ID exists or not. And then it simply changes that balances variable
and the owners variable. Then it emit an event that is
transfer event on its own. So these are all going behind the code
that we don't know, but these are all working. That is this transfer function. For this transfer
function also we have this workflow that
is yet to workflows. Now, let's talk about that. Transfer functions. Like ERC 20 years is 721 has two workflows to transfer tokens from one
address to another. Deaf first one is the
simple transfer function, where the owner transfers token. And the second one is the
transfer from function, where a third party will have that due to
transfer that token. In the code. If you go to this year's is 721, which is present in
the node modules. You can see here. We have this transfer
function here. So it accepts from
two and token. And then there are some
required check that the owner of the token is
what we're sending from. And two should not be 0 at rest. That is, it should be
some valid address. And then that core part
of this function is to update the balances
and the owners variable, which you can see here. So for example, when Alice here has NFT of ID1 and ID3, and Bob has NFT id2. Then the balances
are as follows. That is, Alice has to token
count and Bob has one. But when Alice transfers
that token ID3 to Charlie, then that new balance
will be like this. That is, the address value for Token ID trees are
they date from Alice to Charlie in
the owner's variable. They are counts are
also updated in that balances
variable accordingly. You can see those
in the diagram. This is how it is done. Then we have that
transfer from function. It is the earlier one was not exposed to the user
because it was internal. But that transfer function is used to transfer tokens when
third parties are involved. And it transfers the tokens
on behalf of the owner. So here you can see it has some conditions to check and it makes sure that all
the conditions are true. That is, message that's sent, that it is who is calling
this function is the owner. The message the sender has been approved electrons to transfer that to On behalf of the owner. Owner has approved to
transfer all the tokens. If any one of any
of them is true. It calls that transfer
function internally. And definitely inside it. It has a proven other
functions as well. So here are their functions. We have talked about transfer. We have talked about main
thing and all safe means. Like this. We have talked a
lot of functions. And if you see the NFC code, get is this counter variable. So you might be thinking, what is this counter variable? So this counter is coming from, appends a plane, contracts,
utils, counters. So let's go to open
Zeplin contracts, then utils and counters. See, now we have this
counter and inside it, counters and then
inside it we have this counter struct
and some functions. So here when we write
counters dot counter, you can understand why, because this is the
counters library and discounted they
discounters dot counter. Then we get the value. That is why we write here like this because
earlier I was confused. What is this transfer
that is counters, dot counter and all. But when you go
inside their code, then you will understand, okay, this is the
real meaning of it. Now, you might be
thinking, okay, when we go inside this truck, then how we are able to call
the increment function, which is outside the struct. See here we have this increment function,
decrement function, reset. These functions we
have we were able to call it because of this line
that is using counters. Counters that counter. That's it. Because of this line, we were directly able to access these functions
from this variable. If I removed it,
if I remove this, you can see it will
start showing error. Just remember this is just a simple function
which starts from 0. And when we increment it, just increment one
value at a time. That's it. We might be thinking
to get a value. Why didn't we do it like this? Var I is equal to 0 and then
I plus, plus like this. The main reason we haven't done the increment like
this because in this case, we can change the
I value later on, something like 20 or 30. But we don't want this. We only want the value to
be incremented by one. And in this counters library, the only option is just to increment by one
or decrement by one. There is nothing such to set
the value of the counter. So that is the main
use of this counter. Now, at the very top, you can see we wear, we are importing
these two files. You have understood
that counters file. And this is just
that contract which contains the implementation
of the ERC 721 standards. There is another function, or you can say access
modifier of open Zeplin, which is known as ownable. I will just show you open Zeplin contracts access than ownable dots. So this will be used by you
a lot in the later projects because this helps us to set up access control
on our smart contract. So that only the owner of the smart contract
can mean the NFP is. So if you'd like to if you'd like to make sure that anyone can mean than
if they didn't, you shouldn't use this
library or else you should use it by just writing here. Game item is ERC 721 and then
comma o navel, like this. So now only the owner
can call this contract. That's it. For this
function to be only access to owner we can, we should write only
owner. Like this. This is the modifier which we have to use and it will make sure this function will be
called only by the owner. So I hope you have
understood these concepts. In the next video. When we will be
creating our own NFT, you will understand all
these implementations. And now I just
wanted to tell you how the how internally
this contract is working. Now, I will just
give me the summary. In the open Zeplin
there getters our name. When we are calling
the constructor, we are sending this
name and symbol. So the name field is used
to specify that name, which other contracts and applications can
use to identify it. The symbol is used to define us shorthand name or
symbol for that token. Total supply function is used to specify that
total supply of tokens on the blockchain that's applied does not
have to be persistent. Then balance of returns, the number of NFT is
that address owns. So definitely value-add
creating an NFT marketplace, you should know
how many days this particular my Thomas address
or whatever address owns. Then we have the ownership
responsibilities. First one is owner of this
function returns the owner of free tokens and dress because
yours is having 21 tokens, non-fungible and unique data represented on the
blockchain by ID. This ID can be used
by other users, contracts and applications to determine who owns that token. You know, every image, we give it the id. Then we have the
approved function. This function allows
or approves and other entity alterity to transfer tokens on
behalf of the owner. This is also very important function which you should know, which is an internal part
of the C7 to T1 contract, then we have take ownership. It is an optional function, that function similarly
to a withdrawal function, in that it can be called by an external party to veto tokens from another
user's account. As such, take ownership
can be used when the user has been approved to own a specified
amount of tokens. And vicious to
redraw those tokens from that balance
of another user. Then we have other
responsibilities as well that is transferred. It is another transfer function. It enables that to honor, to transfer it to another user. Similarly, how digital
tokens or points work? Then we have to turn
off owner by index. It is recommended but
are optional function. Each owner may only own
multiple NFT is concurrently. However, each NFP is
identified by a unique ID. And it can become difficult to keep track of ideas over time, as it is, the contracts
towards these ideas in it. And the token off owner by index function allows
us to retrieve that. This was about the
ownership functions. Then we have the function
of metadata. Metadata. This optional features provides
an interface to discover the metadata are linking to the data associated
with ID token. Then we have events. This is very much important
that these two events, that is transfer event
and they approve event. That transfer event
is triggered when the ownership changes from
one individual to another. It emits information about the account that
transfer that token, the account that received the token and the transfer token. That is the idea. So whenever we call any function or
minting function, anything like that, then this
transfer event is called. The log has been saved
in that blockchain. Then we have this blue function. This event is fired whenever
a user grants and other user ownership of the token whenever the proof on
Chinese executing. So this is an event which is being emitted by
the approved function. It emits information about which account currently
owns the token, which account has been
granted permission to acquire ownership of
that token, the future. And which token, that
is the idea has been granted permission to
transfer ownership. So I hope you have
understood a lot about how the ERC 721 opens
up being contract works. Thank you.
7. ERC 721 contract using Openzeppelin: Hi, welcome back. In this session, we will create our
solid the contract using the append
step plane library. Or you can say package
suggests you can Google as well, open sapling. Then click on the first link
that is presently contracts, and you can read what it is. So now to create our
ERC 721 smart contract, we will use this library. Open Zeplin is a library of
modular, reversible, secure, smart contracts from
the ATM network, written in solidity. It allows us to leverage than that tested and
community reviewed contracts for its
purpose and can significantly reduce the development time
of applications. So in simple words, it gives us predefined code
which we will use in our app. That's nothing much. To install it. You just simply
have to do it like any other NPM
package, NPM install. And then append Lynn
slash contracts. That's a presenter. Now it's working. You can just go to Docs
and see that Dawkins, ERC 27211151, like this. If you right-click on 721, you can see this code and on. I will also use the same cord. That's it. Nothing fancy. I will just use the same
code and change the name. That is that class
contract name these days. Simply. If you want, you can read the whole
documentation as well for your own understanding. Okay. I think I did some mistake. C. C. I will just copy from
here on the base. Okay. That's spelling. Okay. I did the spelling
mistake. It's fine. Now, that Contracts
folder simply create a new file called
my NFT dots sold. So first we will always
use this line of code. Like this. That is a
debate that we have to specify the license and
parcel of solid DVI using. Then I have to import
the pen Zeplin lab really lean on tracks to eLC 721, C7 going d1 dot zone. So you might be thinking
how I got this. So if you click on 721, see here, it's not there, but we will use these as well. So you can just copy it, paste it down here. That is E SS7 to D1 URI storage
and counters dots sold. So these inputs from a
principle and it is 721721 URI, storage and counters
have their own purpose. Years it will do 721 that
contains the implementation of the ERC 17 different standard which are NFT smart
contract will inherit. Counters is just helping
us increment that token IDs and can only be incremented or
decremented by one. Er, C7, C8, and T1 URI storage helps in the tracking URI,
which is stored in. Storage pointing
to NFT metadata. So these are the
use cases that is the meaning of these inputs. Now, let's create our contract. I will name it my NFT. Then it is extending to see 721 URI's to
which this is one. This is a kind of inheritance. You can say nothing much. So just using counters. Don't start countered. And founders can. So we are using these
counters to help us increment that identify as
for the tokens we meet, we're also use create, creating this token ID variable to keep track of all the
tokens we have issued. Now, let's create
the constructor. Constructor will take
a string mammary name, string memory, symbol C 721. And we will send this
name and symbol. The error is gone because we
have to write these lines. If you go to the open Zeplin, see this other code I have
been using, that's it. You can read. If you
want to understand more. Obviously, everything
has its own purpose. Now, after this constructor, I will create a function. And F, D, which will address the recipient string memory. Uri. It will be a lake, and it will return this value that is an integer. Now what? I will write this, this line of code c. This, I will write token
IDs, that increment. First thing, then you
went to 56, new item ID. We'll do two IDs,
that current id. Then I'm calling this
main function which is being inherited
in this contract. Some main recipient
and new item ID. Then said, can you add a new item ID? And token URI will be this. And simply at the very
end, return new MID. So now what this function mean? We have our function main NFT that allows us
to meet and NFV. We pass an argument
called recipient with specified that
address that will receive the NFT string
memory token URI is a string that should result to adjacent document that
describes the NFT my data, which we will do it in
the upcoming videos. And NFP is metadata is really
what brings it to life, allowing it to have conflict gable
properties such as name, description, image,
and other attributes. Later on we will create
a metadata file. In the end of the
function, a tense, a number that
represent the ID of the freshly minted
NFT, this one. So this is the code or the solidity contract
for minting and NFT. You can get the same contract here in the
documentation as well. If you want, you can read it
or try this, but the code, or you can just
understand here as this is a game item and an
hour, an hour is there. Nfp, that's it. This is creating an
FTE for the same item. So that's it for this video. I hope you have written
that code here. So in the next video, we will work on the
IPFS and our images. Thank you and see you
in the next session.
8. Uploading images to Pinata: Hi, Welcome back. Now to proceed further. First we need some images. You can use whatever image
you want to be an NFT. I will simply Google. Download free NFT art and click on this
Pixabay website, which gives us free
images like this. So I will use this image. This is, this looks
good as well. I'm just checking
out the images. Images are fine. This evidence simply
click on Free Download. K averages this smaller resolution,
and click on Download. This. I have this downloaded. Download, whatever
image you want. And inside the root directory, create a folder called data. And inside it create a
folder called images. Okay? You have this, my images. And I will just paste those
images in this folder. This image, smiling ape, you can just see,
just write my name. And this second image is this. I would just download it as well and paste it in
the Images folder. And it's good, does
seem Sun, the Sun. So I have these images in the project folder. Now. For uploading it
to the blockchain, I will use pinata, that is an IPFS. It simply uploading images to the blockchain is very expensive since they
are large in size. The best practice is to only upload the link
of your image to the blockchain and store
your image on an IPFS. Pinata allows you to upload NFT images for free
using IPFS protocol. This is a distributed
file sharing system. Simply Google beneath data. See, create a new account here. And then simply login
with your credentials. Then you will be redirected
to the dashboard. And here you have to upload
your images like this. Just simply click on
this Upload button file. I will select the file Web three images first,
that's my link. And then click on Upload button. File uploaded successfully,
C. And then another file, which is the Simpson. Like this. This is also uploaded. So now what we are doing is the steps required for
us to create the NFT. That is, first, we have
to upload the image to die PFS and then also
the metadata of the IPS. In the next video, we will be creating our My dad did that file as
well. Thank you.
9. Create Meta data and upload to Pinata: In this session, we will
create the NFC mightily done. Our task is to create a
JSON file for each image and populate it with data
including the pinata image URL, that is this one. See this image. If I click on this, we will be we can
see that image file, which is stored in the IPFS. And we need this URL to be pasted in the NFT
made up the data file. Okay? And this is a
format which is calm, client and understandable by platforms like NFT marketplace. That is this NFT
meta-data, fine. Now, for that, simply, inside them make
their data folder that is outside the images, create a new file
called the same name as the image file of this
smiling a dot json. So this is the METAR data
smiling images file. You simply have to write this line of code,
this adjacent file. So Dan name is my name a description. My first NFT is a smiling. Then this image is the URL, that is this URL. We have to paste this URL here. Then the F4 key will
be at three builds, which is an array. And trade type. Background value. What is the background
of this image? Something like blue. I will just write dark blue. That's it. As far the next image, again, just can
simply click on this. We're not in the images
in that metadata to it. I'm just selecting it here. You can write it
wherever you want. Json file. Copy this code of the smiling
either Jason, paste it. Now, genes that
values the Simpson. My sick get enough gain. It is a cool Simpson. Now, if I click on this, the background is something like orange, light orange. And the image I
have copied this, that is the URL of
the image, the IPFS. To save it to simply if
you go to the meter data, see we have this JSON
file and the images, we have the image. Okay? Now we have to upload
files to pinata as well. We will also add our this
JSON metadata files to IPFS so that we can pass
it to that token contract. Storing metadata
file directly on the blockchain is
still very expensive. Hence, we add an
additional layer of abstraction and upload these days sent to the Cloud as well. And simply stored a URL
pointing to this file. You simply file smiling, I upload. And then we have the smiley ape. And then that's Simpson. Find this one. Okay? So now we have done
all that necessary, required steps that is
uploading our image. Do I put IPFS, then uploading the NFT
metadata files to IPFS. And remember, we will use
this JSON file URL later on. It is this one. If I click on that simpson, Let's see what happens
that adjacent values. See. We have the image link
here. This working. So that's all for this video in the next session are
there in the next module, we will deploy this
smart contract to the test network and
see what happens. Thank you. See you
in the next session.
10. Writing the deployment script: Now that our contract
is written and our hard hat is also
been configured, as well as it's ready
to be deployed. V, it's time to write our contract deploying
deployment script. Navigate to the scripts folder, create a new file
called deploy dot js. Now, at first, where
we will require that eater dependency acquired. It is ethers from the
hardhead dependency. Then we will write and
sing function called main. Then we will create an instance of our contract. It is, we'll get the contracts, ethers that get contract tree, my NFT, and this is the contract
named see here, my NFT. Then we will simply writes in the small letter my end
if D is equal to await. Got big Dell, my NFT. Deploy. When we are
deploying the contract, see it in the constructor. It is asking a name and
symbol for our NFT. Name is my first. And and the and
symbol will be mine. And see like this. Then simply right
away, my NFT deployed. And we will console.log
that contract address that is deployed
address where it's being deployed in
the stadium network. The diploid two, and then my NFT address. We have uses a scene because we are using a weight
a lot of time. Then I will just
call the function. And then the good thing, if everything is okay, then I will just exit with 0. Or else, if we catch any error, then I will console love that. I love this exit issue. That contract factory. See, I have written that code, but let's try to
understand that lines. It is line-by-line. Let's try to understand
that contract factory. It test.js is an abstract
used to deploy new contracts. So this NFT here is a factory for instances
of our NFT contract. When using the harder it
tells plugin contract, factory and contract instances. I've connected to the
first signer by default. Calling deploy on a
contract will start the deployment and return a promise that results
to a contract. This is the object
that has a method for each hour of our contract
function that is, after being. We can also call whatever function we want in debt contract,
that smart contract. So the deployment
script is written. It's time to deploy
our contract. Let's check if it
will work or not. That's I would like to
create a new terminal. The deployment command is and bx or had run scripts. And then the scripts
we have deployed dot js network link to be. Let's see. Obviously it
will take some time. First, it's being compiled. Code. You can see one new
folder called artifacts. It's being created. Now let's wait and
see what happens, whether we will get an edit or it's
successfully deployed. All these hard hat code or
this NP x around deployed. This can be read or seen in
their documentation as well. These are nothing fancy. Stuff is very simple. But now we just have to wait. Sometimes I know there are
a lot of errors in it. Sometimes we're not able to deploy for some
silly mistakes. Let's see. I hope I haven't done any. So you can see our contract is successfully deployed
to this address. Make sure you copy
this address here. I will just read the
comment and paste it here so that I don't lose it. But luckily, it has taken
some time, but it's fine. Now to check whether it's to check that
deployed contract, we can use that inky be eaters can see that transaction
which happened right now. Let's see. Here I have read for
th second ago from this public key that is the from address is
our Meta mass address. Again, I wanted to
just see Degas E, D, E D, C. This is That's it. We have successfully
deployed our first contract. This contract address
will be used later on. And so that's why I
have just copied it. You also do the same. That's all for this session. In the next module, we will make our NFT. Thank you.
11. Creating a minting script: Hi, welcome back. Earlier, we have successfully deployed our smart contract to the Itanium destiny and
caught our contract address. In this session, we
will meet our LFTs. So what is meaning? Meaning the first to
the process of turning a digital file into an NFT
on the titanium blockchain. This NFT is stored on the
de-centralized database, making it impossible to
edit, modify, or delete. Now, for that to happen, we have to install a
library called a verb tree. We will need the alchemy library to interact with that
contract deployed. Therefore, you should
install this at first. Alchemy web tree is
similar to eaters, but an enhanced web
tree library used to make requests to the
Akkadian blockchain easier. So in that terminal, we have to use this command. Now open up your project. Here. Simply npm. Install ALL CH slash alchemy hyphen three. It will take some
time to be installed. And after that, our next task is to create
our minting script. So earlier we have is deployed
script, same like that. Create a new file, insights script and name. It meant NFT dot j is the main thing process need some variables like your MetaMask keys
and that alchemy URL. So far the melanomas keys simply require that
dot ENV back cage. Then that alchemy Web three, which we just installed at these create Kimmy three equal to. Require. This tree. Then create an instance that is our URL is processed. The ENV. Gamey. You like this. Now, we have to
grab our contract ABI and create an
instance of our contract. Aba is that interface
to interact with the smart contract
which we have deployed. Hard hat has generated an
ABF or our smart contract, which is stored in
artifacts folder. See here, contracts, my NFT and then we have
mine FT dot json files. This is the ABA
am talking about. It is important that we have that smart contract
address which we have deployed. And this is this smart
contract address. We will use the Web three
contract method to create our contract instance using
the ABA and this address. Let's do it. Yet I will let const
contract is equal to, is equal to constant require
will go up a folder, then artifacts than corn tracks. Then my NFP dots soul than mine. If d dot js, this, then that contract address, I will write it here on track. Address is equal to this. And then I will create the contract instance,
tree, contract instance. So I will just name it. And if the contract is
equal to new Web three, dot dot contract,
and it will accept the contract ABI on track dot
aba and contract address. So that's it. That's
how it is done. Now, we will define
the minting function. Let's create the front
chin here and name it meant an F D. It will be a sinc function which will accept a token URI. This token URL. I will
tell you later on, what is it, what it is. But right now, just focus
on this piece of code. Let's write it down at first. Nonce is equal to await. Web three dots it. The Get Transaction Count processes that ENV, not wallet, public key, latest. Then we will sign a transaction. And first we will create
a transaction object. It will accept from process the ENV not let private key, the public key only. Well, let public key then to contract address. Then nonce. Nonce. Then gas 500, housing, then max d fee. But gas will give it
the value 199999987. And data it is NFT
contract methods. That meant NFT. We will write
versus the ENV dot. Let public key. Can you add a code ABA? So that's it. Now, let's break that code down. Nonce is used to keep
track of the number of transactions that have
been sent from your address. This is necessary for
security purposes to prevent replay attacks. The from is the original or the initiator
of that transaction. This is our public address. That two key defers to the contract address we
use to interact with gas is the estimated gas needed to complete
the transaction. Max. Priority fee per gas means
it is estimated fee to bid. But gas and data is that
computation you want to perform? Richard is maintaining an NFT. This is the code. Now we have this
transaction with us. Then the next we have to
sign this transaction. The sign this transaction
in order to send it off. Here we will use our
private key for days. We make use of the Web
three dots it functions. This will give you
the transaction hash in order to verify that our transaction was effectively mind and not dropped
off by the network. Now, let's say Code sign
transaction is equal to await Web three accounts, that sign transaction. This transaction
object and the process that ENV the vallate
private key, this thing, private key. Then section receptor is called Web 38 dots and
signed transaction. We have same transition
dot raw transaction. Then simply we will write console.log,
transaction receipt. Learn JSON dot stringify, transaction G, C. Okay, Save. Now we have completed
our main thing script. Now it's time we call
this meant NFT function. And the end of this file, that meant NFT functions
requires a token URI parameter here that refers to that JSON document where the metadata is
stored in Kenyatta. So what I mean by that is that might tell me that file which we have
uploaded in the opinion data. This this unit. Okay. Simply we will
call main NFT function. Here. That I'm mentally tough file, not the image file. Just remember that JSON file. And one one-by-one. Yep, Let's save it. Now it's time to
open our domain. We'll just, I've been here
in new terminal like this. And write the command
node scrapes meant and f, d dot js. And press Enter. Let's see if some areas there are everything
is working fine. Sometimes I have what I have
encountered is I haven't got the print statement and
terminal just got stuck here. No. This is not the case in our we have this proper
transaction receipt. You can see I guess it
has properly main dead. So that's it. If you want. Let's go and check in our
contract address here as well. Earlier it was this transaction. If I refresh, and you can see
our mint NFP is also done. So you can just celebrate, we have successfully wrote the script and maintain
our first NFT. In the next video, we will view this
NFT in our wallet. Or if you want. I can also mean the other
NFT as well. Let's see. I will just copy does Simpson, simpson here as well. And then in our code here, I will change it to
that data file URL. And again, I will just go
here and type the same code. Node, scrapes main, NFT dot js, and press Enter. Let's see. Let's see if it is showing any error or do we
know it is also done? It is very fast right now. I'm, I'm very glad. That same thing. Let's check. In our contract address. Do we have a new yes. We have districting second ago. We have this new
transaction here, which is the main NFT. So that's it. In the next video, we will view our NFT in
that MetaMask wallet. Thank you for watching. See you in the next session.
12. View NFT in Metamask wallet: Hey, welcome back. In the last session, we have successfully
maintain our NFA. In this video, we will view our NFT in
our MetaMask wallet. Now for that, we need some information and
we have to visit this ring ether scan,
our contract address. I have already done that. In this transaction hash. Suppose this one, the
first NFT we maintain. This contract
address is required, that is this
contract address and this token ID is
required because we have to paste these details in the
MetaMask wallet in order, in order for our
NFT to be viewed. And that's it. So let's see. I'm going to move my mask. And if D The first, we have to make sure we are in that incubator desk network. Then we have to go to this NFT section and
click on Import NFT. See here this is the contract
at this which is required. Just paste that contract address
and the id which is one. And I will just click on Import. Let's see. You can see that my first NFT is
now written here. Definitely. It will, the image will take
some time, I believe. But at least it is being fetched from your account
or from the blockchain. Will just try to
refresh it and do something that's C. Also. If you want, you can go and upload your
other NFT as well. Just refresh it multiple
times. Let's see. It's working. It's working. See, smiling. Name is also correct. Only the image. It's taking too much
time, I believe. You can see here our
NFT or that smiling is successfully showing
in our MetaMask wallet. So that's it. This part is done. If you want. You can import
the other NFT as well. I will just show it
here and then try to sell it in the marketplace
in the next video. That's all for today. Thank you.
13. View and Sell your NFT in OpenSea: Hi, welcome back. So we have successfully viewed
our NFT in the Meta mask. Now it's time. We list our NFT in the
open sea market place. So if you write a, C, C is that piRNA marketplace for nf this it also has the
most NFT activity by far, with all that time trading
volume in billions, making it ideal place to
get started with trading. And if these to
login into appends, see we should have a valid and since we are using
rinky bit test network, so that is why we have to
use the net of a pensive. We cannot use this main
neat stuff because our NFT is also sent
on that testlet. So if we connect our
volunteer, it won't show. For that to show, we have to go and write
a fancy designated, this designates that
are pensive.io. See here. Then we have to
connect our MetaMask wallet. Just click on this. Notification, will pop up. Just simply login to
your MetaMask wallet. And see. We have our two. Nft is. Just remember, I haven't view imported this NFT in them
at damask wallet, but that doesn't mean open sea or it is not in our
contract address, since you can see both days where sent to the test net with
this MetaMask wallet. And you might be thinking
how this is here. This I already bought
from this marketplace, and I will also
show you how to buy your own LFTs in that
test market as well. Simply. Now, it's time. We sell this NFT in
this test market. So simply when I click on it, you can see this
background dark blue. I write it in the
METAR data file. And this is the description. Now I will simply click
on this cell button. Here. I will write a fixed amount
of suppose 0.01 e duration, one month, and click
on complete listing. So simply to enter the price
duration. And that's it. It will show a
progress indicator and append a pure voted to
approve that transaction. C. Here, I will simply
click on Approve. That is confirm. Now, simply sign saying that transaction. And that's it. We have successfully listed our NFC to sell in
that test market. And the same thing can be
done in the main net as well. If you have the editors, definitely you can do it. See our NFP is now in sale. So cool. This so good. If you want, you can
explore other LFTs as well. As I told you I bought that. Suppose. You want to buy or
you like some NFT. Now? Yeah, cryptocurrency,
they can be bought. I will just quickly
click on binary 0 eater, I guess it's for free. I will just simply
click on Checkout. Okay. Sorry. It will
go to the wallet. This right now I don't want, I want to buy directly from here any NFT, 0.01, at least. I don't want this free
stuff. Again, this is here. And if I write by now and sort by recently listed Dan, see, our NFT is now here. Same as this. There are a lot of other
NFT is camping with potato. I like this NFT. I will just click on
this night, 0.05. I will click on Buy Now. And simply, I will check it out. This is in the, this is all happening
in that test network. See, my test eaters
will be used here. Let's see what happens. Status is yes. Now I have what? This NFT. And if you want to see, if you go to the profile section and see this NFT is now here, and if you want, I guess
you can sell it now. I don't know. Yeah. Since you have this, you can now sell as well. So yeah, that's it. I hope you have
enjoyed this course. Also, I will upload or attach the whole code of the
solidity or this application. Feel free to check if you have any doubt or if you did anything
wrong in your own code, are simply upload that code in your GitHub so that you can
show it in your resume. Thank you very much,
and keep practicing.
 Rahul Agarwal, Flutter Developer & Trainer