Transcripts
1. Intro: I love the look of block prints. Their beauty, their simplicity, and their handcrafted charm. There's just something
about them and because I love
trying new things, I bought myself a
block printing kit. It's sat in the drawer and it sat in the drawer and
it sat in the drawer. I think about a year went by
before I even touched it. I was afraid to
try something new. I was afraid to be bad at something I didn't
know how to do. Does that sound familiar? Hi, I'm Anne Butera. I'm a self-taught botanical
watercolor artist. I find inspiration in
my garden into nature. I'm passionate about encouraging other creatives to explore their creativity and to overcome their fears
and begin making art. If you have been dreaming about learning how to make block print but didn't know where to start
you're in the right place. In this class, I'll
help you create a beautiful design based
on your own inspirations. You can create a block print that reflects your
creative voice. I'll share tips and
suggestions to make this imagery work as a
successful block print. I'll show you how to transfer your finished design
onto your block and how to successfully
and safely color it. Finally, I'll demonstrate
how to make prints with your block and how to
troubleshoot printing problems. Throughout the
lessons, I share tips and suggestions to help you not only be successful but also
to make this medium your own. You can enjoy creating unique
and beautiful block prints. If you're ready to begin your
own block printing journey, I'll see you in class.
2. Your Project: Your project is to create
your own block print. The lessons show you step by
step just how to do this. I've broken down the project
into small steps that you'll take from start to
finish to make that happen. Throughout the class, I
will specify which step in your project you will
be taking next to make sure that you will be successful creating
your block print. Look for images like this
throughout the class. Here in Skillshare, there are also some handy
things you'll need to know. Every class will have
these different tabs for the different
parts of the class. If you click on
About this Class, that's where you learn about what's going to take
place in the class. It's also where
you can follow me. If you're not already following
me, be sure to do that. Just click on Follow. You can click on the Review tab to read reviews of the class. Also, once you've finished it, you can leave your own review. I'd love for you to do that. The Discussion section
is where you can start a conversation
or ask a question. You can also share your project
here if you want to get some feedback from other
students or from me. You can click on the
Transcripts to have a written transcript of
all the text of the class, all my spoken text if
that will help you. You can save the class. You can add it to your calendar. You can share it. The Projects & Resources tab is where you can
create your project. Also, it's where
your resources are. This blogging class
has two handouts. The block printing
class will have one. That's where you
can download it. You can also take a look at
other students' projects. That's a great place to
get some inspiration, and it's a wonderful
way to connect with this beautiful community
here on Skillshare. I hope you will do that. Why don't we get started?
3. Gather Supplies: One of the things
that makes block printing a little
bit more complicated than other types of
art-making is the fact that you need a lot
of specific supplies. I've created a block
printing supply checklist which you can download from the class in
the class resources, as I showed in the last lesson. Then you can use this to make sure that you have all
the supplies you'll need. Let's go over what we're
going to need for our class. I've gathered them
all here together. The first thing that
you're going to need is a carving tool. I'm going to be using this
carving tool from Speedball. What's great about
this is that it has lots of different tips
that you can use. It's different sizes,
different shapes. They store in the handle. You can choose the
one you want and then put that in the top here. You tighten that and
then you're ready to go. That's a lot more convenient
than having multiple tools. You can use one for lots
of different carving. You're going to need
your carving tool. You're going to need
something to carve. There are so many
different options when it comes to blocks. There are these
Speedball Speedy-Carve, really soft, thick blocks. I like these from Blick; these blue easy-cut blocks and they come in lots
of different sizes. There really are so
many different types of materials you can carve. It might be helpful for
you to test a few of them out before you get a lot of any, see which ones you
like the best. You need something to carve
with and something to carve. In terms of printing, you're going to need some ink. There are lots of
different types of inks and I'm going to
use this fabric ink, which you can also use on paper. You can use it on fabric too. Also works nicely on paper. Comes in different kinds of
containers, different sizes. I prefer using
water-soluble ink because it's easier to clean up
and it's not smelly. But, again, personal preference. Use what you like using, you could use paint too. Just experiment and
see what you like. Also for printing, you're going to need
an inking surface. This is an inking plate that came with my block printing kit. You can use whatever you have. It needs to be a hard,
flat, smooth surface. The way you use this
is to squeeze out your ink onto the plate and
then you roll your brayer. This is a brayer. That's
something else you're going to need for your printing. They come in different
sizes, different materials. That is how you're going to
apply the ink to your block. Something else that is handy for printing is called a barren. This is a barren and that
you use to apply pressure to your block when
you're printing so that the ink transfers. If you have trouble
getting a nice, clean print, it might be
handy to have a barren. You could also use your fingers. It's not a necessity, but it makes for a better print. You're going to need some paper, and I'm going to be
using a sketchbook and some loose paper for
sketching my design. You could also
sketch directly on the block if you
feel very confident, but I think it's
better to create your composition first on some separate paper
and then transfer it. To transfer, I'm going
to be using a spoon, and I'll show you how to
do that in that lesson. For printing, you're
going to need some paper. There are all sorts of printing papers that
you can purchase. Some of them are very fancy. This one is made with mulberry. You can really use any paper. Printer paper works fine, sketchbook paper works fine. You can experiment and see how the prints work
on different paper, what it looks like on smoother paper or
more textured paper. You'll need a pencil for sketching and also
transferring your design. I also will go over the pencil marks once
it's transferred, with a permanent marker so that the lines don't get rubbed
away while I'm carving. That also makes it
easier just to see your design on the block
wall you are carving it. The last supply I'm going to be showing you is this
freezer paper. I use this just for covering up my work surface and that way
I don't get ink everywhere. You can reuse your
paper again and again. I like it because it has
plastic on the backside, so it helps protect the surface. It won't bleed through. You can use any paper or if you don't mind your
work surface getting messy, you don't even need to cover
it with something else. For your project,
your first step is to download the block
printing supply list. Then next you're going
to gather your supplies. When you come back, we're going to
start searching for inspiration so that
the block print that you create will be truly a reflection of your
creative voice.
4. Design Inspiration: Are you ready to look
around for inspiration? Let me show you how I find it. I'm primarily a
botanical artist and so my garden and nature
and flowers always catch my eye and
are the source of my inspiration and also the motifs that
you'll see in my art. When I'm thinking
about a block print, I look at shapes, I look at textures, I look at juxtaposition
of details. Where is there a large space of one texture next to a
space of another texture? Where are their details? Where are things flat? That all comes to
play in block prints. When you are going
out into nature or maybe you're in a city
looking at man-made objects, take a look at those
juxtapositions, take a look at
light next to dark, take a look at textures. All of that will provide
you with inspiration for your art and especially when you're
thinking about block prints. In the beginning, take a
look for simple shapes and think about how you might want
to translate what you see, simplify it, and simplify
it into its largest shapes. Think about the textures. What sort of lines do you see? I also find inspiration
in my indoor garden. All the house
plants that I grow, the block I'll be carving is inspired by one of
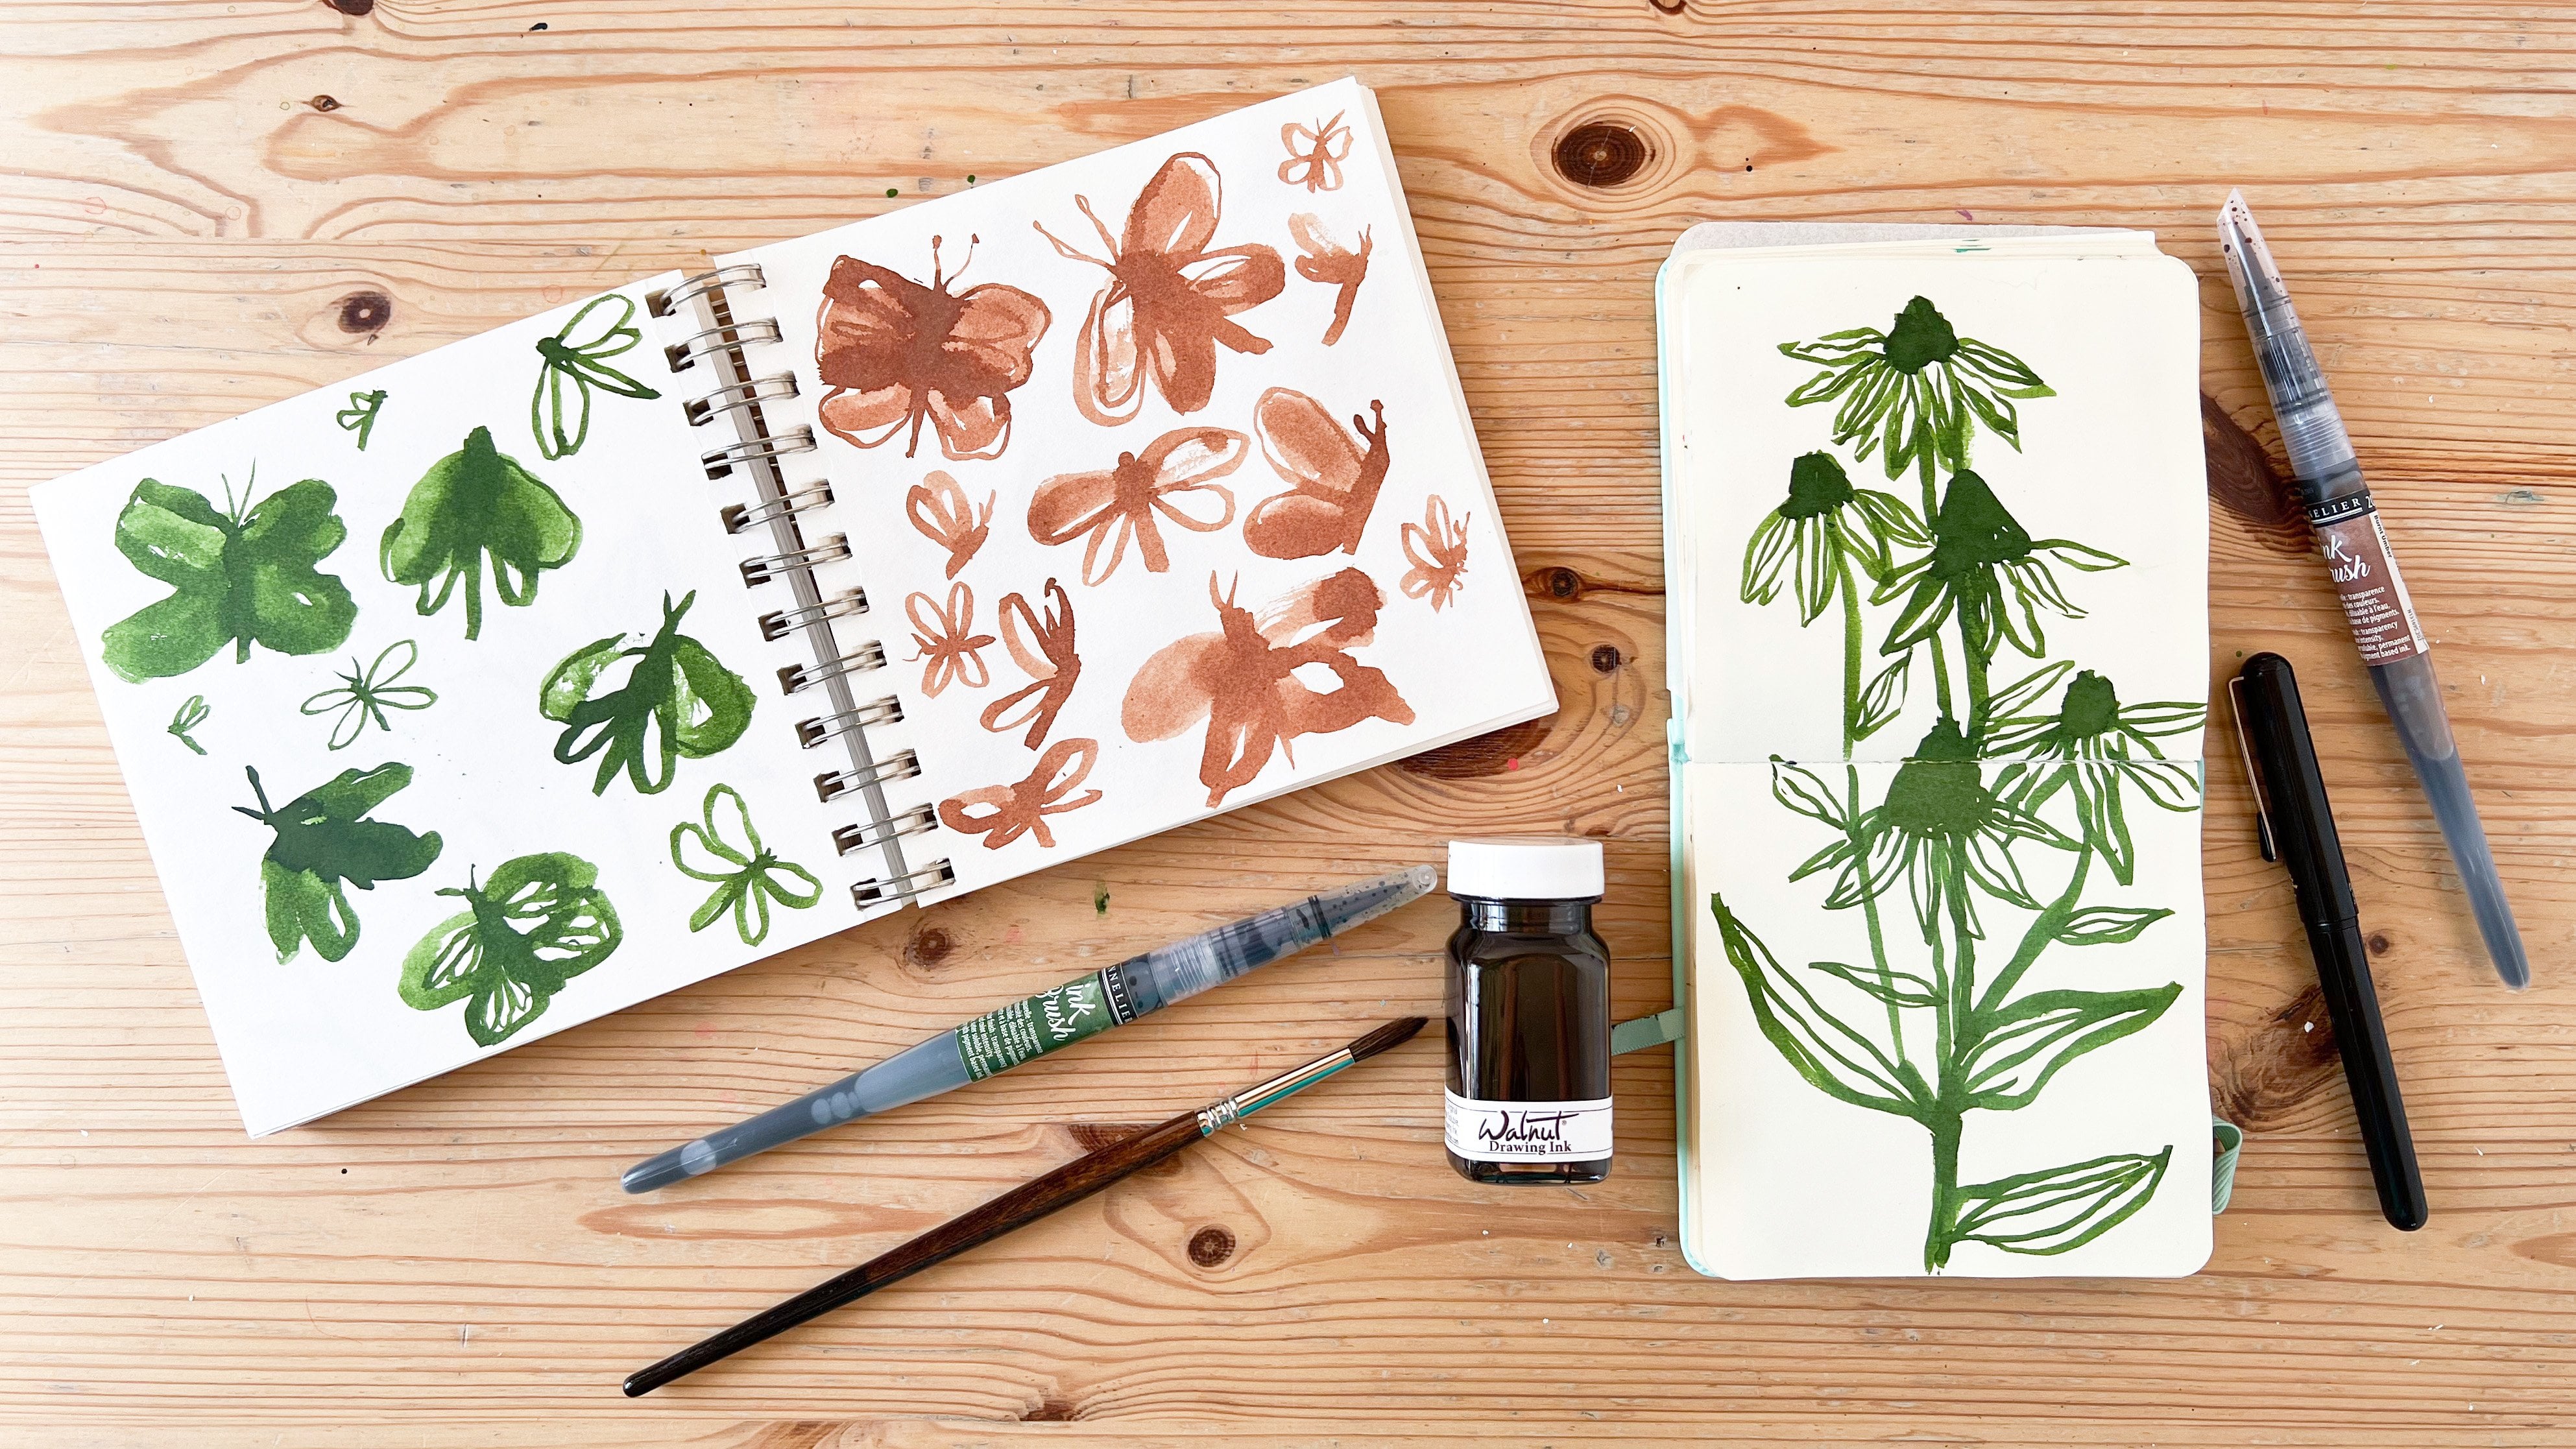
those house plants. Another place to
look for inspiration is your own art in
your sketch books. Take a look for
those same things in your sketches
and your drawings, lines, textures or
blocks of color. All of that will
help inspire you. Don't only think of
specific objects. Maybe you want to do something
that's more geometric, shapes like these would
be very wonderful in a block print and easy,
simple first design. I love these mushrooms
and they have a great juxtaposition of large shapes next to more
small detailed shapes. Look for those sorts of things as you hunt
for inspiration. Look for more tips that show up again and again in
your sketch book, look for something
fun and different. Here's a few more
mushroom examples and then some sketches that
are a lot more detailed. You can definitely do
detailed block prints but for your first print I would suggest doing
something more simple. Here's a beautiful plant. Something like this
star quilt block would make for a fun
block print as well. Another sketchbook
here are some collages and looking at the
different shapes, the blocks of color
that it gives you so much inspiration and that all of these would make
interesting block prints. The shapes are simple
enough that it wouldn't be difficult to carve. The simple shapes of
these paintings would also be easy to carve. I thought it might be also helpful to take a
look at some of my sketches that lead
to the block print. I sketched these
[inaudible] and then created this block from them. I also sketched a
bunch of hummingbirds. Here are some more. Then I went on to create some block prints from
those hummingbird images, so my sketches and
then the blocks. This one is symmetrical
and so I used the tracing paper to make
sure that it was symmetrical. Then here is the block
that I created from that. This one is actually
my first block print and I absolutely love it, is that bubble wand
and the bubbles, I cut them apart to
create my prints. I actually use these as stamps. That's something else
that you could do. If you don't have
the other supplies you could make stamps. Another motif that I
love is the goldfish. If you've taken my
goldfish watercolor class you'll see my
goldfish paintings. I thought it would
be fun to create some block prints
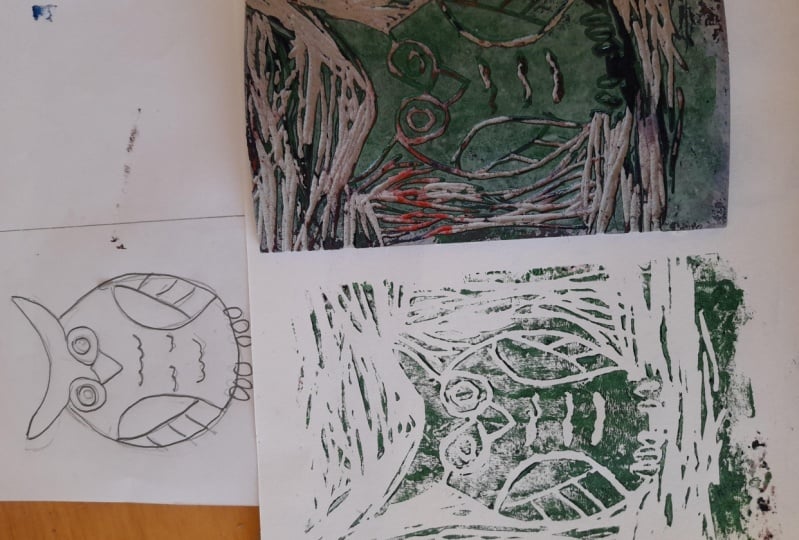
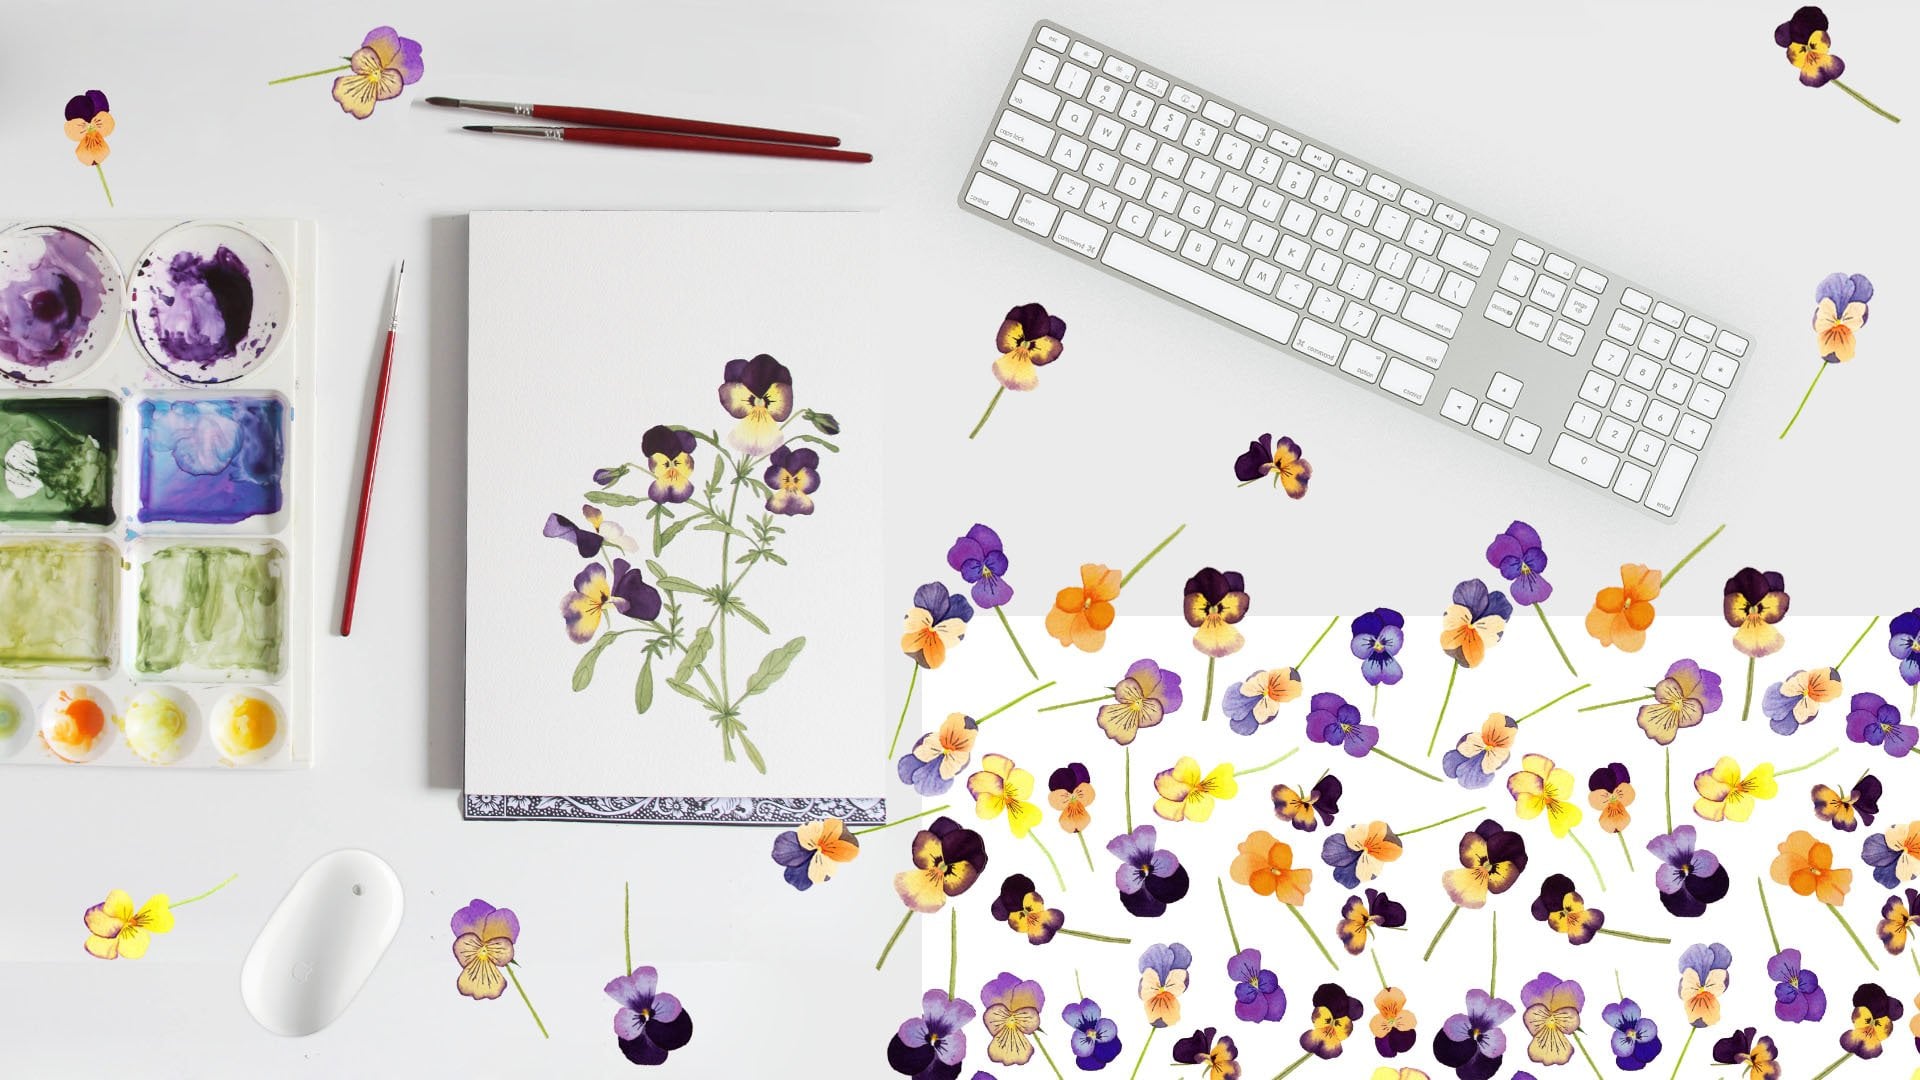
with fish shapes. Pansies and violas are some
of my favorite flowers and here are the sketches
that led to this block print. The viola is here, a couple of different
variation of sketches and then the sketch that was eventually this print. Then something a
little bit different, this geometric fabric
repeating shape. That's something
else that you can do with your block prints. The next step for
your project is to hunt for some of your
own inspiration. I hope that you
have an idea now of what sorts of imagery you want
to use in your own design. In the next lesson I'll
give you some tips for creating your design.
I'll see you there.
5. Create the Design: Creating your design is such
a fun part of the process. I know it can be
overwhelming because there are so many possibilities. But if you take
your time with this and play around
with some imagery, then you will make sure that
you have a successful print. I've decided to use an XLS
as inspiration for my block. I have my plant here. I have a sketchual page to
use as reference as well. I just spent some time playing with different
arrangements of the plant and the pot to find a nice composition
for my block print. You can see I played around with the
placement of the leaves, the number of leaves, the different directions
that the leaves are facing. I wanted to find a nice
balance and a nice flow. Now my block is a rectangle and my sketchbook
reference is a square. So I wasn't going to
recreate it exactly. That's how it was very
helpful to sketch first. I just traced around my block
to create the rectangles, which is another tip that
I'll share with you, trace around your block when
you sketch your design, so you'll know
exactly the size and shape you need for
your composition. Then I sketched in
them until I found one that I liked the most. I think of all the designs, the one I like the
most is this one, this landscape
orientation design. The next step for
your project is to sketch some design ideas. I need to decide what parts of the design I'm
going to carve, and so I've taken my
final composition and sketch it out on some tracing paper with
my permanent marker, then I can test out my design. That's another tip for you. Test out different versions of your design to help you figure out which areas you're
going to carve. To do that, what
I'm going to do is I'm going to fill in the design. Any area that is colored in is this space that
we're not going to carve. I can test my design by coloring in different parts of it. There I colored in
all the leaves. Then this other
option I'm going to color in the entire pot. That gives me two
different variations. I'll get to see what
my design would look like if I had carved
it two different ways. That'll save you a lot of time. You won't have to carve the entire design twice to
get two different results. Here's some more examples. With each of these botanicals, I needed to make a decision about how to carve the blocks. Which parts of the
plants would be light and which would be dark. For this Marigold, I chose dark leaves and stems
and ablate flower. I could've carved it
the opposite way and had light leaves like
with this flower, and a dark flower like
with this, Mr. Shyam. I chose a dark flower and dark
leaves for the Mr. Shyam, but I could have
done the opposite, or I could've kept one
dark and one light. It's a stylistic decision
you'll need to make for your designs so
think about that. With this viola flower
compared to the Pansy, they both have dark leaves, and the Pansy top
petals are light. But the viola's top
petals are dark, where the bottom
petals are light. You can also see the
textural marks that were left from incompletely
carving the backgrounds. I also carved around the detail
lines like on the face of the viola flowers and the
leaves of this flower I carved around those veins too. These tomatoes are
another example where some of the fruits are dark and some are light. Then this one has stripes like
the tomatoes in my garden. The leaves at the top of
the dark tomatoes are light and they're dark
on the light tomatoes. I've also included
carved lettering here in this tomato design, which is another option. I show this sketchbook page
and suggested it would be fun to carve something
geometric like this. Again, with this design, you can decide which to leave dark and which to leave light. Again, there are
so many options. I also want to point out
one thing to keep in mind, especially if you're using text, is that your block will be a
mirror image of your print. Here's the carved block
for the tomatoes and you can see the text is backwards. But you don't have to
worry about designing backwards because of the
way we transfer the image. This is my original sketch
for the tomatoes print. When I transferred it, what shows up on the block is a mirror image of my design. Therefore, when you print, you get the same
image as your sketch. This is another reason
it's a good idea to do your sketch first instead of designing right on your block. The next step of
your project is to decide which parts to carve. Now that you've
created your design, the next step is to transfer
that image to your block. In the next lesson, I'll show you how to do that.
6. Prepare the Block: Once you've created your design, the next step is to transfer
your image to your block. Let me show you how I do this. To get it ready to
transfer to the block, I'm just darkening
all of the lines. I want there to be a lot
of graphite on my image, to make it easy to transfer. You could also directly
draw on the block, but this way you know
what you're getting. I'm taking my block, and taking my paper, and just laying it
onto the block. I can see through and see
where these lines are, and that way I can
get it arranged just right on the block. Then I'm taking a spoon, just like this old
tarnished spoon that I use just for transferring the
images for block prints, and just rub really
well all over. Now it doesn't look very pretty, but this is perfect. The next step is to
take my sharpie, and I'm going to go over
all of these lines, so that I have a nice indelible mark on my block that I can
use for the carving. I've got all of these lines
is darkened with my sharpie. I am just going to darken the areas that
I want to be dark, and that's the spots that
I will carve around. Because these oxalis leaves, the one on my real plant, they are a dark purple. I'm going to carve around the leaves so that they pick up the ink in
the block print. You don't have to do
this step of covering up all the spots with your sharpie, but this way you
have no confusion. Lastly, I'm just going to
darken the lines of the pot. The next step of your
project is to prepare your block by transferring
and darkening the lines. Now that you have your image
transferred to your block, the next step will
be to start carving. We'll do that in the next
lesson. I'll see you there.
7. Carve the Outline: Now is the part that
gets a little bit scary, at least for me it was. We're going to begin
carving our block. But don't be worried, it's not as hard or scary
as you might think. Now, I'm ready to carve using
my speed ball carving tool. The blades are in the back, so I just opened it
up and take them out. There are a bunch of
different sizes and shapes, and I'm going to be
using a number 3, which is my favorite one to use. I'll put the other ones aside. To attach the blade, you do it in here at
the top and you just fit the back part in
there and twist it. That secures the
blade to the handle, when I like to close the little
compartment in the back. Then I just start carving. Now, the most important thing
is to carve away from you because you don't want to
accidentally cut yourself. Remember, cut away
from yourself. The little bit
sometimes gets stuck in the tip of the blade and I'm just
going to take them out. You don't have to do that, but if they build up, it can be annoying. Just go slowly
with your carving. If you're doing this
for the first time, you may want to just
do some practice cuts. When you're carving, you want
to apply pressure evenly and you don't want to gouge
too deeply into the block. You don't need to take that much off in order to carve it. You're going to need to
experiment with your pressure, the angle that you
hold the blade. You want it to be somewhat
downward and also horizontal, pushing away from you. Another tip is to practice
cutting before you carve your design so you get the
hang of how the cutter works. This will take some practice, but you'll get the hang of it. Take your time.
What you don't want to do obviously is cut yourself. Also, you don't want
to have the blade cut into your design where
you want it to be raised. I like to start my blocks
by outlining the image, and then come back and take away the rest
of the background. For this oxalis, I'm just going around the leaves and I'm
turning my block a lot. That allows me to have
the perfect angle so that I'm less likely to
have my blade slip, also less likely to cut myself. I'm also holding onto the block with my left hand while
I carve with my right. Now that was a slight
dip it into the stem, but I think it will still print. You're going to have mistakes, they're an inevitability, but I think that also gives some charm to
the block prints. Tight spaces are a
little bit hard to do, so just take your time. I'm going to say that again
and again. Take your time. You don't want to rush
through the process. I've sped up the video, but rushing through the
process will make it much more likely that you will make a mistake and
that you may hurt yourself. It's okay to take more than one sitting
to carve your block. Especially if it's
a larger block, it'll definitely take you
more than one sitting. Be sure you take breaks. This is hard on your hands, this is hard on your neck and your back leaning
over your workspace. Take breaks for your
body, for your health. Stretch out your hands, stretch out your neck, do some neck rolls, maybe do a little bit of yoga. You will feel better by doing
that and you'll be less likely to make mistakes and
possibly injure yourself. Take a good care while
you're doing this process. Something else that you
can experiment with is changing your blade size. Here I'm switching to a Size 2, and I'm going to come back
and use this smaller blade to help take care of some of
these really narrow areas. I'm just coming back to
some of the areas that I've carved and where
there's a sharp point. I'm just carving in that area to help make a cleaner mark. This, of course,
is not necessary. You can experiment with it and see where you may need it, but maybe you'll look
at your piece and see that it's fine
or maybe you'll be using a smaller blade to
do all of your outlining. It's really a
personal preference. Now I've finished carving
the outline of my design. Continuing with your project, the next part is to
carve your outline. In the next lesson, we will continue carving. This time we'll carve away
the rest of the background. I'll see you there.
8. Carve the Background: Let's keep going and
finish carving our block. There are lots of
different ways to do this. You just want to be
careful while you are carving not to
destroy the image. I'm going to start
with the pot first. For this, I'm not going to be as careful to
carve everything away because I want to leave some textural marks
for the printing. I think that looks really neat. I think that could
be fun with the pot. Any of the places that
are not fully carved out as texture will show up as little
lines in the printing. I want this just
mainly for the pot. I'm not going to carve
quite as carefully or quite as thoroughly with the
inside of the pot here. I am turning my block again
to get the right angle. For the most part
I'm just trying to create horizontal lines across the pot so that the
textural shapes and marks will be
horizontal as well. I could do it the other way
and that would be fine. When you're carving
away the background, if you don't carve
everything away, there will be some little bits which makes it look
like a block print, which is part of the charm
and beauty of this medium. If you look at these other
block prints of mine, it's those lines that are in the background that
I'm talking about. If after you have done a print, you see that there are
too many marks like that, or you notice something
that you forgot to carve entirely you can go back and carve more out
to make a cleaner print. But you can also
control the amount of those bits by the
amount you carve out. Let's see this last little bit, carefully carve it away. Then I think that'll create a really cool effect
when it's printed. Now I have to carve away
the rest of the background. I like to do it in sections. I'll carve one area
and then the next and have my marks mostly go in all the same
direction in an area. I'm trying to carve deeply enough that the lines
won't show and look. I missed a spot.
I can catch that. I missed the spot of outlining. Can come back and take that out, and then just keep
moving across the block. When I'm carving a larger space, I like to use the
side of my blade. That way I can carve
out larger bits. Depending on how you hold the tool and position the blade, you can get different marks. As I mentioned before, it can be helpful to
do some practice cuts. I've sped up the video again and I'm just going to
carve out the background. This is a long
process and again, you may want to
take some breaks. You want to be sure to
turn your block as much as possible and
never cut towards yourself and then go back over any areas that seem like they're a
little bit too high. I also like to come along
the edge like this, so it's somewhat beveled. I've skipped ahead and most of the background is finished. Now, just have this
small spot to finish. I've carved it section by
section like I was showing you. It's a long process. When you're working
on your own design, it's going to take a while, so be patient, curves slowly take breaks. Another option to shorten
your carving time is to trim around the image so that it's not a
rectangle anymore. I have one tidy little bit
left here to carve out. Taking the slices with
the side of my blade and it's so exciting
when you get to this point when you've finished the carving process because
it's such a long process. Beveling that last edge, and here is my beautiful block ready to print for your project. The next step is to
carve your background. Now that you've carved away all of the background
for your block, it's time to make the print. We'll do that in the next
lesson and I'll see you there.
9. Make the Print: Are you ready to make
your print? Let's do it. I have my workspace ready. I have my surface
to add the ink too. This ink is for fabric but
it also works on paper. I've got my block, I've got
my brayer to apply the ink, I've got my baren to
help make the print. I also have paper,
and my sketchbook. I'm going to take
my ink and add it to my surface, my tray. Just squeeze out a little bit, and then roll my brayer
in different directions. This is to thoroughly
coat my brayer with ink. Just back-and-forth. I want you to listen
to the sound here [NOISE] That crackly sound means that there's a
nice surface of ink. Then I roll my
brayer on my block, and I go in different
directions wanting to get my block completely
covered with ink. Now I'm going to print
in my sketchbook. I'm going to lay my block
down, press it down, and then use the baren to
rub the back of the block, and make my print. Then I'll lift this up
and see how that did. Now, that's not a
very dark print. I'm going to try again here, add some more paint to the brayer then add some
more paint to the block. Looking at your print, you can see what areas might need a little
bit more paint, or a little more attention. That's a good clue. The printing process is probably
the hardest one for me. Looking here, seeing
it's nice and covered, I'll set it down and
then rub with my baren. Thoroughly applying pressure to the block to make the print. There's still some sections
that aren't showing up. What I'm going to do,
I'm going to open up my sketchbook and have the
page flat against the table. I'm also going to add a
little bit more ink and see if we can get a
darker print here. As I said, the printing process itself for me is the hardest. To get a nice, clear, clean prints is tricky. You want to have
enough paints so that you have a nice image, but you don't want too much. You have to apply
pressure evenly, you don't want the block to
move while you are printing. Trying again here
with the baren, rubbing the back of the block. Hopefully we will get
a clearer picture with the paper flat on the table. You see that's a lot darker because I can apply
more pressure, because I don't have
all the papers and pages of the sketchbook
behind there , softening the pressure. One more print here
in my sketchbook, rubbing again with the baren and we'll see how
this one turns out. Lift this up. That looks pretty good. Even if they're a little
messy, that's okay. I'm going to try some
printmaking paper too. Usually when I have ink out, I like to make a lot of prints. Partly because it takes a lot of tries to get
some really good ones, and partly because you don't
want to waste all that ink. Applying evenly, grabbing one of these pieces of
printmaking paper, and then rubbing with the baren. I also find that I get
a clear image when I have the paper on
top of the block, instead of the block
on top of the paper. That's another great
tip to keep in mind. For the clearest image
and the darkest image, put your paper on
top of your block instead of printing with the
block on top of the paper. Let's lift this and see. That's pretty good. I'm going to make a few more. Again, rolling the
brayer in the ink, and then rolling it on the block to make sure that
it's completely covered. I'm grabbing another
piece of paper. I have a couple of printmaking
paper that I'm using. The one I'm not sure what it is, it's an unlabeled pack. If you don't have a baren, you could use a spoon, you could use your fingers. That one's getting
a little light, I think we might need
some more ink on my tray. This tray came with my
block printing kit, you can use anything really. Trying again, adding
some more ink here, there are lots of
factors that go in to making a good print. I'm also out of practice, I haven't made one for awhile. I've covered my surface
with a piece of freezer paper that I
use for block printing. It's a good idea
to have something to protect your workspace. That one looks great. Now we're at the last
step of your project. Make your prints. I hope you'll experiment with different papers and maybe
even print on fabric. I hope that you enjoyed
making your print, and that it came
out beautifully. I can't wait to see it. If you haven't already, now is a great time to
upload your project. You can include
photos of every step, or just some of the steps. You can include questions
you might have. Be sure that if you do have questions or if
you need feedback, or if you struggled with
something to ask them either in your project or
in a discussion. I really can't wait to
see what you create. In the next lesson
I want to show you a little bit more inspiration because this has just scratched the surface
of block printing, and there's so much
more to discover.
10. On Your Own: We've just scratched the surface with a very simple first block, but there's so
much more that you can do with your prints. I showed you how to
find inspiration in your own art and in
the world around you, but you can also find
inspiration from other artists. Of course, I would never recommend copying
another artist's work, but you can always get ideas
for different techniques, different color palettes
you might want to use, different motifs and imagery that you might not
have thought of. Looking at books is one of my favorite ways to
find inspiration. Here are a few printmaking books that I really enjoy and
I hope you will too. PrintMaker is an edition of the uppercase encyclopedia
of inspiration, all focused on different
types of printmaking. Block printing is
one of those types. This book is just full of so
much beautiful inspiration. Another great book
is this Print, Pattern, Sew by Jen Hewett. This is more specifically
focused on printing on fabric and then sewing with the fabrics
that you create. It has a lot of step
by step instructions and it's really
beautiful and inspiring. If you've been interested in fabric design that's a great one for you to take a look at. BlockPrint by Andrea Lauren is another step by step
book that has lots of projects to take you further than just simple
one-color design. That's a great one to
check out if you want to continue learning and
developing your skills. I hope that you'll begin
thinking of ways you can use your own print that might be a little unusual, or interesting. I hope that if you do, you'll share that with us. You can treat your print like
art and hang it on a wall. You can print on fabric. You can make pattern designs
with your block prints. There's so many ways
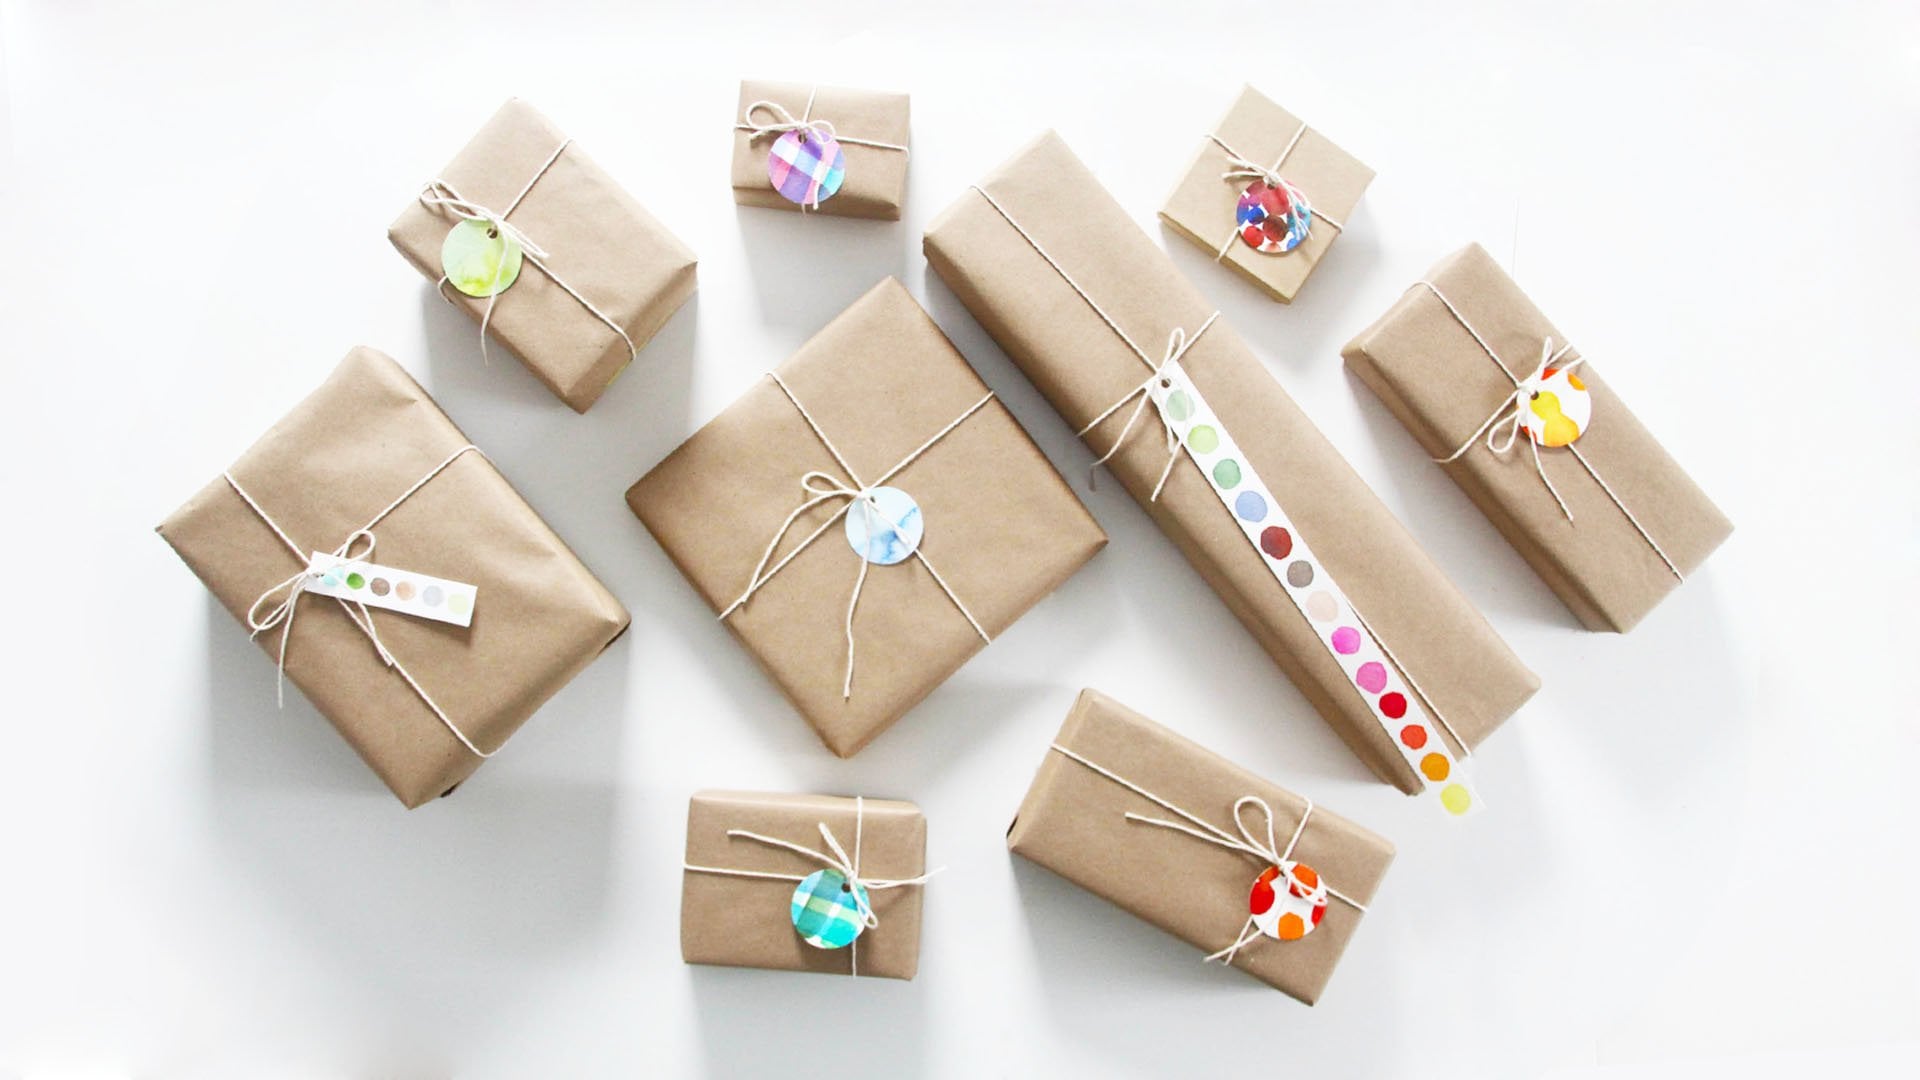
you can use them. You can make cards, you can create packaging
for other products, you can embellish clothing, you can make tea towels. Really the sky is the limit. Thank you so much for
taking this class. I hope that it has inspired you on your
own creative journey. Please be sure to post your project and ask any
questions that you have. I'm always here
and always willing to answer any questions,
or give feedback. If you have specific questions and want specific
types of feedback, please ask them and I'll do
my best to address them. Be sure to follow me here on Skillshare to always
be up to date with what I'm doing and to receive periodic
inspiration from me. I also love hearing from my students about
what other classes, or topics they'd like to
see in future classes. You can also pop over to my website,
mygiantstrawberry.com. Click on the Classes tab and there you can sign
up for my joy letter. You can download my
free sketchbook guide. Also, you can
subscribe to my blog. I hope to see you there. As I've said before, I can't wait to see
what you create.
 Anne Butera, Artist. Instigating creativity and joy.