Transcripts
1. Introduction: Hi guys, welcome to the course. Than HTML, CSS, and JavaScript. I'm Priyanka, your
instructor for this course. A little bit
background of myself. I have experience in full
stack web development. I'm also an EIN Emma enthusiast and have done numerous
projects in it. I also have experience in online teaching and I'm
also an author at medium. Before starting to
learn the course, you must understand why
HTML, CSS and JavaScript. Html CSS and JavaScript are
building blocks of a website. It forms the best of the
front end framework. Learning this course
will help you in your career to
become a developer. So what do we get to
learn in this course? First of all, the
basics of HTML, text formatting, list
forms, CSS and JavaScript. And so advanced topics
like how you can embed Google Maps
into a website, etc. And also many hands-on projects
and some bonus videos. So without further ado, let's get started and I wish you good luck
and happy learning.
2. Installation of Notepad++: Hello everyone and
welcome to the course. We're going to start the
course by installing an editor to write
the HTML code. In our case, we are
using Notepad Plus Plus. So let's go and download it and install it
in your computer. Open a web browser. I'm going to open Google Chrome. You'll know right? Download Notepad Plus, Plus. I'm going to write for Windows. If you're using some
other operating system, you can write that. I'm writing Windows eight. Now, click on
Notepad Plus, Plus. Now you could install it. Now. Now click on download from here. Now select the configuration. I have 64-bit machine. So I'm going to download the 64-bit download Notepad
Plus Plus installer. I would recommend this for you. Now click on it. And as you can see this
getting downloaded. Now once your file
is downloaded, click on it and then
select the language. I would recommend you
to select English. And then press Okay. Press Next, and then
agree to the license. And then select the
destination folder. In my case, it's safe. You can choose your
destination folder. Now click on Next
and then Install. Click on Finish. Here,
use your Notepad Plus, Plus, fully installed and ready for us to write
the coordinate. So let's get started.
3. First HTML Page: Hello everyone. Welcome back to course. In this video, I'm going
to teach you how to write your first HTML code. So open Notepad Plus, Plus from the icon
on your desktop. Now create a new file. So let us open the
HTML tag first. So you have open the HTML tag. Now, give a slash to close it. So whatever code
you have to write, you have to write it
within the HTML tag. Now, we're going to write the head tag and
simultaneously close it. Inside the head tag. We need to give it a title. Now close the title tag. So we need to give a title to our HTML page we're creating. Let us give the title of
this first HTML page. Now let us save
this, go to File. Click Save As, or. You can also use this save
button present till now, I'm going to save my
file on my desktop. You can save it
wherever you want. I'm going to name it test first. Dot HTML. Don't forget
this dot HTML extension. Now save it. Now before we run it, let us understand this
title, but very clearly. So open your web browser. I'm opening Google Chrome here. You can open any web
browser of your choice. Now, as you can see, I've opened Google Chrome. Now. Go to google.com. You can see it's
written here, Google. So this is basically the
title of this HTML page. Now, let us go back
to our editor. So since we have given the
title as first HTML page, this will appear as
the title of our page. Now, let me go to the next step. Here is the first node HTML. Double-click on it. Yes, As you can see, this is my HTML page and this is the title
that is shown here. Thank you for watching. In the next video, we're going to
learn how to create the body of our HTML page.
4. HTML Body Tag: Hello everyone, Welcome
back to the course. In this video, you're
going to learn how to create the body part
of your HTML page. So go to Notepad Plus, Plus editor on the deck step. Now create a new file. So as you already know, we need to open the HTML tag
and simultaneously close it. Then we have to
create the head deck. Then you have to give a title to our page and giving
the title as body. Since we're going to learn about the body of the HTML page. Now close the head tag. So after this, we had
learned now to create the body tag body and then
simultaneously closed it. Remember your body tags should
be below the high-tech. Whatever you write inside
this body tag appears on your HTML page to
understand its spectrum. That is go to our web browser. I'm opening Google Chrome. Now, is go to google.com. Urea. So whatever you see here, that is Google written on your
screen and the search bar, and whatever is shown
here is basically written inside the body
tag of this HTML page. So now let us get back to our
Notepad Plus, Plus editor. Now let's just write
something inside this body. So I'm writing this body part off our HTML page. Now let us save this file. Click on Save button. I'm going to save it
as body dot HTML. Don't forget the
dot HTML extension. Now save it. I'm going to, my next tip. Here is body dot HTML. So double-click on it. As you can see, my
title here is body. And this is the
body part where I had written this is the
body part of our HTML page. So whatever you write
inside the body that gets displayed
on the screen. Let us get back to our
Notepad Plus Plus editor. Now this body tag has certain attributes with the help of which you can manipulate it. Let me show you how to use the attributes
in the body tag. The attributes should be present within the body tag itself. So the first attribute
is bg color. Vesicles stands for
background color. With the help of this attribute, you can set the background
color of your HTML page. So let me set the
background color to red. Now, save it. Go to the place
where you had saved. Here it is, body. As you can see, my
background color has been changed
from white to red. You can give any
color of your choice. Let me show you another colour. Suppose pink. Go back to the body, reloaded. So as you can see, the color has been changed from red to pink. Similarly, there is other
attributes of body text. So just using which you can
style your body according to your choice will be learning
this in the upcoming videos. Thank you for
watching this video. In the next videos, there are lots more
for you to come.
5. Headings in HTML: Hello everyone, Welcome
back to the course. In this video, I'm going
to teach you about the different headings of HTML. So on your desktop, double-click on the
Notepad Plus Plus icon. So I have the editor open heel. Now let us open the HTML tag. All this. Remember, you have to close the tech simultaneously. So I have opened HTML tag. Now. Open the head tag and simultaneously close the
head tag within the ad tech, give the title Tech TI TLV. Simultaneously close
it within the title, the title of this HTML page. So I'm going to
give the title as headings since we're going
to learn headings today. So headings, yeah, it's done. Now. We'll do the body open the body tag, close
it simultaneously. We did the body tag. I'm going to give the heading. So open a tag and write H1. Now write a text to
anything into Lake. The first heading. Now close H1 tag. The first heading is my
texture and within the H1 tag. So let us see what
happens and output. So save this first, click on the Save icon. Now, save it wherever you want and remember
where you are saving. So I'm going to save
it on my desktop. So click on Next step
and write the file name. I'm giving headings.html. Don't forget this dot HTML. So save it. Now minimize the editor. As you can see, my
headings.html is created. So I'm going to just
double-click on it and wait for it to open, give it away. So as you can see, the first heading is shown here. So this was our first heading. Now. Now let us add another tag
called H2 and give a textual. Suppose the second heading, and then goes to H2. Now, save it and let us see
what happens in the output. So we'll go back to
it and it's reloaded. Here is my second heading. As you can see, this, H1 and H2 D are basically the heading tags where one has the largest size and
as you go further, then the size decreases. In HTML, there are
six heading Types. So I'm going to test, all right, TO h3. Then give the text. The third edition. Okay, now close the tag. H3. Similarly, h 456. So compared to just change the banks. Now right here for checking all at a
time will give us the idea of how this forehead length will
look like on the screen. So H5, right. Now, close it once again. The last H6, right to
the sixth heading. And close the h tag. So now save it. Go back to Chrome or
whatever browser you're using and just reload. So as you can see, the
variation in the size of the headings as we
move from H1 to H6. As we go down, the
size also decreases. So you can use
your headache deck as per your convenience. Thanks for watching guys
in the next videos, there are a lot more
for you to come.
6. HTML Paragraph <p> tag</p>: Hello everyone. Welcome
back to the course. In this video, you're
going to learn about paragraphs in an HTML page. So open the Notepad
Plus Plus editor. Let us start writing our code. So let us begin with opening
the HTML tag. The head tag. Give a title to your HTML page. I'm giving the tight
the last paragraph. Close to title
tag, the head tag. Open the body tag. Simultaneously. Closet. Now this paragraph
tag should be inside body. So open the paragraph
tag might be. And whatever you write
inside the paragraph Greg, that is shown on your skin. So let me write this paragraph. No, you need to close the
p tag. So let us save it. I'm naming it as B dot HTML. You can give any name. I'm saving it on my deck step. So let us look at the output. So click on the Run button
and launching Chrome. So as you can see
using the p tag, we can also write on the screen. Now, if you want to
write another paragraph, then again open
the p tag, right? This is another paragraph. And close the p tag. Save it. Again, run it. So
as you can see, I have written two paragraphs. So in this way you can
write multiple paragraphs. So let us get back
to our editor. Now, if we want
at our paragraph, must start from the
center of the screen. Then if we give spaces here, this will not be detected. Let us see, save it. Now let us run it. Launch in Chrome.
As you can see, those species has not
been detected here. So in order to do that, we can use the tag called pre. So let us use a tag called
simultaneously ended. Save it. Now let
us see the output. So as you can see, as we had used p, So there is a space
in the front. So now if you press Enter and write something,
suppose hello. Then it gets shown on
your screen as it is. So I do run it. Yeah, So hello comes below. This is a paragraph. In this way you can
manipulate with your paragraph and write as
many paragraphs as you want. Thank you for
watching this video.
7. How to Insert Images: Hello everyone, Welcome
back to the course. In this video, I'm
going to teach you how to add images to your webpage. So open a Notepad editor. Now, create a new file. Start with the HTML tag. So we are done with
the head part. I have given the
title as images. Now let's start the bottom part. The code for inserting images should be inside the body part. So to insert the image, you will see tag IMG. The IMG tag does not need
any closing tag for it. So you knew dot close it. Now. It has an
attribute called SRC. Src stands for source. So we need to give the
source of the image. So let me go to Dexter. Let's create a folder here. I'm naming the folder images. Now let us add an image in this. I have already an image
in my picture section. So I'm just going to copy it and go to my next
tube and paste it to. So here I have this image. Now, right-click on this image. Go to Properties and
just copy it a name. Now, go back to Notepad, editor. Write equals, and then the folder name
slash, the image name. Based it. It's done. Now let's save this file. Click on Save button,
and I'm going to save it to my Dexter. There is a folder called HTML. I'm going to save
it there, right? Ing dot HTML, the file name
you can give any name. I'm saving it. Now, let's
go back to my textbook. So here is the HTML file
where there is ING dot HTML. Now also put these images
file inside this HTML file. So this IMG dot HTML
will have a reference to this images file where
the image is located. So we're done. Now,
let's run it in Chrome. So as you can see
the sky image here. You can select any
major fuel choice. In this way, you can insert
an image to your HTML page. Now we can also
change the height and width of the image
that we're inserting. Let's go back to our editor. The IMG tag has attributes
called height and width. So let us use those
HEI GHD height equals, you can give any height of
futures. I'm giving 500. And the width equals
I'm giving thousand. Let us save this
and let us run it. Now as you can see, the size of the image has been changed. You can further
decrease the size or increase the size according to your convenience and choice. Thank you for
watching this video. Keep watching more videos
to learn more about HTML.
8. How to implement Hyperlinks: Hello everyone, Welcome
back to the course. In this video, I'm going to
teach you about hyperlinks. So open the Notepad Plus Plus editor and create a new file. Now in this video,
I'm going to make HTML files and then link them. Now to understand the concept of hyperlink in a better way, let us take a real life example. Now from your computer, open any web browser. I'm opening Google Chrome here. Now let me search a
website called Wikipedia. Enter it. Now, as you can see, this is a webpage of
wikipedia.org G. Now, as you can see here, it's written a little corner of it in bold blue letters
with underlying. So this indicates that there
is a hyperlink in this. So as you click on it, another webpage comes up. So this is the
concept of hyperlink. Now let us implement
it in our webpage. So go back to your editor
and create an HTML page. So as you can see, I'm
done with the head, but I've given my
title as my webpage. Now let's start the body. Now within the body tag, I've written a heading
called welcome to my webpage in H1 heading. And I've written a paragraph which says to know
more click here. Here, I'm going to anchor, open a tag and
simultaneously close it. So this will be the part. When you click it, it navigates to another webpage. Now this E, which
is the anchor tag, has an attribute called HR. So it is the hyperlink. Our HTML reference,
whatever you say. Now within this double quotes, you need to give the name of the webpage to which
you want to navigate. Now let us save this file. Save as I'm going to
save it in my deck, stop within a file
called HTML. Here it is. Let us give a name. So I'm giving the
name is the beach. One dot HTML. Now save it. As you can see, I have the HTML folder here. Within this, I have
webpage one dot HTML. Now let us create
another HTML file. So create new file and
write to your HTML. I've given the title of
my beach as details. Within the body tag, I'm going to add two paragraphs. I am. Can you can write to name. Then close the paragraph tag. And another paragraph. I think going right
to designation. And then the paragraph tag. Now save this file. Remember, you need
to save this file in the folder in which you have
saved your previous page. So as I had saved my previous web page
in this HTML folder. So I'm going to save this
in that folder only. So let me give the name
as webpage to dot HTML. And now save it. So now we have the
name of this webpage. So let's get back to
a page one dot HTML. And within this H ref, let us right page two dot HTML. Now let us save it. Now let us run this file. So click on run and
launch in Chrome. You're going to launch
in any web browser. Now, as you can see to
know more, click here. This text has been underlined
and it's in the color blue. You haven't mentioned
any color there, but still it's blue
because it is linked. Now as you click our teal, you can see you are directed to your webpage to
that is a details. You have this title
here called details. You have your Neiman
designation here. Now, as you click on the back, you are navigating to
your previous web page. In this way, you can link multiple web pages as
per your requirement. Thank you for
watching this video. Keep watching to learn more.
9. Introduction to Text Formatting: Hello everyone, Welcome
back to the course. In this video, I'm
going to teach you about text formatting in HTML. Now, open Notepad
Plus Plus editor. Create a new file. Now as you can see, I'm already done with the basic structure
of my HTML page. Now, inside the body part, I'm going to write a paragraph
called this is text. The p tag. Now first aim is
to make the text involved. So what we're going
to do is write another paragraph and use the stack be V stands
for bold and right. This is bold text. And the big deck. And simultaneously
the paragraph tag. Now let us save this. I'm going to save it
on my deck. Still. Give it a name. And save this. Now let us run it
on chin Chrome. Now as you can see, the paragraph I had written, this is a text. And when they had given
the bold tag, that is B, the texts which was inside the bold tag is in bold letters. So in this way, you can set the text in bold. Now let us see how we can
write a text in it leaks. So create another paragraph and use this tag called
i. I stands for it. So I'm going to write this is text and Ditech and the p tag. Save it. Now run it. So as you can see, this text is in Italy. Now, let us see how we can make a text into superscript
and subscript. So for that, again, start a paragraph tag. Now let me write the text. The chemical formula for water is, we know that chemical
formula of water is H2O. So two is a subscript. So we're going to write H. Then in this stack called
sub stands for subscript. We're going to write two. And then we're going
to end the subscript. Then write o, and then close. So part of tech, save this. Let's see the output. So as you can see, the chemical
formula for water is H2O, where two is the subscript, since we had written to
within the subscript tag. Now let us learn about
the superscript. So let me start
another paragraph. Now in order to
implement superscript, I'm going to write a
mathematical formula. Let's write x plus y. And then I'm going to
write whole square. So for that, I need the
superscript S UP and then two. And then end the superscript know equals,
then again x-squared. So again the subscript
and superscript. Don't forget to end them because otherwise
your whole texts will be in the form of superscript
and then y-squared. So again, open the
super script tag and write to and then end the superscript plus two x y. So as we notice the formula, now let's close this paragraph
tag and then save it. Let's see the output. So as you can see, this two is in the form
of superscript. Now, let us look into
the other tags which we can use to format
our texts photo. So the next tag
is called strong. So starting tag called
strong. And right TO. This is strong text. And the strong tag. And then the dam. Save it and run it. As you can see, this
is our strong text, which is a little larger
insights as well as bold. Next we have is small. So start another paragraph
and use the tag called small. And then right,
this is small text. This will attack the p tag. Now save this and run it. So as you can see, the size
of the text has been reduced. So this is our small text. Now let's get back
to the editor. The next tag is Mark, which is basically going
to highlight our text. So let's use it. Open a tag called MAR can mark. Right? This is highlighted then. And the mark tag, the P tag. Now save this and run it. So as you can see, your
text is highlighted here. Let us see another
tag called del. Basically going to cross the word that you're
going to write within it. Let's have a look. So start
to attack called d l del. And right, this is deleted. And end the del tag. And then the p tag. Now save this. And let's run it. So as you can see,
this part is deleted. So there's a line on it. So these are the different
ways in which you can format your text and
use them in your webpage. In the next video, we'll see more ways how you can
format your text. Thank you for watching
this video and practice this to get familiar
with the tags.
10. Text formatting - Text Color: Hello everyone, Welcome
back to the course. In this video, I'm
going to continue with text formatting in HTML. So open the Notepad Plus Plus
editor. Create a new file. Start with the basic
structure of an HTML page. So we're done with the basic
structure of your HTML page. Now, I'm going to
show you how to set colors to the texts that you are going to use a new webpage. So for that, let me
write the paragraph. This is blue, the p tag. Now I want to set the color
of this text as blue. For that. Inside the PayTech, use the attribute called style. Within the style attribute, I'm going to specify
the color of the text. Now, starting worded comments
and right color, C-O-L-O-R. Right color of your choice. I'm setting it to blue. So BL ui and then give a semicolon and then
close the inverted comma. Now let's save this file. Save as, I'm going to name it as text formatting to dot HTML. And I'm going to save
it on my deck step. So Save it. Now let's run it. Now. As you can see, the text, this is blue, is in the colored blue. In this way, you can set
the color of your text. You can use any color
of your choice. Let me show you another. Just copy the sentence
and paste it. Now, I'm going to set the
color as suppose red. And I'm going to write
here, this is red. Now simply save it and run it. So as you can see, text
here is red in color. You can choose any
color of your choice, whatever color you want
to set to your text, you can use them. Now he'll have written more paragraphs with
color magenta, green. So you can also use this. Now here I've written
more paragraphs using different colors such
as magenta, green. So now when I run it, you can see magenta
color and green color. So these are the basic
colors that you can use to recolor your text. Apart from these,
there are a lot of different colors which you
can use to color your text. Now, I'm going to show you another approach of
coloring your text. For that start another
paragraph and write anything. Close the p tag. Again. Write that
attribute style equals, and within double-quotes, right? C-o-l-o-r color closely
inverted commas. Now within this right hash. Then if F followed
by four zeros, this is basically the hex
code for a red color. So now let us save
it and run it. So as you can see, the last text is colored in red. Let us go back to our editor. So this is also a way in which you can set
color of your texts. There are numerous colors from which you can
select your color. Html offers 146 shades of colors in the form of hex code for you to
use in your text. I'm going to show you that template of all
colors along with the hex code so
that you can use in your text whenever you
write any HTML page. So this was all about how
to set colors to your text.
11. Text formatting - Text Size: Hello everyone, Welcome
back to the course. In this video, I'm going to
continue with text formatting in HTML at open a new file. And start with the basic
structure of HTML. We are done with the basic
structure of the HTML page. Now within the body
section, start a paragraph, text, and close the p tag. Alright, the style
attribute equals then open the inverted commerce and right font FIN different
and give it a dash. And then right size. You have a column and write the size of the
font that you want. Suppose I'm doing 200%. Close inverted commas. Now, save this file. Now let's run it.
So as you can see, this is a paragraph which has
the size of 200 per cent. Now to compare, let us write another paragraph
and change its size. Simply copy this paragraph. And base detail. And diesel size to 300 per cent. Now save this. Let us see what is
the output now. As you can see, this
was my texts of 200% size and this is
of 300 per cent size. So in this, you can set
variable size to your text. Now let us see what happens if I give the text sizes
a 100 per cent. So now let me set the
text size 200 per cent. Now save it. And
let's see the output. So as you can see, this
is 100 per cent text, which is much smaller in
size as compared to others.
12. Text formatting - Text Align: Hello everyone, Welcome
back to the course. In this video, I'm
going to continue with text formatting in HTML. Open a new file, and start with the basic
structure of an HTML page. So after you're done
with the basic structure inside the body,
start a paragraph. And the p tag. Now again, write the style attribute. And within inverted
commas, right text, dash line, and give a
colon and right center. So this will set your texts
in the center of the screen. Now let's save it. Let's run it. So as you can see,
this is a paragraph is set in the middle
of the screen. Then we can also
align the text to the right or left
side of your screen. So for that, again, go to the editor and then
copy this paragraph. You don't need to write
it all over again. And paste it over here and
change the alignment to write. Save this. Now, run it. So as you can see here, your text is aligned to the
right side of the screen. Similarly, you can do that to the left side of the screen. As you already know by default
it is in the left side. So you can mention, are not mentioned that
as per your choice. But for center and right, you can use text-align
and right center. Alright.
13. Text formatting - Font Family: Hello everyone, Welcome
back to the course. In this video, I'm
going to continue with text formatting in HTML. Open a new HTML file, and start with the
basic structure. Now within the body,
write a paragraph. So after you're done
writing the paragraph, now within the p tag, start with the style attribute, then give equal than we did in the inverted
commerce, right font. Dash family and give a colon 80. Close the inverted
comma, saved the file. Save it, run it. So as you can see, my text is of the style ADL. So in this way, you can set different styles to your text. Now here I have a
template for you of different font families
that are available in HTML, starting from Arial to
Times New Roman Georgia. And to impact. You can try all
these tiles and then use them to design your webpage. I'm going to show you some of the font family in this video. So let's see. So now here I'm
showing you some of the font styles such as Arial, Arial Black, Georgia, Times, New Roman and impact for you to understand the
difference between them. So let's save this file. So as you can see, these are the different
styles of text. This is ADL than Arial black. Then Georgia, then it is Times New Roman. And
this has impact. You can try out any
style from the list of font families that
have shown you and implement them
on your webpage. Thank you for
watching this video. Practice this, and use this
to design your webpage.
14. Lists - Ordered List: Hello everyone, Welcome
back to the course. In this video, I'm going to
teach you about audit lists. So for that open Notepad Plus Plus editor on your next job. And now create a new file. Now start with the basic
structure of an HTML page. Now once you're done inside
the body tag, right? O stands for ordered list. So start to tag and
simultaneously ended. Now within this oil tag, you can list the items
you want to list. Now I'm going to write LI
and then my first item, suppose first item, and
then close the LI tag. Now again, open the lighting
and right second item. And close it. You can
also add another item. Now, LI the right third item, and close the LA deck. So this is enough. Now, let us save this. I'm going to save
it on my next to. Now, save this and
let us run it. So as you can see
here, my items, we just numbered with 12 entry
since it is ordered list. So the list comes with audio
that is 123 in a sequence. Now, we can also change the type of sequence
that you want to use. So this is the
basic ordered list. To change this one to
three listing sequence, which is for default. Now let me add
another ordered list. So for that, copy this,
and paste it here. Now to change the type
of listing sequence, we can use the attribute called type within the oil
tag, right TIP. Each type then equals
and then start with inverted commas and
right within a. So in this case, my list is going to
start with capital a, followed by B, C. Now, let us save it and see
what is the output. So as you can see, my items has been listed
and the sequence is a, b, c. So in this way you can change the type of list that
you want to use. Now, let me copy this again and let us see
some other typing. Now copy this part
and paste it here. Now let me change
the type to Smalley. Let us save this, and then let us run it. So as you can see, the style type is Smalley, followed by B and C. Now in this way
you can style it. Now let me show you other types. Paste this again here, and let me write here. I save this and run it. So as you can see, my list is ordered using roman
number sequence. So these are the
types which you can select to use in your list. Thank you for
watching this video. In the next video, we will
learn about descriptive lists.
15. Lists - Unordered List: Hello everyone, Welcome
back to the course. In this video, I'm
going to teach you about lists in HTML. So for that, open the
Notepad Plus Plus editor. Create a new file. Let me tell you there are three
types of lists in HTML. Ordered list, unordered
list, and descriptive list. So we will see those one by one. Let us start with
an ordered list. So start with the basic
structure of an HTML page. After you're done writing the basic structure
within the body, right? You, you will stands
for unordered list. So simultaneous for you need
to close that you will tag. Now within this UL tag, you can write the list of items. Now within the UL tag, right eye and then close it. Now whatever you write
inside this LI tag will be displayed as
list in your screen. Now let us write something. Suppose first item, then again, open LI tag and
night second item. So as you can see, after every item, you have
to close the a light tech. So whatever is there, we didn't want a light tech
will be your one item. Now, you can continue
to add the third item. Just save this. Now let's run it. I'm launching in Firefox. You can launch in any web
browser of your choice. So as you can see here, my three items
marked with bullets, and then we can also change the style of listing the things. So for that, go back to the
editor and copy this part. We don't have to
write it over again. Business and paste it to. Within this you will tag, I'm going to use the attribute
called style equals. Then we didn't inverted
quotes, right? List. Style, type. Now give a colon and
suppose right, so good. And then end up
in what it codes. Now let us save this and run it. Now as you can see, the style of your listing is changed to so-called
from bullets. Will it is for default. And you can also change
the style like this. So there are other types of styling that we show
you another one. So again, copy this
part and paste it. Now within this list-style-type,
right TO squared. And save this. Now
when you run it, you can see the list
child is squares. You can also list your items
even without any style. For that, go to your editor. And within the
style type, right? None. And run it. So as you can see,
the style is none. These are the ways in
which you can list your items using
an ordered list. Thank you for
watching this video. In the next video, we will
learn about audit list.
16. Lists - Descriptive List: Hello and welcome
back to the course. In this video, I'm
going to teach you about descriptive list. So for that, go to
Notepad Plus Plus editor and create a new file. Now let us start with a basic
structure of an HTML page. Now once you're done inside
the body tag, right? D stands for descriptive list and simultaneously
close the deal tag. Now within this deal tag, you can write the list
items for that right here, d t. And within this, write the name of the list item. So I'm going to write to your first item and then close the DD DAG. Now, if I want to add a description to the list
item that I've added, then open DD tag. Now, write a description
for your item. I'm going to write here, suppose this is my first Item, and then close the DD tag. Similarly, you can add
more items to this. So open again DT deck and
then write second item. Close the DT tag
and open DD tag. Write a description. And then closer to detect. You can add more items to this. So now I'm saving it. Descriptive list.html file name. And let me save this now. Now let us run it. So as you can see
in the output here, the two items and with a description of H. Thank
you for watching this video. In the next video,
I'm going to teach you about nested lists.
17. Lists - Nested List: Hello everyone and welcome
back to the course. In this video, I'm going to
teach you about nested lists. So for that, go to
Notepad Plus Plus editor. Now create a new file. Start with the basic
structure of an HTML page. Once you are done within
the body tag, right? Oh, in which stands
for audit list. So I'm selecting ordered
list as my parent list. I'm going to use unordered
list for my sublist. So the oil tech, now within this OL tag, the first item of
your parent list. So I'm going to write item one and then start the sublist. I'm going to use
UL for my sublist. So write the sublist items. I'm going to write sub item one. Then close the light
tech, and then right. Sub item to close the later. Closely you will tend as well. No, you're done with the sublist which is under
this, you will tag. And you have to also
close the LI tag, which you started right
here in the beginning of item warn you, I don't want to sort it. Now. Let us add another item. So for that, just copy this
part and paste it here. I'm going to change
this to item two. And I'm keeping the
wrist as before. So let us save this. I'm going to name it as
nested list dot HTML. I'm saving it on my next to. Now save this and run it. So as you can see here at the
items of the parent list, item one and item two. And within the sublist
I have the sub item 12. You can also alter the
parent and the sublist. You can use us as your parent list and OLS your sub-list
as per your choice. So you can try all the combinations possible
in your nested list. You can also add three
levels of nested list. Let me show you one. For that. Within the sub item one, I want to add one more sub
item for that. Right here. You can use OLS for your choice. I'm going to use UL. And I'm setting the type. Suppose equals, then right, list, style, type. And then write square. You can use any style
of your choice. Now you're done with us. So close the UL tag. And then within this,
right, your itemName. Suppose sub-lists
two and item one. Close the light tech. Add as many as items you want. Now again, sub-lists
to item two. Now let us stop
here and save this. And let's see the output. So as you can see, there are three
levels of sublist. This the parent list is the
first level of sub-list. And this second
level of sublists, you can add as many as you want. So in this way you can
create nested lists. Thank you for
watching this video and keep watching to learn more.
18. Inline CSS: Hello everyone and
welcome back to course. In this video, I'm going
to teach you about CSS, which is Cascading Style Sheets. Css is used for
styling our web pages. This will help us to design
our webpages in a better way. In this video, I'm going to
teach you about inline CSS. So let's get started. So open Notepad
Plus Plus editor, and then create a new file. Now start with the basic
structure of an HTML page. Within the body section, right? Some elements. I'm going to
write H1 to give a heading. So let's suppose my
webpage is my heading. Now close the H1 tag and
let us add a paragraph. Right? This is my web page. So close the p tag. Now let us take the elements. Now, I want that my background
color should be yellow. So for that, use this
attribute called style and write background, dash, CEO, color, and then give a
colon and write any color. I'm going to write
two yellow here. You can use any color. And you can even use hex
code to set the color. Now in the H1 tag, I'm going to write style. And then equals,
then write text, dash a line, then colon, and write CEN DER. This will place the heading
in the center of the screen. Now close the inverted comma
and within the p tag, again, write the attributes style equals right, C-O-L-O-R color. This will help to
set the text color. I'm setting the
text color to red. You can choose any color. Now, give a semicolon, and I'm going to write another style attribute
called font size. So if a N D dash is Isaac E. We have already learned this in the action of text formatting. We are again using it to you. Now give the size as 200. Saint. Look closely
inverted comma. And let us save this. Now run it. As you can see, this is my
heading called my webpage, which is aligned to the
center of the screen. And the background
color is yellow, the paragraph color is red, and its size is 200 per cent. So in this way you
can manipulate the styles as per your choice. So now this is called inline CSS because we are
writing the style attribute for each and every element in the same
line of its declaration. So this was all
about inline CSS. In the next video, I'm going to teach you
about internal CSS. Thank you for
watching this video.
19. Internal CSS: Hello everyone and welcome
back to the course. In this video, I'm going to
teach you about internal CSS. So let's get started. Now, open Notepad Plus Plus
editor and create a new file. Now start with a basic
structure of an HTML page. Now once you are done inside the body section,
right, some elements. So I'm going to write H1
and then write my webpage. Then close the H1 tag, and then write a paragraph. So let me write this
is my web page. And then close the p tag. So we have added the elements,
headings and paragraphs. Now within the head section, write the tag called Style. And then simultaneously
and attack. Now within the style tag. Right? Body. Now open braces and close it. Now within this brace, right, background, dash,
color C-O-L-O-R. And give the yellow. You can give any color. Now give us semicolon. This will basically set
the background color of the body part of
your webpage to yellow. Now, write each one. Mentioned the element
which you want to style. And then write text. Hi, Elaine. And then right center. And give us semicolon. This was our styling
for our heading H1. Now for the paragraph right P. And then open braces. And within the brace
right, C-O-L-O-R color. And then I'm going to
give red as my color. And then font, dash size. Then a colon. And I'm going
to give 200 per cent. Then give a semicolon
and close the brace. Now let us save this file. I'm going to save
it on my deck step. So give it a name.
Now. I'm giving internal ceases dot HTML. Now save this and
let us run it now. As you can see, the
background color of my web page is yellow. The heading is at the center, and the color of
the paragraph is red and its size
is 200 per cent. This web page looks similar
to the webpage which we had designed in our
inline CSS video, in which we had used the style attribute to style the
individual elements. But here we're using
the style tag. And within the style tag, we're writing the element name, which we want to style and the specific style that
we want to apply on it. In inline CSS, you have to
mention the style for each and every paragraph or each and every element
that you're using. But here, only declaring
the element named P will be enough to style
all the paragraphs that you'll be using
in the same webpage. This gives internal CSS
and H over inline CSS. This was all about an
insight to internal CSS. Thank you for
watching this video. In the next video, you will learn
about external CSS.
20. External CSS: Hello everyone and welcome
back to the course. In this video, I'm going to
teach you about external CSS. So let's get started. Now, go to Notepad Plus Plus editor and create a new file. I'll start with the basic
structure of an HTML page. Now once you are done within the body section at a heading, I'm going to add H1
and write my webpage. Close H1 tag and add another element called
P, that is paragraph. And write two paragraphs
called This is my webpage. Now close the p tag
and save this file. I'm going to name it as
external CSS dot HTML. Now, create a new folder. I'm going to name it
as practice HTML. You can give any
name of your choice. Now, within this folder, save this file called
external CSS dot HTML. Now, create another file. And within this violates
the code for styling. So let me write the name of the element and then back down to color yellow, semicolon. Close the brace. Then again, write the name of the
element, which is H1. And then write text
align, center. Give a semicolon. Then write b. And then C-O-L-O-R color, which is red, and
then font size. So basically I'm writing the
same example for you so that you understand that whatever
the type of CSS it may be, this code will run in
the exact same manner. Now save this file. Let us name it style sheet, STI Ellie, SH, WE D. And don't forget this dot css. Now, remember, you need to save the CSS file within
the same folder that you have created to
save external CSS dot HTML. So within practice, HTML, which has the external
CSS dot HTML file. Now in the same folder we're
saving stylesheet dot CSS. Now save this. And let's get back to
external CSS dot HTML. Now, within the head
section, right? In can link. Then HREF equals and then
give the CSS file name, which is style sheet dot css, and give their relation, which is its child. Now, save this file. Now, let us run it. As you can see, we get
the exact same pitch as we have designed
using external CSS. So this was all about an
insight to external CSS. There are a heck lot of styles
for you to learn in CSS. So stay tuned to the course.
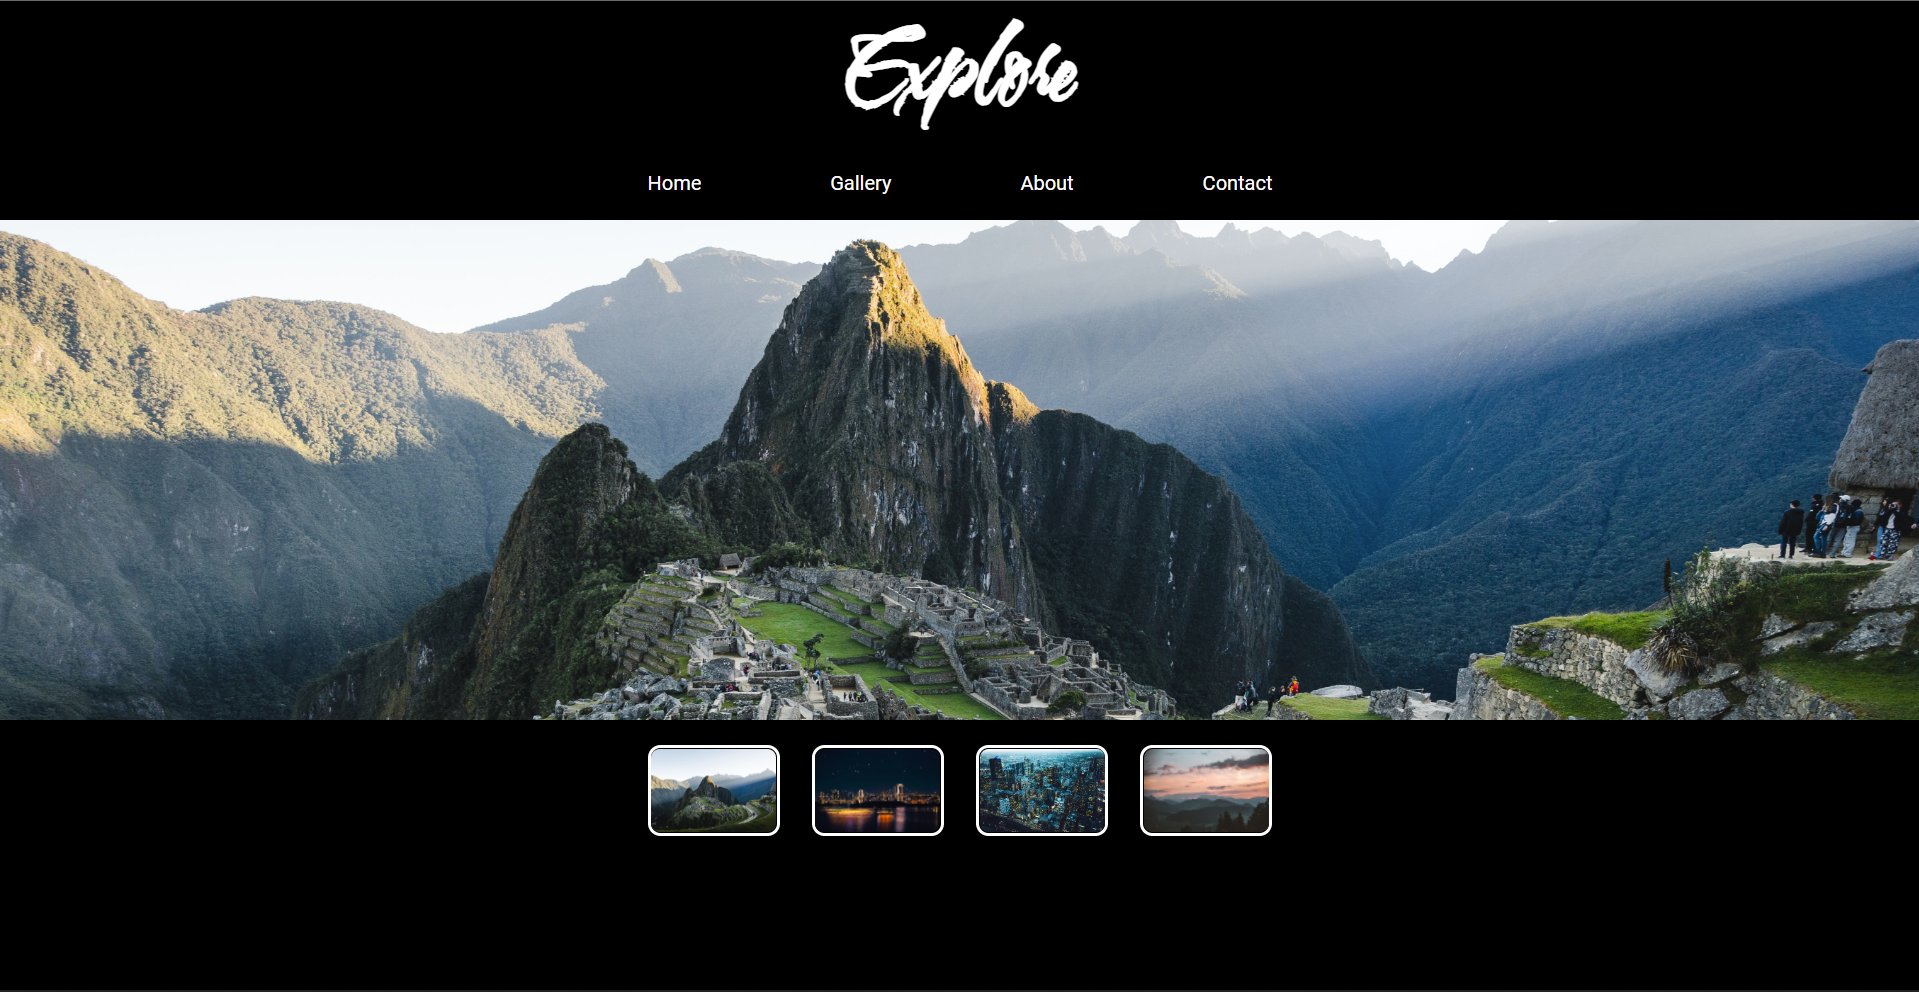
21. CSS Project Introduction: Hello everyone and welcome
back to the course. So you must be wondering by now that why I'm showing
you a space travel. Yeah. Well, you will be elected to know that this is going to be your project and I'm
going to teach you how to make the same repeat. You can build this dynamic
web page by using only CSS. So get some time in
your hand and watch the next video in
which I'm going to teach you how to build
the same website.
22. CSS Project Hands-on Implementation: Hey everyone, welcome
back to the course. So by now, we've learned
a lot of styles in CSS with the help of which
we can design our websites. Now it's time for some more fun. And to do some
animations using CSS. For that, go to Notepad Plus Plus editor
and then create a new file. Now, once you're done, start with the basic
structure of an HTML beat. So I'm done with the
basic structure. And I've also added a
heading saying, my repeat. Now it's time for us to create a deviation for
that, right, Dave. And then the div tag. Now within this div tag, ID equals and then space. Now this will be the total
division of the web page. Inside this space, we
need to have some stars. So for that, create another
deviation and write the class as stars, and then close the div tag. Now similarly, at more
div tags of class, In class does we're going to
write the CSS code to add stars for that unit to add numerous tasks to
your space deviation. So I've added a few columns, are divisions of stars. I need to create an
external CSS file to link it with this HTML page. Now right link. And then H ref, which stands for hike
hyperlink reference. And then write the name of the CSS file that
you're going to make. So I'm going to name
it S, star dot css. And right, relation
equals stylesheet. This is for you to
understand that it is a basically a style sheet. So here we are done. Now save this file. Remember, you need to
create a folder and save both the files in
the same folder for that, create a new file. And lipid rights peace as
the name of the folder. Then within this folder, save this HTML file. So give it a name. I'm going
to name it S space dot HTML. Now save this and now
create a new file. Now in this file, we're going to write
our CSS code for that. Start with the body. So let me start
styling the body. Now within this body, right? The color, the background
color for us it will be black. So right background. And then give the hex code for black witches hash triple 0. Now, I have added of the
font family as arbitrary. As you can see the
freebies video that the text is in the form
of a different style. So that is because of arbitrage. So you can give this style or you can give any other
style of your choice. So I'm using this style here. Now. I'm not writing each and every code line by
line because it will be very time taking
and boring for you as well. So for that, I'm writing
the colon as a whole and I'm explaining each and every line where
I've written that. So this is H1, which is for our heading. And I've set the
position to absolute. Here are the index, that is that index. And then top-left,
which will give the margin actually
from the top and left. It will align the
text in the center basically because we have given 5050 per cent from top and left. And I was just a width. And
this is the color has 011. You can check it out in
your hex codes of colors. Now, my font size is five EM. You can also change it. Now. The text align center
again and next shadow. This is another very special attribute with
the help of phase, you can give shadows
to your texts. So this is tech shadow, and these are the colors of
the shadow that you can use. So you can keep it as it is, or you can change it
according to the hex code. I've written here
has space since our ID was based off
of the deviation. So you have written hash
species and the classes does. So for that, I've
written dot space. So remember for iodine into right hash and for
class indirect dot. Now, here are some
attributes which are overflow and
position top, bottom. These are basically
for aligning. These are for margins basically, and the position is absolute. And here's another
attribute called overflow. And it is set to hidden because there were
numerous stars. And then you have to align it and set it to the
same screen at a time. So this attribute will help
us to make the 3D effect. Now, this is a lot of stuff. So let me explain
you one by one. So here dot stars is what the division
with the class does. And then we'll set
the background image. Radial gradient, which is
an attribute which it can use to set the gradient
of the background. And then these are the RGB stands for red,
green, blue value. And then you can give
the values here. So 00 means it will
be set to black. And then these are for the stars that we'll be creating region of
very smallest pixels. So here are those. Now background repeat. So the stars will
be numerous and it will be spread it
throughout the screen. So we need to repeat. And then here's the
background size. And then animation. Back. Then. Then with an animation, here is five seconds
and in finite, so as you can see, the stars are moving and
zooming into the space. So this will help us
to get that effect. Now, here comes dot stars
and then enter child one. So as you can see, there are a lot of deviations
with the same name as dusk. So these are
basically the child. So for that, I've used
the style thing. Now. Similarly here, you can give the background position how
much five they will be. So this child will be very near. So it's 50 per cent. Then you can see it's 20%, 60, and then it goes to negative, that is minus 20% and minus 30%. So this will help us
to get the 3D loop. So now since we had given four divisions,
let me check out. Yeah, We had given four
divisions of stuff. So we have used for child here. Now, this is for
the Zoom function and its opposite is set to 0. And then the animation
timing, which is given. So this will
basically help to get that view of that we're
moving into the space. So this will be,
the sum function, will basically take
care of all those. 0% is for the first few
when we haven't zoomed. And then eighty-five percent
when we have assumed a lot into this piece and then a 100%. So this will basically
give us the effect of getting into the space and the stars are
moving away from us. Now once you're done, save this. Remember to save it in the same folder as you
had saved your previous. Now, I hit saved it
in peace, I guess. It's in my decks
to use my folder. Now save it. So you have to give the
name as star dot CSS. No. Check it out that
it was star dot css. Yes. We are done with our code. Now. Let us go to space dot HTML and read it from you
and see the output. So as you can see, we have created our
projects successfully. This background totally gives us the fill of traveling in space. So this is really cool and
you can surely try it out. Go to your Notepad Plus, Plus editor and write this code and show your friends that
what you've learned in CSS. Thank you for
watching this video and stay tuned to the
course to learn more.
23. Javascript- Introduction: Hello, and welcome
back to the course. So let us get introduced
to JavaScript. So what is JavaScript and
what is the utility of it? Well, JavaScript is used to make the web pages that you build interactive to
understand it better. Let us take an example. Now. This is basically a web page which
is designed by me. It is a sign-up form. So I'm going to
use it to make you understand how JavaScript works. So let me fill all this stuff. So you can feel the name and
set the agenda and stuffs. Now, you can see here
it's written password. So suppose I want to
give a password, 1234. Now in the confirm password, I write a different password. I write 2345. Now let me check. It says
password not matched. Now again, I'm going to change the confirm password to 1234. Now again, click on Check. Now it says password matched. So we're doing this with
the help of JavaScript. This is a small example of
the utility of JavaScript. So in the next videos, you will learn more about
JavaScript and its utility. And thereby, you
will be equipped enough to make your
webpages interactive.
24. How to Create an Alert: Hello everyone and welcome
back to the course. In this video, I'm going
to teach you about how to set alert
in your web pages. So let's get started. Now go to Notepad Plus Plus editor and then
create a new file. Now start with the basic
structure of an HTML page. I'm done with the
basic structure, and I've also added a paragraph. It says my VP8. Now inside the body tag, right? On, load ON or AD
on load equals. Then start your
inverted comma and write e o t, which is alert. And then give a text inside. Suppose, welcome. Then close the bracket, give us semicolon and
close the inverted commas. Now save this file. I'm going to save it
on my deck stuff. So let me name it. Alert dot HTML. Save this. Let us run it. As you can see, this alert
box which says Welcome. And it comes with the
Okay button by default. Now click on OK, and you will
never get it to your page. This alert box game, as soon as we navigate it to our webpage because
we had used on load, due to which the light is shown as soon as the page loads, there is another way to
declare a load using JavaScript function
for that within the head section, right? Script. Whatever you write
inside the script tag, that is basically
your JavaScript code. So Endo script tag and now
write a function if UNC, T-I-O-N function, and
give a name to it. Suppose my alert. Now give places. Start the curly braces ended and within those
curly brace section, right? In IoT alert. And then your message
which says, welcome. Then give a semicolon. Now here, instead of
writing the function, just write my alert
and give a semicolon. So now let's save this and let us run and
see what is output. Similarly, here
is the alert box. It says Welcome. This was all about alert. In the next video,
you will learn how to write your prompt function. So stay tuned to the
course and keep learning.
25. How to create a Prompt: Hello and welcome
back to the course. In this video, I'm going to
teach you about prompts. So without further ado,
let's get started. Now go to Notepad Plus Plus editor and then
create a new file. Now start with the basic
structure of an HTML page. So I'm done with the
basic structure. And I've also added a paragraph
we see is my webpage. Now within the head section, let us write the tag called script and simultaneously
close the tag. Now within the script tag, write the function and
give it a function name. Suppose my prompt, and
then start the curly brace and write V-A-R. Var stands
for variable in JavaScript, it's a keyword to
declare a variable. My variable name is name, and then give equals
and then prompt. Basically prompt takes
an input from the user. So we're using a
variable which will save the input that
the user will give. Now within them, let us ask
a question to the user. So Booze, What is your name? And now let us display
the name to the user. So for that right, alert. Then, right, welcome. Concatenate the
string and ripening. Give a semicolon
and curly brace. Now within the body section, right on load equals. Then within inverted coats, write the name of your function, which is my prompt. Give a semicolon. Now, let us save this file. I'm going to save it on my
decks to give a file name. Suppose prompt dot HTML, and then save this. Now, let us run and
see the output. So as you can see here is the prompt box which
says What is your name. So right to name here. And then click on Okay. So this is the alert box which says Welcome
and your name. So basically, prompt is for taking an input from the
user using JavaScript. And alert is to show any
random message to the user. In this case of alert, the user cannot give any input. He or she can just see the message that is
being displayed. So thank you for watching
this video, guys, stay tuned to this course
to learn more about how to implement different
functions in JavaScript.
26. How to implement Confirm: Hi everyone, and welcome
back to the course. In this video, I'm going to
teach you about confirm. So let's get started. Now go to Notepad Plus, Plus editor from the screen
and then create a new file. Start with the basic
structure of an HTML page. Now within the head section, write the tag called script
and ended simultaneously. Now within the script tag, write a function
called my confirm. Since we are going
to learn confirm you can give any name
to your function. Now. Start your curly brace and
within it, right, variable. Suppose c equals conform. And write equation. Suppose, Do you
like my weak beat? Now close the bracket,
give a semicolon. So this variable c
is going to take the feedback from the
user, which he will, he or she will give through this confirm and
then check what is the input given by the user
by writing, if c equals, equals true, then give a message through alert saying, thank you. And if the feedback
is false, then right. Then give an alert saying, sorry for the inconvenience. And then close
bracket, semicolon, close the curly brace
of L's as well as close the curly brace off
mike confirm function. And then within the body tag, right, on load equals. And then the name
of your function, which is my conform. And then give a semicolon
and closer inverted code. We're done. Now we're
going to save this file. Save it, give it a name. Suppose can form dot
HTML and save this. Now let us run it. So the bases do you like my web
page and say OK, and then say thank you. So let me reload this. What happens if we
say no, cancel. Cancel. And then it says, sorry for the inconvenience. So in this way, you can show
a message to the user and take a valid input as
feedback from him or her. Thank you for
watching this video. Stay tuned to the course. See you next time.
27. External Javascript Implementation: Hello everyone and welcome
back to the course. In this video, I'm going to
teach you about external JS. So here we are going to
write the JavaScript code in a different file and then link it with the original HTML file. So let's get started. Now go to Notepad Plus Plus editor and then
create a new file. Now start with the basic
structure of an HTML page. Now once you're done with
the basic structure, go into the head section
and write script. Then simultaneously
close the script tag. Now, within the script, use the attribute called SRC, which stands for source. So since we are going to link an external file
to this HTML file, so you need to give the
name of that external file. I'm going to give the
name of that file as external dot ts. Now within the body section, you have to give the name of the function that
you are going to write in the external
dot js file. So let me write it. Alright, onload equals and
give the name of the function. Suppose fun. And then give a semicolon and
close the courts. So we're done now let
us save this file. So remember you have to save this file in the same
folder that we're going to save the file
called external dot js. So let us make a new folder index
to give a name. Suppose HTML. Now get into this folder
and save your file, given name to your file. Suppose external js dot HTML. Now save this file. It's done. Now. Create
another file, right? Function. And give the name of
the function similar to the name which we had
written in the body section. So let us check out we had written the function
name is fun. So right, fun. And then start the curly brace. And within this section, right document dot write. This will basically show a
message on the screen itself. So let us give any text. Suppose welcome to my webpage. Give a semicolon,
close the curly brace. Now save this file in the same folder as we had
saved external GAS dot HTML. Give this file name as external. Dot j is, since it's
a JavaScript file. So dot js. Now see we had given the source
as external dot js here. So this is our
external node JS file. So this is going to
basically link it. Now let us run it from here
and see what is the output. So as you can see here, it is written, welcome
to my webpage. But we have not used any
paragraph here to write that. Welcome. So basically
it is taking that from external dot js. So in this way, you can write
your JavaScript code in a separate file and then link it with your
main HTML file. Thank you for watching
this video and stay tuned to the
coast to learn more.
28. Javascript Number Game Project Introduction: Hey everyone, welcome
back to the course. So after learning
the JavaScript, we need to do a project on it. Since simply learning
some codes won't help you unless you
put it into action. So by now, I hope you are all familiar with the tax
and codes of JavaScript. So the project we are going
to make is a number game. Now let me show you
how does it work. We are directed to
our game peach. And then it says that
the computer has chosen a number between 1200
and try to guess the number. So let me get some number
between 1100, I'm guessing 65. It says the number is larger, so I need to input
a smaller number. So suppose for t. And then it says larger. Now let me give 20. It smaller. So it's between 2139.
So let me give 30. Yeah, I got the right
answer in focuses. So isn't it cool? Now in the next video, you will learn to
code this game.
29. Javascript Number Game Project Hands-on Implementation: Hello everyone and welcome
back to the course. In this video, we're going to do a project based on our
learnings on JavaScript. In this video, I'm basically
going to build a game. Yes, you heard that right? And I'm going to make this
game using JavaScript codes. So this video is going
to be a little longer. So it's better. You get
some time you knew hand to sit and learn how to make
the JavaScript project. Now go to Notepad Plus Plus editor and then
create a new file. Now start with a basic
structure of an HTML page. So I'm done with the
basic structure. The title of my webpage
is number game. Now let me write the tag called script and
simultaneously close it. So within the script tag, we're going to write the
JavaScript code for our game, as you have seen in
the previous video. In this game, the computer
will select a number between 1100 and the user has to guess which
number it has selected. Now the user will give an input and then the
computer with less respond that if it is smaller or larger than the number
it has selected. In this way, it will find in how many cases the user
gives the correct answer. For that, we need to
declare some variables. Declaring a variable called target and another variable
called target one. Now start the function
for your game. So I'm giving the name as game. And then open and
close the curly brace. Now within this function, right, target equals math dot random in 200. So what I've done is
this math dot random is an inverse function
in JavaScript which returns a
value between 01, since we want the computer to choose a number from one to 100. So we're multiplying
hundred-year. So in this target, the computer will store
the value it has selected. Now this target value, if Math.random returns 0, then it becomes 0. So we just not desired since we're choosing for a one to 100. So for that, we need
to do a plus one here. So right, get one equals math. But flow. Then give the argument target
and then write plus one. I suggest you to
understand each, at every step very clearly, since it's not about designing,
it's purely programming. Now once the computer has chosen a number in this
target one variable, now let us ask the user that we have chosen a
number from one to 200. I guess that number for that declared a variable
called finished, which will be a
Boolean variable. So I'm going to write false. So this will
basically indicate if the user has guessed the
right answer or not. If this finished
variable becomes true, then the user has got
the correct answer. So till then we need to increment
the counter now, right? Right. Then not finished. So while the finished
variable is not true, it will keep on
running this loop. Now within while you have to take the input from the user. So for that, we have to
take another variable. Suppose, guess underscore
input and then write text. And then variable guess input. I'm going to explain to
you why I have taken two variables to take input
from the user in a way. So hold on for that moment. Now, right here. Guess input text equals,
then write prompt. And within that, write the message you want
to show to the user. So write the computer, has chosen number between 100 and then write, try. To guess the number. So this is the message you
will be showing to your user. Now, we know that prompt
takes an input from the user. Input is basically going to
be saved in gas input text. Now, this input will be
in the form of a string, but we need a number as input. So for that, we need to convert this string into a number. So that is why I had
taken two variables, forgets input. Now, right? Guess input equals
then parse int plus n is a function
which will help to convert this string
into the integer. Now right in the argument
gets input text, which is our desired string. Now once the user enters
his or her input, so we need to increment
the guess. For that. Take a variable called guesses. Initialize it to 0. Now as soon as the user
enters the guests, so incremented value
guesses, Sorry. Yep. Now what happens if the user
doesn't enter any value? So for that, the program or the game will terminate
for that, right? If not, then for termination, you need to make the
finished failure as true. It's ferrite finished
equals true. So this was for a null
input from the user. If the user gives a valid
input, then write else. And then open the curly brace. And within this, right finished equals, then write check. So we're going to write
a function called check, which will be checking the
input if it's larger or smaller or out of range of the number chosen
by the computer. So write guest input as the argument and then
give a semicolon. So this check function
will return true or false, that is Boolean written
type to this phi finished. If the user gives us
the right answer, then it will return
true, otherwise false. So let us start the
function called check. Now, we need to
declare an argument here in order to accept
this case input value. Now, right, the
Eichmann called guess. Now we need to declare
this variable. So let us set the
global variable. Now write the variable called guess no within this function, check, give the condition. The first condition would
be if the number is less than the desired
number, right? If guess less than target one, since the number chosen by the computer is
saved in target one. Now, if the guess is
less than target one, then we need to show a
message to the user. So within quotes, right? Alert. And then write. The number is smaller. And then return false since the user could not
guess the right answer. No. If the number is bigger. So for that, copy this if part, and paste it to right. If guests greater
than the number, then write the number is
larger, then return false. Now what happens if the
number is not a number? That means if the user gives an input which is an alphabet. Now, right? If within the
bracket, right, is, and then N is N. N stands
for is not a number. So this is a function of
JavaScript which returns true if it is not an unwell and
false for if it is a number. Write your guess, heal. So it will analyze if
guess is a number or not. So if it is a number, then it will not
enter into this. If and if it isn't a number, then it will execute the code written inside this if section. So given an alert and right, Please enter a valid number. No, return false. Now, they can be another
condition that if the number is less than
one or greater than 100. For that, right? If and then guess less than one. R. So r is given
using these symbols. If you are a
full-fledged program where you can understand
it very well. Otherwise, this symbols can
be got from your keyboard, which will be available
above the Enter key. Now, right? Guess greater than a 100. So this will take care of
the outer fringe inputs. Now within this
section, given alert, do you use that outer fringe? Now return false. So all the conditions of
being false and taken care. So if none of the
conditions are true, then you can directly send. So for that given
alert, that right? Yes. You entered the right answer. And then you need to mention
the number of cases. So right. In. And then concatenate
my writing guesses. Guesses, you have the number
of guests the user has made. Now, this much guesses. So close the alert
and then return true. So this will terminate the while loop of
the function game. We're done writing the
code for our game. Now we need to load this Games for that or to body and write onload equals and
then write the game. Since the function name is Kim. Now save this. It's a bit on your deck stuff. I'm going to write g is game with the
extension of dot HTML. Now, save this and let us
run it and see the output. It says the computer
has chosen a number. So let me write the
number, suppose 50. So the number is larger. So let me write Twenty-five. Number is low too. So let me write ten. It's smaller, so
it's between 1124. So let me give 20. It's also larger. So 15, smaller. So get me give aiding. It's also larger. So it's between 1617. So yeah, the number was 16
and I got it in seven cases. Thank you for watching
this video and stay tuned to this course
to learn more.
30. Extra : How to stay Motivated While Learning: Hi guys. I hope you're
enjoying this course so far. Learning a new skill
is really awesome, but the process
is a little hard. So how can we stay
motivated by learning? Here are some tips for you. First of all, it's
very important to set a goal as it helps you to
focus when you get distracted, to get you back on track. When everyone just dancers,
what to learn, right? This is the syllabus you need
to complete this and that, but no one tells us how to learn when learning
is a process, remember to get
your basics way and enrolled in a course to
track your learning. Number three, consistency, persistence is the
key to success. Learns law, but learn everyday. Break the task into smaller parts so that you
can easily complete them. The most important part of
learning is to take breaks. Taking break refreshes our mind, which in our learning journey. The next is to surround
yourself with people who have similar interests and join a community who will help you grow in your
learning journey. Last but not least, believe in your abilities. Always remember. You can do it.
31. Introduction to HTML Forms: Hello everyone and welcome
back to the course. In this section, I'm going
to teach you about firms. So before creating
forms in HTML, let us understand
what is a form. So let's get started
now from your computer, open a web browser. I'm going to open
Google Chrome here. Now go to facebook.com. As you can see here, there is a section called
create a new account, where you can input your name, username, your mobile
number, or email address. You can set a password and you can also
give you a birthday, and also set the gender of yourself and then
create a account. So this is basically a
form using which you can create an account
in facebook.com. So this is basically a simple
form which you can design. In this section, I'm going
to teach you to design firms with various
attributes and features. So keep learning and stay
tuned to the course.
32. How to add Text field: Go to Notepad Plus Plus editor and then
create a new file. Let's start with the basic
structure of an HTML page. Now, inside the body section, start with a tag called form
and simultaneously ended. So whatever you write inside this form tag will be
the code for you form. No, let me start with name
for that given level. And right in AME name,
then closer level. Then write input type equals text, and then close attack. So this input tag will help
you to set the type of text or type number you want to accept from
the user as input. So here we want to take name
as input from the user. So we have set the
input type text. Now, there are
certain attributes of this input tag called autofocus. Autofocus will
basically give a focus, extra focus to your input. And then required. Writing required will
make your film monetary. And if the user skips the field, it will assure message that
this is a required field. Now there is another
attribute called ID. You can skip this, I'll give it this ID will basically help us to write CSS code
for this input type. So I'm using it here. Now, let us save this. I'm saving it on my
decks to give it a name, suppose form dot
HTML and save this. And now let us run it. So as you can see,
here's the label name. So you can write your name here. Yeah, like this. And if you don't write anything, then it's saying, please
fill out this field. Now to make the user understand that this
is a kind of form, let us give a heading H1, save sign-up form, and
then close the H1 tag. Now let us save this. Now get back to a web
browser and reload this. So as you can see here is my H1 tag with
say, sign-up form. And here is my liberal name
with the input type text. So now you know how to say
the name field in your firm. So get back and try it yourself.
33. How to add Password **** field: Now add another liberal
and right password, closed syllable tag. And then write input type equals and then right password. And you can also
use the attributes called autofocus and required. Also given id. Suppose pass. Now let us save this and run it. So as you can see, is
this my sign-up form with a name and a password slot. Now, in order to change
this password below that, namely, now let us write here after the input
type text, right, BR. Br will help to get this
lipid password next lane. So now save this and run it. As you can see, the password
is right below noon. Again, you can also
give another beer. So this will add
another line of space. Now save this and
let us run it again. So as you can see, the
password is quite below name. So in this way you can change the format now when
you write a password. So as you can see, it's coming in the star form. You cannot see your password, but for name, you can
see whatever you write. So now get back and
try it yourself.
34. How to add Email field: In this video, I'm
going to teach you about how to set the
input type to email. For that, start with beer. To set email below
the password level. Now, right level. And then write email. Now close the label tag. And right input type. Then write equals. And within that right email. No, you can also write
the attribute called required and give an ID. Now let us save this. Now, let us run it. So as you can see here
is my image of thing. Now, right to email. You. Now, get back to your
editor and try this out.
35. How to add Numeric field: In this video, you're going to learn about input type number. For that, right? Br. And then start with
writing the Lieber. Then write suppose phone number. We can use number input type
for phone number eight, etc. So close the level tag. Now, right, input
type equals number, and then give an ID. Now, let us save
this and run it. So here is my phone number slot. So we can write two
phone numbers like this. Now, you can also try
writing as a bit too. However, you press the alphabet so it is not going to
be displayed here. You can try it out and see no text will be
accepted in this slot. Now get back to your editor and let us try
another level called H. H and then close the level. No right, input
type equals number. Here you can also set the minimum and maximum age that you want to take
the input from the user. So let me set the minimum
age to 18 and maximum to 60. So the user cannot enter
any age below or above 60. Now you can also use the
attribute called step. This will basically set
the increments range. So I'm going to set it to one. Now given an ID to this, suppose H, and then save this. And let us run it. Here is my eighth slot. Now right here, suppose 18
know as we increment this, you can see it's
incrementing by one. So it is decrementing by one. Now, you can also set a default
value to your age slot. For that right here. Value equals, let us say
two to 18. Now save this. Now running. So as you
can see the difference. So as you can see, the
default value is 18 year. So in this way, you can
manipulate with your input types. Now quickly get back to your
editor and try this out.
36. How to add Placeholder: So in this video we will
learn about placeholders. Placeholder is another
attribute of input which enables you to write
something in the input slot. Now let me show you
one. Right here. Placeholder equals
and then write a message called
enter your name. Now save this. And let
us see the output. So as you can see, here is a text called
enter your name. As soon as you write something
here, then it disappears. Now similarly, you
can set placeholders for other slots
like password, etc. So do it by yourself
and check this out.
37. How to add Date field: Now to add input type date, you need to do is
start a new level. Then right, date of birth. Then in the level tag. And then write input. Then type equals,
then date. Given id. Suppose date. Now,
don't forget this BR, otherwise it will be
in the same line. So let me give two beer tax in order to align
it. Now save this. Now let us run it
and see the output. So as you can see
here is my date slot. Now, you can click here
and choose any date. So this basically
gives you a calendar. You need to add dates manually. You can directly select
from your calendar. Now, get back to your
editor and try this out.
38. How to add Time field: Now to add time
slot, right here, we are for the alignment
and then right label. And suppose, let us
write what time. You can choose any
slot of your choice. I'm going to choose more time. Now in the level tag. Now start the Input tab. And right type equals.
Then right time. Now given id, we're done. Now let us save this. And let's run and
see the output. As you can see here
is the time slot. So you can give
our than minutes. Let us write two, Then Forty-five, then 00. Give a morpheme view. You can change with this arrows. You can also change the
date with this arrow. So this is all for
the time thing. Now go back and try
this out in your ditto.
39. How to add Color input field: Now, in this video you're going
to learn how to zip color as your input type
for that right knee. And then start with the label. Now I'm writing favorite color. Now, indelible. Know right? Input type equals
C-O-L-O-R color. Then given an ID to it. Now close it and save this file. Now let us run and
see the output. So as you can see here,
YouTube color slot. Now when you click on it, you can choose any
color of your choice. You can even custom color. Using this color tab. Select a color and
click on Okay, and your color is selected. So in this way, you can
select your favorite color. Now quickly get back to your
editor and try this out.
40. How to add Radio Buttons: Now to set radio
button in your form, what do you need to
do is start with BR and write a level. Right gender. Now in the liver. Now right? Input type then equals and then
write trade deal. And then give the
value equal to male. Then right here, meal. Then in the next line, right? Input type equals, then write radio and then give the
value that is female. No, close it and
write your female. Now when radio button, you can select
either of these two, either male or female. A person cannot be male
and female together. So for that, you need to give a name, attribute, says gender. And similarly here also write
name and then write gender. Now save this and let us
run it. Here is our agenda. And you can either
select male or female. You cannot select
both simultaneously, since we used the
name attribute and had given the same name for
both the radio buttons. Now, get back to your editor
and start trying this out.
41. How to add Checkbox: Now I'll start by writing
BR and then write labor. And write languages. You know. Then close the label and then
write input type equals. Then we didn't quote
right, check box. And then write name equal items. This name will help us to
understand that it belongs to the same category item name. And then give value
equals English. And then write English. And then give BR. And then again, right? Input. Then type, then equals, then again check box. And then give me names
would be same items. And then give a value. Suppose Spanish. And then write Spanish. Give BR. You can add as
many checkbox as you want. So I'm going to add
three checkbox here. So right checkbox. And give the name as items. And then give the
value to pause French, and then write French
and give a BR. Now we're done. Now let's
save this file and run it. So as you can see, languages, you know, English, Spanish, French, you
can take all of them, are only one of them. So unlike radio
button in check box, you can select multiple data. Now quickly get back to your editor and start
trying out this code.
42. How to add Dropdown list: Now to add a drop down list, start by writing the level. And then right country. Then indelible. Then give a BR. No, use a tag called Select. Now give a name to it. Suppose country. And now start the
options. Right option. And then right value
equals suppose India, and then write in text India. And then int option. Now given adoption, give the value suppose USA, and then write in text. And then again in the option. You can give as many
options as you want. Now, let me give another option. So no need to write
it all over again. Just copy this part. Right-click, then copy,
and then paste it. Now said the country to France. And write in words France. So you can give as many
options as you want. I'm giving just three options. You can try out other
countries also. Now end the select tag.
Now save this file. Let us run and see the output. So as you can see
here is my country. So as you click on
the drop-down list, you can see the items that
we had entered in our code. So we have India,
USA, and France. So not only for country, you can use drop-down list
to any field that you want. So now get back to
your editor and start writing the code
for dropdown list.
43. How to add Textarea: So in this video you're going
to learn about text area. So for that, start with
BR and then give a label. And right. Please
enter feedback. No, closer label tag. And then start the
deck called text area. Now simultaneously close it. Now within the
textarea tag, right? Columns. So this will specify the number of columns
that you're going to enter. So I'm giving a 100 yell. And rows equals. Then you can give for. Now, let us save this and
run it and see the output. So as you can see, here is my text area. You can write as
many takes as you want throughout this
text area slot. Now here comes the level. Please enter feedback. So you can give the user a total textarea to write
his or her feedback. This text area is very
helpful in order to take feedback as well as for the
slot called about yourself. So in this way you can
use it now quickly get back to your editor and
start trying out this code.
44. How to Upload Files: In this video, you're
going to learn how to upload files in your forms. You can upload any file, beat a PDF file or an image, or a Word document, any kind of file, you
can upload your phone. So for that, what do you need to do is write a piece of code. So let's get started. So start by writing BR
and then give a level. Suppose upload your picture. And then in the label tag. Now right, input type equals then
within quotes, right fight. And then given name
supports file, and then save it
and run in Chrome. Now as you can see
here is my level. Upload your picture. And here is input type
called Choose file. So when you click on it, it directs you to your computer. Now, choose a file and open it. So as you can see, here is the name of your file
which is chosen. You can change it
multiple number of times, as many as you want. I'm selecting this. Now, the name will be changed. So you can change like this one, but only one file
will be chosen. So not only a picture, you can upload any file
starting from PDF files to Word document files
or any kind of file you can upload with the
help of input type file. Now get back to your editor and start trying out this code.
45. Advanced : How to embed Audio: Hello everyone and welcome
back to the course. In this video, I'm going
to teach you about how to embed audio
in your web page. So let's get started. Now go to Notepad Plus Plus editor and then
create a new file. Now start with the basic
structure of an HTML page. Once you are done within
the body section, write the tag called audio. And then within this tag, use the attribute called SRC,
which stands for source. So here you need to give
the source of your audio. Let me write closer. Dot mp3. This is basically a song. You can choose a new audio file. Now, right controls the
control of playing the audio, then increasing or decreasing
the volume from the panel. Now you're done. So close out your tech. Now let me give a heading. Suppose each one I'm
writing my new song. So this is basically a
demo now in the H1 tag. Now save this file. Now go to decks took, and then create a new file. And give a name to your file. Suppose I'm giving HTML. Yeah, now enter this file. Now give a name to your HTML p. Suppose I'm
giving audio dot HTML. Now save this within this file. You have to also save the audio source file that is
in my keys close a dot mp3. So let me navigate
to the section where I've saved that song. So I have saved it in my
music folder. Irritates. Now copy this song
audio file and then paste it in the same folder value of
kept your audio dot HTML. Here it is now pasted in the same folder.
Yes, we're done. Now let's go back to your
editor and then run it. So here is your audio file. Now you can play it and
listen to it. Even. Stephen just found
before a match you drink too much and
that's an issue. Okay. So you friends, it was
nice to meet them and this was all about
knowing the leg. I'm going to teach you about
how a unit broke the record.
46. Advanced : How to embed Video: Hello everyone and welcome
back to the course. In this video, I'm
going to teach you about how to embed
videos in your web page. Now let's get started. Now go to your Notepad Plus Plus editor and then
create a new file. Now start with the basic
structure of an HTML page. Now once you're done
within the body section, right, vdu, v IDEO tack. This will help you to embed
a video in your web page. Now, start by writing the
attribute called SRC, which will give you the
source file of video. Now let me first go to the
location where I have a video. So I'm going to the
videos folder of my PC. Now here my videos. Now, let me select
this video which has the name called
hyperlink dot mp4. So let me go back to
my editor and write the name hyperlink dot mp4. Now, right controls here, which basically gives
you the control of playing and then pausing and
then regulating the cursor. Now, right, controls. And then end attack. Now let me give a heading here. Suppose my video now and
H1 tag. So you are done. Now save this file. Similarly to save this
file in the same folder. So let me go to my deck
stuff and then create a new file and give a name
to your file, suppose video. And then within this file, save this HTML file. I'm going to name it as video
dot HTML. Now save this. And remember, your
video files should also be inside this
folder called video. So let me go to my videos section and
copy this HTML dot mp4. And then let me go to my next tube where I've
saved the video folder. Katie's. Now within this
hyperlink dot MP4 file. Now go back to your
editor and run it. So as you can see
here is my video. Now, this is taking the whole
screen since we haven't mentioned any heightened
width of the video panel. So let me go back
to my editor now, right, that attribute
called height. And then equals and then
set the height to 500 Px, Px ten. So pixel. Now give the width
to write with. Then also set the
width to 500 px. You can manipulate
the height and width according to
your convenience. Now save this again
and let us run it. Here's your video. Now we can play it. You can use these controls. Now you can even make it mute
and then play your video. So there is no sound, right? You can forward the COSO
like this and then played. This was the way
in which you can embed videos in your page. Thank you for
watching this video. Stay tuned to the coast
to learn more in HTML.
47. Advanced : How to embed Youtube Plugin: Hello everyone, Welcome
back to the course. In this video, I'm going
to teach you about how to embed YouTube
plugins in your webpage. So let's get started. Now, go to your editor and
then create a new file. Now start with the basic
structure of an HTML page. Now once you're done,
go to your web browser. I'm going to Google Chrome here. You can go to any web browser. Now, go to YouTube. Now from such a video which you want to
embed in your webpage. Now, let me search a video. So I'm searching a video
called What is HTM now, and then select any video. So I'm selecting this. So this is the video
you want to embed. Now. Pause the video,
now click on Share. And then you can find an option called
Embed. So click on it. And as you can see here is the code which you can
invert innovate bit. So copy this code. And then we're back
to your editor. And then within the body
section. That good. Now let us save this file. I'm saving it on my deck
stub. Give it a name. I'm giving Youtube dot
HTML. And then save it. Now let us run it. So as you can see
here is your video. So now play it. And the same video, please. So in this way, you can add YouTube videos as
well as you can add multiple videos
in your webpage. Now, let me go back
to our editor. So we're using the
tag called iframe, which is enabling us to set the YouTube plugging
in our webpage. Here is basically the width
and the height which you can manipulate to make the sites of the video bigger or smaller. And then this is the source. And these are some
permissions which are auto-play and allow full
screen within this iframe tag. Thank you for
watching this video. Stay tuned to the coast to learn this advanced features
of a stammer.
48. Advanced : How to embed Google Map: Hello and welcome
back to the course. In this video, I'm going
to teach you how to embed Google Maps
in your website. So for that, let's get started. Now go to Notepad Plus Plus editor and then
create a new file. Now, start with the basic
structure of an HTML page. Now once you're done, go to your web browser and
then go to Google Maps. So here we are. Now social location
in Google Maps. I'm going to search
my city, Kolkata. You can search your city or
any place of your choice. Now, as I search it, it's being displayed here. Now, I want this to be
embedded to my website. So for that, what do
you need to do is go to share and then go to embed map. Now you, here you have
the link of iFrame. So copy this link and
go back to your editor. Within the body section,
paste the link. So this is a long link. Now, save this file
on your desktop. Now give you a file, a name. Suppose map dot HTML, and then save it. And now let us run
and see the output. This is your map with
depicts Kolkata in my case, in your case it might be OCT. So you can drag the map, then zoom in and zoom out. You can use all the features
of Google map right here. Again, we're using I-Frame to embed this map into our repeat. So this is a total source. And this is the width
and height which you can adjust according to your choice
for watching this video. And don't forget
to practice this.
49. Introduction to Main Project - Blog Website: Hey everyone, welcome
back to the course. It's time for us to start
with our final project. In this project, you'll
be learning to design your blog using HTML, CSS. So as you can see, this is the home
section of your blog, which has a dish and then
followed by its recipe. So basically this
is a food blog. I will teach you exactly how
to build this blog website. Now, you can also build
fashion blog website or other blogging websites
in this manner only. Now, this will be
your About Us section where you can click on
this fight us on Facebook. And also there is a gallery. And this is your gallery. And whichever picture you posting a blog that
gets saved here. You can also click on
find us on Facebook, and then you can directly go to the Facebook page of your blog. So this is the Facebook page of my blog with
this foodies world. Now, I will also
teach you how to make your website life using
triple 0 wave host. So in this way, you can get to your site
live and your block can be accessed by anyone
throughout this world. And for this, you
don't have to write a single line of coding. In any of the programming
languages like PHP or Java, you do not need all these programming languages
to design your own blog. You can do that using
only HTML and CSS.
50. Blog Website - How to add Headers: Hey everyone, and welcome
back to the course. It's time for us to write the
code for our final project. So without wasting any more
time, Let's get started. Now, go to Notepad
Plus Plus editor. Create a new file. Now start with the basic
structure of an HTML page. Now I'm done with the basic
structure of an HTML beat. I've set the title to home since we are making
the homepage first. Now within the body tag, write def, right, class equals, and then main. So this is a division
for your main content. So I'm writing the classes mean. Now closer division tag basically will write everything within this main deviation. Now let me start writing
another division, which will be for our
header, right header. And then close the div tag. So in this header section, you can give the name of your
blog and then a tagline. So let me write a paragraph stating
the name of your blog. So heal, the name of a
blog is foodies wall. Now close the p tag. Then you can add a tag here. So given an ID, dag, right, it takes to both
explore the daily cases. Now close the p tag. Now, I'm writing
a food blog here. You can use any topic
to write to a block. It may not be food, it can be fashion or
lifestyle or technology, anything, any domain
you can follow. Now let us save our file. So I'm going to save
it on my next tip. Now create a new folder
and give it a name. Suppose I'm naming it food blog. You can give any name. Enter this foot blog folder, and then give the file a name, rating home dot HTML, since it's our homepage. So home.html and then save this. So this is now mirror
our HTML page. So for now, you need
to style the speech. So for that, create a new file. Here we'll be writing
our CSS code. Now, let us figure out what are the things
we need to style. We need to style distribution
mean and then header, and then this tag. So go to your new file
and gray dots mean, since mean is a class, so start with dot and open
and close the curly brace. Now within this right position. And then give a colon
and write absolute. So this will take the
total screen, so absolute. And then write the width
that is 100 per cent. Since we want to use the
total width on the screen. Now for the height, we have to set the height because the height
can be in finite. So give the height. I'm going to write
thousand pixels. You can give more or less
according to your convenience. Now, we need to set the
margin for that right top. So this will set the margin
for the top and right. And the left margin will
also be 0 per cent. So we are done
designing the mean. Now, let us design the header
part to write dot header. Since headed is also
a class header. And then within the curly brace. Again position. Now also give absolute
and then the width. So we want to use
the total width. So a 100 per cent. Then give the height. So we don't want our header to take the whole space
of the web page, so it must be on the top. So let me give the
header as 20 per cent. Now let us set the
margin for that. Right top. And then 0% and
left to 0 per cent. So we're done designing
the header section. Now, within this header section, we have this two paragraph
tags called the foodies world, which is our title block. And this is the tag. So let us write the code
to style our title. Now first let us set
the background color of our header section for
that right background. And then give a hyphen
and light color, C-O-L-O-R. Then let
us give a color. Now, we can give color
using the hex codes. So let me take the
reference of a hex code. Now, I want to set the
color to dark magenta. So my hex code is hash
aid being 00 a B. Now, you can set your color
according to your choice. So you can take reference
from the hex codes, which I've shown in the text formatting section
of this course. Now, I'm using
this dark magenta. So let me write here now. Hash eight, WTO, ATP. No, give us semicolon. Now let us design
the title for that. Give a color to your title. With dark magenta, white
will be appropriate. So light, and then
set the text size, font size, and then
give, suppose 38 pixels. Then right, font weight. And then write volt. So this will make the text bold and give more focus to it. Now, let us set the font family. Font family. So I'm going to use the font
family called George yarn. Now, let us give the texts some shadow for that right text. Then hyphen, and
then write shadow. The shadow will
be set like this. You can give dimensions of the shadow on x-axis,
y-axis, and z-axis. So let me write three
pixels on x-axis, three pixels on the y-axis, and three pixels on the y-axis. And the color of my
shadow will be great. No, we need to design our
tax section for that, right hash and then write deg, since stack was an
id to our paragraph. So here using hash, now open the curly brace
and within that section, right, the font size. Let me suppose 20 pixels
and then write font-weight. Bold. No right font-family. No, set the font family to
optima and write comma. Then sense no, right color. And then write white. Now right the margin, so margin, then hyphen,
and then right-left. Suppose 40 px. Since we want the stack to be shifted a little
bit towards right. So we're done designing
the head section. So now let us save this file. Save it in the same folder
as your saved home.html. Now write home dot css
and then save this file. Now within home.html and within
the head tag, right link. And then HREF equals
the right home dot css. And then right relation
equals stylesheet. Now save this file. Now let us run our file
and see the output. Let us launch and grow. So this is the header
section of our web page. It says for this fall and here's the check which says
explode the delicacies. Thank you for
watching this video. In the next videos, we will proceed with
making the web page.
51. Blog Website - How to add Menu: Hey everyone, welcome
back to the course. So we're going to write the code to proceed
with our project. Now, go to your editor. The same page, right? You had written the
header section. Now today we will write the
menu for this homepage. So after the ending of the
division tag of header, start another division
and give it a name. Suppose right, class equals
and then write menu. Now close the
division tag as well. Now within this
division will write the menu section for that. Start an unordered list. So start with the tag UL and
simultaneously close it. Now within this UL tag list, the menus want to give. So right eye. And then my first item
for the menu is home, which will be our homepage. And then close the LI tag. Then another menu for
us will be about us. It's alright About Us. In which you can give
you information. And then another menu, which is called gallery, where you can see
all the pictures or the food that you're going
to use in your block. Now, each of these menu
item is a web page. So as you click on this menu, items will be redirected
to the page it belongs to. Now home is a peach, which we are right
now designing. So you have to anchor
this page, so right. And then write H ref equals
hash because it will not navigate to any other
base since it is only the homepage now
and the anchor tag. Similarly, you need to
give anchors to about us. So write a and then H ref, and then write about dot HTML, which will be creating
in our further videos. And then close the ETag. Now it's underlined because this page has not
been created yet. That's why it's underlined. So we will be creating this. We can get this now, right? Gallery, then H ref, and then give gallery dot HTML. Now the anchor tag. So I'm menu is ready. Now it's time for us to add
some styles to our list. So for that, save this file
and go to home dot CSS, since it's all stylesheet. So here is my home dot CSS. Now, first of all, we need to design the
division called menu. So here is our division. So go to home dot css and
then write dots menu, since the class name is Menu. And within this right position, Will it be absolute? And then the width. So I need the width to be 100%. Now give the height. Let's suppose so 15%. Since the manager
should not occupy the whole space in the pH. Now you can give top as suppose 20 per cent because the head though
height is 20 per cent, so we need to keep
pace with that. So let's give 22 per cent so that there is a gap between the header and
this menu section. And then give left. Let us give some
margin on the left. Suppose 20 per cent. Now right? Ul LI. So in this section we
will be writing the code for styling the list items
of our unordered list. Now here you can add a background
color to a list items, but I'm not going to add that because that won't
look in my webpage. You can do it in your
webpage if you wish to. Now, I'm going to write
text-align, center. And then I'm going
to write list, then dash and right style. And I'm going to
write here none. This will basically help us
to get a horizon to list. Now let B, right? So I'm going to give
the width as to 20 Px. So after seeing the output, we can change all these
dimensions if we want to know with this given now and
to give the line height, so line then height, dx. And then slowed. This float attribute will
help it to get positioned. So I'm going to
write float left, so it really gets positioned
at the left side. Now we're going to use a
new attribute which you haven't yet learned
in this course. That is, it will ally hover. Hover is something
which will help you to design your menu in
a different way. That means when you hover your mouse pointer on
the specific menu item, then whatever the
code you write inside this hover section
will be applied there. So let's write and in the output we can
see what happens there. So use the tag called Transform and then RightScale. Now within this rate,
1.5 and then 1.5. Now, right, color. So as you hover on
your menu items, so we want some properties
of that item to be changed. So initially it will
be black in color, but when I hover on it, I want it to be white. Now for that, we need to
set a background color because our background color of the item is already white, so white on white
will not be visible. So let us set a
background color. Now, I'm going to
say the same colors set for the header section. So I'm just going to copy this hex code and write it till. Now, let's go back
to our home.html. Now our menu items where under this anchor
tag, now as we know, this anchor has a default style, which will be, it will be in blue color and it
will be underlined. So we don't want
that in our webpage. We wanted to style it in a different way
for that right E. And within this right color. And then write none. Then write black. Then write text. Decoration. None. So we will not have any
underlying thing. You can give the font size, font size. Suppose 20 PX. We are done now. Now
let us save this. Let's go to home.html and
run it and see the output. Here we are with
our food is false. So here are three sections home. So as you can see, as soon
as you have your hovering, your mouse pointer on this menu, items distance forming, it is zooming in and it's showing
a background color there. So this was the Hubbard thing which we did in our CSS code. So these are the menus we have. Now as you click on Home, it redirects to hormonally, we cannot go anywhere, but we haven't yet designed
about us and calories. So you couldn't go anywhere
by clicking on these menus. So we are done designing
the main section. In the next video,
we will learn how to design the rest part
of your web page. Thank you for watching guys, stay tuned to the
course to learn more.
52. Blog Website - How to add main content: Hey everyone, and welcome
back to the course. So in this video, I'm
going to teach you how to add content to your blog. So for that, go to
Notepad Plus Plus editor. Now go to home.html. Within this home.html, after you completed
with your menu, then after the menu
deviation, right? Deviation, and give
the class as content. Now close the division tag. Within this content, we're
going to add our content. So since it is a food blog, so I'll be adding some food and the recipes with
the pictures, etc. So basically we're going to do three things, which is one, we have to give a name to our food that we are
grieving in our blog. So we have to think of a very
nice and lucrative name. So you have to do
that first of all. The second thing is
you have to give a nice image of the food
that you have prepared. And the third thing is
the recipe of the food, which will help the users of your blog to understand
how to make that. First of all, let us start
with the name of the food. Now, I'm going to use
the header called H5. And when this I'm going to
write the name of my food. Now your name should be
attractive and lucrative for the users to use your blog and
get the recipe from there. So my first food
item is sandwich. So let me give a name to my
sandwich that is delicious. Sandwich. So this will be the
name of my sandwich. Now, you have to give an image. So write IMG and then SRC. So you have to set the source
for that, go to a dx2. Now, I already have
this image of sandwich. So what I'm going
to do is cut from hill and then go to the folder where I have this
home.html at home dot css. And right away, create a new folder and give
the name images. So whatever image
you're going to use for your website will be saved
in this images folder. Now, I'm simply going
to paste it here. So I have my sandwich. You now go back to Notepad Plus, Plus and then write your source, that is images slash. And then go back to the folder and see the
name of the image. So it's sandwich dot JPG, right? Sandwich, DBT. You are done with the image. Now, we'll be giving the
height and width and other attributes of the image in our CSS section of the home. Now, after the measurement
to give the recipe. So I'm going to use
the p tag for it. And then write the recipe. Then close the p tag. And here you write VR. And then another P tag. I have already written
the recipe here. That is the chutney and all. So I'm just going to copy this
thing and write it there. So I'm copying it and I'm
going to paste it two, this will be my recipe
and close the p tag. So we're done with our recipe
and image and the title. So save this and let us go to warm dot CSS to
design these things. Now start with dot content, which was our division. And then within this, right, the position which is absolute. And then give the
width and height. So it must be suppose 80 per cent and then height. So we want our content to take the screen after the
menu and the header. So we need to calculate that how much height is
taken by header. And the main section for that, Here's our head
though with takes 20 per cent of the height
and menu texts, 15 per cent. Here we had given
two per cent of gap to total is
thirty-seven percent. Now, we also want some gap between the
menu and the content. So let us give the
height as 60%. Then it's considered the top
section to be 40 per cent, including the header
and the menu. So the desk 60% will be the
height of our content now. So right top and then give 40%. And left gift in percent. And that's it. Now, right? H5. And then we want to
set the font size. So right font sites. And then write, suppose 38 px. Now, let us design
our image section. So right, image IMG. And then within this gives the height and
width of your image. So right height. Now let us set the height
to 300 PX pixel and then width to 500 px. Now once you're done,
go back to home.html. So for that, let me write BR
to make it in the next line. So just keep writing BR to
make it more organized. We are done. Now save this. Now, let us run it
and see the output. So here is our recipe and
the image of the sandwich, which is delicious
grid sandwich. So this is our homepage
where we have our content. Now, we can even add more
content to our web page. What that go back to
Notepad Plus, Plus editor. And simply copy this part from age five til the paragraph. So copy this and paste it to. The next item for
me will be pasta. So for that, I'm going to write saucy pasta. Now, again, I have
to give an image. So for that, you can download
the image or you can simply make pasta and
then give the image. So here's my pastor image. I'm just going to cut it from you and paste it in my image, a section of the food blog. Paste it. So it's pasta dot JPEG right here
instead of sandwich pasta. So you imagine sorted. Now, it will just spin to
change the recipe for that. Good this out. And I've already written the
recipe for pasta. So I'm just going to copy
this and paste it to. So I need to give some VRs
just to organize my stuff. Now once you're done, save this and run it to
see the output. So here's my web
page for this world, and this is my homepage. And here is my delicious
grilled sandwich with recipe. And then I have my salty
pasta with the recipe. So in this way, you can add
as many dishes as you want. If you are doing a fashion blog, then you can add your image. You can even add your
videos to your web page. Thank you for
watching this video, guys, stay tuned to the course.
53. Blog Website - How to create a Gallery: Hey everyone, welcome
back to the course. So we are left to
design two more pages, and then we'll be
done with our block. So in this video,
I'm going to design the gallery section for that. Go to Notepad Plus Plus editor and then
create a new file. Now start with the basic
structure of an HTML page. So we're done with the basic structure and I've
given the title as guilty. Now, within the body section, write the tag called H1. And then write gallery. No close H1 tag. And I'm going to write some
styling using inline CSS. So I'm going to align it to
centre, so right, text-align. And then writes and don't know. She had a deviation.
The deviation tag. Now give the class
name as photo. Now let us save this. Remember you need to save this in the same folder as you have saved the other web pages. So I had saved in food
blog on my desktop. So I'm going to save
it in the same folder. So select food blog and give
a name to your HTML page. I'm giving gallery dot HTML. Now save this. Now
within this deviation, right, IN cheat, since your
gallery must have images. So IMG, so let's see. We're going to add
images of a block. So for that, right
images and then slash sandwich dark GPG as we had added this in
our previous video. And then P1, that when the
user clicks on this image, it will open in a
full-screen mode. So for that, use the anchor
tag and then right target. And then write
underscore, then blank. So this will open the
image in a new window. Now write H ref
equals and then write images slash sandwich, dot JPG. No endband could tag. Now let us add some height and width to our image
for that right, height equals and then write 300 px and width as 500 Px. So we are done. Now let us save this and run it. So this is our gallery
which has this image. Now when you click on it, the image gets displayed
in full-screen. Now we can add more images. So for that, copy this part, this whole deviation,
and paste it. Now in the source, you can give another source. So I'm going to add the pick
of pasta, pasta lot JPEG. And now here instead
of sandwich, right? Pasta. Now we want this image to be
at the right of this image. So for that, we need
to do some styling. So right style within the head section and
simultaneously ended. Now within the style section, use the class called dot photo. And then within this, right, float. And then lift. Now save this. Now let us
run and see the output. So as you can see here, use your grilled sandwich. Here is your salty pastor, and as you click on it, limit gifts shown to you. Now, what we need
to do is we need to link this gallery
section with our homepage. So for that, go
to home dot HTML. And here, as you can see, it's anchored to
gallery dot HTML. So now let us run home.html. As you click on gallery, here is your gallery. Now as you're back from you, Here is your homepage and
here is your gallery.
54. Blog Website - How to create About Us Page: Hey everyone, welcome
back to the course. We are already done with
Homepage and gallery. So in this video, you will learn how to
design your about us page. For that, go to
Notepad Plus Plus, and then create a new file. Now start with the basic
structure of an HTML page. Now, in this page unit to
write about the blocker. In this case, it's you for that. I didn't image of
yourself or the blogger? No. For that, select
any of your images. So I have an image of
mine on my desktop, so I'm just going to cut it. And in my food blog folder, inside the images folder, I'm going to paste it. Now. Let me rename this image. So go to the name and
give a name to it. Suppose no, go to your
Notepad Plus, Plus editor. And then in the source images, then slash, then dot, JPG. Now give the height and width. Height equals 300 px and width equals 300 Px. So we're done with
the height and width. Now, you have to write
the about section. So for that start
a paragraph tag. Now, I have already
written about myself. So I'm just going to
copy it and paste it to. So I'm going to give some VRs to make it look
good on the screen. Now close the p tag. So now before saving this file, let us go to home.html and find out what was the name that
we used for this About page. So we had used about dot HTML. So similarly, let's
name this about.html. So inside the food blog folder, I've already inside
the food rockfall. So let me write about dot HTML. Now save this and run
it to see the output. So here is my photo. Here is about me. Now I can change the height and width attribute of your photo. So adjusted accordingly. So let me give the width as 200. Save this and again c. So in this way you can add
just now It's looking good. Now, this is about my bio. Now this is a short bio. You can add many more
things to your bio. Here you can also
add some links to your social media account so
that they can contact you. For that. Go to Google
and search for images. Images of Facebook. Choose an image and
longitudes this. So click on it and then
right-click on it, and click Save Image
As and save it in the folder for block
inside the images folder. So it's called download dot PNG. So long to keep it like that. It's saved. Now let's get back to
Notepad Plus Plus. Now here, write IMG, then SRC, then equals, and then write images slash download dot PNG. Now we are going to anchor this to Facebook page or
Facebook profile. So I recommend you to create
a piece in Facebook with the name of your blog and then link that
page with this image. So for linking, we're going
to use the anchor tag. So here is our anchor tag. Now write H ref equals. So we need to get the link. So go to your browser
and then go to Facebook. And then login to your account. I'm going to log
into my account. From here. You can create pages. So since I have already
created a page for this block, so I'm directly
going to go to that. So click on pages. And here is my foodies world. So click on it. Now here you get
an option called us beach with the
toe. So click on it. This is your blog and the
visitor will see it like this. Since I've just created a blog. So there are no posts as yet. So you can create your
page and it pulls, and you can also
publicize your blog. Now, copy this part
and paste it in H ref. Now save this. Let us
run and see the output. Here is find us on Facebook. As you click on it, you get
redirected to your page. You can also add your other
social handles that just Twitter or LinkedIn or any
other profiles if you have. Now, let us get back
to Notepad Plus, Plus. And from the home dot
HTML it does run it. And let us click on About Us. So we have the BGO.
55. Blog Website - Website going LIVE: Hey everyone, welcome
back to the course. So we have come to an
end of this course. So in this video, I'm going to teach
you how to launch your blog site and make it live. So for that, you need
to do a small change. That is, go to your
food blog folder. Then instead of home.html, just make it index.html. Now, go to your browser and
then search for web host. So write triple 0 where post. So this is basically a free hosting
platform where you can launch your website for free and you do not need any
money for that. So since it is a
project for testing, in our case, we'll be
using this free hosting. If you want to launch your
blog in a commercial manner, then you can obviously by some commercial hosting
platform such as Host, Gator are hosting, etc. Now click on this link and
then you can do a free signup. So click on that. I need to give the email and password and
the website name. So give me your
email, right TO know, give a suitable password, and then write the
name of your website. So in my case, I'm going to write
foodies world. So this is going to
be my website name. Now click on. Get free hosting. Know quickly verify your
e-mail account for that. Log into your email account. Here is find the
mean from a post. So click on Verify E-mail. So now your email is verified. So click on this file manager. So click on upload files. Now. Here are two files
already that is public HTML and
another that is TMP. And now this is public.html. Now within this folder, you need to keep all your files. So for that, go to
your next tube. Here is your food blog
and right-click on it and click on Okay, so I'm converting it
into a read file. Now. Now go back to your browser. And then from you
click on Upload Files, click on select files, and then go to your desktop. Now. Click on food blog dot
rare, and open it. Now, click on Upload. So as you can see,
it's uploaded here. Now select it and then
right-click on it. And you can see this
extract option. So click on it and
click on extract. Now we have all our
webpages selected here. Now what do we need to do
is create another folder. For that creates a folder and
give it the name as images. Now click on create. Your folder is created. Now, double-click on
this images folder. Now click on upload files
and then select files. And then go into the images folder and select all the images
that are relevant. And then open and then upload. So your images are uploaded. Now, let's get back
to public HTML. Now select this theme folder and then right-click
and delete it. Since we don't want any
redundant file in our website. Now within this
public HTML also, we have this HD axis. So let's also delete
it since we don't need it. So we're done. Now go back to file manager and just click on your website. So here is your web page. Now, click on gallery. You have your gallery, and then you can
click on About Us. So you have your
About section and you can also click on
find us on Facebook. It will redirect to
the Facebook page. So our website is
okay now it's life. So this thing is for
the free hosting. If you have a paid hosting, then you won't get this
kind of watermarks. So this is your website. Now, do one thing. Logout from your
account in web host. For that. Click on log out or sign out. You have successfully sign out. Now, click on a new tab and
then write your website name. So this is basically
my website name. So as I enter on it, so here I can see my website. Your blog is live now. Now you can add the URL of your blog to your
Instagram handle. And you can also share
the website with the Facebook handle and the
Facebook pages and etc. Thank you for being
a wonderful learner.
56. It's time for Class Project: Hi guys, welcome
back to the course. Now it's time for
the class project. For the class project, you need to create
a blog website. For the topic of
the blog website, you can choose any topic. I can give you some
idea like food, travel, fashion, beauty,
technology, life hacks, etc. The blogger site must
contain the Home section, gallery about us and
some social media links. Some tips and tricks for you. Always use a coding
editor because it really makes your life easier as a developer if we use
our coding editor. Now, the next thing is you must give proper indentation
while writing your code. The proper indentation
really helps us because there'll be many lines of code
and indentation will help to make the
code more readable. And last but not the least, do not panic if you get stuck. There are many sources
out in the web where you can check out like W3
schools for example. You can go there and find
solutions to your queries, or you can feel free to ask
questions here as well. Now, it's time for
the deliverable. The deliverable will be the screenshot of the blog
website you have created. So after you are done
with the project, you need to share that
screenshot of the website. I wish you all the very best.
57. Bonus : How to add emojis: Welcome back to the course. So in this video, I'm
going to teach you how you can add images
and you'll repeat. So for that, open your editor. So I'm just simply
going to open Notepad. You can also use Notepad Plus, Plus or any other
editor of choice. Now, just write the basic
structure of an HTML page. So I'll start with tape and then come to a head. Head. Let's give
a title to this. So suppose the Manchus, right? Don't forget to also
include this Meta tag. So I'm going to give it a value. So the metal can set, should have this
value, UTF eight. Then forget to input this. And then we'll go
ahead with the body. Now within the body tag. Just give a heading, emojis and break to go to the next
lane and then a p tag. Now, from here, like whatever
image you need to give, so we need that
decimal value for it. So what we'll do is we'll
go your HTML decimal. Okay? So here we have the decimal
codes for all the emojis. So let me quickly open this. So you have a gleaning face, are faced with tears of joy. So let's start with this. I'm just going to copy
the decimal value, go back to editor
and just paste it. Let's close this p tag
and save this file. So I'm going to save
it on my desktop. So limit t dot HTML and
where it and sell it. Have it saved. Now, let's open it. And yes, we have this emoji, so let's make it a little
bigger for us to understand. So I will set the
font size, font. Okay, so I need to
give the style tag. And then font size equals. This looks better. So save. Go back to the web page
and the friendship. No changes. Let me make it more. Okay, so you should not use
equal to hear my mistake. So let's see now, if it changes. Yeah, we have a bigger mountain. Now, let's go back to our
guide and use another one. So I'm going to take this one. So I'm just going to
copy this decimal forward or back to your editor. And then I'm going
to paste it here. See right. Go back to the web page and refresh and you
have the next emoji. So in this way you can
add emojis to repeat. So to give it a more meaning, I'm just going to
write something. So suppose this is my favorite
and we have that emoji. So let's go back and refresh. Yeah, this is my favorite and
this makes much more sense. So in this way, you can add emojis in your web pages to make it look more better and the more approachable
to the users. So thank you for
watching this video. We'll see you in
the next videos.
58. Bonus : How to install Sublime Text Editor: The course. So let's continue with
the installations. In this video, I'll
show you how you can download the sublime
text and install it. So go to Google and
search for Sublime Text. And we'll have it here. So click on download, the Windows version
and Linux one. So I'm going to go
for Windows 64 bit. So just click on it. Okay, you have the file here. So I'll click on Save. Now, as soon as you click on it, you will get installed a pop-up, and you have to just
press Next and Finish. So since I already
have it downloaded. So I'm just going to
show you how it looks. This is our sublime text editor. Here you can have this folder
structure for your project. And then here you can have the space where you
can write your code. So thank you for
watching this video and stay tuned to the course.
59. Bonus : Jquery Introduction: Welcome back to the course. So let's get started
with jQuery. Jquery is basically our featured
each JavaScript library. It is basically used
for event handling and an animation other purposes. So let's get into our first exercise and
see how jQuery works. So for that, we need to
search for jQuery CDN. Jquery CDN. Cdn is a content
delivery network. So using the CDN will help us to contact the
jQuery library, which is hosted somewhere, and we do not need
to install it. So I'll use the latest one. So we need to copy this. And let's open our editor. So I'm going to start
coding in Sublime Text. Open this editor and get started with the basic
structure of an HTML page. Html. And then Right, the head tag. They are involved in it to port this granny script
code in the head. No. Shake Ready one. Okay. And now we need
to paste the CDN. So I'm just going
to paste it here. Okay? Now, when the body tag and I'm going to basically show you kind of MCQ challenge
which you can design. So I'm just going to
give it a heading. Mcq questions and the H2. And then further questions. I'm going to use H6. Don't forget to put a break. So BI. Okay. So one. Then write the question, how is the weather today? And then, and H6. Again, I'm BR. And then we can go ahead
with writing the options. I'll use p tag for the options. You can also use depth. So let's use div here. And let's give the
option, option E signing. Okay? And the div tag. And let's style it. So, right, stale. And font size. Suppose 1 to EM. Okay? And let's give it an ID as well. So id, then give an ID. So I'm going to give the idea
of scope PT-1, option one. Okay? Now I'm going to save this and let's see how it looks. So save it. I'm going to save it on Dexter. Name, right? To play one dot HTML. Save this. Okay. Now let's run and see how it looks. So we have this, okay, this question is
looking very small, so we don't use something else. The option looks affect, the font size is good. Let's change it from
H6 to something else. Maybe we can use H4. Yeah, we can use H4. So let's save. And let's
see. Mary loading. Yeah, it's bigger but still
not the desired size. Maybe I can use h reinstate. Yeah, Looks perfect. So this is a question I'm
taking just normal question. You can not take any question of your choice just to make you
understand how it works. Is the weather today and we
have one option as Sonny. And let's give adoptions. So don't forget BR after this. And one more thing,
you also need to give a height and width
to this division. So let me give it a height and width of 50 PXE. Okay? Now, let's copy this one and create
the other options. So let's make it option tool. And then just remove sunny, rainy and B option B. The rest will be the same. Now let's go to the next option. Option three and this change make it Option C
and then cloudy. Okay, so let's save this. So we have sunny,
rainy and cloudy. Okay. I need to
increase the width. So let's skip though, what S 100 px. And let's keep the
height as 50 PXE. Okay, Save what happened? It became 500. For that. Yeah, now, it looks absolutely fine. You can give as many
options as you want. You can also have option D. So once the user
chooses an option, it will get marked. Okay? Now, let's write the script. What you need to do
is open a script tag. Okay? Not cilia. Then. What do you need to do is when you are dollar symbol
and right document. And then got ready. Okay. So this document.ready, what it will do is
whenever the page reloads, that is the document
that is stovepipes, a web page that is ready. It will invoke this
particular function. So we need to write
the function for that. Okay? And then this is how
you should write deck. Okay? And don't forget
a semicolon here. So this is the basic structure
of jQuery functions. Just remember this and
within this ready, we have to now write our code. So whenever a user how voice
on this particular option, that is division here, we want the color
to change, okay? So let's write it. Right dollar. Then whenever we want to perform some operations on the web
page using this document, now we're going to perform
an operation on this div. So for that, we need to
write them here. Okay? And then dot on
this on function. Similarly unit to
get this structure, okay, in this odd function, we need to write that event. So the event will be mouse and the mouse and
terminates when will be hovering on the division. So for mouse enter, we'll write a function. And this will contain the operation that we
want to take place. So what we want to do is whenever we are
covering on any answer, the color, the
background color of that particular
option will change. So Let's say this. So again, in this dollar and
then within the brackets, you need to write the limit. So here the element is D1. So that's why I'm writing this, this and then dot
CSS because we want to change the style
of the division. That is, we want to
do some background. So we have to use CSS. Then we can write
background color. Okay? Then we need
to give it a value. So I'm going to write late. So whenever any option
is being hovered, it, the background color
will change to light gray. And when the mouse is hovering
on that option anymore, then again it will
change back to white. So for that also, we need to write the event, so that is most leaf.
And then a colon. And then function. And then, don't forget a comma here because we are writing
a lot of events. So then similarly, this dot css and then
background color. So now we want it to
change back to my right. So this is done. Now what we need
to do is we need to set an event for them. Click, Okay, whenever
we click on any option, the color must change. So let's say the right
option is sending. So whenever we click on it, its color is going
to change. Okay? So let's do one thing. So what do we need to do this, not in this odd function, so it is ending here. So after this, we need
to write that function. So now I'm going to write hash or BP when I am using the ideas for using the ID
to use this hash symbol, hash OPT one, and then dot. And what is the
event that is click, click, and then write function. Okay, And don't forget
a semicolon here. Now, I'm going to do
right now operation. So again, dollar. Then we can write this
dot and then CSS, and then background color. And then clean. Okay? Now next, whenever this
option is selected, now even if the mouse is
hovered over it anymore, we need to keep the
background as unclean. So for that, again. And this, and then dot c.
I'm sorry, my mouse leaf. We want to do it for mouse live. So again, function what to
do when the mouse leaves. Again a semicolon here. Alright? Then we need to write the operation that is this, and then dot css and
then again Macron color. And then between, so it
should remain. Okay. So this is for your right and so this was for
the right answer. Now let's set the things with at all and touch up with option
two and option three along. So I'm just going to
copy this Control V. Now instead of option one, option two, then a comma, and then option to
rest will be seen. Now, if it is clicked, then the background
color will be red, since they're all n size. So read and even if
the mouse leaves, it really mean. Let's save this. Now. Let's see the output. Some hovering on
sunny, rainy, cloudy. So yeah, everything
is working fine. Whenever I'm just
hovering over it, it's turning gray
for all the options. And whenever I'm not hungry, I'm just moving my mouse away. It's still running
into right now. And let's click on Add option. Clicked. Okay? So read this. Rainy is not an option. Okay. Now let's click on
Sunday and it's green. So yeah, sunny is the right
option that we have chosen. In this way, you can set all your questions
and you can simply have MCQ questionnaire and you can try to their
friends and colleagues. So I hope you liked this video. Thank you for watching.
60. Bonus - Jquery Toggle: Welcome back to the course. So hope you enjoyed
the last tutorial. Now, let's move to
our next exercise. For the next exercise, what you need to do
is open your editor. And then what I'm going to do is create a new file. And then just copy
all this code. Okay? And we don't need this anymore, so I'm just going
to remove this. Okay? And also we know
we don't need this. So we again have a
basic structure. Cheek fat it will
be and exercise. Okay, now here we are
going to implement toggle. So let's see how it works. So for that, we need to create two panels. Let's check out. So for that, we need to
create two div tags. So then I need topic. And then you have
to write a topic name. So suppose cheek ready? You can write anything
here of your choice. I'm just writing it to
make you understand, okay? It's already in debt. Now, when it does
create another div, which will be the description
of this topic description. And then we're going to
write a description that Java for even handling etc. Okay, So we have the
description now enter div tag. Now let's style this. So I'm just going to style tag now, right? Hash. And then topic and coma hash description. So I'm going to do the
padding and then text-align. So text-align, we'll show the incentive we give center and left it to ensuring
the left and right. It feels right, right, it will showing the right. So again, let's give
it a background color. Let's give it any color we can give, maybe yellow. Okay. And then when it
could give a border. So I'm giving you a
solid border, one px. And let's give it a
border color as well. So let it be. That looks good. So now we need to hide the description. So whenever we
click on the topic, the description must appear. So for that, the padding. So we'll do a padding of
50 PXE and right display. None. Okay, we're done
with the styling. So let's save this. I'm going to save it as g dot HTML on the desktop. So C. And let's run and
see how it looks. Yeah, Good Friday. But whenever I'm clicking on it, I cannot see the description. Okay, so let's do
that using jQuery. Now what we need to do is again, dollar document, ready function. Don't forget the semicolon. Okay, so within this, we need to write the events. So dollar hash topic. So when we click on the topic, the description, Let's step you saw the event will make click. Okay, and then the function. Now, whenever they
click on the topic, the description must appeal. So dollar, hash description
dot slight darker. We can write the time. I mean, the type of
problem that you want. So should it be fast,
shouldn't be slow. So let me keep it slow and I'll show you how you
can set the time for it. So yeah, slow. And I think we're done. So let's save this. And let's reload the page
and click on jQuery. So yeah, we can see
the description now. And if you click
back, it will hide. So it's basically
toggling. Okay? Now, go back to the editor. So if you want to set the
timing on this thing, so suppose we want it to
be done by five seconds. So you can write
5 thousand, yeah. Okay. And save this and refresh. So when you click on
this and open cities, and when you close this, close this really slowly. You can set the timing
here as per your choice. And if I set it fast, and don't forget the
quotes, save this, reload. And yeah, it's
opening very fast. So yeah, this is
all about toggle. Thank you for
watching this video. Stay tuned to the course.
61. Bonus : Jquery Animation: So in this video, I'll show you how to perform
animations using jQuery. For that, go to your editor. Okay, So I'm just going to copy the code from the first
exercise I predict for jQuery. This one, see what pain control and manipulate certain things in order to perform
this exercise. Now, so let this
be MCQ question. And instead of this question, I'm going to write like me. And for the options, what I'm going to do
is let this be sunny. I'm not saying Let
this be yes. Okay. And the next option,
remove the adoption. Looks good. And now what I'm going to do is I'm going to place two emojis. Yeah. So for that, go to
Google and write emojis. Decimal coats. Yeah. The first website. Okay. So if somebody
says yes, I'll be happy. And if somebody says
no, I'll be sad. So this is the happy face. I'm just going to copy
the decimal code. So we need to write another
div, give it an ID. So happy. And then
write the code, okay? And similarly we are
going to copy a sad face. Let's find it. Yeah, this is a sad face. So I'm just going to copy. Okay, So I was copying
the hexadecimal, sorry, not the hexadecimal one. To copy the decimal one. Okay. Remember this scientist
removed for this Majlis face? And let's go back again. All right. It's a sad face. Yeah. So remember to copy
them decimal code. No. Again, id, sad. And then paste, and
then Endo div tag. So we have a happy face
and set fees. Right? So accordingly, we'll also alter the Java like the JQuery code. First save this. I'm going to save it as cheek by three on the deck stuck on. So give the extension dot HTML. Yeah. Now let's
see by running it, how it looks. Yeah. So we have this yes and no. And you're like me. And now what we're going to do is let this be the
mouse hover one. For deaf. Now, we're going to set
a variable called click. So we weren't the only ones. So for that, I will
set this flag. So variable click call to
false and just write here. So when the option
one is clicked, so we will check F
triple equal to one. So if this condition is valid, then we will run no code here. So here in this code, what we'll do is we'll turn
the background to green find. And then what do we need to do? Another thing that is, we need to animate
that particular emoji. So I'm going to make it a lot bigger when it gets selected. So for that, you select the ID. So ID will be happy. And then dot animate. Okay? So animate is itself a function, so you don't need to
write function here. So just write the event. So what we need to do is we
need to change the font size. Suppose five EM, okay? So this will be our
font, font size. For the emoji. In case the option
one is selected. We do not need this, so I'll just remove this. Now what do you need to
do is to simply copy this code and paste it and manipulate it for the option 21 more thing
when the click is false, so we need to change the flag. So now assigned click with true, so that we can only
choose one option. Now, if the click is
false, again here, the same thing. Okay? And then what you have to do is, since it's a no option, so I'll make the background red. Okay. Now here, it will be sad
face ID sad as you remember, if you remember for
this act phase. And it will be siem,
and again here, the background color
will face in both. So let's save this
and run it. Okay. So refreshed it. Now. Let's click on yes. Yeah. Showing a happy face. Now, if I click on
No, it's not working. Okay, because I had
already set the flag. Now let's refresh again. And now we'll click No. So yeah, we have this set phase. So in this way you can perform
an emissions using jQuery. You can perform a lot of
things using animation. So let's see what we
learn in this journey. Thank you for watching and
stay tuned to the course.
62. Bonus : Introduction to Bootstrap: Welcome back to the course. So let's get started
with Bootstrap. Bootstrap is basically
a fronted framework. It contains HTML
and CSS template, and it also helps to make
the website responsive. So let's quickly start
our first exercise. So first of all, you need to
search for Bootstrap CDN. So Bootstrap CDN. Okay. So click on this and you will have certain
kinds of CDN heal. So instead of going here, I would recommend you to go to get started with Bootstrap. And then you can get the
relevancy dance from here. So what do you need to
do is just copy them. Okay? Now, open your text editor. So I'm opening Sublime Text. Now. Start with the basic
structure of an HTML page. And then HTML. The HTML tag. Start with head. We need to put this
CDN in the head. So first we'll write
title Bootstrap, and then the title tag. Then what we're going to do
is to copy the CDM, Okay? So this is a CDF we have
copied into the head section. And now we need to
start the body. So stack body and the body tag. Now what we need to
do is we need to start a div tag. Okay? Now, within this div, we're going to write class equals and then jumbo. Okay? And that's just
by writing class, you can style this particular
depth and just write, I think tech center, you don't need to write text
align within the style. So this is the
beauty of Bootstrap. So next, you can write the
heading you want to give. So I'm going to
write get started, bootstrap and then
end the H1 tag. No, right? Bootstrap is a framework. And close the p tag and then div tag. Okay, so we have
the code written. Emails, Let's save this. Save it on my deck stuff, and give it a name. I'm going to name as Bootstrap. One dot HTML. Okay? And save this. Let's run it and see the output. We have the output. So as for the jumbotron, you see or what it makes us, it makes the background
on the light gray side. And you also get this heading, which is beautifully
come link generally, if you use each one, it won't come this beautifully. So get started with
Bootstrap and then you have a simple description about like bootstrap is a
front-end framework. So in this way you
can use jumbotron. So as you have
already seen that, just by mentioning
the class, again, just by mentioning the class
jumbotron and tech center, we got this particular thing. So a nicely designed in order to show you the CSS
and everything, you must be curious, like how is it happening for that or right-click
and go to Inspect. Okay, and then click on
this icon and select. Suppose I want to see though the CSS behind
this particular thing. So click on here. Now, you can see, if you can see here
jumbotron and then dot H1. And it has a colored inherit. And then there is a
particular font sizes. So you did with it. We did not assign any such values for
font and everything, but still we are getting this. So this is actually
done by Bootstrap, as we had already
included, it's CDN. So really get this
from bootstrap, and it is already designed. Okay, if you wish, you
can make some changes and see like if I just make the
statistics px as 20. So instantly you
can see the change. But since it's just
showing us here, if we refresh the page, it will again get back
to its original form. Okay, so this was a very brief introduction
about Bootstrap. In the next exercise,
we will learn more. So thanks for watching and
stay tuned to the course.
63. Bonus : Bootstrap Grid: Hi guys, welcome
back to the course. So now we already know how
to implement a jumbotron. Okay, so let's go ahead
with the next exercise. What I would
recommend is it will just copy this code from here, create new file, and paste it to write
it over and over again. So we have all the CDN and
everything configured. Now. We will learn about
something called container. So death, there is a
class called container. Let me show you what it does. Let me keep this jumbotron
inner container. Let me go ahead with
the indentation. Indentation encoding
is very important. Now it looks good. So let's save this. I'll save it as boot
strap dot HTML. And let's run this and see. So as you can see
in Bootstrap one, we had this Jumbotron, which had the full
length of the screen. But whenever I'm
using container, it's getting
electric compressor. This is because container leaves a certain margin to the
left and to the right. Okay. So similarly, when
inspect and see how it does it, basically in Bootstrap
container is used to make the website enough Salt Lake to get the website
in as ordered, man, and leave
unnecessarily margins and everything to
make it look good. Okay, So just how it works. And in this particular video, I'm basically going
to talk about the grid system in Bootstrap, which actually helps to make
the website very responsive. So I'm just going to
show you how it does. Okay, so let me show you
this basic grid structure. This is a Bootstrap grid system. What it does is it divides the whole screen into
small spans, okay? You can also think of it
as two small columns. So at most it can
have two columns. Now, in the first one, you can see span one, lake, the sizes one. It's span-wise. The size of every column is one. And you can count
there 12 columns here. The next line you can see
the span is for, okay? So if we add up four
plus four plus four, again we get 12. Okay? So in this way we can set the grid system and we can arrange our
content accordingly. So here you can
see spanked well, so this basically takes
the whole screen. Let me show you how it works so that it will be
easier for you. Let's get back to the code. One more thing
before we proceed. So apart from this column, we have something else, which is the grid classes. Okay? So what it does is it has certain classes as excess S, M, and D and energy. Access is for lakes. Very small screens like phones. Sm is what? Tablets,
which are a little bit. And MDs for small laptops. And LG is what? Big laptops and desktops, how these are implemented. I will show you in the code. So let's get started. Okay, so now what we're
going to do is we're going to make different columns. Now. This container will be there, so we will use a
different container. Now. We will start with
a new container. Div class. Container div tag. Okay? Now, inside this container, what we'll have is Class called to do, okay. So div class. So in this way, we're actually going to divide the screen into
rows and columns. So just hold on and see
what is the output. So let's first quickly
write the code. Okay, now we have
the div class row, so we have the first row. And in this first row, let's say we are going to have for like three
columns maybe, yeah, three columns sounds, but now write def king
and get rid of class. And the class will
be column here. Now, we have to mention
the size of the column. As I already told you. Let me show the picture again. As I already told
you, that you have to give the span of this
particular columns. Okay? So let's say I want
three columns. So if I want to
create three columns, that means you can see in the second line we
have three columns. Suspension before for h. So let's give the span
is four, so column. And then this is a large screen since I'm
doing on my deck stop. So LD. And then for no comeback here, we can give a heading h1 and h3 tag, and right, this is first column. Okay? And the p tag, we have our first column. Now in the same row, we're going to have
the second column. So just copy this
particular code. The column will have
the Span forward again. That's absolutely true. And this will be our column two. And this is our
second column. Fine. Now again, we'll
have another column. Since the size would
mean 12444 will make. No, this is column three. And this is the third column. Now, let's quickly
run this and see. Yeah, so we have
three columns here. These are single row, and we have three columns. Now, what we're going to do
is we will have another row. And let's suppose we will have two columns
there, one of span. And what, I've spent ten. Let's do it. So get back. So this law, NCL. So it will have another row, div class. It'll all and div tag. And now we'll have two columns. One, I'll spend 21, span ten. Okay, so def last column, then LG, then, okay, in this div tag. So let's say we write three strep and then NH3. And again the next column. So div, class and
column and empty. And then that's great. And let's write something here. Welcome to trap. Looks good. Okay, now let's save
this and run it. So I hope you are able
to understand this. Let me do one thing, let
me use background color. It will be very helpful
for you to understand. And so what I'm going to do it, Let's take background color. Suppose a red. Let me use something little
on the lighter side. Looks good. And similarly, we'll have another
background color. Supports Hello. This is just to
show you the span. Okay, let's refresh. Now you can see
this has this span of two and this has
this pan off. Ten. Okay? So this is how the
grid system works. Now, as I told you, this grid system actually makes the website various ones of how let me show you
again, go to Inspect. Now what we'll do is, as you can see, it is
already shortened. Now, click on this
device to Lima. Yeah. So when we have the screen resolution
and let them smaller, you can see that the columns are already getting
placed like this. It won't happen if you
don't use Bootstrap. So let me see, let
me see for iPhone X. So this is how it shows. Let me see for iPad. This is how it shows. If you click on responsive
and make it very small, even then it is not breaking. So even for the
jumbotron you see, get started with Bootstrap. And if I make it smaller, it's getting to next name, okay? In normal cases,
it won't happen. Okay, So this is the
beauty of bootstrap. It makes the lip side
when it is born. So this was all about
Bootstrap grid. Thank you guys for
watching this video. Practice when and stick
stake into the course.
64. Bonus : How to create Navbar using Bootstrap: Welcome back to the course. I hope you're doing well. So in this video, I'm going to show you how
you can create a navbar. So for that, open your
text editor and just copy the code you had already written in your previous
exercise and paste it. So we would require
the CDN of Bootstrap, but we won't require this quote. So whatever is
inside the body tag, just remove them. Okay. Now we need to create
a knack for that. First of all, we need
to open nav tag. Okay? Now after that, we
need to give a class. The class will meet
navbar, navbar inverse. Okay, so as you already
know that in Bootstrap, we're using classes in order to assign certain styles
to our elements. So what are the significance of these classes will see
when we see the output. So after this, we need
to close the nav tag. And then within this started div tag class and
then container fluid. Okay, so what does container
fluid does this in the last exercise we had learned about container
what it does, it just leaves a space from the left and the right side of the screen
and create some margin. But if we use container-fluid,
it won't happen. It will use the total
width of the screen. Okay? So this div tag, and now within this, we're going to write the
name of our lip-sync deaf. And let's give it a class. So in this particular
class we'll have our name of the website. So navbar hyphen handle. Okay. Now within this, you have to write then. And good deck class. So the class will
be navbar brand. Okay? No given hf. And now write the
name of your website. I'm just going to write
tariff trade name and then anchor tag. Now next what we're going
to do is we're going to write horizon menu. Like the homepage, the beach we generally
see in our website. So we're going to
do the same thing. And then class, and then give the class
nav and the nav bar. And then you will soon get
familiar with this classes. So hold on. If you think that this class is that too
much for you to remember. Now, start LI, tag and then
class, and then active. So what does class active
does is it shows you on which page you are currently highlighted
particular page. And by default, we are in the homepage
for the first time. So that is why I'm writing
active for the homepage. So again, we'll start
our anchor tag, hf hash, and then we'll write
the anchor tag, an end tag. Next we'll have another page, Let's say About page. So again, LA and then class. And then what do you
need to do as well? This all really
don't need any class because active we're
already mentioned. So no need of class my bed. So then anchor hf
equals and hash. And then write about. And then could tank and then I tech and we're good
to go with them. Horizon too many. Now we'll add another menu on the
right side of the neck, but these are horizontal menu. Now. Right? Next stop, right, menu, which will have the
sign-up and other stuffs. So again, we're going
to open and then class. So we lose different class
now here, so nav, navbar, nav, and this important
navbar, then great. So this will place. The menu on the
right of the screen. Now close the tag. And again, we need
to open the LA and then anchor tag than HF hash. And then we'll be using for the same span and within
that class glyph icon. And then click I can, okay, simply in the span. And then write
sign-up, anchor tag. And also like, Okay, now I'm just going to copy this particular
thing and paste it. Now I'm going to
create a login button. So replace this with Logan. And I will also change. I can lock hyphen and I
think we're good to go. I'll save this nav bar dot HTML. And let's run it and see. We have our first nav bar. Okay, So this is
our website name, this home and you can find the background a little darker since it is the active page. Then we have the next menu item. We have the sign-up biking and the sign-up option,
the log-in option. This is a very basic nav bar, but I think we're good to go. So you can search for different kinds of
navbars on the Internet. Like if you can go to
the Bootstrap official website and you can get
different types of nap, what they want to use, different kinds of now
bar for your website. So what I would
recommend is go to Bootstrap and then
again Bootstrap. And then go to just press
slushy CSS and JavaScript. And you can see you have certain kinds of
things like get out, alert, purple,
dropdown, et cetera. You can, if you
click on Components, you can get all this kind of the glyph icons which
I have been using. So you can get the name of
each glyph icon and you can use them as per your
choice in your website. So we just use this glyph I can give I can use for our sign-up. So you could have used any of the icon as for
your convenience. Okay, so on the right side I think we can find the nav bar. Raise it. Yeah. If
you click on that. So yeah, this is a
really basic network. You could have caught. This is the total
code of that nav bar. So you can, what you can do
it so you can just copy. Go back to your editor. File. New, Find, paste it. Okay. It's better if you paste it within the particular code. So what I would
recommend this coffee, this total thing, File, New File, and then
paste it here. Now from the body
section you will remove all the code you've
written. Okay? So up to here, and now copy this and
paste it. Nothing to do. Control-s, navbar, then
to dot HTML and save it. Let's see what is our output. Let's see what is our output. So we have the snap tool. And yeah, you can get a nav bar. With all wonder what's written. You have the brand and
the links and everything. So I hope you
enjoyed this video. Stay tuned to the course.
65. Thank You and Next steps: Hi guys, congratulations
for making it till the end. I hope this course has helped you to learn the skills
in a better way. Please do not forget to leave
reviews for this course. For more updates, you
can join my answer them community where I share
a lot of content, learning materials and lot more. Thank you for your time and I wish you all the
very best in life. Keep learning.
 Priyanka