Transcripts
1. Introduction: Hello everyone. Welcome to my course. I am. Are you follow them? I do have more than
seven years of experience in cloud computing
is specifically in AWS. I hold multiple
certification of AWS. Currently, I do have AWS
solutions architect, professional
security specialist, and all the associate
certification. So this course is all about
Cloud, specifically AWS. And I'll try to give a very basic understanding
of cloud computing. And I'll try to explain all those core AWS services that are very much
important to know. I can ensure you guys after
completing this course, you guys will have a very good, solid understanding
about AWS core services, which would be a very
good starting point to learn AWS Cloud. And without further
delay, let's get started.
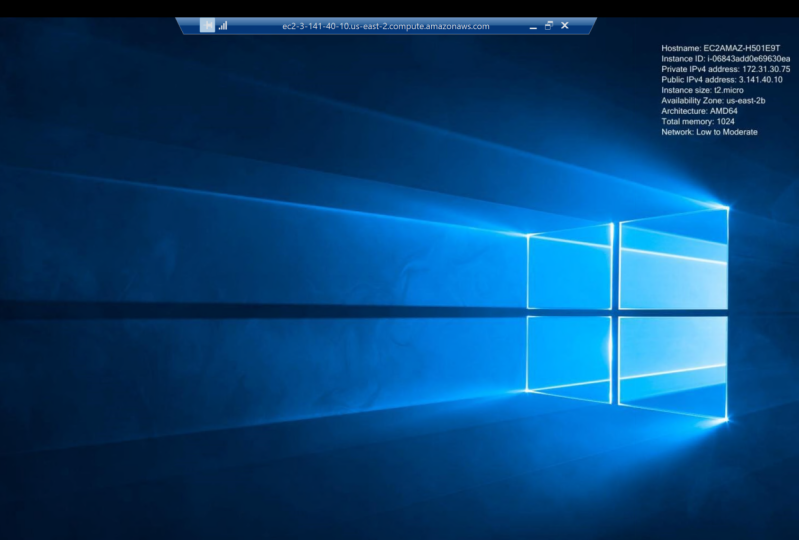
2. AWS EC2 Overview: Hello everyone. So let's get started with
our compute section. From the Compute section, we will click to EC2 is one of the main
core services of AWS. Here. Pretty much like
we deploy servers, we can deploy Linux servers
and also Windows servers. So here we can see easy
to has many sections. Let me just help you to
go through the process of creating an EC2 server. So if I click to
launch instances, here, we need to provide
a name to our ec2 server. For our case, I'm
going to name it test. After then that we need to
select the AMI or image that will be used
for our ec2 server. If we want to launch
a Linux server, then we can select Amazon Linux. We can see multiple distribution of Linux here, like Red Hat. And if we just want to
deploy a Windows Server, we can choose this option, which is Microsoft
Windows 2022 base, which is free, free
tier eligible. Then we have to choose
the instance type. So whenever we are talking
about instance type, that means we are talking
about the server types. So in AWS we do have
different types of servers or instances. So whenever we are
talking about t, t2, T2 is the kind
of the generic one. So this is a good fit for
any sort of workload. If we want to have compute
optimized instances, then we have to go
with the C5 category. We also do have m for m for is, for memory intensive
EC2 servers. So if we want to perform this sort of memory
intensive workload, and four is definitely
our option. For this demo. I'm just
going to use T2 micro because it's also free tier
eligible for the server, we need to provide a key. So in my case, I already have a key, I'll
use this specific key. Then we need to have a
security group in here. So this security
group will help us to protect our ec2 server. So it will work as
like a firewall. So for now, we can see just
only one rule is allowed, that is RDP, and
the traffic will be allowed from anywhere
which is not secure. So I'm going to
change it and just, I will put my IP in here. Then we need to
attach to a volume. This volume is the
storage volume where our OS will be
deployed and it will, it will act as root volume. And we will see some
advanced details. We can ignore it and just
keep all as default for now. After this configuration. And here we need to define
the instance number. So for our case, we're going to put
just only one. And then we can just
hit Launch Instances. And within almost three to 5 min we can see our instance
will be up and running. So add the sisters that
instance in painting state. So after some time it
will be inactive state. After passing all
the health checks.
3. AWS Lambda Overview: Hello everyone. So in this section we're going
to talk about AWS Lambda, which is a service for
serverless computing. So suppose if we have a
code and we want to run our code not inside the server, we want to run our code
serverless, serverless framework. Then lambda can
help us with that. It's very easy to create lambda functions just from
the AWS Lambda console, we have to click
create functions. And let's give our
function a name test. And from here we can
see late to what kind of code went to run under
this lambda function, we do have many options. Do we do have dotnet, NodeJS, Python, Java, so also ruby. We can choose our
prefer to language. In my case, I'm going
to choose Python 3.8. And then we can choose
the architecture type. Here. We can go with
Lambda basic role. And let's keep
everything default. So let's create our
first Lambda function. Now, we do have a
lambda function. It is a kind of like very blank Lambda function
here we can see just under body we're printing
hello from lambda. That's it. So let's look into the functionalities of
our Lambda console. So here we can see the code
and if we want to test it, we can create an event, demo event and we can run our Lambda function
to see the response. We can also monitor our Lambda functions
from the CloudWatch. Patrick says here
we can see a lot of metrics is from CloudWatch are also kind of like
displaying in here, like invocation duration, error rate,
concurrent execution. All these sort of
important matrixes can be monitored using a
Lambda console. Here under configuration,
we can see all the general configurations. And if we do have any, any environment variables,
we can see from here. And also, if we want to deploy our Lambda function inside of
VPC virtual private cloud, that can also be done
right now, by default, lambda functions
are not deployed in any Virtual Private Cloud, so it's outside of VPC. And if we want to have multiple version of
our Lambda functions, you can also have that.
4. AWS RDS Overview: Hello everyone. So the next section
that we're going to cover that is database. So under database, let's
look into AWS, RDS. So RDS means relational
database service. From RDS console. If we click Create database, we will see multiple
types of database. So from here we can see
we do have two option. One is the standard queer
and there is a secret. So let's go through the standard rate where we can explore some more features and options. Under here we can
see in gene options. Here we can see it
supports multiple types of instances, DB instances. It's supposed to
Aurora, MySQL, MariaDB, SQL Server, Oracle postgres
SQL, which is great. So from here we can choose
the version of our DB. And it is always a
good practice to actually go with latest one. Then we do have three
options in here. One is production. In production scenario, we
will deploy our database in multi AZ for redundancy
in Dev Test is okay to actually just test it
under one AAC and free tier. Artists, artists, free tier. We can deploy our test db just only for learning purposes. So I'm going to choose single DB instances
as I'm just only going through the
and the features to get you guys familiar
with the options. So here we need to give a
name of our DB instance. We can name it
anything as we want. And then we have to define
our master username. Username will be used to
enable locked into our db. So it's important then we
need to give our db password. Then we have to define
the instance type. This is same like the
EC2 instance types. Remember, when we deployed
our ec2 server first. So m six large, M6 large is comes with a
two vCPU and a GB RAM. It is recommended from, it is the default one, but we can change it to
anything if we like it. Then we have to
choose the storage. Again, we have covered this storage option thing
in our ec2 servers section. So here we need to choose
what type of storage we want to use for our DB
and the storage size. And the iOS, ios is
input, output per second. Which is very good to know. Like if our DBs very
extensive or it will recall multiple
times and we should go with the higher IOPS numbers. And if we want to have
the storage autoscaling, then we should take this option. This whole DB will be
launched inside of VPC because databases
to be secure. So it's always recommended
to actually deploy these databases inside
a private subnet off a virtual private cloud. These are other options,
other sections. And here we can
see the pricing of our database and we can see
the breakdown of our cost. And if I just click
Create database, then we'll have our DB instance, which you can use for
our database purposes.
5. AWS DynamoDB Overview: This section we're going
to cover DynamoDB. Dynamodb is a NoSQL database. So suppose if our data
doesn't have any structure and we need to
store it somewhere, then we can't use the traditional
relational databases. We have to use something no CQL and DynamoDB is a
solution for AWS. So here, what do we do? Pretty much like
we will have a key and value of R of any data. So every data is
mapped to a key. So we can call our
data using the key. Here, we can have two create
tables to store our data. So if I click Create table here, we have to define
our table name. And then we have to
define the partition key. So this partition
key will be used to actually categorized
our data so that we can call our data using
the partition key and sort key is kinda like step
section after partition keys. Then some default
table settings. So if we want, we
can change this. So we do have a
read capacity unit and write capacity unit. We can change these numbers
according to our needs. And after that, if we
just click Create Table, then we'll have
our table where we can store our data
or no secure data. And also we can backup
our DynamoDB table data. We can export our data multiple data to S3 for
bitter, he didn't say, suppose for some reason our DynamoDB region is
down and our table is not, we can't access our
table in that case, we can we can restrict data from S3 bucket in another region and we can create a table
using that data. And our application will
be up and life again. Besides that, we can also
use this reserved capacity. So for the right, you need write capacity unit
and read capacity unit. If we don't use on-demand basis and we know exactly how much
traffic we're going to get, read and write operations. So you can always go with
the reserved capacity, which is kind of like less expensive
compared to on-demand. Read capacity and
write capacity unit.
6. AWS CloudFront Overview: Hello everyone. In this session
we're going to cover networking and content
delivery services. So let's get started
with CloudFront. Cloudfront is the
CDN service of AWS. Cdn means content
delivery network. Suppose if we have
an application and our users are from
all around the world. In that case, if our server, a server is only just
in the US region. So what about the
European region? Users, they will definitely face a delay because the traffic has to Florida all the way from the US region to
the Europe region. And they are definitely on a
face, some sort of latency, in that case, our
CloudFront gonna help us. So CloudFront will copy or cash our data in multipole H
locations all around the world. So suppose if European client
tried to access our data, so this cached data will be retrieved from
the European region, each location, which definitely increase the speed of
our data delivery. So here for creating
the CloudFront, sum constantly to be cleared, that is the distribution. So under distribution
are defined all the logic here we defined, if I just click Create
distribution in here. Here, we can choose
the origin domain. So origin domain is
like from where are we going to fetch the traffic or fetch the data fits the data. So in here, so if
we want to fetch the data from our S3 endpoint
or from EC2 servers. We can define the ARN in here. And then here you can see we
do have some other options. We can definitely go with
the different HTTP methods. And for web servers is
always a good idea. Just only follow the
least privilege access. Just get head if it is required and always go with this option, HTTPS only because for
replication, HTTPS, the secure protocol, which is a port four for
three, other than that, HTTP is not secure, It's just plain
texts and our data can be compromised
if we just use HTTP. After that, we can see some
policies and other stuff which we can cover in our
more advanced courses. And yeah, after
configuring all of it, then we can just create
the distribution and our data will be copied from our origin to
multiple Edge locations. And our application is speed will definitely
going to increase. In the CloudFront. We do have some monitoring
features that alarms features. Also we can set some
statistics, caches, statistics, which gonna help us to actually understand how our traffic is flowing from our origin
to different locations.
7. AWS Route 53 Overview: Hello everyone. So the next service
that we're going to look at is route for 23, Route 53 is that DNS service, domain name service
of AWS, Route 53. What we can do, we
can register domains, we can buy domains. So if we just click
register domains here, it will show all kind
of domain like.com.net. If our domain is available, we can search here and it will show us the results
like whether our domain, domains are available or no. So right now we can see
test.com is not available. Definitely, it's a very
popular one for sure. And that's why it's
unavailable is already taken. But we can see there's some
similar domain names in here. Not only just two, we can
register domains in here, we can also transfer domain. Suppose if we do have a domains in top priority,
maybe in GoDaddy, we can transfer our domains from GoDaddy to 53 using
this specific feature. Also, we can create
a hosted zones. So if we don't want
to create our domain, we want to do, if we don't want to
transfer a domain, we can just create a hosted. So what it does, it's created a origin or
a center of our domain. Then we have to pass the names. Names are named
requested from here, we have to make
connections in-between our domain and this hostage on. So from this hostage and we can control our domain if we want, which is really cool feature. After them that we
can also create some role DNS
firewall rule groups. And also we can do
some traffic for a traffic policies to encourage some policies to actually
monitor our traffics, how our traffic is being flowed from our Route 53 to
other AWS services. And we can also create
some health check. Suppose if we want to make
sure that our endpoint is healthy so that our 53 can pass our traffic to
our endpoint perfectly. We can do ping. We can pick our endpoints
and try to find out whether our application end points
are healthy and up. So that really helps.
8. AWS VPC Overview: Hello everyone. In this section, we're going to cover AWS, VPC, which means a
virtual private Cloud. So what is VBC? So VBC, we can think about something like
a big chocolate bar. So under the VPCs, we do have subnets. So subnets, we can think
about like subnets are smaller portion of
the chocolate bar if we break our chocolate bar. So inside VPC will
have multiple subnets. It's more about
networking stuff. If you guys are familiar
with networking, these terminologies
are very basic. So suppose if we
create a VPC and VPC, we can create multiple
subnets like this. So here we can see I just
only have one default VPC. Cidr block is 17,231.0 dot 016, and this is a default VPC. So for every region, AWS creates this
default VPC. For us. Under this VPC, we
do have the subnet, subnet CIDR block are smaller in size
because these are the, a smaller subsection
of our VPC, right? So after a sudden it's there. What we can look into
the route table. Route tables are the
primary gate of our VPC. So whenever we get a traffic, then this traffic is first hitting this route
table and this route table, then routing or traffic
to different subnets. So the subnets are associated
with this route table. Right now I just only have
the default route tables. So all the subnets from our VPC are associated with
these default route table. The next section is
the Internet gateway. Internet gateways. Now we can think about this service gives us the
axis to actually Internet. So if from our from
our ec2 server, if you want to send a
request to Internet, maybe we want to update a package or download
a package for the Internet. Then we need to send the
request to the Internet. And from Internet we
will have to download some packages to
our ec2 servers. So if we, if the subnet, which is associated with our ec2 server doesn't have Internet gateway
attached to it, then the EC2 server can't request can't get those
packages from the internet. So it gives us the Internet
access after that. And we can also look into
the security section. And the security section, we can see network access
control layer ACL. So knitr x is contradictory. We can say it's similar
to the security group, the EC2, easy to serve
a level firewall. So under networks ACL, we can see I do
have one default, NACL, and it also has the inbound and outbound
rules seem like our ec2 security groups. So here, just only
one feature that is extra in here that it has
the allow or deny section. But for our ec2, we don't have that
option. Decide this. We can also create a VPN
connection from our VPC console. So suppose if we
have a VPC and we do have an On-Prem location. So what I can do, we can create a connection in-between our on-premises
infrastructure and our VPC using this virtual
private network section.
9. AWS IAM Overview: Hello everyone. So in this section,
you're going to look into the security identity
and compliance services. So first you're going
to start with, I am, I M stand for identity
and access management. So this is the service that helps us to create
users, AWS users. And we can assign
permission to our users, access our AWS resources or create some new
resources for us. So in this console
here we can see, we can create users in here. So right now, I'm just
using my root user and I don't have any user
created in this section. We can also create user groups. So it's always a good practice
to create a group first. So suppose for
your organization, many developers works in your
organization and all the developers needs and the
same sort of permission. In that case, it's
always actually to create every single user from here and then assign
the permission to each and every
single one separately. So what we can do, we can
create a group and we can assign the required
permission to the group. And we can just create users and put this users
inside this user group. So every time we
don't have to create new users and define their rules and manage
all these rules. So one by one, which
is a really good move. The next section is roles. So here we can create
multiple roles, these roles, or we can
assign roles to our users. So suppose if we want to create a new user
with custom rule, then we can just assign
those roles to users. And same thing
with the policies. Here we can see our
account settings so we can make all these sort of administrative
work from here. And cool part is cell from
the credential reports. Suppose we want to audit our environment once a while and from this
gideon shall report. If we click Download Report, it will download
our Excel sheet. And this Excel sheet will have all the recent logins
and the secret keys, username and all this
sort of information that will help us to
complete our audit process. One important section
in here that is, we can also create
keys for our users. So suppose if our
users need to program the programming tick access to our AWS resources than our
developer can use these keys, access keys to actually deploy
services are configured. Some services using Command
Line Interface, CLI.
10. AWS WAF Overview: Hello everyone. So in this section, we're going to cover wife
Web Application Firewall. So suppose if you have a web application that
is running in AWS, then we need to
protect our layer seven attacks like DDOS attacks, all these attacks,
SQL injection attack. So this, the wife can help us to actual report at our environments how
it's going to help. Let's find out. So under WAF, we can
create a Web ACL. This Web ACL, we can define multiple rules to
our oil phase SEL. Let's name it Test. And here we can see it can be connected
to our CloudFront. Remember CloudFront.
Cloudfront is a CDN service that
we covered earlier. Also, we can choose our
regionals resources. So when we're talking
about research resources, then we have to
build our region. And under the region, we can find if any resources
are available to actually connect our integrated to our
graph of f configuration. So if we go next door here
we can see the default rule. So default voice, he'll action requests that
do not match any rule. So here we're going
to add some rules. If those true. If the request is not
matching to any of the rules and how it can
handle the traffic. So it's always good to actually allow it first
because you don't want to disable or kind of like terminates some valid
request is from our users. So under add rules, we
do have two section. We can create our
own custom rules or you can add some managed
rules under Manage Rules. So we can see multiple roots. We can see ruled from AWS site where we can add
bought controls, non known bad inputs, SQL, database, protection
kind of things. And also we do have the
third party roof in here. We can add exploit wipes rules. We can subscribe to rules
from AWS marketplace, which kind of put it our layer
seven of web application. And you can see multiple kind of like third parties are
available in this section. So once we create
it and as I said, our resources with this, then our, whenever the traffic will hit to our web application, it will first go through
this wire fruits. And if it is satisfied
all this condition after then it will be able to
actually access our resources. Other than that, all those
secrets is gonna be blocked. And also we can create IP sets. So suppose we do have an internal web
application and we want to have only access to this application from a
specific IP address ranges. So here, under the IP set, we can create those IP set. We can whitelist those
IPs in here and then assign these eyepieces
to our rules. So that only requested from
this specific IP addresses can be able to access our
replication, which is good. Other than that, we also do have some paid services
like AWS Shield. So it protects us from
any sort of DDOS attacks. So if we want to have really good controls and want
to spend some extra bucks, then definitely you can
subscribe to AWS Shield and push the environment
from the DDos attacks.
11. AWS S3 Overview: Hello everyone. In this section I'm
going to cover storage. And we talked about, we're going to cover
S3 and S3 Glacier. So let's get started. So if I click S3 from
the drop-down menu here, you can see I already
have some S3 buckets. So we can say S3 buckets
are more of like Dropbox where we can
drop any kind of files. And good thing about S3. Storage capacity is unlimited, so it's really great. So if we want to store many, many, many files too, I'm a Cloud Solution, then S3 is the option for us. So as I already
have some buckets, let me just help you to
understand how to create buckets. So if I click create
buckets here for Sandy defined name of our S3 bucket, then we have to choose a region. So S3 is a region-based service. We need to choose the
region, why we want to deploy our S3 bucket. So once we choose the
region in here than here, we need to choose if we want to block all public access
settings for this bucket. It's always a good idea to
block all public access at the very beginning
and just only give access to required users. One fun effect in
here a few years ago, this option was not
available in AWS. So some people just to create some buckets randomly and put some very sensitive
data in the S3 bucket. And what happened next? You can guess right? All those important five. So we've got compromised
and got hacked and faced a very big lawsuits or something like that from that point on, AWS made it a default option. So yeah, it's some sort of protection,
right, that's cool. And then the bucket
version in here, we can enable the versioning. So if we enable the
version in here, so if we upload our
object and if we delete it or update or upload a new
object with the same name, then we'll have multiple
version of the object. So it's some sort of
protection for us. Then we can enable
default encryption. When you are talking
about default encryption, this is more of a
server-side encryption, yet we do have option
to use SEC S3, which we'll use S3 Managed Keys. And if we want to
use our own keys, we can choose KMS and we can do the encryption at rest
using our own keys in here. And there are some
other sections. So if we want to lock our files, object logs is an absolute
locks to protect it, we can enable it from here. And if we just click
create buckets, and it will create
our S3 bucket. One cool thing about S3 is that here we can
create lifecycle. And the lifecycle rule is really great feature
for management. If I click life
cycle rules in here. So suppose we have uploaded
an object and after few days, you're going to need to
delete those objects, right? Or we want to move those objects less costly storage classes. So we can do all
of it from here. So here, under
lifecycle rule action, we can see the move the current version
of the object between storage classes. We can do that. We can also permanently delete our objects
if we wanted to. So this is a very good feature. When we select this, we can also move our
objects to archive class, which is S3 Glacier. So if for some reason there is some sort
of audit requirement for an organisation is that the files are the important files need to be stored somewhere for X amount of years, maybe
four or five years. And the files are just
only used for one year. So what we can do
after one year, we can create one
rule that we'll define that after
one year those file will be transferred to
an archive storage class to save some extra bucks. And if it is needed, we will retrieve those
files from the archive. Doing the audit phase, which can save tons
of money for us. So we can always use S3 and S3 Glacier together
to save extra money.
12. Conclusion: Congratulations
everyone for reaching to the end of our course. I really tried my
best to actually summarize all major
AWS Cloud services. If you guys want to learn
some specific, says, indeed, just let me know
in the comments section. And I'll definitely love to create some more
videos and try to go through in depth for each
and every AWS services. And if you guys think these
scores really helped you to understand the AWS core
services a little bit better. Please give me a
very good review. And I really wish you guys a very good starting
journey of cloud.
 Arif Alam, Cloud Geek