Transcripts
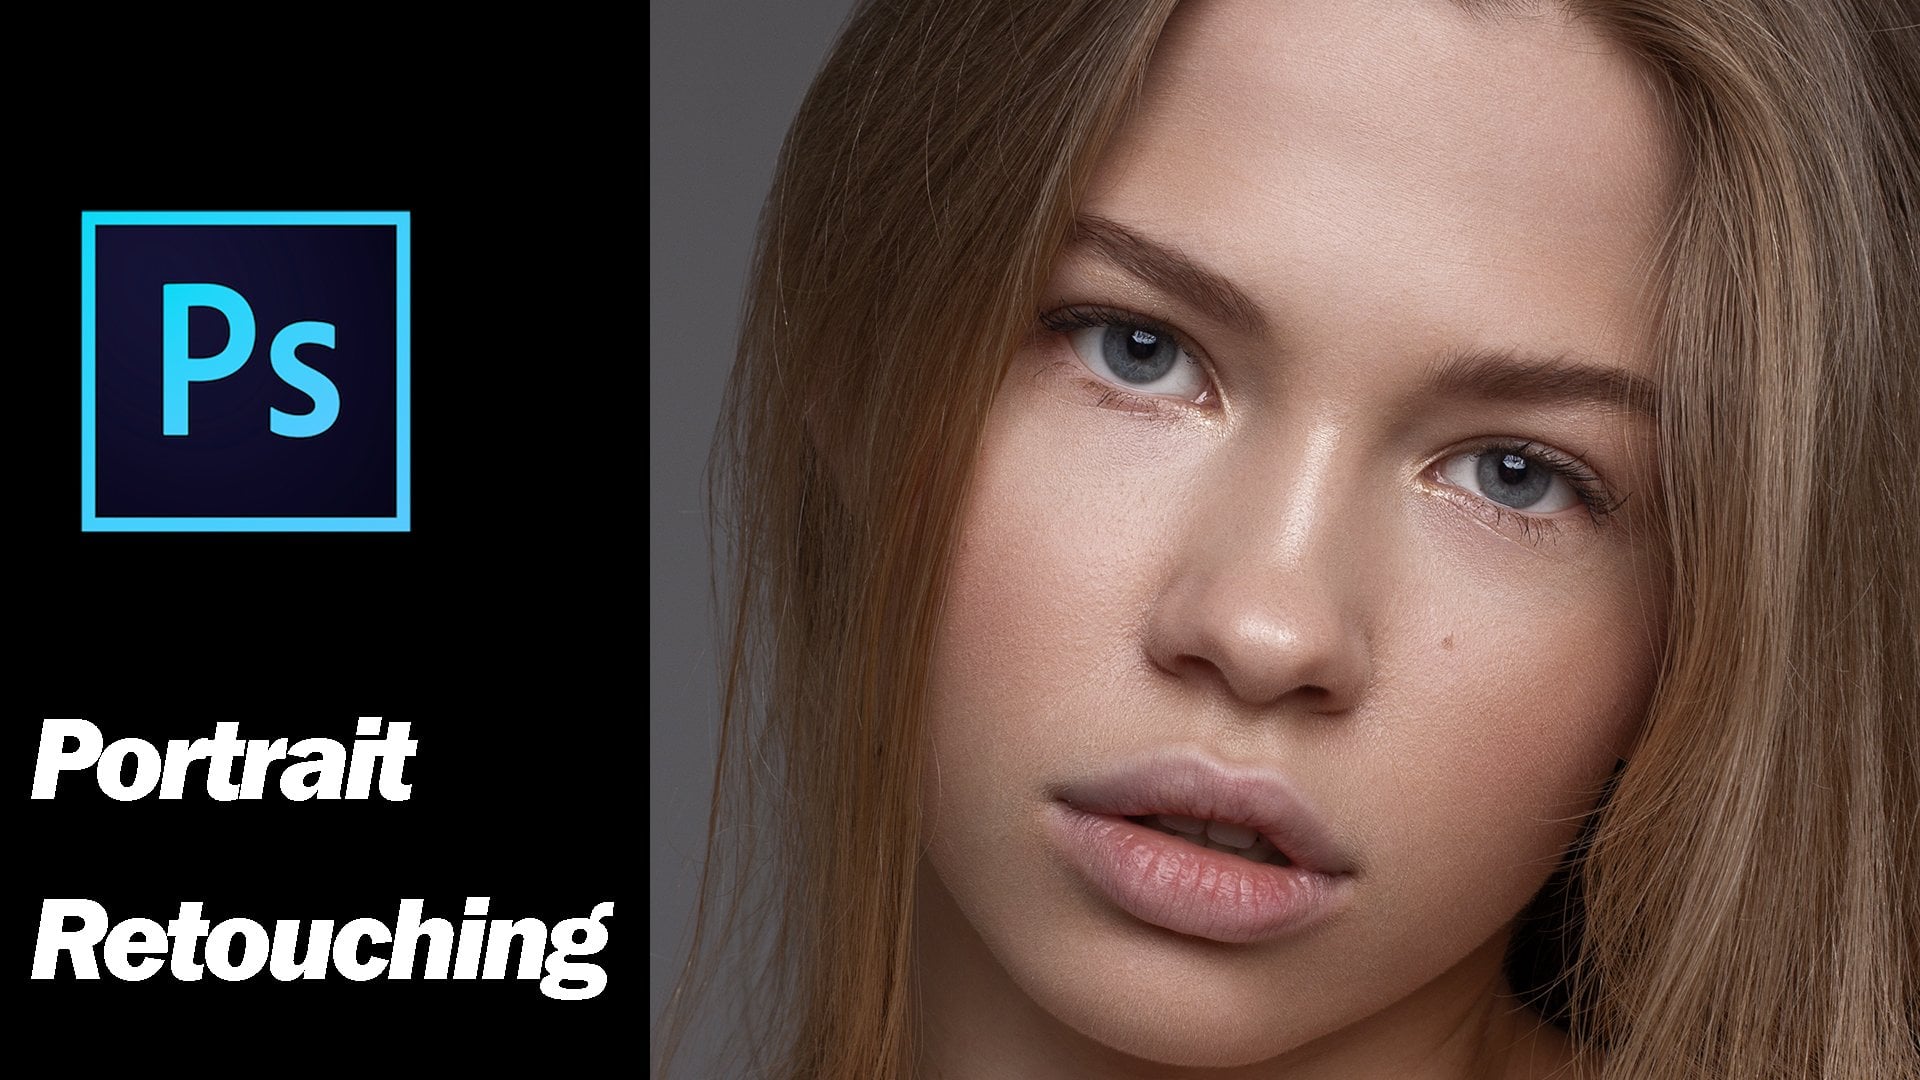
1. Introduction: If you want to learn
portrait retouching in Affinity photo, you have come to
the right place. I welcome you to the Affinity Photo or trade
retouching essentials class. In this course, I assure
you that you will learn all about professional portrait
retouching in Affinity Photo. Get on the path to becoming a master of
portrait retouching. My name is Joseph
and I have been doing photography
for over six years. I have a ton of experience in photography and
photo editing. You will learn how
to work with skin, how to remove blemishes, how to retouch eyes. And here you will also learn differently touching
techniques in Affinity Photo, such as frequency separation
and dodge and burn. You will also learn how to
adjust color contrast and sharpness and how to work with different adjustment
layers and layer masks. You will also get high-quality raw images
to practice retouching. Let's have a look at the before and after
retouching photo. I am really good to
see you in the course. Thank you.
2. Preparing the Photo for Retouching: In this class we will see how we can prepare our image
for the touching. The first thing I'll do
is import our image. I'll go to File. Click on Open. Then from here I will click on the file that we have to edit. As soon as the images imported it opens in
developed persona. You can see some
basic settings here. The first one is all
basic than lens details, stone, tones and overlays. When we are preparing our
image for retouching, we will not touch any of these. What we will do from
here is we will set up exposure, black
point, brightness. Then we will set
the white balance. The other things we will do after we are done
editing the photo. From here. I can increase the
exposure a bit, bring the black point
towards the left, increase the brightness
a little bit. The best thing is to
just slide up and down and see what
you like the most. This looks already to me. For white balance, I will
click on white balance. And from here I can
set the white balance. All right, this looks
all right to me. We do have some tools
here in the left side, but we are not going to use it. Now. From here we will go
to press develop, and go to Photo Persona. Now the image is opened
in photo persona. If you will see on
the right-hand side you can see the layer panel. The first thing that
we are going to do is duplicate this layer. So I will right-click and
then click on Duplicate. Then we can see another
layer has been created. If you want, you
can just name it. You can just leave it like this. The other way to create a
duplicate layer by pressing Command J on Mac or
Control J on Windows. This is just for safety
purposes because we are not going to touch
this background. The first layer that is logged, all the editing that we will do will be on the
different layer. After this, I will make
another layer, empty layer. From the tool panel. I will pick up Brush Tool. Or I can also press
B from the keyboard. I will resize the brush. Also, I will change the color
of the brush, make it red. What we will do first
before we start editing is that well figured out all the things that
we have to work upon. We will see all the blemishes
that we have to remove, all the things that we
have to straighten. Or if we want to skin Paint or if you want to
liquefy something, all those things, all small freckles, blemishes or pimples. We have to remove all those
things we will mark from now. I will just zoom in. Then we'll start
from the forehead. As you can see, we have a big scar here. I will just mark it. Then you can also see
these small pimples. All these small pimples we can mark that we remember
these freckles, you can keep it or
you can remove it because we are doing
high-end retouching, we will just remove all these here also we
have here, here. Here we have some blemishes. All these things we are going
to remove here, here, here. These hairs, all the
stray hair that we have. We will try to remove
all these. Then. We'll look at the eyes. We will see the ice. What all things we
have to fix here, all these veins, we will remove these small, small things. We will remove same
on the other eye. All these things we will
remove on the lips. Then we can see all these small, small dots will
remove all these. As we start working on here. We will also have to fix all these have that is
going in different direction. All these you can see here also, there are some hair here. This is fix all these things. See some here, Stray here. Then if you look closely, you can see there's this
color difference here. This color looks different
than this color, so we'll try to fix this. One thing is that this neck
fold looks little awkward. So we will fix this
and here we will use Liquify tool to remove
this extreme Ben. Also remove this. Now we
have analyzed double photo. Now we can turn off this layer and start editing the photo. This is all for now. I will see you in
the next lecture.
3. Face Reshaping: Once our images all prepped, we have figured out what all
things do we have to edit. The first thing that
we're going to do is see if we want to
reshape the face. To reshape the face, we can use Liquify tool. And to do that, we can
go to liquefy persona. I can simply click here. You will see on the
left-hand side top corner, I'll click here and then
this is how the image opens. From here, I can
reshape the face. Just to show you how we
can use Liquify tool. We can go and pick up
the tool from here. As you open it is
already selected, so no need to select it. From here. You can
select it and then you can simply click and drag. You can see just overdoing it
to show you how it affects. And from here you can change
the size of the brush, the hardness, the
opacity, and the speed. You can just change these values and see how the tool behaves. And according to however
you like, you can do it. I will leave it to default. For now. We can
reshape the jaw line. I will make it little softer. Also, I will reduce the speed, reshape the jaw line. And from here I can remove
this dense little bit. From here. We will also
fix this part of the neck. I can simply push it outside. The other thing that I
would like to tell you about is about this tool. It is called Liquify
freeze tool. What it does is if you paint
over some area, selected, if you paint over some area, then that area will not be affected by the
liquefied tool. If we are working
fixing this area, then we can simply
paint the area around it so that when we are
applying the total here, the other part is not effected. So I am just doing
here over the mask, but you can see the
area we just painted with the red color or the
area where I put the mask. It is not getting affected. To clear the mask, I can simply click on clear mask and you can
see the difference. Will undo, it, will just
try to fix this neck area. We can also zoom in by Command
or Control plus minus. Then pick up the
Liquify tool and from here we'll fix the neck. All right, this seems
all right to me. With liquefied tool, you
can reshape the jaw line, the cheeks, forehead,
the other part. And we will also see how to reshape the lips,
nose, and eyes. And later in the class. For now I think it's all right. This is all I wanted
to do on the face. I will click on Apply to see the change
that we have done, the reshaping that we have
done in liquefied persona. I can simply click here, make this layer invisible. And I want you to put your, I want you to look here. This is what we have done and
this is how it was before. Although this image does
not need to be reshaped because I think personally
the face looks all right. Sometimes the angle
is not right when the photograph is taken and some shape looks really awkward. So to fix that, you can use liquefied tool
to reshape the phase, but this model's face
looks all right to me. But just to show
you, for example, I have reshaped her jaw line. This is all for this video. I will see you in
the next lecture.
4. Blemish Removal: In this video, we
will learn how to remove blemishes from the phase. We will turn this
layer on to see all the problems
that the image has. When we were
analyzing the image, we had decided to remove all these problems that
is there in the image. I'll turn this layer off. Now. Rename this layer, double-click
on the name and then rename it to face reshaping. I will duplicate
this layer again. Rename this layer
to blemish removal. Now we can start
working on this layer. Will start from forehead. I will come to forehead. On the forehead we can
see this big scar. We will fix this big scar
by using patch tool. To do that. You can come here. Usually it will look like this. And from here you can click here and then pick up the patch tool. After you have picked
up the patch tool, you can simply draw
around the scar. And it will get
selected by itself. You'll see as I move the
cursor or the pointer, this selected area is changing. So we'll go to the place
where we see it's okay. You have to be
careful to pick up the place right next
to the selected area. Otherwise the texture
will look different. Suppose if I am
taking from here, you can see the hair is coming
or if I take from here, it does not look nice. So you don't want to go too far. Just wanted to be
around this area only this looks all right to me. Maybe come up. You can also come to this side, but I would rather take from
here, just click there. Dispatches fixed. Now, after fixing that part, we will remove all these small, small temples and these
freckles. To do that. Again, I can go here, click here in the
little triangle. From here we can pick
up Healing Brush tool. Of course, there
are other tools. You can also choose
blemish removal tool, which is auto tool. So you can simply
you can simply click on the blemish that is there
or the pimple that is there, and it will automatically heal. This may work in
most of the places, but some places
it does not work. So we are going to use blemish removal tool
and Healing Brush Tool. For now I will use
blemish removal tool, increase or decrease
the brush size with the bracket
from the keyboard. Now the problem with
blemish removal tool, you can see here,
let me just zoom in. I am using the
blemish removal tool and it has changed the texture. So this looks very awkward. So here we cannot use this tool. What we will use is
healing brush tool. To use Healing Brush tool, you press option from
the keyboard and then click on the
area that you want to use to fix this area. So clicking right next to the blame Azure
itself will be the best. I'll click here and then increase the brush size a
little bit and just draw. Again, we will do here, we will click here,
press Option, click here, and then drawn. This will be very
time-consuming. It'll take the most time. But you don't have to hurry. You have to go slow to
get the best result. This kind of editing is only done for high-end
retouching if you are doing some jewelry or if you
are doing some makeup shoot, some portfolio shoot you
are doing for the model, then only these kind
of editing is done. Usually you don't
have to edit so much for your normal clients. We can see now here
in the forehead, we'll see before and after. I'll make this layer invisible. So this is what we had, this is what we have done. There are some more
problems we will fix. You can just turn it on and off to see what you have done. These two small dots we will remove and this small
pimple will remove. Again, we will choose
the Healing Brush Tool, press Option and
then fix this area. This part also will fix
this looks all right. With that, we will just work on the hair also a little bit. Let me just try to use
blemish removal tool will also fix the stray hairs. Again, simply press Option
and click the area nearby. Then I can start fixing. Same here also. The forehead area
is almost clean. You can see before and after. Now will come on the cheek. Fix the right chicken, then the left cheek, and
then we can fix the nose. Again. I will choose
the healing tool. We'll see before and after. Give this looks. All right. Then we'll just fix
the hair as well. I adjust the brush
size. The idea. Just draw. You want to be as
small as possible. This hair we will remove. So to do that, I will just click next to it
and then just draw on it. All right, It's
not working here. Again, we'll go till
halfway from here. We can again increase the
brush size a little bit and pick up The next to it. And then again from again,
I will do the same. Then this part we will heal. To do that and
simply click next to it, which is a draw here. This white patch
has come up here writing I should
fix that as well. Click here option. Please do not forget to use Option key from your keyboard. And click on the area
which you want to use to fix the blemishes. Press Option and click here. From here it will
just clone it or take the texture and color from here and fix the area
that we want to fix. I am constantly
as I am doing it, I'm constantly pressing
Option and clicking around the blemish to take
the sample from there. This ADS little bit difficult because
there's a lot of hair. So when we try to fix slowly
and as much as we can, I can also zoom in. Then from here, then we can do it this area from here and
then draw right over it. You can also use blemish removal tool to remove all these small,
small white dots. This tool is little slow so you have to click and then you just wait for like a few
seconds, two seconds. So we can see before and after. So all those white
patches we have removed. You can zoom out a little
bit and see the effect. You can see all those white
patches we have removed. Then. Now we can easily
work on the hair as well. From here I can just be
this point right over it. You can also do it here. We'll come and fix
this area now. The short key for using Healing Brush Tool or the patch tool or
blemish removal tool is j from your keyboard. You can simply press
J to select it. Then I can simply click
here and start fixing. Alright, so we have
fixed it a lot. I don't think we can fix
anything more than this here, especially in this header area. What we can do is when we are applying
frequency separation, we will try to fix it more. And we can also copy the texture from here
and put colored. And also we are going to fix later in when we are editing, we can come near the eyes. We can fix here. The problems on the nose
will fix this area. This is probably the most
time-consuming process. After, once you are done
with cleaning the blemishes, the other process will
not take so much time. All the images that you'll see on the internet or
on the magazine. All of them are fixed like this. Before I had learned to do retouching or
high-end retouching. I absolutely had no clue that so much of editing
is done on the image. I always used to wonder that how come people have such
a beautiful phasors? Can I had a hang that some
kind of editing is done, but absolutely no clue
how exactly it is done. We can see all the blemishes we have removed from the notes. This is how it used to be. This is what we have
done. I'm pretty happy with the nose now, the next thing that we are
going to do is fix this. Here. Again, select the
Healing Brush Tool. Again, I would like to
tell you that use Option key to pick up the
samp sample area. Press Option key and click
on the sample area and then you can use the tool. We have fixed the whole area. You can see all
the hair is gone. We'll see before and after. This is how it was
looking before. This is how we have done it. I'm quite happy with the
results. You can see. We can also fix this area if we want to link,
we can leave it. But I highly recommend to fix this area because we are learning
high-end retouching. And the small blemish will
have a lot of problem. It will be absolutely miserable. Fixing this area seems little difficult and we may
not be able to fix it with simply Healing Brush Tool because there's a lot of hair. And what we can do is
we can use patch tool. I can simply click on Patch Tool and just
draw a circle here. And from here, I can
simply pick up this area. This area, and click here. Click outside. Now
this is being fixed. But you can see here, there is some problem here and
it looks a little awkward, I think, which we can fix
now using the healing tool. To fix this area, you can simply click
here and increase this. Just I'm connecting. If you can see clearly, I am connecting the hair. These are small, small spots which does not look connected. So we will simply increase this area to make sure
that it looks connected. We can extend this here. Here we can see the
head is broken. So from here we can
simply try to fix this. This looks better. This idea also we
can try to fix it. Try to zoom in and see if it looks all right or
if it looks awkward. This area looks a
little bit awkward. So maybe we can just
draw this from here. We can just still look okay. If we are not happy
with the editing here, we can always fix this area
in the Frequency Separation. Another thing that I would do is that there's a lot of this
hair going all around, so it's not very well trimmed. The eyebrow. So we will just
quickly fix that as well. This is how it was earlier
and this is how we have done. This looks all right to me. Now, we will come on
the left cheek and fix all the problems. Again, we will use
Healing Brush Tool. Fix the tin. Now. The area, all the
blemishes that we have on the chin will do that. On the lips also you can
see these small spots. White patches will just
remove these as well. I will highly
suggest you to zoom in and zoom out to
see the difference. Because many problems will
only appear when you zoom out and many problems will
only appear when you zoom in. So you keep on zooming out and zooming in to see what
all problems are there. See some veins here, will also fix that. Then you can see this line. Just remove this line as well. This seems alright. We'll fix this stray hairs on the face. Before and after. I think we have almost fixed
everything on the face. We'll just focus in my eyes. Well, fix these veins. Press J, select the tool. Then simply draw over it. It looks perfect. Now. You're also fix smaller
white patches will fix. All right, this seems alright. Now, just quickly come
and fix this area. This will be faster. Pick up the tool, sample it and just draw with it. This looks all right. Now we'll see before and after this is how it was and
this is how it is. I can zoom in and show you
before, after, before, after. Alright, this is
all for this video, we have learn how to
remove blemishes, pimples and stray
hair from the face, forehead and eyes and nose, lips and chin, Jawbone, and the shoulder and all. This is all for now. I will see you in
the next lecture.
5. Face Painting: Welcome to this video. In this video we will see
how to do face painting. And why do we do face painting? If you can see here
near the eyes, you can see this area
a little more grayish. And also you can see this
area is little darker. This area is also little darker. By doing face painting, we can fix all these problems. What we will do is make a
new layer and call it phase. Now we will choose
paintbrush tool. We'll just come here. And from here we will select paintbrush tool and increase
the brush size n from here, if you will see this is the width or the
size of the brush, then this is the opacity
will not touch the opacity, but we will work with the flow, will reduce the flow to maybe, maybe three or 4% or maybe 5%
depending upon how it goes. Then hardness. We can keep very less, maybe 12, we'll
see how it comes. What we are going to do
now is simply come here, press Option key and click on the area we want
to pick up the color. So we can take, we want to fix this
area so we can take color from this area simply, I will press Option
key and click here. And as soon as I do that you can see the color has
changed from here. Then I will increase the brush size according
to however I like. And then start painting. You can turn it off and on and see this area needs
little more fixing. All right. You can see how this area was earlier and how
I have fixed it. Texture is lost here, but you don't have to worry because it will not
be so much visible. Also, you can click
here and you can fix the opacity and you can
retain some texture, and you can fix the
problem that you have. So you'll have to come
in a place where you are okay with having the texture. You're okay with the
problem that was there. So you have to compromise
and come to a place where the ADA is fixed and texture is
not absolutely lost. So we'll just keep it 50%
to see before and after. This is how it was, and this is how we have done it, zoom out and we can
see the problem. This is how it was, and this is how we have done it. This will look even better once we do frequency separation, so you don't worry about it. We'll just fix this
area also a little bit again, little bit. We can see right now this area is looking
a little more darker, where you will also
fix this area. So simply click here, click here, and pick up
the color and increase. Similarly come here, click
here, pressing option. Then we can simply start
drawing or you start painting. You can see we will
do the same here. Also. Pick the color by
pressing option here outside and just paint it. You can see before and after. This is how it was looking at earlier
and we have fixed it. Alright, we will
come now down here. This is the area that
we really want to fix. We'll do the same thing, increase the brush slice. What I am going to do is take color sample from here
and paint over this area. So I will simply press Option key and click here and increase my brush size
and start painting. I will again press Option key and pick up colors
sampled from here. And start painting. Again. We'll do that until
we get the desired color. This video also looks little. Fix that as well. Turn it on and off and see. Alright, so you can see this is how it was
looking at earlier. And we have fixed it, done
like this. This is okay. We can fix this even more in
the Frequency Separation. Maybe I will just go to blemish removal layer and
try to fix this little bit. To do that, I will
take the patch tool. Simply draw around
here. Click outside. Done. This looks better than before. Maybe we can just try to
remove this area also. Alright, so looks okay, there is a little problem here, but we'll just fix it now. This looks okay, we'll
do before and after. You can see it's gone. To make it a little uniform. We can also do
little face painting here or little painting
here. This looks all right. Before and After you can see, we can zoom in and
fix this area. I will go here on the
blemish removal layer. Simply fix this area from here, I can take the healing
tool and click here. And just paint here.
Here this area is something wrong. We can fix. This looks okay. We'll see before and after. This is how it was. This is all we have done. We have fixed the problem. What we have learned is to
do face painting and you can remove the darkness
right under the eyes. Or you could have, could have worked here also. Near nose also. We have logged here. Then all the other
areas also you can use. You can just figure out
where do you want to use it. We can also do near the nose, we can do face painting
and all this area looks like Locke work
does not look perfect. So here also we could have done, maybe I should just
quickly do it. Take sample from here and
just paint a little bit here. Now you can see, looks
a little better. We'll leave it like this. Okay, Thank you so much
for completing this video. I will see you in
the next lecture.
6. Frequency Separation: In this video, we will learn
about frequency separation. Just to let you know,
frequency separation is the most powerful tool, which is used in
face retouching. And it takes some
time to master it. But once you are good at it, you can fix all the
images that you may have or you can fix all
the ions of problems. It is little difficult in
the beginning to learn it, but once you master it, it will become very
easy for you to apply Frequency Separation and it
gives you the great result. Before moving further,
what we will do is click on these two layers, face painting and
blemish removal. And we will group it
together and rename it to painting and blemish
removal, removal. I'll click on this layer and
then go to Merge Visible. What it does is all the
visible layers that is there. It combines, it, merges it, and makes a new layer. We'll just leave it like this. And we will make a duplicate
layer. This layer. We can call it fs, which is stands for
frequency separation. After clicking here,
we can go to Filter. And from filter we will click
on frequency separation. In Photoshop, you have to
have an action for it, or you'll have to
manually do it. But Affinity Photo has
given this amazing tool. Here, you'll just click on frequency separation and it
does all the work for you. Now we can see here, there's this black and white, black and white area, which is the high frequency, as you can see here it is
written high frequency. This is the low frequency. What do we want to do? What is our goal here
is that we want to separate the texture and
the color from the image. So you take this radius
towards the right, and you take it so much that the color from this layer is not coming here and all the
texture from here is gone. So we can go little further. Suppose if I go all
towards the right, then you'll see that
the color is all here. Now, we can see all the color. We don't want the color here, we only want the texture
here. So I'll come back. Or if I come here, we have some texture here, but most of the texture is
on the low frequencies, so we do not want that either. So we are going to
come in the middle and figure out a place where we have only texture here
and only color here. This looks alright. Although it is
sketching some color, maybe we can go a little lower, right? This looks okay. Maybe 4.3 looks alright, maybe we can go to
4.5 or maybe five. This looks all right to me. So after setting this, this, I will leave it as as default and I will
simply click on Apply. Then you can see two
layers have been created, low-frequency layer and
high-frequency layer. We'll group these two
layers and rename it to fs, which stands for
frequency separation. I'll click here, open it, and now we can start working on the skin using
frequency separation. As you have seen here, there is no change. It's just same as before. If I turn it on and off, you can see there is no change. But the real magic
will happen now, I will go to low frequency
and then we will choose this tool,
freehand selection tool. From here, we will. From here we will select a
certain area of the face. I can simply draw it. One thing that you
have to take care of is that you want to keep the feather to some level
and it should not be 0. Let me show you. If it is 0. Deselect it, then you draw. The selection is made. You can press Q from
the keyboard to see how much further
is the Alto. Since we have done 0 feather, you'll see this hard edge. We do not want this hard edge. We want softer edge. Again, press Q and Command D to de-select and increase
the feather to maybe 130, and just draw a
circle on the face. Then again, press Q. This is how we want. Again press Q, the syllabus. You want to come
to low frequency. And then you want to select
this freehand selection tool. And you want to keep
the feather high, maybe around a 100130. Maybe for some image
you may be keep, keeping it 50 or 6070, but for this particular image, we will keep it a 130. And to check if it
is good enough, we will just make the
selection and press Q. This feather has to be there. Once we are sure that
we have the feather and we like it, we can deselect. Then we can select a
portion of the face, like in this case, we
will select the forehead. When you are doing
the selection, you make sure that you
do not cross the edges. So this you can see the hair. You want to keep it within. You don't want to come here, you don't want to come here. We'll start from
the right shape. I will again choose
the selection tool. And when you are
doing the selection, you want to choose the area
that has the same tone. You only want to
choose highlights, or do you only want
to choose shadow? You don't want to
choose highlight and shadow at the same time. We will just from here,
choose the highlights, which is this area as
you can see. We have it. I'll just do crosscheck. I will just press Q and
C. There is nice weather. Click Q again. Now after doing the selection, I will come to Filter and go to Blur and click on Gaussian Blur. And as soon as the
Gaussian blur comes up, you can see this
is however image. And if I increase the
radius of Gaussian Blur, you can see the whole
skin tone is changing. As soon as I
increase the radius, you can see the effect
of Guassian blur. Not keeping 200 ohm. We can also keep it to a 100 and later on decrease the opacity. Will keep on maybe
around maybe around 8082 and apply unselected. Then what I'm going to do is turn it on and off this layer, this group and see the effect of the
frequency separation. This is how you'd use to loop. This is how it is looking now. Before, after, before, after. Of course we are
losing highlight. But you don't have to worry because when we are
doing Dodge and Burn, we will get the highlights bank. Now we will again press
L from the keyboard. Select this area. Press Q to check. It looks all right. Now simply I can go and repeat
the Gaussian blur. Click here. Again, I can go to filter and
repeat Gaussian Blur. We can see the effect. We can turn off
and on this layer. And we can see the
effect of Gaussian blur. If it is looking more
than what we want, then we can always reduce the opacity and control so we can keep it
a little higher, more than we require. But later on we can fix
it. In the same way. We can just go to
all the areas of the image and fix
it. I'll come here. I can press command or
control F from the keyboard. These highlights we'll
pick. To unselect. I can press Command D. The
selection will be unselected. Now you can see if
I'm doing here. If I press Command F to
apply the motion blur, you see there is a black
highlight and this is, this can be a very big problem. Why? Because this area is black and Guassian blur is taking blacks from here
and applying it here. So you have to be very
careful near the edges. You don't want to overdo it to apply Gaussian
blur in this area, you want to go to
Filter and then go to blur and Gaussian blur. And from here you
can pick the radius. You want to go so much that
the black is not coming. If I go a 100 pixel, then you can see the
black highlight here. You can see the black area here. I want to keep it a little low so that the black area
is not so much visible. Maybe this looks alright,
so we'll keep it 45. See before and after,
before and after. This area also we will do
the selection Command F, little area black
part is coming. So I'll redo it. Maybe I will not go that far. I'll just keep it a
little here only. This looks all right. Again, come here,
select this area. Will pick up this area. Here. You can see before and after. This is how it was before. This is how it is now. Of course it is. It looks a lot but you don't
have to worry. We can always reduce the opacity to reduce the
opacity of the whole group, to reduce the effect of
frequency separation. Doing too much of it was
also not good because the whole face looks
very unnatural. And we don't want to do that. Now will come on the
nose and fix the nose. Click on low frequency
and again press L or select from here the
selection tool and draw here. Press command F,
command D, command F. I'll also select this area. Come on F before and
after. This looks okay. We'll do here also. Then will come here. Here also. The same way we can come
here and fix this area. Also. See before and after
will come on the forehand. This highlighted area
we will choose first. Come on F, Command D to
de-select this area. Then we will select this
area and do the same. This area is looking
a little weird, so this area is unaffected. So we will just quickly
select this area as well. Command F. Command F. You may be wondering
why the hair and all is not getting
affected because hair texture is in this
layer, high-frequency layer. So we are only working in the
colors which is underlying. So even if I'm coming
close to the hair, there is not much
happening on the hair. Will come and try
to fix this area. What we will do is
come to low frequency. We will take patch tool from here and then
select this area. Then from here, we can
pick up the color. Turn on high-frequency layer. Before and after
we can see this is how it was before and
this is how it is after. It still looks better. To remove this. Here. We
can go to high frequency. From here. Again, I will take
the patch tool, select this area, this
area I've selected. And then I will just take
the texture from here. As easy as that. This is how it was and
this is how we have done. It looks all right. It looks like it could be
a little better. This is how it was before. This is how it is now
it looks much better. Your skin looks
very unnatural now, but you don't have to worry. We will fix this later on. We'll just apply
Frequency Separation on her neck and shoulders. Again, select low-frequency. Go to Selection Tool and simply select
the highlight area. And press Command F. Because this idea is different than face and this is
little blood also. So we will go and again
do the Gaussian blur. And from here we will pick up how much we want
to apply the blur. We don't want
everything invisible, like if I do 100 and you'll see everything is
just invisible now. We'll just keep it maybe
around five or six. Looks all right. Turn it on and off and
you can see the change. Maybe we can apply a little more because there's
barely any change. Come to blur, Gaussian blur. Then increase it to
maybe 20. Let's see. All right. This near the edge, you'll have to be very careful. We don't want to
cross the edges. This video we will pick up. Then again, this
area will pick up. Again. We will go
to coercion blurred because this has
barely any texture. Will have to again,
reset the Gaussian blur. If I do this, then you can
see everything is gone here. There's nothing was what I
wanted to keep it to a place where still some
textures visible. Maybe this module will do. Just keep it like that. Again, select, again, press
L and do the selection F. This part will come
and pick up here. Alright, so we have
done the whole neck. This area is still
looks a little, it has a different color. We will fix this idea later on. When we are finally done
with the whole editing, we will just remove this
color cost and fix it. But for now I think
it looks all right. We can do before and after. Texture is a little bit gone, but it's so qubit will be, alright, This part is left. I can see if we can,
we can quickly fix it. This point. Go to blur and Gaussian blur. The cube root 16 apply. We've done frequency
separation on the face. This is the result. This is before and this is
after, before and after. What we can do is we can click here and we can
reduce the opacity. So maybe we can keep it maybe
around 65, maybe around 75, or maybe AT depending upon
how much you like it, you can keep it.
This looks alright. 75 looks all right to me. So this is all for
frequency separation. Thank you so much for
watching this video. I will see you in
the next lecture.
7. Dodge and Burn: In this video, we will
learn about dodge and burn. Dodge and burn is a
process of manipulating the exposure certain
area of the image. So in simple terms, we make certain
parts of the image bright and certain
part of image. Dark. Dodge means making things brighter and burn
means making things darker. So what we do is that
areas like forehead, nose, lips, and under her eyes on the cheek will make all
these area lighter. This dark area that
we can see here, we will make it more darker. So nose here, the lips, this part of the lips, inner side of the lips, inside of the cheek and
the jaw line and the hair, we will make it dark. You will see it and then
you will understand what exactly do I mean
by dodge and burn. Before we go ahead and
do dodge and burn, what I'm going to do
is just crop the image a little bit because I feel that the whole keeping
the whole images little unnecessary
and we have to give much attention to
the shoulder and unknown, which is not
necessarily for now. We are going to just
crop the image, maybe make it original ratio. Then we can do like this, maybe a little bit
more cubed guys. The 1 third of the frame. All right, this looks
okay. Just keep this. All right, This looks okay. Now, what we will do is we
will meet two empty layers. I'll click it twice. Here. You see two empty layer
has been created. One I will call Dodge, which means to make it bright. And another, burn, which
means to make it darker. So first we will work on burn. Before that, we
will just come here and change the layer
property to soft light. Also will do same with the dodge layer
property to soft light. After that, we will choose the
paintbrush tool from here. This part is very important. The flow has to be very less, probably, maybe two or
three, or maybe four, but not more than that. Opacity. You can keep a 100. The other thing that you
want to do is you can click here on this gear icon and change the blending option. Bring it here. So changing
the blending option. Suppose if we keep it here, bring this point here. 50% out. The blending option of dodges. 50% in what it does
is when you paint, I will click on bone and select the black
color from here. When I paint the face, you see the paint
is only applied in the darker area on the
highlighted is not applied. In the same way. We will do dodge and change
the color from here. The paint will only be
applied on the white area. It's not very much visible. What you can see if I
turn it on and off, then you can see the white
paint is only applied here. Maybe we can go to
Blending Options. I can show you, see
when I move the slider, you can see how much it
is affecting the image. We will just keep it
to 50 so that it only affects the highlight
area of the image. I will learn to all the paint. We can also change the
blending option later. After doing dodging. We're already to go ahead
and do Dodge and Burn. First, we will do burn. So I will click on board and then I will pick up
black color from here. And then what I'm
going to do is start painting on the darker
area of the image. I only have to paint this on the darker area of the image. Change the flow to
maybe three or 4, 4% percent and start painting. You can turn it on and off and see how it is
affecting dimension. Even if you are overdoing it, you don't have to
worry because you can always change the opacity. Usually I will do over only. So that later on I can
change the opacity. I'll do on the nose. This side of the nose
also I will do here. I will do. You can
see when I turn it on and off from here you can see that vector
of dodge and burn. We'll do here. Then here, here. Then right under the lip here. Then we will do
here on the neck. Turn it on and off, and then you can see the effect. Another thing that
you want to do is you can zoom in and zoom out. Then see the effect.
That effect. Now the barn part is done. You can take more time
to do it very precisely. I am doing it faster. Then we go to dodge layer and we will change the
color here to white. Many times if you are
trying to dodge and you do not change
the color to white, there will be no
effect on the image. Makes sure that you
have white selected. Then I'm going to increase the flow for why
it a little bit. There's also a little bit. Then start painting. Over the North. It
may not be visible, but the change is going
to be very subtle. You can see on the forehead
I will paint under the eyes. I will paint here. I will paint this place. I can turn it on and
off and see the effect. You can see also I will do here, here and here, 200 on and off. You can see the effect
of dodge and burn. What we will do is
group these two layers. Right-click and group. It will name this group
as Dodge and Burn. We can turn it on and off and see the effect
of Dodge and Burn. Now usually it's very
easy to overdo it. You always want to
make sure that you are not keeping the opacity to 100. You will just bring the opacity down and
keep it very subtle. This looks alright. Maybe we can increase little
bit, maybe to 45%. We can just move this
whole thing so that we can see the original image and the
image that we have edited. This is what we had and this is what we have
converted it to. You can come closer also. Zoom in a little more. You can zoom in a little more
and then you can change it and see we have done a
lot of changes in damage. And it looks very nice. So far. Maybe we can increase Dodge and Burn
little more, maybe 265%. And see before and after
this looks nice to me, we are going to stop here. And this is all for this video. I will see you in
the next video.
8. Hair Retouching: In this video, we will learn
about hair retouching. We will see how to detach hair, fix all the problems
that we have. And we will also apply
dodge and burn. The hair. Moving farther, I
will just click, right-click on the group and
click on margin visible. As soon as I click
on Merge Visible, all the visible layers will be merged into a single layer. We have a new layer here, and we'll just name
this layer as healing. We'll zoom in. We'll zoom in, and then we will take a tool from here called in
Paintbrush tool. We are going to use this tool for fixing the problems
with the hair. You keep the size enough so that the size of the width
of the head is covered. We can make it visible
and invisible. The correction
that we have done, we'll keep on moving. Something feels odd. We can fix it later. But for now we can just
keep on doing this. Apart from using in
painting brush tool, we can also use
clone stamp tool. We can simply sample from
nearby coupon drawing, decrease the
hardness little bit. One thing that you
really have to care is that the place from where
you are taking the sample? We can do before
and after you can see all the hair
that we have fixed. This area seems to
be very difficult to fix with the
tools that we have. Another thing that we
can do to fix here is actually take a
patch of hair and then put it in the place
where we think that we cannot fix it by the regular
tool that we're using. So I will just duplicate this
layer just for safekeeping. Then I will go little bit
and take this patch of hair, this and put it here, see how it comes. And if we like it,
then we will keep it. And if you do not like them, we will try to fix
it in the other way. Just take this portion. I'll pick up the
Move tool from here. Then click on the hair
healing this layer, and click on this layer. And then I will
just move this to displace first from
here, we can fix it. Once we have it,
press, click outside. Then I'm going to go
select the erase tool. I'm going to go closer and then just turn it on and off to see the effect. This looks alright, so you can
see rather than fixing it, fixing every hair, we can take a batch of
here and put it. This looks already.
Come down here. This looks alright,
March visibility. Then we have a new layer. Again, I have just taken
out a patch from the side and put it over the distal
video that we have, put it over the problematic
area that we have we had. From here, I can just, again take the eraser tool, select the layer, and
gently fix the edges. You can always turn
it on and off to see the edges. Looks all right. We'll do merge with
disability again. Take the clone stamp tool
and just fix this area. This small hairs
that you can see. I'll just zoom in. We'll
fix it with the other tool. In painting brush tool, group, all the hair layer
that we have created. Then name it. Then you can see the difference, what it was and what it is. Now. This is before. This is before,
and this is after. Fixing some few hair
strands we have here. I could maybe use in
painting tool, brush tool. I'll take Patch Tool
to fix this area. This part of hair can be
fixed by selecting the edge. And then we can use a paintbrush or we can also use clone
stamp to just paint over it. So I'll quickly show
you how to do that. We will select Pen tool first. Then I'll just click out
saying, Bring it back. Right-click and welcome to here and make selection. After selecting,
we can simply take a paint brush and pick
up the color from here by pressing Option
and clicking here. And we can just
simply brush for it. We have this. Now this looks little unrealistic
because it's already hard edge. What we're going to do is
create a masking there. And over that we
will just paint, click on the masking layer
and paint here with black. To make sure that
this underneath layer is visible from here
in the, around the edge. It does not look
so we'll do lag. And then from here press
D to get the black color. Then keep the flow to ten
maybe and start painting. Just paint over the edge. Now this looks all right, man, does not look very unnatural. This area looks a little weird, so I'll change the
color to white. And again, I'm on
the mask layer. Just paint here to make the
underlying layer invisible. Logan, come in March visibility. And keep make this invisible. And name this one fs, which stands for
frequency separation. Anybody this layer
will get renamed. So I will just directly go to filter and use
frequency separation. Will come here in
the lower-level, pick up the selection tool, and from here increase
the feather, maybe 200. Then we'll go to Filter
blur and Gaussian blur. Then. See which one I like.
This looks all right. It looks perfect. De-select. And then
you can see how it was earlier, how it is now. Just put this whole thing
I'm going to group. We can see before and after this is after applying
frequency separation. So I'm happy with the result. The hair looks much more
better than before. Maybe we can do here
also little bit. Apply the Gaussian blur. That looks all right. This one hair strand
looks weird here, so I can simply go
to high frequency. Then from here I can take
clone stamp tool and pick up. So we can see now before and after I think everything
that we could do, We have done I have done all that I have
to do with the hair. We can see the result. This is before, which looks very shabby and bad.
And this is after. The other thing that we
will do with the hair is we can use dodge and
burn on the hair for which I will
create two layers and then call it dodge first. Born. Other one will do burn
first, but before that, we will change the underlying
composition range, the blending option. Then I will simply take brush, pen, brush tool,
increase the size. And from here I will pick, from here I will pick black. One more thing we have
to change this to soft light and this
also to soft light. Now we can start painting. Keep the floor. Maybe four. You can see before and after. We'll go to dodge layer and
then adjust the brush size. You can see before and after
it was very subtle change. Alright, so we'll
just grab this, name it to dodge and burn. See the effect before and after. It looks very nice. Alright,
this is all for this video. I will see you in
the next lecture.
9. Lips Retouching: In this video, we will
see how to retouch lips. The first thing that we will do is right-click on
the Layer Pattern, click on Merge Visible. We can rename this two, lips, reshaping,
shaping and helium. The lips look alright, so we don't have to do
any reshaping as such. But just to show you, I'm going to do some
subtle changes on the lip so that we can learn how we can reshape
the lips. It's really easy. We can simply use Liquify
tool. To do that. We can go to liquefy persona, decrease the brush size, and we can choose this one, liquefy push forward tool. From here. What I'm going to
do is give this a push so that it looks
a little more edgy. And from here I can push a
little bit down a little bit. We can increase
the lower lip and also the upper lip
that a little bit we will just increase
the lower lip. And also overall upper
lip we can increase little bit. All right. This looks okay to me and we can click on Apply and we can see the change
that we have mean. This is before and this is after very subtle
change we have done. If you feel that
something we have done, which is the WE wrong,
we can, of course, we can click on Undo or the other thing we can
do is like the CD, I don't like, I
don't want to keep so I can simply click on Mask. Just press D to change
color from here, I will pick up black color. Take the brush, pick
the black color, and then paint here. Increase the flow. Then I can just paint here to hide the current layer and
show the underlying layer. So we can see the changes. Little bit here also
I will write this is before and then this
is after liquefying. Can again do this. Very subtle change. We have done. So you
can absolutely do it. And her lips looks
all right to me, so I don't think I'm going to keep the chain that
we have done with liquify because our ellipse
looks very natural and nice. But if you have to work with the lab that
does not look so nice, then you can always use Liquify tool to change
the look of the lip. I'm just going to
keep it like this. Then create another
layer and keep this layer as
healing and will do whatever healing that we
need to do in the lips. Which is not much, very less
things out there to heal. Because previously also we
have done the lip healing. So now we can just simply
use in painting brush tool, work on little problems
that ellipse has. These white spots are
there that we can use. Smaller things that we see, it does not look nice. All those things we can fix
this fall looks very awkward. So I'm going to fix this code we can do is use Patch
Tool to fix this. I'm going to just paint here. From here I can take here now we can see this
is before and after. Again, I will change
the tool to in painting brush tool and then work on some
areas that we have. Just see the healing
that we have done. Very few things we have
here because we have already a lot of things in the beginning of the editing when we were doing the face, we had also worked on the limb. So now we will just
leave it like this. And the main thing that I wanted to show you
here in the lips editing is using
frequency separation and using dodge and burn. So we'll just create another
layer by emerging visible. We'll click on this layer, go to Filter and do
frequency separation. We can increase the radius. All right, this looks
alright to apply. I hope you already know now how to use
frequency separation. We have two layers here, high frequency and
low frequency. Low frequency has color and high-frequency has
the texture in it. So we'll just change this name. Ls. Lips will come down to LA flips, which is low-frequency lips. From here we will choose
the selection tool. And I'm going to just draw this, but before that we'll
just check the feather. This is a lot of editing, so we will just reduce the
feather to maybe around 50. Deselect it by
pressing Command D. Press Q. This looks all right. Now, now we can go
to filter blur. Click on coercion blur. And from here we can just change the radius and see that suits
us best. We'll do apply. This is before. This is after. Of course, you can see that
the lip look much more flat. It does not have
any onto rennet, which is not a problem
because when we do Dodge and Burn will
get back the contour. Before and after. Same, we will do
on the upper lip, click on low-frequency ellipse, and then we'll come here
and do the selection. Press Q. C. Looks alright. We'll
go to Filter blur and Gaussian blur apply. We can see before an
octet this would be four, and this is often, we have overdone it. What we can do is go to
opacity and decrease the opacity to maybe
around 6560% percent. After doing the
frequency separation. What we will do now is
Dodge and Burn on the lip. You know the process,
how to do it. We'll create two layers. One we will name as dodge, and another we will do is burn. And we can click here on dodge. And from here we will change the blending option
to soft light. Here also. Soft light. And click on the gear icon. And keep this here. Click here again. And keep here. Maybe we can just
keep it here for now and see how is
there a factor of underlying composition
range will go to bond first and start
painting on the lip. And we'll pick up the paint brush tool and
reduce the flow to 5%, 4 or 5% and keep the opacity. 100 and hardness 19 is good. We can start doing that. We can start painting
over our lips. Of course we are overdoing it. What we can do is control how much we want this
effect by Opacity. You can see here, we'll reduce the opacity, maybe 50% and see what is
the vector before nafta? This is before and
this is after. Before and after. I think we can do a
little more here. Increase the brush. Just paint a little bit here. This looks okay to me now. Loop before and after. Now we are going to
do the dodge for which I will click on the Dodge layer and change
the color from here. For Dodger will just
increase the flow to 19% Reduce the brush
size and just paint over this white
reflection that we have. Increase the brush
size a little bit and also start working
here a little bit. We'll see before and
after. This is before. This is after. We can also increase the effect of dodge by clicking here. Bringing this little bit here. We'll group this into one group. Name it two lips. Lips, Dodge and Burn. Overall effect. We can see this is before
and this is after. We can just group
the whole liberate, touching into one group
and call it lips. We can just make it visible and invisible
to see the effect. This is without retouching. This is after retouching. Without retouching.
After retouching. What I'm going to do
is reduce dodge little more because I don't
like the effect of it. This looks okay. It was looking a
little too much. We'll see what we have done. So we can keep the
effect very subtle and not so much so that it does not look
that we have overdone. It will click on lips group. And from here I will
control the opacity. 70% I will keep. We can see that effect. Let me just, this is
before and this is after. It's a very subtle change, but we can keep it in the same way as we had
changed eye color. We can also change
the color of the lip. To do that, It's a
very simple process. We, we'll create a new layer and change the blending
mode to soft light. Take a brush, pick a color. We can take purple. Then start painting over it. Of course this looks
a lot, which is okay. Because what we can do is
again, reduce the opacity. Just draw maybe 20%. Then turn it on and off to see the effect.
It's very subtle. Not much. This is before. This is after, can
increase it to maybe 35 before. And after. Another thing that you can do is apply Gaussian blur
in this layer. The color is all uniform. Gaussian Blur. Very subtle, will just keep it
to maybe 84 and apply before and after,
before and after. It's a very subtle change. Of course, if we
increase the opacity than the overall lip
color is changing. You can see, but we
are going to keep it very less. Maybe 235%. We can also use Pen
tool to exactly get the edges of the lip, but it is going to
take much more time. So this is an easiest
way to do it, and you can of course
do that as well. This is all for
ellipse retouching. And I will see you
in the next lecture.
10. Eyes Retouching: In this video, we will
learn eye retouching. We had done healing and
the eyes previously. But there are some problems
with the eyes fool fixed. Now. The first thing
that we will do is click here on the top layer and click on Merge Visible. This will create a new layer. And upon that layer, we can start working. We'll just name it as i healing. But before that I will just make a layer and we'll just
quickly discuss what all things are we going to fix the ice so we will see what all problems
are, different eyes. This part looks weird. Photographers reflection. And also here is light
reflection, which we will fix. And the small white, white dots are there,
which looks very bad. We'll fix that as well. Then a little bit of
this red portion, we will fix snot much. These just fix the size also we can fix this
part and this part. Then on these small, small things rule for x. This will be the healing part. We will quickly start healing. To fix this one, we can either paint it or
we can use the Patch Tool. What I'm going to do is
use Patch Tool to fix l. Already. For this part. We can select this part. And with clone stamp, we can, with any other tool, we can just fix it. I'm going to use
pen tool to make the selection to get
a proper So-called. This looks all right here. Then from here, click on Select. Now this layer is
selected and take the clone stamp tool and pick
up from here the sample. Just paint this. Alright, The selected, and
we can see this is fixed. This looks a little
too hard for the edge. Maybe we can quickly take smudge tool and
smudge it little bit. Alright, so this looks alright. Little better. Come into the right eye and
fix the problem here also. Take the patch tool. Already. This is also fixed. This looks all right. Welcome here and fix small. These wins out there. Not much. If we don't fix it as alright. Quickly use in
painting brush tool. There is not much to do. But then because we had
already previously, when we were healing the face, we have already done that. We can fix all these
white, white patches. Before and after small white and black
patches we can fix. Alright, so this looks okay now, just not much to do. It will come here and fix here. This small white patches. All right, this looks okay. Now, the healing has
done what the next thing that we are going to do is do little dodge and
burn in the ice. To do that, what we will do
is first create two layers, as we've seen before, name one. And this one we will do dodge. Change the blending
mode to soft light. Blending option to soft light. Then after that voltage is, click here on the gap. And bring this one here. For burn. For Doidge. You are going to bring
this point here. Now we'll change the color, press D from the keyboard. You can also bring this slider
to black, becomes black. After that, we will pick
up the brush, paintbrush. Not smudge will use paintbrush. Reduce the flow to four to 5%. Hardness. We can keep maybe 20. Now from here we will
darken some parts. And those parts could be these. See before and after. You can see. We'll see before and after. You can see. Then this area also
we can start doing. All right, This looks okay. Maybe you will just do, we'll just overdo it
and reduce it later. Same result over here. There is some
blackness coming here, which we can just take realize, which we can just
take your data, set the size, the flow to. Maybe 10%. Just clean it. All right. You can see
now the size loop. You can see the change
will come to Dodge. And then we'll take
white from here. The color and start painting. Increase the flow level, but see the change. I was doing here, dodging
but nothing is happening. So what we can do is click
here on the blending range. And then from here you can take this point to adjust to
the place where you want. This looks all right, we'll just keep it a
little extra and then reduce it later.
This looks okay. Now here also we'll
just do also this area. We'll just do a little dodging. Here also will do
little dodging. We'll just see before and after. This is before, and
this is after you can see the slight glow in the eyes will just put both
this layer in one group. We can see the
change that this was before and this is
after, before, after. This looks all right to me. We can also control
how much we want. Dodge and burn by here opacity. I can just reduce
it a little bit, maybe keep it to 70 or ohm. Then you can see the effect. This looks perfectly fine. Other things that you can
do with Dodge and Burn is just around the eyes. Here you can use Dodge and Burn. You can see the difference
before and after. Little bit dodgy, we can do
increase the flow along. But what I will do is rename this. I dodge and burn,
dodge and burn. Then I will just put these
two in one group and call it. The next thing that we can
do is change the icon. Changing Eichler is pretty easy. There are many ways to do it, but the easiest way is just to take a paint brush
and just paint over the eyes and change the
blending option to soft light. So let's do that. Will make a new layer
and name it to color. Then set the brush size. Then we can change the color
to any color that we like. I am planning to
change it to blue. So I'll take blue. This blue looks all right to me. Then. We will reduce the flow to six. Then just paint over it. And don't worry, if it
isn't looking too much. We can absolutely control it later by controlling
the opacity. Again, we will do
same thing here. This looks too blue. What I'm gonna do is reduce
the opacity and keep it too. Will check before and after. This is before,
and this is after, we can actually increase a
little bit, maybe to 30%. And you can see the
change before and after. We have colored it to blue, but we can still
change the Eichler. To do that, we can simply
go to Adjustment layer. And from here we can pick HSL, which stands for hue
saturation and luminosity. And we can click on Default. And we'll just close it
once and go back here. And click here and
mass two below, we will just click on that. Now whatever changes we are making a little just
affect the eye color. Double-click here
and bring it on. We can increase the
saturation and from here, we can change color. You can see it. Let me just exaggerate so that you can see. Let me just quickly increase the opacity also so
that you can see, of course we are not going
to keep it like this. You can see I can
just slide this. Turning on red,
purple, and blue, green, yellow, red,
whichever color I want, I can absolutely change it. We'll keep our just no color. A little bluish. This looks
okay. I'll just turn it off. From here. We can decrease the opacity and
keep it very light, maybe 25 to 30%. And we can also see before and after this is before,
and this is after. This is before and
this is after. If we feel that it is, We have done a lot of editing. We can simply click on the whole group and reduce the opacity
of the whole group. This is before, this is before. This is optimum before, after. Alright, this is
all for this video, I will see you in
the next lecture.
11. Final Adjustment: Welcome to this video. In this video, we're going to do all the final adjustments
that we have to do. A couple of things
that we will work upon as color contrast, brightness and sharpening also will try to the net
look little darker. So we're trying to
get rid of that also. But before doing anything, the first thing
we'll do is march visible, just named neck. Then we will go directly
to Dodge and Burn Tool. I will click on
Dodge Brush tool. And from here, we'll adjust the brush size and we'll start
working on this blackness. You can also click here. Make it visible and
invisible to see the effect. This looks still
better from before. Alright. This is how it was. And we have done this. This looks alright. This looks fine as much
as exposure is concerned. But there is still
some color costs here which we can remove. To do that, we'll just
make this invisible and click here and March visible. Once we have this layer, we'll rename it to color neck. Now the next step
is we're going to take freehand selection tool. We'll just roughly draw around, will roughly draw
around the neck. Alright, press Q to see the feather. This
looks all right. Now after doing the selection, I will go and click
on Layer Mask. And after doing that, what I'm going to do is go
to Adjustment and from here, click on white
balance and default. But before going any further, we'll go back again to layer. And click here on the white
balance adjustment layer and go to mass two below. This layer from
there has come here. Now we can double-click here. And whatever changes
we are doing now will only be
affected in this area. Just so you can see it's
all your lower, all blue. We are going to make
it little yellowish. Zoom out a little
bit to see that, but this looks a
little too much. Maybe do 5%, 6 percent. From here, we can play
around and see what looks the best. All right. This looks okay a little bit. Alright, for now
we'll just stop, deselect this and then
see the color change. You can see it's a very subtle
color change. Very subtle. But we do have the effect, very subtle color change,
but we can see it. It's making the image
look better than before. We also have to
apply this color. Remove the color
costs from here. To do that, what we are
going to do now is click on This white balance
adjustment layer and take a brush and
take paintbrush. And from here take white color
and come here and paint. And we can see the
change in the color. This is how it was, and this is how we have done it. This still looks
better than before. I will turn on this
layer also increase, decrease the opacity
a little bit here. See before and after, we'll just put these two
layers in another group. Click here and call
it in the neck. Then we can see the
changes that we have done increase the brightness
a little bit here, exposure on the neck, and also change the
color a little bit. So this looks all
right to me now. We are done with neck. Now, once we are
done with the neck, what we are going to do is adjust the color and
contrast and brightness. We will also increase
the sharpness little bit. To do that. I will again click here
and March visible. We have a new layer
here. We'll call it. Adjustments. Now we'll
click on Adjustment. And the first thing
that we will do is click on white balance
and click on Default. From here, we'll see
what we like the most. We can go little yellowish, make it a little warmer, and make it little more. Increase the magenta
little bit more. This looks alright. You can do however you like. This is how I am liking it. So I'll go back and
see the effect. What we can do is
mass two below that, the practice only on this
final adjustment layer. Press on and off. This is how it was, this is how I have done. After this, what we will do is I will again go to
our adjustment layer. We'll click on
brightness and contrast, and we'll click on Default
and increase the brightness. See how we like it. Increase it a little bit. Increase, contrast a
little bit. Not too much. Very subtle. This looks alright. We'll go back to layers. And also right-click here
and click on mass two below. Now we can click here and see the change
that we have made. I feel that brightness
is a little too much. So I can simply click here
and reduce the opacity. I can see before and
after final adjustment. We will see before and after. Once we are done with this, what we will do is
sharpen the whole image. So to do that again, I will go and click
on margin visible. Once we have the layer, we will call it sharpening. Then we will go to
Filter Sharpen. And we will use Unsharp Mask. From here, we can increase the radius and
see how we like it. You can just play around and see what is the
best to you like. Keep the factor two, maybe two, and increase
the radius a little bit. You can see the
effect, how it looks. You can also, from
here what you can do is do the split view before
and after you can do. We have done split view. And from here we can see however images getting affected by what
we are doing here. We can even decrease the radius. Also decrease the factor. You can do this back
and forth and see. Of course this looks
like a lot of texture. But we can keep all
these texture in the skin and we'll just
keep this like this now, I like the sharpening
press Apply. We have some before
and after we can do. This is before.
And this is octa. This is before, and this
is after. This is before. This is often very
subtle change. Maybe if I can zoom in, then you can see this is
before. This is after. Now we will just remove
the sharpening from here. To do that, we'll just
click on Layer Mask. Once we have it. Will
click on the mask. Simply take paintbrush
tool and click on Black. And we will just paint over. Here. In the hair. You can
see all the sharpening, all the extra sharpening that was there in
the hair has gone. If we do this visible
and invisible from here, there will be no
effect the hair, because we have removable the sharpening effect
from the hair. This looks all right to me now, we'll just check how much
work we have done on the image and how it
was and how it is. Now, I will click simply on, maybe rename this
group to retouching. We can make it invisible. This is how our image was. This is how we have retouched
it and converted it. This is how it was before, and this is how it is after. Thank you so much for
completing this class. If you liked this class, please go to the review
section and give a five-star and you can write
something good about the course so that the other students also
can get encouraged. And I also will feel very nice if you can give a
five-star once again, thank you so much.
 Joseph Khalkho, Photographer, Entrepreneur, Artist