Transcripts
1. Welcome to the Class: In this class, I'm going to teach you how to write your screenplay in Celtx, so you never have to worry about formatting your script ever again. Hi, my name is Piotr, and I'm a screenwriter and director. Up to this point, I've managed to do a couple of movies that were shown on the festivals all around the world. And as of this recording, I've already shot my first feature film, and my second feature is already in development. I remember back in the days when I was beginning my screen writing journey, I used Microsoft Word to write my first script of my first short film. And it was a very painful process because this software was never developed with screenwriting in mind. So then when I went to Polish National Film School, I was introduced to Celtx and it was a complete game changer for me. I've been using this program for more than a decade and now I would like to share my knowledge with you, to help you with the beginning of your screen writing journey. In this course, I'm going to tell you which version of Celtx to use. I'm going to guide you step-by-step through the installation process of the software. Then I'm going to show you how to set up your project. I'm also going to show you how to export the screenplay to a PDF format so you can give it to the people that don't have Celtx installed in their system. As an example, I'm going to show you a project of my first feature film that I wrote in Celtx. So you can see how I've managed my project. So basically I'm going to give you many, many tips on how to use the program properly that come from many years of experience of using this software. In case you're wondering that you should get a different program, then I'm going to tell you that Celtx has the same capabilities as any other programs, but Celtx as one big advantage. Celtx is free. You don't have to a couple hundred of $ to start writing. And this is something that I absolutely love about Celtx. So thank you very much for listening and hopefully see you in the class.
2. Installation: Thank you for taking my class. I'm super happy that so many people are interested in screenwriting. I myself have been doing this for a while and I think that there is always place for new talents, new original ideas. But first thing first, before we get into the software, I want to talk about the clarity of my speech because you've probably noticed from my accent that English is not my first language. Polish is actually my mother tongue. I want to just let you know that I treat clarity very seriously. And I proofread the captions that are there for this course. So just remember that at any point you can just turn on the captions. Okay, So let's talk about Celtx, the program that we will be using. It's produced by Celtx studios. And they've already moved on to their browser version of the program. We will be using the standalone version, that you can install into your system and work offline. It's a legacy version. It's no longer supported, actively supported by the company that produced it. But it still works. And I've been using it for more than 10 years. I've written my first feature in this program. Okay, so now I have my writing PC here in front of me. What I'm going to do is, I'm going to open a folder in which I have the installation files. So let's dive into the files. As you can see here, I have four versions that I want to talk about. First is a Mac version. And what you want to do, is to type in the exact name of the file into your web browser. As I told you before, the company that produced this software, Celtx Studios don't support the legacy version anymore, so you cannot find it on their website. But what you can do is you can google the names of the files that I'm showing you here. And that way you can find them on the Internet. The version that you want to work on is either 2.9.7 or 2.9.1. They are very similar. These are the final standalone versions of the software. You can either choose. the Mac version is going to be this DMG file. Or, if you're a PC owner, you can use either of these versions that you see here, which is CeltxSetup-2.9.7, you can add PC or not. The version of Celtx 2.9.1 is also acceptable. This is very similar to the 2.9.7 version. So if for some reason you cannot find the version 2.9.7, you can always download 2.9.1 version, And it's going to work as well. As you can see here, I have the Polish version of the software that has Polish UI. Maybe you can find a version of the software with UI translated to your language as well. Please experiment. For the demonstration purposes of the installation, I'm going to use 2.9.1 version. I initiate the installation by double-clicking. Nothing new here. It's pretty straightforward. So this is the icon of the program. You just click Finish. Now we can close this window. I'm going to initiate the program by double-clicking the icon. And here we go, The program is already installed, and this is the welcome page of the software. So in the next lesson, I'm going to show you the user interface of Celtx and how to set up your project. See you there.
3. User Interface: In this lesson, I want to show you the user interface of Celtx. And to do this, we're going to use a sample project that is available in the program. I'm going to use Wonderful Wizard of Oz. Okay, So this is the program. And the first thing I want to talk about is the Project Library that contains everything that your project contains. So any file that is a part of your project is going to be stored here in the project library. Now, as you can see in this example, you have the list of characters, you have the screenplay, you have the storyboard and other stuff. So you can find everything in the project library. Now, you can also arrange stuff by dragging it and dropping somewhere else. So you can build really impressive structures here. I like to keep everything very minimalistic and simple. In the upcoming lessons, I'm going to give you my tips & tricks for Celtx and how to manage your project. But now let's just focus on the UI of the program. Now let's talk about the work area. Here on the right-hand side and the center of the screen, you have the part where you'll be editing the files that are contained in project library. So this is how you can open the files just by clicking them two times. As you can see, after clicking two times on a novel, it has been opened in the work area. So here you can edit the novel. I'm not going to do it right now, so I'm just going to close it. Let's focus on the screenplay. So here, whenever you're going to add another scene to the screenplay, I'm going to add a scene right now. So whenever I'm adding a scene heading to the screenplay is being displayed here in the scenes. This is a navigation tool. Whenever I am clicking the scene, two times it's going to take me there. And it's super helpful when you have the whole script, and you're revising. Therefore, make this window bigger and navigate through your script using this scene headings. What you see here is they've added only 4 scenes for presentation purposes, but then later on, I'm going to show you one of my drafts. And then you're going to see, how helpful can this be when you're navigating our script, whenever you're revising it. So, as I told you before, this is the work area. And the most important part of the work area is the middle of the screen. Here you will spend the most time because here you will be editing your script. You will be writing your script. The panel on the right side is the panel where you will be taking notes. So for example, if I want to put a note here, I'll just click "Add Note". And as you can see, the note has been created. Here I can write whatever I want to, and it's being saved to this place. You have to remember that whenever you're navigating through your script, the panel on the right will display only the notes that are in the active scene. So, for example, if your cursor is in this scene, it will show you this note, but if I will move the cursor to another place, the note has vanished. As you can see. Here at the top of the writing panel, you see the stuff that is specific to editing the text. So you can find the text that you're looking for. You can cut the part that you don't want. You can highlight something. You know, this functionality from Microsoft Word, I'm sure of that. So we're not going to discuss this any further. Here at the top of the work area, you have the currently opened files that you're working on. You won't be working on every file from the project library at once. Maybe you want to open master catalog, screenplay, and let's say storyboard. Then you have these three files open and active. You can have as many files open as you want. But my short advice is to keep this minimalistic, so you don't lose yourself. Usually I just keep my screenplay open and that's it. Here below the work area, you have some additional functionality which is specific to screenplays. As you can see here. When I open the master catalog, nothing is here. When you open a screenplay, you have this additional cards. Now, you will be spending most of your time in the script mode. Because here you will be writing your script. Now the other card is the export card here you will be exporting your screenplay into a PDF file. You can also use a scratchpad. You can also use index cards. Here you fill in a title page, and then you can generate reports for the character and the dialogue. From my experience, you're going to spend the most of your time in the script mode. Then you're going to hit typeset PDF whenever you want to export your script into the PDF. And then whenever you are going to export your PDF, you're going to fill out the title page as well for you to know which version of your script you're using. The rest of this functionality, for me personally, is not that important and I don't think I ever use scratchpad or index cards in this program. Okay, So now you have the overview of the interface of Celtx. And I'll see you in the next lesson where I'm going to show you how to set up your own project and give you some tips and advice on how to use this program effectively. See you there.
4. Setting up Your Project & Writing: In this lesson, I'm going to show you how to set up your own project in Celtx. Let's dive in. I'm going to choose a template of film. And here we go. This is our project. As you can see, the project library is mostly empty. You don't need the sketch thing so you can right click it and delete. Okay. Unfortunately, you cannot delete the master catalog. What it does is to catalog all of the characters you have in your story. Unfortunately, this doesn't work too well. So I just forget that it's even there. So by default, Celtx created a screenplay for us. So what we're going to do is we're going to name the project. Here, we can rename it to our sample screenplay. And then I'm going to call this a first draft. What I like to do is to create a notepad in my project library. So this is what we're going to do right now. I'm going to hit a plus and then I'm going to choose a novel. Everything else that is here, which is catalog, sketch and all this other stuff I never used. And this is what is important about Celtx is that it's a great tool for screenwriting, but it's not a best tool for pre-production management. There are better tools to do this. And for example, in Poland, the industry standard is Movie Magic. I suppose that this is also true to different countries as well. So back to our novel, I'm going to call this a notepad. And I'm going to use this file as my list... of notes to change in draft one. And here I'm going to put all my notes that are specific to the first draft, for example. So here I want to save this file. As you can see, I have my first draft which is already active and open. Here is my scenes and here are my notes. So this is the functionality that we have been talking about earlier on in the section when I was talking about the user interface. And whenever I want to write a scene, I'm just going to start from the heading. So I'm going to write interior, dot, house, day. And after pressing Enter by default, Celtx world transition to write action. And it's going to do that automatically. So now I can write what's happening in the frame. So let's say Robert is sitting in he's living room. Let's say Robert is 30. Then after writing action, I'm going to press Enter one more time and it's going to transition to write another line of action by default. But let's say I want to write a dialogue of Robert, a monologue, for example. To do that, I have to press Tab and Celtx is going to automatically transition to write a character name. Let's say that I want Robert to say something. I'm going to write, Robert. And by the way, here in the right bottom corner, you can always see the functionality that is active right now. So if I press Tab it's going to transition to action. And if I press Enter, we're going to start to write the dialogue of Robert. So I'm pressing Enter, and here is what he says. And he says, "Good morning". And this is a great way to write the worst screenplay ever written. But let's continue. For the sake of this example. If I'm going to press Enter, now, we'll transition to writing another character's name. And it's going to be Louiza. Now, after pressing Enter one more time, we're going to write dialogue once more. So now I'm going to write, "Stop calling me that". And now the words screenplay of all times just got a little bit better. "Stop calling me that" is an interesting line. It's an unusual response to a "good morning". So we don't know if "Good morning" is her nickname or not. Generally speaking, these kinds of mysterious lines might be a great hook for your audience to be introduced into your character's world. But let's get back to the example of writing in Celtx. If I'm going to press Enter one more time, it's going to transition to another character so Robert can answer Louisa. But we don't want to do that, right? What we wanna do is write some more action. Maybe they're doing something. So I need to press Tab to transition to action. So as you can see, if I'm going to press tab one more time, it's going to transition to writing a character name again. There are several different modes and you can always transition just by clicking this drop-down menu. Scene heading is self-explanatory. I don't have to explain it to you. Is this gray pair part over here where you just right where and when the action takes place. Then you have the action. Then you have the character and dialogue. We already did these ones. You have parenthetical whenever you want to put something specific about the dialogue that I'm going to show you right here, right now. If I want to create a parenthetical all I have to do is... in the dialog box, because now we're in the dialogue mode. Press Shift, and open parenthetical. Boom. And it's already formatted correctly, as you can see. Or open a drop-down menu and do it like that. You can always choose whichever is most convenient for you. Now I just wrote that she said is "slowly" stop calling me that. Stop calling me that. Anyway. After writing few of this screenplays, you're going to use Enter and Tab very instinctively. You're just not going to think about it at all. For example, now, I don't have to think. I know that I want to write a scene heading and I know that I have to click Enter, then Tab, and then enter again. That this way I'm going to transition into scene heading. Now let me show you a little bit more of the functionality. Let's say that you want to make a note about this particular scene, what you want to do is you want to put a cursor whenever your note is going to be, press the left mouse button, so the pointer is there. And then click Add Note. You can see that you can change the color of the notes. Let's say, I want to improve this dialogue later on. And I don't want to forget to finish the scene. So I'm going to put it in the gray. "Finish the scene". So here, this is how you can use notes. So anything can be a note. You can put a media clip or a picture here as well. But I advise you not to do it and just focus on writing. I use Notepad here, which is a novel component to write more abstract ideas about the draft that I've written that don't really fit into this dialog boxes here. Usually it's ideas for the whole draft. For example, I have to change this particular plot point, or I need to foreshadow this character's behavior. But I don't yet know which exact scene I'm going to edit. So this was the lesson on how to set up your project and Celtx. See you in the next lesson.
5. Managing Your Project: You've made it this far. So I can see that you're pretty serious about screenwriting. I like that. Now, what I wanna do is to show you, in this lesson, how I manage my projects. Therefore, I just brought up my own feature film that I've done two years ago. It was written in Celtx. So let's just dive in and I'll give you some tips & tricks of how to use this program and not to get confused with so many drafts of the same screenplay. Let's dive in. Before we begin. I just want to let you know that this screenplay written in polish. It doesn't matter because I want to talk about managing your script so you don't really have to understand what is the film about. So here you can see that I've titled my project the title of the film, which is "Wiarołom". The English title is "Faithbreaker", and this is the draft number 5.1. It's actually draft number 5.2, but it doesn't matter at all. You know, you just change the file number and I forgot to do that. But anyway, this is the last file. So I know that this one is for sure the last version that I went to shoot on the set. So let's see the project library. So as you can see here, this is the project title. This is the main catalog, and here I'm going to show you why this is a big mess. So you can see, whenever I inputted anything into the character name, this algorithm copied the random text I've mistakenly put into the name of the character and made it an actual character. So therefore, if you want to manage your main catalog properly, what you do while you're writing is you have to go into the main catalog and delete every mistakenly added character from it. And I just don't want to do that. I can remove it and he's going to ask me should I remove it. But there's just too many of them. You can see there's 148 characters in my script. And my script has five main characters. So there are probably 30 characters there. So you have another extra 100 mistakenly added characters. So what I do is I just forget that the main catalog is still there. So let me close the main catalog so we don't have to see it. The main tip that I'm going to give you is just to keep your work area clean. Because if I'm going to open this many drafts, you sometimes forget that you're writing in the wrong draft and you're starting to change the draft that you shouldn't suppose to be working on. It's better to just keep the draft that you're currently working on, which for me is draft number 5.2. I'm going to close this folder. And now let's talk about how I manage my projects. So the files that I'm currently working on are here in the main directory. So here I have this changes to draft for changes to graft five. Here, it's a novel where I would put the problems that I had with the script. And as you can see here, I've crossed out the things that I've already dealt with. And you can do it here. It's changes for draft number four. So most of it is already dealt with. So I'm going to close this one. So this is how I manage my notes, the notes that I will be using later. I'm going to keep them here in the main folder. So now I want to talk about what you do when you want to move from one drafts to another. So let just say that you've just finished working on the first draft and you start writing your second draft. What I would normally do is I would move everything to a folder. So for example, here I have the draft number one. And what I have here is the draft. I have other scenes, because when I was writing the first draft, I was writing, apparently, the sequences separately. With this particular film, I decided that I'm going to tell the story non-linearly. So writing the first draft, I didn't knew at which point I'm going to use this particular sequence or a scene. Therefore, I decided to write, I don't know how many, eight scripts. I created, eight scripts. And I've written these sequences so I could combine them later on, and edit the movie when I would have all these sequences written. And then when I was moving to write, second draft, third draft or wherever, I would just put everything in the folder, duplicate the first draft, move it into the main folder, changed the name, and start writing from there. To be more clear about this, let's imagine that I've just wanted to write a draft number 6. What I'm going to do is I'm going to duplicate my current draft, changed the name of my current draft to draft number 6. I'm going to open the draft number 6. So I know that my current draft is draft number 6 and I'm going to close the old one. I'm going to come back to the project library and I'm going to create the folder for draft number five. Draft number five. Okay. And now to clean up, I'm going to move everything that is in the main folder to the folder name draft number 5, except for draft number 6. Now I'm going to close draft 5 and I'm going to push my draft 6 below. So now, look how clean this. And whenever I would want to come back to my notes from draft number 5, I'm just going to press this and then I'm going to see all the stuff that I had for the draft number 5. And that's it. This is the way I manage my draft. Whenever I'm working on a script here, I always use the navigation bar here. Look how easy it is to move through your screenplay using navigation bar. Whenever you're going to find a scene that you want to work on, you just double-click it and the work area will be transferredthat scene. Another tip that I can give you is that whenever you're early in the stage of writing your script, you don't know what's going on in those scenes, because those headings are not very descriptive. So what you can do is you can put a parenthetical here. And then you can write a short message for yourself. Let's say that one of the characters is coming back home. As you can see here, it's already here in the navigation bar. So whenever I want to export this to the producer, what I'll need to do is to delete these notes from here. By adding these notes to your scene headings, what you're essentially doing is you're making index cards. To do this professionally, you have a specific tool here in Celtx, the index cards. What it does is that you can put a label on every scene that you have here and you can color code it as well. For example, like this. But I never do this in Celtx. What I do, I love using index cards, but I do them physically. I prefer if it's a physical object that I can move around on my table. Another functionality that I don't want you to use is the scratchpad and it's over here. So the idea is that it's another of your notepads and you can take notes and it's specific to the draft that you've just opened. So this notes that I'm putting here will stay with this particular draft. Whenever I am going to open another draft, these nodes are not going to be there. What I've discovered after working with this, that I would forget where I would put my notes. And if they're here in the project library, I would always find them without a problem. So what I would advise you to do is never to use scratchpad, ever. Okay, so in the next lesson, I'm going to show you how to export your screenplay whenever it's ready. This was the management of your project and Celtx. See you in the next lesson.
6. Exporting to PDF: So let's say that you've written your script, Hurray! So what you need to do now, to show it to anyone, is to export it into the PDF file. And in this lesson I'm going to show you exactly how to do that. Okay, let's dive back in to my screenplaye of my feature film. This is "Wiarołom". Again. First of all, make sure that you have the right draft. For me is draft number 6. And we're here, right? I have the right draft. Now, I need to fill in the title page. The title page is here on the bottom of the work area. So here you write the title of your movie. Then you write, who is the author? This is me. Piotr Złotorowicz. What I tend to do is I would add in a date of the export. And then sometimes I would additionally write which version of the script taht is. If I'm sending this to an actor or a producer, I would delete the version, because I don't want them to see which version of the script this is. Which draft, but I would still keep the date because it's easy to correlate your draft number with your date. Afterwards, I'm filling in the contact information and that's it. We are ready to print this draft to the PDF file. So what I'm going to do is to click this typeSet/PDF card on the bottom of the work area. And as you can see, Celtx formatted my script. Now there are few things to consider here whenever you're exporting your PDF files. This is the only downside of using the old version of Celtx that you actually have to have an Internet connection to export a PDF file. What it does is, it's going to send your script to the producers of Celtx and they are going to export your script into the PDF. Now, it's safe. I can assure you that nobody ever stole my screenplay. I don't think that anyone reads the scripts that come into the Celtx Studios. I think that they've left it like this. So they know how many people are using their software. So to see your PDF, you will have to click Dismiss on this information that it's time to upgrade. What they want you to do is to go online, find them online, and register to their service. Which is a paid service when you're writing your screenplays in your Internet browser. So we dismiss and keep using standalone version of Celtx. So here you can see the layout of your PDF. This is the title page. And then you see the screenplay. Now you have some formatting options. And these options are totally up to you. If you have another printing format, you can change this to us letter. You can have the numbers of your scenes on the left or on the right side of your page. You can set these options however you like. I like to keep my screenplays super clean. That's why I use A4 format. I have my number of a scenes on the left side. I don't break the page after each scene. What is going to do is you're going to use a lot more of paper this way. I'm going to show title page at the beginning of my script, and more continuous. And I don't like to use more and continuous at the bottom of the page and whenever the dialogue breaks, I don't want to have a additional information that is going to be continued later on the other page. Therefore, I leave this unchecked. Now to be specific about when I use this "more and continues", I do turn on these options, when I'm printing out my shooting draft, I'm going on a set with. I do that because on the set, usually you're working just with a few pages that the scene is printed on. Therefore, it's really helpful when you have these things marked that you know that on the other page you have the ending of the scene and that you have the ending of the articular dialogue on the upcoming page. I'm telling you that because in this course I am focusing on what I do with the draft as a screenwriter. Preparing for production as a director is a completely different thing. The main thing to remember is: as a screenwriter who wants your screenplay to be financed, you want to keep the format of your script as simple and novel-like as possible. First of all, you want the reading experience to be good. That's why you want to keep your draft clean. Okay. So I'm going to press OK, and it's going to reformat the script one more time. Now please, notice that this time when I reformatted my script, this notification that we previously had to dismiss about registering into Celtx Studios was not displayed. This is because it only shows the first time you want to export your screenplay into a PDF during one session. Now you're ready to save your PDF. So you're going to press this button, Save PDF. And it's going to ask you, where do you want to save your file? And as you can see, I have different versions of this screenplay already here. I can name this draft number 6. And I'm going to save this on my desktop. I'm going to save this to my desktop, so we can see it. And I'm going to press Save. Now a pro tip. Give Celtx a second to create this file. It has happened to me that whenever I clicked "create the file", "save the file", and immediately left the program, I found out that it wasn't saved and it wasn't exported. So make sure to close the program after you see that the file has been successfully created. So now we can see the PDF file. Double-clicking it is going to load my PDF program, which is PDF Annotator. And we can now scroll through our screenplay outside of Celtx. Now, I want to give you another pro tip about sharing your files from Celtx. I never really send people my Celtx project. Why I never send it. Because I don't want people to see this, because it usually my project library is a mess. And whenever I'm sending someone a draft of the script, I don't want them to be confused by which draft should they read? And whenever you'll be sending your project file, they're going to see all of this. All of your creative process will be on the display. There are going to see the other drafts of your screenplay. And you don't want that, clearly. You just want them to see the draft that you wanted them to check out. And it doesn't matter if it's a producer, it doesn't matter if it's a colleague that you just want opinion from. You want to be as specific as possible. So this was some tips about exporting your project. Thank you for watching this and see you in the next one.
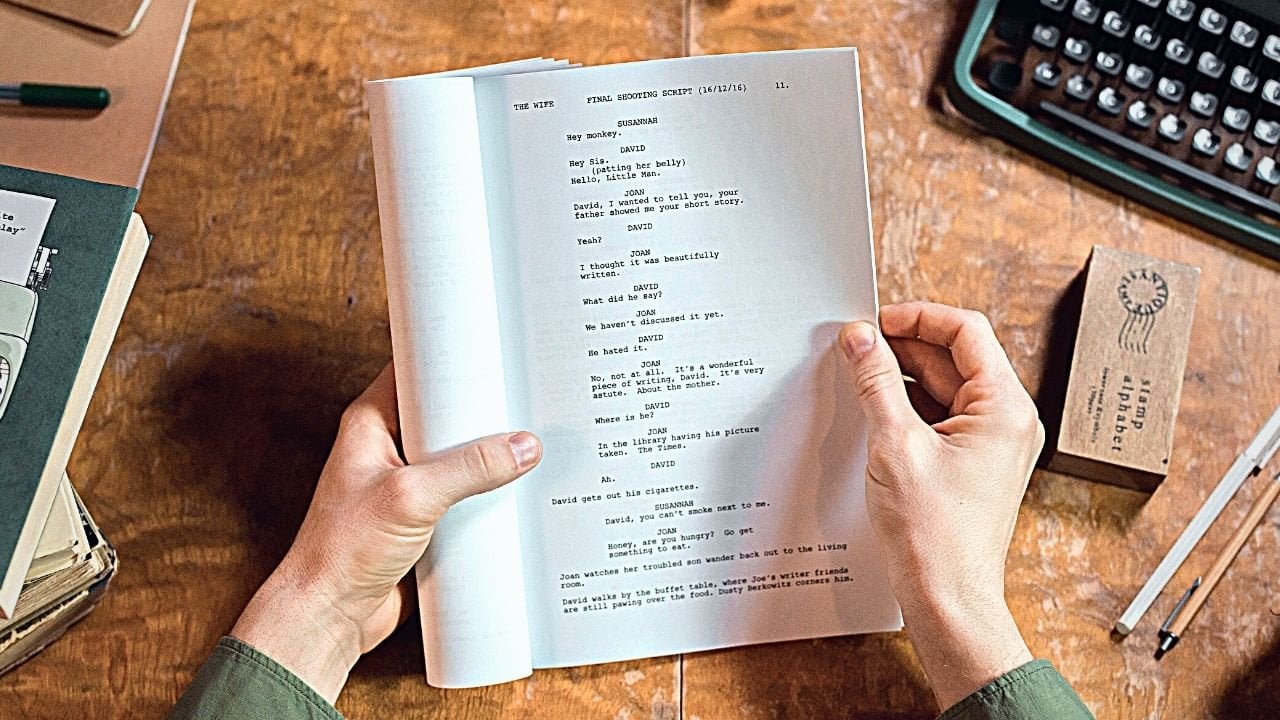
7. Class Project: Okay, so I give you so many tips on how to write your screenplays in Celtx and now as a homework for you, I would like you to choose a scene from a movie. It might be your favorite movie, or just the movies you like, or even the movie that you just have around. And pKa seen that contains dialogue. Because we know that every scene contains action, but pick seen that contains dialogue and write it into the Celtx using action dialogues, parenthetical, whatever is needed to write the scene. And I want you to really reverse engineer it. See it on the screen and then type it in to Celtx. And then the second stage of your project is going to be checking what was the original description of the scene that you've typed in. So the way you are going to do that is that you're going to download from the internet the original screenplay of the movie. It is pretty easy to find a original Screenplay of a Hollywood movie. If you're going to choose art house European movie, it's going to be a lot harder to find an original script. What you can do is to find the film, find the screenplay, then type from the screen what you see and check what was written in the script. And please, when you'll be reading the original script, don't be hard on yourself because there's a big chance that an author of the script used different words, had different intention when he was writing the screenplay. To use a cooking analogy, I would say that the screenplay is a recipe for the dish, not the dish itself. So for this project, please upload your version of the scene in a PDF format. Thanks.
8. Thank You for Joining Us: Congratulations, you've made it. This is the end of the course. I hope you've learned
something useful. I hope I was successful in
giving you all the tips and the knowledge I got from using Celtx for more than
ten years, I think, and writing several short films and the feature
using this program, I'm super excited that
you are joining us, this screenwriters of the world, and that we will benefit
from your talent as well. Initially, I wanted to
create a longer course that would cover all sorts of different topics
on screenwriting. Celtx was supposed to be
a part of this course. But then I decided to
make a series of courses. With that being said, I don't know when are
you watching this, but there's a big probability that I've released
other courses as well. So please follow me and
check if I've already uploaded different courses on other screenwriting
and directing topics. If you like this course, please consider
leaving a review. And if you have other
questions to the course, please leave them
in the discussion. If you have an idea, how can I improve this course, please send it to me
as a private message. So one more time. Congratulations on
finishing the course. And I hope I will be
reading you very soon. Bye bye.
 Piotr Złotorowicz, Screenwriter & Director