Transcripts
1. Introduction: Food is something that everyone has to relate to because we all eat. It's something that evokes nostalgia and it produces memories for people. Food is the ultimate form of connection and that's why sharing photos of food can feel so powerful. Hi. I'm Melina Hammer and I'm the award-winning food stylist, photographer, cookbook author, recipe developer, and proprietor at Catbird Cottage, my space here in the Hudson Valley, New York, where you can eat at my table. Today's class is about shooting and styling beautiful food photos for Instagram. Food styling is really just about playing on the plate. You've got shapes, you've got colors, you've got texture, and you've got light. When you're playing there and you see how juicy something can be and convey that to the viewer, all of a sudden it's seductive, it's bliss and you can eat it. We're going to style a still life of ingredients that tells a story, beautiful cheese board because who doesn't love an epic cheese board? We're also going to style a plate of dish. To take this class, all you need is a camera phone. We're going to use natural light and we're going to use the food you're already eating. By the end, you'll have everything you need in order to take really gorgeous food photos. I hope you'll feel empowered to play and I can't wait to see what you create. I'm so excited you're here. Let's get started.
2. The Art of Food: Welcome to my home in the Hudson Valley, upstate New York. I wasn't always a food photographer. I had a whole other career as a metal-smith and I loved that work. I never thought I was going to be anything else. After moving to New York and making compromises for a series of years that weren't panning out, I realized that I really just needed to figure out how I could be creative, but also do something that felt like it was sustaining me, something that I could get old doing. I decided I eat food, I love food. I had fine art as a background. So why not use colors and shapes applied to food and then do that as a career? All the years as a food photographer has brought me closer and closer to the food. Because food became central to every single thing for me, we decided upstate was the place where I now can grow my own food, forage food. I love finding beautiful ingredients. I love learning about new ingredients all the time. In using those ingredients, I'm able to speak to more people, connect immediately and find love stories amongst us. When we think of food styling, a lot of times people are like, Oh yeah, motor oil and lard and all of these fake ingredients made to look things look great. I laugh, It's understandable, but that's a food photography that ended back in the 1990s. Bringing everybody up to speed, food styling is really about using authentic real ingredients, doctored minimally and hopefully edible by the end so that you can enjoy it. The traditional style of photographing has been to see it elevation. Now, we're seeing so much more overhead where the viewer is at the table looking over the food, and the graphic nature of food captured from above, lends itself totally to easy, beautiful food photography. Also, because we're looking at the pictures on our phones mostly, there's really this interest and need or benefit at least to come in closer, seeing that food closer cropping in on a dish, rather than seeing an entire scene. The things I've found that really resonate in taking great food photos. What are these forms doing? How do these colors relate? How is the light hitting each of these pieces? How do we find those elements so that it can become truly effective, visceral, beautiful, seductive? Through this process, I learned so much about what really great ingredients actually were. I hope you too are going to find excitement in ingredients and discoveries and seek those things out for yourself as you make beautiful food photos. Also, ingredients are really important, but you're going to work with whatever you've got. You're going to find a way to make that visceral, beautiful, and delicious feeling thing where you are in your space. Now that I've gotten you excited about taking gorgeous food photos, I want to see your work in the project gallery. I can't wait to see you share it on Instagram. When you do so, tag me, tag Skillshare. We can't wait to see all the beautiful stuff you're making. Let's get started planning our shot.
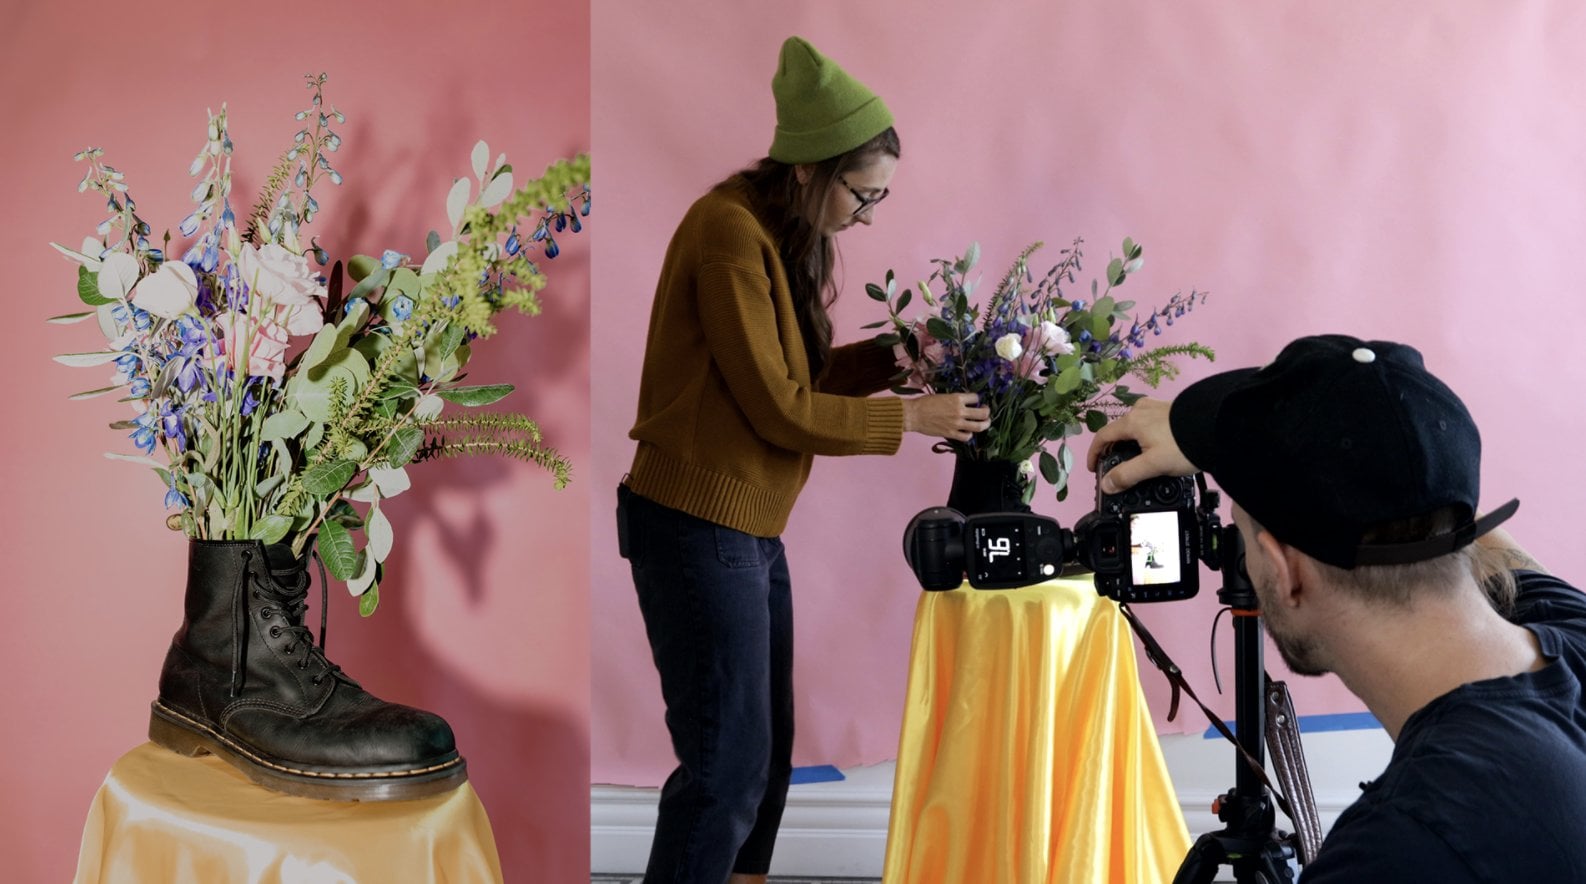
3. Planning Your Shot: One of the most important things in setting up your shot is figuring out what kind of story you are about to tell. What's your story? Is it about beautiful shapes, graphic elements? Is it about connecting to a certain community? Sometimes, the story you're telling is just that it's Tuesday lunch. What's that look like? How can you make a juicy or how can you make it feel like I got to eat? Maybe the story is that it's your birthday or a friend's birthday. What feels celebrational? What feels like, "Oh, I've got a birthday in summer, and this is what that quintessential experience feels like"? Once you're clear on the story you're telling, you can figure out every single subsequent decision. Does that decision makes sense? Can you justify the scatter of this or how the napkin is placed or even what the meal on a plate looks like? Is it formal? Is it casual? Are you at a picnic? Think about those decisions because every single decision is a further direction that you're taking to make that beautiful visual story be told. One of the ideas I've conjured for our lesson, the still life to tell a narrative and ingredients was born because I have some beautiful fruits ripening on shrubs just outside of the capillary property. That because they're so beautiful, I felt like they needed a story to center around. Even though I love all kinds of storytelling and sharing that visually, I've realized that what people gravitate to most on my personal feed is delicious food. I in turn have been listening to that so that I can redeliver that day after day, post after post. Certainly, I'm encouraging you to find the things that are inspiring to you. I want you to seek out the gorgeous images that make you feel like this is a beautiful space. Replicate that, see how it feels, See if that's what resonates with the people who follow you. Then it becomes this relationship back and forth where you listen, you create something beautiful and what you think is beautiful, and then it becomes this continuum of creating and fine-tuning. My first advice to you is to choose a location with good light. If you have a window, you have a space to shoot. It's really about looking at how the light passes through that window at different times of day and test it out. Put your scene in front of the window at different times and see how does the light feel on that food. Is it beautiful? Is it flat? Does it give you gorgeous graphic contrasts? Look at those things, learn what they are, and that'll set your best foot forward for the next setup that you make. If you don't have ideal light, if you're in a situation where it's like, "I've got cool scene but I don't have really the light that I need to make it shine," some of my favorite ways to compensate for that are getting into the food, make it messy, feel like there's the spontaneity that you can elicit from the scene that makes the bad light kind in that matter. Maybe you're at a bar and it's delicious and messy, just like so many bars feel. Or you can make a boomerang, you could make some fun out of a circumstance. Use gesture, use taking the food apart, use other ways to elicit energy, activity, lustfulness in the scene, even though the light isn't what you might otherwise choose it to be. If you're telling a story that's really specific, like you want to tell a picnic story, it's so nice to go and take everything with you on a jog to a park, with the forest, or wherever the location is that feels beautiful, gives that feeling of a quintessential moment, and set your scene. It's really beautiful to do things that way. It frees you, in a sense, to explore all kinds of new ways that light affects whatever you're shooting. All of this is food for thought. All these things are cool elements for you to use to style your own scene of scene. Once you've made those considerations, you can get more gorgeous, successful results. Next, we're going to go to my sunny room and we're going to begin shooting.
4. Styling Tools: Now we're in my sunroom, and this is one of my favorite places to shoot on a day-to-day basis. One of the reasons I love this space is that it is essentially a white box. That means that I get the clearest connection to light. I want to talk with you about some of my favorite tools, that I use on a daily basis styling. To start that, there's a tool that I really love, that transitions using in the kitchen as a chef, as well as how I style food. That is my mandolin. The mandolin is basically a really sharp blade, which is to be respected because it's super sharp. Whatever you're slicing can become window pane thin, and transform typically really sturdy knobby vegetables that are otherwise really dense into something that is lace-like or delicate. Another thing I really love is this awesome little spatula that I got in Japan. It's a silicone spatula, so it's really flexible, which means that I can smear and spread sauces or anything that's a little creamy but that needs some gesture. For this, the spatula is really great. The reason I like these tweezers, specifically, is that they are rounded tip, which means that even in grasping something, usually something really delicate, it won't mark what those ingredients are, like tender herbs. A lot of the times, toothpicks, Q-tips, and a paintbrush and various kinds of tips come in handy. Toothpicks are fantastic for extra precision like in moving crumbs. Pushing crumbs is an art form. Toothpicks are excellent for that. Q-tips are excellent for, if I'm using something that is sauce or liquid, and I want to have a really clean line, especially if I have, for instance, a beautiful panna cotta in here and I've poured it, and it has settled slightly or someone jostled it or something, you just have the opportunity with a Q-tip to make a clean line and give it that perfect edge. Anytime there's something that's just slightly uneven onset, there is a really helpful tool, that's a wedge basically. I collect all kinds of things and rather than just purchase a wedge at a store, I love to use really shallow stones. I have them in all kinds of elevations. Just a tiny little prop inside of a glass or any other object, to make it level with the camera, super useful. Then lastly, this small mortar and pestle. If I want to have a really nice coarse-grained of pepper, that I'm adding to something as a final flourish on my ingredients, this is a really nice way to achieve that. I feel like peppermills really nice, but there's greater control here and I can stop when I want, and I can see what it is, how the coarseness is evolving because I'm the one doing it by hand. If you're just starting styling, one of the things I would recommend is, don't feel like you have to incorporate all kinds of bells and whistles at the outset, really. It's about approaching it with simplicity and using the tools you have available. But that said, what I would recommend is the tweezers, because when you want something to be specific, this gives you that deliberate means to do so, rather than an arbitrariness that you might otherwise have, messing around with it with your hands. I highly recommend the tweezers. Similarly, a little spritz bottle. You can get one at most Dollar stores or any kind of drug stores, you carry them and just a little bit of water in it, and it gives you the opportunity to refresh food, especially if it's been sitting there for a few minutes, and make it look beautiful again. If you're interested in pursuing more food styling as you do food photography, one of the things I have found to be the greatest satisfying experiences is gathering more elements to tell your story. If you are curating and collecting backdrops, surfaces, plates, dishes, all of those things that help tell a story, and you can refine your own vision about what you're going to bring into yours, that's going to make you more effective and tell a beautiful series no matter what you're putting onset. Now that that has been established, we're going to make a still life of ingredients, tell a story with those ingredients, and you'll see me use some of these tools, as I set that scene up.
5. Capturing a Still Life: Now we've covered some of the styling tool basics, I want to bring you into an experience of styling raw ingredients. The styling raw ingredients is a really amazing chance to learn because it's not like you have to go and cook something, you don't have a huge amount of prior planning, let's say, to do. Instead, it's really about choosing really great ingredients, fresh ingredients, special ingredients if you can find them, and having fun with it. Let's get into it. As this happens, I am growing currants this season, and I have some really beautiful fresh currants that I just picked in the garden, they're going to be part of my still life. There are gooseberries from a plant that is successfully fruiting this season too, so we're really lucky today, I can do both of these things. To make it even more special, just a few days ago on a bike ride, I found some wild black cherries and they are so good. They're like epitome of cherry flavor that we all know and love. But this is on steroids cherries. It's going to be a lot fun using these. I'm going to come over here because the light at the window is telling me how everything's going to relate onset and the directionality is really important. If I was in front of it, it wouldn't really help me. I'm going to just start by getting some of these vessels filled. Today, I decided, I'm going to do a neutral tonal story, so you'll see that most of the props and plates and the dishes are a similar monochromatic feeling. That helps the diversity of the ingredients really become center-stage present. Another thing about these props is that, I always love to include an element that's handmade and an element that is vintage. Today, I'm going to tell a story of making a tart because I have all these beautiful at the moment fresh ingredients, and I thought the best way to showcase them would be to make a tart. We're not going to see the tart, but we're going to see the process of what it looks like to endeavor, making the tart and try to tell a story that way. I've got my flour, sugar, eggs that tells a bit of a baking story. Then these guys, we've got the pie server, dessert forks, and the vessel that it will ultimately be baked in. I always use my phone to set my shot up and to see what kind of framing I want to use. I chose this dish because I love the reflectivity as a metal object. It's really giving me a nice dimensionality, and my thought had been that I'm going to do the cherries there. I'm going to continue setting the shot up, but let's get in on what this looks like. Because these berries are so fresh, I'm including some of the leaves from the plant, and that's a really special detail that if you bought it at a store, would really be unlikely to be present. I think that that furthers the story I want to tell that is, these are so fresh, literally I went out and picked them. This gives you some of that flavor. The currants are my favorite because they really just glow. There's a little bit of casual mess here, which is, I think so important not to be too precious with your ingredients or anything that you're working on, you want to really feel natural and not too placed, placed, placed. All of those things, paying attention to that kind of detail really keeps it real, and that's the story I like telling. One of the big reasons I really like using the phone is so much these days I'm working directly to post to Instagram. This is really giving me an indication of, what my framing look like. Now, I'll use the phone to do a little more fine tuning, then put it down, work through some of the final adjustments, and then check out how it's evolved with the phone again. Now, that I have that general idea set up, I'm going to get into these cherries. I've made a little bit of a mess now and it's looking gorgeous. It makes me feel like I want to get closer into that mess because that's where the magic is for me. I like that there's a couple of cherries that still have their stems. We actually were diligent about not bringing the stems home, because that's extra work. But the cherries with the stems are really pretty and it helps you remember, especially if you don't know black cherries, that these are actually cherries. We've got that. I'm going to put these over here. Let me just see if there's another with a stem, yeah, we got one more. Three is always a nice number. Good odd number. I really like it feeling harmonious but not necessarily contrived and odd numbers, 3, 5, and 7 especially really do that. We've got the cherries, I'm going to make a little bit of mess with a few of the currants, I love the tangle of the currants. Gesturally, that's making a magic moment. The leaves are nice, they're strewn about. The gooseberries are just an add-on, another cool shape. We've got this repetition of shapes, a difference in contrasting colors. The eggs add to those shapes. But obviously a scale is, they're totally their own thing. Then just peeking in a little peripherally is the baking elements of the sugar and the flour, because really the magic is in these special ingredients. I'm going to crack an egg, see what that looks like as I add to the activity going on in the scene here. Let's see what that looks like. Because these are eggs for my neighbor, they are really golden and bouncy yolks, which makes that feeling of freshness further extended. That is so good. If the food doesn't make you want to eat it, it really isn't doing its job to me because it's food. We could work with any medium if we're just looking to make something pretty, but if we're working with food, let's get some sensuality, some visceral connection to what we're doing in there because you want to conjure drool, you want to affect people. I'm just arbitrarily playing with the shells right now because they're really light-colored. If I'm facing them, cracked open to the light, it makes them blown out. I want to keep that in mind as I'm working with them. I might even make the broken egg more prominent with just a little bit of that shell peeking in to let you know that it is part of the story. Now, do you see how as I rotate the dish, how it keeps wanting to settle into the center of the dish because there's a slight slope going on. If I propped it up with a little wedge, it would be where I want it to be, which is at the side of the dish rather than more central. I'm going to get my little stones that I talked about earlier as a shim and change that, fix it. When I'm thinking about establishing an image, it's always where's the eye traveling and are there places that the eye rests? This feels like an empty space here unused. I actually think I might put the egg shells here, because then I can keep the framing tight and get in all this delicious action but also use this area. Originally I thought, okay, cool, I'm going to have a wider frame because I wanted to tell the story including these other elements. But as I've been in this moment, I'm saying, okay, the real magic is in getting close, and it's still telling a story. We've got the cracked eggs, we've got that beautiful yolk next to it, we've got the pits, we've got the cherries with them, some of that juiciness, and then here we have this seasonal moment, super fresh ingredients, really thoughtfully placed but not fussy, and giving a visual flow as you're looking at the scene. Now, that you've seen this lesson and the ideas presented in it, I want you to really consider what appeals to you? What catalyzes excitement for you? Whether it's your cultural heritage, whether there's ingredients at the farmers market that got you excited, whether there's a dish you've been wanting to try and think about the ingredients present within that. Then play with this notion of those broad brushstrokes and then the refinement and where the play is and see if you can create for yourself something that feels really authentic and delicious. The next lesson we're going to do is going to use the idea of a cheese board.
6. Capturing a Cheese Board: We've just done those raw ingredients creating a still life that tells a story and now a really fun thing I think for everybody is making a cheese board because a cheese board presents this cornucopia of color and shapes, all kinds of delicious elements. I think in styling cheese boards especially these days, more is more. There is a notion that the more over the top, that it is, the more delicious and epic it's going to be. Right now, I've got this incredible array of stuff, both props as well as ingredients. We're going to figure out how to make sense of all this, create a harmony and really have some fun with it also. The idea for this lesson is texture, I really want there to be this celebration of texture without those things competing too much with the food. I want them to complement. I've used a certain similar color palette and we'll see if it succeeds. I'm actually going to be pretty spontaneous with it. I've moved to the side of the table again because we've got this gorgeous afternoon light streaming in and I don't want to disrupt that by putting my body in between the light and the set. We're going to add grapes and it's a really big shape especially grapes in a bunch. I'm just comparing the two bunches that I think are the prettiest. This feels quintessential as far as a bunch of grapes. But either I stole a couple grapes or maybe my husband did but those don't need to be part of the scene. I'm going to use my handy scissors, get that trimmed away so it's visually not there, and I'm going to start with them here. I think that because they have this beautiful glossiness, I want to see if the light's going to pick that up and so I'm just going to put my phone up again, see how the light is relating to them. I like the idea of them cascading off a little bit because even though I've chosen this board I'm not relegated to that. I also put my marble surface underneath the board, so things might end up living off of it too. Full disclosure, I love antipasti platters just as much as I love cheese boards. I think any good cheese board is a marriage of both of those things. I got some gorgeous marinated artichoke hearts, and I'm going to incorporate them and see. Here we are again, remember I talked about earlier that notion of harmony in three, five or seven elements. We've got that three here again. I'm going to add this wonderful fresh goat cheese. What I'm going to do instead of handling it because this is a really soft cheese, and I don't want to marred, I'm just going to give it a little bit of a cushion and landing as I empty it into the bowl. Then I'll start to very delicately move the elements around. The silicone spatula is excellent for this kind of thing. I'm going to be able to help move these pieces apart, give them a little more room. I don't think I need every single piece here because it ends up filling the space too much, so I'm going to remove one. We've got four here, so it's not that three trio notion, but it's pretty. Let's look through how this is going. What's nice about having this set of fresh cheese further away from the light is that it's so white, it's so light, it could easily be blown out if it were placed closer. I'm going to place more of the elements that are darker colored closer to the light, and that'll really help give them the light that they need. Like for instance, the figs are really dark and they actually would benefit from being closer to the light. Let's do a few of these beauties. This fig has a couple mars in it, and I realized that that isn't going to be as beautiful to show on the board. I'll either turn that side down or tear to it so that, that's less visible. Then we got these really cool olives. While they're beautiful, a lot of them are also dark. I want to think about, oh totally is pairing them with a dark plate then going to be perfect, because they are dark, the plate is dark and there's not going to be too much of a contrast to think about. Sometimes if you use a really light dish and dark elements in it, that can blow out the dish. Cornichon, this one has part of its stem still. But we don't need all of that, and it just is extra material that I don't think is as attractive. I'm just going to put a few of them out. This cheese is a gorgeous ash ripened pyramid. Because I really want to feel a visceral connection to it, I'm just cutting into it and not being particularly precious with it. I'm going to use the contrast of the outside versus the inside as an aspect of playing with shapes, playing with color, and see how that works. The elements are really starting to come together. Because each of these little containers is this isolated space, I will end up feeling in a variety of the open spaces with the crackers, with the crostini and other elements like that. I feel like this is a really nice moment to add the dried apricots that I got. My local grocery is a really nice one, and during certain seasons they have fresh nuts in the shell, so whenever they're available, get a bunch of them because they really keep for a long time in their shells. I use them as still lives at the cottage just in our daily living. Then on certain styling occasions, I realized that it's nice to be able to use them to break into as part of the scene. Here is a certain like, oh, we're activating everything isn't just in its full shape. Here's a little bit of that process of people getting in on that cheese board and making it a little more real. Trout roe is one of those ingredients that like the currents from our still life lesson, really has a special glow. Of course that means that it adds this extra allure to a set that you're building. I'm going to move a few things around here. I want the trout roe to get more light. If there's an object that has an equal or it's taller height that's in front of it, which this cheese on its plate was, then that means that this doesn't get kissed by the light that is my guiding force. I'm going to relocate. These are a really strong form, and if I keep them totally center, that may end up dominating. I'm going to put some smaller things. Now see here, this is great because there isn't anything particularly high on this side of the dish of cornichon which means that the light has a clear passage to them, which gives their edges and their surfaces more opportunity to reflect light. That reflecting light is what gives food a lot of its beautiful edibility. It's like the painting aspect and not just food on a plate because it's lunch or something. Now I need to figure out what's going to go here. It becomes a game of musical chairs in a way. I feel like now I'm starting to really develop the overall story and I just have very clear areas that are to be filled in now with the other elements. I brought this stack of crackers out because there are these cool repetitions of shapes. I'm going to stack them so that they're on their edge so that you can really experience those shapes. Now I think I'm going to add the crostini here. Because again, the shapes is going to be just super varied, but also a repetition that is a pleasing moment. Because they're light surface, I'm going to face the light parts away from the light coming in through the window and the bronzed toasted areas, they can be closer to the window and that will illuminate those aspects of the crostini. Maybe I'll include this other breadboard as a side addition. Because it's a lighter surface than the large breadboard, I feel like it could be helpful to illuminate the trout roe even more. I haven't set my mind on it, but if I have it here, I might as well test that theory and see if it works. To me, I like including all of these little elements in my decision-making. The board gives me a little more height for this little plate, which gives it a little bit of overlap here, which I also like. We're getting very close and I'm going to go into that fig, this is a beautiful one, so good. I want it to feel like it's been really ripped in two because then it's extra visceral rather than a sliced moment. I'm just evening out the edges so it doesn't feel torn, like ragged. I want it to just be a beautiful feeling. I'm just tapping and pressing back some of that flesh. Then I want to face one of the pieces to the light so that you really get a sense of that juiciness. Now I'm going to do the focaccia down here and a few more other crackers right here. The focaccia is much too large as is, you don't want them to dwarf the other elements. I'm trying to think about that and cut them a medium size, and I'm going to stagger them once they're on set. Again, the light surfaces versus the caramelized surfaces. I'm going to add a little more pepper and offset the uniformity of those pieces of cheese. I think making that cheese into wedges would be one more way to give life to the overall experience of the board. I'm going to cut into that. That's a little better, I think it's more interesting. This is also something that I think anyone who does food styling experiences and that's like the Pac-Man effect. Now, because it's been gone into, it inevitably is Mr. Pac-Man. What I'm going to do to change that is cut it so that it's two different shapes which makes an even more interesting, hopefully effect and also doesn't read as that. Sometimes I'll add a little more brine to cornichon when I'm finished with my scene, definitely makes me want to eat it. I'm going to make a little story to showcase how beautiful it is in video, as well as with a still image. Now that I've assembled this epic cheese board, it's your turn. It'll be cool to see now that you've been inspired hopefully by these ingredients and the combination of elements together to see the kinds of things that you want to create. Having arranged all of these elements will be a way to form something that's so delicious. You're going to just make everybody else super-excited. Next up is going to be a prepared dish.
7. Capturing a Prepared Dish: Now we're at the culmination of the lessons. We are going to plate a cooked dish. The idea I had was super moody to start with, and the weather is taken a turn for a moody direction, so it's going to help in making a super contrasty image onset. Let's get at it. My thinking with this setup is that I have this beautifully tattered cloth that I wanted to incorporate, but I also wanted to not have the threads be distracting. I just want to reconnect with using the iPhone, seeing what my framing looks like, getting that establishing shot again. I am figuring out how I want to place the bowl, I'm just going to look on this side and see. Does that produce a little more moodiness? I actually like the side more. So test it out. I have a lot of props that are navy or blue in color because since it's the only hue that doesn't easily or often get replicated in foods, it's a beautiful way offset any food choice. Now I'm just going to get in and loose prepare what the dish is going to look like and then go to my refinement stages once I'm in it. I made a really simple salad, basically of zucchini ribbons. The contrast between the flesh and the skin is going to produce this gorgeous graphic quality. I'm just nestling in different loose bunches, and if people are going to see the elements, I don't want this negative empty space to be very prominent. I want to use that space to actually fill it with beautiful gesture and deliciousness of the food. Now if I had strong daylight, sunlight, I would be looking at how it relates to each surface of the scallops. But because I don't have that, I'm going to go free form. These are beautiful crust on top, beautiful rosy sides. Here we are. I have a series extra that I can add, but I also want to keep it to an odd number because I think retaining that preserves a harmony. Let's see, we've got 2, 4, 6, and I'm going to add this last one here. That's cool. I'm going to take one shot there, I'm going to use the plate, then I set aside for this additional element to be the run-off of where gorgeously fresh corn was sheared off of its cob. That'll help tell a little bit of a story that this is just done really fresh. When I cut the corn off the cob, I try to keep the kernels intact so that if there were any rows. I'm being really specific about placing those. But I also, I want to not be too fussy about putting them on the plate, some I'm going to do that gingerly, and then I'm just going to add a little bit more for that feeling spontaneity so that it doesn't look too placed. I've added enough, I'm going to transfer anymore here, and then make that a little messy as if I just grabbed a bunch, strewn it onto the bowl, and getting ready to eat. Last flourishes are, I got flake salt, which texturally is always such a beautiful thing to finish any food with, and visually, the texture is gorgeous too, pepper, olive oil, and then some fresh herb elements, there's lemon zest and then purple shiso from my garden. It's super graphic contrast in color, and totally delicious. it should be a win-win-win. I'm just going to place a few really choice leaves around, these are especially gestural and to see what that looks like. Here is where I tried to get a little more specific, see where the herb can really capture the light so that its shape becomes more relevant, its color becomes more dynamic. I'm just going to play for a minute and see, does this work? Let's see what the larger leaves present and if it's any different. I'm going to just be really spontaneous with those and see how the cards fall. Some of them really look nice and others are like, let's take something away. That's nice how it ultimately is capturing a little more of a light. There's some lemon zest that I want to add gesturally to keep it authentic, I always try to think about what would go with this dish? But what also adds another, either color or shape to be a beautiful moment. They see how this is a very straight line, for me, it doesn't add value, and in fact, takes away from the lyrical, graceful curves that the rest of the lemon zest has, I'm just going to take that away. One last thing, I'm going to do, a little bit of oil to make it juicy salt and pepper, and then it's ready. Cracked pepper, I think adds more texture immediately, going to drizzle, cool, little scatter of salt. The salt and the dark areas is always nice because since it's light, it'll get blown out if it's in the brightest points, so just a tiny touch in those areas, and otherwise go liberally, see if that info all look at that. All of a sudden I've rotated it, and the oil that's on the surface of the scallops really picks up because of the way that the light and the direction of those scallops is. Now I can be a little more casual about it because I feel like I captured something that was nice. I'm just going to play, and there are even times when I'll start eating the dish and be like, cool, I got that first shot. Then I will photograph it at varying stages of having been eaten, and sometimes that's actually the most terrific version. It's fun to realize that you have an idea about a thing, and then you can be surprised over and over again. Now that you've seen this lesson, I want you to go and play at your own set. Whether it's a technique that you've aced and you want to try out onset or set of ingredients that you're like, okay, this is my next meal and I'm going to try this out. The more you play the more that you're going to make it beautiful, and it's like it's all part of the process. One of the beauties of seeing food shot from overhead is that that's really the perspective of the eater. You're at the table, you're about to dig in, and that's totally what I'm going to do. I'm going to finish enjoying this, and then we're going to go to the next lesson which is editing the photos.
8. Editing to Share: Now that we've taken each lesson, I want to show you what my editing process is. On the phone, I have a variety of photos and I'm going to work with the cheese board setup. I really loved that scene, all those beautiful colorful elements. Essentially, I go through and I see what are the things that are flags for me. There is extra frame without ingredients. I'm looking at this shot right now and I realize, that's not my favorite. Then I go even further. I realized, oh yeah, once I made that final cut of that small [inaudible] of cheese, that's where I wanted to land. Those are really what my favorite favorites are. Here we are at that scene now. I'm going to go back and forth, toggle back and forth to see if there any other versions that I really liked that I want to consider. I realized I love this one. It encapsulates all of the elements. I'm just going to go back a few and see. This is a little further back. This might be my candidate because it really brings you into the frame to see every ingredient, every element beautifully. Let's take this to Instagram. I always work with my favorites because that has narrowed down the selects. It makes it so that it's not too many images to review. Now going back and forth to see those micro adjustments that as making towards the end, which are my two favorites. This feels a little tight. It doesn't give me the whole scene but I love this one. Let's see, this one versus the other. Actually, I like this because I love seeing the edge of the board. It gives you context place. Let's go here. I'm going to adjust it just a little bit to give a little more of those beautiful artichokes at the bottom of the frame and then we go into editing. I love this tool at the top immediately see what that does. It's the last filter. In this instance, it's a little strong. I'm going to back that off a little bit. I want to have a luster in those grapes and those apricots at the top of the frame. I'm going to move on from there and go into the edit mode. Contrast is always fun to play with. It really produces dimensional feeling, gorgeous images. I'm going to go there because that's low but medium range. I might come back and adjust brightness but because some of those cheeses are already white or verging towards the high-end of the visual spectrum, I'm going to let that be for now. Because we're looking at images on our phones so much, I'm going to use the structure edit tool, because structure helps that food literally pop out of the frame. I've adjusted with structure. I know that when I shoot photos in my center, it often runs verges towards cool. I'm going to change that setting and warm the image up a little bit. I don't usually type saturation because the food is already doing beautiful with its hues. I'm going to leave that be but as I said before, I shoot in the warmer months dealing with that green light cast. To offset that in my shadows, I go to pink and I do a variation on a little bit of pink tones, really bringing it just a tiny bit into what is visible. Often, I'll touch my screen to see how different it looks so that I can understand what it looks like without that setting applied. Then lastly, I'll do a tiny bit of sharpening just to see if that produces somehow even extra bit of clarity that would benefit in the image. Again, I'll touch that screen to see what the difference is one way versus the other. I now go back to that brightness tool. Brightness is one of those things that I've learned does well for people. There's a friendliness in a bright image. Before posting, I like to click on the image so that I can see it at its largest true scale. I'm realizing when I see it larger, it feels still a little cool to me. I'm just going to go back into the edit mode again and see pushing that warmth toggle, what that does. When do I go too far? On a rare occasion, I'll go into the pre-set filters and look at what those do, how they're affecting the picture that I've just shot that I want to share, and then say, cool, is this more interesting adding one of these. Let's just play with that here. You saw how much I back that off from the full set of the filter to 10 percent opacity on that filter. Then I can say, okay, here's what normal would look like and here's the filter applied. I actually really like that. This filter makes the apricots and the trout roe and all of those warm elements glow a little bit more. Therefore, it's more effective at showing you how beautiful, visceral, delicious and seductive that it is. Then that's it. I'm going to now choose a caption. An excellent caption to me, always convey something that tells you what it is, describes something wonderful and perhaps as clever or humorous or shares a little background of what I've been working on. One of the things I do when I think about my caption is how do I tell the story even a little further? Because maybe sometimes people don't know what those ingredients are, even though I'm really excited about them, they're not familiar. I love to lay that out a little bit more. I also like to give a little piece of humor or something that's evocative of what's my day been like. Or whether that just come from that contextualizes what I'm sharing to day. After I share my caption, is there anything about hashtags? I don't know what the relevance of hashtags as far as more and more people seeing them, but I don't think there's anything wrong with continuing to include them. I love things like epiccheeseboards or cheeseboardsofinstagram, because for your own purposes you can go back and see what other people have created and the kinds of things that are out there in the worldwide community. That in itself is a lot of fun. Now that I've made this image, I feel really good about it and I'm going to post to Instagram. Now it's your turn. Make your selects, go ahead and do your edit. Make your posts. I can't wait to see what you make.
9. Final Thoughts: We've made it this far. Now you have all of the information you need to make gorgeous photos. Whether or not you feel like you're making beautiful images, keep making. You're going to get there. Have patience with yourself. The entire process is a learning process. Trial and error is the name of the game. Fake it till you make it is also the name of the game. Truly, you'll find your own style in all of that practice and play. I reinvent myself continuously and it just depends, what's my recipe, what's my story of the moment, and who do I want to connect with. Now that you follow the whole class, I want to see you produce an image, share it with the project gallery, share it on Instagram, tag me on Skillshare. I can't wait to see your beautiful work. Thank you so much for coming to my class. It has been a lot of fun sharing with you the things I've learned over all these years. I can't wait to see what you do with it. Make beautiful images all on your own. Cheers.
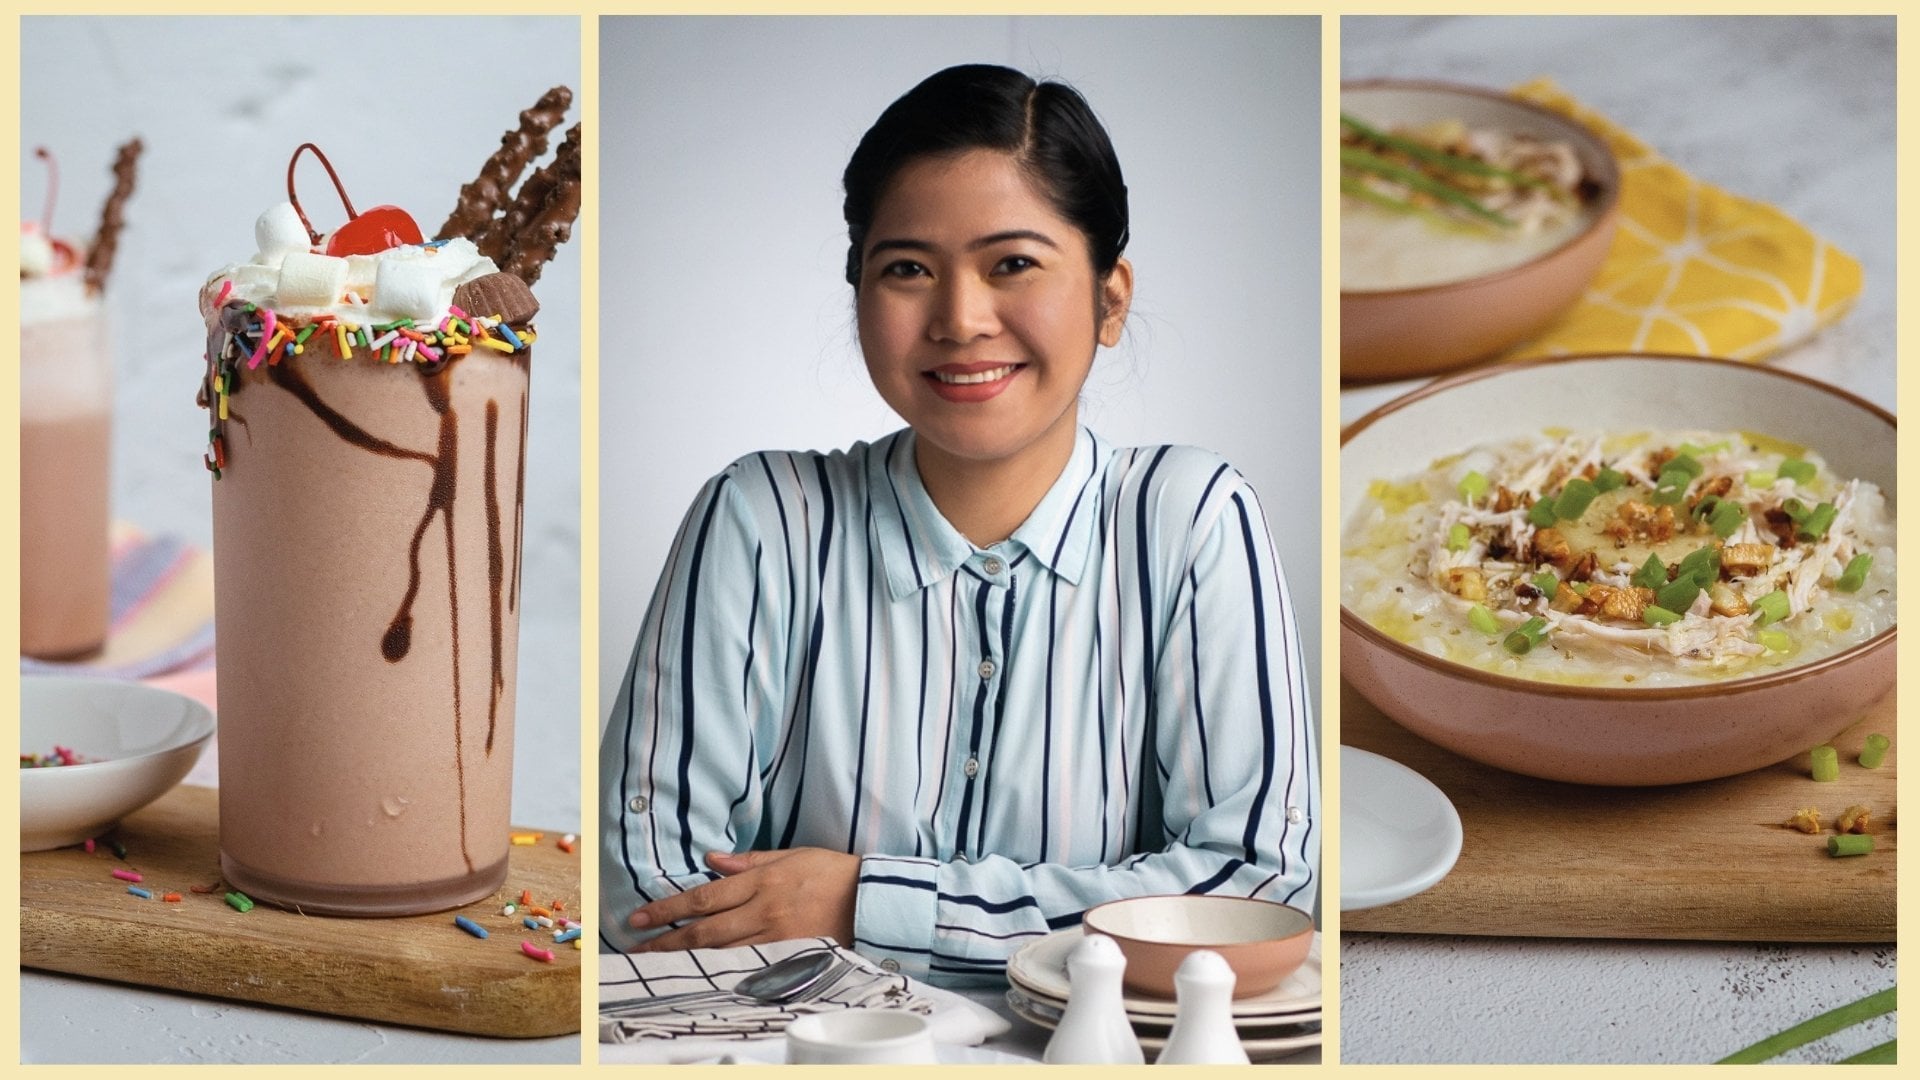
 Melina Hammer, Food Photographer and Stylist, Author