Transcripts
1. Introduction: Hey, everyone, Mark Price here with desktops dot com, and this is Iowa's nine from beginner to paid professional, I'm gonna teach you everything you need to know about IOS development in order to get a job as a full time programmer, making up to $70,000 a year right out of the gate, or to build professional apt to the Apple App store. I've built 57 mobile app sedate, and I also teach in the coding boot camp, and I know what it takes to learn. And I've had lots of students coming up to me saying, I've been taking online courses, but I can't get what I need. I can't retain the knowledge. Here's $10,000. Help me out. And so I started thinking, What if I could take that immersive boot camp experience and bring it online students, but for a fraction of the cost? And I've done it and there's a formula for success, and let me tell you how I'm gonna make you a professional IOS developer in a matter of weeks. First, you're going to learn all the core programming principles such as functions, loops, arrays, everything you need to be successful in any programming language. You're also gonna build more than 15 APS, and these aren't just crashing toy APS. Professional appetite can put on your portfolio or submit to the APP store. We're also giving you over 40 hours of content. No other Iowa sports on you. Timmy offers anything even close to that. Our classes are also super fun on their on video. It's like a real immersive classroom. We're gonna go through the problems together. It's not scripted, so we're gonna learn how to really learn. And so when I'm gone, even know how to solve problems on your own. Lastly and most importantly way, offer a free online chat room and free forum where you can go get help instantly, I'm gonna be there. My teacher's aides are gonna be there, and the community is gonna be there a super powerful tool to go to you need help instead. So if you want to make money building APs, whether that's creating your own EPS for building APS professional, Yes, developer thin. This course is for you. I'm not just some guy sitting in his basement making videos. I'm a professional developer. I'm also a professional teacher and I teach in a coding boot camp every single day and help people go from knowing nothing to getting jobs. Iowa's programmers. So check out the free previews, Click the Enroll button and I will see you in class.
2. How to get FREE live help: Hey, what's up, everyone? Mark Price for depth, Celts dot com And in this video, we're gonna talk about free online chat room that you could join to get help instantly. And the reason why I don't want you to miss this is because getting help is so important when you're trying to learn, especially when you're trying to learn programming, because it could be very depressing and you can get distraught very easily. And so I've provided an online community. There's already tons of people here were helping each other all the time. I'm there. There's moderators there. There's people who are coated for years there, and we're out there helping each other. Students are helping each other. You need to join this chat room if you really want to get the most out of your education in this program. And so it's using the discord platform. It's actually a gaming platform, but works fantastically for our community, and I keep all the spammers and all the junk out of there, so it's really a pure learning environment. And to get to this chat room, all you gotta dio is open up a browser and go to def slopes dot com and click on Chat Room , which will give you an invite to our community and chat room here. And so what I recommend that you dio is as you run into problems at work on them for about an hour. And if you're banging your head after an hour and you absolutely cannot solve a problem, come on to the chat room, get some help or just be there in general and help participate because as you teach, you also learn and grow yourself. So there's the chat room and let me just show you kind of how it works. So if I was toe post a problem, here's some code right here. I could just copy this Code command, see? And if I want to post it here in the chat room, we can use mark down. So tick, tick, tick the top left key under the escape key on your keyboard and type in the name of the language in our case, swift on the hold down shift and press enter, enter again and do three more ticks, and inside of it, I'm gonna do command V to paste the code, all right. And then I'm just gonna press enter. And as you can see, the code is there. Let me just tell the students that that's a test because this Israel time recording. So that's how you can paced code. It's also some other simple things you can do for, like, bolding words. So you can do double asterisk here to say this is bold or you can do a single. This is I tallix. Okay, So really cool stuff. Huge community there to help you. It's really important that you joining you learn on their I've been doing this for a long time. Come get help from me. I'm a professional programmer. I'm here to help you. So anyway, does the heads up joined the chat room? Get some skills and I will see you there hopefully.
3. Why take this course?: Hey, Mark Price, hear with deaf slopes dot com And I just wanted to take a moment and have a one on one conversation with you. Pretend that I'm your teacher and you're the student or I'm your mentor and your the mentee . Maybe you're deciding whether you should purchase the course or not. And if so, I want to help alleviate any concerns or fears you might have. This is a conversation I might have in real life when someone's coming to the boot camps that I'm teaching at. Okay? And so I want to give you every bit of confidence you need to take this course. And so why take this course? Well, I saw that there was a lot of students that were coming to me in real life boot camps, saying I went toe online courses, but I didn't really retain everything. It was a good start and help, but I couldn't get it in my head. And I feel like a nowhere closer than where I started to getting a job, and I started seeing this over and over again. And so I had an idea. What if I could bring the $10,000 boot camp experience to an online course. And I've chosen you to me for that platform, and I think we can do it. Okay. And so what we're gonna do is we're gonna treat this like a boot camp. Except you're not gonna pay the $10,000. You're only gonna pay the few $100 of the course costs. Okay? And what it's gonna dio is it's gonna take it from knowing absolutely nothing. Okay. All the way to being able to work as a junior developer or being able to release your own APS to the APP store. Okay. And so why is this course different? Well, that's because I'm treating you like a student. Like I care about you. Because I do. I want you to be successful. And if you're here taking this course, it's probably because you haven't found what you are looking for. Okay, if you're looking for a reference where you could just hit line, item by line, item X, Y and Z figure out syntax for something, you know, you're probably not gonna find that here. That's probably a better thing for a stack overflow dot com or developer dot apple dot com Looking at documentation. This is not about reference. This is about changing the way you think as a programmer. So you can work professionally or so you can release professional applications and everything we do here guide you down that path. We're not gonna build trashy toy APS. Okay. Everything we do is going to be high quality, and it's gonna help build your portfolio and help you become a professional app developer. Which, by the way, some app developers are making up to $150,000 a year. So when I know recently applied for a job as a junior, Iowa's developer making $100,000 a year, and he's only been doing this for six months. Imagine going from making whatever you're making right now up to making $100,000 within six months. It's very possible. And so I have all of these things in mind as I'm teaching you, okay? And so a few of the core points will makes our course different from others is one. We have a fantastic online community, live chat rooms and forms. You could get help at any time because getting help while you're learning the code is so critical. Secondly, we don't read from scripts. As you can see, I'm not reading from a script right here and right now, okay? I'm just teaching you what I know to be true and what's effective. Okay? And also, we plan everything out from beginning to end very carefully, but we still don't read from a script. And why, that's because I want you to be able to go through the actual development and coding process. I want you to go through the mistakes you're gonna find that we build a few apples have crashes in them throughout the course. We're gonna fix them together. We're gonna do all the things that you're gonna do is professional developer so that when you finish this course and you want to build something new, you're not like, oh, crowd. They didn't teach that in the lectures. What do I do? Know you're gonna know how to do it because you've learned the underlying principles and concepts and no other course and no other IOS course on you, to me or anywhere else does that. They teach your X, y and Z, you'll learn it. And then you go on to the next thing. It's very scripted and you don't know how to solve problems, how to use the tool to solve the problems. So that's one thing that separates us from all the other courses, is our focus on helping you become a better programmer and IOS developer. And we do that through a few means. One is warm ups at the beginning of each section way have a warm up, helps train your brain to think like a programmer. You thinking like a programmer is different than you've ever thought before. You've got a train. How toe think algorithms, How to solve problems. So we're gonna do that every single section and most importantly, after each app that we build and after some other concepts is well, too. We have exercises, and basically what an exercise is is way. Give you a list of to do's to build your own app, and basically they're very similar to the app we just built together in the videos. The difference is you have to use your own brain power to try and solve some of these problems. Some of the exercises have solutions, and some of them don't So you're gonna have to figure out going to the community, figure out how to solve these problems. But basically the things we just thought we build a slightly different app. Not the exact same at, because that's just copying. And it won't help you retain. We build a different app with same principles, so you can immediately retain the things that you learn. Okay? And so I want to give you my personal commitment that I'm gonna help you. Okay. If you need any help, reach out on the chat room on the online forms. I'm gonna be there, reach out of the discussions here. And you to me. Let's make this an online immersive course. So you're not paying the $10,000 boot camp fee, But you're getting the boot camp experience, and I hope this is exciting for you. I want you to take this class. I want you to be successful, and this is Mark Price with death slopes dot com, and I'm going to see you in class. Hopefully
4. How to Run Mac on a PC: everyone. What's up, Mark? Pricier Deb soaps dot com. And this is a short video on how to run Mac on a PC. Maybe you don't have a Mac computer, and all you have is a PC, and you want to try and get Mac running on it. So what you should dio is open up a browser and just type and run Mac on PC. And the video that you actually want is right here how to install Mac OS X. Uh, this one right here. Okay, So here's the guy. This is the best video I found. Goes through the whole process in depth. I'm not gonna do it for you because this guy just knows his stuff and can help you out. Now, with that being said, I have a very powerful PC in addition to my Mac and actually tried to follow these steps. And it didn't work because it does not work on all PCs and minds about five years old. So you gotta have a newer one. If you want this to work is in my recommendation to you is that you get it working before you attempt Teoh, take this class or buy it, uh, because I wouldn't want you to. I wouldn't want to tell you that it's absolutely gonna work because it doesn't work on all computers. With that being said, if you want to be a professional developer, if you really want to get in this industry And if you really want Teoh being iPhone developer either as, ah full time program or making your own APS, you've got to get a Mac. Now, if you're a programmer in general, you've got to get out of the ideas of being biased towards one platform another. Oh, I hate Mac. I hate Apple. I hate Steve Jobs or whatever. Or, you know, or on the flip side, I hate PC. I hate Lennox. Whatever. I hate android you got. You got to stop. You got to be technology agnostic, and you've got to start loving them all. True developers and good developers know how to use multiple platforms, so I recommend that you get a Mac, and there's a few different ways that you can do it for a fairly cheap price. First off, you can go to Google and type in Apple refurbished. Okay, A refurbished computer is basically a computer that had some problem, and they took out the problematic part. Put a brand new one. And so it's almost like it was really, like a brand new computer. But they legally can't call it a brand new computer. It's refurbished. So just think of getting a new computer. And what I would recommend is this one right here, the refurbished Mac book air. Okay, um, and so if you go down to the left hand side over here, just click Mac book air 13. We'll see all the ones that they have available. And here's some refurbished ones they have available. You get really good computers for, um, for a lower price. And you're like, $1000. That's that's sort you. That's too expensive. Well, um, you gotta you gotta invest in yourself. Okay. Uh, I don't want to sound rude or mean. What? You gotta invest in yourself If you're really serious about about doing this in real life in person, people who take my boot camps, we make everyone get Max because there is so prevalent, especially in the world. Open source technologies, not talking about apple. But in general, if you want to use open source technologies. They're really starting to cater towards Max. Okay, Another option is ah, best buy open box. Okay. And what I like to do is this Click right here and look at all the open box stuff. And so click computers and tablets and ah, that's cool. But we don't want PCs. We want Max. So let's go and find the max. Liken. Uh, well, let's click laptops. Okay. And then here we go. Here's the brand. You click apple, okay? And they have some refurbished computers here as well to you confined him. I actually got a really nice Mac book air for, like, $680 a 13 inch one. It was on Ultra cell, by the way. At best Buy. If you really nice, you can talk to the store manager and say, Hey, I'm trying to learn something new. I don't have a whole lot of money. This is open box can give me discount. I've done that before, and they'll actually give you, like, another 50 or even $100 off. So best buy is a great place to go and get a used Mac book. Um, I would get a Mac book air. Very powerful. Runs everything you need to do. So again, if you're really serious about making iPhone APS. Okay, get a Mac. Uh, you can try and install on a PC. I just can't guarantee it's gonna work. It didn't work for me. It does work for lots of people, though. So anyway, there's some free advice Street. Here's the euro. This guy's great, and I hope you can get this up and running and take this course investing yourself and let's let's get to work.
5. DO NOT SKIP THIS VIDEO: Hey, what's up, everyone? Mark Price for depth, Celts dot com And in this video, we're gonna talk about free online chat room that you could join to get help instantly. And the reason why I don't want you to miss this is because getting help is so important when you're trying to learn, especially when you're trying to learn programming, because it could be very depressing and you can get distraught very easily. And so I've provided an online community. There's already tons of people here were helping each other all the time. I'm there. There's moderators there. There's people who are coated for years there, and we're out there helping each other. Students are helping each other. You need to join this chat room if you really want to get the most out of your education in this program. And so it's using the discord platform. It's actually a gaming platform, but works fantastically for our community, and I keep all the spammers and all the junk out of there, so it's really a pure learning environment. And to get to this chat room, all you gotta dio is open up a browser and go to def slopes dot com and click on Chat Room , which will give you an invite to our community and chat room here. And so what I recommend that you dio is as you run into problems at work on them for about an hour. And if you're banging your head after an hour and you absolutely cannot solve a problem, come on to the chat room, get some help or just be there in general and help participate because as you teach, you also learn and grow yourself. So there's the chat room and let me just show you kind of how it works. So if I was toe post a problem, here's some code right here. I could just copy this Code command, see? And if I want to post it here in the chat room, we can use mark down. So tick, tick, tick the top left key under the escape key on your keyboard and type in the name of the language in our case, swift on the hold down shift and press enter, enter again and do three more ticks, and inside of it, I'm gonna do command V to paste the code, all right. And then I'm just gonna press enter. And as you can see, the code is there. Let me just tell the students that that's a test because this Israel time recording. So that's how you can paced code. It's also some other simple things you can do for, like, bolding words. So you can do double asterisk here to say this is bold or you can do a single. This is I tallix. Okay, So really cool stuff. Huge community there to help you. It's really important that you joining you learn on their I've been doing this for a long time. Come get help from me. I'm a professional programmer. I'm here to help you. So anyway, does the heads up joined the chat room? Get some skills and I will see you there hopefully.
6. Apple Developer Account & Xcode Installation: Hey, everyone, Mark Price here at depth slopes dot com. And it is an exciting day. You get to sign up as an Apple developer, first step into a larger world, so let's go ahead and go to developer dot apple dot com. Pullup Any browser and developer dot apple dot com is the website for all the resource is that you're gonna need videos, documentation, tools, etcetera. It's there, so click a member center at the top right hand side, and what we're gonna do is create a new apple I d. So click that button there and it's gonna ask before some basic information. Much of your first name, your last name, Your apple. I d, um, which, uh, is going to stick with your iTunes account. And, uh, but in your password confirm password All the basic stuff. I just want to make sure we walk through this so you see exactly what I'm doing putting your security questions. And if you're wondering if these are really questions and answers have to do with me, they are not. So you cannot hack my apple account. Is there like a huh? We'll see about that. Well, it's okay it's all fake. So let's move through here. Security questions. It's pretty cool. The actual used to cost money, even just to become an apple developer. So they've really opened up and allowed people Teoh embrace the platform. Birthday getting closer. We go put in your mailing address and just get basic information here. You're like I thought, these videos, we're gonna be exciting. Well, I don't know how much more exciting I can make filling Ah, form for me. But if I didn't do this video, sure enough, someone to be like I can't get it to work What is going on? And so here it is. If you have any problems, you can watch this video, and it's all here recorded. Put in the security code here that it's on the image and create apple i D. Which is going to send you an email to your email address. And sure enough, we got it. If you didn't get it, checked your spam folder. It could have gone there. Use click the Verify now, but in there and go ahead and put in your user name and password that you just created for your account. Email address verified whoa! Success. I think we have just become an apple developer. Let's log in. Very good. Sign in. You gotta agree. You can read the whole thing or you can speed read it or not. Read it all. Really? Don't care and submit. And now we are in all access pass. So SD case is what we want because that is what has all the tools that we're gonna need that we're gonna be able to download. Very pretty website. This used to be really ugly, by the way. They've really opened up again to developers making it a great experience. Click X coat, ugly click X code. And it talks about a few of the basic principles of extra. You definitely want to read this really cool stuff. Gets familiar with everything that you can on the website on anything that has to do with with apple or Iowa's development. Read everything that you can. The more you read, the smarter you're gonna get. The more you're gonna learn, click download. And right now it's the beta. Okay, X code seven, beta four. It could be beta five in the future. If the export seven is live, you're gonna download actually from the APP store. So you may have different beta versions here, depending on when you're watching this version, or you may have downloaded it from the APP store. Hopefully we've updated our code inside our program to work with whatever beta aversion you might have. They should all be very similar. And to download it, you can just click that download ex coach seven data and it's gonna download and install. And that is it. All you gotta do is download it. Now we'll talk about installing it in the next video.
7. Increase & decrease Xcode font size dynamically: yourself, everyone. Mark Pricier. Deb soaps dot com Today you're gonna get an insight into the tips and tricks I used in increasing font size and decreasing it on the fly. Now, maybe somebody you've been wondering Is it magic? How does he do it? Because I can't do it. Well, let me show you. I'm making it sound more exciting than it actually is. It's actually plug in an X code does not provided by default. If you noticed on X code. Well, let's just pull it open here on X code. You know, I could go to x code preferences, fonts and colors, and then I can actually manually change the size here. What a big pain. But sometimes you want to just be able to quickly, uh, at increase or decrease the size like you can and lots of other I d ease. So what, we're gonna dio we're gonna download this plug in here, get hub dot com slash Zatz slash adjust font size dash X code dash plug in. Now, if that's a lot, you can just go to Google and type in Ah x code increased font size and this top stack overflow right here. Okay, click that and then scroll down. And you see this one right here? This 13 13 up votes may be different when you look at it, it's 14 now. Ha, ha. Go ahead and click that link and I will take you to the same place. And so what you're gonna dio is you're gonna download the zip. Okay? Click the file itself. The zip file. Go into the folder and this project right here. You're gonna right. Click it and open with either X code Beta. If if you are working in the beta X code you've got you've got open it with beta. Okay? If you want install on your regular X code, you have to do the same thing is what as well there to you've got to open it with the X code that you wanted to work on. In our case, we're using X code beta for Apple TV because it hasn't been released. Step if it has been released. Used the live 7.1 version, which you will have downloaded from the APP store so open with X code beta app. Okay. And you pull it up right here and all you dio is you run it, That's it. You run it. And once it says running, uh, let's just do it now running X codebuild succeeded. That's it. Done. Deal. Okay. Nothing else you need to do. You can click out of it. Stop the task. That's fine. And then if you pull open your project, you compress command. And the plus sign gets bigger command in the minus sign and get smaller. Ah, Anyway, that's another tip from marks. Cool X code tips, something that doesn't really exist. But you know what? I dio so cool. Deal. Have fun, happy drinking and growing.
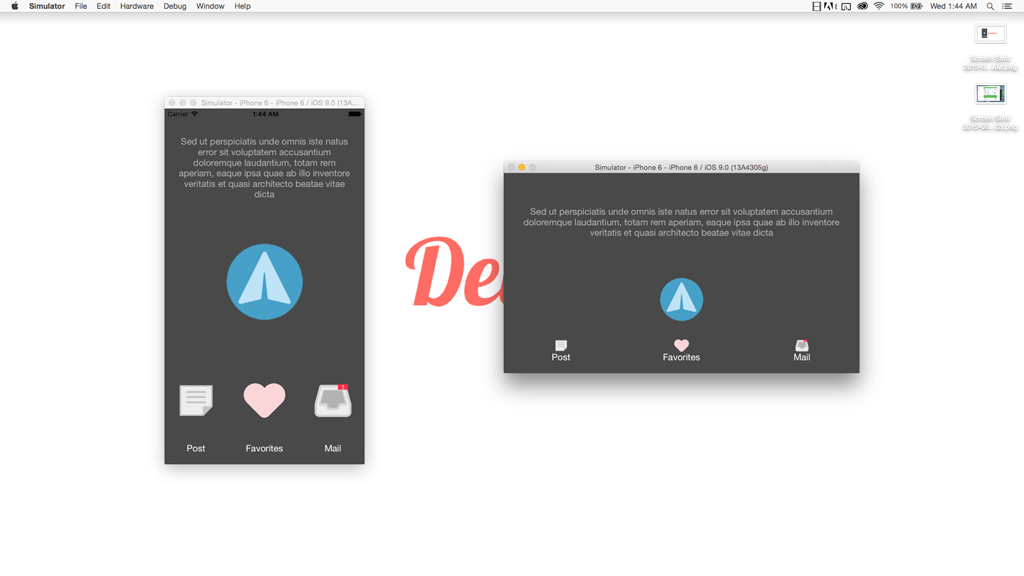
8. Intro to iOS 9 App: Hello, everyone. Mark Price with Deb slopes dot com I'm gonna given intro to the app that we are going to build in fact, our very first app Super cool. In fact, that's the name of the APP. I'm gonna pull open the X code simulator here. And as you can see, it is a white screen with some blue text, and that just happens to be a button. And when you click the button which says make me super cool because right now it is super boring. Boom, ap, We got a background. We've got an image there. So what we're gonna cover is a few principles. How to get X code up on going. We're gonna talk about I'd be outlets. We're gonna talk about I reactions. Ah, you image view. And ah, do you image views, actually, and the u A button and ah, it may seem simple, but there's some things you're gonna learn, so it's gonna be very fun, exciting. And this is the beginning of a journey into the world of app development. It only gets more adventurous, more fun and were complex from here. But this is the starting point. I'm excited to have you here in the class. Let's go ahead and have some fun and build an app. Everybody, we're going to talk a little bit about this upcoming app were about to build as well as some tools that can help us spill it before we build it. That makes any sense. So we're gonna talk about wire framing, so really cool website. Um, I can get you up and running real fast is https colon slash slash wire frame dot cc. Okay. And, uh, I'm gonna go ahead and just click start drawing button over here, and they have a few different options, so you can pick a, you know, tablet, this one is a mobile. This one is a mobile landscape. And so our app is just going to be mobile. So I'm just gonna click it and like that makes me a nice little iPhone. Just what we want and all we're gonna do is get a rough idea of what we're about to make. Now you can build wire frames in many different ways. You can do it through its software tool like this. You can do it on pen and paper. Take pictures of it you can do in Photoshop with a sketch pad, which is what I do. Sometimes the idea is just getting your app visually in front of you so you could know what you're gonna do before you start coating. So our application is called Boom AP. And what it's gonna do, basically, is be very boring at first and have a button on the screen, okay? And then when you press that button, it loads a cool background in a cool logo. Should not be a whole lot we're actually gonna do here on this on the screen. So we want to do is just go ahead and click and drag something. So what we'll do is we'll say, we know we need a title, a big title that's gonna up here. Okay. And, ah, it's gonna be an image that tells us in image, okay? And then we're just gonna click and drag down here, and we know we're gonna need a but in here's some different things rounded box. You know, lots of cool little options here. Um, So they're gonna say this is a button, okay. And ah, you put stroke on it. Things like that. Uh, So here's your button. Very cool. So we know when we click this, but in, um, that it's going to make this appear and Accord is gonna make a background appeared if we really want to, um, make it perfect with their another image. I know we lost our other stuff. Well, we could probably just go over here to arrange elements and we want be sent to back, so it's highlight it sent back. There we go. So we gotta image under here an image here and every cheer representing our app, the logo image, background image on the button that'll make those appear. So it's probably only need for right now you can leave this screen open. If you get the premium version, you could download this. Uh um, do whatever you need with it, but I think this is good enough for now for us to get started on our app and let's go ahead and get coating
9. Learning Resources - Train Your Brain!: however, one I just wanted to take a few minutes and talk about some super important learning resource is as you're going along taking these courses. So as you are becoming a baby junior developer, you're gonna want to eat, sleep and breathe code every moment every time because you have to train your brain to think a certain way. A lot of us haven't in our lives used these types of skills that we're gonna be using a program. It's just problem solving with logic and things like that. So you need to train your brain continually. So, to resource is, I want to recommend right out of the box. Here is the WWDC videos. Every year, the Apple Worldwide Developer Conference puts on Big Conference, full of presentations on development, in addition to release new products and things like that anyway, So if you are a registered apple developer, which you should be at this point, you can just go to developer, not apple dot com for it slash videos for a slash wwdc for its last 2015. That being the year it'll change as the years go by, they have featured videos here. Fantastic resource is what's new and swift? What's new in X code? Designing for a future harbor. Some of these are very, very advanced. Some of them are very basic. So just do some searching. Figure out which ones seem like a good starting point. But you should be watching. You should become an apple expert. You should start living and breathing these things because they're gonna gonna teach you the principles of programming on and the IOS sdk. But they're going to teach you what makes good app what Apple expects in their design and their ah, in their system. So when you go to submit after the APP store, you can know that your app is following the best guidelines and principles and practices so very fantastic. Resource developer top dot com slash video slash wwdc slash 2015 Learn all about Iowa s and all the new stuff. Super cool. The 2nd 1 I want to talk about is Project Euler or Project Oiler. Depends how you want to pronounce it tomato, tomato But basically this website is a website where you can practice problem solving skills. Okay, so when you write a Sure there's a series of questions that uh, programming questions that they'll ask you to solve. Basically, each one has a very specific answer, and they'll they'll tell you what you need to do to solve it. And then in that whatever programming that you want, you solve the problem. You should aim to solve one of these projects on Project Euler once a week and keep training your brain to be a programmer. It takes lots of time. You're gonna go through this course and you're gonna learn a whole lot. But isn't stuff there? In fact, every moment where you're not working on course work here, you should be practicing and programming and subscribing to tech blocks really get injected into. If you really want to make a career change or if you really want to do something great with iPhone development, you've got to inject your brain and decoding every single day. So project Euler WWDC. Make sure you're spending lots of time to studying on these resource is and learning as much as you can
10. iOS 9 App: Your First App!: Welcome back, ladies and gentlemen way are about filled our very first app. Super exciting. Super cool. In fact, that's the name of the project. Super cool. So go ahead over to your ex code beta and click on it. It's gonna bounce. It's gonna pop up with a menu. Now you should see the screen. If you don't head over to our forums and post what you're seeing, we can help you out. But this is the common screen you see every time you want to create a new project. So what we're gonna do is we're gonna click this one right in the middle, create a new X code project. They're nice. Okay? No, this is our first time through. We're gonna go way more in depth later, Ron. So we'll go through the semi fast. I won't explain everything you see here, but basically we're gonna click that we wanted IOS application and that we wanted to be a single view application. OK, Single view means one view extents. Click the next button. Product name, super cool organization name you can put in there whatever you want. Your name or your company, name and organisation. Identify where it is conventional with Ivo naps to use a reverse domains such as com, your company name dot name of the app. So a Z you could see right there the bundle identifier. It's filling in the name for us automatically, so com dot Deb slopes super cool. Well, that is supercool languages. Swift. Of course, we'll go into objective see later, but Swift is the biggest, baddest programming language out there back recently. Rated number one programming language in the world. As far as being most popular and devices I phone, I pad in Universal Universal. Obviously meeting both. We are just going to select iPhone for right now to make our life easier. Okay, All that's happening now is that we are saving the project, and I'm just gonna put on the desktop for now. There's a source control. Create get repository on my mac. Now. We don't really need this right now, but you will in the future. And when you're creating your own projects using version mitral, were Oslo gonna talk about version control later on? So just go ahead and click create, And if you notice appear in the top, right, they did create a project for me. Very nice. This is our general application information. Here. We have a target. Okay. The target is super cool, and it's general settings. Okay, Are right here. And what we're gonna do. Let's keep it on iPhone. We're gonna take off landscape left and landscape, right? We'll turn on upside down. We just want to keep it as a portrait application, Okay? And the idea is that we're gonna have a very simple app and that as a biden, and then we're gonna press that button and the APS gonna turn super cool and show some cool images. So let's go ahead and mosey on over here to our main dot story work. Okay. And a storyboard in X coat is like a story. It takes you from screen to screen, showing you what comes next toe what comes next. And, uh, that's how they work. Basically, as if you were building a storybook for a child, you'd put one page up together, and that's how storyboards were. Very, very nice s. Oh, here it is. Okay. We've got the right hand side, which has Inspector, full of a whole bunch of information, go into that more and details. We go on here on the left hand side, it shows you what's currently on your story board for this. What's called view controller. Okay, So what? I'm gonna dio again. This is just to get a nap done and make it real simple and not over confused you at the beginning. So what I'm gonna do is I'm gonna click view controller over here on the left hand side and over here. Want to make sure that the show attributes Inspector is elected and size. I'm going to switch this Teoh a iPhone six, Which is this four point inch. Okay, all that saying is, Hey, let's kind of make it look like an iPhone six. Uh, so you can design things accordingly. So again, what we want to have happens, you press a button, and it makes your app look super cool. So down here, you've got a list of controls, right? Uh, you got what's called here. The object library. Okay, so I'm gonna search for what's called a U I. Button. I'm just gonna click and drag it over here. Very, very nice. It lines up. I'm gonna click it and light it up. all right in the middle. Perfect. I'm gonna stretch it out nice and long. I'm gonna read Drag it over here and center and again. Okay. Now, over here on the right inside. I can change what it says. Okay, this is the title here, and I'm going to say make me super cool. This is a button. Make me super cool. So I'm going to save it. I'm gonna go ahead and over here on the right inside these your simulators. This is what you can test your app on in order to deployed to a device you have toe have ah paid registered apple developer account. But you can use simulator for now. And so I'm gonna select in this case iPhone six. Because that's where building and testing for, um, And if you don't see these right here, Okay, it might mean that those those required components and insulation step did not get installed. Okay? And so, um, go to our forums, post your problem, and we can point to the right direction getting an insult, but it should have installed with installation. So iPhone six gonna click that. All right. And all I'm gonna dio is press this play button up here. So it builds our very first application build succeeded running supercool on iPhone six. So it loads up, and there it is. Our app is loaded and look, the button clicks and everything. We just built our very first iPhone app. Take your hand and pat yourself on the back and exciting achievement. And it wasn't that complicated. And iPhone development is actually quite simple. Compared to many other platforms, it can become inherently complex as you build more robust applications. But to get started is in the article a couple of pointers here with the simulator. If this is too big on your screen, there some things you can dio. Okay, you can, uh Well, first off, you can change your devices here from iPhone six and six plus etcetera. All right, um, you can save Screenshots by clicking. This will save a screenshot of that to die. Stop where you can first command us. Okay, um let's see here. But I'm actually looking for is ah, seeking rotate left and right to simulate landscape. And what we want to do here is actually change the size of it. So if I press command on the keyboard Command plus one makes it super big by Press Command plus two. It makes it medium size Command plus three makes it small sites. So if you have any sizing problems on your computer because your monitors to small command plus one or command Plus two or command Plus three will resize eso command button on your keyboard is says command and hold it down while you're pressing +12 or three. So there we go. Got a basic iPhone app running, but it is not complete just yet. Now what we need to do is get are apt to point where it's starting to look super cool, and I think we're gonna need some graphics for that. So I'm gonna go to Google Chrome, pull it up here. And by the way, if you saw that pop up on the screen, okay, it's called Spotlight Search. You can access it by pressing command on your keyboard, plus the space bar, and it is super helpful. You can type in anything and will take you right to that application. That's what we just did for Google Chrome. I'm going to this fund website called Text Craft dot net. And we are just going to get a cool graphic for our application. And so you could pick a bunch of letters and funds and type of things in here, and then you can download it. Uh, I'm gonna go with the pre built one, but they have down here that someone made called super picks. And I'm going to say, uh, boom ap because this is an app and it's boom. Cool. Okay, so boom at cool. I made a little logo here. You guys can play around with whatever you want on your end. I'm gonna download it. And it's thinking and thinking, and they're this boom ap. So if I click this to go to show and find her or if you're using safari, you can use safaris, download tool, in any case, it to my download section on my finder on my back. And there it ISS So what I'm gonna do is drag some folders around and back an X code over here. I'm gonna click assets. Okay. This blue folder here in the left hand side when I click that and I'm going Teoh, open my finder there again. And what I'm gonna do is just simply click it and drag it over. Now, this image is in my project and I can use it. Super cool click. The main story board over here in the left hand side is where we've been working. Okay? And, uh, what we want to have happen in a rap is we want this cool logo in the school background to appear when we click. Make me super cool. Before that, it's gonna be super boring. But so what? We need to do his first. Get it on the screen. So I'm gonna type in what's called a U I image of you. Okay, I typed it down here in the right hand side in the object, inspector. Right here. Object library. I'm gonna click this and just drag it over here in the middle. The size doesn't matter just yet. So image views, of course, have an image behind them. OK, so I'm gonna take this icon of the right hand side over here on the inspector, and I'm just gonna pick the image notice that automatically finds the name of your image that we drag him. That a super cool. It's clear and oh, my gosh, it has made it super ugly. And we're saying super a lot, so we need to make it super un ugly. So I'm going to click this mode right here, and I'm gonna put in here aspect if it nice. Now it looks aspect ratio, and I'm just gonna drag it up. Okay, um, if I click this thing right here, I could drag it around, and I'm just gonna make it bigger. And it's keeping it aspect ratio, which is what we want. Okay? And it's a little bit off now, but that's OK. So I'm just clicking and dragging it to make it a little bit bigger and nicer, and I'm just gonna drag it until it aligns right where we want it. Very cool. Very, very, very cool. But now we need a super cool background to go with our super cool text. So I am on free pick dot com. Okay, the link is up here. Sorry that it's long you can copy it if by pausing the video but basically on these guys have ah free royalty free images to use so long as you give attribution. So we're giving attribution to you free pick and designed by free pick dot com, and we're gonna go ahead and download it with the free license with attribution free download. You must credit the author we just credited you. Stop asking for accreditation. All right, get it. Is downloading now 5.1 megabytes. That's it's a big, big zip files. I'm gonna click it. It's gonna open my folder and unzip it. And I am just gonna grab this J peg, and we're just gonna go over here to our project folder again. And I'm gonna Another way to move around on the Mac is command tab. You move between files. If you hold down command while pressing tab, we're gonna tap back over to find her. And let's call this BG for background just taken. Drag it over here into your image section again. Remember, we have image. We have assets. Thought xsi assets highlighted. Okay, What we're gonna do now is go back to the main story board and since that's another image, we need another image view. So what I'm gonna dio is dragging on now. It's not the right size. We obviously need it to be the full screen and uh, What I'm gonna dio is actually just go ahead and select the image BG. Of course it's not. What we want is shrinking it. And let's say, uh, aspect fit. Okay, so it's really small right now, but I'm just gonna We're gonna have fun. Just take this little guy. This little arrow here in the top left corner. Just make it really, really, really big. Gonna hang off the edge. That's okay. Okay. It doesn't have to be perfect to slide it up. This is just for fun And making it look nice and like, OK, great. There it is. Um, you can also move it around like pressing the arrows. So so long as it's selected here in the left hand side like it is, you can, uh, um, move around with the air. Lucky's as well. Okay, so there we go. Looks good enough for now and then notice. How are other controls disappeared? Well, that's because under review here these things were ordered in a certain way, and our background is on top of everything else. The bottom layer would be up here, so we need the background to be right there. Understand? Click. Drag it over there on the left hand side there and ban. There's our logo. There is our wording now. Of course, we don't want the logo and the background to show right in the beginning, so we need to write some code. So what we are going to do? Remove this over here, Drag this little it bigger is we're gonna click thes two little circles. Appear the assistant editor. If you're in a different version of Mac operating system, this might be a different icon, like person or something like that, but it's still the same. Just click the one in the middle, and, uh, it's gonna open the assistant editor here. And what it's doing is it's opening the corresponding code file. Okay, So our view can our main story board in this view controller that you see right here it is attached to this view controller dot swift over here. Okay. Attached to it. And anyway, so it's opened up the Associated Code file to this, your controller. Now what we need to do on iPhone is we need to connect, connect things to make him work. Our code needs to know what our user interface is doing and vice versa. And there's two types of things that you have. As far those interactions goes, you have I D outlets and Ivy actions, and I'd be outlet is a variable that you set in your code that stores a reference to the user interface elements. It just points to it, so it knows how to use it and change it. And I The action is an action. When performed on the iPhone app on the you I that will take place in the code. It will call the code and make it do something. So we need to do that. So what we're gonna do is making sure this guy's selected right here. There's multiple ways of doing this. And what we're gonna do is we're gonna go ahead and hold the control key on your keyboard. It says control. Okay, hold it down and then click. And if you're using left and right clicks, it's left, click, click and drag. You see a little thing here forever. I'm holding control and clicking and dragging from this. I'm gonna drag it over and inside underneath the class. But over the view did load function right here. We're gonna let go of the click and it wants a name. And so we're gonna call this cool logo. This is our cool logo. And you can press, enter or click, connect, press, enter, click, connect and bam! There it is over there on the right hand side. And this little dot being filled in shows that that's what it's connected. And if I hover over it, it shows it on the interface builder left hand side. This is a U. S. Image. You were given a name of cool logo. Now we also need to do the same thing with the backup because we need toe. Unhygienic is things when the button is pressed. So what we're gonna dio is do it differently this time. Okay? This time we're actually gonna write the code out here on the right hand side, I be outlet week bar. You're like, what does that even mean? Weak? This week is a strong Is this bad? I'll explain those things later week bar, and we're gonna call this cool Bijie and it's gonna be a type. You are image view. Look at that. Beautiful auto. Complete exclamation points. All right, so we've got another Ivy outlet variable. And this time, what we are going to do is you know how it's already. I could actually click and drag this year on the background and it would work. But I want to show you something else. Another way of doing it. Uh, what I want to do is actually click this guy here this view controller. Now remember, he's tied to this over here on the code on the right, and so he knows about these variables. So I'm gonna right click on view controller and notice how you can see that right click or two finger click. However, your mouths is set up, you can see that has some spots here. And look at our Kool. BG is there. Don't worry about the other things, but worry about her Kool BG. So it is. There is. What I can do is I can click this and actually over here on the left hand side. I can select it that way as well, too. There's multiple ways of tying your user interface to your coat, which is really cool now, of course, um we needed action for those things too. Be hidden Are sorry to show in the but in this press. And we need the button to be hidden When, uh, the button is pressed, so we actually need one mawr I'd be out with. So what I'm gonna do is I'm just gonna from right here, I'm gonna control drag under these other ones, and we're gonna call this un cool, but because he's not cool. Okay, so he is over there now and now, would you One more thing doing that same control click drug. We're now going to go over here and underneath our did receive memory warning function. We're gonna let go. You like what? We just did this. Well, here's the difference. Pay attention. Instead of connection being an outlet, we're going to create an action. Done. Did it, uh, and we're gonna call this make me not so un cool. That sounds like a proper function. Name Connect, press center. That time and there's our function. That means whenever this button is pressed. Okay, this function is gonna be called, So we're looking pretty good here. Got things connected up. Let's write a little bit of code, okay? We're just gonna go ahead and grab our things cool logo and we're gonna call dot Hidden equals True. It's a property on the image. You That's really cool. And kool BG dot hidden equals true. All right. And then un cool and dot hidden equals. Actually, I did this backwards. This should be false. We want Thies to not be hidden when we press the button and we want the button to be hidden when we press it, That's exactly what we want to have happen. Now there's only one problem. These things are going to be, um, not hidden by default. So let's go ahead in the in the interface builder here in the storyboard I'm gonna click the boom logo here and I'm just click hidden, okay? And I click the background and I'm gonna click Hit him So they're both hit. And now Okay, as you can be a little bit faded out here And so if I press stop to stop the current build and I rebuild this okay everything should be ready to go make me super cool. So we got a super boring background and boom there it iss your first app and it is supercool boom ap Congratulations on making your first application and it is live and running on be simulator. So there you have it
11. How Exercises & Warmups Work: Hey, everyone, I want to talk briefly about exercises and warm ups and how they fall into the course and why they're important. Since I don't have anything to show, I'm gonna give you an object for you to look at what we're talking about exercising. Okay, so here's the deal. I've taught a lot of people, and I've learned how people learn. And I learned what it takes to learn and to retain things. And but I know for a fact is that you cannot just go through these videos one after the other all in a day and learn to retain this stuff. It's going to go in through one air right out the other. So if you are interested in really learning iPhone development, do every single exercise to every single warm up and you'll see the warm ups in the following sections. After his part one and warmups help refresh what you've already learned, as well as teach you how to think like a programmer. So the very program oriented problem solving simple math problems, things like that, things that will help you start thinking like a programmer to train your brain. Okay. And the exercises how they're designed is I teach you a concept visually in a video on all the principals in it, and then on your own, you build a nap without video instruction. It's very similar. All the principles and concepts are similar to what you just learned in the video, but their app a slightly different. So you have to use your own brain power to translate how things work, uh, and how things connect and you can look back the videos that I made as reference. And so do not skip the warm ups. Do not skip the exercises if you really want to learn these things. If you do skip those things, then it's going to be much harder to retain this, OK, And the idea is that in addition, to be able to do those exercises and retain those principles that were being taught, you can also go to our website in our forum and post problems you're having and actually make it like a real life interactive classroom. So consider this an online boot camp where you're getting the best help that you possibly can without having a teacher there, knowing your name and put all these things to good use. And so that's my rant and rave about exercises and warm ups. If you really want to learn and care if you really committed to this course, you're gonna do those things and I would even suggest that you submit them to get hub Eso people can look at your code later, Ron, as you're interviewing for jobs, etcetera. So please do those warm of exercises and, uh, let's get to it.
12. Intro to Swift 2: Hey, everyone, Mark Price here dead slopes dot com And today you're gonna be introduced into the world of Swift. We're gonna talk about where you can learn on your own when you're not watching these videos. So go on to your Mac and commands. Plus space opens up your spotlight search and type in iBooks. Okay, All books. You may or may not have swift books here. These air apples, officials, swift books. If you don't have it, click iBooks store. Okay, And type in swift at the top, right in your search bar. And you should see this one right here. Swift programming language currently swift 2.1. And go ahead and click. Get, or if you have it already read will open it. And there's a book. It pops open. And this is exactly what we want to see. I'm gonna make my font size a little bit bigger here, okay? And I'm just gonna give you the overview of swift per apples wording so you can get a feel for what you're about to get into. Swift is a new programming language for IOS and os X. APS that build on the best of see an objective C without the constraints of C compatibility . Swift adopts safe programming patterns and adds modern features to make programming easier , more flexible and more fun. Swifts Clean Slate backed by the mature and much love Coco and Coco Touch frameworks, is an opportunity to reimagine how software development works now. This is really important. Here's the reason why Let's take a step back when objective C came out. Okay, If you're familiar with objective see, you know, it's a lot of the classes in Objective City. Start with the letters N s like N s string okay, or any object, What's this? And S Will N s stands for next step. When Steve Jobs left Apple the first time around, he created a company called Next Step. It was like the rebirth of Apple, but in his own eyes and way, and they created a programming language that was based on C, and it was an object, ornate programming language. And it's developed over the years now when IOS first came out, that's how APs were built. Objective C. And it's been around for a long time, but it's been built, built upon and built upon an enhanced and enhanced over time. And what we were using it for in the beginning of Iowa's development was never what it was originally anticipated to be used for. So here comes Swift and Swift was built from the ground up to be a powerful language, using modern programming principles to completely support IOS and OS X app development. And so my point is, Swift is built so we could make amazing IOS and OS X APS with all the powerful features that we could ever want, thought and thought of and created just for us and making our life easier. So that's why Swift is such a big deal. And if you already know objective C, you probably know that swifts pretty amazing. Most of programmers I know myself included have already made the jump over to Swift. So anyway, that's a brief history of why Swift is so powerful, and I'm gonna teach you how to use Swift in a professional manner. Not just let's read out of the book and do X, y and Z. Let's actually teach you how to build swift APs that you can put on the APP store that an employer would be proud of And so I'm gonna teach you everything that I know is a professional developer. And I'm gonna inject that into our learning of Swift. So what that being said, let's go ahead and just dive right in and build some swift APS.
13. Swift 2 Variables & Constants: Hey, what's up, everyone? Mark Pricer death slopes dot com And today we're gonna talk about variables and constants. So let's go ahead and open up our X code here, click on a and click get started with a playground, and I'm gonna create one here called Variables. IOS is fine. Click next, and I'm gonna put this on the desktop for right now. All right, let me get this nice and big here for us so you can see what's going on. Okay, So what is a variable? Well, variable is a name and representation of some type of value. Okay, if that makes any sense, So basically, in programming, you have different types you can work with. You can work with strings like this right here. This is a string type with words and characters. You can work with numbers such as doubles and floats. Integers. You know, you can do math operations with numbers. Think about this for a second. If you're brand new to programming, think of when you go on to your banking website, US bank Wells Fargo, Whatever it is OK, and they give you messaging such as new alert. You know, your account has been updated or you have been overdrawn. So there's actual words and characters and then there's actual numbers as well. To such as this is my bank balance, you know, negative $500. You guys know what I'm talking about, right? And Ah, so you've got numbers and you've got characters So same thing with programming programming is built on these constructs. And so in this case, right here, what you're seeing is a variable indicated by the word var a variable called str and its value is equal to hello playground now str you can call us whatever you want. This is the name of your variable. So you're actually naming ah type of data, a specific piece of data. You're giving it a name so you can reuse it later, which is really interesting. So this is a swift playground, okay? And I'm gonna make this bigger here. And so it prints up exactly what you're putting here to the screen now in a application on IOS or Mac, you might do something like this print str and actually print it to the consul. Now, as you can see, right there it is printing and adds a new line character at the end for us here. And ah, that's that's what you do to print up that variable. We don't need to do that here right now, though, so hello. Playground is what comes on here. And this is a string which is really cool and so understanding computers a little bit. You need to understand that when you create a variable that's actually stored in memory on your computer, maybe you're thinking, What do you mean in memory? Well, on your computer, remember how you went to the store and the salesman was like, Oh, you should get this computer. It's got 512 gigabytes of RAM. Well, ram the random access memory. This is where variables are stored. So the more ram you have, the faster programs run because they could store more variables and data more information. So when you create this right here, this very bill here called str Okay, it's been stored in a slot in memory on your physical hardware. How cool is that? So this is a variable of type string, which is really cool, and there's other types of variables to or other types that you can use such as I could say number, and I could say 20. Interesting. So this is another variable. But this is an integer okay of 20. I can also do decimal numbers which could be floats or doubles so or other types. So I could say decimal equals 50.5. And you could do that in programming is well too. So these air variables Okay, Every time I created variable, I give it a name and I can put a value into it. And this name is stored in memory so I can use it later on, which is really cool. And you can change variables like so. So I could say decimal now equals 20 point 23. And I've now changed the value of this variable to equal this. Now this variable is still in the same spot in memory. But we put a new value into it, which is really cool. You can change it around. So that's a variable variable again is unnamed representation of a value of some kind. Casey of variables. And you also have something called Constance. And a constant is something that's unchangeable. And you define a constant with the let keyword so I could say Let new decimal equals, Let's say, 40.4 five. New decimal Eco's 40.5. Now let's watch what happens if I try and change the value of this so I could say new decimal equals 6.4. Let's see if it'll let me change that value. If I look over here, there's a red air. Fix it change, let too far to make it mutable. Mutable means changeable, but we don't want to do that. That's not the fix we want. It gives us an era, says you can't change its value. So the two basic things that you can do with swift is You can create a variable, which is a changeable value, a changeable value here, Okay? Or you could do a constant, which is unchangeable. Once you assign it, it cannot be changed. Okay, so there's advantages when you're going to use these in different applications and ah, and you'll see that upcoming here. But this is variables and constants. In its most basic form, your variable can mostly be named anything, anything that you want, which is really cool. So it didn't have to say, str could it said, Welcome message. Hello, Playground. That's kind of cool. Or if we did the example of the bank, let's say you know your Wells Fargo. Welcome message. This could say hello. Your your account is overdrawn. Don't you know how to manage your money, dummy? All right. And this instead of number This could be account balance equals negative 500 because that's what it seems like. Our bank accounts are always doing going in the wrong direction. So really cool stuff, different types you can do here. This is just barely scratching the surface. If you want to see something really silly that you can dio if we command space and open up our font book, Okay, I could do a search for emoji. By the way, don't ever do this. Guys and gals, this is just ridiculous. I'm just going to show you. I'm just highlighting this emoji and command. See? And I can save our monkey equals horse. You're like, Wait, what the heck is going on here? Well, Emojis are based on Unicode characters and so you can use Unicode as variable names. Ah, and you could give it a value. Now again, don't ever do this. This is ridiculous. And absolute lutely. No point in doing this. I'm just showing you that you can do that. So this is variables and constants. In its most basic form, we want to get a little more advanced. We can declare multiple variables on the same line, such as far account. One equals 0.0. And I could do a comma and say account two equals 1.1 and comma account three equals 3.6 And what we've done here as we've declared three different variables, The only difference is we didn't put the var keyword in front of these other two. We excluded it and put it on the same line just to make our life a little bit easier and little more readable. So you can also declare variables on the same line, like such now these type of variables that we've been creating so far, we've inferred their type. So basically we have said decimal, and we've said, Oh, hey, this is going to be a double because it's 50.5. So swift is real smart, and it gives you a data type. Okay. All these variables have data types and we haven't specified explicitly what these data types are. But I can do that. I could save our new message is of type String. So what this says is, Hey, I haven't put any data in it yet, but when data does come into it, it has to be a strength. Okay, So, for instance, see what happens if I say new message equals 50 What you think is gonna happen gives me an error, cannot assign value of type end being integer to strength. So we can't put inter journey here. So we've done a type annotation. Okay, type annotation. That's the key word. So this is a type annotation, and we've basically said, Hey, this variable is gonna be of this type. And so instead of the 50 if I say hi, this is a new message. I know that's not very creative. It works. OK, so very cool. You can also do type annotations with multiple variables. So I could say far red, green blue is of type double. And so all three of these variables are of type double. So now if I say red equals pink string, let's see what happens. Same as before, Okay, We got an air. So this is how you can define multiple variables with type annotations with a single annotation here. So this, if you have lots of variables you wanted to define that are of type double and related, then this is a good way to do on one line. So really cool stuff, huh? What do you think this craziness is? Madness? I think so. But if you're not understanding completely, that's okay. You'll get it over time as you actually build applications. So this is a complete overview of variables and constants. Just scratching the surface, but very foundational. And so we're gonna call this video done and move on and forward.
14. Swift 2 Comments & Semi-Colons: Hey, what's up, everyone? Mark Pricier death slopes dot com And today we're gonna talk about comments and semicolons . I know, right? Not really exciting. And these aren't the comments like, you know, when you go on Reddit, I know who you are. And you start trolling, huh? You're the biggest loser Belova bubble on. You make a comment and no one knows who you are because it's anonymous and you think you're really cool. But you're really not. It's not that kind of comment at all, something completely different. So go ahead and open up your ex code and let's open up the last playground that we did. Or if you don't want to do that and have some other code fall, you wanna open, feel free to do that. We're gonna open up our last playground here. As you can see, it is right here and notice here at the top. There's this thing in green here. This is a comment and a comment is something that is skipped by the compiler. Okay, so when you are building swift applications, a compiler will compile your code and allowed to be used by the user and the different functions etcetera will be called. But comments or skip, they have no impact on the user. So basically, you just comment things out by doing to forward slashes. Okay, that's it. It means it's no longer going to read. And so, for instance, if you wanted to have a message saying, You know this variable is to let the user know when their account is overdrawn. So if you have code, you can leave comments for the developer who might be looking at your code to give them an indication off what your code is doing now with that being said, Okay, first off, don't go around putting comments and all of your code because this is a important design principle. I want to drill into your brain right now. Good code documents itself. Okay, so the names of your variables and the waiter coda structured should be easy enough so a developer can come in and understand what's going on without having to read comments. So if you have comments all over the place, you're probably doing it wrong, okay? But this is how you can add comment. Sometimes it's nice to comment out code that you don't need just for a minute. Or sometimes you do need to explain things. Maybe there is a bug you need to fix later. And a comment might be a good thing for that. But don't go putting comments everywhere. Good Coach. A document itself. Okay, so I just did double slashes. You can also in X code. You can highlight what you want commented out and holding command on the keyboard. You can do command ford Slash. And it will comment out all of those lines at once, which is really cool. I can highlight it again and do command slash again and uncommon. Sit. So that's a way of quickly common the commenting out a block of code rather than doing it manually. One more way of commenting out a lot of code is by doing slash star The pastor Rick asked the risk. Can anyone pronounce that correctly and to close it? You put an ending. I'm just gonna call it star. Is that okay? Star and slash. Okay, So starting slot. So Ford's last star star Ford slash That's how you ended that will come in a block of code . Okay. Pretty cool. So very useful and commenting. Things I use comments every day, but it's mostly not in production code. It's mostly when I'm developing. I want to try things out and messed around. Okay, I might comment some code out, try different things. That's what it's used for a lot. And so that's pretty cool. Notice how in swift moving on, by the way, comments. You can talk about comments or so long moving on here. We don't have semi Coghlan's in Swift notice. How other languages have semi colons? Well, Swift doesn't, which is really cool. I hate semi colons, but you can use them pretty cool, right? So the thing about Swift is, it reads to the end of the line, and then it goes to the next line. That's why doesn't need semicolons. However, if you want things on the same line, multiple statements, okay, these air statements. Here's the key word for the day statements. This is a statement, any piece of code that's going to be run. So this is one statement. If I want another statement on the same line, I then can use a semicolon and save our new balance equals 50. Okay, and so there's a new statement so If you want multiple statements on the same line, you can use a semicolon. This is not common and swift at all. In fact, nobody is really doing that. And I recommend that you don't do that, that that's what people do in other programming languages. It's not common to Swift, so but you can use semicolons to put things on the on the same line. Also, you will use semi colons when you're using for loops or loops of some kind, and we're gonna talk about that in the future. But I'll show you here right now what it actually looks like. So I could say four for of our X equals zero X is less than you know 50 x plus plus, and we've got this loop here, this four loop and notice how there's semi colons between these different statements here. So that's another time when you use but pretty cool stuff. Pretty simple stuff, semi colons and comments. That's all you really ever need to know about them. So let's go ahead and move on and Ford
15. Swift 2 Numbers & Type Safety: Yo, what's up, everyone? Mark Pricier deaf slopes dot com. And right now, we're gonna talk about numbers. My numbers. I mean, integers, doubles and floats. Okay, not to be confused with root beer floats or parade floats or any other silly thing I might say, Let's click Rx code and one other way to open up the next code project. Actually, if you want to know, click your ex code here and go to the top when it decides to load. Come on. There we go. File new project or playground. In our case, we're just click the playground here again, Getting started with a playground and this one we're just going to stay numbers. Cool. Deal. Honest throw This year folder. Put yours wherever you want. Okay, so there we go. Let's make it nice and big here so you can see it. So we've briefly talked about numbers I showed you before. Let's really get into it here. So, in programming, we have something called an integer. Hey, look at that. These comments are coming into play an integer and let's look at what Inter juris here. Okay, imagers are whole numbers with no fractional component, said just 42 negative 23. Integers are either signed positive zero or negative or unsigned, positive or zero. That is interesting. So there's two types of integers that you'll mostly work with. There's other types you can use, but there's signed and unsigned and the standard is signed, which means it can have negative values and positive values. So, for instance, you know I could save our my bank account equals negative 500. Okay, that's interesting. That's of type integer. I could also have done this. Remember a type annotation I could have said far into, or my bank account. Colon end equals negative 500 That works just the same. Okay, And notice how it's the into keyword with capital. I not integer like, So it's int. Okay, now let's try something else. Var. Click here my second bank account. By the way, you can put numbers in your variables. That's kind of cool. My second bank account, and this time we'll say of type. You end for unsigned unless a negative 200 Let's see what happens. Oh, interesting. An error. Negative integer overflows when stored into unsigned type in. Okay, so it's not big enough to allow negative numbers. We can't do that. Okay, so Onley use unsigned integers this you int any time you see a you in front of integer Onley Ever, ever, ever, ever used that when you can absolutely guarantee there's going to be a non negative value. Okay, so zero and onward. Okay. Don't ever don't ever do it this way. It won't work. You can crash your application so clearly a bank account is not a good thing to use an unsigned integer for. Okay, So Ah, what you might use is ah, something better. Like, let's say of our my age. Hmm. Interesting. You end equals 22 that works. You know, because of age, you're never gonna have a negative age unless you're Benjamin Button. And Ah, so that might be a good choice for an unsigned integer. Okay, that's kinda cool. Now maybe you're wondering how high can I go in an integer? Well, let's see what Swift have to say about it. The swift book here, it iss neck. I lost it. There it is. Okay, let's make it bigger. A little bit bigger. Alright, let's try this again. Now. Okay, here's the number What is that? Negative? 2,147,487,648 all the way to the positive. 2,147,483,647. Okay, so your regular standard integer is going to fit within this range, which is really cool. So if you have numbers within that range which most applications are going toe be OK with this with standard integer. Unless you're Donald Trump, who has more than this much money in his bank account, if you want more. Okay, then you need to use an n 64. So let's go ahead and try it here. Let's copy this number here, okay? And what? I'm gonna dio save our big number and let's take out the comments. Okay, so that's our integer. Let's see if I add another seven onto it. Let's see what happens. Oh, interesting. You're not getting an air. That's kind of cool. Let's keep going. Well, it's really cool about Swift is it does type inference, and it will tell you what type you have, but let's say meaning it will make it an integer 64 so we can support this. But let's say we did this instead, see what happens. Still no air. But the problem is we can have overflow problems and other memory issues as well to So, if you know your number is going to be over that amount that two billion amount. What you're gonna want to dio is using integer 64. And what number does that go too? I don't know. It's a lot just goes on on and on and on. So if you have really barely big numbers work within 64. But with all this being said 99.999% of the time, you're gonna use a standard integer like we've done up their online seven so far, a NUM equals five. That's gonna be your standard into juror. OK, so you're not going to see this to common or this. In fact, I've actually never wrote written and IOS application that ever used an unsigned integer or that ever used an integer 64 So and I've built a lot of APS things like 58 now. So standard integer is what you want, but and indigent does not have floating point decimals. So if I open up my are swift book again here, Okay, If we look at floating point numbers here, floating point numbers are numbers with a fractional components such as 3.14159 point one negative to 73.15. Floating point types can represent a much wider range. Okay. Uh, much. Right. A range of values and integer types and consort numbers that are much larger or smaller than could be stored in integer. Okay, so a double represents a 64 bit floating point number, and it float represents a 32 bit floating point numbers. So I talked about this. We've got doubles, and we've got floats. When do you use which? Well, let's read the note. Here. Double has a precision of at least at least 15 digits. Decimal digits. Okay. Whereas the precision precision of a float can be as little as six decimal digits. Oh, interesting. So here's something important. If you want more than six decimal digits, okay. Then use a double because you're gonna get at least 15. If that's what you need, then use a double, okay? And it doesn't it doesn't really matter too much. Otherwise, you can keep. It is a little a six decimal digits with a floating point number here. So if you want to work with smaller decimal digits, but you still want decimals, but you really want to force it to be smaller than use afloat. Otherwise, use a double this doubles preferred on IOS development with swift. And that's what you should use everywhere is the double okay? It doesn't really matter. Honestly, it really doesn't matter. Um, as far as you're concerned, okay, I've never had a have never had a point where I had to. Absolutely. Because of the sake of my application. Used a float ah, or double or vice versa Now have used floats or doubles because of the way the apple is right. And I have never had a situation where I messed, absolutely have used one or the other. In most cases, they have both worked fine, but the default is double. So if I save our ah, another bank account equals 55.5. What do you think that's gonna be? Well, that's going to be a double by default. Okay? And by the way, What kind of type do you think you should use for a bank account? Would you use an integer or a double? Well, you do the double because you've got change, right? So double. Now maybe you're thinking, Well, maybe it floats better for currency because there's less decimal digits. And maybe you're right. Maybe if you're building a bank and application instead of using double, you could use float, but it doesn't really really matter. The double take up a little more memory. Possibly. But it doesn't really really matter. Okay? And so that's really cool. You can store doubles. You can also store float so I could save our Ah, some vow equals five. Excuse me of type float equals 5.5. So now we have a float. Right now, let's say I wanted to multiply these bar. Some equals another bank account, times some value. And you haven't seen operations yet on variables. But I'm showing you here for the first time. I wanted to multiply those two values. It's not gonna let me. Okay, Binary operator multiplication cannot be applied to operations of type, double and float. Okay, so you can't just go around and use these values interchangeably. Okay, doesn't it? Does not work like that, and the reason for that is swift is a type safe language. So if I open up, let's just opened up here. Type safety and type. Inference. Sarah reading from the book a lot, but it's important that you learn how to read for yourself and understand where to go to get help when you're not watching videos so swift is a type safe language. It type safe language encourages you to be clear about the types of values your code can work with. If part of your code expects a string, you can't pass it an ent by mistake. Because Swift is type safety performs type checks when compiling your code and flags. Any mismatch types ends as heirs. This enables you to catch and fix airs its earliest possible in development process. So why is this important? Why is it important that your variables can only have one type or another programming languages? Okay, you don't have to have specific types. In fact, I could have bank account was entered your here and then later another programming language . I could put a string in there Well, and some of those languages. Let's say that's happening at run time, and when I say run time, it means the users on the program. We put the wrong value and what your app crashes, right? Your APP completely crashes while they used to using it. So the reason why swift uses type safety is because we can solve those crashes and problems before the code has ever even shipped. OK, when it's compiled, we could say, Hey, you're putting the wrong thing in here, okay? And that's why this is so important. That's why Swift is so powerful. This is one of my favorite things. I've worked with many programming languages, and some have type safety and some don't. And why this is so important is because your APS have less crashes in them, unless problems at run time, by having this in here by not allowing a user to store bad values in here, so another bank account time, some value doesn't work. So if I want this toe work, what I first have to do is I have to cast this value into something that the double can work with, or vice versa. So if I cast it like so put the word double in front of some vow. Okay? What it's gonna dio is it's gonna take this float here, and it's gonna convert it into a double and then take the result of that and multiply it by this value here and so some. What do you think the type is of some? Well, what if I try and do this? What if I said var be vow of type? Float? Okay, equals, let's say 5.6. My 0.7, of course. And then I say some equals B vow. Let's see what happens. It won't let me a sign it, so that's interesting. So to answer the question, this sum is of double because it took this double and we converted this to a double and multiplied it. So it's staying a double. And but here we tried to take this float and put it inside the existing Some Valium won't work because it's not a double. So if we reversed here, took off this casting right here and instead casted another bank account to a float like so So where this time we're doing the opposite thing. We're casting it to afloat comforting it to afloat. And then if I said some equals B vow, we should not get in air this time. Why? Because some is now afloat. Okay, so type safety, very important and very big principle with swift. You just can't put whatever you want in whatever. Whenever variable you want, you've got to think clearly about what kind of data do you want. Think about your application. Is this a banking application? Should I be using a double or float or an integer or an unsigned integer? Can I have negative numbers? You need to think about all of those things when you're working with your data types and then Swift won't let you just changes on the fly won't let your users change those. You get to decide how your code works and what goes and what variables so really cool stuff . So this is the basics of integers in floats and doubles, and I've taught you some important things. Now you know when to use things and when not to use things. And as we go on and you actually build applications, you're going to see the value of this type safety and way need to have these floating point numbers as well. Ended yourself. That's it for now. Mark Price. You're signing out with debt slopes dot com and see you soon.
16. Terminal Basics: Here we are again. Everyone, and we're gonna talk today about the terminal. Now, the terminal is a tool that you are going to be using every single day as a professional programmer. And the more you use it, the better you get at it. And, uh, there's pretty much no day that goes by when I'm programming that I don't use terminal throughout the entire day. So I've actually doctor here on my sidebar, but there's multiple ways of getting to it. If you press command plus space on your keyboard and start typing in terminal, it's gonna pop it right there. Okay? Or you can go over here to your launchpad, okay? And scroll over until you see or is it here? System preferences? No other Curtis other K and it's right in their terminal. You click on it there. Ok, so I already got mine open. So I'm gonna go ahead and ah, open it up here. I'll make it nice and big so you can see it. By the way, if you ever type of manure spring green and you won't make the letters bigger or smaller, just hold down command, plus the plus sign over by the delete key at the top. Right? Work my end plus the minus key right next to it, which will make a smaller And so your terminal may look different. It may have a different word. Your name here. That's fine. Um, mind just shows this right now. And basically a terminal is a command based system that allows you to navigate your computer and perform operations on your computer. That, uh, that you could also do graphically. So, for instance, here, er says bash. Okay. One of the first things you're gonna learn is ah ls okay. Basically, it lists the contents of the of the director that you're in. So the terminal here is starting off in your root directory. So if I go ahead and open up a finder window Okay, here's my find a window. Here's my terminal. Okay. And if I click this right here, it's the same thing. Okay, So this is my computer. It's called spent tack, and basically it showed me the same director. Of course, I've got a few of the things in here showing some hidden files and stuff, but basically this this is it right here. Okay. Same exact thing. So if I type in a command called CD Okay, this is called change directory. And let's say I want a CD into my documents folder. I can start typing documents, press enter. And if I type ls this time, it's going to show me all of my documents. Okay, So what we're gonna dio is ah, go ahead and make a directory using em que de ir. Let's make directory command and we're gonna give it a name. We're gonna call this terminal Dash Fund Gay M k D a r Space Terminal Dash Fund. And here's the really cool thing if I and organized by name Okay, let's go down to about where t should be your on here somewhere. And if I go ahead and press enter, look at that. The folder appeared, and there it is. Case of what you do in your terminal is gonna happen and be reflected over here in your actual finders. Now, of course, it's not super useful. Maybe two. Go ahead and navigate your whole computer through the Terminator as a user of a Mac computer, But as a developer, you're gonna start using it more and more to create files to manage co two work with version control to work with git and so very important you learn these things. So so far we've talked about ls to show that current contents of a directory. We've also talked about make directory to create a directory. And we've talked about CD to change directory. So now that I have terminal fund, I can start typing it in And look at that. That's how it just automatically populated. How that happened is because I press the tab key. So you start typing. And as it becomes a unique phrase when you get to that point where what you're typing is unique when you press tab, it'll fill up the rest for you. It's smart like that. So I press enter here we are in an empty folder. Okay, over here on the right inside the folder. Still there. Now let's say we quickly want to make a new JavaScript files just for fun. Okay, I can type in a terminal chemical touch, okay. And I can save my file dot Js presenter. Look that over here in the right inside, I just created a javascript file. So the touch command is really useful as well. 200 navigating around, You can create files and you're like, Oh, I need a text file real fast. Okay, touch some text dot txt earlier that your your operating system already knows exactly what type of file it Issa's well to. Ah, so super cool things you can do here. Um, let's say I didn't like that, that I want to get rid of it. What type of RM. Start typing in some text and remove it. Okay, so our m and then the file name removes it. Okay, let's make a new directory. Let's say make directory. Let's call this some folder and let's go ahead and CD into some folder. L s There's nothing there. OK? And I'm gonna go ahead and touch new file dot Js make another job script file. And sure enough, it's there I go over here, it's there. Okay, Now let's say I want to go out of this folder, okay? And now I can see my some folder and I could see my father. Just let's say I want to get rid of the whole folder itself. If I just said rm, some folder Oh, No, it gives me an error. Some folder is a directory. Won't let me remove it. So if you want to remove a directory with all the files that are in it RM space dash capital are and then the directory name. Okay. Stash our sense for a cursive meaning to go through justly. Everything inside of it. And sure enough, it's gone. Okay, so that's how you delete files Record new terminal as well as directories. Really cool stuff. That's how you create fathers will, too. If you want to know where you currently are as you've been navigating around, you could type in PWD President Working directory That will tell you exactly where you are in your file system. And ah, again, ls shows you what's in that specific directory that you are in so some really cool stuff. Now we've learned how to see the into something, and you may have seen appear. I did cd dot dot while citi dot dot says taking up one level. Okay, just up one level. All right. And we're here. We are back to where we started. Now let's go back into terminal fund. Let's make a new directory. Go call level one, okay? And then Ah, heres something interesting. You can actually make directories without having to go inside of it. So I could make directory level one slash level two. And if I look in their it created a little too. Okay, So what we're gonna do is we're gonna go ahead and create level three now, so make directory level one sash level two. We know that's there. Slash level three. We need a level three. So I go in there. Sure enough, it's there now, our screens getting a little bit cluttered. Okay. So if I want to clear it, I can type command plus K, and it will clear it. All right. Super cool. You can also type in the word clear, and it'll clear it is well to I typically do command plus K because it's shorter. So what we've done, if I type in ls we know that were there in with level one and my file that Js Now let's say that we want to stay in this directory. We're going to create a file all the way down in level three. So what I can do is I can say touch And then what I could do is I could say level one slash level two slash level three is going to a folder here. And, um And then I could say, Ah, another file that Jess. And sure enough, it put it in there so you can actually put in entire path names and work right from the terminal, which is really cool. So we just made a file all the way. Three levels down and we're still here in the directory up above. Now, let's say that you want toe copy a file. Okay. Well, there's a command for that Cp. Okay, Like as a cp. So you're here. I have a copy, my file dot Js and I want a copy it into level one slash level two slash level, three slash And there it is. I've copied it. That is really cool. Let's say I want to rename something. It was a really quick and easy way for that to use envy, envy, move something. But it can also rename something as well, too. So we'll want to rename something we can just say. Move my file dot Jess, and we'll just move it here in the same directory. We'll call it the same. We'll call it the same thing. I'm sorry. We'll call it a different thing in the same directory, So we'll call it changed name dot Js I've having ls sure enough, it has now changed name dot Js Very cool it. Of course, you can also move it. I could say move change. Named at Jess into level one with slash. It's now gone. Okay. And if I go over here to level one, there has changed name. So there's nothing I want to show you were going to see the level one CD level two. Okay, CD level three. Sounds like playing Mario here. Okay, let's say I want to go all the way back up to my root directory. Well, all I have to do is type in CD and press enter have been pwd. See where we are. And sure enough, we're back at the beginning level of our director here. So, as you go through that your development, you're gonna be using these commands all the time. These are the ones that you use probably more than anything else. In addition to some git commands which we'll talk about later, But basically you need to get a familiar familiarize with moving around, creating folders and doing things like this in the terminal because as you become a more adept developer and if you were start doing like server work where you got to get a database in it and a server up and running so your iPhone app can talk to the server. Servers are all mostly based on Lennox, and you're gonna have to not a log in. And there's no graphical user interface. It's all done right here in the terminal. Eso important thing to know And also you know, you can't do normal things like you're used to. You can't You can't highlight all this stuff and just press backspace and delete it. Ah, there's some very specific, uh, manners in which the terminal works. And so here's a few of the basic commence that could be using every day as a developer, and we'll do some exercises on this as well, and we'll be practicing it throughout the course, but pretty much for no one if you can, as you're using git and as you are working with files, go ahead and start using the terminal. Get practice with it cause you're gonna need it for your job as well as for professional development
17. Version Control: Welcome back to another exciting day of coating Today we're going to talk about Birgit control. Okay, so really a little bit drawing today. It's a photo shop. Love Photoshopped. Fantastic tool. All right, so version control, What is it? You may or may not have heard of something called get G i t. Or maybe you've heard of something called get Hub maybe floating around somewhere in the world. OK, and then there were some other things that you may or may not have heard of, such as Mur Curiel or SD N or Ah perforce. Okay, these are version control systems. Okay? And the idea behind version control is that a manages versions of your code. Now, that might not mean anything to you right now. That is not the color we want. We want white clean appear. All right, so we're gonna sit back. Perfect. Okay, So we I want to talk about managing versions of code. So let's talk about how things might have used to bid. Might have used to be in the olden days of coating through such a thing. So imagine that we have Ah, we've got Conehead Bob here. Okay? Bob's coating He's got a great project. Excuse me? He makes lots of changes on his assignment, his project or whatever he's work on. This is code, okay? It is his coat. Well, it's a lot to change. These things were going great. Bosses happy, but oh, no. Now, boss says you know what? We need to pick up the pace. Let's hire another developer. Okay, so the boss hires Steve. Okay, this is Steve and Steve needs also start working on code. No, let's say we don't have a version control in place, okay? And let's say that Bob is working on the main webpage, but Steve is also working on the main webpage. So what happens if Bob makes changes? A, B and C, and then Steve makes his own changes A, B and C. Now we've got to get this life on the server. So let's say this is the server. We need to get this over here life. But the problem is, Steve made changes that we want, and Bob made changes that we want. How do we get them working together? So, in the olden days, Bob might have had to have sent Steve his code file And then what Steve would do is he would copy and paste. Okay, Copy and paste Bob's changes line by line and inject them in there. Okay. Now, after the copying and pasting is done, Steve might have sent that file back to Bob and Bob. Probably just get rid of his coat file. And you Steve's now, because now they're both up today and their sink. Okay, Now it doesn't take a rocket scientist to figure out and to see why this is a very painful process. Manually copying and pasting lines to cope with something breaks. Oh, my gosh, what a pain. What a pain to manage. And of course, at this point, when this is all sync up, this would go to the server. Okay, so this is this is what that might have happened in the past, Okay? And actually, a lot of new programmers, they end up doing things like this, copying of hazing coats, making back ups every single day. And there is a better way. Okay, there's a better way. But first, let's talk about the other. Let's talk about the other problem that we have here. Okay? So, aside from managing different changes in the code itself. Okay, let's just talk about backups. So let's say Bob makes a bunch of changes here. Boom, boom, boom, boom, boom, boom. Let's say this is 1000 lines of code. That is a lot of lines of code. Okay, 1000 lines of code, and all of a sudden he's been working on it for two hours and he breaks his code. It's broken. He breaks it. Okay, um, now he's got a problem. Bob doesn't know where his code broke and he wrote so much code and he wrote some really good stuff. But somewhere in there he broke something. And he does not have find he wrote 1000 lines of code. What's he gonna have to do? Well, in the olden days, he's gonna have to go through each line of code until he finds the problem. And that could be 500 coat lines of code back in. Who knows? It could take him a while. It's gonna be a very painful mess. OK, not idea. So here is version control to the rescue in version control. What you do is clips. What you do is you make changes to your code. Let's say three changes here. Then at this point, what you do, all right, is you commit that change. Okay, you store in version control. Okay? You say at this point of time, I want to take a snapshot of what my code looks like a snapshot. So every time you get a new feature, right, Seaver commit, you commit, you commit, you commit. So now let's say that were bright here, working on the fourth, commit, okay? And then we break something, and we absolutely can't find it. Well, maybe it's just easier to ex out of this completely and go back to our previous commit. So instead of going through the whole lines of code that we wrote or losing everything, we just go back a few steps right to this committee right here. We can actually check it out because a snapshot of stork of every point in history of your code, which is super cool because it means you your ricotta safe. Your code is safe. You can go back as you need to. So Bob is very happy because he can now ah, his coat and keep versions of it. So that's what version control is all about. It's about making your life easier. So, going back to our other example, where we had Bob and Steve. Okay, let's say we've got Now we've got Bob and Jenny. Okay? There's some great eyelashes, and she's super happy. Okay, She's a super freak. All right, there we go. So here's Jen. Okay, now we've got we've got two things. A code here. OK, we got Bob's code. We've got Jen's code. Now, let's say Bob makes changes. A, B and C and Jen makes changes. A, B and C. Well, this is super cool. What What version control is gonna do for you? It's gonna do this for you. Automatic were before where they did it manually copying and pasting stuff your version control and specifically get we're gonna be using exclusively in this class. But basically, what's gonna happen is your version. Control your get who's super smart. Okay, this is this is your This is the brain k the brains of the operation that is a brain of some sort. Basically, it's going to go ahead and grab this and it's gonna inject there for you automatically. It's gonna grab this, inject it there for you automatically inject for you there automatically and injected for you there automatically. Okay, so it gets gonna do all that thinking, and it's gonna merge that code for you, and it's gonna make your life so much easier. So all of a sudden, lots of programmers. Okay, Lots of programmers. This is Ah, this is Biker Steve. He's not a very happy guy. Usually so he's got a unhappy face. Okay, um, so he's got his code, you know? And then over here, we've got, you know, some you're looking, dude. 02 coats on the side and these guys code here. So now you're get It's talking to all of the different sources of code all the different versions. And it's injecting things where they need to be injected and making your life a whole lot easier so a team can work together. Teoh push out a project. So version control is very, very powerful. You're gonna use it every single day as a professional developer. And one of the big mistakes that novice developers make is they don't use version control to their advantage. You might open up a new Exco project and it says create a git repository. You're like, OK, whatever. And then you never use it again. But I'll tell you what you should be committing very, very often every time you make the smallest feature or changed because when the more often you commit, the better chance you have of saving your code of cases a problem, you can go back just a better good practice all the way around. So version control is super super important, and you're gonna be using it again throughout your entire professional development career. So it's important that you get it down right now.
18. Git Basics: Welcome back, everyone. And today we are going to talk about get. We've already talked about version control, the principles behind it. But now we're actually gonna talk about get how to use it, and you're gonna see it in action. So go ahead and open your terminal. I'm gonna press command space. Okay? Type in terminal. And there it is. Okay, now my terminal looks a little different. Two years, I've got a lot of custom things on it, and so don't worry about the differences. The commands will be the same. Okay. And so I've got my terminal open here. In fact, I'm just gonna go ahead and move it over here. And then what we're gonna do is open up our finder over here, and we're gonna put it to the desktop. So using your terminal, go ahead and navigate into your desktop If you wanna see where you are, just checking pwd. I met my root level, so I know I need to see the into the desktop. Okay, so I'm now on the desktop pwd Guess Stop. Very good. Now I want to make a file and a folder folder first make directory and K D N r. Let's make a little bigger there, make directory. And we're gonna call this get dash Fund, because get it's so much fun. And we're gonna see the into that. By the way, if you don't remember the reason why it's auto populating what I'm typing is because impressing Tabas I start typing and it feels out the rest for me. All right, now and get fun. There's nothing in here right now if I unless it's empty. So let's go ahead and make a it's what file. So it's a touch will say get fun dot swift. Okay. And I look at my directory Over here. There it is. A gift fund dot swift. Fantastic. Okay, so we've got a file in there now. Right now, we're not managing anything with with version control. Okay, this is just a file, and it's just sitting here doing its thing. So if I type in in the command line, get okay. McCurdy knows what get ISS has a bunch of commands here. It's like, Oh, what do you want to do? Ad Bisek Branch checked out cologne, etcetera, etcetera, etcetera. So it knows. Excuse me. He knows exactly what we're trying to do, um, when we typed and get because Mac is great and comes pre installed with it. So I'm gonna command K to clear it. So I don't have all this stuff in the screen. And so in order first to use get, we have to be in a git repository or get directory. And if I type in get status, which is a get command, see the current status of get Taito not get repository or any of the parent directories. Okay, so this is not a get we're not gonna get repository this. Get fun folder. It is not get repository. And so we need to make it a get repository. And so you do that by typing in git in it. Okay, that's gonna make this get repository and make sure that when you type getting and you are in the folder, okay, that you are in the folder that you want to do it on. That's very important. You can just do it for anywhere you need to be in that folder that you are initializing as you get repository. So not anything. What we're seeing is anything inside this folder we want to track with version control. We want to track with git. So now if I do get status, Look at that untracked files. Okay, so before you've added files, okay, before you've added them to your birth control their untracked. So what it's saying is you've got some files in this folder that birth control is not managing right now. Do you want to manage them? You want to leave it here? We're not doing anything with it, so just letting you know it's untracked. Well, we want to track it, of course, because we want to check version changes on it. So what you do to to make something tract is you say, get add in the name of the file. Okay, get add the name of the file. So I press enter. It is just added. This filed a version control. So if I do get status, look at that. It says changes to be committed. Okay. And there's new files and green. I wasn't right before, and now it's in green. So when you have new files, you first got Adam so they're tracked. And then once there, once they're being tracked, you can commit now, when you commit. Okay? What you're saying is I want to commit a change. And so the only change that we've made so far as we've added a new file so we can go ahead and do that. Now get commit, Dash M. Okay, get commit, Dash M means you're gonna commit. And you're gonna add a message. You and then you put in quotes. Okay? The message that you want to put with this commit. So I'm going to say, added, our first file. Can you get commit? Dash M added our first file earlier that one file changed zero insurgency relations. We didn't change any code on it. We didn't delete any code. And all we did was we We added a file. So I go to get status now. Nothing to commit. Working directory is clean. Okay, so I have nothing to commit. This file has been added. There's no changes made to it. It is good to go. Now let's start looking at the beauty of get Okay. So if I typing, get log. Okay. I'm going to see that I have a commit here, and it has the message that we just we just enter. That's great. So I'm gonna press, uh, control, press something. Goodness, that's a cute Q Q is gonna get you out of that screen if you get trapped in their press. Q Goodness. All right, So, um, we now saw that our committee isn't knows. Let's do that again. Get log. Okay, are commit is right there. It's showing it has a special number on it. And there it is again. Okay. Press cute. Escaped. All right, so now what we're gonna dio is having get status. And again, there's nothing. Nothing's different. Nothing's changed. Okay, I'm gonna command K to clear this, So I'm gonna go into my file now. Right? Click it and open with X code Beta app. Seven. Okay. And this is a swift file, right? So what I'm gonna do is I'm gonna make a variable called bar. My first change equals this is a changed. I'm gonna create a variable of type string and just put a value on, and I'm going to save it. Okay, Now, here's something really cool. If I type and get status, look at that. It detected automatically. It detected that co change. It says it's been modified. So we need to make a decision. Do we want to add this to I'm are commit. Of course we do Is right now where we haven't committed. We haven't said I want to keep this change. It we all that saying is, Hey, you change this. Okay, s So what I'm gonna do is the same thing is before I get at. So even though before it was untracked and we added the file get ad is also gonna add modifications. Okay. And deletion. So and you can use this exact same command. Get add, get fun dot Swift. Okay, so whenever you have changes again, get ad so I type and get status. Okay. Changes to be committed. So it's been added, and now it wants us to commit it again. While that is super cool, so we could do the same thing. Okay, get commit Dash m for the message, and we can say added a variable. And if I do get status and notice how this is added a variable in my message One file changed one insertion. I only changed one line of code. That's the insertion. I haven't get status. Nothing to commit. Okay, so we've committed it and now are working directories clean again. So we have tracked it and we've stuck it in a commit. Now, if I go to get log, you're gonna see two commits Very cool. The most recent at the top. Here's our first commit. Here's our second commit prosecute to escape this screen. Okay, very good. Let's make 1/3 change for a second change. Okay, second change started committed are my second change equals 1.568123 Just for fun. Okay, get status. Sure enough, it's been modified again. Super cool. So let's do it differently this time we're gonna add it again. But this time, let's do get add dot Well, that's gonna do is whatever director you're in All the files have been changed in that directory that you want to add. It's gonna add all of them. So that's just shorthand for adding at everything that's been changed in this current directory. So get add dot get status. It has been added, but now it needs to be committed. So we're gonna repeat that process again. So get commit. Dash M, this is my second variable. Okay, One file change three assertion. One deletions, if I go to get status, were clean. That's great if I go to get log, okay, there's three commits in there now, Just what I'd expect. Okay, it's looking great. Oh, no. All of a sudden we realized that we don't need that change. Let's say we broke. Let's actually see what this This code is not what we wanted to dio, and we didn't just want to delete it. We want to just revert back to our previous commit that we know it's safe that we know is doing what we want to do. So typing, get log, you see your commits. So let's say that we don't want this guy here like we made these changes and not happy about it. And I don't I don't want a man and then go back and deleted. I just want to go back to the state before it was because I really like That's what you could do as you go to this commit number here and copy the 1st 7 characters. 1234567 Okay, copy those 1st 7 characters you can right click and go to copy or you can just press command policy to copy those 1st 7 characters of the commit that you want to work with. Okay, Prosecute. Escape. This what I can actually do now, as I could say, get check out, okay. And put this right here. And when I do this, I want you to watch the coach screen on the right hand side. Okay? Get check out. We're gonna check out a previous commit look at that. If you noticed the change that we made on the third commit disappeared. Why? Because we've checked out a previous commit and again, that's one of the beauties of version control with get, Especially because you can check out previous commits and save yourself in case you've made mistakes. So this is pretty cool. We're making some good progress. You're learning the basics of get so you always add files first using get ad, and then you commit files to make your commits, and you should commit as often as you complete features. And as often as you can don't commit broken things into your code base. But whenever you have something that's completed and working, go ahead and commit it because you want to keep yourself safe. The more commit you have, the less code you're gonna lose. The case. You have a big problem or mistake. Commit early and commit often is world is the phrase that you'll hear in the development world very often. So we're thing I want to talk about here. His branches. OK, so let's, um Let's go back to master. Okay? Our code is gonna come back over here. You like? What's that? What did he just get? Check out? Okay, so if I type in clear this year, I'm typing clear this time by type and get branch. It's gonna tell me I'm on a specific branch, okay? And how this works is when you are writing code, you're putting it in a bucket you're getting You're giving it a name. You're saying all my changes. I want to be in this bucket. Okay, so right now we're in master, which is just it's the name of our branch that holds everything. Okay, let's say though that I have a new future that I want that the bosses asked me to create, and the future is to create a create a function. Okay. Yeah, We haven't talked about that, too. Great. A function that adds to numbers. Okay, So I don't put this in the master branch. I want to break it out because the master branch has all the code that's safe. And it's good. And what I want to do is break this off into its own branch so I could test it out and play with it. Okay, So what I'm gonna do is I'm gonna say get check out, Dash, be okay. When you do get check out dash beat, you're saying I want to create a new branch. All right? And you're gonna given name in this one. I'm gonna call it adding function. Okay. Switch to a new branch called adding functions by typing get branch. I spelled it wrong. It's at an age to it. By the way, if you press up on your keyboard, it'll put in the last command that you typed in the terminal, which is useful. Get branches. Now we have two branches, right, adding function, which I just created and master. So now any changes I make are going to be added unto this adding function branch, for instance, I go over here to my code. Now you're like, Well, nothing has changed over there on the coat. Well, that's true. We've done is we've taken all the existing code from the master. We've broken it off into a new branch. Now, I can actually say, um, Funk, that's shorthand for function Will cover this later on bunk. Add two numbers and it's going to take a, uh we'll call this num a of type int number e of type int. Okay. And, uh, we're gonna have this return to us and and and all we're gonna dio say, return number A plus num B. Okay, I'm gonna save that. So I've just created a function that takes into numbers and adds them and returns the result. Okay, Don't worry about this In tax, we're just giving you an inside it to what's coming up ahead. But we got a function here now it's having get status in the terminal. And sure enough, the changes there, let's do another way to add files. Get add dash capital A. Now what this is going to do? Is this gonna add all changed files in this current directory as well as all folders as well as all changed files in sub folders, everything and all the directories all the way down that's been changed. It's gonna add them all at once, and this is very, very useful. But be careful. If there's files that you don't want to add, this is gonna add them all. So be very careful to get Ad Dash Capital A. I mean to get status, and it's ready to be committed. So let's get commit Dash M and let's say added and adding function added in an implosion. One file changed five insertions. One deletion Get status. We're good to go now. You're like, Okay, and that's cool. But what's really going on? Let's look at our branches again here. Remember, we have two branches now Let's say let's say we want to go back and check out the master branch. We want to go see what our code used to look like. Okay, this is how you're going to see the difference between branches and and how they manage their own code versions. Okay, so, by typing, get check out. Not the dash B this time, because we're not making the new branch. Were just checking out an existing ranch, get check out Master, Look what happens on the right hand side on the coach screen. Bam! It's gone. Well, the reason is it is were changed us too. Our master branch, which has a different, uh version, control its managing code differently and all of our changes on that branch, and so that is really cool. So now we're starting to see a little bit into the advantage of branches. You could start building new things out like, let's say I said, you know, I had in another branch Get check out Dash B. Let's call this, uh, subtract function. All right, so I got a new branch called Subtract Function and ah, and so I'm like, OK, hunk, subtract. And I'm just gonna put in your numb a type int and be of type end. And we wanted to return, you know, and into us. All right. And then we could just say return a minus numb, be kept. No, that's cool. Let's go ahead and, you know, get status and, uh, get add dash capital, a get commit dash m created, subtract function. Okay, so get status. Always you get status to always make sure that you didn't have a syntax air, something that your files are doing with the need to so working directories clean, which is what we want to see. Now, let's say, um, we built this feature and the bosses like I don't need no stinking subtract function. We only add in our company. So you're like, OK, well, I don't need this branch anymore. So I could get check out to get check out, master. Okay, so if I do get branches, not three branches, K. So I'm like, OK, well, we don't need this attract function anymore. Well, the good news is, since we put it in its own branch Wouldn't have to worry about it anymore. It's not even in master. We didn't have to have to go back and change code and fix things that, um, that the Boston want, so I can just get branch. Um, Dasha. Yes, D Okay. Get branch test you to delete, and we're gonna say subtract function, deleted branch track function, get status. Nothing to commit. Working director. Clean, good, good branch. And it's gone so great you break enough features and get rid of, um it keeps it very module arised. This is how you should be working in your programming environments. When you start making lots of new features and changes, try putting them in different branches. So you keep your master branch clean and safe. Okay, so now, though, we got a master branch which does not have a adding function. And the boss says it's time to make the adding function. Go life onto the APP store K we needed Make this change the smithy Absar. So if I get check out adding function notice, it's over there on the right hand side. Great. It's still there. That's all I want to show it's still there. Let's go back now, actually, two Master when we want to bring changes into a branch. Okay? And this is kind of like our previous example with with our characters. You know, Bob or he's working with his teammates, and they need Teoh. They don't want a copy. Paste things manually, right? They want it to happen automatically. Well, here's where this is happening. What we're gonna do is we're gonna take the changes. Okay? Take the changes from the adding function Branch K. We'll take these changes and we're gonna merge them into master. Okay, It's all we're gonna do is this. Get merge adding function. Okay, And look at that. It just brought in our changes from adding function automatically into our code base. Here, here's the beauty of get and version control dead this first automatically if you notice here one file change five insertion. So it took the code from adding function and inserted it into master. So if I go to get status, Nothing to commit working director clean. We're good to go. It just brought those changes in. So I gotta get branch now. I can get rid of that branch. Get Branch Dashti for deleting adding function. Okay, and sure enough are changes are right here. Okay, so you're noticing all your projects. From now on, you're gonna create get repository for it and you're going to go ahead and add and commit as often as you possibly can. And there's one more way that I wanted to show you. How did she worked with git and Ex code specifically? So if we go over to excavate your Michels out of this file right now, close out of this. Okay? If I click X code and I Click New Mexico Project. Let's just go ahead and click. Single view application. That's fine. I click next product name. Let's just call this get test. All right, that's fine. Put this on the desktop inside of get fun. Okay, actually, put it somewhere. Let's put it somewhere new where there's no get repository. So let's click desktop new folder. Let's call this another get test. Okay, the quick create. Well, here's Here's the key. Okay, Right here on the screen. See? How says source control, Create git repository Exco to replace your project under version control. This is gonna do it free Automatic. So it's gonna skipped the step where you have to do get in it, and it's gonna do it for you automatically on your ex code project. OK? And if I click create Okay, I click create smooth this over here. Let's navigate So seedy space dot dot Let's go up on directory because we know we need to get out of get fun. Ls we want a CD into another get test. That's what we just created by l s. There's my ex code project. Okay, so let's see the into that. This is where a project is okay. Now, if I do get status, look at that. It's already initialized. This is Hey, we got changes. You created a new project. Oh, great. Let's get at dash A get status to make sure they're all added Now they're green. They were read before get commit Dash M created new X code project and attract that. How cool is that? How? Super cool. Now, here's something that's really cool too. If I go to my code over here, let's say I make a change. Let's just make a comment here making a change and I save it. Okay, If I go to get status There it is. View controller dot Swift It found it. How very cool is that now? Also. Okay, One day you can Dio is actually in X code itself. See the M right there. What do you think it means? Okay, it means modified. It even says it right there has a pop up so you can actually do instead of even doing it right in your in your terminal so I could get status and it's red. It needs to be agreeing that we need to add it first, right so I can actually go over here, right? Click it, go to source control and I can actually committed. It's what it's gonna do, is is, actually, um, it's actually going to add it first, and then it's gonna commit it for us here. So I'm committing it and answer your commit message. Let's say made a comment, which is what we did commit one file and it just did it first automatically snuff. I go to get status. Look at that. No. All right. Um, you are here. Get status. Do clean here. Too many things going on. Okay, so it added that file. You noticed how that changed up that specific file of you control about Swift. It's it's been changed. We didn't add this file here, of course, but if I type in, get log. Look at that. Made a comment so you can actually do it straight from X code as well, too, if you want. Um, all I d. E s integrated environments have cool features like that, but Exco does so very cool. We've done what we've done is we've done get commits, get adding we work with git branches, make sure they always remember, you always make a change and then add and then commit. Okay, change, add, commit change, add, commit, and then you can merge bright. You could merge branches into other branches, and this is version control. These air, the basics of version control 90% of what you're doing with get and version control is going to be what we just did here. There's more complex things that you get into, but 90% of the work you'll be doing are these vaccine things that we did right now. So that's pretty cool. You got a real good overview of it now and welcome to the world version control and get and being a professional coder.
19. Working with Github: Hey, everyone. So we've talked about Get already and version control. Now we're gonna talk about get hub now. Gave Hub is not equal to get. Okay, what get Hub is is a website. It's a service. Somebody's created. Okay, go there. Now get hub dot com It's a service that somebody's created to actually store repositories. Okay, so it stores them for you. And so, basically, your whole organization, if you have multiple team members, you guys can all post your code to your give accounts and share and download code and post changes up. And this is how you get your code talking with the code of other team members. It's also a great place for you to store your projects. So potential employers and the people who want to look at your coat and look at them. So we've got a hub dot com. It is a service. Okay, uses get behind the scenes. There's also another service I want to talk about called bit bucket dot or coke a bit. Bucket is a competing service, okay. And, ah, does the exact same thing is get help. Just different service. Fantastic service actually is both and one thing to note is on. Get up. If you want to use it for free, all of your repositories have to be public. Meaning anybody can look at your coat. So if you have proprietary code, you're building an app that you know anyone to see. You have to make a paid get help account. Okay? So you can have private repositories on the book. It's the same idea. Except the cool thing about bit bucket is it gives you five free private repositories. So if you want to use it for free with a proprietary project, they don't. Anyone else to see a big bucket might be the way to go, because it allows you to make five private repositories before you have to start paying so very cool stuff we're gonna talk about Get hub today. I'm not gonna worry about this right now, so we're gonna go to get up and, ah, if I I'm gonna log out. Here s so you guys can see what I see here. Basically, you go to get have dot com, and it's gonna ask you to sign Anderson or sign up to go ahead and sign up here. Put a user name, password, email and password. Okay. And I'm sure they're going to send you a some type of verification email. You're gonna wanna go into your email and verify. So I'm just gonna sign in since I parted Created an account. Okay, so they were super easy. Super cool. Um, now we're just gonna dive right in here and right here on the right hand side. Years may be different depending on how your systems laid out, but you're looking for a button called New Repository. Okay, I'm gonna click it, and I'm gonna give it a name. Now, since we've already done a project, OK, we we did the super cool AP. Okay. Very have a project. That's what we're gonna upload here. And you're gonna want to do the same thing with your project in the following exercise, so watch how I do it. Now, though, it's a repository name, so it's gonna be spent tax. I assume my account for it. Slash and then whatever I want to call it. So I'm gonna call this IOS course super cool AP lots of dash. That's okay. The check means it's good to go description. This is the first app we built in the IOS course. Okay, Private. Oh, okay. That it wants my money. $7 a month. Okay. If I want a private, we're gonna make it public. So it's nice and free initialized this repository with a read me file? Sure. Why not? Be fun. Okay. And dot get ignore. So he ignore is a file in your git repository on your local system that basically says, what files? It doesn't want to put in version control. We're not gonna talk about about that anytime. If you ever want things that you don't want to Adam Version patrol, you can add it to the dot get ignore file, and it will ignore those files and not push him up to your positive. So if I click, create repository where and bam There it iss. We have a new repository sitting there, but there's no code in it right now. Okay? It's just sitting here doing nothing. So what we want to dio is push up our existing coat through this repository here, so there's a few things that we need to do First, your computer has an ability to generate an ssh key. It's basically ssh is a way to remotely log into things, push things up. And anyway, you have a key that you generate from your computer that identifies you with get up or if you're logging into a server, etcetera. So we need to set that up, actually. So I'm gonna go to Google and search for it. Get Hub. Ssh! Key. It was going to search for it. And sure enough, it pose open help. Get. Have a dot com in this article here. And this is actually what we're looking for. This top one right here. Okay, Now it's gonna give you a few steps. There's Mac windows. Linux is all. We're obviously going to use the Mac steps here, okay? And we're just gonna go through this together. So step one check for ssh keys when my computer has one. If you're new, you probably don't have one. Let's just assume that you don't have one, OK, So what, you're gonna dio you're gonna go through these examples here? Okay. And in your terminal, you follow these steps here. Okay. All right. And so I want to say Ssh Key. Jen Dashti Arce. Dash B 4096 you need to understand any of this, you need to do what it says I don't really even pay attention to. Well, these details mean this is just how you set it up, and you could put your email in here, So I was put, uh, mine in here right now. So, uh, and, ah, it's going to generate a new ssh. Using the provided email as a label generating public slash private RSC key pair. Okay. And her which files? To save the key. Now, you should just press. You should just press enter. Okay? I'm going to not do that because I already have a nexus h key. And I don't I don't want to make another one. So I'm just gonna press this, and you can put your pass phrase in. I usually use the computer pass phrase that you have for your computer. Okay? It's not gonna show any characters as you enter it, it's and ask for it again. Okay. Excuse me. Um, so then mine didn't say, but that's okay, because I didn't I didn't want to put it anywhere, cause I already have one. So in your case, you should just press entered it should have worked just fine. Okay? And then you'll see something like this here. Okay, which has some details there. Then next up is right here. So you can just copy in paces. OK, come and see you to copy. Pace it right in here. And you know, I have one having ssh agent running in the background, okay? And then you're gonna run this command. I've already done this. Okay? You're gonna run this command, and it's going to add your key to that. Ssh. Agent, up to this point, you still shouldn't have any problems. This is to be very fairly straightforward, By the way, on Lenox and Windows, there's more steps in this, and you can run into more problems. But luckily, we are a Mac, which does a lot of things for us very nicely. Okay. Excuse me. So next thing here is to simply copy that key. Okay, so you should have Aquino. Alright. Ah, And if you having any problems here, go to the website, go to the forms you can get help their post your specific problem, or you can google specific problem. This is there's lots of common issues associated with ssh keys. And I'm sure I know there are many, many answers out there for every type of problem. So go ahead and copy this command right here. And what it's gonna do is it's gonna copy your key. It's gonna copy it into your clipboard. Okay? And so whenever you paste it, it's going. Whatever you click Paste is gonna pace this key here. So now all you need to dio let's go back to get help, go back to your account, okay? And you're gonna go to setting. So click this icon, appear the top, right? You're gonna go to settings. And if it's not here, just go figure out where the settings are for your for your profile, okay? Settings. And then you're gonna go to ssh keys. Okay. And what you're gonna do is you're gonna add it. You're gonna put a name and right here Syria to say my computer's ssh key. And what you're gonna dio is you're gonna paste it here. Now, this is a secure key. You don't want to show anybody, which is why ours is blocked out here. But basically just gonna pace in wherever it put on your clipboard. and then you need click Add a key, and that is it. And the reason why you needed to do that is so you can push up to your repository. You could push code up to your repository. Okay, So I'm gonna go back here now, okay? And we've created our repository. It's right here. Super cool ap. I'm gonna click it. Everything's here right where it needs to be. Okay, now, on your terminal, over here, on the left hand side. Go ahead and navigate to wear your project. ISS. So in our case, it's on the desktop. Super cool. Having a CD, Intuit CD. Super cool. Okay. And very nice. So it's all right there now. We've never initialized this to a get repository yet, so we should do that like we've done before. Get in it now. It is initialized. I do get status. There's a lot of changes. I'm just going to get at Dash Capital eight, adult these and then get status again. Okay? They're all green. That's good. It means even added, Let's commit it. Get commit. Dash M Added files for super cool. All right, so we have just added files. Now there's only one thing we need to do. We need to tell our local git repository, this local repository here and our folder on our computer. We need to get it talking to the one and get have dot com They need to talk to each other. OK, so what we are going to Dio is over here in the right hand side, you're gonna see something that says ssh. You're gonna click it. Okay, you can click this button to copy it right here. Okay, so it is now. Copy says says copy. Now what you're gonna dio is everyone left inside? If I type in get remote, Dash V, it's gonna list on my remote repositories right now. There's nothing. So get remote Dash V lists all the servers, like, get up that our house stories talking to right now, it's not talking to any of them, so we need to add one. So what we're gonna do is get remote ad. Okay? We need to give this a name, you know, so I could say my get hub. Ah, very common convention is just to call origin, so I'm gonna get remote, add origin space, and I'm gonna paste in. Okay, I'm gonna paste in that link right here. So get remote, Add origin, okay? And we're gonna pace a sin right here, just as you see it here on a press dinner. Okay? Just added it. So if I type and get remote Dash V. Sure enough, it has two origins. It did one for fetching What fetching means is to grab, so to grab and download. And it gave us one to push Push it up Now it could be different. You know, one could be it could be one link to download one like to push up. It depends on how your servers are configured and your computer. You get up. In our case, they're the exact same. So that's very cool. All we've done now up to this point is we got them talking to each other. K, your terminal is now talking to Well, your local get up repository for your terminals. Now, talking through your get hub dot com account. So all we need to do now this is really cool. Despite having get status, nothing to commit, working directory clean. All you need to do is push it up. So what you could do. Say get push Origin Master. Now we know we rode on the master branch, Okay? Because that's what we've been working out of. If I was a type in get branch, this is remastered by default. That's cool. So I just want to push it up to the master branch to get push origin Master, Okay? And Oh, no, it's giving us an air. What does it say? Saying fell to push some rest to get get up because the remote contains work that you do not owe that I don't have a locally. So if you notice right here, we added a read me file when we actually created a repository. And we don't have that yet locally on our computer. So before you push, there's something that you always always always need to dio. And I want to show you this air, so you know, you're gonna run to it before you push. You always want a pole. Get pole origin, Master. What we're gonna do is we're gonna pull any changes that are on get hub dot com and we're gonna put him into our code base first. That way we can have the most updated coach. Let's give it a shot. Get Pole Origin, Master. And there it is. Okay. He came up with a screen here, And by the way, the screen that popped up here like, what's going on? I'm trapped in here. This is called Vim. It's a text editor at the terminal based text editor has very funky commands. It's a little bit complicated to take a while to learn. So before you do anything crazy here, just go ahead and press escape escape a few times. Okay, hold down. Shift and press Colon once. Okay, Shifted and Colin once. And then just press x X means saving. Quit again. Very funky press escape a few times if you've gotten any weird state and then shift and press Colin once and let go and then press X to saving quick. Okay? All that did was it said Hey, we're merging these changes in notice right here. It did merge. It pulled in the read me file it put it in here. So I just get status. Nothing to commit, working directory clean. And then I can go ahead and do now that it's been pulled in and merged, I can do. Get push Origin, Master. Okay. And here goes compressing, compressing, riding total and then it sends it up. So if I go over here to my page here and refresh it command are to refresh Look my codes here now it exists there. Now, how cool is that? Some now get Hub is officially officially tracking changes. So if I was to put another file here like, say, touch and let's just say, um, some file that swift, I do get status. Of course, I need to add it, get at some file that swift get status and it's green. So it was added and get commit. Dash M added some file. And then I want you to do this time we we don't really need to pull because no one's made changes on the server on the get hub server. But it's always good practice to do that first. So get pole origin, Master, and this is already up to date. So no one made changes known, pushed in yet. That's okay, So let's go ahead now and do get push origin Master to push up that file change we made so do the same thing now it's reading and it's thinking. And if I refresh the page, sure enough, some file that Swift is right there. Very cool stuff. Uh, this. I mean, I can understand how this could be a little bit confusing. It takes some practice. You'll be doing it a lot as time goes by, but you can refer to this video So the takeaways from this are once you've set up your ssh key. Okay, it basically let's get hub. Know that this computer has access to this account in this repository. That's what the ssh key does. That's why we added it over here in the settings on Get home. We generated it here. So once get hub is talking to your local computer. Then when you make changes, you can first ad and commit them as you're used to doing now and then you pull down, get pole origin, Master, you can pull from this repository and then you can also get push origin master to push changes back over here and again. One other thing that we did was we added, get hub Archaea have account and the specific repository We added a za remote repository. Okay, using get remote or get remote, add origin and then pacing in the link to the repository. So this is how you're going to get repositories up on to get hub. Do those exact same steps that we did here for all of your projects here are now and again . You can use the website to get any help that you may need, and that is get up.
20. Swift 2 Conditionals (if / else) Part 1: Welcome back, everybody. Today we're gonna talk about condition ALS. Okay, that is, if in l statements also, this is how you get your coat to think. And in fact, at its very base level. Once you know variables and, you know, condition ALS, you can pretty much program most things in some former way at its most basic level. So very cool stuff. Foundational. Super important. Let's get started. Let's go over to your ex code beta. Okay? And what we're gonna dio is create a new playground. So get started with the playground Iowa's. And let's call this gun additional, okay? And go ahead and save it here on your desktop or wherever you want to save it, and it's gonna open up our playground. So to understand condition, ALS, we need to talk about another type of data called a Boolean. Okay, So spirit of our string here, if I save our is my house on fire, we consider of type bull. Okay, equals false. All right, So, bullying Vala values are either true or false. Okay, More zero or one. Okay. So one being true, zero being false. Okay, so this is a boolean, you know I could also have said another bull equals true. You know, the 1st 1 is just explicitly and explicitly defined type. Okay, So makes sense. One of the core foundations, in fact, basically everything that you do, as far as operations are concerned, come down to a simple, true false value. So let's talk about ifs or else statements. Okay? So we can say if is my house on fire. Okay, it is my house on fire. Then let's, uh, do print. This is gonna print to your your console over here in the case, the playground on the right hand side. Print someone get me some water. Okay. I'm just pressing tab to auto complete here else. Okay, Brent. So if my house is on fire, so give us some water. Otherwise print someone get some fire for my house, I save it. It says someone gets a fire for my house. So this is false, right? So we're saying if this is true, someone give me some water, otherwise, so I get me some fire. So is my house on fire? Equal spots we set up here. So this is actually coming out to false This equals false And so since this equals false, it goes into the else condition. So we're saying, if this is true, do this otherwise do this. Well, it's not true. So we're gonna do this. Okay, so those are some simple if an else statements. Okay, so let's talk about Boolean logic in general. Okay? So we can do this. Var result equals, if true equals true. What is the result Gonna be results gonna be true? Because true is equal to true And notice how we use double equal science. This is how we do conditional checking and swift is double equals. Okay, if it was a single equals, like in here would be assigning the results. So we're assigning the result of this. So this is going to generate either true or false valuable in it, and it's going to store it and result. Okay. What if we say result equals true equals false If true equals false. The result is going to be what false cause true is not equal to boss. Okay. You with me so far, it's getting a bit crazy here, So results would have result equals force equals false, this false equal force. Yes, it does. It's true. You like. Wait, what's going on here? False equals the true. It's nothing I've ever learned. Well, this madness Well, it's actually truth. False. If false is equal to false. Well, that you relates to true because it is true. I make sense. And then so have we covered everything here is true. It was false. False equals false. Yeah. I mean, does your simple, conditional checks here s so you can start really? Doing some some fun stuff is Now we can imagine that we have a bank account, right? So far, account total equals. Let's say we have We have $300.33 in our account. Okay, Very good. Now let's say there's an item that we went a purchase at the store gave our let's call this new call of duty game, and that's gonna equal 59 99. All right, so the game costs 59 99. My account total is 300 dollars and 33 cents. So it's time at the register. Okay. So I could do something like this if account total is greater than or equal to new call of duty game print I just purchased the game. Okay. Else, friend, I don't have enough money. Okay? And look at that. It just purchased the game. Now let's say my bank account only had $30.33. Sure enough, I don't have enough money so you can run bullying operations on anything. OK, so this is gonna equate to a true or false value if account total, if $30.33 is greater than or equal to new call of duty game, which is 59 dot not 59 99. Then do this. Well, we know this is not true because he only has $30 but make it true. We know this is now. This is not true because we now have $300 you just purchase the game. Excuse me. So just starting to make some sense, Okay? We've got values that we compare against other values, and we could do some similar things with some strings as well to So for instance, let's say Ah, I said bar name equals Jack. All right. I could say if name equals Jack. Then do this. That's a print. Your name is Jack okay. Else print. Your name is not Jack. Makes sense. Well, it's printing. Your name is Jack. Well, let's let's say I put in here, Jackie, Your name is not Jack. Okay? So, as you could see, uh, you can do other types of comparisons Here is well, too, which is really, really cool. So if anel statements, you could start building urologic like this. And so if you notice here, like, if I was building a some type of cash register application for a store, you know, I might have similar Logical. This is very based, but I have similar logic to, you know, to maybe decline a credit card or accepted or make a purchase, or and this this could be anything so you can start doing lots and lots of different things . So, for instance, if I say of our some number equals 25 okay. And, uh, let's call this number a okay. Number a save our number B equals 30 40. Our number C equals 45 are number D equals 50. Okay, just a bunch of variables. A, B, C d. And now we can do all kinds of fun things I could save our, um, final number equals 100 and weaken dio some conditional checking here. What we can do is we could say if number A equals final number. Do this else if number D equals final number. Do this else if number C equals final number. OK, do this else else Here. This So we introduce something new here. This is else, if so, before we did. If this then do this. So it's either this and if this is not true, then go ahead and do this. But in this case, we're saying if this is true, then do this else. If this is true into this also, if this is true, then do this. Otherwise, the final case. Go ahead and do this right here. So of course we can print. We can just say Ah, print number A. Just print the actual number and we could go ahead and copy and paste this here, here and here. Print number B number C. Otherwise, we could use to something totally different. We can say none of the values were equal to final number and we should see this printing because none of these numbers is equal to 100. Now if I made this 100 you should see 100 being printed right there. And this is not called because number A does that equal. Find a number? No. 25 does not equal 100. What if number beak was fine number? Well, number B is 100 final number is 100. So that is true. So it prints it there. OK, so you could start seeing how simple ifs and Ellis is. And if an else if statements can help you figure out how to solve ah whole bunch of different types of problems. So this is a basic overview of, if else statements billions, things equate to true. Okay, So notice how if it's greater than or equal to Okay, We could also said, if it's less than or equal to okay or if it's equal to that's another thing we could say. Or we could also say, if it's not equal to that's what the the exclamation mark stands for. So if account total, if 300.33 is not equal to 59 99 then its a sure, of course, that's not equal to that. So it's gonna equate to. True. So there's different ways you can play around with conditional and, uh, you do with strings or numbers, Of course, with strings. You know, you obviously don't want to do things like, um, you know, if name is greater than or equal to Jack, that's going to give you inconsistent results, Not what you're looking for. You're just gonna want to use the equality or the the inequality operators on strings. You're not gonna do less than or equal to things like that. But this is a basic overview of conditional
21. Swift 2 Conditionals ( && || ) Part 2: Hey, Ron, we are gonna dig right into conditional is a little bit more if else statements. So let's go ahead and open up X coat. We're gonna create a new playground. Call this condition ALS to to save it wherever you want. Okay, Perfect. So I'm gonna get rid of this. So we talked about billions we've talked about if an AL statements, let's talk about just having multiple conditional checks on the same line in the same statement. So let's say I've got a bank far my account equals $1000 are my friends. Account equals $2000 are my friends friends Account equals $3000. Okay, so let's say if my account is greater than 900 and if my friends account my friends account okay is greater than 1500. And if my friend's friend's account is greater than 2000 let's print. We've got moot Joe move. See, that equates the true It is true. So let's talk about what's happening here. So double ampersand. Okay, this is the ampersand symbol on the seven of your keyboards, and basically what we're saying is, if this is true, and if this is true, And if this is true, then do this. Okay, And so is my account. Greater than 901,000 is definitely greater than 900. So this is true. So we're saying, if true and true, because it's sequestered true. And troops were saying If true, interim, true, true equals true equals true. So it's true, if that's all true, then print this right here very good. And they always equate from left to right. Okay, so this is gonna go first in this and this and they'll have to be true in order for this to work. All right, let's talk about another example. Let's say we have a cooperative multiplayer game and we need to know if one of our team members is dead so we can send a medic over to revive him. Because if all of us die, the game's over. So what? We're gonna dio to make a few variables player A. A life equals truth. Our player be alive equals true. Our player see alive equals troops. Right now they're all alive. That's great. If player a alive equals false or if Player B alive equals false or if player see a life equals false. So either one of these players, any one of these players is dead. Let's bring a message. One of your team members is down. Okay, so right now these are all true. So this isn't This isn't working, However, What happens if I make player be dead? He got shot. I am. One of your team members is now. Okay. So what happened is it ran this right here? Player A a live equals false. Well, it's not false, so it skips. It goes on to the next one. And right here. Bam! This is now this player Be alive now. You could swaths of player be alive. So false equals false. That's true. So we hit this right here. So what's gonna happen on this or statement is this is going to stop running. It's not gonna even do this right here. It's just going to say Okay, this is true. So let's go down into here. So this is or Okay, do this. And if this is false, try this and this is false. Try this. Keep doing it until one of them is true. If none of them are true, it will. It will enter into the block here. Okay? And you can have as many on these on the same line as you want. Of course, your code could become more complex is you start doing that at as a professional developer , you're not gonna find yourself doing more than two or three of these on the same line. Okay, If you're doing that, your is probably a better way. Teoh, do your logic in your coat. Okay. So very cool. So one of our team members is down, so we know that we're statements are working. Cool. So also, one other thing is, um Well, you could also do, since this is a bully in here. But we could also does. We could actually take off, equals false, and we can just put a pound sign in front of it, okay? And what that's saying is the opposite of what it is. So basically, player live equals. Troops were saying, if this is not true, if this is not true, then go into this statement right here. Okay? So that's another way of another way of writing it, but we'll put it back to the way it was just for sake. Clarity. Here and you don't need to wrap your head too much around doing it. Those other ways this way is completely fine and a little bit more readable. So let's talk a little bit more about these condition ALS and maybe doing some mixing and matching. Okay, we all want to retire at some point in time. So let's figure out if we are allowed to retire and we'll see if natural selection in nature or whatever you wanna call it allows us to do. So. Can I retire? Okay, of our age equals 23 our account, this is your bank account equals $100,000. Endless. Add one more thing here, Let's say of our rich uncle that died, who left me an inheritance equals false. Uh, that's interesting. You could make variable names that are really long. That's pretty cool. Okay, so let's say if account is greater than $70,000. Okay? And if age is greater than or equal to, let's say 60. All right. So if our count has over $70,000 in it and our age is greater than or equal to 60 or if Rich Uncle who died left me inheritance equals true. All right, so that equals true. Just make this a little bigger, girl. Okay, so let's listening this Oregon. So if my account is over $70,000 I'm age 60 or older, Okay. So if this equates to true, these two built these two this conditional checker. So if this condition is true, and if this condition is true, we're going to get in here so I can print You can retire, All right. So Or if Rich uncle that died, who left me? Inheritance equals true means we just got a whole bunch of money. And it doesn't matter what age where or how much is currently or make account, cause we're about to get a big fat sum of money. So right now, save it. So Accounts grader. Well, my age. Oh, so here's a problem. So my age is not greater than equal to 60. I do have a $100,000 but I'm not allowed to retire because my age is just not quite old enough yet. And my uncle did not die unfortunately. So I did not get that sum of money. And if my uncle's watching Sorry, I don't want you to die. Um, I'll take your money anyways. Okay, So age account. Okay, so we know this is equating default. Why? Because age ages. Wrong. So let's say now I make my age 61. Well, it's come out to be true. You can retire. Okay, So if account is greater than 70,000 which it is and the age is greater than equal to 60 I can retire. Fantastic. Alright. Super cool. All right, so we are retiring. Now. Let's say that we're going back to age 23 in our account. Balance has $50 in it. We are a starving student who's living off of top ramen and pancakes. Pancake mix. Okay, So if account is greater than 70,000 and age is greater than equal to 60 you can tire. Well, I'm not retiring anymore, but good news, everybody. The uncle died and he left us like a 1,000,000 bucks. I see. Hey, we could retire. So even though my age is less than 60 my account is definitely less than $70,000. Uh, this condition now equates do true. All right, So what were said here is what we said here is if this and this equals true. So neither of these in this case is truces false? Or here's the key word. Or if Rich uncle that died, who left the inheritance equals true going to hear? Well, this happens. So now we can go in. So this is how you can mix and match and statements and conditional checks with or conditional checks. And you'll use these all the time in your coating. So that is conditional is part two, and we've covered really a good A good grasp off how this works at its most basic level. And so you connects to be a very functional programmer, knowing what you know right now.
22. Swift 2 Functions: another exciting day here in the world of IOS programming. And today we're gonna talk about functions. Functions are another core component of programming. Okay, You're gonna use them every single day as a programmer, no matter what language you're using. So I'm gonna go ahead and, uh, open a new Exco project. Okay? Already have, um, next code file open here. Someone's gonna file new playground, and we're gonna call this Ah, uptown function. You. I made that name all by myself. Okay. Okay. So of course it gives us that evil to string. Hello. Playground will delete that. And this is build our very first function. You use the funk keyword not to be confused with function, just funk. And we're gonna call this one funk A That's funk with the K. And they was in a all right. That's a function. And there is the end of the lesson. Just kidding. All right, so let's dissect this a little bit here, So we've got a function. Well, this is a function name, just like you give a variable name such as bar. My variable equals something just as you give it a name. You're giving this function name so it can be reused. Okay. And the idea behind a function is it performs some type of action. Okay, So if you were to turn a human being into an example of coding practices, a person might have what's called properties and function, so some of the properties might be age, you know, uh, height. Okay. You know, their properties. Personality person. Ality angry. Okay. Those properties and functions on a person might be such as walk okay or talk or engage in a fight. Okay, so there's some function. So we've got a person with properties and functions for actions. Okay, so that's that's how functions work there. Like actions. They performed some type of some type of action on behalf of your program. Okay, good to leave those there. So let's go back and to find Funk A. Okay, We're just gonna print a value. So we're gonna print. This is my first function. Okay. All you're like, Well, what? What is it doing? It's not putting anything well, to make a function work, you do something called calling a function funk. A presenter. And now my function runs Okay. So even though this code right here has been written. This will never, ever, ever run until you actually call it okay. And always know that you never are calling a function until you put an opening and closing parentheses on it. So all we're doing is we're calling funky. We're calling it so So this this moment in time happens right here. It's actually gonna skip up here and to line six. And it's gonna print that for us. Okay, so we just called our very first function. And functions are really a simple Is that okay? It's has a name, the funk in front of it. And you call it to perform some type of operation. Okay, Some type of action. Let's make a few more functions. Funk, funk be okay. And I'm just naming these whatever I want. You can call them whatever you want. Analysts defined funk. See, we got three functions. All right? Now, functions can call other functions. Okay, So what we're gonna do is we're gonna say calling funk be okay, and ah, put that there. And then this was gonna call calling funk, see? And this one's gonna print something else to say. I am the best function of all. That's debatable. Okay, very good. Now nothing's happening. Well, that's because we haven't called the other functions yet. So this is do that now. Funk. Be notice how it even recognizes the function. Even if it's below. It doesn't matter if it's below or above it. They all recognize each other, which is really cool. It's called Funk, See, And this is course is not gonna call anything. Now, of course, nothing's happening. It well, we have not yet called the first function funk A And as we call it calling going be calling funk. See, I am the best function of all. Done that it? Ah. So there you have it functions in its simplest form. Okay, now let me demonstrate a No, No. Okay, you can actually get yourself in what's called an infinite loop, and you can cause your program to crash. Oh, no. Let's do it. It's always fun making things crash. How my eye cause an infinite Well, what happens if I call Funk A from funk? See, let's think about that here. As you can see, it's going and it's going and it may eventually stop and break, or my program may crash. Uh, but this is an infinite loop, okay? And what's happening is recalling function A which is calling function view, which is calling function. See, which is going back to function a and calling it over and over and over again and effect just in those few moments of me talking, it went through 19,355 times. Computers are very fast. Let's go ahead and take this off So you don't want infinite Loop, so try not to do that. And actually, it's gonna crash so it may recover itself. It may not. We'll see here. But this is a perfect example of what not to do. So fever Find your program or ex code freezing. Okay, it's possible that you put yourself in a infinite loop. Okay, so there's functions at its most basic level, but this isn't really super helpful. I funk a frumpy is you know, when you can use that in the real world. So let's talk about, uh uh, more real world examples. Let's say you have a bank account. Far bank account equals $500.50. Okay, Now let let's say that we want to make a purchase. We're gonna buy something. Well, we could use a function for that. Okay, so let's say I have our item Amount equals, Let's a 200 $12.23. And so what? We connection news, we can say funk make purchase, Okay. And then what we can do is we could Of course, you're gonna want to ransom some validation here for some. I'm not gonna call air handling, but some logic. Okay, So if bank account is greater than or equal to item, obviously we want to make sure that that you couldn't afford it. So if we can afford it now, we can say bank account minus equals item melt, of course. Minus equals is just shorthand for bank account equals bank account minus item amount. Now, that's more code than we want to write the same principle. Okay, so let's just go back and say minus equals item amount. Okay? And as you can see, once it's decided to think for a second here bank account. Oh, it's not printing for us. This is printed here. Print. Thank account. Oh, you know what? If bank account is greater than or equal to I am amount. Bank account minus equals item amount. Okay. Uh, so silly. I didn't even call the function burger. I gotta call the function. Of course. I just explain this to you, and I'm not even calling it. Your function never runs until somebody calls it with the parentheses at the end. And there it is. Notice how in explode, At least in the default color scheme, it makes it pink. That means you're calling the function. So we just made a purchase. The balance went down as a great example of how to, uh, how to use function in real world sets. Now, we're actually not using functions in the best manner possible at this point. We have variables here, Okay? And it's manipulating those, but functions as much as they can. They should be able to stand alone. Meaning they shouldn't have to rely on data that's above it. Okay. Function should be self contained, if at all possible. And so we're gonna talk about what's called function parameters, OK? Function parameters make functions more reusable. Okay? And it extracts them from directly manipulating the data in your in your program. Okay, so let's try this again. Let's say instead that's this time. Call this attempt purchase. We don't know if it's actually gonna make the purchase. Not especially if you don't have enough money. Okay, we're gonna do is attempt to purchase. We're gonna put a variable in here named Amount. All right. And we're gonna make it of type double. Let's talk about this right here. Okay? So same thing is, before we gave it a name we defined It is a function, but here's a different thing. Whereas before it was empty in here. Now we put something in here, and this is what's called a parameter. Okay, What it is is when somebody calls a function, okay, they can drop in an item into this variable so they can drop in item into it, and then they can. The function can use that data. So, for instance, if I wanted to call this function, I could say attempt, purchase, I could pass in item amount, okay. And then I can actually print amount. Okay, so let's talk about is happening here. So right here, actually calling the function and they were dropping in this variable. Of course, this is a very bill of type double. We didnt explicitly define it, but it knows automatically because of the value we assigned to it. So we're gonna pass in a double. You're like, Wait a minute. This is item amount, but this says amount. What? What What's going on here? Well, what's happening? Okay, is item amount is being dropped in the bucket right here and being renamed to amount so it can be reused. Okay, so let me draw. Draw some things here. So this is the line that's first called right here. Okay, that's first called. All right, then what happens is ah, you pass in this parameter here, you're gonna hear that a lot. You pass in a value or a variable into a function, so we're gonna pass this item amount, gonna drop it in here. So we're grabbing it, were dropping it in, and then it comes right here. And then we say, Hey, let's give it a new name. We're gonna call it amount. We just rename it, okay? And then we could do whatever we want with it right here. So that's how functions work. You can pass stuff in it, and it renames it almost like a an alias and allows you to ah, to play around with it. So very cool. Now, in this case. Okay, well, we pass in the amount and give it a name. We actually this is a let This is a constant you cant modify. So it's actually copying it. Okay, for for value types such as double into float string things like that. Okay, for those those value types, when you pass them in, it makes a copy of it. And you cannot modify the original version. You're like, What is this guy talking about is getting crazy. Well, let's Let's, uh let's try this out here. So if I So we know that item amount is being passed in, Right? So let's say I wanted to be a nasty little programmer and changed item amount from in here . You know, I could do it like this. Of course I'm amount equals five, right? I could definitely do that. Uh, and it's gonna access it, but we're talking about this guy right here. Amount. Okay, so we passed item amount. Here it comes into here. We renamed it. Let's see if we could do the same thing with them. out because amount. If we remember, If we print the value amount is equal to item amount. So, like, OK, it's the same, right? Well, what happens if we try and modify the parameter itself? Amount equals five point. Oh, what does it say? Cannot sign a value or Sorry. Cannot assigned to value amount is a let constant. Ooh, that's interesting. That's real interesting. And then, um, what's really interesting is it gives me the option to make my parameter a variable. So by default, if I don't have anything in there, it's gonna make it a constant. Okay? All right. But if I put a bar in there, if I could've are in there, Okay, so I now can change it. Let's see if I can Let's just got in print. I don't amount to see what that is, right. So I had amount is still the same. So what actually happened here was this time we actually copied it, and still, but we made a variable. So now we can modify it. Now it's still copy, and this is changing. This is not gonna change. We can copy it, mess mess around with it, and sometimes you want that in most cases, keeping it it let is probably what you want to dio. Okay, so So that is ah, parameter. So let's now go. Let's not think about the problem we're trying to self attempt to purchase. So if bank account is greater than or equal to amount Okay, then let's go ahead. And ah, it's a bank account minus equals amount else. Uh, print, um, in sufficient funds. So you guys hate that You're so excited to go to McDonald's, get my hamburger, and it was, like, 20 people behind you. And then you swipe your card, and it's like car decline. You get embarrassed in any way. Such is life. Real world example. Like I said on you guys could be the ones to print these message these nasty messages so us wonderful and users can enjoy the pain of that experience. Okay, so insufficient funds. Very cool. Let's change the melon and see if our else statement work. So I don't amount is ah, $600. Okay, Are my own insufficient funds. Okay, now you're embarrassed in life. All right, so we're actually making something that's pretty useful here. Okay, That's so bad. Well, you know, I think we can re factor this even a little bit for let's make some mo better code. Okay? It's gonna delete this stuff here. Okay? Um all right. And Ah, I don't amount That looks good. Okay, so let's, uh let's first check. You know, we're talking about when you're in line, you swipe the card first, it's before it even tries to take money out of your bank. It just checks to see if you can actually make the purchase it. All right. So let's make a new function called can purchase. It takes in and a melt just like before. OK, but this time Whoa. It was his weird era looking thing. OK, so we've got over calling a function, but can a function return something? Well, yes, it can. We can make our function return something. Do whoever's calling it. Okay, so in this case, it's saying our function needs to return a boolean. Okay, You can put any type here. You want straining. Whatever. Maybe an int in our case, we want to return a boolean can purchase. Okay, So what? We could dio his similar coded before. If bank account is greater than or equal to amount. He's a return. True else. Return. False. Okay, also, here's something interesting. We actually don't even need a return statement here on the else. I'm sorry. We don't even need the else statement here. We could just say return. False. Okay, think about it here for a second. If this is ever true, it's gonna get here. And once you hit a return statement, okay, it is actually gonna leave your program. Okay? Not not your program, but your function. So as soon as you hit this return, it's gonna return a boolean, and this will never be executed. I could have 5000 lines of code here, and you'll never see the light of day. And that's because the moment you return inside of a function, your functions dead. It's done. And it returns, OK, it returns something. All right, so in this case, we're returning true, so we don't need elf statement an else statement because, uh, well, we'll only get here if this is not called. Okay, so can purchase. All right, start to make sense. Good. Good. Glad to hear that. Cats. So let's see here. So we're checking if we can purchase. Okay? And we got a passing an item. And, um, let's also make another function to actually process the purchase. So this function would be called whenever we actually get past the, uh, the can purchase portion. And this is where it actually comes out of your bank account. Ghost, the to the institution that you are spending money at, so process purchased, Takes a double. And look. This time I called the a m t. Like I said, you can You can name your parameters, whatever you want. Okay. A m t. And we're here with just a bank account. Minus equals MT. Okay. No, this is being called, of course yet because we haven't actually called the function. We've only defined them. Okay? We only to find them. So let's go ahead and process it right now if I can purchase. Okay. And let's say item amount. Wait, what's going on? Wait. Why are you putting an if in front of the function, I thought you just called it in. And then that's how you did it. Well, same thing here. We actually are calling a function. We're calling the can purchase function, right? And remember how he said functions can return things. So in this case, can purchase is returning a Boolean. Okay, so what we're actually saying is it's either returning a true false or tractor saying is if true or if false? K. Look at this. If What if I said, uh far, um, what is in this equals Can not making equal to a function right can purchase passing the item amount. Let's take a look false. So this variable has the value falls in it. Okay, so when you when you assign a function to a variable, you're not actually signed assigning the function to that variable. Okay, you're actually risk assigning the return value of that function, which is this or this. And that's what's getting store inside there. That's why we can use the function as a bullet in expressing here and do it a check on it. Say, if can purchase did see, they're gonna be sure if also, if we can purchase, let's go ahead and process, process, purchase and we'll pass in the item amount. Okay. Else. Okay, else we're just going Teoh print in sufficient funds. Okay, so let's see if it works. Recalling if can purchase, we're processing the purchase. We don't have enough money. It says, Hey, look, It works just like it did before. Let's see if we put a 400 in here and, Ah, I think it made the purchase process purchase. Um, and this is printing here. Print. You made a purchase of the amount are cool. Little, uh, variable insertion string thing here, and we'll just say, uh, yeah, okay. Unless close off our parentheses. All right, so there you have it. Look at that. So we started here. If can purchase. Okay. So if we can purchase this, which we can, then let's go ahead and call this function to process the purchase, which is happening right here. And then you made a purchase of the amount of $400 that looks like it's working. So there you go. You learned about parameters. You learned how functions can return things. And let's do one more. Let's do one more a return thing here. Let's say that you've got a string bar. Uh, name equals Sweeney Sweeney Todd. A lower case there. And let's like, let's say we actually needed this, uh, pregnant on a billboard and it needs to be all uppercase. Well, we can write a function for that lineup so we can say funk get upper version, okay? And ah, we can do is we could just say input string. Now string comes with a nice little a nice little thing for us. A string comes with a nice little property that gives us to us anyway, so we're kind of reinventing the wheel here, But this is just for demonstration purposes again. So we're gonna pass industry the input string, and it's going to return us the upper case string. Does that make sense? Passing the input string, It's gonna do its magic. It's gonna return to us a new strength. So okay, I can say return input string dot uppercase string. Now, here's the here's thing I was telling you about, um, String has an upper cratering property. This is a property. So what it does, is it it's it's actually computed property behind the scenes string is gonna make your stuff uppercase. And so we wouldn't really need to do this inside of a function. We could actually just do owner string itself. But for demonstration purposes. Okay, so you passed into straying into returns a string. All right, so if I say var name upper equals Okay, get a perversion and I pass in. Name the name up here. Okay, so this variable equals get a perversion. I pass in this name and it's going to be some back. Look at that is now all in capital letters. Okay, so our function took a string and it did some magic with it, Did some operations on it, and then it returned. It returned the uppercase version. Pretty cool, huh? So now we've talked about returning things super cool. Let's talk about having multiple parameters were getting close to the end here, which is good. You're learning almost all the core concepts of functions here, and the more you practice practice with them, the better you'll get him down. So, um, the better. The real trick is to knowing when and how to use them. Not necessarily this intact, So it just takes practice. So let's go ahead and, uh, talk about multiple parameters here. Let's say that we've got a game, okay and has multiple players in Each player has a score, and we just want a function to declare who? The winners. Whoever has the highest score is the winner. OK, so funk ik flare winner. We're gonna pass in the first parameter player a score of type int. Okay, player, be score of type int. Okay. And we could just do some if else logic like we've done before. If player a score is greater than Player B score. OK, print player, A winds. Oh, okay, Else If player tell your bee score is greater than player a score print player B wins. All right, else. What's the else? It's a tie. Of course. Print the game. The game is at a standstill. Okay, not so bad. It's not being called, of course, because we haven't called yet. So let's do that now. Declare winner. Let's go ahead and put a score and so player is gonna be 33. Player B is going to be 40. What's gonna print player be wins, of course. But if player A is 50 let's make sure that works Player A wins this to 50 and 50. The game is at a standstill. Donut. Ah, so super cool. You could have multiple parameters. Just let's notice one thing right here So when you put in your first parameter, it actually didn't put the name in right here. Notice how this is Player X verbal right here. It's not putting it before on the first parameter. It doesn't put that in there. You don't put it. You don't put the name of the variable in the actual function call. Okay, But on the second and subsequent parameters, it requires that you put in the actual name of the parameter. OK, so don't be confused. It's just the way that swift works. So So instead of instead of just seeing it like like this, Okay, versus 50 comma 50. The second primer on work requires that the name of the parameter being there and then you pass in the value right here. Okay, so that's that's the only difference. Okay, so that's how you put a, uh, function together with multiple parameters. You can have as many parameters as you want. Of course, you don't wanna be jamming it with tons. If you're doing that, you may need to re factor your code and figure out if you can. Better module arise things, but, um, that's that's functions in a nutshell. Like the basics and core principles of it takes parameters. You call it, of course, by calling the name and putting parentheses after it, it can return something. Okay, you can know where is a return. You can return something from a function. You can assign it into something. You do all kinds of fun things with function. And I hope you can kind of see a glimpse into into the real world as how they might work in a program. And you could be sure that programs at your bank have things like process purchase, things like that. Of course, there is gonna be much more complex and secure and things, but there you go functions.
23. iOS 9: Auto Layout Basics: welcome everyone to another beautiful day in the world of IOS development Today we are going to talk about auto layout, the ability to lay things out in multiple screen sizes so they look nice and not being cut off the screen or stretch or things like that. So we're gonna just dive right in now, already have X code open right here. And I just want to show you a new way of creating a new project. So if you have an existing project open, you can go to file new project, okay? And a single view application is fine. Go ahead and call this whatever you want. We're gonna call this auto layout constraints, okay? Everything else here looks pretty good. And I'll just put it on the desktop, and, uh, there we go. And now I've got two projects open. So let's get rid of this one here, and, uh, we're looking real good. Okay, So I'm gonna make this a little bit bigger. Talk about a few different things here. So you've seen me navigate a little bit in the past and was gonna explain them a little bit more, obviously, here in the left hand, side. You've got a bunch of files. Okay, this is representative of what is in your actual file structure on your computer. We've got something called app delegate dot swift. We get a view controller dot So if this is your code file that is correlated with your main , that's to reward you controller. OK, And there's your story board, which actually opens up what's called interface builder. So this is a storyboard and interface builder, and you've got a launch screen over here. Okay, this is what is gonna be launched from your app. First loads at run time. And there's other things as well to So if you hover over here on the left hand side, it's a show. The standard editor. So Okay, the standard editor means that this is what you see right here. Okay, This is a standard editor. If I click show assistant editor, it adds another pain here in the right hand side. So the idea behind the assistant editor is so you can work with one part of Europe like interface builder and another part, which is the code on the right hand side. Let's go back to standard and then over here. We've got Birgit control. And the official name it says is show that version editor. And this this lets you look at your code side by side from different versions. We've talked about it already, and this lets you compare different changes you've made in different versions on gets. You can actually look at those changes right here. Real time. Very cool. Most ideas. Most integrated development environments, you know, offer something like that's that's really cool. So I'm gonna go back to the standard editor mode here and, uh, also notice here in your story board. Just quick. Note that you're using a mouse. OK, If it's not a magic malice, it's hard to move around. Apple has swiped features on here. So to finger swipes to left and right is what moves it around, you could do it on a magic mouse is well too. Okay, just exciting. Now, over here on the right hand side. Okay, we've got the navigator. Okay, so those files that I was just talking about, it's called the Navigator K. That section is called the Navigator, and right here we've got the debug area. So when you start running code excuse gonna start printing all kinds of stuff to this here . This is like your console. So you can look, Look at Ayers and bugs and things your printed to the screen. And so these hide and show those things in the right hand side is the utility section and has different information based on which screen you're in here. But basically, it's the right hand side. Okay, That's how you can move around, uh, in X coke. Okay, so we've already built something simple. And to understand how to build good applications that are reasonable multiple screens we have to understand Auto Layup. Now, what we've done so far is, you know, we've clicked our view controller right here, okay? And then we've said size 4.7 inch, and we're like, Okay, this is a This is an iPhone six. And so maybe we put a you I label on here, right? And maybe we, uh maybe we put it right here. I made a really big and centered it out and say we could say a double. Click it and say, you know, I am a label, okay? And with center it right. Okay, well, that looks that looks great, but does it really look great? Do we really even know? OK, so we know it looks great on iPhone six because this is an iPhone 63 What happens if I change my simulator over here to an iPhone for S let's who happens? I don't know. I'm not sure what will happen, but let's see. It's building and it's coming up. Taking its sweet time somewhere. Let's let's grab him. Let's force him on the screen. There we go. And again, this is a little bit big, so I'm gonna press command to to shrink it. Oh, my goodness. What in the world is going on here? So I'm a label was not Senator, by the way, just disappeared. Here, here's a Here's a condom steak you might make. And I just made it myself. And this is one of the reasons why we don't have scripted lessons here because I want to be able to see the type of mistakes that you can have and know how to fix them. OK, so basically, I put this in the launch screen, so only shows that launch. So there you go. You got to see what happened on a launch screen. I am a label, but we actually wanted it on her main storyboard here with our main do you controller. So, um, there we go. And on here, we can also go ahead. And as you can see, we can switch it. Teoh an iPhone 4.7 inch. Put the label on here I am a label in the right place. All right, We don't know if that's a true statement just yet. This is in an iPhone six layout on the view controller. That's that's a simulated metrics we set. So if I again build it on an iPhone for us, okay, is that label in the right place? The answer is no, it's not. And so it's very common for a new developers to put things on the screen and just magically hope that they're working on the screen. Says you may only have an iPhone six since you test it and you're like, Oh, this looks great. And then you release of the APP store in almost everyone's complaining. This is kind off. This isn't working well because you need to test a multiple screen sizes, so that's what we're gonna do we're gonna figure out a fix it. So first thing we can do is fix this problem that we're having right now, Okay? And I want to make a comment that the simulated Mexico metrics right here they're simulated . Okay? It doesn't necessarily mean, um well, it means that what you see here is this screen size that you're supporting, but it doesn't necessarily mean it's supporting all the screen sizes. And so they actually recommend over app that you just use the default inferred sizing, and you're just weird. It doesn't look like an iPhone or an iPad. Well, the ideal here, the idea here is you take all your controls, your components, and you lay them out on the screen using what's called constraints. Okay, You lay them out, and then it works on all screen sizes. Regardless off of the actual resolution that it's it's placed on because of the constraints that you've put on it. And maybe that doesn't make sense right now, but we're gonna demonstrate it. We're gonna demonstrate it. So one quick way to know what your app is gonna look like a multiple screen sizes is to use prevue. Okay, this is a very powerful tool. So what I'm gonna first do is I'm gonna turn off the left side, the navigator here, turn it off so we could have more screen space. I'm gonna move this over now. I'm gonna click this double circles right here. The assistant editor. OK, just click this and activate it. Now it's still pain, and we don't want to see the code. I know we actually want to see something called Prevue, So if you go over here towards says automatic and if you're says something different, that's fine. Uh, just make sure you click the link. The two rings go all the way down here to preview OK at the bottom. It's kind of in a weird spots kind of hit it and go over to the right, and I quit. Main storyboard and bam. Okay, here's an iPhone four inch. It shows what it's gonna look like. Here's something really cool. I can click the plus by it, and I can start adding different screen sizes. Let's see what it looks like on a iPhone six, By the way, if you don't know, I've 4.7 inch is iPhone 65.5 inches. Six plus the four inches like iPhone, five in greater and 3.5 inch is iPhone for s and earlier, Of course, I've had his iPad. And, uh, so we're gonna go ahead and click the iPhone six. Okay, look at that. So it's looking okay. And iPhone six, but an iPhone for its Not so we can actually see both screens. We can also rotate it here too, and see what looks like I'm like, Oh, well, why is it being cut off? Well, we can minimize that to make more space or if I double click, it'll make these things small. Unfortunately, there's no, uh, without having, ah, magic mouse or, ah, track pad. There's no way toe really zoom in perfectly unless you do pinch zoom on your track pad or on your magic mouse, which is what I just did right now and so and so two finger pinch zoom, and you got to do it here in the white space. So cool stuff. We can see what it looks like without having to click this run button over here, which is going to save you a lot of time. Okay, so first off. Let's get this label center where he where he needs to be. So if I take him and I move it over here in the middle, see how the lines centering it for your snapping into place. But over here, it's off the screener. Like what the heck is Go Went on. Why is it not work? Well, it's because what you do over here in this inferred, freeform canvas is not gonna necessarily be exactly what you see over here on the right hand side. Okay? You have to use constraints. And let's let's talk about that now. So constraints are what you bind. What used to bind elements to other elements or to the screen, or give spacing and things like that? So if you look here at the bottom, all right, there's some bites hit. So what we want to do is we wanna we wanna pin this guy. Okay. Um and, uh, what we can do is we say, Well, I want him to be at the top of the screen. OK, so if you if I click this right here, lost it here, let's add it again. There we go. So if I click this button and pin it 14 from the top. It is going to be there to stay okay on all screen sizes. Okay, 14 from the top. OK, so add one constraint. That's a constraint. It's one that's only changing, mates. We're gonna add it to that. You I label which is what This is right here. Okay, so it is now added. But wait, it moved over here to the left, and you're thinking, Well, why would pinning it to the top move it over to the left? Well, when you don't have all of the constraints in place and just maybe one auto layout will do some weird things behind the scenes against your wheel and choice, and that's just the way it is. So we have to put all the pieces together in order for this to work. And so right now you can see that there's a little blue icon there now, and it's saying, Hey, I'm pinned to the top Now the next part is we need it centered in the middle, and there's a couple ways to do this. We're just gonna do it one way, so I'm going to click this different icon down here. The align icon. Okay. And I'm gonna say Okay, I'm gonna say horizontally in container. Okay? What this is going to do is it's going to center it horizontally in the middle of the container and there you have it. Okay, So now, now it is looking great on every screen size. Okay, let's see how it looks like on an iPad. Okay. Looks good there, too. What do you think? It looks like if we rotate it. Don't wait until the very end to check how your app is gonna look on different screen resolutions. Okay. It'll give you a big headache, cause you're gonna have to figure a lot of things out at that point in time. So this is one quick way of centering and putting things where you want them to be and for them to work on multiple screen sizes. And you can also position elements nearby each other. So let's say I want to have you have you okay? This is a you I view. It's kind of the foundation of all these controls. I take this and drag it over, announce why you can't really see it, So I'm gonna go over here to the inspector, and I'm gonna go down to background, and I'm gonna change it over Teoh blue. Okay, you can pick your own color. And of course, again Look over here on the right hand side. Nothing is lining up as we want every single screen. So let's just center it, okay? We want centered. And let's say that we want it this far from this top light. We want to keep it there. OK, so over here, as you can see, some of these different heights in between some of it's over on the left, over on the right, it's not the right place. So we're gonna dio it's similar things. I'm gonna click the pin icon down here and I'm going to click again The top one. Okay. And we're gonna put it that far from the top. So it did. And you're like, Wait, everything is screwed up. Oh, no, I just broke everything will, getting where you want to be again. You're gonna have toe add constraints, and things are gonna look broken, but they're not broken. Okay? So again, we can go ahead and click the line menu and weaken Dio is click horizontally and container . Okay, There's one other way to do this. Okay? Couple of the ways, actually, but what I'm actually gonna do is I'm gonna slick this one and holding down command. I'm going to select the label. Okay? The labels already assigned to the center of the whole container, I can actually click the a line bind here, and I can center these two controls together. Okay, so I want them have horizontal centers. Well, since the labels already center to the main container when I click this, this is now is it? Blue View is not gonna be centered with the label. Okay. Minute. The horizontal centers on these controls include add one constraint. All right. And it did it, but yet can't see it because there's one more thing we need to dio we need to set the with and the height of this blue view so I might click off. So it's just the one being selected here. Okay. And now what I'm gonna do is I'm going to click this, um, pin button here, and we're gonna click the width and the height. We're gonna force it to stay that tall and that wide and there it iss it has appeared back on the screen. So again, you're gonna deal with this all the time. Things are gonna jump off your screen. You're like, what is going on? So make sure that you finish putting your constraint, and you kind of have to look a little bit into the future to know what it's gonna be like finished putting those constraints in, and then it will do what you want it to do. So what we did was we were pinned it to the top up here, okay of this label, and then what we also did is we selected both of them. Then we, uh we did horizontal centers right here. And this is no highlighted right now because we only have one control selected. And then, of course, we set the wick and the height of this view to stay the same. No matter what you were on, what was happening is shrinking and disappearing on us again. I don't layout does some weird things, and it's hardly auto lay. I don't even know why they call it that, because you have to do so much work to get your things working on multiple screen sizes. But there is the basics of auto layout
24. iOS 9: Auto Layout (Digging Deeper): Hey, everyone, here we go again. IPhone development, of course. And we're going to talk more about auto layout and constraints some of the more advanced features, so we can solve unique problems that you will come across as a developer. And so for this project, we're gonna use a graphic from the Internet. And I just wanted throw that up here beforehand. This is pretty rocket right here, and I have to give credit in order to use it. So it's his divine, but designed by free pick dot com, there's the URL right there. This is also included in the source code of the project. I chop this up in Adobe Illustrator a little bit, but there it is. Okay. And I've got to hear my desktop already ready to go, and I actually already have a next code project open. So again, I'm gonna go to file new, uh, new project, OK? And we're gonna make this a single of you application. And let's call this auto layout advanced. Now, when I say bats, it's more advanced in the last one. But constraints could become even more advanced, and we're even gonna talk about here. But for the most part, This is the type of things you'll be doing as a professional developer as a someone who's releasing EPS to the APP store. So I'm gonna save it on the desktop. And there were ghosts. Move off this of the project here. Okay, So what we want to do is talk about how to get your how to get your views aligned across the screen and still maintain, like a flexible with, regardless of what type screen the user is on, whatever size it is. Okay, so I'm gonna go ahead over here and click main storyboard right? And again, like like we talked about before. I'm gonna leave it here on this freeform style or because I want I want it to be arbiter. I don't want to think what would look good in an iPhone. We look good. And I had I want to think what would look good on all devices. OK, and if you have a nap, that specifically four an iPhone and you specifically really want to design it in accordance with specific phone type? You can, of course, go here. Click your inspector your attributes, inspector, and you can change the size. Okay to the different phone sizes. All right, um, we're not gonna do that. You're gonna dio inferred. Okay. All right. So let's go ahead and throw on of you. I'm typing in. You have You don't hear. That's just a way of filter. And you could, of course, scroll down until you find it. But it's easier if I type in new, have you? And there it is. Okay. And so I'm gonna put it on the screen, and it's white, and I don't like it. So I'm gonna go over here into my inspector again. You could changes around. What? I'm going to the inspector. We're gonna just change it to this pretty red. You put it whatever color you want. And so what we want to have happen in our case is we want it to go across the screen like that on all screen sizes. Okay. I'm gonna close the left hand side over here. The navigator. All right. So we have more screen space, and I'm gonna go ahead and click the ah, assistant editor here and right out showing code. But again, remember, we want to see the preview, so I'm gonna click automatic or just click the two rings if it doesn't see automatic and I'm gonna go to preview family remained at storyboard review. All right, So already it's not doing what you wanted to dio. You would think things would work out of the box, but it doesn't. And of course, if you're familiar at all with web development, you know that doesn't work out of the box either. You gotta do similar amounts of work to get things going. So let's go ahead and open up a 4.7 inch, okay? And it's not. It's not doing what we want there, either. We want it to look kind of like it looks over here on the left hand side. So let's go ahead and do some constraints. Now, you've seen this before this part before the pin men. Okay, so let's talk about this. So notice how it 00 and zero. Okay, well, the reason why is 2000 is because storyboard here, this view controller, it has a margin of 20 on each side. And so if I was to put it right here, all the way to the edge and then click the pin button. Now it's on out negative. 20. Okay, because it's it's signing it to the margins. Now, if I didn't want to work with margins, I could actually click this check box right here. Concerned to margins. Take it off and notice. Now it's zero. So it's actually pinning it to the corner of the view. We're gonna leave it at margins because that's the default, okay? And so I'm gonna undo this. And what I want to do is I do want zero from the top again. There's the march in there, so it's technically still zero zero from the top. Now I want this to go all the way across the screen, no matter what screen size him on, no matter if it's landscape or portrait. And so maybe you're thinking to yourself, Well, maybe I should make the with this long. Okay, well, let's who happens if we do that 5 60 So I made it with 5 60 course. It disappears on on the iPhone four inch again. Unless you do all the constraints, things are inconsistent. That's the 4.7 inch Let's go to the iPad and, ah, the iPad only goes partial partially the way across the screen. So we definitely don't want a fixed with Well, excuse me. We wanted to expand across the entire screen, so I'm gonna command Z to undo that. All right, now what? We're gonna dio let's go back over here. So we're gonna pin it to the top. We know we wanted to stay there, and this time we're actually gonna pin it to the left and to the right. We don't care about the with. So by pinning the left side 20 and the right side 20 what it's saying is, Hey, you need to stick to the left side of the screen and the right side of the screen. And that with is gonna auto feel for you. So it's going to stretch it to assess faras you what? Which is really cool. So if I do that, it's gonna add three constraints and bam. And you're like, Wait a minute. Now it's shrinking it. Yes, the demons of auto layout are against us. Never fear. The pin button is here, and we will, of course, at the height. Okay, so it's shrinking it because we didn't give it a height So let's say we want the height to be 1 28 Add one constraint. And sure enough, it is doing exactly what we want. Now you may be thinking, Wait a minute. Why is it dinner, like, not as high on the iPad as it is the 4.7 inch? Well, it actually is. Okay. It is. It's just a bigger screen. So having these right there next to each other makes it look a little bit off, but these are all the same size. Okay? Super cool. Now, let's go ahead and throw on another you eye view. All right? Move it right over here. Okay. And I'm gonna make this color over here on the right inside and the inspector actually selected I'm gonna make it blue. All right? You can pick whatever color you want, OK? All right. That is a pretty blue, um, and let's go ahead and command, See, to copy and command V to paste. Okay. I could also have you know at it. Copy at it. Paste. Okay. Drag it over here, and I'm gonna make this guy yellow. Now. We got some pretty colors on the screen. Of course, as usual by default is not doing anything remotely related to what we want to dio. And, of course, we want these guys to meet in the middle and to look really nice together. So what I'm gonna do is change the size of these smaller ones. So if you go over here to the right inside, Okay, there's a little ruler over here. This is called the size Inspector. We're going to start working with this a lot. Okay? So the size of Specter, it has its exposition. Okay, where is it? On the X axis. So from left to right. And the white position. Where is it? Up and down. Okay. And position 00 is actually up here in the top left. So if I was to say 00 it puts it up at the top left. Of course, that's not what we want, but just so you know, that's how it works. Okay, I'm gonna commands Ian commands, eat, undo and undo. And I want to increase the way to this 2 276 Okay. And I want to increase the height of it to 1 28 and then I'm just going to drag it over right there. Okay. To 76 by 1 28 list of the same thing here to 76 by 1 28 Okay, Perfect. Okay, so on the left hand side, it's looking how we want it to look. And by the way, the left hand side is this interface builder here. This is where you want to design things to look the way that you want. OK? And over here on the right is what it's really looking like. Okay, So what I'm saying, though, is even though, like, for instance, let's say I was too put a with on this. And I want the with to be 10 something really small. Okay? And I click add constraint over here on the what it's really gonna look like in your produce. It's really small. But over here on the left, it's still really big. Okay, so this is not reflective on the left hand side. This is not reflective of your constraints. Okay? This is your visual editor, okay? And what's really gonna look like is over here on the right hand side. So, anyway, what I'm saying is to make your left side over here in the interface, but there make it look the way that you want. And in the constraints when you've got them all properly put together, these things in the right hand side will look like the thing on the left hand side. Okay, so very important over here. Design it the way you want it to look and then messed with the constraints until the right side in your preview looks just like your left side. So I'm gonna undo that change because we don't want it to be small like that, okay? And we're getting closer. But what we really want is this. Take up half the screen in either case here, okay? And so there's a special thing we need to do in order for that to happen. What we're gonna do is we're gonna select this blue view right here, and we're going to select the red view. And what we're gonna do is we're going to go over here toothy pin button. We're going to say equal widths. Now you're thinking what we don't want to use to be the same. That doesn't make any sense at all. Well, on IOS, when you set certain types of constraints. You actually have to set the wrong constraints first, and then go and edit them. Unfortunately, that's just the way it is. So we need to set this to equal widths. Okay, We need to set both of these two equal withs. And I'll explain why in a moment my click add one constraint. Okay, that's really weird. I know. And then we're gonna one more thing. We're gonna sleep both of these again, and now we're gonna line the the leading edges here, grab that again in line the leading edges. Because we want this left to be aligned to this left right here. Okay? Announced in all kinds of funky stuff are like, Oh, my gosh, you know what's going on? But if you look over here, it's doing what we said. It's aligning the left part of the blue to the left part of the red, and it's making it just a long so it is obeying what we wanted to do. We're not quite ready yet, So what we want to do to save it a man s I'm gonna click this blue view and over here on the size, Inspector. Okay, the ruler. This is where your constraints are added whenever you have constraints. Okay? And you add into something. If you click that view, it's gonna show all of its constraints right here in the right inside. You can also access them by clicking on the left hand side. Over here, you can click it, you constraint to drop it down. And you can see all the constraints there as well as individual constraints for a specific view. Okay, so you're in the right hand side, all right? We're gonna go to this equal with, and we're gonna change things around a little bit. Okay? We're gonna change some things air out. So what I want to do is I want to change the multiplayer. Okay? I want to change the multiplier. Okay. Perfect. Now, you didn't notice a big change at all, and that's okay right now, because we got to do a couple more things. Click your blue view again. Let's click the pin menu. Let's say that we want it 88 down from the red view. Okay, so let's go ahead and position it the way we want it to be. Go ahead and also select height. We do want to be the height that it is. Okay, we want that to stay the same, no matter what's let's add those two constraints. All right, So what it's done is it's now moved it. Okay, It's moved it down over here on the left hand side. Okay? And it's really big, though. Okay, so if I click it and I go over here to the size inspector again, you know, like Okay, well, what did you even just do here? Okay, um, we got we got this view in this view. Well, things are actually doing what we want them to do. So what I'm gonna actually do is I'm going to click the second item right here, and I'm going to say we reverse first and second item. It's basing. What is doing is by putting the multiplayer too. And there it's making it twice as long. But we don't want it twice as long. We actually want it half. We want the with to be half of this with here, so I'm gonna reverse this, okay? And now you still don't notice any change? But that's OK, cause we're gonna get to that in just a moment here. In fact, actually, there we go. Now it's too. And now it's working. So talk about what just happened. So we went and we set the with of this blue view to have an equal with of the Red View. Okay? No, we don't want that to be an equal with, okay, because this needs to take up half of the screen. So all we've done, I'm gonna click this. I lost the details here on the double click this. So we lost. Excuse me. We, uh we at first it was showing twice the length. And so what we've done now, is this first item here? Okay. We're saying is, uh this red one, Okay. See how it highlights when you hover over it. And so what we're saying is on this first item make it have an equal relation to the second item and make it the with Okay. Now, when you put a multiplier in, it always applies to the second K two. The second view here, The second item, this multiplayer always is applied to the second item. That's what we're saying is Okay, so we want this to be half at any given time, Half of the with of this top view. Okay, that's what multiplayer does. So it solves our problem, right? Because we wanted this view to be to be half of the screen. So we know that the red views the full screen. So if that's 100% and you subtract 50% that's the remaining half. So what we're saying is, hey, make the blue view the same length of the Red View, but let's give it a multiplayer of two to chop it in half. So no matter how big the red view is, this blue one is always going to be half of the red. You okay? So that's why we did equal with Set. First, you were making it the same length. So it's relative to the red one, and they were just chopping it in half. If it's confusing, that's OK. It takes time to get this stuff down. But you can review this video and see how it all works. That kind of get it in your head. Constraints can be very complex. Okay, but now we've got to solve the problem of E yellow one. Okay, so I'm gonna click it. We're gonna do similar constraints. We're gonna make it eight from the top. Okay, We're gonna give it a height. I'm gonna add those two constraints, and I'm going to select the yellow ones like the red one. And I'm gonna click the align button down here, and this time we're gonna line up trailing edges, Okay? Trailing edges. That makes sense. It disappeared off the screen again. Don't worry about that. You got a look into the future again. Think of all the constraints you need to do and then get him done, and then it'll pop back where it needs to be. So go ahead. And now getting click these two views again. All right. And, ah, click the pin button. And just like last time, let's do equal widths. All right, now, obviously, it's not what we wanted to be just yet. We're doing solving the same problem we did before. So click your view again. Okay? The yellow view. And over here in the right, inside where it says equal with to view, double click it. So we need to solve again the same problem as before. So let's set the multiplier to to and again. It's going a little bit long and so Okay, Yeah, that makes sense. Let's reverse the first and second item. Okay? And since we did that, it set it back 2.5 against. Go ahead and set it to two. It'll do that on your press two and then press enter. Okay? And there it iss Okay, so it's splitting it half and half. Now. One thing we knows, we need a little bit of a spacer, Okay? Because we don't want them to touch each other. We want that nice pretty space or in the middle. So what you could do is you can actually add a constant here. This is going to accept a set amount of pixels. Okay, I'm gonna say eight and I'm going over to the Blue View and I'm going to set. I'm gonna click it, and then I'm gonna click proportional with to view double click. That and I must set the constant here to eight. And by the way, every time I change these, I'm pressing. Enter. So they So I make sure they take effect. And there you have it. Okay, so look at that on all screen sizes. here it is looking just the way we want. What about portrait or landscape? I mean, it looks good on landscape is gonna landscape here. All right, so what we've done is we've to recap. Okay, We took these views is blue and yellow view. We made them to the equal length of this red. Okay, we pinned or rather we aligned the left side of the blue view to the left side of the red view. We lined the right side of the l love you to the right side of the red view. And then what we did was we just chopped the with and half by setting a multiplier of two were saying, Hey, let's chop it in half. Giving a multiplayer of two So it's always 50% of the width of the red one. And so those will always stretch and shrink based on the size of the red one. Super, super cool. There's one more principle we're gonna cover here. Okay? And that's something that is re sizable based on. Besides that, you know what I mean is, let's say we haven't image here, and it gets cut off on some screen sizes, so Let's go ahead and simulate that here. So I'm gonna happen. You I image view over here in the bottom. Right? I'm gonna drag it on, OK? And let's go grab an image. So I'm gonna go ahead over to my left hand side over here, turned navigator back on Click the Assets folder. Okay, What I'm gonna do is go to my desktop. You can see it right here. I'm just a click and drag the rocket over here to bring it into my project. Go back to the main dot storyboard, and then my image of you is selected. So I'm gonna go up here to the top, right and re select the attributes, inspector, and I'm gonna click the image, but and and set it to rocket, too. Now, of course, it's a little bit stretched. So if you remember, when do aspect fit? All right. And, uh, let's say we want it much bigger than this. Let's say we wanted to Philip most of this screen here. Okay, so if I double click over here, we lost our preview of use here. Well, just Adam back again. All right? And let's add an iPad. So, um Here we go. So it's still in some funky things. Right its way. Teoh. Way too big for his iPhone. Four inch iPad. It's over here, of course, Is not lying to Belle anyway. Um, let's say we want toe. We wanna line it to the bottom of the screen. Okay, so we know how to do that Already. We can click the pin button and just a line it here to the very bottom. Okay. And, uh, that is fine at one constraint. So they're at the bottom. Of course, it's not looking the way we on all the screens because it's just a little bit two big right ? Okay, okay. There's one more thing we need to dio Let's go back to the 10 menu and let's click Aspect ratio, no matter what. We wanted to stay aspect ratio in the constraints. Even beyond the the image itself in the, um, entry. Let's keep these constraints. Expect aspect ratio as it shrinks and grows. So I'm gonna click. Add one constraint. Okay, Now there's some magic we need to do to get this working. So what I'm gonna do is I'm gonna my rockets already selected. You can see right here. I'm gonna take this and it's super view container. Okay, so the view that it's holding this view is called a super view. So I'm gonna click that as well, too. Yes, they're both selected, As you can see, There, on the left hand side, I'm gonna go ahead and click a line and remember how, before I said, sometimes you have to put in the wrong constraints and then fix him in order to get them where you need to be, and that's what we're gonna have to do. So is click leading edges. And when I say leading edges, that means the leading side of this and the leading side of this view. Let's align them up. Okay? No. Is that what we want to snow? No. Is that what it's doing over here? Well, it looks like it. There's a little bit of white space. It's accounted for, but that's not what we want in the end. So let's double click to get off of this here and go ahead and click your rocket again with your rocket selected here, over here to the ruler, the size inspector and the scary leading space to super view, Double click it. And now we want to change something. So we want to actually change this to be the, um, center X. Okay, center x of super view. So instead of making the left side of the rocket match up with the left side of the super view, let's make the left side of the rocket match up with the center of the super view right here. Okay, So I'm gonna changes to Center X. Okay? And it moved it over, and she's like, Ok, well, that looks like it's working over here on the right hand side. You see that the beginning of the Rockets start at the center of the main view. Okay, But that's not exactly what we won't remember. We want it to be completely centered. So we're gonna put in a multiplier here, okay? It's gonna be zero point 5/2 case. What we're saying is, um let's center it the beginning of it to the beginning, or excuse me less center, the beginning of the rocket to the middle of the super view. But then let's actually at a multiplayer of half. So let's take off half that. So that's what we want. We want to move the left halfway in. OK, and now let's click off the screen again. Here it's like your rocket again. And now click the view again over here in the left hand side. It's like the align button down here. And now this timeless through the trailing edge is let's do them together something as we did before except trailing edges at one constraint. So if you notice, things are starting to resize automatically who were getting closer to where we want to be . Okay. But not quite there yet. So click off of it and then collect your rocket and go over to the right hand side. This time, click DoubleClick, the one this is trailing space. Okay. And now what we're gonna do is similar thing. Okay, so, um, actually, well, in this case there swapped. So we need to switch these items. Go ahead and click this and click reverse first, a second item because we want the super view to be at the bottom here. Okay. And we want the second item to be center X. Okay. And this time, all right. Instead of 0.5, let's set it to 1.5, and let me explain that. So what's happening here? Okay. And if you could figure this out, you just learn one of the most complex parts of auto layout. And I'm actually showing you this because a lot of things are easier than this. This is an advanced topic. There are some more advanced concepts as well, too. But this is one of the more advanced concepts. Get this down. You can do pretty much most of anything in auto layout. And basically all we've done is we've said again, Take the beginning of this rocket center to the middle of the main view. This whole containers the center here. But then let's multiply it by 0.5, which is gonna bring it in halfway, which is just what we want. We want this rocket to be about halfway in right here and then the right side over here have the rocket. We want to center again to the center. But this time, let's do it multiplier of 1.5. And of course, we wouldn't do. 0.5 point five is gonna take it over here to the left. In this case, we want to multiply it by 1.5. So it's right here in the middle. So same principle, just opposite direction. Therefore, it's 1.5. And those values you can pretty much use, uh, whenever you want to do something like this. And so if you notice over here now on the right hand side are rocket. It matches up in each of the views. And once it's good over here, you could be sure that it's gonna work just as you want in the simulator. So I'm gonna go over here on the top left and run the application. Okay? Let's see if it's doing exactly what we wanted to do. There you go. Okay. Big huge simulator on the screen again. If you want a small you could do command three. Okay, we're command to command. One makes it humongous into command three. And look at that. Our rocket. Is that what? Just what you want Now, there's a perfect example of what I was talking about when I said You gotta look to the future. When you start building things over here in your story board, you gotta look to the future of how it might look on all screen sizes. You could have drawn this out on paper. You could do it in your brain. Whatever. Just start thinking to the future because it may not look exactly like this, But so long as you generally lay things out where you want them, it's gonna be as you want it to be. Okay, So this is auto layout. This is constraints. This is how you do some more complex things with it. You use it in your applications. And, uh, yeah, this makes for wonderful user interfaces that can work on all screen sizes. And that's what you want to support all screen sizes.
25. Intro to iOS 9 App: It's a great day, everyone. And I am Mark Price with Deb Slopes. We're gonna talk about the map that we're gonna build today. Okay, pull it right on. It is called Tabar not to be confused with root beer tapper or any other type of tap that you might be thinking of. This actually is a clicking game. And what we're gonna do is put in a number of taps and good play. As you tap the counter goes up, the label changes. And when you get to the taps Oh, my goodness. I should have done a lot less taps there ago. The game restarts, OK, Now you're thinking Is this gonna be hard? Is this gonna be easy? Well, it's gonna be a little bit of both. You're gonna learn some new things, they're going to stretch your mind, and then you're going to do some things that we've already talked about. And, of course, we're gonna put in some nice graphics which I actually have given attribution off in the video itself that we're building it in. So I'm excited to build this with you. Let's go ahead and get started
26. iOS 9 App: Tapper: All right, ladies and gentlemen, we are going to build another app today a full fledged app and help you dig deeper into the world of IOS development. So before we start, we're gonna just pull up. A few of the images were going to be using today. Give some attribution. So we'll be using this guy right here. If you want this image or l, you can feel free to posit video on and grab it. These air also included in the source code that you'll get as part of this video file. So we're using this guy here. Free pick, great website. We're gonna be using this guy right here. Okay? I went ahead and chopped it up a little bit in illustrator for us here on free pick as well . And then we are gonna be using this guy right here. This ticket on again. I chop this one open, illustrate a little bit too, and put a play, but in there instead. And then ah, over here, a text craft dot In that I went ahead and built a logo that will be using a swell too. And I'm just showing you this website that you could build your own logos. And so it's good and close this out here, and I'm gonna go ahead and build and run the app that we're going to be doing today Really cool. So here goes. It's made it bigger. There we go, Tapper under, uh, it only be cooler heads music, But we will get to that in a later video. So the idea is, you enter how many taps to win the game? Okay. And you press play, and then you tap similar to some of those like cookie tappers or coin Tepper games that somehow got on the top of the app store. Who knows? But anyway, so how many taps to win? Let's say 12th click play and what you're gonna do is you're gonna tap a button and the labels could be updated. 3456789 10 11 12. And in the game research. While that wasn't a whole lot, Well, why did you start getting into the code? Especially if you're new here, you're gonna be like, Oh, my gosh is a lot of stuff, So don't fret. Is a good, good ah, slope into getting into more complex things. And one thing I did want to point out is in our applications, the ops that we build from beginning to end, they're gonna look real nice. So there's a difference between you being an iPhone developer and the rest of the programmers in the world. OK, And what I mean is other programmers in the world let's say who program in Java or C sharp or other desktop applications. Their boss and the company doesn't care if they know a lick of you. I okay of good design, okay, They don't care it all. You got to focus on the coat. Not so all of the best iPhone developers can make iPhone APS look good, if not great and fantastic as well as being able to coats. You need to start getting your mind right now. Hey, I've got to start getting my design chops going. I've got to start making things look pretty, and they don't have to be perfect. You don't have to be a graphic designer, but you got to start knowing how toe lay things out and make them look nice together. And of course I didn't actually design any these graphics. I just and good at Google, and that's what I did. So we'll go ahead and get started here. I'm gonna kill this simulator here, Okay? I pressed command. Cute to quit it. And since I have the X code already open, I'm just gonna go file, okay, a new we're gonna do new project. And this is gonna be a single view application, as we have done before. Product name is going to be Taber. And I'm gonna call mind Tapper uh, extreme for emphasis. Okay. And Swift is fine, of course, And ah, iPhone. And that's all we need right now. Click next, and I'm gonna save it here on the desktop. And I'm gonna leave. Create git repository enabled because we will want to submit this to argue. Have accounts after were complete so people can look at her coat and something quick create . All right, Excuse me. So let's go ahead and turn off landscape left, turn off landscape. Right. And we're just gonna support upside down a portrait for today. Okay, Make this a little bit bigger so we could see it and weaken dive right over into our storyboard. I always like to before I start writing any coat, jump into storyboards and start laying a few things out so I can start getting ah, visual idea of how things are going to play out, and so we know we're gonna need some graphics. And since I have all the graphics already exported and ready, I'm just gonna click the assets dot x C assets folder here and, ah, I'm gonna grab all my images. We will find him here on my desktop. Here we go. And I'm just gonna drag all of them so you can see them right here. A dragon drop. Okay. And again, I played with these an illustrator and photo shop a little bit to get the things that I needed out of them. And, uh, it's very useful if you have time to learn how to do the basics of photo shop chopping things off, re sizing things as a developer and iPhone, it has helped me tremendously. There's not a day that goes by as a programmer on iPhone that I don't use photo shop. Uh, and it saves a lot of time to versus hey, you working at the company. You have a nap. You got to go higher designer. You gotta send you things his way or her way. Very good to know, photo shop, but we're not going to cover it here. So cool. Let's go into our main dot storyboard. All right, So what's the first thing that makes most sense to do? Well, probably the thing that's in the back of the screen. OK, which is the background. So let's go ahead and at the bottom right there. Let's search our object library. And if you can't find it, you know, you can click the used to expand what's right there at the bottom. Click this little guy here and go ahead. And you I image view. Okay, We're gonna drag it and center it. Beautiful. Now, this is make it full screen. Uh uh uh is there And if you remember, let's go back over to our attributes, inspector, And let's make an image or select an image, and it's gonna be a retro BG. Look how pretty that looks. Yea, I'm like, All right, we got this done. Oh, don't forget. Do we really have it done? Really, Probably not. I click this, uh, these two circles here the assistant editor and I click This guy works is automatic admit years may not say it might automatic. It may say something else that I go to Prevue Main. That's story. Bored. Oh, my gosh. It was too good to be true. Oh, it's just getting this is getting worse here. Okay, so obviously, we need to do some auto layout. Okay, so I'm gonna drag this over. All right, let's click the background. This one's an easy auto late. Okay? All we need to do is change the mode over here on the right. Let's just change it to aspect fit. Okay? So always stays aspect ratio, and all we're gonna do is just pin it to the edges of the screen. Zero. In this case, um, it does say constraining margins of this negative 20. In this case, we actually don't want to constrain to margins because we don't need any white space. We want the actual entire background to be covered, so I'm gonna take off constrained margins, and it's gonna go all the way to the edges. I'm a select all four, okay? And you notice it's actually not what we wanted to do. So I think we made a mistake. We click this right here. Notice over on the right. Inside. It's not aspect fit we want We don't want to fit in the screen. We wanted to fill the screen aspect, Phil. Ah, there we go. So it's not stretching. It's not squashing. It's just cutting it off on the edges. And I'm okay with that. I think it looks nice. So I'm gonna save it. And it looks good on all the devices over here. Yeah, I like it. A done deal. That was easy enough. No, we know if you remember right, we know that the main screen had a logo and had a play button. And how many taps to win? OK, um, we'll get to the buttons where you're tapping the coin and all that later. Let's just get the main screen working here. And you're bright, wondering, like, wait. I mean, is there gonna be more than one screen? Things are disappearing. Well, we're going to get to that, too. So let's go ahead and throw another image. You onto the screen. All right? And let's go ahead and select Tapper. Uh, now you could do this a few years. You could actually extracted out and pretend that they, um you know what size it's supposed to be. You never want to stretch your squash images. That's that's a cardinal sin, an iPhone development. And ah, it's just bad taste. But never ever, ever I feel like I'm gonna be lazy. I'm gonna squishing him and do whatever that looks fine. Oh, yeah, Let's say that looks my never ever, ever. Especially if you're working with a designer, even if it's a few picks up like, what were you thinking? Uh, they have a really good eye for these types of things. Never squishes washings get the actual aspect ratio dimensions. And if if you can't remember, like in our case, we can't really remember, I don't remember what the sizes, and we just don't know. So what you can actually do is go over here to your assets that XY assets here. Okay? And we can click Tapper if I go over here to the right hand side and I click this Ah file? Nope. No, not those. We gotta click this guy here. Ah, there is the actual image itself and go over here to ah, image on the right hand side and notice. This is for 97 by one of seven. So for 97 with one of seven Heizo for 97 by 107 So I want to go back for 97 by 107 and I'm just gonna set it to that for 97 by 107 And, you know, this is a little bit big. Okay, It's a little bit big. Um, at least we have the aspect ratio denounced. What we can do is if you hold shift on your keyboard and you click and drag, it will maintain aspect ratio. Meaning it will not let you squish and stretches a hold down shift and click and drag. And it's gonna get smaller, and it's gonna maintain its aspect ratio. So even though it was bigger than we wanted, we could just do that here to make it the actual size that we want. And there it is nice and pretty. We didn't upset in the crazy designers and things were looking nice. Okay, of course, as usual, auto layout is not doing us any favors right out of the box. We got to do the work. That's OK, that's what we're here for us to work. So we got our logo, and we just need a pin it. Right. So we want a pen it to the top. We want to about 39 pixels. That's fine. Now, let's just make it 40 to make it nice, Okay? Nice. And even So, 40 from the top is ruin anything else that we want to do? Well, I think in our case, let's just force the within the height on all device sizes can. This is This is make it stay there. So we're not going about aspect ratio as it has these constraints. Hear anything like that would just make the width and height to say Okay, so cool. Now notice. It's still not aligned in the center. Well, that's easy enough. If you remember, we can go to the line button down here, okay? And we can just say horizontally in container and magically is now a line. So if we zoom out here and our preview and we go ahead and add and iPhone 4.7 inch, it still looks good. Okay. Same with the night on both of them. But it looks good okay. Making progress now. Of course, we need a play button. So before we've been using images, we can actually throw an image on a button as well. So I'm gonna drag a button on here right now. It's Ah, it's nice and puny, but that's OK. We're gonna beef it up. So I went over here and I clicked. The little got only know what kind of icon that is. It's It's something. Anyway, we click the attributes, inspector, and, uh, we're just going to go ahead and set a default image. Okay? Default image, and it's gonna be play button. I'll do that. Already made it a good size for us here. Okay, so I'm going to go ahead and delete the text out of it. This is the title. Because, as you can see, it's right there. So I'm gonna delete it and press enter, okay? And now the Texas gun. We don't actually, we don't actually want that text because we have our own texts, and I am gonna go ahead and resize this. I know what size I I want it. Ah, and it's gonna be about 249 by 120. Just, uh, I played with this earlier, and this is about the size that I want here. Okay? And of course, as you could see, it's not lining up as we want it, so constraints it into the rescue, align horizontally in container. Oh, but now it's huge and it's up there. Does it? Looks like it even grew in size. Well, that's because it probably did so. If we cook that constraint here, let's go ahead and pin it to the bottom 65 away from the bottom. And then let's go ahead and give it within a height that's fixed. So it will stay that no matter what screen size it is, and there you have it magically it is. Do what we want. Remember, constraints don't typically look the way you want them to look or your views don't using those constraints in your preview until you've added all of them. OK, so don't think something's broken until you've looked a little bit into the future and said , Oh, I think I need to do this. This and this. And as you can see, it worked out nicely for us. Okay, so we have got the um, almost all the pieces for the main screen here. We just need one more thing, which is a what is called you. I text field. So I'm gonna type in you. I text field. Okay. I could also just type in text field with an F and it will come up is nice little searching for you. It's click and drag it over. Okay, uh, make a little higher. Let's make it a little bit longer. Let's make it just as long as the play button and ah, we go and I'm going and click Thea button up here and we're going to give it a placeholder text. And we're going to say How many taps to win? Of course, puts it over in the left hand side. We don't like that. So let's click the center button right here. Center the text. Let's bring it up a few sizes. In fact, let's make it more readable. You're probably wallet. You're losing smear space there. It's not looking great. Well, we're gonna fix that as well, too. And I'm also gonna change the fun. I hate the IOS system fought by default. One of the more pretty funds that I would recommend using your absolutely, really? Like the default font is you. Um, First off, clip the tea over here. I should probably explain that clipped the tea and over yours is fun. Change it to custom and let us stay right there on Helvetica New. Okay, let us stay right there. I think it's a really great fought and, uh, of course, you can choose any type of font that you are. There's a bunch phone. You can also import custom fonts, which we will get to later on in the course and, uh, look done. And we're like, Well, it doesn't look that great. Well, I would agree, Um, and it's of course not aligned where he wanted to be. So let's do a few things. All right, let's go ahead and just said it from the bottom. By the way, when you start laying things out, it's not laying them out. In every case to the super view, it's actually laying them out according to the other things that are nearby them. And so we're 18 pixels away from the play button, and that's just what we want. It okay? And we know also, of course, that we should probably said it with so it doesn't shrink on us, Okay? And this time we're gonna actually change the highest. So notice how over here in the 10 side, you can't resize the height of the text field. Not sure why it is this way because most developers I know including myself, always change the height of the text fields because they're just not quite high enough, But they don't like to change it here. So you can choose. Do, though, is you can change it with a constraint, and we're gonna click height and we're gonna click 45. OK, so we've tended to the bottom. We get it within the height of 45. That's looking real good. And I'm gonna go ahead and, uh oh, let's see here, the other spine at it. And there's one more thing we need to. You're probably like how we need to center it. And if that's what you were thinking, you are right. And if that's not what you were thinking, then you were wrong. OK, so we're not going to send it to the whole container this time just to be different. We're just gonna center at this time to this control cause we know that the play button is already centered. And by the way, you can either select multiple elements. You can you hold down, command and click or you can actually hold downshifting. Click does both. So what I'm gonna do this time Because I am going to click the line button and I'm going to say that these guys have horizontal centers and there you have it right hand side. Look at that. A nice, big fat texel looking good. And we have all of our controls. Do you want to see your handiwork in action? I'm assuming you're saying yes, but since I can't hear you, we'll run it anyway. Compiling feel succeeded area. And look at that. It is doing what we wanted to do. Look at that, even even highlights for us. How cool is that? No extra work needed. That's what the button will do for you. Super cool on the stub it over here. Stop button And ah, we made some progress can. Now we know that we pressed the play button and we enter How many taps to win? We know that coins going to appear on the label is going to appear and that these things are gonna disappear so we can actually go ahead and just throw that you I on here right now . Okay, So what I'm gonna do is for stuff. I'm gonna hide these. I'm gonna select all three. This time, I'm going to go to the right hand side over here. Okay? I'm gonna click hidden just so they disappear off the screen for right now, make him make it more workable. Okay, I'm going to throw on here a button, remember? Because that, uh, that coin is tap herbal. Okay, so let's make this ugly, but not so ugly or the right hand side of your rid of the text presenter. It's now invisible over here. And let's go ahead and grab an image and set the coin. Oh, how nice. It actually just went ahead and did that for us. Uh, all on its own. So very cool. Okay. And let's see, what science should this be? It's a little bit too big. I'm going to say we're gonna make it 1 72 by 1 77 You can play with this yourself. Um, as much as you want until you get it right. Uh, doesn't have to be exactly like the way I'm designing it here, OK? And now we don't actually need to hide it. Been neath the actual over here because we know the local is not going to be there. OK, so yeah, it looks a little funky, but that's okay right now, because we're gonna lay it out. We're gonna click the alignment here, and we're gonna horizontally in container. Great. And then I noticed that auto layout working against us. Well, let's punch auto layout in the face. Let's say with an eye is fixed and there it is. It's fixed and it's in the center now. It could be in the wrong spot because we haven't aligned it to the top yet. We've just Yep. See how over here it's doing whatever it wants to do again. Uh, things are not obedience. Let's go ahead and click the pin button and this pin it eight pixels from the top. If we do that on both of our screen views here, Okay? It is doing just what we wanted to dio. All right, There's one more thing we need, right? That would be a label We've done these before. Let's go. You a label, but right there in the middle. And I know it's going to be a bigger label. So I'm gonna go ahead and just make it bigger right now, and I'm gonna center it until it gives me these blue lines right there. All right. And then I'm gonna click this weird looking attributes Inspector again, Figure out what that is, okay? And, ah, we're gonna center it clicking this inter button we're gonna course, change it off. This nasty system fought, and we're gonna go to custom Helvetica new and size 17. That is nowhere near what we need. In fact, let's make it bold. Oh, we can change styles here. Very cool scene. Let's go. Bold. Perfect. It's still not big enough. And, ah, getting closer. It's getting close, so I'm gonna make it even bigger now, okay? And let's simulate what it's actually going to say. I'm gonna take out the word label and I'm going to say 100 taps. It's looking good. Still, I think it could be a little bit bigger. This is a game you know, needs to be very present to the user. Okay, that looks really good. All right, Now, black is just not gonna dio, of course. So let's go ahead and use white. Yeah. No, we are looking very sharp. And all we need to do is lay this guy out, so let's go ahead. And, uh, horizontally and container. Okay. So put it up there again. Just do whatever it wants. That's fine. Let's click the pin button. Let's pin it 33 pixels from the coin. Okay. Nice. And, uh, let's go ahead and just keep the height and the with Let's make it fixed. So, um, it ah stays the size that we needed to stay all right at three constraints. And like that, it put it right where we expected it to go. Pretty cool. But it's always good to do. I'm some testing here is well to to make sure on your smallest screen that it looks good. So you know, our games never gonna go above let's say 1000 taps. I'm sure anyone who's playing this app is not gonna want to tap that coin 1000 times, so ah, 1000 taps is good, and it still fits up here just fine. And then you if you if you wanted to put commas in, you know, you could test it out. And, uh, you know, looks good. Still take out the common because we're not gonna deal with that today, So everything is looking great. All right, so now we know that these things only appear when the play button suppressor actually gonna go ahead and hide both these. So hold down shift. It's like, both go over here and click hidden. Now those were hidden, and I'm gonna go ahead and a night of the other ones And let's do it from the left side this time. So, um but in no, that's not very descriptive, is it? So if you press enter on your keyboard when this is selected over here on the left hand side CEO, it's blue President. Er real hard, Sam. Okay. I wouldn't call this play button. It's good to rename these things, Teoh something that's more descriptive. And you know this is tapper should probably call this logo. And this is another button. And let's call this Ah, coin. But in I'm just pressing in around these and then ah analyst taps label lbl okay. And then, uh, we got a text field. This is retro BGE s a BG for background, so I just probably leave it there. And, um, we just need our text field. Okay, let's just call this, uh, taps will call it txt for a text field. Okay, here we go. Of course. Everything is gone now, so let's go ahead and hide the things that we don't want hidden anymore. So we want we don't want this. We want the play. But and and, uh, the logo go over here to the right, inside and uncheck hidden, and we're back in business. So we got everything we need is faras graphical user interface. Now we just need to write some code, so we're gonna do things a little bit differently today before you saw us. So me talking in plural form here, you saw me dragging. Well, I'll show you what? I'll show you what we've been doing. You know, we've been doing I'll show you anyway. So if we get out of preview mode here, just click this preview guy here and go toe automatic and view controller. If automatics not there, you go to manual and then you go to navigate for your project. Do you find the view controller that swift? We're just clicking here. So what you've been seeing us doing go plural again? What you've been seeing me doing, okay, is this. Well, they now control and clicking and dragging and letting go over here in the code. Right? So that's cool. That's one way to do it. I'm gonna show you another way to do it. In fact, I know lots of programmers who don't do it this way. So let's go ahead and escape that. And I'm gonna get rid off the, uh, assistant editor here, and I'm gonna click Standard editor only. In fact, we're just gonna leave this screen all together. We're gonna go to view controller that swift, like, Wait, what's going on? And also, let's go ahead and hose these functions here. These air functions, But we don't even need to see them here right now, because we're not going to use them. Okay, uh, we did receive a memory warning. Oh, well, we're not gonna deal with it. So and we'll explain those functions more in detail throughout the course. Okay, So what do we do I can't remember. Well, that's why we're doing it this way. Because I want you to remember I want you to have this ingrained in your brain knowing how to do this by art. So we're gonna do an at sign and I be cutlet, Okay? Where the keyword week goes first, and then var okay. And then a name because you always do a name after a variable. And so what do we want to do first? Well, let's think of the first part of the screen. So it has a play bun. It has a text field and a logo. Okay, We're gonna need all those because you gotta hide them. So let's go and grab the local first. So let's just say week of our logo. And one thing that's common to do in, um, iPhone development. You don't have to, but it's common to actually put what type off, Um, what type of control it is. So I can say logo image view. Or I could just say local image. That's probably shorter. And he's remember, lower image of type you I image view and we put the pound sign at the end. That is what is called and implicitly unwrapped variable. And you're like, Oh, say what? That's okay. You don't understand that we will be going very much in depth on unwrapping and optionals, which you may have heard over May not So we know we have the local image. That's looking good. Okay, this another one. I VL it week of our and what's the next one we want to do? Text field. So let's call this. Ah, um helm many taps. Txt. Ah, yes. Looks good to me. You are a text field is the type the exclamation at the end looking good. And we have a button maybe outlets week of our okay. And ah, this one's gonna be sleigh, but and you have button looking good and auto complete is being very nice to us. And, ah, feeling a things l notice over here. Like it filled in the style here. That is a bug. It should not be field in because we have not connected this yet, but it may disappear later on. So just so you know. Okay, so we've got those three controls. Good. That's what we want. So what do we want to have happen? Let's think about it. We want when a user presses the play by and we want the game to starts. We want these controls to hide, and we want the other controls to show. So we might as well go ahead and just put the other controls on here is well, too, so we can show them week are. And what were they? So we have a coin. Biden's Let's just call this. We'll call the tap button. Causes the button that you tap. OK, you my button at Ivy Outlet week are okay. And we're gonna call this, uh, but in the label, it was just the label. So we'll call this, um taps, label of type of you. I label. Okay, I'm saving it and letting X code. Thinks all the errors go away. Okay. Very good. We have all of our controls here. Go. So let's talk about the other way. We're gonna connect these things. We already we've written it all out here. That's nice. So now you can actually go over here to left inside and click your story board. Okay? What we can dio is on your view controller right here. All right? You can just right. Click and click. This icon here taps label, and you can either drag it over here. Okay. Onto the taps label. See? Do, or you can go over here and do it. Now it's invisible over here, so we don't want to do it. Finds it, But we don't want to do it that way. So let's because who knows what? We're gonna let it go on. So and notice how Also, it only will let you do the type that you've defined. So it's only gonna let us use that you I labels. We only have one on the screen. It's only selected that one. It's really smart like that. Let's click the one on the left hand side. Notice how it is now connected. So we've just connected it tap button. All right. And if I hadn't renamed these things would be hard to know which ones were selecting here. So the tap button Well, that's the coin by and okay, the play button, of course, is the play button. The logo image is the logo. Okay. How many taps? Text. That's our text field. And what? We've got them all selected here. Search display control that's their by default. Don't worry about that, so those are all connected now to go back to our coat. So you just witnessed a different way of doing something, and in this case there's no one right or wrong way. It's whatever you like better. So what we know is when a user clicks the play button, you want the logo and the text field and the play button to disappear, and we want the taps button and taps label to appear. And, of course, if you remember for a button, it's a buttons click to be detected. We need an Ivy action. So how do we do that? Here in the coat? Let's go ahead and do that right now at Ivey Action Funk for function, Okay, and we call us whatever we want. You give a function any name that you want, and this will be called Let's Say on play, but in pressed, okay and ah, let's go ahead and put in a sender, and, uh, this is gonna pass in the object that was actually tapped, and we know that it's going to send us that you why button? So let's just go ahead and put you right. But in here, it wants the exclamation point. And there we have it on play. Button pressed. Now, again, this is not connected yet. So we got to do that. Let's go ahead and go to the main. That's story. Bored. Okay. And this play button right here, we're gonna do it a little bit differently as well. So rather than right clicking here and dragging over Okay, um, we can It's right here at the bottom. Received actions. We could click this. Okay, we could actually do it. Vice versa as well. So we can click this and you can right Click it. Okay. And you can go to touch up inside. That's a button press. So just know this is a standard button press touch up inside. Don't worry about these other things. Just know that touch up inside is a standard, but impress. Okay? And you can click that and drag it over here to the view controller. Okay, So whenever touch up inside his press, go to the view controller and it's gonna show here all of your ivy actions you have available in our case, we only have one. OK, so I clicked. Tut I right Click the button. I did touch up inside and I dragged it over here, toe on play button pressed and you brought thinking What's going on that seems away more complex and is dragging over the screen. And you know what? Maybe this, um maybe there's no value in it, just another way of doing it. And any time you can right click your view control over here and see all of them. So this is the actions down here. These are the I B al. It's so it looks like everything's connected. Okay, very good. So one thing at a time, let's go back to our code view controller that swift. So these are all filled in now, which is exactly what we want. And so on play, but impressed. So we just talked about what we want to have happens. Let's make it happen. So I'm play but impressed. Let's say that the logo image dot hidden hidden equals true And how many taps text? Ah, it's not what we want is actually the play button hidden. He goes true. Okay. And then the Ah, actually, that is what we wanted. How many taps six, that dot uh, hidden because true. And then what? We could do this. We can say tap, but in hidden equals false. We don't want a hidden in taps labeled Hidden equals false. Okay, so if we run this okay, it's gonna do as we expect. When we press that button, some controls are gonna be hidden. Other ones are going to be re veiled. So let's give it a shot. Clipped the run button. Okay, click the play button and wham, bam! There it is, Of course,
27. Exercise - Multiples App: Welcome back, everyone. We are going to build and exercise, and this is just the overview of what you're going to be doing. And so I'm gonna go ahead and bring up the images that will be using okay over your on free pick composites and grab those euros if you want we using this little pink pad over here and we'll be using this chalk board background over here. And then I just created a logo on text craft over here called multiples. And by the way, I'll be giving you all of these images in the source code as well as in separate files so you can build the app with these images. However, I would like to highly encourage you to grab your own graphics and start learning how to do that if you can. Don't stress out about it. But if you can start getting your own graphics and start getting used to finding things that appeal to you and that look nice and bringing them into projects, so there's the resource is that we're gonna be using, I'm gonna go ahead and run the final version of the APP. Okay, this app is called multiples as you can see. Okay? And the idea is, a user will put a number in here, any number one through anything. Um, and, uh, it will add. Keep it will add those numbers by the multiple. What I mean is you have a running some and you'll keep track of it and add by multiple. So if I go ahead and click, let's say five and they could play. It's his press ad to add Makes sense. Here's add button. Okay, click. Add zero plus five equals five can. Let's add by post five equals 10. 10 plus five equals 15. 15 plus five equals 20 20 plus five equals 25 25 plus five is 30. You get the point and you keep clicking until you get to a certain number. Now that certain number that max amount of multiple or running some that you get to you could determine that yourself and you could hard code that right in your code Okay, as a variable R is a constant okay, is a let and so again to emphasize the projects about having graphics, and they're laying them out. This obviously has laid out nicely here. Uh, with constraints. Whatever multiple you put in is going to be what what works in the math and when you could play hide some controls. So some controls. We set a default text here when the game hasn't started yet. We have a button when you click. Add what it's doing here is it's taking the current running some, adding it, adding the multiple to it and giving you a new some. Okay. And so when I click at again now the old some is two plus the new some of to not equals for Okay, So I provided the source code for this project. I don't want you to look at it unless you absolutely have to. I really want you to figure this out on your own. That's the whole point of these exercises. Okay, Is Teoh is to figure it out. If you're running into problems, I would suggest going to our website and go into the community and seeing what information you can find it help you can get before you even go look at the source code because once you look at the source code, it's kind of an easy out on. Things are gonna start retaining. So try and bang your head a little bit. It's okay to be a little bit frustrated. That's normal in programming. And, uh, again, I would courage you to use graphics of your own. Put some of your own styling into this, and, uh, go and have fun with it, and this is gonna help spearhead you into the next portions of the program. So good luck.
28. Swift 2 Arrays: Mark price here with Deb slopes dot com and top of the muffin to you today, you're gonna dive right in and talk about a raise or face. I'm gonna go to X code. I'm gonna file new playground and pull it up here. Okay? I went to x code file. New playground. All right. And let's go ahead and call this. Ah, whatever you want. I would say my raise and women save it right here on the desktop. Okay, delete this boilerplate code. And what is it? A ray? Well, and a ray is a collection of data. It has been useful for us so far to be able to add variables, but data in them and Constance. But what if you need a collection, for instance? What if you need a shopping cart or what? If you need a hit list or something like that, you've got to find a way to take care of your people. But it in a ray, Okay? One of the core foundational programming principles. So let's go ahead and create our very first swift array of our names. Equals you. Ready? Okay. John Jacob Jingle, however, and Smith Okay. John Jacob Jingleheimer Smith got a few names there and, uh what? This is right here. This is called an array literal. And what we're doing is we're putting literal values into it The moment that we are in Stan Shih ating it. Okay, so we're creating a an array and putting in a variable. Now, you're probably used to seeing things like var some word, you know, of type string equals word. Okay, so that would be in a variable of type string. Well, this is an array, and it has a type is a swell to Okay, So far, names is actually an array. So that's how you would do it. Um, actual do just like this. Ah, we'll do new line here and will say, ah, of our names to is an array of type string. OK, so that's the syntax for it. Now, if I took off these square brackets, it would just be a string. But with the square brackets were saying this is an array. Okay, so I would not be able to do something like this. Names two equals. Hey, what's up? Okay, that's a string and the says string. But why isn't it working Well, the type is not string on this. The type is an array of type string meeting. We're gonna have a bunch of strings inside the array. And that's how you do a collection. A simple collection, and it's super powerful. Okay, so let's go out and get rid of these here. And I hope you can already see the benefit of working with a raise. You can start manipulating data, collections of data, putting things together, and, ah, there's lots of uses for it. But you're not limited, Teoh. Ah, words. Strings. You could do all kinds of race pretty much of any type so I could save our numbers. Equals 44 2 33 12 and 54 Yes, Four. Okay, so this is an array off. It's OK. And notice how on the numbers. I'm not putting quotations around them. OK? Numbers don't have quotations around them. Just strings. Okay, so this would not work, Of course, by putting that in there, because that it's not a string that is a string. OK, so we could do numbers weaken to bully ins. Um you know, uh, maybe Tender has something similar. Like, uh, you know, people you know, hot or not, you know? And then, ah, it would be true. False. True false, False falls. False. We know what 10 usually like. Okay, so, uh, you commit billions and their numbers and their strings, and there are lots of uses. Okay, what about this? Okay, bar, um, mixed equals, and we'll go ahead and put a name here again, John. But this time we're going to 200. And those baby put a string in there and true. Is this gonna work? The answer is yes, but don't do it. Okay? You don't wanna put different data types in your rate, and this is more best practice. OK? The reason why you put a collection of data together is because the data is part of, uh, something related. Okay, if you're using different data types like that, it becomes really confusing to know what's in it, especially to know how to use it. Okay, So what you're going to hear for me? And this is the words of Mark Price professional programmer. I'm not all knowing and all powerful, but I would like to say don't ever, ever, ever do this ever, ever, ever. Okay, so I'm going to erase that from your brain. But I just didn't want to let you know that. Ah, you could do that. And ah, I know that you're not supposed to. Okay, So what else can we do of our let's say countries, Okay, so I'm just declaring and ah, declaring a ray. Of course it hasn't been initialized it, right? I can't do anything with it until it's initialized. So how do you initialize now? An empty ray? Well, almost like you're calling a function put Thea. Oops. Let's get to the colon here and put the equals What we're gonna say his country's is a variable and what this is going to do right here, it's gonna create an empty array of type string. OK, so we put the parentheses at the end of it to create a brand new empty ray. And as you could see, it is right there didn't exist before, but now it does so whereas Lions six is full of string, literal is we're putting literal values into the array. Right from beginning online. 14 were saying we don't have any values yet, but let's just make an empty array, okay? It's not too bad so that you have it. An empty array initialize. Okay, let's see here. Let's say that we wanted to create an empty ray. Uh, at least create a new array, but go ahead and initialize it with a few initial value. So let's say, um, we wanted to say of our top three colors. Want to get a user's top three colors? We're gonna say it equals string. And you know how we put the parentheses at the end. That's empty rate. It also has a special ah, initialize er right here. Okay, where you can put in account. So we want to say three and repeated value. No color. Okay, um, or if we wanted, we could put a default value and say, um boring Brown. Okay. And what it's gonna dio is give us an array of three elements and copied the same thing into it. So that's really great. If you want default values in the array before you start to use it, okay. And ah, so we're making progress with the Rays is really not that much to them. Okay, let's talk about getting things out of them. Let's say I want Teoh I want Teoh change something, actually first will change something that will get something out of us. So let's say I want to change the first boring brown. Okay, so, uh, the users now long Dan, And they can improve their color. So I'm gonna say top three colors and square bracket zero equals. I will say blue. So what we've done is we have accessed the first element in the array. Okay, so how raise work. This is important. Understand how raise work is? They start at zero. Okay. And there's they are sequenced. So let's look into this some more. Their sequence so one equals red and two equals early would very cool color. Okay, so what we've done is we've accessed elements in that array, and we've assigned them value. So when you create an array, it starts at zero. So if you look at this over here online six. How many elements do you think names has? Okay, well, let's look at it. There's one, 2345 Ok, so how would we get Smith out? Would we say bar? A name equals names? Five. No, there's an air. Why? Well, because a raise start at zero. Okay, so, Jonah zero Jacobs one jingle is to heimer is three and Smith his four. So raise always start at zero. OK, so super important to know, Did not they do not start at one. Okay, so that is how you can grab an element out of an array. And so if you go back over here, we are signing values into the array. Okay, 01 and two. And this is this index, the square braces. Okay, You're gonna do it over and over and over again, and you will get familiar with it, but that is how you do it. Okay, so let's talk about adding elements one. Right? So all we've done now is right here. We've initialized an array with three values, and then we've changed those three values. But what if we want to add things to integrate? What? We definitely couldn't do that. And, uh, you can't do it. All programming languages button swift can. So there's a var favor. Cars equals string. So what is this? It is an array of type string, and we're making it empty, okay? And we're gonna go ahead and add something to it. So I must say faith cars dot upend and you could put a new element in there. So let's say, uh, BMW M three. That's a fun car. And, ah, let's go ahead and ah, put in an Audi. Okay, s seven. Very nice car. Very expensive. Very fast. Okay. And let's go ahead and put in. Ah, Ford Pinto. Okay, now what? Who put that in there like, Come on, let's get rid of this thing. Whoever put that in there is crazy. So let's go ahead and go to faith cars dot Remove at index. Okay, what index is the Ford Pinto at? Well, BMW is zero. Audi is 14 Pinto is too. So let's go ahead and call this function. Remove it, index, and it is going to get rid of the four Pinto. At least I think it is. So it tell me what you want to get rid of. That's awesome. And let's go ahead and add one more. Okay, we're going to say Ah 1969 Chevy Camaro, By the way, I have one of these. So if you are jealous, well, you should be OK. So And as you notice their online 28. The Pinto is gone. Luckily, OK? And ah, that's how you can add items to the rate. And now the question is, do items get added to the beginning or the end? Well, items always get appended to the end of the ray. Okay to the end. Well, maybe you're thinking to yourself now. What if I want these in order of preference, and, uh, I need to insert it at a certain spot? Well, weaken do that. Okay, So what Weaken dio is Ah, let's say we want to put it at the beginning. We can say faith cars dot append and ah, let's go ahead and ah, um, not upend. What am I thinking? Insert favorite cars that insert. Okay, The new element. And that is going to be, of course, a Nissan GTR fantastic car. And we're gonna insert at index zero. Okay. And we'll see what it says to us. It wants to print. Maybe it'll get there eventually. There we go. And sure enough, it's there in the first spot. Um, super cool. Super easy. Okay, So you've looked at a pen. Things you've looked at how to remove items we can replace items weaken set items. Okay. Very cool stuff which don't ever want to dio is ah, grab items that don't exist. Okay, so you don't want Teoh? Say, let's save our A car equals faith cars, element 10. Okay, that is going to give you a big problem because it doesn't exist. And so you're apple Crash. So don't ever excess an element in array in an array that does not exist. Or he will have bugs in your application and it will crash. OK, so we're making progress. Now, let's talk about maybe a real world situation, and I'm only doing this for emphasis. There really isn't much more to raise than this. There are lots of helper functions that Swift gives you with the Rays, but for the most part, this is the core basics that you'll be using over and over again. But let's talk about it. So far, let's say we have a shopping cart, okay? And it's gonna be an array of type string, and I would initialize it to empty. Okay, it's an empty rate. And, uh, we got a budget. Okay, $500. And I'm putting a 0.0 at the end of it to let it know that it's double and not an int. Okay, if you don't wanna do explicit typing like this so I could I could say that and it would work Fine. If you don't want to do that, just put the dot at the end of it, and it will let it know that it's a double. So we got a budget of $500 of our current CART amount equals 0.0. So there's nothing in our car currently, and let's go ahead and creative function. As we've learned in previous lessons, add item to cart and this is gonna have two parameters. OK, first being the item and that has a name, the string and the 2nd 1 is gonna be the price of type double. So whenever you're gonna call this function, you're gonna pass in an item name and its price. Okay, so if current card amount plus price so plus the price that were coming, that's coming in. If it's less than or equal to our budget, okay, it means we can buy it. So, shopping cart. I missed the t on that. You guys probably like there's a missing t but you can't talk to me to tell me So I didn't see it. Sorry. Shopping cart dot append and ah, passing the item. So if we can afford it, let's pass in the item. And then, of course, let's ah, add to our current card amount plus equal price. Let's add the price to it. Okay. Else. Ah, print. Not enough monies. There we go. And Ah, for those of you who are watching outside of the United States, you're like, Oh, is money's an American term? No, I think I just made it up or salt in a video game somewhere. So don't come to me for English practice, please. Okay, add item to cart. Looking good. Now, we haven't called it yet, so let's go ahead and do that. Add item to cart. Uh, what's a good game that is? Came out Final fantasy 10 Ah, and 10 2 Classics Remade for the ps four, which, of course, is the best system. If you don't have one, it's amazing. On the price is $50.25 Okay, someone over there is grumbling. Our X box is the best. Well, Xboxes. Good. Teoh I'm just, uh I'm just trying to cause a fight. Entertain myself here where I'm talking to myself. I go a little crazy. Have to do this for a while because you're not sitting in front of me. You're sitting in front of your screen and you're probably talking to yourself to. So I'm gonna go ahead and print the current card amount after adding each item to the cart and I must say, add item to cart again. And this time, let's ah says we got final fantasy. We're probably gonna need some bleach. Um, because it's an RPG is sometimes as long, and you can do your laundry in between the long cut scenes or something, So that's going to $3.45. Ah, and let's go ahead and, um, presenter a few times and add some more lines here so we can see print current cart amount . Let's do it again. One unneeded line there and ah, it'll print eventually. There we go. OK, and let's add another item at item to cart. Let's add a couch. Can't play call of duty without a couch. So $150 in 72 cents. This, of course, is a Walmart couch, not a couch of quality. And we're gonna print the current cart amount, okay? And we're looking good still. So we have, Ah, $200 in our carton, illustrated by a PS four. We snuck it in the cart without telling her wife, and we forgot what the budget was. And let's see if it lets us purchase it. Glad in print, Current cart amount. And this should print $204 Because the purchase should not have been made yet. Our function prevented it. So pretty cool. Let's take a look at what's in our cart. Print our shopping cart, the array, the entire ray. Let's just print it. Okay, area. So there are three items final fantasy bleach and the couch. I got the game in, but the wife didn't let the system in. And now I can't even play it. So it looks like I'll be doing lots of laundry and sitting on the couch doing nothing. So here is a raise and its most basic form, and what we just did right now is gonna be a majority of your usage with a raise. You're gonna start thinking of data types and collections that you want to use with it. You know, shopping carts. A great example. What can use an array for whenever you need a list for something? Okay. So a very powerful tool. Super easy to use. Not too bad. And you can refer to this video if you forget the syntax. And there's lots of cool things you can learn about them. I was swift as you go along and grow and learn. So that is a raise. Congratulations.
29. Swift 2 Loops: Hey, everyone. Mark Price here from Dev Slopes and we're here and downtown Cupertino. And I've got a special guest me today. Tim Cook is on the show to help us code. Yeah, um, I'm actually just in my basement, but we are going to pay him tribute by writing some really great coat today. So let's go ahead and get started. We're gonna talk about loops, okay? And Ah, good. And open up your ex code here. I want to get it open. I'm gonna go file New playground. Okay, I'll pull it up on the screen here, file new playground, and we'll go ahead and call this loops. Now put on the desktop. Perfect. So the thing about loops is loops are what allow a program to run efficiently to perform many operations without having to copy and paste and repeat yourself a whole lot. Okay. Don't repeat yourself. That's the dry principle. Okay, so let's talk about loops and how they can be effective. Let's say I have an array of ages. We just talked about a raise not too long ago. Okay, Ages 23 25 41 51. Okay, lets say 62 Okay, Now, let's say we want to know which ages are greater than 50. Okay, well, without a four loop, I might be constrained to do something like this. And let's say that we want to print to the council the all the ages that are over over 50. Okay, 50 year over. So what I would have to do is something like this. If ages zero okay is greater than or equal to 50. Okay, we're glad and say print. You are 50 or over. Okay. Else if ages one is greater than or equal to 50. Print. You are 50 or over. I think you're starting to see the pattern here, but I'm gonna go ahead and go ahead and throw some salt in the wound and make it even more painful for you because we need to demonstrate how painful this really is. All right, go on and on and on up. OK, so go through each of the items in the array until you get to the end and go ahead and do your logic. Or, you know, we could have done something like this. If ages zero is greater than or equal to 50 or if ages one is greater than or equal to 50 or if ages to is greater than or equal to 50 then let's go ahead and print. You are almost kind of old, but if you are 50 or over and watching this video, you are super cool. And in my eyes you aren't so both okay, Very good. Makes sense. Okay, starting to see how this can be a little bit painful and by the way, just messing around talking about ages here. I've actually taught people in their fifties and sixties who have, in a matter of weeks gone from not even knowing, barely had to use a computer to working as a professional developer asses in the job. So you're never too old to code and to do some great things. And some people even work from home now and just can make it a lot more money. Spending more time with family coding is the place to be, especially iPhone programming. So I'm glad you're here, and if you can't hear my voice, it means you aren't here, and that is unfortunate. So let's talk about a better way to do this, and this is loops This is when you start training your brain to think like a programmer. Okay? You got to start thinking differently. Now. This is something you're not used to seeing in the real world. The idea of loops. Okay, but this is how you do it with programs and computers, and it's so powerful. So if I wanted to do this same logic, Okay, what I would do is, um, write a for loop. OK, so we'll go ahead. And, uh, and by the way, it didn't, uh, way should just make sure that show that it works here. So or if ages. Ah, you know, three is greater than or equal to. Ah, 50. Okay, 0123 Mr. Print, At least something this time they're ago. So we've rated one of them. That's fine. I just showing you that work. Now, let's go ahead and do a four loop. Okay, So what I could do is say four var X equals X equals zero semicolon, while X is less than ages dot count X plus plus and then opening and closing. Curly braces. Okay, so a few different things here. You're probably like, what is going on here? So let's go ahead and talk about it. So first off four. That's how you start off a four loop in Swift. You just use the four p or it's a reserve keyword. Don't use it anywhere else except when you want to make a loop. Now, this first part here looks probably slightly familiar to you. Var X equals zero. Okay, we're just declaring a variable named X and initializing it. Zero. I could have also have said bar blah or whatever I wanted. Okay, is just a variable. And we're saying, Hey, set it to zero. This is the initial Isar phase of a for loop. And then we're saying, While X is less than ages dot count This is a condition. This is like a true false condition. So if X is less than ages dot count okay. And what is ages dot Can't what ages is our array, and so dot count is actually a property on an array that tells us how many items Aaron it. So all it's doing is it's telling us how many items are here. So if we were to first run this code, we would know that ages dot count is equal to 12345 There are five items in this array. And then it says X plus. Plus, So this is the incremental er or the completion block of the for loop. So how it works is it starts here. Okay, X equals zero. All right, This starts right there. In fact, let's just go ahead and make this a little bit more visual for you Here. So this right here, this this part here, this is the finish whole Isar. Okay, that's the initial Isar. That's what happens before the four loop prints. Okay, before All right, be four. Got it. That's what happens before then we have Right here is the condition. Okay, So what we're saying is, if X is less in ages dot Count run the loop. Okay, so again, this is Onley. Run once at the beginning, the the initial izer of our X equals zero. But this right here, this condition is run every single time before the loop goes through again. Okay, so a loop goes over and over and over again until you tell it to stop. So this condition okay, this is the condition. This is how you tell your four loop to stop condition. Okay, that's how you tell your four loop to stop. Okay? And then we have the, uh, this incremental here. What happens at the end of each iteration of the loop? Okay, does it was gonna happen at the end, and we're telling it to add one toe X. Okay, we clear this year. So basically, let's talk about what's actually gonna happen with ages here. So far, X equals zero. That's run at the beginnings. We know X zero. Okay. And while X is less than ages dot count, So let's say we're starting the four loop. OK, X is less than ages dot counts. So if we go if we run this, okay, it's gonna go right into here. It's gonna run this. It's gonna run Whatever code we've written right here, I haven't written any yet, but that's what's gonna happen. OK, and at this point in time, Okay, X is equal 20 Okay, so this was true. X was less than ages. That count cause ages dot Count is five and X equaled. Zero. So it went in here, okay. And then when it runs all of your code. At the very end, it's gonna run this. So X is now equal to one. And then it goes back into your for loop here and ex now equals one. Okay, so X is less in ages. I can't. Yes, that's true. So went back in here and it goes to the end again. X is now equal to two. So this this is now too. And what it's saying is, if two X, if two is less than a just account well, ages account is 52 is definitely less than five. So let's go through the loop again. So X equals two, then it hits here. So in the Nexus three is three less than five. That's what we're saying here. Well, is sure is. So you know we know X's three. Okay. And, uh, let's go here again. Now X is equal to four. Okay. Is for less than five. Well, yes, it is. So X is for and we go into the loop again and then it adds again. Now X is equal to five. Ok, now is five less than five. No, the answer is false. Five is equal to five. But five is not less than five. So this loop breaks. It does not run anymore. Now you're thinking, Wait, there's five elements. Shouldn't This has been equal to five. Well, if you remember, right. Ah, raise. Always start at zero. Okay, so if this was to say if X is less than or equal to ages don't count. It would have gone through one more time. But we're stopping while it's less than ages dot count. And that's something you're gonna do all the time with four lips. Just know that if you start at zero, you're probably gonna want to do, um well, X is less than ages that count or whatever the name of your variable is, while it's less than not less than or equal to. Okay. And that's how a four loop runs, it's going to go over and over and over again until you tell it not to. So if you want to see this in practice, all we have to dio okay is a print this print, and we could just print x k the variable. All right, and, ah, save it. Okay. And notice how it said it ran five times. That's expected because ages has five elements in it. So it ran through five times, just like we explain in our example. And I'm just clicking this. Ah, this button here. And of course, it went through into printed all of them. Um, so, um, very cool. So we just did a four look when it printed. Okay, now, now let's redo our example. They were do before. Okay? And all we have to do it's a var. Age equals ages. Square brackets X. Okay, let's talk about what's happening here. So we're creating a variable called age, and then we're saying equals ages. Ex white, What is going on? Well, if you remember and the other video to get element out of an array so far and age equals ages, remember how we put a zero there. So we're saying Hey, get the very first element out of it and store it in this variable. That's what we were saying before, and ah, no different here. We're just using a race in tax to grab element out of it. Now, the difference is we're using the for loop because we know that the X is continually gonna change. Okay, It's gonna continually change. And so we're gonna use that to grab the indexes. And of course, we can be sure that it's not going to go out of range of our array so long as we make the X less than ages that count. Okay, if I was to say, you know, some random number here, 200 What? We're gonna have a problem, Because ages does not have 200. And this is going to get up to 200 it's gonna break lots of times. And there it goes. It's breaking on us already, cause ah, it builds real time there. So you want to use the arrays count in conjunction with the for loop, Okay. And so now, but weaken dio say if age is greater than or equal to 50. Okay, let's go ahead and print. Um, you are 50 or older. And how many times did you expect us to print? Let's take look two times. Well, two of the numbers on here are greater than or equal to 50. So look at this. So imagine if this array had a 1,000,000 people in it. You obviously couldn't do anything like this is bad, but with an array and a four loop you could just literate through. And of course, the key is these numbers change the exchanges. It goes through So again it goes it initialize is at the beginning to whatever value you want. Usually it's X equals zero I or whatever variable you want to call it. And then what it does is it does This check is X less than five. If his excellence and ages account it is true. And again, this is just a condition we could have said, uh, we could have said if, um, happy equals unhappy. Okay, we could have gotta put junk in there like that. Um, I could have said, Ah, if happy equals happy, um, I get compared strings. So it's just a condition. Any type of a conditional code you can write. You can put it in there, but it makes sense to put something that's relevant. So while X is less than ages, the account X plus plus and then we grab the age by going over to the array, putting the square brackets at the end and putting the index in it. Okay, and we're using X because X is continually changing so we can contain Lee. Grab each elements throughout the entire ray, and then we just write the code. Now, if you're confused at all by this, it's okay. Watch this video again and again and it takes time and it takes practice. Takes lots of practice, and it'll become second nature to us. So very cool stuff. Let's go ahead and just build a fun, simple little app to reiterate it further. Okay, I'm gonna go ahead and go to file new project and a single view application I always like to try. And even when I'm doing my own programming, try and make some fun out of it. Because programming and a playground all day long get really, really boring. At least it does for me. So let's make something fun. We're gonna call this old caps locks on old school A Mac. Why not? And all this looks good here. Click Next. Put it on my desktop, and Ah, there we go. Just click your story board over here on the left hand side. Double click on it. Toe. Pull up in the view. Make sure the view selected here and we're gonna use were to make it look like an old computer and just print some things onto it, using a for loop, just resemble and fund. So I'm gonna click the, um We're looking attributes, Inspector Icon over here, and we're going to change the background. Two black, Okay. And I'm go down here and type in new. I label to find the label, and I'm gonna drag it over here like, so make it a little bit bigger. Okay, Lets looking good. It's looking good. I'm gonna center in the middle, pushed it up here a little bit. I'm gonna drag it down, make it nice and big, so I could fit about 10 lines of text on it. Okay, Now, what I'm gonna do is on the right hand side where it says lines. Let's go ahead and just switch this to 15. And it seems the color you can pick different colors by just a few tap where it says where this white is. Just tap it. Okay? What's gonna happen is this little guy's gonna pop up and you can drag around. If you got a different screen here, you can change these around. Ah, but you could just go over here to this little color will and nice screen for us. They're just like the old computers. And, of course, let's get rid of the ugly system for and just do Helvetica new because it's more better. And, ah, it's looking good So and it's left the line, which is fine. We just need some constraints here so it doesn't move around on us. Let's keep the with and keep the height and let's pin it to the top. So with height, pin it to the top. About 36 pixels is on mind. Your years could be whatever you want. Click add, and the only other thing I'm gonna do is go to the alignment menu here, and I'm going to center it horizontally in the container, and that should do the job. Let's go to our assistant editor here and do some connection Magic control. Drag your label on the left hand side over here, over to the right inside, and I'm going a little bit faster on some of this stuff because you've done this before. In the point of this actually is, ah, the outlet outlet connection. The point of this is to learn four loops and working with a raise Eso Let's go ahead and just call this main lbl, which is fine. And what we're gonna dio is ah, define an array. Okay, a raise and four loops go hand in hand. If you're working with an array, you're probably working with the for loop. And if you're working with A for you're probably working with an array in most cases. So just know if you hear the word hate it array over this collection or iterated over this data, it probably means you're using a for loop to generate over Andre or collection of some kind . So we're gonna print some like phrases when the computer first loads. Okay, so phrases equals will make it a literal array. So let's a, uh, booting from floppy dr dot and I'm gonna had put new line characters there. Well, that's gonna do is it's gonna force a new line on her label that that slash end won't be read. You won't be able to see it, but it will actually make it go into the next line. Okay, let's do another one reading from disk. Remember how these men, these old computers back in the day you put a floppy and be like, hey, and beep and like, wake everyone up and everyone knew you were on the computer and ah, And then, of course, when you got on the computer, um, it was all green and black. Good times. Ah, updating registry, whatever. Whatever that means. Updating the registry. Got a new line on here. Okay. And ah, supercool. And let's ah, do some dots. New line. And by the way, I'm separating these by commas because that's how you a separate array elements. Ah, and so I'm just separated by commas here to indicate that it's another item in the array. Lower case new line there. And let's do Ah, just for fun. One more really long set of dots. Okay, It's doing his loading thing, and ah, then one is done Loading will say Welcome, Jessica. Welcome, Jessica. Jessica, we're glad you here in the class coding with us and Ah, glad you're your name is embedded in this video here. So new line. Well, I want to do a new line inside of this. Actual phrase here doesn't have to be on a new ah ray element. It is nice to see you again. It's talking And those who we are. Okay, so there's are phrases. So if I look at the comments, it looks like we have one. Do 3456 about seven phrases. Okay. And when we want to do is just use a for loop to put them on our label here. Okay, so, you know, I couldn't just I can't just do this. I can't say main labeled at text equals phrases. Write. It doesn't make sense because you can just shove an array into a text field. We gotta put text in there, right? So let's make our for Luke, okay? And so we'll say for var X equals zero. And just to show that you could do anything else anything you want to say for Barb law equals zero. And you would not ever do that in professional code, but to show you that's okay for far four of our block equals zero. And why, while blah is less than phrases dot count, okay, blah plus plus. And we got our curly braces. They're looking good. And what we can dio is really simply as we can just say, main label dot text, um, equals or what we can actually let's let's extracted a little bit better. Let's grab the text from it first. If there's any text in the edl and even before that, let's just give it a default texts. We don't get any crashes in case, ah, cases giving us nothing's We're gonna just make it an empty string right now on this is viewed it load, By the way, we've talked about this once before, but viewed it load is called right when the apple oat So it's gonna after all the views have loaded to the screen and are in memory. So it's going to run this code for you automatically so we don't to call a function to do this. That's why I'm putting it here, okay? And so what we're gonna do is we're first gonna grab the text that's currently in the label . So of our main label of our know what to say, text equals main labeled that text. And remember, whatever is in this for loop is going to be repeated each time, OK? And its just telling us we're not using it. So it's giving us that red Underline what we're gonna say is Ah, text plus equals. Okay. And what we're gonna say is phrases block. So we're gonna grab the current phrase, use the index here. It could be 012345 or six. It could be any one of those. We're gonna grab it out of here. Okay? Using the race index. And so if we were at index number three, we would get 0123 We get these dots right here. That's what we need to be grabbing right now. And so we're adding into the text and let's go ahead and now put it back into the label equals txt. Okay? And, ah, what we need to do here is actually put the pound sign at the end of dot text. Okay, remember, we haven't gone into this. I mentioned a couple times. This is an optional. Okay, It may or may not have value. If you could see that question mark up here, it may or may not have value. And so we need to put the pound sign to say, Hey, I know there's a value in here now. By the way, if there wasn't, you just would have crashed your app. But that's why I did this right here. I just made sure that it wasn't No, I put a string in there, So very good. Let's go ahead and run it and it's loading. It's loading. It's loading. And there it is. Booting from floppy reading from disk updating, registry, dot, dot, dot, dot data lots and lots of dots. So there is our computer. We used a for loop. Teoh iterated through this right here. Now, what I do want to talk about is a couple of different ways we could have written this. So this is a shorthand way of a convenience way of writing this. Okay, We could have also written Are for a loop a different way. What a different way of writing a loop. Well, let's Ah, let's check it out. So I could have said repeat, Okay. And first, what we can do here is we can go ahead and outside of here I could save our X equals zero, and, ah, while X is less than for raises dot count. Okay. And so then what I would do over here is ah, grabbed. Monogrammed this code in the middle here And by the way, if you're like, how did he magically comment out those lines of code? I just held that. I highlighted them. Okay, I highlighted them, and I held down command. Plus ford slash where the question mark is on your keyboard holding down command supercool right? Who? All right, I'm gonna copy what's inside. Because we do want that same code. And of course, I'm gonna uncommon tit, because, ah, we don't need there, and it's indented improperly. So I'm gonna hold down command and then left, Curly Brace or left square bracket. And that's gonna indented back to the left. If I held command right bracket, it's going to move to the right. So Okay, so far, X equals zero. Repeat this, OK? And of course, we don't want blonde here anymore, right? Because it doesn't exist. We commented it out. So action need X here because that's what we're doing here. So this is the exact same thing that we just wrote. We're creating a variable, and we're just saying repeat, repeat, whatever, coz in here until this condition is met. Okay, Well, phrases dot count or X is less than phrases dot com, so let's see if it actually works and does the exact same thing. I felt we just did something very, very bad. We just created an infinite loop. And one thing that we missed is the part where you increment the value, so X plus plus, Okay, so it's gonna run this code, and then it's gonna make X plus X plus one. Otherwise, if I didn't do this, X is always gonna be less than phrases that count. And this is gonna run forever until your app crashes because we're never changing X and ah , let's try that again. I would have been bad. Okay, It's running. And there it is, the exact same thing. So that is another way of writing it. We just manually created the variable ended the it aerator right there. And ah, we do it one more time in one more way. Sure, let's talk about 1/3 way of doing this, Okay? What we can do is we can say for each all right, so free. And I say for each I'm not writing the word each, but that's what it means. So for each, uh, we'll just call it line in phrases or even better. Actually, what we could say is for each phrase Okay, so this is even more shorthand, Okay? And the difference here is we're just iterating through the array itself. What it's doing to say, Hey, grab, grab, go through this and grab an element out of it. Rename it to this, OK? And then you can use it that simple. Like what? What What? What's going on? Well, yeah, it's that simple. What's happening is we're saying, Hey, go through the phrases array, Go through each one. Okay, grab the item out. Okay, so we're gonna grab it out. Okay, So here's the Here's the hand, Okay. It's grabbing the phrase and dropping right here and renaming it. So it's gonna do that every single time. So it's gonna run this. Ah, And I guess in our case seven times and this phrase variable here is the equivalent of saying, Hey, var X equals zero. So all we're doing here is we're well, it's not the criminal of that. It's the equivalent of this right here. Sorry. Phrases, brackets X grabbing the element out of it. So it's grabbing the element out of it here and just renaming it the phrase so we can use it now. Obviously the differences we can't we can't like mutate it. We can't change it. We can't say you know phrases. X equals some new phrase. Ah, we're just kind of reading it here. But that's okay. This is super community and even less lines of code. So if I go ahead and copy these same lines of code that we know we're gonna need okay, and I'll go ahead and, uh under this year and will just we'll reduce MRI factoring here. So we've got the phrase. So what we want to dio is we still want to grab this, but instead of doing phrases Ah, I see. Is that doing phrases x to say phrase That's super cool? It's all we have to dio is ah, used the phrase because it goes through every single time. We'll see what it does. So for each phrase and phrases goes through the whole list grabs an item out of it, renames it so you can use it. Super, super cool. We just this three different ways. This is really loops. This is it. This is loops. How cool is That's not too bad takes lots of practice to really get it down. But its its not that bad. And we just went through the major ways of doing it. So that is how you dio a loop, Okay? And just make sure ah, that you always have a condition that's met. If you're doing it some of these other ways make sure this condition is met because if it's not, you will have an infinite loop in your program will crash. OK, so good stuff. You're gonna use it lots throughout the rest of the course. Um and this is foundational. So if you don't get this, watch the video again and again and we will have an exercise so you can be able to practice this, so All right, everyone, let's keep moving forward.
30. iOS 9: Intro to Stack View: so great day ahead of us here. We're gonna talk about IOS nine Stack. Let's go on and get started. I'm gonna open X code, okay? And got a new project pulling it up right here. Okay, so I went to file, you know, of course, new project. And if you don't remember, and you should know how to do this by now, how to open Exco, you just click the icon that says X Code beta Or if this video is now in the future, this might be the final version of X code seven, which you downloaded from the APP store. Okay, let's go ahead and do a single view application. We're gonna call this Ah, Stechert uh, stack just for fun, because the name doesn't really matter at all. Everything else looks great here, Save it on the desktop. And here we go projects open. And you know what? Let's go ahead and make this universal for iPhone and iPad. That's gonna help show us the power of stack views. Now, we've talked about already constraints. Okay, how you line things up and remember how difficult it was when we had a couple of, for instance, views here, right? And we wanted them to take up half the screen. Okay, so, you know, one was one color like this green right here, and the other one was like, right here next to it. Let's give it a little bit of padding. These aren't perfectly even. But whatever, this is just an example. And let's changes to read and remember how tough it was to make this so they had flexible with. So whenever you rotate or move your device or change screens, they both have egoists. It was a pain in the butt. Okay, big, huge pain. And I think the people over at Apple realized this and therefore they created the you I stack view, which is fantastic. And the rule of thumb now is you stack views first and then constraints with when necessary . So go ahead and learn this and start using them right away. There's no reason not to use them because they're going to completely change the way you build your layouts and make it much more powerful and much easier. So what are we gonna build? That's a good question. Let's go ahead and do something I like to do all the time, which is steel ideals from other people. And by the way, this is how you be really built. APS. Okay, so let's go ahead and find a good idea. So what I like to do is type in Pinter arrest best design APS. Okay, I'm not looking for food or latest styles, but best design APS. And here's a link right here. I'm just clicking a random link. I did this earlier today and look at all these fantastic APS. You could just get inspiration and ideas from these applications here. Great way to do it. Sometimes. Sometimes even I just look at him and, like, I really like this. And then I kind of still the design and change the colors. And that's OK, because art is really stealing everything around your inspiration, etcetera. And I like this one right here. OK, we've got some shoes here. Looks real cool. I like the layout. This is a great way to learn how to do stack use, and let's go ahead and steal this image. I'm going to click and drag it onto my desktop here, and I'm gonna close the browser now. One thing I want to show you real quick. If you don't have photo shop, you should probably get it. And we're gonna talk about this later on in the lesson. You don't have to be an expert, but I used photo shop every day as an app developer. So go to Adobe Creative Cloud. And if you click on their website here, Okay, you can get their cloud services for their software. Like photo shop and stuff are very cheap. I think photo shop is 9 99 a month. Okay. Very powerful tool. When you become a professional up developer, you will be a more useful tool if you know how to use it. So I'm gonna go ahead and just open with Photoshopped, right click to here. And the only thing I wanted to show you This isn't a lesson about Photoshopped. But what I wanted to show you is what I like to dio. Just to prototype APS is I take this little color here in left hand side and I color pick and I grab this color value here and I do the same thing on this guy and I can click it and it gives me the color value so if you want those colors you can grab and right from the images, which is super cool. So Photoshopped, great tool in your belt to have and use as a developer. Okay, so we know what we want it to look like. And, Ah, there we go. Kind of something like that. Okay. We wanted to look good on all orientations and screen sizes, so let's go ahead and get started. Now What? It's up here. Is that you? I Navigation bar. And since we're not actually gonna build a navigation controller in the APP, Okay, we're just gonna pretend so I'm gonna put up of you appear and pretend that it's an actual navigation controller. But that's okay. It's still gonna demonstrate the purposes of our application here, and I'm gonna change the background color. Okay, I'm gonna select this red color. You can pick whatever color you want, okay? Or you can course, click this and changes around. You can actually click the color, but I already picked it out here, so it's reds a little bit big here, and let's go ahead and move it up. Now what I'm gonna do is click the pin menu and, ah, workers. Some constraints. And you're like, Wait a minute. Didn't you just say we're not going to be using constraints? Well, I didn't say that. I said we're gonna use stack view first and then constraints when necessary, but this is not going to be needed to be in a stack view, because it's navigation bar in the States at the top. So I'm gonna say 000 dependent all these sides here and then what we'll do is we will just give it a height, and it will stay there. Okay, so we've got a shoe. We've got some other shoes here. Some like thumbnails. We've got a label here and a sub label on some buttons, and we're not gonna worry about the social icons today. And so I've taking the liberty of grabbing and, uh, chopping up some assets for us to use. Okay, So I'm gonna go ahead and just, uh, grab my nicely created shoes. There's gonna drag him right over here, okay. And ah, yeah, Chuck Taylors today, baby. That's what we're going to be building. And, ah, let's go over to main storyboard here. And what do you think we need Well, with a stack of you, what you do is just lay out your interface here, okay? And what's really interesting about stack views? Okay, it is gonna be kind of weird, but you know how before, like open the preview and whatever you whatever you do with your code over here on the left , you know what the constraints is gonna show up over here on the right? Well, yes, that's true, but actually stacked for us problems with this, and I don't know if it's a bug. Hasn't been done yet because it's still in beta. But this does not update properly when you have stacked view. And so the only way you really know what it's gonna look like is by running it. Okay, so we're not going to use that too much today, So we know we need a shoe here, so let's go ahead and grab Chuck's. Okay? Of course it is stretched. Let's say aspect fit and just make it a little bigger, okay? They're nice. And now you're also going to see the reason why we use this inferred canvas instead of picking an iPhone or whatever, because stackers really are powerful in stretching and and moving across the screen and re sizing things and all screen sizes. So it's a good idea to use this arbitrary size here. Okay, so we got our shoe. We know we need some images right underneath. If I look at the look at the photo here, we need some images underneath it, and we're not gonna make ours identical. We're gonna kind of do our own version, give you a taste of how stacked views work. But we know we're gonna need some images. So let's go ahead and do that. And I know these guys air squares because I created them. So I would say just 100 by 100 maybe a little too big, Let's say 80 by 80. I'm clicking the numbers in the right hand side the over there, and I'm gonna select shoe one and then I'm gonna go ahead and make sure it's like their command d to duplicate moving over here. I'm going to do it again. Okay, they got three and we got four. And now we've got five shoes, and I'm just gonna highlight all of them by clicking and dragging and just center them OK, now, Of course, right now, if we were to run this, all of these things would be off the screen and it would look really ugly, But we're not there yet, so let's go ahead and just change other images right now and again. This is different. We're just our aps a little bit different, that's all. We're not using the same shoe and multiple angles, and the reason for that is I couldn't find once you in multiple angles. So there we go. Got some converse here. And actually, it's kind of pretty with all the different colors anyway. So what do we got here? Got those? We need a label here. Underneath it. Let's go ahead and do that. Let's ah, do au. I label here at the bottom and I'll put it right here in the middle. And let's center it and get it off the nasty system Fun and changed to a better funt here. And it looks a little bit bold in the image, so I'm gonna make mine bold. Okay, It's looking good. I'm going over here on the right hand side and change the color to red. The same red as you see above. I like it looks great. And, uh, we're gonna call this Ah, Chuck Taylor shoes and ah, yeah, let's get a little bit of space there. And I'm not gonna worry about those little ah, great things on the sides right now. Okay, let's go ahead and put a second label. I'm going to just ah, dragon or and, ah, make it a little bit longer here and center it okay and change the color toe, maybe a light gray that's looking good. And it looks like it's bold as well. So it's change the font and the style too bold, and we'll just put some arbitrary data in it. It's a little bit too bold. Let's just do regular. Yeah, regular. And let's say, um, what do you want to say? Let's give it a reference number. Reference 7715112 U. S. A. A special edition. Okay, that's what these shoes are there. Special edition. And that looks like there's a price tag over there on the right hand side. So let's go do that too. Okay. Anthems in a copy and paste this now and change the color to green. I like it and like it. And this time we'll do bold and we'll say $78. Even that's looking good. Let's make this label smaller, cause it's not gonna need to be that big. And ah, line it up right about there. Looks good to me. And we'll highlight both of these and just kind of center it like that doesn't have to be perfect. Just don't look kind of good on the screen. Maybe this is a little is a little too out of place here, Smeagol. Smaller. There we go. Looking a little bit better. Okay, so I got a price. We got the reference I d here. And then we need a couple of buttons. Of course. All right, let's go ahead and throw some buttons on here. You I but in and just put it right here. And what I'm gonna do, actually is make it a custom button. Okay? It's white right now, and I'll put the background color of it. And it's not up here like all the other ones are on the button. You have to scroll down, and it's right down here in the view portion of it. And right now, It's a clear background. So we're gonna change it to read and make it a little bit bigger here. And, uh, yeah, just looks good right there. Okay, Maybe a little bit bigger, even. Just something like that will change the text on it. Teoh. Um, like and let's change it, Teoh Custom, Helvetica New will do Bold. I like it. And I'm gonna go ahead and command d to duplicate it. And on this one, let's call it by. Okay. And I'm going to scroll down and change the color on this one to green. And isn't it cool how just with looking at some at inspiration, we can already start building a very beautiful I think it looks nice. I think people would say your app looks nice if it looked like this and we didn't have to do too much thinking someone else did all that thinking for us, So looks good. Now, of course, let's just play around, have fun and run it and see what it looks like without any stack view and without any constraints. We got to see the bad so we can appreciate the good. Okay, here it comes. And it popped up. And of course, it is ugly. Well, that was expected. Okay, I'm gonna go ahead and stop this and let's talk about stack views. Okay? So a stack view the idea behind a stack view is that it's stacks your views literally. Okay, So what it's gonna dio is you're gonna say what I didn't So I want stacked horizontally. And what items do I want stacked vertically. So let's think about this year. So we definitely know that the horizontal Excuse me, The vertical items that we want stacked are right in front of us here. So if I just, uh, hole up in a tool here so we know we want to stack this guy. So this would be like in a vertical stacked is to be one we know we want to stack this row here. Teoh, We want to stack this label, stack this label and stack these buttons. OK, So 123 for five. So there's potentially five items that are going to go in a vertical stack. That's cool. What about horizontal stacks? Well, this guy could be his in his own stack, so this would just be an element of one though. And this right here, you know, we would stack these. Okay, so there's or five items. That's five items who would stack horizontally. So 12 and, uh, this guy could be in his own stack view. Now, when they're just single elements, they don't have to be in a stack for you, but it makes sense to put everything in a stack. You, in case you add things to them later. And here's another horizontal stack for you and another one, OK, because there's multiple items in it. So few different things going on here. Let's go ahead and just put it into practice. And what it's gonna do is it's gonna break things for us. Um, and then we'll fix them. So let's go ahead and grab him the shoe and dry here at the bottom. There's a little button, little square button with the arrow called Stack, and we're just gonna click stack, and it's like, Wow, um, it just messed up. And so if you go over to the right hand side right now, it's stacking vertically, as if it's in its own vertical stack. I'm gonna put it as horizontal just because I think vertical is not exactly what we're looking for right now. We Because in case in the future, we might add things horizontally, probably not vertically to this specific element. OK, so that's cool. And it's really huge right now, but that's fine. Let's just finish stacking the so I'm gonna hold on to these guys now. I've de selected the shoe and I'm gonna hold down shift and select all the shoes. What we want here is a horizontal access stack. So if you select all of them their cable from left to right. And now click this button at the bottom here, the stack. But they're all now stacked in a horizontal stack view. Very, very cool. Okay, this, uh, Chuck Taylor shoes. Let's go ahead and put this in its own stack view, and I'm gonna change it to horizontal. In case we had things it would be on the left or right up and down and just like these great text and this green text, and put that in a stack of you. And it's smart enough to know that that's a horizontal stack view. And then select the buttons left and right, and put those in a stack of you. What kind of stacked you? Do you think it's gonna put what type of access? If you were to say horizontal, you'll be right now, you're probably thinking, How is this helping us get anywhere? Well, right now, it doesn't quite look like that, but it will soon. So if I go over your left hand side and I select the top stack view and this next one and this next one and the next one and the next one and I put all of these in a stack view, things are starting to look a little bit nice. They went off the screen, but they're starting to line up a little bit better now. Okay. Very cool. Still little big. But that's okay. So right now what we want to dio is we've created a stack views. We created these multiple stack views, but now we need to use constraints. This is what I was telling you. You used the stack these first. Then you use the constraints and what we want is we want to constrain the entire stack view . In our case, we want to put it from corner to corner to corner the corner. We wanted to fill the whole screen, no matter what screen it's on. And the beauty of stack views is they will stretch and there with flexible width and height based on the size of the screen. And it will look nice. Okay, You won't have to do all kinds of crazy, weird stuff like we did earlier with our constraints. So what I'm gonna do is just move are stacked view right here, okay? And I'm gonna go to the pin menu, and what we're gonna do is take off the margins, okay? And, ah, I'm gonna go ahead and se zero for the top changed back and zero for the left and for the right. I wanted to say zero. And for the bottom. Come on. It's disobeying for the bottom. I want to say zero is well, too. And let's see what happens if I pin this all to the, uh, to the sides here. Okay. Starting to get a little bit better here. If you concede e, I can see it looks looks pretty cool. And let's just run it and see what it looks like right now. A little bit better. You know, it's it's getting there. It's fitting on the screen. Let's rotate it. If I press command plus right, it will rotate my screen so long as I have enabled in my project setting. And it looks okay on landscape. Even we're making some progress, so let's rotate it back. He's that cool animation, too, Bring. All right. Okay, Very good. Let's stop it. So let's fix one of the obvious problems. Is these shoes right? They are not going across the whole screen, and that is no more be in. So what we want to dio is distribution. Okay, I want to say feel equally okay. And then what I want to do is I want to add some spacing in between, Let's say 25 spacing and look at that. It went ahead and spaced. Are images equally across the screen? How cool is that now? Will that work in all of our different screen sizes? Well, let's see. Let's go ahead and run it again. And so it's squishing them there, which I'm not too happy about that. And, uh, right here, it's not really centering them, so we've got a few problems that we need to work out. That's okay. So the first problem that I want to solve is the fact that when we were in, I believe was landscape. It wasn't going across the entire screen. Okay, I remember. Right. Let's let's just double check again to be sure gonna build and run it. And yes, so they're squished there, and then here they don't go all across the uneven. It looks a little bit silly. I don't like it. So what we need to actually Dio is in our parent stack view. Okay, up here, we want to go ahead and tour says alignment right now is aligning everything by the leading edges. So what I'm saying is this is being aligned by this by this, but it's all in the left hand side, and that's not what we want. What we actually want is to fill up the whole space. Okay? We want each of these to be aligned with the feel to cover everything. All right? And then, of course, the distribution there's multiple options. Weaken do there, we can say feel well, let's see what looks like with feel, okay. And what you're gonna want to do is play around stacked view to get what you are looking for perfectly. Okay, so now it's going across the screen, which is nice. Nice. Okay, of course it's switching and stretching things, but that's okay. And let's see what it looks like when we change distribution to feel equally okay, Who? That's interesting. Okay. And eso, in this case, it's actually trying to give equal space to everything, and so that's not what we want. Okay, so let's change it back to feel it's looking. It's looking pretty good on field. And again, you're gonna want to play around with these settings. Okay, So alignment is how all these stack views are aligned in accordance with one another. Okay? Or the elements inside of it. I mean, so this stack, you has all these stack views inside. How do we want to align those? Well, we want them to fill up their space from from left to right. Okay. And distribution is the items inside of it. How do you want to distribute their their the elements themselves. Okay. And, um, so right now, this stack, he was a vertical. So 1234 You know, five things or so and ah, they look OK, Maybe we should put a little bit of spacing there. May 5 pixels. Okay, there we go. Just space. Small. Made it look a little bit nicer so you can play around with that Really nice. Remember, doing this with constraints would have been a lot more work. We're making great progress right now. Now, the other problem I want to solve is these shoes They were squished and stretched, and I don't really like that. So I'm gonna select each of the images themselves, shoes one through five. And I'm going to say instead of scale to feel, let's say, aspect fit, no se aspect fit. So it fits whatever boundaries it's in. And let's go ahead and run it there, and you're gonna wanna have to run this over and over again as you make incremental changes . So you can know exactly what your changes air doing, because it could affect everything. Um, okay, so look at that. Are images are now sizing differently, and I kind of like it. I like words going. It's doing this first automatically, by the way. Remember how before I was always complaining about auto layout is not really auto layout will. No, it's a little bit more of a not a layout. It's starting to think for us. Thank goodness. Thank you, Apple, for creating something so amazing if you watch the W W D C video when they present this like, people are cheering and clapping like that's how important and powerful this is so very cool stuff are images are now the aspect ratio, and I'm starting to like it now. The shoe, it's looking a little bit big, and so I think that we want to fix this problem next. So let's go and stop it to save processing power here. Okay? Maybe all we need to dio is give some padding between the outermost stack view and the actual super view. So I think I'm gonna do that. So right here where it says trailing space. Um, I'm gonna maybe say a constant of five. Now, let's say 15. Let's say 20 twenties looking good. Let's go ahead and do that for the rest of them. I'll click on Click Off and ah, oops, wrong one right here. All wrong one again. There it is 20 and let's go ahead and say 20. Okay, This is minus 20. Let's see. No, I was right. What did I do wrong here? This is just 20. Oh, just click the exact same one. Sorry. Yes. Okay, so let's go look at this one here. So that's 20. That's when I was a different one. Okay, that's fine. It's just not showing it. That's okay. Let's say it. 20 and one more. I'm just I'm clicking off of it, clicking it and then double clicking the the, uh, thing there and let's give that a shot. Let's build and I must Let's move this guy over here So it's moved in the middle. There we go. The constraints do that. We'll still do their thing. I just wanted to get it off the edge, so it didn't look so so squished there. That's looking a lot better. Uh, you know, that would give me an example of what the shoe looks like. I could click thes if I had the functionality for it. Not to change a shoe if I goto landscape mode. Hey, you know what? It's still working. That's OK. I'm OK with that. Uh, I like it. I like it a lot. So it's looking good. And this is just my preference. We're just working with stack these. You could play around with it all that you want. So let's look at our Chuck Taylor shoes label here. Well, that's that's okay. It doesn't seem to be in too bad of a spot. Um and neither does this a little bit. There seems to be a little bit of spacing that we probably need here. So let's go ahead and take care of some spacing and some clean up here, okay? Going to stop it? I think maybe we should just maybe adds more spacing. And I just said maybe twice. One word after the other. Really weird. Okay, so top level stack view. Let's go ahead and make more spacing. Say, 10. There we go. Was run that. See if that space is our text a little bit better. Yeah, it's looking really good. Actually, it's looking real good now. These images, I feel like they're a little bit smaller than I want them to be, so I'm gonna go to Placr Image stack view here. I'm gonna reduce some of the spacing. I'm gonna say maybe. Ah, 15 spacing. Make it a little bit bigger. Let's run that. See how it goes again? I test everything. This is how I developed. So if you're like man, this guy builds and runs a lot. This is just how I do it. I like to see where my specific changes air going, especially since I can't preview them. So I like what it's doing right here. OK, But I don't like what it's doing in landscape mode. I think that I think that we need to squish them some more, or at least make them smaller when we're in landscape mode. Okay? And ah, so I think one thing we can do to change that I must stop this year is we can set content hugging. Okay, So if I select the images themselves, don't select the stack, you would select the images themselves. And if I go over here to the ruler Okay, let's talk about content hugging. So content hugging is the idea of something is hugging your content, Meaning? Trying to smash it in. Okay, so think of like you're giving someone a hug. You're trying to smash their bones. Okay, uh, more or less. And content. Compression resistance. Okay, Is How much resistance do you want to give to compression to that hugging? So, like, you know, someone's coming and hugging Uriel type, you know, um, push him back on him. How much do you want to push back on him? Okay. And so, using those two things you can kind of determine, like, the size of things. And so I don't like the size of the of the shoes and landscape mode, so I want to see if I can compress them a little bit more. So what I'm gonna dio is I'm going to go ahead and on here. I'm gonna change this. Ah, to a higher number. So to 60. So I'm gonna say I want to get a little bit more and let's just run that and see what happens now. By the way, I had all these selected at the same time, and so that's affecting all of them. Let's go ahead and run it and see what happens. Got a landscape? Yeah, Still not quite what I'm looking for. So let's try something else. So I just think they're too big in the landscape mode and so we can actually use some constraints now, And what I can do is I can go ahead and select what we want to do here. Let's say let's do the height, Okay? We want to do we want to sit? Yeah, let's try that. Let's set a height. And right now, it's 100 in this mode here. Okay, But let's Ah, let's go ahead and change this here, so I'm gonna click. Add five constraints for the each of these items. What I'm gonna do is I'm gonna select each one of these, double click it, and I'm going to say these shoes need to be less than or equal to not eagle too, but less than or equal Teoh. And I'm gonna change this. I'm gonna say we're gonna say 70. Okay? I need to be less than or equal to 70 and I'm gonna do that for each one. Okay? I'm gonna go in here and change it from equal to less than or equal to 70 and this is arbitrary. Number is just a test. And I got to do this individually on these here, say, 70 changes to less than or equal to, and I like it. And two more double click the constraint 70 and changes to less than or equal. And, ah, one more. Okay. And when you change this right here to less than or equal to and 70. Okay, let's go ahead and run it and see what happens. Hey, look at that. They're smaller. I like it. I like it a lot. So we mix some constraints with some stack views. That's okay, that's what you're supposed to do. And it's looking real good. And we're hugging it a little bit. We're setting a max. Ah, a max height less than or equal to. And that's re sizing for us. So I like it. And ah, it's looking good. Now these Ah, these Ah gray label here in this green label when I goto landscape there kind of not lined the way that I want them to be. So let's take a look at some of their settings. I'm gonna stop this here. And so we've got the reference here and let's look at its case right now. We're centering it. I don't think I want to center. I think I'm gonna say, left a line. And on the money, I think I'm gonna say right aligned and then I'm gonna click the stack view here, okay? And let's look at the line right now. We're saying, feel I like it. I think I like the feel, Um, but what away? What do we want to do? You want to feel them equally? Well, they're both different sizes. I don't necessarily want to fill up that space equally, um, feel proportionately proportionate to their size. That might be what we want. Let's go ahead and run that, Okay? It's running, and I go to landscape mode and hey, I like it. It's keeping it on the left and on the right. And on landscape mode, it's Ah, it's getting there as well, to its left and rights really clear, invisible. Everything's looking lined up. And by the way, it's doing this for us automatically, which is super cool. Do you know how much work we would have had to have done to make these things resize on their own? Oh, a lot of work. Okay, so obviously there's only one more thing we need to take care of. And it's these buttons, OK, they're different sizes right now, so let's click that stack, conceivably see if we can solve the problem just with stack view. So alignment is feel. I want it field. I like it. It should be filled distribution. Ah, well, these are two buttons. Let's fill them equally So they're divided in half and you're like, That looks nice. But what about this space? Well, never fear. Spacing is here. And what do you think we should do about 10? Ooh, that's not real nice. Let's go ahead and build and run it. And it is up and going and it looks nice. Let's command to the right to rotate command to the left to rotate back. And it looks really good. And just for reference. If you ran into any crashes during this project, okay, I did myself at one point. Not during this video, but beforehand. And I think it's X Code seven. Beta bugs will probably go away when the final versions released, but if you do run into those crashes were like, Why is it crashing on me? I'm just playing with the stack views and the constraints doesn't make sense. Well, what you can dio is you can collect this guy here and go to your hardware and select home. Or you could do command shift plus H and it's going to take you home here and all you got to Dio is holding Click. It's gonna wiggle. And then you can click that delete button to delete the APP and then go ahead and rebuild it and it will hopefully fix itself. At least it did for me. So there are some gems for you to solve these problems. They don't freak out. There's always an answer to everything. Always remember that there's always an answer to every programming problem. It's never unsolvable. Okay, so it's looking good. I just want to show you one more thing. Okay, let's say that we want in landscape mode. We want the buttons left and right, but in portrait mode, we want them on top of each other. OK, so we can use something called size classes. We haven't really got into it, but I'm gonna show you how they work with Stack view. So if you select the stack you that you want in our case, the buttons over here to the right hand side and there's a little plus. But next to each of these, maybe you were wondering what they were for world. This is how you can change things based on the device type or the layout. So I'm gonna click one for the axis, Okay? And what I'm gonna do is say compact with and so think about it. Compact with is any screen size where the with is smaller than the height. So that would be a phone, right? Ah, phone and portrait. The with is going to be smaller than the height. If I goto landscape, the with is longer. So that's not gonna be the case. So we want compact with Okay, so whenever it's in portrait mode is what it's saying and ah will say any height, it doesn't matter the height of it and what we'll do is we will say we want a vertical alignment of these buttons. OK, vertical on. Ah, the two buttons here set of horizontal. Whenever it's in portrait mode, let's go ahead and run it Command Plus are to run it. And there it is. Look at that. Pretty cool. Let's go ahead and look at it in landscape and it disappears.
31. Intro to iOS 9 App: Welcome back, everyone. This is Mark Price with Deb Slopes. We're gonna talk about the app that we're gonna build today. Now I know what you've been thinking. Is this my chance to build my $1,000,000 calculator app? Well, it just might be because our calculator is pretty damn cool. And there it iss running in the simulator. Okay, so there it is. It's a calculator. Now, you may be thinking, What? This seems a little bit simple. Well, first off, let me assure you that it's not a simple issue. Probably think. And secondly, this is gonna take your leaps and bounds into the future topics we're gonna talk about. So this is a great app. And let's talk about where I got some of the graphics. Okay? So pull up Google Chrome here. All right? Okay. These were built by Black Moon Dev and they went ahead and posted it on open game art dot org's for free. It's the wtf pl license, and I'll go ahead and let you figure out what that is on your own. So these guys are great. I've actually worked with them before. I stumbled on this art and found out that they're the ones that did it and they built art for my games before. So if you ever looking for some awesome game art, they are great studio to go to. Okay, so I'm excited to build this. I hope you take time to block out the world and just sit down and build this. That because it's gonna take some thinking it's gonna be in two parts and it's gonna lead into the other lessons that we're gonna talk about. So I'm excited. Let's go ahead and get started.
32. iOS 9 App: Retro Calculator Part 1: Welcome back, everyone. Mark Price here with Deb slopes dot com. And we have another exciting after you're gonna build today. A long, long time ago in a galaxy far away, we built an outer space retro calculator. Very cool stuff. Now on the service, it looks like a calculator, but in reality, it is still a calculator. Although it is a fun one, and it looks really cool. Now, you may be thinking this is pretty simple, right? Well, not quite. Nothing is ever as simple as it seems. Of course. And ah, there's quite a few things you're gonna learn today. So very cool stuff. Okay, I'm gonna go ahead and put this back here. And you also might notice that today we have a video of me recording. Somebody told me that in order for me to personally connect with my audience, which I can't see or talk to, that I needed to have a video and ah, boots are connecting, so I'm feeling pretty connected. How about you? All right, well, with that being said, let's go ahead and get down to business. Okay? I'm gonna open a new Exco project. All right? By going to file. Pull it up here. So you gotta file new project. And Ah, here we go. We're gonna build a single view application, product name, retro calculator or retro space calculator. Whatever you want to call it. Retro Cal. You late or all right, All these settings look good here. I'm gonna click next, and we will keep it on the desktop. And we will create a git repository because hopefully you're submitting this to get hub dot com orbit bucket Because you want to be able to show potential employers your code. That is how you get hired. Okay? You need be good with git and get hub. So start practicing now. Create. Very good. When there we have it. We're building this app now. Okay, So device orientation right here in the middle. Let's go ahead and dio landscape off and upside down on. Okay, that's looking good. Everything else in your looks. Good. So if we go to the main story board, it is empty. Now what? I always like to dio when I have a nap that is relatively simple, or at least has some major visual components. I just like to build the user interface first, There's other ways of doing it, but this is the most fun to get excited about the app and starts giving you a vision of where it's going to go on. Of course, X code is highly visual. And so it makes sense toe play around with interface builder to get things moving because it's actually pretty important, too. So there's our canvas. Now we know we need some graphics, K. I've gotten those graphics for you already, and ah, we need to import them. So we have assets dot XY assets right here. I'm gonna go ahead and find my image assets folder, which is right here. Very good. And, ah, we'll go ahead and grab zero 123456789 Add divide equal multiplied. Subtract. We need the back panel to hold the buttons. We need the counter, and we're gonna need some outer space and we're gonna need some ground. And I I think that's all we're gonna eat right now. So I'm gonna go out and drag these over here Very nice. Looks good. Okay, let's go to the main story board and let's go ahead and put the background on. So how do we do that? Does anyone remember? Kimberly says Use a you white imagery. That would be right, Kimberly. Very good. Okay, so let's go ahead and put the U image view on the background here, okay? And, ah, we'll drag it to the edges here. Okay, we've done this before. No big deal. Let's go ahead and select an image. Here I clicked the ah weird looking icon here, which I still don't know what it is. It's the attributes, inspector. That much I do know. Let's change the image to I believe it was ah, space. And there's outer space. Now again, if you are thinking that maybe everything is well, well, maybe you should click the assistant editor here, click the double circles where it is automatic and change it to preview. And sure enough, we've got some weird things going on. We cannot see Planet Earth. In fact, we don't know if it's stretching food squishing. We don't know what's going on. Let's go ahead and add a iPhone six plus by pressing that plus sign there and surely when delete this guy real quick, Surely not all is well. Okay, so we know there's problems. We've experienced it before. Auto layout is not so auto as we've already talked about and ah, let's go ahead and ah, fix some things. OK, so first off, let's pin it this little pin menu here. Okay, you might click it and we're gonna click off, constrained to margins because we wanted to cover all of the corners. We don't any white space some 1000 and zero and that pins each of the edges to the side of the screen or the super view that it's in, which just happens to fill the screen. And it's gonna basically stretch. Whatever this view is. Teoh, meet those requirements now. Since it's an image, it might not always be the best thing to stretch it. So there's one thing that we do need to dio, and that is set the aspect ratio on it and let's go ahead and click. Add five constraints annually. Oh, that's not doing what it's supposed to. Dio and I would be saying the same thing because clearly it's not. Let's go over here on the right hand side and change it from a scale to feel over to aspect field. And there we go. No, In this case, it's okay for us to have the earth cut off because they're different screen sizes. And, uh, you know, space is vast, and that's okay. And, uh, we want to make sure it looks good on most of screens years us to pull up the smallest screen. And it looks good there, too, when delete the six plus. And yet it's looking real good. Okay, very good. So we got her background. No, we know that we are gonna need a back panel, and we know that we're gonna need the counter or the area where you're going to be able to see those calculations. Okay, so let's go ahead and add those on now. And if you were thinking we should add a couple more, you image views, then you are absolutely right, because that is just what we need. Okay, there's one. Let's go ahead and set it to the back panel. And of course, it is squished and stretched and everything else. So let's go ahead and change it to aspect fit. Now, maybe you're thinking, What's the difference between aspect, fit and aspect? Feel well, aspect fit will fit your image with an aspect ratio within the bounds of your view. So, you know, is that views pretty small right now It goes from here to here and here to hear if I switch it to aspect fit my view. Size didn't change, right? It just made my image smaller. So it fit in there. Sometimes you want that sometimes, you know, I'm gonna undo that Command Z. And then let's try aspect feel now, Aspect Phil will keep your image at aspect ratio, but it will cut off your image once it reaches the edges of the bounce. So I just drag this bigger. My image. It's all still there, and it looks fine, but it's, ah being cut off. That's not what we want. So let's go ahead and just change it. Aspect fit. And let's just, ah, make it bigger. Yeah, it's not so bad. And, ah, the reason why I have the 3.5 inch on here. This is the iPhone four. And for us, Okay, the reason why I have that on there is because we want to support the smallest screen size , okay. And ah, it's not quite. Eric. Girls put it out right there. All right, I'm liking it. Okay, let's go ahead and just move it out of the way here. And let's go ahead and add a another image. You for the counter, and we will change this Teoh counter. Now, if this counter the best word for I don't know, I don't know what's called the view window. That calculation, Vieux Port, whatever you wanna call it. The thing that you looked at, what used to turn your calculator upside down as a kid and spell hell, uh, to impress all your friends. And you would laugh. So that thing, that's what we're doing. And let's do the same thing with this. Let's go ahead and do aspect fit. Okay? You know, it's a little bit small. Notice how? As I'm bringing these down, the image isn't re sizing. I'm discriminated extra border space. Okay, I think this looks good. I think these two should be together. Maybe floating like that, Okay. And Ah, yeah. So I like it. No. In times past, we've used constraints to move things around. In this case, we're going to use a stack view. We talked about this already, but When I was actually building this app, I decided I'd play around with constraints at first just to see how long it took and for what took me an hour with constraints. Took me about five minutes with the U i stack view. So the word on the street, according to Apple, is use stack view first and then constraints when necessary, whereas in the past everything would need to be done with constraints. So it looks good. Let's go ahead and select this holding down command or shift and then clicking the back panel looks a little bit off. See, those little dots said it looks like they're not quite centered. I am not happy about that. Oh, it's because one is just slightly. I'm gonna go crazy anal about this. Let's go ahead and make it this slightly bigger. See if we can match it up. Uh, looks good enough. All right. Looks good enough. Hold down, shift or commands like the other one. And what we're gonna dio is down here. This little arrow and square stack. Bam there, stack. Now you know, it's we kind of got a problem. Are sizing just went all crazy haywire? Okay, All right. Off the screen. And that is not what we want. So I'm gonna go ahead and undo the creation of the stack view Command Z, um, I I was playing around some things. All right, So, goodbye, stack, you write about now. All right, so we notice it got real big. And at least for this application, we just want to fix size. We're not gonna get all crazy complex, And I'm auto already sizing things. Okay, so good. And click your counter view there and go to your pin menu, and you go ahead and click with and height. Give it a fixed with in a fixed height so it doesn't change. Okay, Perfect. Now it's kind of out there, but that's OK. And then on the same thing for the back panel, let's go ahead and click fixed with and fixed height and add to constraints. And, of course, is looking all funky over here. But now when we magically select this and hold down shift command and like the second view and then when you select the stack to you down here at the bottom, they are now stacked together as a single unit which is super cool. Super, super cool. Love it. So let's go ahead and now center this in the middle of the screen because we know that we don't need anything above it and anything below it. So I'm going to go ahead and click thes Suleiman icon and we're going to horizontally in container and vertically in container, and things should magically look correct on the right hand side in the preview screen. And sure enough, they do. Let's see how it looks on a larger screen. Not bad. Now again, we're not utilizing all the screen space, but that is a topic and a lesson for another day for things to grow and shrink as you need them. We talked a little bit about that in our auto layout lesson, so you can do that if you want. Okay, so it looks good enough for now. Now we need some orange button looking things that have numbers on them. Okay, so let's go ahead and do that first, though. I want to point something out. If you can see these dashed lines right here. What that saying is, even though on your screen right now, your images and controls are where they are that they will actually be moving up in do that position at runtime. So it's kind of Ah, glimpse into the future, you know, so pretty cool on the screen. Obviously, it's not completely centered right here, but it will be at run time, as you can tell in the right hand side. So always trust what's on the right hand side. Don't always trust what's on the left hand side. However, on the left hand side, make sure it just looks about right. Okay, so what should we use for these numbers? Well, if you were to say, let's use some new images, you would be absolutely incorrect because we need to use buttons. Of course buttons. You click on images you don't. So let's move it on over. Dragon over. Okay, that is not what we wanted to do. Notice how it just dropped it right there in the stack view. Now that's a really cool feature for times when you wanna drop stuff into a stack that you don't the change constraints, but that is not what we wanted to do. An X code was acting a little too smart for its own good. Let's undo that. Now I'm gonna go ahead and drag it somewhere else on the screen. There we go. And let's go over to the right hand side here and delete the word, but in because we don't want to do that. We wanted to be an image. And for your image, What number do you think we should start with? Well, if you were thinking the number zero or one, that would be close, But we're actually gonna start with seven. Now, the apple calculator on the iPhone, it starts 789 of the top 456 And a lot of calculators do this. Do I understand the reason or science behind it? No, but we're gonna follow suit. So I'm assuming they've done research. And this is what people like And what, so way too big buttons way too big. Obviously. We need to feel to fit more on here than just this. Okay, so let's go ahead and figure out good size for this. Um, hold down shift and shrink it down. I'm just gonna guesstimate real quick here, estimating, estimating when you be three across. This might be good for right now. Let's go ahead and Oh, careful. Going to grab the wrong thing here. Let's go over here. And what you can do is you can hold down command Command. Ah, plus D. Ok. And it will duplicate it. That means duplicate. Or you could do command see than command be, does the exact same thing. Let's go in and change just over to the number eight. Looks good. And then we're in a command de selected again. Just wants to be highlighted Mandy again, and we'll go ahead and move it over here, and that's looking good. Okay, let's change the image to nine. Okay. Every girl. Okay. I like it. So let's also do something else as well to let's go ahead and just make these all a fixed with and fixed height. We can change these later if we want. Just so they say the same. Oh, you love it. There goes auto layout making our life magical over here on the right hand side. Why no 1 may ever know, but we'll soon fix us by selecting all three of these. Okay, hold down, Command, select all three. Hold down shift and we will go ahead and put these in their own stack view right here on the right inside. And now they are in a stack view. That is pretty cool. And they're crunched. But magically, by changing this number over here spacing, it will no longer be crunched. I'm gonna put a 25 in there, see how it looks. And they're now space by 25. That is pretty cool. That is really cool. Actually. Now, what I can do is I can take this whole stack of UK, and I can actually drag it into the stack feel. Okay, boy, that's gonna do. It's going to stag it. So we don't want to stack things in the stack view because they don't need to be a stack. They need to be floating on top of it. So in this case, we're not gonna be using multiple statues with numbers. And the background we're actually doing is laying this out via constraints, which is okay, that's fine. So let's go ahead. Help. Could be careful. You select here. I'm gonna go ahead and just ah, move the stack for you all the way down, okay? And I'm gonna use the arrows now. Two position things, because if you click and drag, it's gonna drop it right in that stack V again. Sometimes it's too smart for its own good. Okay, so, yeah, spacings a little, a little heavy. So let's go ahead and change it over here on the right hand side. What? He thinks a good number 20 20 might be the number. Let's Ah, double click this again and move it over a little bit. I think 20. Still a little bit too much. Let's go ahead and try 15 Getting better. By the way, you're going to doing lots of this lots trial and error and testing unless a designer has provided pixel perfect artwork for you and expects you to implement it pixel perfectly. Okay, you'll be doing a lot of trial air on your own. Okay, so it's getting closer to what I want. Um, I'm really feeling like these buttons are just slightly slightly too big. Let's play around with it a little bit Here. Um, what we got right now? Right now, it's 65 by 66. Uh, let's go ahead and change. It may be like this 61 63. So if you double click these ah, numbers of, in fact weaken Dio Um, I thought we could We can't do all of met once. This is doing one at a time, just ah, now what you don't want to do is you don't want to go ahead and click him in here and change in here again because it will add double constraints. Um, that's not what we want. So let's go ahead. Click this one and double click it. And what I probably should have done is just gotten the right size for the 1st 1 down. OK, but that's okay in trial and error. It's no big deal. So let's say 61. They're a little bit taller than they are wide. That's fine. So 61 let's click off the screen and click it again and changes to 63. Okay, and ah, that looks good. Can let's go to this guy here and ah, let's go ahead and change the That's interesting. The ah stacked You actually went ahead and did some modifications of a tell him, but let's go in and change these. All of them here 61 on 61 not 6 61 thing you and Ah, Click off. Click it again and let's go over. Teoh 63 starting to shape up here. One more, one more. 61. If I got a bear through doing this, you've gotta bear through doing this just the way it is, Okay? And Ah, 63. Okay. I like it. I like it. I like it. Now it is getting closer to what? I wanted to look like. Someone double click the stack view and just moving over a little bit. Here. Up. It found the center for us right there. Perfect. OK, I like it. I like it. I like it now. We obviously need these to float on top of the ah, the back panel. So what's the best way to do? Well, there's probably lots away. So one way is maybe we could just center on this. We know this is centered on the screen, the back pound. Maybe we could just center this and give it a constant offset. Um, I think maybe the best thing we could dio is we want all of these. We want all of these numbers to be in alignment with this meaning. If this was to move all around the screen. The numbers will always be on it cause it's a calculator. So what I'm thinking we need to dio is actually create all the numbers now and all the all the buttons put them each in their own row. Okay? And then I think we need to do is make them all in their own stack view, and then center that on to the center of this. Okay, If that's confusing, don't worry. We're gonna go over right now, So I'm gonna go ahead and, uh, Mandy to duplicate and let's just go ahead and move on down right below it here a little bit slow, cause we got multiple controls selected at once. Okay. All right. We wanted about Let's see here. Okay, that looks good. You know, it doesn't matter too much what we're doing right here, because what I can do is just give it a spacing in a vertical stack, and it should probably is your probably 00 no. Look at that. It wants to put it in the stag, You knows. All right, well, we'll use the errors. Don't Don't use the dangerous Ah, the dangerous clicking drag. Oh, my goodness, grabbing the wrong things. Come on, Come on, Come on, Come on, Come on. There we go. Double click it. It is selected. Moving it down again. It's gonna go a little bit slow. Not doing exactly what we wanted to Dio. That's okay. This move it. We just need it below the other control slightly. Okay? Because, ah, the stack fuel. Line it up for us. Okay, So 1234 We need five rows total. Now we've got three. Let's just go ahead. And it's like these two rows now and command D. Okay, put him up. Put him out of our, uh, out of our thing. All together. Must be a bug. Let's just do one at a time. How that one did it too. Um, come on. I did what I did this time was just command C command V. So edit copy, Edit paste. And it worked that time. So let's go ahead and do it differently this time since is taking a long time. Let's go to the Y axis over in the right. Inside. Let's just move it down. Let me say 400. Okay, well, maybe 4 50 All right, That's too much. But let's say for 20. All right, so we need one more row. No big deal. I'm gonna select this guy here. Command C, command V. And let's go ahead and do, Ah, 500. Okay, very good. So now what I'm gonna deal is we're gonna select all the stack views, so Oh, come on. Camera 12 holding down shift three, four and five. And let's see if it magically works out of the box for us. When we go ahead and select this stack here. Now, it's supposed to be smart and recognize that this is vertical. Let's see how smart the stack view is when I click it and it is pretty dang smart. Okay, so we've got a stack view with a bunch of stack views in it, and that is just what we wanted. So now if I go over here to the attributes Inspector, I can set spacing. How cool is that? And so are the spacing I think was 15. Let's see what it's like, Lewd that here too much. Let's say 10. It's looking a lot better, looking a whole lot better. How about we say seven Okay, I'm I'm liking where this is going. Let's go here and click the ruler. Okay? And, ah, let's make it a little bit higher. I'm sorry. Well, higher. The number will go lower, but the images we'll go higher. So let's go ahead and say 1 80 Too high. 1 90 on 90. Can I get a one? 91? 91 90. Oh, not quite 1 98 Maybe it's moving. It's moving. I m not quite where we want it yet. Oh, I have a bracket, That's why, Okay, we're getting close. Let's just say, uh 205 Can I hear a two of five Duo five to a five com on baby spinning? It's spinning. It's moving a lot of things that once it's understandable. That is a little bit too much. Let's just say 202 Come on. All right, I'm gonna think I think I'm gonna call that good, OK? And you're like, what? It's off the screen on the right hand side. And if you're thinking that you should know that this is what auto Leo does to us, it's not fair. But it's just the way that it is okay. very cool stuff. Not really, but we have to deal with it. So Okay, so what we want is this to stay right here on the right hand side. Okay? It is currently not doing that. So again, lots of options. We could center on the screen. Whatever. Let's go ahead and get these to stack views, talking to each other. Okay, So what I'm gonna say is I'm gonna go ahead and select the modern stack fee, which is my numbers, all right? And I must like the top stack view, which is the actual back drop here. And what I wanna do is select a line, okay? And, ah, I think there's a few ways we could do this as well. To what I could do is I could say, hey, align the top of this to the top of this. And then what we could do as we could give it a constant offset toe. Put it back over here. Okay? Which maybe we should have done that in the first place instead of moving all these numbers around. But, uh, this is after the fact, or what we could do is we could center them. Um of course, horizontally. We don't need to change that. But then vertically as well. And what we could do is on the vertical one. We could actually, I'm not. Not the one. These ones right here. Vertical horizontal centers and medical centers. And on the vertical one, we could actually said offset. There is well, too. And I'm actually thinking that's what I want to do. So I'm gonna click both of these. It's gonna center them in this, so it's gonna send them here, and it's going to put him horizontally now, the the outside one. The back panel is not going to change in accordance with what we're doing here because it's already pinned to the center of the container. So that's already happened. And so this is only going to happen with our numbers. It's not gonna affect the actual movement of this. So that's okay, meeting like if I had these numbers over here and I did horizontal centers, it's not going to the back panel over there. Okay, I'm gonna add the two constraints, Okay. And there we go. Now, it's just as I expected to put it on there. It looks perfectly centered if you consider the whole actual actual boundary here. But that's not what we want, of course. So click off. So they're not both highlighted. And click your numbers stack. You okay? And, ah, over here on the right hand side. We don't want to touch this. This is the ex center. But what we do want to touch is the Why. Ok, so now what I can dio is Aiken, give it a constant, okay? And ah, let's just throw a random number him. So it's a 20 and moved down. So let's say 40 a little too much. Let's say 35 by the way, I'm looking at the thing on the right hand side, Of course. And 35 seems like the right number. Now, no matter what. Screen him on. Okay, This is gonna look just right. Even if I throw it in the night pad. Right? Come on. Where'd you go? I panel the spinning wheel of death is upon us. Okay, let's go ahead. And who isn't big there. All right, so it looks great. And all the screen sizes. Okay. So again, what we did was we put things in stack views and once they were in the statue's. Okay, We didn't do constraints between numbers and numbers numbers. We just put them in the stack of you. It did its own thing magically. And then we did the constraints on the stack views that we wanted to flow on top of the other stack view. And we went ahead and sent it vertically. And then also horizontally and on the horizontal one, we set a, uh Excuse me on the vertical on here, we said an offset, so brings it down a little bit. So it's not quite centered in the whole thing, but we forced it in its offset. So it looks good. Looks real good, actually. So we're making progress. So you're all asking me. I know. When are you gonna change the dang numbers? They steals a 789 Okay, Okay. Let's get to it right now. No big deal. So let's go ahead and just click it. That's pretty easy, guys. Not to do this. I shouldn't even show that you could do this blindfolded. Change this to a four. Okay, for five. Come on, four. This one's five. Okay, this one, I'm on the right hand side here. Okay. Clicking the image. That's all I'm doing. Okay, Nothing magical. 456 And, of course, after 456 always comes. 12 and three, one to and three. Okay. And of course, this 10 gotta have a zero in there, and this one's going to divide. Oh, by the way, you can type two. If you want divides, percenter, find it on. This one's gonna be multiply. I'm typing letters in the M and it pops up on my press center. That's all. This one's going to be sub tract. Okay, this one is gonna be ad, okay? And this one's gonna be equals equal equal. All right. Okay. All happy. We've got the buttons on there. It's starting to look real good. We're missing any. Why? Well, we're missing the ground. We could do that. Now. I'll be fun. So let's go ahead and do that. The ground is static, so let's just go ahead and use a u. I image you for that. You I image wonderful, and we'll go ahead and ah, be careful not be careful not to hover over your stack views. It likes to gobble everything. Apparently so. Um And by the way, if you didn't know this stack of it was a brand new Iowa's nine concept. In fact, it is pretty revolutionary. And I've been playing around with it quite a bit, and I will be using it on all my production APs here on four. That's how important it is. So Ah, the things we learned about constraints are also super important, cause they have to work together, and you will be using both. But please learn how to use stack views if you want your life made easier. Okay? By the way, if you ever click on something wrong, like I just did right now, just press escape and it'll go back. Where belongs case? Sometimes it has issues like here's the head. We actually needed these arrows here. Okay, I'm gonna drag this across now. Okay? Image view. This is our ground. Um, this is raised it a little bit higher, okay? And what I'm gonna do is put it if you notice Ah, there's ordering of things here. Okay? The things that are in the top are, although in the top, and we want the ground behind it, so I'm gonna go ahead and drag it right there. Not to be confused with putting inside of it or under there are right there. Let's just put it kind of drag it over here to the left of the blue line is right well of you right there. And Ah, there we go. OK, so it's on the very well. We don't want it. We do want on the bottom, but not all the way on the bottom, Not behind the space backgrounds. Let's again don't put it inside of it. But put it on the left of the space back or right about there, and it should line up just where you want it. Very good. Okay. A school change the image of it on the right hand side. This is gonna be the ground. Ah, right there. Ground L'eggs. Good. Looks kind of good out of the box. It could be squishing. Could be stretching. I'm not completely sure. Let's just go ahead and say aspect feel just to see, Okay? It was a little bit off. That's okay. S o r aspect. Feeling it here all the way. And that's okay. That looks looks good. Nothing has to be set in stone. If aspect feel looks better, one geyser aspect fit or if you don't even I want to do it. And it still looks really good. It's all in the eye of the beholder. What ever looks good to you? And of course, um, notice how we somehow lost our preview on the right hand side. So I'm gonna go ahead and click this go to preview and select main storyboard here, and it's spitting. There we go. All right, I'm gonna go ahead and get rid of these extra ones because the more things you have on the screen, I'm just clicking and person delete. The more things you have on the screen, the slower it's gonna go. And, um, I don't look at the know who uses an iPhone for nor really Come on. If you guys have an iPhone for, you should upgrade. If you don't have an iPhone at all. Okay, get an iPhone four. But if you do have an iPhone, forget an iPhone five or an iPhone six iPhone six plus, I found six is a really good, really good phone. I have Bo. I have pretty much every apple device that exists in the iPhone six plus is a little bit hard to reach the buttons at some situations. I find myself like throwing the phone in the air, tryingto trying to catch it again and then press a button on the top of that. Throw it in the air when I'm driving, and it's as pretty dangerous. I don't think I shouldn't be admitting this on camera. Okay, so let's go ahead and pull open the six. That's a good phone to test on. Okay. Obviously we have some problems. Let's go ahead and click the pin button here with it's still being selected. Okay? And we'll look back on this screen here and select the ground again and click the pin, but and and all I'm gonna dio is I'm gonna turn off constrain the margins because we don't want white space. And I'm just gonna put it here, here and here.
33. iOS 9 App: Retro Calculator Part 2: This is Mark Price. And welcome back to the show, everyone. This episode is brought to you by Spike Energies keeping me up late at night so I could deliver you some awesome maps. And by the way, this is not a show. We don't have episodes, and I am not being sponsored. So Okay, so in the last part, we went ahead and built all the wife or application. Now we need to actually write some code. Okay, here's my app. Here's your app. Okay. And ah, it's looking cool. Okay, so let's just go ahead and get rid of the assistant editor here. Now move this over. And I'm just gonna click my view controller that swift on the left hand side. All right. As you can see, we have nothing going on here. Really? I just deleted the did receive memory warning. And let's talk about what we're try to dio. Okay? We want to be able to click buttons on the user interface and the controls, talk to our interface over here, and then we from operations based on whatever operator was selected. Okay, so there's a few things that we can get going right now. without having to use too much brainpower, such as connecting our interface elements okay, onto the into the code. So I be outlets as well as I reactions. Okay. And there's quite a few different ways we can do this, but we're going to do it one way. And so first off, what I be Alice, do we need Think about it. Well, as far as I can tell, the only thing we really need to know or have a reference to is something that we can change, which I think is on Lee the output label. Okay, so I'm gonna say I be outlet. Okay. Week of our output, label of type you. I label. There we go. Put a pound sign at the end. Okay. There's are I be outlet. Now, let's think about the actions, Okay? We've got a whole bunch of buttons, and we need to connect those as well, too. No, the numbers are just numbers. Now, what we could do is we could go ahead and make let's see one through nine plus zero. So that's 10 numbers. Okay? We could go ahead and do 10 ivy actions, but I don't think that's the best way to do it. I think there's a smarter way we can do it. So this is what we're gonna dio. We're gonna open up our assistant editor over here in the middle, okay? And we go ahead and change this here. I'm gonna click this folder here. Retro calculator, and I'm gonna select main dot storyboard. Okay, Very good. Very good. Let's close off the left hand side here for space. Okay, so we've got all these numbers here, and there's something really cool you can do with a button or any view. Okay? These buttons and all these controls, by the way, they all inherit from what's called a U I. View. We haven't talked about inheritance, but basically, all these controls inherit features from other controls. Okay? And so they have a feature called Tag T A G. All right, so I go to hear the right hand side and scroll down easier than my default. The tag is set to zero. So what I'm thinking, what I'm thinking is what we're gonna dio is give each of these a tag based on the number that represents the button, and then we'll call the same function in the I b action in our code, and then we just grab the number out of it to see which button was pressed that we only have to do one function. I think that's what we want to dio. So what I'm gonna do is first off, go ahead and change the numbers in each one. So I just changed. Number one toe one change number two, too. Okay. And I'm gonna change 3 to 3. I think you're following a pattern here for 24 and 5 to 5. And you got six. Okay. Yeah. Seven. We got eight and we get a night. There you go. Not too hard. So easy enough. Now go ahead and write. R I B action over here on the right hand side. And I encourage you to write as much code as possible to memorize these things. Okay, I reaction. OK, this is the functions of funk. And let's go ahead and call this, um, what's a good number for name for a number pressed Number pressed. Okay. And ah, to me of type button, put you a button. Remember? The parameter we give it a name and then we passing the type after it. Okay, Very cool. So now we know which button was pressed. OK, I like it. I like it. I like it now before we get into the nitty gritty, let's do one more fun thing. OK, let's put some audio in here, and this is exciting. I love putting audio, my abs. I love bringing life to my APS. Whatever. Have clients who? Ah, who just want the bare bones. I was do my best to give them mawr not not at the expense of time and money, but give them give them more than they asked for. And sometimes a simple animations. And the love that you put into things can greatly enhance an app. And I think those are the APS that make a lot of money on the APP store. So let's go ahead and add some sound effects to our app. Okay? And so what we're gonna do is we're gonna use something that's called a V foundation. I'm gonna go ahead and import the library here, import a V foundation now Swift automatically knows what I'm doing, OK, it didn't auto complete for me, So if you didn't know what you're looking for that wouldn't just magically put it in. But there we have it. A V foundation. What it's gonna do is it's gonna give us and audio video player, and we're just gonna play some sound, okay? And so we need to sound first. So I'm gonna go ahead and open up the left hand side again over here, as you can see. All right. And let's go grab that file. Okay? So I'm gonna open up my finder, and we're gonna look on the desktop going to calculator art here. And ah, this is an art. But we'll go ahead and grab anyone. There it is button dot wave, and you can just go ahead and click it and drag it over here right next to the Minecraft TTF. That is fine. Okay. Make sure add the target is selected just like last time. Destination major copy items if needed, is on. And go ahead and click. Finish. All right, so now we've got a are actual sound file in the project, OK? And so I'm going to go ahead and ah, make this a little bit bigger so you can see the code here. All right, And Ah, OK. Underneath the outlets here, I'm going to go ahead and create, um, a an audio player. So let's save our buttons. Sound of type A V audio. Come on out. A complete Lario A V audio player. Okay. And the exclamation point says, Hey, we're just going to assign this later. Right now, there's nothing in it. And if you try and use it the apple crash. But you're promising me that you're gonna put something in it, and we will We are gonna do that. And we're gonna use view. Did load to initialize that. Okay, So view did load is called whenever. What? Whenever the view loads, that's pretty cool. So after initialization happens, okay, when the views have loaded on the screen and this may still happen before visually in your eye, you can ecstasy it cause computers air fast. Okay, But when the views have been loaded in memory, this is when this function will be called. All right, That's what we need to do is first off, grab the path of the fire when you say, Hey, where does this file live? On our file system. On the iPhone? Yes. Let's do that. Now, let's say let path. We're gonna make it a let because we're not gonna change. It's gonna stay constant. K equals N s bundle. That main bundle. Okay, all those files there were in the main bundle. And so when you want to grab things like what we're doing right now and it's bundled up main bundle is what you want to call ok dot path for resource. So we're getting the path for a resource and there's a specialized path. You don't even need to know what it looks like. Just know that it's getting you that path. Okay, In the name of the file is beauty in of type W A V simple enough. The name and its type its extension at the end. Okay. And so we've got a string path. This is just a string. And now what we need to dio the audio player requires that it be an n s u r l Okay, a special type of apple. You I kid, uh you are l that this audio player is going to use, So let's go ahead and make the Aurel now as well too. So let are not gonna change it so it's a constant sound. You are l equals. And as Euro Okay, presenter and opening parentheses. Okay. And what we're looking for is this guy right here file. You're ill with path, and we're gonna pass in the path, okay. And ah, it's looking good. And let's see what the warning says. It's never being used. What? We know that. So sometimes those warnings or preemptive, you don't need to worry about them. We know we're going to use it. So shut up, X code. Goodness. Okay. So, no, there's something that we need to do. And we need to get this player. Um, we need to get this player assigned to our button. Sound that a B audio player. Okay. And, um, let's just go ahead and do that now. So button sound equals a V audio player, and we're gonna load it with the girl. This one right here, Okay. And, ah, that's gonna be sound euro, and it's going to give us an air. Let's talk about it. It says call can throw, but it is not marked with try and the air is not handled. Okay, this is really important. This is a new swift 2.0, feature. So before and swift one dot x. Of course, they did great things on making in helping you to have very robust code That doesn't crash . OK, well, they've taken that even to the next level to put you in a place where they, in essence, are forcing you to not let your app crash. Ah, and it's actually really good thing. It's really it's really safe thing to do. So what they're basically saying is a B audio player, it might break. We might have put a bad you are l in there and something might break. Okay. And it may not give you what you want. And so they're going to force us to not They're gonna forces to try this first, Okay, before we can use it. So we need to dio something called a do. Okay, put it in. Ah, Curly braces there. I'm gonna command X to cut this in command V to paste it. So we're gonna do this. It means performed this block of code. And what we need to do is put a key word in front of this cult try. OK, so from now on, whenever x code yells at you about Hey, this throws something like it just just yelled at us. It says this. Throw something. We know that we need to put it in a do block here. There's other ways you could do this, but you put it in a do block and then put the try keyword in front of it. Okay, We're gonna try this and see if it works. And here's the key right here. Okay, catch. So what we're saying is try and do this, and if there's some kind of problem, let's catch it right here. Okay, Let's catch our problem right there. I'll see if the air goes away, all right? And let's see what this guy says again. It's never been used. That's fine. Okay, so let's talk about this again. Do do it this block of code. If there's any problems, that's what the tries for try. It's not guaranteed if there's any problems going to here. So let's say that this did fell. We wouldn't be able to play our sound and would give unexpected results. May be right here. We want Teoh. Reload it, retry it. Put in New York on there, who knows right now, all we're gonna do is just print the air air dot deep Ah, debug description. And what debug distributions gonna dio is Ah, it's just gonna print out something that's readable to the consul. If I press this guy down, this guy up here, this thing pops up, it'll print it right there. What? The actual problem so we could know how to solve it. Okay, so all we're doing is we're trying this If it works, great. If not, let's print this here. It's going to work because, um, our path is good and all that. So anyway, very cool feature. We're gonna go into it later. Um and ah, you have to do it because it makes you do it. So let's get used to it now. And uh okay, so we've got what we've done here is we've now assigned an audio player to our button. So here's their variable. And we just put the audio player and we loaded the girl right here. Okay. And what we want to dio is after it successfully loads the audio players, go ahead and just, uh, call prepared to play. It's a function on the A V Audio player. And what is gonna do is this is going to get your sound ready So there's no wait time by the time the user presses it. Okay, Very cool stuff. And so, um, her audio players working and ah, well, I think that's all we need. Let's see if a number pressed if we could just play a sound. So I say button, sound that plate. It should be able to play that sound. Now. We haven't connected our buttons. This I be outlook yet. So let's do that now and then Let's let's test out the sound. Okay, So back over here in our interface builder, our storyboard. And when I say interface builder and storyboard, I'm kind of eating the same thing. Ah, storyboards haven't always exist existed before that you had to use ah, what's called zip files and it's still interface builder with storyboards. Ness is the connecting of multiple Zip's ex I B. Is what they're called, and so we're still using Interface Builder, okay? And so we got our buttons here, and what we need to dio is just connect them up and let's just do it right here really easy so I can right? Click this and Ah, touch up inside. I'm gonna drop it on the view controller and number pressed. Pops it right there. Let's do. Ah, Number one. It is for all of them. Okay. And ah, again, you're gonna watch me do all this? I don't like to skip these things because repetition is incredibly important when you're learning programming or anything else. But especially programming is programming requires a lot of brain power. Thing about programming is ah, it's not like when, you know, you have a job like, uh, you know, back near 16 you worked at Wal Mart. You know, you could be dead tired. Doesn't matter how many hours of sleep you got. That's the wrong one. There. Um, you could still stand up and do whatever you need to do. Not so a program. You need rest. You gotta have a functioning brain. Ah, it's a little harder. OK, so it's a little harder. So, um, so repetition is really important. So I am going to give you lots of it, and, uh, we're almost there. We're almost there. Thats dragging up the view controller. Okay. Um did over five here Oh, I think we did number five. Okay. And let me do number four. Yes. Okay. So number seven now and touch up inside that little doing all of these here. If I screwed up on these, just let me know. But I can't because this is a recording and you are likely in the future. And I am likely in the past. This is some type of strange paradox. So repressed. One more number 90 What did I just do here? That's right. Click the view controller. See what we got going on. So we got button button button, but these were all buttons. OK, That's still looking good. So let me Ah, make sure seven's good. Still it is. Let's make sure number eight is good Still. Look at that touch drag Didn't even tell me. Guys, Come on, touch up. Inside is what we wanted. Okay? And ah, nor nine. Touch up inside over to view controller. All right, now let's go ahead and save it and ah, run it. I think we got everything we need. Let's see if it works. If we're If we're gonna have any errors, it's very possible You never know I always hear Mr always crossing your fingers when you're building hoping that something's gonna work, Which brings up a good point when you're developing, you should test things as often as you possibly can command three. To make this bigger testings is often as you possibly can, because the more code you write, the more potential for problems you're gonna have and headaches. And it's gonna be harder to fix. So test often run it and tested often. Okay, let's see what's happening here. All right? Now, if all these buttons make a sound, we have success. So let's see. Success, success, success, success. You get the point? I think we can call it a success. I'm gonna stop it. Okay. Very cool stuff. So we got buttons playing. How easy was that? How easy was it to put sound into your application? So very cool. We've got audio. Okay, let's go ahead and closed. The assistant editor and let's select on the left hand side our view controller that swift . All right. And here we are in the code. Now let's think about what we need to do. Sometimes I visualize this sometimes I draw on paper. Think about what we need to do. So if you can pretend that you're using the iPhone calculator app and in fact, if you haven't in front of you, why don't you do this? Why don't you look at it positive video and then think to yourself How does this calculator work? Meaning if I press zero and then press the plus button and then press something else, What's it gonna go? Free press of five. And then a divide, and then a five and then a divide. What's it gonna dio and just get real familiar with it? Okay. And I would assume that you did that, and I'm gonna still explain it. So when you have a calculator and you press, let's say the number five and then you press the plus button and then you press a six. What happens? Well, nothing. You just see the six there. But if you press equals, it will say 11. Or if you press the next operator. Okay. When you gonna perform another op, your operation, it goes ahead and performed the operation of printed to the screen. OK, so that's kind of how it works. So one thing that we know is Ah that when the users typing in their first number. Okay, we need to show on the screen. Okay, So if I type of four or five and a six, it always a show on the screen. Now, if I was to do a four plus, if I was like, you notice something this four plus five plus six, it's not going to give me 4 56 is it? No, it's gonna give me what is that? 9 10 11 12 13 14 15 Amy, 15 last night. We want So what type of data do you think that we should store this? Ah, running number in as the users typing. If you said string than you were correct. So let's go ahead and do that, Okay? Var I'm gonna call it running number. Meaning it's running, it's your was typing into it and it's gonna on default. It's going to be an empty string. And just know that when your APP first runs, this code will be called right here. And whatever you initialized these things to is gonna happen. So it at runtime when this starts, this is gonna be an empty string. OK, so we know we're gonna need a running number. Now let's think about let's think about this some more, OK? We're trying to think of what kind of data we need the store. So if I have a running number, those are the numbers that are being printed to the screen. OK, at some point, we need to do something with those numbers and the point that we need to do that is when the user press is, um, an operator. Okay, When they press an operator, it means that hey, we're ready to start typing the next running number. So we probably need to store the first running number somewhere, because if the first running number was five and six and then someone does I'm minus button and then starts typing in that running number needs to change to the new to the new texts. OK, so what we're gonna do is have a couple of more strings. Alright, so I'm gonna say bar left Val, string equals and empty string and far right Val string equals empty strings. We're going to a left side and the right side K like, you know, five times 32 different operators. Okay, So that sounds good. Um, no. When a user presses, let's say I press of five and I pressed the divide, but and I presses six. Well, at that point in time, nothing's happened yet, right? It hasn't performed the calculations. It's just still waiting at the six. And not until we press an equal sign or until another operator is pressed. Do we actually make the calculation on the screen? So what I'm saying is we probably need a place to store the operator that was selected okay , because when that person enters that second number again, that operations, not that calculation, is not happening just right then and there, OK, and if you're getting confused, play with the iPhone app okay with the calculator app and see how it works. When does things print to the screen like just really dig into it as a user? From a real world perspective, it's not even coating. Just look at it and look at the order of events of how things happen, and then you could start breaking it down and building something here. So we need to store the current operation. Okay, but what's a good way to store it. So those operators, you know how we just did and remain storyboard reset tags. Okay, we click the button and we said a tag on it. Like, um 12345 Whatever. And ah, that's Alfa. Here's a tag. Well, tags are only numbers, right? So I could go and say, like, 10 11 12 13 14 on these buttons. And I could say, Hey, if this tag is 14 is divide, but that seems a little bit silly. And plus, you can only put in numbers here, So we're not gonna use tags this time to track how these buttons work. This time we will create a few different functions. Ivy actions for each of those operator buttons. OK, so we've kind of thought about you know what? What we need to do with with our data here and then we know that we need to somehow track when these oppressed and store them. Okay, so let's first track them and then we'll talk about storing them. You are with me so far. You take a break. Go get a drink. Whatever you need to dio stay with me here. It's, uh, were were going through the muddy waters. It's a little rough, but we'll come out on top. So let's go ahead and click this. And if you remember, right, control, drag over here and I'm gonna changes from an outlet to inaction and we'll call this on. Divide pressed. Now, you may be thinking, Why not just shorten it and call it Divide will think about this real carefully. What if our function itself the I b action? What if it's actually not performing division? Okay, maybe we pass it off somewhere else. Um, you know, or why would you know? Maybe we don't want to call it. I be action in our code itself if we need to divide something. So I like to keep my events and my i b action as actually events beat. Meaning, Hey, when this is pressed, then do whatever you want, Okay? So that's why I'm calling on Divide Press because I don't know what's gonna go into yet, and it may not even divided. I may pass it on to somewhere else and actually will be doing that. So on divide press is an ivy action, and I'm gonna connect, and I like to keep on my i V actions together to make a look nice control, Draco over here and teach you the action. We're gonna call this on, multiply pressed, okay? And that looks good to me. And, ah, let's do subtract. Okay, changed to inaction. And we'll call this on sub tract pressed. And by the way, if you didn't know this already, and if I haven't hammered in your brain already enough, this is how I code in real life. I'm very methodical. I spell things out very detailed. Okay. I mean, I am being extra generous in the details. I suppose in order for you to help, help you learn. But I really actually code like this because if a programmer can look at your code and know exactly what's going on, you have some really good code. Okay, on add pressed versus if you have a bunch of code that you can't understand unless there's comments everywhere. You know, if I have to say my code, this function does this and that it's probably the sign that you have some bad code, and it's not very readable. So, um, pure code, in my opinion and the opinions of many others is code that has the least amount of comment as possible And that self describing, Okay, self describing by its name and futures and what it does last but not least on equal pressed. And let me change this to inaction. Okay? It's looking really good looking real good. So now we have the actions. Okay, I'm gonna go ahead and go here again. Turn off the assistant editor. I'm gonna click my view controller so I have more code space came also, you'll notice that the interface builder will sometimes slow things down. So it's good to not be in it if you don't have to be. Okay. Okay. So let's talk about these actions here. So think about it again. Play with the iPhone calculator. So on. Divide pressed. Okay, so when I press it, divide button, one of two things could happen. All right? One is nothing could happen. So on that calculator, you press divide, and nothing happens. Okay? At least visually to the user. And then nothing happened. So you start typing the next number, and then it's stored. Okay, That's one scenario. The other scenario is someone's already pressed a first operator like the first time, and this is now being pressed a second time. So now we need to actually do the calculation and show the equal sign. OK, so it's very obvious to me that we need to store the operator because when the second operators press, it needs to know about the 1st 1 so it can perform the calculation. Okay, And again, if you're confused, AC actually took me a few minutes. I was sitting out there is, like, how does this day and calculate work? I'd actually never broken apart a calculator to see how it worked. And, uh, so it does take something in, just play with the app and tell you figure out what they've done. So I'm gonna call this current operation meaning the current operation that is being performed. Okay. And it's like, Well, what? What should this be? Should this be a string? Do I store them in a bunch of names? Well, I have a really good way of doing this. Let's go ahead and create something called and eat. Um, okay. E n u n short for enumeration. And we're going Teoh say in them and I would call this operation and think of it like this . Even though you're putting a string here at the end, you're kind of defining your own type. Okay? It's something that you can reuse that has multiple options. So it's it's like making your own type like an inter string. OK, but obviously it's a string, but it's an even, um, of type string. So that's the key word in, um, you put the name of it in front of it. And typically in this case, you put a capital letter in the front, okay. And then you give it its type. And when you do, did you say case? Okay. And then you give it a name. I'm gonna say divide and want to say it equals this now what? Actually, the what the value is inside of it doesn't even really matter, OK, it doesn't matter at all. I'm just explicitly defined us. I could have said blah and it wouldn't matter. Ah, they just need to be unique. One from the other. Okay, somebody divide equals that I could also said divide. You know, um, it was a divide equals that case. I want to say multiply equals has put a star Okay. In the ass trick case subtract equals. It's a track case ad equals the plus sign. Okay, Case equals, equals, equals. There we go. A little confusing, but that works for us. Okay, that's looking good. And we're gonna add one more state on here. Order called Empty. Okay, let's think about this. So when you're loading up the calculator for the first time at some point in time, I guess at the very beginning it's gonna be empty. My meaning? No operator has been entered just yet. Okay? And so we just want to account for that as we're doing our logic. Hate as has anything happened yet? Is this the first time that we're running through that? Okay, so now what I can do This is the really cool thing about enumeration, caves, different cases, different options. Okay, I can actually make it into a type, remember tight when I say type, that means in string or in, um, in this case, and so I'm gonna save our current operation. Just like we had before is of type operation. See, you could make it into a type, and we're gonna initialize it with a default value sort of Say it equals operation dot empty. Okay. And I'll tell you access elements in it. Okay, operation dot empty. And so it finds it. It's a very unique value. And so we're going to say, Hey, we first load the app. It's empty because remember these things when they first load their initialized to whatever you put in here. Okay, so we've done a lot of things here. We've got a running numbers to print things as we're typing them, get a left value string a right value string and then the current operation, but which is, you know, when the button is pressed. Okay. And so let's go ahead and handle how this one works First, the running number. So when the users typing, Okay, the sequence should show up on the output label, right? I think it should. And Ah, by the way, did we ever even connect this output label? I am curious. Let's open the assistant editor and ah, I'm gonna change this from manual over to here to retro calculator, two main storyboard. And hey, look like what? It's on this side this time. This is crazy. You can do crazy things like that. I was gonna right click on it, and it doesn't look like it's connected to anything. So go ahead and click your view controller right up here at the top. Control dragged down to your label. And there it is output label and is now connected. And I will close the assistant editor, and now it's connected. You could see the little dot right there are. We know it's connected. Okay, so when should we? Okay, when should we, um, update the label? Let's think about every time a user presses a number a number only should we update it. Okay, so let's already have a function for. That's fantastic. Okay, so let's go ahead and do that. Let's say, running number plus equals, remember that shorthand for running number equals running number. Plus, so we're date basically taking the existing value that's in it and adding to it plus equals . Let's put some quotes in there. And if you also remember, this is how you inject variables as strings into a string. OK, so if, um, this is how you take a value and you put it in there, you know, I could do anything in her one plus one and that would that would print two. Okay, so it actually runs the expression inside this printed this season, so long as you have that slash in front of it. Okay, So we're gonna do is we're gonna say when a button is pressed, we're gonna add it to this string. So but in dot What do you think, Tag? Remember how we we set the number on the tag in the buttons? OK, so we're just grabbing here. So get this. Get this. When you press that button on this, I be action. We haven't really use it up to this point, but that biden ISS sent right here. It's passed in from Interface Builder. Okay, so let me let me let me give you an example here. Okay? So let me, uh this over here. Okay, so we got this calculator, right? Mia, just draw Allah an example here. So there we go. So basically, when you first put in see this red hot? That action comes all the way over here, and it actually drops that button and drops it right there. How cool is that? It drops right there. It renames it to be ta en suite and access it. And so button dot tag if I pressed to seven, but in dot tag is gonna be seven. Kid, this is the usefulness of, ah of using those tags Gonna close out of my highlighter here. That's really cool. So we grabbed the tag and we store it into the running number. Okay, that's really cool. And so what? We added to it right? We didn't just reassign that. We added it on top of the existing number. That is really cool. So that's just are variable. But we're not actually printing it to the screen yet, so let's go ahead and say output label dot text equals running number. So what we've done is we've created the number we've added on to the existing numbers, and then we're printing it to the screen. Do you think it'll work? I don't know, either. Let's see, I'm building it. Okay, By the way, it's set a default value on here. Based on what we put in the editors. That's another thing we're gonna need to take care of. A setting a
34. Exercise - Enhancing our Calculator: Hey, Mark Price at dev slopes dot com And we're just going to quickly go over the exercise for the retro calculator. What you're gonna do is go to the launch screen. Okay? This launch meant here years, we blink. Okay, this is the screen that loads when you're at first loads. Okay? And what you're gonna dio is you're gonna build this scene with these Mars assets. The planet Mars. Okay. And there's a cool robot and a logo, and I'm gonna provide you these graphics. They will be in The resource is of this video and you're gonna build this. You can use stack views, or you can use auto layout constraints. Okay. It should work on all these different screen sizes. Maker app, extra cool. And that's the easy part. The next part is I also have a graphic for you called Clear. It's a clear button. You notice how in our calculator we did not create a clear function? What you're gonna dio is have a button that clears it and resets everything so you can start over. It'll be a little more than just putting a button there. You're gonna have to clean some things up and figure some things out. The thing is, though, I'm not providing the source code on this project, so you're gonna have to figure this out on your own. And, ah, look to the Internet. Look to Google, look to our forums or chat room for help, and it'll help stretch you. And, ah, it's a really good a really good step into training your brain to figure things out. So that's the project. That's the exercise. So if you haven't built a calculator app, go ahead and build it. You can use the graphics, have provided or get your own graphics. And then this is the exercise. Get the launch screen going and get the clear blood clear button implemented with the code that actually clears the calculator and resets it back to zero. So there it is. Happy building, see later
35. Swift 2 Dictionaries: Welcome back, everyone. Mark Pricey with dev slopes dot com. And today we're gonna talk about swift dictionaries, which are another type of data collection, like unto an array. So I'm gonna go ahead and open a new playground. Okay? Pull it open here. And ah, that's gonna be file new playground. Okay? And we're gonna go ahead and call this, uh, some dictionary stuff. Why not? You can call whatever you want. One thought here on the desktop, and Ah, right. So there it is. Let's go ahead and make this bigger so you can see it. Mary G o. It's looking great for all of you on iPhone. You can now see it without squinting your eyes. OK, so what is the dictionary? What? We've talked about an array, and if you remember right, an array kind of looks like this. My array. It's just the variable name equals, um, one. These air, an array of strings that have the number word numbers. 123 Right. That is an array of strengths. So we've used those. That's a great way to collect your data. But what if we want to instead gather our data by key and value. And so I think about a dictionary in real life. Think about the Webster's dictionary or whatever dictionary you're familiar with. Like if I was looking up a word, it might be looking up the word car and it would have a definition, right? So a dictionary is actually quite similar. In fact, let's go ahead and just create a dictionary. I'm just calling it Webster just for fun. And this is the syntax. Okay, What we're saying is, we want to create a variable name Webster of type stringing string. Now, the differences before with an array, it looked like this. Okay, well, a dictionary has the colon right here, and then it has the value type. So this is the key type. This is the value type. So this could also have been an int que or a? Well, if you probably want to keep it to an intense string and don't mess around anything outside of that for now. So you've got an ent and a string, but we want to go ahead and just say a string string. We want the keys and the values to be string. And let's simulate that real life dictionary I was telling you about. So let's go ahead. And most a good word, Kriel. You know those things in the ocean? Um, and I looked this up, So if you think I know the definition for this off the top of my head, well, I don't If you do know what a creel is and the definition of off the top of your head props to you. Okay. Any of the small crust stations. Every girl looks good. So that is krill. Let's do another key. Um, fire, that's a good definition and key name. And ah, a burning mass of materials. One of the definitions for that. So take a look at the syntax here. So what we've done is we've defined the key name as a string now not to be confused with an array. We didn't put a common here this time. If we put comments in between here, this would be a race in tax. But in a dictionary you put the name of the key and then a colon after it. And then you put the value of that key. Okay, so and then there's a comma. Then the comet comes, so the common separates the keys and the values. So again, key value, key and value K makes sense. So we could also do something different of our another, you know, dictionary. And this one could be an end of with a value of type string. And then we could say 54 44 we could say my favor number, and then we could say 31. Man, I hate this number 32 s so you can have to see the pattern there. You've got INTs and strings for your keys and values here, okay? And the reason why you're seeing an air is because I did something dumb. I put it equals instead of a colon. And there you have it. The air is gone, and we have another dictionary. This is getting pretty exciting. So how do you excess elements out of a dictionary? That's a good question. So let's go ahead and give it a shop. I'm gonna print and we're gonna say Webster, And remember how Honore you could put the square braces and put like a zero or something in there where you can actually the same thing on a dictionary except what your excess ing is the key. Okay, The key. And so we want to excess krill. And what do you think it's gonna give us back? Well, if we move this over here, there we go. Get a little more space here. And it says any of the small crustaceans, so it's actually grabbing the value of it. Now, you may notice that it's printing the word optional. Okay, well, a dictionary in Swift may or may not return a value. Okay. It may or may not return a value. So, um, this is gonna give us something if there is something to give. Okay. So a better way of writing it is like this. We say if let and we haven't gone deep into optionals yet, but we could say if let Webster Okay, we'll just call it, uh, actual call it. Ah, Well, call it Kriel. If let Kriel equals Webster and they will say krill, okay. And then what we'll do is we will We will go ahead and just print, um, krill. Okay. And so again, we haven't gone over optionals in details that you've heard me probably say that phrase a few times. We haven't gone over this yet, and I'm probably sound like a broken record, but I'll briefly explain. What we're saying is, hey, grab the krill key or put the krill key in here and grab the value of it out and put it in here if it exists. Okay, If it exists, it will put it in here in this code will be called if that key does not exist, this will not be called. So let's say, instead of krill, I put, uh, banana face, okay? And notice how it doesn't print it, Couldn't find it. So this code has never executed. So in the future, we're gonna be using these. If let's a lot. This is one of the most powerful features of swift the other languages don't have. What it does is it helps prevent crashes in your program, because you absolutely no, you have a value here. And if you don't, you can write code Teoh handle it. So I'm gonna undo that. We know that it's working, and by the way, what happens is it grabs the value out of this dictionary and puts it in this variable right here so we can use it. So this variable is equal to any of the small crustaceans. Okay, so that's the basics of dictionaries. Really, Really. You've got all of it so far. It's It's not too bad, too great collection. When you a great way to store data, if you wanna look things up by key and value and, uh, if you want to clear it, just say Webster equals that That's just be no different if you d like an array and did that to clear it. But this is how you clear dictionary, OK, and, uh, there we go looking great. So cool. That's how it's cleared. It's not much to it. You guys like what's what's going on? We're gonna get anything juicy it well, This is a kind of dictionaries. There's not a whole lot to it. There's a few more things, though. A few more things. If Webster dot is empty, you can check if a dictionaries empty. Let's print. Our dictionary is quite the empty that is bad English. For those of you who don't speak proper English or maybe outside of the United States, that is bad English. Don't, uh, don't again. Don't quote me as an English professor or anyone as an example. Okay, so that's it is empty. No big deal. Pretty, pretty simple stuff, Okay. And, ah, let's go ahead and do something else that might seem more relevant to you. Let's say you have a game and you need a store high scores attached to a player so I can say string. And so dictionary with keys of type string in a value of type hint and we could go ahead. And, um, just add some things here, so I'll say, Ah, Span Tak is the key. And he got a score of 401. What a great score. Okay. And then, uh, you know, play Ah, 21 because he couldn't figure out a cool name without a number. At the end of it equals 200 is not that great of a player. And then let's go ahead and say, um, death by SpongeBob. That's you know this how gamers are these days putting all kinds of wacko stuff in here. And unfortunately he did beat me. I'm spent act by the way. If you ever see any cool games with that word, that's definitely me. And eso. High score is a dictionary of Keys and values with the players name and then the, uh, the value of it. And again, if you wanted to get, um, any of those scores out, you know, you could just say, Ah, you know, print. Ah, print, high score. And then we could, you know, say print, spend tax, high score, Okay? And it would print it. It's gonna start the optional Let's okay for right now. So, um, Sukhum printed, of course. And, uh, you know, what else do we want to do? Lastly, Um, let's go ahead. And it A rate through the collection. You know how we used four loops for for an array? We did a few different versions of four lips. Well, there's a couple different ways of iterating through a dictionary. In most cases, I'm not gonna see in all cases. But in most cases, if you're continually iterating through a dictionary like like a four loop, if that's what you're doing, you're probably not riding the best code. There's probably better ways of Maybe your data should be in an array. Maybe you should have an array that has a class with specific objects and and then you generate through it. If you're iterating a lot through an array, it's very possible that you're not you. Excuse me. If you're iterating a lot through a dictionary, it's very possible that you're not using it the way it was intended. So I'm gonna show you how to generate through it, though. So what you see here is how you how you operate through a dictionary and, ah, let's think about it for a second for each user and score. So what's happening is we're saying, Hey, go through this dictionary. This is the key, OK? And this is the score, so it's gonna go through, and it's gonna give you the key and the value for you to use. So if I go ahead and say print and let's just go ahead and use our our special ah syntax here for printing strings, let's go ahead and say, User Colon. And then let's say score. Okay. It printed three times as expected, because there's three keys and ice and let's go ahead and look at the data here. I just click this little button at the right time. A click this list icon and sure enough, play a 21 205 104 01 So that's That's pretty cool. That's pretty cool. Now you're probably wondering, Well, how do I add a new item to a dictionary? Well, that is as simple as doing this. Let's add a new ah, new thing to the high score. So all I have to do is literally a high score, and we could just put whatever we want to hear. So let's say, um j k kill a beans. All right. He got a score of to and, uh oops, that's not I wanna hang your like, What is he doing? He's already giving us in proper Syntex every go. So JK killer beans equals two. And now if I was to just copy and paste this right here, okay? And I was too then this is four times. Obviously it looks like it's working, and sure enough, it's right there. So to add an item, you don't do upend or anything like that. There are some helper functions that you can do, but this is good enough right here. Just go ahead and put a key name that you want in there and then set the value not too bad . So this is really dictionaries. It is very powerful. I use them frequently in my professional development and, uh, pretty much this is all that's to it. So you're gonna use them throughout this course and you'll learn how to use them. A little bored. That's that's the trick. It's not the syntax on any of this stuff. It's knowing when to use them. And so you do that by lots of practice exercises, practice exercises, practice and will be giving you plenty of those. You've already done plenty of those. So that's it. That's a wrap. We're gonna close this up and move on to the next subject. Thank you for listening.
36. Intro Object-Oriented Programming & Classes: Welcome back, everyone. Mark Price here with dev slopes dot com And before we get started, Someone told me recently that maybe my excitement levels a little bit too high for these videos and a little unprofessional, So I'm gonna teach, like all the other ones do. So now we're going to open up X code and go to file new playground. And as you can see, the window popped up here and ah, this is the great new project window. You guys feeling it? I'm not feeling it. You know, everyone's a critic, but I think I'm gonna go back to my very happy, excited voice, and we're gonna talk about something super super important, which is objects and classes. So I did create a new playground here by going to file new playground, and we're gonna call this fun with classes. Okay, object oriented programming. You Maybe you've heard of it. OK, maybe you're a veteran, and you're like, I can't wait to get through this video, but I have to learn how to do it and swift Well, let's try and make it an exciting and important. See if I can explain in a way that is reasonable. So remember back a few videos. We're testing some variables out and working with, like, a bank account. For instance, we had, like, var balance equals $100. And then, you know, we had a function called, you know, uh, funk, you know, attempt, attempt, purchase. And, ah, then we have an item price, okay? And that's of type end. And then we say, You know, if item price is less than or equal to balance through that guy there, let's go ahead and make a purchase. Right? And so then we did some other functions and things, and these things weren't really in the context of anything. Okay? They they weren't. Ah, double here. They weren't in the context of Hey, this is a bank, or this is your account. It was just some random functions and random balances, and it could get real messy real quick. You know what? If we had a bunch of functions here and variables that we're all related to bank accounts, how would rib reuse this? How can we? Better module, eyes, module arise these items to be, uh, independent of things that have nothing to do with bank accounts. Okay, or here's an example. Imagine that you have a car. A view ical. Actually, you have a vehicle and all vehicles have what all vehicles can Dr. You know. So I've of our vehicle. Okay, Vehicle name has a name, right? Uh ah. Srx OK, eso all vehicles can drive. That's what else can they do? They have odometers, bar odometer, odometer. Okay. And that equals, you know, whatever it equals. Okay, so we have some things here and ah, that are specific to a vehicle. Now what happens if Well, it's a far Ah, you know, um tires, you know, equals, you know, for four tires, you know, But what happens if you have a truck that has, like, like a duly, you know, double wheels? Ah, Or what happens if things start changing on specific vehicles? You know, how do I how do I manage all of this and do it in a way that's reasonable. And then he become toe object oriented programming. So what I want you to think about is objects. Objects are the idea of taking logical pieces of code properties and functions and putting them together into a class. They're called classes and So, um, think of think of a and a class Kind of like a blueprint. Okay, let's say you've got a factory and it builds cars, and so you've got a blueprint for a car, Okay? And then what you do is you create an object out of it. But that object might be different slightly on these different cars. You know, one might be a truck when might be a car, but they all have some some based properties and values, and they can do things like dr and stuff. And so what we're gonna learn about is how to take logical pieces of code properties and functions and put them into something that usable, known as classes. Okay, so let's go ahead and build our first class, and they're not that complex. If you're a visual person, this is gonna make a lot of sense. Okay, so let's say we have a class called vehicle. That's how you declared class and swift class. And then the name of it you always want Oh, start it with an uppercase letter. That's the convention. And then you put the curly braces. Okay, so now we have we can put items we could put properties and functions within the context of a view ical so I could save our engine equals four cylinder. Okay. Ah, I could save our color equals silver and bar odometer Odom Peter equals zero as well. And these air default values OK, that we just want to set to any any vehicle. And then what weaken dio is we can create an initial Isar function. Okay. Also known as a constructor here. We're passing in variables to initialize this with and, uh, you may not understand just yet what we're doing, but I'll be showing you in explaining it. And I could say self dot engine equals engine. Like, what is he doing here? Don't understand. It's okay. I'm gonna explain it in one second here. So we got initialize er, and maybe we've got another initialize er that doesn't do anything with those values there . Okay. And ah, and then let's say, um, when a car drives in, these add up miles, so we'll just do something a little bit silly, but convoluted. But it's OK. Enter miles will pass in some miles, and then what we'll do is we'll say odometer plus equals miles OK, so now what we've got here is a class. Okay? This is a swift class, and what we've done is we've extracted data and put it into on something that could be turned into an object. Okay, so I can write code down here bar, you know? Hey, you know what's up? And ah, I can't say equals engine. You know how before we could just access whatever variables were above it. Well, I can't do that anymore, because those properties and functions are within the scope of a class, okay? And so we're going to get out of the notion an idea in practice of just throwing code wherever we want. Everything we're going to do for the most part now is going to be done with classes. And I don't know if you know this or not, But the things you've already been using in these projects and examples have been classes and objects. When we went to our app and went to view of the view controller, that was that was a class. It was an object. Wouldn't we dropped when we dragged and dropped a U. S image you onto the interface builder or a button those air, all classes and objects as well. And they all have their properties and functions. Remember how we did something like my text field dot text? Well dot text was a property of the text field not unlike this property here. Okay, so, uh, everything you do in IOS is objects and classes. It's fantastic. And you don't actually get this in web development on some platforms, like Java script, Uh, is ah notorious for, you know, not having a great class systems. This is a very powerful, object oriented programming feature, Um, and foundational. So how do we work with classes? Well, it's pretty simple. What you do is we got the blueprint, So pretend that this is the blueprint. Okay, Blueprint. And now what we're gonna do is go to the factory and make a new one. So I'm going to say of our let's say, this is an SRX K, and we're gonna say it equals vehicle. And the opening parentheses is gonna call one of these initial Isar functions. You notice how there's two. There's one that has no properties, and one that does if I call the one that has no properties, okay, It's gonna just leave these default values here for stealing their silver, you know, all car start. It was a four cylinder and silver. You know, nothing. Nothing super great. Um, but let's go to this SRX. Let's go ahead and put in six cylinder. So what happens is when you and the color is going to be, Ah, royal blue, your C Those SRX is just everywhere Royal blue with gold rims like it's like guys figure out a new way to style your car. You don't have to look like every other SRX on the road. And if you are one of those people that has a blue are sex with gold rims, I mean, no offense. Okay, So, um okay, we got a car here and ah, we've given it a color. That's pretty cool. Let's just say var Volvo now equals vehicle. And this time we'll just do the default, okay? And so let's go ahead and print both and see what happens. So if I print srx dot color, that's how you access properties of a class by the dots and tax. Remember text field that text, and that's print the Volvo Volvo dot color okay. And as you could see on the right hand side Royal blue for the SRX and silver for the Volvo . Pretty cool. So what we did was on the SRX. We created a new object. That's how you create a new objects is by calling the class name right here exactly identical to the way it spelled over here. And then we called this initial Isar function. This constructor okay. Ah, And we passed in a new engine style, a new engine size, and we passed in a color. And then what we did was we assigned those right here. So on initialization, this initial Isar function updates these values with with the new values, OK, and the reason why I used the self key word here is because self refers to the properties of the class. Okay, if I take off the word engine, okay, we have a problem. Okay, So the name of the parameter is called engine, which is the same name is here. It's identical, but when you call it right here, it's referring to this one because that's the scope of this variable. Okay, the scope of this variables over here so it doesn't know how to get that. So if we call self on its it knows Hey, this is part of our class, not part of this function. Now, if I took this off and then change this to engine size, Okay, then the problem goes away. Then I can say engine equals engine size and it will work. Um, and so the reason why you self in that specific case was because they had the exact same name. And that's very common. Very, very common to name you're constructor parameters. The same as what's going into your class variables here on your initial Isar and I say initialize er and constructor constructor synonymous e as if the same thing they are. That's just what they are. So just know that that's what it is. And so over here we didn't call this one. We called this initial Isar, and of course, it didn't do anything for us except create the class itself. Okay, what? This does this initialized method It calls. Um, this is a swift keyword here, and this is how what swift uses to create actual objects in memory. So this class here does not live in memory on your app until you actually call it and create it. And you do it by putting these parentheses here. OK? Just like you would call a function similar to call to creating a new class. A new instance of a class. Okay, so this is your class, and it doesn't turn into an object. Really? Until you in Stan, she ate it, which is what we're doing right here. So we in Stan, she hated it. And we in Stan. She hated it. Now, these both are living in memory, and we've stored them in a variable. And you can access its properties by using this dot Syntax right here. Okay. Are you with me? So far? I hope you can see the value of grouping items of data and functions together. It makes so much sense because if you notice here, we can store it in a variable. That's pretty cool. And look at this. Look at this. If we wanted to have an array of cars, let's go and make a new one to save. Uh, bar, um, Silverado OK equals vehicle, and we'll just do that. And then what? Weaken dio makes move down a little bit. here. Let's create an array. We'll just call this vehicles and this is gonna be an array of type. Here's the cool part you can actually, instead of just doing this string and you can make a raise of a type of class and so I can say of our vehicles equals view ical and I can just go ahead. And actually I can just go ahead and take off this colon here and we can just We can just make an empty array. Okay, so there's are empty rate, and then this is really cool. So obviously I can't do anything like this. I can't say view Hit Cole's dot a pen And I can't say I can't say, um, Beetle, right. I can't do that. That's a string. And it's like, What are you doing? Like you can't invoke a pen was an argument list of type string doesn't want to string. It, wants a vehicle. But what I can add is my vehicle class, so I can add a Volvo, the object that I just created. I could do it again with the Silverado, and I could do it again with the ah SRX. Okay, wear. We go and we can add the SRX to it just like that. And now we have an array of vehicle. So here's the power. Remember how we have the bank account before? And the data was just scattered all over the place. Now we can have an array of ukuleles that's gonna be an array of bank accounts. It could be an array of anything. We're starting to see the power of working with objects grouping data together. Um, and you're gonna be using them for the rest of your life as a programmer and especially in IOS. So this is really cool. And of course, uh, remember how I said You can access properties and with the dots intact, you can also do the same with function so I can call a function so I can say srx dot ah, inter miles. And let's just say we want to add 10,400 miles and let's print Let's print the miles on it beforehand, so srx dot odometer, we're just gonna print that. And then let's let's print it after we enter the miles just to make sure it worked. Hysterics odometer. So it starts zero. We add the miles in the function and look at that. We call this function and it modified the property and we printed it. And there it waas okay. And these things don't even affect your Silverado or your mobile. Only your SRX. This is really cool stuff. Okay? We are grouping. We're grouping data together. Really, really cool. Okay, so that's that's really cool. And I want to talk about one more thing. So it's not always a good idea to just access things like this. So right here, we've got a bad problem. And this is the problem. OK, so I can say srx dot odometer equals, um you know, uh, 400 right? So I just change the value. Okay, now, think about that. I don't know how it is in other countries, but at least in United States, if you sell a car and you modify the odometer to make it look like it has less, you could get in big trouble, go to gel. Even so, you don't wanna mess with your odometer. But we just allowed a programmer and user to do that. That's not very good. And so what we need to actually dio is something called data hiding or also known as data encapsulation. Okay. And so what we gonna do? I'm gonna go ahead and comment these out here. I just held down command and pressed Ford Slash and let's go ahead and make these private okay. Private privates and private. Okay, so what we've done is we've made these variables private. What it means is that nobody outside of this class can access it. Now, I do want to say that here in the playground, that's not as true. How it works is you typically create new classes and IOS Okay, uh, or new classes in their own files for IOS. You don't typically do it here in the playground. And then, um and then you can Ah, you can't access them. But anything that's in the same file has access to it. But you don't typically put things in the same fall, but let's go ahead and just test it out here. I'm gonna go ahead and open file New project. We're just gonna do a simple IOS app, so I can so I can show you how you put it in its own class. Okay, So single view, application and I'm just going to call this class test. Burn me after we are done. All right. Very cool. And put on the desktop here. And I named it that way because my desktop is piling up with stuff, and I want to make sure I remember to get rid of it. So over here, I'm going to go ahead and just right click this folder, and I'm gonna go to new file. And for some reason, Alice on my computer, it's always taking me down to the OS X. Okay, the Mac, where this cladding click IOS and click Swift File Click Next. And let's just call this view ical its own file and press enter. And right now it's not doing much. Just empty. Okay, so class says view ical now I just pasted in the code command V All right, so we've got a class called vehicle. This is really cool. So now notice how we've made these things private here. All right, So if I go to my view controller and in my view, did loads get rid of this comments in this junk here, in my view, did load Let's create a new vehicle. So let's save our and will say, Ah B m w equals vehicle. Okay, that's great. And it's just yelling at us because we're not using it yet. That's fine. So let's say if I do b m w 0.0, Dom ITER equals 100. Okay, Gives me an air vehicle. Does not have a member named was gonna wait a minute. It's there. I wrote the Dane code for I know it's there. Well, what we did was we made it private. Some no one else can get. Conjugate it right. And so it may be your thinking. Well, if I can't get it, then what's the point? Well, we do want to let people get access to the odometer, but we don't want them to to ah, to make it whatever they want. Okay, So, for instance, let's Ah, let's talk about how we would actually solve this problem. This This is what you might do if you're actually building some type of car app. So what we can do is what I like to do myself is I put an underscore under these. It's just a different name. I could have called it a or whatever. I just like putting underscore under in front of it. And what I'm saying is, hey, this is the real property. But let's create what's called a getter, okay? And a center. Okay, These are also called excess sores and ah, mutate ores. That sounds a little bit cooler, kind like X men or something. But basically, we're saying, uh, you can set or get these these ah, parameters or they start these variables. But we do. On our own terms, we don't let anybody just change it. So here's an example. So I can say var odometer Remember this public because it doesn't have the private key word in front of it. So odometer and I can say it's of type int. Okay. And what I can dio is I can say get and this will return odometer. So whenever someone does the dots in tax to get it, it's just gonna return. Whatever the current odometers, it's gonna return this value. Now. Maybe you're not seeing the value in the value in doing this yet. Like, why would we still do this? I could have just called us. Well, that's true. Were just returning the value, but here's where it becomes really important. We've got another one called set, okay? And whenever someone tries to assign something onto it, this is what gets called. Now let's say the odometer currently is 500 now. Would it be ethical or legal for us to change the odometer to something less so if it was public and someone said, Hey, let's change the odometer to 100 to roll back That's bad. We don't want to do that. That's that's against the law. So what we want to do here is this. So we're gonna set, were going to say is if new value Keanu value is the value that's coming in and it's gonna be the same type as whatever you put right here. So this new value is going to be an end. Okay, that's a key word. I didn't make that up. New value is a key word. Remember that? So if the new value that's coming in okay is less than okay, 500 don't do anything, Okay? That's probably not the best way to write it. So in other terms where we could say is on, Lee said it. If so, if new value is greater than odometer. Then we can say odometer equals new value. Who? This is really interesting. OK, so we get it like this, just like we might have done before. Okay, This is its own property, and it's working with this property here. By the way, this is called a computed property computed property. Remember that? And swift into computed property. And this is how you work with getters and centers. And so what we're saying is, hey, return the odometer here. Fine. Makes sense. We need to get it at any time. But here, if someone's trying to modify it, okay, it needs to be greater than the existing odometer. So now here's Here's what's really interesting. So let's go back over here. And now this should work because we created that property. But what's interesting is our odometer here it's that 500 right? So let's take a look at what what we just did. So if I say print BMW dot odometer Okay, If I print that and then ah, let's say printed here again BMW dot odometer. Now, maybe here at this code here, you might be thinking, Oh, this is gonna change. It may. Maybe it will So I'm gonna open my consul here, okay? And we'll go ahead and just run this, Okay? We go Popped up, moving over here real quick. Okay, Look at this. So we printed it before it was 500 we printed it after, and it was 500. Still, So that means our code worked. We just prevented somebody from breaking the law. So congratulations. Thank you for being a great citizen, and we just did something great. So what we did was we wrote a center that, um that prevents bad data from getting in here. This is so important. So this is something, by the way, that nobody ever teaches new people. It is so important. OK, all of your variables should be private in most cases, but they should all be private. And what you should do is you should have getters and centers. So you determine when you're creating your class, you determine how it's going to be changed and manipulated. And that's what we did. We said, Hey, nobody's allowed to mess with this odometer. It's right here in our code. So let's see it in action. So what if I instead say odometer now equals, um 700. We just upped it, Okay. And I rerun it. What do you think it's gonna say? 500? 700? Our code is working. So you just learned a very valuable principle. It's called data hiding or data encapsulation. And you used getters and centers to do that. Okay. And so this is the basics of classes. This is classes. This is super powerful. We're now managing our data. We're doing what we want with it. We're keeping it safe, and we're creating something that's reusable. How cool is that? Without having Remember before. You know how if we wanted to have multiple bank accounts, I'd save our bank account. One equals, you know, 1000 bar bank account to that's That's a silly way of doing things. Okay, What we'd want is classes. So, you know, I got my BMW. I've got my Ford Pinto, um, all kinds of things. And these all manage their own state in their own properties. And really cool stuff. So this is objects and classes. This is an overview. You'll be using this stuff for the rest off class for the rest of your programming career. So very exciting stuff. I love object oriented programming. It's fantastic. And if you have any questions, feel free to ask on the chat room or the forms, and we're gonna sign out here and move on and move forward.
37. Inheritance: here we are together again. This beautiful day or night, depending on where you live. Mark Price here with death slopes dot com Have you guys ever gonna read reviews on, like, the app store, IOS or Android? Some people are pretty brutal. I was just looking at one right here. Look at this. This app crashed twice on me. The developers should be shot, and I want my time back. This is a free app. Hmm. You're gonna feel the pain of that. When you start getting your APS out, you're gonna get your 1st 1 star review nearly like, Oh, but a crime. And people are brutal, like you don't go in tow. McDonald's like you buy a 99 cent hamburger and then, like, it tasted like garbage. Which 99 cent hamburger is gonna taste like our but you don't like, Take it and throw it in the employees faces. I want my dollar back APP store spend $50,000 building an app, and so would want you to be shot. Anyway, welcome to the world of app development, Uh, just giving you a glimpse into the excitement of it. And, uh, I guess you guys are kind of reviewing these courses as well to and reviewing me. And if you haven't given me a five star review yet, now would be a great time to do that. And if you aren't happy, just talk to me, and I will do whatever I can to make you happy. So let's talk about another important principle today called inheritance. Okay, You should have just watched the one on classes and objects. And inheritance is a very basic and important principle to object oriented programming. So I'm gonna go ahead and create a new playground, okay? And here we go. I went to file new playground, and let's call this I want and inheritance okay. And put on the desktop. And there we go. Now, remember how last time we worked with vehicles and we worked of classes were into the same thing here? What? Maybe we'll mess around with it a little bit differently, so I'm gonna get a class called person, Okay. Kind of a base class. Okay. You're gonna start hearing that a lot, especially when you start working with inheritance. So whenever someone says what is the base class or grab the base class. What it means is it's the most bottom class, the bought most bottom class. Okay, so let's talk about a person a person has. Ah, my color. Right? I color equals Blue Anvar name and will say that's of type string. And we're not initializing this one off the bat because there's no default name. You get a person, I guess if you're just born, maybe you don't have a name yet. Some nice. We don't name their kids for a while. And, uh, Speed. Ah, as in running speed. Okay. Just random rights and 10 miles per hours. Pretty fast, uh, still get eaten by a cheetah, but 10 is still pretty fast. And ah, bench press. How much can you press? Ah, £200. Well, if it was me to be more like this, but will Ah, well, guess good. Nice average here. So all right. £200 or, uh, and whatever country and that could be kilos, perhaps don't know what the equivalent is, but just know, I'm thinking about you and let's go make an initial Isar, okay? We're gonna have initialize or where you can initialize the name, Okay? And we'll say self dot name equals name. So, by the way, let's just delete that real quick. There's an air here, return from initialize er without initializing all stored properties. You can not have a property like this unless you initialize it in your initial Isar. Okay, so there's no exclamation point at the end. There's no question, Mark at the end, we're saying there has to be a value here. There has to be absolutely has to be. And the only way you can get away with this is if you initialize it in your initial Isar. Okay? Otherwise, I'd have to say, I know there's gonna be a value in it. There's not one yet or you can say I really don't know if there's gonna be a value at all, But we know that. Well, what we're saying is, Hey, you can't even create a new person unless you pass in the name. Okay? You were not gonna let you do that, So let's go ahead and say self dot name cause everyone needs name equals name. Okay, We're gonna say this name right here equals this name when you're creating a new person. All right? And, ah, let's say this. This person has a default Catchphrase like this is This is the catchphrase that every person is going to save by default. It's going to be a function that returns a string, and we're going to say Return high. I'm an average person. Okay, so there's a catch phrase just the default. Here's a person, right? And if you remember from the last class, I can save our Um, I would just say John equals person like this one here, and I'll pass in the name John. Okay, so there's Johnny's a person. That's great. Now you haven't witnessed inheritance yet. Inheritance is really inheritance. You're inheriting something from something else. So what weaken Dio is we can say I want a new class. You guys ever remember that show a long time ago like Anna morphs. Maybe it was a book Siri's I can't remember. But like these teenager kids would like, turn into ah, turn into animals. In fact, you're probably familiar with twilight. You know, they turn into, uh, wolves and stuff like that anyway, so let's make a class called animal if the idea that a person it's like a person, but not quite a little bit different, but we still want the base attributes because, uh, this animal, if this person you know, he does have eyes in the name and speed in the bench press, But he also has some other character or six to like the type of animal that he could turn into. So we could even do that. Now, I could save our animal animal type, OK, And, uh, by default, it can just be, um Well, what would be a good default animal? Something boring a dog. Bassett default. Um, and so there's a dog that's the default type. But what I can do is I can ah, I can override that. Okay. So I could go ahead and say, you know, in it, and we could say type, and this is gonna be of type string. And what we can do is we can say animal type hips, animal type equals type. Now we can't have a problem here. Okay, The problem is, this initial izer is never being called on this base class because we just created a new one. Okay, so what we need to actually do here is we're gonna say convenient sort of state. Let's just make this convenience like let's let's add something to it to make it apply to this specific class, okay? And then let's go ahead and call the one that we already have. So let's say self dot in it And in fact, as a second parameter, let's let's give this guy and name okay, or the girl it's gonna string And what I can dio is I could say self doubt in it and we could pass in the name. Okay, I think that should work expanded here a little bit. Let's see what air it's giving this here. Um oh, I forgot to say, uh, sorry. This is where it goes. It goes after the initial Isar here, your convenience initialized when you this lies those properties, when using your convenience in this in it it goes underneath. So if this is confusing, let me explain it again. So this anamorphic inherits from person, right? But what we also want to dio is when you create an animal or if we want to set the animal type in addition to the name. So we've created a new initialize er Okay. We have to still call this one because this is required on the base class. So what we do to say, Hey, this is just a convenience initialize er it's not the main one. It's just a secondary one. But it's what we're gonna call on animals, and we're gonna pass in the animal type and the name, and then we're gonna call the initialize er on the parent class, which is required right there. That's all it's happening. It's, like, secondary. And we're just calling the primary one and then adding some extra things here. Not not too bad. Um okay, so we've just created that initialize er, and it's calling that one right there. And, uh, this is really cool. Now we have a person, right? And so here's something interesting. What if I say, uh, so you know how we have John up here? Okay. Right. What if we just print his eye color? So I just save print john dot I color. Okay. All right. So we're printing the eye color and it's blue, right? And let's just create an animal for now of our we're gonna say dolphin equals Annette an animal and will give it notice how? Look, we can call the initialize er on the parent class. What you're like, Wait, this animal, It doesn't have this initial Isar with just one. Well, it doesn't, but its parent class does remember, it inherits. It's like a subset. So you can still call that initialize on the parent class. But we want the convenience one because we want to set the animal type. And so once a dolphin and the name is going to be a jack. Okay, now, that's interesting. So I want you to pay careful attention. There's no property on the animal of called eye color, but there is on the person. So what? But I just created an animal. Will I be able to use the eye color? So let's give it a shot print dolphin dot i corps. And sure enough, it's there. So because it inherits from the top class, okay, the person class, we can we can access its properties. That's really cool. And what about the catchphrase? Right now, the catchphrase on both of these is Hi, I'm an average person. Right? So if I print John's catchphrase john dot catch phrase, I print that, Okay, it's gonna say Hi, I'm an average person. Now if I do that right now with the dolphin, Okay, If I say dolphin dot catchphrase, it's gonna print the exact same thing. Hi, I'm an average person. That's interesting. Well, that's not very helpful because an animal definitely needs a different catchphrase than a normal human being. So this is where inheritance also becomes really powerful is I can override based class functions and properties and so I can save funk catchphrase, and I just overrode it. And now I can do a different when I could say I can turn into a cool animal. That's my catchphrase. So I just overrode it. And now look over here. It changed. So before this printing out, I'm an average person. Now it's printing out. I can turn into a cool animals, so that's interesting. You can override functions of a base class. So doesn't that make sense? I don't want Oh, I don't want to rewrite this code, right? I don't want to have it animal for have to copy and paste all this code because I need it. No, let's just The idea is keep the things that are similar among all things, so your base class should be a stripped down. It's possible. Meaning it on. Lee has things that are gonna be common among all sub classes. Okay, let me say that again. You're based class should be stripped down toe on Lee have things that are gonna be common among all based classes. Arms. Excuse me. All subclass is okay. And so that's what we did. We still want the eye color name and all that stuff, but here, we want Teoh change things around. And, of course, if we're making animal, we could, of course, modified properties. So I could say self that speed if your dolphin, I don't know how fast they can go, but I'm sure it's faster than 10 miles an hour in the water. So, you know, I could say, you know, 25 25 mph or, um, what would that be in your country? It's probably Kilometers. You like dumb Americans? Ah ha! Easy MPH. The rest of the world uses the metric system. Okay. Don't ask me. I don't know. I didn't create the system. I just use it. And so here we go. We can update things like that as well, too and we just overrode a function of the base class and may to do something else. That is really, really cool. And then to see the example of inheritance one more time in perfect clarity. Let's go ahead to make another class called superhero, and that's gonna also inherit from person. So a superhero in an animal that's two different movies, two different books, something completely different. However, they're slightly related, Okay? And there's things that we can use, um, on both of these so I can again do the same thing. That superhero he does. He has all the other things that a person has. But he's not an animal, so it doesn't have an animal type. But what a super Pierre. What a superhero does have, of course, is a special power, which is expressed a vision in this case. And, uh, he has a back story. Everyone has a back story, no back story, probably some truck hit some slime that had chemicals. And now I'm super awesome. Right back story ever, you know, But a person boring person doesn't have a backstory, just says I go to my job every day and I come home and watch, Uh, you know, movies and true blood. Ah, game of Thrones. You know, that's that's the average human game of Thrones, right? You know. OK, so backstory. And then again, we can ah, convenience in it. And we can go ahead and put a name in here and ah, maybe in this case, the we want to change the bench press, OK, just for fun. And ah, so let's do that yourself will call self dot in it and will pass in the name. Okay, that's coming from right there. And then bench press, though we're gonna say equals press. So we're gonna update the bench press again. Um, we're just using the power of inheritance. That's really cool. And then, of course, to create a superhero. It's not that hard. We can say of our, um what's the good superhero puke, man? Like, he got some toxic vomit. And now whenever he throws up, it pours acid. Uh, it's a terrible superhero. Oh, weird things that come out of my brain. Okay, so let's give him a name. We're gonna call this puke man and his bench press is £5000. Okay, £5000. That's a lot. Okay, that's a lot in kilos or pounds. Okay, So puke man is a pretty pretty cool guy, and Ah, there we go. Let's go ahead. And, uh oh. Can't forget the catchphrase. Let's override the catchphrase. Okay, so let's say funk catchphrase and let's go ahead. And what's a good superhero catchphrase? Um, with great power comes great. Now it's a great power. Do or do not to infinity and beyond mixed a few of them there works. So there's our catchphrase. And of course, if I print puke man that catch phrase and then I print dolphin dot catchphrase. And if I print john dot catchphrase, we should expect three different results because we overrode them and the all the different things. And sure enough they do. That is the power of inheritance. Okay, this is so powerful. Um, like it could be anything it really could like, imagine a bank account. Um, you know, you have a default bank account, but maybe there's a different make account type like, um, like offshore bank account. You know where you got to do shady things, toe hide transfers and things like that because it's probably some drug dealer and ah, you know. So maybe you've got two different things. There may be a second subclass called like, um, you know, opportunity account. You know, when the bank like you don't have any good credit or things like that, the bank gives you like one of those lame accounts where you can only spend, like, 101 100 bucks a month or whatever. You know, it might have different features. It all needs based features like balance and stuff. But you know, has its own sub features. So very cool stuff. Start thinking in terms of objects and classes when you're building on applications, whatever it may be started thinking of. How can I put this into an object, visualize something in real life, put it in an object and then strip it down at the base level as much as possible. And then when you need a new feature, think yourself. Could I put this in a subclass? Okay, does this 22 subclass is what makes the most sense and then start breaking things out very powerful. You're going to use this all the time. And of course, in IOS, inheritance is a very apparent thing like, for instance, your you image, you and you, you're you I button. I don't know if you know this. I think I may have mentioned it, but all of those controls actually inherit They all inherit from you. I've You Okay, that's interesting. So Ah, you have u K is the base class there. And you I image view is a, um is a subclass and then Ah, you have you also you I button is a subclass. What really you I label is a subclass. Those all inherit from you. I view these all have based features, like a frame and a center, You know, the positioning and other things, and then these take it down a step further. That's really cool stuff. We'll get into that more later. But how you feeling, everyone? This is great. This is inheritances is very powerful. I hope you liked it. We're gonna dive right into the next course and be using this right off the bat, so familiar with it. And that's a wrap
38. Polymorphism: Hey, everyone, Mark Price Hear with deaf soaps dot com And today we're going to talk about polymorphism, okay? And if this is the first thing that came to your mind when I said polymorphism, that's pretty damn cool. But that has absolutely nothing to do with what we're talking about. But by the way, remember how everyone had a crush on her back in the day? I know it was you if your girl is probably taught me or somebody else but Power Rangers, another stroll down memory lane and I'm gonna go ahead and open a file. New playground. You guys are like, Where does he get all this stuff from? Like? Well, you're just getting a glimpse into my brain and history and past, you know, like things that are considered retro now. Cool. And that was my history. I mean, the retro days. And so I'm a retro kind of guy and ah, let's go ahead and call us Poly Morph. What? Polly? More for what? Polymorphism. Okay, it's an object oriented programming principle, and I just put that on the desktop there. Okay, so let's get rid of this junk. Polymorphism is a very simple principle. This won't be a very long video because it's not that bad of a principle. However, you will be asked this in a lot of job interviews. I was asked this once and you know what? I actually know this principle in and out. But I did a terrible job explaining in one of these interviews, and they thought I had no idea what I was talking about. So it's important to know what you're doing and be able to present yourself in a good way in an interview. So even though this principle so simple, it's like I know polymorphism and it was like, Wow, you're so smart. Yeah, I'm gonna get a class called shape. Okay, a default based class all right, unless they want to calculate the area. And by the way, this is a very common example to demonstrate polymorphism. I did not make this up. Just It's really simple. So and shapes have an area right, and this area is gonna be a type double. I'm just saying, Hey, maybe we may or may not put a value in here, so it's optional. Okay? And let's create a function called talc. You late area All right. So how can we calculate the area of a shape if we don't know what type of shape it is? Are all shapes calculated? The same in regards to area. The answer is no. Circles are different from triangles are different from rectangles, so we actually can't write code here. It's like, What do we do? What do we dio? Well, never fear a polymorphism and inheritance to the rescue. Okay, so I'm gonna say funk print area, okay. And then we're gonna go ahead and print The area is okay. And, ah, put a colon here on, then we're a little special parentheses, and we're gonna print the area. Okay. And, uh so Okay, print. I forgot closing parentheses there. Okay, so we're printing the area, and Ah, right now, there's nothing in it. Okay? And but at some point in time, there will be. So what we've just done is we stripped away a Z best that we can down to the bare bones, and so we can have some to inherit from. So this is good practice, actually. And so let's talk about a rectangle so rectangle should inherit from shape. That's right. Good answer. John and ah with Well, just give it a default value for now. 1.0 and bar height equals 1.0. So just setting some default values, that's all. And when you create into class, you can pass in the with okay? And you can pass in the height, okay. And ah, there we go with and height looks good. And what we'll do is was a self taught with equals with and we'll say self, the height equals height. And again, if you're confused at all, the self is referring Teoh the properties of the class. And this is referring to the parameter K. This is called local scope. This is called global scope. Can angered two different types of scope here. All right. And so then let's go ahead and ah, let's put polymorphism in action. Let's override funk calculate area. So just like we did before, we're gonna override the calculate area function Now. This time, though, we're gonna give it specific behaviour. In fact, you're probably thinking, what did we already demonstrate? Polymorphism? Well, we kind of did actually, So area equals with times height, so the area equals the with times the height dad makes complete sense because it's a rectangle. It's all right. And, uh, let's go ahead and go to class circle that should also inherit from shape. There we go. Does anyone remember how to calculate the area of a shape? Well, we need a radius 1.0 and let's go ahead. Initialize it with a radius of type double and, ah, let's go ends a self dot radius equals radius. Okay? And of course, what do we want to dio override the function or say, calculate area? And how do we do that? Well, area equals 3.14 times radius times. That's ampersand. Times are radius, and that's looking pretty good. That's looking pretty good. So that's let's see these in action. Okay, So if I go ahead and save our circle equals circle and I pass in a radius of let's say five and said 5.0 and let's save our Andi rectangle rectangle equals ah rectangle, and we're gonna pass in a with of 20 and a height of five. Okay, and then we'll go ahead and on each of these. It was a circle, no wrong circle circle. So you noticed the difference Capital nor case you may run into problems were like, Why is this not working? Well, that's cause you click the one wrong one on auto complete ones, the class ones, the instance of the class circle equal or sorry circled calculate area. And then we'll say, a rectangle rectangle dot calculate area. And then what we'll do is we'll just simply print circle dot area and we'll print rectangle dot area and let's see what happened. This gave us 78.5 on the circle and 100 on the rectangle. Well, that looks pretty good to me. So it actually works. So that is polymorphism in its most absolute basic form. Um, it doesn't get a lot more than that. Really. Um, it's the idea of having functions that you can override that perform different behavior. So even though we're calling the same function on these sub glasses, they're doing something differently. And that's another one of the powerful features of object oriented programming. Okay, and, ah, let's do one more example just to seal the deal. Let's say we have a class called enemy. Okay, this is a game of some kind, right, and bar h p equals 100 of our attack. Power equals 10. Let's go ahead and give it an initial Isar HP and will say is of type end, and attack is of type aunt, and we'll initialize these values self. That h p equals hp and self dot Attack Power equals attack power and not attack power. That's what we won't attack. And ah, OK, that's looking good. We've got our initial Isar there and ah, let's have a function called Defend Attack. So whenever you're being attacked, you're gonna you're gonna be the defender, okay? And so you're gonna pass. Someone's gonna pass in the attack Power The incoming powers weakened. We can probably say incoming A T T power for incoming attack Power will say int, And what we'll do is we'll say HP minus equals, um, the incoming attack powers. What we're saying is, hey, let's go ahead and take that incoming attack power and subtracted out of the HP and assign it back into HP. So if attack fire was five, HP would now be down to 95. So we're defending the attack. Okay, Now let's say that we have a specific type of enemy class angry troll, and he inherits he or she We're We're not going to gender stereotype on an angry troll. A woman could be just as much of a troll as a man. Thank you. Okay. And so angry troll inherits an enemy. So we're gonna say if Okay, so let's take a look at what are we trying to do here? Actually, let's think about this. So we want the angry troll to do something different than from the enemy winning incoming attack comes. He's got special power. So let's say are angry. Troll actually has an immunity equals 10. What this means is, hey, if an attack comes in, that's less than 10. He's immune to it. Okay, Not only that, he gets an extra extra point to his life, you know? So you could only attack this angry troll if you've got more than 10 attack power. So we're gonna do is we're gonna say, override funk, defend attack, and we're just overriding the default one. Right? So we're overriding this, okay? And what we're gonna dio is we're going to say if power if, uh, incoming attack power is less than or equal to immunity. So if it's less than or equal to the immunity, Um, we're not going to take away that damage, and we're gonna say HP plus plus. Okay, so think about this. If we do this right here, if we override it, this function is never gonna be called. Okay? It is never gonna take away the attack power here because we've over written it. But did you know you can still call it if you want. What? Yeah. So if they did attack with something over 10 we can just go ahead and call super dot defend attack and we can pass in the incoming attack power. So super means call the super class. Okay, so you have parent classes and child classes, or, in other words, you have a super class and a base class. So what we're saying is, hey, if the attacks okay, if it's greater than 10 go ahead and call the regular function as normal. So super dot defend attacks were actually calling this function here, and we're passing in the attack power. That is really cool. Um, and so that's another way inheritance works. You can use it to work with the data as you see fit and, of course, defend attack at its base level. This time it's not empty. It has something that it does. We can choose to use it, or we can choose not to use it. So and this is inheritance mixed with polymorphism mixed with good object oriented programming design. I hope that makes a lot of sense. If not, you'll be using lots of this throughout the course and you'll you'll get it down. In fact, you may go to a job interview for Forget all of this stuff and you know the stuff in and out. Someone's like, What's polymorphism in your logo? It can't remember. And then someone's like, Well, here's an example. Oh, I do that every single day. So don't worry about it. You're gonna master this even if you don't know it. But it is called not to be confused, Power Rangers, and thank you for tuning in. Everyone thinks is Mark Price of death soaps, and I will see you next time
39. Swift 2 Optionals Part 1: everyone Mark Price here at death soaps dot com and state. We're gonna cover it. The most important and fundamental part of Swift. Well, maybe the most important item, but very fundamental. And it's optionals. You're gonna use them all the time. And optionals are kind of one of the things that separate, Um, good code from bad code that helped prevent crashes. So I'm gonna go ahead and create a new playground, go to your ex code and file new playground. Okay? Although this is not a playground file. New playground. There we go. And go ahead and call this whatever you want. I'm gonna call my optionals and but a year on the desktop. Okay, So optionals, so many programming languages allow you to write code that can crash. The idea behind optionals is if you use them, your code base could be virtually uncrackable. Um, that's never true. But at least your code, we much, much better. And so let's talk about what an optional ist. So if I save our lottery winnings of type and I put a question mark at the end Now the question mark is what defines something as an optional. Okay, what you're saying when you put a question mark on a variable type, you're saying this variable may or may not have a value. Okay, so if at some point in your program you don't know if there's gonna be a value there or not , um, then new market as an optional. So, for instance, lottery winnings. If you have an application where you are going to check to see if you've won the lottery, you may or may not have a value in there, and it's probably not gonna have value in there, just so you know. Ah, and so basically what you're saying is, Hey, you need to check this value as a program and you need to check this variable and make sure it's not kneel. Notice on the right hand side, over here. It's Neil. And so you're like, Well, why? Why Why Why Why? Why does it matter? So let's figure that out. If I say print lottery winnings, okay? And I put an exclamation point at the end to unwrap the value. Okay, we just got a crash. So the exclamation mark is what's called unwrapping. So it's you take it optional and you say give me the value out of and you try and use it. But if you do this and there's no value in their, your program is gonna crash. OK? Lots of new programmers are going around all over the place and swift doing this, and their programs are crashing, and sometimes they're not crashing because there is values in it. But sometime in the future, that value does not come and the app crashes and the person will give the app a one star review. Not good. Now, with that in mind, if I right here on the next line down, said lottery winnings equals 500. Notice how linemates not crashing like. Okay, well, I solve the problem to set a value. Well, it does solve the problem, but it doesn't really solve the inherent problem, which is your you. Ah, you're abusing this optional. Okay, we got lucky. But what about the times when we don't get lucky and there's no value, so don't first. So first rule The first rule about optionals is we don't talk about optionals. No, that's not the first rule. The first rule is don't ever, ever ever ever ever, ever, ever implicitly unwrapped something or excuse me, unwrap something like we're doing here, okay? Don't ever do this bad, Bad, that bad, Bad. Very bad practice. If you do it, I'm gonna come to your house. I'm gonna beat you. I know where you live, so just know that. So this is not good. This is very, very bad. Okay, Very, very, very bad. So it gave us a crash, right? So what should we dio? Well, we definitely do want the question mark here because we really don't know if it's gonna have a value or not. Any time again, Any time you don't know if it's gonna have value, Put the question mark on it. Okay, Um and, ah, if we really want to work with this, all we need to do is one of two things. If lottery winnings is not equal to kneel, go ahead and print lottery winnings. Now we can put the exclamation on it. And you like what? You just told me not to do that. Well, there's a time and a place for everything. Let's think about what's happening online. Seven were saying, Hey, if lottery winnings is not Neil, it's Neil right here. If it's not now, then you can print it. So if you have this, if block and then you unwrap it, your absolute guarantee to have a value. Why? Because this code will never be called unless lottery winnings has a value in it. So notice how nothing's printing right? However, if I say lottery winnings equals 10 okay and now printed because there's a value in it. So this is what you do when you work with with optionals. You always check and make sure there's a value in. At first you're like, Well, that just means more code. Well, the reason why he added this and Swift because other languages don't have other languages, let you abuse things, and then you have to worry about your own crashes. So what? Here's the point to take away what Apple and Swift is trying to tell you to do is hey, if you don't know, there's going to be valued at for shore, but a question mark on it. That way you could know to check for it all. The question Mark is saying is, Hey, check me later to make sure I'm not empty because I may not have a value in it. That's all it saying. And that's what we did right here. The other way of doing it is called is using what's called if let syntax K. So if let winnings equals lottery winnings and then we could say print winnings. Now, this is interesting. So how if let works is we take the value out of this, add a lottery winnings, and if it exists, we put it in a new variable, a new constant. Okay, so if this has a value in, it goes into the new constant. And so if it's not kneel and there's a value, then this code is called and this is the preferred way of doing it if you can. Sometimes you got to do it this way, by most cases, do it this way. So basically they the syntax were, is if let's so you're saying if and then you're making a, um, a constant in with the name and then you're assigning the value into it. So if there's a value, it's gonna get stored in winnings. Now, you could still say print lottery winnings, but you'd have to put an exclamation point on it to unwrap it, and we don't want to do that. So why don't you just use the new variable that just came in, and then you don't have to put an exclamation point. It just prints for you and notice how, of course it's not printing. So if we say lottery winnings equals 100 Okay, so here didn't exist. It was still kneel at this point, but now has a value, and we get to this. So if let is the desired syntax, you basically all you're doing is taking the value, throwing it in a new variable if it exists. If it's not kneel, then you know it's there. And that's this is what you do. Any time you have a question mark, use if let before you try and use that value. Got it. Any time of variable has a question. Mark is an optional always using if let first to make sure it's not Neil. Okay, that that's the law. Okay, if there's anything you could take away from this lesson today, it is that that is the most important important thing. Okay, so let's go over a few more examples of, um of optional. So let's have a class called Khar. Okay. And we have a very blunt called the model because it's the model of the car, okay? And so we don't know if model's gonna have a value. Makes sense. Ah, it could have a value. It might not. And so what we're gonna dio is ah, we're gonna do a multi line if let So what we're gonna do is we're gonna create a car so far of our vehicle of type car, and it's an optional meaning. Hey, at some point in the future, this vehicle will have value. It doesn't just yet. So we've got a class or an object declaration of a class, that is it optional. And then this class itself has an option of value inside of it. So what if we want to get the model of the car? Okay, well, one thing we could do is we could say if let, um v for vehicle. Okay, this is just a very, very building call. Whatever. If let v equals view ical, okay. And then what we can do is we can say if let model or m for model equals v dot model, So we could do to if let's right. And then what we could do is we could print. Um we could print, uh, m for the model. Right? And right now, it's not gonna print cause there's nothing. We didn't create it. Right. Um, however, there's a better way. And this is a single line. If let so what we could do instead of say, if let v equals view Hickel and let m equals Vida model. Ah, that's interesting. So how it works is equates the left side first, and then the next one, the next one, the next one in that order. So if there is a view ical okay, it is then going to do this right here and grab. It's going to use the V variable cause it exists. Now it's on to grab the model out of it. And if we get here, Okay, um, it means that there is a model right now. There's not. So what would we need to do to make this work? Well, this is a simple assaying view. Ical equals car. OK, so we just created a new car class, an instance of that object, and it's still not printing down here because There's no model yet. So what we do is we save you ical dot model That model equals, uh, listen, we'll just call this Bronco, okay? And ah, Now if you notice over here on the right hand side, it prints Bronco. That's pretty cool. So, uh, again, we just saved ourselves from a crash right by doing this if let Okay, obviously, if I tried to, you know, print If I tried to do this up here before we initialize that my pride try to save you ical , if I tried is a view ical, um dot model. Okay, it's going to crash. Okay, So pretty cool stuff. Um, maybe you're wondering Hey, what does this mean right here? Why? Why is there a question mark in front of it? Well, that's the optional Syntex when you use an optional with a question mark. OK, any time you're going to use, like the dot to excessive property or something, you got to put a question mark in front of it saying, Hey, this is an optional and I don't know if it's gonna have a value or not. That's all we're saying. Vehicle is an optional and we don't know if it's gonna have a model in front of it. And so what's cool is, um if I if I was to do so right here. If I was to say print view vehicle, um, and knows how it's gonna put it in for me automatically. Okay, Now notice how it's not crashing. Like wait a minute. Why is this not crashing? Well, what you're saying is, hey, we know this is an optional. This is what it's saying. We know that vehicles and options, So if there's a value, print it, Okay, um, otherwise it's not gonna do anything. So you can also do this as well. What you don't want to dio the naughty thing to do would be this okay, Because you've just broken your program. You just crashed the user because what you're saying is unwrapped this Use this value right now and you just crash your program. So by leaving the question mark there, you're saying, Hey, I don't know if there's a value or not, but print it if we need it. But by the way, if you do this what, you're also saying this I don't care if it works or not. OK because it may work. It may not work, and your program still needs to continue working, even if it doesn't work. So just know that if you use this, this question marks in tax. When you're printing or excess ing something you're saying, I really don't care for its value in it or not. If you have code that is absolutely dependent on knowing whether it's evaluate or not, you got to do. And if let like this right here, because let's say your program cannot continue unless there's a vehicle. So if you don't have a vehicle you want to create one first, then you would use if let's in tax, because it forces you to handle the situation. This does not force you to handle the situation. This just prints if Prince, if it's there or does or not. And so, if you're expecting a value there, just make. Just know that this this optional syntax right here means that may or may not give you what you're looking for. So there's some really cool stuff, and if some of this is confusing for you, that's okay for right now we're going to use this throughout the course on different things . And I explain this over and over. You're going to hear me talk about it so much, and you're gonna like this guy never shuts up about optionals. Well, the reason I never shut up about optionals is because it helps you. It helps you create very robust programs. So let's talk about some other things that weaken Dio. So let's say we have an array of our cars, an array of cars, and it's of type optional, meaning it may at some point in time, have a value, and it helps to take off the S here, and it may not again. This is just an array of cars, and it's optional. Okay? And so let's say at this point here, now we said cars. Now we actually creating array, we initialize it. We credit with an empty array. And so what we want to Dio is not just check of its Neil, okay, because it could be empty. But we really can't use an array of cars unless there's actually cars in it. Right? So we would first do this. Like, if let car car are for car A equals cars, right? And then so if there's a value in cars, we're gonna get in here, and there currently is because we just did it right here. But we don't really care about this, right, because we need it. We need to know if there's anything in it. So what we could also do, of course, is if If we get in there, we know there's in a race, because if car are dot count is greater than zero. So if there's more than one, there's at least one element. Then go ahead and run code. But that's two lines of code. It's a little bit little bit nasty. There is a better way. So within, if let's in text, you can actually do the let and then you could do a condition after so we can actually say where. Where is the key word Car? R dot count is greater than zero. So what we're saying is Okay, what we're saying is, if, uh, it was yelling at me is an unused closure. Okay, stop it. Okay, so it was just freaking out. Just build. If you ever see that, just build it. Sometimes it freaks out. Don't know why if let the car R equals car. So we're doing is saying, Hey, if it's not kneel, shove it into this variable here this constant then we're saying, but also where the count is greater than zero. So Onley go on, Lee, execute this code. So on Lee execute if not kneel and if more than zero elements So that's really cool. We can do we can do. And if let as well as a condition on the same line to run a block of coats on our codes, gonna be getting even smaller on then. So, for instance, if if you didn't have a car array or didn't have more than one element, then you could handle it, right? You could say else and then you could say cars dot penned. And then you could create a new car like so um passed a new car in there, and then you would be adding it and ah, that's really cool. Right? And again, you're seeing this question marks in tax, Hear what we're saying here is Hey, if cars, um if cars has a value in it, okay, just go ahead and upend it. So right now it is it's actually gonna work. But if I took this off, OK, well, here's a good example. So then I could actually print the count rag. I could print cars dot count. So in this case here, it's going to give us a count of one. Right? And then ah, but notice how it says optional one is because we're using the optional syntax right here. Okay. S were saying, Hey, print it. If it's there and it's optional, that's fine. If it didn't exist, this would never even print. Okay, Um, see how it's not. Printing is not doing anything. So, um, anyway, really cool stuff. What we just talked about was doing in a flat in aware condition. And if any of these fell, you should handle it. And that's what you're going to most of your cases here you're gonna handle, um, the condition where there is no value in it, so your program can move forward. And this is this is proper Syntex, you're gonna you're gonna use this model right here, less less. It's gonna be less common to use this model where you're using the question marks in tax to call things. That's because if it doesn't work if it doesn't come out true, like there's no value in it. It's just not gonna work on your program is going to keep going on. And so what you're saying when you do this is I don't care if it works or not. In most cases, you do care. You care if there's a value or not, so you can handle the case. Or you can initialize the object things like that. So, um, really cool stuff. Let's talk about something else. We're gonna talk about what's called an implicitly unwrapped optional, and you're like, What? That's also complicated? Well, it's not too bad. So we got a person class. We're gonna have a function here where you can set the age. You say self age equals new age. Um, so here's the deal. You got a class here that has a property, and there's an exclamation point on it now, here, like, what does that mean? Well, what it means is there still no value in it? In fact, it's the exact same thing as an optional. Okay, but the difference is the difference is it's not going to yell at, you know? Okay, when you try and access properties. So if I try and say, um, if I try and save our, um, jack equals person, okay? It's not gonna yell at me if I try and do this and say print jack dot age, It's gonna let me do it. Right? But look what's gonna happen, okay? It has a Neil Value in it, okay? And ah, that's bad. In fact, this could crash your program on. That's not what we want to do. We don't want to crash our program. Okay, so, um, what we're saying here is I'm gonna give this of value at some point in time, and I'm guaranteeing it. I'm absolute, Gary, absolutely guaranteeing there's gonna be a value in here. So what you're saying is, hey, get rid of a question, mark, cause I don't wanna listen to the warning. Um, because I'm definitely gonna put a value in here, but here's the thing. This could be very bad. You're going to see it in programs, and we're gonna do it here. But this could be very bad if you don't know what you're doing and why? Because you've got to make sure you initialize it. So right now we're not being a good were not being a good developer because it's never being initialized right off the bat. So when I do this right here, it is still not valid. And so when I access it, there's nothing in it and our program can crash. And so, um, even though we have a set age function years so if I say Jack, that said aged, yeah, that's cool. I could give him an age now, but the problem is, what if this functions never called or if it's called later where someone tries to access age? Before you do this, it's gonna be Neil, and it's gonna crash your program. So we need to take precautions when we're using this. If you're going to use an implicitly unwrapped optional, you need to initialize it, um, in some way or form. And so, uh, so what I would actually recommend is, rather than actually using the implicitly unwrapped optional like so why don't you just initialize it to like a default initialize er like? So that'll save your program from crashing another way of doing it. Okay, If you don't want initialize, it is, you could say, Okay, you could say, Ah, let's do this here. Let's make this private and let's Ah, let's just change the name. I'm just putting underscore doesn't mean anything. It's just it's just the name. And then what I can dio is Aiken say, ah, far age of type int, and I can actually, um, initialize it in a getter. So what I'm gonna do is I'm gonna say if age equals Neil than age equals zero, you can set some default value, and then we can return age, So this is really interesting. So what we're doing here is that let me get rid of this function here. Um, here we go. Um, what we can do here is make are variable private, the one that has the exclamation point on it. And no one else can access this because it's private. But what we do is we create a get her. This is called data hiding. Okay, we create a getter, and what it does is when I say get her, this is in swift. It's called a computed property. We're creating a computed property, and what we'll do is we'll give it a default value. So if age, if this variable is Neil. Okay, let's go ahead and give it a default value of zero age now equals zero and then return the age and zero Lame. Let's give it, like, 15 K So this is really interesting. So I've just created a new person, right? And ah, right now the age is nothing. It's Neil, Right? So, um, in fact, if I take off the private real quick just so you can see if I if I do this if I say print jack dot underscore age Okay, it's nil. Interesting. But what happens if I print jack dot age without the underscore 15? You're like, what? Let's talk about what happened again. So we created this variable here, and it should be private. I'm just showing you for demonstrations that it's not So it's It's private meeting. Only my class person can access it. And then what we're saying is the one that everyone else can access is called age. It's a computer property, and what it's gonna do is it's gonna run this code. If this ages Neil, let's set it to a default age, and then well, then we'll go ahead and return it. So what? You can dio if you have, You know So rather than directly accessing these and checking them in other classes, you can create properties like this here, this computer property, you can do the check and then you can give back and initialized value. So that's another thing that you can do just be really careful about using these. I would I would If you're going to use these, I would definitely have some type of ah computer property that initialize is it or if you if you don't know if there's gonna be value in it. So this is again. So that's what you're saying. You're saying I'm guaranteeing a value in it, so you have to have a value no matter what, You better handle it if you put the exclamation point there because you're guaranteeing a value. If you don't want to guarantee value, then use a question mark because then the outside class condone if let and see if it has a value in it. So, um, very important things to know. Okay, if you're confused, watch this video again. This is so important, and we're going to do this a lot. I we do this all the time in all of our applications. So on I'm teaching you best practice a lot of those other courses. They'll just put exclamation points in front. Everything they say, Don't worry, it's gonna work and it works in that case. But then when you go and build your own program, it's crashing your like I don't know what todo so just be grateful that you're learning this. It's little bit complicated, but you'll get it down. So let's did we get a dog? Okay? And it has a property called Species. Now his Here's something that's interesting. What if I don't want to use a question mark or an exclamation boy? I just wanted to have a value, but I don't want to say species by default equals pug. Don't do that because that silly it's not gonna It's not going apply to everyone, right? So what I want to dio is I want to say species is of type string and then we would use me in the constructor. This is our constructor K. You pass in the species that you want and what you can dio as you can initialize it in your instructor, your constructor. So Here's something interesting. This does not have an exclamation point and it does not have a question mark. What we're saying here is that not only are we guarantee is gonna have value, absolutely is gonna have a value right when we loaded up. So on an initial Isar. Okay, If you initialize all of your property, have you initialize properties? And in an initialize er in a constructor here, this is called a constructor. If you initialize your properties in a constructor, then it doesn't have to have the question mark or the exclamation point. And if that's confusing it all, just watch how it works. So if I save our, um, we'll call this lab equals dog and notice how it wants the species. So I I I put in black lab because they're way cooler than the other labs. Uh, and now if I put that in there and then I print lab dot species, it's gonna print black lab because what happened was right when we created the object, we initialize that we call the constructor and initialize the species right here. So that's a case when you don't have to have an exclamation point or question mark is when you're initializing things in the constructor. Um, so that's really cool. That's really, really cool. So, um, this is kind of optionals right here. This is optionals and implicitly unwrapped Osh optionals. The lessons that I want you to take away from this are, uh, you as a programmer. If you don't know where this whether there's gonna be a value or not, If you don't know that and can't guarantee that, use a question mark. Okay, using optional. If you absolutely, absolutely guarantee that your values gonna have a, uh or your variables gonna have a value in it. But maybe you're not ready to give it to the user, or maybe they'll get at a later point in time. But you're guaranteeing it will have it used the exclamation point. But with the caveat that if you do use the exclamation point, you better make sure you've got some safety code like this. This getter here, this computer property, you better make sure you have safety code to initialize it. Because if you don't, someone's gonna access it and your program's gonna crash. OK, at least the optional tells you to use. And if let this you don't even know. You don't know whether you should if let it or not. You don't know if it's initialized, So it's up to you as a programmer to make sure that this has a value when someone wants to use it. Okay, we also learned that it doesn't have to have a exclamation or a, uh, question mark and optional or implicitly unwrapped optional. If you initialize it in the constructor because that's just saying right at runtime when it first is created, it's going to have a value in it. We also learned that you can. You can use the question mark on optionals to perform the regular commands, as if as if it was a regular thing like this car stop hand, um, or cars that count the question marks on it basically say, Hey, if it's not Neil, go ahead and run it. But if it is Neil, we're not gonna do anything so and it's okay to use these to go ahead and try and do things , but you're only you're gonna probably do those when you don't care whether they work or not , because, um, it may or may not work and ah, if you do care about what happens if there's a value in it than do this otherwise do that, then what you need to dio is use the if, let's in tax like so Okay, so if you care what's gonna happen, use if let if you don't care it whether it works or not, you can use the question mark model right there. So that's optionals. That's unwrapping optionals. You've seen the program crash. You got to be a safe coder, and we're gonna use this throughout the course, so if you don't understand it, that's OK. But do watch this video over and over again. And as you go through the courses, you'll get really good at this, and I'm only gonna teach you the correct thing. I'm not gonna she and do things to beat the system. You're going to see riel world coating. So these are very, very important again. If there's anything else, I get stressed about this course as you're becoming a programmer, and with this programming language, it is optionals. Become a master of this and you will have an app that doesn't have crashing. So Mark Price here desktops dot com signing out. It's good working with you. Let's do this again sometime
40. Intro to iOS 9 App: everyone back in the saddle again. Mark Price here with Deb stops dot com We're gonna quickly talk about the app that we're gonna build today. This app is a smaller app, and basically, you're gonna be learning the principles of classes. Okay, An object oriented programming. So the visual pretty cool icons here and all that jazz we put on this this was just for fun . The real work is actually happening under the scenes. I just didn't wanna build a nap. That was boring. Wasn't doing anything except printing to the screen. Oh, so anyway, I can't stand that. So all it does here is you click attack. OK, It takes away his hit points over here and ah, the devil wizard is going to die. He dies, you can collect the treasure and it gives you a random loot. And then another bad guy appears. This time it's a wild Kimera. It's randomized. He has is on HP. He's not attacking back or anything like that. This is really simple. But under the hood is where we're really gonna start experimenting and exploring. This is core foundational stuff. You gotta build this go through this app here and so let's go ahead and get started. It's gonna be fun. And by the way, after this assignment, I have got a really cool exercise that allows you to expand on and do things like add sound effects and really take it to the limit here. If you want to continue with this idea. So these graphics here are provided by cartoon smart dot com. Where I've got the other graphics have showed on previous videos. You'll need to buy these graphics if you want to use this commercially. Okay, you could use this for the tutorial because I purchase these, but you want to use it and make your own naps on the after. Go ahead and buy these graphics from partner mark dot com. Let's go ahead and get started. See it in the code.
41. iOS 9 App: Building a Simple APP With OOP: Hey, everyone. Mark Price here with Deb slopes dot com Glad to see again wear gonna dive right in and build a simple object oriented programming RPG. And I'm gonna go ahead and open up my ex code. Click it over there and I'll go to file a new project. Okay, I'll pull it up here so you can see it. Perfect. So I went Teoh file New project. Okay, Single view application is fine. And what should we call this? How about r p g o p. Are a group? Looks good to me and devices universal. That's fine. It's click next and I'll just save it on their stop. Awesome. Okay, so a few things is this is going to be a landscape only app. So let's go ahead and do that. And of course, as you know me, we're gonna do the fun stuff first, get all the fun stuff out of the way, make some graphics and stuff. And the reason why ah, we're doing some visual effects here is because APS they're so much more fun when they're visual. OK, lots of courses and people like to teach on blackboards and on consoles. And you just seeing Wide and Black Tex and just shoot me Now shoot me Now we're gonna do some really cool stuff. So we've got our view controller here, and ah, we know that we're supporting landscape. Um, only, but that shouldn't matter. Here. I'm gonna go ahead and find the art for the project here. I'll pull it up one second. There we go. These artwork here. I went ahead and ah, re factored and change some things around. It's from the cartoon smart package that we've talked about before. If you wanna sell this app or use it commercially or released anything you're gonna want to go purchase this. Ah, this art packed. But you can use it for this tutorial just fine or for your own learning purposes. Okay, so we've got all this art. I'm just gonna highlight all of it. Everything except for the Photoshopped file. Well, you don't need you and click the Assets folder, and I'm just gonna click and drag it over. Okay, So remember the idea behind this app is that you've got a character on the left character on the right, and really the only the left character, which is you the player is attacking you. Click the attack button and it takes away life from the character. When his life is gone, he dies, you can click a treasure chest and it's filled with loot and the process repeats. And the point of this is to really start getting down object oriented programming. So we're gonna be building classes were not gonna be doing all this stuff in the view controller, not everything. We're gonna be using classes as they should be used. And I find that games actually are one of the best ways to learn how to program because things were very object oriented that you can think in terms of objects a box, an enemy, a player, very, very objects. So if that makes any sense, so let's go ahead and dive right in here. Um, let's think about we need a We need a player class and we also need an enemy class. Okay, we got players and enemies. So the question at hand is, are there any traits or attributes of an enemy or a player that should be shared? Maybe into a parent class? Well, health attack, power. There's probably a few things eso I'm thinking we need to create a parent class, so let's go ahead and do that. Click your folder here and right click and go to new file. Or you can click your folder and go over here and go to file new file file new file and I'll Click source and Click Swift File. And we're gonna call this character. Okay? We don't know if it's an enemy or for two player, but it is a character, and creating a class is a simple s saying class character, no big deal. And let's go ahead and create some variables. So we know we talked about they're gonna need health points, right? So private, far HP type, and we'll just default it to 100. And if you've forgotten why we're using the keyword private, it's because we want to employ good developer behavior, which is called data hiding or data encapsulation, and we don't want to just expose anything's so other classes and things can ruin it. We want to carefully protect our data, and we will design functions are computed properties to give us exactly what we're looking for. So attack, power and the reason why I'm putting the underscores there is because we're going to do just that. We're going to create those computed properties that do what we want to do. So, for instance, attack power. No one else should be able to modify that. Eso I'm gonna save our attack power of type And okay, this is a computed property, and we're just going to return attack power. So whenever someone calls, this is just gonna return attack power. We also could have said done it this way. Get on, then. We could have said return attack, power. That was shorthand, though. So, uh so very good. There's attack power and those go into hp var hp of type int and we'll do the same thing Will say return hp. So if you're accessing the property directly, all you can do is get it. You can't modify. It will take care of that ourselves. So we've got HP. We've got attacked power. Um, would probably need some initial Isar methods. So let's say in it and let's give the user which is you the programmer, The ability Teoh set this starting hp. So let's do that there. And let's give the user the ability to set the attack power so that can be changed If you pass it in through initialize er and so will say self dot h p equals starting hp and self dot Underscore attack power, oneself underscore Attack Power equals attack power again. Remember, self is referring to the global version and this is referring to the local version the local scope. OK, so you can initialize the default attack power. That's great. What else can happen? Well, somebody can attack a character whether they're an enemy or a player. And if that happens, the health should go down so we can build a function for that. We know that's gonna be shared Attempt, attack. And we're gonna call it Attack Power, where the attacker will pass in the power that they're pushing in here. And, ah, I'm gonna say bullying that we're going to return because we don't know if the user's attack is gonna be successful. Like what happens if there's an immunity Or, you know, if you're attacking a rock creature with lightning, it may or may not work. We haven't written code for any of that, but, uh, major May network. So when we return a Boolean if it was successful. And in this case of at the parent level, parent class, I will always returned true. Okay. And, uh, what else? What? We should be able to check if the characters alive. Okay. We need know if he's dead or not. Well, how do we do that? Well, if HP is less than or equal to zero, we know that he's dead. So why wouldn't we just say if h p equals zero? Well, what would happen if an attack took more than, ah life than the person had, and it went down even below it? We need to account for that. So let's make a computed property, okay? It's gonna be called is life. Remember computer properties or just properties that have a computation in them before they return or set a value. So we're gonna say get okay. And, uh, so it's gonna return a boolean. And if HP is less than or equal to zero return false. There. The character is not a life otherwise return. True, because the character is a life. And so, again, this is a computer property. Therefore will be able to say, you know, character dot is alive and it will perform this computation and return us the proper value . This is looking real good. So we've got a character class and let's go ahead and move on to the player class, which we know we're gonna need because you are the player. And, uh, we need to define what the player can do. So player dot Swift and, ah, same exact thing here Will say, class player, lower case l And, uh, what else? So question a player, do you? This is really cool. This is all you gotta do You gotta think about in terms of objects. Like, literally, what is the bank account? Do what is a cardio. And then you just start building the properties and functions the attributes in action just like in a human being. Attributes maybe eyes, height, weight, skin, tone, funk on the functions of the methods would be Ah, run, walk, jump, curse. You know, whatever you whatever you want, so attributes. And so players should have a name. Right? Uh, you know, when you load a game like final fantasy or something that says, Hey, what is your name? Oh, brave warrior. And, uh, by default, it's gonna call player makes sense in bar name is gonna be a computer property. Of course. Why? Because we're not going to manipulate important data directly. We're gonna make sure our class takes care of that. So we're gonna go ahead and return the name. Okay. This for Texas keeps us safe. Some good programming, uh, logic there. And ah, player should also have an inventory. An enemy probably doesn't have an inventory, but a player does. Things you've collected along the way Are you starting to see the value of object oriented programming and inheritance? We're inheriting things that are a plaque applicable to everything. But we're adding things that are specific to that class. And that's important because we don't want to duplicate code over and over in each class. You know, we want we want our code to be well written and tested and we don't make sure it's not broken. And the more code you have to write, here's an important principle. The more code you right, the more possibilities for bugs and errors. And that's why the dry principle don't repeat yourself is so important. And since that is private as well, it's Ah, it's a list, right? An array. We're gonna make a, uh, a computer property for that together. Also known as as as an access, or yet accessories and mutate, er's But get her is a lot easier. Invent Ory, and that's gonna be of type string. So an array of type string, and it's just gonna return inventory. So not too bad. Um, except I spelled it wrong. There we go. And ah, one more thing. We need an initialized now. We could already use the parents initialize er, but I think a player I should have the ability to have their name entered in so we can say convenience in it. And we're gonna pass in the name, okay, The apparent classes and have a name field. But this one does pass in the HP and the attack power, just as is done in the parent class. Okay, so we'll still capture that data. And then what we'll do is we'll say, uh, we'll just say self dot in it, and we'll just actually call It's not auto completing for me. I think this may be a swift thing, but I gotta character. This is what we want. Right here, right? so I'll just copy that. It's not auto completing. Disobeying me. Eso Let's go and just delete this past this in right here and instead of saying and will say, um, HP because we're gonna grab this hp and right here we're gonna say Attack power, attack power Because we are gonna grab this attack power right here. So we're gonna pass it in, and the last thing we need to do is just assigned the names, so name equals name meaning this name right here is equal to this name right here. Okay, so it's giving us an air. Hold on. Maybe I did something naughty. Cannot invoke player dot in it with that argument list of it. Looks like my arguments may be incorrect. Let's, uh let's go ahead and take a look here. Attack Power. It's attack power. It looks looks pretty good to me. I don't know what it's griping about. Let's just double check it again. So, starting HP attack power. Um, it looks good to me, to be honest. Let me, uh let me just save and build it and see if it still gives me in there. Now it is still giving me an heir. Let's see what is going on. Kenna invoked player dot in it with an argument list of Give me the full details here. There we go. Starting HP and int and ah, attack! Power of type and attack. Power attack there. This should be good Was going on here Partial, partially listed parameter Says, um okay, I think I know what we did wrong. So we forgot to inherit from, Ah, heart character. That's why I can find I can't find the ah, these initial Isar here. Let's go ahead and rebuild this. Come on, baby, get rid of that red and it's building and it looks good. So what we did here was recreated a convenience initialize er meaning Hey, let's just add an extra field here and it's gonna call the other initial Isar, which is required. Okay, And then let's just set the name so convenience. Initial lasers are great for sub classes when you want to add fields that aren't necessarily in the parent class. But you can still call the parent class and pass in the important data that it requires. So we've now got a player class. He's got an inventory. He or she, and that's looking real good. Now we've got to make an enemy. Let's go to file. Are you right? Click the file the folder there and click New file and I will do a swift file. All right. And let's go ahead and call this enemy and no me click create and let's do it the same thing here. Class, enemy And what should go into an enemy? What? What is different about enemy? Well, um, and enemy actually can have loot. So, you know, when you kill an enemy and it drops, you know, like, uh, squid I jail, you know, gives you, like, three of those for some reason, even though he had one eye doesn't make sense that RPGs and eso let's make loot so far, loot of type string. Okay. And this is a, um, computed property, and we'll just go ahead and return. Rusty, Rusty dagger. What else would be like a default loot? Uh, cracked buckler. Correct, Buckler. There we go. That's what usually get off the low level guys. So that's our dilute that will be returning. And, um, let's see here. Oh, an enemy can probably have a type like What kind of enemy am I? Like a name like a Camara or, you know, an evil lizard king. So I'm gonna save our type string, And we can just put it in a default value for now because I think what we're gonna do is we're gonna have some more enemy sub classes that override these things and sit them to different values. So we got a type and what we're gonna call it, we'll call it, uh, grunt. You know, it's generic. Those guys were easy to kill. It's the default value. And, uh okay, so let's think about this for a second. When an enemy dies in our game, at least he's gonna be able to drop loot. Okay, so let's do that. Let's make a function called drop looped. Okay. And, uh, it's gonna return string the name of the loot. And, um, when should we drop the loot? Well, on Lee, If the enemy is dead right, that's only win. So if not, is a lot. Um Oh, okay. Another problem. I mean, he did inherit from character. What am I thinking? There we go. So now if we say if not, is a live look at that. We're calling the parent classes is a life property. So if he's not alive, Okay, then let's go ahead and drop a random loot. So Iran is gonna equal, and we'll say arc for random uniform, and we're going to say, um, let me just write this out Here, you end. Come on. You into 32. That's the type that it requires. Auto complete. You are killing me. There we go. And was a lute dot count. Okay. And, uh, close that off. Will close that off. Let's talk about what's happening here. You're probably, like way. What was going on? I've seen the random, but what else? OK, so are you for random uniform. It requires that you passed in a you into 32. Okay, well, the count of our array items okay, is it returns to us an integer that dot count property. So what? I'm all I'm doing is I'm saying, Hey, I want to do a random number between zero and the length of this array so we can grab random items out of it. And so, uh, this returns an integer, so I first have to convert it into a U N 32. So that's what this is. This is casting were casting an integer into a you into 32. All right, we're casting it into an integer or excuse me into a U int, and then we're getting the random number. But of course, this random number returns us a u N 32 and, uh, we just want we just want an indigenous. So then we cast it back into an integer so we can use it again. You're going to be doing lots of casting on, basically, Just think about it this way. When the swift is requiring a certain data type, you may have to cast your existing data type into that data type, whether it's a double to an ent or into a double. You may be doing that which is called casting, and we're gonna return loot ran. So what it's gonna do is it's gonna grab whatever number this is. This is in this case, would be between zero and one. It's gonna grab loot zero or one so that item out of it and it's gonna return that string if they're alive. Otherwise, okay, otherwise, let's return nothing. Let's return Neil. And so if I want to return Neil, I've got to put a question mark at the end of this meeting. Hey, this function could return something, but it might not. And so that keeps our coats safe. It keeps us from doing naughty things, like getting loot every single time. That would be a hack. And we're not gonna do that. We're going to be We're gonna be fair player. So we've got an enemy, and what I also want to do is create two subtypes of enemies. Um, and this is really just to demonstrate the points of inheritance of object oriented programming. So let's create a new enemy and, uh, go ahead and create. I clicked. I right click this. I did new file. I went to source and swift file. And let's call this Kim Mara. Okay. It sounds like a cool enemy name. And, uh, for those you final fantasy fans, you probably like, Yeah, I know that reference. And if you don't, that's okay. It's an obscure enemy, and it just kind of sounds cool. And it's gonna inherit from enemy. Okay, So enemy inherits from character and key. Mara inherit some enemy did you know you could keep inheriting as much as you want. That's pretty cool. You could go this far down the rabbit hole as you want. So this is an interesting character. So in his case, okay, what's gonna happen is he has an immunity meaning any attack that comes in, that's, uh, under 15 or 15 or less. It will not do any damage to him. And not only that, it will add one to his life. So you've got to make sure you attack this Camara with an extra powerful character. So what I'm gonna do is credit. Constant estimate called immune Max. Meaning Hey, if it's under this immune, don't do anything. If it's over, then we'll do the damage, OK? And the Camara? He's a tougher enemy. The the default enemy stuff like Rusty dagger and cracked Buckler. That's not very good loot. But when you kill a Camara, he's gonna drop a lot better stuff. So what should we do? Well, easy enough. Rather than rewriting code, we can actually override the loot computer property of our apparent class. So we're now overriding this, which means any time the Camara salute is accessed, it will not give this stuff. So when this functions called, even though this function is written on the enemy even though this functions written on the enemy, whenever you call this when I call Camarda drop loot, it's not gonna return this loot. It's gonna return this loot. And that, my friends, is polymorphism being able to use, uh, defined functions in different ways and be able to have a parent class that defines those functions Very cool stuff. So in this case, we're going to return Tough hide. Um, que Mara venom Very good for dipping your spears in and a rare trident, You know, one of those rare ones that sparkly and gold and you could sell it for lots of money. So we've got some different loot that the tomorrow is going to do. And, uh, I'm gonna go ahead and override also the type. We're going to give him a name, and, uh, we'll just call him a key Mara. So that way, whenever we grab the type to print to the screen, um, it's going to give us the property. So we overrode the default grunt, and it is now Camara very cool Now, since we have this special code here. Whenever you get attacked, it has to be over 15. We need to probably override our attempt attacked, attempt, attack code and write some different logic. So override funk attempt, attack. Okay, now think about this. What? You know, aside from the logic, we're gonna be overriding dysfunction, which means over here on character, this will never be called right, so he'll never lose HP. So how do we solve that? Do we really want to rewrite this code? What if this was 50 lines of code? We want to rewrite all of that and potentially have bugs. And there's the answer, my friend is No, we do not. What we can dio is your logic. If attack power okay is greater than or equal to immune Max, then what we'll do is we'll return Super attempt attack. So we're actually gonna call the parent function passing attack power. So we're gonna call the parent function right here. This guy right here. So we're gonna call this? Did you know that you can call a parent functions so you can override it so it takes it, it gets called first, and then you can call it yourself, which is what we're doing right here. So we're gonna call, And so if you're attacked, damage is over 15. Just running as normal as it as default behaviorist. And we don't have to rewrite any coat otherwise returned. False meaning the attack was not successful. Okay, so we're returning the parent class here. Otherwise, we're returning this one right here. So really cool. We just overrode the attempt attack. We've got one enemy, and I think we need to make one more enemy, and Ah, and then we can start writing the game logic. So I'm gonna go up here again, the file new file, file new file and go to source swift file. And let's call this devil wizard. Okay. I like it. Sounds pretty cool. Class devil. Wizard Wicks erred of type enemy. Okay, I like it. I like we're going with this, and he's not gonna do to too much differently except have his own loot that we want to override. So I'm gonna say override bar, maybe his his name to override of our loot of type string string. There we go. Okay. And it's looking good so far and us return some unique loot. A devil wizard, of course, would have a magic wand and a dark annual it because he's a devil wizard. And, uh, salted pork. The devil Wizards gotta eat. Um, so yeah, And then, uh, override var type string and, uh, this return, Devil Wizard, This is the type in his name is Devil Wizard. Okay, cool. So what we've done is we've defined the model for our class, and by now you're probably wondering Hey, wait a minute. Didn't you say we were gonna do the fun stuff first? Yeah, I forgot. We did the code instead. But that's okay. We just to find the model. And actually, sometimes I do create the model first. In fact, sometimes before even create an app, I say to myself, what data am I gonna need? And I draw out the classes in the little squares on a piece of paper. What kind of features and properties and functions and properties they're gonna have. So ah, very common way to design your program is by starting off with the data. Of course, you could do the fun stuff to do. You know what it's gonna look like? So I went ahead and click Main storyboard here. Let's do the fun stuff now, if that's okay if you're if you're not too offended, we'll go right in and move this. You probably fast sort of the video and did it already. So Ah, we got this cool blank canvas. So let's go ahead and throw on a background. Which, of course, in our case is gonna be an image view. I'm typing at the bottom right hand corner here in our object, our object. What is it called Object Library. And let's go ahead and stretch this out full screen and I'm going to make it go to the top , take off the margins because we want to constrain to all sides. So it stretches and the image and the That's the class. We're gonna click this guy here and then we're gonna change the image to be G. And that looks pretty nice. But let's go ahead and do aspect feel so we're not stretching it. Onda, uh, looks good. Looks really good. Now we know we need to put the ground in so we can do that. Now let's just do another you my image of you, right here. I'll drag it into the corner, drag it over to the side, and we'll pull it on down and let's go ahead and pin. This is well to turn off the margins, left bottom right. And let's give it a height of 67 add four constraints. I'm gonna select the image here, too. Ground. That's kind of cool. It looks like it's stretched. Let's go ahead and aspect feel e um, not liking it a whole lot. Um, we're gonna have to pull this up a little bit. Wow. It's really big. Um, you know, a little too tall for my taste. Not really. Not really feeling that. So what I'm gonna actually do is I'm gonna pull this up like, No, I'm gonna pull you here, and I'm just gonna drag it down like this off the screen just to make it look more like that. There we go, and I'm gonna go to my constraints on the ruler. Here, click the ruler while your ground is selected and go ahead and let's just take off height just to be sure. Uh, it's gonna do what we want. Let's take off bottom space. And now let's click the pin but in here and we'll do Um uh, see here. Yeah, we'll go ahead and pin it to the bottom. It says 74 it's It's way down there. It's out. It's out of where we want it to be. But that's OK. I wanted to look good, and that's what's important. I'm gonna set a height of 1 43 Okay. And, uh, obviously it's gonna appear up there. That's not what we wanted Commands. Let me click this command Z to undo that. Here, let's go ahead. And you know what? Let's just change it back to the stretch image. I don't waste time with this, Uh, very go. Um, we could do aspect fit, but look what it's doing. And so well, this is what we could dio I know gonna be Perfection is here, So what we can actually do is make sure the constraints are gone. Let's get rid of the trailing and leading space. And since this is actually the size here with aspect fit, what we can dio is just shrink it down to a size that we really liked, like this one right here. Okay, And then what? We can do is, uh, weaken. Duplicate it. So command G and I could move it rate here. Okay? And then, um, you know, we can just ah, in this guy over here. So it spin it to the left and the bottom and give it a height fact even give you this one, Um, a with Okay. And, ah, this guy right here, let's go ahead and do the same thing. We're gonna pin it here, and we'll go ahead and give it a with and a high as well. Pin it to the bottom. And, uh, there we go. Let's just see what it looks like in pretty mode. I'm not too concerned about dealing with this. I don't want to spend a lot of time on the U. I think, uh, this was not about you. Why, it's about creating. Ah, it's about creating. Ah, some object oriented code. We've really done this a bit, Gillian time, so you can perfect it on your own. You're happy. Welcome to do that. There we go. It's looking good. So OK, so previews Looking good. Let's make this bigger here and move this over. Okay, so we got the We got the background, we got the ground and, uh, you know, there's lots of ways we could have fixed that ground. We could have put things in to those two items in a stack view. I made it equally space. There's a bunch of ways of doing it, but it looks good right now. Remember, the end result is what we care about here. So now we need the characters, character, one and character to let's drag them on. Here they are images, so I will select. I dragged an image on him slicking image over here and let's go ahead and select player players in the left hand side and you absolutely must be aspect fit. And there we go. Let's make you about right there, drop you down a few pixels, looking real good. Okay, so he's good. And let's just give him a width and a height will force force it and then I'll turn off, constrain the margins and will say 14 from the left and 82 from the bottom is fine For right now, he's not going anywhere except where we want him. Wonderful. And let's go ahead and duplicate this player Command D I selected the player and I did command E. And, uh, it may be crashing on us here. And sure enough, Exco did crash on me. And so let's this time click our little player. I reopened X Code, by the way and click, Edit copy and edit paste. There we go. We'll do old fashioned way and let's go ahead and make it an enemy. I'm gonna drag him over here. He's floating off the ground a little bit. Don't like that. There we go. It's looking pretty fly. Let's see what attributes carried over for my constraints. We gave him a within a height, which is fine. Let's go ahead and Pan am to the right. Turn off margins here and pin him to the bottom. And there's our bad guy. There's are good guy looking pretty good. We just need to go ahead and put a label in here, okay? And so we need a label and we needed another image. You for the background for the background of the text, right? So let's do that first. Put the background on here and it's called Print. This is what it's called. Nothing. Nothing unique here, and every goes, pull all the way across the screen. I did aspect fit, by the way, if you didn't see what I did over here. Aspect fit. I like it like words going. I want it center. So I'm gonna click the alignment menu, and I'm a century it in the container horizontally. And then I'm going to set a with and a height, and I'm gonna pin it from the top, which will put it right there just fine. It's above his little feathery thing there. So I'm gonna move this layer all the way back above the ground, but the little d behind the characters. Okay, So, looking good, It actually kind of cool. Adds a little bit of depth to him, and we are gonna need a label. Okay, So you I label at the bottom here, okay? And let's just go ahead and drag it over all the way to the edges. Here. I'm gonna center it. I'm gonna change the color to yellow. I'm going to change it to custom. And then Helvetica knew that looks good. And just to kind of fill it out, I'm gonna say Ah, player attacked Wild Kim Mara and I like it and let's go ahead and select the label and select the print thing, and I want to center these. I'm clicking the alignment menu. I want to center these Ah horizontal centers and vertical centers. Add those two constraints and then I'm gonna give a with and a height fixed to Not there. Let's de select both of them and just select the label. I'm going to select the label and give it a fixed with and fixed height. There we go, and it's gonna do what we wanted to do. And we're so close. We just need some HP labels, so it's a little bit condensed on the screen, so maybe I'll put one right here and maybe I'll put one right here. So a couple more labels right here, let's go ahead and make it a little bigger. I'm gonna center it. Change it. Teoh Custom fought Helvetica New. Unless this time do bold. I like it and let's do white and what it's gonna look like. Maybe something like this 100 hp and that's it. That's enough space. So let's go ahead and give it a a fixed. See here, click it again, disobeying me. There we go, a fixed with and height and let's keep this is Pinto. Whatever it's about, where we want it listens Pennant right there. So add constraints. It's a little bit high. Let's bring it down slightly. So I'm gonna click the world or here and this one that says, um, let's see here, leading space to serve, you know, bottom space to ground. Um, there we go. Double click the one that's his bottom space to ground. And let's see what happens if we take off some of this size 1 20 I just brought it from 1 40 to 1 20 on the constant, and it brought it down about where I wanted. So that looks good. Looks real good. And, uh, let's go ahead and click this. I'm gonna do edit copy this time because duplicate crashed us last time. So edit copy and paste, which, by the way, is just the dumb X code bug. Nothing.
42. Intro to iOS 9 App: Welcome back, everyone. Here we are together again. At last, we are going to build something frickin pool on the upcoming videos. And here is the preview of it. So let's go ahead and run it and I'll pull it up on the stream. Our little Gholam here, all lonely, wants to have affection. Way didn't make it in time or we can feed him. It's random. There we go. Uh, have a few seconds we're gonna feed him or take care of them. And if we don't? Oh, we lost another life. Poor little guy. And so Yeah, that's pretty cool. Um, so that's the app, and it's gonna be lots of fun. You're gonna learn a lot of things, okay? You're gonna learn about touch dragging and dropping. You're gonna learn about animations, and maybe you're wondering, Are we using Sprite kit? Because I wasn't really expecting to. Or maybe you didn't want to learn it. Well, this has nothing to do with Spike it. You're actually all doing this in you Iike it completely. And we are using professional real world development practices. Okay, to do this and ah, such as? Ah, using views and images and objects and classes and subclass ing you image. Use all kinds of cool things that are super applicable to the real world. And it's lots of fun. Got sound effects and all kinds of things. So I just want to pull up a cool website here where I got some of the sounds from Okay, right here on Ah eric skiff dot com forward slash movie music. He's given away his album for free to anyone who wants to use it some great eight bit music . We're using this for the main, uh, game music theme and all the other sound effects actually, are I created from previous work I've done, whether I paid someone or did it myself so you can use those as you desire. A swell is this. And, um, the next thing I want to show you real quick, pull it up right here. Here is the art cartoon smart dot com for its last sprite. Underscore bundle dot PHP five. I went ahead and purchased this myself. It was $40. You won't be able to use this art commercially, so feel free to use it for this tutorial. But if you want to release an app to the APP store. Make money from it. You're gonna need to purchase the Super Sprite bundle from this website. Here it is what we're using in the app. And so that's our app. It's gonna be really fun. You're gonna learn a lot of things and I am excited. Jump right in. So let's go ahead and do it.
43. iOS 9 App: My Little Monster Part 1: you gotta stop. Don't forget your back hungry. Dino, do Don't make that you want to get a bigger Your baby wants to play. You get cash from Sabrina the teenage I had a tiger you don't separately got. Look, don't forget your giga pet. What is up, everyone? Mark Price, Hear with deaf slopes dot com A stroll down memory lane For those of you who are as old as me For those of you who are younger, you probably never heard of a Giga Pet. But we're gonna be building one anyway and are just pretty doing cool. You've already seen the preview of what it's gonna look like. So we're just gonna dive right in and start building it. So go ahead and go to your ex code over there on the right hand side or on the bottom or wherever you decided to put it. And we're gonna go to file new project, okay. Pulling up here, file new project. Okay, We're gonna do a single view application and let's go ahead and call it my little monster. Or you can call yours whatever you want. Now ours is not gonna have all of the features of a giga pet. Don't click. Create. Oh, wrong. Wrong spot to put it up. Put it here in my documents, every GOP. Okay, so really cool stuff. Let's go ahead and turn on upside down. I don't know why they always turn that off by default, but we do want universal because we wanted to work on iPhone and iPad. Now, you maybe you looked at it and you said, Is this a game and my going to be learning? Spike it. Well, the answer is yes, it is a game. But no, it is not gonna be built with Spike it. In fact, all of the cools and components will be using to build. This, uh, comes from you, Iike it, as you can see right there. And we're going to go ahead and make our screen a little bit bigger. I'm gonna hose this just because I don't like extra code when it's not needed. And I like to get rid of the comments, so yeah, we'll be building it from you. I kid standard controls because the point here is that we're gonna learn principles that you're going to use on the job every single day. And so we're gonna build this game using standard iPhone controls, which is really cool. And there's nothing wrong with that at all. In fact, sometimes Ah, Spike, it is a little bit overkill for simple things. So this is really cool. So I'm gonna go over here to the main, not storyboard. Okay? To make this bigger here and again, we're just gonna have some fun as usual and build the interface first. So I'm going to click the Assets folder, and I have some assets that I want to bring in. Okay, I'll pull him up here, and some of them I've already exported, and ah, that's okay. So we need a background. Let's drag the background over. We need some food. We need a heart. What else? We need? O the ground? Be great. And, oh, the skull. Don't forget the school, Giga. Pets can die the lives panel and I'm going to grab an animation here. Idol 2123 and four. Because we will be using those shortly. So Okay, I got some graphics and ah, you're to know where we got these things from. And eso I purchased these and you are free to do the same. If you want to release this commercially, can't use these graphics or you get in trouble. But you should buy it if you want to use it and make money off of it. Okay, so we got her stuff and here's our storyboard. So let's get to it. I'm gonna throw an image, You on the back Here and again we are building a giga pet. So there it is. Took a minute to load up. And so, you know, Giga pets can spelling it wrong. U i u I imaged every girl, uh, Giga pets can, of course, be fed. You could do different things of them. You can pet them. In our case, our little guy, he's gonna want to eat or he's gonna want love, affection. And if you don't give him either one of those, there's gonna be a timer. And if you don't give it to him within about five seconds, or whatever time we set, he's gonna lose a life. Eventually. If he loses all three life's, he's gonna die. And ah, so that's how the game works. So there's our image view and let's go ahead and pin it I know I'm gonna need dependent because it's gonna need to go on the, ah, corner to corner. So let's turn off margins independent to the left, the top to the bottom, into the right. And I don't need to set the width and height, of course, because since I've pinned it to the edges, it means it's going to stretch and grow to the entire size of the screen ad for constraints . And let's go ahead and change the image over here to BG for background. And it's looking pretty good. But it says scale to feel, and you can never trust that, even if it looks good, because it will stretch your graphics. So we want aspect, Phil. Now, why would we not choose aspect fit? Well, if it was a really large screen size, uh or small against, it could be any screen size. It may not cover the entire screen. It may just cover part of it, so long as it all fits in the side of the view. But we want ours to feel as if it's a background, and so there's a background and I kind of like it, and we need a ground now. Now, we haven't used any stack. Use it because I don't really think a stack use appropriate in this case because these things were pinned to the edges of the screen and they're not really stacked. So this is gonna be our ground here. I'm going to turn off margins again and we'll do left bottom and right, And we do need to set a height. If we don't set a height here, it will squish our image or stretch it. So we do need to set a height, and this ensures that it stays the same. And let's go ahead and select an image. The ground looks kind of nice. Let's see what it looks like. An aspect Ah, if it see how on the edges there, we lost part of it off the screen. We don't want that's we want aspect. Feel very go. It's OK if it cuts it off so long as we're not stretching or squishing her image. Because you know that that is a very bad thing to Dio. So I like it. It's looking great. Now what else do we need? We need to throw a character on here and we also need the life's panel and we need the little skulls for the deaths. Eso Let's go ahead and put on. Put those on as well to. And so here we go. Let's go ahead and do the back panel. This is going to be called Lives panel. Of course, it's stretched by default. In this case, we will do aspect fit. Does it make sense to have this thing cut off if it needs to be No needs toe all fit on the screen and there we go and I'll just move this up, clean up a little bit here and it's looking really good. I'm gonna pin it Teoh the top. So zero from the top margin. If I turn it off, it would be, Ah, not on the margin. So, um, that looks good. And let's go ahead and keep the width and the height the same. Okay. Rather, let's pin those to their specific sizes. I mean, and let's click the align button here and align it horizontally in the container. Okay, it's looking good now. Normally, I might look at this in preview mode, but I've done this enough times to know that what I've done is right. It's gonna work. So let's just keep playing around with it here. We'll look at them. Look at the preview mode in a minute here, let's go ahead and throw the schools up here. Um, I believe they are a square image, so I'm just gonna go ahead and click the ruler and change this to a square. Let's just say 50 by 50 for now, we can make it bigger in just a moment. I'm gonna click this guy here and change the image to ah, school. There you go. And again to be safe, aspect fit. We don't want to school cut off. So no aspect feel. Let's just see what it looks like. Do you know what? It's not too bad. That's not too bad at all. Let's go ahead and do some work here on him first before we duplicate him. So let's just give him a width and a height. That doesn't change because our back panel is not gonna change, so this doesn't need to change. Otherwise, things will not look correct. I'm gonna add to constraints and you're like, Wait a minute, why are we pinning it? Do it like centering it or something. Well, I think that what we should do is probably use a stack view. So I'm gonna select this guy and hold down command D and ah, drag it over and then command d again. Drag it over. And how do we do a stack for you again? You hold down, Commander Shift. Oh, come on. There we go and select each item and then go on down here to the bottom and click this little square button with the arrow. And it is now a stack view. And this is gonna be real nice, because we don't have to manually center these things. According to the back panel, We can just put it in here and distribution on the right hand side of the stack view. I want to feel equally. And then let's set some spacing in between each one. Let's try six. Oh, it's not enough. Eight. Still enough. Let's try 15 Getting closer. Let's try 16. Click off of it here so I can see what's going on. And ah, that's not half bad, Really. Let's go ahead and click the stack panel over here the stack view and click the lives panel And how do you think we should align them? I'm thinking that they should be lined probably the same. So this is what we have. The same, actually. So that's interesting. So the back panel we've already aligned with the main view, so it's not going anywhere. So all we have to do, say, horizontal centers and vertical centers, meaning, Let's just put these two atoms together And are you? I stacked you with the skulls in it will line out right where it needs to be on the panel. I think I could be wrong. Let's check it out. I'm gonna click the preview button over here on the right hand side and ah, that is not a preview. That is code. And there's the preview. And you know what? That's not too bad for the first try. It just kind of worked for us. Um, it's little real cool, actually. Bigger screen. It's looking pretty good. What do you think? Yeah, all right. Very good. So we know what? That we're gonna need two images. One that the heart and one that's food. Because sometimes he wants food. Sometimes he wants love and affection. Who knows why it's just a rock Gholam. You never know what they're thinking. So let's go ahead. And there are another image You on here and I believe these air squares as well I could be wrong, but just to make a nice and clean I'll make it 80 by 80 I'm going to click the attributes inspector and change the image to the heart. And again, you maybe think it looks good, but you aspect fit just to be sure. And you did notice that it's shrunk a little bit on the sides and with and, uh, that looks real good. I'm gonna command d it. I don't gotta click on it sometimes. Ex coach touch about that. Even if it's selected, get a click off of it and click it again. So I just did command d Teoh duplicate it and ah, let's go ahead and do the food right there. Alright, aspect fit looks good. Maybe somebody if you're wondering, why are we doing the skulls instead of the heart's? Well, because schools are so much cooler than hearts and ah, I was a little bit hesitant. Even Teoh, you know, give this guy love and affection. I was thinking maybe you could swipe to beat him, You know, he was bad or something. But, you know, video kids watching. Gotta give affection to our Golan's here. So let's go ahead and, um, figure out where we gonna put these things. I really don't. Don't know. Maybe. Oh, maybe they're in there. So the ideas, at one point in time, one of these will be disabled, and then the other one's the one you've got to give to the Gholam and Sea Dragon onto him, and then he eats it, and then this one gets his affection. And if you don't do those things, of course, uh, you get a school. All right. Uh, do you think this should be in a stack panel? Yes. Someone said yes, I would agree. So click both of those there. Hold down, shift and click the stack panel button at the bottom of the screen. Oh, look how friendly they are. Now. I'm really liking these stack panels because now, by the way, that would have been a nightmare toe like auto size and things these things in the past. But right now, it's pretty damn cool. Um, so let's go ahead and put the spacing to will. Say 10. No, that's ridiculous. Let's say 30. Gonna get a 50. Whoever go. How about a 70? I'm really liking this 100. Okay? No. And let's do some or things Gonna click it again and let's go ahead and change the distribution to feel equally okay. And then when you do XYZ move are stacked panel right there. Hey, look at that. It's not too bad. Not too bad at all. Okay, so looks good. Let's go ahead and ah, center it in the container by clicking the alignment icon and, uh, there it is horizontally. Center it and it's looking all right. I think I clicked off of it. My menu items disappeared. Let's click it again. And now click a line And there we go horizontally in container. Add one constraint. Now, obviously, we haven't pinned it anywhere else, so it's gonna go up and down. We want it right about there. So let's go ahead and pin it to the top 16. Let's say 15. Is that a better number? Of course. And so it's going to 15 pixels from the school panel up there. Add one constraint and it's starting to look pretty cool now. Can't forget the star of our show, our little monster, the rock going. And so let's go ahead and put this image. You here and I don't know what size he is. Let's go ahead and take a look here. I think they're off sized because animations and stuff eso let's just go ahead. And first off, renamed these I'm gonna call idle one. Feel like something's wrong with that icon there? Well, go back for Has any problems? Idol, too? I'm just pressing Enter, by the way, Like housing renaming this Just pressing. Enter the standard, Mac, uh, on the command to rename something at all three and idle four. And we have four images because they're each doing something different, and that's how we're gonna do our animation. So, uh, let's go back to the main dot storyboard and I'm going to select the image view, take the image here and select idle one. Now he doesn't look right. So let's do aspect fit, and you're like, Well, he's a little bit small, don't you think it was a little guy? Is it a girl? Real big right now, though looking pretty meaning and cool. He's actually not mean. He's He's warm and fuzzy on the inside. It's just, you know, it's how he turned out. And, you know, you can't judge by appearances and, ah, so he's right there now. I'm not sure what he's gonna dio when I when I pin this. And so let's see where he let's see what he looks like right now without doing any pinning . Okay, so he obviously is doing whatever he wants on these different strains. He's a disobedient gholam, so we need Teoh pin him up. So I just click them here, and I like where he is on the screen, on the left hand side. So let's see if we can get that working there. So I'm gonna pin him. Let's see 49 from the bottom. That's fine. We can just paint it straight to the bottom here. I really don't care if it's if it's fixed. Although he's floating, that's that doesn't make sense. He's going to use them levitation powers. Come on. Okay, so there we go. I like it. Let's go and repent it now. 41 from the bottom. And what do we know? Um, well, we know he's a good height right now. I'm not sure if I want to change his heights. Let's just go ahead and make it the same. So he's pinned from the bottom. He now has the same height. That doesn't dictators position from left to right, though. And so what I'm thinking we could Dio is just click left over here. It says zero, but that's because there's lots of white space on this image. It's empty. You can't see it, but see how this see how this ah is part of his image right there. Lines up right at the margin. What it's gonna say is, Hey, we're gonna make force him to be at the margin every single time and force him to be this with and hide, and I think that should keep him where he needs to be. There's a lot of different ways we could have done this, but I think, um, he's an action, not quite where we want him. And this is why preview is important because he's not doing what we wanted to dio. So let's click him again and, ah, we can do a few things we can leave that we can leave that line meant there and just change the constant on it. So if I go to leading space to super view, let's say I say this is 22 happens So he's going the wrong way If I do 20 or like I just did. Oh, just it to let's say Negative 20 is moving, moving a little bit towards where we want him And, uh, you know, it's okay, Toe do this kind of positioning, Really? In the end, you just want your app to look the way that you wanted to look. There's nothing wrong with putting these negative numbers in here. Um, and, you know, we it's kind of a game anyway. Just want things in certain spots. And, uh, I'm starting to really like where he's at right now. Now you're probably thinking, why? Why is it that, um, on these screens? He's over here and on this screen, He's over here. Well, in this specific case, I probably don't have a good answer for you. Sometimes things like this happen. He has this big image here, and he is pinned where I wanted to be, Um, but it's clearly moving him a little bit off from where I wanted to be. So you can always be sure that you can trust your preview over here. And that's ultimately, that's ultimately what matters the most is your preview. Okay? And, uh, I'm OK with it. I'm OK with it. Like it is right here. It's not too bad. And, ah, keep in mind the image has lots of white space. It's because of the animation. I didn't trim it or anything. I wanted to keep it just like the designers and artists kept it. So sometimes is a developer. You have to deal with things like that. This extra white space Hasnat lining up on the screen. It's driving me crazy. You're gonna have to work around designers sometime to solve these kind of problems, like we just did so good enough for me. For now, if you want to play with it on your own and make it a little more perfect, you're welcome to do that. You know how to do it by now, at least to play around with things. It's not too bad. So he's doing. His thing is sitting there floating. I like it. I like it. I love it. Okay, so it's coming together real well. And so what I want to dio is Ah, in this first part of the video, I just want to get him animating. You know, that seems like a really fun thing to Dio. So let's do that. Let's go ahead and, ah, we'll all together just go into our view controller and we know he's an image view. All right, so I would say I'd be Outlet Week bar and we're gonna call it a monster image of type you I image of you. There we go, exclamation point at the end. That's what you do on these. I be outlets, and that's looking real good, Okay? And so what do we need to do? Well, we need to get this image you animating and there's some commands with the image you that that you could do to actually animate image view has functions that allow you to dio PNG sequences or different image sequences. In the case of any any file format, I believe so you can have things living and breathing on the screen, and that's what we're gonna do. So au Image View has a property called animation images. I believe animation images, Airness. And if you look there, it's looking for it is an array of type you image and the question work means there doesn't have to be something here. You don't have to have animation images, so you got to be careful and working with these optionals. That's what a question mark is. It's an optional. Gotta be careful how you work with them because it can cause crashes in your program. And, ah, it's actually a safety feature to help prevent you from getting crashes. So you know that it could be empty, so you can check for that. So monster animation images, it wants an array of you I images. Okay, you image view is a view that does different things with images, but it actually has inside of it a you I images another class that ah, um, the actual stores the image itself. So what we need to do is load up our images from our assets. Now, what? I could do something like this far image one equals, um you just saw a glimpse of objective See, what am I think you i image and ah, we'll call it, um or is the image named? There we go. And then we could say, um, you know, I believe was idle one that PNG We could do this and then we could do this. Image two equals this. We could do that. And we could do that four different times. Or is it five different times? How many did we have? 41234 Okay, so there's four of those there, Okay? And, uh, we could do this, but you're probably thinking don't repeat yourself, man. Use a for loop. And if that's what you were thinking good for you, because that is what we need to do. So I'm gonna create a temporary ray called imagery, and it's going to be an array of type you white image. You. I image not your image. You We're gonna make an empty array of type you image just like the one that we saw on the , um the help pop up. And of course, it's giving us the warning because it's like, Hey, you're not even using this. What's going on? So we're gonna use it, So we're going to say for var X equals zero X is less than send what? When we know there's four images. So, actually, do we want to do zero? Well, maybe we just took a four look for granted because we don't actually want to. You zero We want to say one. So X equals one because that's the name of the image. And so then we're going to say while X is less than or equal to four x plus plus because what we want to do is get the actual name of the image. Because each image has a +1234 after the word, right. So if I save our I am G equals you, I image and we give it an image named All right, so remember how it could just dio you know, idol one dot PNG You're probably thinking, Oh, I'm I think I know what I think. I know what Mark's gonna do here. I'm learning at a code. This is so cool. Well, let's take a look. If I do that, remember, you can insert variables in there. I can put X who pretty cool. So what it's gonna do is it's going to create a new image. It's gonna find one called Idol x dot PNG and then it's going to stick it in here. That is pretty cool. Um, that's really cool, actually. And ah, then what Weaken Dio is just say image array upend added. Okay, now this image here, this image is an optional. OK, which means it may or may not have value in it, but our array is demanding something that's not an optional Well, I know that these I know that this is gonna work because my, um my images exist, OK? And this is something you do as a programmer at compile time. It's OK, So for instance, I could put and I can put an exclamation mark here as a programmer right now, which is gonna force it's gonna force unwrapped this saying, I know there's a value in here, okay? And it's gonna force and wrap it, but I can do that as a programmer because let's say this crashed. What's gonna crash on me probably in testing because it's not finding the images like this is nothing that a user would do like your images wouldn't magically delete out of your code bundle. So so long as you get these images right, you can fix it, modify it till it's working, and you can be sure that there's a value in there. This is something you can trust in this specific case. Not in all cases, but ah, you should be able to catch this at compile time and it dealing at us because we haven't modified image. So let's go ahead and turn it to a constant. Okay, I would start off with the bar first and then change it as it yells at me. Makes sense easy enough. So we've Creighton image and I were a pending it to the red. So what we've done is we've created four images and put it in the array so we can use it on our image of you. So now I can say monster image. The animation images equals image, right? So we have an array of images and we're just setting it. That's all we're doing. Next thing is, how long should the animation play before it repeats report finishes. So we got to give it a time and ah, monster image dot animation duration. Okay. And I test this out earlier, and 0.8 is a very nice time. Very nice. You can play with it. Um, you know, test things out, and then animation repeat count. Okay, Is how many times you want to repeat? Well, he's idling, He's breathing, and we don't want him to stop breathing. When there's an air here, the story are equal. Sign there. We don't want to stop breathing, so if you set it to zero, it means it's going to do it infinitely. And the last thing we need to dio is actually to start the animation monster image that start, start animating. Okay, now we're almost ready to go. The only thing I need to dio is get this guy working right here. Okay? This, uh, um, outlets so I can click the preview are the assistant editor. I mean, not the preview. And ah, in this case, just for fun, I could actually select manual and select may storyboard, And I could do it on the right hand side. This time you're doing what? What is going on? Actually, I'd like to know that myself, cause it's not pulling it up. I was looking for the preview. Uh, user Murray, come on, don't be this way. All right, Well, prove me wrong, hung like, Ah, this guy's an idiot. OK, so let's just do it this way. Let's just click our main story board here and then try that again the way we're used to doing it. And there we go. And, ah, let's go to our, um, code. Give me the day and code area. Uh, okay, So here's our monster right here. Here's your monster right here. Let's just go ahead and, um, drag it over like this. He's a big monster. He's even this images even covering over these things. Um, all right, so he's now connected. And, ah, if everything ran right which had happened is on view Did load, which will happen in all these views? Load. He'll start animating. We load the images up, and he just should start animating. And if it doesn't work, we'll figure it out together. Okay, let's go ahead and build and run it. Here. It's coming. There we go. Oh, it looks good. Now again, he's a little bit off center, but I really don't care right now. You know, it's something we can touch up later on something you can touch up. Maybe it's maybe it's artistic Maybe it looks good, but what do you think? We got an animated character and so a few principles that you learned before we close off this video here is you learned how to work with you image views and you images and how to use a sequence of images and repeat them in animation. And that's really powerful. You can do lots of things with that. There's plenty of animated images out on the Internet, So if you wanted loading spinners or whatever you want it, even though I was has its own loading spinner, you could have custom ones. You can do a lot of things with these animated images and just for fun. I don't know what it's gonna look like. Let's rotate it. You know, it's not too bad. It's actually not too bad. We could actually change some things around later on. We could, like, move the food over here to the right hand side for landscape mode and make it more usable. That's pretty cool, actually. Looks a little bit more fun in landscape mode. So there you got it. We went ahead and did some really cool stuff right here off the bat and this is going to get me a longer video because it's a bigger app and see a next time.
44. iOS 9 App: My Little Monster Part 2: Ladies and gentlemen, welcome back for another exciting day of development, Mark Price here with back home. And we're gonna continue our Giga pet if you remember from yesterday's show, if that's what we're calling it now we built a gholam rock monster who idled. And if I go ahead and build and run this, it is going to show me what we did. Here it comes. Here it comes. And there he is. He is animating looking justus. Good as we left him, minus some landscape features we should take care of And I think we should take care of those right now. Why not learn a little bit about Iowa's size classes? Well, what's a size class, you say? Well, I'll be happy to tell you a size class is a class based is a size based constraint and layout system. Okay. What it means is you can set different constraints and layouts for different device screens . Okay, so currently, notice how all the things that we've set up in our constraints are applying here to the bottom of the screen here. It says any any any within any heights with the W in the H stands for So what we're saying is, hey, these constraints are the same for all screen sizes. OK, but clearly, in our landscape mode, the heart and the food we want on the right hand side and we want those things vertical. Now, when we change your science class here, all the existing constraints are going to stay the same. They're not gonna get ruined or anything. But what I do want to dio is I want to go ahead and take off this alignment on on our stack . You're here. It is centering in the middle, and we will put this back. But for right now, let's go ahead and get rid of the align Center X. And let's also get rid of top space to Lives panel. And I'll show you why we're gonna go ahead and switch to where to click this button down here, okay? And we're gonna switch to and it'll tell tell you that the different size classes that you're supporting with these different options here, we're going to switch to compact height with the regular with, So I'm gonna click that and notice how this now and blue down here it's in. Hey, you're in a size class. Be careful what you're doing, because whatever you do is gonna work for that phone size and notice how Here it actually made art canvas rotated in, ah, landscape mode. So this is about what it looks like when we had on landscape. So let's go ahead and make some changes. I have the staff you selected. I'm gonna go to the right hand side and we're going to click this little button right here . See this plus sign, I'm gonna click it, and I'm going to say any with compact tight, the same size class that we're in. I'm gonna set it right there. And so any with with compact tight. So it is a compact tight. That's fine. So what we want to do is say, in that mode, let's make it vertical like, Wow, it's already working. That's not too bad. It's pretty easy now. Notice how if I try and grab my stack view, it grabs the Goldman said that's because he's in front of it. I'm just gonna move stack view in front of him, and then I'm going Teoh and it could be a she. Sorry, not trying to be gender bias. This could very well be a female rock. Golam. Um, Yep. So let's move it over here, okay? And that's cool. It's on the right hand side, So let's go ahead and set up in to the right hand side. Zero. Put it to the margins there, and let's pin it to the top is, well, eight from the top. Sounds fine to me. And there's one more thing that I want to dio and ah, that is make the spacing a little bit less. And so let me rearing my screen Here's lightly. See how the spacing is 100. Let's just make it 50. I kind of like that. And, uh, something. Undo that, actually, Let's put it, Let's put a size class on it when you're working with stack views. They have these plus buttons next to them, which allow you to set the size classes right here. And, uh, now the reason why I switched the size classing down here is well, it's so the painting and the alignment would be applied to that specific size class. So over here we could have done these pressures plus buttons, even without having changed the mowed down here. But since we're already here, let's do that. And listen, add a size constraint for this spacing. So we're gonna say any with compact tight that's looking really good and now will say 50 and notice how the height didn't change on the ones right here. Because this is in portrait mode and let's rotate him, Just see what it looks like. Hey, look at that way. Got a real life preview of what it's gonna look like. Obviously, that spacing is is ah, too much still. Hey, look at that. That's looking pretty fly. If I do say so myself, so that is pretty cool. I like it a lot, actually. And now let's go back to our regular. Let's go to any in any, Okay, this is just the base layout Now. Now let's go back and do what we did before. We will. I've got the stack view selected. We will pin it from the top by 16. Actually, LSU 15 again. It's better number. Pin it from the top and that's okay. And then we'll go ahead and horizontally and container will center and okay, notice how it just went all ugly on a silver here, it stretched out. That's because we forgot to actually pin a a size the with on, um, on our size class. Let's go actually back to our size class to our compact height regular with here, and I've got the stack view selected and on the actual stack view, I'm just gonna go ahead and set a with here in this mode on Lee. OK, and the five sixties way too much. I know that it's 96. They just looked at it. So I set the with at 96 add the constraint. There we go now. Now it's looking real pretty. Both screen modes are looking real pretty and let's go ahead and just build and run this to make sure it's working in real life. And there he is. Let's go ahead and rotate it and oh my gosh, we gotta fix it. I think the reason why we have this problem is because we still have that Senator elect, Senator Online X over here on the right hand side. And since we I didn't since we actually said on any, it was actually inherited on the the with. So let's fix that now. Let's click it and delete it. Okay? And what we'll actually dio is go to our size class here and we're going to switch Teoh, I think I believe compact with it says for all compact with layouts 3.54 point inch force 0.7 inch. I think this is what we want. And for all this is for all iPhones and portrait. Actually, this is only for all iPhones and portrait. This is what we want. And so for all iPhones in Portrait. Now, we want to, um we want to take the stack if you click on it, and we want to align it horizontally in the container. Okay, Now let's rerun it and see if that fixed our problem. So that Center X was applying to both rotations, and we just wanted it to apply to portrait. And, uh hey, I think we are making progress. Hey, look at that. We did it really cool so that its size classes, it's not too bad. You just select a size class and then you set the constraints and ah, one thing that you learned as well and that I was just reminded of is when you have any in any which is right here. Okay? For all the outs, if you add constraints that it's gonna add it to all of them. So if you have to do something like we just did right now, where we need a position, something in one place in one mode and another place in another mode. Okay, Um, then Ah, you've got to set the specific constraints. Now, I'm not sure this is gonna work on iPad just yet, because there's more constraints that we'll need to do. But so far on these Ah, on on here. It's looking really good. I think it looks great, actually. And it's important to do this for your APS supporters. Many screen sizes as you can. So that's looking really cool. We are making progress. Let's go ahead and look at our code and see where we are. Okay, I'm gonna close the assistant editor here, and we don't have a whole lot going on here. Clearly, Um, that's okay. And so let's think about what we want to do next. We've got the heart and we've got the food, and we wanna be able to drag those around. Okay, here's the really cool thing dragging things around. I think that'll be fun. Um, it is an iPhone, of course, in famous for, um, innovating, intimating apse where you can drag in touch and swipe things. So let's do that. So right now we've got our animation is going on here. That's fine. Well, what? We probably need to see my be outlets for the food and for the heart. So at I b outlet. And maybe you guys are wondering like, uh, why do you Why did you write this house so much? Couldn't you just connect things up right from the editor? Yes, that's true. I've been coding for a long time, and sometimes it's a pain to go back and forth. Or sometimes it's also slow toe. Have your interface builder open. It can start slowing down your system because its graphical and, uh so I try not to as much as possible have the split screen open for demonstration purposes. Yes, but I really like to do things just this way. So I know exactly what's happening. So monster image, food, image, your image view, Okay. And, uh, do another one are and will say heart image. You. I image view. Okay, now let's talk about this. How do we make something movable? Well, one thing we can dio is Iowa's provides thes nice override classes here, um, or classes that you can override called touches. Began touches canceled, touches into touches. Move. If I pressed enter here. Uh, it's a function. And what will happen is any time I touch the screen, this will be tapped or this will be ignited. So if I say print and I say I just touched the screen first tab tab Okay, I just touched. That's a little incomplete and strange. I just touched the screen. Okay, let's go ahead and build and run it and see what happens. Okay? And let's just touch the screen to over there on the right hand side in the council. I'm touching the screen and it's igniting that, so that's really cool. So how it works on IOS is there's something called a U I responder, Okay. And what happens is when you tap the screen at the very top level, it passes it down to your class, are the top level class, and this is Hey, do you want to do anything with this tap and then it goes down to the next one. Do you want to do anything with this tap? Do you want to do anything with this tap all the way down it over here where it's like a Do you wanna do anything with this tap? So the tap they is actually on the screen is forwarded from class to class, the classic class all the way down to here. And when I say four to think, think about this. Imagine, You know how when you have Ah, um, an iPhone app that has a view on navigation bar at the top where has, like, the butt back button on the left. Or you can go into a new screen, pops up in a new screen and you can navigate well, those controls our first gonna intercept, and then the screens underneath them are gonna intercept the controls. And so that's really cool. Weaken, weaken, detect touches. We could move things around, but we don't want to do it here on this view controller because we're not moving the view controller, OK? We want to do on the image itself, and I could write some complex code to manage it all here in the view controller, but it actually doesn't make sense. And I think there's a much simpler way. And that is by sub classing, um, the ah you image. You weaken subclass and we talked about this. So this is this is programming object oriented programming 101 that you're gonna use this kind of stuff all the time. Let's go ahead. Make a new file file. New file. New file That makes sense. IOS. Let's go ahead and click source and click Swift File. Click next and let's go ahead and call this drag image drag as in dragging things around, Not the other type of drag, if that's what you were thinking, create perfect now import foundation. That's the foundation. Swift classes, etcetera. But we also need to import u I kick cause that's what contains information about you. I image you and all of the IOS control so import you I kit and then all we need to do, say, class drag image. Notice how in swift the the name of the file doesn't necessarily correspond with the name of the class. What's inside of it is more important. So class and it's going to extend from you image view. What it means is it's gonna inherit all of your image. Use features so we can use them. And there's a few things we need to do to get this working. We need toe override some initialize er's, uh, if you're gonna use a you like it class. Okay. Are any swift class really? Um, some of the initialize er's are required, okay? And so it's gonna force you it. It's gonna force you to use them, and that's what we're gonna do right here. We're just putting in the boilerplate initialize er's that it's requiring. And then it has a required initialize. Er, um, if it wants auto complete first, that would be nice there ago. Coder a decoder. And this is gonna be super dot in it. And all we do is we pass up the, um come on super in it and coder. And in the past, a decoder. All we're gonna do is pass it in, um, up to the super super in it. So basically, you my image of you has its own initialize er and so we're overriding it and doing our own thing. But we also have to call the parent one, because ah, you My image of you was doing things that we need it to do. And if we don't call the parent initialize er okay, we're gonna have problems. So this is looking real good. This is looking really good, actually. So let's go ahead and implement some of those touch methods like touches began. Okay. And what else? We don't attract touches moved. Whenever you're moving, we want to move the object and, ah, touches ended. We need to know when the objects ended and the reason why we need to know where it ended is Ah, because when you when you drop the view, Okay, um when you know, if he dropped it on the character or not. So we need we need to be able to detect that. So that's looking good. So we have our override functions that will detect when the touches have began or touches have moved or touches have ended and notice how we have set these up on a U image. You What we're gonna dio is instead of using the regular you image view, we're gonna use these ones this drag image you I view your image. You so we can write some custom stuff. So what we're gonna dio is when the touches began. Okay, We need to detect where what we need to store off, um, where the center position is. So meaning like, let's say that I drag it, but I don't drag it on the character. We need to know what position to send the object back to if it's not a good drag. So what we need to do is create a variable toe. Hold our ah, beginning point someone save our original position of type C G point. Okay. And appoint has Nexen a y coordinate. That's what a c G point is. Okay. And so when touches began, whenever it begins Okay, I'm gonna say original position equals and ah, let's see here. Wanna say self dot center. Okay, let's talk about this right here. So self Dutch center. So what we're saying itself when we say self were saying the image view. Let's get its center. It's X and Y Cordon. If you go look over here on the right hand side center is STG point and it's it's it's centre point in the coordinate system So we're gonna grab that center point there. Now. I didn't You know, maybe you're thinking. Well, why didn't you just put it here in the initialization function? Well, the problem is these initialized methods, okay? They're called before, um, layouts are laid out on the actual screen, so we can't guarantee that the center is gonna be correct Her and maybe Nolan may be empty . We can't guarantee it. So what we need to do is is put it somewhere where we can guarantee that there's already a center, and there's no view Did load on a on a view. Okay, So touches began. Its an okay place to say, Hey, as soon as you make a touch, let's first save off where we started. Okay? I'm liking it. Now, let's talk about touches moved. Okay. Whenever this is called, it passes in a set. Okay. A set of touches. Okay. Set is a data collection, like an array or a dictionary, and it's giving us some touches. And of course, we've only made one touch. So what I'm gonna do, say, if let touch equals touches that first. Okay, So what? What this is doing is saying grab touch the grab. The very first object in the touches set. So this is the set were just saying Grab the very first object out of it. That's all we're doing and it's not guaranteed. If you look over here, there's a question mark at the end of means, it could be optional. So again, we're doing the If Let's in tax were saying, if this exists, then let's use it in here. This is good. What's gonna prevent crashes by using these? If let's okay. And of course, when you make it a let it becomes immutable, you can't change it. So if we get in here, we know we know that we're safe. Okay, So what we're gonna say is, let position equals, touched up location in view, self super view. Okay, some more things to talk about. So we're grabbing a position. So and we're saying touch, dot location and view. So what we're doing is we're saying, Hey, grab, grab the position of the look Grabill a position or the location in the view. Okay, so and then you pick the view that you want, So we're saying, Hey, I want to know where the position the X and Y coordinates are of this touch in the super view, the view that has our gholam and that has the U. Y and stuff. What we're saying is we want to know where that position is, where they or their finger touched. Let's get that location right there. Okay? And ah, then what we're gonna do is going to say self dot center equals C G point. Make position dot Exe and position dot y. Okay, so you're saying Let's grab the first touch, Let's get its position and its parent view. Let's see where the users finger tapped on the on the view above it. And then all we need to do is move our center being the image. You move our center to this new position and CG Point make. It creates a CD point. OK, that's what it does. It creates a CD. Points were creating one from the Positions X co ordinate and the position's wide coordinate. In essence, what this is saying is, wherever your fingers dragging, let's go ahead and move the object, okay? And this may just work right out of the box. Mother is one more thing that we need to dio, I think Two things, actually. So now we're using a custom class. What we need to do is go to our main dot storyboard. Click your heart. Okay. And over here in the right hand side, there's this little box here we haven't really clicked on yet. It's the identity inspector. Okay, click it. And by default to you image of you. But we know that we've created a subclass now called drag image. And look, it's only gonna put items on here that will actually work for this object and so drag image . You need to select that. We need to tell this object that Hey, you are the custom class, not the default class. And I would do the same thing with the food, change it to drag image, and then I'm gonna click the assistant editor here and we'll go ahead and look at our code . Um, actually, I wanted somebody when I wanted to code Over here. Here we go. Um Okay, so let's see. Actually, that is not what I want. I want this right here, and I want my code right here. There you go. It magically work for us. See, him play around with enough things and things magically work. Okay, so notice how we have a food image and a heart image We need to change. These here is well, too, since a drag image and drag image. Okay, we need to set them to the custom class, and I don't need to do is click this and drag it over to the food and click this and drag it over to the heart. Now, if this worked, what should happen is we should be able to drag these items anywhere on the screen. So let's go ahead and see if it worked. Moment of truth and it is not working. And I think I know why. By default, you image use do not enable user interaction. So let's stop it. Good and click your heart and on the right hand side to click this icon over here, the attributes inspector and turn on user interaction enabled and do the same thing for the food user interaction enabled. Let's go ahead and run it again. The new moment of truth. Oh, look at that. It is rolling around all he's so happy. Mm. So it moves around. That is super cool. Um, start letting us do it again, as you can tell. But that's okay for right now. And Ah, pretty cool, huh? And I think I know why. It's not letting us roll around. It's because I think, um, this his images in the way here. So I think that's what's happening. Okay, very cool. So what we need to do now is, let's say, a user let go of it and they don't drop it on the monster. We need to reset where it goes. So let's do that. Let's go to our drag image. Subclass here and on touches ended. We're gonna have to write some unique code. So let's say if let touch, go to the same thing, would grab the touch, equals touches. If let touch, equals touches that first, okay? And ah, that looks good. What we can do is we can say, um actually, don't ended. I don't even know if we need to do any of this right now. It's just let's just run a quick test to make sure we could send it back where it needs to go self. That center equals original position, so we save that regional position. Let's just say whenever you let go, it goes back to where we started. This is run that test first I was testings incrementally because it lets you know when something's working in with something's not working versus writing lots of code and wondering where your problem is. So I'm clicking. I'm dry game. I'm glad dragging here and let go. Did it work? That is the question of the day. I think the answer is definitely a Yes, it did work. Now, of course, the next feature is when we drag it here, you know, it either feeds him or gives him health. Okay? And I think we should write some logic for that. First, though, before we start making these things disappear. So we're looking so good so far. I think we should call that a rap for video number two. Here we take a break catch up and then we'll move on to slot number three. Thank you for joining us today and we will see you very soon.
45. iOS 9 App: My Little Monster Part 3: Hey, everyone, Mark Price here with Dev slopes dot com And here we are together for the finale of My Little Monster, Part Three and let's take a look at what we've already done previously on My Little Monster There's our code. Let's run the app, pull it up here and there's our happy Golam. He's happy and the heart you can drag it and you can drag the food, and that's about all that's happened. We did get the size classes in place, which is super cool. You're learning things that other classes don't even teach, which is really cool. I know plenty of advanced IOS developers who don't even know how to do this. So you're ahead of the game and he's animating, and that's about it. We've got some you I in place and ah, that's what we got. So let's finish this up. Let's make some magic happen. Let's bring them to life. So let's think about what we want to do. Well, first off, we've got animations running inside of our review did load. That is not a good place. I'm sensing a code smellem smelling something bad here, and it looks like my code because this is not reusable. What happens if he dies? If I want to replay the animation So I want a copy and paste code. No, of course not. And so I think that our monster deserves his own subclass. OK, we've talked about classes already. This is no big deal. Let's go ahead and click the monster at the top left over there, That folder my little monster And go to new file and I'm gonna click source, appear in the Iowa section and click Swift File And I'm gonna call this monster. I am G meaning monster image. Now we know that if we want a subclass au image, we have to import you, Iike it, Otherwise it will not. Swift will not know what we're doing. So I'm gonna say class monster I am g inherits from you. I image view. Awesome. So here's our class and it's looking pretty. So what we first need to do is create our initialize er's here. I'm just going to override the default initialize er frame CG wrecked and it's going to say super dot in it, let's call the Super One. We're just putting these here to satisfy potential problems that it will give us. It likes having these initialize er's here. So then we're gonna put required in it. This one's actually required. This is Coder a Deke Co. Come on. It's I wanted to auto complete me, type this stuff in what does press enter goodness okay. And we'll call super dot in it and we're gonna call the coder one, and we're gonna pass in a decoder again. We're just over rising initialize er's and calling the super one. So everything works as we would expect because we need Teoh. We need to initialize code here. And so if we didn't have these in here, we wouldn't be able to do some initialization, and, uh, we haven't written the code for that yet, But that's OK, so let's think about what we want to do right now. We said that. Hey, why are we animating the image interviewed? A load that doesn't seem like the best place for maybe the monsters should be animating himself, and I think he should. So what I'm gonna do is I'm gonna highlight all this and Command X to cut it, and then we're gonna go over to our months or image. And I'm gonna create a function when you call this funk play Idol Animation. That seems like a great name and a great place to put this. Now we also have a death animation that we need to take care of to And ah, So first, let's get this working and then we'll go into the death one. So monster image. So now we're not referencing the image. We are the image mind blown. Okay, So we need to do instead of se self. Okay, Because remember, from our previous lectures who lectures? That sounds boring. Our previous awesome, exciting videos. We inherited things. And so we want to call self to grab those things. So we know that you image. You has all these properties, so we just need to call self in order to use them. Okay, Lectures. Oh, my gosh, guys, stop me now. These are not lectures. And if they start sounding like lectures, somebody shoot me. Okay, so let's go ahead and ah, do play death animation. I mean right. You guys have been to big university campuses. You sit there with 100 students and the professors like the history off America just like, Oh, my gosh. And you just don't even go to the class. You have someone take notes for you, and then you just study on your own and you pass the class anyway, college systems, little bit broken. Okay, Play death. And what we want to dio is Do we even have the death animations in here yet? We got the idol. We do not have the death animations, and I think that we want to grab those. So I'm going to go ahead and find him here. My file system. And here they are already pre made ready for us to go. Ready to go for us. Dead. One dead, two dead, three dead for and dead five, these air five frames for the animation. And I'm just gonna click and drag them over here. Okay, Looks fine to me, and we'll go back to monster image. And really, it's kind of the same thing here. To be honest now, we could probably create a slightly more elegant way instead of copying and pasting. Maybe you look at me like Are you really get a copy and paste. You're gonna be a hypocrite and break the dry principle. Well, things are gonna change a little bit. Um, maybe it doesn't make too much sense to change. You probably could figure out some way, but we know that there's five images, so I'm gonna change that. And I know that it's called dead, I believe. Not death, right? Yeah. Dead dead one there. Five. That's fine. And, um, animation Repeat count. We wanted to play once. We don't want it to be infinite. And what else are really we need here? Okay, this is looking good, but let's think about it here. If I and these you image views, they have ah, default image. Right. So if my animation stops, what image is going to show? We probably need to set that here in the death animation, because we wouldn't want toe and the animation to complete and for him to go back to frame one where he's still standing. So what I'm gonna do is I'm gonna set a default image here. Say self dot image. Okay. My default image equals you. I image named, and we're just gonna call this dead five. So the default image here, when the animations done, is the last frame. So that way he stays dead, OK, we don't want magically pop back up to the first frame. And then also, I'm gonna say self that animation, animation, image animation images equals Neil. I'm gonna empty that out. Think about it. If I wanted to restart my game, okay? And I and I had these animation images, I don't want them to be interchange with death and an idol. Now, again, we are reassigning here, which kind of does a similar thing. But think about this. If I had animation images, it was full of, you know, the idle animations, you know, I'd be a pending, you know, images to I could be potentially a pending images just could give us unexpected results. It's okay to clear things. Go ahead and throw Neil in there. That'll empty everything out. OK, that's fine. So image animation images. This is looking really good for the death. Let's go ahead and do a similar thing for our idol animation. Okay, let's set a default image. So we we have a base image when it's not animating. And, uh, you, when you play around with these things were just or just being extra safe here When you play around with these things, you'll find these nuances. Maybe, like I need to change that. And so this is how you do it. Okay, so you fix those little tiny problems here and there and we'll say itself that animation images equals kneel again. Maybe we could re factor this to B'more reusable, maybe create a function and passing the animation type and things like that. But it's a little more work than I think is worth the effort right now. So there we go. We've got to animations here. And how about what we do is we just go ahead and ah on and this initialization will say play idle animations. So when the APP first loads, let's play the idol animation and get that started, okay? And we'll come back to the death one later and tested out and see if it works. Um, but first, it's not gonna work for us just yet. If we go back to our view controller, notice how our monster image is of type you y image view, but we no longer want him to be of type. You image you. We want him to be of type monster image. So when did change that? Here to monster image? That's the class we want to use. And then let's go ahead and go into your main dot storyboard. There's one more thing we need to dio click your Let's open this up here. Don't disappear. Let's click your monster areas selected and what you're gonna do is you're gonna go over here to this little square box on the right hand side called Show the Identity Inspector. Click it and notice how the class is you. I image view. That is not what we want. We need to change it to monster image and notice here that it only lets us pick classes that are acceptable on Onley classes that inherit from your image. You because that's what it ISS. And so it lets us pick it. And now we're all connected up and ready to go. So if everything worked correctly used to see no change, it should just have him animating right from the start. I'm just went ahead and click the run button at the top left over here. Okay, Build succeeded. Let's throw it up here and he's animating. Looks like he's idling. He's repeating Everything is the same, which is good. It means our code ain't broke. Which eyes? Good. Now, you could have continued on assuming it was good. I like to test as many things as possible. And I would even test the death animation right now, however, we would have to write custom code that we would later threw away to test that to get that warning because we have to call it and ah, I don't want to deal with that right now. So we've got that working for us. So the animations air in this looking good. So the next thing we want to talk about is dragging those images. Remember how we created this drag image class? You could move them around, and then when you dropped it, it put it back to the original position. But what do we really want to have happen when what we want to have happen is when you drop it in the right spot, that it does some type of event? Okay, it Let's let somebody know that Hey, you dropped it on the character. Do something with it. Okay, so I think we need to write a few modifications to our code to get this working. So what we want to do is when we create one of these drag images in the code, we want to pass in the target like, Hey, you're dragging this. And if it's over this target, let's do something. So let's do that. Now Let's save our drop target. We're gonna make this of type you live. You remember how I said all the controls, like buttons and all those things and images they all inherit from you, I view. So I'm just actually putting a base class here. I know he's an image, right? I know he's an image, okay? And that would work as well, too. But imagine if we wanted to reuse this class, this drag image class. And if you drop it over a button or a view, it does the same thing. Why limit yourself to justify images? This is a smart thinking. This is This is thinking for the future, which is what object or innate programming is all about thinking for the future. So the idea is when you drop it and you let go on touches ended. We see if he dropped it on top of the target view. Okay, So if we dropped the food or the heart on top of the character, that's what we want to check. So what do we know so far? We're grabbing the touch or grabbing its position in the super view. That's looking great. Okay. And then we're saying self that Senator equal Steve. Gee, point, make position X. So Okay, so this is touches move. Were in the wrong spot where you need to be untouched ended Here. So what's happening here and touches end? It is. All we're doing is we're sending it back to the original position, okay? And we do want to do that no matter what's let's leave that here. But what else do we want to do? We want to check if we've dropped it on top of our target. So let's go ahead and do that now, just like the coda. But we're gonna say if let touch equals touches that first, Okay. And what we're gonna do also is we're gonna say let target equals dropped target. So this is too if let's on the same line. And basically what we're saying is if there's a value here, and if there's a value here, then go into the coat. So if there's a touch, this is good. We need this code here if the touch is accurate and then what we're saying is, Hey, if there's a target meaning, notice how this is an optional user may not have put this in here. They may not have put a drop target, and they just wanted to drag the image around, but they don't want to drop it, so it's empty. So we want to make sure it's not empty before we try and use the otherwise our program or real crash. This is perfect swift IOS development practice not to toot my own way. So I'm just letting you know that this is how you should be building your APS in this style with these. If let's don't go around putting pound signs on everything I get, I'll come over there and I'll be true if you're doing that because you're writing bad coat . And I did not teach you that. So if there's a touch, that's great, Um, and then what we need to do is again, like above grabbed the position of that touch and super view so position equals touch that location in view. And this is gonna be self that super view. Same thing as before, which is completely fine. And so let's grab the position and then what we're gonna dio and, you know, I usually just ignore those warnings and tell him down with my code. And if they're still there, I go back, and I fixed them. So then when we need to do is the code where we see if the image that we drag if it is on top, anywhere of the frame of the character, meaning if it's landed on him at all, okay, or her could be a female Golam and ah, CG direct contains point. Okay. It's a function that basically let you pass in a rectangle and appoint, um, Teoh to see if it is Ah, president there. So what we're gonna do is we're gonna say, hey, does this rectangle contain this point? And what rectangle do we want to check? What? We want to check the mark. The monster, which is the target, so target dot frame. Okay. We want to say, Hey, it did your touch land there and then we got a pass in the touch, which is going to be positioned. Okay, So what we're saying is, hey, if the position that you tapped on is anywhere inside of this frame anywhere inside of the monsters you image, you frame okay? If it's anywhere inside of there, that means that you dropped it on the monster, okay? And that's great. That's exactly what we wanted to do. Now let's learn a new principal. Don't notice. Very cool stuff we're gonna learn right now. So there's a system, a service in Iowa's eyes called ns notification center. And it allows you to post notifications and have observer of observers of notifications and then act accordingly. So what I can do is, I could say, Ennis Notification Center, that default center described the main notification center. You can create other ones dot post notification, and we're gonna create one right in here. I want to say Ennis notification, Okay. And what we're gonna do is we're gonna give it a name right here. Actually, this is perfect. And so we're gonna call this, um on target dropped okay. On target dropped, and then I'm gonna say object. Is Neil okay? And so what? We're doing here is Let's look at this carefully. Were calling a service called and it's notification center. We're grabbing the default center and they were posting a notification, and the parameter it takes is a notification. So right here in the line were actually creating a new notification. This would be no different than me saying, um comes here var note if equals and its notification giving it a name which was on target dropped. Okay. And, uh, saying Neil for the object, OK, we don't want to pass an object with that. That's the same thing. We're just doing it in line to save space and make it quicker. Also, another thing to notice is Ah, the name. Um I did this on accident. The name course corresponds to the name you're giving the notification. So your observers gonna wanna listen for that name as well. So what we're saying is, hey, if he had dropped the item on the target, let's say notification saying you successfully drop the item on the target. That's all making notifications. So our view controller can know what to do next. And ah, I'm gonna copy this. We can add an observer, but that's looking pretty good to me. And then, Ah, in the either case, we are sending the item back to its original position. And you're like, Why don't need a notification? Well, there's a few things we need to do, right? If you feed him, we need to make sure we don't give you a skull. You know, it was a life and and we need to make We need to make sure we move on to the next. The next thing that we need to dio we gotta run some logic. So that's why we need the notification and let's go ahead and move back to our view controller, and it's looking pretty empty right now, but that's OK. It's going to get much bigger more quickly and ah, let's go ahead and talk about how to become an observer. So this is the controller, the class that needs to listen for that notification. So N s notification center dot default center dot Add observer. Okay. And the desert is self meaning. Hey, this class is gonna listen for it. Okay? Selector is the function that you're gonna call. This is how you do it. Okay? You just put it in quotes. That's what you got to do. It's not that bad. So we're gonna say, Item dropped on character and I'm gonna put a colon here at the end. What that means is there's one or more parameters, and if you don't put it there, it won't work. It's gonna look for a function that has no parameters, so we know we know from experience. At least I know that and that's notifications. They pass in a notification object as a parameter, so you must put the colon there or your function will not be called. It's a common mistake to make as you're learning IOS don't make it the name of the of the notification itself, which is the name we gave it before, on Target dropped. An object is Neil. There's no object we need to worry about with this right now, so we're just adding ourselves as an observer, and now we haven't created this function yet, so we could possibly have a problem if this notification goes off. So let's go ahead and add that function now. And if you remember right, there needs to be a parameter in here called notification and I'm just gonna call any object. Uh, who knows what objects gonna get passed into it. It is an Ennis notification, but I'm just gonna call it any object. That means it could be any type of objects. This just says, hey, passing a parameter here and whatever you give me, whatever you give him, we're not going to use it. So I'm not gonna worry about its specific type. Okay? So we know when the item has been dragged onto the character. Okay, so let's go ahead and see if this worked. I'm just gonna print item dropped on character, okay? We'll see if it worked. I'm gonna go ahead and open up my consul down here so you can see it and was running. So the test is when I let go of the item. Did the notification success did it detect that you did drop it on the monster? And also is notification working? That's a second test. And is the function that's gonna be called when the notification is called? Is that being called salt? Is We're kind of testing three things here. And so let's first off, drag it anywhere else. So you notice nothing is to be happening here. Now it's safe. We drag it on him and nothing is still happening. So we definitely have a problem here. Knows how nothing's happening here. And ah, let's drag this way. So nothing's happening at all. So we definitely have a problem. And do you know what the problem is? I think I know what it is. So what we need to Dio is right here, in our view, did load. We need to set the target of this images. Remember? We haven't done that yet, Remember, it's optional. Okay. Where is it? Here. Drag image. It's optional. Appear at the top. There may be a target. There may not be a target. So our code worked. Nothing crashed because we have good air handling. Congratulations on writing some good code that didn't crash our program. So all we need to do in here is in view. Did load say food image duct? Uh, drop target. That's what we called It equals monster image. This one up here, we're just passing in the image there. And same thing for the heart. Heart image that dropped target equals months. Her image. Okay, let's give that another go. some quick problem solving. Let's see if we fix the problem. So I'm dragging it. There's nothing. I drag it on him and he's got a crash. Oh, no. Good. Let's see what it says. The unrecognized selector sent to instant. So item dropped on character is incorrect, and I think I may have misspelled it. This is a common crash. So I'm gonna click the back button up here and let's see if I spelled it. So here's one spelling. Okay. And ah. Oh, I did this wrong. So good catch. Here. Good coming. Mistake. Good thing for you to see. So what I did was I said, hey, this is the function I want to call. But I accidentally called it this. I called it the name of the notification, and so it actually needs to be this. This is the function that it's gonna call. You guys have probably been sitting out there looking at, like you're an idiot. Change it. But you can hear me and you're yelling at your screen. And, uh, well, that's what you get for not being in one of my riel life classes. So, um, you get the watchman, make mistakes so I'm dropped on character. It's right there. And I don't like the lower case. See, that's bugging me. So I'm gonna change it on both. And now let's give it a shot. Let's go ahead and run it and see if our crash is fixed. Clear this junk off the screen. Okay, here we go. Attempt number three dragging. Nothing's happening. I drag it on you and item was dropped on the character. There we go. It is definitely working. Should we test it with the heart? I think so. Let's pull our simulator back up here and tested with the heart. And sure enough, the heart is working as well, too. So we have just done something very cool. We're dragging and dropping, detecting what item it lands on. And then we're sending a notification. And then we're listening for notification, calling a function when that notification is hit and handling logic right after. So that was quite a few things we did and us pretty cool stuff. So let's now figure out what we want to do next. So let's think about the problem we're trying to solve. So if the player so what will happen is that there's a need that the monster has, whether he needs affection or he needs food. Okay, Just like any man. And he if he doesn't get that need taken care of within a certain period of time, he loses a life. And if he gives three lives lost, he dies. Okay, so let's go ahead and focus on the death in the school's first. So we know there's three lives and we know that there needs to be a timer, like every three seconds. And he's gonna lose a life if he's not taking care of, and then he dies. Let's get that working first. I'm gonna open the assistant editor here, okay? And, ah, let's change this over to our main story board. There we go. And, OK, so we've got our schools here, but we're not referencing them in our code. And so I'm going to go ahead and moved over slightly here. Okay, so let's go ahead and select the each school here. This is number one. So I'm gonna say this is called, um What do you want to call us? We'll call its penalty. This is penalty one image. Okay. This one is obviously penalty number two. So, uh, penalty to image. And obviously we have one more. Come on. But in the right spot, it's not obeying. Wait. Almost got it right. There could be a pain. That's why Do it in code sometimes. Okay, so and we're gonna call this penalty three image. And there they are. We've got I be outlets now. Okay, let's see some cleanup. Okay, we've got a three. I be out. Let's let's go back to the code. So it's not so squished here, and I'm gonna click the folder over here in the left hand side and click view controller. Okay, so we've got our penalty images and what we want to do. Well, what we want is maybe by default, they have, um they're kind of almost see through. And then what we do is every time you lose a life would just make it fully visible. So we're gonna modify what's called the Alfa Channel of the, uh, of the image itself, the opacity. And so what I'm gonna do is right here on viewed load. Let's go ahead and give it a low opacity and well, we should probably store some variables to some constant. So let's say let dim Alfa. So the Alfa win it is dim is going to be 0.2 okay in graphics and anything, 1.0 is full. Okay. And, uh, anything less than that is, um, not full. It's not opaque. So So you have opaque and then you have, ah, less than opaque, I suppose. And, uh, before I forget, I know the Alfa property because I have experience with this is a CD flow. It's actually not a double CG float is a is a certain type of, ah, float that's used on cocoa, which is the underlying framework of IOS. So I know it's a CD float is the type, and I'm gonna say let opaque equals of serc G float equals 1.0. And the reason why I'm putting these in all caps is because it lets the user, which is the program or no, that this is a constant. Okay, it means it's not gonna change. It's it's really a constant. That is, um, that's gonna be used for everyone. Um, okay, so we know that, um, that we have also a max amount of penalties which is three so I'm gonna store variable for that as well, too. So basically, any time you get a death, we're gonna check check against the max penalties to see if you want to lost the game or if he should die or not. So Penhall teas equals three, and then we probably need keep track of the current penalties. That's not gonna be a let that's gonna be a bar. So penalties equals zero. And if you're wondering, like, how am I coming up with these things off my head? Well, we just kind of sat down to discuss the problem. We know that a few of these images need to be on here, and we know that every few seconds he's gonna lose a life if we don't take care of him. And so, uh, when when we when we lose a life, we need Teoh, make it opaque, make it fully visible. Otherwise, we needed dim and there's a maximum penalties and we need to keep track of the current penalties that you currently have. That makes sense, and eso penalties equal zero. And so here we go interviewed load as an initial Isar. Let's go ahead and just set those penalty images Alphas right here to dim because we're starting off. He's got full life. So let's say penalty image dot Alfa There does and see that CG flow I was telling you about . That's the property. It's not a double. It's a CG float and penalty imaged Alfa equals dim Alfa. Not too bad. And penalty image to dot Alfa equals dem Alfa and penalty image three Die Alfa equals them . So for all the images, let's just make it a little bit see through. So it looks like it's not currently in effect, and that's looking real good. Okay, that's looking great and what we need to do next. Okay, so we need a timer that goes off, and every three seconds it's going to, um it's gonna call a function. I guess so. Let's think about that for a second. We need to use something called an N s timer. And so I'm gonna go ahead and put it up here. We're gonna just call it timer so far, timer of type N s timer. And, um, we know that we're gonna use it, so I'm gonna go ahead and put an exclamation point on it. This is saying, Hey, we know we're gonna have one of these for sure. So let's go ahead and just implicitly unwrap it right here. And if there was no value in, it would crash. So you got to be very careful with these things. Okay, Whenever you do that, you gotta make sure that you absolutely assign it value. Otherwise you have a crash. So that's great. A function called start timer. Start a timer. And what it should do is it should started the timer and ah, and then repeated every three seconds. And we'll just get that up and running first as a test. So what I'm gonna do is I'm going to say if timer is not equal to Neil, let's go to say timer dot invalidate. Now, remember, um, we're gonna this time is gonna be started at different points in time. So all I'm saying is, hey, if there's an existing timer before we start a new one, let's just stop the existing one. It's just is just a safety measure, okay? And they want to say timer equals N s timer dot scheduled timer with time interval. And we're gonna say this first parameter is the time between calls. So I wanna say 3.0 seconds. Invocation is going to be self. We're gonna call the Actually, I think I did the wrong one here. Sorry. Let's go back. And this time we're not scheduled. I think it's the air. Does the 2nd 1 that we want there in that list there. Now we'll do three seconds. The target is self okay. Similar to our notification. The selector that we want to call is ah, change Game State is a function that we have not created yet. We're going to say basically call this function every time No user info needed repeats is going to be truce every three seconds. It's going to fire this function right here, and it's going to call this function every three seconds, and that function does not exist. So let's go ahead and create it. Change game state okay, And notice how we did not put a colon to hear this time. That is because our function has no parameters, which is okay for right now. So what we can do now is start giving our player penalties ramp ramp. So let's do that now. this is just a test. He's not always gonna have penalties. But right now, we're just gonna force penalties. So penalties is gonna be plus plus So basically, we're saying at a penalty, and then what we'll do is we will say, That's right. Some code here, some ifs And Elson logic will say If penalties equals one, then what we want to do Well, gonna say penalty one dot Image now equals Alfa now equals opaque So it's now fully visible . And what we also want to dio is, um make sure we're just gonna do some clean up, so we're gonna say penalty to die imaged Alfa. We're just gonna make sure the 2nd 1 stays dim, just just to force it just to make sure that the next one in the line if it was if it, um if it already was undimmed, you know that it is now, um, dimmed is there's never gonna say is else if penalties penalties equals to Okay, what do you think we should dio salvage something similar? Penalty two dot image dot alfa equals opaque. We want invisible. And let's just make sure penalty three still stays dim. Okay, there's a safety measure, that's all. And, ah, that's looking good. And let's say if else if penalties okay else of penalties is greater than or equal to three in the case that we ever ADM or Okay, let's go ahead and say Penalty three image dot Alfa equals opaque and we probably need one more else. If none of those are true, it probably means we have no penalties. And so, as another safety measure just to prevent any possible bugs, let's just force these back to dim. So if it's if there's no penalties, obviously they should be dim unless just do that again. So penalty three dot image now equals dim. So all we've done is we said, Hey, if there's a penalty, dim this. Don't dim this. And as you notice your doing dumb stuff, of course I'm just gonna copy this. Paste it, pace it. So if there's a penalty, show this one. If there's to show, make this one dim, etcetera, etcetera, etcetera. And um Okay, here's the cool thing. So now penalties plus Plus, this is looking good. So now what we can do is over here. We can just say if penalties is greater than or equal to Max penalties. There's that variable coming into play. Okay, we can say timer dot in validate. Okay, invalidate the timer. Which means we don't want it to go anymore, because the game is over. In fact, we could probably create a game over function here. Funk game over. And that could go in there so we could say game is over and Ah, timer, Dotan Valley. What else should we do? Well, we should probably play the death animation. We've been waiting to test that. Anyway, I know you've been excited to see it. I've been excited. So let's go ahead to say monster image dot play death animation. Let's see if it works. So to recap every three seconds change Game State's gonna happen, Okay? It's gonna add a penalty will fix us in the future. Okay. And, ah, if penalties is one show, that is to show those images of three shows and miss otherwise don't show any of them. And if penalties is greater than or equal to max penalties and means you lost the game, game over is called. We invalidate the function, and then we call the death animation and When I say invalidate, we invalidate the timer. I mean, so let's go ahead and build and run this here and it's going. It's just right there. Okay, Let's see if it works there. All invisible. Kind of right now, we're waiting for it to go. We're waiting for it to go. And you kno
46. iOS 9 App: My Little Monster Part 4: Mark Price Hear with deaf slopes dot com Welcome back for the fourth and final portion of my little monster and let's go ahead and get started. The code is ready to go and let's just recap where we finished off. So I'm gonna build this. So last time our little creature, If we didn't take care of him every few seconds, he would lose a life. Of course, we never wrote the code to take care of him with the heart or with the food, no affection or or food for this guy, and so he just would die. But we did test that the death did, in fact work. Okay, Every three seconds currently, a new school appears, And on the third skull he will die, and that is pretty much how it works. We also did test that we could drag things around, okay? And they would go back to the spot that they need to be in. And we did also test that when we drag it onto the character that the log said that yes, it worked. We detected when it dropped on him. So what's left to do is basically, whenever you drag the heart or the food onto him. We should reset the timer so he doesn't get a penalty so he can live a little bit longer. So basically, every time that you feed him, he's gonna live a little bit longer. And if you don't feed him within that time, which is currently three seconds, you can change it to whatever you want. He will lose a life. And when he loses three lives, he dies, as you concurrently see, so there's not a whole lot left to do. We're making great progress. I'm gonna go ahead and stop this and let's look at her code here. So we've got an empty item dropped UN character function. So we know that we're gonna need to do something here. Basically, when you drop an item on the character, we need to reset the timer and ah, that makes that makes complete sense, actually. And ah, then what else we need to do? We need to make sure that we switch between the food and the and the heart. Gonna have some code for that. And so, um, yeah, I think I think we've got just a few things left to do. Really. um And so let's go ahead and take care of that here. So, currently, whenever the timers fired, we changed the game state. Okay, so every three seconds, this will be called and we need to do a few things. One is change, the type of need that he has. Either a heart or the food. And then, ah, if he hasn't been taken care of in the past three seconds, then we need to give him a penalty. So we need to write code for that. So let's go ahead and start with that part. So I'm gonna scroll to the top here and create a new variable called Var Monster. Happy equals False will initialize it to false. Basically, what Will Dio is we'll make a check and see if he's happy. Okay, Every time you feed the monster, he becomes happy every time that you don't feed the monster and then we get to the change Game state. Okay, um, he's gonna lose a life, so let's go ahead and finish up the code over here. So first off, when the whenever we're changing the game state. Okay, let's just wrap this into condition here, So if not monster happy. So if the monster is not happy, let's go ahead and run this coat. And of course, this is the code for penalties. Okay, so let's go ahead and just move all of this Command X to cut. Let's move it right here into the if statement here. So if the monsters not happy, let's go ahead and give this guy some penalties. Otherwise, let's go ahead and run some code to give him Ah, random need. And when I say need, I either mean affection or food. So let rant. I'm gonna create a variable, and, uh, we're gonna call something called Arc for random underscored uniform, okay? And not to be confused with a uniform you might wear as a police officer or something else . What it's saying is, let's get a uniform random number, the best random number that we can figure out, and it's kind of a range. So what we're saying is, hey, I want you to give me a rant. A random range, you know, two numbers. Okay. And so it's gonna start at zero and go toe one. So the only two numbers you can get from this okay, are zero or one. Does that make sense? So you're putting a to in there? It's saying, Hey, give me a random. Ranged between two numbers. So zero or one, because it starts at zero. It obviously doesn't include the two. Okay, if you wanted it to include the two, um, you know, you could do something. You could do something like this, but we don't want it to include that. We just wanted to be zero or one. Okay? And what we're gonna do is say, if Rand equals zero. Okay, If it's option eggs, we only have two options. Food or heart. Let's go ahead and just adjust some of the visual settings on in these items. So food image dot Alfa equals dim Alfa. So what we're gonna say is this is the heart. Zero is the heart. So let's go ahead and dim. The food. Food image dot user interaction enabled equals false. We don't want the user to be able to drag it around anymore. Okay, else. Oh, and one more thing. I forgot, actually, let's let's go ahead and make make sure the heart is active so hard. Image dot Alfa equals opaque. Right? We want to be fully visible, and heart image dot user interaction enabled equals true. Then over here, we can just reverse it, right? We can say heart image dot Alfa equals dim because this is the food and heart image that user interaction equals false. And then food image dot Alfa equals opaque and food image dot user interaction. Abled equals true. So make the food active, okay? And what we'll do is okay. I think we're gonna need another variable, actually, looking at this here, um, we need to be able to store what the current item is. So basically, I'll put it up here as a variable groups of our current item and we're gonna say ah equals will just make it equal to zero by default. We're just gonna store the current item. And ah, I need to actually make this, um, make it of type you int 32. It's ah, it's an integer 32 bit integer. It can hold more values. That's all it's saying. Just, uh, holds more values unsigned integer than a standard int, which is fine. We're gonna go ahead and initialize that 20 and let's go back down here to are changed. Game state, and what else do we need to do? So what we're doing is we're saying, if rand equals zero, let's go ahead and make the, um the heart active and otherwise, let's go ahead and make the food the active choice. That's looking great. And so, quote what we'll do is we'll say current item equals rand. So we'll just store off the current item that was selected here, and then we're gonna say monster happy equals true. Okay, so look at this here. So we're saying is if the monster is not happy, let's go into this. So basically, if you haven't fed the monster within three seconds, OK, he's not gonna be happy. And we're gonna give you a penalty. Otherwise, okay, this will never be called. Otherwise, we'll go ahead and we'll switch the We'll switch the food items with the heart item or vice versa, and we'll continue on and forward, um eso hopes and this is supposed to be false. So basically, every time we hit this code block, we reset it to false because you have to make him happy every single time. Does that make sense? Every three seconds. You got a dragon item to make him happy. And, of course, when we get here, um, we're gonna reset it to false, and then you've got to make him happy again. So we're just kind of We're kind of repeating the repeating the code here, So that's looking real good. Ah, the next thing we need to do is handle the item dropped on character. There's a few things we need to do here. So if we drop an item on a character, of course he's gonna be happy again. Right? Makes sense. Means you've been doing your work. Now the next thing we need to dio is ah, we want to give the player a bonus whenever they make him happy. So we need to re start the timer, you know, just said it said it again. Uh, so he doesn't get a penalty right after you've fed him. So let's go ahead and say, uh, start timer right there, and it's right below us here. This function, we're just calling the function. And if we're invalidating, invalidating the existing timer, remember how we set this up before? And maybe you didn't understand it at the time. But now I maybe you dio because we have to keep calling this function and we need to stop the previous timer from firing. And then we just restarted again right here, OK, No big deal. And so we're starting the timer that looks great. And then let's do some Ah, let's do some clean up here. That's a food image dot Alfa equals dim Alfa. So basically, every time that you every time that you drop in item on him, we want we just want to set those items back to default value, you know, kind of give the player a break from having the feed the character, you know, it's so let's disabled both bees, actually. So heart image dot Alfa equals dim Alfa and heart image dot user interaction enabled equals false. Okay, this is looking really good, except for the fact that I'm missing an equals sign. So let's look at our code here. That's what I like to do is kind of map out what's gonna happen in order of events from a user perspective. So when we know we have the code working, when you drop the item, we know that it calls this right here. Okay, so we've now dropped an item. So the monsters now happy we reset the timer. OK, give the player an extra three seconds. Let's dim the heart and the food. Say, Hey, you don't need to drag anything on him. He's happy for at least three seconds. Maybe in a real game, This could be a few minutes, you know, You know how they are. Like if you ever played this like you being class and that dang fricking giga pay would be , like bugging you, like every minute wants food, or it's gonna die. And guys like having having a baby. Why would you buy a toy? That's like having a baby. I have had babies, by the way, at least my wife has, and I know what it's like. And they're pretty needy. In fact, not even know why. Rebuilding this. Why would you build something that's super needy anyway, aside the point. So he's needed. You can change the time if you want, and Okay, so we've disabled those That looks really great. And, um, OK, that sounds cool. And, uh, maybe you're wondering why, um, we're storing the current item because we're not really using anywhere. I'm gonna explain that in a minute, but basically, it's so when you drop the item here, Okay. Ah, it's so we know. Um, so we know what sound effect to play when we put the sounds and what you're gonna put Sounds in? Yeah, we're gonna put sounds in semi cool. So it's so we know which sound effect to play, So OK, so I don't drop that character. That's great. We really start the timer. And if we don't do that, he gets the penalties. This may very well work. Let's let's go ahead and run it and see if those if those few lines of code get us to where we need to be. Okay, here we go. Here we go. All right. So if I drag it on here, they're both dim. That's great. Okay, three seconds goes by. That's great. He's still happy. Feed him again. I don't see any schools yet. That's a good sign, because I'm still feeding him now. Let's not do anything. We'll wait for the one of these the pop up and let's wait another three seconds and see if we get a skull, which we should another three seconds to see if we get a school and we should this feed him now, we should not get a school that thes things should come back to life. Okay, that's looking great. I'm gonna let it come back again and then wait three seconds and he should get a school and die. And I think our code is working. That is pretty damn cool. So I think the last thing we need to do is add some sound effects. Now, this is the fun part. Uh, I love I love doing this. And, ah, I love putting sound effects and as many APs as I can as possible. There's something about it, by the way, that brings a better user experience to people. Not when you overdo it, but even on regular APS. I don't know if you've ever played with the Facebook app, but recently they've added, like some whizzes and pops minor sound when you're doing things. But it kind of adds some life in value to your code. Um and, uh, the generations that air coming up, the millennial generation especially, and you may be part of that eyes especially interested in games and things that are exciting and adventurous. And so it's it's good to bring as much life and excitement to your APS is possible because those are the audiences that are spending money on your app. So keep that in mind. Okay, so let's go ahead and create some sound. We've done this once before. We'll just do it again this time. So we wanna have music playing in the background. We also wanna have some sound effects when he bites when you've given the heart when he dies. And then the sound of the skull when, uh when basically Ah, he's ah, losing life. So I'm gonna go ahead and find my sound files here, pull it up right here. And there we go. So we've got some cave music and then we've got these waves down here these dot wave files , OK? And, ah, I'm gonna go ahead and just drag them over to the project. This like so there they are in the project looking great. So now what we're gonna dio is create some music players. Okay, So far, Music player, A V audio, we're gonna create some players, not all music players. Some of them are gonna play sound effects. Okay? And I believe I'm forgetting to import import a V foundation. Remember, we've got to import the, uh, the code that actually has the audio player so we can use it. And there it is. Looks good. Sue The sound effects now So sounded fix, by the way. Sometimes I like to kind of give things, names, vice versa instead of saying, you know, bite sound effect, which might make more sense in the English language. But think about this. What if we had a bite image, a bite controller? If we've just put sound fixed by all we have to do when we're looking for auto complete is type in S F X, and it's only gonna pull up all of our sound effect so we can quickly grab it. So I like to prefix things, um, by what they are. So they're easily reference Herbal Hvar s F X heart and we're putting the exclamation points at the end of it because we're going to guarantee that there is a value in these in these players here. Okay, Heart death when he dies, Maybe audio player and ah, school right as effects school a B audio player. 1234 That's looking pretty good to me. Uh, and if you remember, we've gotta initialize these, right? Ah, and remember, we also can't guarantee that it's gonna work. Of course, we will guarantee it, but, um, these files, if we load a file from the resource is it may not return anything. Eso we do need toe Do what? A do a block here, remember, Because we have to use the try keyword in front of these players here, otherwise it won't work. So a V odd oops equals a V audio players. So we're just gonna in Stan. She ate it here. And, um, contents of your Ellis. Fine. And so we're going to create a new NSC earl open parentheses, and we're gonna dio ah, file Ural with path I believe is what we want. And this is gonna be N s bundle that main bundle dot path for resource. And that's looking good. And we're gonna call this cave dash music dot M Legos and everything. This is MP three, and that looks good and it's gonna demand an exclamation point right there. And eso if this is confusing at all we're creating Audio player. This is the initial Isar method. It wants a URL in Mosul. We could have blocked this. We could have put this in its own in its own variable before it. But it just made sense to do it here inside as a parameter. Um, and then, ah, so we're creating an issue rural, and it want to file path. So then we call another function, and it's bundle that main bone of that path for resource. So again, I could have done this. I could have said of our your l equals. And then I could actually um Ah, actually, first thing I could do is I could actually say, uh, resource path did the innermost one first, which is this one right here. Okay. So I could do that there, and then I could say of our u r l equals. And then what I could do is I could grab this year and ah, this is for demonstration purposes. So you see it both ways. And so there's the resource path K and the's in this case should be let because we're not going to modify them. Let in let okay and then at the very end here, now we can Ah, now you can say you're ill. So same thing happened here except just more explicit way. Took it from one line of code to three. That's backwards. But just so you can see that that's what you can dio And OK, so we tried that. And, of course, on a try block, we're gonna need a do tribe are also going to catch. And if remember from last time, we're gonna try and catch the error. So this will populate automatically if it exists. Putting this print air dot debug description. Hopefully this little red exclamation point goes away. Very good. Okay, so there we go. We just created our first audio player. Now, I don't want to make three lines of code for all of these, so I'm gonna I'm gonna solidify the other ones into one. So I'm gonna go ahead and basically kind of do the same thing on all of these here. So we're going to say try SFX bite equals a V audio, maybe audio player content of your l and this is going to be NSC Earl Europhile Path and Ennis Bundle that main bundle dot path for resource. And this one's gonna be bite of type wave and put exclamation point there. And now I'm just gonna copy this three other times. You're like, Oh, please, Mark, please don't type it through this. I don't want to watch it. Well, luckily for you, you got video. You can skip stuff. You ever get bored? Just skip stuff. That's what I would do. You get bored. Listen to me to skip. All right, there we go. Obviously, it's the same names. We're gonna change things around. This one's gonna be sound effect. Heart. This is gonna be sound f X Death is going to sound f X skull. Very good. And these ones, of course, will changes Will, too. So this is going to be heart. Maybe these are the names of the files, and they're all named. I think the same thing on that bite does his death. And then this one is skull bite heart death skull wave. Ah, there's ease on this. I caught it wrong kind of wave, man. All right, Uh, so that's good. Cave music isn't MP three. As you could see over here in the left hand, side. So we've got some audio plane. This is really cool. And, ah, if these all work out, let's go ahead and just prepare to play them. So, um music player dot prepare to play And the music player. We can just start right away because this is steam music, so we'll just play after it's ready to play and then sound f X bite up. Prepare to play sound FX Sound effects heart dot Prepare to play sound effects death dot prepare to play and lastly, sound effects. Skoll that prepared to play all right. And, ah, we've got our audio set up very easy. By the way, this is not the only way to play audio. There's nothing wrong with doing it this way. This is absolutely fine. It's nice to have your own audio players so very good. We got some audio going here and let's think about when we want to play the audio. Okay, So whenever we drop an item on the character like a heart or, uh, food, we need to play audio, right? But they need to be different sounds. So what we need to do is say, if current item equals, remember we set a zero or one in these values here. So zero was ah, heart and one was food. So if if it zero, let's play the um despite the sound effect for the heart scientific heart hoops dot play, that's easy enough. Look how simple that was me. Just make sure. Yeah, that looks good. Eso otherwise, if it wasn't the heartless sound effects a bite dot play. Okay, and that looks good. What else? When you play whenever there's a penalty, right. So whenever penalties plus plus is let's go ahead and ah, say s f x skull dot play. Are we missing any other sound effects? The death? That's right. So game over. So on the game over, we're gonna play the death animation, and we're, of course, going play sound effects death dot play That makes complete sense. And ah, what else do we need to dio um, in all the spots? Let's give it a shot. You may not be able to hear the sounds through my recording here, but I will tell you if they're working and they should be working on your end. So let's give it a shot here. The music is definitely playing. It's for ringing in my ears. So are the skulls. So is the heart. That was really loud. There's the heart again. Come on, give me some food. Come on, Come on, Come on, Come on. It's random. It says it's random, but it's no different than flipping 1/4. Right? You could have 20 heads and one tell. There we go. The food is definitely working. Let's see if the death plays correctly and we will call it good. There's the death or the school. At least the death is working in the schools working. Very good. Okay, Okay. Okay. Okay. It's working. I think we're all done. I think we're done here. Um, not too bad. We played some sound effects. Brought some game logic. It's really not that much code. Literally. 151 lines of code. And we've got some pretty cool stuff going on here. Some things you might want to do to improve this is make it like a real giga pet. You know, add some other features. Maybe some more animations go by this art set from the cartoon smart, where I got it and add some extra things to it. Build your own game over menu. Start over. Maybe at some new characters where you can pick which character you want to raise. Okay, um, and out a whole bunch of the characteristics to it. This is all in you. I kid, as you can see right here. No Sprite kit. We did a lot of really cool things, OK? Things that ah are super applicable to real world. So let's recap what we've done in this project. So we've written a custom image of use. As you can see right here a custom image of you using inheritance and classes. We've, ah talked about how to drag things, tapping it, dragging it. What happens when you let go and also detecting when you drop it onto another view detecting if it's within those bounds. We also went ahead and learned about notifications. How toe create notifications like so and then how to listen for them as an observer, as we did right here. And it calls a function So notifications air past throughout your entire application. The classes just need to listen for them super cool stuff. What else did we dio images. So animation images on July image views and we re factored this stuff to be in their own functions in a subclass on you image. Very powerful stuff. We Ah, of course, that auto layout in this story board. And, uh, I'd be outlets dragging things, moving things around we tested. Also, remember how we tested size classes and we made this support landscape mode. That was a lot of fun, Really cool. And nobody else that I know of really goes in depth on to that as good as we did so very important stuff. You learn about timers and s timer how to make a repeating timer. You've learned a little more about audio player, and ah, wow. We've learned some great things here how to make constant here when you want things that are are going to stay the same and you're gonna reuse them. Put em all in capital letters. We've learned a lot of things. Ah, you are well on your way to becoming a professional IOS developer. So pat yourself on the back. This was, ah, big size project. They're only going to get bigger from here. But that's okay. You should be spending lots of time on this. This course isn't meant to be a quick, you know, 10 minute video in and out. I want you to retain these things. And I'm confident if you do these things and spend lots of time on them, you'll be able to get a job. What I do every day in your life so well on the way. Congratulations. I'm done talking. Have a great day or night wherever you may be in signing out here. See you next time.
47. Model View Controller (MVC): Hey, what's up, everyone? Mark Prize here. That slows dot com And today we're gonna talk about a core programming foundational principle and wanted that IOS is built upon and it's called model view controller gonna pull up in my photo shop here because we're gonna be drawing today a little bit. And I'll show you some coat today as well to so model view controller. What is it? You hear the phrase M V c quite often and model view controller is the idea that you have you. You logically separate your application or your product into three tiers and ah, so the model. Okay, the model model. It's a terrible writing. Their who is your data? OK? Data should manage itself. So if you have an application where you're storing a list of people and maybe you can show their images and interactive send messages to those people, well, the data the model might be a class that's a person and might be the person's first name last name on. Maybe it has a function in it called print full name. And so it grabs a full name. And so the idea is that the data is separated and it manages itself versus putting it in a view controller and managing it there. So your models, the data, your view is your view. It's what the user actually see. So the user interface K now, it should actually be just the view. You shouldn't have complex logic here. You shouldn't be doing calculations here. The view should just be displaying user to the data. So that's custom designed classes. So if you want to make a custom class that has, like, rounded corners, things like that, you should handle that all in your view, layer. Okay, You wouldn't do that in your view, controller. And I'll show you a few examples of what not to do and what to do. Model view in the controller. Okay, your controller is like the glue. Okay, The glue, the binding. It's what takes the data and injects it into the view is like the connector. And you're gonna have some more thinking here and regards to just grabbing stuff and putting it where it needs to be. So your controller eyes like the network that pulls things and put them where it needs to be. And so, um, really look at it like this. So you've got You've got your data here, K. So this is your M for model? This is your data. All right. And then down here, you've got your view. That's the view. Okay? It's got your user interface. And then what happens is you have your controller. OK, so the controller is gonna grab data from the model, okay? And then it's gonna pass that data into the view. That's how it works. And your controller also. So let's say the view manipulates data. Let's say it changes the value that's gonna send it back to the controller, and then the controller is there, then going to update the, uh, the model, of course, and grab data back from the model. So it's it's not the heart of, ah principle. Not at all, Actually, it's actually quite simple, but you've got to know how to use because it's very common for developers to make foolish mistakes because they don't know they don't understand amount of you controller. And if you really want to impress an employer or write a good application, you're gonna want to use model view controller in its purest form. So let's go ahead and close at a photo shop here and I'm gonna open up X code. Let me just do this here. X code Beta. We're still in the beta version at this point in time currently, Beta six. And let's create a new X Code project. Single view application is fine. And we're gonna call this M V C test. And I don't need to get repository on this one here, and OK, so this is your standard IOS project that we've done in the past and notice We've got a view controller. So this is our controller, right? This is the controller here. Let's make this a little bit bigger for your for you. This is your controller. And if you go to your main storyboard, Okay. This is your view now you're like, Wait a minute. This is the says view controller. Well, what you have right here is you have a view, right? Okay. And a view controller, Managers of you. So there's the principal was just teaching you. The controller manages the view, grabs data, puts it into it, and if the view manipulated, it sends it back to the controller. And that updates the data So if you right click your view controller Now on the storyboard , we do have its does save you controllers visual representation of your coat. But the key here is the view. Okay, in your story board. Ah, In fact, your whole storyboard could be considered a view management layer. So I right Click the view controller. Notice how every view controller has an associated view that it works with so very cool stuff. So you've got a view here. Now let's talk. So let's talk about what? An instance when you might have used model view controller or how to best use it s oh, right here in your project folder here. Right Click and go to new Group. What I like to do my applications is actually create folders for each of those groups to logically separate them. So I know that I'm putting things where they need to be. So, uh, says view. So I'm doing controller view, right? Click, new group and model. Okay, so first off, let's go ahead and dragged the view controller into the controller field here in the control of folder. Now I don't like Teoh. Even those storyboard is probably categorize as of you. You may not want to move these around because movie goes into the to the view folder just because your projects referencing them. And if you move them, you'll have to reconnect paths and will be a little bit of pain. So I would just leave that there for now. Um, and some other things I like to do that. Some things that don't typically fall into model view controller are things like like resource is, Maybe you've got some custom thoughts you want to drag in there. Stenson's have a resource is folder. Sometimes I also have a util fuller for utilities like third party utilities that do certain things that maybe don't necessarily fall into the model view controller. But overall, they're all gonna fall into your model view controller here. And so you're like, Well, what does that mean exactly? Well, let's talk about it. So Intermodal folder. Let's say in our example of the of the app where you're managing people, maybe it's a social network app. Okay, so I right click my model folder and I do a new file, and this is gonna be a swift file. And again, remember, in most cases, your model should not need to reference you like it should just be your classes. Your data, in most cases, no every case, but in most cases. So we'll call this person. And what we're gonna do is just create a class called person. Okay? Class person and ah, Private bar. First name. Just like we're talking about, right? A private bar. Last name. Okay. And then s o. Those are private variables. Of course, we need the public ones as well to some of our first name of type string. And it's going to return the underscore first name variable. It's just underscores just the name of it. It doesn't mean anything else except for the name. Okay. And then bar last name of type string is gonna return last name. And then let's say that we want a computed property, eso like, bar full name, and it's gonna return a string. And this is just going to return. Ah, well, say first name actually compete in the special string format here, so you should be familiar with that, right? So we could just what we can do is we can say first name and then another one here and called last name just grabbed the variables and we just put a space in between them. So that's just gonna create special string that prints the whole full name. So we got a class here. Here's our data. Um, and so this is where full name should live. OK, so you're like, Well, what does that mean? Well, let's let's try something out here. Let's take off this full name. This this computer property, right? What new programmers will do is they'll go into their controller here. Um, actually, let's make some more context. Let's say we want to print the full name. Okay? We want to print the full name on the screen. Let's give it some complete, completely perfect context here. So we want to print the full name here on the screen. This is our full name label. Okay. I'm gonna pin it. Um, actually, let's just Let's just pin it 66 from the top. Give it a with an height and on the alignment menu here, let's just horizontally in container, so it's on our screen. Okay. I'm gonna open the assistant editor, and I'm gonna make an Ivy Outlet control drag from your label here and this is IBL, and we're just gonna call this full name. Okay, Close the assistant editor. So that's our full name label. It's connected. Let's go back to the view controller. All right, so let's say right here. Let's go to work. Let's go back outside of our view. Control. Let's go to our person, Not Swift. And let's give it an initial Isar. One more thing, you're like he's jumping all over the place. Well, just just follow along. Uh, this this makes it just makes sense more as we go through here. So we got our initial Isar, right? So, um, so in it. And we're going to say, first of type string last of type strings. When you create a new person, it has to have a first name. So self. The first name was first and self. The underscore last name equals last. Okay, so we just created an initial Isar a constructor. And when you create a new person and we want to pass that in OK. And currently we've commented out the full name computed properties. Now go back to view controller, OK? And in your view, did load right here. Let's create a new persons of our person equals and will say person and will pass in the first name. Last sensible. Say, uh, John Hancock. There you go. So we just created a person right now? Well, to make it into a let's what doesn't yell at us. Okay, so we got that full name label, right? So what a new programmer will dio is something like this. They'll say full name dot text equals person. Well, we'll do the special string syntax, right? They'll do this and they'll say a person dot first name. All right, Then we'll do it again with space between person, not last name. And if I run this just to make sure that it's working so under viewed it load, we're creating a new person. And then, uh, we passed in the first name last name, and they were trying to print the full name. Okay, try different full name to the screen. Get rid of this. Didn't. Here it comes loading, loading. We're getting there almost there. And come on their ago. So you see right there, right. We just printed a full name. This is what a new programmer will do just like we did right here. And maybe you're thinking, What's wrong with that? Well, here's the problem. What you just did was you wrote model layer logic in your view, Controller. What you did was you manipulated data to show it in the view. That's very bad. You don't want to manipulate data. You don't want to do anything like that here in the view controller, OK? Because what happens is let's say you have 10 view controllers and you need to get the first name on all 10 of them. You're gonna be doing this 10 different times. Do you think you might run into a problem? You might have an accident, do something wrong or another programmer might. Yeah, it's very possible. So, you know, you've introduced bugs into your code. Maybe someone did maybe so almost typing so fast. And they said, first name, first name, right? So all of a sudden, in 10 different places, you've written code, and it's not testable, and you have your air prone. So what's better is to do what we had before I go back to your person class here, okay. And uncommon. This here. So now we've got a computer property called full name. It's manipulating data. That's where it should live in your person class in your model. And then over here, all you have to dio instead of doing all that, you just say person, not full name. And then it's going to give you the exact same result. Fact. If I build and run, it's going to give us the exact same result. But the point is, we've extracted the model, the data manipulation outside of the controller. So I just showed you an example on its working right there of what? Not to dio Okay with what not to do In your view. Controllers. You do not want to manipulate data. Here's another example of what not to do, and then I'll show you the right way. So let's say in here we have a, um, let's say we have an image, Okay? It's been an image here, and, uh, and what? Something completely random that we can grab from the Internet Here, Let's see something completely random. Let's say, uh, Bobby's world, because they were watching that show. Howie Mandel Pretty cool stuff. All right, so let's say we want to show Bobby's world image here. I'm just gonna take this from the Internet, drag it onto my desktop. OK, let's change the name called. Uh, it's a gift I don't want to give. Hold on. Hold on Here, let's get, um, Let's do this guy here. There we go. PNG, Bobby. I find that there's issues when you sometimes when using gifts, gifts, however you pronounce it with IOS you you don't want. It's not a good file type anyway. Slow resolutions, nothing Great. Okay, so we got Bobby. Let's go ahead and throw him in our Assets folder here, and, uh, he's looking happy. He's not gonna be happy because we're gonna do this the wrong way first. Then he'll be happy. So let's change it to Bobby. The image here that lets me select it. Let's do aspect fit. There we go, and I'm gonna go ahead and give it a within the height. And it was pennant from 93 from the top label to the nearest neighbor, and then we'll go ahead and horizontal in a container on the alignment menu here. So now we got Bobby right, and here's what we want to do. I'm gonna run it here. But what we want to do is we want around the corners of this view, right? Because maybe well, I think square images anyway, Little kind of hard. They're not very appealing to a user. They're not the greatest experience we want around the corners A little bit. Um And so what? A new programmer. Well, dio is something like this. They will take an I B outlet. Okay? And now and they get all they're doing is rounding the corners. They're not even manipulating. Don't even change the image that is manipulating the corners of the view. So what a new program will do something like this. They'll make an image, You'll to say, Bobby image. I'll close the assistant editor here and go back to the view controller and in view, did load. A new programmer will say, Oh, bobby, image dot Uh, lair dot corner radius equals 5.0 and we don't want the image to go outside of those corners. Let's say, uh, Bobby image dot clip to balance equals true. We want to cut off the corners of the image so doesn't go past the radius there. So I'm gonna run it here now, And, uh, we should see a very nice looking around ID image at some point in time. Okay. And, uh oops. Hold on here. Like this guy sucks. It's not. It's not even working. Well, here's the problem. So, um, this is all working here, but in our main story board here, we did aspect fit so we can't see the corners of the view. So let's actually changes the aspect. Feel for now just for fun and rerun it here. So just so just go to the edges of you. I'm just trying to demonstrate that we can around the corners. So there you go. You see the corners around, right? So So the new programmer will do it right here in the view controller. But this is bad. The reason why it's not reusable. It's not testable. The more code you have to write in different places. Let's say we want to put this image in other places like we're going to rewrite code. This is bad. Just like the other thing we did was bets. What we want to do is get rid of this Command X to cut it. We don't even need the Ivy outlet. I don't even need that and said What we want to Dio is in our view folder here. He's got a new file and do a cocoa class clique source in Iowa split cocoa class and let's go ahead and change the subclass here or the the parent class to you. I image view and class hoops. Um, class is going to be We'll just call it rounded image view. Okay? And what Will Dio is in fact, actually, what I like to do is if I know I'm gonna have lot surrounded images, I might just call this base image or something like that. But right for now, it's called Rounded around image view. All right, And, uh was created here. And then what will dio So now that here's the class, right, the custom class, what Will Dio is in awake from NIB? We'll call this function and we'll go ahead instead of saying Bobby will just say self okay , meaning, referring to itself because it's an image view. We'll just put the code in awake from nib or zib. However you want to pronounce it and go back to your main storyboard and this time changed the image class in the identity Inspector. Change it, Teoh rounded image view. Now we should see no change on the screen. It should still be rounded and work out of the box. 01 thing we have to do I just gonna teach you something really powerful. You know, it's how we just got a crash. Remember how in our view, controller, I deleted the Ivy outlet right here. Okay. One thing that is probably still happening. It's sometimes Exco does it, sometimes it doesn't. But if it's still holding a reference to it in our storyboard. So if you right click your view controller, see how there's a little thing here say, Hey, where's my bl it? You've got rid of it. This happens sometimes not all the time. Uh And so if you get that crash, okay, just click out of that and that crash will go away. And here we go running again. And there it is. It's rounded. So what is the lesson we learned here? Okay, is that you don't want to manipulate the data from here, but you also don't want to manipulate the views from your view controller view controller should only be doing things like this, grabbing your I be outlets and putting data into them. Or if, like, let's say, let's say that, um, we have a, uh let's let's show the example of a view controller. Let's say that we want to have a text field. So a text field here and what this text field is gonna dio is it's going Teoh. It's stupid, but we're gonna give it a new Ah, a new first name. The person doesn't like the name. They're gonna change it. So I'm putting on a U I text field. I'm gonna pin it with a width and a height. That's fine. And let's pin it 31 from the label up there and let's go ahead and align it in the middle horizontally of the container. Okay, I'm going. Teoh, make a, uh um, I open the assistant editor. I'm gonna make a ibl it for this. Um, come on, controlled wreck. There we go. Let's call this, uh, rename filled. And also what I want is a button called Put a Button on here called Rename. So it actually starts the action. So let's rename and let's go ahead and give this guy with and a height. Put it one of six from the top. And let's align this in the center here and over here on the right hand side, let's control drag and do an I b action. Okay, We're just gonna call this rename pressed close the assistant editor here. And so basically, what's gonna happen is I'll put a placeholder here placeholder text, enter a new first name. What's gonna happen here is a user from the view wants to change the first name of a person . Okay? And then we want to update it through the controller onto the model. Okay, So what we're gonna dio is we're gonna go over here to our view controller, OK? And, uh, let's see Really impressed. Oh, give me an I B outlet instead of ah, instead of an I b action here. Hold on. Let's let's fix that. Here. You guys were like I I noticed that. What are you thinking? Sorry. Wasting my time. Ah, it's all good stuff. Alright, let's try this again. Control drag. Change it to an action. There we go. Let's call this, but in press just for analysis closes this netter. Let's make sure we don't have any broken Alex, we dio let's click that. Get rid of it. And you, Controller. Okay, So button Press is gonna grab the text out of the rename field and it's gonna rename the person, right? That's that's all that needs to happen. So first we need to do is go into our person here and we need to create Corey a center for the first names instead of return. First name bring to say get and it's gonna return first name, and then we're also gonna have a set, okay? And then what we can do is we can say if new value is not equal to this. OK, if it's not equal to empty and excellence, Listen, Neil first And if new value is not equal to empty So Onley set the first name with the new first name if it's valid. Okay. Um and so it will dio is Well, doesn't like what I did here. It's not equal, Teoh. We're gonna say first name equals Get off, get off! First name equals new value. Okay. Oh, and the reason why we have a problem here is because it's guaranteeing a string. But we're not guaranteeing that right now. Some putting an exclamation point there saying Hey, it could be it could be Neil. It could be optional. Um, and so what we're doing this in? Hey, if it's Neil, or if it's empty, don't set it, okay? Don't set it at all. Um, actually, we don't even need that. We could just because if we leave this here is a string without the optional. It means it forces the user to not have Teoh to not have to do this Check here. So all we gotta do is in the set. Value is just said it First name equals new value. Okay, here we go. So we just made a center in our in our data here, and all we have to do now is in our view, controller, OK? All we have to do is say, uh if let renamed field dot text, let's actually put t x t equals. Let's grab the tax out of it. And if it exists, what we're gonna dio is gonna change this person's name. So what we need to do is move the person. Let's let's go ahead and move the person up at global object up here. Okay, so let's make it a global variable Global constant. And then what Will dio is? Well say person dot first name okay equals txt. All right. And then what we can dio is we can print the full name to the screen Now. Full name dot text equals person dot full name. We'll reprint it to the screen. Okay, let's go ahead and give this a shot. We're gonna explain it a little more, and then we're about done here. Just a few examples of how model view controller really applies in Iowa's development instead of someone just saying this is how you do model view controller. This is really how you use model view. Controller makes explaining real world practice here. So, John Hancock, um and let's, um let's change the name to Stephen Hancock. I click rename. Okay, So what happened was we grab the button was pressed. Okay, so we grabbed the date the data out of the text field, and we update the person's first name, okay? And, uh, and then we reprinted it to the screen. So what happened was we used the model, So person that first name. We changed the name on it. And that's okay. Doing it from here from the controller. Because that's what the comptroller does. Remember It talked to the data and sends new data to it. So our model up here, it has a getter on a center. Okay to handle that. Notice how we didn't do anything like this in our controller. We didn't We didn't really say, um uh, you know, we didn't do any like formatting of text, I guess, is what I'm saying. We didn't, like, capitalize it. We didn't We didn't make sure that it has certain characters. It doesn't that should be handled in the model. Or all we did really was saying, Hey, um, let's take this text that you just gave us and let's update it on the model layer. Okay? And so that's it. That's a model view controller. Okay, What we've done is we've extracted our model to the model air. We have a computer property here to do operations on that data. Don't do that from the controller. Do not do this from the controller. Sending with viewed logic. Don't modify your view. Like how it looks and how it appears to the user. Anything that appears to the user that needs to be customized should be in custom view classes in the view layer. Okay, Um, just like we did here in awake from NIB in this image view subclass on the controller. Just use it works with the IBL. It's an I V actions to pass data back and forth. So anyway, the rule Here's the law. If you want to customize your views, don't do it. Interview, Controller dude and custom view classes. If you want a customizer mess around with your data or format it, Okay, you should do that inside your model air. OK, What you don't want to do is anything like this. You don't want to say class some person. You don't want to put this here in your view, controller and and and do all kinds of nasty stuff. I see lots of Java programmers doing stuff like this and maybe that's okay over there, but IOS development No, no, no, no, no. Okay. Model air lives in the model. All your classes go here. All your views, which are, is what you display to the actually user. What's on the screen goes here, and the binding that finds from the view to the model happened here in the view controller , that is model view controller. Um and you've just made Bobby really happy because now you're being a good, happy programmer. And if you program this way, I promise you people are gonna be impressed if you code the way the other way. I just showed you where we're doing stuff here. You're veteran employer who's looking at you in a job interview. There would be like, This guy's new. He's putting all this code in the view controller, and every other course out there teaches you to do it that way. I'm teaching you to do it the right way. So do it the right way. Get a job, some awesome maps. That's it. Model view controller MBC. You've got it down. Let's press on and move forward
48. UIViewController: Hey, everyone, Mark Price Here death slopes dot com Today we are going to talk about you. I blew controller, and so I'm gonna go ahead and pull up in a new project by going to file new project and we pull it on the screen. Here. There it is. File new project right there. Okay. And let's talk about view controllers. Single view application is fine. View controller example Now you've been using them already clicking next but on the desktop . Every application we built so far, in fact, has used a view controller. But what is it? Well, it is a class. Okay, in this case, this name of this we just called it view controller. This could be named anything, but it inherits from what is called a U I. View controller. This is a class provided by apple, and what it does is it manages of you. So in the model view controller, the M V C pattern your model has its own area of life. Your view are the actual views themselves. Remember how we subclass views, like creating custom, uh, images, whatever, maybe with their own outlets and own code. So we subclass view so views could operate in and of themselves. But have you controller is what takes and glues the data to the actual views. It's kind of the thinker it does. All the different operations is pulling things around, putting them where they need to be, and so of you. Controller is kind of the core foundation of of managing views. You can't You can't put views on the screen without some type of view controller. OK, let's just take a look at it. Go ahead and hold down command on the keyboard and click this guy here and it's gonna go open toe apples, apples code here. So what? The public class, Um and uh, inherits from you. I respond. Er has some other protocols that it abides by. And so it's a class that they built, and you can look at all the functions and things that it provides. It does a lot. We're not gonna go into here, but just know that this is a great way for you to see what it can do. OK, it looks like they have an extension, ADM or features and functionality to it. And it handles everything from rotations. Thio of use. Ah, a whole bunch of stuff. I'm gonna go ahead and get rid of this. Did receive memory warning. And so they're not too complex. Soas faras. You need to know for a using them. Just know that every every view controller has a view property. So if I say self that view, it's gonna be right here. Notice how there's a view. Okay, Uh, it's expecting it. You mean in your codes, expecting it to be there. And so, uh, let's just Let's do an example here. First, let's go ahead and run this program, okay? And it's gonna load the app here on President command three to make it a little bit smaller . There we go, and it's gonna load and have a white background. Okay, so what if I say self view, okay? Actually need itself. I could just save you dot background color. Okay. And I can say equals u y color will say green color. Okay, I'm going to run it here. So I just want to show you that the view controller has a property cold view. And there it is. It's already connected for you, right? When you build it right When you build a nap. So all you need to know is a view controller manages a bunch of things for you. Ah, view is one of them and probably the most important thing. And they are logical segments of code in your application. So in most cases, different screens or for every screen that you have in your app, it's gonna have its very own view controller. OK, so not that big of a deal. You've been using them already. Let's go ahead and look at how they work together. Okay, So if I go to the main story board here, you know, I could double click. And you know, there's nothing else here. This little era here represents that this is the starting view controller. I can have multiple view controllers. You know that these could all be their own views. And you know, each one I'm just control dragging. Each one could connected each one. I'm just clicking show. So in some way or form were saying Hey, this goes to this one. This one goes to this one. This one goes to this one or this one could go here is well too eso lots of different things you could dio And, uh So that's how you move around and view controllers. It's really simple principle, Teoh, Understand? It's just a bunch of code. Just know that I'm viewed it Load. Okay, that's when, uh, all the views loaded. So it's called when all the views have appeared on the screen. There's also another one that you can override called view will appear. This is before the views have loaded right before they're about to appear. And you're gonna want to make sure you call super on all these to make sure that I'm just passing in. What, coming up here on passing in this into here. So basically, I'm calling the parent classes implementation of it just so nothing's broken. Okay, so it does what it needs to do because we're overriding it. We're taking control over and so fuel appear. So this is called right before views appear on screen. And, uh, this actually is called every time. So what I mean is, and let's say I create my view here. This view controller loads and then we go to another view, and then we go back. Well, this is gonna be called again every time I'm about to visually appear. What's interesting is viewed Load on Lee called once when first loaded in memory do so Very common mistake to make us for programmers to going here. And every time did this view appears on the screen, they write code here, you know, So they want to refresh, You know, if they want to refresh, you know, a table or something, They do it right there. Well, that's only ever gonna get called, probably once. And that's when the loads memory so view will up here. It's probably where you want to do it every time it actually appears back on the screen. You know, you could refresh your table much better place to put it. So, um, if you will appear is ah, um something that you'll use frequently view did lay out sub use okay. Called to notify the view controller that its view has just laid out its sub use. Um, sometimes when you're changing the visual appearance of the screen that it may not update. And so if it doesn't, this is a great place to put code eso put code that modifies view layout. Okay, um, if view will appear doesn't work. OK, uh, looking at the thing here says call to notify the view controller that its viewers just laid out to sub use when the balance change for a view controller view the view of just the positions of its sub use and then the system calls this method. However, this method being called does not indicate that the individual layouts of the views sub use have been adjusted. So, um, anyway, you can read the documentation here whenever there's ah visual change, it's going to call this method so another another thing you can call to to be functional here, Um, so those are some things that you're gonna use a lot. Of course, you did see at the beginning every single one, the did receive memory warning. So if there's if you're getting your memory warning, you can unload something, strengthen things off, make a better experience for the user. Um and so that's a view controller. If you want to create your own, OK, we've done well. Have we done this? I'm not sure we done this or not. But you guys right, click this folder and go to a new file and go to source and cocoa touch class. Okay. And, uh, we're gonna call this, uh, 2nd 2nd VC VC for view controller. And make sure it inherits from you. I view controller and Swift is fine. Click next. And okay, now we have a 2nd 1 Got some boilerplate code here. And so if we go to remain so sin another view controller, that's all. If we go to our main dot storyboard now, I can click this guy right here. Okay? I'm clicked on it. I can click this little square box the top, right. And I could not change its class to second VC. So now what we're saying is this is my coat. This is my view controller, and it's connected to your coat over here. So whatever I do here is gonna happen over there. So, um, if we just for fun, if we take this, let's take the Segway out here. Delete that, and let's drag our entry point arrow over here to our second you controller. It's just telling our app that this is the starting view controller, even though it says second view controller. Okay, let's go to our code now. Um, so for demonstration purposes. This is the code for the first few controller. Remember, how would change it to green? Let's go and do that again. So viewed background color equals you eye color dot green color. So let's change that background to green just to show that it's not gonna appear. And on the second view controller, let's change it to read so well, say viewed up background color equals you eye color dot red color. And when we run this, we should see a Red View controller on the screen or view on the screen. Because we designated our second view controller as the controller for our application, and we also specified there it is. We also specify this is really important. OK, that this is the class right here. Second VC. Imagine if we were to take this off. Ooh, let's just change it back to you. I view controller. Let's just take that off, put it back to its default class and just run the program and see what happens. Okay, notice Nothing's happening, Okay? It's because our codes not being run. It's just throwing up a random view controller on there. So very important is when you're working with you Controllers, make sure you set the class of the file that you're working on right here. Okay, so that's view controllers in general as a whole, you're going to use them on your project. There's a few different variations of it, like a table view controller, which is, ah, table view that inherits from you. I view controller. In fact, we can do that right here. Let's go to new file and ah, Kobo touch class. This time we're gonna instead do this. It's called us Table V. C and let's go ahead and click you I table view controller and added junk on it did not ask it to do that and create okay. And so what it did was it created me another type of you controllers that this one's you white table view controller provided by Apple and just set you up for a table, gets a whole bunch of default stuff in here for you. And if I command click it. Okay, notice that it actually inherits from the regular. You have you controller. So they're just taking all this stuff from it and adding some more things to it, and by the way. I don't typically use your table view controller. I typically actually create a regular view controller and do it This right here. This exact thing you see right here Well, maybe not the scroll of you delegate, But this table view data source and this table view delegate, I usually implement those myself. So I know exactly what's going on. Table view controller. He may or may not want some of the things that offers you. I'm always more minimalistic wanting things that I only want. So, uh, there you have it. Uh, and, uh, that's your view controllers. We're gonna talk about how to swap between them in another video, But just know that there's functions underneath it and what I would encourage you to dio is click the View controller and over here on the right hand side, just go to a class reference, okay? And you can look at all the different details of what it provides, how it works like this. It's got a whole bunch of stuff handling view rotations. How toe, um, implementing a container view controller, configuring a controller using nip files which were actually gonna talk about that as well to and in the next video, and just all the different properties and things you can do with it. So, uh, again, you should be spending lots of time in this documentation learning as much as possible and very cool stuff. That's a wrap for view. Controllers. I just want to give you inside it. It's more than just something that you're using. There's extra some purpose behind it. And just remember, you can't really have any view on the screen and do anything without a control control. This is it. I'm done our price, fear of death. So stop, Come see you soon.
49. Size Classes Part (Different Layouts for Screen Sizes): Yo, What's up, everyone? Mark Crazier Deb slopes dot com And today we're going to dog about size glasses, So go ahead and open up a new X Code project. Way will write a new one, and a single view application is fine. Let's call this sizing it up. Call it whatever you want. Make sure that Universal selected. So let's talk about design philosophy as faras IOS is concerned. Okay, if what Apple wants and recommends is that if you're not going to put real effort or brainpower into, let's say, supporting iPad, in addition to iPhone, would rather do not support it and support it, Um, in a way that's less than the best experience ever. So what a lot of companies will do is that we want an iPad, and so they just release a barely working version, and it's OK, but it's functional and really what they What they recommend is using size classes to make your application look beautiful on all screen sizes. Now, with the advent of staff views, supporting multiple screen sizes is even easier because stack views resize and they're fantastic, just absolutely fantastic. But let's go out and talk about basic sighs classing. So let's go to our main story board. Okay? And, ah, for this project, we're gonna use one image here. Actually, let's go to the assets folder first. And I'm going Teoh drag in Mr Dwayne the Rock Johnson himself. Oh, yeah. Okay. And let's go back to the storyboard. What we're gonna do is let's pretend we're building a very simple app, like a biography app about individual, which just so happens to be the rock. And we wanted to look good on all screen sizes. Okay, so I'm making this full screen here. I'm gonna turn off the left hand side to just have more screen space here. What we're gonna dio is we're going to open the preview here, okay? And changes from automatic to preview. So I click the assistant editor and then changed to preview here. Okay. And so here's our screen. That's what we want to do is we want this to look good on iPhones in portrait landscape and iPad. Okay, so let's talk about how size classes work. So you are used to doing this grabbing. Let's say you y image of you. Okay. Putting it on here and then setting constraints right here, right? That's what used to doing. And that's fine. And but notice here at the bottom, it says, w any h any that means any with any height. If you click this, notice how it's covering this center section right here. So this is any with any height, basically, these your size classes. Okay, I just changed it on accident. So this is your size classes. And what we're saying is, um we want to pick a mode that are constraints and the storyboard efforts are gonna be applied to. So for instance, all right now, back in the any And that means when I put constraints here, it's gonna be applied to any any. Let's, Let's show you what I mean. So let's change him to aspect. Feel okay? And let's just go ahead and pin him from the top, given within a height. And let's go ahead and line him in the center. Okay, so if I run this, why didn't need to run it? You could see on the right hand side. So here's portrait. Let's go ahead and add him in landscape to another four inch, so there's landscape seal. Same constraints right, 14 from the top and right in the center. Same exact constraints. If I do, I pad it's gonna be the same exact constraints for all of these. Now, of course, the iPads a huge screen. We don't want him in the middle here in this screen cause it's landscape, So things are off, okay? They're not the way that we want them. But currently our constraints are being applied everything. So that's where size classes coming. Now, what you do to activate size classes is changes to a certain mode, and this is very, very important. You pay attention to what? Motor in very, very important. Easy to forget. And I'll show you why. So you know how you through an image here on any? Okay, that means he's gonna be on all screen sizes Now, here's the deal. You've got to make sure that controls that you want all screens need to be put on on any mode like Wait. What do you mean? Okay, think about this. When you're building your story board here, everything that you want to be on all screens. I'm not talking about lay out how it looks, but just that controls that you want on all the screens gotta put here in any any and to show you why. Let's take off the rock. Okay, so we're in any anymore. But let's now change this to compact with regular height. And this is going to be all, actually, snow Children. Let's go to, uh, compact height. This is iPhones. This is all iPhones and landscape OK, all iPhones and landscape notice. When I click that my canvas changes. Now let's drag the image view on okay? And let's go ahead and, uh, do aspect feel Let's change to the rock and let's go ahead and paint him from the top and give him a heightened with and align them in the center. So it's great, right? Why isn't over here on the foreign screen? Will is the one landscape was on the landscape wise. He not on the foreign script. Well, the reason why is you added the view. Okay, While you're in a moat, anything you do while you're in a motive Onley gonna apply to that mode. So it's very important that you put all the things you want on this screen in any any any with any height And then when you want specific constraints, you lay them out because the idea is what if you don't want things visible on iPhone, but you do on iPad, or vice versa. This is how you can do it. You can add things and change things based on whatever mode you're in. So right now he's not in portrait, and that's not that's not what we want. We want him available in all size classes, so we just want to change how things look. I'm gonna delete him, go back to any any. So we're gonna put him back on. So he's available in all screen sizes. Okay, so he's there, and that's fine. So any settings? Here's the rule. This is the rule. Any settings that you want to apply to everything in every mode doing any any. So if you want to change colors, you want to change with high tech, size it on that, do it in any any. Okay, um, some things don't matter that apply across all of them. But some things doing you never Sure, So make sure that you just any changes you want globally borders, colors, whatever you do it in any with any height. Okay, so let's talk about this now. So we want to support course portrait. Excuse me. Portrait phones, portrait landscape. We also want to support IPAD. Okay, we've got three screen sizes here that we want to support. Um, and so let's look at how we could do that. What we want is, uh what was We'll just We'll just do it as we go along here. So let's look at the different options we have. So the single square is compact with compact kite, and that says this is for 3.5 inch for inch and 4.7 inch iPhones in landscape. It tells you exactly what it's gonna apply to so they it's gonna apply to the iPhone. The 3.5 inches iPhone foreign for s four inches, iPhone. Um, you know, iPhone five. And the 4.7 inch is the iPhone six. So OK, so we know exactly what this is gonna apply to phones in those landscapes on Lee. What about this? This is for all compact heights and all the outs. So all iPhones in landscape, remember? You're thinking. Is that all of them? Well, look at this. 5.5 inch iPhones in landscape The iPhone six plus is. Actually, it's its own thing It can have. Ah, I don't know if you know this, but the iPhone six plus can have split view layouts. It kind of can work like an iPad because it's so big. So it's a bigger phone. And so it's handled differently. So it has its own size class. Okay, so is all compact height layouts. Um, this is iPhones and landscape. This is any any? Of course. Let's go all the way down This way. This is all iPhones in portrait. Okay, this is all regular height layouts, iPhones and portrait and ipads and portrait or landscape. This is s So this is ah, all regular height layout. So layouts that have a regular type height, um and this is exactly right here. IPhones in portrait ipads in portrait or landscape. And then this is for ipads in portrait or landscape. So this is this right? Here is ipads on Lee. OK, ipads only is right there, and it doesn't really separate ipads with portrait or landscape. The reason being is because there's so much scream space that it really doesn't matter in most cases, but you can directly you can directly apply things to landscape mode. It's just we think about it when you've got and advocacy hate when you've got a screen that's so big, you know you can put stuff anywhere. Really? So this is ipads in portrait or landscape? Um, again, Um, that's interesting. There's not really. It's not really much different. Here is difference here, is there? This is just regular within. This is regular with and regular height. Um, okay, and then that's the iPhone six plus. So what we want to do is get this looking great and all the layout, So first thing we're gonna do is we're going to support. We want to support iPhones and portrait and iPads in Portrait. So we're gonna do those together. So all regular height layouts, iPhones and portrait and ipads and portrait or landscape. OK, so here's something very important. Remember, once you support a size class, you gotta make sure you support all the size classes. Otherwise, it's it's not gonna look right, And some of them okay, it doesn't just magically work if you support one, because these settings are only gonna be applied to a specific size class. Okay, so what we want is in portrait mode. Let's say we want this image to go from the margins. Okay? Like so let's make it a little bit bigger. And, uh, that said the image here and let's go ahead and say aspect still. And I probably should have done this in any any mode. Feckless aspect fit. There you go. Um, well, uh, just do aspect aspect. Feel I like it better even if he gets cut off. That's OK. It's artistic. Okay, so let's go and get some constraints here. So we're a from the top zero from the left is your from the right, These in the margins, and let's go ahead and give it a fixed height. Okay, So notice how it's broken and landscape because we haven't set those constraints yet. That's what I'm telling you. Once you turn on constraints, you've got to support all screen sizes. Now, um uh, and some some. Of course, some concerns work. Cross screen sizes just fine. So looks right here, and iPhone four on iPad. It's cool to, you know, it's kind of cut across. That's fine. Uh, let's go ahead. Eso looks good, so let's go ahead and go back to any any. Okay, so I click down there. It's got any any because I want to add a new control and what I want to add is, I want to add a label for Has a description about the rocks? Let's just type in rock. Are Dwayne Johnson biography. We'll just go grab some random texts, OK, I didn't want to get it off. Wikipedia just didn't want to deal with all the links. There we go. Let's go ahead and grab his early life just for fun, because he's cool. And look how amazing he is. You just good looking, buff guy. Just wanna punch someone that face. I want to be like the rock. Okay, let's see here. So we want to label, right? So remember, we're in any any mode. Okay? If you want to add something new doing any any, so it's applicable on all the screen sizes, and what we'll do is we'll just go ahead and the size doesn't matter too much right now, because we're gonna change that ourselves. But I do want to put the Texan here, so let's change the lines on this label here to 15 on the right hand side. And let's go ahead and paced in his his description there. Okay, so a couple things, uh, one is it doesn't matter that is cut off right now because we don't want to set the height or anything like that Right now, we want to do that in the specific size classes. Also, I wanted to show you something else. Whenever you see a plus sign here, that means it's applicable as a size class. That means you can actually set font size. So I was telling you. Okay, you can actually set font sizes, things like that to specific classes. So some of these things will work regardless of what size class you're in. Um, they'll be applied across the board. But some of these things where you see these pluses can have specific values for specific size. Classes were not gonna play around right now you can play around with it on your own. It's really easy. And we've done it a couple times with, uh, stack using in some of the lessons in this course. So no big deal. So play around that it's important that you learn how to play around with things and and get familiar with the results. Are you learn more quickly That way. So we're in any any mode. I've got my label. That's fine. I don't like the color. Let's dio dark gray. And, uh, let's just change this. Want to Helvetica news? Fine. Or let's say, uh, is there, like, a great Just a night, Alec, Maybe tell. There we go. Just for fun. Okay, so we're gonna do now is go back, change out of any any and go back into regular height. Okay, so we know he's where he needs to be, but this is not so what we want to dio is let's move it down right about there. I'm gonna move this over here. I'm gonna move this over here, okay? And we'll just go ahead and pin it from the top and from the left and from the right, and ah, I'm not sure I want to set a high yet. We'll see what happens. Okay, so right here in this mode, it looks great over here. It's OK. We don't have enough content to cover the whole screen, so, you know, What? Maybe I mean, maybe you want to set like, a bigger font in this screen size over here. Maybe not. We're not gonna mess with it, but that might be something you want to consider. Okay, so he looks good here. He looks good to hear. Let's talk about this four inch layout. Here. Let's go to our size class and let's say Ah, for compact height layouts for all iPhones and landscape perfect. Okay, so notice how there's no constraints. If I click the ruler, there's nothing there. Okay? Right. Nothing. So what I want to dio is set some constraints. What we want to look like in Alaska. Well, maybe in the landscape, we want the image over here. We wanted more of a square. So let's, uh, maybe do something like this. Okay? And let's go ahead and pin him again. We're in any in any within compact height pending from zero from the left, zero from the top. Let's give him a within a height. OK, notice it instantly changed over here. Pretty cool. And in the text, Let's move it here. Let's move this to the edge and let's make a goal that Let's make it go all the way to the bottom. Like so and yeah, that looks good to me. So let's go ahead and pin this to the top and pin it to the left. 19 from the left, zero from the right. Unless his pennant 20 from the bottom. Here. That way, it just feels the whole area and look at that. So in portrait mode, looks good in landscape mode. Looks good in here. It looks OK. We don't have enough content. Uh, this is where in this mode, you might want to add a few more things to it. Make it look cooler. Um, So OK, so it's looking good in multiple screen sizes. This is how you do it. This is how you support multiple devices? Um, so let's go ahead and just run it here. I'm going to change it. Teoh iPhone, five c How that looks. Okay, so there it is. This is Portrait. That's what looks like a landscape. Hey, look at that. It did its thing. Now it's not perfect, and it's never, ever gonna be perfect. See how it kind of we lost some edges here, here and here yet to play around. It's never perfect. It's pretty close, though. Most of time. So it looks good. It looks good in portrait. Looks good landscape. And you saw what happened. We first ran it, right? It just didn't work. I mean, it did this the same constraints and all of them so clearly are different. Constraints are working in different views. So there's nothing more to it than that. All your controls and things like that just put constraints on them in the different size classes that you you want to support, that you want to support where you want to move him, things like that. You could do anything height with anything. You can change it all around. Just remember that if you add a control in a certain mode, it's only gonna be in that mode. So if you want to add controls that are on every size class, you've got to do it in the any with in any height. So any questions? Well, since there's no questions, we're gonna go ahead and call this video done, start using size classes and start making a beautiful applications. Um, I will say that I worked with professional developers all the time and most developers I work with, they don't know how to do this, right? Like they're really like I know how to code. I could do all kinds of crazy algorithms and things like that, but they don't know how to support multiple devices, so they start doing really dumb things, Like having multiple, uh, zip files for multiple screen layouts. You don't need to ever do that. What a pain. Twice the code. Twice the work sometimes. Then you supported all they tell their boss. Oh, we can't support iPad. It's twice as much work. Well, was it really twice as much work? Probably not. You just don't know what you're doing. So you know something very valuable. Start using it right away. And if you start working on a job or project that doesn't have these, start implementing them. It's a very good best practice recommended by Apple. You are now ahead of the game, so congratulations
50. UITabBarController: Hey, everyone, Mark Price here, Deb soaps dot com. And today we're gonna talk about have bars, You go over to the right hand side for the bottom. Where do you store your ex code and clip your ex code or Exco? Beta slowed it up We're gonna do is create a new project. And so far, most of things we've been doing have been single the applications. But now notice you've been wanting to click on this, and now you have. You've seen it there. Some of you been really wanting to click this. Me too. But we're not going to tab application, okay? And this is called this tab test. This is really super super simple. Okay, just create it. Put it wherever. So this is a tabbed application. That's it. It's no big deal. So go to your main storyboard. Okay? All right. So I notice you've got a tab. Our controller here and has the first few in a second. You know, these air view controllers. Okay, so all of have bar does all it does is managed different view controllers. Now, in most cases, you're not gonna have more than five, OK? You're not gonna have more than five tabs on a tab are Okay, Um, it's just not good practice in any way. Eso use it when it makes sense. Many applications still use this like like the apple app store. Uh, you know, Tab are things like that. So good user experience is no more than five. OK, so this is a tab or it's not much to it. In fact, we can even build and run this right now. Let's go to our first view here and just change the view color. Let's change it. I'm clicking this button right here. This is change it to blue and we'll change this one, too. Read. Let's run it. There we go. And so there it is. So the first few controller is loaded right here and the red ones the second view controller. And if I click the tabs, it just switches back and forth. I mean, that's literally it. Like give us code for it to first. Few control our second view controller. That's all it's done. It's just it's just given us multiple views in context to work with Um, so now with that being said, you know the difference between using this may be a navigation controller is we're not popping one view onto the other after the other after the other. Each section in the tab, you controller manages its own state. So, you know, if I have this red one here and I have three view controllers under it, those are all in that state. And if I have three view controls in the blue and loser all under that state and it's going to try and keep these in memory as best that it can, So when you switch back and forth has very quick loading. But of course, if you start using too much memory and one of the one of the paths here, one of the buttons, the interview controller, it will dump whatever the other one is. And it'll reloaded when you go back in. So, uh, not much. Do it again. What if you want to add 1/3 1 even his drag a view controller here again, you'd have to create the code for this. Remember? Just like there's a first control of second. Actually, you have to do the same thing here like we've done in the past and what you could do is just control drag from your tab. Our controller over here. And we want to do ah, under relationship Segway. You controllers and notice how it now gave us a You know, it gave us a new button down here. This item right here. See, um, there's our tab. Are so no big deal, right? No big deal. You've got your, uh you've got your tabs there, and, uh, you can change the buttons on these if you want. Um, if you had a selected image here, we've only got the default ones in the app that it gave us. But you can create your own your own images, and you could just load him in there. No big deal, just like we've done it. Just drag him over to the assets folder and put him over here in the tab. Are, um I'm trying to make this more exciting. There's not much. Do it. It's that simple. That's how easy it issue. Just you've got a tab are now. Um, so you give it a title. Um, call this, You know, you know, profile, screen, whatever you want changes right there. Um, OK, so and again, each each Each tab can have its own view. Control. Or so you know, I could have this 1st 1 We can show it here. Let's say this one is Yellow has changed. Let's click it. Change the view to yellow. Okay, so and maybe, uh, actually, let's let's get rid of that Segway. Zoom in here doesn't like that. We're gonna put a button on here so I can just put a button on here right here in the middle. Of course, Blue on blue is ridiculous. Let's change the text toe white or light gray and then just control dragged from the button over there and click show. And so I'm just trying to show you, like any other, um, view controller in the Segway, you can navigate between them. Um, here we go. So click the button. Takes me to the yellow one. Okay. No big deal. It's running again and just show you. Now there's three tabs. Okay? It's all working. That's it. That's it. That's tab bars. You just, uh, just like we've done already. You drag view controllers around, you connect them to the tab, are And you're basically saying, Hey, my application has multiple states not keep in mind, you really should use them for what they're used for. This should be it should be states. Like, if you have a nap where I have a profile section would be a home screen and something else . Tab bar might be a great choice. Okay, um, to make sure the biggest thing we need to figure out is when to use the tab bar. And that all depends on your application. There's plenty of APS out there that use them plenty that don't So that's Tab. Ours, I don't think, gets more complex. So that's it.
51. Storyboard Segues: Yo, what's up, everybody? I am Mark Price of death slopes dot com, and we're gonna talk about Segways today, which are the means whereby you open up new of you controllers onto your screen. And so I'm gonna go to file new project gay right there, and let's go ahead and do a single view application. We're gonna call this Segways cigs seguis, and click next and put on the desktop here. And so something interesting is Segways and story words actually didn't always exist. I think it came out with with IOS five, I believe where x code 51 of the other. And, uh, these do not exist. I'm not sure that I personally am still 100% sold on him. Sometimes I use them. Sometimes they use storyboards. Sometimes I don't. And the next video we're gonna show you how not to use them, and you can make the decision for yourself. But basically, the Segway is how you go from view to view no big deal, and they're pretty simple. So what Apple introduced was this notion of having a storyboard that where you could visually layout where your screens were Now you could never do this before. Before it was all programmatic and you had a bunch of files. And but And there's in this case here, they're like, what? We want people to have a visual way of scene, how their application is laid up so you can put a bunch of you controllers on here. You know, wherever you want, doesn't really matter. And, of course, this is the starting point of the application You can put on whatever one you want to be your starting view controller. So right here, we've got three view controllers, right? Okay. So what we want to Dio is go from this one to this one to this one. And so I want to do is change the colors on these real quick. Just we know which ones are which. And so on this 1st 1 minute, I clicked the view. Okay, See how it's the view selected here and I'm going to the right hand side and change the background color, something nicer. You're like, Oh, that's nicer. Well, on then, the next one which is right here. Or I could just click the view here on this left hand side. Let's change this one to a nice blue. It's a little bit better. And then the 3rd 1 Let's change this view to a nice read. These colors actually looked really nice together. I picked them out myself. Yeah, I know. OK, so there's our three view controllers that each have three views. If you remember, every view controller has a view, and what we want to do is again transition from one to the other. So it's a symbol as doing this, putting a button in this case here, we'll put it right. I had a zoom in. Yeah, double click. It doesn't like let you do that from the outside view. So there's a button, and, uh, this one's going to say Go to blue. Well, right there and then, Okay. All you gotta do is whatever but in or control is taking your from one view controller to the next. It doesn't have to be a button doesn't have to be button, but are just gonna be a button. We're just going to click and drag from the button over here to the view and says Action, Segway. We can show show detail present mortally pop over presentation or custom we're not doing anything custom. Pop over presentation is Ah ah, pop over style. Like you might see in an IPAD app. It doesn't really make sense to do that here. Present motor Lee means pop it up over the screen here. Okay, show, detail and show. Well, I'm not completely sure, actually, On the differences of those Let's see here. Okay, show detail is replaced, so it's going to replace the current screen, and this one's gonna push on top of it. That's the difference. Hahaha! I don't have to know everything by heart to teach you this. I know what you're thinking. He should have known that. Well, Sorry. Okay. And, uh So now we're going to blue And here's our connection A connection here and, uh, see how it doesn't really matter. Uh, let's go this button here. Action view, controller show. You know, it's just the thing that's triggering the action, that's all. That's all It's happening. Let's try and run it, actually that males trying running just just for fun to see what happens, See if it works right out of the box. Is it really that simple? That's the question of the day. Could something be so simple. Come on. There we go. Go to blue. Is it that simple? It's that simple on Web development. Yeah, Not so simple. Lots of other platforms. Not so simple. But basically this button went ahead and triggered a Segway over to the Blue View. Now, I could have also not done it from the button so I could delete this secondary. Here, Notify us if I right click my button. That should be gone. See, the action is gone. Stop this here. I could also trigger it from anything. Even the view controller itself clipped the view. Here. Here we go. Are right here this view controller. See, I I selected the view controller icon right here, or it's selected right here. Click and drag over to the view through the same exact thing. Now you're probably wondering, um, but wait, how do I do that? Because it's not a button now, right? The buttons not gonna do anything. Well, now we have to do it in code. We've created a Segway, so we said, Hey, we want to make a transition. But something has to trigger in this case here it was the button, but right now, we have no way of triggering that Segway from happening. So I opened up the navigator, and I'm gonna click my view controller. Okay? And it's not that hard, Really. All we have to do is, uh, create a way for the Segway to be triggered. In fact, we probably are gonna need to dio some have a button click because you can't do it. Interviewed it load because, uh, it ah, it actually won't work because I believe it's running on a background thread. Eso, um are they a separate thread from from where you need it to be? So let's just go ahead and we'll do some I be actions. Okay, I'd be action funk, and we're gonna call this, um load blue. Okay, We need to send her on here. Going to say, any object. Great. So Okay, so what we're gonna do is we're gonna call that from here. Perform. Go to blue. Okay. Now, remember, before we didn't write any code, okay? It was just coming straight from our button. This time. Let's just go and I will go back to the main story board here. Let's click our view controller here and this time, Let's cook the button, and then I'm dragging over the view controller, and then I'm clicking Load, load blue Right here. Okay, Now, keep in mind. Before this went straight to the Segway, this time for demonstration purposes, I'm having it called us function. So it doesn't have to be a button. It could be anything some type of event. Or if it's a table view or a collection view, you can tap a sale, and you can call it from here. So I just want to show that it doesn't have You can also do it in code. Anywhere you write your perform Segway, it will change screens anywhere in your code. Okay? And we're just using a button because I don't have another good way of testing it out. So here it comes, loading. And it loaded the blue. The button didn't do it itself, but this function was called right here. Okay. And, uh, you know, that's how you define multiple Multiple Segway. So, um, I could put another button on here, Double click to zoom in, and I will call this go to read. And, uh, on this one week unjust. Let's see, here do the exact same thing. Actually, Open up our assistant editor and click this button here. This is the go to read, but and I'm going to drag it over making Ivey action. You know, it's how we do it differently each time. I just want you to know continually that there's not just one way to do it load red, and that looks good. And what did the same thing except this time performed Segway. We're gonna say, Go to read and the center is gonna be Neil. And let's make sure that go to read is set up over nips. Let's, uh, you have you control. Let's get a red guy back over here. And, uh, let's go ahead and where to go? Uh, gonna zoom in, Click the view. There we go. Background red, and then this one, Let's go ahead. And instead of doing the Segway straight from the Biden again, let's do it from the code. I'm gonna drag over to my view controller and click, uh, load are already did that. It started good to go, but I need to do is create a Segway here. So from the view controller, less is controlled drag over here to the red view controller will say the same US to show detail just for fun and on the subway identifier, uh, go to read. And that's looking good. Let's run it running. There's go to read. And now the red loads. No big deal, right? Simple stuff. So what you've learned so far is you you control drag from one view control to know that to make a Segway or from a button or for anything, uh, make some type of Segway transition and then make sure you click the Segway and give it an identifier. Um, so it could make that transition on. That's That's if you want to do it from code. Okay, If you do it straight from a button, you don't have to put that identify her. Okay, so it's gonna do it for you automatically. But if you wanted to trigger it from code, then you wouldn't need to put that, uh, the identifying there. So one more thing I want to cover. And that's how do you pass data between views with with a Segway? How do you How do you get it from one place to another? So let's say, um, we have a label, and we put it over your on blue double click to zoom in, put on the blue, Okay. And, uh, center it here, get make it white. And okay, so there's a label, and what we want to do is pass some data from the yellow loops over to the blue. No big deal. And let me just put some constraints in here real quick, so it just stays where we want it. Get rid within the height. Okay, so, um, we're gonna have to write some more cooks right now. We've been using these view controllers, which don't do anything. Okay, They're just empty view controls. We don't have code attached them. So what we need to do first is go to our Segway here, right click and go to new file. That's Segway folder. Um, and then you want to go to source cocoa touch class and change this if it's not already there. Teoh you I view controller. And let's call this blue view controller, okay? And that looks good to me. That create what we're gonna dio it nicely switched us without my permission. Okay? It's trying to think for me Click your view here, your view. Control your blue and go to the little square box rectangle box at the right hand side. And let's change this to Blue View controller. So all we've done is we said a this view controller right here. It's connected to our code that's over here, because right now it's not. It's connected to an arbitrary view controller that we don't have access to. So now we have access to it. And what we want to dio is that haven't I be outlet? So at I B outlet week var, we're gonna call this main label of type you I label and there's our I be outlet. It's not connected yet, So let's go to our main story board and this label right here. Okay, distract from your view controller over to your label and select main label. It is now connected. And our goal is to get data coming from the Yellow View controller over to the Blue Controller so we can use it. Okay, so we're gonna go back to our blue via controller and let's call this var transfer text. Uh, it's just gonna be a string. An empty string right now. Okay. And what we're gonna dio is ah, Annville. You did load. We're gonna say main label dot text equals transfer text. So when when this view loads grab whatever's in here and put it in here. But you're like, Wait, it's empty. Well, it is right now, but I'm gonna show you how to transfer data over so it can when it's ready to go right at run time. It's good to go. So we're gonna dio is over here, back in our view. Controller, this is our yellow one, right? We're gonna call a function called Prepare for a Segway and this is called before. Okay, this is called before it shows up on the screen. It's called after it's been initialized. Okay? It's in memory living. But before it shows up on the screen, Okay, very, very important. And in fact, what we could we could do, Actually, Teoh is actually put it in a better place over in our blue are Blue View controller. Instead of doing this in view, did load because that's only ever gonna happen once when it's when it's first loaded to memory. What if we want it? Every single time save you will appear almost a super view will appear and pass in the parameter rights right there. So we call the parent class and now any time it even visually appears on the screen, we're gonna do this right here. So let's go to view controller. And what we're gonna dio is Ah, first off, whenever you're working with Segways, if you have more than one, you want to check for what type of segregated. So if Segway identify their equals, go to blue. Remember? That's what we called it. So this is gonna be called right here and a has the identifier. OK, if they were not identifier equals, go to blue and then let's pass the data. And so what we'll do is we're going Teoh, we'll grab the view controller. And so it's called Blue View controller. Right? So what we're gonna do is we're to say, if let um, Blue v c equals segway dot destination view controller, as we're gonna say, it's called Blue View controller. Okay, so what we're doing is if you look here destination view controller, it's just passing you a you I view controller, the generic class now of course, ours inherits from it. Okay, so it will still work, but we got to cast it. Okay? We got to cast it to the type that it is, which is a blue View controller. And then, um, all we need to dio is say, Ah, let's see here. So we've got, um, our center there. There we go. So we just We're just gonna do this. We're going to say blue V c dot Ah, it was a transfer text. That is we're going to say, Hey, we just came from the yellow screen. OK, so what we're doing is we're grabbing this view controller. I've got the equal sign. We're grabbing this view controller right here. The one that we're about to go to its been initialized snow up on the screen yet, and we're going to say, Hey, the transfer text equals Hey, we just came from the yellow screen. Now, let's say that, um, prepare for Segway. It doesn't make sense, actually. Hard code it right here. Okay, this is gonna work. But why would you put it in? Prepare for Segway? That's called whenever a views transferring. We need to actually put it from a better place. So that's where Um, that's where this comes in handy over here. So let's say that you're in your application wherever it's being triggered from. That's actually where you should store the data. Ah, so what you should do is actually over here where it says sender notice how center is any object means you can put any object in there. So let's do that. Let's cut it from there. Let's go over here. Say, uh, var stretch equals that. So it's a string, right? And what would those would just pass it in there as the sender? So what we're saying is, Hey, I need to pass some data in here. So let's perform the Segway and then before it's called, it's in to come over here. Now remember the reason why we can't just shove this string right into the next view from here because we don't have access to it yet, But we do over here and prepare for segment cause it's gonna give it to us now and said, What we should dio is we should say if let well say, Uh um, let's call this the string equals sender as strings or we're doing the same. Hey, we're expecting a string right here, So let's grab it out and put it in here. You want to do the If let, of course, because this may not have anything in it. So if the string is like that, let's pass it in over two. If we get the string out, let's pass it into the next week now, because a blue V c dot transfer text equals the string. All right, so let's take a step back and just think what's happening here? So we triggered it from right here where the data actually is living. This is how you're gonna rebuild your APS. So at this point, we have a string, and we put it in the center Mean this whoever's calling the perform Segway and then before it loads in, prepared to side with before it shows up on the screen. Weaken. Grab that data from the center object. We can actually pass it into the next view controller like so Because the Segway has the destination view controller. So if everything worked as it supposed to when we get to the blue, the blue screen, we should see this. Hey, we just came from the l A screen text. Let's run it and give it a shot. And here it comes. Come on, baby, Don't fail me Now go to blue. Hey, we just came from the yellow screens Cut off a little bit, but do you see what's going on here? So really cool. So, um, just some comments here, So use sender to past data. Okay. And then this is where you do work right before the view loads. Keep in mind. Ah, the next view controller has already been initialized, so it is initialized initialized, but it's not yet visible on the screen. And so we just We just transferred data over to the next screen. You could do that with anything If you got an object. Let's see of a list of items. Ah, shopping list. A shopping cart. Right. And you and you want to click one of your items to show up its details. You can pass over your shopping cart class. Whatever you want. Any object can get passed over. That's the basics of passing data back and forth between Segways. That's the basics of Segways. You just dragon drop. You perform Segways and you prepare Teoh, you prepare for your Segways, but I putting data in them. No big deal. Really Cool. Your main storyboard. You know you can have a bunch of using here. You can do Segways straight from your controls or programmatically. Keep in mind if you do do them from your controls. It is easy to without having any code. It is easy to forget how it's happening. If you had 100 controls on your screen, you may forget where they're coming from, and it may be harder to debug. So just however you wanna build Europe, maybe you want to mix code. Segways or not Idle must be inclined not to. I don't must be inclined to do all of my Segways for my code so I can track exactly where it's happening so I can know how to solve problems. But it's up to you. In the next exciting episode, we are going to talk about building APS without storyboards, which I still buildups about story so on. I do miss. So that's a wrap. Segways, not too hard, and I hope you had fun. This is how you go from one screen to the other and let's get to it
52. App: Building a No-Storyboard App (XIBs): Hey, everyone, Mark Pricier at def slopes dot com. And today we're gonna learn something that most people will never even teach. And it's It's really kind of cool on the reason why I'm teaching. This is because you may come across applications. Let's open up a new project. You may come across applications that are not using storyboards. In fact, a lot of developers, myself included, don't always use storyboards. Yes, interface builder storyboards and Segways know. And, um, there's some advantages and disadvantages. I suppose I'll let you be the judge. I would say one way is not better than the other the Apple way, though it is storyboards. But let's go ahead and create a new X Code project. And let's call this a, uh, single view application that's fine and click next and what we're gonna dio and say No storyboards. And some developers are actually very, very adamant about not using swords very professional developers. In fact, the last big projects I worked on, they didn't have storyboard. So, um, so there we go. Everything else looks great here. Let's create it here. And, uh, let's do a few things. So you notice how our app came with a storyboard right here. Right. You can see it right there. Okay. Um, so we're gonna have some fun, and we are going to press the delete key moved to trash. Okay, Sound good. And, uh, I may just leave the launch screen storyboard there because it loads up on launch. I don't care about it. So and, uh, that's cool. So what we also need to do now is go over to your info dot p list. Okay? And where it says, Ah, main story, word based file name. We're going to click the delete button, and it's now gone. Hmm. Very interesting. Okay. And so that storyboard is gone. Now, we got this view controller, but there's nothing to load it yet. Right? So here's our handy dandy app, delegate. And if we haven't talked about before, the APP delegate is the starting point of your application. This is called before all views are loaded and everything else Okay, this is the very first thing that is loaded. So what we're gonna dio is see this view controller? First off, let's rename it something better. Let's call this, uh, where did the same exact strings we did before, so let's call this yellow V. C. You weren't called this yellow V c And then we'll go to your app, delegate. What we're gonna dio is right here on did finish launching with options at your starting point says override point for customization after application launch. Go ahead and create your app Delegate arm in your yellow V c So far, yellow V c equals yellow V c. And, uh, right now it's just a numpty class. Okay? It's not gonna do anything for us. What we actually need to do is create a zib. So click here, Uh, the user interface. So click your folder here and go to new file and go to user interface. Go ahead and do empty, and we're gonna call this the same thing is our view controller class yellow V C. Okay. And, uh, let's do some clean up on our folder project folder right here. It's to a new group. Was type in, uh, model, even though we won't have any. And then a new group called View for the any of you related stuff in the new folder called Controller for Controllers a lift. So let's drag are yellow VC into the controller. And then what we'll do is in the view folder. We're gonna drag this yellow VC into that and click it and notice how it's it's still your your ex code interface builder here, but just know storyboard. So what we're gonna do is remember how every view controller has a view. I'm showing you bare bones from ground up, so go ahead. And do you have a new eye view and just dragon on the screen? You got a view, right? So from your files owner, we need to make sure the class over here on the right hand side is changed to yellow VC. We're attaching the class to it. And then from your files on her, we need to connect that view so it knows what have you to load. So now we have a view and let's go ahead and change the color of it on the right hand side , over here on the changes to yellow like we did before. So there's our view. No storyboard. We still have the interface builder, but no storyboard. And let's go back to the actual goto this over here now. So what we need to do now is actually load that specific, Zib. That's what we're gonna dio is wearing a tie pin in it. Yeah, there's one right here called initialized with nib name. Okay, we'll just go ahead and say super dot in it with Nick name. And I'm just gonna pass in the parameters that it's giving us. You have to You have to call this dysfunction here. Okay? And bundle is nib bundle or nail. And I'm just calling the super function on the super class on there, and it's giving us some heirs. It's saying needs the override keyword because we're overriding it, and then it wants the coder function, okay. And so what I can do is right here, super dot in it and coder a decoder and requires both of those. Okay. And so there we go. Let's go to our app, delegate. And ah, what we're gonna do is ah, instead of calling that initial initial Isar function that that default and we're gonna actually call with never name, and then you put in the the the name of the nib zib uh, Z with Z. Whatever either or, uh, And it's called yellow V. C. Okay. And the bundle? You can put Neil because if you put Neil there in knows, it's the main bundle. Otherwise, you could do an s Pondel that main bundle. But if you put Neil, it'll grab the main bundle. So So we've got our yellow view controller. It wants us to make it into a let. So this is the entry point, remember? And so now what we can dio is we could say window dot root view controller equals yellow V c. Okay, so we got to set the route view controller of the main window with storyboards. It does all this automatic. You probably like, uh, why are you doing this This in a way, more code? Well, there's some advantages you may see later, but basically, we're We're saying this is the file one a load on entry. And then what we can do is we could say window, make key and visible. Um, and this makes the receiver key window invisible. Basically, this is what what even says it right there. This is the communes. Met that to make the receiver of the main window displays it in front of other windows. So We're basically just in hate Show the APP. The last thing we're gonna need to do is just, uh, actually create the window here. So let's go ahead and say self dot window equals you. I window and it wants a frame. That's when we want to call. So we'll say you I screened up main screen dot bounds. So we're gonna get the actual screen of the phone said, Hey, the window of should be as big as the screen. And, um, there we go, by the way before storyboards, um used to give us boilerplate code to do all the stuff. They took it out there like, Ha ha. You have to use storyboards now. Well, some of us don't. Still So we got a window. We've got a view controller here that we've created were initializing the zib with its name . If you notice here, it's critical that we put these initialize er's in here and we've got the yellow V c dot Zib, we've ripped it out of here. The main starting point. We've ripped out the storyboard from there. We deleted this storyboard. We went to our yellow V C and we changed its class its view controller class to the yellow V C class. And we've also connected the view to the view controller because every view controller needs of you. And then in the app delegate, which is the starting point, we created the window. And, uh, anyway, if, uh, if we did everything correctly, it should, uh, load our application into the screen. And it should be yellow. You should see a bright yellow screen moment of truth running. Ah, there it is. Pretty cool. No storyboards. You're probably not seeing any advantages yet. Um, and maybe there aren't so far, Maybe there aren't. All this is just another way of doing it. So let's go ahead and talk about how to create a new view controller so you can swap between them. So let's just go to new file and ah, source. And we're gonna say a cocoa touch class. And this time we're gonna call this blue V c. And this time, why don't you click also create zip file so it could just do it for us automatically. Okay. And so that's fine. And ah, it's unless you pick me to an iPhone and iPad doesn't really matter, right? now. And so I'm gonna create notice how created a zip file and a coat file? Let's just dragged that zip file into the views folder and Blue VC. Notice how, since it it did a zip for us automatically. If I goto files owner, it's already connected. We don't have to change at that time. So select the View knows that nothing else has changed except the storyboard. There's no Segways and connecting between views, that's all. Everything else is exactly the same. Change it to Blue. Okay, no big deal so far. Second view controller looking good. Got the view. Got the class? Uh, well, when you do, here is the same thing with these initialize er's. You can just go ahead and copy them from your first view and put him over here in the 2nd 1 because the thing is, you have to override this zip name, otherwise it won't load the associated zip file. And, uh, if you implement this, it requires you to implement this, so you might as well just copy and paste over. We don't need this because it's not a storyboard application. Um, so that's gone now. And so there's our Blue View controller. And now the question of the day is, how do we transition from one view to the other? So let's go back to our yellow. Let's put on a button. Okay? And this is moved this right here, okay. And ah, that's looking good. Let's say let's call this. Go to blue. Okay? And it's just a line in the middle with some constraints. See, constraints and everything still work here without the storyboard. Just again. No subways, no extra view controllers linking on the same file. So we created a But in even our assistant editor will still work for us. Here's our code file. We can just click and drag as usual right there. I'd be action. We'll call this load Blue view. Okay, Close. The assistant editor then goto our blue view code and actually saw Yellow View code. And here's our action we just created and this is how you do it. And what you typically dio eyes store reference to the next view in case you ever need to access it. So basically what we can do is we can say of our blue Veasey of type Blue View PC. And there you go. At some point in time, we will create it, and we're gonna do it right here. We're gonna say blue V C equals Well, let's create the object itself and nib name. And let's go ahead and call this blue V C and bundle. You're gonna say Neil like we did before. And then one more thing we need to do as we need to say, Um, well, there's a few different ways of doing it. Um, self dot present view controller. Okay, we can present it. Motile mota. Lee. Okay, so I could basically say, um well, it's right here. Blue v c. The View controller present Animated. True on. Do we want to know when it's done? Yeah, let's just load it. So present view controller was to run the program and see if it works. Okay, No Segways this time. Just couple and Dakota here, and, uh, we're gonna load it and go to blue and it loaded. So just like the Segway. Except we just did self that present view controller instead of the self represent the Segway or whatever the awarding was on that. And so that's that. Now maybe you're wondering how to pass data. And I think this is one of the advantages of not using storyboards is working with data is so much better, because, um, you can pass things in an initialization time. Where is it? On the scoreboard. You have to pass it in after. And so what we can do is in our blue view controller. I can actually create a convenience method, so I could say convenience in it. And let's say we want to pass over. Um, no, we just do it here. Uh, print print means we will call it It's of type string. We want a Passover pass in a string to the screen, so it's ready to go. So what we can do is we can do it convenience in it. And then we could say self dot in it. Oh, come on. We'll just do this. Basically, um, I will call instead of super will say self dotnet. So South means it's gonna call this one right here. We're just gonna call it, and the and the nib name will actually call it, um, the same as before. So we'll say we want to load the, um blue. So we went a little too blue view. See, because this is the blue View controller and the bundle could be Neil. Okay, so what we're doing is we're calling this function here, but it's a convenience method. And so what I can dio is go back to my yellow. And instead of calling that Zib one, I could say blue V. C. And I can actually call print me That I could say, um uh, print this now, okay. And so the differences on the storyboards we had two first add a sender when we were calling the storyboard, and then in the prepare for Segway, Okay, we had to grab it out, parse it and then passed in after his initialization. Whereas in this case, right when we're creating the next view controller or passing in data and so really powerful. So it's definitely an advantage, I think a little bit less code. And you can guarantee when things are gonna happen right at initialization time and not after the fact. Um and so print me. Print this now. So what? This does it again? Initialize is our view controller using this convenience method here convenience function, and ah, Then we call this one right here, the one that we need, because we have to call the initial Isar here, and it's actually kind of nice to being able to create your own. Call it from somewhere else without having to worry about what the name of the view controllers this its own class can handle it, so it's loading it up there. What we'll do is we'll create a label at Ivy Outlet Week Var, and we're going to say, um, print, label of type you I label. It's not connected. So let's go ahead to the Blue V C and we'll put a label on here and there we go. Okay. And let's, uh, let's center this and put some quick constraints on it horizontally and vertically. Give it a width and height so doesn't shrink on us, and then we'll make it white so we can actually see it. And then from your files owner just control drag over your label here over your label here and click print label. It is now connected. This is double check our code here, so that's right on initialization. What we want to do here Now it's say print label dot text or actually, what we can do here is Ah, we need to say we need this. We just wish it store here, actually, so you can save our, uh, print text print text. So this do that and then make it initialized to nothing there. And then right here, we can say print text equals Print me. So right when you're initializing your your code, you can assign a value into print text, and then all you gotta do is ah, over here in view. Did load. Okay, you could just say, um well, the view will appear. You will appear superdawg view will appear animated. And what we'll do is we'll just say print label dot text equals print txt. So, um, it's very common in programming languages. And, uh, hold on here. What am I missing? I forgot the override. Keyword. It's very common in programming languages to do all of your initialization on an initial Isar. And unfortunately, I don't know why the storyboards prevent you from doing that. They make you do it after the fact. So one of the advantages of not using storyboards is you condone whatever data you want in your own classes and directly managing story words have limits, and they have boundaries. When you're doing things from scratch like this, you really have no boundaries. You can do whatever you want without limitations. With that being said, there's also some things that storyboards do for you that you don't necessarily get out of the box doing it this way. So let's see if this all worked again. What we did was we When you when you're clicking the blue button here now, Okay, we're gonna present the view controller using present view controller were passing in data right here instead of the two different functions. We had to do it in before. And then this convenes initialize er grabs that data, stores it and then it calls this, uh, first calls this nip function to load or nib and then on view will appear we just print to the label. And if all is well, we should see that that data we pass from the other view controller on the screen go to blue and print this now and there it is. So this is a simple application without using storyboards. Another advantage is you can see all of your views right here. OK, just directly as files. Okay, rise in a storyboard. Your starboard can get massive. And when I say massive, I mean massive This is that our launch screen storyboard. And so, for an example, just to show you, you know, you could have you know, I've seen this, you know? I've seen them. Where? That's almost 100. Okay, imagine this. Look at all these view controllers. Look at him all. Okay, so that's cool, right? That's really cool. Um, but, uh, imagine trying to navigate what goes where. Oh, my gosh, I am so lost. There's so many ding storyboards here. I mean, there really is a lot of meat and do all these here. All right, there we go. They're gone. Okay. So you could get lost really quick in a storyboard. Also, if you have multiple people working on a project at the exact same time. Okay, um, you can have emerged conflicts because storyboards are all using the similar same xml files . And so you have multiple people working a project you can run into problems eso and they get really cluttered real fast. So another advantage of not using storyboards is you can have all of your views and zip's lined up right here in front of you broken out. Um, but that being said, it's your choice. What you want to dio I've showed you both ways. Um, you may just want to storyboards, especially as you're learning and going forward. And I don't I really don't think there's a big selling difference over one or the other do it makes the most sense. Um, for me, it's about half and half. It just depends on the project. Depends home feeling. And one thing I don't like about storyboards is the fact that I have to go to the Segways and I have to give identifiers, and then I have to go to the code and determine which one it is. And I have to pass the passing data I think, could be better done in storyboards. The fact that I have to do it when I'm calling to prepare the or to bring up the Segway and then I have to do prepare for segregated past data in like I don't like the whole system, how it works personally. So that's it. That's a wrap that storyboards, not storyboards. that's that's not having storyboards in application. Choose what? Your real that's how you do. It is a mark price with deaf slopes dot com, and I'm signing up.
53. Subclassing Views (Custom UIView): Hey, everyone, Mark Pricier depth soaks dot com And today we're gonna do something really fun. We're gonna actually subclass of you and make it a little more exciting. So go ahead and open up your ex code beta or your live version of X coat, whatever day and time this might be. And go ahead and create a file new project or you can do it here is well to create New Exco project. And the reason why we're going to subclass of you is because when you're building iPhone ups 99% of the time, you've got to do custom things for your U Y. Uh, that's what the project calls for. And, uh, you know, maybe other people would be like, Well, this is in the court concept. Well, actually, it is whenever you have to do something over and over again at whatever job you're at, it's a pretty much a core concept. So it's important to know how to subclass things and to make things look nice and pretty. So I'm gonna create tabbed application just so we can have two different views on that so I don't have to drag two different views on the screen and just go ahead and call this custom view, okay? And I'm gonna put it on the desktop here and there we go. Okay, So go ahead and click your main storyboard. So you're probably used Teoh in its simplest form, working with buttons. So if I scroll over here to my first view, a tabbed application starts off with a couple of different views here. View controllers. If I select my first view and let's say I wants a save button. Okay, so I type in button right here. I drag it onto the screen. You're probably used to seeing this year like, Well, it's not that pretty. You know, I could you know, I could screw up clicking the identity inspector here. I could scroll down. I could, you know, change the background to, you know, a color like green or whatever, but you still gotta square button. It's not that exciting. And that's kind of what you're stuck with right now. Maybe unless you change the image on the background. We've done that, too, But what if we could create a class that's reusable? Throw your application. Let's say your designer says I want a rounded, but that's blue. And I want you used to use it throughout the entire application, Will. It kind of sucks to have to go in and modify all the properties and shading and stuff right here. An interface builder. So what we can do is create reusable class. And so what I can do is, uh, you know, I could say I want this to stay safe, right? And Ah, there it is. There's our button. And so let me go ahead and Ah, pennant here. I'm gonna give it a within a height, and we'll pin it one away from the top, and we'll align it right here with the alignment menu letters align horizontally. So we've got this ugly save button, but we wanted to be blue, Okay? And let's just think of what color we want. Just have it on hand. So, um, let's see. I want this blue color right here. Let me just I'm gonna click this to open up the RGB sliders, and then I'm gonna undo that. Okay, so you've got your colors over here on the left hand side, as you can see. And so what I'm gonna do is click my Custom view folder my main project folder and go to new file and source and cocoa Touch class. And the subclass right here is going to be you. I button. And I'm just gonna call this blue button, okay and will create it. And there we go. So what I'm gonna dio is ah, let's get rid of this. I'm gonna Great. I'm gonna call the function awake from NIB. Okay? This is gonna call when the storyboard loads it. All right. And, uh, let's go ahead and give us some color. So we're gonna call the layer properties. You could also do self dot layer. Every view has a layer property. Somebody say layer dot corner radius equals 5.0. I wanted to have a rounded borders. Okay. And ah, Then what I can do is I can say Ah, sell. What is it? Ah, background color. Yep. Background color equals you eye color. And ah, we want Red, green and Blue and Alfa. That's fine. And so for red, if you look in the top left and our color picker, it's 46 And what we actually need to dio is 46.0 divided by 2 55.0 The U Y color doesn't use the full range to 55 uses values between zero and one where zero is black and then to 55 is the full amount. And so we're just doing were just converting it to a decimal, some simple math. And so just know that when you find your RGB values just divided by 2 55 you don't have to understand it completely did know how to use it. But you'll do this a lot. And for the blue will say 1 95 0.0 divided by 2 55 points your own alphas one points where we want it to be fully opaque. And then lastly, I think our title should be, um, white. So I can say set title color and we're gonna say you like color white color for ST just in the normal state. So all we've done here is we've created a custom class it inherits from you. I buy in, were given a corner radius of five and background color, and we're giving that we're setting the title toe white, and, uh, that's it. That's all we're gonna do Now if I go to my main storyboard, Okay. In the save button right here. Let's go Over here. This little rectangle called Identity Inspector, you click it and then change the class instead of your button. Changed the blue button. Okay? And ah, so right now you're seeing on the screen this plain old puke look in white button this whatever it is, let's make it exciting. Like puke. It looks just boring. Boring? Oh, yeah, loading it up. Let's see what it looks like on the screen. It's coming. I promise. And there it is. So look at that. Now, what's really interesting? What's really interesting is I can use this throughout my application now so I could have a consistent button that's completely reusable. So if I go here to my second view controller, OK are my main storyboard and I go to my second view controller. I'm just gonna copy this first button pasted over here. You know, you put as many as you want all over here with the blue button class assigned to them, and it instantly makes like a cookie cutter pattern of that view. So now you can do all kinds of fun stuff and it doesn't have to be buttons. This could be this could be your background of a view. This could be, Ah, an image. You. It could be whatever you want, you can write all kinds of custom coding were use it. So the the point of this lesson is to know that it's very good practice when you want to know make custom things. It's very good practice to go in, just subclass it and then use that class instead. That way, your coats only written once You're not going in your storyboards and styling everything know how we've been going through a changing the font name and all that stuff we can do. The author recode one time and just reuse that class and makes our life much easier, keeps things consistent. And then in the future, let's say you've got 100 buttons throughout Europe, and the designer and the boss is like, Hey, those buttons need to be orange. We just changed our branding and logo. If you didn't do it this way, you know what you'd have to dio Yeah, you're like, Oh, I'm starting to see you have to go through your whole application and change all 100 buttons, all the colors. What a nightmare. And by the way, it's very common to see people writing code like that. I'm in people's code all the time and they do stuff like that and those changes come down the line and they spend time and money, hundreds of dollars, thousands of dollars going back and making changes. So get ahead of the game here, use custom classes to do stuff like this, and that's it. For now, I'm gonna show you more cool stuff in later videos. For this is Mark Price of death slopes dot com, and we'll see you soon.
54. Intro to App: Yo, yo, yo, What is up? Mark Price? You're deaf slopes dot com and I've been getting a lot of feedback. People saying Maybe I should start appealing to other audiences, like just a beer fans. You want to learn the co? Yeah, I'm not really feeling it. Uh, rather pay tribute to vanilla ice than Justin Bieber. Goodness for you, Justin Bieber fans. Just kidding. He's a nice guy. Let's talk about more fun and important things, though. Then Justin Bieber. And that's the app that we're gonna build today. So, uh, it's kind of a simple app, but you're gonna reinforcing principles with stack views and layouts of constraint. You're also going to use Segways. Okay, uh, you're gonna put it into practice and so cool app. It's kind of the ideas you picked your favorite place. You can choose whatever place you want. Um, this isn't really my favorite place, but this is where I grew up. It's a town called Yucca Valley out in the desert, the middle of nowhere on No one's ever heard of it. So I thought it would be fun to just do it. And so basically, just gonna show your favorite place, you're gonna put the state or the country or wherever, wherever you live and show picture. I picked the picture specifically that had a blue background on the top so the text would stand out. Can just grab an image. You got to kind of think it through a little bit again. You can use these images OAS Well, if you want to follow along and you could find out more and it shows another picture and opens up the Segway on and then just shows from details about it. I described the population and the history from Wikipedia, and that's kind of it. You clicked back. Take it back to the main screen, but really cool. So focused on styling, an app correctly focus on Segways. It's a good stepping stone into going on to more complex things. Really got a master thes principles down. Hopefully by now you're got under memorization. You know, some of the basic principles, like laying out some constraints and adding ivy outlets and things like that. So this is just more practice. Lots of fun on. You know what you could even releases on the app store if you make an app that looks really nice like this. I think it looks nice. You can have multiple screens and you'll be doing that and some of the exercises afterwards , you'll be adding more screens and adding more value to you could create a nap for your favorite town. And you know what? Why don't you go talk to the mayor of the town and say, Hey, I built this app. Pay me $20,000 give it to you and then it'll be really, really be a portfolio. So that's it. That's the app on. Let's go ahead and get started.
55. App: Favorite Place: Hey, everyone, Mark Price here, Deb slopes dot Com and wear Gonna build this really cool app here. Favorite places or whatever you want to call it a little bigger there. I just press command to and, uh, we talked about this in the intro video. But again, it's a nap that's gonna take us from screen to screen with Segways. Really? Just one screen. You go back as well. It's also gonna talk more about constraints and things like that. And here's something really important to start off with before we dive into the code. This is a simple app, right? But if you can design an app that looks good like this and I think this looks good, Okay, If you could design an app that looks good like this, it doesn't take you that long. You get on the APP store and you don't people going to say you know what? You did a great job. They're gonna be very impressed. So you should be submitting these to the APP store. You're like the way you didn't teach me about that yet. Well, later on, there's a video and you can watch now that talks about submitting app to the APP, sir. Get these up on the APP store and get him on Gib on. Do some really cool stuff. Okay. End of soap box. Here we go. Let's go ahead and create a new project. I'm gonna get rid of this guy here and go to your ex coat and go to file new project. I'll put mine up here, okay? And this is just a single view application. Let's call this favorite place, okay? We don't need court data and let's go ahead and just click next. And there it is. No big deal. NBD man. All right, So you got your view controller here, and we know what we wanted to look like because I just showed it to everyone. Here s O. Um, as you can probably imagine, we probably need an image for the background, and we're also gonna another image for the project and a little compass icon. So let's go ahead and go to our assets folder here, and I've got on the on my desktop here. At least I've got my my images for this project. Okay, You can grab your from the source source code to the project or from the assets that I've uploaded and just drag these sort images over here. I grabbed these from the Internet. Okay, um, these these images here and, uh, for this, uh, this compass image just, uh, just so I could give a proper attribution. Okay, It's right here on the internet. It's a sky right here by Dmitry Better knockoffs. G. Uh, he's the one that made it. And here's the Eurail, and that's who did it. Okay, so I got that compass there. I changed. I inverted it Toe white, That's all, Um and there we go. So go back to your main storyboard and continuing on. We know we need an image of the background. Let's go ahead and grab that image and put it right there, right there. And let's pin it to the top. Turn off margins because we want to cover the whole screen. And that looks great. And let's put the image to Yucca and it's stretch. So change this mode to aspect feel, and it's looking good already. Okay, let's go ahead and add some labels. Wow, this guy right here and let's change the color toe white and let's change it from system to custom and the Helvetica news Fine. But from regular too bold. And I'll see you make a little bit bigger here, and I'm gonna say out door. And that looks okay. Size a fund there. So outdoor. It was outdoor adventures desert. Okay, adventures, outdoor adventures. And then I'm gonna copy and paste this one more time. I'm just copying and pasting anything. You see something magically appear on the screen. Its command C command V or edit copy, which it's not. Let me do right now for some reason and edit. Sometimes you gotta click off and click back on. There it is. Edit copy than edit paste or duplicate either one of those who work. So you should not do this by now. You should know how to be copying and pasting stuff. Command C, Command V. Ok, um, let's go ahead and move this guy down here a little bit and this one's gonna be called Desert Outdoor Adventures. Doesn't know it doesn't sound right, but it's kind of cool. It's kind of like hipster, whatever that means. So that desert one right there, um I know what needs to be a little bit faded. So let's just reduce the Alfa until we get it where we want it. And I think point for five Looks nice, So just going to give it some color variation, and that looks good. So I'm gonna copy this guy here and not, you know, there we go, Uh, put it right here. Going to make it a little bit bigger. And, uh, I'm gonna make this size 60. Let's do that over here. Changes to 60 and this is gonna be called Yucca. You guys were like, no, one of this place is called yet Goods desert Nasty desert. Well, true. And grew up out here Yucca Valley. And I don't like how this is almost the same size of this, so I just want to make it a little bit bigger and then to say, 75. Yeah, like that. What do you guys think? Now it's ugly. Well, I'm doing building it, not you, actually. You're building it. Making offer. Make it however you want. Stop arguing with me. Okay? Alright. See? Yucca Valley. That looks great. Now we just need our little compass icon and one more word. So let's go ahead and grab an image for the compass. Here we go. Too big. Its changes to compass. Gonna say mod aspect fit. We want to stay perfect. Just make a little bit smaller. They're all right. I like where this is going. I really dio Let's copy the desert one and command C and Command V That and we'll do is, uh, well put California here Who started to look nice. Of course. We don't have any constraints yet, right? Let's do that. Now let's select these. I'm holding down shift and selecting these Don't put him in a stack view. So click the stack view, but and I'm going to select this one in this one. Put these in a stack view, and then this one, and this one is going to be in a horizontal stack view. Okay, I like it. And then what we can do is take these three stack views and put them in a stack view. Mind blown, right? How easy is this? Stag news are amazing. I'm so glad I'm teaching about him. I mean, I have ever got to them for, like, six months when I got to them in the, uh, wwdc video. So really cool stuff, changing everything. I use it every day. Now spacing 20. Let's say 30. So we want vertical spacing between these stack needs to be 30. I like it. I like it. I like it. I like these already. I'm not gonna play with those. I like this. This one does need some work here, though. This third stack view. Just give it a little bit of horizontal spacing. Let's say 20. I'm 15. Okay? I really like where this is going. I'm just gonna pennant now the whole stack view itself. Okay, lets just minute 20 from the top, actually. Why owner? Why that ST zero usually doesn't have the top margin. Let's find what say 20 or zero from their, uh, and zero from the left. Because that's the margins. That's fine. Okay, let's go ahead and run it and see how it turned out. Look, we're making progress so fast. Pull it up on the screen and it's looking really nice. Let's look good in landscape. The cool thing about stack fuses, they look beautiful, even in landscape in most cases. Look at that man. I should release this to the APP store. No one's gonna care about that. Why did we kidnap about this nasty desert? Don't know. Okay, s Oh, that's good. Um, let's go ahead and make the button. I think that's all when he left on the screen. But short for button, of course. And, uh, let's make a little bit bigger. Let's change the background color. I'm clicking over here, scrolling down, background to read and text color appear. Let's change it the white. And let's change the font, of course, to Custom and Helvetica New and let's do bold looks good. Make it 17 font size. And this we're gonna say, Find out more all in caps. Just just kind of the convention we're doing here, of course, are but it has a little bit of rounding. We'll fix that. You've seen it before, so let's go ahead and pin it. Click with and height or fixed that and then pin it one more time to the bottom will say Let's say 40 from the bottom, Okay? And I like that and let's go ahead and just click the alignment menu and do horizontally and container. Okay, so our button is there. Looks great. Now let's open up our assistant editor. And I'm gonna make a reference to the button simply because I want to give her a rounded edge. So I'm gonna put it right here. We're gonna call this, uh, more button. Okay, That's all close. This isn editor. Um, that's looking good. Let's make a second view controller. Why? We're on this screen here before I forget, that's all. And I'm just gonna make a transition I was doing here from the button itself. This more but transition over here. Let's show it. Okay. Looks good to me. Let's go back to our code and on this view did load here. Let's go ahead and around the corners of our button. You should know how to do this by now. I think I think we've covered it. If you haven't, you're gonna cover it like a bazillion times because I do it all the time. More button dot Layer that corner radius equals 2.0. Looks good to me. Okay, So, back to the story board and, uh, make this little bit bigger here. Okay, so we've got to this one's gonna go to this screen here, And, uh So what we want to do is Remember, we're gonna put the image at the top, okay? And then have some text down below about your town. So go ahead. And if you want, If you're not doing Yucca Valley dio do some different towns get their population or whatever you want to use. And you are image view, and I'm just making an arbitrary height on this. Doesn't really matter because we're going to aspect feel so I'm going to say five from the top. No. What are you doing? I think it went above the top. Did. Okay, so I'm painting it zero to the top. Takeoff margin, zero from the left, zero from the right. And give it a fixed height of 1 52 Put the image to Yucca to or whatever your images and of course, change scale to feel Teoh aspect. Feel much better. Look, that pretty desert. Okay, so that looks good. I do want to copy this adventures text label and just paste it over here so I don't have to do all the formatting stuff, so I just command see on the other screen and command vita here who say about Yucca Valley , Um center it and Let's go ahead and pin it with a fixed width and height, Okay? And then normally, if this was a regular view, I might just center this within the container. But image views don't really allow you to put some views on them. So what we're gonna dio is we're just gonna pin it from the top. So within height and 45 from the top is fine. And then on the alignment, man, you just do horizontally in container. And the container is the whole, the whole thing. So that's good. We pin this, we pin this, we do need a back button. So let's go ahead and make the back button now and has changed. Text color, toe white. Okay, make it bigger. Here. Let's say back I like it. Okay? It looks good. Now we just need That's amore some more labels and stuff. So let's go ahead and command C command V. Okay. And make sure you join me problems here with height. Okay? I'm just I was just making sure I didn't carry over any bad constraint, so I just selected this one I just copied and pasted. I was glad to get rid of the width and height on this on. Let's change the text color and move back over here again. Um, and, uh, attributes, Inspector. Okay, Hopefully have that down by now to just know whenever I'm changing stuff around, I'm over here in the attributes of inspector. Like like the colors and things like that. I'm working with constraints or changing within height over on the ruler. Okay, Um, the size inspector. And when I'm over here on the changing the class name, it's the identity inspector. Okay, Just gotta get that down. I'm gonna change the color. Too. Light, gray color. Okay. I like it. Works for me population. I'm gonna command C command V. And let's change this from bold to regular and instead of doing all caps would Well, you can't really do captain number, so it doesn't matter. So there's population, and then we do need the history. So I'm just command C Command V did the selecting the wrong one. There we go. This was gonna be history. And then let's command c command v the population and put it right here. And what we're gonna dio is on this one. Let's make him go. All the way across. Well, hold on. Before we do that, before we do that, we need to put these in stack views. But I do want to give this, like, 50 lines just to be safe. So 50 Okay, so let's go ahead and put him in stack views. So this one and this one are going to go in a vertical stack view. Yeah, and these are gonna be in their own vertical stack view, and then we take these two statues and put them in their own vertical stack view. It's good. So I didn't have to do stack these two statues right here, but I did, because I want to give them spacing with, uh, with stack view, spacing and things like that. And I want a group things together logically. So you can do that if you want. You can not do it, or you could do it. Just use one giant stack view. But it's all about getting the end result. And I think the best way to get the end result that I'm looking for is by doing to stack news and then put these in their own stack, but which I'm gonna click right now down here. So they're now in a stack. You. So what I'm gonna dio is obviously not where I want it to be, So I'm going to pin this This stack, you here, I'm gonna pin it. Let's just say 40 from the image and will say zero from the left margin and will say zero from the right margin. These stack views like to go way off the screen for some reason, Um, which is not what we want at all and say zero from the bottom, actually 20 from the bottom. Um, Okay, that should move it right where we want it. It's obviously not looking pretty yet, but that's okay. We can change some things around. So what we want to do is first on the Inter stack views. Let's do this population first. The alignment is Phil. Let's try alignment, leading and distribution feel proportionately. I'm just playing with options here. Okay, Equal centering. You know, let's just leave it like this for now, okay? I do want to keep the leading, though, and then this one is leading, and this one's going to be feels well, let's go to the top stack view when it's holding both of these leading How about feel proportionately? Okay? Feel equally what changed lemon to feel. So that's feeling the whole thing. Um, I really don't care about that too much. Well suited. Let's just see what it looks like when we actually put the text in. So go ahead to find the techs that you want to paste. I'm just grabbing mine here and down here. I'm gonna paste it right here. There's my text. Okay, so it looks pretty good. I think the spacing on this seconds office Let's go ahead and do some, uh, some stack you spacing, Let's say 10. Mm, Yeah, it's good. And then here on this stack view, it's looking kind of ugly. But let's see what it looks like when we actually running on the device. Just to be sure, pull it up here, find out more. So, first off, my history labels completely gone off the screen. The text here is kind of cut off, is well to population, is doing some kind of some kind of wacky stuff here. It's definitely not doing what we wanted to dio. And I'm not happy about that. Not at all. So let's look at our stack. These here again. So I'm going to say, feel this time There we go and feel proportionally is fine. Let's give us some spacing between the two stack views. Okay? I think that's gonna do nicely. And then on our school to get her top population stack view. Let's change this leading and feel that looks that looks good. Actually, that looks real nice. I think it's gonna stay just where we need it. And then, uh, let's look at this guy here. Looks looks kind of fine, too. Let's try this again. Now that I've changed the setting on the field, let's see if it looks any better, Find out more. You know what's good enough for now, we could play around with it, and you know, uh, bringing these closer together, but I'm completely fine with it, for right now. You can play with it on your own. Doesn't work in landscape. Very well. Would you? Might want to do is do some type of size class. Make this image up here smaller, Um, when it's ah, make image smaller when it's on landscape device, things like that. But so far it's looking good, knows the back buttons, not working. I think that's the last thing that we need to do here. So we've got her Segway, which is coming from the button. It's looking real nice. It's taken us over here. We just set some constraints. Looks looks pretty good. Um and ah, we got our text and stuff in here, and those are working with constraints and stack views. So let's get that back button working now. This view controller is not tied to any code right now. So go to your folder over here and go to new file source Cocoa Touch class and, ah, let's call this detail V c and make sure it it is a subclass of you. I view controller, which is what we want and click create. And all we need to do now is go here to remain storyboard. Clip your second view controller, your detailed view controller. Click the identity inspector and change the class the detail V c. Now it's connected and talking to the code. So if you open up your assistant editor, the two circles here, that's what you should be working with here. And if you click the back button in control Drag right here to Ivey. Action. Okay, this is gonna be called back pressed and right from inside this code here. Just say, um, dismiss view controller. So you don't dismiss the view controller that's currently open animated? Yes. And when it completes, we don't care to sled it finish. And we don't care what happens after. Let's see if it works. Here it comes. All right, So this screen looking fabulous, you know, looking pretty good in landscape as well to That's pretty cool and s Oh, that looks great. You click. Find out more about the town. It loads this view controller shows the population history. You could put whatever you want here. Um, this is just really basic stuff. And so that button loaded the segway right here, initiated it. We didn't have to do it from code. Okay, we did it all right here from the from the storyboard, you click back and it dismisses that view controller. So I think we have it completed, so that's really cool. And that's really simple segments. It's not that bad. And it's not that hard to get APs that look really nice on the APP store with limited amount of work. I mean, how long have you been doing this? Uh, 20 minutes and 58 seconds. So 20 minutes, 58 seconds. You could release an app to the APP store or less. So, uh, congratulations. We're done, and we're gonna move on to bigger and badder things.
56. Swift 2 Enums: Hey, everyone, Mark Price Hear with deaf slopes dot com And today we're gonna talk about Denham's also known as the new orations. And the subject of the course today is ugly cars. Ah, actually, click and drag and save this because we're going to use it in our application. Right? Okay, go ahead and open a new X Code project and do a single view application. You guys were like, Oh, this guy's a jerk. That's my car. Sorry, guys. Just not my thing. Blue gold rooms. Everyone does the same was changing around a little bit. Okay, so let's call this Denham's Denham's and ugly cars. Okay? I was called items. I'll be nice, okay? And let's put it here on the desktop. And what we're gonna dio is have ah, three different buttons on the screen, okay. And, uh, based on which button you selected, we'll, uh, we'll give a choice and we'll do some action based on that choice. So let's go to our view controller here, and we're gonna create an Denham. Now, an Inam allows you to, um have a series of choices that you can pick for anything. So if I say in them cars. I got to give it a type. So artisan me of type string and then I can have a series of cases or options. So case BMW, that's not ugly cards, a cool car. And ah, you guys are like, Oh, you're opening a can of worms here. Sorry, guys. I like all cars equally, some more than others. BMW case is well say, but also we want to do a Honda SE Honda case test. Logical car. Tesla goes Tesla's in case, um, a Subaru. A Subaru. Okay, so what it does is allows you to have a limited set of options. So there's many use cases at any time in your application that you want to choose from one of more options. You want a hard code without having to manually, um, right strings or integers all over your application to say, Hey, if it's a one to, this is if it's a to do that on in them is a great a great option for that. So that's all you got to do, Teoh declare one to use it. It's a simple as saying, Um, well, we could have a variable right. It's also a type. Okay, so I could say, uh, bar, um, car of choice. It could be of type cars. Okay, so we're saying we have a variable of type cars, a variable of this mm type, and it expects a choice. So what I can dio is I can assign it here. So, um, you know, I could say car of choice equals cars dot tesla and car choice if I print it, Okay? Car of choice. It would print Tesla. No big deal. Right? And what is it actually printing? Well, what's putting the option here? It's grabbing the option if you want to actually grab the value outside of it. So you can choose whether you want to use the values or not. These values arbitrary, but they don't have to be. You can use them if you want to. So I could say I could make, uh, for instance, I could say bar car one equals cars that BMW Anvar Car two equals cars dot Subaru. Okay. And you can, um you can use the values out of these if you want. So I could say if car one dot raw value. Okay, that's that's this value over here. Okay. If raw value equals cartu dot raw value and do this Well, now we're comparing the strings over here, the actual values of them. So if he actually the values out of them, then you can use their all value and a lot of cases you're not going to use those values. You're just going to use the actual, um, items themselves. So rather than saying raw value, we could have also have said if a car one equals card. Ah, Carter too. Okay, um, and that would compare the enumeration items itself. Okay. Would compare BMW to Subaru these actual items right here. And so really cool stuff if you want to make choices in your application. So just for fun, let's build a simple little app here, okay? And school your main storyboard. All right, I'm gonna open up the identity inspector over here are attributes expected. Excuse me, and let's go ahead and drag some buttons on here. Three buttons, little drag, one at first novel style it. And, uh, that's going to go to the assets folder here and drag the im. You don't have these images. You can grab whatever images you want off the Internet. Um, also provide a miss part of the source code is called a Subaru. Let's drag this in here and I've got Come on. There we go. And I've got three other images that I found on the Internet. Very good. Okay, so we've got our images here. So what? I'm gonna dio let's go back to the storyboard and on this button here, I'm gonna change the image to just a BMW here. And let's go ahead and take off the word but in and it's way too big. That's a really big button. So let's go ahead and change the size to 150 by 150 and will change the image to Where is it? Here, aspect, Phil. Hips I forgot. This is about There's no aspect feel that that will, that will work here. So what we'll do is we'll just we'll just do what I tell you always not to do. We're just gonna pretend that it's scaled appropriately. We're just gonna move it like this. Okay, so there's one, but in just make it like this and this. Copy and paste. Copy and paste. I'm doing Command C Command V Ok, no big deal. Although I moved the wrong one there. OK? And then what I can do is I can ah change. Ah, that's quite and change the images on these. So BMW will say Honda, who has was Honda's man, who and then Ah, here we go. Tesla, Every ghost. We got this four cars here. Let's go ahead and give them a fixed with fixed height. That's fine. And also, I want to align them, uh, horizontally in the container. That's good. And then, ah, let's just go ahead and pin each one from the top one, each one right from it. The one above it, That's all. Okay, I'm just clicking the pin button over here. And ah, remember how I said numbers are arbitrary? Okay, you are. The values are arbitrary on these items right now. I just said BMW, Honda, Tessa, let's go ahead and change our type to end. This is a little bit more common just to have integers here. And what we'll do is we'll say BMW equals zero. Honda equals one. Tesla equals two, and Subaru equals three. Okay, so it does make it integers here and what we'll do is on our storyboard. Go back to the buttons. So these buttons, by the way, not images. I made them into buttons. And if you scroll down to the right hand side here, each one of these has a tag property. So the tag on the 1st 10 Well, actually, let's Let's make sure BMW, let's make sure they're lined up BMW, Honda, Tesla's Subaru and BMW Honda. Those two are mixed up. Let's go over back to here, actually, can we can just change the images. That's easier. So let's make this one Tesla. Okay. We're just gonna order them, That's all. This one Tesla. And this one could be the Subaru. Okay, there we go. So now click your image. This one has a tag of zero. Let's find this one. Needs a tag off one right here. This one has a tag of two, and this one has a tag of three. So 0123 So we've given each one of these attack and these tags correspond with the numbers here. Okay? We want them to be like that. So this is a perfect use of when you can use in terms When you have things that need to match up certain values, and in this case, we're actually gonna compare against the values here. So what we want to dio is create so back to the story board here and open up the assistant editor, OK, we want to do is create an I B action, and all of these can call the same action. So I'm gonna say on change it to an action here on but in Clicked Tapped It's not It's not a web up. We tap these things of their fingers and, uh, there we go. So on function, tap or unbutton tap, this one's connected. Now, I can also just click these other buttons control drag to my view controller and then select the same one on each one. So I'm just control dragging to the view controller and selecting on va and tapped and selecting on but untapped. And if I right, click any one of these now you should see it there. Touch up inside on button tap. There it is. So there we go. What we want to do now lastly is ah, at least for you. I want a label here. What? We're gonna do is every time we tap, but we're gonna update, update the label. Okay, so let's do that right here. Let's give it. Let's make it really long here, actually. Okay? And I just put a button on there. Label. Okay, So here's our label. Let's center it. There we go, looking much better. And let's go ahead and give it a within height. Hey, let's put it from the top 2016 tops. Fine. And then let's go ahead and do it horizontally in the container. And let's open up the assistant editor one more time and make an ivy outlet for that. So controlled dragged from your label right here. We're gonna call. This was caught, uh, the label for lack of a better phrase. Close the assistant editor. Save it, and I'm gonna go ahead and open it, my view controller. And now what we want to dio is depending on which button was pressed. We just want to print something to the screen. So how do we do that? Okay, So, in fact, we don't need this car's of choice anymore. There we go. So what Weaken dio is Ah, First off changed its any object to you, but we know they're all buttons. So let's just go ahead and put a but in there, because whenever you tap something on, I B action is gonna pass in the object that was tapped. Okay, So what will dio is will say if sender dot tag Remember, the tag that we set equals BMW dot raw value hopes Sorry. Cars dot BMW dot raw value. Okay, so if the tag is equal to zero, that's what we're doing here. But it lets us know that Hey, this is a BMW. So rather than having a type 0123 throw your application. Your not knowing what they belong to their actually attached to a specific car here, which is kind of cool. Eso if if the tag was cars that BMW don't raw value, the label dot text equals B. M. W is awesome. Yeah, bad spelling, though. Okay. Uh, there we go. Else. If center dot tag equals cars that honda dot raw value, then we can say the label dot text equals somebody. Get that ugly Finn out of my face. Strike Not going to fit in our label. Uh, okay. Else. If sender dot tag equals cars dot tesla dot raw value The new cool kid on the block else. What's the last car else? Oh, somebody shoot me now. So, uh, what am I missing here? If else if centered out tag to equal signs there we go value. So we're just checking in the wrong values here against the tags. And then we're writing texts in the label against it. That's not bad. Let's see if it works and there it is. Okay, So if I click the BMW BMW is awesome, somebody get the ugly Finn out of my F, the new cool kid on the block. Everyone loves Tesla's. Who, by the way, that's where I grew up. Right there in the desert. How cool is that? He's like the desert sucks. That's true. And then, Ah, somebody shoot me now. All right, so it's working. So what you just saw was an in, um, and based on the value we compared against its raw value. And we compared it with the tag, the integer tag of each of you and lets us know, Hey, this is a BMW. This is the heart of this is a Tesla and then you can use anywhere in your application, uh, and and use this to identify things that should be grouped together. Eso It's not necessary tool, but it could becomes useful. It makes your coat very readable. I'm very nice. So that's enough. Not that big of a deal. You're going to start using them in your program if you see a need for them when you have to select an option and that's it. This is more Christ with death slopes dot com and see again soon.
57. Swift 2 Extensions: What's up, everyone? Mark Price here with death slopes dot com And today we're gonna talk about Iowa's extensions. Glenn, open your ex code and do a file new playground. Okay, I'll pull my screen up right up here, and that was file New Playground. And you can just go ahead and call this extension and we'll go ahead and put it right here on the that. Stop now, what is an Iowa's extension? Well, think of it kind of like a hair extension bad analogy. Think of it as when you want to add functionality to an existing, um, swift class or swift or swift type. You can do so. So let me show you the problem that we're trying to solve by working with extensions. So imagine if we have an application that has 50 different screens, and each of those screens need to print out currency. I need to take numbers and print out currency with a dollar sign in front of it, or whatever currency symbol your country uses. And so we might have ah, you know, account one, and that my equal $400.32 of our account, too, equals $500.12 and bar account three equals $600 14 cents. Now we need to print these, right? So what I would need to dio is something like this print, And what we'll do is we'll use the special strengths in tax here to insert variables, and I put the dollar sign in front of it. And then I would say, you know, account one. Okay. And, uh, I forgot my closing parentheses here and wrong spot. There we go. Okay. And so will do that for a count. One on account to an account. Three. And I'll just change the numbers here. I just did. Command C command V to Paste. Now, this is gonna print what you would expect it to print with the dollar sign in front of it. But don't you feel like we're kind of repeating ourselves here? Yes, we are. So what we can dio is right? What's called an extension so I can write Extension it and we're gonna call it on extension of ah, you eye view. Sorry that you have you of double smoking, cracked. It airs on them guys. All right, so extension is of double. So why double? Well, we're using the type double here. Right? Okay, so this is a double. What we want to do is give the double extra functionality. We want to create a way for us to be able to just called the currency value on it. So that's really cool. So let's do that. So what weaken dio is? Ah, right. A computer property called currency. Okay of type string, because it needs to be a string. And what we can dio is simply return. It will say, Well, there are little special strings in tax here and will just pass in the work. Keyword this and then the dollar sign. I'm not this sorry self wrong programming language, woo. Okay, so look what's happening here. So you're extending double your adding functionality. You've created a computed property. We've talked about this a little bit and all it's doing its returning self and what itself Well, in this case, self is going to return to the value. So when you ever you do an extension, the keyword self returns to the value of that keyword. So if there was a string self would be that string and so we just extended double. We give extra functionality. We added a property to it where it would return a string that takes the current double value and adds a dollar sign in front of it. And so, before I've created the extension, what would happen if I tried to print account account one dot currency? Well, it doesn't exist yet, right, cause we haven't credit that extension yet. However, after we create the extension, watch this. I could now say Print that I could say account Ah count one dot currency, print account, two dot currency and print account three dot currency. And how cool is that? It's doing the exact same thing. So we just created our own extension that extends the existing functionality of a class, and you can do this with anything. OK, so for instance, you could have an extension. You know, string, you could have extension of you. I view you can add extensions to any class, and what's cool is on IOS the moment that you create an extension in your application and put it in its own file. Everybody instantly recognized all the classes, confined it and work with it. So this is really common thing to do, and it's very helpful when you have to do things a lot of times and you need extra functionality for me. That's working with currency sometimes, or like doing decimal rounding. Ah, where you need to round up, around, down. It gets really cumbersome having to write it all over the place. So the principle here is if you find yourself repeating yourself a lot, kind of like I do in these videos, you hear me saying things over and over again. You're like, You're not helping your case here. I know. But if you find yourself doing lots of repetition, it may be a good case to use an extension to extend functionality. So you only have to do something one time like right here and then this is testable. You could test immature working, and that's extensions. It's not that big of a deal, and now you know how to use them. So that's it. Mark Preiser with themselves dot com. Let's go ahead and move on for
58. UITableViewController: Hey, everyone, Mark Pricier Deb slopes dot com And today we're gonna talk about table views. Now table views are a four principal of Iowa Spellman's The X Code icon here because in any application, whether it's Web or IOS or mobile, whatever you need to show data. And so IOS has provided a fantastic tool called a U I table view any white table view controller. So click create a new X Code project so we can display data to a user without having to hand right all the code for, like showing each cell and putting things in it so very, very useful. And, ah, they made it very. I did a single view application. They did very, um, memory efficient as well, too. So let's call this. Ah ah, table view, controller test. Why not? And everything else could stay the same, but it here on the desktop And OK, so we've got our single view application that you're used to seeing so far. Okay, so what we're gonna do on the main story board here is this. Go ahead and select it and delete it with the backspace key, OK, and then scroll down here in the right hand side till you see table view controller. So before it was a U I view controller. Now it's a table view controller. And so drag it onto the screen here on the right hand side. See where it says is initial view controller. Make sure you select that. So the APP knows what what screen to start with. So now we have a table view controller. Unfortunately, though, we don't have any code yet to talk to it because we deleted our view controllers on the left hand side. Go ahead and delete your view controller. Right. Click it and delete it. Moved to trash and right. Click your folder here and go to new file Cocoa Touch class under source. And let's go ahead as a subclass of you. I table you controller and we'll just call this my table VC VC for view controller. We don't need a zip file because we're gonna do this in the storyboard and go ahead and click create. And here's our coat. It actually generated quite a bit of boilerplate code for us, and you're gonna see lots of things here because a table view controller requires a few different functions in order to work properly. Okay, so first off, let's get this boilerplate did receive memory warning, and ah, we don't care about this stuff that's in here as well to interview did load. You're not going to use that. And so here's the important stuff. So number of sections in table view, that's how many sections air in it. So if you were building an application that had different categories, maybe like of cars, you could have a category for imports. You can have a category for muscle cars, whatever. And you could have multiple sections and a bunch of rose inside each section. In our case, we just want one section that which means all the roads will be in one section. So you go ahead and get rid of that comment here. We're telling it Hey, we want one section. Okay, now, number of rows in section. So this is how many total rose you're gonna have in each section. So if you have 10 different cars in a list in one section, this should be 10. And you usually based this off of some type of data set. Okay, so in our case, we should do in the race. So I'm gonna save our I would say cars is gonna be an array of cars and will say BMW. I will say Ford actually proper spelling here say Chevy is more like brands, but whatever. And, uh, Volvo, who drives a Volvo? Um, sorry if you're if I have offended you. There's some nice vocals. Number one safety rated car in America. Uh, Subaru, Subaru, and ah, we'll call that good for right now. So we got some cars here, right? This is our data. This is our data source. So what Will Dio is? Instead of saying zero Rose, we want the rose to be equal to the amount of items in our data set, so cars dot count. So what it's gonna do is for every single item that's in our array, which is the cars, Ray, it's going to create a row for it. Very, very cool. Okay, so it also created this function for a cell for row and next path Go ahead and uncommon tid by deleting the comments here. Now, what this is saying is hey, I don't want to waste lots of memory. Okay, let's say you have 1000 cells and your program saying I don't want to waste lots of memories, so I want to re use those. So as soon as it goes off the screen, I'm gonna put it back on the top of the list. And so when the next one comes on the screen, I'm gonna give that to you, and then you need to put new data in it. So you may only ever see the same 20 2 30 cells cycling through an application because it's reusing them. And so when it gives you an old sell, you have to clean it out and put new data on it. Okay. And so right here, Um, it's providing the cell. Okay, So sell here is equal to table view dot de que reusable cell with identify air. What does that mean? Oh, my gosh. Well, so remember how I just said the table ville table of you will reuse the cells. Well, what's happening here is you're trying to get a dick. You'd sell sell that's been thrown out off the screen, and you're trying to grab it, one that's still in memory. So it's gonna give it to you okay. And, ah, the reuse identify Air is saying, Hey, this cell is of this type. Imagine you had five different sections and each section is a different cell, like it has different layouts. Maybe one has two images. One only has one image, one has no images. You want to make sure you grab the proper sail cause you don't want toe reuse a cell that doesn't fit your specific section. So this is just an identify are saying, hey, reuse this very specific cell. And since right now, um, we're only using one type of cell. I'm just gonna leave it as it is. You can make that identify or anything that you want. And so, basically, this is where you're gonna do your configuration of the sell, which is exactly what it's telling you to do. So if I say sell dot text label, that's the main text label. So a default cell comes with a main text label and a subtitle. Okay, by the way, you probably never, ever will use this default sell. You always make your own because nothing ever really calls for this default sell. You gotta do custom stuff, but we're gonna do that in the next video. So sell dot text label. We're gonna say dot text equals, um, and we could make it whatever is in the race. So we want each item here to print out there. Right? Right. So what we're gonna do is we're gonna say equals cars index path dot ro and I want you to look what's happening here. So cars is an array, right? So we're grabbing an element out of the irregular and that already by using this square bracket syntax, we're grabbing a certain index out of the race. And so, index path dot ro is right here every time it gives. You knew, it gives you a cell. Okay? It's at the current bro that you're at. So it's only gonna have as many rose as is in your data set here. So we could be at rose 0123 or four. There's a total of five rows. And so, index, pat, that row is gonna be 0123 or four. And so it's gonna match since it matches up perfectly with your cars array. Okay, You can grab an element out of the array, and that's what you can print to the screen. And so that's our text labeled that texts. And for the sub label, we can say sell dot detail, text label, not texts equals. And we can just say I like my and we can ah, pass in the We can actually pass in the name of the car here by doing the exact same thing . Copying that and just pasting in here and just for fun. Eso And that's how we print up to the detail text level. So again, table view, self Roo index path is gonna be called every time a row it needs to pop up on the screen and you're gonna try and grab an existing self. It exists, and then you're gonna clear it out, put new data in it, and then you're gonna return to sell back to the table view who's calling it. Okay, that's how you work it right there. And what does this one can edit Row index path. This is allowing you to, like, edit. Or you could do like a swiping a delete on a cell. We're not gonna worry about that right now. If we don't use that too much now you will use it in the future. But, um, don't worry about it for right now. And here's another one. Commit editing style. That's when you're editing, like to save the edit that you made. We're not gonna about that either. Um, we're not gonna worry about this one, which is move row, where you can actually, like drag and drop. And things like that requires a little bit more complex code. This is just a lot of extra benefits and bonuses. It's giving you out of the box here. We don't need all of it can move ro index past. We're not gonna move anything, okay? And ah, then here's the Segway. We're not gonna worry about that. So that's interesting, huh? We've got a number of sections and table view, number of rows and section and sell fero index path. That's all. You really need to start showing data on the screen. So and to recap, we've gotten array of cars 12345 of them. There's one section and the total number of rows is equal to the total number of items in the array. So it shows that many cells and then for each cell we have to grab an existing self. It exists, and then we have to create one. But they ah, put the details in the data into it, and then it will return it and do its magic. So that's the code. Let's go ahead and tie up our view controller here to our to our coat. So it's going the right hand side here, and I'm going to were in the main story board and ah, yeah, it's good main storyboard here, and I'm gonna delete this, okay? And let's drag in the table view controller Perfect. And let's change its class over here on the right hand side. Okay. Change it to my table V C. Because it is a table view controller, and then don't forget over here, click right here. Over here we want to do is initial view control. Or so it loads up right when the app starts, okay. And ah, that's looking good. So I just realized we just said the exact same thing we did at the beginning of the video, and I was thinking about cutting it out. But I want you to know that sometimes problems can happen. Okay? we're all of a sudden, you go back into your storyboard and things we're screwed up, so just be very careful of that. Ah, and you got to see it twice now. So any time you want to have a starting view controller or whatever, you could just delete it. Dragon new one on here and then Click is initial view controller, and that'll set you up right from the beginning. And so again, I'm gonna change the class over here too. My table v c. So it's connected to our code, which is down here. If it's not connected, the code, it's not gonna work. And let's right click on the actual view controller itself. And so notice how it's already connected to a view. So we don't have to make that. And then there's two other properties here. There's data source and delegate. This is very important if you don't have data source and delegate tied to your view controller, those functions we were just going over like self Aurora index path and number of rows and section. Those will not be called and you'll have problems. So, um, I think we have everything we need to get this going? We've got our table view with gutter code were saying How many rows you want, what we want to put in each row and let's go ahead and build and run it and see if we can look at our list of cars. Here we go, but we've got a crash. Let's take a look at what the problem is So assertion failure de que reasonable. So what's identify for index path? Terminating app. Okay. Unable to de que a cell with identify res identifier must register a nib or a class for the identify or connect a prototype cell in the storyboard. Oh, we forgot to do something. So if you go back to your story board over here, let's move this council down. Okay? Notice how there's a prototype cell right here. Let's open the right hand side. We need to give it a re use, identify air, and maybe you're wondering, Did he really miss that, or is this actually part of the program? Well, wouldn't you like to know? Actually, I want you to see this crash is very important. You may run into this exact same problem so we can call it anything we want. This is, uh we want calls. Will sell this car cell just like that. Okay, I'm just gonna copy it. Make sure it's spelled exactly with the capitalization ever everything and go back to your my table V c And, uh, where it says re use identifier. All you gotta dio is put that in there and our air should go away. Let's try and run it again and see if we've made some progress. And sure enough, it is working. We've got a list of cars when you click on that doesn't do anything, cause we haven't written code for that. But that's a table view controller. You can show simple data on it. Um, you can show information. You can do all kinds of stuff. So really cool. We did it in its simplest form here. OK, we didn't do anything crazier complex. And maybe you're wondering why are second label didn't show up? Well, let's talk about that. We don't actually have a detail text label because we didn't tell the story board to use the subtitle version of a cell. So if you go over to your story board here and click your car sale. Okay. And there should be a style Pray here. And ah, we want subtitle style. Very G O. Too bad. Now we have a title and a subtitle. So now we really run it. We should see our secondary line on each item. And look at that. I like my BMW. Like my ford. Like my Volvo. We should fix that. And eso it's working. So you now know how to split display basic data onto the screen. Okay. And to recap, you created a table view controller in your code. You created a table view controller in your story board. We connected them up. We created an array of cars because all table views need to be based off of a data source so they can know how many rows they're gonna need. And so we said the number of rows to be cars that count. We've given it one section for every cell that it produces. We go in and we add the date to it by accessing data out of that array, and then we pass it into it. And so this is a basic table view. Now, with that being said, I'm only showing you this so you can start getting your feet wet and understanding 99.9% of the time. You're never gonna use this title and subtitle it. How boring like Oh, good is nobody wants that in their app. Everything needs to be customized and look a lot better than that. So we're gonna talk about that in the upcoming video. So this is it. Um, if you are a little bit confused, go through the video again and, uh, again, tons of free support on the chat room on before a judge to me. I'm happy to help you. And that's it. Mark Price. Here, Deb soaps dot com. See you in the next video.
59. WKWebView: Hey, everyone, Mark Price Hear with deaf soaps dot com And today we're going to talk about Web requests rather how to interact with the Internet on on IOS. So go ahead and open up your ex code to file new project. There we go, OK, and we're going to do a single view application and I'll call it Web Request test and the ideas you can use, um html um uh, systems. Or you can load html. You can load websites. Basically, if you think about your iPhone app, you have a safari app on there or on your iPhone you have so far. And safari is just a Web browser. It, uh it can load things. It can run HTML and JavaScript, and you can do all that right from your IOS app. In fact, you can build your whole IOS app and Web views If you wanted using HTML and JavaScript. Now we're not gonna talk about how did that today It's a little more complex on. Why would you Why would you build an entire application out of html on IOS? You know, not sure there's a good reason for that. However, I will say there are some things that come with HTML some little tricks and fun things that can add enhancements to an application. And ah, there's actually native APS, like the the apple messaging app that used that you used to text message people that actually uses, uh, some web views under the hood. But we're going to just do some simple Web use today. So go ahead and go to your main storyboard. Okay? I'm gonna make this view a different color will make it a light gray. And what I'm gonna dio is I'm gonna type in new I view and drag it on here. So we're gonna use a, uh, W k web. You okay, this WK web you replaces a USB which was used for the longest time. So if you go down to the bottom right here and type in new I web you, this is a U. S. Web. You you don't want to use these anymore because they have memory leagues. They have other problems. They're slow, so wk Web view is the way to go. However, with that being said at the time of this video, uh, you can't add a wk Web view from interface builder yet from your storyboard. So we have Teoh do it from our code. Okay? And since we can't drag it on, we still wanna have constraints working in the auto layout working. So what we're gonna do is we're just gonna drag a regular view on here. And the idea is we're gonna put a view we're gonna size it and place it the way that we want. And then through code, we're just gonna add the web. You on top of this view here, this container of you were just gonna make it have the same size. Okay, so that way it it looks good and goes where we want it to be without having to figure out in her head of the math. You know, where, how many pixels on the screen it needs to be from the left in the top. So what we're gonna dio is ah, takeoff constrain the margins left on top 000 and this one. Let's just make it nice little 50. They're 50 from the bottom, and that's OK. Okay. And what we're gonna do is I'm gonna show you how toe just load multiple requests. So if I go to, um, Let's see. Here, button. I can put a button right here. We'll call this, uh, swift, so basically one. But we'll load a web page about Swift, Another button load. A web page about, um, steak. Everyone loves steak, Right? Except for vegans. You guys going vegan? People can put veggies or tofu or whatever it is, whatever it is you eat. And ah, over here, we'll put, um, What do you want to put over there? Um, have a new. Here we go. How about celebrity gossip? If I could spell it. Right. Okay. And let's let's move this one in the middle. I think this one over here, and Ah, there we go. Center that what we'll do is, uh all right, align this button here. And I left the line. This button here. So the constraints air more perfect. There we go. There we go. And I will online this guy from the left and from the bottom. Give it a fixed within height. Do this one from the right and bottom with a fixed within height. And this one could have a fixed within high as well. But we'll do it from just this bottom here and then we'll align it center on the screen. Okay? Everything is aligned Looking good. This is our container view. And to show that it's gonna be working, let's just change it to an ugly, bright color. That way we know it's gone. So there we go. If you get a seizure, it's not my fault. You sign the disclaimer. Um, okay, so, view controller, right over here, bringing this where we need to do run our code, okay. And so let's go ahead right here in view. Did load and let's go ahead and start working with our, um with our web you now we can't create a web. We can't create a web you yet unless, um, we have the ability to, uh, use it. And you don't at this point and tell you import Web kit. That's the framework that you need to import in order in order to be able to use the W K Web view. Now, also, you can tell we're also missing our container view. So at I b outlet week of are what is called container of type You live you and ah, before we forget. Let's just go back to our view controller here and connect it up. So it would be this view right here. I'm just control dragging, of course. And let's select container Now that is attached. So we're gonna dio is we are going to create our review. So, um Web, I don't have you to as well. That's what we needed first. So let's go ahead and say of our web view of type wk Web view. There we go. Okay, So Web view equals W K web you just created right there. Okay. And then ah, so now we've created it. But when we got to put it on the screen, right, So all you gotta dio is come do container dot ads of you. And since wk web, you inherits from view like every other control does, you can actually just but it right here. So by the way, we haven't done That's a lot in this course, But as you become a more talented IOS engineer, you're going to be adding lots of sub use via code. I do this all the time. I don't just work in the store, but some things even easier to do it here So just know that any of you, for the most part, can have a sub view added onto it, and you could do it via code via add sub you, um so that's really cool. But when we add it, we need to make sure that even though you're adding it doesn't mean that it's going to be the exact same size nohow. Sometimes on storyboard, we drag control on, and it's never sized appropriate way Drag it on. So what we need to do is make sure that the size of the Web you matches the exact bounds of the container that you just put it in because we said that Containers constraints. And we want the Web you to have the same constraints. We just need to make the Web you match of the frame of the of the container of U. S. So what we're gonna do, we're gonna say, Let frame people studio wrecked make You could make a frame anytime by doing see direct make. We wanted zero from the top zero from the left. That's the top left corner. That's where it starts, okay? And the with is gonna be the container dot bounds that with and the container dot bounds dot hype. So we're just saying Hey, but in the top left, because that's where that's where always starts in the U. S. Top left Make it the with the same is the container and make the height the same as the container. And then what Will dio is? Well say web you got frame equals this frame right here We're just readjusting it. And by the way, notice how I change the frame after I added it. It's always best to change the frame after, because once you at at a sub view, it now inherits the parents coordinate system. So whatever review you put it on inherits the parents coordinate system, and you need to make sure it lines up in the parents system there. So okay, that's looking good. So then all we need to do now is actually loaded request. So let's go find a website to load just to start off with its going to good old Google chrome here and see if we can find something about Swift. So a sudden swift blood Ellis to the Apple Swift blawg. Perfect. Okay, that looks good. So let's go ahead, and I'm gonna say, uh, let your L string equals this. Okay? And that's fine. And so we've got our your l So what we need next? Ah, let's just do the irregular euro is me and this u r l uh Come on, spelling here where we go and we're just gonna create and as you are, well, like we've done in the past or not, depending on when this video was created. But this is an n r sc, Earl, and, uh, we're just gonna pass in the euro string. Okay, Looks good. And they let request equals Earl requests. We got to make a request. And it's looking for euro, which we know you there ago, which we have right there. Then all we have to just say if let your l equals. Um, no. Excuse me. Um, not that What we need to say is, uh, first off, create the exclamation point right here just to say, Hey, uh, we're unwrapping this girl, and then all we need to do is say, web you dot load request and passing the requests. Okay, so all that's happened so far because we created the web. You We added it onto our container view because you can't add Web use from interface builder. So we have to create a view that, well, the sizing that we like and just added on top of it as a sub view and then set the frame of it after we've added it. Grab the or we want a load turn into an issue rural create an end is your or request because the Web use looking for that request and then we'll start that request. So we connected our outlet here. So if all is well, we should see the apple Blawg loading up in our Web you whenever we run this application. So let's go ahead and give it a shot. There we go. Okay, so looks like we have a couple of problems. Okay, if you notice we could still see some of the green, which means that it's not going down all the way. So I might have missed a constraint and, um, also notice how it's being cut off. The Web page itself is being cut off from the right hand side. That's another problem we need to address. Let's take care of the green problem first though. I'm gonna go to the main story board. Let's click our guy here. And if I look at bottom space, notice how it's doing 50 from the bottom. That's our problem. I was thinking maybe it was 50 from the gray, but it's not. Let's see here. Uh, you know what? Actually, I think we actually do want it. Um, it it, you know, I just put it back right there. I think I know what the problem is, and I think it's related to this problem here. Eso you notice how it's cut off right here? And then how are web? You, um the green actually is going where it's supposed to, but I was wrong. The greens going where it's supposed to go. Right? But the web views not. So it's the same promises. It's getting cut off here, and it's getting cut off here. And here's the reason why. Okay, so remember how we have constraints on that Greenview set up right here. Okay. And, uh, but we don't have So anyway, what's happening is we're going to viewed it load right here and viewed it Load. OK, make this bigger for you here on view. did load. All this is being called before the constraints are applied, so the constraints haven't been applied. It serve. You did. Load is not a good place to be grabbing the bounds. Okay? And just to show you they were in an iPhone six. And, uh, if we want one quick test, you can dio, as you can say iPhone six, um, resolution in life. Okay, so, Skilling factor of three A s o. Um, it's what it's saying is it's 12 42. So if you say 12 42 divided by three, Um, because has a scaling factor of two. Well, it what we're expecting is for it to be 6 21 Okay. Or 4 14 You know, we should see some type of value like that when I print to the screen. That's how wide my screen should be, right? So if I go to print and I say container dot bound, stop with we should see one of those values when I print this. This is a test were debugging. This is how you solve problems when you're a developer. What's going on here? Well, that's interesting. Why does it give me a with of 600 that just It doesn't seem like the right with so and it's not because it's not being It's not going to the edge of the screen, as we would expect that to cause the constraints haven't been applied it. So let's go ahead now and actually just take all this right here and cut it out, okay? And let's go to a override function called View did up here. So after the view appeared, then let's run this because in this function the constraints have been applied, and let's go ahead and just move it there and rerun it and see if our if the bounds here are going from edge to edge. Hey, look at that. So it's going all the way to the bottom in all the way onto the right hand side. It's sizing, as we would expect it to size perfectly, and so again, the reason why is container not balance that with that start that was our container in our storyboard. This guy right here a T interview did load it still hadn't had the constraints applied. Haven't stretched the side of the screen on Lee after viewed, it appears, are viewed it load happens with those constraints be applied. So now we can grab the bounds and the with of all those things right there. So, um cool, Super cool. So there's your website. Looks great. Let's go ahead and connect some things up and show you how to just load requests as well. So I'm backing interface Builder. Open up the assistant editor here, and so that's controlled Drag here, make a 90 action and let's call this Ah, load swift things call this changes to inaction. I'm just control dragging into the editor here in this one to be called load gossip and load steak. That's my favorite one control drag changes to inaction. And let's call this load steak. Okay, close. Is this an editor? Let's go ahead and go back to the view controller here. We've got our three ivy actions. Course we're gonna be cool and clean this up. There's nobody likes ugly code. Okay? Yeah, that's cool. And so what I'm gonna do is create a new function called load uh, load request. It's gonna take your l string type string, just weaken, have reusable code. And what I'm gonna do is actually just, uh I'm going to copy this year. And what we'll do is, uh, we'll take this out here, okay? How? Executed to me. And let's actually take this out here, too. What we'll do is we'll make this reusable function, that's all. So I'll just, uh, from right here, let's scrap this here, commit a command X to cut it. And then now we can just call our function, and it's a load request and just passing a string. And we could do that from any of these here. We just got to get the We gotta get the or else. So let's go. And, um, celebrity gossip. Oh, see what's flowing around on the Internet. All right, look at that. There's even a who? Team Z. That's Ah, that's a legitimate website. Okay. Ah, so there we go. So low gossip. All we're going to say his load requests and we're gonna pass in the string and ah, more. Um, I love steak soup. There's a blawg. Come on, There's no blog's just about steak. Here we go. Prime cuts. Blawg said. I knew it. I knew it. If steak offend you in any way, feel free to put whatever type of food does not cross your more boundaries. All right, so load, request load requests. I put in the wrong spot, though this should go in the steak won, Of course. And then if we do click the swift button, we should actually just copy that and put it here. Okay, so all this did was create a functional over load the requests and connect up these buns so we could just We can just see make sure that the request is changing. So basically, this code is going to run each time, and we're just changing the euro, and I just want to make sure it works, and, uh, it's not gonna work. And I'll show you why in just a second here. So we know Apple blog's gonna load. OK, but what happens if we change to celebrity gossip? First off, let's make sure that it actually extra guy here. Okay, So notice how nothing's happening. I just did a break point. This is not changing, right? And there's a reason why it's because I was nine. If it doesn't have the https, apple will not loaded your iPhone won't lotus. We got to get permissions to websites to be loaded That don't have https. That's how it used to be. And, you know, they recommend that, um that you don't allow them to allow users to just use any arbitrary website. Well, you could be the judge of that. So n s ap transport Security. I just opened up my info dot p list right here. Okay. And at the bottom, here in its app. Transport, security. That's what you need to type. And we're gonna changes to a dictionary. Okay? And, ah, you need to have an item in s allows arbitrary loads. And that's gonna be a boolean. We're gonna say yes. So what we're saying is, hey, allow any arbitrary website to be loaded from our application. Um, And again, there it is right there for you. Look at Okay. And this app Transport security. Don't forget it. You're gonna have lots of problems. We're trying to load websites, and you're like, why isn't it working? Well, it's because, um, you gotta give it permission to now on IOS nine Cam running. Okay, there. Swift celebrity gossip. I just click the button. And as you can see, there goes, It's now loading. Now maybe what? Maybe what would have been a better user experience is if you like, made a loading spin or cleared out the other Web page first, cause it didn't look like it was working. But it waas and ah put the stake blawg. So it's running its request behind the scenes. And there it is. There's our blogger on steak Click. Celebrity gossip should load the same again. And there you have it. Look, even even adds a popping up Just what we want. So very cool stuff. So what you learned okay, Was that wk web? You is not available in interface builder. So you've gotta add it via code you could via add sub you. We put it onto a container that was part of the storyboard and then we didn't do and viewed it load because the constraints were applied in view did load. And we want our constraints to be planned after. So if you want to add things programmatically and have proper bounds and dimensions, you could do it in viewed it appear, which is what we did here. We set the frame of developed web you to match the the container of you and then on the load request. It calls this function here which takes an N s A r l puts it into an MSU wrote request and puts it in a web. You and then we just showed you how you can load a few different types of a website. So, um, very cool stuff. Um, you you use these, you use these, uh, frequently, not a lot, but you'll use them frequently and a very powerful tool. Um, in fact, you could Like I said, you could build very complex applications. If your CSS html JavaScript expert, you should play around this more because you could know what actual HTML into this design, your own things. You can do all kinds of fun. So if you can pass variables back and forth between swift and and the web, you so lots of fun. This is all we're covering right now, but good stuff. So that's Web. Use UK love you and not much to it. So that's it. See you next time
60. App: Ugly Stuff - Custom TableView and Custom Cells: Okay, everyone, Mark Pricier. Deb soaps dot com And last time we talked about using a y table view controller to show a list of data on the screen. And today I'm gonna show you the way that I like to do it, which I think is the better way. And so go ahead and create a new X code project. Great New Mexico Project single view application will be fine. Let's call this ah, marks, table view. Okay. What I want to show you, I think is the best practice on gives you most flexibility, so all right. So go to your main dot storyboard. Last time we went in here and we deleted our view controller, OK? And then we put in a table view controller, and the table view controllers is a convenient controller. That manages a lot of stuff from you, but we're gonna do it manually ourselves. And we're only going to use what we want. Case go ahead and type in table view. And instead of dragging and dropping in the table view controller, grab this table view right here and ah, go ahead. But it wherever you want, I'm gonna make mine go full screen here. Well, mome almost full screen. Ah, the other table view controller forces you to go full screen and forces it to be the only thing on the screen. Really? And you gotta do some work arounds to get around it. We don't want to that we want complete flexibility. So instead of putting the table of you controller in a different section over here, we're actually just putting a table view, Not the controller with the view itself on our view controller. So we're gonna leave our view controller, and I'm just having a new I view and and putting up of you up here, you know, we could make a nice little banner just for fun, that's all. Just for fun. And we'll drag it up to the top and give it a nice color over here in the right hand side. I'm gonna pick this. Ah, it's nice yellow color. And if you want it, it is FFC 11 D. Okay, so we've got a cool control or cool view up there and let's go ahead and pin it when pendant to the top. No margins. I want fully across the screen and the height can stay the same. That's looking great. And let's go ahead and make a label just for fun. Okay, there's our label. Gonna drag it out, make it a little bigger, and we will center it and let's make it changes to different fought. Let's change to custom and, let's say, a Vatican Ooh, that's perfect. And ah, I like it. You know, this could say, Ah, ugly things. You're like Wait, what? Well, let me just show you what we're gonna dio. It's gonna be fun. So there's our label. Let's go ahead and give it a within height. And let's add that. And then let's go ahead and click the alignment menu and put it horizontally and vertically in the container. Okay, Last thing we need to line up is our table view, so let's just move it up a slightly there. I'm leaving a little bit of a gap, but we'll fix that with constraints and actually changed my mind. Let's let's give it a little bit of a margin. Let's do right there and right there. And you can't really do this with the other table view controller again. This is complete custom functionality, which is really nice. This is kind of what you're gonna probably doing your job. I just move that up instead of their ego. So what I'm gonna do now that I've got it about, So I'm gonna make sure it zero from the left. Margins are on zero from the right. I want to actually 20 from the tops. I'm going to click that, but change it to 20 and 20 from the bottom. That'll give it a nice margin all the way across, and thus add those constraints. So there's our table view. It's looking real nice. Now, Um, we talked about last time how you know, we had the list of cars and we just inject the data. But now we can actually create a custom table view cell, which is really cool. So on the right hand side over here, type in cell and we want table view cell. So just drag it over here in the top of your table in the table for you, and it's a prototype cell. And so what we're gonna dio is first, I'm gonna change the background color just to a different color for now, so I can see how big it is because the white is kind of hard to see how tall you're making it, and we're gonna make it bigger. Let's make this a big sale. And what I want in it is an image. Some of the dragon image. It's too big right now. We'll make it smaller. There we go, and I'm gonna make it a square. So we'll say we'll just say 75 by 75. And I'm gonna make this a little bit bigger. So lines up a little better. Yeah, that's not what I wanted. There we go. OK, so were lined up. It's looking good, and we've got an image there. What else we want? Well, maybe we'll put our own label in Okay, how we want it. And we'll make it long like this. Maybe we'll put it right now. Let's keep it right there. Kind of, Yeah, let's put at the end. Why not? And OK, Alex, cool. And let's go to custom change the fun. Let's make it really, really big. Just for fun. I'm just showing you can do all kinds of custom things and, ah, let's move this back over here. And I'm really liking it, actually. What if we do this edge to edge and then we center it. Ooh, There we go. OK, so I like where it's going. Okay, What I'm gonna do is pin it now. That's been the image first, actually. So let's pin the image to the top and to the left and notice how on a table view cell there has actually margins in the top in the bottom. As you can tell, 00 But we're not at the edge, so there's some margins there. And, uh, let's give it a width and height. Let's make that fixed. Okay. And, ah, are label here. Let's actually let's make it the same height just for fun. Make it easier. So let's go ahead and say we want you ate from the left. In fact, we don't. We can just select all these here, so it stretches and grows as needed. We got our label and we got her image. Now I'm gonna change the background back to White because Red is overbearing. I just wanted to see where I waas and let's go ahead and change back to default, and by why it's actually a clear background. So um, that's looking good. We just created a custom cell, okay? And so we've got our table view. We've got our customs sell. Now we need to go write some coat, so go over to your view controller. Okay? And a few things we need to dio. First off, let's get rid of this junk we're not going to use and get these comments. So before we just inherited from table view controller and implemented all those delegate functions for us now, we're gonna actually manually put some protocols here. Which is you, I table view data source. And you I table view delegate. Now again, this was automatically included in the table view controller. And if you're thinking well, I didn't have to write it before, so now you're making me write it. Well, that is true. A little bit more code, but a lot more flexibility. So I think it wins in the end, and we need toe have a table view itself. So let's go ahead and do an I B outlet Week of our table view. Remember, the table view controller automatically connected the view first, we're gonna do it ourselves. So not too big of a deal. Okay, there we go. You I table view will connect that up in just a moment. And, you know, we have some functions, and it's actually good to do this way because you memorize them. So let's go on to sell for hoops table view, cell pharoah, index path. Find that one right there. By the way, these wouldn't pop up if you didn't implement those protocols. We just implemented these air protocols. Meaning, Hey, we're gonna abide by the rules that you've set, And, uh, if you click on one of these here, Okay, it has a bunch of optional function saying, Hey, here's some optional functions that your table of you can call and we want to listen for them. So, uh, that's cool. We got the cell fero index path. What were the other ones you remember? Well, we had a number of sections and table view. We're gonna return one, and then the other one was table view, and it was number off rose and section, and we don't have a data set yet, right? But we can do that right here. And so just for fun, this app is gonna be called ugly things, okay? And, uh, you're like, Well, where is this going? I'm not sure I like it. You're not gonna like it, but it's OK. Eso we've got an empty array. Oh, this should be Ah, actually, this to be an array wrong programming language. This should be an array of type string. And there we go. Empty array. Okay, Now, what we can do is we could say we want the number of rows and section to be equal to ugly things dot count And when it and I need to return that actually, there we go. Okay. Lastly, we've got the cell Ferreira index path, and if you remember, we need a dick. You a reusable cell? So what, we're gonna dio we're going to say, let's sell equals table view de que reusable cell with identifier. And ah, we'll do that for right there. Okay? And the identifier, We're just gonna call ugly cell, okay? And that's looking good. So we got our cell, and then ah, we need to return that because that's what it's asking for. Now we're also gonna need to configure it, but we do have a problem right now. Right now. Um, we, uh We don't have a custom cell to, um, to assign image to put a label on. So we got a few problems We need to work out here. Okay. And so let's go ahead and write a custom class, a subclass of white table view cell. Okay. And this is what you're gonna have to do Any time that you want to, right? A custom, Have a custom self. So let's changes to you. I table of you sell, okay. And we're just gonna call this ugly cell, okay? And we don't need to create a zip because we're doing it in storyboards and go ahead and create it. So now we've got our customs cell, and if you remember, right, our cell needs that have an image and a label, okay. And we've given it its own spacing and layout. Completely custom. Somebody get rid of set selected. We don't need that right now. And let's go ahead and write a function called configure cell. Okay. And in this cell, what do we want to do? We want to pass in an image and we want to pass in text. So we're gonna say image image of type you I image okay, and we're gonna pass in the text. We just got a text of type string, and then this sell itself is gonna have some I be outlets because we're gonna drop, drag and drop the image and label on it so weak bar and we're gonna say main image okay of type you I you I image view and then at I b outlet Week Bar, and we're gonna call this main label of type you I label and then in the configure cell, keeping my remember on cell pharoah index path, it gives us a new cell and reuses it. We're just going to say, Hey, we're gonna pass and custom data here and we're gonna reset ourselves. So remember how I said when it raises the old sell, you have to clean out the old data and put the new data back into it. That's all we're doing here is that we're doing it ourselves. Where's before? We just did detail label, main label. So here all we have to just say main image dot image equals image, meaning the image of our image view is just equal to the image against passed in and then we can say Maine label dot text equals text and number is gonna pass in this text here, and maybe you still don't quite see where we're getting at here. But watch now, go back to the view controller. And now we could do a few things First off now we could do and if let because we don't just need a regular table cell. We don't need a table of you, so we need a custom ugly. So that's what we created. So I'm gonna say, as we got a cast it to an ugly cell So now we're saying, Hey, if there's a cell, if we could get a reusable cell of this identify air, let's go ahead and use it. So, um, that's great. So now what we could do, we could say, Sell that configure cell and it needs an image and text and we don't have either of those yet, so we can't really do that. We can't configure our cell yet, but we can do is get the rest of our boilerplate code. So if if we have this cell right here for was successful, let's go ahead, just return it So if we've successfully re used a cell, return it otherwise. Okay? Otherwise what? We're gonna dio else we're going, Teoh return a brand new ugly sell, like so. Okay, so keep in mind if it fell to give us a cell or it fell to cast what you won't. But if it fell down anyway, we would just create a brand new one. Okay, remember, we're using cells, so you got to use an old one or use a new one. So that's all we're doing here. Okay? And we can't configure it yet because we don't have our data source yet, so we're gonna need that. So let's go ahead and have some fun. You can follow along with me, uh, or skip this part of the video if if it takes you, takes you too long or kind of dry. But we're gonna go get some images, okay? We're gonna go get five images, so I'm gonna go to Google, and I'm gonna type in the word ugly things. Who I am scared. What's gonna happen? I'm gonna click images and ggo. Okay. So, um alrighty. I'm going to click the image here, and I'm going to Ah, view image. And I'm gonna grab this image right here. I'm gonna copy it. Okay. In fact, let's put this on the left hand side and let's put this on the right hand side. So I'm gonna go over here to my view controller and ah, in my ugly things string right here. I'm actually going to just take off the ah, the string here, and we're going to go ahead and just put letter string liberals in here. Okay, so the first you Earl is gonna be this. OK, that's one. And I was not that these kind of cute. Ah, there we go. Um and, ah, I don't know what this is, but we'll grab this one who have some of your cringing right now. You can do pretty things. So there's our 2nd 1 and Ah, so, um, let's just throw the gremlin on here just for fun. So that's two. Here's three. I'm just making an array of your else. OK, so that's That's three. And ah, let's go ahead and get the blob thing you hear? And ah, we've got this. And ah, so that's 41 more and you won't have to look at these for too much longer. And, ah, some of these things are so bad. Oh, well, I spoke too soon. All right, so, uh, here is number five. Okay, so now we have five euros, right? Okay, let's expand our code again. And, uh, remember, this isn't a race, so they're separated by comments and these air strings, okay. And, ah, what we're gonna do is have a second array when we're gonna call as far ugly titles. And ah, I remember what they were. So just put in whatever we want. So, uh, we'll say, man this and this is, uh, ugly. Well, and ah, this one isn't so bad. He's putting random random phrases, and he would need five of them. Ah, I wouldn't. I want to look like this again. I can't remember what we're doing here. And ah, so you've got 123 Whoa, man. No, thanks. That's four. Somebody, Somebody turn off the screen. Okay, so now we've got five titles, okay? And we got five year or else that's what we want to do is show these in our table view cell . Right? So now what? We can dio This is really cool. We can go to our table view right here. And since we know index path, that row is always going to the current row. So it's gonna be we're gonna have five. We could just grab and create images and things right here. So what, we're gonna dio is listed the image first we gotta download it from the Internet. Okay, Let your l equals s Earl of type String. There we go. So we gotta created your l first, and this one is going to be What was it? What was the rate ugly things? Um, yeah. I want to say ugly things. Um, index path dot wrote. So let's grab the current element out of it, which is a girl, which is fine. And then what? We need to dio because we need to download that image from the Internet. And when we do that, it comes down his data as N s data. So we're gonna say, let data equals N s data. There we go. And we're looking for contents of U R L right there. And it wants euro, which would just create it. Okay, and then ah, what we're gonna dio is ah In fact, this should be an it. Let if let right here if let data, OK, and ah, that looks good. In fact, there's a couple things we could do here, actually. Um, yeah. So if let data, what it's gonna do is it's gonna download it. And if there's any problem, it's it won't execute this code. Otherwise that, well, I'm gonna go ahead. But exclamation Also at the end of our you, Earl, because your l's aren't guaranteed to create your l. But since these are actually or else and I just got them from the Internet and no, there are working, it's okay to with this exclamation point here in the future. If you were downloaded these from the Internet randomly, like a user could grab them, you would definitely want to do an in flight here. But since this is hard coded and I know they work, okay? And so if let data so if successfully downloaded data from the internet Okay, what we're gonna do is we're gonna say image. We're going to say what I want to say. Um, the screen image Let I m g equals you. I image and that it has one where you can create an image from data. That's a constructor right there. And I can say data. Okay, So if let data if it worked, if it downloaded the image from the Internet, it puts it in this data, and then we can convert the data to an image, and then we can use the image. Okay, Not too bad. And so that looks good. Um, one thing I want to do, though, is handled the case where maybe, um maybe there's no, there's no ah, there's no image. So if I go back to Google, let's just grab a like a placeholder image. So ugly things on Google and let's scroll down and hopefully don't see anything bad here on the Internet. And, uh, this isn't ugly, but it's ah Okay, so let's go ahead and just drag it onto the desktop here and what is going on? Um, I don't get it. That's fine. But anyway, um, let's just call this dog and I'm just gonna do click assets here and drag it in again. You can grab any image you want. This is just for complete. Fund the images K. And I'm gonna that looks good. So what I'm gonna dio is actually, um, go back to my code. I just click the back arrow here, okay? And so what we're gonna dio is ah, let's just create an image here. So I must say of our image of type you I image and I'm putting in an exclamation point, meaning? I know there's gonna be a value there. So what I'm gonna do is I'm actually just going to say image. This image right here equals this. And if there was, it was not able to download the image. What we can do that to say image equals you image. And we're looking for the one named, and I think we just called it. Ah, dog. Right. That's what we called over here in the Assets folder dog. So it's gonna it's gonna instead use that image. Okay, so we've got we've officially got an image here now, downloaded from the Internet, By the way, it is downloading it synchronously. Meaning it's going toe. Pause your program until it downloads, which will give ah slower user experience in the future. You're gonna learn about doing asynchronous Web Web calls where you can actually download on a separate background threat so it won't make things seem slower. Ah, little techniques like that to make your application and extra powerful. And so that looks good. We got our image. So now what Weaken Dio is Ah, we can configure the cell so I can say sell dot configure, sell it once an image, we have it. And the text, if you remember right, is gonna come from ugly titles. So all we have to do here is say, ugly titles, okay? And this is index path dot ro and sweet just passed in an image and a title into our celled configured it. And, um, this is looking really good. It's looking ugly. That is looking good. Uh, let's just run it and see. I was like to run it and just see, I may have to have a crash, but that's okay, that's expected. This is how I actually developed in real life. If anyone tells you it's any different in this, they're lying. Teoh. This is how developed development really is. You're seeing the real world here. I want to be honest with you about how things are. Get your real taste of programming because this is what it's like. So were loading it up. And I know I forgot something I can already remember right now. It may crash. It may not. So Okay, it didn't crash, but it didn't give us what we're looking for, right? So one thing that I did forget is ah, remember how before, when I went into the main storyboard, right? Okay, um, before I clicked on table view and I right clicked it and I showed to the data source in delegate. I could just drag it over here to the view controller and assign it, but we're gonna do it a different way. And river, the data source and delegate, Um, that's what tells your code to listen for events from the table of you. Like haloed new rose. This and that. All that good stuff. So what we're gonna do is on view. Did load. Okay, We're gonna say table view dot delegate equals self and table view dot data source equal self. And I noticed we actually did. We missed two more things. We didn't connect our table view and we didn't connect, Al, it's on ourselves. So I got a little ahead of ourselves here. That's OK. Easy fix what we're gonna dio. Okay, right. Click the controller and see where it says table view. That's our baby outlet. All we gotta do is drag it over to our table view. Not so bad. Okay. And then on your cell, which is right here. This guy right here, right click it and noticed. Um, wait a minute. Oh, it's right here. See this? Right here inside the table of you Sell. No, it's not. Where is it? I'm looking for our outlets, but I'm not seeing it here. That's interesting. Okay, let's go. Let's go back and look at our ugly cell. Oh, I know why this is. This is why so on your table of you sell right here, we forgot to give it the custom class. Ha ha. Which is if you go over here, click that little rectangle ugly cell. See, we set the class so it can recognize the outlets. Okay? And also, we have to give it the reuse. Identify right? And if we remember, right, the reason identifier we gave it waas ugly cell with a lower case. You okay? Let's be conventional and just give it a upper case just like the name of the class. So that's all consistent. But back to Maine storyboard. Click your sale and give it a reiss identify of ugly cell. Okay, now, if you right click on Ugly Cell, you should see there it is your main image so you can drag it and select the image and your main label and drag it and select the label. Okay, Megan Progress. Let's go ahead and build it and see if we've solved all of our problems. Here comes and look at that. It's working. It's working, although it looks like it felled Teoh. Download three of the images. OK, so it's a good thing that we set the default. Sell their right. Um, yeah, it's ah, doesn't like doing that. They're so not too bad. Three of the images fell to download that could have been Jeffs or something and didn't know how to parse it correctly. Um, that's okay, but we know that it's working right. It's looking good, but the text you know what? It's a little bit big. And so what if we wanted to shrink down? So we can do is you can select your text label right here. And instead of fixed font size in the right hand side under auto shrink, why don't you do minimum font size and give it a font size of, like, 10? Meaning it's gonna shrink it down all the way till 10 until it fits. Also, I don't like I don't like the divider lines. Okay? Not at all. So I'm going to click my cell, and I'm going to actually, I'm going to click there. This No, that's not it. I'm gonna click my table view, and I'm going to go to separator and turn to none. So we're gonna turn off the separators. I just don't like him. And ah, then I also don't like how there's the images Air Square. So let's go to our ugly cell we're gonna do is our our wake from nib function. We're going to this is called when that first awakes and shows up on the view. What we're gonna do is give it a rounded corner. Just add a little bit of love to it. A little bit of love and attention can take an IOS app a long way. So we're gonna say lair dot corner radius equals five point. Oh, so it's gonna It's going to make the ah, the borders on it rounded. Okay. And ah, then also, what I'm gonna say is I'm gonna say layer dot clip or dot Let's see here, Blair Mayne image main image, not clip to bounce okay, equals true. So what's gonna happen is it's going to make my image. You have rounded corners, but if I don't do clip to bounds, the the actual image inside of it is still going to come outside of it. And we don't want that. We want anything that's that's outside of the bounds to be clipped. So it gives us that nice, rounded style Scott and rebuild it and see if we got rid of those lines and made our image is a little more round. And here it comes, Moment of truth. Hey, look at that. So the images air there. It's not squaring them, though. We need to fix that, actually, and ah than ah, the funds. So they did definitely shrink in size here, so that's really cool. That's really, really cool, actually. So, um okay, fact, I'm not quite sure why the corner radius didn't actually work. Um oh, that's why it should be main image dot lair dot corner radius. I did the cell dot corner radius itself. We need to set the image to have a rounded corner. You guys, like already saw that dummy? Sorry. Can't be perfect. Pretty close, though. There to see how it's rounded. Now looks great. We just made a really cool app in a very short period. Time downloading images from the Internet, using a custom cell with custom outlets, all kinds of good things going on. This is how you want to develop IOS saps like this, using custom cells, making it look really nice. It didn't take that much time. A little bit of a little bit more work with a long way to making this a much better application. I think so, Yeah, The things on it are ugly, but it's pretty ugly application. So that's it. This is custom table for yourselves. This is custom table views and this is mark price with Death slopes signing off CIA next time
61. NSUserDefaults: Hey, everyone, Mark Price here in depth slopes dot com. And today we're gonna talk about Ennis used defaults. You'll be using these in the my foot app on their great way to, um, to store data on your device and on a pullup in a new project here. So file new project. Okay. And so the goal is to be able to persist data to the disc. Okay? Meaning when the app closes, we can still load data from the iPhone app. And, uh, in this user defaults, we'll save it to the device. And it's not as robust as some of the other systems like SQL light data base or core data, Um, but still very powerful. And many, many, many applications can be built using just this, even if you know. So if you don't start things on the Internet, you can do it with your s user defaults. Really cool. So let's go ahead and click Single view application. And let's just call this defaults are fun. It's created here on the desktop. That's fine. And go into your, um, view controller here. So what we want to do is, let's say we want to store um, a user's favorite color. Why not? Let's go to the main story board, actually, and asaib unbutton. Okay, what we're gonna do with this button, he's gonna make a little bigger here. I'm gonna take off the word, but in I'm gonna give it a background color down here and we're gonna say read you pick whatever color you want. That's fine. Let's just make it a nice election election. Let's make it a nice rectangle here. We're gonna do three buckets, k, and we'll go ahead and do a within a height. And I'm just going to control C Control V and control C and control of you one more time. And, uh, I'm gonna change this middle one to a different color. The scroll down here. Let's change it. Teoh yellow and the strangest one to blue. So red, yellow and blue, these air three buttons, OK, And so let's go ahead and let's just slept all three and align all of them horizontally in the container. Okay. And then this top one, we'll go ahead and pin it from the top, and that's fine. And we'll pin this one from the red 1 20 pixels and this one from the blue one by 20 pixels . Looks great. And they should also have their within heights. Yes, they dio Okay, so we've got our three buttons here, so let's go ahead and open the assistant editor. And what we're gonna dio is Ah, let's turn off the left side here and the right side Just for more space as let's create three I be actions. So right there, sir. Control dragged from the red one. And let's change this to inaction. And we're gonna call this, uh, just call it red and let's control drag from here. Let's call this change to an action and call it yellow. Okay? And then let's control drag from here, and we'll call this one blue Change it to an action. Okay, so we've got red, yellow and blue. And what's gonna happen? We want to dio is store the users favorite color. Okay, so let's close this real quick and open up the right hand side. And one more thing I want to do is have a label at the top that just shows the users favorite color. So what? It will dio so like it bigger here? No. Well, center it. Let's make it even bigger. Okay? So centered it there. And you know, so it looked like this. It'll say favorite color. And they'll say, like blue. Right, Um, or something like that. Okay, that looks good to me. I like it. So let's go ahead and give it a within a height. Amputate 25 from the top. And let's also click the alignment menu and horizontally and container. Okay, So the idea here is, um basically, if there's no favorite color, it's gonna say it will say a pick, a favorite color. And if there is a favorite color the next time, the upload that's gonna show that color Okay, using s user defaults. So let's go ahead and assistant editor again, and I'm just gonna make and I'd be out of control drag over here and we're gonna call this favor label now close the assistant editor. And then let's open up the left hand side here and open the view controller. And what we're gonna do is whenever a buttons press, we're gonna save it. That's all s O. What we can do is, um, say, uh, if the red buttons press okay, we're gonna do? Two things were to say favor label. Okay, favor label. Um equals, um, Faiveley will not text equals favorite color. Okay. And we'll do the special variable insertions index here, and we're just going to say, actually, don't even need that, to be honest, because it's not a variable. So I will say very color red. And in fact, we can copy and paste this on all these. This is not necessarily great coating practice, you know, repeating ourselves here. But this is just this is not the point of the exercise. So yellow. OK, so we're gonna update the label that we're also gonna dio. Okay, What we're also gonna do it's a n s user defaults, not standard user defaults that set, uh, object. So this today, when you object over the value in a key in it or you could set value four key, either of them will work. Okay? It looks go ahead and say set value for key, and we're gonna say the value is going to be read four key color, okay. And what weaken Dio is, uh, copy and paste, This is well, two on each of these will change the colors. Okay, so I'll change this color to blue would keep the key name the same, but will change the actual value and this one's gonna be yellow. So what we've done is we've gotten these user default here, and we've set the value for key. There's one more thing we need to do is say, Ennis, user defaults that standard you standard user defaults that synchronize. And what synchronizes gonna do is is this going to actually save it to the disk? And so we'll call that each time as well, to any time we want to save something will synchronize it. Okay, Synchronize, synchronize, synchronize. All right. And then the last thing we want to do here is on Viewed it load when the APP first loads. If there's a value in there, let's assign. If not, we'll change the label accordingly. So we'll say, um, if let and we'll just say color, we'll get the string color equals N s user defaults that standard user defaults dot value four key reaction. So we're gonna get value for key, okay, And the key is gonna be color. So what we're saying is, hey, grab the value for the key. And of course it doesn't. It doesn't know what type it is, so we can say as string, Okay. And there we go. So basically, we're gonna try and grab the value for that key. If we get in here, it means there was a value if we didn't get here, we know it's the first time loading. So what we could do is say else. So if there was no value, we can say favor label dot text equals pick a color. Okay. And, uh, otherwise, if there is a value, what we're gonna do is we're gonna say favor label dot text equals favorite color and now use the special strings index here. Insert variable insertion will say color meaning, referring to this variable right here that we called color. So this is what's gonna happen when the APP first loads. If there's no user default, it's never been said before. It's gonna say, pick a color on the label. Otherwise, we're gonna set it to the favorite color that was picked just to show that it exists beyond the death of an application. And, um, what we have here is when you click the buttons red blue or yellow. It's going to, of course, updated label, but it's also going Teoh set a value for each of those colors. In the end, the standard user defaults for the key color, it's gonna either be blue, red or yellow. And that's gonna store on your device and synchronize actually synchronizes and saves it to the device. So if I go ahead and run this, we should expect it to say pick a color because we've never saved anything yet. Okay, here we go. Running the application. Cruz is here. Here we go. Alright, right. Yellow and blue. So I click red Let's just make sure they're all working yellow blue So they are all working as far as the you I hear. And so let's dio let's do read. And so this should have called this red function here and should have saved it to Ennis. User defaults, right? I remember how in times past we closed the apple reload and everything will be reset. So now if I stop this, okay and I go over here and you could do command shift H, that's gonna take you to the home screen. Okay? Command shift H and then if you do command shift Uh um h twice in a row, real fast. It it pulls open the multi task manager here, and we can just drag up to close it and kill it. Okay, so it is officially killed. The APP is not loading at all. It's out of memory. So when we load this, we should expect that label based on this right here. We should expect that label to say red. And that means RNs user defaults are working. It's safe to the device clicking the app. And there it is. Favorite color red. So it definitely saved to the device, which is great. So what can you save? With N s user defaults, you can save strings. You can save integers. You say billions. You know, all kinds of numbers, things like that. You could even store, like, full on classes and data. And so we're gonna talk about that now. So we've we've done. It's just a simple value here, right string. We could also have done a number set a value for Kia number. Something like that. Um, so we've just set simple strings, and by the way, this is very powerful in and of itself being able to set strings. You know, if you want to save, um, a unique thing for that user or whatever data that you want. But let's talk about a better instance where Let's say you have a list of items. Okay, so let's say we create a new file called person. It's gonna be a class. Okay, so what's a person and put it right here and what will deals will say class, person, And we're gonna have a of our first name of type string bar, Last name of type string. We're not going to private variables right now, just just for demonstration purposes. So a first name in the last name, right, And then un initialize er first of type string and last of type string. Okay. And, uh, I don't need that. There we go. That's what we could say is Ah, first name equals first and last name equals last. That's the initial Isar looks good. And so let's say in our view, controller here. Okay, let's say we want to have an array of people so far, people equals an array of type person. Let's just make an empty ray okay. An empty array of type person and then right here we can just ah, weaken, sit. We can create a few people. Let's create three. Okay, so var, um person a equals person. Let's give it a first name. Last name. Uh, wing John Everyone Wing Chun tonight and ah, person b equals person. And let's say, uh, Lady Gaga, if she is still classifiable as a human being and bar person, c equals person and ah, this will be Justin Beaver, the baby baby. Er, who cares how his name is Bill? All right, so there we go. We got three different people, right? So how would we save this now? Could we do something like this? Could we first, let's actually added to the right. Sorry, people append person a. Okay, people append person B people. That append person. See you now. Let's see what happens if we Oh, it doesn't like that for some reason. What did I spell her? No, I think it's tripping out here. OK, it worked. Give me a random air. I just built it and it's fine. Of course it wants you to be Let's let's be I just hate having these dang warnings on the screen that drives me crazy. OK, so I think that's why did it noise? So we do it the way they want us to. Okay, so we've added these people to the array at at low time here. Okay. On view did load. Now maybe you're thinking, Well, let's just save the rates. Let's say Ennis, user defaults that standard user defaults set, object. So we could say set, object and will say people people for key. I want to say people is the key. Okay, now and then we can do. And this user defaults dot standards were not synchronized. Okay, so maybe you're thinking that would work. Well, let's go ahead and try and run it. So this is gonna happen, right? When the apple Oats, we're gonna add those people and try and save that array. Okay, We have a problem. Look at that. We got an air terminating app. Teoh in s invalid argument exception attempt to insert non property list Object. Okay, so maybe that doesn't mean anything to you right now. Um, like, what does that even mean? Well, it's kind of hard air to read, but what it means is our application can't save this data because it doesn't know how to recognize a person object. It's a custom class that has properties and burials in it, but it doesn't know how to recognize it as an object that could be saved because when things get saved, they have to be what's called encoded. Okay, They have to be encoded so they can save on the device. When they come out, they're decoded. Strings can do that normally into jurors billions that happens automatically, which is why we were able to do that before. But custom class is okay. You wanna store an array of things on custom classes. It doesn't work so easily s we have to do something else. So whenever you want to store custom data like classes and you should be all of your data, for the most part should be in custom classes. You know, it's gonna be very common store, an array, one app that I built it was called Make a Snowman and you'd move snowman objects around and things like that. So I needed to save coordinates and positions and transforms to what I did was I created a custom class that stored all those transformed positions and things like that. And then I I coated them and decoded them. And so we had to do something like this where we have an array of objects. And so what we're gonna dio is going to our person class, and there's some things we've got to do to make this work. First off, uh, if we want to be able to save class to Ennis user defaults we have to implement or after inherit from N s object. OK, that's an objective C Class K. And this object and s coding is a protocol we have to implement. Okay, So if you want to save a custom class tennis user default, this is what you have to do. You don't under half. You don't have to understand it completely, But you have to know this is what you gotta do. You gotta implement in its coding and Ennis object. And the object is this is the parent classic, and it's coatings of protocol. And what we're gonna dio is we're going to implement a, uh, initialized, and it's gonna be called required convenience in it. And it's going to be coder should be popping up automatically, but it's not an s coder. Okay, so what we're gonna dio is ah is we're going. We have to create this convenience initialize er, and we also have to create and just an empty initialize er as well, too. Like such What we're gonna do is we're gonna first call the regular initialized herself dot in it, this one that we just created right here. We're gonna call that first, okay? And so we've got convenience initialize er, and there's one where we need to implement, and it's going to encode with coder. Okay? And that's the other thing we need to implement. So what we're gonna do is that when were loading from N s user defaults, this is gonna be called automatically. Okay. It's gonna automatically call this special initialize er here to decode it from your system . Okay, so that's what you have to have it here because what we have to do is assigned the value. So what we'll do is we'll say self dot first name equals a decoder dot decode object, four key. And the key is going to be whatever you want to give it. We're gonna call it the exact same name as our property as strengths. What you do when you are decoding something. Okay, when you're decoding something when this is called automatically, all you want to say is, Hey, what did you save it as? What did you say? That coded object as so I can take it out and turn it into a string or whatever you want to turn it into. So it's just it's just taking the object, and it's formatting it for you. And so you're gonna want to do that for anything that you want to save to disk in your custom class. You need to do that. You need to write a decoder for like we're doing right here is the last name is gonna be a decoder dot decode object for key. And this is gonna be last name again. These keys. You could save them at whatever key want, but it makes sense to save it as the exact same name is the variable. So that's what happens when you decode it. When it loads up from the disk, it's gonna do automatically gonna call this for you automatically and put the variables in here for you automatically. But what about encoding when you want to save it to the disk? Well, we got to do that too. So a coder dot in code object. Okay. And wrong One in encode object for key. That's what we want. So we want to encode object for key and the object we want to encode here is self That first name for key first name. So again, we could have called this anything we could have called disease. Easy. Whatever. It doesn't matter, but it makes sense to call it the exact same name as your property. That what you congrats here as well, too. And then a coder dot encode object, and we'll say self dot last name four key last name. So when you say of user defaults, when you do Ennis user defaults like set, object for key and then synchronize. Okay, this is gonna be called automatically. You don't ever have to worry about these right here. Okay? It's gonna do that stuff you automatically, but you have to implement them if you want to save to disk and reload on custom class is like we're doing right here. Okay? So that so those air now saved, Decoded, encoded. So now if I go to my view controller here So we that we've created these people remember these people have just they're now able to be decoded and encoded. And so what we're saying is, hey, let's add into the array and then let's save that array. So now let's see what happens if I run my application. If we get any errors when we click set, object for key and then we synchronize. Okay, so we still have an air. Okay, there's one more thing we need to do. We can save. Okay, we have to turn our object. We want to save into data. OK, so what we want to do is right here, Okay? We want to create a new variable that converts are. It's this very well it's gonna hold are converted people a race. So we're gonna say let people people data equals n Eschede archive er the archived data with root object. We're gonna type just gonna put in the people array. Okay, so we're gonna dio is we're gonna take that people array. That's right here, and we're gonna convert it into data. Remember the data inside of it has sent be encoded, able and decode herbal. And then we need to convert it to data as we're doing right here. And then instead of setting object people, we set people data. Okay, so now we're setting the data, So we've turned into data, bytes and bits. That's what we've done here. We're archiving it. We're prepping it to be safe. Now, if you're thinking now, this is a lot of work. I'm getting really confused. Well, first off, we watch the videos over and over again, but this is the easiest way to save data and IOS. It only gets more complex from here. So if you want the simplest way, this is definitely it. So you want you're gonna want to learn how to master it. So let's run it now and see what happens. Okay? And it worked. Now you're like, Well, nothing happened. Well, all we're doing is saving it. That's why nothing happened. But let's talk about loading it now. So let's say after it saved here, unload. When we click the blue button, we just want it. We want to load those people and we want to print it. Okay? So, um, that's that's not too bad. Not too bad of a deal. So what we're gonna do is we're gonna say if let, um, loaded people okay? Equals n s user defaults. Not standard user defaults that object for key. Remember we I think we called it people. Right. Um, we called it people yet right there. And remember, we didn't save the actual array. We saved the array as data, so let's convert it into a data. So it's s data. So what we're saying is, hey, grab the people that's in that user default that data and convert it to data. And if we get here, we know it worked, and then we'll say is ah, if let people array, okay? Equals n Eschede UN archive. Er, we called archive. Turn it into data. Now it's on archive it on archive object with data, and this is gonna be loaded, People. Okay. That's what we called it, I believe. Yep. And, uh, never say, as it's an array of people. Right. So let's convert it to an array of people. Okay? Hope person, not people. An array of persons. Okay, so again, loaded people is the data So we're going back into the standard User defaults were grabbing the object that we saved. And, of course, we saved data. We didn't say the object itself would convert it to data. And then we're un archiving that data into an actual people array, and we're converting it into a person. Okay, so all we need to do now is say for each person in people array, we're just gonna print it out and see if it worked. We're gonna print person dot first name. Okay, so again, this is loading data, OK? To recap appear, we took the array. First we encoded our class that's going to be in the right way, encoded and decoded it. And then what we did was we archived the, uh, people array into s data, and then that's the N s data that we saved in our standard user defaults. And then we synchronize down here when we click this blue. But we're gonna load it, and what's gonna happen is we're going to grab that data out of the energies of defaults on , archive it into a people or a or person array. And they were just gonna print to make sure it works. So if this all worked when I click this blue button, we should see each of those names printing, and it grabbed them from the disk. Okay, so let's give that a shot. Here we go. Moment of truth. So we know that when it loads, it's saving it to the disc. Okay, Now, let's see what happens if I click. It was the blue one, right? Yep. Wing lady Justin. That's kind of a cool name. Like a serial killer kind of thing put Weird. Okay, so it worked. And just to emphasize that it really worked. Let's change a Justin to muffin muffin beer. And what's gonna happen is it's gonna instead store that name, and we should see that name printing up here instead. When we click the blue button, that just is a second test that let us know it absolutely is saving. We absolutely are loading it from the disk wing, Lady muffin. So it worked. Okay, so this is really cool. What I just gave you was everything you need. Everything you need to store data on the iPhone app. So if you're ready to get itching to get your first app out there. Okay, You've got what you need. Now you can store a raise. You could start data. Anything you want, you can now store, and it's gonna be starting the device. Mind yourself. The user deletes the device are deleted. The app off the device. All that data is gone. But it was so long as the apse there it will stay. Okay. If they kill the app, you know, turn it off. Whatever. It will still be there when it comes back to load so you can build many, many applications. And by the way, the application that I built make a snowman. You know that Use this type of saving, you know, got like, 500,000 downloads made, like $10,000. So you can go a long way with all this stuff, but we're doing right now, so if you don't understand it, just what we watch the video again and to recap. And if you don't want me recap again, you could just end the video. But to recap if you want to save a custom class, which is what you should be staging data in most cases, remember that you're gonna need to inherit from N s object, you're gonna need to implement the n s coating protocol and then you're gonna want to put an empty initialize Er, uh, put your required convenience initialize er with coder a decoder self dot in it, it's gonna call this one right here. And then you need to for each of the properties you want to save into, you don't have to save all of them. Whatever ones you want to save, you need Teoh first decode the object that's this is when it loads. So it's gonna call this automatically when it first loads. And so you want to decode it with the exact key names that you save it in it and then whenever you save it to the disabusing Ennis user defaults. This is going to get called automatically, and you want to do that for all the properties that you want to load as well to, of course, the key names need to be the same. And the view controller, when you want to save something like like an array okay, or just an individual object, you're gonna want to convert it first to data so archive data with through object. You're converting your object to data. This is in this case, it's an array. And then you're going Teoh, set the object in the inner cities or defaults the data object. Okay, if it's just a regular string or Boolean or integer or double whatever. You don't have to do this archiving. You can set the value directly because it's already uh uh works with Ennis coding. But otherwise you got to set the data, set a key for it, and then you got to synchronize to save it, okay? And then if you want to load it hey, you just grab it out of the Not this one right here. You grab it out of the Ennis user defaults converted to N s data, and then you got a un archive it from data into the object that it used to be, and then you can use it, and that's it. You do that with any application now, so you've got energies s user defaults down. Congratulations. Use this in your APS and do something great
62. UINavigationController: everyone mark pricier at Deb slopes dot com. And yes, again, I am wearing a white T shirt. And if you are thinking maybe they are all the same T shirt. Well, let me assure you, I bought a five pack. So all is well. Let's go ahead and do the lesson for today, which is navigation controllers, and you're gonna use them a lot, a lot, a lot, a lot throughout your career in every application, probably the idea behind a navigation controller. Go ahead and create a new project. The idea behind a navigation controller is that it manages a Siri's off controllers for you . OK, it's like a container. That's what it technically is. It's a container, and basically it's optimized for performance. So basically, when you click on data, it takes you to one screen. If you click on something that takes you to another screen, and then if you press the back button, it goes back, back, back back following the whole trail of you controllers, although about down to the beginning, if you didn't have the navigation controller, you'd have to write all that code yourself. You have to write a container that manages holding all the other view controllers. Which ones? At the bottom. Which ones? At the top here. It's manageable for us. A Very nice. So go ahead and do a single view application. They're not very hard to use. Just call us knave controller just for short next and created here on the desktop. Okay, so they move my ex got around a little bit here and go ahead and go into your main storyboard. Okay? And when that decides to load, there we go. We've got a view controller, but if you want to use a navigation controller, you should put this inside of it. It's a navigation trailer will be our starting point now. It doesn't have to be. You don't have to start your after the navigation controller. You can put it in later. You can even add it programmatically what? We're gonna do ours from the start. So click your view controller here and go up to the top of the screen and go to enter in bed in navigation controller. And there it is. Okay. Not that big of a deal. Starting points here that did all the work for us. And so what? We're gonna do is drag a few view controllers on here. So we're gonna drag one right here and drag one right here and then we're gonna link them together. So on this one, click it and then let's change the background to read, just to show that it's a different view. And go ahead and throw a button on here, okay? And then control drag from this screen. Did this screen. I'm trying to show you how quick this is, how quick we can go from one swimming to the other and then click this one here and change it to yellow, and then go and throw another button on. Then control, drag over to this third view controller and click show, and then click on the view controller and the view and change it to blue. So we've got red, yellow blue Now, keep in mind, navigation controller doesn't show its own view. It shows a root of you control. This is the U route view control of the very first you control. So that's what's actually gonna be shown. It's just gonna be held inside of a container. So if I save this and I do command are to run it, okay? It should just work right out of the box for us. And there it is. So we've got red If I click the button, we've now got yellow If I click it again, we've now got blue Oh, my goodness, I can't see. I didn't put any buttons on booze like I can't see. It s Oh, you're like, OK, we've done this before, but there's a difference. Look at the tough left side. There's a back, but it does this for you automatically. Now, when you press the back button takes you back and back again. How cool is that? So without having to write any extra code, thanks to Iowa's the SDK, it handles the popping and pushing of you controllers. That's how it works. So when you when you add a new view controller year, uh, pushing it onto a stack, okay. And think of it like pez. You know that you know the candy, like with the cool Star Wars head or my little pony if you're a Baroni or into that kind of thing. And basically you put the peasant Yeah, you push it on to the top and then you pop it off. So the idea is last one in is 1st 1 out that's called a stack, right? Like a stack of books, Jenga, whatever you want to do. So that's what's happening. We are pushing on a view controller and we press back. It's popping it off Super cool. It does all the memory. Management keeps it there, so it's nice and fast, so you don't have to do any of that stuff. So that's how it works right off the bat, real easy. Of course, we've got a couple of problems, but one is that these view controllers they're not tied to any code right there, just showing screens. We don't have any code to manage them. And so what I want to do is just show you how to papa view controller programmatically. That's the last thing I want to show so we can do it right here on the yellow screen. Let's make a new but in here, and I caught something different this time. Let's just call this one pop because it's gonna pop it off when we click it, okay, and let's go ahead, click the naff controller folder here and do a new file and source and cocoa touch class. And we want to inherit from you. I view controller. And let's just call this yellow VC for yellow view controller we don't need Is it because it's in the storyboard and create? Okay, so we have a view controller. It's not connected yet. If you remember, we gotta click our view controller over here and click the little rectangle over here. The identity inspector. And we gotta change it too. I'm still have this selected. There we go. View controller. There we go. I click the l A. View controller, Identity inspector, And let's go ahead and change this to yellow V c. So now it is officially connected. Right? Okay, So what we're gonna do is open the assistant editor. It's now gonna pull open our yellow V C code right here, and you can tell it makes more space here. It's close the left hand side, and all we need is an I B. Action on the pop rights are gonna control drag over here, create an I B actions. Could be anything, you know, you did some action. Yeah. You loaded an image. Whatever. May be whatever. Whatever you want to do to go back? Um, you know, maybe a download felled. Do you want to see the user back to the other screen? Cause it's a download screen. Whatever. I just changes to action. And let's just call this pop V C. Okay, let's close the assistant editor. Let's go ahead and open the left hand side here and click yellow Veazey. So whenever that buttons press, what we want to dio is really easy. You say pop gives Ah, every self that navigation controller dot pop you pop view controller. So there's a few different options popped. Approve, you contribute trawler that goes all the way to the bottom on. You could pop to a specific view controller. If you have 50 view controllers, you can find the specific one you want and pop it pop to that one. Or you could just go back one, which is the one we want. So, pop view controller. So again, you're calling self doubt navigation controller. Now here's something interesting. This is an optional. So if you call this function and it doesn't exist, your program is not gonna crash, and that's okay. But just know that because it's optional. It means that may or may not work. Now we know it's gonna work because we actually do have a navigation controller. So if we created one in the storyboard and if this view controllers part of it, which it is right now because we did that in the story board, it will find it. But let's say we did not use a navigation controller in the storyboard and we were just using view controllers. This would not work. So keep that in mind. We're accessing the view, the navigation controller if it exists, okay. And so you can just do it like that. In fact, you don't even need the self dot You should just be able to call it just like that. Do you wanna animated the Yes, Everything should be animated. And, uh so if we click it, it should pop to the previous view controller. So again grabbed of you, grab the navigation controller. If it's there and then call this function on it. So let's go ahead and run it and see if our button works. Okay, so we're loading the yellow one clicking pop, and it pops. Okay, let's do one more Let's create our third view controller. So I just wanna make sure I know what color it is. It's the blue one. So let's do one for the blue and pops all the way back to the beginning. One. Okay, so let's go ahead and create a new view. Controller. New file source. Cocoa Touch Class. You have you controllers? Fine. Let's call this Balu V C and click. Click next and create and go into your main storyboard scroll down to the blue on here. Click view controller opened the right hand side and change the class to blue V C. Easy enough. That's going through a button on here. And this one is too blue for me. So I'm gonna change the color. I'm clicking over here. I'm gonna change the color of it to white. Okay, let's call this one. Um, Pop two. Or is it red? So Okay, look at this here. So yellows the next one down. But red is the root of you. Control, right. The very, very base one. Okay, so we got popped to read. Let's go ahead and open the assistant editor and let's let's make sure we're in the right one. So this is Blue View controller, just where we want to be controlled. Drag to create an I B action changes to action and let's say pop to root. Turn off the assistant editor. Go to our Vyugin Blue View controller right here and then what we'll do is, we'll say, navigation controller dot pop to root view controller. So this one should take us all the way back to the beginning, whereas the other one just took us back one. This one should go back to the beginning. Let's see if it works. So the point I want to make here is you can access the navigation controller from within your code if it exists. So we load the yellow course clicking Pop goes back to read loads yellow. Let's load the blue pop to read takes us all the way back to the beginning, so that's navigation controllers think about this. There's so many applications, you've got a list of data. Let's say you have a list of recipes, and when you click on it, you want to see the details of the rest of the image that steps well, navigation control. It would be a great choice for that kind of application. You show one view and then the detail view. And maybe that has even 1/3 view like it shows how to make the recipe and then has a link for the store that you want to go to to buy them. So it pushes on a new view controller like a Web view or something, and then you can look there and there's multiple views. So very powerful used is in your applications. You're gonna Now that you've seen the here, if you go back and look on the app store, some of the apse that you have, you're gonna notice most of them. Use this type of set up here. You can use navigation controllers with tab ours. You can use navigation controllers later on in your app. It doesn't have to be the entry point. You can use them whenever you want. You can load them programmatically as well to you don't have to do it from a storyboard. You can create it from your code and load it as needed. Very powerful. Many ways to use it. I showed you the simplest way, and you can build most of your aps using it just the way that I showed you here. So very powerful. Start using it in your APs. This is Mark Price with deaf slopes dot com and we're one step away from being another step away from being a professional developer, actually, is lots of steps, but, uh, what I recommend you do is use these skills building happen soon as possible. Very cool stuff. See you later.
63. App: The Walking Dead (UIScrollView): Hey, what's up? Everyone marked. Rise here deaf slips dot com. And today we're going to talk about scroll. Let's go ahead and open a new Exco project. Your ex code Go to file new project. Okay, I'll pull it up right here and ah, single. The application is fine. And we're gonna call this the walking scroll of you. You'll see why you already know why. Okay, So really cool scroll veals. Um, they allow you to have ah content on them and for it to be scalable across the screen. Now, with that being said, as I develop more and more absent as I get in other people's code mawr, squirrel views air kind of becoming a thing of the past. They're not being used as commonly as they were as they were before auto layout and especially stacked for use. Now they really help out with a lot of things that you might have you scroll these for in the past. Now, a scrawl view Okay, uh, is really good when you have just a few items that you maybe you want to scroll. Okay, Uh, because we've got table views, we've got collection views that are optimized to show lots of items and to be scroll herbal . Um, and it reuses cells and things like that. And so the scroll view doesn't scroll. He doesn't reuse anything. So everything you throw on it is loaded in memory. So the more things you put on a scroll view the ah more, um, memory is gonna be used. But what's interesting is a US squirrel view, actually, Is the parent class of a table views the table uses a scroll view, but again, the table view in the collection views are highly optimized. So the use case for a squirrel view is very, very low. Uh, you're not gonna want to use it that much, but I'll show you one way to use it, which is fun. So go ahead and enter a U I scroll you right here. Okay. And let's just drag it from corner to corner on our main view. And what we'll do is a pennant to the sides. Take off the margins, pin it to the sites, okay. And what we're gonna do is we're gonna have a bunch of characters that we're gonna scroll across the screen like pretended like a toy store app like Like maybe you're building an app for a toy store, and they want to show some of their toys. And so we're gonna Our toys are going to be walking dead, which is really cool. Eso we have our scroll of you here. So let's go ahead and throw images in the project here, so may find mine there. Right here. I just grab these off the internet, These air, those vinyl pop toys. And I thought they look kind of cool. Don't. We're not doing anything gory. Kids are watching this show. Actually, it's probably the kids that want the blood. It's us normal people who are like, uh but anyway, no blood in this one. Sorry. You can add blood on your own time at my logo and add my shelf. Okay. Very cool. There's our graphics and go back to the main story board. And what we're gonna dio is just ah, make our little area look nice here. So let's go ahead and throw on an image. You We need to put the wooden plank at the bottom, and we're just gonna drag this across here. I'm gonna set the image to, uh shelf. It's a little bit too big. Let's go and say Aspect fit. There we go. Scallop down a little bit. Here. Effect. There we go. Move it up. Just a few pixels. That's right where I want it. Let's go ahead and just Ah, pennant to the left to right into the bottom and give it a fixed site. Okay, there's our shelf. Let's get the logo on. Okay. Just for fun is just for fun. This has nothing new with this girl view. But why build something if it's not gonna be pretty, let's change this to aspect fit. Okay? And this is the wrong image. Me Grab another one that doesn't have this ugly line on it. Okay, let's go to the, uh it's go to the assets here and just delete our logo. It's got ugly line on it. What was I thinking? I just dragging the new one on here much better. Could remain storyboard. And their ago has the same name. So just updated automatically for us, which is cool with me. All right, so that looks good. Mm. It's slightly bigger. Go on. There we go. Center it. All right. I'm gonna give it a fixed within high on the pin menu down there. And let's spin it 15 from the top and squared and align its central in the container horizontally. All right, so there we go. We've got a logo. We've got this here. We've got a scroll of, you know, keep in mind, actually, that I think I did this wrong here. We don't want the shelf in the logo inside the scroll view itself actually want it above it . So we're gonna have to re gonna fix our concerns. Actually, scroll of you needs and I say above it and he's appear. But so the scroll video here in the left hand side, actually, Dragon below it there ago. Now we're making progress. What is this guy doing really showing me how to make APs? Well, that's how you make caps. You screw up, and then you do it the right way. So, uh, the heightened with they're still good, but let's go ahead and pin it from the top 19. It's fine. I don't care. And it's good. And the line it horizontally and container and then the shelf the with or the height is still good. We just want to drag it down to the bottom here. A little bit higher right there. Let's go ahead and pennant to the left. To the right, Into the bottom. Okay. No big deal. We just took it out of the scroll. You itself and, uh oh, man. You put it inside the scroll view again. Let's fix this again. Holy smokes. Right Scroll view. Obey. Okay, so the problem is, when you drag stuff, it likes plopping an inscrutable because it's a container of you. So we're gonna have to do this the hard way. So I want what I want you to do is click the logo, so notice it's not in the scrolling. Click the logo. Okay. By the way, I'm glad you saw you do with this all the time, and you're like, what happened? That's what happened. So let's put it 10 from the top over here. I'm under the ruler and 10 from the top. And let's say 15 from the top, we'll just do it manually. So I don't accidentally drag and drop it into this world view. Okay? So go ahead and pin that 10 from the top and we'll align it here horizontally. And then this shelf. Let's just go ahead and move it down some mortals to try 400. Let's try 500. Okay, Getting closer. Let's so just click. The arrow still goes where we want it. Okay? Again. When you click and drag and you have a container in the background, it likes to think for you and drop it in there. And that's not what we want. We want this in front of the scroll of you. Okay, so there we go. I like it. And what we're gonna do is just go ahead and same thing we did before, Uh, except we're going to turn off constrained margin zero from the left, zero from the right, and we'll say 14 from the bottom. And the height is already set. All right, we're good to go. Okay, So there's our scroll view, and ah, we want to do is also throw an image on the scroll view of our character just just for layout purposes, just to see where we want it to be. So go ahead and grab your image, you and notice how it plopped in the scroll of you this time. That is what we want. And let's go ahead and take this image and ah, set it to one of the guys here will say, Darryl. And of course, would be aspect fit we're gonna do is we're gonna resize him until he's the size that we want. And I'm thinking that's a good size. No bigger. That's a good size. Okay, So what I'm gonna do is I'm gonna move him down, and those feet are right about there. Okay? Right about there. That's fine. Okay. And you notice he's behind it. So what we'll actually do is ah, this scroll view, we will move it in front of these other items. Okay. Um right there. There we go. So you notice how he is now in front of it. I just changed the ordering there, so he's right where we want him to be. So all we want to do is remember, uh, we want to remember that where his positioning is 1 80 or 96 he's got a within the height to 40 by 3 97 Okay, um and so that's fine. For right now, we'll come back and look at that in a second. Here Let's go and go to coat. So the idea is, here's the idea. You have a bunch of images that we're gonna throw up on the scroll view in code on Adam programmatically, and then you can scroll through those list of items. Okay? So go to your view, controller. And Ah, by the way, um, for us to make this more friendly for us, let's go ahead and renamed these images two numbers so we can just put him in a for loop. So 12 three, four and rick be number five. We got our characters here. Now go to your view, controller. And, uh, I'll get rid of this boilerplate code here and in the view did load. Okay, let's make this a little bigger for you here in the boot viewed load. What we're gonna do is we're gonna cycle through the images, create an image and throw it onto the screen. And, um and that's what we're gonna dio. So one thing I want to capture is the width and the height of the of the image. Since we are doing this programmatically, we won't get to set the pins and the constraints we could do that problematic who are not going to. So we're gonna We're gonna set the width and height, like so with BCG float and let height. These are constants are going to see g float. So you float. Let's go back and grab those now So they with and the name changed on it. So it goes, you know, um so the with is to 40 in the highest 3 97 So 2 43 97 And it's a border because we want our guys here to be on the actual would like he is right here. So to 43 97. So this equals to 40 in this one equals 3 97 So that is the width. And that is the height of our guy or characters. And so let's go ahead and throw them out there. So for var, X equals one. And while X is less than or equal to five, right, cause there's five characters X plus. Plus, this is just a for loop. Then we're gonna create an image. So let image equals you. I image and give it a name, which is down here under named and, uh, what do you want to call it? Well, since we named it ah, number, it's easy enough just to put X in there. It's one through five. So that's gonna work. And, uh, then we need to create the image of you. Of course, because images don't go on by themselves, they're they're stored inside an image view. So and that equals you. I image view, and we're gonna initialize. It was an image which is the one we just created. Here we go. And now what we dio is programmatically is we added as a sub you. So of course we haven't referenced it yet, so let's do that. Now. Let's create an ivy outlet for our scroll view at I b outlet week var. And we call the squirrel view of type you I scroll of you. So we're adding the scroll of you and what we want to do is just cycle through the images and add them one after the other after the other. But we want to add them horizontally. Eso we're going to need to add to change like their positioning. So scroll view dot add sub you and we're gonna say image you Now I want you to think about this s o this code just as it is right now. Okay, if we just leave it just as it is right now, um it's going to add them all in the same place and to show you let's go ahead and connect our view controller here. Let's let's ah, control drag to the story to the storyboard to the scrub you and click it. Okay, I'm gonna hide him. You don't care about him. It's just a place holder. And so let's run this here on our simulator and see what happens to see if our images even load up at all on the scroll view. Okay, As you can see, it loaded them all up right here, Um, in the middle of the screen, all in the same spot. That's not what we want, obviously. So let's fix that. So we've added it to the sub you. But now we need to change the sizing and positioning of it, right? It's what we're gonna dio is gonna say image. So after we've added it, we're gonna say image view dot frame equals C direct make. We're gonna set the frame. Remember the frame is set to the within the high in the positioning, and the top left corner is 00 OK, so X is going to be negative with. We want to just subtract some to set him, set him on the left hand side. Plus, we'll say with and this is our constant times. Did you float? We're gonna pass in X here. The current, the current instance that were at okay. And, uh, then the white the white coordinate is going to be, Well, let's take a look at it where we actually want it. So I have it selected right here. So I go to the ruler, Um, why is 1 96 okay, 1 96 So let's ah, make the why 1 96 That's the position of the why that we want and the with it's gonna be the with. Obviously, in the height is gonna be the height of the guy there. So all we're done here is we say, Hey, where do we want a position? This well, remember, we're adding it onto its We want each item to be added onto the right hand sides of scroll views. You can add them. You can add items vertically or horizontally, and they're gonna go off the screen now. The frame of your scroll of you is not gonna change, but the actual content inside of it. It's gonna expand, and it's called the content, like the contents size. So there's a content size and there's a frame on a scrubby, the contents sizes, the the stuff that you're putting on to it, how long it is. And so what we want to do is we want to add things horizontally on the right hand side for each of the characters, Uh, and just add those items there, and that's what we're doing here. So I'm just saying, Hey, you know what? Let's start a little bit to the left. Don't start right in the middle of the right hand side. Let's start a little bit to the left. That's why I'm putting a negative within their And they were saying, Take the with times, the current X. So if this was the first item, it would be to 40 times one, which would put him in slot number one. Okay, this is just simple math. If we wanted him a slot to okay, it would be with times two, which is happening here in the array with Time Street with temps four. It's gonna take to 40 and multiply about each of those, and that's obviously gonna move it to the X by that number. So we're just multiplying its position by its with okay. And the last thing we need to do is when the scroll views done, we need to actually set when we're done adding items of the scroll. But, I mean, we need to actually set the content size. This is where I was telling you, you gotta There's a sizing of content that goes outside of its bounds, so we have to set the size so it knows how far to scroll and isn't BCG size make. We're gonna make a size, and the with is going to be the with the character, right times five. Because there's five characters, that's how big we want it, and the height could stay the same. So it's a squirrel view that frame that size. All we're doing is grabbing its current height and setting it back in there to keep it at the same height. Uh, let's see if it works we may have to do some adjustments, so let's go ahead and run this here. Here we go. And if you notice it is scrolling, but he's a little bit higher than I then I want him to be or all the characters are, but you notice how it's growing. Now that's really cool. Looks. Looks pretty nice. Actually. You should go approach this pop company and say, Hey, we want to build Jonah. Um okay, so the why is not It's not down nearly far enough, this 1 96 So let's try to 50. Let's try that. We're just playing around with numbers here, sometimes with scroll views. You gotta play around with numbers. It doesn't sometimes work right out of the box is try to 70. All right, there we go. Pretty cool. So again, scroll views are really good for just showing a few items like this where it's like, Do I really want a table of you delegate with a cell Fero index path and all the stuff I'm just showing a few things. That's a great option for for squirrel views. One thing you're gonna also dio it's not gonna be super pretty because we have to play play with the numbers, but you can also go to your main storyboard here and you can clip your scroll of you. And, uh, the after weeks inspector turned paging on paging enabled. And again, it's not gonna work perfectly because their numbers are off right here. But I do want to show you that this is a feature of squirrel views where you swipe and it snaps into place. So when it decides to load here, if I swipe, see how it's snapping into place. I see. So when you could do is you could change the positioning of these characters so they're perfectly positioned every time you swipe, it brings a new one on the screen, right in the middle again. It's just playing with numbers, like positioning the sizing where you want to put him the bounds. Things like that, you might add a spacer because I'm just adding image so the images are actually touching each other. I didn't add any space, but you could add a spacer that's the size of the whole screen, and then you're paging. Will will be that that size of the screen and the snaps in the place, which is cool. Um, I'll turn it off, though. So, um so that's what we've done here in the view controller is we just grabbed our squirrel view. We went through a four loop added items at images as sub use onto the scroll of you. And then we just gave it a position in the scroll of you one right after the after the other. After I could put these anywhere, I could have put him vertically or horizontally. I just positioned these ones horizontally. And then we just set the content size of the scroll view, which, of course, is the with of the character times five, because that's how long we want it. So there's one great use for scroll views. Just join a few items, and there you have it really cool. There is another really important use for scroll movies, and probably the more popular usage. And that usage is when you I need to build some type of screen and now everything if it on the screen, so you need to scroll. It's very common problem, actually, scroll these that didn't used to be the main use for scroll views, but now it's become kind of the main use for scroll views because you want to show all your content on the screen. And so sometimes, even though you have stacked views and auto layout, sometimes things just don't fit on the screen. But you wanted Teoh. So let's go ahead and, uh, go do file new project, okay? And let's do a single view application, and this was not too bad. We're gonna call this fit me on screen, OK? Next. Okay, so I want you to pay attention carefully. To what? We're what we're doing here. Because there's a certain way you have to do it. And if you don't, it's not gonna work. Um, so pay careful attention. So click your main storyboard here. Okay, so let's say that you've got a form that you need to fill out, okay? And it's not fitting on the screen. We're not gonna do anything pretty here. This is this is purely this is purely Ah. Um just, uh, controls. Okay, So let's say I've got this guy here, and, you know, maybe there's ah, view you I've you, Okay? And I drag it over here and let's say we put make it really long right here. Um and, ah, you know, make it red. Nice, red. And let's say we click arcview controller here and we actually go to the ruler. And we change the size to free form unless we make the height, like, 1200 like off the screen here. Okay. Unless we make another view here. Okay, let's make this one this one blue. Okay, let's make this one blue and let's do one more view, okay? And will make this one like a nice yellow. Okay. And so then what we'll do is we'll pin it this one to the top and to the left, into the sides, and this one will do the same. Will say, Ah, top left, Insides. And we'll set the height on this one. This one will the same thing. Top left, Uh, right. And then the height. And this one here, we'll just go ahead and pit along the way around. Okay, Now, let's go ahead and run this. Let's see what happens. Okay, so the name of this app is fit me on screen. But look, can you even see the yellow? I can't see the l. In fact, half the blue is cut off and you can't do anything about it. This is a very common problem. No one else is gonna teach you this. This is a very common problem You're gonna be pulling out here. Why can't I say everything on the screen your boss is gonna want and you can't figure it out? Well, you got to use the scroll of you. And so what we want to do. Okay, What we want to do is get this working, uh, as it should. In effect, I think our little guy here is having an issue is not appearing on the screen. Let's fix that first, um, top space. Bottom space. That's fine. But maybe we just set height on a Maybe. Maybe it's getting shrunk down. Was rebuild this here and just make sure that he's appearing on the screen Are little text field up there. There he is. Okay, so yeah, clearly it's cut off. So what do we do? How do we fix this? Well, that's what scroll views divorce. So let's go ahead. And Ah, I'm just gonna delete all these now. OK, so it's delete, delete, delete and elite. So by the way. Uh, maybe you haven't seen me do this before, but I clicked my view controller here, and I went to the ruler and actually change the size of it. You could do that. That's perfectly fine. Just know that things are gonna get cut off. They don't fit on the screen. And so the only time you're really gonna change the width and height of these, for the most part, is when you need things to go off the screen and unities escrow view. So let's go ahead and do that. Um, so we've got our view controller here. Now, what we want to do is at a scroll view onto it. Sort Kevin school of you, okay? And your scroll view it needs to be. And it's Teoh. Well, it could be anywhere. It just needs to be pinned. Okay, So what you want to do is make sure is all four corners of your scroll of you are completely pinned. If you don't, it won't work. Okay, again, your scroll view. It doesn't matter if it's on the edges of this screen, okay? It just wherever it is, it just needs to be completely 100% pin on every side, every side. Okay, that's a rule. That's rule number one. So I'm clicking the pin menu. I'm gonna take off constrain the margin. Just 2000 and zero. Okay, so now a scrawl view, it gets its size from its sub content on. And there's a certain way that we need to do this here in this story board. Very special way. So first rule is whatever wherever your scroll view is, you need to pin all four sides. It doesn't have to be on the edges of its super view, but that's what I did. But all four sizing to be pinned. The second rule is that you put a you a view, a content view inside of it, and it needs to go the entire bounds. Okay, so here's my view. Scrolling it down as you can see all the way to the edges. Okay, so it needs to go across the entire bounce. You got that? Okay, that's rule number two. So your scroll, you must have a content view. A u I view that covers all four corners 100% of the size and what you want to do now for your constraints. Okay, this is really important. You want to pin the height, but not the with. Okay, pin the height. We want to say this is a fixed height. Remember? It has to be this high because it's a scroll view. We know the high. It doesn't matter what device it's gonna be on. We know what the height is because it's on. We have X amount items we gotta fit on the screen. So you set your height, which in this case is 1200. So the high is now set. But you're like, Well, what about the with Here is the critical piece is his rule number three. Click your content view and then click your main view. Skipped the scroll viewer, but click the main view, the one that is going to be loading when the app loads. Okay, click that. So I held down command and I'm clicking it and click your pin menu and say equal withs. Okay. It's like the main view of the app and then your content you equal with what it's gonna dio is it's gonna match the with of your scroll of you to be the size of your main view. It's very important. Otherwise it won't recite. So Rule number one was your squirrel view needs to have all four sites pin to something. Rule number two is your read your content view inside of it. Okay. Needs to match the full size of the scroll view. Okay? And then you pin the height to whatever the height needs to be, and then the with you pinned to the main view as equal with. So Okay, so that's so We're good. We're good right there. Okay, Now what we want to dio is kind of that same thing. So we take our text field, right? Let's put it right here. So make it a little bit bigger. Let's just Let's just say that, OK, so we have our text field here, and then let's Ah, let's pin it from the top and let's go ahead and give it a height. And let's go ahead and align it horizontally and container and put a you have you here. You I view. There we go. Okay. And, ah, let's make this little bit bigger here. It's time. We perfectly the same as the other one that we just did without. Okay, let's make this one yellow this time and we'll say, um, 54 from the top, okay? And will give it a height. And ah, and the with That's fine. And let's go ahead and align it horizontally in the container and, ah, let's go ahead and create another view. Do this one as a blue, all right. I'm sure by this point we're about off the screen, which is fine. So here's our blue view and let's go ahead and change it here to blue and let's pin it from the top. Give it a within a height. Let's go ahead and align it horizontally. And container analysts do one more view that goes down to the bottom, which is fine. And this, of course, wouldn't be discolored views. I'm just trying. This is an example. You'd have forms, controls, whatever your app as image use, it doesn't matter. And let's go ahead and re on red now. Yeah, we're on red. Let's go ahead and pin this one from the top. Give it a within the height and, uh, let's go ahead and also, um, let's actually take off the height. Let's just pin it to the bottom. Actually, there we go. And let's send it out horizontally in the container. Okay, so we've got our views and they're in a scroll of you. Let's see if it works right off the bat, it may or may not. We'll see. Just testing. So here we go and notice how it's not working because there's one more thing that we need to dio The last thing we need to dio, which I forgot, is on this view here. We need to pin all the edges. So we gave it a Remember we gave it a height and we did the with with the view, but we actually we also have to pin it to the edges of the scroll view. Okay, like Well, let's make sure we're there. Actually, yeah, it's not on there, So let's do that. Now. Let's Ah, to the edges of the scrubby. I told you that was part of the rule, remember? I said, you've got to make it the full within bounds of the scroll of you. I just forgot dependent. So let's go ahead and pin those. So I took this inside content viewing appended to the corners of the scroll of you. Let's run it again. There we go. So look at that now. You could fit as much stuff on the screen as you want. I forgot to settle with on that. That's okay. So you're gonna fit as much stuff on the screen as you want. So remember the rules. Please pause the video. And remember the steps for the rules. Well, if you didn't pause the video or whether you did or not, real Number one is when you put a scroll view on your in your app in your story board, it doesn't matter if it's pinned all the way to the edges of the view. Um, but it doesn't need to be pinned on all four sides. Now, with that being said, it's very common to just pin your scroll view to the inside air the entire portion of your view, because you want the whole thing scalable makes sense. Right. Okay, so remember, that's remember one just pain. All four edges of your scroll through rule number two is you need a content view inside of it, okay? And that content view needs to be needs to be pinned on all four edges of the scroll view pinned. Okay. As well as a giving it a fixed height as a constraint, whatever height you want. And then the with needs to match the with of the main view. Okay? They need to have equal withs. Okay. And then inside of your scroll of you, of course, you want to set your constraint and all the inside your content, you on all your items. Okay, So now you have now, any of you. You have any of you, it'll okay now. Ah is a Scrabble on you for everything on the screen. And remember how lots of APS you know, we did like landscape mode, right? Well, look at that. Now you can do the landscape mode on pretty much any app. If you use a scroll, be this way. So really cool stuff. This is the most common way to use it. So if you run into a problem or things aren't fitting on the screen, you don't know what to dio. Maybe you're thinking about putting things on a new screen or whatever. A squirrel view might be a perfect solution. This is a lot more common. The first example use Both are great, though, and so that scroll views plan to start using them because you're gonna use them throughout your career, and it makes sense to put him in your absence and possible. So that's it. Mark pricier deficits dot com Moving on.
64. Intro to App: a everyone mark price here deaf slopes dot com And we are gonna go over the app that we're gonna build today, and it is called my food. So basically, the idea is you don't like your neighbors. You don't like your neighborhood, Just go around, take pictures, post comments of what you don't like about it now. And this app it's gonna be all here on the screen, on our phone. It's not gonna post the Internet, so people can see. But it's really cool. Eso basically just roll their a list of comments and pictures of the neighborhood, and you can add new ones. I had a picture here, you know, I can add Ah, no, that's not. And that let's add a picture of a pie. I hate pies. What? The freak? Why do we have pies here, man? Eso Yeah, I hate pie. Stop leaving these at my doorstep. I don't want to meet you. All right, So you write a comment, make your description and you post it. And then it was shows up on the bottom of the list right there. Pretty cool. And if you're wondering, do all these pictures belong to me? and my house. The answer is I'm not going to tell. Uh And so that's the app. Really cool. You're gonna learn a lot of things. You're gonna learn how to, ah, store data on your device, how to store images. You're gonna learn how to crop images and this circles, you're gonna learn how to style things. How? Teoh Load up pictures. Um, from your phone, how to save data, how to encode and decode things. You're gonna learn a lot of things. You're gonna learn how to use a table view, a custom table cell. This is a huge step in the right direction and helping you become a professional Iowa's developer. So don't miss this app out and let's get to it.
65. App: MyHood Part 1: he already to get your hands dirty? I am. Because this is Mark Price from Deb slopes dot com and we're gonna learn how to code and make iPhone. APS. How does that sound? So let's get right onto it. Open up your ex code. You should know how to do that by now, I would hope and go ahead and ah, create a new project. I'll do that right here myself. Just pull it up here in the screen. There we go. And I went to file new project. And so what we're gonna dio is a single view application, okay? And product name. You can call it whatever you want. I'm going to call it. Ah, my hood. Dev slopes. Okay. And swift is fine. Universes fine. That's all good. Okay, just save it wherever you want. Do create a git repository for it because you should be submitting these onto your get help account so you can have portfolio pieces to show people. Um, so looking good here? I'm not gonna change anything here. Let's just dive right in and let's talk about what we're gonna do with the app. We already learned about what the AP's gonna dio So let's think about what we need to make that happen. So this time I think I want to start the app building the model by building the data. I really do that pretty often on a lot of my APS. I start with the model, however, these house the data going to connect and I break it. I break it down from the user interface or mock ups down Teoh to the data that the Abscam need. So let's think about it. So we know that we're gonna need a title and we know that we're gonna need a description. Now, as for the image, that's something really interesting where the image is gonna live. Well, in this app, we're actually gonna save images directly into the app into the documents directory of that app. So hypothetically, if you kept saving images, your app would become massive, you know, hundreds of megabytes and, uh, in the future, you know you wouldn't do this. You store your image is probably on the Internet somewhere on a server, but this is ah, baby, step in the right direction. And so we're going to save our images on the device in the APP itself. And so what we need to do is store the path to that image. Okay? We're not gonna actually store that image in a data base or anything like that. So we need to start the path to that. So let's go ahead and in your project here, uh, right. Click on the folder and create new group and create a group called Model Model, as in Model View controller and right. Click it and go to new file. Okay. And we are gonna dio a plain Jane Swift file, and we should call this one of these is their posts. So let's call it a post post that swift. Okay, we make this a little bit bigger here for you and ah, class post. Okay. And let's think of the data that we want in the class eso it needs, Ah, an image path of title and a description So private, more image, path of type string again, making variables private. So we are good coders, and no one else is manipulating our data. That shouldn't be. And ah, title is gonna be of type string and ah, we're gonna do post description. Um, I find it. I found out something really interesting that actually caused a problem for me later on. But don't call your app. Don't call your variables description because it actually can conflict with underlying class description. So we're gonna call it Post. We'll just cut post disk for a description. Okay, that's looking good. And then let's create an initial izer. Of course, this is a classic needs initialize er and I say that we don't let anyone create an object. A post object has all three of these will make it required so much the image path of type, string, title of type, string and description of type string. That's OK to put description here because it's a parameter name. Um And remember, the reason why we're putting these exclamation points here is because we're saying at some point in time they will definitely have a value. And actually, since we are initializing it right here from the initial izer, we can actually take these off and ah, basically so long as we initialize them and in the initial Isar, it will let us do that. So it basically it's guaranteed to have a value if you pass him in in the initial Isar, So we'll do that now. Self image path equals image Path and self dot title equals title and self post description equals description. Now, this air should go away. Hopefully and there you have it. So we didn't even need to do the implicitly unwrapped exclamation point. Uh, these air just good to go. We're saying we guarantee absolutely that they're gonna have values because we're putting them in the initial Isar. If you didn't have these here it was thrown air. Eso cool. So we've created a class to store our data. It's not not too bad at all, actually. We're making great progress. So that's cool. Let's go to our storyboard now and get some things lined up there. So here's our main dot storyboard, and here's our view controller. It's ah, the main entry point, which is fine. So we're gonna use a table view, So go ahead, just type in table and don't click table view controller. We're just gonna do the table view itself. We don't need the table view controller because we'll be personally managing the data source in the delegate and all that kind of stuff ourselves. So Here's our table view. Just drag it here and drag it over here. Also, I know we're gonna need the blue banner at the top, so let's just make that a U I view. Um, and you know, we could have used a navigation controller and styled it, but this saps not too complex. We'll just we'll just build our own view up here, make it look nice to get a little bit bigger. So it's this little battery top status bars, not covering it. And let's change to the color, which is right here. And if you want that color, it's two e 87 C three. Okay, so it looks real nice. I like it and just drag it up there and let's go ahead and pin this So pin it to the top. Take off the constrained, the margins to the left, to the right. And, of course, the next thing we want to do is the height right? And so the dependent to the left of the top to the right and give it a fixed tight. So to look like that on all screens and it will stretch accordingly. And now our table view. Let's go ahead and ah, well, let's how do we want to do this? Let's we want to go from edge of the screen to the edge of the screen Or do we want to give it some margins? We can play with the margins. Let's try that. Let's do it. 20. From there, we'll say 20 from the top or so and 20 from there. So and will even say 20 from the bottom. Just for fun. Eso Let's go ahead and do that. Now I got close. It was 18. So 20 zero on the left, there on the right eyes. What you want? Because those assess the margins, remember? And then 20 from the bottom is fine, and so that will stretch it out across the screen, which is what we want. That looks great. And, ah, so there's our table view. What else were missing? Um, we can Ah, we could put our logo in. That'll be fun. Let me go ahead and grab that Here. Here we go. Scrap this logo. Actually, let's click the Assets folder. Of course first, and then let's drag the logo in. If it doesn't want to crash on us, it may not were good And let's go ahead and just load Thea are throwing the the splash screen while we're at it and the camera icon while we're at it, cause we're gonna need that as well to. And of course, you have access to these as part of the source code. So that looks good. Let's go back to our storyboard here and let's get that camera in. This is messed with that. First, that's gonna be a button, right, Because it ah, you click. It makes sense. I just dragged a button on here, by the way, and I'm gonna take off the text and I'm gonna set the image to camera, and I'll just shift and scale it down. The things that a good size Yes, it iss Don't argue with me. Okay, so, um, looks good to me. And let's go ahead and give it a fixed with and fixed height, and we'll just said it eight from the bottom and eight from the right and that'll keep it right where we want it. And let's go ahead and get our logo right here in the middle. That's just a static logo. Soldiers make it an image of you. You I image and me drag it up here, okay? And, ah, it's a little bit big. Here we go, make it smaller and image is going to be banner logo. Of course, it's stretched we don't want that will be good programmers and obey the wheel of our artists and say Aspect fit. Oh, that's looking good. It's looking nice. What do you think? I think so too. Okay, let's just give it a fixed. Ah, within height. That's fine. We'll do that with a little too long. We don't even need it. Really, Uh, don't want to waste extra white space. Um, there we go. Oh, center center. Okay. And now let's give it a fixed within height, and that looks good. And let's go out and pin it. Eight from the bottom, Which is fine is well, and the last thing we need to do is just a line. It's to click the alignment menu down there and let's align it horizontally in container. Now, I haven't checked it, but because we're getting so good at constraints, I'm gonna assume that it looks good and pretty. Moz, I'm clicking the assistant editor over here on the right hand side clicking prevue and main dot Storyboard Uh, looking nice. Looking real nice, actually. Um and ah, 5.5 inch. It's looking good there, too. Good job, guys. Yeah. Okay, so we've got that. We've got that and we've got her table of you, so that's really cool. I say we add our table view cell, so type in the word in your object finder down there, Type in the word cell, and we're gonna do a table view cell. Just go ahead and drag it right in your table view, and it just plops in there. And, um, what I'm gonna do is actually just put a background color on it, cause the white is hard to see where the boundaries are gonna change this later. Um, but I want to see what the boundaries are. So there's the boundaries. It's a little too small. And so how this works is you create your custom cell right here in the storyboard. If you're not using the storyboard application, you got to do this in a separate ZIP file and then loaded in your code. But this is really convenient doing it here in the storyboard. So we'll define our cell on what it's gonna look like. And then it will just reuse it and repeat it, which is really cool. So we know that on the left hand side we have an image, right? So let's go ahead and do that and dragon in. And of course, it's never smart enough to put it to the size we actually need. And ah, looks about Okay, let's make it an equal 70 and 70. I just clicked the ruler over here. By the way, I'm hoping you're getting more familiar with this navigation. Here s I clicked the ruler. The attributes to change the attributes makes sense. Uh, that looks good. I like it. I like words going, Um, let's go ahead. And it looks real nice. Ah, that's so notice. Here on the top and bottom, it says concerned margins this time it zero on inside of a table of you sell. There's margins in the top and bottom, whereas on the other view appear there was only left and right margins, if you remember. So that's cool. We wanted from the left, the top and the rights exactly what we want and then go ahead and give it a fixed width and height. It's going to stay exactly like that. And Ah, that looks really cool. Actually, um, I'm impressed. I mean, I designed it, you know? Of course it's gonna look great. So I'm gonna do now is get an example. Image. I'm gonna click the assets folder here and just throwing an example. Test image. Eso I can, uh, see what it looks like. Make sure it's ah, coming together. So I clicked this guy here and let's go to was a barrel water bridge. And I'm going to say aspect feel in this case, I don't want my images to look really nice and fill the entire screen so I don't do aspect fit cause if I do that, it's gonna leave extra white space and it's gonna look weird. Aspect feel is the right solution in this case. So I like it. I like it. I like it. And let's go ahead and add her labels now. And by the way, we're adding these to the cell. If you've accidentally added any of these controls outside of the cell, you're gonna need to change it because we don't want it outside of the cell. So there's your label. I'm gonna drag it all the way across I'm gonna change the font to custom and then Helvetica new And that looks okay And I might change the color Pretend that we have a white background which we dio and not a blue background I'm gonna change the color too A dark grey Here's a design tip for you. In most cases, black is always to black, black and white is always to black Always want to go with a darker a darker gray It just looks a lot better That slight difference could make all the difference Eso ah, there's a design tip from you That's straight from Ah, Designer. Actually, it's not my words only, but Okay, so there's a label and Ah, here we go. There's this would be our multi line labelled. This is like a description that could have ah say three lines. And so, um, you know this This could be like, Hey, this neighbor is such a punk. He blasts his, uh, corn music. Corn is anybody. Listen, you guys, you guys were even born in corners around a bit. Anyway, uh, for those of you know it is. That's okay. You're cool. I blasted corn music way too loud. Um, and ah, I'm thinking about burning his house down. Youth as an angry neighbor. Um, it's OK. Notice how it's cut off. It's not quite fitting three lines. So what we want to do here is Ah, see this auto strength right here. Let's change from fixed to minimum font size, and we're at 17 right now. I think we should shrink down to 12. So basically, if it doesn't fit, it's gonna shrink down till 12. Until it does anything below 12 is just too small. Then it will cut it off, but I think we'll be OK. So we've got her label. We've got her image. The image has constraints that labels don't. Here's our title, actually. Um um Music man music man needs to go. Cal, get rid of this guy. And, uh, also, here's another design tip. Um, you know, it's really common to want Teoh make this bold, right? It's a header. It should be bold. You know, um, the designers I've worked with oh suggest against not doing that as your headers. Just use a regular font size. And then what you do on the sub font size is actually change it. Teoh A light or italics so I could change this to light italic, and it's starting to look really good. This almost looks bold now, but it's not too strong. It just creates the perfect Ah, perfect balance there. So there's another design tip. Use regular and light Teoh. Make your stuff look real good. Um, and so let's go and constrain this label here at the top top and left is fine, actually. Right. It's fine to will just make it stretch in this. In this case, we don't need to give it a with Let's just give it a height, because it's gonna have a flexible with because it's pinned to the left and to the right. So that's fine. And then ah, lastly, this guy here going to the same thing three from the top eight from the, uh, left zero from the right, and we'll go ahead and give it a height. Okay, I'm gonna call this good. Let's go ahead and get rid of this. Ah, this blue background just does not fit. But did you see how it helped us figure out what we need to do. Where is this background? Um, there it is. That's about to change it to, um, by default. They have white or clear color backgrounds, which works for us. Hey. Doesn't look nice, I think Looks nice. Looks really cool, actually. So there's our table view. Um, What do you think? How's it looking, I think looks pretty good. So do you, y, for this is really done. That's not bad. So let's go ahead and go into our, um, our code, our view controller. And what we need to do is create an ivy outlet for our table view. So at I b outlet week of our, uh, we'll just call this table view of type you I table view. There it is. And, ah, you know, what we'll do here is actually add a scapegoat of this memory warning. We're gonna go ahead and, um, add the delegate protocols or the protocol delegates or however you want pronounce it. So you I table view delegate. So basically, how this works is if you have a table view. So how table these work is? No. If there's one in play, one running What it's gonna do is it's gonna call things called functions. It's gonna call self Arrgh index path. It's gonna call number of rows and section. It's expecting some functions to call. It's expecting to call those things, however, since but it's not gonna call in its own class how delegates and protocols work. As you say. I implement the protocol meeting, I promise to implement the functions you're looking for Mr Table View and Mr Table View says, Oh, you have my functions. Great. I'll call them and give you stuff so you can use it. So what we want to do is implement the functions for the white table of you delegate so the table of you can call them, and so it can work. So it so we can pass data around and things like that. And the reason why they did that is because, um, they didn't They didn't want you to not be able to get access to the things you need to run a table. They were like open functions that you can use to perform operations, and so they have to be in protocols that you could implement other classes so any other class can use them. And it's a little bit complex of a subject for you. Don't understand it completely. That's fine. Just know that to implement these protocols, you put a comma after the class it's inheriting from. And then you implement the protocol right there, and we're going to implement two protocols. Okay, You a table view, delicate and new I table view data source. So we're saying, Hey, this is the delegate for the table of you. So it's gonna listen for certain functions. And also Hey, this is where you're getting your data from the We need to set our data here as well, too. Um, and Apple chose to put those in two separate ones that could have put him in the same together. I've never actually used one without the other. So, uh, but whatever. Um, so we've got those That's great. So the other thing we need to dio is ah se table view. So caller table view and say delegate equal self. So remember how he said Mr Table views, looking for a delegate to call, He's like, Hey, who's gonna be the delegate? And I'm whoever is the delegate and was implementing these functions. I'm gonna call them for you. And so he's looking for it. So we got to say, Hey, I'm the delegate. My view controller. This guy right here, he's the delegate and he's listening. That's all we're saying in table view dot data source equals self. And ah, same thing with the data source. Hey, where's the data? What? I'm I'm carrying it. I'll help you out with that. And Ah, that's really cool. The problem is what you're seeing this air right here is that we have not implemented the, um we have not implemented the functions that it's requiring, but I did want to show you one more way. So we're doing this in code here. You also can do this from your storyboard. So if I select my table of you right here, uh and ah, I stuck my view controller actually vice versa. If I select my view controller than my table view, I think I was selecting the cell. Um, OK, so see this table view right here? What? I also by the way, what I just did was I connected that table view tour outlet. I just clicked and dragged with control drag. I went like this. Control drag. Okay. Anyway, click your table view. Right. Click it and Ah, see how it says data source and delegate. You can actually drag these to your control or say, Hey, this belongs to the source and this in the delegates right there as well to with that being said, I get a little bit a little bit weird, uh, weary or leery of, ah of doing that kind of too much stuff in the storyboards because what ends up happening time and time again is you forget and it's hard to debug. Hard to figure out where is right here in the code. It's in your face, you know that you're calling it. So, um, I like to do that as much as I can hear in the code. So it's you can debug it and track it. So we need to go ahead and implement some of those delegate methods. Okay, so one of them that we need to do is number of sections and table view. Okay. Notice how just did that for me automatically. Real nice. Eso a section is just Hey, how many different logical ways you want to separate your data and in most cases, most APS I've ever abilities. You always one. But in some I have built multiple sections. And so, like, you know, if you were if you're building like a Pokemon at and you wanted to separate all the Pokemon by type, like grass fire, whatever you could, you could do different sections, and each one can have date a bunch of table rose in its own section. But in our case, we're gonna return one only one section, okay? And, ah, by the way, that one starts with number of sections and table view. That's the name of the function. Most These other ones start with the word table view so you can see all these. These wouldn't pop up, by the way, unless we had implemented those protocols up above eso. There's a few that we have to have. One is self pharoah index path and what this is saying to us, Okay, what is saying to us is, um hey, you've got a bunch of data you want to show every time you wanna show data on the screen. Let's create a cell, a table view cell and put data in and show it on the screen. So you have to deliver a new cell each time and say, Hey, what data do you want me to show in this specific cell? Okay. And so that's the first thing we need to do. We also need Teoh. Do a few more here. We need to scroll down and find it here. All right, this one right here. Height for row index path. It wants to know the height of your cell. Okay, Um, so if we go to our main story board here and we look at our cell on the right hand side over here, we know that it's 87 pixel high. Okay, so let's go back to our view controller here, and ah, let's return 87 0.0. Okay, um, now, in Iowa's eight and above, if you want. If you don't want to put, um, a fixed height in here. Ah, and you wanted to be more flexible and you want your like, for instance, your labels. If there's lots of text, you want them to grow and expand and things like that you can actually get rid of this. And what you can do is you can say table of you dot estimated estimated row height and then you just give it an estimated height, so it kind of has a base to go off of. In this case, it would be 87. And then what you do is you design your constraints in your storyboard, so they're flexible. So your labels congrats. Oh, and shrink and then they'll change accordingly. We're not gonna do that here. Not today. So no big deal. I just wanted to let you know that you can do that. You can have estimated and grow and shrink. You gotta set up your constraints a certain way to do that. And, um so we've got Heifer Road and expects Index path Self A row and next path. Now, what we need is, ah, number of we need a table of you. Number of rows in section. So number of sections in table is how many sections you have the number of roses each row that you're gonna have in each section where we only have one section. And so what we're saying is, hey, how many rows are we gonna show? Well, we don't have a good number for that yet. So what we need to do is add the data for that. So we do a save our, uh, posts, uh, equals, and we'll just initiate it right off the bat here as an empty array. So we're gonna have, um, array of post. Every time you make a post, we're gonna add it to the array. That makes sense, right? And so the amount of the total amount of cells should always equal the total amount of posts. Make sense. So what do you think we should put here? If you said return posts dot count, you would be right. We need to return the total number of posts that are in our table view. That makes complete sense. And Ah, so we got number of rows and section height for row and next path Self wrote and expect. There's one right here that's not required. Um, I'll show you anyway, but it's ah, table view, and it's did select Rola and next path. And this is what you do when you want to select a row to load. Um, something Some new view of some new data. We're not gonna do that here. Ah, and this Ah, in this app. But this is what you would implement to when you select a row and it takes you somewhere else. In our case, we're just gonna show the data, and, uh, we're not able to edit it right now. And so lastly, you're probably like, Well, why do we Selvan air here? Well, it's looking for us to return a table of you sell. Okay, but what we need to do is create a custom sell. So if you noticed over here in the main storyboard, we've gotten image into labels here. But how do we get the code talking to the store board to this data here? Well, you're used to clicking and dragging views toe. I be outlets, but we we don't have a way of doing that. So what we need to do is actually create a custom view accustomed table of you sell. So go over to your folder over here, your main folder in at a new group. We're to call this one of you whenever I write custom view code. I put it in the View folder model view controller. I just re arrange that. And so there's our view folder Let's do a new file and go to source this time. Cocoa touch class. Okay. And go ahead and change this to you. I table view cell. Okay. And the class, you can just call it Post sell because it's, ah, the post cell That's gonna have all the stuff that we don't need to create a zip file because we've already created the sell in side of our storyboard. No big deal. So cook next and then create and easy enough We don't need this function here. It's setting it when it selected and, uh, no different when you see before except here We're inheriting from you, I table view. So this is this is a custom class. You'll be doing this all the time. If you're not writing custom classes on your views frequently, probably not doing it the best way, because the best way is toe is due module Arise as best as possible subclass and hold your the logic for those views inside of those classes. So at I b outlet week var and we know that there's an image, right? So let's just call this post image of type you I image view by the way. It's common for some nights for new people to accidentally leave you image. That's that's not gonna work. It's not gonna give you what you want. Image of use. Hold images, but images won't work on your screen without an image view. And let's go ahead and create the other ones week bar. And this is ah, title label, right of type you I label and one more week of our And this is gonna be, uh, what does say desk label of type your label for description. And there's our I B outlets looking pretty cool, actually. And ah, so let's go ahead and connect those up. Put your main storyboard here and ah, do you see this cell right here that we just clicked on? Okay, we just clicked on the table of you sell. Go over here to the right hand side, click the rectangle here, the identity inspector, and change your class to post sell. This is really important. If you don't do that, you won't be able to recognize those outlets were basically telling the story board. Hey, this is a custom cell, and we got to use it. So now if you right click on your cell here. You'll see the title labels right here so you can click it and just drag over to the title . The post image straggled over to the post image and the desk label. Mr. I get over to the description easy enough that it was that easy. Okay, that easy. No big deal. Um, also why we're here on this cell. Let's go to the separator. Um, actually, the table view this table of your here. Let's go to our separator and put it to none. We don't want any separators Perrigo, and that's looking good. Okay, so there's one more thing we need to dio uh, see right here back on our cell, click yourself and go to identify her. And, uh, when you're creating table view cells there re used over and over. Picture this. Imagine if you had ah, 1000 rows. Lots of data being shown. Do you think an IPHONE or any mobile phone could handle 1000 rows in memory? Probably not. That's a lot. That's a lot of views. It's creating a memory. So what it does is when views go off the screen, it takes them and reuses them and throws them back on the screen. So you may only have, like, 30 or so ever in memory, and they just keep getting re you. So you have to have a re use identify are saying, Hey, this cell is of this type and I want to re use it. So, for instance, if you had, let's say three different sections, but they all had three different styles of sells. Well, you don't want to reuse the wrong cell and put the wrong data, and it wouldn't make sense. So we just have to give it an I. D here saying, Hey, it's this type of cell so we know what type of data to put in it. So identify here is gonna be called the same thing is the name of the class post cell. Okay. And, uh, now go to your view controller and we're gonna write some code we're gonna say, um, if let cell equals table view dot de que reusable cell with identifier. Remember, this is called post cell. I'm going to say, as post self, let's talk about what's happening. So what I'm what table view does is when you get to sell for on next path. This is what I was telling you about this. Is that what this is when it reuses those cells? So you call your table of you and you say, Hey, you've gotta sell for me. If you do filling in my way, I'm going to reuse it, and I'm gonna update the data that's inside of it. So it's already going to say, Hey, grab one of those cells you've ordered created, all right? And, ah, of course, it's going to give us a you a table of yourselves. We need to cast it as a post cell. We know it's gonna work because that's what we're using. Post sells, um, and that's that's object or in a programming that's polymorphism. Being able to use one use a parent type as the same as a as a child type. So So if there's a cell, if you've given me back a cell, that means we've got a fresh cell to use. But the data and its old we need to put the new data in it, cause we just re used the data from an old cell s so we need to update the data in it, but we don't yet have a way of doing that. So let's go back to our post cell. We're gonna create a function called configure, sell our own function. It takes a post just like so. And what we're gonna dio is Ah, I'm not gonna about the image just yet. But for the title description, we can say title label dot title, not tent adjustment. Come on or not. Text title able that text equals post op title or post that. Oh, stop. Oh, come on. What did I do wrong here? Equals post title. Oh, it's because we made them private. Ah ha. Smart thinking. Here. We need to make getters for these, right? You're like, Oh, hate doing that. Why do we have to do this a little time? Well, this is that we write good code. And by the way, if you do it this way, your potential employer is gonna be very impressed. Me, like you're a junior programmer and you're already doing data encapsulation. That is amazing. Like usually when I bring people on, I gotta train them on data encapsulation. This is fantastic. You're hired. Listen to what I'm saying. I know what I'm talking about. All right. So of our image path and that's going to type string. And we're just going to return image, path and bar, title of type string. And we're gonna return title and lastly, var Ah, Post desk of type string, and we're going to return post description. Perfect. That should do the job. Right? All right. And let's go back here and now it works, Okay? We created a getter and access er, and so let's go ahead and say, Ah, description, label dot text equals post that text. No post description put. What is it? Post that post description there. You okay? We're not gonna mess with the image right now because there's some more work we need to do with that. But I want you to think about this 1st 2nd what's happening? So over here, in our view, controller, the table view, uh, is is wanting another view. It's like, Hey, we got another row. We need to show. Can you get me a cell ready?
66. App: MyHood Part 2: Hey, everyone, Mark Price. Here, Deb slopes dot com And here we are for the exciting conclusion of my hood, and it's turning out pretty good so far. I have to say, this is where we left off, if you remember to some of you that was 15 seconds ago. To others, it's been a couple days. So to those who has been a couple days, you need to be coating a lot more often than that. If you want to get this stuff down, be doing this every single day. So we've got our table view with test data, and it's looking good. Images are a little bit big. We're obviously not saving images and things like that, Um, but we don't really have a way of creating this images anyway, because we got a load him up from the phone. And so let's go ahead and create our second view controller. So begin do just that. So let's go ahead and create a new group over here called Controller, Of course, model view controller. We have now completed it, all right? And let's ah, but the controller right there and I'm gonna go ahead and drag my view controller in there . And in fact, these storyboards here you can put them in your view, because their view uh, it's code. And, uh, and the actual interface itself that could all be classified as the view. And so there's our first view controller. Let's create a new one. So a new file, I just right clicked on it. Coco touch class is perfect, and this one needs to inherit from you. I view controller. And let's just call this add post V C. It's kind of common in IOS to end your view. Controllers names, the letters V. C obviously don't want to write the forward view controller. I don't know why apple puts that in there for you, but basically at V. C at the end view controller, very telling of what it is. Click next and click create. Okay, So Okay, so we've got our second view controller. It looks good. I'm gonna go ahead and get rid off the, uh, boilerplate code there, and I'm gonna get rid of this and let's go into our main story word and actually create a second view controller. And all we have to do is search for at the bottom right here. So view controller and drag it onto the screen. Looks great. And, ah, we can even create the Segway right here. So take your button. It lets us click it. We gotta zoom in and go ahead and control drag over here to your view controller and just click show no big deal, all right. And on the Segway will click that and we'll give it unidentified air, and, uh, I just like calling it the same thing as the view that I'm going to. So I will call this ad post V. C. And it's looking great. One more thing when you do selected this new view controller and click the identity Inspector over here this rectangle and change that to your new ad post view controller. That way we can connect outlets and things like that. Now, what we need is the question. So we need we need a way to go back so I cancel. But in we need, um a place for image to show we need it when you tap that image, it adds, let you add a new one. We need a couple of fields and a button to make the post and maybe a title at the top. And so we do need a few controls. Here s so what I'm gonna dio is actually slept this nice blue view up here and click over here and then this command V to pay. So I command C command V to paste it here and, ah, let's get rid of the logo here. And ah, let's get rid of the photo or the camera and let's go out and put a label right appear at the top. Most center it okay, And, uh, there we go. And let's just entitle this Make new post that looks good to me and it fits, knows changing toe white. So I'm gonna click the color and change it toe white. And let's change it from system over to held that it could new a little bit bigger now. So let's make it whiter. That's looking really good and OK, so let's go ahead down to our pin menu and we'll go ahead and pin it eight from the bottom , and we'll give it a within a height so it stays as it should. And then let's go ahead and senators horizontally, so it's right in the middle, and I think we may have forgotten to pin this. Maybe not. Let's take a look. Eso it carried over with it the height but it didn't carry over the constraints. So when we copied it So let's click the pin menu, turn off constrained margins Click left top and right. And I think we're in business. So there's our top title. We do need a but in there. So I'm gonna type in the word but short for button. And I put it over here in the far left side. And let's change the text to cancel and change the font Teoh, Hellenic and new. And what I'm gonna do is actually change the color toe white, nice little cancel button. And, uh, I don't like how it's centering there. So over here, if you look at your control on your button, I can click left alignment and, uh, I save it. Make sure you save a lot everybody. So when your program crashes, especially with X code, um, seven, which is crashes a lot, that you have your stuff still. Okay, so we've got a title. Gotta cancel, but and that's looking great. Um, so Let's go ahead and get our image in here and ah, there we go. And let's go ahead and say to 40 by 2 40 A perfect square. We'll bring it up right about there who I like it and, ah, let's go ahead and click the alignment menu and let's center it horizontally in the container. We don't want vertically and said, We want the pin menu. Let's just go ahead and say 35 from the top is fine and let's give it a fixed with and a fixed height and then also go ahead and scale are changed. I'm click the image and over here and then click the aspect feel. I want the image to feel completely and we can set the example Image right here. Just so we have something there for now, and it's looking good. Now Maybe you're asking how do you tap an image to load a button or to load the image picker things like that. What I'm actually gonna dio is cheeked. Actually, lots of people do this. There's nothing wrong with it. There's lots of lots of ways Teoh cook a chicken to skin a cat to beat a bat. You know, I'm saying I don't know what I'm saying. And, uh so I just took a button and I dragged it on here, okay? And I'm dragging it over here, all right? Just how it's just dragged to the same size as the image view. And make sure on your left hand side over here that it is below it on the screen. So it's clickable. And what will dio is will change the text to a nice orange color. We're gonna make this disappear, so doesn't matter. But here's the orange if you want it f a a 71 c. And, uh, I'm gonna change it to the Helvetica new and let's make it bigger. And let's make it say, um, plus add pick. So that's what the buttons going to say. I like it OK and the pick and wouldn't do something fun. Select your button and your image and select your pin menu and say equal withs and equal heights. Since you already set a with and high on your image, your buttons going to conform, which is really nice, and then on your alignment menu, Just click horizontal centers and vertical centers and again, since the images already laid out your button will align and conform. And, uh, that's good to go. So let's go ahead and create our fields. These are you, I text fields, and we'll just drag it right here, and we'll drag it over to the left, and we'll drag it over to the right, and ah, I don't like the way it looks. Um, I'm going to switch it. Swell. What do we want to do here? It's not too bad. We're leaving this place. Holder, enter title. Okay, squad and center that. I'm gonna change the, uh, the font Teoh Helvetica new and I like it. I might change the font color to that dark grey. You can't see it yet, but let's see if it happens would go right in here. Yep. That looks good again. Grays or was nice. And it's a little bit, um, small, I think I think I'd like it to be a little bit taller, I think, um, yeah, let's make it taller. What's currently at that 30. Let's make it to 40 now. It doesn't let you drag these controls here, so you have to set that in the constraints Let's do that now. Let's go ahead and give it a height of 40. And, uh, well, pennant from the top 25 is fine. And from the left and from the right. Very nice. Okay? And so that's looking good. Let's go ahead and just click that and control. See or command C Command V to make another one and drag it right there. And let's call this one, huh? Enter description. Okay. And let's see what constraints carried over here. It gave us the height, but it didn't give us the other ones, and that's difficult. So let's make it 25 from the top and zero from the left and European right? And that's the margins, of course. And let's give it a height of well, actually, don't give it a high. It already has the height separate there, So that looks good. And now we need a button. So let's add a button, and this would go right here, and what I'm gonna do is just take off the word button to make, say, make post and will change that Funt to Helvetica new, and we'll change the background color to this nice blue and again that blue is too e 87 c three and does change the text color Toe White. Okay, and there's the white color and let's make it a little bit longer. That's starting to look real nice, okay? And so it looks good to me. Um, factory. Just put it like that and let's go ahead and click the pin menu. Give it a with and hype and will say 25 from the top. That looks good to me and glad and click. Add three constraints and then on the alignment menu, change it to horizontally and container. Now let's check out our preview and see what it's gonna look like. The screen. It should be OK if we did everything right. It's looking pretty good to me. I think it is. At least, um, yeah, well, you know, let's make the button. You know what? Let's make the button the same with as the other things. Okay, so let's go ahead and take off with this to 25 and, ah, let's just do the same thing we do before on the left and right alignment. Just do this. And now let's look at her preview. I like that better? What do you think? It doesn't matter what you think because you're not even here. I'm here. You're, like, in the future, and I'm in the past. So this is what we're doing and Ah, okay, So it's looking good. Do we have all the controls that we need? Image. But in fields make post. I think we have all the controls. So time to start writing some coat. Go ahead and open your assistant editor here. Change from Prevue to automatic and add post V C. And what we want to do is click this button here and control drag down here. I like putting the actions at the bottom change into inaction, and we're gonna call this make post, but in pressed and ah, over here. Select your cancel button and controlled rat. Don't do that. It was command right. Click it and control drag down there and change it to action. And let's go ahead and call this one cancel. But in press and let's get these outlets in here to make my coat a little bit smaller here so we can add these things. Okay. And so let's go ahead. And this, uh, Mr got the to the ad pick, but in, um needs to have an action as well. So let's add that here. We're gonna change it to action and call it ad pick, button pressed and okay. And then this image here, we need to start outlets so we can change the image. So I'm gonna call this post image and let's get these fields. This is ah, title field. This is Description Field. Um, is giving me grief. Looks like a gonna bug. Or I did something dumb because create a space here. Let's try this again. Dragged over here and let's call this description field. Very good. All right, so got the image that Okay. And, uh, I think what we want, actually, let's let me think about this. When you click, you add, but in um, yeah, it's not too bad. I like that. So what we'll do here? See how this ad when you click this ad pick button we want to do is hide that text, make it gone. Showed the image instead, as we don't want a top of the image looks kind of ugly over here on the right hand side, I'm gonna change any object to you I button because we know what to button, right? And what we're going to Dio is just say sender, the set title. And, uh, we're gonna set the title for the normal state to be empty. All we're saying is, Hey, once you've added a picture, let's make this title empty. And I didn't want to hide the button because I wanted still tap a little, But I wanted to look like a hidden. So if we just set the title to empty, it looks good as new. There's lots of different ways of doing things in Iowa S and M programming in general, so I think we've connected everything. So let's go in and close our assistant editor. Go to your ad post V. C and let's write some code. I'm gonna clean some things up here. I always clean up my code. I can't stand messy clothes. You should be doing the same. Clean up your code, don't have to make sure things consistent, you know, get rid of junk, make it look nice and OK, so when they add picked button is pressed when the make post buttons press Well, let's handle the easy one first. So when the cancel button is pressed, all you have to type in is dismiss view controller Animated, Yes, making animated. And when it completes, we don't care what happens. Let's just do that. Okay? So when you press the cancel button, it should take you back to the other screen. Okay, That looks good. Uh, so what do you think? Do you think we should test it out now? So when we actually click the picture but the camera button, it takes us to the new screen. I think we should test it out. Let's give it a shot. Okay? And hey, look at that. It popped up. It worked to see if the cancel button works. Cancel button does work. Look at that. And it's animated. It looks pretty and ah, wraps really coming together. And, uh, look, this this kind of ugly, it's nice and big and square. I mean, it's OK, but in our were going around it just for fun. So you know how to do it. So what we're gonna dio is right here in view. Did load prevalent loads. Uh, we're gonna say post image dot lair, corner radius. We're going to set the corner radius of the layer of the image, meaning that the sides and we're gonna set it. Teoh equals post image dot frame that sized up with divided by to just think about it. You take the with of our, um, our image, which currently I think is to 40. So that would be wet 1 20 And so, uh, we're saying, Hey, we want the corner radius to be 1 20 So few. If you do the radius on each side 1 20 it's gonna make a perfect circle because you're cutting it in half. That's how much you're rounding it by, um and that's gonna work. But one more thing we need to dio is ah called post images that clipped about equals. True, when it's gonna do is anything that is outside of that circle, it's gonna cut off. So we don't see if we didn't, we wouldn't see the circle. Okay, let's go ahead and run it. I'm gonna command Plus are to run it and see if it's doing what we wanted to dio Let's click it. Hey, look at that. It's looking pretty fly. I like it. Um, okay, very good. Very good. All right. Uh, main storyboard, though We actually don't want to show this image by default. Um, I'm gonna just turn it off because we shouldn't have an image by default. Makes sense, right? Right. Was turning up scared of the image on the image view. There we go. Let's go back to our view controller. So we've definitely tested that when the screen is working. And so what we want to do is when you post, um, we want it to, um, save to the array, and we want it to update that array. And, ah, we're getting real close here. So I want to do what I want to do is actually one more thing I want. I want to fix our main screen here and make this not so ugly and square. Make that circle as well to. And then maybe what we'll do is will, um, we'll call this video done. I said I was gonna be the last one I know. I tricked you again on. Then we get focused on the next one just on getting the data right. Let's just make this look. Let's make this looked pretty real quick. and then move on from there. Um so what Weaken Dio is go into your, um, post sell Peritus and envy awake from nib function. We'll just do kind of a similar thing. Post image that lair dot corner radius equals post image. That frame that sized up with divided by two and the post image. That clip to bounds equals true. Let's fix that up here, okay? And it's looking pretty good. I have to say so myself. And just so you know, there's there's other things we could have done like we could have, we could put like Corner Radius equals 15 just to see what it does. Okay, the all kinds of things to make it look, however we want see how it's like a square, and it's almost kind of like a square. Now, that's kind of cool, huh? Mm, You get around that. Have fun. That's one of the cool things about IOS. Lots of lots of fun. You can have lots of cool things you can do. Okay, so that's looking real good. Guys and gals, let's go ahead and call this video done, and, uh, maybe we'll finish in the next one or maybe we'll make 10 more. Who knows? We're just We'll just see how it feels. How does that sound? So hopefully the next ones the last one So really good stuff here. Make sure you understand everything you're doing. Go back and watch videos if you don't support. So, uh, let's go ahead and continue in the next video.
67. App: MyHood Part 3: Hey, everyone, Mark pricier desktops dot com Remember that one time when I said we're done and then we weren't done and I will make a video. And so here we are, making another video. And, uh, I think this is the last one. There's just so much good stuff I want to teach you. There's so much to know There's so much that Ah, so many the courses don't cover. And if I had all the time in the world, I'd give it to you. But just know you're getting all the good gems of knowledge here. So this is where we left off. Um, looks good to May rounded circles. And now we need to make the post. We need to get, actually get the data posting to the list refreshing and also saving to the phone itself. So when we close the app, it loads back up. Uh, so let's go ahead and do that now. So in your ad post VC right here. OK, we have this make post button pressed, and so what we want to do is make sure that all the fields have data in them, okay? And, uh, but we can't do that yet? Because, um yeah, the text. The title field. We could check the description field. We could check, but the image field. We can't check that yet because right now, currently, um, we can't load images. Why? Because we haven't written the code for it. So let's do that now. What we need to do that is something called Click. It's called a U I image picker controller. So I must save our image picker of type of you. I image you. I image picker controller. OK, and ah, there we go. And so what we're gonna dio on viewed it load. Remember, we're putting the implicitly unwrapped exclamation mark here because we know for a fact we're gonna put a value in it. We're not doing this because this will be saying, Hey, I may or may not have a value in this at some point in time. No, that's not what I want. I want to guarantee a value, be there before anybody messes with it. So that's what I'm gonna dio. And then right here in the initial Isar we're going to initialize It makes sense, right? So let's go and do that now We'll say image picker. Our image picker equals you. I image picker controller and just initialize it. No big deal. And one thing that we do need to do is implement a delegate protocol or other protocols. Delegate. Um so the app can No, After you've selected a picture like so when you're the auto auto picker comes upto interact with photo album things like that, it'll tell our coat when the user is done selecting the image. And so that is called you. I image you. I image picker, Controller, delegate. It's a mouthful, and this does not work. Um, unless you have you I navigation controller delegate as well, too, because it uses a navigation controller Teoh work with it's callback methods. Just know that for what we're doing here to be able to listen when a user picks an image, you gotta implement both of these protocols here. Okay, Just take my word for it. Um and OK, so the idea is you select the image, the button, it pulls up the image picker, you select the image and then we saved image. Eso we'll first need to do is set the delegate of the image picker dot delegate equal self . Remember, this wouldn't work unless we had just implemented this. What we're saying Hey, image picker. This class is gonna be the one that's listening for the callback functions. Okay? And so now what we want to dio is when the button is pressed. Okay. In lows image picker. And then when the image picker images selected, we store that image. Uh, right here in this image view. So there is a function that we need to call or that listen, for at least a called image picker controller did finish picking image, okay? And so let's ah, let's use this function here. And what we're gonna do is we're just going to say, uh, first off image picker dot dis mitt. Dismiss. So when the user selects an image, we want to hide the image picker. Right? So we're gonna do that here and then, uh, we're gonna say post image image equals image. So this picker controller, we'll get it right here. It gives us an image back. So when the user actually taps an image, it just gives us you image. How cool is that? Super easy. So if you're confused at all, Okay, we've implemented the picker controller delegate So we can hear when the user selects an image which is gonna call this function automatically. And it does that because we set the delegate saying, Hey, when we're listening for this function and then we dismiss it and we save the image to our image, you and then, um yeah, then I'll do the trick now here in the make post button press. Now we want to make a post, right? So we could do, say, if let um, title equals Title field dot text will say, Let the script or desk equals desk, field that text and then we can say, um, let I am G equals post image dot image. So all I'm doing here is I'm saying, before I save anything or let the user make an actual post, let's make sure that a title exists. We grab it out if it doesn't exist, this code is gonna turn out to be false and won't run or in the same thing with description . Heyzer in a text in the description. If there's not, it's gonna false and executes ending with the image user hasn't selected the image. We're grabbing image out of the image of you than the code is not going to run. And therefore we're not posting junk or half date or things like that. And so the question of the day is, now that we have a title and a description and an image, what do we do with it? How do we add to our list and how do we save it? So basically, we're kind of at a stopping point here because we can't really We can't really do anything with this. Causes were not set up for that yet, But what I would like to dio is, um, test out this function at least so far. See if the image picker works and let's give that a shot. So I'm gonna build and run. Just click the play button up here. It's coming. There we go. Okay. Click of the camera button and let's click the ad pick. So it did not work. All right. Did not work. Ad pick, button press It is because we did not, uh, present it. So I'm glad we tested it. So here we go. We'll say, present view, controller, and we're just gonna present the image picker you're like Wait a minute. Image Pickers of view Control. Yeah, it's a view controller and it does different things that it's Apple's implementation of its own image picker. So but it's a view controller. Yes, animated when it's completed. Um, we don't care right now. Let's try running this again and seeing what happens. We're gonna get there. Stay strong. Alright? Ad pick. Oh, my goodness. Is it working? It looks like it is working. Hey. Hey. We got it going pretty cool. So there's the image it saved in there. That's looking really cool. Um okay, so we made progress. I like where we're going. Now let's talk about data. So So first off are, um, our view control. So our list of posts is here, and my ad post doesn't really have a way of accessing it, right? It's It's over here in its own view. Controller. How do I save a post and go back over there? And and then there's thought of OK, well, maybe this posting screener, this ad post, maybe it saves it. And when you save it, uh, this one will somehow load it from the disk or something. But the more code we have to write in our view. Controller, um, the less cleaner code bases because things that are in relation to our data model, like saving and persisting and reading and writing That should happen in our model there. But we don't really have a good way to do that. So what I want to introduce to you now, um, is something called a singleton, and I'm gonna call this service. So you got model view controller, But then you kind of services that, Yeah, it's kind of part of our model, but it's also kind of a service. That does think so. I'm gonna create a new group called Services. Okay. And here we go. We're gonna discredit new file. I'm just right clicking it new file. And this would be a swift file. Okay. And I'm gonna call this, uh, data service. Okay, so we've got a data service, and what we wanted to do is ah, work with our data. So it's going to create a class here class data service. Okay. And so a singleton. Okay, the idea of a singleton is that there's one instance of it in memory, and it's globally accessible. Um, everyone okay? Uh, you know this. Ah, this is not ours. Here. This is not globally accessible. Everyone, right? Because add posts can't get access to it. When we could maybe pass it over, pass it back. But that's really dirty. So we need a way to globally access our thing. Our class here so we could say static, let instance equals data service. Okay, so let's talk about this. So what Static is saying is, hey, Onley ever make one instance of this? Ever, ever. Ever. So no matter how many times people trying mess of data service only ever create one instance of it, and any time you access it, it's going to be that specific instance and restoring it in a variable. I could call this anything I could call blah, or sometimes people like to call it shared. Okay. Um, yeah, I'm colonel. Instance because it's an instant into the instance. And Ah, so that's all you got to do to have a, um, Singleton globally accessible in swift by any other class that keep in mind. You gotta use these carefully. Ah, Singleton lives in memory and it never shuts down and never dies. Once you're using it. Okay, so it's always a memory. So whereas other things like posts and variables, when you're done using them, the garbage collection will clean them up and take care of it. Free of your memory. Not so here. All of the singleton's that you create will live in memory for the lifetime of the application. So you don't just use them everywhere because you'll be a loading up your application, um, to be using lots of memory. So, uh, using carefully use them wisely. It's a good use right here. So what we want to dio is do a few things thing about this. Our data service should load posts from our database, which is just our phone should also be able to save them. And also, there's a nuance with saving data to the disk with images. We can't store images in the same place that we're gonna store other data like titles and descriptions, because it the IOS devices have a certain place to store documents and files that it's meant for. So we got to do a few things here. So what we're gonna dio is ah, First off, we're gonna hold. We're gonna host our data here. So, private, um, I want to save are loaded posts. So this is where we're gonna, um, get our post room. I could have just called it posts, but I wanted to indicate that these posts have been loaded, and that's just post. There we go. So at run time, it's gonna be just empty array, and we will initialize it later, though, Um, by the way, this is always safe. To do with a race. Is if if you don't wanna have accidental accessing of optionals that Neil or going out of bounds, things like that just initialize your razor at run time, right at the beginning to an empty right. Um, Okay, so we've got our private bar loaded post. It's going creator getter right now. So far. Loaded posts. Um, and, uh, let's call this post, and we're just gonna return loaded posts. Just good practice. So let's Ah. Okay, so let's go ahead and ah, right out. The functions we're gonna need so function save posts. This is when we save all of them to the, uh, to the disc. When I say disc disc anymore. The reason why we say that because, you know, we used to use discs to save stuff fun, but the hard drive of the IOS device and we're going to function to load post, So load posts. Um, that looks good. Also, we're going another function, um, to save an image. And now how it's gonna work is we're going to save an image to the disk, and it's gonna give us a file path. And that file path is what we need to store in our data. So when we're storing our title in our description, instead of storing the image itself with all the data, we're just gonna store an image path string so we can grab it later from the file structure of the device. Eso we're gonna dio is ah, we're gonna make another function called save image and create path. And this is going to take the image itself. So the U image that we have, right? And, ah, if you notice here actually it's not working because we have not imported you like it so it can't work with you. Why images? Because it doesn't know what they are. If I put this in right here, it now knows what a u I images and can work with it. Okay. And, um then so that's saving images. But what about retrieving images? So function image four path. And, uh, this will return something, but right now, I'm gonna leave it without a return value. So doesn't yell at me with an heir. Okay, so we can, um, see so we can save the posts. We can load the posts. We can save an image and create a path and then weaken getting image for a path. Oh, one more. What about when we want to add a new post from, like, the the ad post VC? So what Weaken Dio is that as well? Add posts and it takes a post of type post. And OK, um, yeah, And so whenever what's really cool is you can kind of scaffold your functions like this and start putting things together and then write the logic for it later. So, for instance, add post whenever we add a post, I know that we need to upend it to our post, right, So we can say loaded posts dot append and, uh, passing the post if it wants to obey. And so we'll do that. And then, of course, whenever you add a post, we want to save the whole list of post, right? So it's on the disk so we can call save posts. And then after you save posts, we want a low post. Right? Because every time we load a post, we want the list to refresh and show that new post that we just loaded. It makes sense. And so so far, these functions weren't really doing anything. But at least we're getting some things in place. Um, and that's the important thing. So now what Weaken Dio is? Ah, right, All the logic. Teoh, Just save this stuff here and it's not that complex. Uh, some things you got to know how to do. But, um, so what we want to do first, Um, well, let's talk about saving posts, right, because we've added the post to the array, but we want to save a whole array of posts. And how do you do that? And of course, in Iowa, Esther's multiple ways of saving data today we'll be using s user defaults and we'll be using the documents directory for images. In the other ways are other methods you could use are using core data posting things to a server you could use parse as a backend firebase. You could have your own server. Um, you could Ah, Locally on the device, you can have an SQL like database and actually run sequel commands to save two database many different ways of doing things. So Okay, so let's talk about saving posts. And what we need to do to save a posts is we need to archive. Going to do is called archiving data. Converts it to like like bytes and bits on it stores it on your device, so save posts. What we're gonna do is ah, they let posts data we're gonna turn we're gonna do is we're gonna turn. Our objects are loaded posts into data. You know, those bits and bytes, OK. And, uh, it's gonna be n s keyed archive. Er the archive data with root object loaded a loaded posts. Okay, so we're taking our array, and we're just turning it into data. Okay, That's all it's happening. It's could be a bunch of numbers. It's not gonna is gonna be gobbledygook. Okay. And, uh, then what we're gonna dio is we're going to say n s user defaults dot standard user defaults dot set object and, ah, it's gonna be post data posts data for key and will say, um, what do we want to call this? I think just post is probably fine. So what we're doing is we're taking that whole array of posts and we're converting it into data that can be stored on the disk. And then, uh, we're grabbing the standard user defaults. User defaults are just, ah storage mechanism on IOS were grabbing the standard, the main one. And we're setting an object right here and giving it a key. Kind of like a dictionary, or do you have a key in value? So we're just setting an object for a key that we can retrieve at a later point in time. And this post sorry will always go to the same spot. What we're gonna do is replace that we're not gonna penned where every time we're just gonna want to say we're just gonna replace the existing array with what we have right here , make it make our life really easy. Okay, so that looks good. Um, so let's go ahead and load the posts. So if I say let, um posts data, there's gonna b n s user defaults dot Um, standard user defaults dot object for key. And this is just going to be posts just like before as N s data. Okay, Does that make sense? So we're doing kind of the opposite thing here, right? We're taking We're going to Our sanity is ready. Folks were saying, Hey, we want the object for this key. And if you noticed, we, um we're kind of duplicating this code right here, So let's put that in a constant. So I'm just gonna say, let em is going to say key posts equals posts. It's better to have it all in one place. That way, if we would have to change it, we can do it in one place on this, take this out and put it right here. And right here. I like it. OK, so it's yelling at us, though. Let's see what's yelling at us. Um oh, keep hosts. Let declarations cannot be computed property. Um, posts data. Mm. Me Build this. Something seems off. Initialization of posts. Data. Oh, I forgot that if not very helpful. X code didn't even make sense. OK, so there we go. We're grabbing the object for that key. And if it exists, like if we spelled it wrong or if there was corruption and we're not going to get anything here, So it's very important that you do the If let Okay, So if we got it back, Okay, then we go to the next step, we gotta turn our data back into an array of posts so that we say if let posts posts, array equals n Eschede a narc. Ivor. Okay, the UN archive object with data, and this is gonna be posts data as a post a rape. So let's look at this step here. So first thing we did was we grab the data could because we stored the data here. We converted it and started here. But now we're grabbing the data, and now we're saying, Hey, take this data and convert it back into an object that we can actually read. Okay, so we're just reversing, you know, reversing what we already did. And if this worked, if we got here, don't only do say loaded posts equals posts array. So if this works here we just set are loaded post. So whatever. We just got back. And, um yeah, so our post just loaded. No big deal. NBD no big deal. Um OK, so we've added a post. We've saved the post. We've loaded a post. Um, that's looking really cool. What I want to do is, before you mess with the images is I want to test and make sure that our user defaults are working just for the titles and descriptions. Okay, But we kind of do have one problem. So let's say, over here we make a post, okay? And then it saves, and then we load the posts. How does our view control or ever even know that anything change? It really doesn't. It really doesn't, um so we need to do some some connecting. There's lots of There's lots of different ways of doing this, actually, um and we're going to just do it the easiest way. Um, he's this way I can think of which is just to use notifications. But the first thing we need to do is, um is make is make the post itself. So let's go back to add post v C and right here where we did this. Check to make sure there's actually data there. Let's go ahead. Now create our post objects. I'm gonna save our post equals post and the image path. We're still going to keep it, Neil, just for right now. Um, and what I'm gonna dio is I'm going to give it a title here, and we're gonna say this is title. Come on, come on. And this one is going to be a desk. OK, so there we go. We've got our new object there. Looks good. Looks good. Um, okay. And then Ah, Now what we can do is because a data service dot instance dot add post we passed in the post. Come on, X code killing me. Oh, yeah. So look what we've done here. Made changes to a let So look what we've done here. We've were in here. We've got all the data we needs from now. What we're doing is we're creating a new post object with the title and description. You know, I'm not using the image right now. Uh, it's because, uh, um, we're not testing that just yet, and then we're adding the post to the post okay. And so that's going to take us all the way over here to our data service. It adds the posts, so as it to the array. And then we say that array, as you could see right here and then we reload. Um, we reload that array with the new data just to make sure it's completely sink. And any time that poster loaded, what we want to do is notify anybody who cares that the poster loaded. So I'm gonna say N s notification center dot default centered up post notification. And, uh, we're gonna make a new notification. It's an s notification, and we're going to give it and name on. This wasn't gonna be called, um, posts loaded. And the objects? Neil, we don't not. We don't need to give it any object. Okay, so all we're doing is saying when the Post have loaded, let's go ahead and call our default notification center. It's using this syntax. You don't understand how completely works. Um, you just have to know that this is how you get your default center and your post new notifications. Anyone who's listening to it can hear them are giving it a name creating a new notification with the name whenever posts are loaded. And so what we're gonna do is over in our view, Controller. Okay, let's get rid of all this test data security. All this test data. Okay. What we'll do is right here. Will say N s notification center dot default center dot Add observer different this time. And the observers self, it's this class. Hey, this class is listening for the selector. Is the function that you wanted to call when that event happens? And so this one will say on posts loaded. And I would put this the colon there because that means there's a parameter because it's going to send us a notification objects. We have to have that there. And then it wants the name of the notification, which is the exact same name as the one before an object is still Neil. So again, we've called the default center. We're just saying, Hey, we want to listen for this notification whenever poster loaded, um, whenever poster loaded called dysfunction. And I haven't created a yet, So if I go down here, I can not create that function and it takes one parameter We'll just call this any object. It's gonna give us an objects. We have to put it in there. And then all I need to dio is ah say Well, actually, it's not. All I need to do is say table view dot reload data, And then instead of having our posts here, get rid of this. All we need to dio is a change that where the date is coming from so we can instead say, um, data service that instance dot um, loaded posts there it is right there. And so we're just gonna do that in all the spots where we need it instead of accessing it or storing it right here and one more place. I think it right here. So I just grabbed all we're doing this instead of having the post here were just grabbing it from our singleton our service right here. And here's the syntax that you can see is instead of, ah, you know, making parentheses or things like that were just ain't data service dot instance. Okay, when you call the dot instance thing that we created and then you can call the property. And, uh so now our table views being fed off the data in there. And whenever we add a post it reload, it's going to call this function because it's listening for the notification and it's gonna reload the data. I'm really curious if it's gonna work. So let's give it a shot. I may very well have for gotten something because we've been going on for a little bit here . So here we go. Come on, come on, come on. And OK, so blank screen. That's understandable. We don't have anything yet. Uh, we're not working with the pictures yet, but I do need to add a picture because our code requires it because that's why we designed our coastal title. Um, I likey the pretty flowers. Flowers make me sick. I don't know why I'm going crazy. Why not? Don't give me much to work with flowers on the simulators. Okay? So let's see if it works. Okay, So we do have a crash, okay? And see what it says. So it did get to the safe post, which is cool. It says, uh, post does not implement method signature four selector and replacement object for Kaede archive er, so that may not mean much to you. Like what? But there is something really important that we need to dio. And so whenever you're working with, um, date data like saving it and loading it, you have to abide by N s coding. You know how he how he said we're taking this data were converting it into bits and bytes. Well, uh, we tried to do it, but the problem is our posts, they don't conform to any type of coating, so we need to implement that. So if you go to your model in your posts, not swift, Okay? There's a few things we need to dio. The first thing we need to dio is that we need to inherit from some class we did inherit from a class here, and the classroom he did inherit from is called NS Object. This comes from Objective C and, uh, the whole idea of archiving to bits and bytes and things like that. That's all using objective C code behind the scenes and stuff. It's been there forever, So we need it inherit from Ennis object, cause it has some very important code coding things that we need to use. And, um then we need to also implement the n s coding. Uh, protocol. Okay. And, ah, this will help us to code are think so. Just remember, even if you don't understand it, just remember if you want to archive and un archive things, okay, You got to use your class that your archiving it needs to the needs to implement. And it's coding protocol and needs unheroic from in his object. Just know that that's what you have to do. If you're trying to use N s user defaults K, no big deal. It's not that complex. What we're gonna dio is ah, we're gonna create some functions here that will do what we need to dio so required convenience in it. And this is the one we want right here. Coder a decoder. You may have seen this a few times before. Ah, lot of the table views and things like that use this. Um, that's what we're gonna do. Here is first off. We need to create we first need to create a regular initialize er function, and it wants to be overridden. So let's override it here. There we go. This is just this is just a basic initialize er we have our own Here's well to That's fine . And then, um, we're gonna call the basic initialize er it's just required is part of it. You gotta You gotta initialize yourself when you're decoding here and then we're gonna dio is just a self dot um image path equals a decoder dot decode object for key. And ah, that's all we're doing. Okay, it's ah, it's not that bad. So just think about we're doing you're grabbing the image path. This is when we're loading it, okay? And we're We're saying, Hey, um, when somebody's un archiving you, which is gonna happen in our singleton when someone's on archiving you, all you gotta do is grab it from here. That's all saying, Hey, this decode it first. So basically what I'm saying is in your our service here when load post is called when this , uh, when this guys called right here, you see that? And this guy, especially this one right here, UN archive object with data. It's trying to figure out how to do that. And it doesn't know how to do that unless you tell it how to do that right here. Okay, so those key names that you're putting here are gonna get called right when that happens. Super important. Okay? And it's yelling at us here. Let's see what it's dealing at us about. Um, okay, that Why is it yelling at us? Self? That image path. Okay, we'll get to that in just a second. It's being quite in polite. Um, OK, so let's go and do the other ones here self dot Underscore title equals a decoder dot decode object for key. And this was just going to be called title as a string and then self dot underscore Post description equals a decoder dot decode object for key. And this one's gonna be description. Okay, as a string. And ah, that looks good. There. Why is it yelling at me? Though? I don't see why value of title just dream is not unwrapped. We really need to unwrap it. Um, I guess we dio let's just unwrap these instead. Uh, well, yeah, Let's just get rid of these airs real quick here. Um, come on. It's looking for them on these guys here. Okay, I have a better idea. Let's just appease the appease the gods here of x coat and put exclamation points on these up here, and that should go away. There you go. It was going away just because, um we're saying, hey, these air, these air implicitly unwrapped and, uh um we're not forcing it. Have any value? It will have a value, but it's just yelling at us anyway. Uh, anyway, quick fix there. And so one more thing we need to do is now have a function to encode. Whenever it's saving, it's gonna call this function, and you're never gonna call these functions yourself. Whenever you encode the data, it's gonna do that free automatically. What you actually have Teoh have to implement the functions, okay? And so it's not really any different. Think about this. We're gonna encode, write in code object and ah, sex wrong. One in code object with a key. And this is just gonna be self image path for key image path. Like I'm starting to see a pattern here. We're getting really close. And, um, this one's gonna be what, Post description for key. Or just call it description. This is just the king name uncovered. Ever we want and encoding objects. Self self dot title. Um, yep, and it's just going to title Kate. So all that's happening here is whenever that saves called, it's gonna it's gonna call this. And whenever the ah load is called, it's gonna call. This is going to do it for you automatically, but you have to do it in order for it to work. Okay, now let's spread and try running a rap and see if it will save our post for us. Cama, Come on. All right, there we go. Let's load it up and well at a picture again. And ah who for waterfalls. I like to jump off of them until I die. Let's make a post. And ah, so it didn't close our screen. And I think it's because we didn't write the code for that beauty load. Make post button press. Do you see where me and where I'm closing the screen? I don't but But I didn't see any errors, and so it may very well have loaded that post. I just don't have a way of seeing it. So what happens if I click the cancel button? Maybe my post will be loaded. Hey, look at that. It's there. It's there. That is pretty cool. Yeah. Um, yeah, that's really way cool. Let's go over here in our code where the make post buttons pressed and let's go ahead and just make sure we dismissed our control or we didn't do that. So whenever you make a successful post, let's go ahead and close the control. It did work it. You know what that means, right? It means the Post went from right here on the ad post controller. It went all the way over to the data service and it went to add posts in the ad post, upended it, and then it called save posts and it saved its the documents. Then it loaded the posts, and then it sent a notification which came over here to your view controller. And it heard it because we're listening for it right here. And then it went all the way down to this function and called it and you reloaded the table view. And of course, the data comes directly from, as you can see right here. The data comes directly from our data source in our data service, and it all worked, so that's really cool. We only have one more thing where we need to do, and that's get these images working. And we just have to store them in a slightly different place. No big deal. So let's go back t
68. Intro to App: Hey, one mark pricier deaths oates dot com. We're gonna talk about the app that we're gonna build today, and it's very similar to my hood app, except instead of user devotes, we're gonna be using court data, which is a very strong, uh, system for being able to store data on the device. And of course, this is the big daddy of all the data stores and this is IOS is recommended data storage system. With that being said, we're gonna go over the simple foundations of it. We're not going to go into the heavy, complex stuff You could spend 152 103 100 hours in court data and still no understandable. It's very it could go very deep and very powerful, but it can also be simple to. So we're gonna talk about that and the app we're gonna build. It's called Recipes with a Z, and basically it looks cool really well, styles and everything and against simple, simple and solar components to the other. My hood at that we built, except we're doing recipes and you're gonna add ingredients and things like that and court data, you know, I've never had a job interview where they've asked me. You know how to do something in court data. They just kind of want to know if you can learn things. And so this is a great intro into the world of court data. You're gonna want to keep practicing and using it in your applications and getting better at it. But most junior iPhone programming jobs won't ask you to be an expert at core data. And if they do use as part of their application on, they want to give you a job or talk about job, just do some research on it, builds a massive the claim of this more and show your ability to learn. So let's go ahead and get started. It's gonna be fun, and you're gonna learn along.
69. App: Recipez Part 1 (Core Data): a mark price slopes dot com and let's go ahead and get started with our recipes half. So go ahead and go to your ex code and create a new project, as we've done in the past. File New project and single view application is fine. Click next good and call this recipe's with a Z or whatever you want. Very important, though. Make sure use core data is selected right here. All right, very, very important. Okay, so click next and, uh, create. So here it is in. So to recap, court data is a system built for Iowa's and allows the user, which is your the developer, to have a simple interface in interacting with databases. So in times past, maybe before core data and I was developing APS before then, you know, you use SQL light and you have to run queries, um, on your own in the code. It was very painful, and, uh was not a great experience. And so they created an awesome system that extracts away a lot of that ground work, and it makes your life a lot easier by working with entities and relationships and things like that on a very visual way, and what's interesting is you can still use an SQL light database underneath. But core data will do all the talking to it, and it will do all the converting and all that good stuff. It's very powerful, very fast, and the most complex applications out there use coordinative. So if Absar storing data on the device, it's probably using core data. With that being said, many, many applications these days are going 100% Internet Web based. In fact, because the Internet's becoming so prevalent, some people are even removing local data storage altogether, except for things like preferences and things like that, and moving completely toe, Web based streaming and sinking. Whereas if you can't connect to the Web, you can't even really use your app. And that's becoming a nok standard. Mostly will have connections these days, but there's also frameworks that have mike sink engines like a parse or fire base, which allows you Teoh store things offline and it does all the work for you. Eso You might want to use fire base. If you're connecting to excuse me, you might want to use core data if you're connecting to the Internet download except But when you go off line, um, you still wanna be able to use the app and safe stuff for send stuff back up to the Internet later? So let's talk about core data today. Let's get in and go and it's not that hard. It's a little bit this. In its simplest form, it's a little bit easier than the Ennis user defaults, I think so. Let's go ahead and start with our storyboard. Let's get our Let's get our act together here. And so what we want is to show just a list of recipes. It'll have a title bar. Nothing too crazy. So let's do that now. So we're gonna just put a now Let's just put a navigation bar. Uh, in fact, let's just click your view controller here and go to editor embed in navigation controller . OK, and there's our navigation controller. Click the navigation bar right here in the left hand side and let's click the attributes Inspector. And let's change the bartender here to nice orange. Let's just tent it, and that's fine. Okay, there's a navigation controller hears our view controller so on here, type in table and put a table view. We're gonna make it cover the whole thing just like that. No big deal. And we do want to go to the edges this time around because we will are We want our recipe images to go to the edge of the screen, which is fine. And so turn off, constrain the margins. 000 and zero. Bam! I like it. Okay. And so that looks good. And let's go ahead and, uh, at a table of you sell right here. And I'm going to just make my table view, have a temporary background color so I can see what's going on. Just make it pink so I can see what my cell actually looks like. And that is how the table views just taking up a lot of space there. Okay, So what do what do we want the cell to look like? Well, it's not that big of a deal. It's gonna be an image on the background. So your image view and I think it's a little too big right now. I'm gonna put a red about there from side to side. I like it. Let's click the sale here and bring that into you want to go to the edges and so then click your image and we're going Thio, Thio takeoff! Constrain the margins and do 000 and zero. Okay, and ah, that's cool. Now we just need a label, uh, to put in the middle. So let's do that now, and I'm going to make it go back. Let's just make it go all the way across the screen. Here we go. Let's center it. I'm gonna change the font custom, and that's fine. And let's dio bold italic. Okay, let's make it white. And I want a shadow on this one. So let's set a shadow. Let's use ah, dark text color for the shadow. I don't like the direction it's going in. Let's on the vertical. Let's changes just toe one and the horizontal. Let's change that toe one. Okay? And let's make the font size bigger. Appear like so So this might say, um, mums. Happy hamburger. Here we go. Let's go ahead and pin it to the left. Pin it to the right. Let's, um, make it have, ah, width and height that's fixed. And let's align it horizontally in the container and, uh, vertically in the container and did I said A within this. If I didn't take that off, we don't need a with you How scared of the with. We just want the height. We're setting the left and the right hand side. So I just took off the with and there's our image view. Looks fine. Okay, let's go ahead and go our table view here. And, uh, I don't like it being pink. Of course. Let's ah, um, make it not pink would be great. There we go. Que background was turned that from pink back to default. All right, there's our table view cell looking good. Okay, we are making progress. Let's go ahead and a bunch on the right hand side here, typing button. And we're gonna do a bar. But an item We're gonna drag it onto our navigation bar on the right hand side instead of item changes the plus new. And let's change the tent to a white. There we go. It looks like it kind of went grey. There didn't, are there We go. So there's our button. It's looking good, bordered. Fine. Plan was plain. Do ordered. Doesn't really change anything. Okay, so that looks cool. We got a new button that'll load a different screen. Okay. In fact, we could probably just create that screen right now. Um, I don't see any reason why we can't. So let's do that now. Let's, uh, Dragon, New view controller on here. Here we go. And what this one's gonna do is it's gonna load when we pressed the new button. So you click your new button and control drag over, weaken. Just, uh, say show, which is fine. Okay. Looks good to me. We put some text fields on here. I think so. Text field. OK, there's nothing. Ah, nothing. Ultra pretty. You know, just some text field and placeholder. Texas recipe title looks good. Let's do another one. I just command C command V on. Then we're gonna call this recipe ingredients. Okay. And then one more recipe steps. There we go. Recipe steps and we need an image. So it's great an image here. Let's make it a square. Click the ruler. Let's changes to say 1 75 by 1 75 1 75 Looks good. Okay, so that's good. None of these air pinned yet. Um, so let's Let's do some pinning here, So let's pin the recipe Title 32 from the top. That's fine. Zero from left, zero from the right. I don't need to worry about the heights because they stay the same height on these text field, so it'll force it that way. So that looks good to me. Yep. And, uh, this one here from the top from the left and from the right. And that's 14 from the top. And this one. Let's keep it the same. Will say 14 from the top and zero from the left. Zero from the right. Looking good, this image view will say 43 from the top. And let's go ahead and give it a width and a height fixed here. And let's click the alignment menu and put it horizontally in the container. Okay, look. And good. And now we need a but in here Teoh to go on top of the image of you to add an image. Um, or we could actually also do a, um, like a tap gesture. But we'll do a button this time around, so I say button, put it right over the top. Make it just as big just is big, okay? And we will change the text to say, Add image or add image. There we go and we'll change it to White. It's fine. Okay, add image That looks good. Let's select our button here and her image. You. Let's go ahead and click the alignment and let's do, um, horizontal centers and vertical centers. This will align our button with our image and then on the Penn menu, with both of those being selected do equal withs and equal heights. And this will make the button have the same height and with as the image. And we need one more button right at the bottom here, and this one's going to say, Create recipe button. You actually press when you want to create the recipe and believe everything the same on it was just lined up here was a line it horizontally in container. I will say 39 from the top, and we'll also do it within a height. Okay, He ain't going nowhere. All right, that looks good. Okay, so let's go ahead and look. So I just got the views out of the way there. Let's go back to our view controller here. And so we got a table view that we need to take care of its good or code in our view controller here. And, uh, let's get our table view junk going as we've done in the past. So let's call this. Ah, you I table view data source in new I table view delegate. Okay, Those of the protocols we need to implement to use our table view, and we need to create an ivy outlet for our table view. Up to this point, we haven't done any core data stuff yet. Of course, we've got to get this out of the way. So weak var and, uh, table view of type you I table view. Hold on, you I table view. There we go. Okay. I don't know why this is highlight because we haven't even connected again. But that's okay. You're to this junk here. All right, So for table views, we know that we need to implement ah, table view cell for Rohit Index path. And for right now we can just return au white table view cell just to get rid of the air. And we also know we need a, uh what is it a number of sections and table view. So let's return one section, and then we have table view, number of rows in section. All right, now, let's just return zero. Okay, So this is what we need for the boilerplate stuff here. And it looks good to me. So very cool. Okay, so we've got that. Let's get the storyboard connected up here. Um, let's see. Here. Let's, uh, in our view, controller of control, drag over to the table, you and select table view. All right, that is connected up now. Core data. Okay, the part you've been waiting for. All right. So court data, um, if you notice right here, whenever you have coordinated implemented, you have something called dot xsi data model ivy and or just model. Um, this is your data model, and your data model is where you define your data for core for core data. And so, in times past end, in times that come, we create lots of classes, recipes, posts, Pokemon, whatever, we create classes, and so core data is still gonna let you create classes like that. But it's gonna tie it to court data so it can save to the database, which is really cool. So if you go to your app delegate, since we've made this a core data project, it actually added some things for us, which is really nice. And I don't expect you to understand all this. It's there's a lot going on s Oh, look at it with caution here. Okay, But if you go down, they're doing some things here. First off their defining the for the application documents. Director. This is where core data is gonna story database in your documents directory. So it created this re automatically a property that grabs that the documents directory. And then let's talk about this the persistent store coordinator. So in court data, a port, a persistent store coordinator is kind of the coordinator that that says, Hey, where does your database live? On your disk. Where's the path for it? It's just kind of the manager that, um that manages where things go. And so if you click on it, it's evil. Give us any help. Ex codes having some been having lots of issues lately. But why? Says right here, the persistent store coordinator for the application this implementation creates and returns a coordinator, having added the store for the application to it, its properties optional. Since there are legitimate heir conditions that could cause the creation to store fell anyway. They wrote some nice stuff for us, but basically think of it as a coordinator. OK, it points to where your data is supposed to go. It's kind of like the traffic cop of your data bringing things in and out. So that's what the persistent store coordinator is. The next important thing you want to understand is this managed object context. So manage object context is kind of like a scratch pad. What I mean is, let's say you've got some classes that you're making changes on some core data classes like you change the name of something, whatever until and so what happens is, um when you when you are working with that data, it kind of floats inside a managed object context is just sitting there, and until you actually click or enter, save like right here, save context basically, until you actually save it. It doesn't actually go through the persistent store coordinator and into the database, so you're managed object context is just like the scratch pad the hold. Your data changes until you actually persisted to the disk. And that's kind of like the the two core components of core data. Of course, there's lots of things going on here, which I'm not going to explain. Feel free to read through this in depth and do some tutorials on the Internet if you want to learn more about in depth about core data. But anyway, this is all boilerplate stuff that they did for you automatically. So any time, any time you want to do an APP has coordinated. I suggest that you, um make sure you click that include core data, but in when you're creating the APP, so does all this for you. So let's go back to the data model. Click that they're So what we need to do is we actually need to create a recipe, um, recipe object that could be saved to the database. Right. So, uh, if you click this ad entity button right here, it's gonna add a new entity. And again, just think of this as a class. Okay, um, like you might have before. So we want to create a recipe class. It's all you have to do is press, enter and change the name to recipe. Pretend it's just the classes or entities. Okay, So from now on, when using court data, you'll be using entities and just like a class, it has properties. In this case, they're called attributes, and so are recipe needs. Toe have an image, so I can call it image, and you're gonna want to make this binary data. So images need to be binary data, and there's one more thing you need to do with images. Click this little icon over here on the right hand side. Show the data model inspector, and what you want to do is click allows external storage on your images only. Okay, so you don't You don't want those images to be stored directly in the database. We talk about this multiple times. Throughout this course, images should always be stored in some type of storage space, and so this is going to store them on your device in the documents directory, and then it's just gonna reference them. And that's what you want. Never store in any database on any platform. Never store actual images in it. It's not. Databases aren't made for heavy data, heavy data like that. So Ah, there's your image. Click the plus button to create a new entity, and we're gonna call this ingredients, and this is just gonna be a strings to change it to string. Okay, there's our ingredients. And then we have a steps, like steps to make the recipe. And that's a string and again notice. There's multiple data types. You could make this again pretend it's a class and you give it your giving it a type except in court data. You have to give for the most part, you have to give raw data types. Eso it can persist to the database. And so, in this case, a string again. And then lastly, a recipe has a title. So let's give it a title and call it string. Okay, and that's it. That's that's how simple it is to create an entity. Okay, you just add and see an ad attributes to it. Give it a data type. If you're working with images, make it binary data and make sure you allow external storage. Okay, cool. Now we need to create. We needed to create data for us, right? So let's Ah, first could do some clean up here on your recipes folder. Right. Click it and go to new group. We're gonna do them a whole model view controller thing. So model, and, uh, we'll do it again. New group view. I will do it again. New group controller. All right, I'm gonna drag the view controller into the controller, and Ah, there we go. That looks good. And then so we're gonna dio is a go back to your data model here. Okay, Go up to Editor at the top and go, Teoh, create Ennis managed objects subclass all core data entities inherit from N s managed object. You don't need to worry too much about it right now. Just know that it talks the corded or allows your class to be saved according to Remember how before Ennis user defaults, we had to do encoding and decoding. Remember, we had to add extra co for that. Well, they've got their own version of it going on behind the scenes for you already. So you don't have to write that code, which is really nice. So click create this managed objects subclass and, uh, you want to click Click your data model. We only have one, which is recipes. And then, uh, this is gonna list multiple entities here if you have more than one. But we just have once a selector, one recipe. And then, uh, what it's gonna do is it's just gonna tell you, where do you want to put it? Language Swift is fine, so click create. And it just created two files for us. As you can see in the top here recipe dot swift and recipe plus core data properties that's whipped. Click both of those and drag him into your model folder. This is what you'll be using them. So if you look at your recipe plus core data properties, notice how it has our fields here now has something called and it's managed on there, which you've never seen before. But it's kind of like, you know, the VARS Okay, it's just has a bunch of fields here, so I got that ready for you, so you'll never, ever, ever want to modify this file. This recipe recipe plus coordinated properties never modify this. If you want to change this stuff here, you go back to your data model. You change your entity attributes, and then you generate that subclass again. So don't never change this file. Got it. What you can change, though, is your recipe that swift. This is custom code. Ah, and of course, this is gonna work with it. But this is any custom code you want to write for your class. If you want a format data like put dollar signs in front of currency, things like that, you could do it. All right here, which is really cool. Um, and we're actually gonna write code here. Teoh, handle how images are processed. Um And so anyway, we've got core data working in its simplest form right now. And so why don't we go ahead and get our, um our image is working the way that we need to. And what I mean is we can't just save a U Y image into the documents directory. You remember this from from the my hood app? Basically, we need to convert things. Teoh data. So funk set recipe, image of type image. You I you images not popping up because we have not imported. You like it? Ugo, this is you image. So we want to set an image we're gonna set au image or say let data equals you. I image PNG representation and we're gonna say image and we're gonna say self dot image equals data. Remember how in our entity here we have ah, image and its binary data over here and the rest of people's core data properties, We've got image and it's N s data. So all we have to do here because it has a reference to it, it's a self dot image. That same property equals this PNG data super easy and then funk get recipe image. Okay. And this is just gonna return au image, and we're to say, Let I am G equals you. I image image from data, and the data is gonna be self dot image. We're just gonna grab the image data and then return image. So we just used this really cool recipe class that was provided to us from core data and added custom functionality to it. Notice it is inheriting from Ennis managed object, and, uh, over here, we've got all of our properties for our core data for our core data fields here. So really cool. Okay, so we got our we got her day of working for us here, Um and ah, let's go ahead and look. Now at our view, controller. So review controllers with the table views inside of them need to reference some type of data. Right now, we don't have any yet, but weaken set up the framework for us to get things going to where they need to be. So, um, let's go ahead and ah, uh, and already Vira recipes equals Okay, look at that. That's really cool. So, um, we can just make a list of Honore of recipes using our recipe class. That's really cool. And then instead of returning zero here we were just returned recipes dot count and ah, that's looking well, yelling at us here. Let's go ahead and build us even get rid of these errors here. Uh, I broke something. Uh, I forgot to put exclamation point here to unwrap it. Let's try building it. Now Sometimes if if your ex code is tripping out and like, things just aren't working. Uh, make sure you build it so it confined the ares and get rid of them. Because sometimes an air will cause the rest of your program to break, which is not what we want. Okay, So very cool. We're now referencing our recipe list here again. There's no recipes in it yet. Um, and we'll get to that in a minute. But what we need to do now is finish up or you Why? Okay, we have a, um We have a cell that we need to take care of, right? We need to We need to get, um we need to get the image and the title showing up in the cell. We haven't created this cell. Yes, let's do that. Now. So file in the view folder here, file new file and click source under IOS Click Cocoa Touch Class. And let's change this. You have you controller parent class to you, a table view cell and this one We're just gonna call, uh, what do we call a recipe cell? Okay. Recipe cell and will create it. Its creator. I be outlets here. Okay, We've already done the u Y for this. An interface builder. We just need to do the code here. So at Ivy Outlet week var. And it has a title. Uh, this is caught recipe title. Sometimes I get worried using the word title description, because sometimes some Iowa's classes have those properties. We don't want to override the market conflict. So recipe title It's going to be you, I label and I be Outlet week var. This is a recipe image after view I image of you, and I think that's all we need to reference there again. We'll do our configure cell function, funk, configure cell and ah, this is gonna take a recipe object. And what we're gonna dio is we're gonna say, Ah, recipe title dot text equals recipe dot title and we'll say recipe image dot image equals, um recipe dot get recipe image that function that we created to give us the actual U Y image. So in the configure cell and the cell phone next path, we're gonna call this every time we need a new cell and it's gonna configure it. And so let's connect this up an interface builder. Click your main not storyboard. Okay. And, uh, click your cell here view table, view the cell, and obviously it doesn't have a custom classes or open up the right hand side here having the cells selected. Click the identity inspector. And let's change this to the custom recipe cell. There we go, Right Click it now and which is the recipe image and just click and drag over here and recipe title. Click and drag over here. We do need to add a cell reuse, identify air. So click your attributes, inspector. And let's call this recipe cells just called the same name as the class. So it's not to be confusing, so let's copy that. Let's go to our view controller here. And, uh, again, I'm just kind of quickly going through the things we've already done before. Uh, and so it's not a big, huge deal. We haven't talked about court data too much in depth as faras fetching things yet. So we'll get we'll put more time in that in a minute here. And, uh, what we're gonna do is the same thing we've done in the past. So we're say, if let's sell equals table view dot de que reusable cell with identifier, we're gonna pass in our recipe cell identify we just created as we're gonna call this recipe sale. Okay, So if let's sell, then we're gonna say sailed up. Wolf, Actually, first Let's scrap the post. Let the recipe post. So let recipe equals recipes index path dot ro. So grab the current recipe at the current index, and then we can do sell dot configure cell and we can pass in that recipe. Okay? And then, of course, we'll return the sale. If that felled, for some reason which it never does, we're gonna return. Ah, the recipe cell, Like so this. See if it works for us. I saw a little red flash there, but it's working. That's OK. So one thing we need to do now is, in our view, did load. We need to set the delegates so table view dot delegate equals self in table view. That data source equals self. Because we implemented the protocols, we gotta set the delegates, and this appears to all be working. Um, let's go ahead and run the app. And what we should see is nothing. But hopefully there's not a crash. So let's go ahead and change it. Teoh iPhone six. Here. I'm gonna run this and again. Uh, I'm just testing to see if the table views connected and there's no there's noth nothing big that I miss so we don't have to worry about this later. When we start working with the core data, here we go running. It's running, running, running the things happening yet there it is. Okay, so it looks good. No crashes yet. Uh, yet. But we got a table of you there. It's fine. There's no cells. And because obviously, we haven't, uh, we haven't put in a data in the U. S. So let's go ahead and call this video done in this one. We've just gotten to you and everything prepped for core data. We did build a a data model, though. Okay. Uh, with attributes such entity and we wrote custom code to get and save images. And so let's go ahead. And next video, which is the last video we're gonna go ahead and show how to save for data items as well. That'll be. It's not a big deal. So I was glad and move on.
70. App: Recipez Part 2 (Core Data): Hey, everyone, let's continue building our recipes at, and what we're gonna do now is go to our view controller and get our data displaying and showing a screen. And again, we can't really show data on the screen until we actually have data. But this is a good place to start. So in order to fetch results, okay, when I say fetch results, whenever you want to get some type of data, you've got to retrieve it from the database. Okay? And to do that you used a fetched results controller, and we need to create one in order to fetch data. So far, fetched results controller equals N s fetched. And it's not working. Why? Because we did not import core data import core data like so. Okay, let's try that again and has fetched results Controller. Very good. And that's great. And so what we want to do is we're gonna create a function to fetch the results and then set them after they fetched after they've been fetched. So ah, funk fetch and set results. Okay. And, uh, in order to make a fetch request, okay, we've gotta work with some of the things that are being provided to us in the aft delegate . Namely just the managed object context. Or is that here? Ah, notice. So it created a property in our app. Delegate Right here. And we need to be able to use this. Okay, in order, Teoh, make requests. We gotta grab it. So go to your view controller, and we need to first grab the app delegate. So let at equals you. I application not shared application. This is how you grab the app delegates, just just the way you do it dot delegate. So there's only ever one app delegate in any application. So you application that shared application dot delegate will always give you the main delegate, and we're gonna force unwrap it because I know it's gonna work, and we're gonna force unwrap it as the app delegate. And then, uh, we need to grab its context that managed object context I just showed you so we can remember the context of the scratch pad, and we think we need to be ableto put data and change data on it and then save it. So it goes through the persistent store coordinator into the database. And so let context equals app. So called that, uh, managed app delegate dot managed object context. Okay. And eso over doing is grabbing the property on her app. Delegate were just grabbing this right here. We're just calling that. But we couldn't do that until we had a reference to the APP delegate, which we now have. Okay, so there's are managed object context, remember? That's the scratch pad. And so let fetch. Request equals N s fetched and s fetch requests. Okay. So, to get data, you've gotta make what's called an Ennis fetch request. OK? Like so. And it's looking for a name of the entity initialize a fetch request configured with a given entity name. What's the name of our entity? Well, it is a recipe. Ah. So the entity that you have here in your data model recipe is the same one that you want to call here. So we need to make a fetch request with this specific entity. Meaning we want to grab all entities that have that name on it. And of course, coordinator, you can do complex filtering and all kinds of things. So if you don't want if you didn't want all the results like, let's say you had a 1,000,000 results and you only wanted, like, 10 or something like that. You can do all that kind of stuff in court data. So let's do affect, request and affect requests can fell. So we need to make a do block. Otherwise it will yell at us. So So we can catch the problem, right? So results let results equals try context. So grab your managed object Contexts that execute fetch request, OK, like so. And it wants the request, which we've already created right above. Okay, so all that's happening here is we're saying, hey, managed object context. Make a request for us to talk to the database, okay, and grab data and bring it to us. So it's gonna talk to the press is persistent. Store coordinator is gonna grab stuff for us. Uh, and, uh, it's gonna start right here and results, Okay. And if that worked, were going to say self dot recipes equals results. Results as, uh, recipe. We're gonna force and wrap it there because I know it's gonna be a recipe, because I just said it was a recipe here, So if it was able to get results. Let's go ahead and store it in our recipes array right here. Okay. Uh, very good. And then we'll say catch Got. Always have that catch, cause right as it'll thrown Ennis Air, we can just print air, air dot debug description if it had any kind of problem or whatever. Okay, so very cool. Now, when do we want to fetch and set results? Well, let's think about this. So when, of course, the at first loads, we want to pull it up and globalist of data. OK, Also, if we open up the other screen to create an object are creating a recipe unless they would click, save in the screen disappears whenever this screen reappears. This list here, we want Teoh, we want to refresh so viewed it Load. I'm not sure that's the best place for it this time, because that's only gonna be called probably once. So I viewed it appear is a better place to do this check. So whenever the view appears, let's just get the results again. So we're gonna say, um, fetch and set results. And after we've fetched and set, the results were going to say table view that reload data. Okay? And it's yelling at me. Let's build it and see why it's yelling at me. Okay. Oh, it, uh, it wants to the override. So our auto auto complete and the Exco Beta has issues sometimes. So expected member name or constructor call up. This wouldn't be an equal signs. Should be a colon. My bad. Okay. And, uh, you know what? I don't even think in this case here. I got ahead of myself. I don't even think we need the fetched results controller anywhere, cause I don't think we're using it. Actually, yeah, we did. We're not. You are not even using anywhere. Um, I I built so many core data applications that are a little bit more complex in this that it's just a habit to put this in here. A fetch results controller works with your table view to do more complex things. We're not doing anything too complex, So scratch the head. Excuse me? We don't need it, So I'm gonna go ahead and run, Command Plus are to run and just make sure there's no crashes running, running, running, Okay, No crashes. That's fine. Okay, I'm curious. If this new button works we do. We try and see if it works. It does work in the back button. Works too. Nice. So OK, so that new screen is definitely loading there, which is really cool. Um, I feel like we need a template holder image there. Also, we need to create the view controller for this screen here, Uh, and, uh, so we can actually save data. And I think that's the last component. Really. Sometimes when I'm building big applications, I won't. I won't spend all this time building you y for both screen so I can post and save. What I'll probably do is run some tests, saves right here in this view controller, and actually run some saves here. Like in view, did load just to see if they populate there. But it's a small app. It's not a big deal. So let's go ahead and move forward. Um, could remain storyboard. First thing I want to do is on this view control here. I want to put a template for our base image there. Um, if I could find one anywhere, Yes, We've got one here. Got the school hamburger, this food. So click your assets here just drag that food there. Go back to your main storyboard and I'm gonna open the right hand side here and make sure I got my image selected. It just changed the background of food. And this is gonna be aspect. Phil looks great. Okay, there's our food. I like it. Okay, let's create a view controller for this now. So in our controller folder, right? Click and go to new file, Cocoa touch class and, uh, no, wait. Instead of table of you sell, let's say, um, you I view controller, and this one's gonna be called create recipe VC for view controller A Riggio. Let's get rid of this boilerplate stuff. Okay, that's looking good. And, uh, let's gear right on the code here. So Okay, what do we want to have happen when we got to get our outlets in there for fields? Uh, image selecting and then saving and all that. All that jazz. So let's go ahead and make our I B outlets at IBL. A week of our recipe title is you. I text field for the title. I be Outlet Week Bar recipe ingredients. W I text field. I'd be outlet week bar and this is recipe steps. You I text field I be Outlet week var recipe image type you I image view and then ibl it week bar add recipe, Add recipe button DePuy button. We want Teoh. Keep a reference to the but in there. Okay. And then we need an image picker, right? And we just did this with the last app. So let's go ahead and see if we can remember how to do it. In fact, if you wanted to pause the video and see if you can implement image selecting on your own and parts Okay, I'm sure you did that. Let's go ahead and say you I image you. I image picker, controller, delegate. And then, of course, we need the associated. Um navigation controller delegate. Okay. And then we need to store an image picker far image picker, image picker. Sure, again, I'm going a little bit faster here than the last video because we just did this and we're here to reinforce concepts and hopefully you're doing a lot of this on your own. If you already know how to do it, don't just copy me if you don't have to. Let's go ahead and create our image picker and viewed it load. So I image picker controller an image picker dot delegate Equal self Remember all this all this stuff? No big deal. Um okay. And, ah, say, uh recipe image dot uh, layer, Let's just quickly said I just hate square corners. Normally created custom view for this, but you know, you already know that it's no big deal recipe image That clip to bounds equals true. So it doesn't go off the edges of the rounded corners. That's looking great. Um, now what about the, uh, the delegate method we need to call its image picker controller did finish picking image. And when that happens, we want, of course, dismiss the image picker. We don't care about the call back. Um, and then recipe image dot Image equals the selected image that we just got from the image picker here. Left hand side, a little more space here. Okay, so we dismissed the picket, the image vigor, and then we set the image from the picker. That looks great. Um, okay. And then what about when the when the person presses the button Teoh loden image. So let's credit I be action for that. I be action funk, add image sender. Any object you've seen this intact before. It's going to send us the But in that, we, uh, that we, uh, clicked on and then present view controller, This is gonna be image picker. Animated is true because anything that's not animated, it's kind of boring. Um, so we're just loading the image picture whenever that selected, which is fine. Um, okay, What else? Uh, the create recipe button another I reaction funk, create recipe sender. Any object. Okay. And, uh, let's make sure that, um, let's just make sure that there's a title. That's the only thing that's required. So if let title equals recipe title dot text where title is not equal to empty string, let's just make sure that there's, ah, title on it, and let's make sure no, that's fine. Just a title. Okay, um, let's do some Let's get all the other things going on there, too. So, um Okay, so we've got an image. We've got a description. Uh, well, what we're going to do, we want to grab those out of the text fields, and then we want to save them. So um, in order to do that in order to save something, the core data, we're gonna need that managed object context again. Right? So let at equals you. I application that shared application, not delegate as a delegate. Okay, Just graham unaided, grabbing it again. Let context equals app dot managed object context. And then this time, when you actually create and we need to get a reference to an entity that we're going to save, So, uh, actually, why? But entity equals N s entity, uh, import core data at the top Here. Keep forgetting. You want to use something, you gotta imported import core data. Okay. Whenever auto completes, not working on a class kind of I realized that I probably didn't import it. So entity is Ennis. Entity description dot Entity for name, and we want recipe in managed object context. You can actually have multiple managed object context in an application. We only have one. But that's why it gives you the option to pick one. So in order to create a new recipe class, we have to say what kind of entity it's gonna be, which is right here. Okay, um I think that they should handle this internally. I don't know why they separate it like this, but that's just the way this and then we'll say, Let recipe equals a new recipe like so. And it's not gonna do auto complete for you. So pay careful attention to the parameters I'm entering. So this is entity. We're gonna pass in the entity and then insert into managed object context. There we go. OK, so, um, since our recipe class inherits from Ennis managed object. Okay? One of the initialize er's allows us to pass in an entity, and then it wants the context that you're going to be saving into again. I think that they should make this internally handled. Handled? Just I'm not sure why they don't, but this is how you have to do it. And I need Teoh. I need it. Unwrap our entity here. I put exclamation at the end. Okay, that's looking good. Let's, uh so we've got so what we've got so far as we've gotten, we grab the app delegate who grabbed the managed object context. We created an entity reference for the recipe, and then we created a new actual recipe class that object that we created and been using. So now we need to dio is us assigned the values into a recipe object. So recipe dot title equals this title right here that we saved off, which is fine. And, uh, this air on the screen is a little bit annoying. Not gonna lie. All right. And then recipe dot ingredients equals what did recall it. Recipe ingredients recipe ingredients dot text recipe dot steps equals recipe steps dot Texas Grab it out of the text field. If it exists. Recipe dot set recipe image. And this one is going to be recipe image the image, grab the image out of it and pass it in, and we're gonna assume there's an image here. You can read more air handling on your own. You already done this before? Not a big deal. Okay, so we've now what we've done here. Excuse me? What we've done here is, uh, created a recipe. Um, and we are using a specific entity, which is the recipe entity. Okay, we're just saying, Hey, these matchup, this is the context we want to save too. And then this is just the class field here. So if I open my left hand side here and I click. Uh, my recipe. It's our this dress to be here. It's just these fields here that we're grabbing. It's made available to us. And so Yep, title ingredients, steps, recipe image. We're just setting all that right here. Now we have not yet. Um, Creed saved it yet. So let's go ahead and do that now. So let's say a context dot insert object, and that's insert our recipe. This one right here, let's insert it into the context. Remember, the context is a scratch pad. Nothing that's persisted until we tell it to which has not happened yet. And then again, this can throw on air. So what we're gonna dio is due. We're gonna say, try context dot safe. Okay. So anything that is floating in this managed object context, we're going Teoh Now, save it. We're gonna catch any heirs, and we're supposed to just print, uh, could not say recipe. Yeah, okay. And then what do we want to do? So, yeah, after we save a recipe, let's go ahead and, uh, dismissed view controller animated. Let's just dismiss it. Okay, We got a lot going on, but it's not that much. It's It's actually only like 62 lines of code. Okay, so, yeah, you picked the image, you select it. And then when you go to save it, we create our entity, our context, we just set the values. And then we insert it into the context, and then we just try and stay of the context. Whenever you call dot save on the context is gonna talk to the persistent store coordinator , an attempt to save that into permanent storage, which is really cool are our only problem right now is, um, we haven't connected the outlets. So go to your main storyboard. Click this guy here, open the right hand side. Let's make sure in the identity inspector that we not you, the view controller. Let's make sure click to view controller. Make sure that we change the class to create recipe view controller so we can set the outlets and stuff. Right? Click it and yeah, there's recipe steps. So this one's recipe steps this one's recipe ingredients. I'm just clicking and dragging. There is a recipe image. In fact, the address be, but and I don't think we really need to. This distort reference to that cause we're not doing anything with it. And then recipe title. Then we got some actions. So this ad image, um, you can just click and drag there and do touch up inside, and then this great recipe, click the button, Touch up inside. Okay, You should try it. Let's give it a shot. Here we go. Here we go. Come on, show me the money. Okay. Nothing serious. We haven't created anything, so it's click new loads the screen, the title. And since the other things are required, I'm not gonna add them right now. So let's say the title and let's call this, uh, super cool stuff because it's not gonna be a recipe. I don't have any recipes on the simulator Images. At least click add image. Yes. Allow access. We'll do this app image here. Okay. And let's go ahead and click. I feel like it's not rounded, but maybe it's maybe I'm going crazy here and then click create recipe and I feel like nothing happened. Let's click back. Well, it's definitely there, actually. Um, so I know what happened. Let's go back to our create recipe view controller. We don't want Dismiss view controller We want Ah, pop. No, We want self that navigation controller dot pop Um Pop do controller animated. That's what we want. We want a poppet poppet, back also, I feel like this image here is stretched in our in our cell. So let's go ahead and not stretch it. Let's go ahead and go to our main story board and click the first view controller. And on this image view here, let's set it to not scale to fill. But aspect feel there we go. And let's ah, try running it again. And actually, the image should still be there because we saved in court data even after we close the app . Okay, it's their very nice I don't like these lines here, and this was a bad image to pick because it's not covering the full space, so it doesn't look as cool as the example at, but click new. And let's call this, uh, balm sauce. It's click. Add image will pick a different 11 that's full screen, like this very recipe band that looks much better. In fact, I can't live with this. I got to delete it. I just got to get a guy to get rid of it. Uh, let's try that again. I can't stand it with something just out of place. It just has to be perfect. Okay, so those lines, Right, let's go. Uh, fix that. Here, clip your table view and separator on the right. Inside. Clicking done. And separate her. Yeah, that's that's fine. Let's just stop it and run it again. Okay, Much better is gone now. Okay, New Tried it again. Bomb sauce. Add image. Let's like this cool waterfall isn't recipes, but they'll do the job. It's good. New again. Will say Luke. Luke. Just because analysts like another waterfall. There we go. Yeah, it's got the nice rounded edges, so it looks like it's working whenever we go to view Did appear. That's refreshing. It's fetching the results from our from our database. Um, making new one scary Larry three. I think it's a movie. Not really. Uh, okay. Lots of waterfalls. Maybe we should call this waterfalls of the Z instead of recipes with Z. Okay, so we've got, um we've got some recipes going on here. It looks Looks good. Looks fine. So that's it, Really. I mean, so it wasn't a whole lot different. As far as the wind stuff goes, it's no different than what we just did on my hood app. The only difference is we used core data, which has entities, as you can see here. We included it when we created the project, which created all these boilerplate stuff here. If you didn't select that and then you add a core data later to your project, you're gonna have to implement all this on your own. Okay, So when you're learning, just make sure you create your project with this. You don't have to do that on all on your own on. So what we did was we created an entity over here, and then we, uh, would generate it. We went to editor, and then we generate, created and his managed object subclass. And then it created these two for us here. OK, we never touched these ones. This is untouchable. File just has our properties. This one here we can touch, we set a set image and receive or get image which convert him in just a data and vice versa . And then, uh, in our view controller, we just did a fetch request to fetch results. And it wasn't that many lines of code. Just this. Just find the results and grab them and show them. And then in our create recipe, all we did was grab the context like we did before. But this time we created an entity, put it inside of our recipe. And then we said the title ingredients, etcetera, etcetera. We started it into the context first, and then we saved the context. And that's corn ETA and its simplest form. So if you want some simple data persistence, this is a great way to do it. It's much faster, I think, than Ennis user defaults and much better suited for for everything. So I would suggest doing this instead. But Ennis user defaults are great for for storing simple things. So do what you want, though it's it's no big deal. But start taking time to learn more about for data. It will benefit you in your career, and that's it. Pretty cool. Let's go ahead and
71. Student Showcase: Hey, everyone, Mark Pricier deaf soaps dot com And I just wanted to take a moment and show you a student showcase after what I mean is there is a gentleman I was working with in person how his name is Pierson, and he was somebody I was mentoring in IOS Development and he beta test of this course, and he built a nap and actually released on the APP store. And all the things that we're doing in this quarter's will allow you to build a professional application just like he did. And you could actually build an app that similar to the one that he built and what it is. It's a recipe app, and it talks to on a P I and downloads ah, list of recipes, and you can put in ingredients and final recipes that have those ingredients in them so you could find see what's in your cupboard and see if you have the recipe. Are the ingredients for those recipes so you can make the food and the student really well in the APP store? He's had investors even approaching him. It's actually really cool, and so it's very simple in nature of a very powerful on The APP is called No Time and it's It's on the APP store available at absolute dot com. Forward slash no time and the reason I bring it up is because I want to let you know you can do this. You can do this course and build some professional applications, and I'm here to help. And I want you to succeed and I want you to publish absolutely absolute. And this will also help you get a job. So that's the story, cares the app, check it out. Really cool. And I'm hoping you can do something awesome like this, too, because you're gonna have the skills to do it by its course.
72. DevCamp iOS 9 App: Creating the project: Hey, what's up, everybody? Mark Price here with Deb slopes dot com. And you know, a lot of people have been asking me over the past months. Why don't you do anything on sports? Like sports? APS wanted to wear sports clothes. Well, your lucky day, you're like, Wait, that's not a sports team. Well, it's the Punisher. He goes around killing people. It's not really a sport, But if it was a sport, I'd probably watch it like that. Guys messed up. Well, just the way I was born. Sorry, guys. We're gonna create a new project here. I'm gonna go to X code file. New project. Sorry. Some other monitor Here. Pull it on over. There we go. Okay, so we got an Exco project. What we're gonna be doing is building out the u Y for our location based application. It's gonna be a simple map, view and table view. Just get all the components in pieces working so we can later build the actual location components. So what we're gonna dio is to a tab application. We're gonna pretend that our application kind of has, like, a screen that's dedicated to, like, our store locations and one screens like the home screen. OK, so let's just do a tab application and let's call this Dev Boot Camps because we want to know where all the boot camps are so we can learn coding and everything else here looks great. I don't need to get repository. I'll put it on the desktop and there we go. Okay, A little bit different colors here. I got a new four k monitor and the white was just like, blinding me. So I'm trying something new. Let me know how you what you think about it. So we've got a second view controller and first view controller. I don't like the names of those, so I'm gonna change it. Press enter on this one here, and we're gonna call this location VC location BC. I'll change this to location V. C. And, of course, there's one more place where we need to do it. Do you know a place that is? You're like, No. Well, if you don't, you should. Because we've done this before. Let's go ahead and click this right here. Second view and we're gonna change the class type up here from second view controller to location BC So now it's tied up on our storyboard as well, too. So again in the locations have the top part is gonna be a map, and the bottom part is gonna be a table view, like showing a list of our locations for our stores. And so let's go ahead and just drag some views on here, type the word map here at the bottom and drag it on up to the top. And I make it about like so And then what I'm gonna dio is I'm going to click the pin menu here, pin it to the top. I'm gonna turn off, constrained the margins and minute to the left and to the right, and we're going to give it a fixed type of 215 pixels. Next, let's drag a table view right beneath it, Not a table of you controller, mind you. And I'm just gonna drag it like so Okay, and I'm gonna leave a little space there, so I'm not overlapping. I will make it zero, but it sometimes if you overlap, I'll show you an example here. If I click this and overlap and then when I go to pin it's showing me 185. So it's finding the top of the view as the next thing dependent, too. And that's not what we want. We want to pin it to the bottom of the map, so I'm just gonna leave it just below it, and we'll just sit here so I'm gonna turn off, constrain the margins. It's going to be 000 instead of three. It's going to be zero, and that looks good to me. So now we've got our table view. It's looking good to me. We got our map view. Great. Let's go into our code now, over into our location V. C. And we're going to just do all the boiler boiler plate stuff that we are used to doing. So let's make this a little bit bigger here, and I'll make this bigger. And what do we want to do? So we have a table view, so we know we need the U white table view delegate and you I table view data source. And then we also know we're gonna need our views here. So our outlets I be Outlet week bar. You should like to say that to somebody like when you're mad at them, You're a week Var What do you say? I say coder jokes hunting You get punched in the face week of our table of you. Doesn't this guy ever shut up? Sorry, Too much caffeine today. So you white table view table view at Ivy Outlet Week var and we're gonna say a map because we need a map. This is gonna be m came at view, but it's not gonna pull up now. The reason why is we need to import the map kit. So let's do that now at the top import map kit. Now it'll say m k map view, and there we go. And we, of course, are putting the exclamation points here the implicitly unwrapped optional because we know for a fact that we're gonna tidies up to the U. Y. And r. AP will not work without it. And so if you get a crash at compile time, you just need to fix it, and then you never have to worry about it again. So completely. OK, one more thing we need to do is have the delegate for the map view in here. Well, do we want to do that, we'll do that next video. Let's just leave it as let's leave it as it is for right now. I just want to get this up and running with the boilerplate stuff that we need. I'm gonna get rid of Did receive memory warning. And what I'm gonna do is implement the table view, delegate and data source protocol, methods or functions. Call it whatever you want. And here we go. So we know we need a number of sections in table view, and for now, we'll just return one. I always when I'm coding, I always get the boilerplate stuff done first and try and get a build out as soon as possible. Ah, meaning? Run the app soon as possible s so I could make sure everything's good to go The number of sections and table view and we need table view, number of rows and section. Right now, we'll just return one. And what else do we need? A table of you? This is get old things we need sell fero index path. And for right now, just to appease the demands of the function, we will return table view cell. We'll just create a generic one for right now. What else do we need just for fun to get it all the way? Let's do Did Select Row did select Grow. It's like artist. It's electro at index path. Be sure that you did not select, Did De Select wrote at index path. Okay, so this is looking good. This is looking good. It's not yelling at me anymore, which is nice. Let's go back to our storyboard here and I want to connect these things. I'm not gonna open up the assistant editor this time. I'm just going to right click this orange icon here and I'm just going to drag my table view to my table view. I'm gonna drag my map to my map and maybe you're wondering why does he do it this way? He should just drag and drop from the controls. Well, sometimes that when you have both of them open, it could run slower specially if a slower computer. I mean, I don't, but sometimes it's easier just that when you're in the coating spirit just to go in code and then do it this way as well to you can do whatever you want. I'm not your boss. Okay, That looks good to me. Okay, I'm assuming I've got everything there. I might not. Let's go ahead and just run it and see I'll open up my iPhone six year and let's go ahead and run it, Okay? It's up and going, Let's click second and we've got a map and we've got a blank table view, which is fine for now. So it definitely is working. And of course, this is a real map. You can, you know, Let's go see what's going on in Utah today. I could tell you what's going on. It's frickin snowing. I need to move. You guys have any leads on houses outside the Utah where it's stunning all the time. Let me know S Oh, yeah. Anyway, the map is definitely working and the table view is good. There's no crashes or heirs. Let's go ahead and call this video done. We've got Are you? I set up in the next exciting video. We will do some fun map stuff with locations, so that's it. Mark Price at depth slopes dot com. See you soon
73. DevCamp iOS 9 App: Working with user location: back again, everyone Mark Pricier Deb slopes dot com And last time we got our table view and our map working and ready to go not doing much, but there, there and there are no crashes. So in this video, we're gonna get the user's location and let me explain the process. What you dio is you ask the user for location when they want to use when you want your app to use that location or that users location. And so we need to set this up in our code. We also need to set this up in the permissions in our info top the list file. So let's go ahead and get started. First things first. Whenever you're working with a user's location or dislocations in general, you're gonna want to set up the location manager with the C l l location manager. So I'm creating a constant here, and I'm gonna go ahead and stand. She ate it here at initialization time because we need it right off the bat. And basically the location manager is gonna manage what permissions are available for that user because a user can say no, don't use my location. They can turn it off, and so you need to be able to know if they've denied it or accepted it, etcetera. OK, also, whenever you're working with maps, if you doing anything besides just showing the map, you're gonna want to use the M K map view delegate M k map view delegate. The M K map view delegate has a series of optional functions you can implement in response to map events. Because most map events are asynchronous, they're not gonna be instant. And so you have to get called back whenever things are completed. Like if the apse retrieved the user's location, used the GPS, things like that. So I'm gonna command click this just to show you that you have lots of functions that are available to you right here. Map view delegates such as regional change. Matt View will start rendering map a whole bunch of different things here that you can use . You can reference this and museums in your application. So now you know where to go, what to do. Location manager manages location for a user. What permissions, Etcetera. OK, so we've got the location manager now. What we want to dio is when the view loads. We want to see if the user has given us authentication to use location. If it hasn't, we want to ask the user for authentication. You know, those little pop ups on the screen that said, Hey, do you want to give this at permission to use the location? We need Teoh create something that does that, but we don't want to do it in view did load because this is only going to be loaded pretty much one time when the views first loaded okay in memory and never be called again. But we want to make sure every time the user goes back to this view that the permissions are there so they can actually use the location. So we're gonna put it actually, in view. Did appear, But we're gonna create a function for as well to and have you to do, peer call that function, if that makes any sense. So let's go ahead and create that function that we're gonna call here. I'm going to, but here at the bottom and we're gonna call this location off status. Okay. Where's my closing brace? There we go. Down a little bit here. So we can see it. So location off status and it's just a nice convenience function we're going to use to check status of location and permissions. And so let's go ahead and just call it here and viewed it appear just to get it ready. And that looks good to me. So let's go ahead and do what we need to do. So if CLL location manager the authorization status equals dot authorized when in use. Okay, so let's talk about that when we call location off status, whenever viewed it appear happens. Okay, we want to check the authorization status. So there's two types of statuses here. There's authorized when in use. In fact, we'll just look at both of them here and there's authorized always authorized win. In use is when you want to authorize or have the user authorized usage of location while the APP is running while they're interacting with it. Okay, this is the recommended the Apple recommended way of working with location authorized always means your app can always be getting location in the background. And Apple does not recommend that to security their security problems, and it drains your battery s o this is the recommended way. Of course, you're not prohibited for using authorized. Always. Just know that you may have more users who declined that option because they don't want their battery life to die. But if Europe requires that Europe requires it. So what we're doing is we're checking. We're calling this authorization status, OK? And knows we're not actually calling this on our location manager object here. Okay, we're calling it on it. It's a, uh, a static function here, okay? And so we're calling it on the actual class itself. And so what we want to dio say map that show user location equals true. Okay, So when viewed, it appear happens, we're gonna check the off status, okay? And we're gonna say, hey, is if it's authorized, win and use diffusers authorized to use allow their location to be used when the absent use . Let's go ahead and show the usual location on the map, and then the map will show that location. Okay? Otherwise, we need to show that pop up that actually asks the user for permission. So else Well, say location manager that request when in use authorization. So if the user has not given permission yet. This else statement's gonna be called. Okay? And it's going Teoh, show that pop up. This is Hey, do you want to let this user, uh or do you want this app? Have my location basically more or less so that's cool. Couple of things we need to do here is, of course, set the delegate of the map. So map dot delegate equals self. Okay, if you don't do this, this this won't This won't work. Okay, You'll have issues. All right, So let's go ahead and set our table view outlets as well to or excuse me delegates, not outlets. We've already done that. Equal. Self and table tab, inal table view dot Data source equals self. Okay, there is one more thing that we need to dio on. I mentioned this before, but this is the permissions. Okay, So what we're gonna dio is go over to info dot p list, and at the very bottom item here, click the plus sign, Okay? And I'm gonna pace it in, and then I'll read it out to you because it's long. Okay, So the key name is N s location. When in use usage description Okay, try saying that five times fast again in this location. When in use usage description, make sure it's spelled just like I have it here camel cased. If you don't, it will break. And the thing we need to put right here in the actual value is the message you want to show to the EU's. Remember when the AP appears, when the APP comes up in the user loads of the map, it's going to show that pop up saying, Hey, do you want to give this user access? Do you wanna get this app access to your location and then you could have your own message here. In our case, we're gonna say location needed to check distance to boot camp locations. We want to get a message that clearly states why you want to give the location so the user can make an educated decision. Okay, so this is looking good. Now, let's go ahead and just run this and see what happens. Assuming I have done everything correctly, You never know. I screw up a lot. Okay, Click. Second view. And well, there's a location there. Um, you know why it didn't I've read this before. And so it didn't ask me for that pop up. What I'm actually gonna do here is I'm actually gonna delete this app off the device and rebuild it again, Okay? Because those locations will be stored. It will remember your decision so it doesn't have to keep asking you. So this is a good note. Okay, If you're testing things and you like, where's my pop up? Go ahead and delete the app because it stores that information locally on there that you've accepted permission. So just know if you want to test and want that pop up to come up again, do your out and rebuild it. Let's go ahead and try that Now. Second, there it is allowed to boot camps. Access your location while you use the app. Location needed to check distance to boot camp locations. That's what we put in there. So if I click allow, then the apple start using that location. Okay, which is pretty cool. Now, let me show you one more thing. Some of this here down at the bottom here. When your app is running on the simulator, you can simulate an actual location. So if I go to, let's say San Francisco, California. All right. I picked that from the little drop down there. I'm gonna go ahead and stop the app and rebuild it here and now I can actually stimulate New York City. Excuse me. San Francisco, New York City. What? Smoking something here Because simulate San Francisco on the map because, uh oh, come on. There you go. Uh, and there it is, As you could see it. Of course, you can double click to zoom in here, but notice the problem. How the map is just way too zoomed out. It's not even useful for us. We're actually gonna fix that in the next video. But that's how you can actually simulate a location. I highly recommend that you do all of your actual device maps and location testing on a device. That's arraignments. Say, do your location of map testing on device. The reason is the GPS is more accurate. Simulation is on. A simulator is not a good representation of how to work with maps and GPS. You absolutely, absolutely, absolutely need to test on a device. Do not Shippen app without testing. Ah, maps and GPS on your device. So you're gonna want to run that on your device, if you can. For all of your applications, it will become more apparent to you when you start doing more complex things. But that's it. For now. We've got our simple map working. We're showing the user's location in the next video. What I want to do is set a zoom level when the at first loads it at the proper zoom level. That actually makes sense for applications, but that's it for now. Mark Price it Deb slopes dot com
74. DevCamp iOS 9 App: Zooming in on the map: Hey, what's up, everyone? Mark Price Hear with deaf slopes dot com and previously we implemented a map and a table view that does absolutely nothing. And then we implemented user location with permissions so that it shows the user location on the map. But the next thing we want to do is set the zoom level of the map because it is just too far out. And it's not useful, especially if we're looking for locations. You know, assumed this soon Assume that this is like a Starbucks app, right? Or you do a search and you probably within five miles of you, depending on where you live. There's 3 to 5 Starbucks and so you want to be zoomed in in a in a way that makes sense for your specific application. Okay, so, I mean, if you're doing an app that's you know, U S military bases, you know, which will be spread out throughout the whole United States, meet your map might be a lot bigger. You might see the whole US or something like that, but, uh, that's not what we're doing. So let's go ahead and set the zoom level, which is important to know for any application. And so let's go ahead and do that now. First things first. We need a C L location distance. So let's do that here. It's going to be a constant. We're gonna call this region radius CLL location, dissed distance, and we're going to set it right off the bat to 1000. OK, and it is a double. It's just kind of as a type alias here that gives a different name, but it's important, uh, that we used the actual type that we're going to need, okay and type used to represent a distance in meters, you know? So about 1000 meters were putting here arbitrary number. This is just what I felt. Look good. Okay. You know, it's about 3000 feet or so. Uh and you know, not quite a mile will play with this in just a minute, but we need to set a rate, a region radius. It's a default value that will set for the radius of our of our region. Right now it's about 1000 meters, okay. And the next thing we want to dio is have a function here, and it doesn't have to be in a function if you just want to do it one time. But I liked putting everything and functions just in case I ever need to reuse it. And we're going to call this one center map on location, and we're gonna pass in the users current location. Okay, so cl location, CLL location. Okay, that works. So the idea here is when the APP gets the user's location, okay, working and listen for that which we haven't implemented yet. We're gonna grab that users location, and they were gonna pass it into the center map on location function and actually zoom down onto the map at the level that we want it to be. So what I'm gonna dio inside of this is now create a coordinate region, so I'm gonna create a region based on coordinates. User's location equals m kay coordinate region make with distance. That is the one that we want. It's a little bit long. That's OK. So, senator co ordinate is going to be location dot co ordinate. So remember, we're passing in the user location here, okay? And so once we have that, users location were actually grabbed the court in it out of the coordinate object out of location. Okay. And coordinate has longitude and latitude. If I command click this, um, it doesn't show here, but basically it's a location. Coordinate to D. C. If this one shows that there is latitude and longitude. OK, so according as landed latitude and longitude. And, um, you pretty much do anything when you have latitude and longitude and the second thing we want to pass in here is the thing we created earlier Region radius. And we're gonna multiply this times to just to make it longer about 6000 feet, about 2000 meters or so, just a little more than a mile. And again, these are arbitrary numbers. It's kind of look and feel kind of thing. And the reason why I left this appear at a default of 1000 instead of building all the distance right here is just in case. I want to use that again for something else, and I can run my own math on the other thing I want to use. But for now, times two is about right region radius Times two for the third argument here. Okay, so we've just said a coordinate region just a region that we kind of want to zoom in on. And then in your map, you just a map that set region. Okay. And we're gonna say coordinate region animated. Of course. Why would we not make it animated? So that looks good to me. So when when the center of map location is called, it's going to grab. It's gonna create a region based on the distance that we want, you know, arches about little more than a mile or so. I don't know how many kilometers that is. Maybe you guys can translate it. Those who are outside of the U. S. And that looks good here. So the last thing we need to dio has actually figure out a way to get this center map on location to be called. And that, of course, will happen when the map gets the user's location or when the APP does. And then it will call that callback delegate function that I was telling you about. So map view and we want there just did update user location tells the delegate that the location of the user it was updated OK, works for me. So this is a simple as saying if let luck for location, user location, dot location and then we're gonna gonna say center Matt on location and past in that location. Okay, that makes sense. What's going on here? So we've said that we want the APP to start tracking the user's location. They given us permission. And so the M K map delegate map view delegate is going to start calling back functions if we've implemented them. And if we did implement them, it's gonna call and pass in that users location, which is right here. Now, the reason why I'm doing and if let is because if we go into this m k user location, notice how location is optional, OK, we don't want to just force unwrap it. If there was a problem and it gave us back a Neil object, it would crash. So that's why we're using an option of value because we are requiring an actual value here . So only senator the map when we actually have a location. That's what's happening here. Okay, And let's see if it actually works on well on the simulator. If it doesn't, I'll go ahead and pull it up on the devices Well, too. But let's give it a shot on the simulator here. This is where it started becoming really important. You start testing on actual devices, so I'm hoping that it just stays in the New York region and really zooms in because it's assuming a location for us here. So it's quick. Second, let's see if it zooms in Bam. And there you have it zoomed in, uh, you know, about 6000 feet or so a little more than a mile here in San Francisco, and it's looking good. So to recap what we've done so far, it's not much code, Really. The things regarding maps really are implementing the map view delegate. That's what we've done so far. OK, and then we asked the user for a location every time the view appears. Or rather, we see if the users authorized for location already if he's not. Then we asked for location, made sure that in the info dot P lis file, we have that property in there, and then once the user look, we have permission to use a user's location when the map in the APP actually grabs that users location. Okay, it's gonna call back. This did update user locations. So did update it. And when it calls this, we're gonna call the center on map where we actually zoom in to the amount that we played around with. And again, this is going to trial on air for you. How far you want to zoom in or not. This is not a one way type of thing. You just grab a region. We just created a region on the map said, Hey, let's go into this region here. That makes sense. So that's what we've done, making great progress. You can actually already do a lot of cool things with this, just with this limited knowledge here. But that's it. For now. Let's go ahead and move on and Ford.
75. DevCamp iOS 9 App: Annotations & Geocoding: Welcome back to the party, everybody. Mark Pricier Deb slopes dot com. And today we're gonna continue our project here. And what we're gonna do is we're gonna have pins drop on the math. Okay? Those are called annotations, and what we're also gonna do is we're gonna get some adverse is, and we're going to geo code them. And what geo coding is is taking a string based address more or less and converting it into longitude latitude coordinates. And let's go ahead and get started. First things first is let's go ahead and get some adverse ists Go to Google here and what you can Dio already have some addresses that I'm gonna pace in here in just a moment. But what you can dio is this a San Francisco actually go toe to toe apple headquarters on Infinite Loop? Cupertino. Been there, by the way. Super cool. You should go check it out. They have an apple store with exclusive apple products and items that you can only get at the headquarters location if you didn't know that. And so what? I did the grab these add versus was I just went and found places like like this Cupertino in, and then I just copied the address, like so. Okay, so go ahead and find a few addresses you like in your neighborhood and your city in your country, just like I did here. Okay, So what I'm gonna dio is going to copy over some addresses, put him right here. Okay. And these ones actually are in Cupertino just fine. It's just an array of addresses. Okay, String addresses address, At least in the US It's address. Um, city. Excuse me. I don't even know what I'm talking about. It's the It's the street address. And then the city and then the state. And then the zip code. So good. But your addresses in, however, they're supposed to be formatted in your particular country. And that's what we're gonna be working with. Kayla. Saga annotations. What's an annotation? Well, an annotation is simply an object class that represents a location on a map. And there's some very specific things you need to do with annotations, so I'm going to right click death boot camps. I'm going to go to new file. We're gonna create a swift file click next, and let's go ahead and call this boot camp and notation. We're pretending that we've got a boot camp or multiple boot camp locations, and we need to create an annotation for it. So let's go ahead and create that now and you'll find that it's fairly straightforward working with it. Well, the first thing you do is import map kit. Okay? And then let's credit class again. This is boot camp annotation. Now, here's something that's important for an annotation. Teoh. Be an annotation it must inherit from N s object. Okay, you can't. I work with annotations without doing so. And then it needs to conform to the M K annotation. Um, protocol my here. And if I command, click this your like this. Way too small. There we go. Sorry, guys, If I click this here, it'll take me into the protocol. And very important, it requires a property called co ordinate and then optionally it has a title and a subtitle . Okay, if you think of a pin drop on IOS map, you've probably seen them. Sometimes it's a simple as you know, there's sanitation and there's a call out that has a title in a subtitle on it. Okay, so the most important thing, though, is this coordinate? So we are object. Our class must conform to this protocol and have a coordinate which, of course, C l l location coordinates duties have a latitude and a longitude. Ah, OK, so there we have it. We've implemented the protocol definition. Let's go ahead and actually fulfill the demands of that protocol with the coordinates. So I need to create a property called co ordinate. Okay. And is BCL location to coordinate to D? I'm going to just create it right here off the bat, like in just ah, generic the generic location or excuse me, generic coordinate. But you have to have this on here just like this. This is fulfilling the demands of the protocol. Okay, I'm the name. Everything needs to be just like this. Okay? This is we're saying, Hey, since we're implementing this protocol, we're gonna implement this property here named coordinate of this type. Okay, If you don't do it, won't work so very, very important. Okay? And then let's just created a lynch initialize er where we pass in cord in it. Where passing a coordinate. Okay for yourself. That coordinate equals coordinate, and that's it. That's our annotation. You're like, That's easy. Well, all it is is a representation on the map. You can customize the customers. That's a lot more. But this is all we need for right now. Just a simple annotation. Okay, so let's go back to our location. VC. So we've got addresses, right? But with your map, you really need to work with coordinates. Because, remember, as you just saw in our boot camp annotation moving up here in our boot camp annotation. It's looking for a coordinate with the latitude and longitude, so the annotations work with coordinates. So how do we get these addresses into coordinates? Well, we need to do some geo coding not to be confused with geo cashing where you go and find junk in the earth. Geo coding is the process of taking against string based adverse is and turning them into usable coordinates and reverse geo coding is being able to take coordinates and make them into readable addresses. Okay. And you don't have to use the guei p i for this. Some people think you dio some people will tap into Google, use their geo coding system. Actually, apple has a built in system. It requires network services because it's gonna go do some magic behind the scenes in the A p I. But we can use it. So let's go ahead and use it. What we're gonna do is quite a function called get place, place mark from address of type string. So, basically, for each of the address that we have, we're gonna call this function and path in the address, and then we're gonna geo code it. We're gonna say cl geo coder. Okay, We're gonna do that, too. In Stan. She ate it there, and we're gonna say Geo code address string. I think this is the one that we want. Yep. Geo code address, string and just passed in the address. Like so. And in the completion handler, just press enter and press enter again, and you can even click here and press enter. This is one of one of multiple ways work with disclosure, so I could just put in here place marks. Okay, Just give it a variable name. Call this one there. And so what's gonna happen is when you geo code that address, it's gonna give you an array of place marks. Now Of course, we only have this one address here and we're looking way. No, we're only gonna get one object back. So we're gonna assume we're gonna work on the assumption that we're only getting one object back, but it still needs to be an array. And there still could be in Oeiras. Well, okay. Are you with me so far? Let's go ahead and move forward. Let's say if let and let's just call this marks like meaning multiple place marks. OK equals place marks. That's what we're gonna do is make sure it's not kneel because it can, because there's it's an optional with a question mark. Okay. And we're going to say where Marx dot count is greater than zero. So what I'm saying here is I only want to work with the place marks. If there is one. If it's not kneel and where there's more, there's at least one object in it. So we're just running some simple logic here. I could have said, you know, if place marks is not equal to kneel and then inside of exit, you know, and, uh, where place marks that count is greater than zero. But if let is the way to do it, of course. And Swift. And so to move further if let lock meaning location, people's marks, zero remarks is an array dot location. Okay, so remember, this is a C l place mark inside of this array. That's the type of the array. And so what we're doing is, if we've made it past here, we know there's at least one object. Okay, So what we do is we grab that object out of the array and, of course, it's a seal place, mark, object and seal place. Mark just so happens to have a location. Property, as you can see right here. CLL location, which in turn has your coordinates. Okay. Are you with me so far? I'm over explaining it here, but you have the code to do what you want with it and look over as often as you need it. So we've got So what? Basically, at this point, we have a valid location with coordinates that we got from the actual strings, which is really cool. We didn't have to do much to get that working. So the next thing we want to dio is now that we've got Now that we've got a valid address here, we want Teoh, take those addresses and create annotations. The doctor dropped them on the map. But first off, let's get those addresses into that function down there. So this function is called get place mark from address. So what I'm gonna do here in view did Load is create a for loop. So for each ad in addresses, let's go ahead. And what does it create? Address? Get place mark to second member here. So get place mark from address, and we're gonna pass in ad. Okay, that's for each loop. It's just gonna call that function each time. And this function is asynchronous. Okay? It's not synchronous. It's not gonna happen instantly. It's gonna hit the network servers, and it's gonna hit the A P I behind the scenes. And so it's not synchronised. It will drop on the map as they see fit. Okay, we didn't even we didn't even do air handling here. Like, for instance, if there wasn't type of air, what would you want to do instead? You cannot find location or something like that or maybe not do anything at all. We're not doing anything at all. And if you have a complex application, by the way, you might not put this in here. You might have a whole geo coding service that you create a singleton service that manages your geo coding, creating of annotations and returning them to the view controller. We're doing it here because our app is so darn simple. But just know it doesn't have to be here. And there's multiple ways of doing what I'm doing. The important principle for you to understand is that if you have a string address, okay, you've got a geo coded to turn it into a coordinated location. And then if you want to show pin drops on a map, okay, you want to make sure you pass coordinates and locations into it. So whether you get your locations here or from somewhere else or from a server from whatever you're doing, that's fine. But those those of the steps and we're just doing one way, we're just doing it one way. Getting on the map in one way and form so we want to do now is actually, um, great annotations. So let's do that funk create annotation. That's like one of those words that, like, if I go too fast, I just absolutely spell incorrectly location. You guys are lucky. You get to see all the stupid mistakes they make and laugh at me, and I don't get to see anything. What you're doing. Okay, create and notation for location. It's like Mary Poppins, type of, like rhyme or something. Like what? The hex. Mary Poppins. Okay, so what we want to do is grab that location and turn it into an annotations. Leslie, that not let boot camp equals boot camp annotation. This is the classroom in eight we made. And what does it need? He's a co ordinate. How do we get a coordinate? That's as easy as doing location dot co ordinate Is it all coming together now? So right here. We've created this location, okay? And what we're doing is we're gonna pass it in over here, and then we're gonna pass that into the annotation. So we took a string address, turned it into a c l place mark, which had a location, SCL location, which we are grabbing the court and out of location and putting it in the annotation. And of course, right here we want to go ahead and call that function. Create annotation for location. In fact, we need to use the self keyword since we're inside a closure self that create annotation for location. I should make a rap I almost wanted, like breaking out into song, saying that annotation for location. Okay, location. And let's pass in luck. This lock right here. This location we grabbed from the from the place mark. Okay. And so there we go. And the reason why we didn't if let's is to make sure we actually have objects. So if we've gotten to this point, we shouldn't have any crashes, because there's valid objects there. And so we've got our boot camp. That's looks great. All right. And so let's go ahead and say map dot Add annotation. Okay, this is looking good boot camp. So we just we're now adding it to the to the map, like so let's just go ahead at this point and run it and see what happens. Okay, assuming that I've done everything correctly, hopefully I have. Okay, there we go. We are running. Let's go to the second view controller here. And look at that. It dropped three pin drops, which is pretty cool. Now, if you click on it, nothing's happening. Right? But those pin drops actually represent those addresses. So we know it's working at this point, which is go, which is really cool. What you guys think? Yeah, this is awesome. No. What if you don't like red? I absolutely hate the color red. I'm just kidding. It's fine. But what if you want to change the color or what? If you want to customize your annotation at all, which we, of course, do one do that because it's gonna lead to more customization in the future that we're gonna want to dio. So let's go ahead and actually create custom annotations. That's what we're gonna dio its credit function called map view view for annotation. This is part of the map view delegate appear at the top M K map, you delegate. So basically, you see right here when we sit, we do map the ad annotation. Well, whenever that's called behind the scenes, if the if we've implemented them came at view delegate okay, behind the scenes, it's gonna actually call this function before each one of those pin drops happen. Now we didn't include includes before because it's optional. But what this function does view for annotation is it intercepts it right before it drops on the map. So there's an interception between when this is called and when this is or when this is called, when the pin drop actually goes on the map than this functions called in between So we can customize those pin drops as we see fit, which is what we want to do so. But keep in mind this an annotation also includes locations. So remember when that blinking blue dot on the map is you and your location? That's also an annotation. So we knew what we need to account for that as well, too. Annotation dot is kind of class, so if it's a boot camp annotation you see I'm doing here, I'm just saying, Hey, if this annotation that is being dropped onto the map is a boot camp, let's do something, Okay? And then if we say, let's say else if Anil Tae Shin dot is kind of Class M K user location and we can actually return return Neil and then down here, we can return Neil. Now you're probably thinking. You're probably thinking right now. Um, wait a minute. Why are you doing return here, Neil Here and kneel here. Isn't it redundant? Actually, it is redundant. But I wanted to show you that this is how you check for user location. Okay. In a real world, I could have just said I could actually just taken all this out here on my return. Same unlocks you being here. And if we get here, we know to return, Neil. But just to explicitly show you that you need to return Neil for the end user location, you don't want to touch the user location. Just leave it as it is. Don't play around. Okay? So if it's of type boot camp, though, what do we want to do? Well, let's create an Anil view equals M k pin annotation view. So an M camp, in annotation view is a pin like you just saw. All right. And it expects an annotation, and so I'm gonna pass in the annotation that is dropping on the map. Remember this one right here? Okay. Mapped at annotation. Okay. And re use identify right now. It's not important. We're just gonna call it default. Okay, And let's say an O anil view dot pin tent color pen color, as you could see. Right here it is deprecate ID. Do not use it anymore. Besides, it was always limited to specific colors. Pin tint color lets you pick whatever color you want, which is really cool. So pin tent color and let's just go ahead and put a color here. What color do you want? New white color dot How about yellow color Getting ugly? Ilo Because it's so much better than red and again you Could you What color RGB values whatever you want in there but which is really cool. And then an overview thought animates, Drop. Let's make it animate down. Of course, that looks good to me. So animal Anil View that animates drop. You know how they just kind of appeared there before. Let's see if we can get him to drop down if we may not get there in time, because it may load too quickly before we load it. But we'll give it a shot. So that looks good to me. And lastly, we just need to return the Anil view. Okay. Are you with me? So far. So now that we've got a valid location and we create an annotation right here Okay, then we added to the Met. Well, we add this to the map, but before it actually drops in the map every time you have a pin drop going to the map, this function will be called automatically by the delegate by the protocol delegate. And what we're doing This reason we're saying, Hey, are you dropping a boot camp annotation? If so, let's go ahead and create a pin one. Okay, pin annotation and let's make it yellow. And then let's return that one instead. So it's still gonna have It's still gonna have our our boot camp invitation. As you can see right here, this is a root annotation since it inherits from M k annotation. So it's all the date is still there, except we're just changing the color on it. And let's see if this works. I'm curious. Curious. Okay, it loaded. Let's click second and it zooms in. Oh, that's nasty Yellow. You're like you that red is bad. Oh, that's pretty ugly. But anyway, as you can see, our three pin drops are now yellow. OK, so these air urinal facilities, by the way, that's what you represent them with this nasty yellow color eso There you have it. And, uh, I honestly, I just can't take it. Guys, Uh um do black color. Let's see. See what a black color looks like, But that's how you do it. Okay, so we've got lots of things going on here, but it's not that much coat, okay? You've learned a lot of cool things just now. There we go. Black Boehm, These are agents. Okay, So questions class. No, No questions. Great. So there you have it. Mark price at depths. Pope's dot com Making great progress.
76. How Web Requests Work: everyone Mark Price here at dev slopes dot com. And today we're covering a very foreign principle. It's basically how Web requests work, how the Internet works in regards to making Web requests. We're not gonna talk about how the Internet really works. This isn't a philosophical lesson about privacy and Internet connecting to all kinds of junk. It's just about how Teoh talk to Web server. So very important, though in fact, until I actually became a Web developer later in my career, Um, and I did this just just for fun till or new things until I understood what was really going on behind the scenes. I was never really great at interfacing with servers on my iPhone app, so this is very important principle. So, uh, let's let's look at it like this. So you've got a phone. Okay, here's your iPhone, right? Looking great. Here's your cool android phone, you know, not a school's iPhone, but still pretty cool. And then you've got this busted up Windows phone that no one ever uses. Okay, it could still make what requests a windows. You guys were like jerk. I say what I want and you have to watch. Okay, so, uh, let's pretend these are clients, because that's what they are. These air clients. This could also be a computer, right? A browser. So Israel clients now in the past, Ah, websites used to be very static, right? Like front. And you just have a website before APS even existed on iPhone mobile app. So you'd have a website have static data on it. It wouldn't do much. You just would all be living there. But as the days are going by, websites are starting to think more. And then mobile APS came out, and it's like, Well, how do we get our data talking to our mobile APS? And how do we get this all working? Well, um, nowadays, Okay, everything is in the cloud. And when I say cloud meaning virtual servers everywhere, and it allows us the ability to have our clients talkto our server so we could have instant a data access across all platforms. So over here is where we have our server. This is our cloud server. Okay. And, uh, we got a server in here. Okay. And connected to the cloud is a database. It could be living on the same server or it could be on a different server. But basically, database is what's gonna permanently permanently stored data. And so we've got these clients that need data. So how does it work? Well, you probably obviously it talks to the server and sends back, and it does. But there is a little bit more going on than that. So, um, so with that in mind, though, that is the basic flow. The clients talked to the server and the server is down here, and the server sends data back, OK? And that's how we typically communicate with devices and on the web. And basically, these requests And this discussion today, we're not talking about other topics. We're just gonna assume that this is how it's done, because it mostly is. We're gonna talk about http thes all use H T t p protocol. Now, if I seeing this in your browser like when you're typing in http Colon for its last four slash https, which is secure. Um, you've been using them forever. And what it means is hyper text transfer protocol. Okay, Hypertext transfer protocol. Not gonna write it out. You can look it up online if you want to read what it stands for, But basically, it's a protocol that, um, clients and servers obey in order to pass data back and forth. So if so, for instance, on Google Chrome all right, they are obeying the http protocol, which allows data to go from your browser to the server and vice verse, ex cetera frame. There's web friends that do that. Your clients to like, uh, IOS. It is also obeying the http particles. So in IOS, we use a class called N S U R L session. Okay, in this SQL session allows you to make Web requests to servers. And so IOS had to implement this protocol. Android had to do the exact same thing and sort of windows. So all of these platforms for the code bases to bail, to talk to servers, they implement this this protocol and more or less what? What? What you do in a request is you just past data back and forth. Okay, So data goes back and forth, back and forth, and so let's talk a little bit about a request. Okay, So you've got a web request. I'm just gonna call web requests. That's kind of the common term. So let's say that, um we are making a a kidnap, you know, for all those kitten videos. So, you know, cute little kitten up. Okay, He's a happy cat. Okay, We're making a kidnap, and we need to So the user over here on this iPhone or any of these devices, any of his clients? What they've done is they have added a picture of their cat, and we want to save on the server. So next time they load the app, it pulls it from the server, and it's always there. So let's say that the request looks like this. And these requests are, um are gonna be in Jason. Okay, um, you can also use XML, but pretty much the whole Internet is moving to Jason. And, uh so basically, let's say we've got a cat object here, and, uh, it has a name. So this is an object called name. It's unquote. So they're quotes. And, uh, the name is Liu Liu. Ok, there's a comma. And then, uh, it's got an, uh, an image or l. Okay, so maybe that maybe your iPhone uploaded it to Amazon, and it's stored the oil here and now we gotta send it to the server. We got image or l. And this is Http Colon, colon, whatever dot com and what else on then? Maybe a description, right? Well to say DSC and ah, you know, this is my favorite cat. Probable block. So we just what we've done here is the user added a new cat. So from your perspective, they click the button, They took a picture, they click the button and said, hey, saved my cat. And so it took this request here and in our code. We wrote some type of code to transfer data into Jason. What you're gonna be seeing how to dio, which is really cool. And so basically, we've got this text now hypertext transfer protocol. So we're just transferring text for the most barber transfer in text across. So our client are iPhone here. It makes this request, and this request of Jason goes to the server and the server then receives it says, Okay, this object looks good. The data looks good. Let's go ahead and stored in here. Okay? And by the way, this is called a post request. When you're posting something new. Okay, so we've just posted something to the server. Now, let's say that we just loaded the app and we want to get a list off of the top cat videos. Well, those have been posted on the server. So now we just did this post repressive post a new one. Let's take our iPhone app. Let me let me erase. Um, wrong color. Black and black. Not a good combination. Their egos just change. You too. White under detail here. And there we go. Okay. And I'm just gonna erase this. Just clears up from space, okay? And so let's say we need to get a list of cat videos. So what we're gonna do is we're gonna make another request to the server. Okay, so we're making a request. And what does the request look like? What we talked about, what we talked about here is just the stuff we posted. So this stuff right here is called the body. Okay, we've just We made a poster question, we pass in the body, but a request has more than that. So if I'm making a get request, okay, this is called a get request. We're going to get stuff from the server and on a get request. You actually don't usually put a body. What you usually dio is your quest comes with a few things. It comes with a URL, so every request will have a girl. Okay, um, you might have what's called a header. So let's say or headers one or more headers. Let's say that you can't make requests unless you're signed in. So sometimes is typical in the header part of the http requests to pass in, you know, like an authorization and off token eso basically or your user name and password. So basically, you say, Hey, I am allowed to make this request cause maybe sometimes on a server you don't want anyone to get any data. If it's a bank account, for instance, do you want anyone logging into your account and getting your data? No. So in your head? Or you might have some type of password or authentication token to say, Hey, this is who I am. So you make a request and in this case is a get request. So the server takes it and they say, OK, yeah, this guy's authorized in our case in some of the apse for building. We're not gonna worry about authorization. They're just opened AP ice that let us get data from it. So basically, we made a get request. The services? Yeah, it's good. And then guess what it sends back what's called a response. Okay, so the server sends back your response and then the clank and handle the response, and that's what we're gonna do on our app. So you get the Jason back that response. It's Jason in most cases, and then you parse it, and then you use the S data in your application. So those are some basic server communications right there. Now, let's go ahead and just erase all this for a quick moment. Show a few more principles here. This is really important for you to understand. OK, so we talked about a couple operations, okay. And let's let's talk about a little more. Those operations are kind of known as a principle called crowd. And if you don't know what it means means create, read, update and delete. Okay, these are the common operations you're gonna perform on data and ah, in other words, create his post. Read is get. Update is put and elite is delete. So these air common terms you're gonna be seeing. So when you post something, your posting something new, Okay, suppose something new? When you're getting something, you're just retrieving, okay? And when you're putting something you're updating, So you're taking existing data and changing it. And when you're deleting, it's gone, baby. Okay, that's an exclamation point. All right, so those the typical request you're gonna make his post get put, delete your posting to a server. New things. You're retrieving things from server you're updating or deleting things. That's very typical of most applications of the operations you're gonna be performing in our case. You know, like on the Pokemon app, we're gonna be doing only get requests. A lot of absolute fact, a lot of APS he may only be doing get requests. And a lot of actually doing post requested stuff is well, too. And so basically, how it works is it's, um, to recap what we've already what we've already talked about is ah, you'll make Here's your client. And here's your server. Okay, this is server. This is client. So the client will always make some type of requests, and the server in most cases will always give a response. So you've got a response. You've got a request, OK? And they both the response and the request the abide they abide by the http protocol. Okay, http, you don't have to worry about what's going on under the scenes with http. It's very complex. A bunch of big, huge companies and individuals and thought leaders in the world sit down and say, What is the Internet need to be? And then they create standards, and this protocol gets modified occasionally. And so basically, all the clients adhere to it. So if they didn't like you could create your own protocol. Do whatever you want, but no one's gonna use it. You know, Chrome has to adopt it. Your iPhone app has to adopt it. You know, it doesn't make sense to build your own. And so you make a request. If it was a post request, it could have a body. Okay, you could have headers. Remember, the body is what you send up to the server. That Jason. So if you're posting new thing, you're gonna pass it, Jason to the body of response. Um Well, the response kind of has the body to. In most cases, you send back a body of of data, you know? Hey, like, for instance, a get request. How all the cat videos. So it sends back a list of Jason full of cat videos, and ah, that's how that's how it works. It's not too bad when you when you look at it from this this visual perspective, you just make request to the server and they come back. And then you parse the data, etcetera, Um, so really cool stuff. In fact, what we can do here is just demonstrate a little bit more how it works. So if I close out of this here, let's get out of photo shop and let's go ahead and open up a browser. All right? What happens when I go to google dot com? Okay. Now owned by alphabet. If you haven't read the news, Google is no longer Google. Well, it is, but it isn't. And so google dot com, you're like, OK, what are you showing me? This is a thing I do every single day. Well, yes. So if something interesting here, you just made a get request. So your browser Google Chrome. It just made a get request to Google and Google sent back hte familiar like Wait, what are you talking about? Well, you want to do something really cool. I'm opening my terminal command space terminal. Okay, you see over here in the right hand side to make it extra big. Here's something interesting. If I type in curl google dot com curl is a, uh, a Mac command to make what requests. So the in the case of the browser, the client is this browser, and in this case, the client is my terminal fight. Curl google dot com. Look at this. That's interesting. Um, we do better, uh, let's curl the actual https. Www dot google dot com You're like, Whoa, look at this. It's sending back HTML. So what's interesting is your server sends back data, and that's all that's happening here on chrome. The differences Chrome knows how to handle HTML, so the server sends back. HTML says, Do what you want with it, and so Chrome knows how to handle it because it's a browser. My server are excusing. My terminal does not know what to do with all this html it send it back, but it can't do anything with it. Um, because the terminal is not a browser, so But they're both clients, and they both made the exact same request. That is really cool. So servers consent back whatever they want. And so in this case is sent back HTML really, really cool. Um And so if we go back to our postman if I launch postman here Okay, let's give it a second here, I think. And this has a Star Wars ap DiNozzo. H T T P s W e a p I doubt CEO slash ap ice less planets test one. If I want to pull a get request and click send. Okay, it gives me data. Now. This is also a client postman. Its own plight. Whoever's making the request is a client. So here we didn't get request. We hidden ap I this a p. I sent us back Jason. And there it is. So we just made a get request. Pretty cool stuff. Okay, um, this is raw format. I just click the Robert, and this is what your This is what it will look like when you actually get it. We just, you know, we made it look pretty, Um, and let's see what happens if we try. I'm gonna cook the reset button if we try and load up Google here, https google dot com and I click send. So it's like, OK, well, there's There's the HTML that I got back, just my terminal, So same exact thing. But if I click Preview has its own little browser thing, we're kind of previously here. And so anyway, point being is postman is a client. Your Web browser decline. Your iPhones acquire Androids, a client, anything that's making our questions. Serve is a client. All that's happening is you're making requests in the server, sending things back, and that is Web requests. That's how it works. So when you're digging in this stuff, just know there's no magic going on. It's just Jason. In most cases being passed back and forth, you can grab values out of it. Click this one here to reload my last request. You can grab values out of it. The name rotation, you All these things are key values. This is an array. Um, you're gonna using Jason pretty much. Most of the applications. So that's Web requests. That's how it works. You're going to see an action as we go along here. But if you ever have any question how it works, you refer back to this video on and know that this is a core principle. And if you can understand this, if you can put a lot of thought into this and really get it down, you're gonna be ahead of a lot of the people who are just coming out of school. By the way, if you do this course and you do all of these things, you're gonna be way ahead of people who are getting out of computer science degrees because they come out without practical knowledge there still teaching c plus plus at degrees in universities, you know who uses C plus plus like video game programmers and NASA. So if you're not planning on being a game programmer, not planning on working at NASA, you see any way very important stuff. Learn these concepts, get him down. Mark Price of death slopes dot com Thanks for tuning in, and I will see you next time
77. Working with POSTMAN: Hey, one mark pricier depth slopes dot com Today we're gonna talk about Postman. So thing about this movie is a little bit exciting, but also a little bit dry. I know what you guys are thinking, but I don't think this is the postman you're probably expecting. By the way, it's a cool movie. It's alright. Kind of more there. I don't know. See it maybe don't see it. Don't buy it though. Eca And, um So what is postman? I'm gonna type in Postman Chrome, Okay. And basically, as a professional IOS developer, you're gonna interface with Web servers all the time. And you make requests, and as we talked about already can create, read, update, you can post things already said, That's create, um Anyway, um, you know all kinds of operations and you need to know how the Jason's gonna look, how the day is gonna look. And so sometimes when you're on IOS, you're gonna get thinks pointing out to the concert it can look real nasty. It it's hard to know if your request is coming in right. It's hard to know if your code is bad or if the request is bad or Maybe you're calling the wrong or else so what you want to do is you want to get postman, so go to I just searched for chrome post men and it pops up right here. You can just click Add to chrome minds already installed And when you click, add to chrome right here. What? It's actually gonna dio I'll pull it up over here on the right hand side is gonna install, um, the chrome app launcher right here. You just click that and, uh, right over here, you've got chrome onda. Uh, it's not there. Well, let's just add it is not there. I don't know what happened to it. Click, add. Okay. And it's checking and its installing. You can see it right there and there. It iss Okay, so postman is now installed, so I'm gonna click it, drag it over here. This guy has a little bit here, okay? And just go to the app. And so what postman does is it allows you to simulate web requests like you might do through the app, but you can see exactly what data you're getting back. So if if the data matches here and then the data matches in your IOS up, you're doing pretty well. So let's go ahead and type in the browser Star Wars, a p I. And it's right there. The top one. It's s w a p i dot ceo and what it is, it's just a free online a p I. That has stuff. So, for instance, this one has Luke Skywalker, for instance, If you put this your Ellen here and so what do you can dio as I can Copy this right here. Go over the postman and this is a get request k. You can change it from get to post to put to delete and a whole bunch of other ones. But those the main ones, you can put the girl in there And this one is Ford Slush people ford slash one slash and all you got to do is click said and there it is. So our request, it hit the server in a sent back data, and here it is in Jason format. And, uh so if we were doing this in our app and this wasn't happening, we're getting something else. We'd know that we're doing something wrong with our code and So all the time I'm going back and forth the postman making different requests, testing things out to see exactly what kind of data I'm looking for. I'm gonna click this these things here and go to the documentation. And, um, here we go so you can do all kinds of things. Like it looks like they've got a plan. It's one. So if I highlight the planets over here, I pressed. Send pulls that different data, so I know it's working. So you're gonna want to use this as your testing out, your data and your Jason to see how it how it really how it really looks and works. Okay. Very fantastic, tool. I use it all the time. And also, if I copy this right here and actually paste into a browser window, let's do that right here. It's doing a get request, and it's ah, that's nice that actually, this one actually sent us to this this nice, uh, four matter screen. This is Ah, Python and Jane. Go back and do this for you Automatically. Let's go to an A p. I wear. It doesn't make it all pretty free. Let's go to the pokey I believe it's the Pokemon ap I pokey ap I doubt CEO will be working with this one. I copied this right here. Okay. And then I put in Pokemon slash one slash. Okay, there it is. Excuse me. So what we've gotten back is a bunch of Jason, right? You're like, Oh, my gosh, this is nasty. So on Get requests. You could just put those in a browser. No big deal. Put it in a browser. You can see all the data that's here, but kind of hard to read. So what I like to do sometimes is go to this website. I just type in Jason online for matter. Jason Online four matter and all you gotta do is pasted in your command V to Paste. I command command a command. See? And then, uh, command V. There we go. So there there's our Jason I click process and it for meditate for us nicely. So as you're gonna go build your Pokemon app or any other app, you'll be like, Oh, yeah. I want access to the abilities. You can expand these things. You can look at him like, oh, descriptions. You can get all the Urals, you can collapse. He's very nice way to look at the coat because when you're on IOS and your print except to the console, it's not gonna look like this. It's gonna look pretty nasty, actually. In fact, I've pulled it up here in X code. This is the Pokemon project will be working on. And I've just printed out the data that comes from the server, and it's right here in the council. Usually your consuls like this, you know, it's it's okay to work with, but it's not the prettiest, just a bunch of block. I can't expand or collapse or anything. So anyway, just a quick example of some tools that you're gonna be using a regularly or you're gonna want to use. It helps you debug problems and figure things out. And most new developers go through tons of stress in trouble, trying to figure out how to connect to the Internet and solve these problems here to make your life a little bit easier. This is Mark price depth soaps dot com, and let's keep moving forward
78. Web Requests (NSURLSession): Hey, everyone, Mark Price hear with deaf slips dot com And we've been talking a lot about Weber Plus, so let's go ahead and make one with Iowa. So when Open up your ex code and I'm gonna go to file new project, pull it up here for you. See it file new project. OK, so click single application product name. This is called this Web request test and I'll go ahead and just leave all the stuff the same. Click next and we will store it on the desktop. Okay, So the reason why I'm showing you, uh, this today is because you're gonna be using this a lot throughout your career and you may not be using SQL session If you decide to go with the framework which we do later on, we turn to Alamo fire for swift requests, cause it's very elegant, but this is a very handy tool that IOS has provided us, and there's nothing wrong with it. It's fantastic. It's simple to use. Um, I'm gonna show you because you may not be using a framework at your job. You may be using iPhones default request maker, which is an SQL session. So I'm just here in view. Did load. This is an iPhone app. And so basically, this is gonna be called. This is gonna be called the second that we, um, run the or that we run the app. And so let's go ahead and make a request. First off, let's test the request. Uh, here on Star Wars. Okay, so we'll do this one right here. This people want, So I'm gonna go open. My postman. Launchpad postman. No, I clicked the wrong one. Actually, I need to go to the APP launcher and then postman. Okay, so here's our postman. It's loading. I'm gonna grab the URL. So it's this one right here. Here's their your l. And I'm gonna put it right in here, and I'm gonna go forward slash people for it slash one and slash. And what we're gonna do is we're gonna hit this endpoint and get the data. So it's already worked near this client has already implemented code to download this. We've got to do it ourselves. And so the end result of what we get on iPhone should look like this. Okay, It's not too bad. So let me close out of this a p I website here. I'll move this over here so we can see it. And let's look at our code over here. We'll turn off the left hand side so we can see more code. And Okay, here we go. We want this as the end result. So what we're gonna do is ah, first, but the your own. So I'm gonna say it. Let your l string equals http s w a p i dot code a p i slash people slash one slash merry go after right side here too. So that's it, right? There's are your l Let's go ahead and now create a session. OK, so a session is Well, let's Rudo says the n zero session class and related classes provided a p I for downloaded content via http This AP I provides a rich set of delegate methods for supporting authentication and gives you the give your at the ability to perform background downloads. When your app is not running in IOS. Why rap is blah, blah, blah, blah, so any way you can look, you can always look at the reference code here, By the way, very helpful press enter so basically think of a session as hey, I want my app to have a a session where it's making many Web requests of all different all the different formats and types. However, I'm gonna set some global settings that apply to all of and think about. When we talked about how some requests need user name and password or authentication with authentication token, you can actually set those on your session. So that way every single web request that you make you don't have to go and add that authentication token. You just put it in once. Another thing that changes is the or else that you're trying to hit. So that's what you use a session for and real simple. The command that we want. The function is data tasked with your l. And this is the just make sure that this is the one we want. You just want to pass into your l And, uh, we don't have that yet, actually, slits. Uh, let's say let your URL equals N S u R l and just click the one that has string parameter and ah, I wanted to do that. And there we go. So I just put an exclamation point at the end because I know this is your el. If this was trashed by put in something that was not a Eurail, this might give me nothing back. And then it would crash the app when I do this. But I know for a fact that this is a good girl, meaning it's formatted correctly. So it's OK. And so let's go ahead and put our your Ellen here now, right there on a press tab and then press enter. I don't want to introduce all by hand. So when a press enter and you know it's how it's given me things, Teoh highlight. So I'm gonna press enter tab, enter tab, enter. Okay. And it's still broken. I'm gonna delete the code one here. It's still broken because it's giving us the data types, but it hasn't actually given us parameters to use, So I'm gonna put those myself data colon space, just like a function right. That's all This is a closure, and it just didn't automatically put in the parameters force it gave us. The types were not the actual parameter names. I'm gonna call this one response, and I'm just gonna call this one air? Not too. Not too bad. Um okay, so that's looking cool. So how this works is you're saying, Hey, let's do a task. Let's retrieve some data K data tasked with your else. We're doing a get request. And when it's done, it's gonna go in this block here, And data is gonna be filled with data. If there was date, If there's no data, this could be empty. It could be Neil. You know, you see the crash, her app. If you try and access it directly without checking first, it's gonna give us a response. Was it a success? Was it an air? Um, and then it's going to give us on error if it exists. So, uh, not not too complicated, eh? So we're gonna do is say if let data equals data. And if you don't remember, what we're doing here is we're grabbing this response data here, and we're putting it in a new variable called data. It's the same name, okay? And we're just putting it in there and this. So if data is not know if everything's okay with it, this will enter this code. Blocks were basically saying Hey, if this date is OK if it's not empty, let's go in here. I could have called this. Uh, I could have called this response data so as not to confuse you. So, uh, we'll just do that just to not be confusing. So if let response data equals data, okay, the warnings is telling us we're not using it yet. And what we want to dio is we want to take that data and convert it into, um convert in the Jason. We've talked about Jason something that we can actually read and using our app. So what I'm gonna do is I'm gonna say let Jason equals N s, Jace N s J son serialization. That's ah, classic comes with IOS dot Jason object with data, Okay. And it wants us to pass in the data that we want to try and convert to Jason and then options. I'm gonna say Ennis J. Son reading options dot allow fragments. It's right here, and it says specifies that the parson should allow top level objects that are not an instance of an array or dictionary in case it was just a string or something. It wasn't actually an object and Jason, but maybe someone just gave us a stringer number. We're just saying we want to allow that. That's fine. That it doesn't matter. Just we're just giving it an option there. And, uh, now we're not gonna be able to use it. Just satisfy if I printed Jason. Oh, by the way, you notice how there if there was an air over on the left hand side, See how there's, um, a triangle and square? Well, it's not letting me select both of them, so I can't really see what the area. So if you ever see that where it's like, Hey, you're not using this and it's giving you the triangle. Just use it real quick. Just put it in a print so that yellow triangle goes away so that at least you can see what the real heiress. It's kind of annoying, but eso says you can call throw, but it's not marked with try. So the problem is N s Jason serialization. This can throw an error, and with swift two point no, we need to catch those. It's not gonna let us do it. So we got a we got to put this in a do block. So I'm gonna say, do what we'll do is we'll say. Well, actually, just take this guy here and this guy, and we will put it in the do block, and then we'll just have a catch block here. Um, just just to satisfy the demands of it, and it looks like we still have a problem. Oh, and it's let's take a look at it here, Um, forgetting the try keyword. So we want to try doing this first. Okay, so it's gonna try to serialize it to Jason. If it doesn't, we need to handle it here. And this might be, you know, print, uh, could not serialize. Okay, whatever you want, whatever you want to put their And so there we go. It's gonna try and and, uh, run the request, and then ah, it's just giving isn't clean up here. And just, uh, just for completion sake, I'm gonna call dot Resume on the end. It's It's a function you can call in the data tasked with your and so if this gets hung up , it's waiting on anything. Resume will just let it go forward. And that's our request, OK? And if I run this, it's not gonna work. But I wanted you to see why. So I'm gonna go ahead and run. And again, the end results to have our Jason looking like that. Jason, over there that you saw and running. Running. Okay, here we go. Almost there. There it is. Look at this. So apt. Transport security has blocked a clear text http. So with the new X code and IOS nine Okay, you can no longer make web requests unless it's to secure websites with the https. It prevents you from doing that? What? What Apple's trying to is saying, Hey, we want a better protect our users. So stop sending them toe websites that are not secure. And, uh, that's by default. No, because they want to encourage people. Teoh, Um, do you secure that secure websites? And, you know, um, the people who really, really care, you know, like all this is a fantastic, fantastic thing. You know, uh, we want to get the inter more secure, secure privacy like, Well, I'm just a teacher. I really don't care. Lots of abs, so I'm just gonna turn it off, turn it off. We're gonna allow all Web requests to go through like it used to be before, before I was nine. So you're going to deal with that in your APS? Just so you know, I'm gonna move this out of the way. What we're gonna do is open up the navigator here. I clicked the left hand button and I'm gonna go to my info dot p list. And there's a thing, a key that we need to add and it's not gonna pop it first automatically. We actually have to manually type it in. It's not like all those other ones you see popped up right there. So it's called N s AP Transport Security. Okay. And we'll make this a dictionary. Okay, You can click this arrow here to drop it down and cook a plus sign, and another key is going to be N s. Allows a r b i traer e so arbitrary load. I just spell it us. That's one of those words that you just like you confused on the keystrokes. And that's gonna be a boolean. We're gonna set it to Yes. So what we're saying is on the app transport, security, let's allow arbitrary loads. Let's allow us to work with any arbitrary Earl request. OK? And I just said it. I'm gonna run it again. Let's turn off this left hand side here running it again and it's coming. There it is. And look at that. So that's interesting. It's giving us in different order. It looks like So on the left hand side, the name is first Luke Skywalker. And right here, it's down here. So what's really interesting and important for you to know is you can never guarantee that what you get from a server is gonna be in the order that you want. It can never guarantee that. Don't ever guarantee ever in any of your applications that something's gonna be sorted ordered. You know, there are some a p I and points you can hit that that purposely do that, and that's that's a different case. But just always assume that the data is going to come and whatever format it's gonna come in. And so notice a few differences here. So we got the object here, but you notice how on postman there's a colon there. But over here, the at the X Code council, it puts an equal sign. That's okay. Um, it's still this is still kind of a dictionary. OK, here's your key. And here's your value. Here's your key. And here's your value and notice how some of these have quotes around and some of them, some of them don't Don't worry about that. To be honest, I personally don't know why when it prints on the X code Council that that it does that, Um, but you could just be sure that these keys and values are there for you to use. And so we just successfully made a web request that downloaded the same data that this client did here. So we've just done what postman is done. And there it is. Not too many lines of code. Okay. You know, with the class and everything, we're looking about 35 lines of code. Really? It's more like, you know, this many and so good job. We took the data. Well, we took a u R. L. Then we made a in his rural session, and then we ran a get request using data tasked with euro on the response, he gave us back data, which we converted into Jason. Okay. And it successfully went through way just printed. And you may use this for many of Europe's in fact, news for a lot of questions. So that's it. That's simple requests and moving on.
79. Cocoapods: Hey, Mark Price here, Deb slopes dot com Back in the saddle again. And today we are going to talk about Coco pots now will open the website here so you can see it. Uh, it's cocoa pods, that organ. Now you're gonna find that when you're coding projects, there's lots of tools and things that you don't want to write. You want to make your life easier by using some code that someone else has written. And in the past, you would do that. You go on the Internet, search on get hub, you'd find projects should download them to install them. You dragging your project, it became a big pain. How do you manage them on your get up and on your own jab? And so coca pots came out, and basically it's a dependency manager. It allows you to use their system to bring in other packages into your project. And basically, you just say which pot, which pods or projects you want to include as part of your project, and it will install them for you automatically. And so pretty much. Ever since cocoa cop cocoa pods came out, I've used on every single professional project or a project that I've been included on his used. It s so you can go to their website and you can start for something. So it's like, Hey, um, what if I want to make a Web request? You go look at all these packages I can use here, Um, really popular one, which we're gonna be using and what you should use to. It's like the best Alamo fire. Okay, this is, um this is ah, networking library. And see if you click on it, it'll tell you about the package. What it can do now We're gonna use this in place of N S, u R L session and how to install it, etcetera, etcetera, etcetera, and get information on packages that you want to use really cool stuff and everything you can think of. Like, Hey, I wish I had a really cool pop up for my for my app, you know, So I could say pop up and, uh, you know, what's There's a pop of you and look, they even have examples of how it works. It's like, Oh, that's easy. So anything you can think of you can probably find it there and cocoa pods. Just be careful. Not all code is great. Some of them are better than others. And so you can look by how many downloads It has things like that. This guy has one download in one month. Mm. But if you look at Alamo Fire, let's go back to that one. I'm curious now. Alamo Fire who? 36,357 downloads and just 10,000 downloads this past week. So not too bad. Okay, so that's Kobe Pots. You're probably not going to really go to the website much except to, like, look at packages like this. What we're actually gonna do is all that and closes here is you're gonna want to open up your terminal. Okay? Minds right here. You can also command space type in terminal and to make it extra big so you can see it. So let's say we want to install cocoa pods on our computer. You may not have it yet. Well, pretty much all Mac books or Mac OS X comes with ruby installed and Rubies. A programming language and cocoa pods is built on review. So what you're gonna want to do first is type in Sudo gem Install cocoa pots. Okay. And what that's gonna do? The pseudo is your administrator privileges. So it may ask me for a password and you know it and put it in. So what it's gonna do is it's gonna install cocoa pods. It's gonna find it on on Ruby's, uh, dependency manager. It's gonna install it for you and so glad and press enter. It wants a password. So I'll put in my password. I've already installed it, So that's just gonna reinstall it for me to get the latest version for you, it's gonna probably install it for the first time. So it's just thinking here it's doing its thing. It's doing its thing. There we go successfully installed cocoa pods if yours did not install or, for some reason, your you cannot recognize the command gem on your computer. What you're gonna need to dio is, um, go to cocoa pods and I believe they have ah getting started section here, and it will give you steps on what you need to dio in order Teoh in order to install it. And if it doesn't work, they have some other resource is so there you go, It's installed. Now, the next thing that you want to do is just use it and to use it well, open X Code Beta and will start a new project. Okay, click next, and we'll just call this cocoa pod dash test. Okay. Save it on the desktop. That's fine. Created. And there it is. And now all you need to dio disclosure project. Get out of your project. I just did command que to kill X coat. And here in your terminal. Okay, let's navigate. Oh, no. The terminal Let's navigate in the terminal. Ls So that's where we are right now. And it's going to the desktop. So seedy desktop on president Tab ls. And there's our cocoa pods test folder, city cocoa pods test. We'll just have into it. And if I type in ls sure enough there's my project. No cocoa pods installed yet. So this is how you get cocoa pods running type of pod in it. And now, if I type in l s u C something called a pod file, no big deal. Right? So what we're gonna do is go back to Google Chrome goto cocoa pods and let's go do Alamo Fire. Alamo Fire! Okay. And I'm just scrolling down to see how to install it. Um, where is it? Here. It was actually. Let's go there. Get hub site So much better. I don't like the way that it works here. If I actually go Teoh areas right here to get have repeatedly suit on the bottom. Right. Let's click that. And this is where the code is actually hosted. They're much prettier. Okay, Installation. Um, this is the one we're looking for right here. So this is what you need to put in your your, um, cocoa pods file. So let's go to your finder. Let's go to the desktop. Let's go to cocoa pod Test pot file. Just open with any text editor text edit, Adam Sublime. Whatever you want. I'm just gonna do sublime because that's what I have my computer. If you don't have sublime into free text editor really cool again. Any text editor will work. And so platform Iowa, six point. Oh, well, that's really old. Let's just change it to eight. Will support eight and up. That's fine. And so that's looking good. We also need this, um, this use frameworks key word here. Um, in fact, all of these things right here, we're gonna need solicitors. Go ahead and copy it. In fact, let's just copy the whole thing and get rid of everything we've got here. Just paste at so important things is used frameworks with swift, you have to use frameworks. And, uh and here's the pod itself. Okay, actually, undo that because I don't want you don't want to give you bad information. I don't completely copy what they've got here. Um, let Centcom ent this year platform, okay, We'll keep it at eight. And then right here in your target. This is just saying, Hey, your main target, this is what you're gonna include here. All right? And so the use frameworks, we will include. Well, put it right here and then right here. That this is where you actually put your pods. Okay, There you go. So we're saying we want to include Alamo Fire. It knows where it is because cocoa pods has a reference to it, and we want version 1.3. So looks pretty good to me. I'm going to save it. Okay. I'm gonna x out of it here, and you're should look like this, okay. Or something similar. Okay, I just left. I wanted to target in here because we're saying hey, everything for this specific target. Some projects have multiple targets, So there we go. Closing out of that now, back to the terminal command space where we hear command Space terminal. Okay, so we are still in our directory here, as you can tell, and all I need to do now is type in pod install, okay? And it's gonna read out of the pod file, and it's gonna install any of those pods that are in my project. So right now it's updating the specs for cocoa pods. And then what it's gonna do is it's gonna grab Alamo fire, installing Alamo fire right there. And then it gives you this this little green warning Here, please close any current Exco sessions. That's why we closed it. And from now on, use the workspace. Wait. What does that mean? Well, go back to your folder here. There's now a new icon. So from here on out, any time you're using cocoa pods, okay? And you've installed them. You're gonna use the workspace instead of this. If you use this. You're not gonna get your external projects. They're not gonna be included, OK? And so now all I gotta do to get this working is just double click the white icon, okay? And it'll load up X code with the packages that we've installed. And so there it is. Here's our project. Okay, Not too different from as it was before. And here's the pots. If we go into pods, there's Alamo fire. So it's including it right there in our project. Did everything for us. And if you want to use it, it's a simple as going to your code, which is, um, let's see here. Here's our code of you controller. If you want to use it, all you gotta do is important the package or follow the steps. Right? So on there is there saying, Hey, if you want to use it, um, where is it? Import? Alamo? Um, right there, this guy imported so import Alamo fire And it didn't auto complete. Sometimes Sometimes they don't, so that's OK. And we clean my project here. Oh, this is a really good point. This is really good point. So good that we stumbled on this problem. So this version of Alamo Fire doesn't support Swift yet swift two point. Oh, swift to point. It has a bunch of changes in it. So if you ever run into this problem when you're in a beta or even when it's not made, it may be the give hub has an actual ah branch where they're supporting Thea. Newer version. So, uh, if we go back to the website here, Alamo fire and click branches Okay, there's Master. Wait, What's this? A swift 2.0, branch. Oh my gosh, they do. They're supporting it. How do I use this? So let's click it and see if it has any instructions. Okay, Lets go down all they do have instructions instead of using that other version. Let's use this one and it actually pulls it straight from straight from Get up this specific branch. That's a nice So it's copy that now. And let's go back to our finder here and go to the pot file again open with going to do sublime. And now I'm gonna take this out and put in the get a branch that supports Swift 2.0, because our project had an error. It wasn't working, so that's really cool. Okay, well, thanks, guys. Over at Alamo Fire. You've got a nice little ah Swift. Two point. Oh, thank for us to go back to your terminal here, Okay? And just type in pot and stall again. It's gonna get rid of the old one. And it's going, Teoh, install the new one. Pretty cool, huh? And it is refreshing the project. But I always close out of it because, um, you never know what kind of problems you're gonna have. And so it installed it. Very good. Let's go ahead and open up the white one here. Okay? And, uh, here we go. Fact, let's see what it does if I build it. It's building right now. And the air? Well, I still giving us an error, but our project is built. So this is an ex code bug. If you're running into this. Okay, X code beta bug. It's definitely it's definitely there. It's just doesn't It's being silly. So, um, if I wanted to, like, try and use it, I'm sure it would, uh, Alamo fire dot Uh, yes, it's It's definitely working. You can see right there. That their methods were there, but they're giving it air. So that's a beta problem. There we go. So that's cocoa pots. Okay to recap. Hopefully, I didn't confuse you by running to those problems, but you may run into that stuff and you have to figure it out. So basically, you go find the pod that you want, like, right here. You follow the installs instructions, and then you go to your pod file, okay? And you edit it like so you put in the pods that you want with the pod. Keyword, make sure you use frameworks is in there, and this is the platform you're targeting minimum platform. And then in your terminal is do pod install inside the folder that your projects on. And then you can always make sure to click the workspace here. And if you want to uninstall pod in this pod file, okay, all you gotta do is delete the pod, save it and then run pod installed, and it gets rid of it. It just reinstall everything and roof things that aren't there. That's pods. You're gonna use him on many, many projects. So that's the deal. I hope that makes sense. refer to this project running any problems, and we are in beta, so you may run the other problems. That's okay. We have a chat room in the forums for any help. That's it. That's a wrap. Cocoa pods. Here we go, moving up.
80. JSON: Hey, everyone, what is up today? I'm just reading a comment on one of my videos and someone's like, I doesn't eat crack more jokes more often. Move program enough frickin comedian. Guys, give me a break. You should try and listen some of those other videos today we are going to build an iPhone application first. We're going to be very bored listening to my voice all day long. Oh, yeah? Well, make it as exciting as we can. Super cool stuff today. Parsing Jason. This is the bread and butter of everything you're gonna be doing every single day of your professional development as a programmer. And that is taking this data here that we just got from our last application. Same at, by the way, pull it open. If you haven't already go to file open recent or, you know, you can click on your project here. Double click the icon it whatever you need to do to open the project we just built or just follow along and we're gonna be taking data and making it into something useful. There's no point in using data if, uh or downloading data. If you can't do anything with it. So in this case, we were downloading a Star Wars person, I believe. Let's just pull up in the concert, this middle icon up here? Uh, yeah. There he goes. It just ran. Okay. Simulators over here that's not doing anything. Just ran. But notice here. How? We're getting data, right? Looks nice. And so let's talk about how we can, uh, make the state of useful. Now, I don't want to look at this here and go back and forth and figure out what it looks like. So what I'm gonna dio is what I showed you in a previous video. I'm gonna open up Google chrome, and we're gonna go to In fact, it was run the same request right here. Okay, put it in the browser. The browser is gonna run it. Gonna run a get request. It doesn't know how to handle Jason. Well, this one does, cause it redirects me to a web page actually was. Let us keep it here. This is This is nice and pretty. The other thing I was gonna say is, take this and go to that online. Jason. Pretty fire. But this is good enough for now. So I'm gonna make it a little bit bigger so you can see it here. So we've got some data and what we want in store. Let's say we want to store this as a character in her application. So the very first thing you should do is start thinking objects. How can you take data and make it into an object? So let's do that first. Before we do any parsing, let's build a class. So go to your Web requests, test right here, and, uh, create a new group. If you're not doing this yet, now is the time to start doing this. Let's put all of our model in a folder called Model because models your data and I'm a great a new file. I'm just right clicking new file and I'm gonna go to source, not cocoa touch, but a swift source. Click next, and we're going to call this a person, okay. And if this was a Star Wars that I might call this SW person just to say, Hey, this is a Star Wars person. Prefix it there And there it is. Excuse me. So let's make a class as you've seen before, class and we're gonna call this SW person. I like to give the class and the same as the file name, Okay. And, uh, he's gotta have a name, so private bar name, and he or she on this is gonna be of type string. Okay. And if you're wondering why I'm putting private on here, we've gone over this before, but a good programmer will keep all the data private and only give outside users, which are other programmers only Give them use of what is absolutely necessary. So ah, name would also we want to capture uh, there's a height over there. Um, let's do that So far, height. And that looks like it's a string. By the way, when you see Jason in a string, it typically means that it's or in quotations. I'm sorry. It typically means that it's a string. Now I can't guarantee that it's gonna come over as a string. That's one of those things that is hard to know. Before you actually downloaded in the app here. I just opened it up here, and so it may give it to us as an integer or may give it to us as a string. I don't know at this point, but we'll find out as we're parsing the data, and we can change this data type as needed. So we've got name and a height and ah, birth year. Okay. Birth year. And making that string homeworld is actually another you, Earl, where you would download the planet. The planet Information. We're not gonna do that here today, though. And, uh, last ones just do one more will do. Hair color. So private bar hair color. Okay. And make that of type string. Okay. And then we needed an initial Isar. That's what I'm gonna do, is I'm gonna I'm going to create a convenience, so well, let's just do this. First. Let's create a regular initialize er and see what it does. So let's say whenever we create a new stars person, we want that that data to be passed in right away. So what we're gonna do is say, name of type string, height of type slips, height of type string. I would just say year. Well, we'll say birthday here. Why not? Same thing. Berthier of type, string and hair color of type string. Okay, so we just created an initial Isar and we want to initialize some fields whenever this is called. So we'll do. Is we'll say name equals name? Oops. By the way, I'm putting underscores on these because we're gonna create will create some getters and centers or at least some getters for them right now. And so again, we're making these private so other people can't get access to them and and destroy our data way. Want to determine more building our class? Who could do what with our data, So name equals name. Height equals heights again. We're just assigning the default ones here to these the global properties here, to the ones that are coming in. In fact, you could have said Self dot name and self dot height. If you feel like you wanna use self when it's not needed, you can. Some programs do. They basically used the self keyword on anything that's global. I tend to not write more code than I have to, So I only put the self keyword when I absolutely need it. Okay. And birth year equals birth year, and hair color equals hair color. Now, if you're wondering, why are we typing the same things over and over this assumes we're done it. Well, that's that's what you got to do. That's that's programming Ghetto. Take the measures to keep your data secure, private. So let's pass it into initialize. Er so you're gonna dio a lot of repetition of typing, but it doesn't violate the dry principle. Don't repeat yourself. It's this good stuff. So all we've done so far now is created an initial Isar and created private variables. Let's go ahead and create the public ones. Excuse me so people can access the data. So how do we do that? Well, same thing. Just give it a different name, but similar. So without the underscore of type strain and we're just gonna return the name. Okay. The underscore name. There we go. All doing Is it returning? Okay, um, var height. And remember, we could also have done get and said return height if you forgot. Okay. And of course, this is wrong. Not underscore height. Got to give it a different name and of our birth year of type string. And we will return underscore birth year and bar hair color of type string. And this is gonna return hair color. Now this is good programing practice. If you do this in your code basis and the things that you put on, get up. And when you're applying for jobs your employers make Wow, this guy, this guy or girl, they know data hiding. They know how to do that. That's really cool. This is the kind of stuff that only, like senior programmers know. Well, aren't you glad you're taking my class? I'm telling you these things and you're learning cool things, and it's not boring. Hopefully, it is boring. Tell me how to not be so boring because I didn't want to be more hair color, birth year high. So right now, did you know that nobody can modify this data except your initialized? Because you have not given access to this. So I will not be able to change any of this unless when I'm creating a new object. That's really cool. Um, Okay, so there's our class. Simple class. No big deal. Okay, Nobody, No big deal. And let's go to the view controller here where we have data and let's talk about parsing it . Okay? I'm going to close the left hand side to just make it a little more spacious, and we know that we're printing the Jason. We know it's working, Remember, It's right. It's right down here. That's fine. So let's go ahead and create some space. If we've gotten here, we know it's all working. Okay, so Jason comes in a raise and dictionaries, really, That's that's what you're gonna be using. And so if we look at it here, it's just a big giant dictionary. So what I'm saying is these open curly braces here? Okay, think about it. It's a giant dictionary, and it has some keys and values. The key is of type string, so these are all string all the keys here. Strings notice. They're not numbers. It's not like five or six. Every key is a string, and the values will. They appear to be all strings. I'm not quite sure yet, like I know on the on their website has it in quotes, and it's saying it's a string, but I'm not sure it really is. You can never really trusted until you actually get it, OK? And by the way, your code, You, the client Iran may have its own way of parsing data, and it's Jason it may convert it to a number you don't know, so don't trust it 100% but we get pretty close here. So we know we've got a dictionary because it has the curly braces and we know there's keys and values. So what I need to do is take this Jason and first converted Teoh a dictionary, something that's usable and, uh, let's actually first off, let's see what it's actually giving me back. It's returning any object, so it's just giving me in any object. You could see it right here in any object, which means it's not doesn't mean anything to us. Lets convert it. Let's say if let we'll call it dicked D I c t and will say equals Jason, not Jason. Jason as question mark. And we're going to say a dictionary of type string for the key. And we don't know if they're gonna be numbers or um, or strings. You can you don't need. You want to guarantee that so most the time you're gonna put any object. Okay, so you're gonna put any object as the value type? It could be a string. Could be an integer could be a bullying. Just unless you absolutely know that every value is gonna be a stringer of a certain type, Always put any object there. So what we're saying is, hey, take this, Jason. And as I remember, workers, this is casting it, okay? It's converting it and the question markets. And here we don't know if it's gonna work or not. We can't guarantee it because right now, the Jasons any object we don't know what data type is. Now we do because we're looking at the Jason here, but we don't know for sure. So use the question, mark because it may or may not work. And by the way, this is how you do it the way I'm showing you right now. Having Jason open over here and looking at your your data over here, this is how you're gonna do it. Profession. You're gonna go back and forth and back and forth, and this is how you're gonna program. Everything I'm doing right here is the real deal. So put it in your brain, okay? And then we're so we're casting it as a dictionary. An addiction. We must have a type, right. It must have a key type in a value type. Well, we know the keys or strings name, height, mass, those roll strings. And any object could be an integer. Could be a name. Uh, so we don't know. And so if we get here, we know the conversion worked. So if we got here the conversion work, So let's, uh let's just try it out. Was this the first step? I'm gonna say print And we're gonna say, um uh did we get here and then we'll go ahead. And also, we're gonna put in the dictionary here using the literal string is indexer and say addict. Okay. And we're say that debug description, it's ah, it's a property of the dictionary and it's just gonna be able a debug description is just when you want to print something to the screen, it makes it a little more pretty. And I'm gonna open up my council here. Okay, Let's go ahead and trash that. I'm gonna press the stop button to rerun it again. Okay, here it comes. Let's see how we're looking. It's loading. The request is about to start. I am sure there's the request and ah, did we get here? Hey, we got there. It converted our Jason into a dictionary. And there it is. Look, it's looking not too bad. Um, so notice how it put brackets here like an array. Not sure why it does that again. Don't trust what you see in the council here completely. Okay? Trust. Just trust every you gotta do. Is this test every step of the way? Make make sure that you're getting what you need, because now there's, like, weird things, like parentheses and stuff, like, don't pay too much attention to that. Okay, um, but it's looking good. And, you know, this is kind of saying hates an array. Um, so we've got data. That's great. We know it's working. We know we successfully parsed the outer dictionary. I'm deleting that clicking this here. Okay, So what do we want to dio? We've got this data. Now let's see if we can use it. So, um, let's go ahead and just say, um, let's do it like an all fell are all past kind of thing where we just have to get those those properties that we're looking for. So what I'm gonna do is say if let we're gonna say name equals Dict and we're gonna grab the name out of it. So notice how this key right here is the exact same. Keir, this is very important. Your key needs to be exactly the same as the key in the Jason. Or you're gonna have problems. We're gonna say we're gonna try and grab that value out of the dictionary. And so if let name dicked Okay, um, Ardeche name as and we don't know what type of. Remember, this is any objects we've got to use the as keyword. If this said string, I wouldn't have to do that. I wouldn't have to do the ads. Okay, um, because it would know it's a strain, but it doesn't know type of obvious. So if let name equals Dict as string, that's the 1st 1 we want. And we're gonna say Let, um what were the other ones that we already forgot The other ones we wanted. So we wanted name height, Berthier, hair color. Okay, let's do height. So close that let height equals addict height. And, uh, you guys were like, I'm just waiting for him to say dicked incorrectly so I can laugh at him. I won't though. And, uh, that's going to be a string right way? Don't know. It looks like a string. We'll see what happens. And, Well, Dio the next one was birth year, right? So let us say birth equals Dict, and it's called Ah, birth underscore here. I'm just looking at the Jason typing exactly as it is. Okay, you know, and that's as ah string as well. So we got 1231 more and we're gonna say Let I forgot to get what was the holy smoke hair color, right? It was hair color cow. Just get it down. Hair color. Oh, yeah, Woo! Alright. And then we'll just call this hair equals dicked, and we're gonna call this hair underscore color as string. So what we're saying is all of these have to work, or if they don't, Then we're, um uh it's gonna not go into this code block right here. OK, So I think that yes is telling us that we're not using it. That's okay for right now. So cool. We're here, So let's go ahead. And, um, it was billed it to make sure. OK, so it works. And what we're gonna do it out is take our Star Wars object, right? Someone save our, um, person equals sw person. And look at that are initialize. Er wants some things. It wants the names we pass in the name it wants the heights we pass in the height. It wants the year. So we pass in the, uh, birth. That's what I called it here. And the hair color. I just called hair. And if that worked, we got there, and there it is. And let's make it a let because it's yelling at us. And so now if this worked, weaken, Say, uh, print. Remember how, by the way, we didn't give access to those fields in the person. If I say person dot um, thank you. It's thinking here, person dot uh, hair. What is it called here? What do we call, um, name? It's a person. That name. Okay, see, houses built succeeded because it can actually grab the name. But watch if I do this. If I try and call this Darth Vader because we made a private we can't modify. That's really cool. So we cannot send property to get only property, So we're doing some good stuff here. So let's just go ahead and print these to make sure they work. So let's go in print person dot Name. Okay. Print person dot height, print, person dot hair. Let's just commands. I'm holding now, command, and I'm clicking. I just can't read the exact name. His name. Height, birth year. You should probably have uppercase their birth year and hair color scene, birth year, hair color. So that's a hair color and print person dot For some reason, my auto completes not popping up just being weird. Um, I've become too dependent on it. Okay, So if everything worked, we should see these printing to this screen individually. Okay. And let's make sure I removed all the prints off of here. There we go. So yep. So Okay. So, basically, and I just did command f to do a quick search. Basically, we know that everything worked. We if we got here. So what that means is, um Excuse me. We already know that the dictionary works quiz. We tested that, But what we're saying is we know that we've successfully grabbed these values out of the dictionary successfully, and if successfully converted to their various types. And then we have successfully created an object and successfully passed in the data and successfully printed. So if we get to the print, we know everything worked. And this is how I personally code just like this. Just testing things out, making sure it works. Moment of truth. Let's go ahead and run it. See what prints to the screen. Luke Skywalker, 1 72 blonde. And that's the Star Wars. Birth year. And so it worked. And also, we also know now, too, that this did not come out as an integer. It actually did give it to us as a string. Some AP eyes will give you actual numbers. Some will not. You never know. And you can never really trust what's printing you got, actually see and test it. And so, for instance, if this was a number once height was 1 72 Okay, this would have felled, and we never would have seen this. And then that would have been indication to me. Oh, you know what? This didn't work. In fact, you want to see it working. Let's actually change height here. Let's pretend that we thought it was a number, so I'm changing it from a a string to an end. Okay, let's pretend that we it's a number and not a string, Okay? Oh, and, uh, are persons yelling at us because it wants a string? So let's just convert that height here. What we'll do is we'll will actually convert it to a string and put it in quotes there. Does it make sense? I'm converting this to an end, but because our person character exists expecting a string, I'm just changing it. I'm converting it to a string, but we really want to test is what happens if I if I assumed it wasn't an integer, but it really wasn't is a string which we know it is. Let's see what happens. OK, notice how nothing's happening. Nothing printed. That's because this felled right here. Right? You see what's going on here? If you want to see you doing further just for sake of testing, okay, this is important stuff to know, weaken, Say, uh, let's just say let height equals this. All right? And then that said as an integer. Okay, so it's converting it to an integer. And then let's see if I print height. Let's see what happens. Mm. What do you think? What do you think? Nail? It's empty. Who? So imagine if I tried to do well. Here's something real interesting. Imagine if I tried to do this with an exclamation point. I force it. I'm forcing it to be an integer. Let's see what happens. A crash, OK? Very important stuff here. Okay, first off, you know this already and those of you who didn't know it, you know, because I came to your house and I beat you because you don't ever do this. You don't ever unwrap stuff forcefully. Unless you Absolutely no, it's gonna work out. What we did was we said, Hey, this is going to be an integer and let's force it there. So that's our first problem. We forced it. And of course, it wasn't. And our app just crashed. Okay, so and then the second problem was when this was a question mark. He gave us a Neil value because it's not an integer to string. So very common problem. You could experience this yourself as you're going through your programs here, so don't do that. Okay, uh, check your values, make sure they're all right. If you're getting crashes, it's because you're unwrapping something. Shouldn't be if nothing's printing here like it should have, I could have done a break point as well, too, by the way. But if nothing's printing here, it's because something was wrong. And so it's easy to know. Hey, is my one of my value types incorrect? And of course, in this case, it wa so that's a way to debug. And let's go ahead and changes back to a string. And let's go ahead and just put height back in here because now it's a string again and we're good to go. So that's how you parse Jason. Not too bad. Just know that it's It's full of dictionaries, um, and keys and values. And, uh, maybe you're wondering, What about the array there? Well, how would you handle that? Well, that's that's not too bad either. So we're here in the dictionary. It went through. And so if I go to see the films there in the left hand side, we know that it's an array because it has quirk. A square bracket, so that's in a rain, has an array of strings. In this case, it's it's not even an array of objects is just an array of strings that's not too bad. This one should be an easier one. So what we do is, we say, well, easier than if it had objects in it. So we'll say if let films equals dicked films. Okay, as and this is gonna be an array of type what type strength. So grab the film's out of it and convert it to an array of type string. That's how you do in the rain. And if you want to see if it worked, we can just do this for each film in films, print, film. So if this worked, we should see 12341235 your else printing to the screen. And by the way, these are your world because it takes you to another A p I and point, I get my copy, this copy link address, and I paste it here. Okay, It's just another endpoint that there we go has more data, and that's all very common. AP I designed. It gives you a U R l two more data so you can grab it instead of just embedding it all in the same file. So if this works, we should see each film print into the scream after this basic information. Kammen. There you go. And it worked. You can see right here. Okay. In this other junk, I don't know what's going on with that is this is currently exclude bait, and I've been having lots of problems with it. So hopefully you're one of the few who are now doing this When the app when expert has been released to the APP store. If not, you're going to bear with me and solve some problems yourself. And by the way, if you do have any problems, the next code go to the go to the chat room, go to the forums, he'll get help. So it worked. There's our ray. Is there any other data types that's on here while really, that's good. Um so we took an array parts that here and then we just grabbed the items out of it. No big deal. So there you have it. Simple, Jason parsing. Make sure to do those if let's okay saying, Hey, if this if you pull this out when it converts fine, let's move on the next one, the next one. And if all these work now, we can use them. If let's always in your Jason always, always, always If let do not force it or you have lots of problems. This is how you do it. This is the best practice for parsing Jason. Okay, Sorry for talking too long. This is good stuff. And see a next time here on deaf slopes dot com.
81. Intro to App: Pokemon Pokedex: Hey, everyone, Mark Price here in depth slopes dot com And today you're gonna be building your very own poke index. And this is no ordinary poke Index. This is a frickin cool polka decks with lots of cool graphics over 718 Pokemon that you'll be working with. And you can scroll through the list to find all the Pokemon beautiful images, great graphics. You can also search filter. So as you're typing pokey model, be filter so you could find the ones that you're looking for. And then we've also implemented a feature where you tap on a Pokemon and you go look at the details of that Pokemon like the next evolution, the weight and the height, and were very well done. This is definitely a portfolio project for you. The things you're gonna be doing here or what you're gonna be doing probably 90% of the time in a real world job. So master these principles and you'll be so close to having a job or being able to meal professional applications and release them to the APP store. This is definitely portfolio project. Throw it up on your show, your friends and family, and you can take it as far as you want. Make the whole Codex as involved as you want it to be. I'm so excited to build this. Let's go ahead and get started.
82. App: Pokedex Part 1 - Project Setup, Images, Data, Github: everyone Mark Price Hear with deaf slopes dot com And today is the most exciting day of all . We're gonna build our own Pokemon app pokey decks. And by the way, I forgot to tell you that you actually can't build this act unless you're wearing some type of Pokemon shirt for hat so you don't have one. Go ahead and stop the video. Go to your nearest hot topic or amazon dot com and yourself some poker year because you've got to be in the zone to build something as cool. Is this or not? You don't have to have it, but highly recommended so very exciting stuff. We're just gonna dive right in. This is gonna be a longer application, England, and create a new project. It's loading and create New Exco project and a single view application is fine. Clears whatever you want to say poky decks by Deb Slopes and click on Ah, next looks good and we'll just put this one on our desktop and we do want to create a git repository cause we're gonna go ahead and put this under get because if you're looking for a job, you're gonna want to be posting this and showing your code because it's gonna be a very well done project. In fact, top notch project like if you get this done, people will be like, Wow, you did that. So that's how amazing this project's gonna be. It actually took me about 24 hours to build and perfect when I first went through it so well, whether it more quickly. But I wanted it to be perfect for us. So eso you could have something great. So go ahead and make sure that selected create your repository. And the very first thing we're gonna do is put this on our get have accounts to go ahead over to your local browser, whatever that may be, and go to get hub dot com and sign in. If you if you're not signed it already and then go ahead and click. Create new repository. Mind says spent tax years is going to say your user name and call whatever you want. We'll call ours poky decks, pokey decks to already have one on there and, uh, you call yours whatever you want minds this Gumby pokey decks to public and this all looks good here, create a repository. And then what we're gonna dio is go to your terminal. So command space, Open up your finder and go to the terminal and, uh, mind on my desktop. So I'm going to see the into desktop and CD into pokey decks by the death slopes. It's already get repository because that's what we said in X code. So what you want to do is typing Get off, get add Dash A. Well, you could first check and see what's going on here. So get status. The red means there's something we need to add, which is our project files. So go ahead and get add dash a get commit dash EMS, and then the quotes We're gonna say, uh, first project commit. And then what we're gonna dio is yours will be different. But I'm going to copy the one that says get remote at origin again. Yours will be different, so I'm going to just not do that. I'm gonna copy this and go back to my terminal, and I'm just gonna pace that in there. We're adding our remote repository. It's added, and all you got to do now is get pushed. Origin master. Okay, a repositories up. And if I refresh this, get help Page, you will now see my project here. So go ahead and do that. Get your project up on going. And as we go throughout with Mitt will be making commits and things like that cool stuff. So we're just gonna get our project set up here. Um, basically, you've seen what the app looks like. And now we just need to get some of the files that we're gonna need a part of the ap's gonna be built by parsing. Ah, see, SV files and part of it's gonna be connecting to a public ap I on the internet. So you're gonna learn a lot of things today, And, uh, so go ahead and go to go to pokey ap i dot c o okay. And down here in the page, that better link to their get hub. Okay, so go ahead and click that link at the bottom here. And this is the project that we want. They made it public on get has all the images and files and things that we're gonna need. And so for the first part, just so you know, I actually built this whole app in the beginning. All talking to 100% through the Internet? No, no parsing CSC files. No images locally. But what was happening was it was taking too long for images to download. You know, there are 700 21 Pokemon now are absolutely gonna do 718 by the way. Sorry for those last three. And But anyway, it was taken way too long. So I was thinking, How can I create a better user experience? And the solution was to actually bring those files on locally and not download them from the internet. So here's the source code. Okay, So go ahead and just download the zip. Okay? Mine's going in my downloads folder. I'm gonna put it on the desktop showing finder, and I'm just gonna drag it on the desktop here, okay? And double click it to open it. Delete the zip file. I don't need that anymore, and I'm gonna close out of my browser. Okay, so there's a few things we're gonna need out of this project to get started. So go ahead and click your assets folder. The first thing we're gonna do is Dragon. All the images we're gonna need. So I'm opening this Pokemon folder going into no assets data, and here they are, poking want X y sprites. And as you can see, there's a whole bunch There are 718 and the reason why we're only supporting 7 18 right now because that's what this code based supports. You can always add more later. If you're a die hard Pokemon fan, you can you can do whatever the heck you want with this app and make it as great as you want. So I'm just gonna command a to highlight all of these and literally just gonna drag all 718 and drop him in here. And it's thinking, and I'm also gonna provide these images as part of the resource is in the case that that get hub account ever goes down, you could grab them from the project. Resource is Okay, so we've got her images, they're looking great, and these were the sprites from the actual games. I don't own any of these these air publicly available, so all existing rights and copyrights are standing, and so there's our image is the next thing we're gonna need is, um we need a list of all the Pokemon. So also is part of this this a p I that we're gonna be tapping into They didn't really have . Well, what was happening was the a p. I wasn't sending me down the Pokemon in an ordered list, and so they were all out of order and they weren't matching up with images. And it was a big pain, actually. So go ahead and go into version one. And there's one here called Pokemon CSP. That's the one that we want. And what we're gonna do is this. Drag that into our project as well. Just right there. Copy items. Yes. Okay, so we've copied the Pokemon dot C S V file. It's right here. Okay. And, uh, we are images. And the advocacy there they are. So here's our Pokemon. Um, just a bunch of data right all the way down here, and we're gonna do some first. So, by the way, I've I've selected the file here, Pokemon that CSP, and we're going to get rid of some of these special ones right here. They've got a bunch of special ones and we're going to get rid of them for now. You can support them in your own app. But, uh, we're not going to support any of the Maiga's. We're not going to support some of these other things. Miao stick, dash female all these very rare cases, we're going to get rid of them. Also after 7 18 Does highlight this all the way down here. Let's delete those K and save it. Command s so we're only gonna go to 7 18 And the reason why I'm not supporting those is one is I'm just trying to show you some principles. And to is I don't have the assets for any of those. So we just have the data here, so Okay, it's looking good. And this is the idea. The number of the Pokemon and the identifier is the name. That's all we really care about right now. So we've got to see SV file. We've got the project set up. We've got the images. We've got this all set up on get hub and, uh, starting to look really good Already got some cool images. The work was to go ahead and open your terminal and type in ah, git status and you can see there's Aton of images. So go ahead and get at Dash Capital A adding all the files and then gets gets status again to make sure they're all green, which they are, and then get commit Dash M added images and see SV file and then get push origin Master 70 85. There we go. Come on, baby. There you go. So we are all now ready to go for our app. Let's just look on, get hub here and make sure everything everything's there that needs to be there. So let's go to my repositories. Come on. Where's pokey decks to? And, uh, let's just make sure we got everything we need in here. Assets? Yep, they're there. They're all there. Yep. Okay, so it's great. So that's it for right now. This is the first part of the video just getting the project set up. And, uh, let's go on to the next one
83. App: Pokedex Part 2 - Creating a Pokemon Class: Hey, everyone, Mark Price. Here, Deb slopes dot com In the last exciting episode of Build Your Own Poke Index way brought in images, we set it up on, get up and we got ourselves ready to go. We're gonna dive right in, open up your project and file open recent or wherever you stored the file. You can click on it and let's go ahead and just move on into getting things to work. So way want to do is show a list of Pokemon onto the screen. Remember, on the main screen, a whole bunch of Pokemon, we want to show their images and we want to show their names. And so there's a few things we need to do first, which is we need to have some type of data. Sometimes I like starting off with the u I. Cause it's fun. But probably in most cases I end up actually building the data. First the model and we need a model when you need a Pokemon object that will store a Pokemon name as well, is there? Ah, they're poquito pokey Index, the number that they that they've been assigned. So I'm gonna click this folder here. Okay. And let's make the code a little bit bigger. I'm gonna click this folder, right. Click it and go to New from New Group, actually, and let's make a group for our model will call model. And inside that, I'll click that new new file and swift file under source here. And we're gonna call this pokey month. Everything we're going to do in this application is what I would do in real life if I was developing an app. Okay, I've built 57 mobile APS. So what you're going to see is my best skills in practice. So you can know what I would do, which is really cool. Uh, I'm not just some random guy was teaching random things. I'm gonna teach you what I really do in real life. So class Pokemon, and, uh, there we go. And so we need a name, right? So private of our name of type string. Okay, we're giving it the exclamation because at some point in time, it will have a name will guarantee it can have a Pokemon without a name. So there's no point in, uh and, uh, putting a question mark there because we know we're gonna have it. And then we're gonna call this poky decks I D And that's no, that's gonna be an int because it's a number and that's looking good. And let's go ahead and create our getters already. So you should get in the habit of doing this just crazy variables and then create your getters and eso We're gonna save our name of type string. Let's go say return. Underscore Name Anvar Pokey decks I d of type int and we're going to return Poke it exciting. Okay, so we've got those fields and that's looking good. What else do we need? Um, an initial Isar s so we can pass that data and so in it. And we're going to say the name of type string. Whenever you create a new Pokemon object, it has to have a name and has to have a polka decks I d. So that's why Pok Decks I d. That's why it's OK to put these exclamation points. Remember, it could be dangerous, right? If yet put these here because then the program is not going to yell at you for accessing them. But your program could could crash so Onley ever, ever, ever use these. And you've heard this before so many times, It only only ever use these. If you absolutely No, there's gonna be value in there. Well, we're forcing it right here. We're saying you can't even create a Pokemon object unless you pass in a name in a polka decks. I d. So then all we have to do is say self dot Underscore Name equals name and self dot Underscore pokey decks. I d equals pokey decks. I d. And, um, that's simple enough. We got our class. It's looking real good. And, um, there's our model to start off with. And so remember, if we wanted to ever use this let's get rid of this here If we wanted to do this right, um, we just save our Pokemon equals Pokemon, and then you just pass in the name you know, Charles ard pokey decks. I d is gonna be What is? What number is he, like, six. Maybe I can't be for sure. Um, of course, we're not gonna do it this way. We're gonna do it dynamically from the data that we're gonna parts here, but yeah, So there's our class right now, That's all we really need. I'm gonna break this video these videos up very tightly here. So we're gonna end this video here. This is building your own Pokemon class and let's move on to the next video.
84. App: Pokedex Part 3 - UICollectionView, Storyboard Layout: everyone next part in the series Mark Price here with death slopes dot com And here we are . Last time we built a class for our Pokemon right here. And you know what's really cool? You know why I picked this project? Aside from the fact that put him on its really cool I like bogeymen. I'm not afraid to minute. Okay, uh, the big thing, though, is you're doing so much. You're gonna learn so much if you can, master, if you can master every principle we learn here connecting to the network building beautiful. You I great user experience. If you can master this, this section will help you get a job. If you publish APS like this, you're gonna have users you're gonna have. You're gonna have a lot of good things going for you. So we're not like the other courses where we're just building some simple, simple, simple, simple app, so you can just learn a principle. Just just do do these things very carefully. Put a lot of effort into them, and you will be very close to getting a job. People, people love this kind of stuff, especially even if they don't say it, especially when things are visual. Uh, you really just you sell it to people. So that's why I'm getting so fat, Because all the candy at the store is the bright red colors, and I buy it, and I just keep eating it, so make pretty stuff and people will want it. Okay, So here's our Pokemon class. You're like Collis guy never shuts up. Well, uh, sorry. Gotta deal with it. Um, So what do we want to do next? Let's set up or lay up main storyboard. Okay. Ah, here's our view. Controller, um, we need a few things. One is we're gonna want to put that pretty background on there and then start working on. Are you I Collection view putting. Ah, the cell in there. Uh uh. Sella's in cll to get your images and stuff set up. So let's go ahead and do that now. Okay, So let's go ahead and grab our background graphic. Okay? I've provided this in the resource is for you and, uh, right here. Most us troops, actually. Let's, um let's clip the assets first. Sorry. There we go. And then let's go ahead and had to think for a second cause all the poking on here, let's go ahead and drag the the B G in there, and that's looking good. So go back to the main story board. And pretty simple. Let's type in image down here at the bottom, right, and we'll just make it full screen here, and that's looking good. Um, is that what we want? Well, if we don't want it like that, we can change later. But I think that's what we want. Actually, let's put let's put our our border bar on their first. We'll put it underneath it, so type in new I view and dragged this guy up here. Okay, here we go. Drag it all the way over here to the right, and it looks like it's hanging over the edge. There we go. I'm gonna pick my color. You could do whatever color you want. I'm gonna do my coat, which is this red. And if you want the color, it's right here. F f 5855 And, uh, you like this guy uses this color a lot. Well, I like it. It's really cool. And yeah, so let's put some constraints on him. So we want to turn off margins and I want him zero from the top zero from the left. Zero from the right, and the height will make 55. Will force the height there so it stays here and add four constraints. And then this image view. Let's go ahead and, uh, turn off margins. And so we don't want him 34 from the top. What? That tells me when it's saying 34 from the top that I'm a little bit overlapping. My red view here. Let's just bring it down slightly. There we go now it says two. Okay, so we're overlapping. That was trying to find the next the next border here, but this is too. So that's what we want. And then, instead of two on the set zero and thats zero. That's 00 so we're setting it from all the edges there. It'll stretch as we need it to add four constraints and then for the image to Stedman, BG Press. Enter and I want aspect feel, and it's looking cool. Um, it'll look better once we get the other things on it. So there's our background. It's looking good if I click the preview Over here. On the right hand side are the assistant editor, and I changed from automatic to Prevue. Okay, It's looking good, right? Not too bad. Move. Let's move this all the way over here like this, or like this. There we go. So I think it's looking about the way that we wanted to. Um Okay, cool. Deal. Let's Ah, let's get our collection of you on here. So you I collection view I just typed on their u I call. And there it is. And ah, let's put it right here. Let's move it up here, move it up here. And ah, um OK, so it's looking fine on you're, like, looks ugly now. Well, we're gonna get there, Um, And also, let's go ahead and put our search bar, and we're not gonna do the code for that yet, but let's get it in place. So at least we've got a good little layout here. Okay, so the search bars there, please add some constraints. So instead of two from the top, I want zero and 10. Turn off the margins here. Hey, I said zero trick is trying to be sneaky. There goes again zero. Thank you. And Ah, that's looking good. We wanted zero from zero from zero and the height on these actually don't change. It's a fixed height, so I don't even need to set the height, because it's not gonna change on me. I'm gonna leave that there. And lastly, we got our collection view, and Ah, you know what? Let me see here. So you've got this collection view? We don't want to, actually, um, we don't want it all the way on the edges because we wanted to kind of float and look really nice. So let's just do 20 on all sides. I like that. So let's say it says 15 from the top. I'm just a 20. This is gonna be 20. This is gonna be 20. And this would be 20. Hey, come on, obey, man. These auto layouts You gotta be careful, cause they don't. They don't obey all the time. So that looks good to me. And ah, we did get a problem, though. On the right hand side, it's ah giving some issues here, actually. What is going on there, Mr. Collection view. Let's try this again. Eso margins on. Yes, your own zero. And then, um right here, let's do 20 into the bottomless do 20. There we go. For some reason, it was acting strange, and now it's doing what we wanted to dio. Okay, it's looking good. What do you think? Good. So now we've got this little collection of you sell, if you know it's right here. This is the cell. We can actually design it right here in the, um, storyboard. So I'm gonna make it a little bit bigger. Um, what's But it's a good size. Let's say let's say 1 25 for right now on four. That seems a little bit big. Let's just do 1 10 No, that's good for now. Okay. And there's a view for us. Um, what do we need to put on here? Well, we need an image, right? So let's go ahead and type and image, and it's a little bit big, so let's make it smaller, Okay? And what do we want to do? Well, I want it to go on all the edges here, and then what I want to do is throw label on the bottom. You I label because, remember, there's an image right And then there's the label on the bottom. So I'm gonna drag it from edge to edge here. That looks good. I'm gonna make this a little bit perfect right there. Center the label. Let's change. It's fun from system to custom and Helvetica news. Fine, let's make it small. Maybe size 12. Let's center it. Okay, now it's looking good and scroll down here by default. The labels actually has a clear background, but we can actually give it a background color like Red, who now starting to take shape, change the color of the font, but the top there too white. And it's looking real good. Has looking real nice. We do need to set constraints. Okay, So this image view, uh, do not constrain the margins. We want 000 And, um, that's fine for analysis. We that right now and on the label, let's go ahead and make sure that its bottom set to 000 unless that a height on this. Okay, so that's good. And so the label all I wanted are the images Go back here now and I just want a pennant right there to the bottom. And instead of one, we're going to say turn off constraining margins instead of one. We're gonna say zero we wanted flush with the label. Okay. And just for fun, what we can do is change the image of it and just make sure it looks right. So whenever she picked, uh, I'll school indifferent to 97 who is a big guy changing the mode to what's trash aspect feels that we want us to aspect fit. Who? Who do you like it? I like it. I think it's looking great. Um, cool. So we've got this cool the school thing right here. So let's click our collection view. And, uh, we don't want a background on it. I think we wanted clear. Right, so we can see the are pretty background. So we're here where it says background right now, it's unclear color. Okay, now you don't want to change the Alfa. Um, let me see here. Well, that's well, actually, maybe we do. Let's let's change the Alfa to 0.1. Um, seems Alfa 20 Ah, well, it's It's ah, the right thing selected here. So that's a review. Our backgrounds clear right now is to make sure it changes as we ask it to. OK, so it is changing. Um, but what we actually want is clear color. There it is. Clear color. That's the one we were looking for. And now on our our cell here. Though, um, we notice that there's no background on that. So let's give it a background color of white and you brought thinking, Well, in your app, he's kind of transparent. It is a little bit transparent, so let's do that. Click the white part right here and wherever, says Opacity. Let's just change it down to 70 now. We're starting to see through it a little bit. That's looking really cool. So that looks good. Let's just run it and see what happens. So click the run. Look on the iPhone six and see how it's looking. OK, so it's not showing our collection view. That's OK. It's expected because we haven't written the code for it, so it's kind of invisible right now, but that's OK where we want to be in this video, we got some things set up. It's looking nice lights and things out. I think it's looking nice. Um, you know that that bar right here. Not completely sold on it. Let's fix that real quick. It's this great color, right? So let's click on it. And, uh, the, uh, over here on the right hand side. What are we looking for? Search style. Minimal. There we go. That's kind of pretty. Um, it's got, like, a blue there. Um, that's not bad at all. Actually. I'm wondering if I should keep it. I m gonna give it a bar tent. Uh, let's think about this here for a second. Well, let's actually I have a better idea. Remember this image view we made right here on the background? Let's actually just make it smaller. Who do you see what I'm doing? See that pretty white right there. So that looks good. So instead of 46 from the top of the red, I'm clicking the ruler over here on the right hand side. I'm gonna go to top space to view, and I'm just gonna delete it. No, What I'm gonna do is click the pin button right here, and we're going to say we want a zero from the top right there. And now look at it. We got that pretty white search bar. I'm really liking it. Okay. Easy fix. It's looking great. Let's go ahead and call this video. Good. And, uh, get this. Get all up to speed here, and we'll move on in the next one.
85. App: Pokedex Part 4 - Custom UICollectionViewCell: Who here we are again gonna make some pokey fund OK from our Chrissie or deaf slopes dot com. Let's get to work. This is where we left off last time. Got a nice collection view, some funky looking podium on here. Nothing showing up on the screen. That's okay, though, When I say nothing, I mean the collection you itself. So what we need to do now is we've got a collection view cell. But here's a question. How do we change the image on it? How do we change the label? What we need to do for that? So we actually need to create a custom U Y collection view cell that has that information it. So go ahead and create a new folder, a new group. We're gonna call this view, okay? And of course, the model always goes above the view because it's model, view, controller. And so we got a view here. There's nothing there, which is fine. And, uh, let's go ahead and put a new file and cocoa touch class. Let's call this poky cell, as in you area, a collection of you sell and let's change the class to you. I collection view cell. Add a gent at the end. Thank you, Apple. Okay. Excuse me. So we don't need these if we've already got the cell right there on the on the file itself in the storyboard. So that's looking good and create. And there's our customs sell. Let's turn off the assistant editor here. And, uh, let's make it a little bit bigger so you can see it on that tiny little iPhone of yours. Okay, so pokey cellulite collection of you sell. What do we need? Well, we know that we're gonna need an image, right, cause every single one of those cells as an image and it has a label so easy enough, I be outlet week var. And let's call this. Ah, how about the thumb image thumb for thumbnail. And, uh, I have type you white image, Have you? Let's make another ivy outlet. What's anything? The label. Right. So the name okay, so good to me. Um, what else do we need? Um what else do we need down here? Oh, I know. Um, we gotta store Pokemon object, right? So, like whenever whenever you whenever new cells created, we have an actual class that were using the hold of data that we're gonna have to re copy, like name, description, all that stuff. We don't have to re copy it all over the place. So let's go ahead and do that now, say, of our Pokemon of type Pokemon. That's the Pokemon class recreated right here in our model. So we just want to store that right? And, um, that's looking good. And what else do we need here? So we probably needs a way to assign these things at some point in the future. So I'm gonna say funk, configure cell. This is just what I like to call it. Whenever I'm configuring the cell, I'm setting it up. Okay, we're gonna do is we're gonna pass in a Pokemon object, and, uh, we're gonna grab stuff from it. So what we're gonna do is we're going to say, um, self dot Pokemon equals Pokemon. And I do have to use the self cured because this name is the same as, ah, as this one right here. If I change the name there, I wouldn't have to do this self. That's okay. And then we'll consider because a name label dot text equals self dot Pokemon dot name. And if you remember, right, the name from our procurement COC. None of these your capitalized if you can see that right there. So let's just do that now let's say Ah, capital lie string. That's gonna every word in a sentence. It's gonna capitalize the first letter in it. That's a nice little off life's little helper computed property of a String. And the next thing we need to do is set the image so we'll just, uh what we'll do is we'll say, name label not named label thumb image dot Image equals you image, and we're gonna do We've done this before, uh, image named right. And you're like, Well, what's name of the image? Well, let's look at it. All of our images are just numbers, right? Those the names, That's really convenient. So we got to do is put in the number, right? And what's the number? Well, we have it. It's right here and self, that Pokemon that pokey decks I d. Right. That's just the number. It's just gonna put 123 718 whatever it is. So whenever configure Cell is called, it's gonna pass in the Pokemon, and it's gonna pass in its name and passing the image. That way the cell can be re used over and over and over again. So it's looking good. All we need to do now is probably tie up. These I be outlets in our storyboard. So let's do that now. Okay? And here he is. Let's click the collection view and then the cell, which is right here. I've got a selected and go over to there we go put the cell, go over to this little rectangle and change the class to pokey cell. Right? Okay. And all we got to do now is a control drag from pokey cell to, let's say, uh, this image here and, um, it's not obeying. Hold on. Let's, uh, let's try this a different way, right? Click it every go. I don't know why it's not popping up. Could be about right. Click it pokey cell sources. Name label. Go ahead and drag it over here to label and reverses thumb image. Go out and drag that over to the image. Our views are now connected. That's looking great. So we've just created a custom you I collection view Sell class right here. Okay, so no big deal. Um, the next thing we need to do is get all of these things showing. But let's go and call this video. Done. This is creating custom cells. This is also creating a custom view. Custom class is you're gonna do that a lot if you're not creating custom class is frequently for your views and other things inside of your projects. You're probably not doing it right. It probably means you're putting all your code in your view, controller. And that's bad. Okay, this module arise. If you consult class, it subclass it put it in its own view, sending with your classes break things down as much as possible. Make them in reusable as possible. And let's move on to the next video.
86. App: Pokedex Part 5 - UICollectionViewDelegate, Data Source, Flow Layout: Who's that? Pokemon. What? The Frick is this? Come on, guys. Who did this? This is not a Pokemon. And I apologize for putting something I've seen like this in there. OK, anyway, moving on. This is where we are. We've got Let's see here. We gotta poke yourself custom collection view. So we've tied it up in our baby outlets to our main dot storyboard. We're making great progress. Now, what I want to do in this video is actually get these cells appearing on the screen, the whole bunch of them, and we'll just use tested at first. We're not gonna parse the CSB just yet. So how do we do that? Well, we got to set up our view controller. We've got to send it up to be able to work with collection views. So what we're gonna do is put in a few particles. So the first we're gonna do is you I collection view delegate, and, uh, it says this particle defines methods that allow you to manage this selection highlighting of items in a collection view and perform actions on those items. So excuse me, We need to have this in here, So we can click on a collection view and it responds and does things like that. If we don't have these things, it is not gonna do anything. And then we also need is you I collection view data source. And look at this right here, responsible for providing the data and views required by collection You. So we're saying, Hey, we're also going to give this view controllers also gonna manage the data that shows up in side of our collection view. And lastly, there's one more we need to dio you I collection view delegate flow layout and defines methods that let you coordinate with a collection Buell flolo object to implement a grid based layout. So basically this is ah, the delegate has delegate methods and functions that allow us to set layout on the collection reelect, sizing and spacing and stuff. And so let's just go ahead and implement some of these delegate methods. So if I die pin collection view knows how things are popping up now, these wouldn't be there if I didn't have those implement those protocols we need to do sell for item at index path. Okay, We need to also dio collection view Let's just scroll down here. Um, did select item at index path. Okay, Looks good. Well, this collection view, what are the other ones? Ah, number of items in section. We need to know how many items are in each section and then, uh, we're almost there. Collection view. I believe there's a number of sections. Um, it may not be here, actually, just yet. Uh, we may need to actually type in the word number number there. This number of sections in collection view, and, uh, we're gonna have one section. OK, maybe in different absolute have different sections. Like, if we were categorizing each of these Pokemon maybe by category, like or type like leaf type, fire type water type. We could have multiple sections, and each of the sections has its own and data in it. But we're just gonna have one that's fine for right now. And what else do we need here? I think there's one on sizing that we we need to set up here. I'm just going Teoh, take a quick glance, and Yep. Sure enough, there's one more we need. And this one, actually just type it in will type in, Um What is it called? Collection view in it's layout one. Which one is it though? This one is, uh, inset. No, no, a minimum line. Spacing? No. Where is it? We need sized. Won't need that. Its size for item in the next past path, you can see right there at the bottom of the screen. It's kind of popping up. There we go. So we didn't know. We want to set the size of the grid, right? Eso it looks nice. And so I'm gonna return. CG size makes we're gonna actually make a size. And that's me 105 by one of five. That's just good. Grid size I tested and played around and one of five was a good size for each of the grids . And that's looking good. And now it wants to know the number of items. Well, let's just start off his some test data. How many should we do? 30. So return 30. We're going to say we want 30 items at one section and then for each Celt, Then we have cell for item it index path. Okay, so what, we're gonna dio his? We're going Teoh Just put the 1st 30 Pokemon in. Um, actually, we don't need to do that. We can Just what I can do. This is easy, actually. Weaken. Say, um, what are going to say if let, um, collection view cell for item index path? It wants a Yes. What was the If let cell equals collection view that de que reusable item with identifier? We forgot to set the identify air in our storyboard. So let's call this, uh we just call it the name of our actual custom view called Pokey Self for index path is the parameter it wants. So basically, let's talk about this. This is kind of like a table view. Is it Telling me here must have an optional type. Oh, yeah. On this is gonna be as we got a cast it. Remember? Pokey cell? Okay, so right here, What we're doing is we're d queuing this now, just like a table view a collection view what it does to preserve memory and to be extra efficient. It reuses those cells. It doesn't keep creating 718 new views. It's gonna create, however, money's on the screen and reuse them over and over and over again. then you clean him out. You put new stuff in them. So when we say de que were saying Hey, grab one that's not being used right now that's off the screen. Let's grab it and put it back on the screen and put stuff in it So we're gonna de que it if there's one available, it may or may not have one available, but it's going to, um and let's find we want to take you one By this i d. And for index path. The index path is the current, uh, you know, index of the of the row. And so we're just gonna grab it and cast it as our pokey cell, That's all. So we're grabbing it here, and then what we can dio is Salix good. And what we can do is just return cell. So we're gonna do is we're saying here. Hey, if you were successfully able to grab an empty cell of this type, let's go ahead and return that because collection views cell for Adam in this path, it's going to return a cell, and what it's doing is it's returning. It's returning cells that are going to show on the screen. So as you're screwing the very next before it appears on the screen dysfunctions called right here. And then you conform at your cell. You can set up the data and stuff in it, which we're actually gonna do in the future. But you can set up all your data on it, and then right before it appears that all happens, and then it returns the cell. And then it appears so if for some reason this felled okay, it won't. But if for some reason to did, you could just return Ah, you I collection view cell, you could just return a generic one with nothing in it. Um, again, it's not gonna happen. But we do need to do one thing, though. We need Teoh Goto, our pope. Copy this poky cell here and in our main, that storyboard. Okay, applique your pokey pokey cell and then click the right inside. A few closed yours. And what we need to do is on this one right here. We need to put in the identifier. If we didn't, it would not work. Would have would have a crash. So let's recap before you run it. So we've set the identify air. What we've done is we've implemented the yuet collection view. Delicate the U. S. Collection view data source in new I collection view delegate flow layout. This allows allows us to set the size of things. Um, and, uh, the data source says, Hey, your data sources coming from this from this application are this view controller. And then what we've done is we've implemented those delegate methods that are gonna be called, So every time it needs a new cell to show on the screen, that's gonna call this, and we've got to give it a cell to show on the screen. Whenever you select an item, we want to do something. Right now, we're doing nothing. So it's not gonna do anything. And, ah, how many items do you want? Well, in the future, this is gonna be based on the total number of Pokemon. But right now we're hard coating it to 30. How many sex is just one section for this app? We don't need anything special. And what size do you want for each of these items? Okay. And you know, this could be different if this was a photo app and you wanted every photo to be its actual size, landscape or portrait. You could might actually make this dynamic in the change of based on the size, which is really cool. Larger are gonna be perfect squares. And that's looking real good. There is one thing that we're missing and we have to set the delegates, and we actually, there's another thing we're missing. Two were actually missing our collection view. So let's make that now at i b outlet week var. That's just call it collection. And it's going to have type you I collection view. Okay, so we actually need to save that off, Okay? And that looks good. And then what we'll do is we'll say collection dot delegate equals self. Okay, we're saying, Hey, the delegate for this collection is going to be this class, and we've of course, um, we've done that right here, okay? Just yelling at me. I think it's just a next code bug. Let me build it. Yep. X code bug. If you ever see that problem, or if you ever have any problem where X code like is giving you an air and it shouldn't be , just build your project. That was a bug and collection dot data source equals self. So what we're saying is, hey, we own the data source and we're also the delegate. Okay, Watch what happens if I take out this? This you I, collection view delegate. Okay. What is gonna happen and build it here? Oh, let me take out this one too. Now, let's build it. See how there's an air there. It's like, um, wait a minute. What's going on? You're tryingto give something into my delegate here, but you're not conforming to the protocol. So the collection use looking for a class that conforms to the protocol. But this does not conform anymore, cause we're not. We didn't put that on there. Let's put those back Were saying yes, we do conform. And, uh, if I take out data source, you see that problem right here? Hey, this doesn't this class that you put in here this self it doesn't conform to the protocol. Uh, where's your protocol? Well, there it is right now. I put it back. So we conform. We have to set those. If you don't set those, none of these functions are gonna be called. Okay? The delegate pattern is a little bit complex for new people. Delicate delegates and protocols. These air protocols, these air delegate methods just know how to use them. He implement the protocol, and each protocol has their own methods. And these are the methods right there if you click on it. Okay. In fact, you can command click on it. And you can go look at the methods here. There are. Some of these are optional. Similar required, So collection view should highlight. Did highlight. So anyway, you go into the class and actually see what things are available for you to use. Pretty cool. And so that's looking pretty good. Should we build it and, uh, see how we're looking? Yes. Okay, Let's do it. Oh, it's not gonna work. We didn't connect the outlet stop before it crashes. Ah. Okay, let's go ahead and connect that first main storyboard. And all we need to do is your view Control right here. Control, drag over to your collection view and select collection. Now let's run it. That was a close one. Who? Here we go. Did it work? 123 So 369 12 15 18 21. 24 27 30. Hey, I think it worked and doesn't look pretty. It doesn't look real nice. Were like, um, it's cool, But what about the rounded edges? I've been waiting for you to implement that. I've been wanting to know how to do this forever. Okay, easy enough. So that's looking really pretty. Look at that. We didn't even do that much stuff. Were already building a pretty apt. Isn't it crazy what a few nice colors can do on an application? A little bit of thought in the styling. Um, so go to your poky cell, and what we'll do is ah, what do we want to do it? Let's do it in the initial Isar right here. We got this initial Isar super dot and it's gonna make us implement both. Now, um, both the coder one and this one. If we implement any at all, that's okay, super dot in it. Okay. And that's what we'll do is ah, it's this, Uh oh. I forgot to override, huh? And this one's gonna want required in front of it. Okay, So if if you implement any initialize, er, you've gotta implement this, uh, this required one here. In fact, we even need to implement this one. I'm curious now. No, we don't. Okay, let's get rid of that frame one. And right here. Let's just let's just in the our initial Isar. Let's set the corners of our view to be rounded, and maybe you're wondering how to do that. Well, every view has what's called a layer, so I can say self dot layer Oregon. Probably just say layer without the self layer dot corner radius. Okay, the radius to use when drawing rounded corners, Fillers, background. So layers are drawn underneath the view. It's so each of you has its own layer. It's kind of where all the drawing happens. Okay, uh, drawing all happens on layer level below the view. So that's all you need to know. If right now and so I'm gonna say layer dot corner radius equals 5.0. Could it be that simple? Well, let's find out. Hey, look at that. They're looking nice and around it. That is really, really cool. What do you think? Yeah, how about just for fun? Rather than just saying 30 it's just for fun. Rather than saying 30 let's just do, um, we'll do 718 because I know we have 718. Um, what we'll do is, uh, in right here. What we'll do is ah, we will say now that we've got our cell, this is working just fine. We'll say, cell duck, configure cell, and ah, In fact, let's just what we'll do is we'll create new Pokemon for each before we do it. Let's create a new Pokemon Are here so far, Pokemon. Remember, this is gonna be called 718 times, Okay? Because every time you want a new cell is gonna go call this function and we're gonna create a new Pokemon. And for right now, um, the name just put a test. All the names could be the same. But for the pokey decks, I d. OK, let's do something different. Let's put the actual number of the index So we'll say in next path. DOT wrote Now this is gonna pass an inter Jurin of the current index. Right? But that's OK, that's OK for right now, because we know that all of our images air numbers, remember, So these are all numbers, so I know this is gonna work because if we say there's 718 it's gonna call the 718 times, and the current row is going to be. And when I say row, it means the actual idea of of each item. Uh, it's going to be the number that we're looking for, not that's pretty cool. Um, what is it giving me here? Oh, it once it actually doesn't want a string. It just wants to interred yourself. There you go. So we created Pokey month. That looks good. Okay. And what we'll do is it will now say, sell dot configure Selmer. We created that method and it's looking for a pokey month, So we'll do that. We just passed in the pokey moment. Created, I remember, is gonna have a new number each time for each Pokemon because it's grabbing index path that row, and this changes for every single cell again. Don't be confused by the row. It's not like a row in, um, like an Excel spreadsheet were like the three items that we have our one row In this case, every single item is its own roe. Andi think that comes from the table views on IOS, which used to be just one row collection. Views can have multiple items in a rope. And just to refresh your Pokemon or your poky cell. Okay, when we call this configure cell, it's going to it's going to set the text and it's going to set the image and ah, yeah, Should we give it a shot and see what it does? Pressure fingers. Hope it doesn't break. Okay, the 1st 1 didn't work. That's okay. Threw that out. Oh, it's because it starts. It's starting at zero. That's why, um, that makes sense. Starting at zero. Anyway, um, it's just I just wanted to test it and see, but look at that. Pretty cool. All your Pokemon are showing. We have been doing this for very long, of course, to click on it doesn't do anything, but right after that, you've got a really cool app. I think it's cool. I mean, I know that created designed it, but you could take credit for it. I don't care. Okay. You're the one building that you should be happy. So, uh, great. What do you think? Very fun stuff. Let's go ahead and move on to the next video.
87. App: Pokedex Part 6 - Parsing CSV Files: everyone. Mark Price. You're deaf slopes dot com And let's go ahead and keep building are very poop. Hope you, Dex. So last time wait, This got our Pokemon images showing up pretty cool. Just ransom test. It's not nothing to greats happening right now, but it looks pretty. We rounded are edges. We made some predications, and we didn't spend much time doing it. So very cool stuff. Let's go ahead and do some more. Why don't we focus now on parsing in RCs v data so we can actually put real Pokemon names into the application. So what we're gonna do is go to our handy dandy internet, and we're gonna go to get hub dot com for a slash spin tack. Okay? And I've got a repo on here that you can use repositories and here to see us V. Swift. So here's the URL appear you have dot com forward slash spent tack, forward slash CS v swift. Okay. And, uh, Gwen and download this or what you can do is just, uh you can copy this code right here. Um, I think it'll copy over. So if I copy this, you know, this is downloaded just to be safe. Let's go back here and click. Download zip file. There it is right there, and I just unzipped it and there's a swift file. All I'm gonna do okay, is dragging over here into our project. Let's close this out. Yes. Copy and click finish. Okay, so get that. See? SV parse. Er, I didn't wanna have a whole bunch of lessons dedicated to like doing, like, the comma parsing and things like that. So many were just going to use a little library here that does it for you. I'm just going to show you how to use it. You can look at the code yourself if you want to know what's going on behind the scenes. And so there it is. And let's create a new group here on this top level here in new group. I'm just gonna call this Ah, you till short for utilities. And let's put it below the view and I'm gonna drag see SV into their Also, we got a model view, but let's make a controller folder. Israel new group called controller, model view controller, and ah, this drag our view controller in there, okay. And, uh, You know what? We can even do more. How about another group called Resource is really getting this down here and there we go. And what do you think we should put in? Resource is, how about our CSB file? All right. I'm like, in our folder structure. Start taking note. You should be doing your folders similar to this. So here we go. We got RCSC file. We got our CSP parcher in the utilities here, and, uh, what do you want to do? So what we want to do is when the APP first loads, we want to grab all the data from it, create a bunch of Pokemon and load their names onto the screen. What? We're kind of already working with the images. We almost got that down. The first slot is a little bit off. It's ah, it's empty, but we'll fix that. So go over to your view, Controller, uh, in the comptroller, of course. And let's Ah, let's create a function. We'll do it right here. And we're gonna call this funk parse pokey month CSP. And we'll do is right when that first loads will do that. So we'll call the function I sometimes do this. I just create the shell like the empty function, and I call it where we want it. Because sometimes if I don't do that right when I'm thinking about it later, Robbie, like running the happened. Like, why isn't it working like Oh, yeah, I forgot to call it. So do things when you remember them. Mix makes your life a little bit easier. So let's ah, let's go ahead and parse this CSTV file here and what we're gonna do is grab the file and then run the Parsa on it and then, uh, work some magic from there. So, um, first things first is we remember how we said right here. The data source is in this file. Well, we currently don't have a data source. There's no there's no array of items. Remember a collection view or a table of you? They need to be based off of some type of data, OK, And my startup discuss full thanks to you guys and all these videos and just running out of space here. Okay, so far. And we'll call this Pokemon of type Pokemon. It's actually gonna be a ray, But the Kabbalah Honore. Okay, so we're gonna create a pokey Monterey, and that looks good. Except I think, instead of just declaring it, let's go ahead and, uh, actually create one. An empty one. Okay, so now we have an empty pokey Monterey, and what we want to do is grab the data from the CSB five. We want a parson in here. Okay, so but first, I'm gonna get a path together in a spun DL. That main bundle that path for resource. You've seen this before for audio files, right? Pokemon of type C S V. So we're grabbing the path, that's all. Um, I'm putting an exclamation point at the end because I know for a fact that that file is there. I can see it with my own eyes so I can guarantee it. If it crashes, it means I did something wrong, and I'm gonna catch it at compile time. And then what we're gonna do is we're gonna run our part, sir, which can throw an error. It can throw something. So we got to do that. The do so. Just add these curly braces here, and let's go ahead and move forward. C s V equals. Try. This is the CSP part circuit, and we're going to pass in contents of Euro. And this is gonna be I'm a path, okay? And then, um, I wouldn't let's do the catch block. It wasn't mellitus. We'll catch, let air as and s error and we'll just print the air dot debug description if there's a problem, okay. And then that's what the red icon was giving us for would needed to the catch block and we're gonna do is just grab the rose out of it. So let Rose equals C s v dot rose. Okay, so we're grabbing the rose out of the Sea SV file and let's just print it and to see what it looks like. Print Rose. Okay. I'm gonna run the app, Remember, we serve. You did load is gonna call. It is going to do our parsing here and let's run the app and see what it looks like and hates putting up stuff. Good. We know it's doing something. It's working. So it's putting up our rose out of the CSB file. And so let's go ahead. We're going. What we want to do now is we want to iterate through the roast and create a bunch of Pokemon objects and put them in already. Okay, so we're gonna say for each row in rows this is a for each loop and will say, Let's get the pokey I d let Pokot equals int row I d And we put exclamation at the end in another exclamation. OK, so what we're doing is we're going into the row, okay? And if you remember, right, if we look at our stuff here, um, this is a This is what we want. The idea, the number here. And so what we're doing is each row here is its own little dictionary. Okay, if you remember when you look looked at this, I guess I didn't really explain it, but it's it's an array. So it's an array of dictionaries. And so you notice how there's a colon here and then the i d and then a colon, Nettie. So basically each item in the array is a dictionary, that's all. It's just a dictionary. And so we're grabbing the row, the idea out of it, and we're converting it into an integer. Okay, so that's cool. We're converting it to an integer and I know it's there. So I'm just putting the pound sign. We could also I'd probably teaching you bad things here if let pokey i d equals int se ro i d. And, um there we go. It's What are we doing here? Oh, we don't need to actually. So it's cool. We don't need a way. We can go back to the way that we were because there's a guaranteed value right there. So that's fine. Alright, Let pokey i d. And let's get the name out. Just code and not perfect. I don't want to be a perfect programmer in front of you because I want you to see the stupid things that I do all the time. Let's grab the identifier. Remember? That's the name of the Pokemon, remember? Remember? Taste. That's the name. And, um okay. And so let's go ahead and create our Pokemon. So we're gonna say Let pokey equals Pokey month And what does it need? It needs a name. Is that to be the name and the pokey? I d is the pokey i d And then we're gonna say, um Pokemon dot Upend That's our list that we created at the top, right? And it's pokey cool. Um, I like it, except it doesn't like what we're doing here. Let's look at this. It wants us, Teoh. It wants the pound sign. In fact, we could have done it right here because it's not guaranteed the grab and item out of that dictionary, right? It's not guaranteed. And remember how I said It's really bad to put these things on here to force it? Well, it is. But think about the specific case that we're in right here. We've got a C S V file right, and it needs the partial no matter what in these the parts. And so if we have any problems with it, we're catching it here before at compile time before it's released to any users. And it's not gonna change. It will never, ever change. We're not getting it from the Internet. This will never change. So once you've got it right here and it's working, you know it's working. So I don't I don't mind putting the pound signs. They're enforcing these unwraps okay, because it has to work before we delivered to user, and it's never gonna change once we do get it working, if that makes any sense. So we've grabbed the I d and remember ideas in number, Okay. And, uh, well, it pulls it out as a string. Um, but we want to convert to an integer again. Then the row. We want to, um, grab the identify air out of the row, which is the name of the Pokemon. And ah, there we go have credited Pokemon. We've added it to the array up here. Okay, so now we should have. By the time this file's done parsing, we should have 718 Pokemon. And the difference is now here in the cell for item it index path, let's go ahead. And, uh, instead of creating a new Pokemon, let's just grab it. Will save our pokey equals Pokemon. That's our array. Remember, this is the brackets in text of grabbing an index out of it will say index index path, dot wrote. And by the way, this is very, very common. Uh, this is what you do in these self for items in the index path, same as you would on a table of you self a row in the next path. You would, uh use the index path dot ro inside of the array index right here to grab the current Pokemon as it's like a loop. Almost. It's looping through your your data, and it's grabbing it out of it. And all we need to do is just pass in the pokey in their Pokemon, okay? And see what it's yelling at us about, Um oh, poke equals Pokemon index path, that row type argument list of type Pokemon. Um, I don't think this is an array. What did I do wrong here? Pokemon? No, that's right. You build this. Okay, Um weird X code bug dripping out here again. If you ever have a problem, you're like, I don't know what's going on. Just build it. This is a beta version. So you're gonna get problems like that. So command B is build, by the way, we've been doing it forever. But command be. And there we go. So, to recap, were we calling parts Pokey month? We grabbed the path of the CS file. The CSTV code does its work right here. It parses it into the Sea SV and then put two rows here and then we enter it through the rows and each rose a dictionary, and we just grab the I d and the name out of the row and would create a new Pokemon. We added to the list when I say creating a Pokemon, that's our class that we created. Which, of course, are Pokemon in the model air here it stores the name and the pokey decks, so we're creating a bunch of those 718 and then on self for item index path. It's going to go through that whole list every time you want to create a new one, and it's gonna grab the current index path dot ro the current item in that index, and it's gonna pull out our Pokemon that we need for that row. It's gonna configure the sail past in the Pokemon, assigned the name and the image, and that's going to return the cell. And is that it? Let's see. Hey, hey, hey. Looks like it's working. Um, yep, it's working. What do you think? We just parsed in a C S V file. Congratulations. That's pretty cool stuff. You're starting to work with data. Let's make sure it works all the way to the end 718. Pokemon is quite a few who you are going. Hey, it looks good. And by the way, just notice how fast it doesn't go fastest is that's pretty cool. Did you know that if we did not de que the cells here, this would run terribly. So in fact, the APP might crash because it could not hold 718. Think about it. What you see on the screen? 369 12 15 18. There's probably only 30 or so items that are actually appearing on the screen. Okay, um, the rest are being de cute. We see what it looks like. An iPad just for fun. It's called the iPad air. Let it build here for a second. Ah, yes. So it's reusing the cells, which is really nice. It makes the app run really fast. Okay? And it's giving me an air. Hold on. Let's close a simulator. Let's try this again. Oh, come on. Come on, come on. Look at that. That's pretty cool. Is that cool? I think it looks cool. Look, always poke him on. Now, In this case, it's showing a lot of cells, right? And if you were experiencing any type of slowness, you know, maybe you'd make them bigger. So not as many are fitting on the screen. It's OK. For now, though, that's pretty cool. It really looks nice. Actually, I really like it. Let's rotate it. Who would even look good in the landscape? I just held command. And in the right arrow that rotates. It looks good. So congratulations, you parts to CS file. We pulled the data in and we're displaying on the screen. Looks really nice. Let's go ahead and keep on trucking.
88. App: Pokedex Part 7 - Audio & Custom Font: Hey, what's up? Everyone back again? Mark Price deaf slopes dot com And let's continue on with our pope index. I'm going to pull it up here and again if you need to find it. File open. Recent find a project and last time we've got our CSD parsing and they were displaying data on the screen, the names and the images. Very cool. Now what I want to do right now is just a little bit of styling with a font title on the main screen and then putting some audio in. So let's go to our main story board. We want to put, um, a title here in the middle, and I don't like being boring, So I don't want to put just any old font there. Let's go ahead and grab a Pokemon font. That's what you can do is go to Google and I've been Pokemon font And here you go. That was easy. And we don't want the hollow one. We want the solid one. Let's go ahead and download. I'm gonna click here and there it is. Got the hollow or the solid reviews what everyone you want. Actually, I'm gonna use the solid and all you gotta do is take this. Let's change the name. I don't like spaces and naming, cause it causes problems. I'm just gonna call Pokemon and just take it and drag it over into your resource is folder in your project. And Ah, very, very important. Stop what you're doing and focus on this. Click this button right here. Add to target if you don't do that, okay? It's not gonna add it. And, uh, it won't be in your bundle. Resource is, and you won't be able to find it or at least your interface builder world. So I just added it. Okay, one more thing I need to do is go into my info dot p list. Click this bottom plus sign at the bottom right here. And let's change. Just let's start. Just type in the letter F capital F o n fonts provided by application is right there. Okay, it's an array. So click the little arrow to drop it down. An item zero. We're just gonna were gonna get put the name in there, so Pokemon dot TTF that's all. OK, now we should be able to use it in our application, so if I go back to Maine Storyboard. Okay, let's click the right hand side to open up our little inspector there and at the bottom type and label and the dragon in the center to make it a little bit bigger to make a lot bigger. Go his dragon in the center center of the text and then ah, on Funt change it to custom. And then instead of how that a canoe, we should see our Pokemon fought There it is Pokemon solid and you're like I looks kind of ugly. Well, some words do Our word actually looks OK. See? Let's make it bigger. The have faith in me. I know what I'm doing. It's gonna look good to change the color toe white. Isn't it amazing how just something so simple as a font can add so much value to an application? I'll tell you what. It's the small things that count of you here watching these videos because you want to make a $1,000,000 application. Don't leave out the small things very important if you build. If you throw trash out there, um, you know it's going to hit or miss all the best applications are really well done. So if you're going around like on you, to me or other places trying to find tutorials and videos and things don't look as good as this kind of stuff, I would just be weird because every little detail counts And, uh, that's That's the right way. That's the apple way. That's what IOS app store all about there about being the best, being the highest quality applications. Eso um All right, so I'm just clicking this pin menu down here. But what I think what I want to do is align it first horizontally and vertically in the container and the container is the view right here. So there we go and then let's just go ahead and pin the within the height so it stays. Ah, stays the same. Really cool. Now, the next thing we want to dio is ah have a naughty oh button Here and by default, music's gonna play just for fun, to make your app more exciting after you listen to it loop for about 15 times. If you want to turn it off, there's gonna be a button for that. So we need the graphic for that. So I have it. Um, and, uh, it's right here. And it's in the resource is folder for you. And, uh, actually, I don't want to put it in the project. I want to put it in my assets. I clicked assets. I'm just gonna drag over music right there. It's in there somewhere. Just make sure, actually. Doesn't look like it. It did go in there. Let's try this again. There it is at the bottom. Okay, too little music notes There. Let's go ahead back to the story board and, uh, grab a button. I tightened bu t. It's right there. There's my butt in. I'm gonna take off the text because I don't need it and just go out and change the image. Teoh, Uh, music m us right there. It's really big. Does make it smaller. Okay? And I'm holding shift to make sure it stays uniform and ah, right there looks about right and I like where it is. I like it. So let's go ahead and give it a width and height and put it 12 from the top eight from the right. I like where it is. I wanted to say the same size too. There's our button. Looks good. Open your assistant editor. And let's just go ahead and create an action while we're here in the echoed uh, right now it's pulling up the wrong file X code again. Goto automatic and switch to view controller. OK, I click in this automatic view controller. There we go. Close the right hand side. Here, Give me some space. All right. And let's just create click this and control dragged down here inside the brackets. Unless changes soon I be action and this is gonna be called, uh, music, but in press, Okay. And, uh, that looks good. So we got our title in there. We got our button. Let's go ahead and close the assistant editor and let's go straight into our view controller code here right toward this. But this actions we created and just put a space there. Okay, So what we also need to dio is ah, create the music or let the music play when it first starts, and then this button will toggle it. So let's do that now. You should remember how to do this. So we just need to create an audio player. So of our music player. Actually, first we need to import the framework, import a V foundation, and then we could say music player equals a V audio layer. Okay. Pretty cool. And ah, it's yelling at me. Oh, I did the equal sign. I was supposed to put a call in there. I'm not ready to create it yet. We will create it, though. So what I'm gonna do is create a function called innit audio. In case in the future, you want a more audio or sound effects, You have a function to put it there, and we'll go ahead and call air just like we did with the other functions. Get it ready and you remember how to do it to see we can do it by memory. Okay, so we need to grab the path. Right? So let path equals N s bundle dot main bundled up path for resource. And this one is called, um, we didn't drag the music in. It's called nothing because we didn't dragging it and let's go. Ah, find it. Hear music dot mp three. And again, this is Ah, this is part of the resource is I'm providing with providing you so I did not create this music. This is Pokemon music publicly available on many websites. Barbara PD etcetera. Ah, all existing copyrights standing apply. I would be careful about commercially releasing this to the world. But your choice There's a ba jillion other Pokemon websites out there so many. And, uh, anyway, so there's the music and, um, let path. Okay, so half the resource is music of type MP three, okay. And we know it's there, so let's go ahead and just force unwrap it so we can use it. And remember, the player doesn't always work. I mean, it can throw an error, So let's go ahead and just catch it. Now let air as N s air. I think that's what we're looking for. And what we'll do is we'll say, we'll say, What are we trying to say? Um, music player equals, Try a V audio player. There we go. That's were looking for and ah, what was it? It was contents of euro. Yep. And we're just gonna put, uh, an S u R l and passing that path known here strength. And this is passed in the path and we'll do that. I think Is that right? No. We don't need the last summer. The last exclamation point. Just that one. So there's our music player. And if it worked? Music player dot Prepare to play, Alex. Good. And, ah, Music player. Music player dot Number of loops equals negative one. We wanted to infinitely loop and then music player dot play. Okay, so and let's so if there's an airless just print it print aired debug description. Okay, Let's Ah, let's run it and the see if it's working. If it is working, uh, we'll hear it makes sense. It is quite an easy test. Okay, By the way, if you had other audio players, this is where you'd set him up right here in your in your do. You could just do them. All right. Here, Um, make it nice and easy. Here we go. Show me the money. Uh, is this getting quite exciting? We haven't been doing it that long or we're doing something pretty exciting. Camp stop. So yeah, very cool. So let's just handle the toddling now. So the ideas let's say you press the button, and if it's playing, it pauses it. And if it's not playing it starts it. So we're gonna do something interesting here. So what we'll do is I will say, if ah was a music. If music player dot play ing. So if it's playing was a music player dot stop else music player that play now. The button we want to do is when it's playing, it's fully white, but when it's not playing, it's, um, it's half. It's transparent and or a little bit less than transparent or less than half. I mean, um And so rather than creating another IBL, let just so we can do that. Here's something unique and interesting. What we can actually do is on this center here. Since we know the button is actually calling this function, we can actually just grab a reference to right here and change right here. So if music players playing, let's stop it. So when it stopped, it means, Ah, we're faded out so we can say sender dot Alfa right there equals 0.2. And when we want to play it well, say sender dot Alfa equals one point. They're fully opaque. Let's give that a shot and see if it works. Here's the button. It's white cause it's playing. It's faded now. I stopped it. Hey, it looks like it's working. So audio is now working. We've got our poke Index logo in here. It's starting to look really cool, and, ah, again we're grab. Whoever calls this that button is what causes when it's press, it passes in the actual button itself. And so we're just grabbing that button right from here and changing it, and it works. Nothing wrong with doing it this way. So there you have an audio, a custom font, really cool, and that's it for this video. Let's keep on pushing forward are poking except
89. App: Pokedex Part 8 - UISearchBar, Search Filtering: Hey, everyone, Mark, Pricier depth soaps dot com and we are back to build more pokey decks. Pretty cool. Today we're gonna focus on searching. Okay, If you remember, our application currently shows a list of Pokemon, and basically you can scroll through the list and look at their names and their images, and it goes all the way to a 718. It's styled correctly. It looks really good, but what we want to do is make it more effective. So basically, when you're searching, you just start typing in letters and immediately starts filtering out the different Pokemon . So that's what we want to dio. Let me stop this here. Mute. Okay. And so, uh, there you could see it right there. Um and we want to start typing in here. Okay. In the search box. If I start typing like C h r, it would find any Pokemon that has the word. The letter C h r in it and ah, great filtering tool. Make it useful. So let's go ahead and do that. And it's not too bad. So we know over here in our main story board, we know that we have a search bar. Okay, currently, it's not connected to our application. And, uh So what we want to Dio is open our assistant editor here. Scroll up to the top of your view controller and let's make an ivy out for it. So good and control dragged your search bar over here, and we're just going to call this search bar. If we had more than one search bar, I might give it a more specific name, but said Since it's the only one, it's completely fine. We just connected it here. Looks good. And let's just put some temporary texting here. A placeholder text. I'm opening the right hand side and placeholder. Let's just say, uh, search for bogeymen looks good to me. Let's go and do our view controller now. Okay, so think about the problem we're trying to solve. So imagine a user types of letter. Every time a keystroke happens, we need to see if there's any Pokemon that matched that letter. So we're not gonna do it after you type all the words after you press the word search every single keystroke. So how do you do that? How do you know when the user presses a keep what we have to implement. The search bar delegate. Basically, you set the delegate of the of the search bar. And basically, every time so impresses a key that's gonna call that delegate so we can respond accordingly . So over here, next to your other protocols, go ahead and type in new. I search far delegate. Okay? And we've got our search bar connected so over here, similar to what we did before. Go ahead and say search bar dot Delegate equal self, because we just implemented the protocol. Now we can, uh, a sign of the delegate. And which delegate method are we looking for? Well, you can actually command Click your search bar delegate here and see what are available. Okay. Search bars should begin editing. No search bar text did begin editing. Well, that's when it first started. Now should end editing. No. Did end editing? No. Um uh Ah. Search bar text. Did change called when text changes. I'm thinking that's what we want here. Texted change. So we just looked at the protocol methods. I'm gonna go back, score down to the bottom here, and let's just type in. Ah, search bar. Right there. text did change. And so what do we want to do every time the text changes? So first, what we want to dio is, um I actually think about it here. So you type in a letter, right? And, uh um, but we want to do is filter the list, but how do we do that? So we have an array, but we don't want We don't want to get rid of our main array That has our Pokemon it We don't want to destroy that. Um, So I'm thinking what we need is a second array, and basically this array just holds the filtered Pokemon. Um, so we can any time you're in search mode, basically, we're gonna use the second array with those results in it, um, instead of the instead of the main array. So I think what we need is a bully in at the top here, a zealous another data set. So far, we're gonna call. This is in our will to say in search mode, more defaulted to false. And then let's create a new array. We're gonna call this of our filtered pokey month equals, and it's gonna be an array of type Pokemon. We'll just initialize that to an empty array right at the beginning. So we need to detect whether we're in search mode and we need to have a second array to store are filtered Pokemon. Okay, that makes sense. Okay, so what we want to do then, is over here in our texted change meant that it's gonna be called Every time a keystroke happens, we're going to say if search bar dot text equals Neil or if search bar dot text equals empty. Okay, so basically, any time that there's no text in the search bar meaning, let's say they used a press, the backspace key. Okay, um, so if they press the backspace key and it's empty than in search mode is gonna be false, meaning we want to go back to the fullest and then we'll go ahead and say, um uh what else? Well, that's good for now, s o. I don't wanna be in search mode anymore. And then else it means we have typed in a letter. And so let's say in search mode equals true. And you maybe you're wondering what search motives for Well, I'll explain in a second, but basically when your list is being filtered that sell fero index path, we gotta show different cells based on the data that that we have. And so what we want to dio is if a letter's been typed, it means we're in search mode. Okay, we need to start filtering the Pokemon. So what I'm gonna do is I'm gonna grab the word that is currently in the text field. So let I'm gonna say lower equals search bar dot text were grabbing the text out of the search bar. Okay? And I'm putting a pound here to unwrap it because we know for a fact that there's gonna be text here because, um, we already did this check right here. It's not Neil. It's not empty. So there definitely is text there, and then we're gonna do is grab it and put it in lower case string. So let's say someone types in charge hard with a capital C. Well, if we did a searching based on Capitol versus lower case, it might not pull up the right one. So it's just every time, every time that someone types of letter, let's grab the current text and let's go ahead and make it lower case string. And that's what will base are filtering off of. And the code to filter actually isn't that complex? Let's Ah, let's take a look at it right now. So, um well say filtered Pokemon. That's the array we created, remember? Equals Pokemon dot filter. Now, that's interesting. So an array has a function called Filter. And what it's gonna do is it's gonna go through all those elements, filter out based on some criteria and give us back an array that's filtered. That only has the things that we want. And so how does this work? Well, I will show you. I'm gonna get rid of all the boilerplate stuff in there. And what we're gonna do is we're gonna put these Ah, curly braces. That's a that's a closure syntax. Okay, What we're gonna do is we're gonna say dollar sign zero. Okay, that's a cute. That's a important thing right there. Dollar signs. Zero. What it means is, um, that we're gonna grab the first. So what it's gonna do is it's gonna grab an element, and it's gonna give it a name of zero. It's a little bit confusing, but just know that dollar signs. Zero means it's grabbing an element out of that array, so pretend that it's grabbing it and putting that in a variable. So we're going to say dot name So pretended to Pokemon object because that's what it is. So zero means Hey, let's check this Pokemon object and let's grab its name, property, What we're gonna do It's a range of string. Lower is not equal to Neil. Okay, so what this is saying here Okay is go through the array. Basically, it's going to run through the entire polka moderate, and it's gonna run this for every single poll. Come on, let's in there. Okay. What it's gonna dio is it's gonna grab an element out of it. A Pokemon object and the dollar sign zero. This means hate. Ah, this is the object that we're grabbing it. Just pretend that pretend that that zero is the same as doing this var some Pokemon equals , you know, Pope, you know Pokemon, you know, 24 23 grab the object. Pretend that this dollar sign zero right here is the same thing as doing something similar to this where you're grabbing and putting into variable where zero is the variable. Okay, And what we're gonna say is grab the name and let's see if there's a string in it and range of string. OK, that's a function of of the string class. And what it does is it finds it right here, finds and returns the range of the first occurrence of a given string within a given range of the string. So what it's saying is, hey, passing a word and I'm gonna check this string and see if the word exists. So let's say that the word was Charles ARD and we typed in Z a R D. It's going to go through. And this Let's say this, said Zh already. It's gonna go through all the words, all the names and see if that name contains Zrt and all the ones that did it would pull up . So all we're doing is checking and see if in seeing if it exists in the string, we're doing that for every single one and then So what we're saying is is not equal to kneel. So ranges string. Okay, it's gonna return a range right here. And so if it's nail, if it's empty. It means it couldn't find it. But if it's not empty, okay, that means it found something with that word in it. So all we're doing here, okay, is we're filtering the array by the name, making sure that that the name contains whatever the user typed. And if it's not Neil, it's gonna add it to this filter rate, and then it's gonna put it here into filtered Pokemon. And now we have our filtered list that we can use. That is pretty cool. So I hope this isn't too confusing for you. Um, if he doesn't know how to use it, that's fine. Just know that your filter it takes an expression were passing in a closure expression, Which means this is gonna again be run for every single element that in Polk, Amanda Filter. And if the if, whatever word that the user typed in here that we grabbed from the search part. If if that word we're grabbing on that specific Pokemon is in its name, it's not equal to nail. It's gonna add it to our filtered Pokemon array. And then, uh then we have a list, and basically, every time we type, it's gonna run this and it's gonna filter it. And it's it's built to be very efficient and fast. We could have done this with a four loop and checked it ourselves, you know, gone through every single thing. And if it that the words in here, but that would be very inefficient. And this filter function is written to be, um, efficient. So the next time we want to Dio is after we've got a, um after we've got the list of Pokemon filtered, What we want to do is we want to refresh our our collection view, okay? And you do that by doing collection that reload data. So basically, whenever you call reload data on a collection view or a table of you, it's going to basically refresh the whole list and grab everything from your data source again. And currently, right now we're grabbing data from our main Pokemon list, So this isn't gonna do anything. So what we need to do is, if we're in search mode, we need to actually grab it from the other list the filtered list. So we're gonna do that right here. So basically, um, here's our cell, and we're grabbing it from index path that row and notice how? Right here. We're saying grab it from Pokemon. Okay, Well, all we need to do is grab from a different list. And Ah, So what we want to do is we can cut this Command X, and I'm gonna say pokey type Pokemon, and we're gonna put a value on it. And then we're gonna say if in search mode So if we're in search mode, do this. Otherwise do this will say up to this back poky equals poking one. So if we're not in search mode, do what we were doing before. Grab it from the regular list. Otherwise, pokey equals filtered Pokemon index path dot ro. So if we're in search mode, grab it from the filtered list. If we're not, grab it from the regular list and then go ahead and configure the cell. That looks good. One more thing leading to do, I think is right here. Number of items in section You should never heart co this There should always be dynamic. So what we should have done is actually said Pokemon dot count. That's how many number of items we want. We're going to change this, right? We're gonna have to do the same thing here. If in search mode, return filtered Pokemon dot count It needs to know how many items to go through if we don't will bit crashes because we're going to exceed the boundaries otherwise, actually, don't even to do in else. Because once we call return here, uh, it'll end, and this will never be called. So you could just leave it out like that. So it for in search mode returned the count of the filtered Pokemon. If we're not in search mode, return the, um, the regular Pokemon count. Now, is there anything else that we want to do here? Um, Segel? Look, I don't know. Let's give it a shot. What do you think? Using my students and rule after. Like what? You forgot something. Semi colon. Whatever. You've got a problem. Well, you can't tell me because I'm talking to a screen talking to myself. Crazy, huh? Turn that music off. All right, So let's see if it worked. I'm gonna type in C h a r. Backspace backspace. I think it's working. What do you think, Meu? What's another one? Let's just have anything a Z z e z a z o. It looks like it's working too busy. Oh, here, Ezio. Here. There's a zero right there. Zio, I think our codes working. It wasn't that bad. And look how fast it is. Isn't that fast? Dig Very cool. I think it's working now in a normal application, when you when you click onto the when you click on to when you're not a normal application , when you're building to a phone, the keywords going appear. It's not appearing on my simulator, so let's let's talk about that here. So keyboard and let's go ahead and, um, turn it on here. So here's a question. If I'm typing in something here, how do I get rid of the keyboard? It won't go away, and that's a very big problem, because your users are not gonna want that. So we do have a problem here we need to solve. Also, you know when well, I think we are solving that when you delete the text. If it's empty, we were detecting that texting, so I think what we need to do is get this keyboard to disappear whenever the search button is pressed or whenever the little excess press when you start typing right there. So let's go ahead and do that. This shouldn't be too big of a fix. What we'll do is ah, let's see you down here. We'll just say, um, if, uh if it's empty, let's go ahead and save you dot end editing force she we're gonna force it closed. So basically, we're just saying, Hey, whenever it's empty, whenever all the characters are gone, let's go ahead and and the editing also, we forgot to reload our collection view here because whenever you delete one, we also need Teoh reload the data so we can see the updated results. I forgot to put that they're so so What we're saying is, whenever you've deleted all the text, okay, turn off search moat, closed the keyboard, and, uh, then go ahead and reload the data there. And then, um, there's one more thing I want to do. And it's another delegate function, and it's called search bar. Search button clicked. So see, over here, this search button. Okay. All we want to do is change that to, um, toe, actually, just hide the keyboard, okay? And ah, there we go, We'll just say true and that looks good to me. What else do we want to do here? Um, I know, I know. We don't want to say search because we're already searching. I think it's kind of redundant. So let's go to our view. Did load and let's do one more thing or just a search bar search bar dot return key type equals you. I return key type dot done. So instead of saying search, let's just, uh, let's make it have the done keyword so it just hides the keyboard. So all we did hear was, hey, when were Whenever you click the search button or the done button, let's close the keyboard. And also, whenever you delete all the characters, let's go ahead and hide the keyboard and let's go ahead and reload the data, so I'm going to stop it and replay it here. Turn that off and let's give it a shot. So I'm gonna type in char. Let's delete all of the characters and the keyboard disappears. How cool is that doing? All the characters keyboards disappears. This is a little tiny thing that just adds value to an application. Notice how it's done now I can click done and they're gone. I can click those okay, Really cool stuff. Guys and gals search filtering. And it's these little things that that count an application. You could have just thrown out an app to the APP store without the search feature. Well, I don't know how to do it, whatever, but it wasn't that hard. A little bit of love goes a long way. So there is search filtering. Um, we didn't jump a couple places in the code here. So do posit video and go through it again until you get all of this down. But basically all we did was implement a filter a new array that holds the filter data. We filter as we're typing the letters we had to do the texted change delegate to detect in letters of being typed, and we grab the text from the text field. And then whenever we get rid of all the text, we hide the keyboard and we also hide the keyboard. When the view is done editing pretty cool stuff. Our application is really coming together. And I think that everything we really need on this screen is about done. All we need to do is implement clicking it to go into the details screen, and then we'll work on that. So that's a wrap for this video making progress. See you next time.
90. App: Pokedex Part 9 - Detail View Controller & Segue: Hey, everyone, Mark Price here, Deb slopes dot com And we are making great progress on our poke it except when full open your project here. So far, we've got a scrolling list of Pokemon, their names, images looking great. You can search for them some really great stuff. We could, in fact, probably just submit the app as it is. But there's more to do. And the next part and final portion of this application is building the details screen, which is going to be quite a bit of work. Um, but, uh, necessary and very important. Very cool. You're gonna learn a lot. So let's go ahead and just get things moving along. So go to your main storyboard. What we're gonna do is open the right hand side here, Scroll down here. That's already there. Actually, view controller, we're gonna drag a new view controller onto our storyboard. Move it over here. Perfect. And what we're gonna dio is, uh, grab our little cell here. Our collection view cell. There we go. Grab him there, make sure the cells selected over here in the left inside and all we're gonna dio is gonna take it and control drag over to the other view controller, and we're going to say show okay. And go ahead and click on the Segway right here. And the identifier. Let's go ahead and change it to, uh, Pokemon detail. V c. Okay, there we go. In fact, let's put a capital P on that. We'll just call our view controller. We're gonna make the exact same thing. So Pokemon detail V c. We're gonna push it on. That looks great. Okay, that is looking really good. Okay, Looking good. So let's go ahead and create the view controller. Remember, these view controllers all need toe have code attached to them. Right now. It's just floating. So with no code, so go to your controller Over here. Your folder. Right. Click it new file and go ahead and do Coco touch class, and I'm gonna call it Pokemon detail V c. And it's going to inherit from you. I view Controller. Ah, it always adds junk on there. Okay. And, uh, that's looking good. Click next and just save it off here. And it loaded it for us and school back to our storyboard. Click on it. The view controller here, OK? And Then click the little rectangle box and change this to your new Pokemon detail. View controller. Very cool. So we've got the Segway. We've got the view controller. It is connecting. It is working. Let's give this a temporary background color to make sure that it's gonna work as we need it to when we, uh we transition over. And that's so we've made that Segway. It happens when this cell is selected here. That's cool. So go over to your view controller and we just need to trigger it. That's all. Just needed. Trigger it. So go into a search for Did select their did select item index path. If you haven't put this function in, go ahead and do it now. It's one of the delegate methods delegate functions. And what we're gonna dio is whenever an item's tapped, we're just gonna grab that item, and we're gonna pass it over to our new details views so in knows which Pokemon was clicked on. So uh, similar to before we've got two different lists on item could be selected in the filtered array. It can also be selected in the regular race. We've got to account for that So what? We're gonna dio say, if in search mode, let's go ahead and right above it here. Actually, let's create our Pokemon like we did before. So far, Pokey equals Pokemon. And so if we're in search mode, poky equals and we'll say a filtered Pokemon in next path dot ro, let's grab whatever the current row is and grab the Pokemon for that. And remember, what we're doing here again is this is a race in tax and you put it indexing here to grab an item out of an array. And the index path dot ro will always give you that specific cell that was tapped on the exact location of it. And so the location, the numbers of the cells are an exact correspondence with numbers of elements in that array . That's why it works like this, because they're exactly the same amount of elements else. You're like you've already told us is 100 times. Yeah, well, it's It could be a rough concept to understand understanding how this works. So, um Okay, Pokey. And this is just gonna come from the regular Pokemon List index path dot ro and again that's coming from a peer. Okay? And so if it's in search mode, grab it from the ground. The ball. Come on. That was tapped on in this search in the filter to Ray. Otherwise, grab the Pokemon that was tapped on from the regular right. And then all we will dio it's a, um What is it? A pretty pair present. Prepare for Segway. There it is. Okay. And ah, actually, just make sure I've got everything else we need here and no, not prepare. Silly me. Um, perform there. You perform Segway and good pace. Your identify in there, it's poking on detail. V. C. That's what we called it. And the object we're going to send is the pokey object. Change it to a let since we don't modify it. So okay, what's happened is we've clicked on a sale, and now we're saying, Hey, that's Segway that we connected Are you? I collection of you sell with in the storyboard that when that happens, when someone taps on it, let's go ahead and load that Segway up and let's pass in the Pokemon, Okay? And if you remember that there's one more step we gotta dio, uh, this is gonna load it, but we still don't have a way of getting that Pokemon over to our new view controller. And also, we haven't even stored that Pokemon in that view control yet. So go ahead and click on Pokemon detail V. C. And right here at the very top. Just go ahead and put the Pokemon objects. So it's just like that exclamation point. We'll have a Pokemon. We can't really use this screen without a Pokemon, so it will have won for sure. And what we'll do is we'll go down to It's gone. I deleted it. Uh, go ahead and go to the bottom and just typing. Prepare right there, Prepare for Segway. And what will deals will say if Segway not identify air equals. So if it equals the end of the identify air for this, uh, we're going to the detail screen, which it will, because it's the only one anyway. Okay, if that equals that, then we need to grab the view controller. Okay, so if let we'll just call it details V C equals Segway, the destination view controller as Pokemon details BC. So what we're doing is we're saying, Hey, if this is the Segway that's being loaded with this. Identify air. Okay, then let's go ahead and grab the destination view controller. So it's now it's already been created. Okay, it's in memory now, so it's gonna grab it. Remember, it's just of type. You have you controller. That's what it's sending us. But we know that it's actually poke him on. Details V. C. And since Pokemon detail V. C inherits from your view controller, we will successfully cast it as popular in detail. VC. That's why we're doing the if light here because it's returning to us, not Pokemon detail V. C. But it's returning us the You have you controller, which we must cast into our subclass and then, ah, well say if let pokey equals sender as Pokemon. Remember how in just above when we said, uh, we said present Segway performed Segway. Okay, we passed in the Pokemon object as the center, so we gotta grab it out now. And of course, this is any object. It's not a Pokemon object, So we've got a cast this as well to we know it's the object we're looking for, cause we just put it in there, and so We do have to cast it, though, so we grab it there. Then we just say details V C that Pokemon equals pokey. Okay, so again, recapping if this is the Segway were using going from the screen to that screen. Great. Let's go into it. Let's grab the view controller that we're going to be going to Let's cast it to the Pokemon class Pokey tell BC Then, um, we are grabbing the pokey object that was past as the centre and then we are stuffing it here in our Pokemon detail, V c. And if you remember, right, we put that right there. So this is now gonna be holding that, and that will happen before view did. Load is called so we can use viewed load, and this data will be available to us. And, uh so we pass it over. That looks great. And just to make sure that it works, let's go back to our storyboard. And over here, let's just drag a label on it. Okay, Well, dragon label and we'll go ahead and just put the Pokemons name in here. I'm gonna center it. And this is just for testing. I do this kind of stuff all the time in my tests. I just want to make sure stuffs working. I'm gonna give it a fixed width and height. And what I'll do is open the assistant editor here. And I'm gonna dragon ibl it from the label right up here. And we're just gonna call this name label and, uh, close the assistant editor. Go back to my Pokemon detailed code here. No, not this one. The view controller. And just double check. Everything is looking good. And it is. So Okay, so Pokemon detail of you controller back over here now. And what we'll do is on view. Did load. We're going to say name label dot text equals Pokemon dot name. Now, we've passed in the Pokemon object from the Segway through the Segway. And if this if this works, what we should see is whatever Pokemon we tap on, it should be on the screen. Okay, so I'm gonna go ahead and run it here. Hopefully I didn't miss anything. It is possible. I'm only human. I know it can be perfect. I know you'll like me a lot, but maybe perfect. So here we are. If I click on blast toys, and we got a crash, so Pokemon dot name is empty. Okay, So Okay, so what I'm thinking is we just go back here, so let's make sure we got here first. This is back in our our view controller. Okay, so we got a crash. Okay, let's turn off the music and select war total. And look at this. Um, that's interesting. So viewed it. Load is getting called either before this is being called or, um or we have a problem here. Um, let's just do a few things here. Let's see if we even get here. It all, see, if we even get here it all if we even get here, it all run it again. Okay, So that's being run. That's being run and we're getting here. Okay. Sender as Pokemon. Ah, OK. So there is the problem. This code is never being called right here. So if let pokey equal sender as Pokemon So we have a problem here. The sender is Ah, this is felling. It looks like it's failing on us. It's never even getting there. Um, let's try one more time just to be sure. Yeah, we're never even getting in that block there. So let's see where our problem is. This is a good problem to figure out together. So if let details V c equals Segway destination control, we know that's working there would say if let pokey equals sender as Pokemon. But center's having a problem. So let's go over to our prepare or present Segway. Where is it performed Segway with identify air. So hokey. Okay, filtered Pokemon in next path. That row. Let's go ahead right here and see what pokey? Let's go it in print. Well, say pokey dot name. See what happens there before he performed the Segway. Interesting. OK, so did select items. Index path is not even being called. And I think I may know what the problem is. Um, I may know what the problems. Let's go back to the story board here, and I'm gonna delete this Segway for just a moment. I mean, I'm gonna delete this Segway, and what we'll do is instead of dragging it over from our cell right here, this is Dragon from the actual view controller itself. Okay. Uh, not that one. Let's see, we want there this view controller up here Let's drag it over here and do show. Okay? And let's give our Segway and identify air Perfect. So what I'm gonna do is rather than doing it from the cell, let's just do it from ah, from the actual view controller itself. Because I think what was happening is since we did it right for Mark Button. Okay? It was triggering it from the from the view control or not from our code. So that did select code was never even being called. This was being called first. So what we're just saying now is, hey, let's give it a generic Segway not tied to a button, and we'll manually call it when we're ready to call it. Let's go ahead and give that a shot here. Hey, there it is. Okay, so do you see what the problem was? So the idea that that we were planning on doing is you click an item here, it did select items, index path, and then it's gonna load the Segway. Well, since in our storyboard, we attach the Segway straight from the cell. Remember how in a previous video, I mentioned that if you connect Segways from buttons in your story board. It's not gonna talk to your code. Well, that's what happened. It didn't talk to the coat, so it started transitioning before we even selected an item. That code never got called. So our Pokemon object was empty because the cold was never even called. So I disconnected that Segway. I made a generic Segway just from the view controller itself, saying, Hey, this view controller goes to that one, not from the u I and then here interview Control. We manually. We do it right here, and this is important because we have to pass data. So it is. It is working now. So the only thing we changed was changing who the Segway was coming from, not the but in itself, but from the view controller. So we are now switching over. It's looking pretty good. I selected. Charged Are Do you notice how it said charters aren't on there? That means that our code did pass over. Let's just like one more guy to be sure. Let's find somebody else right here, glam you and sure enough, it's passing over and it's working. Alright, guys and gals, you just saw something cool. We fix the problem. Very common problem, actually. So good for you to see that we've done a lot of things here. Transition to the other Segway did select items, indexed path wear, accounting for what? You slept in a Pokemon in the filter to ray. Whether you selected a pope came on in the regular array. And we're making progress here. Let's go ahead and call this video done and move on to the next one.
91. App: Pokedex Part 10 - UIStackView & The Detail View Controller: Hey, everyone, let's go ahead and keep building our pokey decks App. And what we want to do is build our detail screen at least the layout for it. Let's get it going. We're gonna use you. I stack view. It's gonna be great. And I've obviously built this apple ready. And so what I'm actually not gonna do is I'm not going to just go in to this, uh, this storyboard here and I'm not gonna just put all the settings perfectly and say, OK, that's how you do it done. You're going to see me do some trial on air here, Um, as, uh, as we go through this so you can see that there's different ways of doing it. I need you to understand how to do these things and play around with things, because just because I say do X, y and Z doesn't mean that you should do that in every app. You need to see what the different settings and options dio. I'm also this is a great way for you to learn and master new Iowa's nine US stack views. I'm still learning them. It just came out. I can't I can't be a master Adams. So I gotta keep play around things test things out. So let's just experiment together, build this out and make it look real nice. And you see all the different options that are available to you. And maybe what I'm doing here is not what you want to do with your app. Play around with it. So very cool. I'm gonna I'm gonna keep that name label there. Really? For right now, what I'm gonna do, actually is ah, we're make the top bar, and I'm just gonna make it the exact same size as this other one. So I'm gonna copy it. I just did. Command, see? Click over here and paste it. Okay, I'm a drag it over to the top, Okay? And let's get rid of the button. I don't need that. And we don't need this title here because, uh, we're gonna put the name there, actually, so I'm gonna go to our name label here. I'm gonna delete the constraints, Okay. And then I'm just gonna drag it up here into the container, and that looks good to me. A little bit bigger, and maybe Well, I'm just centering it there. What I'm gonna do is ah, make this Click it again. I lost there. I'm gonna change the font, Teoh Helvetica new. And that looks good. Let's may make it Besides 22 I like it, but to make it white, Okay. And let's put a name on there just to see what it looks like. Charters hard. Okay, Some of them are probably a little bit longer the names, so I'm gonna put it right there, and I like it. So let's set some constraints for it. I'm gonna say horizontally and vertically in container and let's go ahead and just give it a width and a height. That's fixed. Good. Let's go ahead and get rid of this ugly green that's plaguing our screen. By the way, I hold no liability if you get seizures from watching these ugly, bright colors on the screen. So you know how those packages say on the video games? Step away after 15 minutes a plane so you don't get a seizure. I guess I should probably have some disclaimers on these s. Oh, there we go. White and red. Looking good. So what do we want to do? Well, if you remember from my description screen. We got an image description, a few different fields on there. There's a back by and let's go ahead and do that. Let's get let's get the backbone here. I'm gonna click the Assets folder and I'm gonna go to my desktop here and there it is. Just drag it up. I'm providing you with this resource here. So there it is. You see right there. Go back to your story board and let's go ahead. And ah, that actually quantify Command Z Teoh, Give me my button back now. I should have done that. Hold on. Go back to the future. There we go. This is but a new button on too much work. All right, grab a but in but on the left hand side, get rid of the text. And let's change the image to what was it called? Goodness back. Here we go. There it is. I'm holding down shift and I'm scaling it inwards. And there's our button ago. Not too bad. And let's go ahead and give it a fixed with and I just click dependent pin button here, Okay, fixed width and height. And with, uh, let's cook that pin button again and do, ah, left and to the bottom. Why not? Okay, that's not going anywhere. Looks good. So it's looking good. We're getting there now. We had in our image, we had a segment control that one for the biography, the bio One for the moves in our little video demonstrations here. We're not gonna build out the moves. You're gonna do that on your own, and you're gonna do some other things too. This polka decks on your own as well. But I'm gonna go ahead and put in the U Y for it because it looks nicer. So here's our segment to control. And now we need to start thinking in terms of a stack view. Okay, because all these things need to go to stack for you. Typically, when you've got things that are like lining up here and they need to go on corners of the screen like that, like a head or something, you probably don't use the stack of U. S. So it's blue right now. The segment control. Let's change the tent right here to our red. Okay. And, uh, said a first and second just double click in here and you guys a bio and double click this one and say moves. Okay, by the way, I was command s throughout my project to save it. So if it crashes and ex code Beta has been crashing quite a bit, you may have experienced it yourself. Make sure your command plus s at the same time a lot. Savior Project a lot. Okay, so we've got that. We do need the image now, So this is put in image on here, and I'm gonna make it a nice little square. Actually, it's close to say 200 by 200. That's too big from the skeleton holding shift, but right about there. And we need a description right about the character about the pokey month description. What am I thinking? Label on through a label on here, OK, I'll just put it right there. What I'm gonna do is actually make it just is tall as the image. You I'm gonna drag it over here. I'm gonna give it about 10 lines. Meaning it could go 10 lines long, which is fine. Couldn't change your fought to Helvetica new or if you re like the system phone, that's fine. it's your app. Not gonna complain. Size 15. That looks good. Okay, left the line. That's fine. So we've got those two items there. Um, let's just go ahead and do a few more things. Let's get the rest of our fields on the screen. So this one is going to be read, and I'll change the font here too. Helvetica new system to custom Helvetica new. And this is gonna be bold because it's gonna be like a like the description label. I'm gonna call this type. What we'll do is we'll just copy and paste this a few times. So, uh, command C command V. There's our type, and I'm gonna throw it over here. We're putting defense. That's another one that we needed. Okay. And let's do it a few more times for height, Poke index, I D wait and base attack. So this one's going to be height, and that looks good. I may actually decrease the size 2 12 Put a divider line here in just a minute, make it a little bit smaller. Copy and paste it. Command C command V. You could also do command d to duplicate Say, wait and that's looking good. Pretty right there. I'm not calling both of these. Now come and see command be drag him over here and I'm just generically lining things up. When I put them in the stack for you, it's gonna move things around. So, Hokey decks I d the number of the Pokemon and then the base attack. So there's my six fields there and we're getting closer. Let's get our dividing line in here. So I'm gonna make a you have you You live, you and I'm gonna make this color to be right here. I'm gonna make it like gray. That is not a light gray. Wow. Uh, let's go ahead and make it really like gray. You can pick your own color. I already got some over here. This one right here is good. Okay? And I'm gonna make this one pixel tall. Height is one that's looking good, actually, before I make it one, let's just drag it all the way across there and we'll just do the same thing there. And now let's make it one so high. Okay? Like it. And then let's make another view this time. We need a little red bar that's going to go across the entire screen. That's going to show the evolutions. Okay. And let's change this to read. There we go. A little bit smaller. That's looking good. Put it right about there. That looks good. Uh, this needs a label on it. So let's just copy and paste this guy here or changed him too. Drag him in the middle here of your bar and this change of colored or white so you can actually see it. Okay. And I'm gonna change this instead of bold. Let's just change this to I talaq There we go. Bring the height early, size up, se 17. That looks good. Make it really long. This is gonna show kind of our evolutions to say, like, next evolution Venice, Venice or and, um OK, so heights. So it might look like this, Uh, next I just double clicked in here. Next evolution, then sore level 32. Okay, here we go. We're almost everyone. Got the views almost in place. We gotta put those labels right there, too. Also, it's gonna show it's always gonna show the current Pokemon that you've got open indicating Hey, this is the current evolution, and then it's going to show the next one if there is any. So let's go ahead and put a couple of images down here and these ones will make a little bit smaller. Maybe like 1 50 by 1 50 That's too big. Still, whatever size that is, here we go. 99 by 99 it's just get even 100. So two images, Right? So, command C Command V and, uh, was put it, Put it right here for now. There we go. And just for fun, you can put some in Pokemon images in here. I'm just selecting the image on the right hand side. You won 22 0 that's the worst. We pick the terrible ones. Mr Mine, Uh, for 37. Let's put one right here Just for fun. 33 ha! Yeah. So don't talk about okay. Better than stupid, Mr Mine. How worse Poking whenever. Okay, so looking good. We got a label here. Let's go ahead and make some more labels when a copy and paste this one. So we've got those of the descriptions, but we also need the label that actually, um has the data in it, so I'm just making a little bit longer there. And let's go ahead and change the color to bull. No, I don't like black. Let's do dark text color. No, I don't like that either. A suit, dark gray. There we go. Take off the bold still regular. There we go. So that's the height. And this might say something, like, you know, 71. Okay. And dentals, command C Command v. This and this is the way this might say, You know, like, 2000 and that looks good. Just copying and pasting it again. Some nice. By the way, when you command seeing community, it doesn't work. So you got to re click the item in some type of X code bug. Maybe this little bit smaller pok decks I d goes up to 7 18 or 7 21 I think. But we're only doing 7 18 so that's fine. Copy and paste. One more time for the base attack. Say 44. Just some arbitrary numbers. This looks good. And, uh, let's just put some temporary Texan here. Your type, whatever you want. I just copied and pasted some Pokemon text, so it looks a little more feeling there and It's starting to look about what we want. So now it's time to make sure you save it. Now it's time to put this in a stack view, and it's gonna make it look real ugly. That's okay for right now. And so, um, first off, you want to do the things that are logically grouped together first. So before we go down, let's go from left to right. So this needs to be in a horizontal stack. You. So I'm selecting both and just clicking the stack view, but okay, save it. And then, uh, we forgot. We forgot to put descriptions here for these. So type. That's fine. Except let's make it not bold. Let's make it regular. That's not for this one regular. And let's make it the dark gray color again. Here we go. On type is probably going to like this, you know, grass slash psychic. It'll look like something like that. Probably. So there we go. And defense, um, the base defense, you know, save, uh, 101 Why not? Okay, so that looks good. Okay, so that's in a stack view. These need to be in a stack for you, So let's go ahead and put these in a horizontal stack view. But these in a horizontal stack view put these in a horizontal stack. You okay? And then Ah, so what we'll do is we'll have all of this and once giant stack view, and then this could be in its own stack of you here in a minute. So let's go ahead and select this guy and this guy put them in their own horizontal stack. You okay? And now we can go down vertically. So select this one, This one back just gonna left inside to select all your stack views here. Um oh, and then the, uh, the divider that can all be in the same view. Actually, let's make the divider go full screen. So let's not put it in the stack view. And that looks good. So bam, bam, bam, bam, bam! Those are all gonna go in a vertical stack view. Okay, so it's looking good. You're like, uh, no, it's not. Well, you're right. So we got to do some actual constraints now, So your main stack for you. Now, let's put the constraints on it. Click your pin button. We do want to constrain the margins. Let's look, let's make a look real nice. So zero notice how it went. It went way off the great over here. I don't know why it's ridiculous, but it's what it does. So zero from the left, zero from the right, let's put it 20 from the top and, uh, 100 to the margin. So no sweat. 20 from the top is the same as 20 from the side here, which is fine. And from the bottom we don't really care about right now, So let's go ahead and add these constraints. Oh, all right, let's go ahead and set a bottom constraint. That's being ridiculous. So what will say is, Oh, I was terrible. Us first undo this dang X code. All right, let's try this again. Goodness. Okay, so let's So we've got those there. Let's actually get our box. Let's get our bottom constraints in first, and we'll work our way up there because it's gonna be a pain. So see how we've got our guys right here. They're in their own stack. You, which is fine. So what I want to do is I want to take this bottom first off. Let's constrained this first. I like where it is. I want to keep it there permanently. So what I want to do is ah, turn off margins 24 0 from the left, zero from the right. Um and, uh, no. Sorry, guys. Let's start at the very, very bottom. We gotta We gotta work from one corner up. So let's go to this bottom stack for you here. Let's work on him first. All right. So what? We want to dio move him up a little bit here. Come on. Come on. It's going kind of slow. All right. So we want to dio You can stop now. You can stop now. Stop it. Oh, X code. OK, there we go. Wow. Thank you. So that's what we really want. And so I want to say you are going to go. No, we're not gonna constraint. The margins were going to say zero from the do we want to constrain the margins? Yeah, Let's concern the margins. Give it a little bit of white space. So let's go ahead and say zero from the left Margin, Zero from the right margin and from the bottom, Let's go ahead and say eight. It's fine. Okay, there we go. So that's doing what we want. Notice. How has the dashed lines here of where it's going to be at run time? And for some reason, that kicked it off the screen. I think. Stack, you still have some bugs? Let's drag it back over. Okay, so right, Like, it's something that we don't worry about how it looks right now. Just the mainly out is what we really care about now, Um, that's looking good. So what I want to say here now is Ah, this guy, Let's just move it down. 1234 times. That's fine. And now let's put constraints on him will say, Turn off, constrain the margins from the left, zero from the right zero. And from the bottom, let's say eight. Okay, and then let's give it a fixed height of 26 pixels. Okay, there we go. So I think it's going to stay where we want it to be, Um, our little guy here, um, I want this to go to the edge is actually so it's Let's, uh, let's move it over. Sometimes it's hard to selected you a one pixel thing so you could make it a little bit bigger so you can select the edges here, Okay? And then you can change the height back down to one a little bit high. It's, uh let's see here. Actually, this is in the wrong spot. Eyes is in the wrong spot. It's in the wrong spot. Guys don't need it here. We need it actually below the type. It tricked us. It's dragon. And right there, there we go. So I dragged it into our stack You. Now it's now it's kind of obeying us, and now we can give it a high of one high of one. It's changing it to 50. Let's set that. And the constraint cow, it doesn't want obey. Okay, there's the height of one add constraint there ago. Gotta forces to do what we want. Okay, so the constraints are good here. Constraints look pretty good here, I think, Um, but what we want to do is we want to get our our Ah, the concerns are not good here. I mean, the layouts go, but the constraints are we've got to get the constraints. So it's fitting on the screen here, so select your main stack. View this one right here. Okay. And now go ahead and zero from the left. We do have margins own, and from the right, we want zero. Not a negative 900. Whatever from the top 20 is fine. And then from the bottom. But we want instead of 1 83 We also want to do 20 meaning 20 from this red thing. And I'm not click. Add these constraints. Let's look at our privy here. It's It's acting kind of strange. Uh, I'm gonna change from automatic to preview. It's acting really strange, actually. So OK, um, did we not set constraints in its ability to see what we set? Constraints on? What? We didn't set constraints. Let's make sure we've got to turn this off too much going on in the screen here. So let's make sure we got constraints for our top view. Actually. Do need that on turn off the navigator. There we go. So top view is right here. Uh, we've got height in the bottom space. Oh, okay. Way forgot to set. Um, we forgot to set it to the edges here. Really? Did we really forget to do that That seems odd that we would forget that you guys were like I did. Forget it. I've been trying to tell you for 15 minutes, but you can't hear me. Sorry. So let's go and send it from the left from the top and from the right. So strange. They're Ugo. Okay, Notice how the screens looking good now more or less the screens looking good. Um, it's filling up the whole screen here, which is nice. We do have a problem. Our segment and control is really big, so let's give it a fixed height. I know just from experience that the height on a control is 29. That's what it's supposed to be. And it's stretching it against our will. So said it to 29. That looks good. Looks really good. See, by the way, I've talked about this before. What? It appears that the preview on X code is not 100% accurate. When you're working with staff use, it just does not seem to work correctly. The only way you really knows by actually building your project. Just so you know, we can't rely on 100% on the stack view. Okay? and I've also noticed that with X Code beta stack user crashing quite a bit there, very powerful again. I still think they've got some some bugs going on. So click your main stack view here that this vertical one and let's do a few things click your, um, weird little icon here. The attributes. Inspector. Let's give us some spacing between each item. Let's say 20 spacing. Okay, and, uh, notice how again? Doesn't really look like it's changing over here on the right inside, but don't worry about that right now. And alignment instead of leading. Let's do Phil. So knows how. Now when across the screen, this is across the screen. K. It's looking good generically. I still got some things we gotta fix. And so let's move on down to our first act. You here. We know there's two items in it. There's an image view, and then there's the label. So on the image of you, um, let's go ahead and just give it. What I want to do is give it a fixed width and height. Ah, so I'm gonna go ahead and change where I've got it selected. You can't see it on the screen again. Storyboards Acting strange. Click your pin button here. Go ahead and give it a with of 1 20 and a high of 1 20 There is looking fly. Looking good. Okay, so that looks good to me. Um, let's look at this horizontal stack view that both these air in it says feel on distribution feel, um, cures if we change it to feel proportionally by which stack viewed? Did I select? Uh, it looks fine. So again, notice On the right hand side, it's cut off. I'm not actually sure if it's gonna do that in the application. Let's go ahead and run it and test it out because it's kind of bugging me that it is cutting off. But again, I said you can't trust what's going on with privy with Stack these. I don't think they've got all those pieces together yet. Pull up in the simulator here. Okay, Turn off the music and let's select blast toys. Okay. Okay. Cool. So 123456 We do have six lines of text. Even though I said that it should be 10. So I'm not sure why completely just yet. What's why it's cutting off, but it's looking OK. It's not looking too bad at all. Um, in fact, we're getting really close here. That's very cool. Okay, so cool. Deal. Um, don't worry about the text cutting off here in a minute. Not completely worried about it just yet. And OK, so we've got our stuff there. It's looking good. Actually, I think what we want to do actually is on this text. Let's make it shrink. There it is. That's why it's it's giving a fixed font size, and so it cuts it off. Let's go ahead and give it a minimum font size. And right now it's at 15 Let's say size 12th. So what we're saying is, hey, if he doesn't fit on there, you have my permission to scale it down to size 12 men no less than 12 at that point, Cut it off. So I'm gonna build and run by command plus R and see if that fixes are truncated text and it did shrunk down our fun. Maybe a size or two, so it would all fit on there looking good and remember, stack news have to work and correspondence with things like that like with the font size with constraints. You've gotta work. Use them all together. Um, so it's looking good, though. It's stacked now. This right here not impressed with how it is. I'd like it to fill across the screen better so I can click the stack view that it's in. It's right now. It's alignment. Feel what if we say feel proportionately? I was better. Let's try that with these other ones, too. With the stack of you feel proportionately. And with this one, let's say feel proportionately. I think my ex codes crashing. There goes my ex code did crash jerk, and, uh, I went ahead and just redid the feel proportionally in both the stack views. And it's looking okay. It's not quite perfect. Not too happy about it. Um, we Maybe we can play around with some things like, uh, so these Ah, let's go to this first stack. You hear the height and the weight is on the second below it. So the height and the 71 they're different lengths. Um, they're both left a line, which is fine. Let's try changing it to feel equally looks a little bit better. Let's do the same thing here. It's nice to looks a lot better. It's nice to use the tools like this that the stack use have, if you can, unless your boss or whoever absolutely wants it pixel perfect. I recommend telling your boss or people you're working on projects for their like, Hey, I want looking just like this. Say, Well, here's the thing, Boss Pixel Perfect does require extra work, but sometimes is actually better to use stack views, so it supports all devices. So hey, Mr Boss, rather than just releasing for iPhone and we'll do the pixel perfect iPad later, let's just make it a little more generic. We'll still make it look real nice. Let's make it a little more generic using these stack views, and then we can support all the devices at once, and it'll look really good. So you should be having conversations like that with your clients. You gotta teach them sometimes that these are the tools at your disposal, and there's benefits to using them. So I'm gonna run this project here and see how it's looking on the real screen. Good. What do you think, guys? It's looking, I like it. I'm gonna roll with it. We're gonna leave it just as it is. I like it. The next thing we want to do is fix this guy here. This label, um that I put constraints on it. Let's click the ruler and see I did not. I'm tripping out. Are you tripping out? I thought I put constraints on this guy. I guess I didn't go ahead and align it horizontally and vertically in the container. Okay. And let's go ahead and give it the width and a height fixed. Okay, now it's aligned. Lastly, I just got this little guy down here That's not too bad. It's not too bad. Let's Ah, photo are stacked view. And let's click the attributes here. And maybe if we feel equally Oh, you. I like it. Um, let's click these images, though. I'm collecting both of them and I'm gonna say aspect fit. Let's run it and see what happens. What do you guys think? Maybe some of your saying Well, I think the images of the bottom are too big and there's too much white space. If that's what you're thinking, I'm kind of agreeing with you. So let's change these images here. Remember how we set him to a size of 100 before? Let's go ahead and do that. Now I'm selecting both the images by holding down command. Go to your pin menu and for within height, go ahead and say 100 by 100 and click. Add constraints and, uh, let's run it now and see what happens. Hey, hey, Not bad. It's kind of cool. Um, it kind of space tease out a little more than I then I would have liked. Um, it's not too bad. I don't think we need to play around anymore. You guys could do that on your own to change around spacing and things like that, but it's looking real good. What do you think? So I'm gonna call this a wrap for this video. We've got the actual lay out here with statues, and now we've got to do the fun part and connected the Internet parsing all the data. It's going a little bit more complex. It's gonna be fun, though very important concepts for building professional applications. And by the way, you're mastering stack views right out of the gate Here. Probably a lot of developers who are professionals. Probably haven't even watched the new stack videos that Apple's provided its You're gonna be ahead of them when you go on your first project. You like. Hey, why don't use the stack you under? Like, why don't you just go jump off a cliff and you like You know what? I'm cool. I'm using new stack used. You're not give with the band, so get with the program. Whatever. So here we go. End of this lesson moving onto the next one.
92. App: Pokedex Part 11 - IBOutlets Detail View Controller, Updating Class: Hey, everyone, Mark Pricier Deb slopes dot com We're getting so close to finishing Our poke Index app is really coming together Way got our layout here in place, as you can see, and it looks pretty good on the screen. Now let's go ahead and do a couple things. Let's get R I B outlets connected. And then let's update our Pokemon class to have all the fields that it's gonna need tohave because what's gonna happen is we're gonna download that data from the Internet. And so we need to get all the fields ready and the outlets ready. So let's do that. Now. Go ahead and open your assistant editor and change it from preview to automatic and go to Pokemon. Details V. C. And I'm gonna close off a few things. Here is just we have some more space to look at her code here, and that's looking good. Okay, we got one. I'd be outlet. Let's put the rest in here now. So what we have is the name which is up here. Let's go ahead and ah, put the image on here. This is the main image, so we'll call this main image. Okay? and then we've got the description here. So let's go ahead and put the description. And so we'll call this description label. Okay, we've got the type, so let's drag the type over. Is gonna be the type label. The defense label. I'm just control dragging. Okay, Defense label. We've got the height label. You're like, this is fun Dragon. All this stuff. Yeah, it's kind of cool. Kind of soothing after all this other nonsense we've had to do height label, pokey decks label. And this is gonna be, um, current. I'm gonna call current Evo image for current evolution, and this one's gonna be next. Evo, uh, image for the next evolution. And then lastly, this is the evolution text. Okay, so we'll call it Ivo. Just got evil label. Did we miss anything? We've got our labels and all this stuff here. How about our back button? We should We should make that work, right? So let's go ahead and do that. Let's make an I B action so controlled drag from your butt in here and we'll go ahead and changes from Outlet Teoh action. And we're gonna call this back, but in pressed and all we're gonna do here on the back. Braaten is we're gonna dismiss the view that we popped up. So this this ah, details view. So you right here in your co. Just go ahead and type in. Dismiss view. Controller. Animated? Yes. Do we care what happens after it's done? No. So just putting Neil in there, and all that's gonna do is it's gonna pop it off. The screen and load are our main list. Again. Get rid of this navigation storyboards stuff here, and OK, so our outlets are connected. No big deal, no big deal. So let's go ahead and open our navigator. Go back to our, um, code over here. In fact, actually, let's let's reopen it. Sorry. Let's just change our class here too. I'm gonna go to manual, and we're gonna go to model Pokemon dot Swift. We'll just go ahead and since right here in the context, we're going to go ahead and just add the rest of the fields that we're gonna need for our application. Okay? No big deal. So we got name in a poke it excited. Let's but on the rest. Um, so let's go ahead and do description so private of our description. That's going to be a string private bar. What else do we have here? So we got a description type that's going to type string, private bar, defense type string, private bar, height of type string, private bar. Uh, well, we got the polka decks. I d That's fine. Um, wait and ah, you know what? Let's just make these all strings. Even if they come out down, his integers will just convert into strings maker life a little bit easier. Private bar. Um, we're gonna say attack type string, and then we've got those. All those images we don't need worry about those. Um oh. And then how about this text right here? We can store that Texas will to We're gonna need to create it, um, or format of ourselves. But in a certain way, let's go ahead and distort here as well. Twos. We'll call this next evolution text will spell it out this time and make that of type string. I think we got everything we need here. On 2345678 um, 9123456789 We got all those there, So Okay, we've connected up our data here. We've connected up our ivy outlets, and we're looking real good here. Anything else that we're missing? I think this looks good for now. Um, yeah, I think it looks good for now. So I'm gonna call this video. Done. Very short video. But what we're gonna do is we're gonna focus on the next video on how we're gonna use this data down with the information from the Internet. We're gonna look at the A P I we're gonna really dive into it, so it's gonna be a little bit longer on, So, uh, we're gonna cut this one short. Get right to it. So see you then.
93. App: Pokedex Part 12 - The API, Github, Cocoapods, Alamofire: everyone getting to the thick and juicy details of downloading data into our Coke index mark Pricier Deb slopes dot com And let's go ahead and talk about where we're gonna get the data from. So go ahead and go to pokey ap i dot CEO, and we're gonna be downloading individual Pokemon data from this service that's provided on the Internet. And basically, it's just a free public ap I and what we're gonna do is actually just grab different pokey month from this girl, just like you see right here. So, for instance, if I put this my browser here when I do ford slash Pokemon Ford slush in this case 715 it gives us Jason. It gives us the details for that poking one. So if I copy this here and I type in online Jason four matter, just do a search there, and it's usually this top one here, Jason. Four matter dot Curious concept, calm pasted in there and click process. It's gonna make it look really nice for us. We could see what we're gonna get. So what we're going to get is the abilities which we're not going to do in this video you can You can put those in abilities and moves and we're gonna get our defense. We're going to get descriptions now. Notice how it actually doesn't have a single description with this Jason, we actually have to download the description from a different endpoint. So what we're gonna do is we're gonna download this information and make another download to grab the description of the Pokemon, which we're gonna show in the APP. So multiple downloads. So we got a description Don't care about the aid groups. It will have evolutions. So if I go to we know that Bubba store has an evolution. So I just goto one for Bulbul sore, Okay. And, uh, I know pace. Well, let's let's refresh the screen. Absolutely. Go and pay spoke ulcer in here you'll notice that Globalstar actually does have evolution. So he's got abilities, lots of descriptions, EG groups and OK, evolutions. Now, with this specific AP, I it on Lee gives you the next evolution and that's why our APs kind of designed that way. It only show you the next one I love. I would have liked to have had all three evolutions showing on each pokey month. But this specific AP, I doesn't do that. However, however they do provide, if you go back to their main website here, scroll down to get hub account. Okay? And if you go, we downloaded this earlier, by the way. But if you go into the data, you go to version one or version two and they have a bunch of C S V files to have all the data you could ever want about Pokey month. And you can actually parse these all in yourselves. You don't have to connect to the Internet. You can download these parts among yourselves and grab out whatever information you want and format it however you want, and you won't be limited by the A P I. But the point of this lesson is to show you how to connect to the Internet, how to connect to an A p I and how to work with the data. So that's what we're gonna dio. So, uh, this is another download will have to make is Ah, really is we have to make the download. We just have to grab it out of here because we have what number it is and we just need to show the image so and we have the evolutions there, the moves. You can do that on your own member. Our segment control, um, sprites. This is where you could download the actual image. And I was doing that when I first built this up. I was downloading them all from the from the Internet. But as you can imagine, downloading upto 718 images even highly optimized, could be really slow. And so it was better to pull them onto our laps. We're not using the sprites. And then here's the types. We're gonna be grabbing those and making them putting them in our app. So that's the Jason. It's coming from pokey ap I dot CEO. And, uh, if you want more information about the rest of the things that they offer on their a p I. It's right here on their documentation. They've got a whole pokey decks full of all the Pokemon, the types of moves abilities, egg groups, Ah, eggs, etcetera, etcetera. You can get all that data from their That's the ape EI. So we need to get prepped and ready to start working with the A P I. So what we want to do is go ahead and open up your terminal. Okay? I just did command space and typed in terminal and glide and navigate into your project minds on the desktop Sooty desktop. I just pressed Tab, and I'm gonna go into my pokey decks. So see the pokey decks, Pokey decks by Deb slopes. That's what we called it. We're in the directory now. So what I'm gonna do is I'm actually going to, um, get the cocoa pods working for the application. So all we need to do is type in pod in it, because what we need to do is download Alamo fire that networking tool that's gonna help us make network requests. We've just initialized the pod. Our director is a pod is go ahead and open up a browser. Just type in Alamo, Alamo, Alamo fire. And that we're gonna grab it from Get hub right here. He's got some instructions for us. All we need to dio is, uh is make sure we've got this in our in our pod. So open up your finder. Go to your your, uh, pokey decks application. Opened it with any text editor your pot file text, edit out. Whatever. I'll do it with sublime on. There we go. Sublime is free. There it is. Nice. Nice and ready for us. And I'm just gonna go ahead and change my platform to eight. I don't need to target six and right in here, actual right above it. We're gonna say, use underscore frameworks. We want to use frameworks. Make sure you put the exclamation at the end. And then inside the do inside our target here couldn't do pod. And that's Alamo Alamo Fire comma Another one of those till d Arrow 1.3. And that's looking good. So I'm gonna command s to save close out of it. Go back to your terminal. By the way, I've closed my ex code project. Make sure you do that before you install this here on. Go ahead and do pod install. And if you don't cocoa pods installed. Go watch the previous video where we installed cocoa pods, explains the whole process. So it's installing Alamo fire. And there it is. Good to go. Now. We need to reopen our project. Okay? With the white icon right there. So go find your project. double click it. Open it up with white icon and we can now use Alamo fire. Uh, we made one mistake, though. We installed the wrong Alamo fire. I was wrong. Sorry. Go back to the website Here, Click Branches. The current release version doesn't support Swift two point. Oh, Yet at the time of this video, Swift 2.0, is not officially out yet. So click this. I clicked branches again. I clicked branches here, click the swift 2.0, Branch And then scroll down and you'll see the instructions. Um, And there it is right there. So go ahead. And, uh, copy this instead. Sorry. Let's get that in here. Go to your cocoa pods. File again. Your pod file. Open it up. And, ah, let's change this to this. And let's add one more file. This of this source at the top. OK, it's Copy that, and I'm just gonna put it. Ah, put it right here. I don't take off this comment, silly. There we go. And I put it right above it. There we go. Save the file. So all we're doing is we're grabbing the code. That's that support swift. 2.0, that's all. And I'm gonna close X code again, and then go ahead, just back to your terminal and run pod install again, and it's gonna get rid of the old one and put the new one back in. There we go. Now we're good to go. Okay, So go back to your project and open the white icon. Now we are in business. Okay, So, cool. Deal. We got our for our framework in there. We've talked about the A. P I. Let's just go ahead and finish this video s so you can get up to speed here and the next video, we're gonna just dive right in to part, downloading data, parsing it, getting in our application. And hopefully, that's our last video. If it's going too long, maybe two videos, we'll see how it goes. But here we go. Let's get ready to get cocoa pods installed, and we'll see you in a little bit
94. App: Pokedex Part 13 - Downloading & Parsing Data: Hey, Mark. Pricier deaf soaps dot com Here we are again. Let's see if we can finish this bad boy. If not, it will be in the next video. And so what we've got right now is some data in our properties that we need to use. But we're not downloading information from the internet now. We talked about the pokey a p I and so we know we know. What the hell is that we need to grab for each Pokemon. Okay. And, uh, excuse me. So basically what the your l is gonna be is Ah, just pull it up here again. So if you remember, right, the Ural looks kind of like this. And then, you know, there's a number at the end, right? That's what that's what it looks like. Okay. And so comment this out here. So obviously this number is gonna change for each pokey month. And what we want to have happen is whenever you click on one of the Pokemon, we down with the information. We don't want to download all this information for all 718 Pokemon. Right? When the app loads are apt, Could possibly craft ran out of memory be a big mess. 718 network requests is a lot. So what we want to do is what's called, like lazy loading, where you only load it when you need it. So as soon as you click on the pokey month, then we hit the Internet. We download it will take a second or so, but no big deal. So what we're gonna do is let's go ahead and, uh, let's go ahead and put some your rails in our application. And so I'm gonna create a new file. I'm gonna put it here in the u tail new file. I'm gonna call this. It's a swift file and I'm gonna call this Constance. And what Constance is is just a Siris of values that you put in here that are globally accessible. If I don't put it inside of a class there globally accessible. So I'm gonna store the URL for our main M point, and you want to get in the habit of using a constants file. When you got to use things, throw your application. Maybe you'll put him in different places. But Constance is a great place for it. So we're gonna say base actual. Say you are l underscore base like the base Eurail. And we know that that's http ford slash pokey ap I doubt CEO. I believe that that's what it is. Let's just double check and make sure poky ap I doubt CEO. Copy it directly so as to make sure we are really good to go. There we go. And, uh, that looks good. We'll just take off the trailing slash, though. Okay, so we've got the base, your row and what we also have is the Pokemon. You're also let your l pokey month, and that is gonna be equal to what we kind of just did. Uh, this guy right here, um right there. And, uh, what we'll do is we'll add the will, add the number at the end of it, and then another slash. And so it'll be this plus this, plus the number at the end. That way we can reuse it later on. And so we've got our We've got our your l. And so what we want to dio is store that your URL for each Pokemon when we when we create a pokey month. Okay, so first off, we're gonna need a property for that. So go ahead and do it. I'm here in Pokemon dot Swift. By the way, private var we're gonna call this resource girl is boring. Good Pokemon Ask me of type string and what we're gonna dio is right here. We'll go ahead and set it. Whenever you credit new Pokemon, we will set this Your l make some space here so you can see a little bit better. Okay, So what will say is ah, um Pokemon Euro equals, Do you remember what it was? This is the string syntax for injecting strings. It was your l base, plus your l Pokemon. Oops. You're all Pokemon. Plus, it was the number, right? And did we have a ford slash instigator constants? So this does have a forward slash We just need to add the number and then a trailing slash . So the number is going to be, um, self dot underscore pokey deck city. Right. And then we just add the trailing slash. So all we're doing here is just building a string member. This is the syntax toe inject variables and the strings. So we're injecting the base. You are Well, then we're injecting the Pokemon, your L and then we're injecting the pokey decks I d and then afford slash, and that's our euro. So whenever we create a Pokemon, it's gonna dynamically generate that you're also weaken later, download it and use it. So that's really cool. So let's down hold some data. How does that sound? Let's talk to the Internet. So here we go. It's gonna be a little bit lengthy. I'm not trying to explain his best I can to pay. Very careful attention. Uh, so far, we've implemented the cocoa pods with the Alamo Fire package. We're going to use Alamo Fire to download data from the Internets Fantastic library, eso, funk download, Pokemon details. And by the way, if you ever working an objective C the framework you want to use for that it's called F networking. It's written by the same guy who were Alamo fire except for ah, for objective C. So we're gonna download Pokemon details and, uh, let's think about something for a second. A download is a synchronous right, meaning we don't know when it's gonna come back with a result. So let's say I click on my Pokemon to go to the next screen is my day. They're gonna be instantly available. Well, it's not so I can't just do viewed it load and then grab this data because it won't be there yet. So what we need to dio is when the download finishes. Okay, We need to let our, um our custom cell not to sell the view control. We need to let the view controller know when that date has been downloaded. So then it can assign the fields. Otherwise, it would break. It would crash because the date is not there yet, so we need to account for that. So there's something we're going to do. We're going to create our own closure, define her own closure. And so over here in the constants dot swift, I'm gonna just go down the line here. I'm gonna say, public type alias. I want to say download complete. In fact, I'm not sure next refining the public. He word on here, Um, something I do. And okay, you're probably like, uh, wait, what's going on? Your like I was understanding so much stuff, and then you throw this in here, okay? You don't have to understand everything that's going on with this to know how to use it. But basically we're creating a closure meaning, ah, block of code that's gonna be called after whenever we want it to. So just like we've done in the past with the U. N s u R L session. Okay, we had those closures that are called after the fact. That's all we're doing. We're creating our own custom closure. So when a download's complete, somebody can call it and run some code. And all we're saying is it's an empty closure. No parameters in it. We're not passing anything in it and it's not returning anything. It's returning nothing. Okay, that's all we're saying. It's not that big a deal. Just know that if you if you want to create a simple closure, that's how you do it, and we'll go back to our pokey month, and what we're gonna do is we're gonna pass that closure right in here into the Pokemon download Pokemon details, and so it's going to say, completed. That's the name of the parameter we're gonna say, Download complete And okay, so what this is saying is, Hey, when the download's complete, let's call this and whoever whoever passed this in as a parameter will call that block of code. Okay, so, for example, download Pokemon details. Let's actually just build the framework for what I was talking about. So let's say you click on the button. Okay? On the Pokemon that's going to take us here to the Where's here, Controller? That's gonna take us to the Pokemon detail. VC, right? It's gonna take us right here. This is gonna load now The name. We already have the name. We're not downloading that from the Internet were also not downloading the image. We know its image to dio. In fact, we can do that right here. We can say main image dot image equals you. I image image named, and that's down here. Image named. And we know the name of the image is going to be, um, Pokemon because we have our Pokemon object right there. It's gonna be Pokemon pokey decks. I d um And that's not a string, you know, make it a string first. Here, there we go. Store little string syntax here. It added extra thing on it for us that I didn't want. Okay, so we're taking that pok decks I d and turning it to a string. And that's the image we've already done this before. Way have both of those. We don't have the rest of the data, though, So when view did load happen, let's go ahead and call Pokemon dot Download Pokemon details and look, it's looking for a parameter. It's looking for closure, right? Like a coat. It's looking for code to call when it's done downloading. So look at this. All you gotta do his press enter and it does the rest for you. So what we're saying is down with the pokey month. So it's gonna run all of our downloading code and then when it's done, whatever, Cody, Right here. So this will be called after download is done. So when the downloading is done, it calls here and then we update the views. We don't want to update the views here with the height and the weight cause our program or crash, cause we don't have the data yet, but maybe in in one or two seconds, this will be called with the data and then we update it. Does that make sense? We don't have the data yet, but we will in the future. And so whatever codes running here is not gonna be run instant on. Viewed it. Load this code is not gonna be run right away. It's gonna be run whenever this closure is called. And that will happen from our download Pokemon code. That's what closures are all about. Its code that you can run at a later time, okay, and so very cool. So that's ready to go. So when we when we click on the Pokemon, viewed it loads gonna be called it's gonna hit this and it's gonna download Pokemon details that that looks perfect, actually. So let's go to our Pokemon. Let's actually download the details of the Pokemon. So to use Alamo fire. Um, I'm not sure if we have two important. Let's see if we do or don't. Alamo fire dot request. We do need to import it. So up at the top here, just go ahead and import Alamo Fire Command be to build. You're gonna see a little air, a little red air there, cause I think X code has some bugs still, um, but it should build for us and still building right now. I should say build succeeded. And if it succeeded, we know that we really don't have a problem in X codes. Just being ridiculous. X codes being ridiculous. So don't worry about that. It's working just X code. I think it has to do with the beta, but anyway, build succeeded. So that's the That's how we know it's working. So Alamo fire that request and sure enough, the code there. So it definitely is working and OK, so we've got a request and what we want to do. So this is a request. Remember? We talked about requests in the past Internet requests. We want to do a get request, so dot get okay is what we're looking for. And the string we want to do here is the, uh, the URL. So all we have to dio. In fact, let's go ahead and grab the URL here. Let's say you let your l equals. We always got to turn your your your l strings into S Yarl's. So I'm just going to Ennis. You're well, I'm calling this string parameter, and here we're gonna pass in the Pokemon. Your l Okay. And then here, down here. Well, actually, passing the actual girl like that. Excuse me. So what is it? We're gonna put the exclamation at the end here because we know it's your We know it's gonna work. Um, we're gonna figure that out of compile time. So that's looking good. We pass in the your l. And so what is the next thing we need to do? Well, so with Alamo Fire, you just do this request gets it, and that's pretty much it. But we do need to know when it ends so we can do something with the data. So all you gotta do to make this work, it's typing dot response, Jason. Okay. It's right there. And completion handler. That's the one we want, I believe. Yes. Um So press enter and then press enter again and then press enter again. Press tab pressed, Enter press tab, press, enterprise tab and delete thing that says code. We don't need that and what it's doing, OK, it created another closure. It's saying after the request is run, run this block of code and we're gonna pass in the request. The response and the result Now, right now, these are just the types we actually to put parameters here. So go ahead and type in request and then a colon. We're just giving parameter names. It doesn't do that for us automatically. That's okay. Type in response. That's our response. And then go ahead and type and result. And that's the results. So all we've done again is repressed. Enter. And this was the closure it automatically gave us saying this block of code is going to be run after the request is done. And we've put in a request parameter, meaning we're just giving it a name so we can use it. We're giving this one a name and this one a name. The Alamo Fire Request is going to do all this force. It's gonna pass in the request. It's gonna pass in the response, and it's gonna pass in the result. Okay, so that's how little fireworks who runs a request. And then it goes into the closure block and lets you know what's happening. So it's not too bad. Um, and the first thing we want to dio is we just want to see if it's working. So I'm gonna print print result dot value that debug description. Okay, so this result here is it has a value parameter. That's part of Alamo fire. The value is the data that you want. And so we're gonna just printed to the screen and see if the download even worked. Okay, let's just see if it worked. It will print everything it gives us. So what will happen is if we see Jason or things printing to the screen, we know that it works. So I'm gonna go ahead and run the application, okay? Pull it up here. That's tiny. That's too big. Just right. Okay, here we go. Let's pull this open a little bit bigger here. That's loading. There we go. So when I click this, this function should call. In fact, let's put a break point here. I'm gonna click it and the break points going to stop whenever it gets to that code, and it's gonna let us know it got there. So I clicked it. It definitely did get there. I'm a dragon to break. Turn off the break point and press play. And, uh so Okay, I ran the request. I'm waiting for it to print. Appears to not be printing. Uh, we got a problem. Okay, So we need to go ahead and give our app permissions Theobald city to talk to the internet. So if you remember, we've handled this before, right? And so what we want to do is go to click in my folder here, go to your info dot p list. Okay. We're gonna create a new item here, and this one's gonna be called N s AP Transport Security. Remember, Iowa's nine now prevents you from going to your roles that are not https. Okay. And, uh, we just need to turn it off. So change it to dictionary. I'm a click the arrow to drop down here. Maybe a little small. Unfortunately, Exco does not let me zoom in here. And so let's create a new item in there. We're gonna call this n s Allows a r b i traer e That's hard word Teoh type sometimes, and this allows arbitrary loads and that's gonna be of type Boolean. And we're gonna say by default, Yes, So just look, let the app load whatever webs, whatever You are out once that's all we're saying. I'm gonna click back my Pokemon code here. Let's rerun it again and see if we can't get some the request working here. Turn this off. So this should be downloading charge Ciara Zardes information and it Look, we are printing stuff and I think I saw a charters art in there. Yeah, look at that. So it's working. So let's recap again. I know I sound like a broken record, but this is so important. This is what you're gonna do in your job in all your aps. So what we're doing is we're creating our your ill based on the pokey decks. I d remember the pokey ap I euro gives us data, tow us really nice tool. We know the URL. So we make the request and it's a get request. We pass in the URL that Jason comes back in the result and it prints up the data right here . So now what we need to do is what we've done in similar videos. We just need to parse that Jason, stick it into our views, and we are in business. So I'm going to get rid of this and let's let's get to work on this here. So we needed If you look at the Jason here, notice that it's Ah, it's a dictionary. Okay? It's a dictionary. That's that's expected. So what we're gonna dio is, say, if let dicked equals result that value. Okay, as remember, it's a dictionary and the keys are strings and the values or any object it could be a could be an array could be, ah, string could be an integer We don't know they're all different values, but we know the keys are all strings, so it's a dictionary of type string. So if we so all we're saying is, hey, convert the Jason into a dictionary, a new app on IOS Swift Dictionary so we can use it. And then from that point, it's not that hard. All we need to do is grab fields out of it. So, like if I do a search on here, type and wait, there's a weight filled. Remember, there's a height that we want is just called height. There's a base attack or there's an attack, I think, is what is called That's Right and Attack Field. There is a type filled wrong type. Come on. Wow, there's a lot of types on this guy here, um, types. Oh, it's types because there could be one or more type, so there's types that we're gonna have to grab. So looks like all of our data is there. Which is good news. Are what What this means so far is were successfully talking to pokey ap I, the website and its successfully sending data down. By the way, if this Ap I ever goes down or you want to enhance your app and don't want to use it, just grab those see SV files and you can build all your app and you can even store all the stuff in the app without having to make these network requests if you want. So what we're doing was it converted it to a dictionary. Keys are of type string, and the values are of type, any object. So let's just start grabbing data out of it, okay? We'll just say if let weight okay, if let weight equals dict. And remember, it's the weight. The key names have to be spelled exactly right. So just like right here, wait needs to be spelled exactly the same most what you're getting from the Internet. And we're going to say as ah, string. Excuse me. So, basically, you got to do these. Reflect, If you don't, you could crash your program. Okay? Don't crash your program. Make sure it exists first and that it converts correctly to a string before you try and use it. Otherwise, your program will will crash will do exactly what I'm doing here. And every app you build, always check to make sure it's working before you use it. And then all we have to do is say self dot underscore dot Underscore weight equals weight. So make the one up here. Okay, This wait right here. Make it equal to the one that's working. So if we got in here, everything's good to go. Let's assign it. By the way, if I don't use self watch, what happens? It gives us an air reference. The property enclosure require self. So if you have a property in a closure were in a closure and you can tell because the curly braces, if you ever have code and closure, you always have to use the self keyword. Okay, you have to say a word where the object lives, what you're referring to. And you're referring to the object here because this code is on a different threat. Sometimes it's running somewhere else. Always have to use self. It forces you and then we'll just keep going down the line if let height equals dict height . We know that fields in their exact key name is in there because I just looked it up and, um, they always to say, self dot underscore height equals, uh, height. And that works. Okay. And that's good for me. If let Attack equals Dict and I believe it was attack in the Jason as a string self dot attack equals attack. And so we're just assigning the variables from the dictionary into the variables on our property object on our poll coupon object. Okay, this is very common practice. All professional developers do it pretty much just like this. So if you do it this way, you are running with the best of the best, so that's cool. Um, so we've got weight height when you defense, right? If let defense equals dict and less typing defense, as I say, uh, string, by the way, I'm not sure if some of these numbers here because there's no quotations around it. I'm not sure if they'll convert properly for us, so we'll see what happens. So I'm just gonna say self dot Underscore Defense equals defense. Okay. Okay. So we've got a few things going on here. Were just grabbing the dictionary from the Jason were grabbing items out of it. And remember the way that you structure it like these strings right here. They need to match what's in the Jason down here. Okay, so, um, we may have success with weight or not. It could be a number. I'm thinking it might not work, but we'll see. Um, and so wait. High attack. Those could all be numbers. For instance. I'm not quite sure we'll see in just a second here. In fact, we'll check it out right now if it all worked. If this all worked, we can print the objects from our main Pokemon, and it will print out. According So if I fight, print self dot Underscore, Wait and print self dot Underscore height, print, self dot, Underscore, attack, print, self dot, Underscore defense. Okay. So if everything worked, those will all print what they're supposed to be. If they didn't work, they'll probably say Neil, Neil, Neil and Neil. Not to be confused with Neil, the person who's probably watching this video. But Neil as an n i l s run a program command plus r see what happens. Turn off the music. Click chars ard And so 905 worked. So this top on this weight, it worked 17. The height worked, But it looks like attack and defence are integers I didn't design it this way, But guess what? Here is a common problem that you're going to run to as a developer. You've gotta obey whatever the A P I says And this ap eyes telling us the weight and the height, our strings. But the attack and the defense, our numbers Don't ask me why. I don't know. So all we gotta do is this. So let's change the attack to an end. Let's change this attack to an int. And then what will Dio, since our main our main property appear on attack is a string? I don't want to deal with integers because we're not multiplying the numbers, so let's just convert it to a string. Let's just, uh, do that special string format here where you can insert your variable. So we're gonna basically take this ended your attack, converted to a string and put it in our Pokemons attack, which is a string. It will do the same thing here. Self defense equals going to make it into a string. Just convert it, convert this into a string. Now what we're saying. So what was happening before is the cast was felling. This was failing because we're trying to make it into a string when it's an integer. Now we're saying it's integer. And so if this all worked right, these last two Neil's should now be integers and we should see the numbers. Let's go ahead and run it. This is exactly how I write my coat. Test things out, see how it goes. I make changes. Let's click charge hard and there you have it. The 905 is working, so the way to the height it's already been working. Now the attack and defence are working okay, because we're casting them correctly. Very good stuff. So we've got these parts working now what else do we need to dio? Let's see here we've we've got weight, height, attack and defense. We need to get the types OK and ah, let's just, uh Well, let's let's open up our pokey A p I make it look nice over here, poky a p I and see if they have types on here. I think that you Okay, so look at this. Excuse me. Um, you guys try and talk for 50 hours in a row without clearing your voice. Yeah. Okay. Um so types, the key value or the key is of type string. We can tell that now, again, this is very common going to a p I documentation looking at because you got a partial data exactly as the A P. I says so. Types is a string, but the value, What is that value? You know, it's an array, so it's a an array of dictionaries. These curly braces mean it's a dictionary. So types is it's an array of dictionaries, so that's that's how we gotto interact with it. So let's go ahead and work with the types now, So here we go. If let types remember always if let gonna make sure converts correctly. So we're grabbing it out of the remember It's called types, as you can see on the left hand side. And just like I said it's a I'm putting the open square bracket cause it's an array dictionary of type string. Remember, the key value is a string, OK? And ah, well, in this case, um, so this is a dictionary, right? If you notice this is a string, the key value or the keys a string and the values also a string on both of these. So we can actually instead of saying any object weaken just a string and string because we know we know that both of those are strength. So again, types is an array of dictionaries and each dictionary is of type string, string, the key end value, both string. So let this absorb for a second what we just wrote here. This right here is the exact same thing. Is this right here? I want you to. If you don't understand this completely, I want you to pause the video. I want you to look at what's highlighted over here, and I want you to translate it into what's highlighted over here. That's the exact same thing. That's how you partial Jason's deposit look at if you need to, until you understand it perfectly. It's an array of type dictionary with string and string. So Okay, so if that worked correctly, we're gonna it's gonna print or types of the screen. And so let's just test that out. That's just print types that debug description. Okay. And let's see what happens if Prince Data we know it was successful. So turn off. The music was printed out, and here it is. It printed it out. It definitely worked. Definitely, definitely worked. Def. Definitely. Def definitely worked. Eso um yeah, uh, types. That's looking good. Eso Now, what do we want to dio? So think about this in our app, Remember, we wanted to say have multiple types, so it would be like grass slash magic or grass slash Is magic even a type Don't hate me Pokemon fans. I don't think it is. It's like magics less or a grass less psychic or dragon or whatever. Maybe so we want to put slashes after each type because, ah, Pokemon can have one or more types. I think there's a maximum of two. Um, so we've got some types here, so let's figure it out. So Okay, so we've got some types what we want to do. Um Well, first off, you know what? We don't even need to mess with this. If there's no types. What? This Pokemon has no type. We should probably account for that. So at the end of your of the end of your little ah casting here, why don't you say this where types dot count dot com is greater than zero. So that's interesting. You've never seen that before. Close this left hand side here trying to keep the text big so you can read it while also making a not jumbled. So look at this here. So where's and if let type. So what we're doing is we're grabbing that. We're grabbing the data out of the dictionary, and we're casting it as an array of type dictionary and string and string. So if that works, if it's successfully casted okay, then we go on to this section here. This is a condition, and we say where types that count is greater than zero. So what we're saying this first converted, and if it successfully converted, let's make sure this array, because now we know it's an array. Now, let's make sure the account is greater than zero. If it's not. We don't care. We don't want to do anything with it because we don't need an array that has no objects in it. We need to have something. So Onley go into this code if it casts correctly and if the account is greater than zero. So cool little thing where you could do a condition right there. Makes your code a little bit. Let right less code. So Okay. So what do we want to do? Well, we want Teoh. First off, we want to grab the first type. If there's only one type, let's just grab it in here. So we're gonna say self. Well, we'll say if let type equals types. Zero name. Okay, think about this. 1st 2nd what's going on here? So OK, he's creating a variable. A constant called type. What we're doing is we're grabbing it out of the, uh, remember types is an array, right? You can tell by this and by this. So let's grab the very first item in it Now, is this gonna break? No, because we know that we have at least one type, so this will always succeed, cause there's at least one because we did this check here making sure there's more than zero. What we're doing is we're grabbing the first element out of it, and then we're calling the name property. This is no different than saying ah than doing this. Um, it's no different than doing that. And then ah, doing something like this Eso if let type 00 yeah. You know as uh well, actually, I should work. Fine. I'm just showing you an example. So if I did if let type zero and then I said, you know, if let name equals type, um name, that's the exact same thing. OK, I'm just doing it shorthand. So what I'm saying is, Hey, it's gonna return us the very first type, which we know is a dictionary of type, string and string. And let's grab the name property out of it. OK, I know it's a little confusing, but think about it. Here section slot zero grabs the first item out of it, which is a dictionary of type string string. So it's giving us a dictionary and then were immediately calling Are grabbing an item out of that dictionary. Just pretend that we don't need to store it because we don't. We're just calling the name property of that dictionary right after. So it returns us the dictionary and then we're calling this on the dictionary. That's all that's happening. And so what's getting put in the type is actually, um, is actually not. It's actually the name. Look at the key over here, its actual name. So I can call it name, because that's what it's giving us there. So if there's a name, then what we can do is we can say self self that hook self, that type equals name. Okay, so what we're doing is remember, we have this type property, and that's is gonna look kind of like this, right? It's going to say, um, grass slash fire. I don't think there's a grass slash fire tight, but, um, grass slash fire. It's gonna look like that, right? We're gonna we're gonna have to format it ourselves. So what we've done here is we're just saying, Hey, grab the first type in a sign it because if there's only one type, this is all we need and then we're done. But we need to do a little bit more. Okay, that's what we're gonna do now is say, if type stock count is greater than one. So we knew there was one already. But what if there's more than one? Mm. Now we need to write our coat. So what we're gonna say is, ah, we're gonna write is a for loop for var X equals one. Okay, well, X is less than type stock. Count X plus. Plus, why do you think I didn't put it? X equals zero. What? We've already grabbed the zeroth element out of it. We were to grab the first index, so we only care about the next index and onward. So let name equals types X and then names. This is almost identical to what we did before. Okay? In fact, let's just say we'll say if let so we don't have a crash. So this is pretty much identical to what we did up here. Okay. Except this time we're dynamically grabbing indexes one and onward. So if there was 20 types, it would go through each one of those, and we're so we've grabbed the name of it. And now we just need to add it onto the onto our ah, onto our types. I guess itself dot underscore type, and, uh, let's ah, unwrap it there, I must say, Plus equals, Let's do a Ford Slash. That's the slash in between the words, right? And then the backslash parentheses. That's our special syntax to insert variables. And let's just insert the name. Okay, so what's happened is, if we've got if we got the types and if there's more than one or more than zero, let's grab the 1st 1 and a sign it. If there's more than one, let's go through the rest of them had a slash after each one and then put the type in there . That's all we've done. It's looking really good. There's one more thing that I want to do in right here. OK, on this. If let's say and else if there was no types here, okay, if there was no types, if that completely felled, let's just a self that type underscored type. This is making equal to an empty string, okay? And so what I want to do after this is all run. Okay, let's go ahead. And print are types. I know that was a lot of code, for one thing, but this is how you work with Jason.
95. App: Pokedex Part 14 - Completing the App: welcome back for the exciting pokey decks done that way you're gonna finish this? I promise. And let's get right into it. Mark Price here, Deb slopes dot com. And so we've got height, weight attack defense coming down from the Internets. Looking good. We've parsed it all out. We've also parsed out the array of types made it look real nice with slashes in between them, the last things we need to dio is get that description downloaded. Okay? Because member doesn't come in the Jason. It gives us euro and said the actual description and we got to get that description. And then, uh, the evolution we got to get the sea of that character has another evolution. So let's go ahead and start with the description. So we're right here in our in our download Pokemon details where we are just downloading data, OK, And then if I didn't mention, we gotta connect a lot stuff up to the user interface to so right here, we're downloading information. We're parsing it. It's looking real good. Uh, Yep, yep, yep. OK, so we're gonna continue on parsing data. Let's talk about the description. Let me, uh, pull up in this here. If you look at our we'll get our Jason here. This is just from one of the Pokemon notice How? There's a field called descriptions. And I think what's happening is each of the different games they have. Different descriptions of the Pokemon, something new about them are different, just slightly different. So this is an array of the different descriptions. We're only gonna grab the 1st 1 Some of these Pokemon don't have more than one description and can't guarantee. And we only care about the first right now. Building your own poke Adex. Feel free to download old them, parse them, put it into app. Make your app. Ah, 100 times more involved in this one. The world is open for you to mess with it. But in our case, right here, we've got descriptions, which is a an array you can see by the square braces. Here it's an array of dictionaries, and the dictionary is of type string and strength. String key name, string value. Okay, So what we're gonna do just parts of the description grabbed the 1st 1 in store it. No big deal. We've already done this for the most part. So here we go. If let I'm gonna say D S d sc for description and a r r for array equals dict and it's descriptions. Now remember, we're grabbing this exact keyword here. We know it's an array, so we gotta grab you. Always grab the top level object first in, uh, in the Jason. And then once so we've got we've got to grab the array. And then what we want to do is we want to grab the resource. You are. I okay. And remember? So we're grabbing the array. Okay? And I messed up here. Um, let's see. Description. My bad. This is not what I wanted. So we want this descriptions as What the heck is this guy doing is confusing me. Sorry. So a dictionary of type, string and string. That's what we know. Okay, so there we go. Grab the array. It's a dictionary of type string string. If that successfully parsed, which it will, Um, And if it successfully parsed, let's go ahead and grab the URL out of it. Because what we're gonna do is grab this girl we're gonna download it from. We're gonna make another download call, download it on and then store it. So let's do that. Now let's say if let euro equals description array, what do you think we're doing there with zero? Remember, we're grabbing the very first element out of the array. Okay? And, uh, what we probably should do also is that where Klaus again, where descript array de es e r dot count is greater than zero. So what we want to make sure is I must be swelling this wrong. There we go. So where the where the array dot count is greater than zero. So let's not even run this code unless it's equal to zero. And let's just make a quick else clause before I get a bunch of, ah, curly braces, but I don't know where it ends were Just say, if there's no description, we'll just say self dot Underscore description, not defense. Come on, description equals an empty string. Okay, so now let's go back up here. Let's grab the euro. So grab the very first description. Okay? And then in that description, now, let's grab the resource your I as a string. So grab the very first element out of it. And if that succeeds, grabbed the very first key out of it. And, uh oh, you know, I don't think we have to cast it. Actually, let's take a look here. Is gonna force us to cast it. No, we're good. We don't need a cast it because we define the type right there. We said it to string. It knows it's a string. So we don't need to say, Hey, is it gonna be a string? It's expecting a string. Okay. And eso Daleks. Good. So if we get here, if there's euro, it's a string looks good. And we're grabbing this one right here. This resource you are right. Let's go ahead and make another Alamo fire request. And technically, we're making a request in the callback function in the closure of this one. That's okay. It's fine. So let's make another request to download the description. And once that downloads and will parse that data and store it. Okay, this is typical. I This is a big IOS typical network development when you're talking to servers. Got to do this in any programming language. So Alamo fire dot request same things before get request, ok? And for the string. What is it gonna be actually eso It's gonna be similar to the other one. We're gonna put the base. You are? L plus that that you're all right there. So let's go and create the euro first. So we'll say let, um the n s your l equals N S u r l And the string is fine. And here is where we will build our Uriel. So we're going to say you are l Base, remember? And then, uh, this other one over here is what we want, okay? And we've parse that out, so we know that it's this one right here. So we'll go ahead and put that into and it has the Ford Slash minutes. We don't need to add extra slash. So that's gonna create our Earle put an exclamation point at the end to unwrap it, cause we know what's gonna work. Or at least we'll catch it up at compile time before ever goes to a user. And then right here just passing the girl. Okay, That's just what I called it. It's just a variable name not to be confused with this one right here. This is all caps. And, uh what was the, uh thanks thing we need to do dot Jason response response. Jason, There it is. And uh, Okay, it's Ah. Um it's being naughty. There we go. Exco Who? This is copy, but it has here already, So I'm just gonna copy this, So I want to do it again. That dot response Jason all the way to the in. Okay, that in right there. And let's go down here. Just paste it here. And all you need to do is add a closing curly brace. Okay, to match this one right here again, if you don't remember, this is just a closure that gets called after the request is done. Whether it fails or succeeds, we're gonna just assume it succeeds. So what we need to dio is like what we did before. Okay, we need a parse. We need to parse the data, so let's see what it's gonna give us back. We don't know yet. Right? So if you go over here, uh, let's say we grab this description right here, this is the specific description is giving us So let's go ahead. Go to ah, open a new browser window. Goto pokey ap I that CEO and just paste that girl. That's what we're looking for. There it is. There's our description. Let's go to online, Jason. Four matter and let's format it so it looks pretty process. There it is. Uh, see what it gives us. So he talks about the games that it's in. The data is created. Idea modified. All we really care about is this the description field. So not to be confused with the description field on here. This is descriptions. We call this your L. And then it sends is this data and it has a field called description and notice. The main the main file itself, is actually a, um it's it's an object or it's a dictionary and it has a key of type string and value of type. Any object cause in this case, it's a string. In this case, it's a number. So you want to call it any object. So we not we now know what the Jason's gonna look like. And it's critical to knowing what you're Jason Looks like before you can parse it, obviously. So if let we call this description, uh, dicked for the description dictionary, the whole thing of data, it was result that value. Just like we did before. As remember, it's a dictionary of type string and any object. We just talked about this there. Okay, Alex. Good. So it's Ah, description Dictionary, Dictionary of string of any object that looks good. And let's do another one if let Well, just a description equals description. Dicked. You're grabbing the key out of it now. Description. So this key right here, that's what we're grabbing at it. We're grabbing the value of it. We're gonna cast it as a string, Okay? Because it's any object way, Uh, we don't know what it's gonna be, but we got a cast it to a string. Say, Hey, this is once this key specifically is supposed to be a string. Why is half of this blue and half this red? That's next code Bug X Code made a little bit buggy. And because we have the description now, is that really that easy? All we need to do now is a sign of the thing. Let's say self dot underscored description equals description. And so if we go out of this block here, we should now, actually, that's not true. So here's something interesting. Order, order of operations. Pay attention. Okay, so this line of code is gonna be called, right? And then this one, everything's good. But then the request happens, right? So if I was to write some code right here, this would actually be called first before we ever even get here. Okay? You're like, Wait, What? It's going down. How is this being skipped? Remember, request is a synchronous. When you make this request, it's gonna hit the internet. It's gonna take a few seconds. What's so this block of codes gonna continue going? Where is this? One's gonna wait till the request is done. Okay, So what we'll do is right here. We're gonna print the description. It's a print self dot underscore description. And if you see a description printing to the screen, you know that it worked. And then we'll move on so build and run did to dio We're getting so close and its app looks pretty damn cool. You should build and show it to all your friends. They're going to be blown away and you should be happy to. You're gonna have a lot of skills under your belt once you get this down here? So it's just runnings taking a second. Hear music off. Let's see the description of blast toys. A brutal Pokemon. By the way, all these say Pokemon. I think there's something wrong with that. With their A p I Sorry, not poking mind, but whatever a Bruto Pokemon with pressurised water jets on its shell. So is it working? It's working. So what we did was we grabbed the URL that came with the original Jason. He gave us a euro in the description. We downloaded the URL in the data from it, and then we grab the description out of it. So we made another second request. We're getting really, really close here. Everybody bear with me. So last thing is, evolution's okay. How is it gonna work? So what we want to do is grab the very next evolution, okay. And just to show the image for it and the name. Okay. So if we look at let's see what we got here. Evolutions. Do you have some evolutions here for us? Unless the wrong with evolutions here? Evolutions. Okay, so if you look here, uh, in our initial dictionary, which we ordered currently have. There's an evolution Zarei, and it may have data and it may not, because some pool come on don't have evolutions, and it's only giving us the very next evolution. It's not giving us all of them, which is unfortunate. I think they should add it. But, um, that's the A p I. We got to do what they say. And so what it's giving us is the level that the next evolution will happen at the character level, the name of the evolution, Um, and then Thea the resource where you can actually download the data. We're not gonna do that. What? This number is important. This is the actual Pokemon number that we're gonna need. And then, um, how how you get to that evolution. Some of times it's leveling up. Sometimes it's by trading the Pokemon. There's other ways of poking one involving. So let's just start writing in here. So we know that evolutions is, um it's an array, and it's an array of dictionaries, as you can see over here. And the dictionary has a key of a string and value type of any object because it has numbers and it has strings so we can't We can't specify a specific type for the value. So here we go. Here we go. Here we go. Here we go. If let evolution's just some good old safe coding here equals Dict, Remember the dictionary? That's way up here now. Okay, we're still we're still in it. So, um equals Dict Evolutions were grabbing the exact evolutions key. And, uh, remember, it's a dictionary, Okay, of type string and any object. Okay, that looks good. So if we've gotten in here, it means we've successfully, um, parsed the evolutions. And, uh, you know what? In this case, um, we can actually just say, um, we can actually do another. Where Klaus Actually, where evolutions dot count is greater than zero. So only go into this block of coat if there's at least one evolution. Otherwise, we know there's none, and then we don't have to do anything, make our life easier. So here we go. We want to get the name of the we want to get the name of the, uh of the character. So let's go ahead and to say, if let to equals evolutions zero. Okay, By the way, what? I know just working with this AP. I was. I've been testing it. It only ever gives you one evolution object. I'm not sure why, so just go ahead and grab the 1st 1 and you'll be safe, which is what we're doing here. Okay, Zero. So as we're grabbing the 01 and then it's a dictionary, right? So we can now call the property to which is the name as string. So it's given us a name, so that looks great. Um, if let two equals revelation or evolutions. Okay, Now it's all rainbows and butterflies just yet because one of the problems I found as I was going to the a p I is there's a mega evolution. Remember how in the beginning, when we went to the CSB file, deleted all the extra junk had mega evolutions and all kinds of crazy stuff that we're just not even ready to account for? But however the a p I still sends us some of the Maiga's and it messes with stuff, so let's just not include anything that has the word Maiga in it. OK, um, and what I'm saying is, ah, this is too. It might say mega blasts. Oyster may go whatever. And if If the word makers in and it'll we're just going to we're gonna abort, okay? Because we're not prepared to handle We don't have the graphics for it on. This is something I experienced myself. I'm not gonna demonstrate it just because it was a little bit of a pain to figure out and deal with. So over all we're doing here saying, Okay, you've grabbed the Pokemons name, okay? And if the word Maiga is anywhere in it in the beginning and if those four letters are in it, Okay, um, were actually rather what we're saying is, uh, if it searches for Maiga and can't find anything, it means we're good to go. Okay, so this means Ah Maiga is not found. Cause range of string will return the range where that string was found. Eso If it's Neil, it means it wasn't found. And that's good, because we don't want it if it's if it's in there. So So we're now we're there. We don't want to deal with the mega on. We'll put some notes in here. Uh, can't support Maiga Pokemon right now, But ap, I still has um, make a data. And this. I usually don't put a lot of comments in my code because Coach should be self explaining. But when you have very specific problems, like does like why are you writing the word Megan? There may make sense to write some comments of future programmers like, Oh, that makes sense. And so they don't run into the same problem. Okay, so what we want to do now So think about what we want to know. We want. We're in here. There's an evolution. It's not Omega. So what we figured out so far there's at least one evolution. It's not Omega because we just check for that here. What do we do now? Well, what we need to dio is grab this number right here and show that image and why? Well, because remember, our images are all named by numbers. So the problem is, it doesn't actually have a poke Adex idea. You notice that it doesn't give us the idea of the evolution Pokemon. So I was thinking like, do I really want to make 1/3 Web request to download this dang I d? Well, the answer is no, because it's right here. Look at that. We've got it right here. We're just gonna have to extract it out of this string. I think that's the best way for us to grab the next pokey month. I d. So we could show the image. It'll save us a Web request and save us more time and speed. And it's just the right thing to do. So again, we're gonna grab that number out of that string there and show the image that image number . So here we go. Let me make some space here. Let str just It's a temporary string. That's all it is. Evolution zero. So grab the first evolution and grab the resource. Your eye, your eye of it. Okay, so grab the resource. Your I and Ah, well, we better do better doing if let high if let evolutions resource your I, um that looks good. And in fact, we better say as string. Okay, So if we What we're saying here is ah fecklessness call this your I Okay, so if this works, it means we grab. We successfully grabbed the URL out of there. Okay? It's your eye. You are all same thing. We've successfully grabbed it out of there. And what we want to do now is say, Ah, let new, um, new string. Okay? Equals we're gonna do something a little different. Who were going to say your eye dot String by string by replacing string by replacing occurrences of string. This is the one that we want. Okay. And so the target. Okay, so the target is going to be, um, what we're gonna dio Let me see. Here, Put this in here. I'll explain what's going on. Your probably like I've never seen this before. Okay, look at what's happening here. What we're doing is we're saying, Hey, let's create a new string. How do we create the stream? Well, we're gonna grab this existing string, which looks like this, by the way. And what we're saying is, hey, replace all the occurrences of this. So replace all the occurrences of this right here, get rid of it. Whatever we're gonna we're gonna replace it with something, and I'm saying, replace it with an empty string. Oh, that's smart. Weaken. Strip out all that stuff. Let's just grab it. And if we find that string in there, let's grab it and replace it with nothing. So we've just stripped out all that stuff. Were a little We're almost there. We've almost got that number. We got to get rid of that last trailing slash that we can use it. So the new string we've now gotten rid of the the A P I version one Pokemon slash have gotten rid of that. OK, we replaced it with an empty string. And finally, one more time. We just say, let numb the number of the Pokemon okay equals new string that will do it again string by replacing occurrences of string. And so let's get rid of that last trailing slash Let's replace it with nothing. So we first replaced the first part of it here. Get rid of all that. They're still this string right here that we need to get rid of. So we just do it again. We take that one. We just changed, and then we get rid of the last slash on it. And now we have is the number Yes, Weaken. Grab our next Pokemon. Who? And so what we gonna do now is say, um, self 0.0, next evolution we need to store the i d for that don't weigh. We've got the text we're gonna show, but we need to start the idea so we can pull the image. Of course. Private bar next evolution. Ah, I d And that's going to be a string. And the reason why I'm gonna make it a string is because, uh, um our image is a string when we pull it up. And so no point in converting it to an integer strolling back here. Now we can say self dot next evolution I d equals, um numb. Cool. Uh, that looks good. And then let's grab the name. Right. Self dot Next evolution. Txt, um, equals And, uh, we haven't grabbed the or Did we grab them? Yeah, we grabbed the name. It's the to, right? Yeah, if let to. So next devilish evolution text. Um, and that's just the name. So just put two meaning. Remember, we grab the name up here. Yeah, that's fine. That's exactly we want. So we're just grabbing the two. And, uh, what else? Um oh, our ah, our character. Remember? It's supposed to show the level when we click on it. Supposed to say Supposed to say next evolution Venice or at level of 34 or 32 or whatever we need to store the level as well to if there is a level, Um, let's put that on their private bar next evolution level. That could be a type string as well. Even when you have numbers, it's OK to put him in strings, because if you're just printing them their strings, unless you're performing computations on them, they could stay a string itself that next evolution level. We haven't grabbed it out yet. We got to do that first. So let's say almost there. Guys always there if let level equals evolutions. Zero evolution zero. Uh, And what is it called Level? I'm just looking at that. Jason over there is called Level as Shoe. I think it's an integer. It wants an integer, so it's an integer. And then what we'll do is we'll say ah, self dot next evolution level, and we'll just convert it to a string easy enough. Just do that. So if there is a level, let's go ahead and save it off. If if there's not, you know well, we don't need to even start that. We'll take care of that later on. We don't need anything empty in there. Whoa! Okay, guys, eso we've got, um We've got these things working here, which is really cool. Should just print them and make sure it's working. Uh, yes. All right. Good choice. Eso se self dot Next evolution will start here with the i d. Print self dot Next evolution txt and print self dot Next evolution level. Who? Let's see if this all worked here. And, uh, I'm gonna open up my thing here, okay? And I know that, uh, I know that bulbous or obviously evolved, So let's click him and see if it worked. Okay on, that's Oh, there it is. Okay, here it is. Found it. So next evolution ideas to ivy. Sore. And then, um 16. Here's a perfect example that I was telling you about. You're like, What do you mean? Well, remember how we're parsing like way attack and all this stuff, and then we're like, OK, we now we need to get the description right. So we make another request here for the description. Now, this is next in the code. But what's interesting is why is my description printing last And my these prints down here putting first. Well, it's because these ones are happening before this request gets done. It's called asynchronous requests. Okay, so you don't ever, ever, ever rely on something to be linear when you're making an asynchronous requests. We don't know when this is going to come back. So I know a good thing that point out, the description came after we went through these other things. And even though the codes down here at the bottom so it definitely is working, it gave us an idea of the next Pokemon its name and the level that it evolves. That So we've got Do we grab? I think we've got all the data that we need. Um, this is really cool. So we have all the data we need from the server, So congratulations. We we've successfully talked to the server. That's a really complex stuff. Parsing, Jason. We've covered kind of a lot of what you're gonna do in your job from day to day. Like when you parse Jason, we're not gonna in your job. You're not gonna do a whole lot of different things. What we just did right now, which is really cool. So now what we need to dio is we need to get this data connecting to are you I and we kind of have a problem right now. Let's go ahead and expand this here and let's go to our view controller. No, not view Controller The view Pokey cell. Okay, so we've got the Pokemon stored, right? That's right here. But what if I want to get the height? Pokemon dot height? Oh, no, we can't get it. Why? Because it's private. So we need to go ahead and create getters for all of our properties. And let's go ahead and do that Now, Um, now, with objective C, you could right click this and create a getter. Let's see if it lets us do it here in the new in the new Ah Oh, see, Look at that. They can't do It was swift, yet they don't have it in basically before you just do right click every factor and create a getter and setter encapsulate and it would put it would put it in for you, But it's not gonna do it for us. We get it right. He's all manually. That's okay, though. very good practice. Definitely. Don't cheat yourself. Don't just make everything public. That's bad practice. You're gonna impress people. If you do it the way I'm showing you, you're gonna press a potential Boston employer. So we've got the name. You've got the pokey decks. I d Let's go ahead and do all the rest of these. Here we go. And on these ones, we don't need a modify. We just need getters. So far, description of type string is just going to return description. And I'm not gonna fast for the video. I want you to see the repetition here. So, um string return underscore type. Okay, so that's the type what comes after type? We've got defense, height and weight of our defense of type string. Return underscore. Defense of our height type string. Pretty turned. Underscore. Height. Again. We're just being good programmers, keeping our code clean, making sure nobody can destroy our data. That shouldn't be destroying it. Return. Underscore. Wait, what else we got? Attack of our attack of type string return underscore. Attack repetition is very, very, very important for learning. Eso don't be discouraged by copying all this here and doing this again and again Next Evolution Next evolution. Next evolution. Okay, uh, next evolution. Txt. I'm just gonna do it right here. It's a little bit out of order, but I don't wanna keep scrolling up and down of our next evolution Txt of type string return Next Evolution txt bar Next evolution I d. Who x return next evolution I d and, uh, do another one Did appear this time of our next evolution level of type string. And, uh, let's return next evolution level one more, actually. Pokemon your l We don't need to return because no needs to use it. We're doing this here, because are you wise gonna need to know this stuff? So let's follow the order of operations. So on their main view controller, we've clicked the icon, right? And so what it does is it loads our segway and loads the detail view when the detail view first loads, which is this screen right here. It is empty space. Um, we're signing the name and the image currently. And then what we're doing is we're downloading Pokemon details. Okay, remember? Well, let's let's test it out right here. You want to see a crash? Let's test a crash. Let's pretend that, um, we just loaded this view. So let's go ahead and load the height. So we're going to say height label dot text equals Pokemon dot height. Let's see what happens. Let's see him. Brown, brown, brown. Oh, no. A crash doesn't mean I was a bad coder. Know what it means is, Well, it could mean that. But what it means is you didn't initialize. You did initialize your data. And so first off, we could have done one of two things. One is you could guarantee that there's data going to be there. But what also is a common thing to do, is is doing it here is well, too. And that's doing this if let height your weight, we already did this so well, this is this is how you keep extra safe code without any crashes. If you want your users to be happy, you're gonna do lots of this. If let height equals Pokemon dot height and then you dio height label dot text equals height and we are going to do that, by the way. But we're not going to do it here. So remember how we created this download Pokemon details, and then it it put this closure here. Well, let's see what happens when the let's go ahead and print and say, uh, did we get here? Did you get here when the Pokemon has finished downloading? Let's just quickly take a look here. And I got rid of our crashing code. We did not get there. Why? Well, because we never actually fulfilled the closure. So what we need to dio is go back to our pokey month and notice our function right here. Download Pokemon details We passed in the function that's gonna be called the closure That's gonna be called when we're done. But we never called it, uh, so when should we call it? Well, we're not done downloading until the, uh, this main thing has downloaded. And then the description, right? The everything else we get as part of this package right here this this dictionary. But the description is a second request. And since since since it's asynchronous, we need to wait for that to finish before, um, before we call success are completed. Sorry. Before we call completed. So let's go down to our description and right here All you need to dio is Ah, we'll do it. We're gonna We're gonna do it twice, actually. And I will do it here. So here's something. Here's something to know. Um, Alamo Fire. It doesn't have like, And if it's an air, go here instead. Basically, if there's an air, it'll still go in here, and the result will be an air result. So all we need to do is just past the completed portion, whether it succeeds or not, because we don't want to hang there forever, never succeeding. It has to complete at some time. So what we want to do is just put it and just bawling my parentheses here. Um okay, we just want to put it right here. We're gonna call it like so that's it. So all we're saying is, hey, when when this is done downloading whether it succeeds or fails, this request right here may follow my parentheses, just to be sure, opening opening This could be a pain sometimes closing, closing at we're good. So when this request is done, whether it succeeds or felt, then we're gonna call completed. Let's see if and now prints to the screen from our custom cell click my guy here. Did we get here? We did. We called completed. No big deal Done. Deal easy enough. Easy peasy. So let's go to our back to our pokey cell, which is right here and we know we got there, right? Um or, uh, your Pokemon Pokemon details Busy gone crazy. Okay, so download Pokemon details. It calls this. It may take a couple seconds or however long it takes milliseconds. And then after it downloads, we called the success function. And this is where we want update, Are you? Why? So it's great a new function called update You I and we'll just call it from right here. And since this is the closure, remember, I can't just say update you. Why? It's gonna give me an air. It needs the self keyword, since we're inside of a closure, okay, inside of closure, inside of a closure. So now we gotta do is update it, Which shouldn't be too hard. Shouldn't be too hard. It all, actually. So we've got the name already working. The image is already working the main image at least, but let's get the rest and so descript. So if let Mrs. A description equals Pokemon thought description. So if there's a description, description, label groups, description, label dot text equals description. Okay, that's all we're doing. If it's not Neil,
96. Intro to App: Hey, what's up, everyone? Mark Price here at depth soaps dot com We're gonna talk about the app that we're gonna feel today. Now, Thistle's super exciting. This is the big one. Okay, so we're gonna be building our own Facebook style app. Not Facebook itself. But our at is called deaf slow showcasing the ideas. I'm releasing an app. And I want people who are taking my course to be able to post images and descriptions of the absolute bill so they can share them with the community. People can like them things like that. So it'll be using fire bases it back in. We implemented some fantastic Google material design style to make her app look real nice. So we're employing professional coding practices at the best level that we can, um, that will allow you Teoh work in a professional type of setting. Uh, meaning, uh, we're not doing things cheesy. We're not doing things, Aziz. They shouldn't be done. We're doing them as they should be done. And so if you can build this app and go through and learn these things, you're gonna be so far ahead of the game. Uh, no other course goes in this level of depth for new people on how to build professional style applications. And so I really want you to take time and focus on this and know that if you were to release an app like this to the APP store, okay, one is you could probably get lots of downloads to is you're gonna impress so many people, not just family and friends but employers. So it's a really big deal. Take it seriously and definitely. Look, throw this one up on the APP store, and so you can of course, log in, log in with Facebook or log in with email and password, Um and then what? You've logged in. We also have a feature. You it is automatic log in for the next time you come in, and then it loads up the feed. Right now, it's just a global feed and pulls all the data from fire base and, uh, again everything styled real nicely. And you can like the posts you could. Unlike the posts were making connections with user accounts, things like that. So everything can be tracked, and in fact, we're gonna cover all the even though these are all the features that you see right here. The code that we've actually written allows you to go for further on the project itself. You can add more things that the framework is there for you to take this as far as you want . So that being said, it's gonna be a lot of work. Let's go ahead and get started.
97. App: Showcase Part 1 - Firebase Overview: Yo, What's up, my peeps? Broken back Mark prices, Deb slopes dot com And today we're gonna talk about Firebase Firebase is a fantastic fantastic system owned by Google owned, supported and backed by Google. So you know, it's gonna be very well done. And basically, uh, let's think of it as I'm in Iowa's programmer. I'm learning brand new things, but I don't know Web development. I don't know how to make servers. I don't want to deal with security. How do I handle all of that kind of stuff? I need my app to talk to other APS because you can't make a good app without talking to a server because you need data passed back and forth in the Facebook has servers. You know, Snapchat, everything has a server, but you don't know server development, and it takes a long time and you have a team, you have a $1,000,000. So do the rescue. Don't not Adam Firebase. Now firebase is a system that allows you to quickly get your web your app, talking to the Web, talking to its server. And so they have a system in sdk is in place where you do not have to build your own server and you don't have to have those skills. And so if you're one of those people who wants to make a really great app or if you want to get a job and you want to make an app that's gonna impress people, this is the Do it You can do anything with this K in our case, Uh, our app, which is deaf slopes showcase. Okay, it's almost kind of like a Facebook. You make post with pictures and things like that and in a giant feed, and people can look at it so you could build your own Facebook. You build your own twitter, you're on chat up. You're gonna learn of some principles here. That'll take you a long way. In fact, if you use this tool okay, you're gonna you're gonna be smoking. You're doing great. So let's get to it. Here. This is Firebase goto firebase dot com. Beautiful website, too, by the way. Love their love, their design. And here's even the perfect example in their first page here, they're kind of showing like a Facebook posting system. This is not that hard to do with fire base If you're building your own back and server, you'd be writing a lot of coat. But Firebase makes it really easy. Eso they offer a few things. One is the data storage where it actually stores data. And what's cool about Fire Base is its its socket based connections. And maybe that doesn't mean anything to you about what it means is it's real time. So let's say you send a message in a chat room. What's going to go out to everyone into everyone's instantly gonna get it. No extra work needed. So everything you do on fire base is gonna be instant, very, very fast, very, very powerful. So I recommend you check out the website looking all their features. It is free. Okay, the free tier. And in fact, I got an email two days ago from them saying that they even increased the amount of things you get for the free tier. They reduce the prices. They're giving me a lot more bang for your buck here. They said they wanted to get more people, um, using their platform. So they're doing some great things here. It does say Ah, you know, 100 100 connected devices is the limit, OK, on the free plan that maybe you're thinking 0 100 That's not very many. Well, this is 100 simultaneous devices meaning 100 people would not, just would not just be using your app at the same time, but 100 people would have to make a request like data packet would have to be set at the exact same time. And so what I'm saying is, if it was a millisecond before or millisecond after, you're good to go. But if 100 people said a data pack at the exact same time through the app, then you'd hit your limit, so this could be the equivalent. If I remember looking at the numbers right, this could be the equivalent of 70,000 users technically using your at before you have to start paying. So not too bad. So what you want to dio is go ahead and sign up here on the right hand side, okay? And put in your email and password and then sign up. I've already signed up for my account. So once you've signed up, you're gonna be able to log into a dashboard, so pull my dashboard up and, uh, go over here to the left hand side or here in the middle, wherever the new app section is. Okay. And all you need to do is make a new app name are just gonna be called Dev Slopes Showcase . Okay. And as you're going through this, you won't be able to use the same murals as me because, uh, they have to be unique. You are else. Eso choose your own name. Got whatever you want. In fact, you don't have to name Europe this you can make your own theme and everything to so what, You're you're Ellen here and click create new app And now we have a new app and that's all you gotta dio that was easy. A few other things you can add collaborators. So if you want to work with someone, you can add a collaborator to send them an email. Then they consign up on Go into it. Well, you're gonna be particulary particulary really interested in is looking at this five minute tutorial. Okay. Okay, um and, uh, more especially. And that just gives you kind of a rundown, but more especially you're gonna want to look at I clicked. Quick start Quick starts here. You're gonna want to look at more. Especially, um, the IOS quick start. Okay. And, uh, it's gonna tell you how to use it with IOS. We're gonna go over all this. Um, but, uh, it's important that you learn to start reading documentation. Okay? I can't emphasize that enough do when you're done with this course. Don't rely on Oh, I gotta find a video for it. You've gotta You gotta learn what you can from these videos. But then you've also got to learn how to read documentation and start going through here. And also, if you're a speed reader, Okay. Like doing things real fast. You got to get out of that habit to I was a speed reader when I started learning to program . I just go through everything real fast when you're learning the program, every single word matters. Read every single word because it's often a word or a syntax or line that is off. That's causing problems in your applications, Things like that or your understanding. So every word is important anyway. IOS Quick start Fantastic. Resource has a guide on how to do it thoroughly. I mean, they really take it from a dizzy here. I mean, they couldn't Google couldn't have provided a better service. Okay. Talks about everything you need to know about how to use this for IOS. So very cool stuff. Um, so that's firebase overview. Right now. You can use it for any type of application. Anything you could think of that needs a back end. OK, you can use fire base for super faster, powerful. They've done a damn good job. And I would recommend that you use this for all of your APS that require a back end server . Um, until you can learn your own server skills or get some money to pay a server developer. But even then, fire base is a fantastic choice. Limitations, downsides. Um, none, really. I mean, you go look at the pricing. It's really not that bad. Um, look at this. Unlimited connections. Um, how cool is that? $50 a month and limited connections on a your own server, where you're hosting your own server and building it. The hosting alone for 10,000 users is probably be a similar price, if not more. This is unlimited and, uh, 10 gigabytes of storage. That's a lot. Most servers don't even offer that. So they're actually competing with big names and companies that do, like hosting and stuff. So the flipside of fire base is You have to build your own served with your own code. Gonna build your own security. You gotta build everything in between. Then you gotta pay hosting, and then you have to manage a lot. In addition to Europe Firebase, all you gotta do is just set up your data on it, how you want it set up, and they'll do the rest for you. So you may want to choose firebase a long time out. Um and ah, very powerful, Very cool. So I suggest you get really familiar with, uh even though it's not necessarily in Iowa's future. It's You can't have APS without backings without data. You can't. You can't a good app. That's those days are gone where you just you know, every now and then there's a flappy bird. But anyway, I have been talking a lot. I just want to give you some insights into the world of real app development. Fire base is a fantastic tool to make make some fantastic applications. So that's it for this video. Sign up for fire base. Get draft going and we'll go on to next video.
98. App: Showcase Part 2 - Firebase Auth Config: Yo, What's up, Mark? Pricier deaf slopes dot com. And today we're going to go over setting a fire base for authentication, being able to log in with email and password as well as with setting up Facebook. Now, we're not setting up the app yet. We're just setting up fire base so we can implement that in the APP. So go ahead. Go to firebase dot com, log into the account what you should have already created. You also should have created a, uh, an app under fire base here are just called deaf slopes showcase. Good and click manage app, and we're going to go over to log in and off and right here where it says enable email and password authentication. We're gonna do that in a wrap. Our ap's gonna have email and Facebook. Um, so we're gonna click that and then also has cool thing where consent automatic password resets for you. Did you know that for your building, your own server, you'd have to write all this code yourself. What a pain. It also sets it off all for you automatically. So I'm gonna say from Dev Slopes when the email comes even lets you put the subject, You never put custom html in there. Very cool stuff. Um, looks good. What I'm gonna do now is click the Facebook tap. This will save automatically. Okay. In fact, actually, one more thing before we click that the session length the length of the length of a time a session will remain valid. Well, we don't want 24 hours when someone logs in. Let's just leave it in forever for right now. I don't want to deal with it. So go ahead and click Facebook and enable Facebook authentication. Okay, click that right there. Now it's looking for a Facebook app. I d. And it's also looking for a secret. So we're gonna go through together and how to set up a Facebook app. And we're gonna go through the actual documentation ourselves together because I want to show you that that's what I do. And you need to start doing that too. Don't always just go and look for a video to solve your problems. You gotta go on to the documentation. So on the right hand side over here, because that's what you'll be doing at your job. Clique. Learn more. I'm gonna right Click it open in new tab and it gives me instructions to get start with Facebook authentication. You first need to create a new Facebook application. Okay, so that should be easy enough. So I'm gonna open this in a new window and let me do some reorganization here. I'll move this to the right, and I'll move this to the left and OK, so I'm already logged in the Facebook, so you're gonna need to make sure you're logged in the Facebook, and, uh, if you're one of those individuals who is very adamant against not using Facebook, And I know I know you're out there, I know some myself. You don't have to use Facebook in this app. You can just do email and password log in if you want. You can skip this section. But by the way, if you're one of those people and you're making APS just know that just because what you just because you don't like something doesn't mean the rest of the world doesn't like it. Facebook's got like a 1,000,000,000 users, so I suggest integrating Facebook in the apse where it makes sense because it allows you to integrate with existing networks. Make more money. It's a smart business decision. Can be at least so just some food for thought. You don't listen to me. I'm just some guy. Just some guy in some video telling you what to do. And OK, so you need to create new application. Click the add new app button. Okay, let's do that. Okay, Uh, add new app. And then this is the name of your app or website, so you can call it whatever you want. Mine is gonna be called Dev Slopes Showcase. Okay. And name space. It's optional. So let's not do that category. Let's see here. Health, fitness games, food drink. Um, what's ours? Education or technology? I think education's fine. Okay. Create app. I d select all the photos would show a waterfall. Mm. Ok, interesting. This is new. No, but I want to click the poppy. Oh, All right, Well, submit. It's loading. Doing this thing. Okay, so it did it. Very good. Now what it says over here on the left in your Facebook app configuration clicked on the settings tab on the left hand navigation menu. Okay. Following the guide, By the way, I didn't even do this beforehand like I'm doing this on the fly here So you could see how you really go through problems and solve them. So then go to advance tab at the top and scroll down to the security section. And I don't do this for all the videos. Just on the ones where I'm trying to emphasize a point, which is you need to learn how toe read documentation. So click the security section at the bottom of that section. Add https, this fire base year l to your valid Oh, author, redirect your eyes. OK, so let's find that right. Click this and copy. So it says at the bottom of that section. Valid. Oh, Auth, redirect your eyes. I think it goes right in here. Okay, The difference where we need to do though, uh, when you it's it. Once, uh, it wants to make it blocked out like that. We need to do, though, is get are fire based app. I d. Okay. And so go ahead and go back to fire base and let's go to the dashboard again. And let's go look at our firebase. That's our firebase u r l we need a fire base. Ap I d. Let's see here, uh, secrets. I think it just wants our our actual app. No big deal. So let's just Let's copy this. Copy link address. There we go. I think that's it. I think that'll do the trick to make sure. No, that's wrong. My firebase app. I guess it just wants this part right here. So let's just grab that justice coming. So many. Yeah, that's the one. Okay. Are we here? Okay, a short detour. And so what it wants is is https and then off dot firebase dot com slash b two slash And then what we'll do is we'll take off the ending there, so slash your fire base at slash off slash facebook slash call back. That is what we want. So author firebase dot com slash version two slash death slopes Dash showcased the new my app. Facebook call back. Okay. Click save changes at the bottom. It says Okay. Next. You need to get your app credentials from Facebook. Cook on the basic to have at the top of the page. Okay, So, top of the page basic. You should still be within the settings tab toward the top of this page, you will see it. And your app. I d an app secret. Your body will be displayed in plain text, and you can view your app secret by clicking on this show button and typing in your Facebook password. Copy these Facebook application credentials in the log in and off section of your of your app dashboard. Okay, let's go back to fire base. Okay. App. Dashboard. Um, let's go to manage app, it's gonna log on and off, and ah, uh, Facebook. Okay, so once the Facebook app idea and Facebook secret So here's the Facebook app. I d Okay, here's the secret. Okay. What's my password? Huh? It's killing me. Okay, so there you go. All right, so that's safe. That looks good. Okay. And Facebook requires that you have a valid contact email specified In order to make your map app available to all users, you could specify this email address from the same basic tab some of safe changes here, and same basic tab, uh, and contact email. I guess this is mark at dev slopes dot com. Yours will be whatever years is your contact email is so save changes. And the last thing to do is click on status and review right here and on the left hand. Navigation. When you move the slider in the top of the page to the yes position do you want make us app in its features available to general public? Yes. Confirm. Okay. And then you your app in every lives do we need to submit? I don't think it says we need to submit before public usage. I'm gonna click platform policy just to see it Doesn't say we need to do that, so I don't think we need to worry about it is stable. Okay, so this is when your app is ready to go when it's needs when it's all done. So we're not gonna about that right now. Doesn't say anything about submission here, and that's it. So what we've done is we've just set up, uh, we set up fire base authentication, email, password and facebook so we can start logging intimate changes session. It already is on months. Okay, so, yeah, we can now log in with Facebook. We just got write the code for us. That's it. You've also learned how to make Facebook APS to integrate with your applications any time you make an app on IOS app that needs integrated Facebook. If it's a different after you got to do what we just did right here and you always be using that a secret. And so that's it for now, and we're gonna be one.
99. App: Showcase Part 3 - Login User Interface: Hey, everyone, Mark Pricier Deb Solbes dot com And it's time to start building our own Facebook style application. And we both my simulator here so you can see if what it's gonna look like after the end of this video. Here we go. Lock screen, And there it is, looking real good. We won't finish the functionality for log in, but we'll get all the u I in place. We'll get the custom controls. You notice there's some shadows here. Some nice layout here, that's all the stuffs custom. Okay, doesn't come out of the box. And IOS and you gotta write custom controls if you want her. Absolute great. So the first thing that we're gonna dio is pull open a website. We'll pull up in Google chrome, and I'm gonna type in Google material design. This applications design is inspired by Google's material designed now, maybe some of you out there thinking, How could you dare put material designed in an IPHONE app? This is a android app. Well, I like Google. I also like apple. I like them both, and I still stuff from everywhere to inspire my design. So, um, I know I'm showing you this website here because it's fantastic. They teach you have designed things. Okay, so what I'm saying is like when they say they teach you, they actually say this is what looks good. And this is what doesn't. So, for instance, if I go to components and goto buttons, it tells me, Hey, you should put a shadow here. That's how you should let your buttons if I go over here to the top and I pick out, um or is it style color. It tells you the different color schemes and their hex values so you can have him all right there. They're basically saying, Hey, this is what looks good together. So you don't have to do so much thinking So, anyway, we're inspiring our design off of this. So check this website. I'll go back to a for effort. You can start your own APS like this very, very powerful, so you don't have to do it all off the top of your head. What I'm saying is you could make an app that looks really ugly by winging it or by watching some of the videos that you might see in the other courses out there in the world . Or you could spend five minutes studying what Google thinks looks nice. Which, by the way, they've had professional designers come up with this. And then you can just base your app off that your own thinking and in style as faras like the content of the app but a beautiful layout. So they're small things you can do to make beautiful applications, and that's what can make all the difference on the APP store. So we're gonna use Google material designed as inspiration. Okay. And we're also going to use Google's, uh, the font that Google uses for most their APS. If you go to typography under style, it tells you which which funds they use their using roboto in some platforms and another one's they're using one called Noto. And I really like Noto and so we're gonna use that. And so what we're gonna do is we're just gonna do another search for Google fought Noto, and I'm gonna click this one right here the 2nd 1 here. And, uh, you don't down a little fun because there are all kinds of different languages. But this one right here this Noto Sands, go ahead and click download, and it's going to give you some fonts and a zip file. And when you download them, go ahead and unzip it. I've already done that. So I'm gonna just go ahead and create a new X code project. We'll goto X Code. Gonna go file new project, pull it up here for you. So again, I went to file new project. We're going to a single view application, and I'm gonna call this, um, Dev Slopes showcase. Um and I'm just going to put devil on here for my for my sake and knowledge. And I'm gonna put this in the documents, make sure you put a git repository. This is something you're gonna wanna show. Okay, Awesome. So there's our app and let's go ahead and just dive right in. We need What we need to do is we need to create bringing the thoughts, and we need to bring in some images into our application. Okay, so I like to get my projects ready in the beginning. Um, whenever I remember, at least so right click your folder here and go to new group. We're going to say, controller, that's gonna hold our controller files a new group that's gonna hold our view, our view files and a new group that's gonna hold our A model or data. Okay. And then also create a new group called Resource Is which is gonna hold. Our resource is Okay, so in the resource is folders where we're gonna put our fonts. And so I've got some fonts here already. This is what you're gonna get when you download it. You're gonna get these four fonts, so go ahead and just click them and drag them into the resource is folder. OK, very important. Make sure you click. Add to target. Okay. If you don't, it won't include it in the file. Okay. If you forgot to click that I have another solution for you. This is what you dio You click the Blue Project icon right here. Then you go to build settings. Sorry. Not build settings. Built phases go down to copy. Bundle resource is right here. Click the add but and it will have your funds there and then go ahead and select them and add them. It needs to be in this copy bundle. Resource is And that's what happened when we selected that option when it came in. It needs to say, Hey, this is part of the application. Let's go ahead and use it So our fonts or in the application? And ah, I've got some images here to one for the launch screen, one for the deaf slopes code logo and one for a Facebook logo. And again, you can use your own graphics if you want, but these were provided to you as well, to your building the same map I'm building. So it makes sense to give you the graphics, and these are actually gonna go in the Assets folder. So let's drag these into the Assets folder. Okay, looks good. And then let's go to our launch screen and let's just set up the launch screen. Um, sometimes it's nice just to actually like, do something fun, like your launch screen up and going. So every time you're building your app in your testing it out, you see your logo in your in your face, and you're just like, Wow, I feel so good about this. This is awesome. And sometimes it's nice to put a little bit of splash right in the beginning to give you excitement and motivation. Teoh build the APS and so there's an image. It's gonna drag it here, put it in the middle. I'm gonna change this to logo stacked. And of course, it's stretched Will go to aspect fit. Okay, And then I just want to decide how big I want it. I think something like that it's probably good that probably look good on all screen sizes like that. So I'm gonna go ahead and get a fixed with and a fixed height. When you add those two constraints, I just click the pin button here. I clicked the alignment menu and then we're gonna horizontally and container and virtually and container as faras how the alignment goes. So there you go in the middle, looking good. I'm not even gonna test it out cause I know it's gonna look good in the preview. So let's go to Maine storyboard. And the goal, of course, is getting our app looking like this over here. And that's really cool. And so, by the way, uh, what I did for this inspiration is actually went Teoh Google, Google up our Google What was it? A music app? I typed in Google music app and I went to the play store here. Okay? And what I did was I was like him. What? Looks nice. What doesn't look nice. And so I started looking through some of these APS here, and I just started getting some inspiration, like like hovering menus and things like that that I really liked. And so, you know, So, for instance, see how my have this red background right here or this one's a blue background, and then it kind of hangs over the edge. I completely took this right from the website's like, this looks really nice. I like the idea. I like the style. Uh, and so that's how you build a lot of my APS. And so they look fantastic. Um, and you're just getting inspiration. I mean, you're not copying the app itself, but anyway, that's why I got inspiration. So do use those types of methods and styles. Is your building your app? We make Europe much better. So Okay, so here's our main story board. Let's go ahead and put that red view in first. And it's just a view. It's literally just of you. That's all it is. So it's Hey, where is it? That's right again. You have you? There we go. OK, so let's go ahead. And what about right there? I like it. Like it there. I'm gonna change the color to that red. And that Read, if you want it is F 4511 e Okay, that looks good to me. So I'm gonna go ahead and pin it to the top, turn off constrained margins due to the left and to the right, and let's give it a height. So it's always going to stay that height, and it always wrap two sides of the screen. It looks really good. Okay. And so now what else do we need here? Well, let's go ahead and lay this view out here because I think that's what we need to do next to really get an idea of how it's gonna look in our applications. So that's just another you eye view, and I'm just eyeballing it here, So let's go ahead and put it right about there and drag it right over here. The margins are gonna be in place. I kind of like it. I'm gonna go ahead and I'm going to pin it from the left. Bennett from the right. I'm gonna pin it from the top and then I'm going to give it a no no with just the height. Perfect. So it's right there. And of course, it's It's why and so it's kind of hard to see. So if you look at the background, we have a very, very light gray. And again, I just looked at Google's styling, and that's one of the recommendations. So if I click my background view here, I can actually change the background color to that very, very light gray, which I believe is this one e think that's I think that's to think. Thats too dark. I think it may be this one and it ISS and this color here is F three F three F three. No big deal. You can change that there. So there it is. It's looking, we're good. We're already got something that's starting to come together like this, really have three colors on our app. It's already looking pretty, and it's just amazing how ah, a little bit of thought can go such a long way to making something look great. And, uh, what I want to do is build a custom view, get this toe, have a slightly rounded corner and also to have ah, a shadow. If you notice there's a shadow here a shadow here and a shadow here. And if you look at, um, the Google Sweb site here, they actually talk about that in, like, or is it in layout? I think it is their web pages having issues here. There we go. Layout. We're not going about anyway. It's on the website. You can look it up and it talks about shadowing and how to set up. Okay. Fantastic website for that. Um, you guys, like, shut up with the Google already? Okay. All right. I'm just helping you guys out. Don't yell at me. I'm just teaching you what I know. OK, so that looks good. I think it's gonna be laid out. Probably just fine. So what we want to dio is we actually want to create a custom class. We're gonna have a custom class that our views inherit from, so we don't have 21 is we can achieve this effect without a custom class. And to is, we don't want to do that from controllers like. Imagine if you had a view controller and you did. And so, for your views you wanted to do I be outlets on all of these. So you could access the light corner radius properties and stuff like that and do it all from your view. Control. That's bad practice, OK? It would be bad practice to have a view controller and you're making I'd be out. Let's just so you can style things, k bad, bad practice, What is good practices creating custom views and then just changing the class of the view. So let's right click your view here, go to new file and go to source. And what we want is Coco touch class and we wanted to inherit from you. I view. Now we're gonna call this material view a meeting with zero design, and it's really just mostly gonna have our styling changes in things like that. So click next and then create create. Okay, just delete this board boilerplate code here and go ahead and call the awake from Ned function. We're gonna override it. This is again called when the user interface is loaded from the storyboard. And so what? We want to do against. We want to set a shadow on the left on the right and on the bottom, and we want to slightly around the corners. And that's going to give us the really nice effect that we're looking for. So miss a layer dot corner radius, it's grabbing the layer. Property of my view is 2.0 and then layer dot shadow color. And actually, I think we need a nice gray color here, actually, and I don't have the color for that. So we need to create that. So I want to get you also in the habit of starting to use constants, things that are globally accessible and reusable so we don't have to keep reusing stuff and colors is a great thing to have in constance file. So your APP can have a theme, a series of colors that you use in your app and that you reference rather than just doing them in code everywhere. So what we're gonna dio is create a new folder, New group. I'm right clicking the main folder, and we're gonna call this Util short for utilities and in that folder, do a new file and change it to swift file and we're gonna call it constants, Okay? And what we're gonna do is we're not gonna put a class here, okay? Because that's going to give it a scope of what can access it If we just leave this file open like this, it means everything we put in here is globally accessible. All all of the the the lets, the constants that we put in here are gonna be globally accessible. And that's what we want. We want anybody to be able to access those. So let's go ahead. And creator color Let shadow color is of type C G float. It has to be a float, not a double, because that's what the layer property takes and equals 1 57.0 And that's divided by 2 55.0 There we go, OK, And oh, and CG flow is part of you Like it. So we need to import. Uh, you like it? Okay. And if you remember from previous lessons, if you want to get the proper color value, you have to take the value of it and you have to divide it by 2 55 OK, because we're trying to get ah value between 00 is black, 0.0 is black and 1.0 is white. And so that's how you get values in between. Basically, Um Okay, so that's the shadow color. And so what we can dio is go back to our material view and now we can give it an actual shadow color speaking, Say shadow color equals you eye color on we're gonna do Red, green, blue and Alfa and basically we're gonna give it This is RGB values, right? And so we're only doing one color for red, green and blue because it's gray and graze typically or the same on each one, depending what great you have so shadow, color, shadow, color, shadow color And for the Alfa, let's make it 0.5 for meaning half opaque. And the last thing we need to do is grab stg color property out of this so shadow color. Well, it's not showing me for some reason, but shadow color is a Steve. Gee, colors all you gotta do is typing dot c g color. Okay. And, uh, so you take your credit color than you grab the seat color property out of it. And that's how you set your shadow color. Um, that's cool. And now that's for the shadow color. Now we need to set the shadow opacity. So shadow Oh, passage e equals 0.8 Good. A little bit less than full, fully opaque lair dot shadow radius. This says Reiter. The blue radius in points use a run of the delayer shadow. Meaning how much? How much do you want to blur? How much space do you want to cover with the blur? Say 5.0. It's a really good size. And ah, shadow offset. Okay, this is the offset under to the X access. And why access? Okay, SCG side C o equals C g size make. And so the width think about this with is the X Access K how wide you want it. Now think about this, or I'm starting out wide. But the offset how much do you want to offset it on the X axis? Right. And that's what the That's what the with is there. So I want you to think about this. We want to show shadows on the left and on the right. Well, if I was to put a with of let's say to it would give me a shadow on the right of to And the height is gonna go down to the highest Could be whatever we want But we wanted to show on both sides. So what we need to do is actually set it to zero so it doesn't go to the left or to the right. But then we make that shadow radius a little bit bigger. So it expands beyond the borders when it was too small. The radius it wouldn't go past the edges because we had at zero to the left is your to the rights. We have to make the radius bigger. Eso it can go on to the left and on to the right. So 0.0, we don't want it to go to the left or right just right there. So it's on both sides and the height will stay 2.0. So that's what's it gonna look like. Blow it. So that's the material view. Go back to your main storyboard. Click it and go ahead and change the class over here on the top side, the identity inspector, and change that too Let's type it in. It's material view, Okay? And let's just run it. Okay? So this is gonna go. This is the old one we're gonna get. We're gonna We're gonna get rid of this guy now, okay? And I'm gonna create. There we go. That's perfect. Let's create. Couldn't run it. Hold on, hold the phone. Here we go. Let's try this again. Select, uh, iPhone six. There we go. Build and run. I pretty much test any time I'm doing something new or something really cool just so I can stay motivated sometimes coders code a long time without looking at their results. None of those that produce bugs. It looks nice. That's not very motivating. Okay, So you could see the shadow isn't that cool? Like with just a few minutes were already building really, really cool stuff. So I like it. I like it. I love it. So that's really good. We are making fantastic progress. So we need to do now is get a label over here. But we're not ready to use our funds yet. If you remember right when we're using funds in the past, we had to do something in our property list to say that we are ready to use those those fonts for application. So go ahead and go into your info dot p list right here. Click a plus, but in the very bottom one. And to start typing the word fonts and that'll come up their fonts provided by application . I just pressed Enter and it's now an array with a drop down arrow. Okay, click the double click where it says string over here. And we got a type in the exact name of all the fonts that we're using in her apso Noto Sands dash bold dot TTF click the plus sign right there. Come on. There we go. Noto Sands the bold italic dot TTF Okay, Noto Sands dash italic TTF and we're almost there Noto Sands dash regular dot TTF Okay, so our foster in the application and that's looking good. So what I want to do now is go back to our main story board and let's go ahead and, uh, put our label on now so l a b for label and let's drag it right there. For some reason, it's not giving me alignment next to it. That's fine, though. And uh, we're gonna call this, um What? What we want to say on our on our label here. Say sign in slash. Sign up. Okay, go. And I want this to be bold And I just wanted to be my custom. My fun. So I'm gonna click the t, change it to custom change it from Helvetica new and noticed. Noto stands there now Notice how didn't give you four options. It actually puts them all together, and they're as different styling options, which is really cool. So Noto Sands bold. And that looks good, except for the fact that we want it to be white. So change the color to white color who that's looking pretty. Let's go ahead and align it. What we can do is select this and the material view. So it's like this label and the view here, and actually, let's make sure we're let's just make sure we're doing what we're supposed to be doing. Oh, I see. Well, actually, we can't align those up here because they're not in the same subset we don't want. We don't want to break that, actually, so we know this is 20 from the edge, so let's just make this label right here. Let's go ahead and make this one 20 from the left, which is where it is right now. And, uh, 35 from the top is fine. Or we could Let's see here. Yeah, let's do it from the top. And let's go ahead and give it a height in a with will make it fixed there. Okay, so that's pin. Now, that looks great. Now, what we want to dio is put the little code logo. I come over there. This is just for some extra value to Mexico visual stuff. And, of course, to show my cool logo for the world to see. Let's make this a little bit smaller. Okay? I'm gonna go ahead and, uh, said an image and this is gonna be code icon logo, and I'm gonna say aspect fit and I dont like it. Teoh two big. There we go. And that's looking. Okay, Just move it over a little bit. I'm just eyeballing it. You can do that sometimes. If you're working with a very anal designer, he can see he can see he'll see one thing that's one pixel often he'll come to you. I had a guy like this, You say? I noticed that this is one pixel off in the horizontal access. Can you fix that? Yeah, I guess. Wow. Uh, let's give it a width and a height. Make it fixed. And let's set 20 from the right and, uh, 28 from the top is fine. All right, so he's not going anywhere. Okay. And, uh, that's looking good. So we want now is in here. We want a Facebook button, that button just an image, and then actual Facebook log. And but because we're gonna give the option to log in with Facebook, so that's selected there. So let's go ahead and Dragon Image view here. Okay? And of course, it always makes everything way too. Bigs. Kind of annoying. Not gonna lie kind of annoying. Change the image to Facebook icon aspect fit. Okay, that looks good. And then what we're gonna do is we're gonna create a button, uh, for our facebook log in. And maybe you're thinking that doesn't look anything like the button that we want is to change the wording on it. Well, it doesn't. So how can we make it look like the other one. Remember how the button had? Um, nice shadow, too. And I had a little bit of good rounded corners on It was pretty cool, so Well, first, what we're gonna do is we're gonna give it a background color. We'll do that right here. And here's the blue that we want. It's the same as this blue here. And if you want that blue, it's one e 88 e five. OK? And of course, we need to change the text color, toe white and the system color. Our system fought over to custom. And then let's change it to where are, you know, toe sands and then bowled. I like it. I like it. I like it. This is make it a little bit wider here. Okay, that's looking really good. But of course, it's not style the way that we want. It starts. Let's go ahead and create, um, another custom class right here. New file. We're gonna call this do Coco touch class here and instead of you, have you do you buy button and we're gonna call this material button, Okay. We're doing something very, very similar. Um, what we can do is go to our material view and copy and paste his coat. Now, maybe you're thinking, is this really the best thing to Dio? Um, we're kind of copying and pasting code. There probably is a better way to restructure its because we are repeating ourselves. So we've module arised upto one level. But for the sake of this class and for the sake of learning this lesson, it doesn't make the absolute most sense to go into those tiny, tiny little details. This is still very effective. And so I'm just gonna copy and paste it for right now, and I think that all of the current settings will apply. So go back to your main storyboard. We've got our custom. But now change your button here to the class on the identity inspector here to material button. Okay? And notice how it doesn't reflect it here in the interface builder. That's fine. For right now, there actually is a way in the future when you're getting better at IOS development that you can actually, instead of creating just the custom code here, you actually create your views in external zip files, the ex I b files and then you what you do is you go into your views here and you declare classes. I be design nable. And so if you have this and the associate ID interface file, it'll actually update your storyboard in real time so you could see what it's gonna look like. The end results. It takes a little more set up. But if if you're building a big gap and you're sick of looking how things look before their styled in code, you can do that and it's really, really cool. So we've got these two items here. Okay, So what we want to dio is use our handy dandy stack views that we, uh, have learned used throughout this course. So let's go ahead and select the Facebook icon and the Facebook button and then click the stack view button here at the bottom, and it just put it in a horizontal stack view. Now, what I want to dio is I want to get I want to set constraints of this stack for you to be inside of this outside view so it doesn't let me re size if you if you obviously have seen this before, but I can't really resize it here So I got. I got to resize a stack view with constraints. So what I want is instead of eight from the left, I want 20 instead of 353 from the right, I want 20 meaning. I wanted to go on all the edges there and from the top, let's say 10. That was the bottom, but we'll say 10 from the top and 10 from the bottom and that will stretch it out for us. There we go. Yeah, it kind of if you noticed that the dash lines here means that's what it's gonna look like when it runs because it moved it off, We could just move it here. So it's about where it's supposed to be. Okay, that's looking real good. Are stacked news off, though. Well, what? I want to change the settings to over here? Could this little icon over here the attributes inspector, what I want to do is just change the alignment on it or ah, see here The center well, not actually looks good, Senator and feel I do want to put some spacing, though. Let's put a spacing of 40. Thanks. That's not too bad spacing of 40. I actually don't need to change much. Here. Three. Run it and see. So what it looks like. Let's see what it looks like. What a pretty logo. Who is that crazy? How? It's like, what? Doesn't look perfectly great here. But when you go over here, it looks fantastic. Look at that. So what we've done so far is we've got our shadowing here on the outside view. Slight corner rounding. Okay, Notice how? There's not massive corner on just slight. And then slight corner rounding on the button with shadows on the button. We got our logo up here. We've got our techs up here and and not very long. Period of time. We've started to really style this application, so let's go ahead and get the, uh, the email and the password stuff going on here. So click your material view right here and just do command C command V in the copied are stacked inside. We don't need that anymore, but I just I wanted to make it easier by copying and pasting here, so let's ah, yes, put it right about there. It's already on the left and right margins. That's good. And put down here and let's set Thea alignment here so well. First off, let's click the ruler, make sure it's not carrying over anything bad, And it is We don't need a height on this guy. So delete that height. I click the ruler. I deleted his height, the height carried over from the previous copy and paste. That would've been a problem where you're like, I can't figure out why it's forcing my height. And then you realize at some point in time that that constraint was there hiding. So let's say zero from the left, because we do have margins on when we know the margins. 20 0 from the right, 20 from the bottom. And we also want to say 20 from the top. Make it perfect there. Wonderful. And I can actually just a justice to meet the Orange Line. So it's just not there in super annoying. OK, so there we go. We've got the view. This one is also gonna have shadows because the class carried over, okay. And so what we want to do now is put another label here that says emails log and slash sign up. So I just copy that command see. Click over here, Command V. I'm gonna change the color to, Let's say dark, Great. They like that and looks good. I want to put it though 20 from the top 20 from the from the left. It's just good to keep that consistent margin. And let's change the text. I just double click that email log in slash, sign up, okay. And let's look at the constraints. We're gonna want to get rid of the with because we just changed it unless we were both just to be sure and click the pin button here and ah, set new with a new height. Here we go. Now it's doing what it's supposed to do and we want this guy we're gonna say 20 from the top and 20 from the left. Perfect. Okay. And notice the orange things were saying, Hey, you're not where you need to be, where it's gonna be at runtime. So I'm just moving it to get rid of those orange lines. See, whenever you, uh, the orange science disappear when it's when you have it positioned exactly where it's gonna be at run time. Okay, so now what we need is some text fields okay. And our text built are specially styled as well, too, because the Defoe on looks kind of ugly and it doesn't really go with the design we're looking for either. I mean, this is not that great look, So let's change it. Let's make it mo Betta. So click the border style over here. We don't want it to have any border through at least through interface Builder came and we're gonna set this color of the background to the same as the view background. It looks real nice. I was just testing out with it and just looked looked really good. So let's give it a shot. Wrong color. That's the font color. We want to scroll down more to background. There we go. And, uh, no, that's too dark with the wrong color. It's ah, I think it's this this guy, that's the one. It's Thea f three f three F three kept, so it's already looking cool. Let's go ahead, scroll back up and change the fun of it to the Noto regulars. Fine. And if you want to ever tested out, you can just type it in there and it looks a little bit too black. Let's be consistent and use that dark gray looks a lot better. Um, okay, that's fine. And I don't like how you notice how the text going all the way to the left. There's no space or there. That's bad. It took that off of us when we got rid of the border, which is kind of lame. I don't know why they do that, but eso the text is gonna be too close to the border. And I'm sure the place well, there's gonna be the same way email address and it is. So let's go ahead and fix this first before we create another text field. Let's get this one style. So that's great. Yet another custom view, and this one's gonna be called Well, let's click it here first. This one's you I text field and we're gonna call this material text field. And by the way, I do this all the time in my program. That's what sets me above many other programmers is because I take the time to make absolute real nice. I mean, think about this. You go if you go into a job interview against somebody else and even though you're at the same code. One app looks fantastic and one app looks like they just use all the custom controls who zapped you think they're gonna pick? It's a no brainer. No brainer. Trust me on this click next click create. We just created a custom text field. Now, the text field, unfortunately, doesn't let us, uh, easily modify the shadow of the border and things like are the shadow. But we can modify the border of it. And I think that's all we're gonna need to do to really make a look Great. So let's go ahead and call awake from NIB. Let's override that and layered a corner radius equals 2.0 and then layered up border color equals. And, uh, I think we can just use the same border color from our other one here. Except this is shadow color. We'll say border color. Okay, there we go. I think that looks good. I tested this out earlier, and I think that this border was too strong. So I think, um, making the Alfa even lighter make it just a super super light border so you can barely see it eyes real nice. And then layer dot Border with border with equals 1.0. So corner, radius, toe to like everything else and give it a small little border. Now remember how the placeholder and the texts were all the way to the left hand side? That's bad. It looks ugly and things like that count. Trust me. Listen to me. Things like that count make all these little details and changes, it's going to set you apart. I promise. Promise from his promise. Um, And by the way, that you don't see APS getting featured by Apple or app APS getting Apple Design awards by missing out those little things? Not at all. Ever So we needed for for the placeholder. OK, so this one for placeholder, we need to override a function called text Direct for bounds. Basically, you're just you're saying, Hey, what's the rectangle that you want to have the text in? So it's currently on the outside border of the balance is going, you know, along the edges. But we want the balance to be inset just a little bit, so it looks nice. So we're gonna do is return CG erect in set. Okay. It takes a rectangle and then offset X and offset. Why? So we're gonna pass in the bounds. So this bounds here is the one that's passed in. That's the bounds of the actual text field itself. So are passing in the outer bounds. But then we're setting an offset, okay? And the office of we wanted 10 on the X and zero on the Y.
100. App: Showcase Part 4 - Facebook Login: Hey, everyone, Mark. Pricier deaf soaps dot com And on the last exciting episode of Building Really cool, frickin app, we did this. Very impressive. Now there's not really any code doing much, as you can tell, but what we did do was lay up Thea, make the layout here, make a look real nice. We also created some material buttons. I'll go ahead and run it here while I'm explaining we created some material style buttons. When I say material, I mean Google's material design philosophy with shadowing and the color schemes and things like that. So we created some very custom controls here to make our app extra beautiful. Um, credit a launch screen, as you can see. What? That wonderful logo. And there it is. We got shadow. We've got a logo. We've got more shadow here. We've even created custom text fields. Very nice. If you want aps to be branded, if you want abs to look really nice, most of them you've got to use custom controls. In fact, all the best APS do it, so you should just get in the habit of doing it. Make your abs more better. We had to custom fonts as well, too. So what we want to do today is on our main log in screen. We want to give the user toe the ability to log in with Facebook. And so we're gonna do a couple things. One is we're gonna install the fire base sdk. Okay, um and then because that needs to interact with Facebook and we're also gonna install the Facebook log in and core esti case eso week so firebase can talk to Facebook. OK, so not too big of a deal. So we're gonna do is we're gonna go over to Let's open up a browser here. Let's go. Fire base. By the way, I'm showing you all this rather than just giving you the steps on how to do it So you could know how to go to these websites and figure these things out. Most people don't do this, and it puts you at a disadvantage and learning if you don't know how toe navigate websites and find the stuff you need to find, it's Actually it's quite a bit of training that you have to teach yourself in order to get good at that. So here's our app that we created. You should have created your app is well already by now. And go ahead and just click the manage app. Okay? And let's go over to lock in and off. No, we already have email and password authentication set up here. That's fine. Go over to Facebook. I understand. We already have a Facebook app. I d and APP secret. You should have done this as well, too. So right here, there's a learn more button. Just right. Click it open in a new tab. Okay? And so it talks about configuring your Facebook application, and then it has some code on how to do it. But we need to do first is actually get, um we need to follow the Facebook tutorial for, um before follow this guide. Oh, the Facebook guide for implementing the the SDK. So what Weaken Dio is? And in fact, let's click. Do me a favor real quick. Click this IOS tab right here. There we go and go to the guide, and, uh, we won't user authentication. There we go. So we're under IOS were under web. We want user authentication and here it is. See this one? That's his Facebook Okay again. IOS guide User authentication Facebook. This is right. Click this and open in a new tab. This is the guide that we really care about. There we go. It's like what? Nothing. Didn't look too right. This is it right here. So configuring your application. This is faith Facebook. Authentication for IOS. So see this Facebook getting started Guide. Okay, is right. Click in open this in a new tab. This is where you should be. Okay. Facebook sdk for IOS getting started. Okay, you're there. Great. So a couple things download Iowa's STK and download beta. Okay, so Facebook does make its sdk veil and cocoa pots, okay? And we're gonna use cocoa pots for this application for fire base. But we're not going to use the Facebook cocoa pods, Leiber. And the reason why is at the time of this recording, uh, I was nine is not released yet. And so the cocoa pods that Facebook has is not the beta one for IOS nine. It's the old one, and it's gonna cause some problems. So it said What we're gonna do is we're gonna click Iowa's nine download beta, and it's gonna download the sdk for Iowa's nine, which is exactly what we want. There goes OK, so that is downloading and what we want to do now. So we kind of partially we've kind of partially set up our application already, But it's not all the way set up on Facebook. So see this linger Harris is apt dashboard. Okay, right. Click it and go toe open in new tab. So before what you saw was could continue up because you already created a nap. So what you saw before was right here this basic. We created all this. Okay, now what? You can dio and I've already done this here. It's right here. But what you need to do is click ad platform, okay? And then you're gonna click IOS, okay? And notice how I have a bundle. I d hear this bundle. I d. That you see right here needs to be the exact same bundle I d. That's under wraps. So if you go back to ex code and click this banner up here and then click general, see how you have a bundle identifier and this is actually incorrect minds. Wrong mind doesn't match up. Um and I didn't I didn't want this extra dash. Okay, so I just wanted Showcase. So there we go. So bundle identifier. This needs to be exactly the same thing as you put on Facebook's bundle I d. And that's all you have to do. So remember ad platform. Okay, add that bundle identifier. And then right here, single sign on click. Yes. Okay, Single sign on click. Yes. And then click Save changes. That's all you gotta do. We already had this part here. And if you don't have this part, it's because you didn't do it in our other videos. So go back and do that. And so and we are in the dashboard settings here. Okay? That's all you gotta do. So that's done. And now notice our facebook sdk is done downloading. So let's go ahead and just click it, Open it. I'm gonna double click the folder. And there's multiple libraries here that that it has popped up. So the ones that we want to use are gonna be the bolt stuff framework. And the reason why we want this is because the other frameworks depend upon it and we want the core. You have to have the court will report to work, and then we want the log in. We don't care about sharing. We don't care about messaging right now or anything else. So these are the frameworks, okay? And what we're gonna do is ah, let's see, Over here, um, we're gonna do is create a frameworks folder in our projects or right click on this main folder here, and type in frameworks. Here you go. And now click and drag these over here, and we are gonna copy them to make sure copy items is needed and add two targets is selected. So we've just copied those those frameworks in so we can use them. Okay, Now, what we also need to dio is yes. Get coca paws up and running, so open up your terminal. Okay? I got mine right here. Are you just type in terminal with command Space Command Space Terminal and got navigate to your project. So I'm gonna go minds on the desktops of CD desktop and let's go to Seedy Dev slopes. That's showcase. Okay? And I just did communicated clear my screen. Make it cleaner. There we go. We want to do now is get pods going and you should already have had poked cocoa pods installed on your computer. If this does not, if pod in it does not work for you, for some reason we want to do is type in this pseudo gym installed cocoa pots. We did that in a different video. But if you haven't go ahead and do that now and install cocoa pods will ask you for your computer password. And so what we're gonna do is we're in the director now of the Exco project. Good. And having pod in it. Okay. And it's gonna initialize your project as a cocoa pods project, okay? And it's close out of this year. So now I'm gonna close out of my ex code, okay? And then ah, okay. And so we've got a pod file there, So go ahead and open that in any text editor, go find your file. Here, go to documents are desktop for me, and then ah, this pot file And just open it with any text editor and text edit whatever. It doesn't matter, okay? And what we want to dio is if you go over here to fire base, go to the Firebase tabs over here right, um, right click insulation and set up for IOS. And there it is. Right here. Take this line of code, okay? And put it right in here. Okay. And there's one more thing that we want to dio and ah, that is use frameworks. Make it look just like that. We want to be able to use frameworks in Arpad file. So that's how you gotta dio and then command s to save it and x out of it. Go back to your terminal. And now we could have been pod install is gonna read that file and install any frameworks that it needs to install based on what you wrote in there. And it's thinking, downloading, installing their ego. Fire base is now installed. So now I can go back to my project on my desktop right here. And, uh, see, knows were on the desktop notices a new file here. This white file, that's the one we want. So just double click it and notice. Now there's two projects. Okay, One has our frameworks, and one has our falls and ah, listen, It's a very cool stuff, okay? No big deal. No big deal. So there we go. We've now got Firebase in our project. We've now got Facebook in our project. Okay, so we're making great progress here. Just move these. Move some things around here so we can, uh, fact, I was do that. And this will turn off the right hand side. Turn off the left hand side. Well, actually, click are Okay, So we want to do now that we've got Facebook installed, we've got firebase installed. Let's go ahead and look at the Facebook getting started guide and make sure we have everything. It's very important when you're in doing something new or installing a framework, they follow all of the instructions. Okay, so we've already added before just added stuff to our project, so I don't need to worry about this. But now there's something else we need to dio to get Facebook working. Okay, So go ahead and go over to your info dot p list. OK, Right. Click it and go to open as source code. And the reason why we're doing it that way. It's sort of like we've done in the past. Where you clicking that things is it's gonna be a lot quicker. So this main dictionary right here. As you can see, that's that's what really counts. That's where we want to put this stuff in. So what we're gonna do is copy the code that Facebook's giving us here and paste it right in there. Okay, bundle schemes. And it's looking for a It's looking for our Facebook app. I d What? We happen to have that right here. If you if you solve this screen open on your dashboard, just copy that after I d and put it right here. Okay? And then it wants it again right here. No big deal. Just paste it now. Facebook display name. That's the display name of that you have in your dashboard. So ours is Dev Slopes Showcase years Could be whatever you've named yours or you could name it the same thing if you're following along and ah, Alex, Great depth slopes showcase. OK, so we just did that. So that steps done. And now, uh, remember how in other videos, we've had problems being able to connect to the Internet because of the transport security . So we need to add Facebook to our transport security and, uh, if you already had transport security um, enabled in your application, you wouldn't just want to copy this whole thing, because because it this is the main transport security dictionary here. Um, and you wouldn't want to copy this. You'd want to copy just the inside dictionary here, but since I haven't implemented it in this app yet, and neither have you, probably just copy this whole thing here and right up here. Just paste it. That's what Facebook requires. No big deal, Okay. And, ah, we need you Now also is we're not quite ready yet. There's some more things we need to do so in detail, right? Click this in detail link here. Okay. Preparing your APS for IOS nine. So we just put in what it asks us to do right here. Um, but there's some more things we want to do. Um, right here. So we need to white list Facebook applications. So what's gonna happen is we're gonna write some code that requires us to open your else and we need. And with Iowa's nine, there's lots of security. So we now need to add this ls application queries scheme, whatever type of applications women we may be opening from the from the applications to go ahead and copy this. This is the last thing I think we need to put in here and paste that in this will to We need to We need to authorize queer query schemes for IOS. And these are these are the ones that Facebook uses, K. That'll help get rid of some areas that it it will want to give us. So, um and this is for, I believe for Facebook Messenger. Um, yeah, we don't need to Facebook messenger stuff. Okay, that's looking really good. There's one more thing I want to do with Facebook. So, um, Facebook has some problems with the new there with the new IOS nine. They haven't finished their STK and there's some problems with them with the bit code. So if you go over here to click your blue icon, hear your project, go to build settings and in the search for just type in bit code sources enabled bit coat, we're just gonna turn it off right now. Um, we don't need to worry about app thinning or worry about big code right now. This is just helped Turn off some problems that are gonna come right now, you don't need to worry about it or even understand it. Just just trust me. It'll save us. Some problems as we go along on is you see right there, uh, they talk a little bit about it, but they don't have it completely working yet. So Okay, I'm looking back at the other Facebook page here just to make sure he got everything. And, Ah, apparently this is just telling us, you know, that, uh, of how to use this stuff and I'll go ahead and explain that, uh, this one's an objective C We're not doing objective. See, our arses and swift. So follow. So if you get to this point, you could just fall along here in the video instead of freedom. The documentation. Sometimes you're gonna have to do that. You're gonna have to translate objective C code into Swift. And it shouldn't be too hard. You can find the help you need on the Internet or do some searching, So that's looking good. So what we do? What we've got now is we've got Facebook integrated. We've got fire based integrated, but they're not really Neither of them are really doing anything. Um So let's go ahead and look at the looking for the getting started guide at user authentication for fire base. But we want the one for Facebook, which is right here. Okay, So Facebook authentication, this is the euro. Few want deposit and copy and paste if you lost it. And so we've created a new app. Okay, we've included the Facebook app I ds in r p list file. We've included the pot, the their framework. We've included the use frameworks, um, command in Arpad file. Okay, that looks great. Okay, so we're making progress. So what do you need to do now is go over to our app delegate on our project, which is right here. Okay. We needed import some things. Now we don't follow this guy over here. Do what it's telling us to do. So, um, I'm gonna say, And by the way, um, when they and noticed as I was going through, this is firebase wasn't 100% updated with the new With the new Facebook s decay, the new Facebook sdk has a slight differences for IOS nine. So we run into problems, will just change it around and again. Make sure you have Swift selected over here and not object to see this is their documentation and swift. So what we want to dio is import these frameworks that were using so import FB sdk core kit and import FBS DK log in kit. Okay. And I'm just doing a command be to build just to make sure there's no heirs. Sometimes when you import frameworks, it gives you problems. And so if you if you do command plus Beato build it you know there's no problems Also, just so you know, as I was going through this X code seven was having some errors like it was saying it was failing to import these libraries. If you see that, don't worry about it. Always know this so long as command plus B, so long as you can build your project, it means everything's working. If you can't build your project, you know there's a problem. So despite what errors that flashes in your face, if you can build it, you're OK. So, um, Coolio so right here in application did finish launching with options and close this. Make it a little bit a little bit bigger. Um, what we want to do is when the apple launches. We want to check with Facebook. So if if a user has chosen to authenticate with Facebook and use Facebook log in. We're gonna check Facebook first and see if we're already logged in things like that. Eso we need to override the entry point of the application. So this is an app delegate and what you're gonna dio Simon FB sdk application delegate dot shared instance, um, dot application And which one do we want? We want, um, did finish launching with options, and we're gonna pass in the application, okay? And we're gonna pass in the launch option. So all we're doing is we're passing in the things that are already being been given to us when this, when this function is called, we're just passing it over to Facebook and letting Facebook take over and see if there's anything that it has for us. Okay. And then notice here on the right hand side application did become active. Let's find that function. So whenever the APP becomes active, so restart any task that were paused. Well, application was inactive. So basically, whenever it's active, we just want to, um we want to activate Facebook If Facebook is enabled in our applications FBS decay s de okay app events There it is APP events So FB sdk app events toe activate app And here it is notifies the event system that the APP has launched and when appropriate logs and activated app event OK, so we just want to activate Facebook. Whenever that comes, screen becomes active again There's one more function that we need to actually implement that's not implemented here And this is, uh this is the reason why we had to add those query schema is to our r p list file is because from here we're gonna open the Facebook app if the user is not logged in so they can log in. Okay, so what we're gonna dio is ah, type in application and it's open your URL, but this one right here okay, It's just it's just ah function. That's part of the app delegate that you can use and we're going to and notice how this functions looking for a return. Boolean So we're going to return FB sdk application delegate that shared instance dot application But this time it's going to be this Ah, open your l right here. And just passing the application pass in the your L pass in the source application and pass in the annotation. So everything you need is actually right here. It just passing it over to Facebook, letting Facebook handle it Face was gonna handle it and take care of her for us. So all you need to understand is that when you go to log in or create a new account using Facebook for this application, it's going to load the Facebook app. And this is gonna handle that right here. If you're if you're using it. Just cause we're putting Facebook in here doesn't mean that, um, that your APP is going to use it. So if you didn't want to use face or if User did sign up with email and password, these are gonna return false and Facebook's not gonna do anything. So So we've got those functions implemented, and we've already followed this stuff here. Okay. And this right here is the code to actually implement Facebook. Okay, um, you follow along, or you can just you can follow this meaning on your own. If you want your positivity and try it out. Um, let me go ahead and get started on it now. So what we want to do is go back to our view controller. Okay? And, uh, okay, what we'll do is will make sure that, um when a user logs in, okay, that registers are when they click the log in button, it's either gonna register with Facebook or log them in with Facebook. And then what we also want to do is make sure that the next time the apple loads that we see if there's already an existing session and if there is just log in, we don't have to use your have to press that faced with, but every single time. That would be really annoying. So we want to do is just automate that a little bit here. And so, um, what we need to do is when Facebook successfully authenticates, we need to save save the session, okay? Because when you log in, it's going to create a firebase account as well to and we need both. We can't just use Facebook alone. We gotta have firebase included. So we're gonna dio is created. I be action. They FB but impressed, right when the Facebook button is pressed, we want to either log in or create an account. That's what we're gonna dio is make it work. And I think we need to import some things here. Well, they're not showing it on their screen, but I'm I know we need to So gonna import FB sdk core kit. We're gonna import FBS decay Log in kit. Okay. Those libraries that we dragged into our project import those and let's get started here, and I'm leaving this screen open on the left hand side. I'm not completely following this 100% you can if you want, but we'll go ahead and do it this way over here. And it's very common for me when I'm programming toe have documentation open on the left like that and my code open on the right. So So it might help you solve problems easier. So here we go. Facebook log in equals F B s d K. Log in manager, and we're going to We're gonna create new instance of a log and manager. And if you're wondering like, do I have this on memorized, You know, how does he know this stuff to be honest. Me, as was every other developer in the world. We go and look this stuff up. Like I could build this Facebook. I could build 100 absence Facebook, and I probably stuff to come back here and look at the documentation because I couldn't remember it. So you're seeing how riel coders actually code. So when you watch courses where they perfectly type everything A through z like line, you know, one steps one through 50 without one problem, they're misleading. New, because that is not real programming, and it's gonna give you a disadvantage. So facebook log in dot Log in with read permissions. So we're just gonna log in? I'm gonna make this bigger. Um, let's get rid of that documentation for now, okay? And the permissions we want is just email, okay? And it's looking for an array of any object, so we're just gonna make a literal array and the permission again we want is email. Okay, well, we want to be able to do is log them in with the Facebook like email system. Okay. And the handler is what happens after it succeeds or fails, okay? And so what? We're gonna do is we're gonna type in. Ah, Facebook groups. Let's press enter there again and press enter here. So again, what it does is it passes in variables, but it doesn't give them names, and so you're gonna want to give it a name, So facebook result. Okay. And this one's going to be, um, Facebook Air. I'm just giving them parameters so we can use them. Okay. Cool. No big deal. Doing well so far. OK, so now what we want to do is say, if facebook no Facebook error is not equal to Neil. Okay, So what we're saying is, if if there's not empty, it means we had an errant did not succeed. That's all we're doing. Eso we can print, uh, Facebook log in felt and then air, and then we can actually pass in the Facebook face. Book air also noticed how when you're in a closure like this in this, this call back sometime is the like. When you calling parameters and stuff, auto complete doesn't work. Just I don't think X codes implemented all those features yet, So Facebook air, but it still should work. So if there's an air, go ahead and just print the air, you know, maybe in a different application or in your own app, you might take it even further. If it did fell, you give them a pop up notification or something like that, we're not gonna worry about that right now. That's what we want to dio is if there's an air handler. If not, let's grab the access token. So access token equals FB sdk access token. That current access token dot token strings. So you know, like what? What's going on? So all right, so what's gonna happen is when you successfully log in or creating out like we just did Facebook stores an access token. Okay, so there will be something here if we if we got to this point, this were just grabbing the token string because what we want to do is ah, on fire base. We want to talk to fire Base and say, Hey, we logged in and we want to save that user. I d So our user I d can be associated with Facebook, OK, because if we ever take Facebook out of the application user's gonna need some type of way still to be able to log in. And so this is how you is, how you do it. And, um so we've got an access token, and, um, you know what? I want to make sure that we do is, um before we go any further with with fire base and storing this data, let's just make sure this is working here. Let's just make sure Facebook's working all together. So it is just print successfully logged in with Facebook. And what we can also dio is the eligible. I just just want something in here. What we can also do is type in facebook result facebook result dot um, what is it? Um Well, actually, this is print the token. Where The Tokyo access token area. OK, so we want to see if we logged and successfully that's gonna print the token. If not, it's going to give us an air. That's all we want to do. Now we know that the I B action is not connected yet, So let's do that now. What? Your main storyboard. Open up your assistant editor, Grab this Facebook button right here in control. Drag it over. Actually, don't even need the assistant editor open since we have the I b action just control. Drag this over to your view controller and then select Facebook button pressed. All right, let's go ahead and build and run this bad boy simulator coming up. There it is. Okay, Moment of truth. Okay, so here is our It's giving us some Facebook stuff. We'll see. We'll see if it's working. Moment of truth. Click to Facebook. Log in button. Okay, it's loading my Facebook click. OK, and here it is, successfully logged in with Facebook, and it printed that token. Good job, guys. Facebook is successfully implemented in the application, and it's successfully working. And let's go ahead and actually call this video Done. This is getting Facebook implemented less in the next video. Let's get let's get Firebase talking to Facebook and get that start off as well, too. So that's it for now, to recap. What we've done is we've dragged in the frameworks from Facebook right here. OK, we dragged him in. We, uh, in our info dot p list. We added a bunch of stuff we added ls application query schemes from Facebook. This is required. We've white listed Facebook. We've said, hey, Facebook is allowed to use our APS, We've added them to our N S exception domains. We've also added the Facebook app I d. In the Facebook display name into our application that your l schemes with the F B in our application i d we added all that in toward info dot p list. We went Teoh are build settings of our project and we turned off enable bit code. Okay. And then in our view controller here all we did was important The core in log in and we just used it Facebook log and manager we just called It's log in function super, super easy. Um and it either succeeds or it fells. When you click the button, it loads up the facebook app. Okay. And then we also lastly, we went into our app delegate and on application did finish launching. Its gonna use Facebook to check for the check. If you're logged in or not, application becomes active. It's gonna reactivate Facebook if needed. And then, uh, this is what's gonna open the u R l When you click. When it goes to first register you for the first time, it's gonna open the Facebook app and then it's gonna come back over here, and this is how it handles it. So as we've done their asses faras on the web here, you know, we went through the documentation of how to do it. Preparing your app for IOS nine. Um, we also, uh, went through this guide here getting started and we downloaded. Of course. You know, the debate abundant in the future. Okay, when I was nine is officially life and their sdk is no longer in beta. You're gonna want to grab this through cocoa pods, okay? Or you can click the download IOS STK right here. This will be updated at that point in time. That's what you're gonna want to dio. And so that's it. Firebase is going. Facebook's going have followed some guides here. We implemented cocoa pods to install fire base. Lots of stuff here. If you missed any of these steps, go through the video again and you'll find all the pieces that you need. And again, the documentation is actually quite fantastic Here. Pay attention to the girls in the video if you need to go back. Okay. Guides that we went through together and, uh, that's it. Moving lumps The next video
101. App: Showcase Part 5 - Email/Password Login: Hey, what's up, everyone? Mark Price here, Deb slopes dot com and last time on building are very cool. Showcase way had this, which was basically the ability to log into the app with Facebook. So if you're not registered, it would register you with Facebook. And if you are registered, it would automatically log you in. And, uh, we got all the code for that and something working. So good job. So now what we want to do is get email and password authentication going now that's happening through fire base. So if we go pull open our firebase account here, okay? I'll just load the main website here. Fire base. Okay, log in. And here's our app. Manage the APP log in and off. Okay. So what we did was we enabled Facebook, which is oh, off. That's what it uses for authentication. We've implemented all of that. Which is why down here, um, were you, uh we have to excuse me. So we're logging with Facebook first. And then, which is why here, shortly hereafter, we're gonna be implementing oh, authentication for Facebook, and then we're going to go ahead and implement email and user name password which we've already enabled. So if you don't have this enabled enable it now you can put no reply for password resets when someone wants to reset their passwords. Um, really cool stuff, actually. Um, so cool deal. No big deal. So go back over here. Teoh, your firebase dot com docks IOS guide Log in password Right here. User authentication. This is the guide we're following for registering, creating user accounts and logging users in. And I'm just really using the coat this code here to do this. However, ours is different. So what we want to do is just rather than having lots of different fields, you know, confirm password, sign up things like that. We just want to email password, and and you just click log in and it logs you in. And if you're not logged in, it tries to sign you up. Kind of like the Facebook log in button works. Let's make a user's life a little bit more easier, so we're gonna create some logic for that. So here we go. Looks good to me. Is what we want to do is first finish off this This Facebook Here s O. We've got it successfully logging into Facebook. Facebook, which just fine. But remember, we need to get this talking. Teoh firebase. Let's go ahead and do that now. So we're logged in with Facebook, and we need to call the Remember how I said logging with Facebook's and, oh, authentication, not not email and password. So we got to call the off with the author provider functions. So what we're gonna do is first get the base reference data service. Okay, let's see here. We did not You know what? We did not even create a data service, so let's do that now. So we need a place where we're gonna store references to fire base and all of the firebase properties and routes and things like that. We need a place to store that. So we're gonna create a singleton. I'm gonna create a new group here. We're gonna call this services, emigrate a new file inside of that folder, and it's just gonna be a swift file, and we're gonna call this data service. And a singleton, if you don't remember is it's a single instance of a knob checked of a class that you have access to. So we're gonna sit class data service. Okay. And then right here is what we're gonna say. We're gonna say static. Let I'm just a d s short for data service, and then it's going Teoh equal data service. So maybe you're, like, what is going on? I don't get it. Well, we're creating a static property. Ecstatic variable. That means there's only one instance of memory, and it's gonna be we're gonna make it globally accessible. So basically, we're gonna grab this variable, and it can't be changed. Its a let. So we never have to worry about anybody modifying it, destroying only 11 instance of in memory ever. And that's what we want. So there's our data service, and in our data service, we just want to implement some, uh, some stuff that can interact with, uh, firebase. So let's do that now. Private bar is a ref base. I'm just using, uh, we don't have fire base. Important. If you want to use firebase imported up here at the top. There we go. There we go. And, uh, that's the one we want. And for the girl that's going to be your firebase application. So, uh, if you If you're like, what? Does that just go over here to your five base firebase account? And, uh, no, that this is your your L right here. That's you. That's it. So so that's the euro. And what we're saying is let's get a reference to our specific firebase account. That way any requests and things will make their coming straight to our account so they can actually save in the database. This is very important. That's critical. And then let's make a public variable. We're just gonna return the private variable again. This is just good port, good coating practice, that's all. Okay, so we've got a base reference which we're gonna be accessing when we log in and authenticate, and that's what we want. So that looks good to me. Let's go back to the view controller here. What we want to do is grab that base reference that we want to grab it, and then we wanna perform authentication on it. So let's go ahead and do that. So data service dot ds there were accessing that static variable. When you have static variables, used dots and tax on the class, we don't have to create the club. We don't have to do this first, Okay? We could just call it right on the class and grab that DS, and then we can grab the property. So, ref base, OK, And since this is a fire based reference, it has a function called off with, Oh, off provider. And let's see here, which one do we want? We want the one with the token. I'm just gonna press enter on these variables here. And one thing we can do so we don't have to use variables at all, are so it often named the variables. What we can do is actually just I'm showing a different way of doing this. So rather than have the parentheses in here, we know it's going to give us off date, and we know it's going to give us an air. You can actually take off these parentheses, and you can take off the return type void. If we take all this off, it means we don't need. We're just gonna handle it right here on this spot. Nothing to worry about. So what we're gonna do is just delete that and then I'm going to say air and we're gonna call this off data, then you don't have to give them names either. Which is or you don't have to give them specific types, Which is which is really nice. Okay, that looks good. It's yelling at me, though. What did I do wrong here? Oh, I believe it needs to be like so Okay, with completion block air off data, it looks good to mean in Let's just build it. Maybe it's, uh it's still yelling at us. You know, I think it's just yelling at us because we haven't filled in the other fields yet, so it looks good. Sometimes you have to deal with disclosures. Could be very if you like. You're like, Wait, what's going on? Why did you give me this air? And until you finish the whole thing, um, it doesn't actually fix itself. So for provider, you would put on Facebook. You're telling a firebase that you want use Facebook. That's a very specific key. OK, the token. What do you think the token should be? Well, I think the tokens should be the access token. So what we're doing is we're storing Facebook's access token as part of our account and look at that. The air one away, which is great. So OK, so if we successfully log in, we're gonna go in here. And what we want to do is is store on our device, the session or the token of the user? The firebase user. Okay, not the Facebook user. But if you remember your log in with Facebook, Yes, but we still need to save a user and fire base of fire base and knows how to talk to a standing with email password. It doesn't matter if he's logging with grading account with email, password or Facebook. We're still gonna have a firebase user. I d. We want to grab that and stored on our device. So next time we load the app. If the users already logged in, we can take him straight to the screen without having it wherever they want to go, without having to log in again. So that's what we're gonna do now. So make the screen bigger here for you, for you iPhone people and the more blind. Okay, So what we want to do is first check if there's an air and then handle that. So if air is not equal to kneel. It was good in print. Log in. Felled. Okay. Okay. Logan fell, That's all. Um I don't know what else to do to handle it right now. We could do some nice air handling things like that later on. Alerts and stuff. I'll let you handle that on your own. That's what good programmers do. They put lots of air handling and things that we're gonna print that we logged in if it was a success, so logged in. Hey, we did it. We did it. All right, off data. Okay, so we're just gonna pass in the auth data and just print it, just just to show. Hey, it worked. And so if we got here, we know that we logged in. So let's go ahead and now say, Remember how I said we need to save it to the device you've used s user defaults before? Let's do it again. And his user defaults thought standard user defaults dot set value and the value we want to set is ah, the auth data dot your i d for a key. And you know what? We're gonna be using this a lot. This key. We're not a lot of multiple times. I think so. It's probably time to put that over here and are constants. So let's say let key we're gonna say you I d equals u I. D. This is just a key value. So it knows what to look up. But the more often you have to type something, the more problem or potential you have for heirs. And your let's say you spelled it wrong like you speak one letter off. Then you'd be wondering, Where's my bug? Or is my bug? I can't find it. So using Constance is a great way to prevent Ares. And we're gonna say Key you I d. So we're just saying, Hey, save the save the Actually you I d the value of it and this key and the key is called you idiots. We can access it later, so we're just saving the newly created firebase account. And then what we want to dio, at least at this point, is log into a new view controller, which we haven't created yet. So let's let's do that now. It's a great time to do that. Let's go to your main storyboard and just create the basis framework for a new view controller. Here we go. Every go, Okay, and let's just from this view controller here. Let's just drag over to this view controller. We don't need it from a button or anything. We'll do it programmatically and so show is fine. And let's just make it a car that clearly shows that it's working so well. Say, Blue, go back to your view controller and then right here we'll just say self dot perform Segway with identifier. And we didn't create and identify which we should have when we have to go back, I was forget that. Let's go back here to man click the Segway and pass in the identify. Okay, So what's gonna happen is you're gonna log in with Facebook, and if it works, it's gonna take us to the next view controller after it saves it to the device. The token, the fire base Authentication token. Okay, eso Let's go ahead and run it and see if it works. Facebook log in. Here comes Okay, it's loading. Wham bam! Done. Deal. So it worked. That is really cool. That is really, really cool, actually, Um okay. I like it. Okay. That looks good on. Look here. If you notice, we now have. Ah, the data here, off data. Pretty cool. Okay, so it's all working. Um, the next thing we want to do is ah, what about when the When the the APP first loads. If they're already logged in, let's just take them straight to the take them straight to the next screen. So if you remember right, Segways don't work and view did load. Okay, It only work after the views have all appeared on the screen. So what we can do is do it in view. Did appear just a super viewed It appear just toe. Make sure any super classes are being called. And what we'll do this is grab the key out and if it exists, will just take him to the next dust grain. If n s user defaults, not standard user defaults dot value for key. Remember, Here's that. Here's the reuse right there were preventing a bug. So if that key, if we're actually getting a value, were saying if it's not Neil, it means it exists. And let's just take the user to the next screen. So just a self perform Segway with identifier and it's logged in. And, uh, maybe you're wondering where or maybe you're thinking like, Hey, I didn't the type of this identify or twice couldn't I haven't air there, too. That's absolutely right. We should be better programmers and do something called Re factoring. So let's do that. Now. Let's go over to your constants, K. And what we can do is we can create just a section called Segways. Okay? And right here, just, uh, we'll say segue Sega Segway and will say, um, logged, logged in equals that Okay, Oops, that should be elected. All right, Let and then we can just put it right here. Segway logged in and then down here, Same thing. Now, you maybe you're thinking that's not really a big deal, Only doing it twice. Well, this can save you so much time in the future. Imagine if we had to use this 100 times throughout the app, and then you got to change the name of it. You're gonna be really wishing you had put it in a constant. You'll have to change in one place. Okay, So said wait, logged in. That's looking great. So on view did appear. If there's a key, okay, if if there's an off firebase off I d key saved on our device automatically, Lageman, let's give it a shot. We were just saved it once, so this should just take a straight to the blue screen, I would think. Hey, now, if you've ever wondered, how did they do that? How do they know if you're logged in or not? Uh, no. No. You know, that's how you do. Let's get out of this Ugly did receive memory morning. So sick of seeing that in there, but his comments in here Goodness. Okay, so great. We've got Facebook talking with, uh, um and and saving the key. Let's go ahead and get the, uh, email password working. Not too much extra work we have to do. We do need to tie up those email and password field. So let's do some ivy outlets. We have our and sometimes I do it from here. Sometimes I do it from the main screen. A Sfar is out. Let's go. It just depends on where I am at the time. Right now, I'm in the code, so it's easier a week bar and this is going to be password field, you white text field. Okay, so we need to connect those because that's what we're gonna you know, we're going to when you Smith when you press the submit button, it's going to do its magic, you know? And then, of course, we need an i B action for when the buttons actually pressed. Let's do that. Now I be action down here at the bottom funk, and we'll call this. Ah, what is it? Email. But I want to say I email, but impressed? Why not? It was a sender. So you why? But in all right, So and we'll need to tie this up to a swell. Okay, But that's good for now. Okay. And, uh, you know what I like? I like this. Let's say attempt law again. I like that better because we don't know if you're gonna log in or not. Okay, so here we go. If let email equals email filled dot text where email is not equal to this. So what we're saying is grab the text out of the email field and what we've learned from experience is when you grab something when you grab it nothing's there. It's gonna give an empty string. It's actually not going to give you a Neil Value is gonna give you an empty string. We don't want that either, but we're still checking for both. So let's grab the text field where it's not equal to an empty string. OK, and then the 2nd 1 has to work as well, too, which is the password. So P w d equals password filled dot text where, um, pwd is not equal to an empty string. So if both of those pass OK, it means that we have an email and a password. Okay, Um And what if, uh, what if it doesn't pass? Let's show. Let's show on air to the user. Okay, so let's do a funk show. Air alert. Since we'll be showing lots of different types of alerts based on the type of message we get, we'll just create a reusable function. I'm just thinking ahead. Okay, so this is a on an alert function that's gonna great alert for us. And this how it works. Let alert equals you. I alert controller and has a title. Uh, wrong one coming. There you go. Title its title message is a message. Preferred style is you. I alert controller style dot alert. And we don't need this now. I just I forget What? The command? What what the actual things are before I do that. So I used to type it in all the way first, and then I delete it just to shorten it up and let action equals you. I alert action. So alerts gonna have actions in our case. Um, we're just gonna have an o k. Button that closes. So title's gonna be okay. And the style is going to be you. I alert alert action style. Oh, come on, you. I alert action style dot Default, and that's just basically doesn't do anything. It's just just the default default action. And we don't need a handler. We don't care what happens after it closes. We just wanted to close its just another. And then we'll say, alert dot Add action. We're passing the action because that's the action. We want just the okay button that closes. It doesn't do anything else, and then that will present view controller. And this is just gonna be the alert. And we don't care what happens after it's completed. So that's all we're just gonna show on air now. We could show any air that we want, which is really cool. And so, uh, right here, if there's not user name or password, like in the actual text fields themselves, we can say show air alert. And, uh, you know, we can say email and password required. You must enter an email and a password. Now, that's a nice thing you wanna be like. Hey, dummy, you're supposed to put the email and password field in there. But if you do that, your boss isn't gonna be too happy. So I suggest not doing things like that in there. But sometimes you want to. Because, of course, you need to put an email and password, and so I'm gonna do it by itself. Come on, people. Okay, so we test it out and see if it works. So let's go ahead and connect our actions and connect there. Alex, this is a bug. He should not be filled out because we have not connected them. But it's thinking that we did so right here. Just select your view controller and, uh, yeah, and go ahead and control director, email address field and click email. Field Control dragged your password field. Call it Password field and then from the button controlled a drag to the view controller and click attempt log in and, uh, cool. So what should happen is when I run this, if we don't enter an email password, we should see that alert. And I know that my things are hooked up and working. So of course, that's if, uh, we don't automatically logging because we haven't I d on there. So let's go ahead. And, uh oh, things going the opposite way. I wanted to, um that's why I didn't get rid of Got lots of APS on here. Let's get rid of some maps here real quick so I can show you. You may have to do this to. So whenever you delete nap, it'll get rid of all the user defaults, Of course. And, uh, and look at all these APS you've gone through. Good job, man or gal, You've, ah gone through quite a few APS here. Okay. Loading up the app. Let's see if it works. Log in and send it without using your password. Hey, and worked. What if we just put in one and notice how in the password on the password. It's not a password filled me to fix that. Hey, it's still worked. Worked in that case since his enter a password. Only it worked in all three cases, so we're good. Last thing I want to do, though, is fixed that pass for problem. And so click your password field. And then what we want to do is on Where is it? Over here. We want to make this a password field. So keyboard type. Which one is the appearance? We're gonna get it. Hold on. Hold on. Placeholder password. There it is. I was looking for the word password. Couldn't remember. It's a secure text entry. There you go. That will make the dots instead of the, uh, let's auto unable to return to be nice. Okay, let's make the dots. That's fine. So we don't see what the users typing. Okay, so that's working. So we've got the air handled when there's no user name or password, So let's actually handle, um, logging in. So what we want to dio is first try and log in. That's the first thing we want to dio. And based on the response we get from firebase, it's gonna It's gonna let us know, actually, if the account doesn't exist. And so if the account doesn't exist, we know that we need to create an account and then log the user. And so it's either gonna log the user straight in, or it's going to log in, fell, create an account, and then log the user in. And I know it's a little more work, but it's gonna create a better user experience. And that's what good APS are all about. So, um, you guys are making crummy APS. So my fault. I'm telling. I'm telling you the truth here. I'm telling you what people want. Uh, okay, so let's go ahead and authenticate. So let's grab the main reference. So data service dot ds dot ref base. And this is how you log in with firebase firebase, the fire base off the user? Easy enough. Um OK, so we just passed in the email and pass in the password. And yes, we do on a completion block. Um, an honest person enter on those time to get rid of him, though. We want Aaron off data and let's back to get rid of all this here air and comma off of data . And that way we don't have to actually name the give the types of the parameters. It'll just work for us. And so Okay, here we go. Let's handle the air case now. There could be multiple heirs, right? User name or password could be incorrect, or the account might not exist. Or there could be Internet air. We're not gonna cover all from this video. You could do that on your own time to make this app better. Personally, you can cover multiple cases. So if air is not equal to kneel Meaning if there was an error. Okay, um, then we should print the air coats. Let's talk about air Coach real quick. So air dot I think it's code. Come on. There we go. Okay. So let's go ahead and handle this first. Well, let's see what happens when we print up things to the screen from our council. We're looking for an air code, okay. And, uh, if I so I just type in, let's say, um well, I haven't created an account yet, right? So I could say, um Mark Price at Dev's Dev slopes dot com like hey, how he says that dot com. Yes, that's the way it is. 123456 If I log in, I got a negative eight. You're like, Wait a minute. What does that mean? Well, let's take a look. Actually, let's go ahead and print the whole air this time. Oh, not air tight. Sometimes Auto Complete is your worst enemy stuff. Okay, let's try this again. So let's print the entire air and see what it's actually saying from Firebase because firebase will send us back airs and we can print in here. So let's do that again. Let's say rum be Mumby at abc dot com and 12345 Okay, here it is. The specified user does not exist. That's exactly what we want. We want to know if the user does not exist, because if it doesn't, we can actually create an account and log them in. So it's really cool. Some services don't tell you this. If you some services, if you have the wrong password or if they count doesn't exist, or if there's no Internet, whatever may be, are not Internet, but other heirs. It'll just give you the same air back and you can't handle like this. But since firebase does give a specific Ares back, we can handle this appropriately. So that's great. We know that negative eight is the air code when an account doesn't exist. So let's go to our constants. And, uh, let's just make a section called status codes, so weaken Reuse it. Um, and we'll say let, uh, status. Ah, account non exists suddenly, to me equals negative eight. That's the exact air code is giving us right here in the bottom right hand side. Okay, okay. So let status account. No exit. None exists. And by the way, I often depending on, um, it's making this section here to called keys, depending on the type of constant. Amusing. I always put the actual name in front of it. You're like, Well, that sounds weird. Segway First status first. Well, the reason I do it, it's a let's say you had 15. I could actually just type the word status and only the status coach or pop up and there'll be 15 of them instead of like having the word status and then anything with the letter s pops up. So that's why I do that. Okay, so we've got her status coats. What we want to do is say, if air dot code equals status, account on exists, we're just using. That's always doing a bully in equation here. Conditional. So if the account does not exist, we want to actually create a user so called data service. Daddy s dot ref based. Let's get the base reference dot Create user. And which one do we want? It was just this top one here is fine. So the email we just passed in the email the password is going to be ah p w d. And with completion block, that's good there. And let's go ahead and get rid of some of this stuff. And what we want is air. And there's another one. I want to a second parameter called result. Okay. And it's giving me attitude here. Why are you giving me attitude? What did I forget? Email. Password with completion block. Oh, I needed, uh, I needed the other one, actually. Sorry, my bad. My bad data service dot ds dot Ref bay stuck. Are you create Used right. Great. Create user. But we want the 2nd 1 instead. There we go. Email password. Okay. Stripping on something, huh? I just got smoking. Something go. I was screwing up. I'm screwing up for your advantage. And that's actually the truth result. Uh, okay, so we're creating user, that's all. That's all that's happening here. Now, think about this. What would cause an account creation to felt well, probably would only fell if, like the password requirements weren't met. Or if that account already existed again, you can handle those. You can print up the air, coats on the situations and do just like we did right now, put a status code and do a specific air for that. We're not gonna do that. We're just gonna handle if it fails or succeeds. Okay, So if air is not equal to kneel meaning, if there is an air, we're just going to call self that show alert member are alert function, and we're just gonna say could not create account. And the well, just the message is gonna be a problem. Creating account. Try something else. And again, you probably would want to break this down a little bit more. Check out the different air codes of the account orders. This Sorry. This account already exists If the password is invalid like it was only one character. And you need to five. You know, you could say not enough characters. Please enter character in this fort pastor in this format, you should handle those specifically just I'm just telling you that you can We're not going to for sake of time. OK, so great. So if there's an error to do this, otherwise it means we successfully created account. And so what do we need to dio? We need to log in. So OK, so when we do create account, though, what I want to do is I want to save that user idea again, just like we did before. So we need to do that here. So it s user defaults that standard user defaults that set value. And this is going to be, um What is it gonna be? We need to get to you. I d first, don't we? This is gonna be result dot Oh, it's a dictionary. So, um, there we go. And in fact, we can use our key here. Ha, Another place where we can use that and for a key. And, um cool. So what is saying here is Hey, go to your standard user defaults set of value. And we're actually we're grabbing the result now, result here is a dictionary, okay? And so it actually has the exact same value of name of the object. The key name is the exact same name that we named it in our library or in our constants. That's why we could use the same name. So I'm grabbing that value for that key out, and then we're saving it here in our standard user defaults with that same key. OK, so that's really cool. We just reuse something, so don't be confused. It is two different things, but we're using it here, so OK, um, we're saving the key. And now we just need the log in. So data service dot ds and we're already doing this somewhere else. We'll just do it again off the user. And what? Passing the email and the password with the completion block. And, ah, again, we can just take this stuff out here. I could say air we'll call a different air since since there's an Arab. They're already air will say off data. Okay, so if we logged in, actually, we don't even you know what we don't even need? We don't even care if this succeeds or not. So you could handle if there was a failure on logging. There's no reason why it should fail because you just created an account for it, so it should will succeed. What? You could create an air handler here If there was an air, I'm not going to actually, I'm just going to pass Neil into the completion block. I don't care. It's it's going to 60. So and then we'll go ahead and will say self dot perform Segway with identifier, and we'll use our Segway key. See using it again. We don't care about the center. Okay, so that's really cool. So if there's not equal to kneel, that means that we couldn't log in, okay? And if we couldn't log in, then we And if the status is account doesn't exist and we create an account and then we go ahead and handle the air. If there's an air, otherwise we save that new account, and then we log in. Okay, we did a few things here. It's not that complicated. You could look at the order of events if just watch this video again. But there's one more thing we need to handle. What happens if we try to log in and it succeeds the first time? Because we already have an account? Okay, so let's find, uh, so off user. So here's the air, right? Let's see. Here's the air, and I'm just trying to find where ends It looks like So we know this guy is the end of our block, and we know that's inside there. So I think this is our air up here. So what we want to do is say so if there's not an air self dot performed Segway with identifier Segway logged in. Okay, so if we try and log in and there's no air, it means that we succeeded. So let's take into the next screen if the account doesn't exit. If there's no account, let's go ahead and crane the count. And if there's an air creating an account like the past, one already has that user name, then thrown air. Otherwise save the user and love them in. That's all we did okay. Just like I explained. We're gonna dio and looks like it should work. What do you think? Give it a shot. Let's run it. Okay, so log in. Must have email password. So OK, let's create a new one market. Deb slopes dot com. And I think this account already exists. Um, let's see if let's see if it works. Okay, So let me log in with my old account. Okay? So let's go ahead and delete the app. Kind of a hassle. It's because we're saving the user defaults. We could have. Ah, like a debug function that erases it when we're doing testing like this, but no big deal. So Okay,
102. App: Showcase Part 6 - Post TableViewCell UI: Hey, everyone, Mark Price here, Deb slobs dot com. And today we're gonna move on with our showcased application, our Facebook type clone on And this is what we're going to be doing today is just building the U Y for the actual items on the list. Imagine that this is your main feed, like on Facebook, and you can see all the posts. It could have an image. It can have Ah, bunch of text here. The Texas Extra Scroll. You quit links and there's to the ideas. Hey, let's go to desolate Showcase at I built this new app because I'm taking the course. I'm gonna post image of it. You can get likes. People can click the heart and it will like and then it shows the likes here that the number and then likes. And this is the user name. And this is the user's profile on DSO. There's also some other things, too, Like it's being styled right here. So we'll see what we've got is rounded corners, a little bit shadowing and stuff. All this is custom. You don't get that out of the box. And, uh so, yeah, there's a few items here They're all the same right now, but this is all static. We're just creating the prototype cell that could be reused in the future. We're getting it, toe look, the way that we want, it's going to take a bit of effort, so it'll be in its own video like we're gonna do right now. So go ahead and open up your project. The when you've been working on, I'll pull it. Mine right here is well, too. Okay, we'll close this simulator here, and here we go. And, uh, we last left off being able to log in with email or with Facebook, which is really cool, eh? So what we want to do now is get the you I going for the next screen. So not too big of a deal will also be working. Mostly be working an interface builder today. So let's go ahead and open interface builder and, uh, pull it up right here, see what we got. So we've got a view here, but it's just an empty blue view. It's not doing anything. And we know that we need to put this in a navigation controller, So let's go ahead and do that Now click your view controller here. And if you don't have a view controller, for some reason you never got to that point. Just drag a new view controller on, or you could drive a dragon Innovation navigation controller because that's what we're gonna be doing. So click your view controller here if it exists, and goto editor, go to embed in navigation controller. So the next portion of our app we just want to be in a navigation controller so we could pop in, push views and manage things for us. Eso that's cool. And, uh, what we want to do is have, you know, like the users image, the user's name, the heart, the like button. So that's that's what's gonna go up here in the top on. Then we're gonna have text and image. So let's go ahead and put in a image. Actually, what we needed to first, My apologies is a table of you as the first thing that we need a table of you to cover the whole screen. Okay, looks good. We've got her table of you and let's see here We wanted to, uh, have some margins here, so that's fine. And I'm leaving the boot, the blue background on just for now. Just Teoh just to make sure I can see what what belongs to what, Some minutes whenever things. Why? It's hard to tell what's what. So there's our table of you. I'm gonna pin it zero from the top and margins are on. That's okay. Zero from the left, from the right, zero from the bottom. Perfect. Now right here in the bottom. Right inside. Selector, table view so and drag it right here. And I'm gonna change the background of this table view. Sell, um, to yellow just so I can see how tall it is. And it's obviously not tall enough because these are pretty big posts. So let's just make it a little bit bigger, so that yellow is our cell. And that's what we're really styling here today. So if we remember right, the top has an image of the user. It also has the name of the user has the heart button that could be clicked, that it has the like number, and then the word likes. So let's go ahead and just start throwing things on here. Um, actually, before we do that though thinking about it some more. So what's interesting about table views is this is important for you to understand. Case, Remember this table view cells? They're not separated, meaning, like if you've ever seen an application where there's a gap like that, the one I just showed you where there's a gap between each post, that little gap, it's actually simulated. It's not really by default table view cells. They're all connected, and there's no spacing between them. So what we want to dio is take rather than just putting things at the edge of the content here because that's gonna make ourselves connect. We wanna put like a container of you in here that holds it, and that's not connected to the edges. So it simulates that their space. And then we put this as the same color as the background. So first, what we need to do actually is in our table view here on our content view we needed put a you I view here, it's gonna be our container of you. Okay, you have you dragging on here Perfect. And what I'm gonna do is, uh I think it's OK going to completely to the left into the right. But it's the top and bottoms that we want that space on. So right about there, And, uh, I'm gonna make sure. So that's your from the top? Because there's a margin there that should be okay and zero from the bottom. That's okay, too. We've got a little bit of a margin there, so it should work out just fine. We'll play with if it doesn't, cause we want to shadow the show under there. We wanted to look real cool. So Okay, so there's our container view that I'm gonna press enter on this view on the left hand side . Just call it container. So we know what it belongs to. So there's our container view, and let's go ahead now and put on our object. So we got an image. Let's put it right here. That's way too big. Come on, just drag it smaller here. Okay? Got an image? Um, we've got a label. Go right next to it there, and we go ahead right now and change the font from system to custom and from Helvetica new to Noto Sands because that's the fun we're using in her AP. This would be bold, and then it's gonna be Are awesome. Red color, you know? So this would be like demon slayer 40 31. There we go. It looks good. So I got a user name make it a little bit bigger there. We need another image for the heart. Now, I'm not using a button for the heart, cause the button just has some inherent problems with sizing and things like that. So we use an image and later on at a tap gesture, recognize her to it so it can work like a bite. So this would be our heart. And let's go ahead and grab those graphics. Now, I've got him here already. Now they're also available in the source and in the resource is So I'm gonna grab my objects. Uh, from a folder here. I've got him right here. And don't change name of the city. Just screen. That's our pokey decks. App that we wanna use as an example image here. And that's a profile picture of me. I better not be seeing you putting that has your desktop background, anyone? Unless you're really hot girl. I don't think my wife was listening, So that's OK, anyway, uh, just kidding. I don't get in trouble. Um, so heart empty heart, Full profile screen. There we go. Um Okay. So we got all that off there. Cool. I mean, close that folder here. All right, so let's go ahead and set those images now. So, image, we're going to say his profile and this is our heart will do the heart empty. Okay, that looks good. We do need the total likes, and then the the total of the views are no, the total likes. And then the word likes itself. That's what I am trying to say. Goodness can't even speak. So let's copy and paste it over there. Uh, I'm gonna write Align it. I'm gonna change it from red to Dark gray right here. And ah, so I want Boulder regular. I'm not sure yet. Let's try regular now. We'll do bold. I like it. So this will have the total like so you know, I don't think it would be more than 20,000 or I don't think it getting those digits. I think I'll stay in like these digits so we could just test with this. Okay, so we don't need it that big. Just make it out there and let's command C command V Put it right underneath here. And, uh, let's change this to the word, uh, likes. Let's not make it dark, Grey. Let's actually make it this nice light. Great. Here. And if you want to see that color, it is e zero e 00 and let's take it off of bold and put on regular. There we go. Cool. I like it. Okay. And this this may be a little bit too light. We'll play around with it later if it is so we've got the objects that we need. Now, what we want to do is put everything here in stack views and the reason why we're going to stack views eyes because, um, especially table of you sell when you when you hide a stack view, um, like, make it hidden. It actually automatically. Resize is for you, which is so cool, and you don't get that outside of stack views very easily. And so a user may or may not want to post an image. And so we want with all this to be in the staffing lineup real nice. So we're gonna select the likes here, Put them in their own stack. View a vertical stack. You these two? Let's see. Ah, all three of them will just put this in a horizontal stack for you. Okay. And, uh, that looks good. Um okay, so we got to stack, we got to stack views here. Um, let's see. What else? What else do we want to dio? There's There's different ways we can weaken. Stack this up. Uh, so we got those two stack views. Let's put those stack views. Um, inside of another stack view. I think that makes the most sense. So have to stack views. Yeah. Um, yeah, that's your work. Fine. So we got to stack these here. Let's just select both of these and put them in a horizontal stack view. Actually, we didn't need to do that. Let's undo that stack. The I just did command Z, let's like these three and then the stacking, and we'll put those in the horizontal sacked you forgive me for You know, these stack two things here. I don't want to just I don't want to just go. You know, I don't buy Adam number by number. Were specifically doing it. Certainly, I want you to kind of see the different ways of using Stack Stack. These are brand new. There's lots of ways of doing it. There's no one right way. So seeing how we change and play around thinks is very important. I don't think that you're getting cheated here. You're actually getting a bigger benefit by watching us try different things out here. So let's go ahead. I've got all the selected Let's go ahead and do a horizontal stack view. That is what I want. Now, before I start using constraints, I want to get all the rest of the Hawaiian place so we can put all of those and stack views . Um, if you remember right stack news, work best when you've got all your items laid out first and then you put them. You put all your stack fuse together, and then you lay out the constraints, not beforehand. So what we know we need next also is that text like that describes your app. Hey, this is my Abbott. Is this in this? It could take links, and so we're gonna do something new today. It's called a text view. You I text view and a text view scalable, but it can detect links and that's what we want. So I'm gonna go over here and drag a text view on right underneath it, and we're gonna go ahead and just drag it out right out there. Um, that's fine. For now, the font we're gonna change from system to custom. To Noto Sands, that looks fine to me. The color, though we're gonna do this dark gray just to be consistent. And then here's something really important. We don't want edible. Turn that off. I don't want people to be like change that. But what we do want is selectable because when it's selectable, it means that we can put link detection and the tech links and open it and the APP store. So if you want to post your app so people can download it, people can click it and it'll load the app store. So there's our text view. Fine. Um, I don't care about a lime or anything like that right now. This all looks good. So there's our text view. The last thing we need is an image that goes under it right here. Let's go ahead type of image and what has put this right here. And I know it's not the right size right now, but that's OK, because this is all going in a stack view. So selector image here. And ah, this one's gonna be just screen. Yeah, and we want we want aspect feel aspect, fit Look kind of weird on different screens like you don't really want that with Sue aspect . Feel just kind of showed a snapshot of it. Okay, so cool deal. Let's go ahead and select this top staff you this middle text view and then this image and let's click the stack view button right here. So those are now all in a stack view now its course off the screen, which isn't knowing. So let's go ahead and click this constraint button, and now we'll constrain it and do we want the's on? The edge is completely on the edges. Flush with the edge is of the view. Let's think about that here. So the view is gonna show shadow around and stuff. So, no, I think keeping it constrained to the margins is what we want. So zero from the top zero from the left is fine. Zero from the right and zero from the bottom. Let's constraint Alta margins and, uh, notice how now it is? Um, it's lining up just as we would expect it to. So there's our stack view. Let's leave. It lets us. I know. Come on, us, Wells, Give me grief here. I want to stack view Teoh. We can change the height here, other with its not letting exchange it But it's what it's saying is it's gonna be 124 larger when the app actually runs came. And so Okay, so let's go ahead and I move the stacks Few. Oops. Wrong way. This stack me a little bit here in the middle just to make it look line better again. The numbers don't matter what you're seeing here, because, um, it's gonna look fine when we actually loaded in the view. And I know the preview doesn't typically work. Well, let's click these distant editor and change it to preview and just just see what it's given us here. Okay, so this is an iPhone four inch? Yeah, it looks a little bit off. From what? We actually want it. Um, So we're definitely want to change some things around. Yeah, it's, uh, it's It's being, uh, it's being silly on the screen here. You can't trust what you see. So let's close that preview there and let's go ahead and just work on our stack view here. So let's look at this Top one Here is top stack view. So this one holds all these things horizontally here. And so what we want to do with its horizontal items is the question so you can play around with it here so we can click, uh, feel that's already selected. How about feel proportionately? Okay, It doesn't seem to be doing much, but let's go and put some spacing in here, though. Okay, Now we've got some spacing. I'll also this image here. Let's like that and change it to aspect fit. Okay? And since his heart Teoh aspect fit there we go. Okay, so it's space outs. Not It's not quite what I'm looking for, though. It looks, looks a little bit, uh, I don't know, a little bit weird. So let's go ahead and see if we can just set the with on this image itself. If that will help us out here. Let's set the with two in the height. 2 50 and 50. Here we go. Okay. It's looking good staff. He has given us some grief here. Let's, uh let's see if we can give it a m. That's so weird. Doesn't usually do this. Okay, lets see if we can get a stack of use. Um, it's like a fixed with for now are a minimum with, at least so with is gonna be at least 320. Okay. And what does will say go over here to the ruling will say greater than or equal to 320. All right. Um okay, I this demon slayer font thing here. Let's go ahead. And, um, let's give it a I'm clicking the attributes inspector here. And let's go ahead and give it a instead of a fixed font size and auto shrink. That's a minimum font scale on Let's say 0.75 even go down two points. So well, it's even updating real time. Nice. I remember doing that. This is new X coda. Beta seven Exco seven, beta six. Sorry. So I think they've got some some nicer new things going on here. Here's our image. That's fine. Uh, this looks fine here, too. So I think it's OK for now. Um, I think this is okay. And I think this is OK, so I'm curious how it's gonna look when we actually run it, cause in this in the simulator here, it's like a celibate off here. But let's just go ahead and get some code going here and see if we can just test this out. So what we want to do is we only got one view controller here, right? And we should drag this indoor controller folder And if you haven't already create your model view controller folders and, uh so we can put this stuff in there. So let's go ahead and create a new file in that folder. Let's call it cocoa Touch Class. And let's call this, um, well, the fee, like a facebook feed. So the feed VC for review controller and this is just gonna be you. I view controller. And, of course, added unwanted text of the end. And, uh, it looks good. You have you controller. So we're gonna do is set it up for our table view. Someone's late this boilerplate stuff we don't need and started to put the table here. So I be outlet week of our table view on this is gonna be you a table view and that looks good. So let's go ahead and put the delegate. So you have a table of you delegate. You have a table view data source so it can call the proper functions that we're gonna need in view. Did load table view dot delegate equal self table, table view dot Data source equals self. Okay, so that's good to go. Now we need to implement the functions here, so ah, number of sections in table view, return one section and then a table view. These functions wouldn't appear if we didn't implement those. Delegate up those protocols up there. We want a number of rows. So a number of rows and section and we're gonna return three just so we could see, Like what? It would be like Simulator three device, three rows. And then we need a table of you sell fero at index path. Okay. And, um, we haven't created a custom sell yet. So for right now, just to be rid of the air let's say return you a table of you sell, and then what else do we need? Well, I think that's all the required ones for now. So we've got the we've got. We've got all the stuff we need for the table view. Um, Now, the problem is, uh, it's not gonna show us our custom sell because we don't have a custom self created yet. So in your view folder over here. Okay. Right. Click and do new file. And we're gonna do Coca touch class because this is a view. It's not a controller, it's a view. And we're going to say, um, post sell because it's ah, post up. Um, it's a posting. It's a table of yourself. So you have a table. Do you sell, given that the junk they put on their and, uh, go ahead and click next and create. And this is our sale. Really cool. So what we can do is put our outlets in here. I'd be outlet week of our we know we have a profile image, so profile image of you image view, and I'm only gonna put the ones that I want to modify right now. Uh, which is really just the, um it's just the, uh the image actually gonna make it into a circle. Everything else is fine. Everything else is fine. So just that one for right now and then in awake from nib Um what Will dio is? Ah, well say profile image dot Corner radius or dot layer provide image that layer dot corner radius equals profile Image frame that size that with divided by two. Remember, if you want to get a complete circle, you take the with of invited about two. But I just realized remember, it's not gonna work in awake from NIB because at this point in time, we don't know the size. The sizes and constraints haven't been put together yet for our for our things. So we actually need to Dio is over a draw wrecked. This is where we need to write our code. Write the code Teoh around this corner because this is gonna happen after ah, profile image has a frame in size. Okay, so that's where we'll do it right there. And, uh okay, so we've got a custom sell here, so let's go back to our main story board and click your So click your view or I'm sorry. Your table view cell right here. This guy right here and go over to the identity inspector and change it to post cell. And now, if you click on the left over here and looked inside and right, click it. You should now see profile image, and you can just drag it over to the profile image. And that should now be a, uh that should now be a, uh, a rounded image when we get into the app and run it. One more thing, though, on this main stack view here, I wanted to add some spacing on this vertical stack. Use, let's say five between each each item. Cool. So that's custom. That's custom. Okay. And then one more thing. You're like you said One more thing, like, three times. I know. Sorry. In this identify or on your post sale. So on the cell itself, the readers identify, Just call it post sale. Okay? I'm just copying that. And now go back to your view, Actually, why? We're here, Actually, hold on the view controller. Right. Click it and let's connect our table view why we're here. Um oh, we need to change the view controller class to good thinking. Thanks. Click the identity inspector on the view controller. And let's change that class. Teoh the feed Veazey every you know. Now, if you right click feed V C U c r table view there and we just drag it over air we go. Now go back to your feed V. C. Okay. And instead of returning this, we're going to return a table of you dot de que reasonable with identifier Put in that and we're just going to say as, um we're gonna say, as post sale now, normally, we wouldn't do it this way, and we won't we go finish off that this is just a test because this could potentially crash the app. It won't, but it could, uh, So what? We're just testing it out right now. So of the gold that I'm trying to achieve is when we run this, we can see 33 of our table view cells and that they look nice. If they don't look nice, we're gonna have to go back and fix them and and tied him up. So I'm building and running here. Um, and if we have any crashes. Will will handle those here as well, too. Here we go. APS coming up. Hopefully it should log us in already and take us to the screen We want to go to. Okay. App is loading. Okay, so it did. It took us two. It took us to, um, the table view screen. But it looks like there's some problems here that we need to We need to work out. Okay, for one is, we don't see our logos and labels and things on here. They're gone, which is a problem. I feel like this image is going too far out of its bounds. I don't think it should be doing that. Um, so we've got some problems. It looks ugly. So let's ah, let's do a few things. Go to your your post cell and let's go ahead and put, um are our, um our app image our main image on here. So I be outlet week of our will call this showcase image of you image view. What we want to do is ah on this as well as on the profile image which I for guys we want Teoh. We want to say clip to bounds equals true, and then over here will say showcase image. Um, that clip to bounds equals true. Basically, we just don't want We don't have the image to appear outside of where it's supposed to go. And so go back to your main storyboard and let's, uh, let's click. Let's click your, uh, your post sell here, Right Click it and go to, um, let's go to showcase image right here. Okay, there we go. And that's looking good. Okay, s That's good there. What? What? What was our problem over here? We weren't seeing the images and stuff, So I'm a morning if delayering issue. So if I If I open this up here a little more, let's close this left hand side here. It's more space. Um, we've got a stack view and in this stack view right here and then there's a texture. And then there's this image. I just feel like the image is going beyond its balance and it's covering everything else, But in case it's not, what I want to do is take this stack view here and just put it underneath. That's not what I want to do. Never mind. Uh, I think this will fix the issue. Let's let's give it a shot. Let's build and run. I forgotten stack views when you put it on the bottom. Every orders a stack viewed it doesn't actually change the lettering on it. So let's see how this looks. Okay, So that was the problem. The image was going outside of the bounds. And so the clip to bounce actually worked. Sweet. That's great. We're making progress here. So some good things are This looks really good around an image. The heart. I really like it. Okay, What doesn't look good as we still got this yellow background in this blue background, remember, we want that nice light, grey. Let's go ahead and play around with that. So click your main of you here. The one that we put the blue background on. Go to the attributes, inspector. And let's change this to, um, this light light gray color here. They're nice. And then ah, on our cell here, we don't want a yellow background. We want this like Ray. Okay. And let's see, let's go and run this and see if that changes anything. Let's see where it puts us, okay? So there we go. Notice how that member was telling you. Like the cells themselves. Like they don't. Uh uh. They don't naturally have space. We actually had to build that that space with a container view. And then we've got this ugly thing up here, which I don't know what's going on with that just yet. We'll take a look at that here as well, too. But we've got ourselves, but we got a problem. There's no shadows on them. Um, and also this line here. I want to get rid of that. So let's go to our feed V c. And let's go to our table view. Click that table view there and separator on the right hand side Changed the nun that's gonna get rid of those lines on each one. Um, but the other problem we have is there still no shadow on the cell? And if you remember, we actually wrote a custom class. If I open the left hand side and I go to view remember, we wrote this material view which does that shadowing for us. Uh, so go. And this is where reusability is. Awesome. This is how I would really build an app. So click your main story board and then we'll find your container view, which is this guy right here. And what we're gonna do is just change the class to material view, Riggio, and great. And build on running again. Okay, look at that. We got a shadow here. This actually looks really, really cool. So I've got a shadow. Unlike in it, we got a light background are like, great background. Um, I don't like this navigation bar appear on the top. I think it should be read. So I'm gonna scroll over here to the navigation controller and see this navigation bar right here. Let's go ahead and click the attributes, inspector. And let's just change the tent bar tent up here to read. I'm gonna run it again and make sure it's looking the way that we want. Very nice. Very nice. Um, it's okay. So look at these. These cells have shadows. They're kind of rounded. Um, the image is there One thing I'm not seeing, though, if I don't know if you're not seeing it either, but I'm not seeing our text view. Um, so let's click our text for you here and what we want to do. Let's let's just give it a minimum with Let's Say we want to at least this high. So if I click the click the text view and then click the pin button and say height is 70 Okay, now we don't always want it to stay 70. We'll just say We'll click the ruler and we'll say, We'll double click this height Hair wants a greater than or equal to 70. Let's go ahead and build and run it again. I just want to make sure it's there, and it's working as expected, and there it is. Looks good and you can even scroll it, I believe. Yep, so you can scroll it inside of it, too. It's looking real nice. Uh, it's looking really, really nice, actually. So there's our table view. Um, yeah, this is really cool. It's coming together now. I think the last thing we want is to skewer to this weird white space up here, and I think that's just our table view. So if you click your table view here and change the background to this light grey that we've been using, let's just see what happens. It goes away and looks nicer again. This is just test data. So, um, we're just messing with you. And there it goes. It's gone. So there's your table view. We did it. So what we did was we just created since stack views, I have no idea what this looks like on landscape. If you want to support landscape, we're not covering it here. But I always like to just play around with it and see. Yeah, looks kind of ugly on landscape. Still works, but not what we want. Doesn't want to rotate for me now either. Come on area. OK, so there it is. Looks great. We got a shadow we got our controls are buttons in here. We're not gonna connect anything else in this video. We just wanted to get this You're going. You saw how to use the stack. Use multiple ways around stuff, and that's it. Let's go ahead and move onto the next one
103. App: Showcase Part 7 - How Firebase Works: Hey, what's up, everyone? Mark Pricier. Deb slopes dot com And last time in our application way made great progress. Doing some female log in and setting up to you. Why on the app has Facebook log in? And so what we want to do today is ah, hoping your project. I got mine right here. You know, you're going to file open recent and anyway, um, today we want to start working with firebase getting data to show in the application. So basically, what we want to do is when you create a new account as a user, we want to actually save that user to fire base. Right now, it's just firebase manages its own authentication. We actually need users, you know, that could have, like, profiles and names and stuff like that. Like an actual profile. We need to attach that to an email. Slash is your name or Facebook account? We need to attach it to an account. Um and also we need Teoh start testing out our data for making posts, seeing how to pull data into the application. Now, we're not going to actually show in the why just yet, but we're gonna We're gonna do this step that takes you to that point. So here's our app, and I want to do one more thing first is go ahead and open up a browser. Go to firebase dot com, log in, go to your application, manage app, and you should see something similar to this. This is just the base application that you have, and you've got no data in it. Well, what's really cool about fire base is you can put test data in it right here into the database and will instantly show up in your app once your app is connected. So let's talk about how does how does data work in Firebase? Okay. And so firebase kind of works like Jason. We've talked about Jason in the past. A bunch of key value fields. Doesn't have a raise, has objects with keys. And so what are fire based applications gonna have? At least in the beginning, it's gonna have two main areas. So I'm gonna click the plus sign here, and it's gonna have an object called users now. Users, um, users itself is an object. When I say object Member, this is Jason JavaScript. Object notation. Okay. This is like a JavaScript object, but it's in Jason, so we want a new object. Objects have keys and values objects, or, like a dictionaries and swift, have a key, and they have a value. So we want a user's object and the users object is going to have all the users for our application. So if we had 50,000 users, this right here would have 50,000 key values now it wouldn't be an array Firebase doesn't use a raise. And that that's that could be a little confusing for you like, Well, what? Why aren't we using it right? It makes sense to use an array, but they don't use a race. They use objects with unique keys and values. So here's our users array. It's just an object, though, So we've got a name. Go ahead and click the plus sign. Okay, so the user's, uh, is is, um, that array of objects, even though it's not really an array. And then what we want to dio is every user is gonna have a unique key. So we're just gonna make one up for right now. Just for fun. You know when firebase generates use for us. They may look something like this. Just a bunch of numbers and letters maybe more unique than that. And let's say that's let's say that's are you I d remember how we started working with you . I ds Okay, so when we log in with Facebook great account when we created with email password and then we did that off data that you I d Well, what we're gonna do is we're gonna store that you I d into a user here on fire base we can keep track from and so the u i. D. This is the idea, and it's the key of the user. So we're just identifying it as by the i. D. And this is an object as well. So it doesn't have a value click the plus sign, and now it's gonna have a value, right? This is where it would have a user name. Later in, the app will set up how to put in the user name. And maybe this user this user's name is Ah, um Fannie Janney, 21. Now you can click the add okay, and it's their right. So what's happened is we've got a user's array um, remember its object. But this is an array. And inside the way. We've got our unique user, and this user is an object, and he's got bunch of keys in it so we can add a new key. Eso, for instance, What would a user have? Um, I believe it would have a, uh Well, we're gonna We're gonna also say what kind of provider is Is this a Facebook? Is this email in log in. So provider on this, this one is going to be password. A email slash password. If it was Facebook, that would say Facebook. So we're gonna store what type of provider that this account is. We're gonna store the user name. Um, so you know, there there's one user. If we wanted another user, you know, we'd have another unique key, right? So this would be like, um, you know, something like that? Whatever. And then we would add same things here, right? Provider, And this one might say facebook. Okay. And then we'll add a new key for this, and, ah, user name might be, um, you know, forest for rest. For us. Oh, boy. I can remember. All right. Whatever. For his Gump. Uh, he's got Forrest Gump is the user name. And let's add one more key knots. Good, actually. So Okay, so this is how fire based works. You've got an array. It's not really an array, though. It's an object, right? Because it has keys. Here's the key. And the value is another object. So this is an object with keys and values. And so this object has to users in it. These users are objects themselves, and each user has a key in a value multiple keys, multiple lies. In this case, the key names provider, the values Facebook user name, Forrest Gump. So each has its own unique providers so that users Okay, so we're gonna store a list of users for application, cause you're gonna have to have users in the app we're also gonna store. And by the way, this is just test data. I'm visualized helping you visualize it here. Okay. We're also gonna store posts, right? So we'll have a series of posts That also is going to be an array again. It's an object, but I'm just going to say array from here on out, okay? And, ah, we're gonna add um we're gonna add a post and so opposed Also is gonna have a unique idea. Every time you make a post, it's gonna have generated unique I. D. So this might be whatever there's the unique i d. And of course, the Post is an object in a Post has, like a description. And this is where the user be like. This is my first app. I'm super excited. I got a job from this, you know? So there's, ah, the description of that post. Remember, there's an image or l Right? So image your ale and Siskel find one. Let's, uh, it's a cool app. Not cool absence do cool app. Let's go find a cool app. So yeah, this user built this app just grabbing it from the internet, copying this girl here just for testing purposes. So OK, so this post has the description has an image or l o we need to store the likes. Right? So total likes. Maybe this guy girl got, you know, 50. Whatever. Okay, so here's a post Has 50 likes. Um, that's cool. Now, here's something interesting. Maybe you're wondering how do we track how the posts are stored with the user. That's a good question. Now in, if you have any experience with relational databases, you might have a key in a value that has some have a relationship, like a one to many oneto one. Things like that fire base is a little bit different. If you want to store something, you have to reference that I d. So each user probably has its owner a called posts, and this is the post that they specifically have posted. And so let's click. This doesn't have a value because it's another object. And this is where you would list the specific posts. And so what you do is so we have right now we have one post, right? So let's say this is the user that made that post. So the post ideas K h a d s f l k 23 as you can see right here, that's the name of the post that was made right, And then the value we're gonna set to true Now maybe you're like I'm so good. Views. Well, first off, you don't have to understand this completely. It takes a little bit of time, But here's the point to remember whenever a new post is made, okay, it's gonna go into the Global Posts array right here. But also we want to track who made that post. So the minute that someone clicks that bun and says new posts, what we're going to do is we're going to go into this user's posts array, as you can see right here, and we're gonna add the post that was made. So first, we're gonna generate the unique post. We're gonna grab this idea of that post we're just gonna store right here in that users posts, OK? And then what we could do is like later on in the app. If you wanted to show all the post that you've made for that you've made yourself, um, what we could dio is we can go into our posts array on this user, and then we have all the ideas. And then so we go over here to this post array, we just grab all the posts that match of the ideas that are right here. So whenever you create a new post in this array over here, you're gonna save it over here, and that's how firebase works. That's it really? That is how firebase works. That's how relationships are made. You store references by the key name and the true doesn't mean anything. It's arbiter. I could have called this string. Hey, what's up? I can call it anything but true is what Firebase uses for for their referencing. So it's arbitrary. Doesn't matter. But you do have to put something there, and you just want to store the key. All you're saying here is Hey, this exists. That's why have this key in here. Okay, so there's a post, and it's over here. Um, and so that's how it works. So this user has made one post. We have one posts in our application. Um, this user has made no posts. Okay, Um, also, we probably want to store what likes a user's made. For instance, if you click, like on a on a post, you know, you need to have the ability to unlike it, right? But how can you unlike a post if the app doesn't know which posts you've liked, right. It needs to know. So we also need to have, uh, wrong thing here. We also need to have ah on our user here we need to have an array called likes. And of course, this is gonna have Let's say he liked his own post, right? So likes we're going to the same exact thing. Hey, h a d s f f l k 23 valued truth. Same exact thing here. All we're saying here is hey, here's an array of the post that we've liked And then you referenced the name of those posts and then So basically, when you can do in the app is as you're going along, you can say if if this post that I'm scrolling through that I pulled up If I If I have like that, the the button should be unlike, If I haven't liked it yet, then it should be the like button so you can tap it. So So that's kind of what we're gonna store here. So, to recap, we've gotten array of posts on to make one more just for demonstration purposes. So let's say this unique I d. Looks like this. Okay. And then, uh, course has its own objects of description. This was a really fun app to build. Okay? And let's go grab another image from the Internet just for fun. Okay? And some of these abs are ugly. Oh, goodness. This one's cool again. All right, So there's an image and s over here, and this one was Add the image, Orel, By the way, this is real time stuff. This this is real data in the database. When I say it's tested, it's actually real. Data it it's talking to You're talking to your app, um, description, image or L and then likes, Right, So maybe this one has, like, 300 likes. Okay, So just pretend that we've got a couple posts in our post worry, which we do. This is a real data. We're just putting in here for testing purposes, and it looks good. So post there's the post. They have their unique keys, they all of their values. Then users. There's two users here and notice how this one doesn't have likes or posts. Well, he doesn't have any. And it doesn't have to be there if there's none, and that's okay. And otherwise, this user, he's liked one post and he's made one post. And if he had, like to multiple posts that we can add that here. So let's say he liked the other post 2234 K B A k. Ok, And the values true. So he's liked to posts, and he's made one post. Okay, we're just referencing existing posts and notice how posts and users are at the same level . Okay, you don't want it is nest a whole bunch of stuff. I would want to say users post things like that. You want a module module, arise as much as possible and don't nest as much as possible. You wanna reference things just like we did here. So our data set up and ready to go. Now, what we want to dio like I mentioned, the beginning is when the user creates an account. Okay, we want to, uh, store that user i d. As a new user in our firebase application. Because you noticed how, as you were creating new email password accounts, nothing was popping up here, right? You're like it's saving and working. But why isn't it popping up? What we have to tell it that we needed to pop up. We don't get access to users, user names and passwords, and that's a good thing. Okay, Firebase handles all that for us. So we do need to create the user and use their off i d. So I'm gonna close this screen here. You've learned you've learned kind of the basics of fire base and how it works. So that's really, really cool. Okay, so what do what do we want to do in our view? Controller? This is where we're logging it. Let's close this here and make this a little bit bigger. Okay, So this is where we are logging in, and we want Teoh. We want to make an effective firebase account creation. Okay, In order to do that in order to create that user, we've gotta get a reference to our users. Uh, remember, back in our fire base Ah, are fire based screen here? We've got this users. And what's interesting is firebase uses your rails. It uses paths, Teoh to direct data where it needs to go. So this is a You are all here. Post would be its own. Your l Okay. And users would be its own neural. And maybe you're not understanding and you shouldn't, because I haven't showed yet, so let's go ahead and look at our code. So if we go to our data service here, okay? And notice how here's are based reference. So if we wanted one for posts, you know what we could do is, um, right here we can just make another one of these called private var ref posts. It's just remember, this is a ref for this. This is a constant fire base, OK? And what we'll do is we'll just passing in your rail and it would be the exact same euros this okay, Except it would say ford slash posts. And so when we grab a reference to this fire base, it's now grabbing our posts. Or how cool is that? So it grabs the poster, right? And then you could have add things to it. Like an array. How cool is that? Like, I think it's super cool. Everything is your l base. So any time you want to grab something, just put in the path. This is your app. And then there's a path and you do the exact same thing for your, um for your user. So ref users equals Firebase K. And, uh, there we go auto completing. But that's OK. And then you'd copy this here and put it right here. And this wouldn't set be users. Okay, now, of course, this this is a little bit of copying and pasting and I don't want to do that. So let's go ahead and make a constant here was they let your l base equals and let's just post post that Get rid of the post at the end and there's our base. Your URL is what we can instead dio is we could just insert it here. It's a base Say base if it wants the work there we go based your URL or you are a base struggling today, as you can tell and that's cool. And so we can go ahead and copy that in both of these right here. And we can do that right here is well, And now we've got available to us. Uh, not yet because they're private still, but we've got the different Urals that we can access and listen to things. So we're gonna call done for this video. Have learned a little bit about firebase. If you don't understand it completely, go ahead and get up to this point. Play around with firebase crater arrays in your data and stuff in there, and I will go ahead in the next video and actually implement using these references on posting our user on into the fire based database as well as getting some values from some testing. So that's it.
104. App: Showcase Part 8 - Creating Firebase Users: Hey, everyone, Mark Price Here depths hopes dot com Let's move on forward with our project here. So we've talked about referencing paths. OK, to are fire based data. So this would be your l base or this path here slash post or slash users. And as you can tell, this is our main base girl right here. Just really. You can translate all of this to you Or else this is your main uriel slash posts slash users. And of course, these are like dictionaries that you can grab that values and keys out of super super cool . So we've got this information here. Let's go ahead and make these references publicly available. Savar Ref posts. Answer me of type fire base and it's going to return. Ref, underscore posts, Okay, And we'll do the same thing for our users. There's our posts, ref. Users of type firebase again. We're just being good programmers and keeping our data private. We're gonna return ref users. Okay, so that's good to hear for our data. Um so what? We know we need to dio I've talked about this already, but what we know we need to do is when you create an account with Facebook or with email Password. Remember, when you log in, it gives you an off I D. Okay, so when it gives you that off, I d we need to take it and store it in the user's. Okay, so we look back at our data here, we need to create a new user in this path here, and we need to give it the author, i d. And at this point, it won't have. Probably likes or posts. It won't have a user name because we haven't done that yet, but it will. Foot provider will set that as well. So very cool. So let's go here to our code and let's create a function, uh, inner data service because we want to keep things here in this service slash model layer. It's kind of a models kind of a service. We could have called it model service. Um, but funk create firebase user, and it's gonna take a u i. D. Because we no need that. And we're gonna go ahead and also take a dictionary. Well, we'll just create the dictionary as we get it. There are the values that we need. So it's gonna take a dictionary of type, string and string. Okay. And, uh, there we go. And maybe you're like, Well, why string the string wolf? We look at our data here, um, we don't care about likes. We don't care about posts. All we weren't right now is the provider, and that's a string. And that's a string string key string bag It wasn't then we'd put something different here . This is really cool. All you have to do now it's a ref. Users. So we're just grabbing this euro here for its last users. That's the reference that's creating a firebase object, okay? Or grabbing that. And, uh, we're gonna say child by a pending path and let's look what it says, Get a firebase reference for the location at specified relative path. The relative path can either be a simple child key like Fred or a deeper slash separated path like fred slash name slash first. So that's really cool. You can grab it by path, or you can grab it by its actual name. So what I'm saying is, even right here, you could add a path to the end of it and grab an item out of it. Just like we had those variables up there. Um and so what we want to dio is we want to put in here child by pending path. We want to do you i d Let's talk about that. So what does that mean? Well, we know we have a unique idea, right? And we know we haven't had a firebase user created yet. So in this case here, you don't have these yet. You don't have these users, but we want to store this unique I d. So right here were saying child by pending paths. What lessons? What we're saying is, if you look right here, we're saying, Hey, get the you I d. You know, whatever that you ideas, if it doesn't exist, we're gonna create it. If it does exist, it's going to return it. How cool is that? So with fire base, if a specific idee in the path doesn't exist, you can still reference it. And then whenever you save something there, it's gonna actually create the full path for you. It's gonna create everything for you the minute that you save it, which is really cool. So it doesn't exist right now. we're saying, Hey, grab a reference this path, it does not exist, but it will the moment that we save it. So we got a reference to that path so it would look like user slash whatever the you unique ideas. And here is where we save it, not set value. We're gonna pass in, user. Okay, So here's the deal. When you're saving items and fire base most of time, they're gonna be objects. And when I say object, remember how I said objects or like, dictionaries? So firebase is really smart, and it knows what to do with that data, and it's gonna save it. So again, what's happening is we're grabbing a reference to the users path, okay, And then we're setting a You were grabbing the path for the very unique I. D. So in this case, if this was the unique idea, we're grabbing this path right here for doesn't exist. That's okay, because the minute we call set value, it's going to set on that user. It's gonna set a provider with Facebook as the as the key. If we had a user name in there too, it would set that as well, too so whatever values is in this user dictionary, it would set now to that path and they would all be right here underneath this user. Very cool stuff, Right? So there's our user looks real cool, and then we just set the value and that automatically updates and fire breaks. You have to do anything else. The minute you do this, it instantly updates and fire base. That is really cool. So very base is very fast. It sinks things very quickly. So we've got the code to create a firebase user. Let's go ahead and write the code, in our view controller to actually process that. So when do we want to do it? What? We want to do it when Facebook successfully creates an account, right? So let's go ahead and do that. Now let's go to our Facebook. Here it is, right here, right we want to do before we leave the screen. So that's fine. So we can not do it right here. And what do we want to do? We want to create a firebase used or so, um, let's go ahead and do that now. So let user equals provider. Remember high. There's a provider key that I said we were gonna set. It's gonna be off off data dot provider. Okay. And, uh, we're gonna we're gonna assume it's gonna be there. Um, you met You may or may not want to want to do it this way for sake of time. We're not gonna do the if let's on this provider here. I haven't had firebase filming it, but, um uh, so you know, what you would say is, you know, you would say first would say, you know, if let provider equals off data dot provider, you know, as string. And so if you got there, then you could go on and save it. Um, the problem is, we don't really want to go on if if it doesn't say, because we really need it and you'd have to have your own air handling to handle it, maybe make another request. Ah, a little bit more work. But I'm just showing you that's what you can do. We're not gonna do that. So we're gonna put the exclamation point there. I'm giving it a disclaimer because I've told you millions of times not to do that, and you shouldn't Okay, so let user. So we're creating user. What is this? You know what this is, right? This is just a swift dictionary. When you have the colon here, that's a key in a value. Okay, we could have done multiple once. I could have been another key called Law and this could say test that will just leave it there. Just to show you as what we have here is keys and values a dictionary, that's all. That's what we're doing is we're saying, Hey, let's create a dictionary for what we need. We have the u I. D. That's great. Where we have the provider, that's that's great. And then we have the, uh another key here that we're gonna do is we're gonna call data service dot ds dot create fire based user and the author ideas off data dot your I d. Okay. And the user is ah, user. The user would just created Remember, this is a dictionary of type string and string were passing in the u I. D. That we were just given and we're just passed in this dictionary we just created. So the moment that we do this, it's gonna call our function over here in our data service, it's gonna find the path with our unique I d. Okay, and then it's gonna set the value of that unique I d. And so what? We should see when I So this is all working now with facebook. Log in. Um and, uh, so we should see that appear when we create a new facebook account. Um, since we've already we but we may have a problem. You may want to clear out your users. So if you're testing with Facebook now, for the first time again, you may want to go back to your dashboard Here, go to your log in and off and, uh, see these registered users right here. You may want to going in, and it's not gonna show in here. You may want to go in and delete all of them, because if you've logged in with Facebook up to this point, it may still be storing credentials and may not you may not create new count for you in May when you could test it out. But anyway, I'm just saying, as you're going along, you may want to clear out the data, uh, as you go along just to make sure things work. So let's see if it works, though it may or may not work because I already have a Facebook account. I'm hoping it works here. So what we should see is when I create a Facebook account, it should create a new firebase user in my fire based portal. So right here and I go to data. So see these users right here. We should see 1/3 user, the new one that we just created. And it should have the word provider on it. And this will probably say Facebook, and then it will still have a key. Also called blah and tests. So we should see 1/3 user here the moment that we first log in with Facebook. So I'm gonna I'm gonna stop this here and let's go pick. Uh, let's just dio iPhone five s. Okay, let's go ahead and run it. I'm gonna open up. Hopefully, hopefully I haven't running on this device yet, and it doesn't automatically logmein. Otherwise, I'm gonna have to delete the app and try again. It's coming. Okay. So I should see 1/3 years or pop up here when I do Facebook log and also notice we've got We've got the u I issue here. We should probably do like a minimum font scale or something on this button. Just so you know, those click Facebook log in look, OK, they're just use it. So there's the unique I d. Again unique ideas don't matter. You don't ever have to manually references. They're just stored there. So we got a unique I d. And there's the block that we put in. And there's the provider Facebook. It worked. So just by grabbing it, making our own dictionary, whatever dictionary that you want your You're the master of how your data looks, you decide how it looks. So this is how we wanted our data to look, that we created the user over here in our data service. And then just by grabbing a path which didn't exist yet that Facebook I d. Right there on. Then we set the dictionary as the value of that, and it worked. It worked. How cool is that? I think it's pretty damn cool. So there we go. Let's go ahead and get it running for our email log in here. So let's scroll up here too. Scroll down here, Teoh. This attempt log in function right here. And all we want to do is basically the same exact thing. But we want to do it for email. So wherever that happened, well, if the account doesn't exist, we're gonna create it. That's great. Now, keep in mind. Result doesn't give us an author idea. We only get that I d once a user is logged in. So right here on this auth user, you know, it's how we decided not to do a completion block. Well, now we're probably going to need to do a completion block so we can get the authority and no, when the users been logged in so we can start and create that user. So let's just recreate this same McCall data service that DS thought ref base the Auth user . But this time we'll do the completion blocks. The password is password. Same stuff, except right here, we're gonna dio is Ah, Well, just delete this. Actually, what we'll do is we'll say, uh um what is the air comma off data and then in and press enter and then a closing curly brace. There we go. So that works there and let's go and get it to the old one now and now What? Weaken Dio is the same thing we did before we can grab this. Uh, we're where we put it. Over here. This one right here, this is Copy that and paste it right here. So after we've logged in after have created a new account. Okay, we're going Teoh user. Okay. Fantastic law test. Um and, uh okay, so let's call it something else. We'll call this email test, so give us a new user with email. That should be all we have to dio. Let's go ahead. And what I want to do is on my simulator here, Let's go ahead and command shift h to close it. I'm actually gonna gonna stop the app and then delete it. Otherwise, it's gonna log us in automatically, which I don't want right now. So that's gon command shift h to go out of wiggly mode. And, uh, let's rerun it. What we're gonna do this time is log in with Facebook are sorry, not with Facebook. We're gonna log in with email and we should see 1/4 user here now. Okay? And So let's do that. Now we're gonna say Bob Jay at def slopes dot com And 12345 Let's go ahead and log in and sign up and see if it works. Come on, baby. Show me the money. No, there is. I was getting worried, Guys. I was getting really worried. Also, it looks like we've got some type of image problem here. Looks like some of our stuff's being cut off. We're gonna want to fix that as well, too A some point in time. But you should know how to do this stuff by now. You should know how to fix these issues. Layout constraints, things like that. You had a lot of experience and well, you should not be doing is waiting for Meteo explicitly explain how toe change every single layout thing. You gotta experiment. If you don't, you're not gonna learn anyway. Here it is. Ah, simple log in 10. That's the unique I. D. Simple log in Colin 10. That's just what they called it. Okay. And, um, probably have 10 accounts. But anyway, that's the unique I. D block. Email tests and providers Password. So it worked were successfully logging in users and storing them in our fire base and notice how it was instant the moment that we created. It is the moment that it appeared over here, so that's really cool. Um, we've got it going on, so we're gonna call this done. We have successfully created firebase users for Facebook and for, uh, for email log. And next thing we want to do is do some tests posts. In fact, all we want to do actually is just down with these posts, these existing test posts and make sure that they get good and move on.
105. App: Showcase Part 9 - Syncing Data From Firebase: Hey, everyone, Mark. Pricier deaf slopes dot com I've got everything open. If you don't go ahead and open up your existing project. Okay, um, and go into your view controller. All right? I'm gonna close this right here. And what we're gonna do today, at least in this video, is we're gonna just talk about how to download data from Firebase. We've talked about posting data a little bit. We've posted a user by just grabbing a reference in setting the value. How easy is that? So now we're gonna talk about how would you How would you show that data and apologize, not view control about Swift. Go to feed V c dot swift. Okay. We want to go into our feed now. And so what we want to do is download the data, Um, that we have in our fire based database, and it is so stinkin. Easy. Okay, Fire base is amazing. Fantastic. You're not loving it. I hope you really get into it because it's an amazing tool. So what we're gonna do is we need to skip this dumb version of Java. No, thank you, man. He try and close off everything on your computer and junk just pops up. Okay, So what we want to do is listen for whenever a change is made in our data, that's how it works. So get out of the mindset of I'm gonna download a data once. And then I got a refresh, maybe every five seconds or whatever. Get out of that mindset. Okay, from now on, Firebase, think of it as an instant sink. Engine it instantly. Send your data as it comes down. Okay? So that your abs are super super responsive. So what we want to do is listen for whenever Post Data is changed. Added when it's downloaded. Whatever. Okay, We want to listen for those events. So what we're gonna do is right here. We're gonna say data service already got most of the code for this ds dot ds. That's what we created. We're gonna grab a reference to our posts. Okay. Remember we in our data service that we've got the path to the post here? It's this Ford slash posts were just gonna grab a reference to it. Okay. And so dot posts and then here does observe event type. Okay. You can obviously notice there's some different types of versions, and we're not gonna go over any of these. There's a lot of everything that you could do it. Firebase, please read the documentation. See what fits your needs for your project observed event type and the event type that we want dot value and with block. And with this block, we're just going to say snapshot in Anna's press. Enter, enter and put a closing curly brace there. So what we're going to say is, any time a value changes. So let's let's look at that to see if it gives us any documentation. Uh, it's not, um, but basically, value is called whenever a data is changed, its downloaded. In fact, if you hold down command and click, this will give you all the options and tells him right here. So the options you have a child added. It's called whenever a new child notice added, a child removed, child changed, child moved. Okay, you're starting to get the point here. That is a different type of events you can listen for, but we want value, which is fired when any data any day that changes at a location and recursive lee any Children So if any of the the Children changed inside of our posts, like maybe someone edited a post whatever it's going to update this weekend, update or view because we want our view to be fresh with the freshest data. So back to feed V. C. So what we're saying is they call this and this is the closure here, so it's not gonna be called right away. It's only gonna be called whenever data is changed in the table view. So even though it's imputed load, the code that's in here will be called over and over and over again whenever data's change . That's how closures works. I don't think of it in context of its inside view. Did load. However we are. Initializing it there. That's all we want to do is print snapshot dot value. The snapshot is a snapshot of the data, and the dot value is the data that in snapshot it's a faith. It's a firebase snapshot. Okay, um and so we just want to print the value of it. So basically, that's all you gotta do to download data. You're like, wait, no network request no calls and no, just observe an event type on a reference on a path. So observe an event, type on a path. And whenever that dot value happens, whenever anything's changed, it's gonna call this function, and you can update your You I This is really cool. Something really big Google is actually pushing in all of their in all of their platforms Android, everything. They're trying to push this idea of of reactive programming this instant sinking and eso very cool stuff. So it should actually work right out of the box right out of the box. What we should see printing. Is that because we're printing the post, right? Yeah. The ref posts what we should see. Printing is the, uh we should see to post here with this data in it. That's what that's what we should see. Also notice that the path has to be perfect. So, you know, it's the main path slash this. If I had posts inside of users, it wouldn't be able to find it here because my path is wrong. But we know our path is perfect because that's how we designed it. So when we see this printing, which is C two posts, Okay, so let's go ahead and gonna close the left hand side on a drag this over to the left when it drags over to the right so we can see it in real time. Okay. And what we'll do is ah, press stop on the existing build and we're gonna run it. And right off the bat, we should see pulping my council here. We should see these posts printing. Here goes. It's loading. Should Laugesen automatically? I think we've already logged in. There we go and let's take a look. Sure enough, Look, it's right there. Now again. Don't pay attention to how it's completely formatted here. It's a little bit strange, but no, look, there's our 80 for this one are one of these. Which one is it? A post Right up here. So there's our idea for this one has our image or a has everything right there on the spot . That is really cool. Now you want to see something even cooler? You're like, Yeah. Okay, so let's let's really let's really show something cool here. I wanna move this up so my head's not in your way. And what happens? What happens if I, um if I add a user. Okay, so we're listening for changes. Let's see if it will instantly print and call that function. Call that closure that see little instantly. Call that closure when I add data. So let's go ahead and give it a shot, shall we? Well, first of what we can do is we can change something instead of 300 likes, we can say, uh, how about it? Just jumped up to 350 likes. Let's press enter. But I am. Look at that. Look at that instant instant. No other platform offers anything as cool is that how awesome is that? We instantly got updates. So you're after really, like real time, real time. So it just changed what we just put right there and let's go ahead and you're like, Well, why did it bring both? Well, that's what we're That's what we're looking for. Calls it brings gives us all of them. That's what we wanted to do so we can update our you. Why? Which will do in the next video. Let's go out and create a new post. So let's call this one, um you know, some other random I d. Okay. And the value. It's not gonna have a value just yet. What we're gonna do is we're going Teoh, say ah, description, you know. Ah, who My first app. Let's add another key. This one's gonna be an image. Your l And this is grab one real quick from the Internet. Just say, uh, cool beans. Uh, just random, um, and they are super cool. He's got a cigar. Anyone who's it being and smokes a cigar is pretty cool in my book. All right? And likes is five. Now, I'm gonna press ad and we should see this new record. We should not see three records on the left inside. In fact, let's go ahead and clear this out. Go back over here. Okay. Moment of truth. The second I add this, I should see three new records now on my printing. Okay. 123 So I have my cool beans. Yes, I do it right here. Okay. Rate. Um, it looks like I'm not seeing my likes, though. Are they There you guys see them? Likes it. Looks like the likes actually didn't save for some reason. Um thing. Oh, wait a minute. Oh, I didn't add likes I must have missed that. Forgot to save it. Let's do that now. It's just the work. Likes 20. There we go. OK, so there they are. It all works perfectly. How cool is that? You've never seen anything like this before because no one else is really doing this except for fire base, so instantaneous results. So what you would do is right here every time you Ah, every time that this data comes in, you would just do this. You would say table view, not reload data. And we don't have that. We don't have all the stuff in place for that. I need to put itself in front of it. We don't have the self Roo index path and the custom table view cell set up for this, But how easy is that? Any time new data comes in, you just refresh the table and automatically updates. That is really cool. Really, really cool. Anyway, So that's how you download data from fire base. And you just listen for it. An observer. So very cool stuff on. We're gonna call this video done, and then the next one, we're actually going to start tying up riel posts on our screen toe actual data on the back end, which is really cool. We're not gonna post them from the APP. We're gonna put the test data in the back in here, but we're gonna get it displaying first. And sometimes that's the best way to approach things is rather than doing all the why to create things. Why did you just get things displaying in the app image? Test data and firebase makes it very simply do that. So this is Mark Price. Death slips dot com making fantastic progress CN next time.
106. App: Showcase Part 10 - Parsing Firebase Data: Hey, everyone, what's up here? Mark Price at dot com. And last time we built a nap that could talk to fire base and download data, and we printed it. We know officially that are fire based. Application is Ah, definitely, um, talking to our app and the data is there, and it's working. And so, uh, we'll put the data right here. And so all this data right here is connecting to the APP, which is fantastic. Okay, so what we're gonna do today is we're gonna get this data displaying. Uh, well, we're gonna get this data parsed correctly in the application, putting it into a class and getting everything in order. So we then can display it into the table view cells. So that's what we're gonna do today. Our Dave is there. It's working on fire base. And so when you get data from fire base like so it comes in what's called a snapshot. As you can see right here, we can command click this or not. Mm. Well, let's see here. There we go. Um, is that what we want? I'm trying to look at their class data, but it's not letting me in because I don't have a type on it, but that's okay. So what you should do is always look at the documentation of the things you're working with . So you can see, um, you can you can see what's going on. Let's see if it'll let us get in tow. Say, I think it's f uh, Snapshot There is. See that F data snapshot. There we go. This is all written in objective. See, by the way. And so what you can dio is you can look at the snapshot here, which is what we just got in from fire base. And, well, it tells you right here. A snapshot contains data from a firebase location. Any time you read firebase data, you received the data as a F data snapshot. Snapshots are passed to the blocks to attach their efficiently generated. So in their immutable means, you can't change them. So it's a firebase object that's efficiently generated. And so the data is not ready for us to use it. We still got a parse it out, But fire base has been really great and helping us get that data really fast. And so again, we know that any time a value changes its gonna call this function here. So what we're gonna do is parse it out into something that's usable. And right now it's just in snapshot form. And so what we want to do is grab it out of there. So first off, this is our feed view controller, and, ah, the number of rows in the section is three. So we're hard coating that number of rows. So we probably want to do before we start using data here is we probably want to get our table view, actually, um, actually working with Well, let's just do this first. Then we'll go to the table of you. You're like, What are we doing? Okay, don't worry. Just follow my lead. So what we're gonna do here is parse the data and then well, then well connected up. So what we're gonna do is say, for each snap in snap hold on. Wrong thing. If let's snapshots equals snapshot that Children dot all objects as f data snapshot and we need to import firebase up here. That's why it's not working right now. Import fire base. Perfect. So let's look, let's talk about what's happening here. So we're grabbing the snapshot. Were grabbing all of the Children and maybe Children and all objects. Like, why would we do both? Shouldn't they do the same thing? Well, you would think they are. But Children, if I open the right hand side, Children, is Justin Ennis in numerator? It's not gonna actually give us the object that we need. It's just it's in the numerator, so you can grab things out of it. So what we're gonna do is we're gonna grab all objects, which is an array of these snapshots. Okay, so each of these is a snapshot. Remember, this isn't array that we're dealing with on the server. If it was just one object, we wouldn't need to grab all the objects. We have it right here in this snapshot itself. But we need to grab all the snapshots, the individual snapshots in this main snapshot. Because, remember, this is an array of posts. Okay, so we've got all the snapshots right here, and then what we want to do is iterated through the snapshot. So for each snap in snapshots, okay, just ah, for each loop there. And, um, let's go ahead and just print this so print or say snap and let's ah, let's do this right here. Okay, So what we want to do is just print this and see what happens in our consul when we run the app. So let's go ahead and do that now. Changes the iPhone six. So again, we've grabbed the main snapshot we got from fire base. But that holds a bunch of objects in its We gotta grab the array, which is an array of snapshots. Then we gotta iterated through that or were array. Okay, here we go. Okay. So loaded up. Let's take a look here. So snap has this one has a description and likes. This one has a description image your own. Like so clearly it is giving us our individual post objects, which is what we want. We want them at an individual level so we can use them individually, so that's really cool. So we've got our snap object right there. And so in firebase or any other program, what you want to do is store your data in something that's usable your own classes, okay. And so we need to create our own model for these posts and So let's do that now. Eso in your model ful multiple right here. Go ahead and right click and go to new file and ah, Swift files. Fine. And let's call this a post. You don't want to be working with a bunch of dictionaries and grabbing objects and things out of it. It's the big, huge pain when you got to do over and over. So it's better to create a class and actually store the data in the class. So let's do that now. This is Class Post and let's talk about what we know what we're gonna have, right? So, private bar, we know we have a post a post description. And by the way, I'm putting the word post in front of Post Description because Description is a reserved keyword on some objective seat classes. And if we ever do that in the future, we don't want any conflict. So don't ever don't ever create a variable called description. Okay, just know that now conflict were called post description, and, uh, let's see the description we always were to make that required. Let's make that required Ah Cevaer image or a will make this one optional meaning a user doesn't have to post an image. Uh, we got likes That's gonna be required. User name. That one will be required as well, too. And, ah, post key. We're gonna save the unique identifier. We're gonna save that as well. Um, in case you ever need to have access or reference to it. Just a good safety measure. So let's create our public variables, right? Post description. It returns. This one's gonna have an optional thing because it may or may not. It may or may not have a value, and we want whoever's calling it to know that. Give me Jor El. Okay. Um, yes, that's wrong. Apologized. This one's not optional the but the image or l is optional. There we go. There's an image Orioles do likes is gonna return. Underscore likes mirror. The ones that don't have the question marks at the end are assuming that there's a value in there. Okay, so we gotta we gotta make sure we guarantee that later on at some point in time. User name, of course, is required. And of course, we don't have that. We don't have that value just yet. We're not really working with users just yet. So Okay, what we want to dio is create an initial Isar. So whenever you're creating a new post, like as if you're making a Facebook post, right, Um, you would, you would add, like, the description and the image or things like that. So let's put the description in its option. It's not optional. Let's leave it like that. The majority is optional, though. Okay, we make that an optional and then we have user name of type string, which was required that a past that in whenever you create a new post. Okay, Looks good to me. Um and, ah, let's go ahead. And just a self post description equals description itself dot Image or l equals image or rail and self dot user name equals user name. Remember, this is an initialize erso initial. We're setting the values we want initialized whenever a new one of these is created. At this point in time, there may not be a post key to save because it hasn't been created yet on fire base, so we don't need to worry about that right now. Likes when you create a new post is gonna have zero like so we don't need a passing. And he likes, so that's probably good for it. Now, we do want one more initialize. Er Okay, Well, we want to dio is we want to convert the data that comes from Firebase into something we can read right here. And so we know that the data, we're gonna convert it into a dictionary. So I'm gonna create in another initialize er that we use whenever we're downloading data from fire base. So we're gonna call this post key, and we're gonna make this a string and then dictionary the dictionary that has all the data in it. OK? And this is gonna be a type string in any up any object. Okay? And so we're gonna do is whenever we were grabbing data from Firebase, we're gonna pass in the dictionary, parse the data out so we can use it in ah, something that's useful. So let's go ahead and do that now. Close this consul for now. OK, so let's go ahead and sign. That is so self dot underscore Post. No. Come on, post key equals post key self. No, you can do is grab the data out of the dictionary if let likes equals dictionary. Okay. Remember, this is just plain old dictionary syntax, and this is an integer. So we're casting us. We're saying is try and grab the likes out of the dictionary. We don't know if it's there or not. Dictionaries can't guarantee value, so you've got to do if let if you don't do it flat, you can crash your program if you try and use it so that we could say if it does exist. Self that likes, equals, likes. Okay, do the same thing here if let image your l equals dictionary image. Or, by the way, these key names and putting in the dictionary are the exact names that they are on fire base. That's very important. The exact same names, okay, and, ah, let's say a self dot image or l equals image or L again. All we're doing is some safe coding practices here to make sure that the values that we're looking for were actually there. So we don't crash the program and try and use them. So this is the description. And on fire base, we call it the description as a string. And then we say itself dot post description equals desk. Okay, So the idea is whenever download data from fire base, we create a new post object, and we pass in the dictionary that that we get from fire base. So we can, uh, so we can use the data in it because we don't wanna remember. We don't want to handle that from the view controller, because that's bad practice. We want to handle it from the model air. So very good stuff. Let's go ahead back to our feed we see here. And so now we've got we've got our snapshots, but we need to get dictionary. So let's go and do that. Now we're gonna say if let post dicked for the post dictionary equals snap, not value. Okay. As dictionary string in any object, the same exact format, that of the one that we just created in our in our post. Okay, so let's talk about what's happening here. So the F data snapshot has a dot value property. Let's see if I can find it here. Ah, let's see. There it is right here. Returns the contents of this data snapshot as native types, so it could be a dictionary, an array, a number or string. So with that being said, Firebase actually lets you parse the data in multiple ways. It could actually give us an array, even though fire based on the back end gives us a bunch of objects. If we if we use it as an array, it will actually convert it for us. So there's multiple ways of working with data. I'm only showing you one way, Um and they're just making it convenient for you. So that's why, says any object cause it could be any type of object. But the thing is, you have to know what type of data it iss at what type of format it is. And you created it on your fire base. So Okay, so what we're doing is we're going through each of the snapshots in this main snapshot here , each of the Children objects because remember, if you if you look at firebase here from posts, is like an object, it's an eraser. You're gonna get a big array with sub objects in it. So this is the bigger A, the posts and these were the sub objects and that we store in snapshots. We're gonna go through each cell sub object each post, and they were gonna convert it to a dictionary because that's what it is. It's a dictionary of type string in any object. And if you remember from back in the Jason lessons Okay, this is like a dictionary. A dictionary is an object. Okay. Engine and JavaScript, object notation and Jason. So here's the object key or the dictionary key. So we're saying, Hey, this is a dictionary and the key that items in the dictionary have a key, that air of type string and a value of type, Any object? The reason why we say any object is because it could be a string or it could be an integer . There's more than one type. So we say any object? Okay, so a dictionary of string in any object makes sense. OK, so now we have. Now we have the data. Let's go ahead and grab the key so I can say let qi equals snap dot key. So I'm grabbing, remember, Remember, dictionaries have keys and values, so we're grabbing the key here of this snapshot, which is in this case, it's gonna be these guys right here we're gonna grab the key out of it, okay? And then we're going to save that so we can use it later. And, of course, the value when we grab the value, that's this data right here. This object. Okay, so there's the key, and then we want to do is just create our new post. So let post equals post Creighton uob instance of our object. And here's the, uh, the constructor, the initialized that we created. So passing the heat and pass in the dictionary Easy enough. So we took the post dictionary with all those values in it we put into our post object. And, of course, our post object saves the data. Um, which is really cool. One more thing that we need, though, is ah, we're gonna our table. He's gonna need Teoh talk to our table was gonna needed to have posts in it so it can talk to an array of post not just have static data. So let's go ahead and make that now. So far, posts equals will make it an empty array of type post. And I want to make it an empty array right at the beginning because number of rows and section needs to relate to how many posts there are. So let's go ahead and say number of rows and section equals posts dot count If if you didn't have it initialized here, you'd have a crash when it tries to access the count. So we don't want that, So that's really cool. So what we want to do is any time new data comes in, we want to completely re populate the list. Remember, values on this one right here is going to give us the whole entire list of posts. So what we want to do is ah, right up here. Before we start, Parson, Data is we're gonna say posts equals that we're gonna empty out this array if there's data in already, because we're going to replace it. Right? And I got to say self posts because we're in a closure. So we're gonna clear this out any time. This needs update, cause we're going to completely replace all the data, and then right here, we're gonna say self up posts dot append post. Okay, this post right here. So to recap, we're gonna we're gonna grab all the objects out of it. okay, Like the array we're going, Teoh iterated through those objects, convert each one to a dictionary of type string in any object they're going to save the key of the snapshot, the top level. And then we're going to create a new post past the dictionary and our post object parts of the data you watch. We just did that together, and then self doubt posted a pen. We added to the list right here. And so after this four loop, then on after we get out of here, all we have to do is reload the table data, which we already have, and it will refresh with whatever data that we have, which is really cool. Um, okay, so we've got data posting here, and so let's just, uh, right here in self Arrgh, index paths. Everything else, I think, is where it needs to be. So we know that the number of rows in section is gonna equal the total amount of posts. So what we can do here is just to check and make sure everything's working, we can actually grab the post object on Silvera, and next path post equals posts. And then we could say index path dot ro you've done this before, were just grabbing the post. So what should happen is for each post, it's gonna create a new cell, and then, uh, we should be able to grab it out. And so I could just print that posts. In fact, we going to say print, say post. Ah, that's a post dot What was it? Post description. Okay, So what we're gonna do is just just for testing purposes to see, to make sure our objects converted. So the test that we're gonna run is to make sure that the data parsed here just fine that it successfully created them as objects And then that this initial Isar successfully parsed the data out of it and out of the dictionary and shoved it into our into our a post object itself. So this post object, we want to make sure that that the, uh you know, this is working that the data the data saved here from this function right here. And so, if what? What we should see is, if this worked, we should see Well, let's see, actually, we should see. Um 1234 We should see four descriptions printing to the screen. Um, let's go ahead and give it a shot. Okay? It kind of broke it up here. It looks like, uh, snap, snap, snap, snap. So right now I'm seeing 20 you know why it says to it's because we haven't. We only have two fitting on the screen that it hasn't seen the other cells. So if I scroll, we should see the other ones. There we go. So see that 1234 The data successfully parse it, successfully stored it in a post object. And we're actually getting four objects here, which is exactly what we would expect. Of course, the date is not being displayed in the table views just yet, but that's OK. We did something really cool. So I know we took a little bit longer to explain this, but but think about this. This is all it took to talk to Firebase into download data. That's it. That's all it took. Not bad. And it's instantaneous. Any time it changes, made these objects change updates automatically, which is really, really cool. So we're gonna call it done for this video. Go ahead and make sure you got your model ready to go? Uh, you got your data parts When I say model, I mean your post right here. Make sure this is all ready to go on. Uh, this is what we have to have in order. Start working with that data actually into the table. So let's go ahead and end this and number one.
107. App: Showcase Part 11 - Display Data - Image Caching/Downloading: Yo, yo, yo, what is wear gonna continue rivalry left Talk from the last video on. Of course. In the last video, we parse the data, got it all saved in the model. And now all we gotta do is actually get it working inside of our inside of our views here. So we're gonna do a few things today we're going to get We're gonna get the description here on the left hand side. We're gonna get that reflecting the data. And in, uh, firebase thes likes right here. We're gonna get those reflecting the data and fire base and this image here, we're gonna actually implement code that downloads that image from the Internet. And so what's really cool is we're actually going to create a cashing system, whereas if we've downloaded it once, we're gonna save it in the cash and then we don't have to read, downloaded every single time the new cell comes onto the screen because that could destroy performance and cause lots of problems. Most other videos out there were well, actually not teach you this, but you have to do this in a really IOS app or in a real professional job so it's very important that you know it. And so let's go ahead and get started. So what we know is we always modify cells in the tale of your collection of you in the cell for Rohit Index path. Right? And so let's go ahead and look at our post sell. We've already created it. So right now we've got the profile image, Okay, Which we're not gonna change because we don't have the user image yet, And, uh, we do have the user's name, but are they always? Yeah. At least we have the label for, But we don't have the data for that yet. We're not gonna worry about the like button yet. We do have the data for this in this, uh, and but we don't have those connected. So let's go ahead and add the connections that we need right now. So we need and we're just gonna add the ones that only ones that we need right now. So I be outlet week war. We know that we need the um we'll call this, uh, well to say description, description. Ah, this is a Texas soldiers called description. Text of you I text view and then Ah, the likes. So I be outlet week of our, um and we're gonna call this Ah. Likes label of type you. I label. So we've got the three items that were going to be modifying right now. Okay, that looks great. And we're done some styling there. That looks great, too. So what other co do we need to get this working. So let's just take a look here. Um okay, so let's go ahead. And as we've done in times past, let's create a configure cell function. Uh, so here is something that's really important for you to know. New developers and developers. Sure making Iowa saps the wrong way in the view. Controller hero. They'll actually, er they started the cell. Fero index paths are here on the feed V C rather than, uh rather than configuring this cell will actually modify it right from here. They'll they'll change the image here. They'll change the texture. This is bad. The view should manage itself. OK, eso we're gonna handle it in our post cell. So configure cell and we're gonna have the post object of type post. Okay. And, uh, we just need to grab stuff out of it. We also need to store the posts. Let's do that here. So we'll save our post of type post. We'll store threat right there. And so when we do self row and next path will call configure cell. And so let's go ahead and do that Now we'll say self dot self that, uh oops Post. Yeah, that's fine itself. That post equals post. Okay. And so we got the post. Let's talk about the description. So we need to get that word crimes. So if let you just make sure it's not empty. Um, you know, it's kind of kind of guaranteed, because that's what we're doing on the back in, and we get forced to use her to do it, but it's always good to be extra safe. So we're just a post op post description, okay? And we also make sure it's not empty. So where post post description is not equal to empty string, OK, and then we'll say self dot um, description, text that text equals desk. Okay, Um, that looks good. Otherwise, well, we don't need doing thing. There actually was yelling at us. Here. Hold on. Uh, okay. Yes, so my bad. I'm getting in the habit of this defensive coding. We don't even need any of this here because we're actually guaranteeing that there's value in it. So we don't We don't actually need to do any of this. It's already guaranteed. Like we said. So we were already a good coder and, uh, answerable to say equals post op description. Post op, Post description. There we go. There's our description looking great. And we know that the likes is also, um, gonna be there for sure. So we can say itself dot likes label dot text equals and we'll just adore special insertion Syntax here will say a post dot likes because it's integer We want to convert it to a string. We're gonna show the likes. That's great. Um okay, so we've got the post. So we got the description. We got the likes. What I want to do is make sure that works first before anything else before I start working with images and stuff like that. So what we need to do is connect our outlets here, So let's go ahead and do that. Now go into your main storyboard, okay? And ah, there we go. Okay. And let's look at this. Ah, post cell right here. Right. Click it in the likes label. It's connected to the likes level. The numbers here don't do the word likes. And then we've got the description text. We'll drag it over here, and it looks like our showcased images already there, which is fine. Okay, so those air connected Looks good. Let's go to our feed V c. And let's take care of this. So remember how we kind of cheated right here just for testing? We don't want to do this. This is bad practice. We could have a crash. What we're gonna do is we're gonna say if let cell equals table viewed the Q reusable cell with identifier. It's the same code is gonna have a slightly differently as post cell, so it could fail. It might not. And then what we're gonna do is we're going to say, Ah, cell that configure sale, and we're gonna pass in the post that we grabbed right up here. We're gonna pass in that post, and, uh, and we need to return that return sale. If that didn't work, we're gonna say else and then we're going, Teoh, Just return a regular post. Sell like so be ready this year. It'll never be called. Okay, so again, nothing new from what we've done in the past. If you've gone through this whole course, we've created a table of you. So we've grabbed it from the table, view a reusable one, and up here we're already grabbing this post, going to get rid of the print. We don't need that anymore. And then we're gonna configure the cell, passing the post, return the cell to the table view. And then, of course, over here and our post cell, Um, we're actually configuring it. We're setting the description text. We're setting the likes label. We're not messing with the image just yet, so let's go toe open at Firebase. What we should see if there's all worked correctly. What we should see is 1234 posts. So we should see four cells here, and each of the descriptions and the likes should be reflective of what they're really supposed to be. So let's go ahead. See if I can make this simulator a little bit smaller. There we go, and let's go ahead and give it a shot. Want to stop it and rerun it? It comes I use usually always anticipated crash. But maybe it looks like it's working. Hey, Hey, look at that. Okay. You ready? So Okay. This first ones here, the description looks like that 230 likes. That's definitely working. This one right here has 20 likes, okay? And just a description. That's fantastic. Uh, this one right here has 350 likes and has the right description. And Ah, this one right here, um, looks like it's correct to. And it's also ordered the exact same way, which is kind of cool. You can never guarantee that something's gonna be ordered by fire. Race does a good job of keeping things ordered, so it's pretty cool. So it's definitely working. We're updating the cell, and it's looking great. Now what we want to do is get this image working. So one of the problems that new IOS developers have is like, Okay, where it how do we do the image? So what they'll do is they'll download it from the internet. Okay, this is really important. Listen to me very carefully. Very, very careful. This is super important. You need to know this. You need to impress somebody in a job interview. By having this knowledge, new developers will hit the Internet and get a new image every single time. So what they'll do is they'll go to post cell right here, okay? And in this configure cell, they'll download the image from the Internet. Well, here's the problem. Are you ready for it? So let's say it appears on the screen right here. These two sells Well, what's gonna happen is in your feet, view controller here, sell Fero index path is gonna be called twice. But did you know that sell Fero index path is called anytime in New Cell comes on the screen. So what happens if, let's say there was five items on the screen instead of two, and so this is called five times. We've make five Internet requests to download an image, and then the user starts scrolling immediately. Those are now gone, okay, but it's still downloading on the Internet, and the new ones come on the screen, and it's trying to apply them to the old ones that are now off the screen That's coming back, and you've got floating requests that aren't finishing and list some of them load. You've got problems, of course, But if you start scrolling really fast, you could have 100 requests going on at the same time. And ah, really, really bad practice. And lots of new developers do that. So I'm gonna teach you the right way to pay. Very careful attention. This is really important stuff. So images how we're gonna work with images. Okay, So what we want to do is we're gonna use a framework called Alamo Fire. We've used it in the past. It's the most popular and then probably the best IOS networking, uh, framework for swift. And so let's go ahead and grab it. So go to your go to your Internet here, your internet, your browser and go Teoh Alamo, fire un get hub. So it's get hub dot com slash Alamo fire slash Alamo fire click branches. Because so because, uh, IOS nine is not released yet. Their swift 2.0, branch is not released yet either. Okay, it will be later on. So if if it wasn't if this was the live version. If you're watching this when everything's live, you're gonna want to grab it from right here. You're gonna want toe. This will be different. Okay, But you're you're gonna want to go to the main page here and do what it says to do right here. But we're not gonna do that because we're still in beta. So goto go to branches here, Click Swift two point. Oh, scroll down and they give different instructions for this one, and it's right here. We want this guy right here. So copy that, command. See? And then in your ex code project, you should already have your pod file because we've installed Firebase, a click pot file and right in a fire race. Go ahead and put that there and save it. Open up your terminal command space terminal. Okay? And let me pull up here. Okay? So what we want to Dio is navigate to the project, so I'm gonna go to my desktop and CD. Have slopes. Stash showcase. Okay, that's what we want to run. Here is a pod. Install. It's coming. Perfect. Okay, so it downloaded it and it installed it. Okay? It is now in our project, and I believe our project refresh here. So I go to pods, see how there's not Alamo fire. They're pretty damn cool. So now go back to your project, going to your controller, And you're, uh, not your feet VC going to your view and your post cell and at the top here, go ahead and import Alamo fire, like so Okay. And it's yelling at me. But if I build it, it should work. Okay, again, This is beta budget to see lots of red ares and stuff. Oh, the build is always the ultimate authority. Okay, so here's the idea. The theory behind how this should work. We have an image cash and a cash is gonna be the store stored locally on the device for this current session. It's not going to be permanent. And basically, every time we download ah, an image from the Internet, we're going to store it in the cash, OK, And then what? We'll do as the cells are refreshing. Every single time someone scrolling, we're gonna first check the cash, and if it's there, it's gonna load it instantly. So no more downloading super fast and responsive. Also, we're gonna handle if you scroll off the screen. Okay? We're gonna end. There's an existing it download coming from the Internet. We're gonna cancel that request because we don't want something that to download. That's off the screen now, especially if the cells are being re used. And then, of course, after we downloaded an image we're gonna display. But we're also gonna store in the cash so it could be available in the future. So we've imported Alamo fire here. Let's go ahead and ah, initiate downloading images. So, um, let's, uh, first do some air handling here. So post, not there. Handling just some logic. Okay, so we want to make sure there's an image oral right, cause the user does not have to submit an image. So let's make sure there is an image rural. Make sure it's not Neil. Okay, so if a majority is not Neil, it means we need to either get the image from the cash where we need to download it. So how do we know if there's an image in the cash? Well, we don't have a cash yet, And since the cash is going to store all the images for this view, um, it probably doesn't make sense to put it in this post sell. It probably makes sense to put it here in the feed view controller. So let's do that now. We'll put it right here at the top Will save our image. Cash equals N s cash. It's that simple. It's just it. It's designed to cash in store data locally and, uh, make your life easier. So we've got a cash. What we want to do is, ah, change a few things around now in ourself Ferreira index path. Okay, so we've got our post right here, and what we want to do is make sure that we're properly working with the images here, So Ah, a few things. Uh, let's first try and grab an image from the cash. So first, let's declare an image. This is gonna be an optional image like so. And what we'll do is we're gonna say if let your l equals post in Majoro. So we're gonna make sure first there's an image, Orel. Okay, If there isn't a majority were going to say I am g equals. And, uh, you know, one thing I forgot, actually, is that let's make this image cash static. And if you remember what static does is it makes one instance of it, like, available globally available. So went instance of memory so we can access it from anywhere because our posts are posts are going to be able to need to add images to that. So I just made it publicly available One instance of it. Okay, we're going to say you're l equals feed V c dot image cash. Now, the reason why we're using the name of the class instead of saying like self is because it's publicly available and it's static, and we want to grab the single instance of it. And this is how you do it. Okay? The object for key, you're ill. As you I image. Okay, let's talk about what's going on here. So what we're saying is, hey, grab the U. R L if it exists, if it doesn't, don't even deal with this image right here. But if it does exist, let's go to the image cash and get object for Keystone Image A cash and Ennis Cash has, like keys and values just like a dictionary. Is that what we're gonna do is we're actually gonna store the euro itself as the key name because it's unique. And if two images had the same exact your it wouldn't matter because we only need one for both of those images started make sense. So basically, uh, the URL is gonna be the key, and the value is gonna be the image data itself. So let's go ahead and grab the image for that key. And, uh, it's gonna put it right into there and in case it failed, That's okay. We're gonna handle that. And just in just a second here. So the idea is in our post. So if there's an image in the cash, let's pass that in. Otherwise we needed down download the data. And so I think we need to modify our configure cell right here so you can command click it . It takes us to our post sell. So in addition to passing in the post, let's also pass in an image if it exists. So we need to put the question mark at the end of making optional cause it may or may not exist. So go back to your feet, you see, and in your configure sell Now we can, uh, pass in the post and the images Well, and so you're like, Well, why did you Why did you put this right here? Well, what I'm doing is I'm making an empty image. And if it works, if this all works right here, it's gonna not be empty anymore. And that's okay. Uh, and it'll pass it in here. We're gonna do a check in a minute to make sure it's not kneel. If this didn't work, it's just gonna pass in an empty image. And we're gonna No, to check for it, because it's gonna be empty. So, uh, that's that's just logic. That's all it is. And so we're passing in the post were passing in the image from the cash if it exists. Okay. And, uh, that looks good. So now let's go ahead and go to back to our post cell hold on its yelling at me about something. Ah, uh, it's cause we didn't We didn't change it here. Uh, my bad. Just I miss something. Okay. Don't forget that you're like I was waiting for you to fix that. Yes. So make sure you set your image here to the one you grab from the cash. There we go. the oh, so post cell. Now what we want to do is we want Teoh create an Alamo fire request. So we need to We need to store requests here. And the reason why we need to distort it is because soups uh, go. The reason why we need to store it is because we need to be able to cancel it. Okay? Because you don't have to. You don't have to store a request in order to ah, in order to make one. But since we need to cancel it, we do need a store story in a memory location so we can cancel at a later time. So Barbara, quest equals requests, and this is a fire base. This is a firebase object. This request right here. Okay, That's why it's orange. And we didn't create that fire base did. So now we're gonna dio let's go down here. And, uh, what we're gonna do here is if image or a is not equal to nail, So if there is an image or oh, it means we have an image. Otherwise, you know, there's no reason even show. In fact, what we should do is if there's no image or l we should say, Ah, we should say self not, um showcase image dot hidden, not highlighted. Come on, hit an equals. True. So there's no image or elements The user didn't put an image. And let's just hide that thing altogether, okay? And then what we wanted you is say, if image is not equal to kneel, okay, self. That showcased image dot image equals I am Jean. So think about this. We pass in the image from the cash. Maybe if it was there, we pass it. And if it wasn't there, it's passing in nothing here. So we're making sure that we're checking for nothing. But what we're saying is, if there's something here, it means it's a cached image. So let's go ahead and just load it from the cash. Otherwise, now we need to make our request so we can say, like, so close this, uh, council here, we'll say this little bit bigger for you. Request equals Alamo Fire, not request. And we want this one here. And the method is a get request cause we're downloading something and this is post dot image rural. Okay, I'm putting the exclamation at the end Because I know it's there because we really did the check, and we're gonna validate it and make sure that the content type is an image. Okay, that's that's all this does is it makes sure that it doesn't image download. It's optimized for images. And this is a special Alamo fire thing to make your to make your requests. Amore efficient. So, uh, we're validating that we are getting an image, okay? And then what we'll do is we'll call dot response and, ah, this one is fine. Right here. Requests response. Data air. Okay. And, ah, I'm just gonna tab and enter on all these here. We're gonna change this just one second. So what I'm gonna dio is ah, get rid of the parentheses. Here, get rid of this parentheses. And I'm just going to call this one request Call this one response. Okay, call this one. Data, this is RNs data. The image itself in this one's air. Let's get rid of the void and just do the in, like so. Got it. Okay, Just That's just how you work with closers. You could do either way, we're gonna do it this way just to save time If Air equals Neil, Meaning if there's no air. If it if it was successful, we were gonna say, Let image equals you image. And this is an image from a data, okay? And ah, I'm just force unwrapping the data and force and wrapping this. We're just gonna assume it's it's working right now. You probably do if let's on these. But for sake of time, we're gonna leave it like this. It 99.9% gonna work. But just so you know, I'm aware of it, and you should be aware of it too. But for sake of time and because I've told you out in this 1,000,000 times, we're gonna keep moving forward here and we're gonna do It's a self. That showcase image dot image equals this new image right here. So we we did a request. We downloaded the data. We make sure it's a time image. Um, and, uh, this is just the format you use. Okay? Don't worry about how it works under the scenes. You can look at that if you want. On the completion handler, we've got data. And so if there's no air that let's go ahead and grab that image data like you see right here. And let's go ahead and put it inside of our showcase image. And that's really it. There's one more thing we need to do, though. We need Thio added to our cash, remember, Because we now download it. So feed v c dot image cash that set object. We're gonna set the image itself. This, uh, does your image here for key and we're gonna say, Ah, self dot, post dot image or ill? Okay, Any heirs, Let's build and see if there's any heirs. Hey, it worked, at least on the surface. Here it works. So let's make sure we've got all the code that we need. So if there's no if there is an image or a, let's go into here. If there's not an image or I'll just hide the image. Uh, if image is not equal to nail, meaning this image here, it means that we have a cash image, so use that one instead. Otherwise, it's let's talk to the Internet. Do we get requests using the post image or l make sure it's of type image, whatever image, maybe J Peg chip. Whatever on the completion handler. If the air's in that Neil, grab the image data converted into an image, then store inside of our our ibl it in our showcase image and then added to the cash. Okay, now it's looking really good. Actually, there's one more thing I think we need to handle, and that is canceling our request. So if we go back to, let's see here Ah, the feed V c. So what we want to do is that any time that we create a new cell Okay, um, we want to cancel the request right away, right off the bat. So we're gonna say sell date request dot Cancel. And it's OK to leave the question mark there because it just means our request is optional . And if there's if it's Neil, this will do nothing, and we're not worried about that. But if it does exist, we want to cancel it. So think about what's happening. So I'm scrolling right, and this one just came off the screen and I'm were using a new one. And so if the new cell that are now reusing has an existing request to get an image, why would we download an old image and put it in the new cell would give us the wrong image . So we want to counsel that request immediately, and then it will run a new request of it needs Teoh. Um, okay. So what we've seen so far is this is working. So what we should see now is these images here, they should be gone. Either they should have a new image in it or they should be empty. Invisible, because way hit it because it didn't exist. If we see poking one there, we know we have a problem. Let's go ahead and try running it. We may have a crash. We may not. Who knows? You never know. So you gotta build and run often running, loading up. Okay, let's take a look here. So it looks like one of the images is working. Two of the images working. Uh oh. There's the headphones that one just loaded. So this one right here, we know doesn't have an image, Remember? If I look at it here. Ooh, baby. Ooh, baby, you have no image. That's fine. Look, these other ones work. They downloaded them from the internet, and they're all working as they need to work. This one's cool beans us into some headphones. Now, I don't like the fact that, uh, there's no image here. And there was this big empty space. Do you like it? I don't like it. So we need to change the height of our table view Sell if it doesn't exist. And remember how I said you should. You stack views because when you hide something in him, it'll disappear. And Reese Ice? Well, that is true. But you know what I realized is you know how we wanted to have the cool shadow in our cell right here. So we've got this container that has a shadow, as you can see right there. Well, the problem is on a cell. It only resize is automatically if you have things attached to the content view what we had to create Another way to create another container view right here. And so when we make something hidden, its action not gonna resize it for us. If it was all over, objects and stack views were here on the content view and they disappeared. They would re size. But since the container has the shadow and stuff. It's not gonna do that for us automatically. And I don't want to lose the shadow because it's pretty damn cool. So let's go ahead and write the code ourselves to resize it. So what we want to dio is Ah, look at how tall are cell is right here. So open the right hand side. Let's look at the sale. And, uh okay, so it's about 3 58 I'm gonna turn off custom. I wanted to be automatic, so it's about 3 58 So let's go into our feed view controller. Okay? And, uh, in our view, did load right here. What we're gonna dio is gonna say table view dot estimate estimated row height equals. Really? I thought I'd copy that. I can't even remember now. Uh, let's just look at it one more time. Sorry. Uh, 3 58 Cal. All right, My bad short memory here. All right. 3 58 So, how it works is, um if you don't put an estimated row height on every single cell, it's gonna calculate the size and your table views Gonna run a lot slower. So if you say Hey, my cell is 3 58 But if we need to change the way we need to change the row height, um, on a specific one, it's just gonna do it for that one. So let's set an estimated row height and then what we want to dio is down here at the bottom. Most implement a new delegate function called height. Furrow Index path should be here somewhere. Don't click the wrong ones here, Height for row at the next path. And what we want to dio is Grab our posts to say Let post equals posts index path dot ro. So it's grabbed the post. What we want to do is say, if there's no image rural, let's hide, let's let's make it a shorter height. So if, um, if post dot image or ill equals Neil, if it doesn't exist, we need to return to the new height and so I don't know what it's gonna be. So we're just gonna play around with it. So right now we're three, like, 58. So we're gonna return 200. If it's Neil else, let's return. The estimated row heist will say Table view estimated that height that we already set. Let's just Let's just go ahead and return that and said so Height Furrow index path is going to set a height for each row. Okay? And that's okay. That's what we're gonna do is make it smaller if there's no image and make it bigger. If there is an image and I don't know what it's gonna look like, we may have to play around some numbers here. Here it comes. Okay, so it's still a little too big. I don't like it, but we don't want to go off the screen. It let's let's do one more test here. Let's click this text view here. Okay, If it will let me. I was just clicking the stack, you hear Stack upon stack upon stack view description. There we go. And what I'm gonna do is just for testing, as I'm gonna make the background some really bright color, like pink just for testing so I could make sure to make the table view of the correct height. I'm going to click my feet VC again over here can. So yet have you noticed it's actually pretty big. It's bigger than I'd like it to be. I don't know if it's gonna cut it off or not. Um, but I'm just gonna play around with it here. So 200. I think it's too big. Let's do 2150. Sometimes when it's white and white, it's just hard to see what you're doing. So it's a good way to just test things out. Okay, I think I like that. Let's leave it like that 1 50 I'm gonna go back to the main storyboard here. I'm going to see if you'll let me undo it, Which it's not. So let's just scroll here and go back to default. Let's run it again. Okay, so headphones. This one has no image. So it's shorter. Doesn't look great. Were like making her own Facebook app. How cool is that? And scroll down. Got this apple. Who? My first. That. Awesome. It looks like it's all working. Although I do have two items have 20 likes you just make sure that is accurate Here where my, uh, part of my firebase ago did we lose it? Show all windows here. I saw you there. So all windows Try this again. There you are. Ok, so we do have two items at 20. Like I don't like that. Let's Ah, let's change the Wuhu Teoh 41 41. I said 41. Hello? Hold on. It's Give me some grief here. Come on. All right. Likes 41 enter. Okay. And there you have it right here on the right hand side. Uh, so looking good. The table views. Not really refreshing because, um, as as we, uh, as we expect, because the image Kachin stuff is You don't know what I'm trying to say. You don't normally add data, right? Right from here on the spot. And it's just there's some more things we got to do to support this, but we're not gonna rebound right now. It'll work just fine when you when you load the data here. And so it's looking real good. It's looking real nice, actually. I like it a lot. I don't like the fact that when you click it, it's selectable. So let's turn that off. Go here in your story board and click your post cell right here and selection. Change that to none on the right hand side. Okay. Under the attributes, inspector, here, let's run it again to make sure it's working just little changes here and there to beautify it. Okay, good. I can no longer click it, which is great. Uh, what do you think? Making a stinking Facebook app. How cool is that? So that's it for now, what we've done is we've, uh We've taken the data that we already parsed in a model, and we've we implemented a cashing system and downloading system, which grabs it. Images from the Internet working the cash speed up, put from the right spots. Really, really cool stuff. So let's go ahead and call this video done and move onward and Ford.
108. App: Showcase Part 12 - Make Post UI: What's up, everyone? Here we go again. So Mark, pricier deficits dot com way are going to continue building our app. And today we're going to focus on getting the Y in place or being able to post being able to load the image picker and things like that. And so here's our project. If you don't have it open already, going to goto file open recent and pick the app, and so let's just go ahead and get started. And so the idea is, we want to make a post and it has a text area. It also has a new image, but in on and then a post button to actually post it. And so we want to put it right here above the prototype cells, in fact, above the table view. So let's go out and do then now, so notice how your table view right here is way up here. Let's go ahead and temporarily give it scroll down here in the right hand side, over on the attributes, Inspector and change the background, something that stands out to say pink just so I can see how much space we've got here. Now here's something interesting notice how when we've been building the app and running it this extra spaces here. If I run this app right here, it shows that extra space and it's really annoying. And we want to get rid of it. And I don't know if this is a bug. It's been an ex coat forever. Or if it's a feature, if it is a feature, it's kind of dumb. But see this white, this extra space so we don't need And the reason why is because over here in the right hand side, our table view okay, is, um it's at the top level of a review here. Okay, Um and so we need to dio is, uh as we need to add another view and ah, and then move this one, uh, benefit. And so we'll do that right now and you'll see it go away. Just a weird thing. So, anyway, um, let's go ahead and go to your ruler over here. Okay? The size inspector And what we want to do is get rid of the top space on the table view, make sure table view selected and get rid of the top space because we need to move it down . So I'm gonna go ahead and drag it down until the point where I feel like, Ah, the post post section should be That looks good. Notice I didn't move it down. I just resize it down from the top down, that's all. Okay. And what we're gonna do is just grab a regular old viewer. You live, you, we're going to just plop it right there. And, of course, never size. Is it the right size? But that's OK. We'll take care of that right now, and that's looking real good. So let's just click it and drag it to the size of the table of you there, okay? And we want this view to have a shadow and look real nice. So luckily, we've created this material view class that we can reuse. I now you're like, Oh, he's so smart. We can reuse this. This makes sense. Mm hmm. So let's change the class over here on the identity Inspector. Let's change it, Teoh material view, and that's gonna give it our shadow and things like that. Now, let's go ahead and pin it. So click your view here and, uh, make clothes. My consul haircut. That junk out of the way. Click the pen menu. We're gonna pin it. Eight from the top will leave margins on zero from the left and zero from the right, and we'll give it a fixed height. Okay, that's looking great. Now let's solve this ugly table view problem here. Now. If I collapse this, we've got a material viewing table. You if I just drag this material view behind it, that whole extra space went away again. I don't know. Why does that? It's just a common bug. US developers who had to deal with forever. So that looks good. I'm gonna get rid of the pink on the table of you know now that I know it's size. But first, actually, let's let's pin that to the top. So let's click the pin month button table view is selected, and let's change it to eight eight from the top. And there we go. We're penned a turn off this nasty pink back to the default, looking fabulous. Okay, so we've got this view here, but we need to put the post text field in it, right? So let's just type in text field. Okay, lets a drag that on right here. Okay. And then, uh, this camera, I don't want to make it a but in because sometimes when you're playing with buttons, you're limited on how the graphics graphics look, they get stretched, and I really want this to be an image. You also want to teach you how to add user input on an image or any control. So I don't know if you know this or not. But any control, any type of you can actually recognise a tap doesn't have to be a button so we can handle that ourselves. Very cool. So it's dragon image. You next to it, of course. Let's resize it here and resize it here and resize it here. That looks good. And this is what the height is on. This, uh, so 43 highest 37. Let's make sure it snaps the to the borders here. So 37 Slater, Let's make the with 37 on it. No, I think that's what we're gonna want. And then let's go ahead. And this time we will add a button. Okay, put it right here. Let's change this to SE posts own caps. It was changed from system to custom. Let's go ahead and go to Noto Sands. Change it. Two bowls starting to look really nice. Uh, 15. Let's try 14 just for no OK, go to the background. And here's a nice blue So the blue is 00 b four e one If you want that blue must grow up to the top and change the text colored or white And there we've got a button. It's looking good. So now what I want to do is I want to put all three of these in a stack view. Okay, so just click all three, hold down Commander shift, select all three and then click the stack view. They are now in a horizontal stack view, which is just what we want. And let's go ahead and pin this stack. You know, let's pin it constrained margins on. I wonder why it turned it off. Okay. And we're gonna say four. Hold on. Let's impressing escape to see if I can resize it about where I need it. There we go. Okay, let's try this again, Pennant. Gonna say what we want Dio for Let's say four from the top. Okay, Martin's on on out saying zero. How much space we need. Do we really need that much? Let's leave it at zero. We'll see how it looks. So let's say 00 zero and zero. So 40 is there. Let's go ahead and do that. And as you can see, it did exactly what we wanted. Um, when across the hallway, which is fine. And so on her text field here, I wouldn't change a few things around. First, let's, uh, let's get rid of the default text field and let's make it a borderless one. And then we'll click the identity inspector and use our awesome material text field class to make it have the shadow and stuff. And on this text field, we're gonna give it a color on the background here, clip your after you inspector and go down here to background. And let's switch it to a nice light gray like so and the placeholder is going to say, Talk about your app. You know how like Facebook says, you know, what do you want to write or tell us about your thoughts? Don't talk about your app and, uh, let's change the font custom Let's change to Noto Sands, of course, and regulars. Fine. OK, so that's looking nice. Um, although it's saying that it's not gonna be where we expect it to be on unloaded. You could see the little orange dashes there. It means it's gonna be really small in the apurate when the APP runs and we don't want that . And I don't like how the images like Super Stretch like this here, either. So click your image and let's go ahead and do a fix with and Height and we're going to say within height is going to be 37 by 37. We'll see how that looks. Okay, Nice Little Square and the Post I wanted to be. It's OK if it stays that height, but I wanted to have ah, moreover, with Let's go ahead and do a fixed with here. Let's go ahead and say it's just a 50. There we go click your stack, You okay? And let's add some spacing. So let's add spacing of 10 good looking good to me. Um, now, on this image, you though we want to put the camera icon, um, to indicate that Hey, this is where you load your photo when we don't have that in the project yet. So click your assets here and let's go find the camera icon. I happen to have it right here. You can grab from the assets folder yourself or use any icon that Joe, I encourage you to get your own icons. You need to get in the habit of doing that. Go back to your main storyboard and on your image, bled and select the camera and see what looks like an aspect Fit. Looks pretty good, actually. So I'm really curious to see how it's gonna look. Obviously, we can't see the shadowing and stuff right now in the APP looks a little bit ugly, but let's so and command are to run it and let's see if everything's looking the way we would. We would expect it to. It may not actually, that's not bad at all. I will say. I think the button needs some styling, and I don't think we set a custom class on that. So let's do that now. Click your button over here. Let's go to the identity inspector. Let's changes to material button. Isn't it cool having these classes? We can reuse. Very powerful. We don't have to go on right. Custom code. Every single time we want to style something. It's already there. And no one else is going to tell you this kind of stuff. So you're gonna be way ahead of the game here. So, look, it's looking pretty good. Isn't that cool? Just a little bit of styling goes a long way. So talk about your app. Got the camera and got the post, but I think it looks great. We don't have the ugly space above our table view now. It's looking real nice. Really, really nice. Okay, So Okay, so what we want to do then, is next. Let's go ahead and get our camera button working where we can actually pick a photo from the photo library. Um, just gets more things in place here. So we've done this before a couple of times. Let's go to our feed VC here and remember what you need for it. Dude, if you said, uh, the camera image picker uh, not camera picture the image picker, then you were right, because that is exactly what we need. And in order to use the image picker we have to implement that You image picker, Controller, delegate! And we also have to implement the navigation controller delegate. So let's go and do that Now you I image picker, Controller, delegate And you I image you know you on navigation controller delegate Okay, Because you know you have to be able to present it. And these have the delegate methods to call. And of course, we need to store that here somewhere. So let's go and do that now. The, uh the image picker I mean so far Image picker of type you I image picker. Come on out of complete Don't tell me now. Image picker. Okay, Looks good. Of course, it's waiting for the delegate functions to be implemented and it's just really one that would need. And so let's go ahead and let's make sure undeclared Ah, undeclared! You image picker here I must I might have spelled it wrong. Yeah, I did. That's why Image picker controller. You're like you've done this three tortoises twice already. Why you're screwing up? Well, hey, this is real programming K, this is This is not 19 to 1. All right, Okay, so let's go ahead and implement our delegate function called image picker. Controller did finish picking image. Uh, right here. Now, I do want to say that this function here is actually deprecate ID. What it means is it's no longer could be actively maintained, and they prefer that use a different one, which just happens to be this one image picker controller did finish picking media with info, and this is the one they want you to call because this allows you to pick videos and images while systems just images. But I don't want a deal is having to figure out which is which and what is what we know. It's gonna be images right now in the future. If you want to add videos to this project, this would be a great one. A great one to use right here we're going to use did finish picking image as implemented here. And so the again we've done this before. Um, this is after you've done, you're done picking the image. So what we want to say here is, um, image picker that dismissed view controller Animated? Yes, completion we don't care about. And then, um, let's go up and make sure our image picker. Isn't Stan Shih ated? So right here, let's go ahead and initialize it up. In our view, did load so we can do that now Will say, uh, image picker equals you image picker, controller And ah, image picker dot delegate equals self. Okay, just like we've done before, Okay, Looking good here. And then what else happens? So you need a reaction when you click the actual image itself. Um, and, uh, let's go ahead and talk about how we can add an action to a on image. So go back to your main. That's story. Bored. And we got our camera here. Right? So go on the right hand side over here down here and type in, uh, tap. And there's a tap gesture. Recognize? Er, this is one way to do it from a storyboard. I'm actually gonna show you how to do this later on in the code as well, too. So that's really cool. You're gonna learn both ways. So this is very common to add tap gestures to different controls that aren't buttons. So just take this clicking and dragging, drag it over to your image, okay? And, uh, James, let me a very good. Um, it is a really sorry. It's bugging out here. Let's try that again. Click and drag it over on your camera. Okay, So we just added a tap gesture onto the camera. And if you look now, it also added up here tap gesture, Recognize? Er, and it also added it right here. This allows you to like, if you wanted to make a Segway, you could do it from there. Um, but we want to use as an i b action. And I do want to say one thing that you can Onley use tap gesture, recognize er's in storyboards. Okay, that's the whole thing. We just here with clicking and dragging and dropping it. You can only use it here in a storyboard, just like we did. If it's not table view, so we will not be able to do that on the like button, which will do later. We have to do that in code because it does not allow you to do that on things that repeat only on things that don't repeat, such as this right here. But this this cell does repeat, just so you know. Don't try this on a sale here in store, but we got to do it in code instead. So go ahead and open your assistant editor. Okay? And let's make sure we have the right thing selected. We don't want Prevue. We want automatic feed, V c. And, uh, we need to do an I B action. And also probably some outlets here is well, too. So let's go ahead and do that now. So let's finish the tap gesture. So scroll down here and, uh, see this tab gesture. Disquiet in control. Drag it over to your code and instead of an outlet, change into inaction and the type is gonna be you. I tapped gesture recognized. Change that. And let's call this, um Ah, select image. So that's working. There's one more thing we need to do. This is very important. Listen up. Click your camera. Your image here by default, things that are buttons don't have user interaction enabled, so we need to turn it on. So you've got your camera selected right on the eye. Attributes, Inspector, Over here on the right hand side, there's a little clickable box here called user interaction enabled. Go ahead and select that. Okay, This is now able to receive taps, which is very cool. Okay, so that was easy enough, right? And so here it is, right here. Select image. And that will be called anytime someone taps that image, which is what we want. Now, let's go ahead and making outlet from our text field. So control drag and let's put it right here. I'm gonna call this, um what is this called? We'll just call this post field. Okay. Look, that even was smart enough to put our material text field class on their Ah, what else? I guess only one I be outlet. We do need Well, actually, the camera should actually also be an i b al it. Because when we select the image, we want to put the image they're showing that that's the image that we selected. So let's do that too. So we made it in action out of it, but out of the tap gesture, But on the actual camera itself, let's go ahead and make it an Al. And we're gonna call this, um Ah. What? We were hunted gullet. Select image, Select image image. Ah helps to this image selector image. And I say image for short for image view. They were so that we can actually change the button on it. Uh, that's a little bit confusing. Whatever. Okay, so we've got our outlets connected. We do need in action here for the Post as well to actually make the post. So let's go ahead and click your post here, Control. Drag it down and we're gonna change us from L. A. To Action has called make post. Okay, so that's their That's their okay. Looking good. Let's go ahead and close. The assistant editor. I'm gonna open the right hand side, go into my feed view controller, and what we want to do is handle the image being selected from, uh from the button being pressed. So select image right here. And this is where we'll say present view controller Image picker. Animated. True completion is Neil. So whenever whenever you select an image will just present the view controller. And that's cool. Whenever you select an image, we dismissed the view controller. And then what we do is we say, what was it called on our image selector image? It was a image selector. Image dot image equals image. What was going Well, this is our outlet, our image view. It has image property or grabbing the image that was selected here. Just signing into that image, that's all. Um okay, that's looking good, I think. And Ah, yeah, What else? Anything. Let's give it a shop is good and, uh, run it. I just click the play button this time. Guilt. Here we go. Here we go. Here we go and logged us in. OK, if I click this hey are tapped Gesture worked Click moments Click this app image here It assigned it just as we expect it. Okay, so that's looking great. So we've created some awesome you Why here? Look at the shadows. As you can tell, we've implemented the image picker controller as well as the delegate method. So it sets the image When it's done being picked, we can click it again. Of course, it's like any other image. You know, I didn't but it will turn out just right. The post button styled. The viewers styled our text field of styled with a minimal work not very long at all, and it's looking real good in her coat. Looks good. So let's go ahead and call this video done in the next exciting video, we're going to get our images posting. OK, we've just been tested in the past, but we want to do next is actually get our images posting onto ah server somewhere. And we're not going to store the images on fire Base because you're gonna run out of space . Real quick image. Actually, we're gonna talk about that next. So on the next exciting episode of building your own Facebook style application Mark Price here, Deb soaps dot com see assume.
109. App: Showcase Part 13 - Uploading Images to Server: Hey, what's up, everyone? Mark Pricier depth slopes dot com. And by the way, if you're wondering where God was that target like 9 99 super cool. And if you notice it's not one of those trashy snap backs, you know it's a flex fit. Remember how back in the day flex fits were all the rage? And now you can't get anywhere one wants to wear like sleeveless sleeveless shirts and snapback hats. What's happening to society anyway? Really cool stuff, Batman. Of course not The Apple Building? No, Actually, the app is coming along really nicely. We've got our text field here are image picker. It's all working great on the surface, but it's not actually saving data and anywhere. And so think about this. We need to be able to store images like a social network, right? And how are we gonna do it? Well, maybe you're thinking, Well, maybe a firebase consort, and you can actually store photos on fire base. However, with that being said, firebase does not officially support uploading photos. Yet they actually have it on their road map to be built. Um, but basically, if you do store photos of fire base, which you can dio. Uh, first off, it can't be more than 10 megabytes. Secondly, though, you don't want to do that because you only get so many gigabytes of data on your fire base accounting. You don't want to store those with images. So some good options for you are Amazon s three or some online free provider like we're gonna be using today. We're gonna be using Image Shack. So if you go to code dot google dot com slash p slash image image shack A p I or you could just searched Google for Image Shack A p I you're gonna see this page right here. And, uh, really cool guys and gals use AP eyes and free services whenever you can. If some some things you need to know is if you want to use Image Shack, you've gotta let your users know that you're using the free service image shack. Also, if you're gonna have a paid application, you can't. It's against the image shacks rules to use their a p. I distort images. Other than that, you could do up unlimited uploads and things like that. If you do want to store your photos or Excuse me. If you do want to have a paid application, you're gonna want to store your photos, probably on Amazon s three. And their sartorial is for that. But today it's Image Shack. It's free and you're gonna learn a few principles, such as how to make a multipart form http request and how to upload images and how to get a euro back. So we are going to store the image you are. L once we get it back from Image Shack. But we're going Teoh, we're gonna store that fire base. We can pull it up later. So here's Here's the thing. What you need to dio is right here to use the A P. I please request a key. So go ahead and open that request A key and you need to sign up if you don't have an account or log in. Okay, and then So I'm already logged in, right? So I'm just gonna log in with Facebook and it's destroying my image. Is that if so, once you're logged in, it will take you to a screen like this. And by the way, this is real cool. It stores all your images for you. As you could see, I've got lots of test images here. Ah, And so once you're logged in doing what we just did here, then you can go ahead and request a key like so. And here's the form it takes you to. You just fell out your data. It will require a website. If you don't have a website. That's okay. Put something in there. It didn't let me submit the form without putting a website in. So you're gonna have to put something in there. Um but when you do feel out this form here, it will give you an instantaneous key. I'll take it to another page and give your A P. I key you to save that and store that cause you're gonna need that just to upload your photos. OK, so fill this form out, and then get your a p I key on the page that it takes you to so we can use it in the application. So now I'm going back to this other page here, and let's go ahead and click their image shack. Ap I documentation Right here. Many, many AP eyes have documentation, and it's important that they do. So users can what's called consumed the A P I. And what we're going to be doing is uploading an image basic. Okay? It gives you that you are ill. You need to post them, too. When you post it, you've got to set some parameters in your post like that. You're a P I key, which I just told you to save. Um, the file itself that needs to be uploaded. The format needs to be Jason on. These are optional. Right here. Um, and then when you do uploaded, it will send you back Jason, which we've worked with before sending back Jason like this where you can actually get your , um your image, you or else you can use it in your app and save it. So, for instance, where would it be? Links right here. The one we're gonna be using his image link later on. And, uh, so it gives us the actual direct image link. And then that's what we store in fire base. And then it pulls the photos up from fire base. So everything a firebase will actually work just the same. Uh, except we're just giving it your all from our own photo storage instead of just posting and random ones from the Internet. So I know this is a little bit long winded here before we start coating, but it's important that you understand how to work with AP eyes. It's important to understand that you gotta go to their documentation and really, I could have just given you steps X y z But I want you to read this thing, these things on your own. So you know where to get help. It tells you how to use it, you know, tells you the field. You need to have these mean they're required. It tells you the end point on, we're going. We're gonna go over this together and here's what you get back, which is really important. We have to have the image link. Otherwise, Firebase won't know which photo to show over which post. So hopefully have gone your a p i key by now, let's go ahead and go back to the code. And so the idea is what when you click the Post, but and we should start uploading the image now, in our case, we're not gonna do all kinds of cool bells and whistles where you have loading spinners and may it posted instantly disappears and then does the image. After we're not gonna do any of that. We're just going to, uh, let it uploaded what's done uploading. Then we'll call the post successful. So we have a function here called Make Post. And so what we want to dio is we want to make sure that a post has at least, uh, the description. We will not let a user make a post unless there's some words in there. Okay, so we need to account for that. So let's go ahead and get started here. I'm gonna scroll down here, make a little bit bigger for us. Here, make the text bigger so you can read it on those iPhones. I don't know how you guys could be doing this from an iPhone. I'd have it up on a another screen right next to me so I could see what's going on. But if it works for you, that's great. Um OK, so make post and what we want to do is say, if let t x t equals was a post field that text where text is not equal to this. So what we're saying is, hey, if text is not kneel and if it's not empty the store into this variable here, just a standard If let that you're used to seeing and basically otherwise, um, otherwise, don't do anything. Uh, don't let the user proceed. So now let's talk about the image. We need to check for that. Right? So if let image, I am g equals post, what do we call this image image selected in which that's a bad name. You may want to change that. Uh, okay. So if let image looked image, what we're saying here now is hate. Is there an image in there? Okay. And, uh, well, there actually probably is gonna be an image in there. We're not gonna handle this right now, but you know, what you might want to do is make sure that the image in there is not the camera. Um, otherwise, it just may upload the camera icon, but we're not gonna worry about it right now. That's just little bells and whistles here. You can take care of on your own, which you should be doing and experimenting. So there's the image uh, So what? We want to dio if you remember, right, we want to post it to the girl, right? We need we need to Your elder posed to and the one that they gave us is right here. Let's go ahead and just copy that. Come and see to copy it. And, uh, we're gonna say here is Let your l string equals. There's the URL, okay? And then let's create an n S u R l Which years you should be used to doing as well to So you're l equals N S u r l. And we're gonna just scroll down here till we get to the one that's a string and we're gonna put in your l string. And that looks good. I'm gonna put an exclamation point at the end here because it otherwise it will be optional . And I know it's gonna work for a fact. So, um, we will have any problems here, So OK, now, when you upload photos from iPhone there really big, like 3.5 Meg's, we don't want to upload 3.5 make files. That's just a lot. So what I want to do is actually want to convert that The image that we uploaded into a J. Peg and I want to compress the heck out of it to make it really small. And you may not want to do this. You can play around with it. But I wanted to be smaller, so doesn't take a long time. So let's go ahead and do that. Now let's convert it to ah J Peg image data. And besides, data has to be. You can't actually upload a photo itself through an http request. Remember, Bits and bytes go over the http protocol. So you've got to change it into N s data. Just spit out a bunch of numbers, and that's what could be transferred. So image data equals you. I image J peg representation. We're gonna pass in the image and compression quality. I'm gonna say 0.2 now, how compression quality works is zero. It means fully compressed, and one means not compressed at all. So we're pretty close to 0.2, okay? And, uh, but we want it really compressed. And also this will return an optional and so it could fail. Someone put an exclamation point there Just so unwraps it cause I know it's going to succeed. Um, you can add more air handling on your own if you run into problems. Okay. Now, remember, we have Ah, we have a key, right that we got from Image Shack. So let's go ahead and put in the key. And, uh, there's some really important that you need to understand is we're gonna do a special type of request, OK? Using Alamo fire. It's a multipart part form request. And before I talk about the key, I just want to show you what I mean. So, um, on a typical http request, you may be passing up a body that has strings and things like that and it. But when you have, when you need to upload a file like the actual file itself, where is it? Right here. See this file uploads. We've got a file I need to upload. We've got a special key. We've got a format. We've got a few different types of fields that are different formats. They're not all the same format, and it's because that image file okay, we can't just say it's all Jason or it's all this are all one content type of others image in here, so it creates a little bit of a problem for us. So instead of just doing a regular Alamo fire dot post requests and post of a body, we've got to do a multipart form data request, and it requires that we post data Alamo Fire requires s data. So we have to convert all of our fields to data. So we've already done that with the image. We've converted it to data. We need to do the same thing with the key again. Going back. The http request here requires the key the A P I key for your application. OK, so we need to put that in now. So let's say let key data equals. So grab your key. I'm gonna grab mine right here, OK? Don't share this with anyone. I'm sure mine with you because this is just a test application, and, uh and I want you to see what we're doing. So we've got a key now, right now. That's a string, right? So we need to call a function on our string to convert it to data. So type and dot data using encoding, we're gonna say and s utf eight stringing coating. That's just a standard encoding format for strings. Okay, so all we're doing is we're converting the string into data because our request is going to require it. You may not understand it, but that's okay. This stuff takes time. This is really complex stuff, and it takes lots of time in practice. So just take my word for it in this multipart form, request data we're gonna dio request we're gonna do it requires things to be in data formats. So, um, that's that is the key we needed to the same thing for Remember, it requires another field here, Um, Jason. So that is the actual name that it's requiring. You need to tell their server that you're posting up, Jason. So we actually need to actually do the key name itself. Sochi. Jason equals Jason, just like we saw on the A p. I Okay, I'm just doing what they're telling me to do. N s utf So we're just We're converting the word Jason into data as well, too, because that's what it's requiring from us. So we've got the image. We've got the keys and the things we need on, and it's OK if you don't fully understand it right now. And, uh, Allah move. And I can't guarantee you're gonna understand even by the end of this video, watch it over over again. You're gonna have to practice a lot. It just takes time. Okay, um, Alamo Fires not popping up, so I think I may need to import it. I do. So import Alamo fire. We should already have this in the application on a scroll down. OK, so, Allah, Alamo, Alamo fire dot upload. And what we want to do is ah, multipart form data, which is right here. Okay, so what we want to dio is a post request of dot post, okay? And then it wants the euro, which we have. It's, uh, right there, Okay? And then it wants a bunch of stuff, and so let's go ahead and just, uh let's go ahead and get it going here. I'm going to just press enter on these here to get rid of these completion blocks up for us here. And I may change this around, uh, a little bit here to not use the default set up they've got for us here. Um Okay, so let me just look at this year. So multipart form data. This looks good. And instead of having the the parentheses in there, I'm just gonna take that off We could do either way. This way is just easier for us. So that's the variable it's going to give us. Okay? And that looks good. And, um, but what I do want to dio is at a closing parentheses here. Okay? And, um, and take it off this, uh, let's see. Here. How do we want to do this? Uh, so we got that there, Okay. And encoding what we want is actually encoding results. I'm gonna actually let's just take this off here. Let's go ahead and say in coat. And by the way, you just have to play around. If you're having issues with closures, you have to play around with it till you get it right. Like taking off parentheses, adding curly braces. You go look at the source code of whoever wrote it. So you can know what you need to put in. Their closures can be complicated. And by the way, I, uh I'm actually going to remove this comma and put another opening curly brace there. Okay, so basically, this will return something that we can then are another closure on again. Sorry. If it's confusing, it just takes time to practice. Uh, don't stress out too much about it if you don't understand closures just yet. Perfectly. Um, Okay, So basically, what's gonna happen is here's the upload, right? And then, ah, inside this closure, we need to actually add the fields that the Post Request is going to require. And then it's gonna make that request, OK? And then the results gonna come right down here. So let's go ahead and all right, the code that we need. So we're gonna say we're gonna call this variable right here, and we're gonna say, Let's just copy it. Actually make it easier, because it's long, multipart foreign data upend body, a pen, body part, and, ah, again, some of times, this auto complete does not give you what you need. So you have to go look at the source code. You know, you have to do something like this like you have to command click, upload and go look at what it's requiring from you. Okay, so it's like, OK, this requires, you know, closure. That looks like this. Anyway, you have to go look at the code. Sometimes it could be a pain, but actually, looking at the code will help help you learn how to teach yourself, which is very, very important. Multipart form, data upend body, a tent, pen, body part. And the 1st 1 is the data that you're gonna pass up. So that's gonna be image data. Okay, The 2nd 1 is the name, Okay. And, uh, it's going to file upload. Maybe you're wondering where did I get that from? Well, so the first key that we're doing is this one right here. Okay. And notice how the word that they're looking for its file upload and then it's the image file itself. That's the value. This is the key. This is the value. So the key name is file upload is what they want us to put in there. So there's the name file upload justices asking me, and then it has a file name. This is the name of the actual file you're gonna post onto the internet. And I'm just gonna call image right now. The Image shack will rename things for us on its own, so it just put a default name their images find and mime type. If you're thinking of the guy with white gloves and the ugly makeup who, like, does weird things, that's not what this is. This is the type of data that we're transferring, and ours is image slash j peg. Okay, so what we've done is ah, this multipart form data were saying, The first key we want to add is the image just like it's telling us to do over here the name of its file upload, and we pass in the image. So I'm looking at the a p I I Here's the Here's the name. Okay, there's the key. There's the value and there's a few other things, like the name of the file and the mime type. OK, so that's the 1st 1 The next one we need to do is the key, meaning this guy right here, we need to upload the key. So Image Shack knows which which account belongs to. So multipart form data upend body again. A pen body part. It's not giving us auto complete, which is kind of annoying. So you gotta look at the code or just follow along with me. So key data this time and the name is key again. I don't want to sound like a broken record, but it's important. Understand this. So the key is the name. So even though, even though they called it key So the name of this he is actually key. And the value is the A P I key for your application. OK, so all we're doing okay is passing in the key data and effect. I'm gonna put exclamation points on the end of key Jason. End of key data. Teoh, unwrap those so we don't have those airs. It's gonna work just fine. So there's the key data. There's the name for key Stewart again multipart form, data upend body part. And this one's data is key, Jason, and this name is format. Okay, so again, we just took this. We took this key, which is Jason, and we passed it in the key here for format. Jason's the value, the the key is format. So if we look over here, they're looking for a key called format, and then the value needs to be Jason. So I'm just doing exactly what the A p I says so we've just a pendant. First, the image north How this type is different than these two types. If all of our data looked like this where it was just key strings, we wouldn't need to do this. Intense a pen body part multipart, formed A. We could just do a post request. But since this guy right here, this image is different. We have to do the multipart form data to support the image Upload. Okay, so we've now created our request again. If you don't understand. That's okay. Just keep following along now. Encoding result. This is what happens when the upload is done. Okay? It's gonna pass back a coating result with a success value or air value. Um, and we need to be able to handle it. So let's go ahead and do that. Now we're gonna use a switch statement, and, uh, if you haven't seen them before, sometimes you use them. Sometimes you don't you can use them in place of if else statements. It's not a big deal. Just goes through a series of different cases. Like if it's this than do this, if it's that into this. So we're gonna say switch and coating result encoding again. Auto completes not working in these closures. So you got to spell everything very carefully, so switch and coating result and we're gonna have a couple of options in here. So in the first case, if encoding result is equal to success, okay, and it's gonna actually call a function and we're gonna do here, um, here we go. So if the case is that success and the success is, um is a closure here and it's gonna pass it if its success, it's gonna pass in the upload that we did, it's gonna pass in like what we got back from the server. So if it was a success and again, you have to understand this completely to be able to use it, This is this is pretty complex stuff. Um, so it's good that you're being exposed to it, uh, because you're gonna run into when you start coating on projects. So if it was just if it was a success, we want to get the response, Jason that we got from the server. So if it was a successful request, we want to get all this data here so we can know how to store it. Okay, that's all. So if it was a success, we're gonna say upload. So this upload right here, OK dot response response. Jason and, uh, was a completion handler. And let's go ahead and put in the request. The response and the result. Okay, in there we go result in that Looks good. Um, am I missing anything? I think I may be missing the closing parentheses there. Okay, that looks good. Ah, it's yelling at us here because we don't have a, um we don't have, like, a default statement or a different statement to go from the Don't worry about it right now . We're still good. Um OK, so, um Okay, so we got our upload response, Jason. So if it was successful, let's go ahead and grab the link out of it. But maybe we should actually handle the air first. So this is a in the case of success. Okay, What about the case of failure? So if the case is dot failure and it's gonna give us an error, okay, If the case is a failure, let's just print the air for now, okay? All right, so that everyone away, we've got multiple cases here. Um, so if it was dot failure, it was an air. Now this dot success and dot failure This is part of the multipart foreign data. Okay, in Alamo fire. So it's part of their package. And so you have to You just look at what I'm doing or look at their source code to know what's kind of going on. The good news is, this is probably the most complex request you could probably do with Alamo Fire or in most other types of requests, not maybe not the most, but one of the most complex things. So, uh, it's really cool that you get to do this right now because anything that you're gonna do is probably little bit easier than this. So and this is probably the most complex video in the course. So if your stress don't worry, it's OK to be stressed. Your I don't expect you to understand this right now. Um, OK, so now what we want to do is grab the link out of the Jason if it was successful. So what we want to dio is grab the Jason so to say if let info. That's this arbitrary name. I'm giving it result that value. So, um, where's our results? Um, so we're right here. There's a result. Okay. It's passing in the result dot Value as dictionary of type string and any objects. Okay, again, when you're enclosures, at least with X code right now and swift it it doesn't auto complete a lot of times. So what we're saying is, hey, go into the value of the result that we got back from the server and let's convert it to a dictionary that has keys of type, string and values of type, Any object. And if you're wondering where I'm getting that from, well, the result that value is this Okay, this is the Jason they're sending back. They even tell it to me right here. Return object structure. This is what this is the type of data they're gonna send back. So if I look at it, Okay, it is a dictionary through this opening, closing curly braces. It's a dictionary with a key. All the keys here are strings, right? These are all strings, but the values or any object in this case, it's a string number one this case that the number This is a number. This is a string. This is a knoll, so we don't know what the values. Maybe it's any object and their different. So we know it's a main dictionary, uh, of type string and any object string being the key. Okay, so if that works, if info works, then what do we want to do? Well, remember, we're trying to get what we're trying to do is get links, and we want the image link right here. So if this main dictionary works, then we need to get the secondary dictionary right here. Links. And this dictionary is of type, string and string. I'm just going to use any object just to be safe. But these air both strings here. Okay, as you can tell from there, Jason, that's really cool. So let's go ahead and do that Now. We'll say it's called links, Remember? So if let links equals info, remember influenza dictionary so we can use dictionary syntax to grab that links key out. As and I just said this, it's a dictionary of type, string and string, but just to be safe will say any object So let's grab the links out again. It's a dictionary of type string and any object and the one we're looking for. His image link. So lynxes right here. That looks great. And then, um, what we want to do is we want to say if let image link equals links, remember addiction or within a dictionary. It's kind of like the Matrix, right? Or, like inception, intense stuff, dictionaries and dictionaries within dictionaries. Whoa. And, uh, so in this case now, So this is the links dictionary, right? This links is this whole dictionary, and what we want to do is get the actual, um, key and value. So the key is image link. We want to get the value of that, which is this one right here. So if you look at her code were saying grab so image link equals links. So we're grabbing the key image link and converting it to a string. Eso were driving the value of that. This is the actual your l that we're gonna save to fire base. So, um, it's not really that many lines of code here. Okay, Um, so that's really cool. That's nothing. Too bad. Um, so What we want to do then is actually make sure this is working. So what I'm gonna dio is we're gonna print this, and if it's working, we're gonna call this video done, and then the next one, we're gonna actually connected to fire base. So what we want to do is print, uh, a link, and, uh, we'll go ahead and pass in the image link itself. Okay, which is right here, image link. And let's make sure everything's working. So I was do this before I I run my code. Eso we click, make post. We make sure that someone entered text in the text field. OK, um, we make sure that there's an image in there. Now again, there already is an image in there, so this codes kind of pointless right now, you need to do some more air handling if you don't want to count the camera images that's in there. But basically we've created a Eurail string converted to an S u r l. We've got image data for the actual image with taking the image in the image. You converted it to data. We've converted the key from Image Shack into data. We've converted the value. Jace, on that word right there. We've converted that into data because that's what the A p I requires. We've called Alamo fire dot upload and multipart form data. We pass in the type of request the u R l that we're going to we put a closure and for the multipart form data, Then we add the different keys there. So the image itself and then the key, the key named key with its value and then the format and then on success in the switch statement. If encoding a result is that success, let's go ahead and call. It's gonna pass in the upload result, and we're gonna call the response. Jason, we're gonna convert some Jason Moore J Song converting and more Jason all the way down until we get the link that we want right here. You've seen this before in the other apse of built. We're gonna handle the failure and this all happens when the make post button is pressed. So let's give it a shot. We wrote a lot of code without testing it here. It wasn't that much code. It was just me talking a lot, So it's not too bad to not have tested this yet. So here we go. Loading up. Okay. I'm gonna trash all these airs here on warnings not airs. Just warning. So talk about your app. I hope this works. Okay, let's select an image, and we'll say, Ah, let's do the, um, Let's do this one here, okay? This nice little scenery here looks good. And what do you say we post it and see if it works? Post Did it work? Link? There's the link. Oh, my goodness. I think it worked right out of the box, actually. So let's copy this link here and just make sure it's actually working on the Internet. Okay, You ready for it? And just to be sure, let's open it in an incognito window. Command shift in. So I'm not logged in any worse to make sure it's publicly available, which is what we want. Command V. Did it work? That is pretty cool. It actually did work. And you know what? This is with it being compressed to. It's It's pretty pretty good looking for being a compressed image. So, uh, yeah, it definitely did work. So there we go. We just uploaded our very own files. Teoh Image Shack. And again, this is this is this is good design here. Okay, So how it typically works in professional applications is you never actually store images in the database. Okay, Like fire base. We want to start the images themselves. When you typically Dio is post to an image shack or on Amazon s three. And once the files uploaded on the call back when it send your responses says, Hey, I succeeded and you send it gives you back to your own. You grabbed that girl and then you saved the u. R L in the database. And so then your app on the client side, Whether it's an iPhone app or a Web browser, it can grab that euro and actual just load the image right there, real time. And that is how you actually build professional applications and working with images or files or anything that requires maybe a few seconds upload a couple other things. Um, you know, and one of the things will handle in the next video, I think, but, you know, clearing this out, this field out went to the post is successful also, you know, a couple of the things that you might do on your own in the future is basically, let's say you make a post. You could fade all the sound put like a loading spinner here to say, Hey, I'm loading And then once done, it disappears. Or you could post it right away instantly. This all wipes out here and then maybe down here, it just appears later after its successful, you know, because you don't want what you don't want. Is it just to be sitting like this, doing nothing as a post is made? Okay, you want to make it a good user experience, but you should do that on your own. I'm leaving out the little tiny things merriment and explored. So that's uploading. Images worked out really well for us, and, uh, let's go ahead and move on.
110. App: Showcase Part 14 - Saving Posts to Firebase: Hey, what's up, everyone? Mark Price here, Deb slips dot com Remember that one time when we uploaded images to Image Shack? Got it working in our lab? Yeah. It was, like, five minutes ago for me. And super cool. We're making such great progress. Uh, wow, this is really cool stuff. And again, this is the stuff you're gonna be doing. 90% of your thymus professional applications developer. They're going to be talking to servers all the time, downloading data. That's that's how you do. It's actually less common to build aps at, like, complex drawing with, like, your finger and stuff. Or it's less common to use GPS as more, more. You're seeing that naps, but like, it uses it pretty minimally. Actually, uh, this usually opens up maps, things like that, you know? So when you see a lot of people like talking about learning how to use GPS or the accelerometer or like all these, like funky iPhone things like use those things like 1% of your career and the stuff we're doing right now is what you actually use 90% of the time. So don't be fold. This is what you're really going to be doing on. Of course, it's all about the data. Users want data in their APs right now in here. And that's what it's all about. Creating cool animations and experiences all the stuff that we've been doing so really fun stuff. And what we're gonna do now is this. Get it talking to fire base. So after the upload happens, we're going Teoh, create a new post and save it to fire base. And it's gonna instantly upload instantly update our table view. And it's not that hard to do. It's actually quite simple. So what we're gonna do is creative function down here. Let's make sure we're out of our function here. You always know your, uh, where to put the next function is because your class is always gonna be the last curly brace. So this guy right here, Okay, that's your class. And that's always going to the last curly brace. So you could know. You can put your function right here, and it won't be inside of another function and give you on air. So function post to fire base. Okay. And what we're gonna do is passing an image, Auriol some posts may have an image or else. Um, postman, Not because you compose because the description this required right, but the actual U R l for an image is not You don't have to post an image. So, um, so opposed to fire base. And we're gonna do that right here. So after you've gotta successfully uploaded image, we're going to call self, not post a firebase. It won't let us do it without the self key word and image or l is just gonna be image link . Okay, this guy right here. So in this case, it's passing an actual your Ellen, remember? That's why I put a question mark right here. That's why I made it optional because you may or may not have an image or else we're telling the user, which is the programmer, that Hey, if you call this function, just know that you need to check for the value because it may or may not have a value. So, what else do we want To post a firebase, though? Well, we want to post a firebase if, uh, well, if there's no image in the image field and again, um, maybe we should handle this right now because I'm not liking how it's kind of working. Remember how I said it? There's a camera image in it so it could upload that. I don't think this is the the best check to do right here. Maybe what we should do is, um, have a variable up here. This is just maybe a quick solution that we're gonna call this, um, image selected, and it will start off with it being false. Okay. And ah, then we go down. Teoh are image picker. Controller did finish picking image. And when the images selected Okay, we're going to, um we're going to say, image selected. No image selected. Their ego equals troop. So basically will use this to key off. It will be actually selected image after the image pictures come up and someone selected an image. And then So instead of saying, if let image right here equals image. Well, well, well, keep that there, but we'll say and we're image selected equals True. So now we're saying if there's an image in there and if an image was actually selected um uh, let's say where image selected is true. See if that works That works. Okay, So I had to do wear because we're doing and if less so if, uh if this pulls down an image, which it will, because there's a camera there, no matter what and if image selected equals true. Okay, that makes sense. All right, So it's fly is bothering me, Things you don't have to ever think about. If you're not like recording in the studio, it's like it's like, What about the dang fly that went in through the vent Is bugging me all this entire time. Maybe we should do, like, a breaking bad episode where, like, the whole episode that we do is just me trying to kill this fly. You guys were like, No, that was the worst episode ever. Okay, we won't do that, but I'd be pretty funny, Baby Bone, I'll make that a bonus lecture. Okay. Um, OK, so if and for those, you have no idea what I'm talking about, go watch a breaking bad on Netflix. Okay, So images like that is true. So we won't get here unless unless an image has been selected. Okay, Now what we want to do is an else clause. Like what if the user is just doing a description and not doing an actual image. So where is this ending? Curly Brace is what I want to find. Uh, let's see here. This is sometimes kind of hard to figure out. All right? So I don't if you just saw that, but this one just highlighted yellow. There it is. So I know it's that one right there. I know it's this guy. So we were going to do is what we're saying is, if there's an image and image selected is true otherwise else, let's go ahead and say self that post to fire base. And instead of passing an image here, we're gonna pass in Neil. Okay. Why, Neil? Well, because we're gonna pass an empty nothing. Okay, nothing at all. Because remember, if we go in here, this means we want to use an image. If not, we just have a description. OK? In both cases, there were already inside of this, So there has to be a There has to be texts in the text field which were already accounted for. So in this case, we're not posting an image. We're just posting Tex. And so this will be empty right here. Okay, So post a firebase. So what we want to do is create, um, a post its in the format that we want. Remember, Firebase is a client based database. When I say client, I mean your friend and kind of controls are iPhone app is the front end. And so whatever data that we set in here, it's gonna take. And so what I'm saying is servers, for instance, in a typical arrest server, a server will reject data that's not in the format that you want. Well, firebase won't fire base is very open like that. So you have to make sure your data is perfectly sync if you have. If you have ah, browser application way with angular or something and then you've gotten iPhone app in android app. You gotta make sure all three APS have the exact same data structure on their client. Okay, so you're going to go to your fire base, right? Pull open a browser here goto firebase dot com and you're gonna log in. Reboarded created test data. Remember? How would create a test data in the past? And I said to you know, we want to create test dated to see what our data is gonna look like, and that's why we did it. So if I go to manage APP over here, it's gonna pull open our account, and it's gonna allow us Teoh, look at her test data. So whenever decides to load here, there we go. Okay, so when I say the format, so we've got So we got the base Uriel here. And so the basic Ariel slash posts We've already got a reference for that interact and then posts Each post has a unique key. So this is so if you if you think of it in terms of IOS, this is a dictionary with this is the key of each item and it's of type string and any object okay, the values or any object. So we know we need to have a description. We know we need to have an image or l and we know we need to have likes. That's what our data is structured like in our posts. So we just create something that's exactly the same so far. Post of type dictionary string in any object, just like I said we were gonna just could create it and we're gonna initialize a dictionary here right off the bat. So the first key description okay, is going to be post field dot text. I'll just put an exclamation point at the end to unwrap it. We know that if we got to this function that there is values in there because we wouldn't have got there unless we had gotten in here. So I'm just kind of following the chain and or code is pretty safe at this point. So and then Ah likes okay, if you're creating a new post, how many like should start off with? If you said zero, that's a pretty good starting place. I would say you're right. So there's our post now you're honoring Well, do we put the image or on their Well, we don't know if there is once we got to do some logic. So if image URL so if this guy right here okay is not equal to kneel, Meaning if there is one we're gonna say post and passed in the key image or Oh, this is the key that we started Firebase, remember? We're going to say it equals image. You are l and we're gonna unwrap it with the exclamation point. So if there isn't a majority, let's go ahead and add it to this dictionary. If there's not, this will never be called in here. And this will look just like this. Only likes and description. Just some standard coding logic. Now, the question of the day. How do I save this to Firebase? You're gonna be blown away by how easy it iss. Okay, so I'm gonna show you what we've done before. I'm gonna open up the left hand side and go into our services and our data service. Remember how we got a reference to the posts right here. Remember, it's just this your l hear. Forward slash posts. Okay, that's it. Remember, Fire bases you are? L base just grabbed the posts. Okay, so the idea is we want to add a new item to this array of posts. Okay? Really, really easy. You're gonna be blown away by how easy this is. This is how you do stuff and get it in the fire base. And it's instant. So we're gonna grab that reference to the post that your else. So we're going to say we're gonna say it. Let and, uh, what do we want to call it? Firebase Post. This is called FB that could be confused with Facebook. Let's just call it Firebase. Post equals data service dot ds The ref posts Member last the reference the post slash posts Here it is, child by auto I d Look what it says, child. I auto i d generates a new child location using a unique key and returns a firebase reference to it. This is useful in the Children of fire base location represent a list of items while this is representing a list of items. So what it's gonna dio is it's going to go toe posts and then it's gonna give us a unique object with the keys a post slash my unique object eso over. It'll look like this. Post slash this, by the way, did you know that even this is uses the euro this key name here? So this would be posts slash This came here. And so when we when you do, child generate child, I d it's gonna create a new generated I d Just like that all for, you know, extra work. So, um, that's what I just did for us right now and all we need to do now, OK, this is crazy. Ready for it was a firebase post that said value. And we're gonna pass in the post this right here. So it got a reference it created a new child. We're storing that right here, that new child. And then we're setting the value of that dictionary that object to be this. That's it. We just set a value, and it saved instantly across all devices, K super cool. And while we're here, let's go ahead and now clear this out. Okay, so let's clear out the, uh, post field that text, make it empty, um, and will say, uh, se post image. Or but it is the image image selector image guys are about a terrible name. Terrible name, image selector. Image dot Image equals you image. Just send it back to the camera. Okay? And I know it's called camera, because that's what I imported. So let's set it to camera and then table view, not reload data. So that's it. That's how you posted the fire base. So you create the format of the data you want, which you've already done with test data in Firebase. Okay. And then, uh, we added the euro if there is one, and then we grab a reference to the posts, uh, Euro, we add a new child onto it just by calling this function create a brand new record. Okay, this is how you create a brand new database entry, and then we set the value of that post. That's it. And then we reset our form here. Oh, we should also, uh, reset to our image. Selected 1,000,000,000. Said it back to false. Like you reset it all. Um, okay. And that should instantly update our ah, our section here with the photos that we're looking for. She would give it a shot. Should we try it out, Mr. Let's try it out. So I'm gonna open. I'm gonna go ahead and run this here and I'm gonna open up fire race. And since it's instantaneous, we shouldn't see a New Post added here. Right now, we've got four posts que when I make a post, we should see a new one added here. So a moment of truth, right? So talk about your, um please work. So I don't look like an idiot on video. Uh, yeah. And let's go ahead and click the camera. And the one we're gonna dio is this guy here? So we put it there. We have it anywhere here. No, right now. So right now, this is just test data, it looks like, uh, Okay. All right, let's go ahead and let's go ahead and give this shot. You're ready. So if I click post it added a new record right here. Beautiful. Okay, so there it is. Uh, now, of course, we need to get these images working here. We haven't really done that yet. Um, so let's go ahead and do that Now, Um, I feel like we should have done this before. Okay. You guys are like, Oh, what you gonna do it? Well, let's do it right now. So, uh, it definitely works. You can see it's right here on the It's right here in our fire base. Everything worked there, so we just need to get these images working the way we expect them to. Let's take a look. So if we're working with cells here, we know self. Arrgh, Index path is gonna be what we're looking for. Someone to command Have to find itself for a row. Okay, so let's see what we got going on here. Um, okay. We're eso somewhere along the lines. I think we lost our images here somehow. Configure, sell because none of this none of these are actually loading. Let's take a look at it here. It's gonna remain storyboard. First off, let's make sure it's still connected. Um, so showcase image. It is still selected here. Um, let's go back to our post cell in the configure cell. Okay, so, um images. Neil. Um, I'm actually curious why? These aren't, uh These aren't showing up here. Showcase image hidden. Um, Okay, so we've already we've really got this working. Actually, I'm not sure what's going on here. Um, ensuring all those same images here. Let's Ah, let's see if any of these work here. So I'm just gonna put a break point right here to see why these images aren't loading here . They were just working. So, um, let's just take a look. It could be the simulators having an issue that could be, ah, host of things. And I'm not gonna cut this out of the video because I want you to look at some of this air handling here so we can figure it out. So it looks like my break point was never called. So I feel like this is not This is not doing what it's supposed to be doing. Let's see if we, um well, you know what? I'm curious. Now, what should uploaded if we go back to our feed VC here, Let's take a look here. Um, so we're setting our posts? Um, the image or L I spell it right. It looks good. Um, yeah, they all look fine. Post. Feel that text. OK, but over here in our post sell, it never was coming up successful. So what I want to do is let's go ahead. If image is not equal to Neil, let's put a break point here. And let's also put a break point here to see if we even got there and let's go ahead and run it again. Okay, So, image, let's press this step over key right here. So it is new. So it's Neil meeting. It needs to download it. Okay, that makes sense. So we're here in the request. Um, okay. And ah, this press play. It looks like they're just not downloading. Let's go ahead and let's go ahead and print the air. I think it's giving us an error else. Print air dot debug debug description. I should. This should work. It's going to give that a shot. I'm curious what is going on? Step past it. Okay. Oh, here it is. Okay. The resource could not be loaded because the app transport security policy requires the use of a secure connection. We've seen this before and let's fix that, right? Because no Iowa's nine in the secure connection problem. You know how that goes. Let's go ahead and just let's go ahead and open up everything under the sun. So let's go into info dot p list here. And let's look at her Ennis app. Transport security. Uh, we don't have the allows arbitrary loads, So good job. So I hope I hope you just learned a lesson to about debugging. I hope you just pay careful attention to how we solve this problem. Well, it's not solved it, but how we're going to solve it. We need to, you know, we did the break points. We stepped through and then I looked at the actual air because it wasn't giving me an heir . And so what we want to do now is ah, over here was closed. The exception domains right here click the n s AP Transport Security, Click plus and we're going to say I n s allows our bitch rare e loads and, uh, press enter. And that is a Boolean. And we're gonna say yes, done that in a Now let's see if the images will show up in our application. Cool debugging coding. In practice, you're never gonna get that watching videos that just tell you to do X, Y and Z. By the way, what is the best of the best? Glad you're here. And sure enough, it worked. Look at that. You know, it's funny, Is the other guys who actually probably teach courses just X, y and Z? They actually went through these problems and they cut him out. They didn't show him to you. And so you never know how to solve these on your own, you know, like that is not helpful at all. Especially if you're trying to build APS is absolutely not helpful. Eso Anyway, um, look at this it loaded right here. Please work. So I don't look like an idiot on video. You're like, Well, you didn't work, So you do look like an idiot. Well, be nice. Cow said, you bunch of haters and bullies here, man. What a brutal class. I'm just kidding. I was talking to myself. All right, so it worked. Let's just do one more to make sure it really worked now that it's actually working. So talk about your app. This is the second test. Let's load up a different one. We're gonna say this beautiful, um, set of leaves. Good post. It's loading. Bam! Right there. See? On the right. Inside data is instantaneous. Did it reload our photos here? And sure enough, it did. And maybe you're thinking, why isn't this posted at the top? Well, it's not alphabetical right now, and that's actually one of the extra features you're gonna be doing in the exercise on your own, because you need to experiment and play around. So it's definitely working. Images uploaded were also creating new posts of fire base. It's all working. Not bad. So our app is getting pretty close. As you can tell, though, there's a few things that aren't working. Like, you know, the heart. I can't click it can't do likes, um And then also, you know, these images air all for me. But what about post from other people and users? You know, maybe you've been wondering when I'm gonna cover that. Well, actually, that's going to be part of the exercises Will to that you're gonna do on your own. I actually giving you all the tools, like the user account, things like that. And you're gonna learn how to link up things like how to connect accounts and things like that in the next video when we talk about doing the likes. But you're gonna do that on your own because you're gonna have a tools needed Experiment in practice on yourself. So anyway, uh, we're gonna call this video Done. It's looking great. Our social network app is really coming together here. And, uh, that's rap
111. App: Showcase Part 15 - Like Feature (Firebase Relationships): Hey, everyone, Mark Pricier deficits dot com Are you ready to finish this? Let's do it. Okay, so we've got posts going to fire base. They're saving. That's great. Um, what do we need to do? Well, we want it, Teoh. Lastly, when you click the heart button, as you can see here, it would increase the like, and when you click it off, it would decrease it. Now, maybe you're thinking what? This should probably be pretty easy, but what's actually funny? Maybe not funny. But the reality is this one's actually a little more hard. And here's the reason why Who owns a post and who owns a like, Well, a post has a total number of likes, right, but doesn't necessarily store who did it, who liked it. Now if I click users right, the user itself think of this. I'm a user of a nap. I've liked x amount of posts, so we need to store references to the posts that we've liked. OK, so in essence, what we need to dio is on each of these cells here. We need to know if that user has, like that specific poster knots, we're going to check fire by say, Hey, have I liked it? If I have liked it, let's go ahead and set it the heart to the full image. And if I haven't liked it, let's just keep it at the image as you can see right here. Also, when you click it, it's update the likes on the actual post object itself. And if you turn it off and he's actually decreased the likes on the post object. So how do we make the relationship? And this is very important. This is where you're gonna learn about firebase relationships. So pay careful attention because this is important in any other applications you want to build. So notice how on the posts we didn't actually store nested users like a user name and information about them in fire base. You want a flat in the data? It's called flattened, flattening, flat, tending the data and you want to keep things just as you see it here. So in the case of where a post has ex mental likes, but you need to know who liked it well, the user actually instead contains references to the likes. We store the name of the actual post and we just set a new, arbitrary bullying bear for true sing. Hey, this exists We just care if it exists or not. And so we maintain a reference to it with the key name. And that's how you make those relationships. We don't do nested data. We just track it just like you see it right here. And so if you're confused, it all just as we're going along. Positivity. Look at the data that we have here until you understand it. Goto firebase. Okay, when I want you to do is make sure you have these, uh, these Urals safety memorized firebase. Go ahead and click IOS. Quick start right here. Okay. And, uh, basically, what we want to do is, um, go to the guide on the left hand side. Make sure you go through these tutorials, OK? Do not forget about these tutorials. Your all right? Go through each one of them and read them. Important ones are understanding data. We've already done insulation set up. It talks about how to understand the data. You conflict between swift and objective. See here and it tells you how to understand data, how to flatten data on then tells talks about saving data. OK, uh, even has a red here saying Don't do this. Okay, um, and it's talking about don't, um, don't like nest and things like that retrieving data anyway, go through. This whole article redid all all of it. I command you read it. You need to learn how to learn how to learn. Okay, Um, I don't command you. I strongly encourage you in the nicest way possible. So there we go. Let's go ahead and finish this application. Um, So I talked about the theory of what we want to do. Let's let's actually put it into practice. So, um, let's think about the actual details now. So every time a cell is loaded here, we need first thing we want to do is we want to know if if we should show the full heart or if we should. So the empty heart, as you can see here if I've liked it, it should be full. If I haven't liked, it should be empty. And that should be handled in cell four row index path because it's gonna be called every time and actually should be handled in to configure cell of our post. Also click post cell. And right now, in our configure sale. Okay, um, we're assigning the image. We're assigning the description and the likes blah, blah, blah, blah. Let's go ahead and handle. Um, how to manage? Um, the showing, the right. The correct image. So how do we do that? Well, what we want to do is we want to get a reference to listen, Get a reference to the like. And what I'm saying is, you know how we've got in our fire base here. We've got, uh we don't worry about posts. Right now, we've got depth slopes, dash showcase slash users and then, ah, the specific user, right? And then slash so slash that specific user slash, um dislikes. This could have one or more likes, so slash life. So first thing we need to do is get a reference to this array of likes. We don't We haven't done that yet. Okay, So let's do that. Now. Let's get a reference, Teoh the likes and how do we do that? So let's go to our Well, actually, that is a good question. We don't even have a reference to our current user. Right so before we can even get likes, we've got to get a reference to our current user. Because if you remember just looking at this here, we have to get the specific user name right there. Now we have it right. The u i D. We know what it is. Eso Let's go ahead and create a reference to a fire based reference to go into your data service. And what we want to dio is create a variable here called bar Ref. Um, user current of type firebase. Okay. And, uh, what should it be? Well, we need to get rud, which we've already stored. So say let you I d equals N s user defaults. Remember? That's why we save this so we can have access to it to know who the current user is. So let's get it from the standard user defaults value for key. Remember our nifty constant here as string? I'm just gonna unwrap it, forcing rapid because I know it's there because we coated it and it's there on and then let user equals fire basis creative firebase reference, and it wants your l. And so remember what it's gonna be. It's gonna be our base. Euro. So slash. Um, Ural base the base. You are. Well, okay. And, uh, then what we want to do is create a new path. So we're gonna say base Terrell. So that gives us the home base, right? That based Uriel and then child by a pending path. Now, maybe you're wondering what's going on here because you've never seen this before. What's interesting is that this is actually this is really cool. This is actually the same okay as doing uh, if I took this off, it's the same as doing this. Ah, interesting. You could do it different ways. Yes, you can. The exact same thing, ones by function. And one's by actually hard coating it in there, doing it this way this time. And if you want to read what it says here, if it hasn documentation, get a firebase reference for the location at the specified relative path. And ah, that's it. Same thing as it did before. So really cool eso. Let's grab users. So home base slash users dot child by pending path you i d. So all we've always said is goto our firebase Deb slopes that showcased at firebase ioo dot com for its last users Forward slash. Whatever are you ideas? And of course, we've got users here that have their own You i ds. So it could be either one of these any one of these. So we're just grabbing the specific user that's all grabbing the specific user. That's our current user, and then let's return it return user. So whoever wants a current user, they just call this property here, and it's gonna grab the user if it exists. And of course, it's going to exist. So okay, we've got a user. We know that we have to be able to get a user in order Teoh to get the likes for that user . That makes sense. So let's go back to our post cell, okay? And right here, let's Ah, let's figure this out again Now. So, um, we need to create a reference for the likes. And, uh, let's go ahead and say, Let like breath equals firebase snow. Actually, database data service dot ds dot our new ref users current remember dot a child by a pending path, so it's gonna be the current user slash likes, right? Just make sure I'm pretty sure So, Deb, slope slash users slash the specific user slash likes That is the path. Okay, No big deal. I think that looks good. And so what do we want to do? We want to check and see if, um, if the Post exists, You know, I'm saying, like, the post, uh, that is currently here on the cell here, so it's gonna go through each one of these, and we want to say, hey, has the user like this one yet? That's all we're doing. So we're gonna check and see if this post this specific idea of this post remember how each post has an I d? Okay, each post over here, okay, has an idea, and we just want to see is hate. Does this user have I d have this idea in the likes. Well, in this case, whoever this is has one has one like and there's the post. That's already, And we're going to check and see if that specific key for the current post that we're doing self Arrgh index path is on. We're going to see if that if we have a like for that post, and how do we do that? Well, that's a good question. First off, um, we need to, uh, no actual post the key of the post. Do we have that anywhere? So go to your model, go to your post, and do we have it? What we do right here, This post key, private bar, post key. I don't think we're make We've made it publicly available. So let's do that now. Of our post key of type string, Remember how long time ago like, we're gonna need this? You're like, No, not that stupid. I was like, Well, wait and see. And here we are, post key. Um, OK, so we just want to return it. There we go. Return post key. And yeah, it's being stored right here. That's fine. Eso that's the Post s. So we actually to get a reference to that? So let's go back to our our post cell and one more child by pending path child by a pending path. And this is going to be post that post key That makes sense. Does that make sense to you what we're doing here? Exactly. So we're going to We're grabbing the current user slash the current likes, and we're grabbing the post p of this current post on the left hand side here. Whatever current post, Ron, which is this guy right here? Okay, we're grabbing the current key. The key of that post that we saved off right in the beginning. And we're saying, Hey, grab it. Grab a reference to that specific post. Now, if likes is empty, here's a couple of things you need to know. Uh, if likes, it likes doesn't exist. So, for instance, this user right here, it doesn't even have a like so he isn't like anything. This user here's like them. But maybe it's not the post we're looking for. It doesn't matter. The path is to a specific post. If it's not there, we're gonna have to deal with it being null and be able to do logic based on that. So this is how you do that. So we've got the current reference here. This is the reference K. And, you know, it was a lot of typing, but that's OK. It's just the way it is weird to say, like ref, observe, single event, okay of type. And we just want a simple one. Okay, of type of, uh dot value with block. Let's just get rid of this whole ugly block here, and we're gonna say with Block and we'll say, snapshot in and let's close it off there and put that there. Okay, so observe, single event of type. If we go back to our feud view controller, remember how we did something similar? Appear somewhere right here. We did observe event type dot value. And this is this is interesting. This is gonna happen. This is gonna be called many, many times. Anytime Data's change, it's gonna call this over and over and over again. But here it's different in our post. So we're saying observed, single event. This will only ever be called once, and we're saying dot value. So what's really happening here is we're saying, Hey, see if you can find this like, Okay, this for this post. Let's see if it exists. That's all. We're doing a single event. It's only being called once, okay, because we want to check and see if it exists. And if it exists, we want to either show the heart or not show the heart. Okay, so all we need to do now is Ah, do that check. So if let Andi, I'm just gonna create a variable. We're not really gonna use it, but it's gonna help. Help us check. So I'm gonna say it does not exist. That's the name of the variable again. It's just an arbitrary name. I gave it snapshot dot Value as and it's no. Okay. Okay. So what we're saying here is ah, snapshot that value. Remember how the dot value grabs us the data. Well, if this eggs, if this does not exist Okay, so what we're saying is, hey, if if it doesn't exist, then we need to We need to show the empty heart. So what we're saying is, hey, if there's no like in our likes array for the specific post, let's leave it empty because it doesn't exist, and it doesn't. And this Esnal in firebase, okay, data that does not exist is an N s no, very important. This is the firebase thing. Okay? I'm not just throwing random stuff here. Um, if there's no, here's that. Here's the rule. Write it down in firebase. If there's no data in dot value, if there's no veda data, if it does not exist. You will get an N s. No. And that is what you need to check against you, don't you? Don't check against Neil. You don't check against Knoll. You checked against N s? No. Okay, so if the data does not exist in value, it's gonna be N s. No. So if we got here, this means we have not liked this specific post. Okay? And again, Firebase takes a few times going around, wrap your brain around what's going on. But we just grabbed a reference to our likes or right on our on our current user. And we're just checking to see if that specific post that we're looking at is in that array . And if it is, it means we've liked it. OK, But in this case, we haven't so since we haven't was a self dot like, why not do it? I'd be all for it. We didn't know we didn't ibl it for the for the like button. Wow. So I be outlet week var. This is gonna be like image and this is your eye image view. There we go like image. So if it doesn't exist, let's try this again self that, like image, the image equals you image named and it's heart empty is what we called it. Okay, so if it doesn't exist, show the empty heart. Otherwise, let's show the full heart itself that, like image dot image equals you. I image image named heart full. That's what we named our images. So if it doesn't exist, show the empty heart if it does exist. If we have, like that, show the full heart. And so this is happening every single time a cell is configured and configure, sell and sell fero index path in our feed view control. Every time that's called on its cell, we're gonna grab the value only a single events. We don't want to keep calling this over and over. Just once, we want to check it and change the heart based on whether it exists or not. So that's easy enough Now. We also need to handle what happens when a user clicks the tap, but because then we need to either add it to the array or remove it from the array if it exists, and so we actually need to use the same exact reference here. So I think we're gonna need to re factor. It s so let's go ahead and do that. Now, I'm gonna copy this command, see? And, um, we'll go up here and let's create a numerical var like ref of type fire base. That's not working because I need to import fire base here. There we go. Okay. So, like Griffis Firebase? Uh, and we'll go ahead and in the note in the configure cell right here. After we have an actual post, we'll go ahead and say, um, like, breath equals. That's what we call it, right? Like ref. Yeah, like Griff equals this code that we had from before. And it's ah, use of local before its declaration. Did I do something wrong here? Let's take a look. Um, like Griff of type firebase Object. Uh, I spell it wrong. No, it looks right. I think excludes tripping out here. Use of local variable like graft before its deck clear. Oh, it Well, let's get rid of this hat. It's confused. Here we go. Let's see if that figure it's rivet for us. There we go. It's gone. It was referring to the one below instead of the one above. I don't know why anyway. So what we're saying here is ah, let's create a variable firebase variable of the like reference. We're just holding a reference to that to our likes array for whatever posts were currently on. So every time we configure the cell, it's gonna put in the that specific posts and grab a reference to it and then every single time down here, we're going. Teoh, we're going to check and see we're gonna grab the value of, if it exists, will change the heart, etcetera, etcetera. But we do need also handle what happens when it's tapped when the images actually tapped. And so remember how, before I said in your eye be outlets. You can't drag a tap gesture onto something that's repeatable. You can't do it on a on a collection of you sell. You can't do it on a table of you sell. You can't do it here from the storyboard like we did last time. We got to do it via code. So let's go into your post cell, and what we want to do is on awake from nib. Let's go ahead and add a tap gesture recognized her to our likes image so easy enough. Let we're just gonna call this tap equals you. I tap you. I tapped just to recognize er, Target is gonna be self in the and we're gonna call the function. It's gonna be called, like, tapped. Okay? And you gotta put that Colin at the end because it's gonna pass us an argument. It's gonna pass this ascender a tap gesture, Recognize her. So there's our tap. This is really easy. Tap dot Number of taps required equals one just said toe one tap in order for the stick it calls. You said it's like three to go tap tap tap before the functions called. Really cool. We're just gonna do one. And now let's go ahead and go to the like image and say, Add gesture. Record measure. Don't say at tap gesture just and gesture. Recognize? Er the tap juncture recognized her and other taps and swipes and stuff. They all inherit from the same class. And we're just gonna add the tap. Okay, One more thing. If you remember, controls by default don't have user interaction enabled. So let's say like image dot user interaction enabled equals True. So now what's gonna happen is whenever someone taps that it's gonna call a function called like tapped. So it's good and create that now, at the bottom of down here, funk like tapped, it's gonna passes an argument. You I tapped gesture. Recognize? Er, that's what's gonna pass us. And we need to do a similar thing as we did over here. Okay, so let's just copy this code, okay? And paste it right here. Although we need to do some different things down here than we did before in this case, we need a Of course, we do need to change the image. All right, So we'll just three things we need to do. We need to change the image that we're showing kind of like we did before, but also this time we need to either add one like to the actual post itself. We'll remove one like and then third, we need to add to our array of like saying, Hey, I've liked this post. So how do we add the So let's let's handle the image first. Of course. Um so that's easy enough. We've already done this, right? So if the like is tap So if does not exist. So if we've never liked it before, all we need to do a swap this out. So if we've never liked it before, we need to now like it. And so change it to heartful if we, um if we already have liked it and we tapped it, OK, now we need to make it empty, So we're just reversing it, Okay? Eso Yeah. How do we How do we add a like So let's go to our model and our postcode here that the, uh the model air is a great way to a great place to put the code that you want to manipulate your date. Remember how we don't do that from controllers? Data manipulation should be handled from the model layer. So how do we do that? Well, what? I want to dio his first make sure we've got a total amount of likes which we dio. Okay, Um and, uh, So what we want to do is maybe have a function we're gonna call dysfunction A just like so funk I just likes and, uh, we're say, add like, it's of type bully. And so, basically, if, um, um, if you put true in here. It's gonna add a like if you put false in here, it's gonna remove alike, that's all. So, for instance, if add like, that's true, Okay, we're going to say it likes equals. Light groups likes plus one. So if add likes if it's true, then let's add one toe likes otherwise, let's remove one so likes, equals, likes minus one. Okay, Now, um, so that's adjusting it there. But we also need Teoh save it in fire base. Right. So how do we do that? Um well, we need to grab a reference to the current post. Um and then we need to just change the value of the likes on it. So we aren't currently holding a reference to the Post. Let's do that. Now. Let's so create a, uh, private. We've are We're going to call this post ref of type fire base, and I'm gonna import firebase so I can actually use that. Okay, So, import firebase. So we're gonna hold a reference to the specific post. Remember? Again, I'm sorry to reiterate this, but it's important to understand. Deb, slopes that showcase slash posts slash the specific post. We need to get a reference to whatever the current post is. We have the key itself, but we need the actual fire base reference. We can change things on it. Okay, so down here in our initial Isar, let's go ahead and create that reference. So self dot underscore Post ref equals, um, data service dot yes dot Let's get the whole lists of posts and then child by a 10 a pending path and that's going to self itself. Does underscore post keep. We already have the key. So again, all we're doing is grabbing a reference to this very specific post, and it's yelling at me for some reason. What is it saying? Uh, child by pending path. Don't need to put an exclamation mark there. Let's see. Okay, it is building Looks good. Okay. Um okay. Very cool. I don't think I need that. I think it was just yelling at me for no reason. Yeah, it was yelling at me for no reason. I took off the explanation, so we just grabbed a reference to the post. The post that remember, remember, this is a class. This isn't swift class. That's holding data. So we also need to grab a reference to the firebase post just so we can work with it. So how do we save the new likes? So we've we've adjust the likes here in the class, right? OK, but how do we save it on the actual fire based database? So that's easy post ref dot child by pending path, So grab likes Okay, You see what I'm saying? We have the current post, right? We have post slash dash J. Why? Whatever this is now what we're doing is we're grabbing its child. The likes key. You were grabbing the likes key. Right Now it's 21 or whatever this post is, and we're just going to say, set value, we're gonna replace it. Set value replaces whatever you put in it, OK? And we're gonna say replace it with likes. So we're grabbing the current value of likes, and we are replacing it with the new likes right here. No big deal. Okay, so let's go now back to our post cell. So we've changed the image, but now we need to adjust the likes, right? So if it didn't exist before, we need to add it now. So now we can say, um self that post there we go grab the current post, and we're going to say dot Adjust likes. And we're gonna say true, We want to add a like to it. All right? And then here, miss itself That post adjust likes false. In this case, we want to remove that. Like so we've got the image changing. We're actually changing the data on fire base. And now all we need to do is associate that, like, with our personal user account, remember, we need to add it to our own likes. Alright, saying, Hey, we have liked this post. I just want to store it. So let's go ahead and do that Now. I'm gonna go into the, um well, lets you were already here, So how do we wanna handle that? Um, we want to grab that message. We want to store on our account. So I'm just thinking it through here, so let's go ahead and Well, actually, I should be pretty easy since we already have the, like reference. Right? So all we have to do, actually, since we're to have our like reference, See this right here? Okay. Well, we have to Dio is ah remember, if it doesn't exist or we have to do is set the value. So let's say, um, self that, like, ref that set value and said it the truth. Uh, that was easy. You guys were, like, waiting for something complex. So was I. I was trying to remember what I needed to dio. So how does that work? Remember, we have a, like reference already if it doesn't exist. Remember what I told you. If it doesn't exist? Okay, um, then when we never would create sets, when I say sent value, it's gonna create it. So this, like references referencing a specific post. And so the minute I call set value and I pass and true. Okay, it's just gonna do something like this. It's going to save this reference. So let's say let's pretend that this was the, uh this was the reference right here. This this it was user slash My user slash likes slash This. Now, let's say didn't exist. Well, this would be empty here, but the moment I sets, I say set value to true. This appears right here. Just as you see it. That would appear just like that. The moment I say set value to true. And then here. If let's say that we are removing the like, that's a simple assaying self dot like breath dot remove value and remove value actually gets deletes the entire the entire, uh, the entire key altogether. It doesn't like what I've done is command bu to build it, see if my hair goes away. Yeah, Dumb Exco beta Just being silly. So again, remove value if I go ahead and look at the documentation. If I click it, nothing will happen. Auto complete and help is having bugs and ex code. So anyway, uh, but I know from because I've done the research with fire base is removed. Value actually removes the entire reference value so it would actually delete the whole thing. It wouldn't just remove the true and extra move the key itself to. So I basically Yeah, let's see if all this is working now, uh, a little bit of code here, a little bit of code, a lot of explaining, which is actually very common. It's very typical and programming to think more, to talk more, to observe code more than you actually write code. That's interesting. So Okay, We do have a problem, and I'm guessing it's because we didn't. We forgot to tie up our outlet. Okay, The like image. Yeah, Neil. Yet it's Neil. So let's go back to our main storyboard and let's go to our see our post cell, right? Click it. And if you go over to, like, image, which is right there, it's now they're drag it over to your image. And let's try running this again. Open up fire base here. Okay, so it's saying I liked junk already. Um, I'm gonna get rid of all the likes on all of these users. Actually, let's do that. Now, I'm gonna get rid of these likes. I just hope, by the way, if you want to delete data without it yelling at you, confirming it, just hold down, shift and delete it instantly. I'm gonna get rid of these likes. I'm gonna get rid of these likes almost there, just getting into all the likes here because I want I want to make sure it's it's really working. Okay, I'm gonna I'm going Teoh, by the way, since our code isn't checking for dot value. Uh, since we're only observing a single event. This isn't updating instantly as I'm making those changes. You can do that. But I wouldn't recommend it because we only want those to be updated when we're scrolling the cells is going to stop it running again. Okay, so none of these users have likes now, which is okay. All right. Okay. Perfect. So that's cool. Um, And so if I click this like here, one of these things should update with likes. Let's see what happens. So this guy right here, this is me. I guess this Facebook log in and it put the specific post is J y with KJ. So this this one right here. So I did work. Let's see what happens if I unlike it. So it's currently right here under likes. That's unlike it. Boom. It deleted it, removed the whole thing. It's working. And look, the numbers here, updating to its knows how. Updated up here in the top with the new value. So one of these up here, Let's see, uh, one of these has one like this, If you can find it. One of my first acts. Okay. This should turn to to when I click this button There we go. And if I turn it off, it should go back down to one. So it definitely is working. That's really cool. So it looks like a rap is going strong. Is doing well doing really well. We got images. We got all kinds of things happening. Fire bases instantly being updated, which is super awesome. So, yeah, I think we're done. This is cool. You just built your own Facebook app, and it's pretty cool. Look at this. Look at this. Material design. Like you could post this on Google play, um, as an android app or on the apple app stores, IOS, app. And people would think that apple or Google built it. Apple doesn't really do material design, but, uh, but it looks professional. You too soon. I'm saying it's very professional on. And you could have this on the APP store, and someone would think that this is a professional application. So it wasn't that hard. We all did it here real time. So, um, again to soapbox if you don't wanna hear the soapbox. Well, Frito, tune me out right now, but build an app like this will help you get a job If you build an app like this, you're gonna impress many, many people, like think about it. You go into a job interview and say, Hey, I built this out there like this is really nice, like, Well, what did what did it do? Well, it actually talks to a server. It stores data on it, and it's It's instantaneous. And if you want to get real cool technical, you could say it's fact its socket base, which means up. It's continually changing instantaneously whenever changes are made using fire base. And not only that, it uploads images to a server, sends back the URL, and then I store those in our database. You can link the APS. You can like things. There's users you could make posts. The design is fantastic. You can upload images you're doing, like actually with a camera picker. Things like that. You're doing some really professional things, and you're gonna impress somebody if you tell them that. So I highly recommend that you explore some more on this app and ah, in next short video. After I'm gonna explain the exercises, some things that I want you to do to enhance the application notice We didn't, of course, mess with users and things like that. But you have all the tools you need to do that. So really cool stuff. So that's it for now. This is Mark Price
112. Exercise - Expanding Your Social Network App: Okay, everyone, mark pricier deficits dot com You've done a great job getting to this point. You finished the app. That's awesome. Let's talk about an exercise that will help expand your mind and help you learn some new things. So this is the app as it currently exists. As you know you can like you can like posts. You can add post things like that, and it's all global. So there's a few other things that I want you to try out. Okay, there's no solution for this. You got to do it on your own. Come to the community to the chat room to the forms and get the help you need to do this. Uh, I'll be there. Teachers days will be there. Other people will be there. So first off create a screen that makes the user enter a user name after they first create an account. So let's say when your first created account, rather than taking you to the logging you in and taking you to the fee the screen, have it. Take them to maybe a profile screen and they enter their user name and they enter, and then they can add a as a second task that can add a photo. OK, and if you don't want to do in this screen, maybe you can have a profile screen instead, like a settings gear. A little profile image somewhere on your APP may be here in the top right hand side, where the user can enter their own user name or they can enter at a photo. And, of course, with the photo, you can use the same type of code you use before using an image picker and then uploading it to the Image Shack, the same exact code that we did before. Except you'd be doing it with your profile photo and on fire Base. Instead of storing in under the posts section, you just store under the users section. So again you have all the tools that you need to do that. Just gotta implement the u I and slightly change some things around. So that's the first task is create ah, user name. Second task is create a profile pic. Third task is actually getting those t show on these posts after you've uploaded them all. The different post should show whatever users have have made the post and it should show their user names. Um, and you know how to do that as well. To our at least you have the videos. You could go back and look at him. Okay? And then lastly, uh, the for those who want to take this to the next level, give the user the ability to first off, edit or delete their posts. Okay, if you've created a post, you can edit or delete it. And in order to do that, you're gonna need to store that post under the user's account, just like we did with likes. Okay, you need to have an array of post that referenced the posts, but said like, Like I just said, just like the likes exactly like Except you're doing it for posts for a user. And then, uh, add the ability for the user to be able Teoh, um, or not the user. Have users be able to add comments. OK, eso a post. Gonna have comments. And if you think out the data model, you know, ah, comment belongs to a user and a comment references a post. So it's not a whole lot different than the likes. Write your comments just referenced the post. Of course, the Post needs to show all of the comments. Um and so that's that's the advanced feature. But do those things on, then change of the app. Maybe like, 30% change the theme and some of the styles and stuff change it up and then upload on the APP store. So that's the exercise. If you do that, you have my personal, Um what would you What would you call it? My personal, um, personal guarantee. Or rather, I would feel comfortable knowing I would feel comfortable saying that you're at a point where you could start applying for jobs. If you are able to build this app and do those extra things I just mentioned get all that in. I would say you're well in your excuse me. Well, on your way to being able to, um, to get a job and that's important or to build your own professional app to the APP, sir. So those are the things. That's what That's what I want you to dio and will help you along the way. So go ahead and get started and do something great with your not to say you were doing. They've been great for something great again. Or if you haven't done anything great. Now it's time I'm gonna hang up.
113. Creating an App Icon: Hey, what's up, everyone? Mark Pricier deaf soaps dot com. And today we're gonna build and okay. And so you're gonna need a few things to do that. I'm gonna pull it up here, you're gonna eat photo shop, and maybe you're thinking, Well, I don't want to buy it. Or maybe you're thinking I hate adobe. Well, I don't know why, for one, they're a fantastic company, but to is, um if you're really serious about building professional applications, okay, Especially for mobile app. So you need to know how to use photo shop. Okay. And adobes made it really easy to get Photoshopped as well as all their other products. You can use the creative cloud and pay a monthly subscription. It's 20 bucks a month for photo shop versus, you know, paying like $1000 for it. Before, in the past, when they didn't have subscriptions anyway, very well worth it. As a mobile developer, you're gonna run into lots of times when you need to be able to customize graphics and change things around, and you're not always gonna have a design around. So you got to start becoming like a hybrid developer. Okay? One who can write code one who could just fidget around a photo shop. You don't have to be an artist, but you know, you should know how to fidget around with it so you can get things done really quickly. All the best developers do that on developers who aren't so great who build the really ugly APS. They don't know how to use photo shop. So that's my opinion, anyway. So on this website here adobe dot com forward slash downloads dot html You can actually get a free trial and start using Photoshopped right away for free. So you can definitely do this. Do this video here, So go ahead and download it, posit video, install it, um, and then come back here. We'll go ahead and get going with it. And so again, you have Photoshopped 1999 a month and, uh, go. So what I want you to do is go to this website here. App icon template dot com, a fantastic website. This guy, what's his name? It's on here somewhere. You can learn more about him. He made he made a bunch of icon templates to make being able to produce app icons much more simple because when you're deployed to the APP store, the X Code and iTunes connect requires multiple sizes for app icons. You know what's gonna look like on the APP store? I need a big icon, a little icon, an icon for the phone icons for iPhone. Four Zyklon icons for iPhone six is all that stuff a lot of work, this template here walk to make your life a lot easier. And so that's what we're going to use. That's what I use professionally. So again, you're learning everything that I do professionally. And so you condone, get up and running quickly in a very professional way. How many times do you think we can say professional in a three minute period? Let's find out. Okay, let's go ahead and click this one here in the right hand side. IOS App Icon again. They have desktop APS watch app for the Apple Watch is Well, is android apps. We're gonna click Iowa's APP icon, and what I want you to do is just download. Okay, it's downloading now. We're not gonna sir, prescribe. This guy's got great stuff the great designer and you can donate if you feel great about his product here. I'm not advocating his website. I'm just using it. So it's downloading now and Ah, cool. Also, what while this is downloading, what I also want to do is tell you about the noun project. We've used it a few times throughout the course. They also have a Mac application. You can download and get icons, but ah, huge Siris of icons that you can use in your APS. And they're all under the creative Commons licensing. So if you want to read about creative Commons and what you can do with it, you can just look it up on Wikipedia. But this is where we're gonna get our icon from. So my icon and the one that I used for my Death Slopes logo I got from the noun project. Okay, it's all you got to dio is a search for the type of icon that you want our image. We're gonna say code in this case for this app. So we're gonna look for icons that have to do with coating. Okay. I want to close this adobe window here. You should already have the trial by now. Okay, there we go. and the one I'm looking for I'm going to scroll down is right here and all I'm gonna dio is I'm gonna download it. Okay? As a PNG, I've already logged in. Um, so I'm just going to join a Facebook because it should log me and automatically. Um oh, that's right. We're on incognito here. Let me just go ahead and put in my information here. There we go. Let's try this again. I searched for code. It's loading. There it is. Download PNG and ah, we're going to do free and give credit again. What's the difference? Purchase royalty free purchaser Royalty free icon for unlimited use on any project forever Your purchase Director Sports the creator talent for free. Download it for free. Requires giving credit to the creator in your project and cannot be used without giving credit. Okay, so make sure in your app that you give credit if you use these icons if you're not gonna buy them, so I'm gonna free and give credit. And so we're giving credit to a Ziese that, uh, this is his icon, and he made it. And so there's my credit attribution. And so that's downloaded. Now as well as the template there. So if I click this and go to show and find her, I should see my icon pop up right here, which it is. I'm gonna drag it on the desktop, and we're gonna go ahead and drag this zip file that we got here for the template on the desktop. I'm gonna double click it to unzip it. So there we go. We've got our folder here. And if I open it up, here's our app. Icon template. Okay, so go ahead and click. The one that says dot PSD We're gonna open it up here. It's gonna load photo shop, Okay? It's still loading, and we're gonna keep the layers. All right, I'm gonna do command age to turn off the grid Command H turns agreed. On and off. It's a little bit zoomed out, so I'm gonna press Z and click the zoom in. I've memorized a lot of these Photoshopped commands cause I've been using it for so long now. Um, okay. And so the idea is gives your previous of what your icons gonna look on all different screen sizes, which is really cool eso in order to edit this icon that they have here on the right hand side. You see this thing that says edit me and save? Okay, right there. So just go ahead and double click that keep the layers. And there it is whether whatever we edit here is what's going to show up on her app icon. So we've got this cool icon here that we created or that we downloaded, and we want it to be over here. And so what I'm gonna do is on this right hand side over here where it says temps where it says grid. Okay, this grid right here, um what we're gonna dio is actually closed this folder here, see this folder right here. Turn off the grid. Close this folder. Don't care about the guides, and we're not gonna keep this year. And what we're gonna do is create a new layers on the bottom right hand side. Click this great new layer. This is just gonna be our background. Okay, So press the letter g for the paint bucket or in the left hand side. Over here. You see this pain bucket? Okay, I'm going to switch my colors here. This is your primary color, which shows the main clerk that you're using. I'm gonna switch it toe white so I just click it and open it up and drag it to the top left and there's white and I'm gonna make sure my pain buckets selected. And I'm gonna go over here in the right hand side making sure that my layers selected here this empty layer I just created I'm gonna click now. We've got a white background and we don't need this guy here anymore. We didn't want it in the first place, so I'm gonna hide that they're with the little eyeball symbol, and that's great. So now what I'm gonna do is I'm gonna drag this this icon here into my photo shop. Like so. Okay, And looks good. Looks really nice, actually. I'm going to right click the layer on the right hand side over here. This is now. Okay, I'm right. Click it and hit Rast. Arise Layer. Right now I can't really edit it. It's just kind of floating. There is what's called a smart object. We want to rast arise it So it's edible. That's all it means. OK, now what I want to do is get rid of this text. I don't want his name on my app icon. That would look silly. So I'm gonna press the letter M or if you look on the left hand side over here, it's this little, uh, this little marquis M marquee tool. So it's a square. And while the layer is selected and when I say the layer the one of our new image I'm gonna just put a square around the actual words and pressed the delete key. So that is now gone. And, uh, I'm also gonna center this icon here in the middle of the screen. So go ahead and do this type press command, plus a on the keyboard with the marquee tool selected command A. I could also have just selected the whole thing clicked and dragged. Okay. Either one works to command a while. The Marquis tools like it's going to select everything. Now what you want to do is go into select mode, suppress the V key on your keyboard or on the left hand side here this little icon with the arrow This allows us to center things. So the move tool. So if you look up here on the top. No, we can now center this icon. So I'm gonna center it vertically or horizontally, and I'm also gonna center it vertically, knows how to move down. So our icon is exactly in the center of the screen. Now, the last thing we need to dio is just make it a nice red color to match our branding. You can do whatever you want for your I come in your branding, so I'm going to switch back to the red color over here. The one I'm using is F 4511 e. Okay, that's the one we're using here. And what I'm gonna do is go up here to the top and goto layer lair style color overlay. And, uh, you're like, Oh, it worked Automatic. Well, that's not the right red. Okay, So what I want you to do is make sure color overlay selected here, click the color box and with the little dropper tool that you see right here, see, clip your red. And now it is the correct red color, and that's it. That's the icon a member like, Well, it's kind of boring. Well, it's actually gonna look real nice ones is on the phone. Rule of thumb is the more simple and icon is, the more appealing it could be. The users people want to see things that are quick in appealing things that are too noisy are very distracting to the I. So go ahead and do command Plus s to save this file to get a little loading spinner there might take a minute because this is a big file. So what it's doing is it's updating all the layers in our other template that we've created . Okay. And by the way, your windows may look different than mine. I have a different Photoshopped version than U. S. Oh, I really can't help you out with that. You have to play around with it. If the versions a little bit different here. Mine right here, my little tabs air right here on the left and right hand side. So whenever you create a new window, that's what's gonna open. So what you want to do now is we got the icon. Go ahead and click the X on this file that I conduct PSB and look. It's now updated and our other file here and it looks pretty good. Look how it looks on the iPhone two x three x one X iPad. We got a bunch of icons here. It's actually looking really nice. Very nice. Um, okay, cool deal So And looks really good on the iPhone for you can see right there in the bottom . It looks it looks cool. This is exactly how I want my app icon to look so great. Now we've got it looking exactly as we want using some quick photo shop magic. And you've now learned a little bit of Photoshopped magic yourself. So what we want to dio is I'm going to save this file first. And what we want to do is export all of these things here into APP icon. So we're gonna go to window at the top and we're gonna go to actions to show actions. And these actions here are basically scripts that are going to run that are going to perform an operation for you in photo shop. And it's gonna export a bunch of these files here. So the one that we want has already selected. I have to have open this before your should just probably have one here and this app icon template. Okay. And there's two exports. You can do rounded corners right here or square corners. Now, you don't want to ever do rounded corners. You're like, well, app surrounded. Well, the X Code and iTunes are going to do that for you automatically. Okay. So make sure you do square. Otherwise it could mess things up. So make sure you have square selected, okay? And what we're gonna dio is ah, right here with this one being selected. Okay. With this one being selected right here, there's a little play button, all right? And what I want you to dio is just, uh, click that play bun. So make sure square Icon is selected and click play. Okay? This thing's gonna pop up here. It's gonna think for a second, and then just click the save button is gonna ask you for a folders. So put it on the desktop credit new folder for this. We're gonna call this folder icons and we're gonna do is instead of calling it this weird name, we're just gonna call icon and then click safe, and you're going to see why we used this tool. So Let's find our folder here. Icons. Okay, if I open this folder, here's an app icon squared. Look at all the icons that created. Would you have wanted to export those all by yourself and all the different sizes? The answer is no, no, no, no. So there's our icon. Looks really good, has all the sizes we need. So go ahead and close out a photo shop. If he asked you to say, if you can save it, let's find and go find the X code project that you want to upload the icons to. In my case, we're gonna do a deaf slopes showcase app which you should have built by now, and if not, use your own app. But what I want you to do is click the Assets folder here. Okay. Excuse me. Not the assets holder. What I want you to dio is go over here to the top icon, this blue icon here and you see right here where it says app, icons, source, and it's his app icon. Okay, click this little air on the right hand side. You got it. I just want to show you that you could do it through there. You can also selected through the assets holder. Like I was explaining the first time. Okay. And see how you have your ask your screenshots and assets here. Click the app icon. It's the same thing, so you can do it both ways. Now go into your folder and press command A to select the mall. You can click and drag command A to select them on. All you gotta do is drag them over right here where you see the plus signs. Okay. And, uh, just let go. Very cool. Right now. You know, it's how some of these were missing. The ones that are missing are optional. And the, uh so yeah, these are optional. And if you ever want Adam later, you can. It'll it'll tell you the sizes that you need, So Okay, that's looking great. Cool. And that's really all. You have to dio We can go ahead and just run this project and you're going to see that we now have an app icon on the phone. Really cool stuff and voter shop wasn't that hard to use. It was, uh it was pretty simple. And there we go. The app is loaded Let's go ahead and hide the APP. Go to the screen. So command shift H is the home key. And there's our icon. It's looking pretty cool. Do you think? I think so? So that's it. That's app. Icons. Not too big of a deal. Definitely use Photoshopped. Definitely use that I contemplate if you want to save time. Now, with that being said, there are many free tools that you can use that you don't have to pay for out on the Internet like gimp. And, uh, there's a whole bunch of others. There's even online ones. I don't even know. I don't use them. Photo shop is just a powerful tool. So it helps me work very quickly as a developer, you know, think about this like you're working on a project, right? What happens if you don't have a designer and you've gotta adjust something? Well, how are you gonna do that? You're gonna pay someone to do that? Uh, you could probably learn a few small Photoshopped techniques and make a lot of progress on your So that's it. This is designing an app icon and smart price of death soaps dot com. Let's continue forward
114. Creating another app icon in Photoshop: Hey, what's up, everyone? Mark Christ with Deb slopes dot com. And today we're gonna learn how to build an APP icon for IOS. Hopefully within 10 minutes, all from scratch. And it's gonna be real time straight from my brain so you can see how my creative processes work. We're gonna use a thing I like to call borrowing themes and styles and our work from other people and making it look like our own in our own customized way without having any design skills. So go ahead and label that patent it whatever you want. Let's go ahead and get started. So what we're gonna do first is I need to make sure that we have a photo shop on the computer. If you don't go get a photo shop trial Photoshopped CC 2015 you can get a trial for it or paid 10 bucks a month. Very valuable tool. What I'm gonna do here is go onto Google Chrome and we're going to search for a Iowa template crater for photo shop. So IOS app icon, template PSD That's what I'm gonna type in and click the top link here. This is the one that we want. They've got android IOS, etcetera. We're gonna pick IOS Very nice. And I'm gonna click Download after is done downloading. I'm gonna click visit file to unzip it. And I'm just gonna drag mine here right onto the desktop. Okay? And there it is. So don't go ahead and double click the dot psd file. It'll load Photoshopped for you. So here's the icon template. It even shows you what it looks like on a phone, which is really cool. And this is their default template thing here. So what, you want to dio? Okay, what you want to do is double click this icon here on the right hand side in your layers section that says edit me and save. Okay, so double click that not the letters, the actual image itself. Okay. And that's gonna load up this dot psb file, which is where we're gonna do our editing. And they've got some cool little presets here that you can play around with radiance and things like that. If you want to. Okay, They also grids on here, and we're not gonna mess around with any of that stuff. We're gonna build our own. And so let's say we have an app. What's a good idea? Guitar? We have a nap about playing guitar. Okay. And you could do the exact same thing that I'm doing here. So but for your theme. So what we want to Dio is first get a nice background that we like. So I'm going to do that now. I'm gonna go onto Google, and I'm just gonna type in cool, radiant backgrounds and click images and just pick one that you like That might look good for an app icon. I kind of like this one right here, view image to make it biggest possible. Looks good to me. So I'm gonna drag it here into my desktop just so I can have it. What I'm gonna dio is this dragon onto my canvas. Now it's a little bit small, but I'm not too concerned, because, um, it's just the background and we're gonna play around with it a little bit anyway, so looks good to me, and you can put it wherever you want. I'm gonna put mine, exit the bottom here, and I'm gonna turn off the radiant eyeball there and I'm gonna turn off the grid. I don't care about that. I'm gonna right click the layer and go to Rast Arise Layer. And then I'm gonna present V to go into move tools put up here at the top left and command t to go into transform or control t on the PC, and I'm gonna hold down shift. And I'm just gonna make it big so that it feels the whole thing. Now what I'm gonna dio is present v okay, And then, ah, command A to select the whole great here, and I'm gonna click this icon up here, Align horizontal centers, okay. And align. Vertical center is just to put it there right in the middle. So now we've got this cool little icon, which is good enough for me for right now. And I don't like these grid, so I'm gonna do command plus h to turn them off. Here we go. And that's OK with me. So that looks good. It is a little pixelated. So just for fun, we're gonna blurt out a little bit. So I'm going to go to filter, Blur and Ghazi and blur and look at that. Smoothed it out nicely for us. Which is just what I want. Now, this icon is not really working for me here at the top. You can turn it on and off. So I'm gonna turn that off right now and let's go find our guitar. Okay, let's go find our guitar. So I'm gonna go to my favorite website, the now on a project again. You need to give credit if you use these icons professionally, okay? Or you can purchase them. I believe for 1 99 each, which is a great deal. And I'm going to say guitar, and it's gonna show me a bunch of guitars, which is pretty darn cool. So I kind of want one. That's just easy and flat Now the pixel one's kind of cool. Let's see. Here, let's find one that we think really speaks to us. Mm. Guitar. Some of these. I just don't really care for here. Let's see. Uh, here's the one. This is the one. Okay, So what I'm gonna do is command shift four on the Mac. If you're on PC, you can click, download and download it, and I'm just gonna drag over this guitar here and let's go ahead and drag it onto our canvas here like, so I'm gonna make it bigger. Okay, I'm going to, right. Click that layer and go to Rast. Arise layer. Okay. And it just needs to be above to get above the background layer here. And I'm gonna press W to go to my want tool. This is not the one tool. So I'm gonna right click appear in the top left and go to Magic Wand Tool. And I'm going to select the white space there and I'm going to get rid of it. Now. We got this cool guitar floating here and notice we saw that ex im gonna press the e tool for eraser and the right bracket to make it bigger. And I'm just gonna erase that little thing right there. So now we've got this cool looking guitar thing. Although it does have a stroke which I'm not completely happy about. I want to try something. I'm going to duplicate this layer by dragging it down here onto the new layers. I'm gonna turn off one layer and what I want to do now is I'm going to press W to select the outside, OK, but I want to select the entire inside of this guitar, Not the outside. If you notice if I pressed the b brush, it's in the background Command z to undo that. So I want to select everything that's in the guitar. So I'm gonna do command shift I to select the inverse of what was just selected. And with the B tool selected and picked your favorite color, I'm gonna press the right bracket to make it big. And I'm just gonna make this assault assault color and see what it looks like. And I don't really like that. Maybe I dio maybe I don't Mm. You know, this is probably good for right now. Let's go ahead and put this together some more here. So let's say we want a nice red guitar. Okay? What? Aiken Dio is pressed the g g button on the keyboard, right? Click this and go to paint bucket. And I'm just gonna select inside the guitar. In fact, I'm gonna duplicate the guitar one more time. Okay? So I don't have to ruin the original here, and I'm going to just click in here and make it red, okay? And then I'm going to select a darker red like this, and I'm gonna click the border here and see what that looks like. Okay, that looks okay. I'm gonna click these little black icons in here just to just for good measure. Okay, so that's looking cool. And yeah, I kind of like it. Let's, uh let's say this and I just press command as to save. If we go back to our other app icon template, it'll show us what the icon looks like. And this is what it looks like here. This is what it looks like here. It's not the greatest. Um, I think our guitar, since our backgrounds kind of a Grady in our guitar should probably kind of a Grady into. And the red kind of looks like a brown. So let's fix that as well, too. But I don't want to. Grady and the edges. I'm curious if we could just Grady int the inside here. So what? I'm gonna dio express the w tool and selected the inside. Then I'm gonna do command see in command V to paste that into a new layer. As you can see, there's a layer right here and then on this layer what I'm gonna do is go to layer lairs style, and we're gonna go to Grady int overlay, okay? And I'm going to click the Grady int here, and I'm gonna pick some different reds. Okay, I'm gonna pick. I'm gonna double click this darker red. And I'm just gonna move it. Maybe over here, Cam. Yeah, that's OK. And I'm gonna actually click, OK? And do command t on this inner one, and I'm gonna see if I can make it bigger. In fact, it looks kind of cool itself. Let's actually Oh, there we go. That's what I was looking for. So if you know what I just did I did command t on that inner layer that we that we created , and then I just kind of put it here, um, floating on the blue, and I think it looks a lot better. I'm gonna command s to save it. And yeah, look at that. We got a cool rock guitar. We could try one more thing. Just Teoh just to see if we aren't completely sure we can put a drop shadow on it here. And so I'm gonna go to Layer. Actually, don't even need to do that already. has styling. Just double click the effects on the right hand side here with the eyeball and let's go ahead and do a drop shadow. Okay, Kind of give it a slight three d looking effect, like so A little bit bigger there. And I'm just adjusting the size looks kind of cool to me. The edges here are a little bit choppy because of the w tool. So what I can do is go to my blur tool, this little eyedropper or this little teardrop looking thing here. Okay. And I can click that and what I can do is pressing the right bracket to make it bigger. Just on the red outline here, I could just drag to kind of soften it up a little bit just to make it a little bit softer . So those jagged lines just go away because I don't like the jagged lines right here, Mocha command as to save it. And look at that. We've got a pretty cool looking guitar icon. If you could see here, I can zoom in. This is what it would look like on the APP store. It's not too bad it's not. You know, it's nothing crazy professional, but we don't have any design skills. We suck it design. And we just made something that looks pretty cool. And so what I'm gonna do now, save this again. Command s Let's go back to my app icon template here. And as you can see, it's looking Looks good. Okay, so now we want to export it so we can actually use it in our application. So what I'm gonna dio is go to window and turn on actions. Okay? Drag this actions panel down and what we're looking to do is load an action. And you can do that. No, not that way. And I lost my actions panel. Don't do that. Click these three little buttons here. Okay? And what we want to dio is ah, load actions. And then go to your folder that you downloaded the app icon template and click the 30.18 file. Okay, so I've just loaded in action. And if you can see here, we've got this new app icon Template action A square icon around it. Icon, When you're exporting for IOS, you don't want the rounded ones. Okay? Don't show again. We don't want the round ones We just want the square ones. All right. So what you want to dio? Because apple around those free automatically click the square icon OK, and then click the play button. And that's gonna ask you for a folder to put these things, which we will do once it's done thinking Okay, I m click safe. Don't even need to worry about any of the other settings. Make a new folder on your desktop here. We'll call this new folder Icons Okay and give it a new name. Let's just call it Icon, Click Save. It's going to run through its export process and put it in all the difference file sizes that Apple actually requires. Brilliant. So if I go into my Icons folder now, you can now see all the icons perfectly exported. And here's the iTunes version. You know, when it's this big, it's a little bit pixelated. We could have blurred it some more, done some other things, and here's your APP icon, all the different sizes that you need. You know, if you look at it, how it's actually gonna look on a phone like this, we summit. If we zoom in, it looks so it looks okay. No, it's got high contrast. Which APP icon should have? It's It's simple, you know, Here's your cool guitar app. So that's it. Sorry it went over 10 minutes. I really tried, but that's how you create an icon from with a few simple tips and tricks, without having to manually personally draw out the guitar, draw the outlines and things like that. This is called hacking art, and that's very useful for being productive. When you don't have any design skills, that's it. Mark Prices dev slopes dot com.
115. Working with @1x @2x & @3x images: Hey, what's up, everyone? Mark Price here at def slopes dot com. And today I'm going to unravel the mysteries of working with multiple screen sizes and images on IOS that just working with one x two x and three X images, and I'm gonna talk about some of the problems you may encounter. So let's go ahead and get started. First things first. We're just gonna create a project and show you the problem here. So I'm gonna go to X code. There we go. I might create a new project. Single view application is what we're looking for. I'll make this bigger here. Let's cover most of the screen and let's call this No, Ailey s sing. Okay. Everything else here is fine. Next one put this on my desktop and what we're gonna do is we're gonna drag it a very large image onto the screen, and we're gonna talk about what Alias ing is, and you've probably seen it. And this is a prop. Someone explain the problem first. So if we go to our main story board here, you've got your view controller, and what we'll do is we'll put image you on there, but first, I want to show you the image that we have. We've got this watch image over here. I'm gonna right click and go to get info. And if I click more info right here, the dimensions of this are 2877 by 5114. Very, very large image. Okay. And maybe you got it off the Internet. Maybe your designer made it free. And maybe this is the size exported it Maybe you maybe you accidentally exported at this size. But this is a very large image, bigger than any screen dimension, really, that you never use it on. And so what? What commonly happens when you've probably done is you've got that really cool image that you want to use. And so you go over to your assets over here, you create the plot, click the plus button and you go to new image set. And you just going to call this one watch percenter to rename it, you call it watch. And then maybe you just drag it over here into the one x this image, like so and then you go over the main story board here and you actually put your image You on here. So let's go to our image. You will drag it here in the middle. I'm gonna click the ruler up here and change the with maybe the 200 by 200 for now. And then I'll change it here in a second. Once we've got the image on there, I'm gonna click this little icon here. Attributes, Inspector, we're gonna change the image toe watch. Okay? It's a little bit squashed, taking a long time low because it's a very big image here. And by the way, you also may experience slow application performance by using images like this. So if you have a nap that's running slow and you're using really big images, that's probably the reason why it's what we're gonna do is change the mode to aspect fit, okay? And I'm just gonna make it a little bit bigger. So let's say we wanted this inner app right here in the center. I'm gonna go ahead and give it a fix with and height here in the auto layout constraints at two constraints. And then I'm going to set center horizontally in container and vertically in container. Okay, So what we're gonna do is we're gonna run this on an iPhone five, which has a very small screen compared toa the image here. So I'm gonna go to my simulator here, and we're gonna go to our iPhone five and we're gonna run the at. So our APP has loaded and make sure that your screen is on the the normal size for the for the simulator. Don't press command to or command three to make it smaller. Make it is Bigas It's supposed to be. And if you notice here, okay, the edges of this watch have jacketed lines. Okay. Very jagged lines around the edges. This is called a leasing. And it happens when you've got a very large image and it scales down. Okay, now Photoshopped image editing programs. They're built to scale down images. So you don't have alias ing programs like X Code in Iowa's. They're not really built in to do that. At least they don't do it great. And so we don't want jagged. INGE's that's ugly, for one doesn't look great on the phone. It would look even worse if you had on the phone and not the simulator to is it's gonna make your app run really slow having this massive image on this small little screen that's being shrunk down. OK, so let's talk about fixing this year. I'm gonna take a screenshot here so we can compare it later. So I'm gonna say, command s to save that screenshot to the desktop. And so let's command que to quit the simulator. And what I'm gonna do now is I'll go ahead and minimize X code here cause I'm gonna take this watch image, all right? And what we're gonna do is we're gonna edit it and export it as we need to. But first things first. What size do we need to make our images? You've probably wondered that yourself a lot. Don't make it 50 by 50 pixels. 101 100. What do I do? And there are many, many ways to do this, and a lot of you probably are already doing some different things that aren't the way that I'm doing it and it's fine. So what? We're going to do what we're gonna dio because we're gonna go onto the Internet and I'm going to go to Let's see here. This guy Okay. By the way, if you want this image and to give credit here, go to design Cray designs crazed dot org's slash quality Dash three dash flat dash icons. And I'm using the icon from this icon pack right here. Okay, that's where I got that image from. All right, So what you want to do is go onto Google and do a search for Iowa's screenshot sizes. Okay? And you can click this top one right here. ITunes, connect APP, properties. And this is the official apple documentation on the different sizes of screens you're gonna need for your app gives you those dimensions here. So I'm scrolling down here and here you can find the phones 3.5 inch. That's the old iPhone four. And for s four inches are the iPhone five and five s 4.7 is the iPhone six and six s and 5.5 is the iPhone six plus. Okay, So what you want to dio is with your images with all of your images for your app. So when you want to design images that apply to all sizes, you want to build to the largest size first, so I'm not talking about iPad in this app. If you're building an iPad up, you could do similar things. Although iPad has a similar resolution, you just have to support the biggest resolution here. OK, but for these different phone screens, what we want to do is we want to support the iPhone six plus that's currently the largest screen phone device that they have. And if they make a bigger phone, I'm gonna cry, because that's just ridiculous. This thing is huge. I have one and eso what we want to do is build to the biggest resolution here. Let me zoom in here So it's not blinding you. Okay, so it's 2228 by 12 42. So again, there's lots of ways of doing this. There's programs that have different screenshots screen sizes for iPhone that could do this for you automatically. We're gonna do it in photo shop, so let's go ahead and open photo shop, and we want to create a new canvas that's that big. So I'm gonna go file new and we want the with to be well, actually want the 12 42 we want 12. 42 by 2 to 0 and click. OK, so this is your iPhone six plus Okay, Pretty large. Right? So let's go and drag this watch image onto here. Look how big it is. It still feels the whole entire screen. Okay? Way too big. So this is iPhone six plus and we want to support all of the screen resolutions, but notice here on Photoshopped, there's no alias ing. The image looks smooth and clean on all the edges, and that's exactly what we want. So what I'm gonna do is I'm gonna do command t to transform this down to a size that's gonna look good on an iPhone six plus and relatively all the screen sizes. So let's say we want watch about this size. We want it in the center. So I'm gonna command a to select all president to go into my selection mode and then click this align vertical on the line horizontal right there to put it in the center. Okay, so we've got a great looking watch. We know that this is the iPhone six plus, so we know that we're actually building for the largest screen size, which is great. And if you don't know this iPhone six plus is at three X. Okay, that's the name of the images for the third triple resolution. Okay. And what we're gonna do is turn off the background here, click the eyeball here, and I'm gonna go to image and then trim because we just want the watch. We know it's the right size now, so there's our watch. This is the size for iPhone six. Plus. Now, how do we get it at one x and two X for our smaller devices? I'm gonna go to file export export as. And what we're gonna dio is we're gonna create some size classes, some image sizes over here on the left hand side. So right now, it's just exporting one copy at one X. And in this case, one X is the full size meaning the original size. Okay, don't confuse. It's not one x for iPhone works. The smallest image. Size one X here is saying, Hey, this is the full size 100%. So I'm gonna click the plus sign here, okay? And so if this is full size, we also need to do a, um, half size, right? So 0.5 x is what we want to do here. Okay? And sodium has the size here, and also it lets us give it a Suffolk's, which is really cool. So now I can actually change the Suffolk's. And just for the sake of iPhone, I can say at two X and then here on the one x version, I could say at three X Remember, don't be confused. The one X means it's full size here in a photo shop, but in in on IOS, it needs to stay at three, explaining it's the largest size 0.5 x obviously is half of this, So I would say at two X and then it doesn't have to be perfect. Um, you condone change different settings here for how big it needs to be. It doesn't have to be pixel perfect, like half and half and half, but we're gonna say 20.25 x and this is gonna be our at one X. Okay, So the largest size here, medium size here, smallest size here. Okay, because we want to support the different screen sizes on IOS, so there's no alias. Sing also, you don't want toe. One thing you also don't want to dio in the opposite thing of alias thing is take a small image and then stretch it out for bigger devices that'll make it look blurry and ugly. Okay, so what I'm doing right here is the best way to do it. Biggest image down. So now that we've got this size is set, I'm gonna click export all. And here in my desktop I'm gonna make a new folder and listens. Call this. We're gonna call this icons just for now, and I'm gonna click Export. All right, so we've got untitled Dash one. That's I didn't say the name of the file. It's fine. So untitled. Dash 12 x and three X. And if we right click and go to get info on the one X, it's 122 pixels by 2 17 If we go to the three X, it should be the original size here. Or 4 88 by 8 68 Not the original size of the image that we originally had, but the size that we put on our iPhone six plus canvas, which is perfect. So we've got three images here now what? We're gonna dio minimize Photoshopped. I'm gonna open up X code again, And this time I'm going assets and I click this watch and delete it. That's just the wrong size. And I'm gonna open my icons folder And now you can just drag one x into one x two x into two x and three x into three x, but you didn't know I was gonna say that. Okay, so now that we've got the images in there, I'm gonna go back to my story. Ward. Look, it's still selected, which looks great. Now you'll notice on the canvas here the image may look slightly blurry, but that's okay because it's just the campus is not what's actually showing up on the screen here. And I'm gonna do command shift. K declaim my project Sometimes images. Unless you clean your project, they the old images might persist onto the simulator. I've just had that happened a few times. So now that we've got the images selected, let's go ahead and run the iPhone five again, and there we go. And look at this. There's no alias ing. It's nice and smooth as you can see, and I'm going to save this image here so we can compare them here. I'm gonna call this. We'll just call us five dash to call the old one 5-1 Okay. And I'm gonna pull these up here and do a comparison. Okay? So what I did was I just pulled up the screen shots from before and after. So on the left hand side. As you can see, there's lots of jagged lines around this edge. This is by using that big, huge image and having iPhone Skela down when we use the two X And when we use the one x two x and three x images and scaled them down knows how it's all smooth. It looks it looks really good. OK, And if you're thinking maybe the edges on here look a little blurry. Well, they're only looking a little blurry because I'm zoomed in here on Photoshop. Extra zoomed in so you can see the difference. But it looks good. It looks real good. So now you can see the before and after difference. What I want to do now is show you that it also looks great on a larger screen size, so I'm gonna open up X code and stop the simulator. And this time change it to iPhone six s plus the big daddy. And there it is. It looks fantastic. OK, if we had just used the one X, it would look really blurry. And to show you okay to show you what it would look like. So you can know what Not to dio. I'm gonna delete the two X and the three X, and I'm going to rebuild it. And you should notice that it is very blurry now on her iPhone six plus. Look at that. So rules of thumb okay, create your image at the largest size and then size it. Meaning, Let's back up. Rule number one first rule of iPhone Development Club is you create a canvas whatever program you used for the largest size that you're supporting. So in our case, iPhone six plus Rule two. As you grab your image, place it on that canvas. So it looks about the size that you want. All right. And then rule three. This export that largest image size at one X and two x sizes in addition to the original three excise and then bring those into the program so it works on all the different screen densities screen resolutions. So that's how you do it pretty cool. And just that you're not left with the wrong way to do it. I'll put these back in here to X and three X, and it looks great. So that's how you do it, kids. Mark Price here Deb slopes dot com See you later.
116. Paid Apple Developer Account: Hey, what's up, everyone? Mark pricier slopes dot com Today we're gonna talk about getting the APP store ready for, so go ahead and go to your account developers apple dot com Now, you've probably already signed up for this. Go to member center and ah, log in here and this is what we want. Okay, so here's the member center. Right now. Just because you're part of the member center doesn't mean that you can actually create iPhone naps and on the APP store. In order to do that, you need to sign up as a registered apple developer on the on the app store. And so, um, you gotta pay $99 to do. It's $99 a year. This allows you, Teoh professionally. Really? Saps of the absolute When you wanna. When the time comes when you want to upload nap, you better, uh, gear wall already and get ready to pay Apple 100 bucks because it's $100 a year if you want to release APS. So, uh, here it is right here. ITunes connect. This is what we're looking for. Um, and, uh, in case in case, that's not appearing on your screen. Um, let's type in registered Apple developer. Okay? And let's see if there we go choosing a membership. See what happens when we go to this website here. It's never been easier to develop for all platforms. Bubble block, compare memberships. Okay, here we go. $99 per year. Membership. Um OK, so that's it. Go to this page right here. You can learn about enrollment, and it'll take you. We need to go. Go ahead and go through the process of signing up as an apple developer paid apple developer. Okay. You gotta pay the $99. Start your enrolment. Right here. So here's the eurail developer dot apple dot com slash programmes slash enroll Start your enrollment there give you everything that you need. Okay. Now you can enroll as individual or role as an organization now an individual, depending on what country you live in. The United States. You got to use your social security number. You can also enroll is organization. But just know that if you do that, you've got to get a Dunnes and Bradstreet number. It takes some time. It could take a couple weeks to get this whole process done. So just so you know, you could do either or, um and so go and do that posit video until you're ready to go until you're officially registered and then come on back. Welcome back. You're like I never went anywhere. Well, I didn't go anywhere, but hopefully you did. So Okay. So back to our developing a apple dot com Once your sign that we should see this iTunes connect your you can click it, and it's gonna take you to your iTunes connect portal where you can actually manage your APS. Okay. Developer to apple dot com That that free membership that allows you to develop is different than being able to go to iTunes connect and do a paid, um, what's really sign in? Okay, so go to iTunes, connect at apple dot com. That's where you're gonna manage your applications. You sign in there and then, uh, then you're good to go. You have everything you need here. So here we go, loading up. There we go. It wants me to review some agreements. I haven't updated my agreements yet. They've made some changes to their legal jargon and all that stuff. Okay, so Here's what the porter looks like. Um, this is cool. IOS nine is not out yet at the time this video, but it allows you to invite testers even to your IOS nine beta apse, which is really cool. So cool stuff. Here's your APS analytics. You know, uh, Analects inside of your app. Things that are going on that you can track it sells and trends, of course. Payments of finance reports, advertising users and rolls who can access iTunes connect. Who are your testers? Things like that. Agreements, etcetera. OK, we're gonna go into my APS. These are some older APS and built a while ago. This make a snowman actually got good $500,000 which was cool. This is my very first step over here. This drop revenge like back in 2009. It's terrible. Absolutely terrible. Most of the upside build I build for other people s o. Anyway, cool stuff here. So we're in. That's all I'm showing you were in. It's all working. You can select your dashboards and things from here. And that's how you register Is an apple developer paid apple developer and let's go ahead and get everything else ready so we can upload
117. Development Certificates: Hey, what's up, everyone? Mark Price here deaf soaps dot com. And today we're gonna talk about prepping ourselves. We can start distributing APS to the APP store or distributing them to other people at all , or even just to building for your device. Uh, so I'm gonna pull open X code here and just for historical knowledge. When the APP store first came out, deploying an APP was the biggest nightmare in the world. Now, still, with that being said, Apple is still pretty infamous for having a very intense deployment and review process for their absent not nearly as easy as Google play or other platforms. But you get really high quality stuff. But Apple is very big on security, and so this is all about security. So any problem that you're experiencing has to do with them wanting to keep things secure. Them wanted to maintain their platform, things like that. But I'm going to explain to you how to do it so you don't have to go through all the problems that many people go through and I've actually published to the APP store. At least 30 APS myself were actually through this process. So I'm gonna give you the best of the best. Okay, so pick the project that you want to upload to the APP store. Okay, Um, I'm gonna click the death slopes showcase that we built, okay? And so if we click our little blue icon over here, All right, And then if we look right here, we need to have a team here. Maybe you have a team on here. Maybe you don't. Okay, so mine. I haven't I have one on there, but yours might say none. Okay. And so there's some things you got to do to prep yourself to be able to build to your device as well as Teoh publish to the APP store. And you, like you just said that I know I'm repeating myself. So let's go ahead and get started. So let's, uh, get off of there and let's go ahead and open up. Google Chrome. Okay? And go ahead and go to developer dot apple dot com. Log in with the account that you created an apple account with. Select your team. If you have more than one, he probably won't because you're new, and, uh, it's gonna log me in. Okay, so what we wanna talk about Certificates, identifiers and profiles. And right now, on this video, we're only talking about certificates, okay? And what a certificate is? I just clicked that, by the way, if you didn't know, OK, so and then click certificates again Over here on the left hand side. Okay, Uh, this right here, let me go back. I'd better explain it here or no, if it doesn't load. So this main screen here, this says the different things that you have available to you in your development apple dot com account certificates, identifiers and profiles. This is where you go to create app ideas for APS you're gonna make It's where you pra vision your APs so they could be testable on devices and certificates Basically are what allow you to distribute applications. And you can do that for Iowa saps, Mac ups and safari extensions. We're gonna click certificates here under IOS APS and I already have to. I have one for distribution and one for development. And how it works is Apple wants to make sure that sneaky people aren't doing bad things with their software products, distribution, etcetera. And so what a certificate does is it allows you to tie your specific computer. Okay. Your specific computer, Teoh, Um, your, uh, apple account. So you can distribute things so you could distribute APS so you can't just, for instance, create a certificate and then give it to as many people as you want. It won't work. It's tied to your specific computers key chain, and there's ways of getting around it. But just know that it's tied to your specific computer. So let's say you sell your old computer that you've been uploading APS adapter with and like, I'm just going to use my new computer and do it well, all of a sudden, you're certificates will no longer work. You're gonna have to revoke them and create new ones for your new computer. Okay, So very important stuff. So you're not gonna have any right here, so I want you to do is click the plus sign. Okay. Under Remember, Under certificates were under all okay. And the 1st 1 you want is Iowa's APP development. You're gonna need that so you can actually build to your device. So IOS app development. You're gonna click that and then scroll down and click. Continue and it talks about creating a CSR file. Okay, a certificate signing request. And, um, this is how it's going to tie your computer to your account. And so what we want to do is click continue, and then it tells you what to do. I'm just gonna show you what to do So you don't worry about. So do command plus space to pull open the spotlight, their recon, or you can go to your finder here. We'll do it manually one time. One time only. I won't be doing this again because this is a long way. Click your finder. Go into your applications. Okay. And in your applications folder, you may have during things to me, but we should still both have a utilities folder. And we're looking for this one right here called key chain access dot App. Okay, double click that. Or of course, you can do command space key chain access, and it'll pop up right there. Okay, So double click your key chain access. And this is the key chain that stores keys and values on your computer security stuff. So it's important. Would you want to do is make sure logging is selected right here. Okay. And then what I want you to do is go over here to the top left, go to key chain access certificate assistant, request a certificate from a certificate authority and maybe you're confused. Maybe. Like, what is all this stuff that's going on here? Well, I don't even know what it is. There's so much. There's so much junk dealing with the certificates and identifiers and keys and A s encryption and all kinds of stuff is you don't need to worry about that. You only ever have to follow these steps and you'll be absolutely Okay. So, uh, save to disk click that. Let me specify, keep their information and go ahead and put your email in. It's not going to send you an email or do anything, whether it just ties it to the certificate and click. Continue. So this does not have to be the same as what is in your Apple account. Could be anything, just it really doesn't matter. This is the important stuff right here. And let's save it on the desktop click, save, and then 2048 bits are say is what we want. Okay. And then click done, and what you'll see is it is now on your desktop right here or wherever yours is. Uh, and so we've got our certificate. Now go back to your portal here, Okay? And here's something really important. If you're having any problem with Google Chrome or with Firefox on Apple's website, it's very common to have problems. So you safari. They actually supports the safari. 100% surprise, surprise, its own created by Apple. But anyway, if you have any problems uploading, choosing files, any of this stuff here, go ahead and use safari because it will flow us to work. And some things just do not work on Google, Chrome and Firefox. And that's just the way Apple made it. So OK, we're on the screen, click choose file and they go to your desktop and select the file that we just created numbness like this one. Okay. And what's gonna happen is it's gonna generate when you click. Generate right here. It's going to generate a new certificate. Okay, I'm not gonna do that, okay? Because I already have my certificates, and I don't want any problems. Uh, Apple and Exco can be finicky about certificates and provisioning profiles. You don't get mixed up. So what I want you to do, OK is clicked to generate button, and it's gonna generate the file, All right. And then it's going to allow you to download that file, okay? And maybe I should just do it. I'm just gonna do it just for you guys. Okay, Here it is. So here's a certificate that I just created. All right? I'm doing this for you on my expense. Okay, so you got your file click down. All right. As you could see, it's right there. Now, what you can dio is you can just click this file, and what it's gonna do is it's going to load it up into your key chain. And basically, it's going to say now you can develop APS and distribute them onto your device as well onto your dot onto your device. Only because or whatever devices are provisioned because this is not a distribution sort of it. This is a development certificate. So if I go over to the left hand side here, you should have downloaded this, and you could just double click it or click it once. Ah, from the Google chrome downloader here, it will load into your key chain. Okay. And also, you should notice if you go over here to your certificates and click all, you're gonna have a new certificate. OK, you'll just have one. I've I've got to here now. Thanks a lot. And, uh, so I've got to here and basically, this is this is a certificate saying, Hey, I could develop and you could have multiple certificates. There is a limit. I don't know what it is, and then maybe it's four or five. But anyway, there's a certificate right there, and, uh, you can also, if you don't want it, you can revoke it, okay? And ah, that's fine. I'm gonna get rid of mine just to show you wrote revoking the certificate will invalidate it in any related services or provisioning profiles that use this certificate may be affected. Okay, well, we're not even using it, so I'm gonna get rid of it back to the way it was now. Okay, So you've downloaded yours, okay? And what I want you to do now is go over here to your ex code, and I'm gonna show you one more way that you can after you've created your certificate on the Web site instead of downloading it and clicking it another way, you can actually sink up, and I think this is the better way of doing it. So the first way is to download the certificate and install it by double clicking it the better way. Because sometimes that doesn't automatically refresh your ex code, and you have to go dig around, figure out what's going on the better ways to do this. Having X code open goto X code goto preferences and click accounts. Okay, if this is empty for you right here. Okay. If your account is not here, click the plus sign in and click Add apple i d. And what you want to do is add your user name and password for your developer toe apple dot com account. Uh, um, or whatever account you used to register. Okay, super important to link it up right here and click Add after it adds. If your credentials are correct, you will see the screen here it will be looked. It looked like this and you're so probably just have your name here. I've got to because I have multiple accounts that I work with. But you should see something here on the left with your account. And then you should see your name here. What I want to do is double click your name and it's gonna load, OK? And this is really cool. It just sink what it did. Was it just sink your account? I just sink your certificates and things like that, and Ah, this is a lot of certificates I have. I've got a lot of APS and ah, this is that This is actually new feature on X code seven. Download all. I've actually never seen it before. Let's give it a shot. Okay, So what? I think it just did, Because in the past it would just sink automatically. What? I think it just is that downloaded it to my computer s o it would it would install them for you. So this is the other way of doing it. And the reason why I say this is a better way of doing it because you guarantee that what you see here is what you've got. And so, um, what you should see on this screen here is on Lee, probably um, this one or this one? You may not have any of these, actually. Here you may only have IOS development. That's okay, because that's all we created. But now we're completely sink Tok. And so if you want to start developing APS, we're not quite there yet. Okay? We need to create a provisioning profile for our specific app. Okay, so you've got certificates that give your computer permission to destroy distribute ups, But until the actual specific app that we're working on has a provisioning profile, we can't do anything. But we're not talking about provisioning profiles. Just that we're still talking about certificates to go back to the website. And now what we want to do is create a an app store certificate. So click all here and you should have one. This is Iowa's development, but notice how in mind I haven't Iowa's distribution distribution means you are distributing it. Mm. Okay. So what you want to do is right here. Click production. Okay. And same exactly. Click the plus sign. Okay. But this time, notice how developments fade out because its production this time klik app store and at hook. So what we're saying is in the with the development, we give our computer permission to distribute APS locally onto onto our own device. But now, with the production certificate, we are saying, Hey, let's give the ability to distribute this ad hoc, which means you can send it through the Internet to other people. They can download it, or we can send it to the APP store for two reasons. One is you can publish your app to the APP store, or you also can publish to the absolute for beta testing. So the abstract now manages beta testing and AP store submission to the public and beta testing is new. It is their new test flight program. It's only been around for about three or four months, so all right, click this one here. We need the ability to be able to submit to the APP store because we're going to be doing this later and then click Continue. It's gonna ask for the exact same thing. So what you dio is you just that same one we already created right here that should be under desktop. So if you deleted to go back and get it, go ahead and choose the file and then, uh, go through the process again, download it and install it. Or again go here to X code preferences. Make sure your accounts added here, double click here and then I should show up right here, and then you can download it. Okay, I think that's the better way of doing it. And so now we have a distribution certificate on our computer and a development certificate , which means our computer is now approved to distribute and develop APS. And I know it's weird. It's a process doesn't make sense. But that's okay. That's what you have to do. That's what the Apple of God's say. And we're gonna go ahead and cut this video and move onto the next one, which is provisioning our app so we can actually develop. Okay, You gotta be able to provision in your, uh, devices with the absolute building, because Apple does not allow you to install APS on devices that are not approved. So anyway, we're gonna call it around
118. Development Profiles: Hey, Mark. Pricier deaths hopes dot com and let's talk about provisional profiles. So in the last exciting episode, we talked about getting certificates set up so our computer could be recognized as a registered developer and distributor of APS. But now we need to do set of provisioning profiles. And if you go to back to developer, not apple dot com and go back into our portal here, OK, the bottom. You're going to see something called provisioning profile. So I'm gonna click all okay, and he's a really old So provisioning profiles basically say, Hey, you've got a specific app that you're developing. Which devices and users can you build, too? So every device every iPhone has what's called a you you i d. A unique identifier that identifies that device and you cannot install an app on someone's phone unless it is registered in the provisioning profile. Okay, so there's a few other things that we need to do before we can even have a provisioning profile, though, because remember how Just said a provisional profile says which devices continues which APs Well, we haven't created an app yet, and we do that by creating an app I d. So first step is over here on the left hand side. Create an app i d klik app ideas here. I've got a bunch here from many different projects in the past. Many, many different projects for many years ago. Wow. And what you want to do is click the plus button. We're gonna create a new one again. What you're doing is you're creating an app I d for your app. Okay, You're gonna want a new app. I d for every single app that you create. Okay, so before you can submit to the app store before you can even test this out, you've got to create nap I d. And this description right here is just a name. Okay? Whatever you want. Nothing. It doesn't really matter. So I'm gonna In my case, I'm gonna say Dev Slopes showcase, okay? And it's fine. And after I d prefix Okay, there's a team mighty, there's a whole bunch of other ones. It doesn't really matter. Just just use the default when it gives you okay. And, uh, what you can dio is you can create an explicit app I d or you can create a generic one that lets you build to multiple APS. I recommend that you build an explicit app. I d build one for every single app. Um, so you can explicitly identify which which, which APS this provisioning profile belongs to. Okay. And so in our case, and they recommend a reverse domains name style is you can see here. So in our case, we're gonna do the deaf slope showcase or whatever app you're doing, And someone said, com dot deaf slopes dot showcase. Okay, so this is the bundle I d. And, uh, by the way, this is what your bundle I d needs to be in your ex codas. Well, two. Okay, so here's our app. I d. And it looks good and OK, so APP services. So these air services that are associated with your app I d game centers automatically included. If you're building app that healthcare, you would need a select health kit. What you have to do is you have to let apple know which services you've included in your app. Okay, Even if you start developing encoding, it may be working their local linger on your device or whatever. Um, or excuse me locally in your code. It's building Fine. But until you acts until you enable these services, it won't work. So what you want to do is select the ones that you're going to use in our case, it won't be any of these. The common ones okay, are push notifications. Okay, Um, I will pays a new thing. That something coming? Um, let's see here. I cloud it's a new system. Uh, what's really cool is, uh, um I cloud with the new ah IOS nine cloud kit is becoming really cool. And you're gonna see more more APS of that. So it kind of allows you to build your own back and server. Kind of like we do the fire base, but using the cloud kip. So it's kind of cool up and coming. There's not a whole lot of two Tories out out for that. Yet those might be hard to find. Support home care. That's your home automation? Um, none of these a really big except for in app. Purchases are in a purchases which are pre selected there and push notifications. Maybe apple pay. If you're requires that we don't need any of them, which is really nice. So click continue. Okay, This is the lapse last step before we create it, Okay. And then you just click submit and the registrations complete. We now have a nap. Idea. I'm gonna click. Done. So now, if I go over to AP, I ds, um, I think they're alphabetical arches called show Deaf Slope showcase somewhere there it is. That's ours right there at the very bottom here. And, uh, there it is. Cool stuff. And so we've got our APP idea. Now we've said Okay, I'm creating it up. So what you want to do now is say OK, now that the apse created, we need to pick some. Uh, we need to put some devices inside of provisional provide. But guess what? We don't have any devices yet. Okay, So let's say you've got a bunch of friends that you want to test your app. You've created your app I d. So the next thing is your gonna add devices. So see, right here where there's a tab called devices. Okay, um, you can add devices here now, and, uh, basically, apple gives you about 100 a year that you can using. You can reset OK, they may have. I think it may be more actually now, but basically, uh, 100 devices. And once they're there, they're there for like, a year. You can't get rid of him. Okay, um and so there's this unique identifiers here. This is what identifies your specific device. And so, like I said, in order for you to build your app to a device and test on it your provisioning profile, which we have not created yet, must have a list of the devices that you want to test against that app I d that when we just created. So how do you get a devices? You d i d. So this is what you're gonna need to dio for yourself. And it's for all of your friends that you want to test your app. Okay, You're gonna tell him. All right, guys, I need you to has my up. I know this is gonna be a painful process, but here's how you do it. So you're gonna open up iTunes, like, so, like iTunes. What? Okay, then plug in your phone. Make sure your phone or your iPad is plugged in, and then you're gonna see the icon right here. Okay, click it. And what you're gonna do is you're going to see this screen right here. It's in this summary, OK? And see this serial number? That is not what we want. So what I want you to do is click it and it changes to your you d I d who? Magic. You're like, I've been using i Jones's old time and I had no idea what did that. Oh, well, you know. So this is your you you deity. Maybe you're wondering, how do you copy it? Well, here's something interesting. If you just right now without clicking or doing anything. If you just press command plus C, it is gonna copy. And if you don't believe me Look, command. See, I'm just gonna pace it, and it's right there. Command V. So with when you click that just press command, see? And no copy. Otherwise, you can right click it and go to copy. Okay. Same thing. There's nine of the u T i. T. So all of your friends who want to test your device or run a test your app Okay. On these were these were considered internal testers. These are people that you trust to test over and over again. Apples testify also has what's called beta testing, which does not require this process. But beta testing requires Ah, miniature app review process before it could go live. So is your trusted friends. Okay, now they've sent you. You there. You d I ds, go back to your portal. You're like, OK, I've got all their devices now what I need to do Well, what you need to dio it's gonna make me wipe all these out here. That's ok. Uh, let's clear out my list. I'm gonna get rid of all of them. So select the devices you wish to carry over to this membership or dislike devices joint for move. Well, um, iPhone six gold. I better keep that. Better. Take off this. Let's let's get rid of all the ones that aren't mine. We'll keep my iPad and my iPhone. I don't know whose that is. Uh, all right. Good enough for me. I'm gonna keep these ones reset all the other ones. I acknowledge these air toast. Uh, and here's something cool. 100. Apple TV 100. Apple Watch. IPad 97 iPhone. This is different. Used to be 100 total. Now they've got 100 for each. So that's kind of cool. So reset and those were gone. OK, now back to where we were before we've got the device. I ds okay for each of our friends. So what you want to dio is click the plus button here and you're going to give a name for the device. I d. Okay, so it's gonna mind, Would be, you know, uh, Mark price iPhone six plus, I wanna pace my you you idea right there. Okay. And that you can also register multiple devices if you have lots of friends. It says download sample files and it shows you how to do it. So if I open up the sample file here, he followed up here, it shows you what it's supposed to look like. So it would look like this where you have the device I d. And then the name of the person so that make that might make it easier if you got 20 friends, they're testing it and you want to upload all their devices. Just do it in this format here and then upload the file right here. Okay, so, uh oh, I lost my look It So let's try that again. Mark Price, I phone six plus pasted and continue. Okay. Confirmed that This is correct. Yes, it is. Okay, now, mine didn't work because I've already done this. Your should work because they're brand new and that's it. You've just registered a device. So do that for all of your friends that want to test your specific app, okay? And you only ever have to add there devices. One time you can use their same device ideas for multiple APS. But you've got to do at least one point in time. So now that we've got devices, OK, but we can now do is create a provisioning profile. And so go ahead and go to provisioning profiles over here. And just like we had a certificate of development and a certificate of distribution. OK, we have the same thing here. We have distribution, progress, new profiles and development provisioning profiles. So let's do the development One first click the plus bite, and we want IOS app development. Okay. And here's the important part. This is why we created the app I d First you've got it right here. Okay, Go find the one that you did that. We just did. Dev Slope showcase. There it is. So again, the provisioning profile matches up devices against an actual APP. Idea says, Hey, these devices contest this app. Otherwise X code won't allow it when you're distributing it, or even if you send off a build without having X code, people won't be able to install it. So make sure you select your app. I d. There. And, uh, let's go ahead and click. Continue. And it's going to ask you for the certificate you want to use. Well, we created an app development provisioning profile, and I only have one development certificate because I deleted the new one that I created. So this is the one I want to select your IOS development certificate. Okay, remember, certificates tell you say what computer? You can develop maps for distribute distribution or development. Right? This is saying is, uh, this provisioning profile is tied to that certificate. Ok, um and so that's the one we want and then select all the phones that you want to be able to test this app. If they're If they're not selected here, they will not be able to test that out. Just remember that they're not selected here in this provisioning profile. They cannot test your app and then click. Continue. Profile Name. I like to make these very explicit. So I might say Dev Slopes showcase, uh, development. Or you could just call it. I'm just probably call it showcase deaf meaning. It's a dev provisioning profile. Okay. And, uh, that lets me know that it's my development one, and I'm gonna click. Generate. Okay. Now, I could download this, remember? But I think there's a better way. Uh, it just make sure that we're good to go. Go to your ex code and go to preferences and click your name inside of here. And let's make sure it's on here if I can find it. There it is. You see? And see how it has a download. But next to it Ah, click download. It's done. You're good to go. Done. Did it? Uh So you now have a development provisioning profile on your computer? Why is this important? Well, let me show you. Before we couldn't, we couldn't send builds to our device. But now we can. And the reason why we can is because my my team has selected right here. And by the way, um, maybe maybe you've got actually before this video, you're like, I've been building to my device this whole time. And if you did, it's probably because over here, when you when you selected your phone to build two you want maybe wanted to try it out and then maybe you selected a team over here or was already selected. And maybe it just said, uh, fix problem or create provisioning profile. Yes, X code will be extra helpful for you and, uh, credit created for you right here through the app. So if you ever see that notification there and you don't want to go through the whole process we went through don't care what they name it in any of that stuff. If you just wanted to create as soon as possible, it will allow you there should be like a fixed issue but in or a great profile but in here from time to time. If you're running into any problems which is really cool s o. What you want to do is on your team is select your team. You should have only one or just pick the one that you want if you have multiple ones. Okay. So again, we have the development provisioning profile downloaded. Okay, so how do we say hey, run this app with this provisioning profile? Exco? It still doesn't know yet. So what we do is we're going to build settings. Okay? By the way, this is not obscure stuff. I'm teaching. You do this over and over and over and over and over and over and over again. Over and over. Over. How many times have I said over? That's how many times you gonna do is over and over again. So this is real stuff you're doing all the time. Very boring stuff, but it's very important. So click build settings. And, uh, what we're looking for is code signing, Okay? This whole process I've been talking about is called code signing its signing your code in a secure manner. OK, so there's debug mode and there's release mode for the sake of this video in this course, it really doesn't matter to you at this point in time. Okay, um but what we want to dio is go to our provisioning profile here, and, uh, you could select automatic, and it will probably work. Let's just go ahead and give it a shot. You're not gonna be seeing it run on my phone because it's on my phone, and I'm right here. But here's a pop up. Do you want to allow this My key chain always allow. I always want my phone in my certificates to allow this code signing to happen. So I'm building. I'm building what's coming. Compiling to Teoh. Okay, it looks like this is gonna work. And so, by setting it to automatic, uh, it's gonna just find the right provisioning profile for you. Yep, it worked. Okay, so it's gonna Oh, and by the way, you may get if you can see this, you may get an icon that says, Do you trust this computer and you want to say yes? Um okay. And so it actually felt, and this is this is what I was gonna tell you. So automatic won't always work unless everything's good to go. And so let me show you something. Click OK? If it didn't work and, uh, change from automatic. Let's go down, Teoh, Our showcase one If I can find it. Have I told you that? Built a lot of APS? Uh huh. All right. You're like, no kidding. That's right. I know what I'm talking about. Um, okay. And for those you who think I don't, you know, I probably don't. So Okay, um, where is this one I'm looking for? We're looking for the Dev Slopes showcase is gonna be painful for you guys. Sometimes you're like, it's right there. It's right there. But I can't hear you. And, uh, there it is right at the top, actually. Okay, so it has now been selected, and what I like to do is explicitly a set. My build setting. So under released right here. I I like to pick the Showcase Dev profile. Exactly. So what I did is I picked a profile here, And then after I picked the provisioning profile, I set release instead of automatic. I said explicitly to this to this provision profile lets me know I'm exactly doing what I'm supposed to be doing. And remember how our app I d had a very unique bundle. Identify where it was calm dot Deb slopes that showcase. So we want to make sure we go over to general that it says com dot death slopes that showcase, which it does. So I'm gonna go ahead and try running this again and see if it works this time. The applications application identifier entitlement does not match that of the installed application these values must match for for an upgrade to be allowed. Let's fix this problem. What I want to do is make sure we're running the right scheme. And so these air schemes right here This debug is a scheme, okay? And this release is a scheme and the scheme's kind of arbitrary value. But it's basically saying, Hey, do you want to run Ah, distribution profile in this game or do you want to run? Uh, but just local development what you want to do. So let's go and click up here to Dev Slopes that showcase your project here and go to edit scheme. Sure enough, right there. Look at that run when we run the app. It's trying to use debug, okay, and archive is actually release. And so I think that might be our problem is that we're trying to run in debug mode. When we run, we are in debug mode, and I haven't said a provisioning profile in debug mode yet. So let's go ahead and try that out. I'm gonna change this Teoh iPhone developer here. There we go. And then I'm gonna do I'm gonna clean my project. I'm gonna go Teoh edgers it here. I used to do this with a key commander. Haven't actually looked it up here in a while. So there it is. So product clean. Let's clean our project. What it does is just kind of cleans out some of the junk in there or reset some of the internal setting so we don't have any problems. I'm gonna try and build and run this again doing command plus our or clicking This, uh, this run icon here. Okay, we still have a problem. Okay, so I paused the video. I know, I'm sorry, but what happened is X code and Iowa's nine have a bug. Plain and simple. This is a bug's. What? I want you to dio eyes does in problem solving with me here, we're gonna go back to the portal. Okay. We're gonna go, uh, back to our portal right here, OK? And when I want you to Dio is go to your app ID's so right here. Go find the one that you created. Now I just solved this problem and you didn't get to see it because I was testing it out. But go back to your provisioning profile right here. The one you created and what I want to do is go to edit, scroll down and click. Delete. Delete that app. I d get rid of it. It is screwed up. X code is a problem now, Uh, if this worked for you, if it built don't do this because you're good to go. It bugged out on my machine again. This is one of the is one of the downsides of of working with beta software. But at least you get first and we're going to solve the problem together, and you will run into problems later on, even when it's not invaded. So this is good practice anyway. So you've deleted it. That's great. Now go back to your app. Identifies here. Click the plus sign here creating new and give it a different name and create a different a different idea this time to get off team I do you just pick a different one just to be safe ? Okay, Now, what I also want to do is give it a different name here. Like com dot dev slopes taught, you know, Dev showcase whatever. Give it a different name, okay? And what I want you to do is this name that you give it right here. Copy that and make sure on the right hand side and your bundle identify or an ex code, make sure that that is the exact same. And that's just right there in the general settings of the build settings on your target. So make sure that this is the exact same Is this so? OK, you've got your explicit app. I d You've got your I d. Prefix. Here. You've changed all these things around. Just if you have this problem, change it around. If you didn't have this problem, I'm almost done on, uh, Flynn Click. Continue. Okay. And then create that i d. Then go back to your provisioning profile your development provisioning profile. Click development here. Find the one that you created before we'll get there. And I want you to delete that as well to get rid of it. So we don't have any bugs Dang bugs. And then click the plus sign, create a new one. I always have development. Continue thence Let your new app I d. Ok, and that's electric certificate. And then when it creates your profile, go ahead and download it and double click on it. Okay, So once you've downloaded that new profile with the new APP I d and you've clicked on it to install it and that app I d is now the same over here. You've changed it over here. Make sure your team has selected. Okay, Right there. Make sure team has selected and go to build settings. And then, in your provisioning profile, change it to the new provisioning profile. Okay, so if you didn't experience that problem, great. If you did, I hope this house we just solved it together. We just recreated the whole new process against you. Got to go through it twice, and anyway, so I was able to now build to my device after x coats. Silly bugs. So now we are able Teoh we were able to develop two devices that have been registered. Okay, which is really cool. So in the next video, I'm gonna talk about setting up our app as well Is talking about beta testers working with a distribution provisioning profile. So most people will never remember this stuff on the first try. So I anticipate you're gonna have to go through these videos a few times. It took me about 10 APS upload to the absolute before I got stuck down by memory. So and you have to solve various problems. So very cool stuff. We are in business here and let's go ahead and move on.
119. Creating App Store Screenshots: Hey, everyone, Mark! Pricier depth soaps dot com So you want to put a nap on the APP store? Well, we've already set of are paid apple developer account. We've already set up certificates. Okay. At least a development certificate and a development provisioning profile and an app piety . And we've added devices. So people contest the absolutely built and we did some air handling of bug fixing in that process. And so now what we want to do is get her app on the APP store. But we can't do that until we have Screenshots of the APP store is gonna absolutely require that we have screenshots. And so if you're building an app that supports iPhone, you're gonna have to get screenshots for each of the devices. There's no getting around it, okay? And so go ahead and load of your app. Whatever one you want. Okay, I've got X code open here. I'm just gonna move it off the screen for a moment, okay? And we've got a simulator here. This is this is not a hard process. And we're just gonna go through how to take Screenshots of the app in the different screens that we have. So right here, we've got an iPhone six. You're gonna need to take Screenshots for iPhone six for iPhone, six plus for iPhone five screens and for the smaller screens as well to the iPhone, fours and threes and stuff. So here we go. Open up your simulator, build your project, and we're on the iPhone six. Right now, if you want to take a screenshot, all you gotta do is hold down command Plus s. And there's our screenshot. And so I'm gonna rename this to 6-1 Meaning it's for the iPhone six. But it's the first screen shop. Okay? And then let's go ahead and do Facebook log in here, okay? And I'm gonna confirm, and it's gonna log me in, and no, this is cool. Here's our app. Right. So this is the other app, or this is another screenshot we want to take, so let's just do command. Plus s. Okay, So we're gonna call this six dash to because it's iPhone. Six seconds screenshot and ah, that's cool. Two is good enough for now. Okay, So are you. Two is good enough. So that's cool. All we got to do now is go back to ex code here. Let's stop it and let's do it on the iPhone six plus I was running take a few seconds here and just follows Process through all the screenshots. If you don't want to watch me do this, you don't have to. It's completely fine. Um, I'm just pressing command three to make the screen smaller, but this is as small as it's gonna go. Doesn't fit the whole screen because iPhone six plus is such a huge resolution. There we go. Command plus four did the trick. Okay, so let's do command s for a screenshot. And you could do it from here as well. Two, I believe it's on one of these menus here. How they're just file save screenshot. You can do it from there to command s is much easier. Okay, so we're just gonna call this Ah, six plus dash one. And let's go ahead and Facebook log in. That wants my stuff here. Um, let's Let's try it. Let's actually, let's go back here to the log in screen. Will just to email password, log in for now. Okay. Lets just will just create an account, say blah at blocked dot com 12345 slog and sign up. It's going to do its thing. And here we are, so that looks great. And you probably want your screenshots to be the same for all devices. Teoh, try and get keeping this close is possible. I mean, you can and little things. It doesn't matter just anyway. Command us. We're gonna call this six six plus dash to This is not math. It's just the name of the phone. And let's go ahead and pull opener project here again. Stop it. And I'm going to do the iPhone 555 s Doesn't matter. Um, they're both the same screen resolutions. We only need to pick one. We'll just say I from five going to run it. And if we're supporting iPad, you have to take iPad screen shots. If you have the iPad button. Uh, if you have this iPad enabled over here in your project clicked your project here and ah, go to General Tab. If you have an iPad on Universal, okay, you've got to take Screenshots for everything. I'm actually gonna turn it off because I don't want to deal with that right now. Okay, so there we go. There's our app. Let's go ahead. Move X code back down. In fact, I should. Well, in a perfect world, you probably take a screenshot of that, too. I'm not going to go. Okay? Obviously, we have some work to do here, but we're not gonna worry about it right now, so good. Command s okay. That saved it. And this will just call this 5-1 and ah, slog in. That's, uh it's actually, uh there we go. Command plus K will hide your keyboard. It pops up, And what we'll do is ah blah at block blocked dot com. 12345 Okay, let's try this again. It's freezing up here. Let's try this again. Let's just say killer bees at bee's knees dot Com 234 and five. There we go. Command s okay. We're gonna call this five dash to your like, This is so boring. Well, I told you to skip the video. I told you. Okay, let's go and do the iPhone four now, okay? And run it. We're getting there. Oh, look. A baby and small it is. Remember the days of the iPhone four. Remember, the four first came out with the retina display. It was, like, the coolest thing ever. And I keep getting cooler now. It was good. And save this. We're gonna call this 4-1 and let's go ahead and long and even a new one again. We'll call this, uh, headphones at listener listener dot com. Sometimes you just put whatever comes into your head onto the screen. Um, no idea what I'm doing. Okay, log in. And there's the app on an iPhone for Unless let's scroll up a little bit this time to show that there's ah, you could make multiple posts. Here we go. Okay. And this one we're gonna call for dash to. Okay. Looks good. I think it looks good. Okay. I like it. I like I don't like it, so looks good to me. All right, I'm gonna go ahead and stop it now and so never got all the screenshots we need. And you could, of course, have done this from your iPhone by holding down if you build the app to your iPhone itself and dio the home button plus the top power button at the same time your screen will flash yourself for airdrop it yourself. But that's take screenshots withdrawal the ones we need right here. And then in the next video, we'll go ahead and talk about getting our on the outside.
120. Submitting you App!!: Could this be the moment that you've been waiting for a chance to submit your app to the APP store? Well, let's see. I think you will be marked pricier deaf soaps dot com This is the funnest part. You've done all the hard work, and now we can get the Apple store ready. And there's a few things we've got to do to make that happen. But we're so close. So let's go ahead and prep the APP store. Okay, so we've already talked about developer dot apple dot com and I've already got my screen shots on the right hand side over here. But now we need to go into our iTunes account, okay? And so if you go to remember center, you should see an iTunes connect link right here. It can also be accessed toe iTunes, connect dot apple dot com And again, you should be a paid apple developer. I know. Okay, go. If you're not a paid apple developer, you need to do that before you do this step. Otherwise this won't work. So make sure you paid that $99 that you are in and good to go, So I just logging in to the iTunes connect portal here, and it wants me to review some things which all need to do very soon. Otherwise they'll stop selling my APS. Uh, here's some news tests light for IOS nine beta builds. You can now submit beta builds to your internal testers to test the app stability. IOS nine beta. That's really cool. Test flight again is it was a very popular ah third party platform that helped distribute APS to people. Because, like I said, Apple has been kind of a nightmare and getting apso. And then, uh, what happened was, and then they started supporting Android. It was really cool. And then apple bottom out for, like, a ton of money. And then they killed Android and said goodbye. And so now they've incorporated into their platform and, uh, I don't know, it's still not as intuitive as I'd like to see it, But here's your dashboard. If you haven't been here before, um, analytics, ads, all that kind of stuff, you could look at it all on your own. We're gonna go into my APS And by the way, don't make fun of me again. These were really old APS k super old. This one's knew this one's fun. By the way, if you ever want to check it out that it's haunted zombie Halloween Halloween rush, it's a really well done three D version of Ah, Flappy bird. Like I know you've seen enough flappy bird things, but anyway, it's all in three D and it's really cool. Cool animations, this stuff. I did it. Thank you, Onda. Okay, so click the plus button here. We need to add a rap, okay? And we need a new IOS app. Okay, In the name of this one for me is not gonna be Melissa Price. That is not an app. That is my wife. All those you make a very curious ap Ah and Dev Slopes showcase. Okay, is my name of my app. Primary language is English. Now it's gonna ask for a bundle. I d now we could not have done this. Have we done all had we not done all the previous stuff first? So we need to choose the bundle i d for app which is this one right here. Showcase Dev slopes And that someone we want You want to make sure the bundle I d right here. Matches. What's an X code? I know it is because I just checked it. Version The version number is shown on the app store and should match the one you used an X coat. Ooh, this is important. Okay, on X code. When you go to your click your icon here and go to general version one point of that's our very first version. This has to match what's on the APS or otherwise. It won't work gay. This would change over time. It'll go up and also knows that a version could have multiple bills like you may be testing and beta things like that. So, uh, version is gonna be a 1.0, and this skew is just a name. You give to it to identify it. So imagine if you had 100 APS. Like some companies you like Electronic arts. They need a good way to identify it. In this case, we only have a handful of absolute is just call it showcase, and then click create. Now, at this point, if your app name is not available, it will tell you that it's not available, okay? And so we didn't click create and it was available very good. And then it takes you right into the app. This is very cool. So now we are here on the APP store. Move X good, out of the way. And so, since we're right here in the screen shots, let's go ahead and add some screenshots. So remember four point Ah, excuse me. The 3.5 inch right here that's your iPhone force and for us is so good. And click that and then drag your to four screenshots are here CSS for one and 42 Drag him on. If these were not the right size, it will yell at you and it will not accept them. So if it takes it, you know they worked and you can drag him around like so, which will be doing. And the foreign, of course, is the iPhone five. And so we can drag goes on as well to stinking. It's thinking. Come on, you can do it. And by the way, iTunes connect is so slow it times out, it crashes. It has so many problems. It's a lot better than it used to be, but it is very slow, so if you run into problems you might try. Safari were a group of chrome. Right now let's go to the 5.5 inch. That would be your iPhone six. Plus your six plus Excuse me. That's kind of weird. Your six plus and let's grab those here. Drag him over. There's one. There's the other 14.7 inch one hears the other iPhone six screen shot coming up. There we go. OK, so we've got her screenshots Now, that's looking real good. I'm gonna click. Save. Uh, why are you leaving this page? Uh, on what it's doing to do whatever it wants to do? I guess Saving. Come on. Well, you should click save. I'm gonna refresh. And I was signed out. I dunes. Oh, Okay. Uh, you're already experiencing some of the pains of app development. Eso I'm glad I could bring me those wonderful experiences which you'll be experiencing on your own throughout your development career. But with that being said, anything I complain about IOS on is much, much worse than other platforms. I'm also a Web developer and an android developer, and I would prefer to develop in Iowa's all day long every day above all of the platforms. Could is it is absolutely the best of anything that exists. So it does have my validation, but we could still complain about it. It's fine. Um, let's see if our images All right, So Okay, this is quite annoying. Let's see if we can just fix this real quick. Let's get our six plus here. And, uh, just having some issues. ITunes. Like I said, there we go. And let's get our iPhone six on here. I'm just gonna put one up set up to deal with this and take take too long here. So where's our 61? There we go. Whatever. ST shots up. I don't care at this point. All right, let's go and save it. Hair we go. Okay. It is. It is saved. All right, So very nice. Um, let's finish off the rest of this stuff here. So we've got pre release and pre release is your beta testing. Okay, so there's two types of testers you can have. There's internal testers, and there's external testers. Your internal testers. Okay. Uh, you can just adam right here, so you can click. Um, Well, you can. You Adam from a different place. I'll show you that, uh, I'll show you that in a different video, actually here. But anyway, so it pre releases just your your builds that you're gonna submit. And your testers okay? Pricing is the price of your application. So you can set the price here, all kinds of tears. They give you tears, it tells you what they are. You know, Tier two has the pricing matrix. We'll just do ours for free. The date you wanted. Available discounts for educational institutions. Sometimes apple gives discounts by are just free. It doesn't matter. Um, custom Beauty be APS, uh, only available through volume purchase from business to business kind of thing. So, um, OK, anyway, so there's the pricing. Let's save that. Free is fine. And, uh, I know it's kind of weird, but you have to go click cancel at the bottom left. It makes you think that you're losing changes, but you're not. That's the only way to get out of this screen. So click cancel and your changes are saved and you're good to go. And that's actually a leftover screen from years. It's been there for years. They updated the rest, but not that part in that purchases. This is where you would create enough purchases. We're not doing that right now, Okay? But this is where you would create a net purchases for Europe, by the way, in many ways, and that purchases were kind of going away, like the whole just the whole Freemium model and things being free. It's just the generation we live in. You got to start thinking of How can I build my business around a nap and stop thinking about how can I make money off the download on the app? Now, of course, users are worth lots of money. But stop thinking about the dollar that comes from every download Start thinking about If I give my about for free how do I build my business and make money off these users in a different way? Because everyone wants everything for free these days. It is just the way it's going. Just so you know, um, that's been my experience of what I see in the industry game center. If you're connected to gain center, we don't care about this other stuff right now. These are not what we're doing in our APP description. This is where you enter a description about Europe. So this app allows people to post images of the apse that they built through the U to me course IOS nine. Uh, and swift. I can remember the name. My own course. Huh? From beginner to paid professional. Okay, Keywords. These air keywords that when people search for the app, is gonna help the Appy pulled up on the app store it. This is not This is not keywords for Google. This is keywords. When you load the app store and you do your searching, I do want to say that the keyword that holds the most weight this is just some free advice . The key word there heard that holds the most weight is the actual name of the APP itself. That's what you see, some maps that say, like, you know, free calendar app. You know, 1,000,000 users like a bunch of weird names because they what they do is people search for the most search names, and they put it there because this holds the most weight. That's what's gonna help find your app the most. So if you want to stand out in a category, you know, this holds the most weight, and then some keywords. You know, this This would be like app development. It gives you an X amount of characters, as you can see on the right hand side over here. You know, app development, you know, learn swift. Uh, you don't learn IOS. You can put a bunch in there. Support your Oh, okay. Um, it requires some type of your all you have to have it. So just go throw up. You know, go daddy website or whatever you need, But you gotta throw upset up there. That does not take you to a 404 page. Okay? It needs to just be a website. Don't get stressed. Just go to, like, go daddy or wicks dot com bunch of free places where you could just get a quick your lk have slopes dot com and Okay, so there's that, um Okay, apple watch. We're not doing apple watch right now. It does one app icon. And so let's go ahead and do that. Now I'm gonna go into my app icon template that we created earlier going to actually wrong one. We want the one that says icons. There we go. And we want the one that says iTunes artwork at two X Okay. Should have been exported. And it's gonna load up and do its thing there. And there it is. Okay. Copyright. You put that in there. 2015 2015 Dev Slopes LLC. Okay. Display trade representation, contact information don't need That is your address. But this is I don't know what addresses must be like 15 years old. Uh, so you know your name. You know, Mark Price? Uh, you know, 45 some fake address. Whatever. Um, okay. Routing app coverage file. Don't worry about that. Its geographic regions support. Excuse me by your app. I don't care about that. Uh, this is important. Your version number. Okay, remember, it must match what's next code category. This is the main category. Want. So, in our case, what would this be? This part of education and maybe a 2nd 1 Technology? No, maybe a social social social networking out and, ah, rating. You got to give it a rating. And what a rating is? No. Not giving yourself a five star review. Your app is great. No, this is the content that did it, you know? So just look at what it says. Cartoon or fantasy? Violence? None. No realistic violence, No graphic or sadistic real estimates. No crude humor. Gnome suggests of themes. No whore themes, no medical treatment, no alcohol drug, no gambling, no nudity, no sexual content, Unrestricted Web app. Success. No gambling. Uh, contests? No. You selected Operating is four plus. Well, whatever. That's fine. I mean, it's acceptable for everyone. I will say, though, if you click made for kids, you actually have to do some more things for your app. Okay, just so you know, if you have a kids out, be aware that you're gonna have to do some more things like there's new laws in the United States that require you and the absolute requires that they have certain privacy policies in your APS. Because you can't steal data from Children who are using APS. A bunch of things you've got to do now. And your app has to be four kids. Okay, um and, uh, it has age groups and all kinds of stuff, so just just know you're going to go do some more research. Uh, if you want to make a kids app before you just click this button. Uh, so you're African. Get approved. Okay, that looks good to me. Eso We've got our description. We've got our key words. It's really not that much. Okay, um, you can, uh You can, um, throw up a video on here. You can click, choose file and throw up a video for your apple so you could record a video for your app. Like in screen flow. Isa great out for camp. Tasia is a great product to do that on. We're not gonna cover that here. Go ahead and go on YouTube and look at how to make an iPhone promo video. Um, and, uh, it's not It's not a big deal. Okay, um app review information. Who do who do they want to talk to if there's a problem, and this is important because sometimes there's problems. Eso, You know, put your name in there, you know? Okay. Demo account. If you're apple cars, log in to use it, and you can't create an account through the app. You're gonna need to give them password and using them, or they will reject your app. So if they can't get in through your app. By creating an account through the app on the main screen, you're gonna have to give them a user name and password, or they'll reject your APP. You can choose whether to automatically release the version or to manually release it after they've approved it. Okay? And this is all looking good. I think all of our basic and main information is here. I did not give you, like, great tips on, um I forgot a phone number. I didn't give you great tips on how to, like, make an apt description and things like that. I encourage you to go figure out some of these things on your own. Go how to write a good app. Store description, how to write good keywords, things like that. Go do some work on your own. Don't Don't just copy everything I'm doing. That's not gonna make you great. You need to figure some of these things out. And what makes the most sense for your product and what you're trying to do? Um, with that being said, you can't do anything crazy in here. You can really just do dashes and caps letter. So, uh, we can't do any cool. You know, bowling or bolding and that bowling. You can't do bolding or talents and stuff like that. Okay, let's go and try saving it again. Go to do its thing That's just rolled down. See, everything's going here. Still saving another air are it Doesn't like my fake numbers. Here, let's try this again. I'm just going Teoh, Say 5555555 111 Let's try that. That's right about numbers, right? Yeah. Let's try that. There we go. Oh, they want to know This is new formatting and stuff. Spaces in between now, too. All right, that's the problem. Have changed how they change, how they do this since the last time I did this. And I just did this, like, a couple weeks ago. All right, so one plus 11 plus When? One year ago. Let's try that one. Uh, wait a minute. What is going on? There we go. Okay, let's try that. Let's try that. Okay. Saving. Okay. It wasn't like, you know, my fake numbers, So I just put in real, like, phone number from California. So 760 one of the coolest area coats, you know. Um okay, so it looks good. Okay, Now, we don't want to submit for review yet because we haven't uploaded the actual build yet. And we need to do that now. So let's go look at our pre release here. And it says some major builds using extra 5.11 or application loader. So we've got to actually submit a build through ex coach. Let's go ahead and do that now. Okay, So let's go to X code. And how do we create a built? Well, remember how I said we need a distribution certificate and a distribution profile? Okay, so let's make sure we've got those already, so go back to your developer dot apple dot com. Okay, Member center, and, uh, click this. So certificates now go to certificates here. And we've created a development one already and maybe have already created the distribution . If you have, that's great. But for the production, just click production, create a new one, and then, ah, you know, click this and go to the process. If you haven't done it already, Okay. Create an app store and ad hoc, you know, distribution certificate. And then all we need to do now after that's created. And we should have done that. You should have done already. We cover to cover that in the video. So a just quick reminder. So go to provisioning profiles down at the bottom left, click distribution, Click The plus sign. And this time we're gonna do app store. Okay, at Hawk is when you're distributing it yourself to other people through your own like, uh, like your own, like server and stuff. Don't worry about that. APP stores the one you want. Good and click. Continue pick the idea that we're looking for and we're looking for the showcase one I couldn't find a year find at the bottom. Very good click. Continue. I was distribution. That's great. Could continue and we're gonna call this Ah, showcase destro for distribution. Actually, I change my mind. We're gonna call it Showcase app store. So it's we know for certain is going on the app store case showcase app store. So what we're saying is we need a profile that's attached to our app that allows us to submit it to the app store. Okay, so click generate, then download, then click the download. It should pull up your ex code like it did here. Go to your build settings Scroll on down here. And what we want to do is set the provisioning profile to that new one. Showcase Apstar. Now, remember, showcase Deb is the one when you're developing to device and building showcase abstruse to the AB Start. If you have showcase APP store selected and you try and run your app on your device. It will not run. It will not at the app store is only for absolute distribution. OK, so go ahead and click showcase app store and change release. We're gonna change released iPhone distribution. We're gonna change this release the iPhone distribution. That looks good. And I just want to check my scheme and make sure when I building, archiving those types things that's all correct. So go up to this project appear this little thing here, the active scheme and click edit scheme, and what we want is click archive. So when you submit a bill to the APP store, you gotta archive it, okay? And what we're saying is we want to use the release profile whenever we do an archive and the release profile is currently set to the APP store. Provisioning profile So built for configuration to release That's just what we want. So, uh, showcase app store. It's great. That's our provisioning profile. Work under release. We got the distribution profile selected. We can no longer build to the device while these air selected. If that changes back, if we want to do that now, how you submit to the APP sort is really easy. You goto product and you goto archive. But you're like, Oh, no, it's not working. What's wrong? Excludes bugging out. No, no, You can only archive when you have a device selected. So click your little iPhone for a simulator here, screw up the top and select your iPhone. Now, if your iPhones not connected, that's okay. It just you can use the default IOS device. You just can't have a simulator selected. OK, very important. Everyone runs into this problem, and I tell him the same thing every single time. So if it's not your iPhone, if it's not connected, it'll say IOS device. Select that instead. So that's what you want to click now If you go to product and archive, okay, it's gonna start archiving the app. You're going to see the process right here. Okay? And when it's done, a screen is going to pop up on and it's called the Organizer, which will allow you to submit to the APP store. So we have to do at this point is just wait for it to finish archiving. Here it comes. It's finished archiving the build has succeeded. And by the way, this could take a few minutes. Okay, The archiving process takes a few minutes. Also, after it's done archiving, it can take a minute or two for the organizer screen to pop up X codes, doing its thing. It's thinking you just have to wait. Okay? And there it is. See, just taking its sweet time. Good things come to those who wait. Okay, So here's your archives. On these archives are bills that you could smit to the app sort. So before you submit to the app store, you want to validate a build. So what a validation is gonna do is going to say, Hey, is there crap and junk in here that's gonna cause us to get rejected and it allows you to find that out right here right now before submitting to the APP store about a year and 1/2 ago. Maybe two years ago. This didn't even exist. Okay, before that, you had to submit here after the Absar. Wait seven days. Okay, wait seven days. And then for them to give you a problem or things like that. So it's very good that they have a validate functions. Let's go ahead and do that. Now let's validate it. I select your account, okay? It's preparing. The archive it's doing is thinking it's connecting. Everything okay? It's Ah, it's talking about your entitlements, what you're using in the APP. Oh, good stuff here. So let's go ahead and click. Validate. That's gonna do its thing. It's gonna tell us if we screwed up. If something's broken. If we're using a library, that may be a no, no. Um, it's gonna dio lots of under the hood type of checking for us to make sure that we're good to go. It's creating an I. P. A file that I pay files actually goes up onto the APP store. Uh, if you ever have downloaded APS to your iTunes and extra stores, them in dot i p a format. Just just so you know, for reference. There we go. It passed validation with several warnings. The resulting AP analysis file is too large. We were unable to validate your A P I usage prior to delivery. This is just an informational message. I've actually never seen this one before. Um, resulting AP analysis file is too large. Uh, it's not giving us an error splices pursuit forward here. And what we want to do now is just upload to the app store, not keep in mind. Had you not created an app and had you not created a version, it would not let you upload to the APP store. Let's go ahead and give it a shot. See what happens. So click your account and then click choose. Okay, It's gonna prepare the archive, and then it's gonna start uploading it. If there's no problems, submit. Let's give it a shot crossing our fingers Half the time I get this working. You have the time not. Maybe I've forgotten something. It's okay. You're gonna forget stuff. You're gonna break stuff. This This is a learning process, even to this date, you know, having built all the absolute have I still have to fight with provisioning profiles? And I stopped the fight with X code myself to fight with submitting to the APP store. You're gonna fight, and that's just the way it is. So it's uploading the archives. I think it's okay and we'll just wait for it. Teoh upload. There we go. Past validation. Neil. Yeah, very good. So it is now uploaded on the APP store. So let's go ahead and go to the right hand side over here and go back to our agents Connect and let's just, uh, go back here and refresh the page Command. Plus are to refresh okay or the little circle there. So it's refreshing the page and look at that. There is a build here. Now, that's really cool. So I'm gonna click my APS to go back and just make sure everything's refreshed. Look, our app icons there it's looking good. Click it and that's looking good. Okay, we got her screenshots. Um, great. Now can we submit for review? Not yet. Okay, um, the problem is we need to select a build here saying Hey, submit with this built, OK, but we can't do that yet because it's still processing. If we go to pre release, it's uploaded, but it's not done processing. If you click the thing here after builds are uploaded, they will go through a processing state before they can be used. Okay, so before they could be used, they have to process this. Come take anywhere between five minutes and five hours. It has been very finicky lately, and if after five hours it's not being processed, I recommend maybe changing your version number here and on your ex code and uploading a new one because again, lately it's been finicky, especially with the new beta. Um, you guys were like, Man, I have phoned sucks well again, distribution process of iPhone does suck. OK, absolutely sucks this whole thing. You're just it. It's gruesome, but just it's really the only major pain you have to deal with when developing for iPhone. So you know, you could just basically sit here and refresh your page until it's done processing. Um, or you can go back to versions year we can scroll down, and, uh, what's gonna happen is we're gonna see a build appear here once it's done processing. So We're gonna wait for that to happen so we can submit the app, and then we'll go from there. So I've just refreshed the page. Let's scroll down and see. And we can now add our build. Notice how this is available to us. Click Plus to add a build. And if we go to pre release, Okay, we should now see our build here. It's inactive, and that's okay. Inactive for internal testing, inactive for external test. And we don't care about that right now. We just want to make sure it's here, which it is. So go back to versions, Okay? And all we got to do is click right here. It's gonna pull up a list of bills. Okay, The version number has to match. Right now, we're in version one point. Oh, so you've got to click one point. All right. Here and then click. Done. Okay. And what I like to do is just review everything. Make sure things where it needs to be on here in the screen shots. Ah, my description. Mixtures of those spelling errors, by the way. You should never type directly into your description. Do it like in Microsoft Word or in, you know, the apple documents or Google docks. Whatever spellings correct, make sure keywords or checked. And ah, then all you need to do is listen, we got her build here. Where is it? Are real selected argues that looks great. So all you gotta do is save it after you've selected your built click safe and then all you have to dio when all of your information is here and it looks great. Make sure you have someone double check it. Don't just submit it or you're gonna not be able to sleep. Okay, uh, click Submit for review spinning. It's spinning its thinking. It's deciding whether it wants to let you submit an app or not. Your heart started to pound and uh, okay, so do you know why it's not working? You know, it's cause IOS nine is not out yet. OK, um September 9th there. Officially, I believe they're officially releasing it now as well is talking about the new things that they're releasing. But right now you can't submit the app. However, usually what happens is about one week to about 15 days before they officially released that they say the send you an email saying Hey, we are now taking iPhone nine AP submissions. Okay, so you can't do it yet. Uh, that's okay. Um you should spend some time perfecting your app, getting it ready for the app store. They do give you about 10 to 14 days. Like I said, 10 to 15 days or so, but obviously is not working right now because the we can't submit IOS nine ups yet because it's not out yet. But that's all you have to do. Guys and gals is once all this stuff was in here, all you have to do is click submit for review. And I may add an addendum video to this when it's actually officially officially released. But that's how it is right now. You've just pretend submitted your app to the APP store. But everything here will still apply 100% when IOS nine does come out. Eso Congratulations on not submitting your app to the app store. Uh but, uh, again perfect your app get it ready on September 9th 2015. It should be coming out and they should give you 15 days to prep your app. So day one when the apse app. I was nines released. You'll be ableto have your apple live, which we cool. Being first to market is always very valuable. So that's it You've submitted APS. You've done provisioning. You've done development provisioning. You've done distribution provisioning. You've done development certificate distribution certificate. We've gone over some problems you might experience. We've set up the bill settings and the scheme us, and we've download them from this the ex coat, sir, or the developer to apple dot com servers into our X code. We've done a lot of things. You're gonna need to go back through these videos because it's a lot to remember to get. It took about 10 laps to go stuff down. So that's it. Congratulations on pretending to spit your after the app store, and, uh, we'll see you next time
121. Debugging a screen that isn't showing data: Hey, everyone, Mark Price here, Deb slopes dot com And today we're gonna do something really fun. Not really fun. It'll be fun for you because you're gonna see how my brain works in solving problems. I get questions all the time about how to solve problems and crashes. And so the more insight you can see and how I solve problems, the better you will be able to solve problems on your own. So this is a student application that was sent to me. I'm gonna open it up here, pull up in the X code project here and the simulator, and let's go ahead and run it. Okay? The problem that was described to me was that Hey, I've got data in my app. But when I click the list item, the detail view doesn't show the data. So, for instance, if I click this word right here that says equal, it's completely empty except for this world down here at the bottom. And so the indication or thought was Hey, my data is not working. Why is it coming up, Neil in the application? And so let's go ahead and solve this problem. We want data to show there. So I'm gonna stop this. Let's make this X code bigger here, okay? And so let's go ahead and take a look at our code here. So we've got a model of you and a controller. That's great. Very well organized code as far as the project structure, ghosts. And OK, we've got a table of you here. So if I go to my main storyboard, let's just get a glimpse of the application here, OK? So we've got a view controller with a table view, and it has a table view sell here. Okay, that looks fine and normal. And then we've got a detailed view controller, and if you notice there's some labels here that definitely were not showing in the application, let's go ahead and open our assistant editor. This double circles right here. Let's see what it was gonna look like in our preview mode just to make sure our constraints are correct. So I'm gonna click this automatic, change it to preview and goto review right here. So it looks good there. Looks like it's gonna show up just fine as far as our table view sell on everything that's there. Okay, so that's looking fine. Let's click on this pretty over here. And that looks good, too. So what this tells me is that the constraints are okay, so they're they're they're showing up in preview mode. Basically, what you see in pretty mode is gonna show up in the APP. So this is why I check it very first. Because if I didn't see anything here, I would know that the constraints on these views are off. Maybe they're off the screen, Who knows? But they look good there where they're supposed to be, so we can rule that problem off. Okay, I'm gonna close the assistant editor here, and so our problem is again we can't see any data on the screen. Okay, so we know that there's no data showing, or at least visually, it's not showing tow us. We don't really know what the problem is, but our first sumption is Maybe the date is not showing. So let's go look at our detail view controller. So the idea is you tap one of those labels and it shows a detailed view, which we're not seeing information on. So we've got some ivy outlets here. We want to make sure they have data. So what I'm gonna do is right here and update you. I I noticed that in view did load when this view loads the update, you wise being called. So this will be called if this view loads. So what I'm gonna do is I'm going to put a break point right here, as you can see, and I'm gonna go ahead and run the application and see what happens. There it goes. It's loaded. I'm gonna click a cell here, and we stopped on her break point. Okay? This is not a crash. We purposely set this brake point here because we're debugging. This is called debugging. The idea of getting rid of bugs. Okay. And so we're here, so we know we got here. So let's go ahead and just hover over these so exercise names. That's an empty string, as you can see. What? The double quotes right there. All right, let's look at these other ones. These are all empty. That's really interesting. So why are they empty? Well, it could be that there's no data being passed into them, so let's go and check and see what I'm gonna do. now is work backwards. So from the point of this screen loading going backwards Well, how did we load a new screen wall? Ideally, the user tapped a cell and it called self Farella index path and tried to load the view or something like that. We know where we know we're basically where to look. So I'm gonna stop this program here, and I'm gonna click and drag to get rid of that break point. So let's go back and look at our view controller. So this is the one that has the table of you, okay? And sell fero index path. That's what generates the cells. And if I mentioned this earlier, I meant to say, did select row index path. That's what we'll check to see when the cells selected. This is the one that actually generates the cells. Okay, so it looks like we're configuring a cell, so looks like we're grabbing data from right here, and we're configuring a cell. So let's go ahead and put a break point here. What I want to see is that there's any data coming into this exercise names constant right here just to see that it's being properly passed in. Make sure we don't have empty data. So let's go ahead and run it again. Again. Empty. Dead. It means that nothing showing on the screen. So I want to make sure that we have this problem solved. So if I hover over this, Okay, what we got here? Okay, so there is data in here equal beginner. Here is a description, so there's definitely data in it. So data is definitely coming in self row index path. And if I command click configure cell, this is his custom. You a table of you sell and he's passing in the data right here. It looks like it's all working and good, and it looks like there's a connected I be outlet here, so I'm gonna go back. That looks like it's good. Now let's talk about did select row at index path. Okay, so this is when the user actually taps the sell, it loads the next screen. What I want to make sure is that this is being called and that the data is being passed over here in the perform Segway with identifier. So let's put a break point right here, and then we run the program. Okay, click the button. Interesting. What do you think? What do you noticing? If you said did Select Row Index Path is not being called you would be correct. This is not being called, which is really interesting. Which means the data is never even going into our detailed view controller, which is why it's empty. It's not empty because there's no data. There is data, it's empty or something's going on, because this is never even being called. So let's think about this for a second. Why would this never be called? Clearly something's being tapped, and it's clearly loading another screen. Well, the only thing that I can think of is that our storyboard is overriding. This did select Row index path, meaning we probably have some type of Segway in there that's preventing this from happening . So let's go ahead and go over to our storyboard main storyboard. So let's look at this Segway here. Okay? So show detail exercise. It's being pushed on. Okay. And let's see what we got here. So I got a table of you. We got a brief cell. Okay, Interesting. So I think it's hard to completely tell, but I think that possibly What's happening is that this Segway Oh, there it is. Notice how this cell is highlighted right there. Blue. I click the Segway and the cell is highlighted. It means that the person who built this code created a Segway from the sale over here, which is fine. It'll load the next view, but it will never call. Did select Row Index path because the Segway is overriding it. So we need to get rid of this. But first, I'm gonna copy the identify. Or so we have that at the top. Right. Okay, so I'm gonna delete this segway. Now, What I'm gonna dio is I'm going to from the view controller here, I'm gonna control drag over to this. So we're gonna make a generic subway that goes from one view to the other without having put it on the table view cell. Okay, this is a generic Segway, and we're going to say show detail view. Okay, so now we have a Segway, I'm gonna click it. And now I'm gonna put the identify back in here. This is now not tied to the table of you sell, but it's tied to the view controller itself, meaning this has to be triggered from within the code. The perform Segway with identifier command the function. So there it is. So let's go ahead and run it. Well, let's go back to our our view controller dot swift here and put a break point back on. Perform Segway with identifier and run it again. Let's see if it actually gets called. Okay, I'm gonna click. And now Okay, so now it is called. It got hit there. So that's great. We fixed that problem. Let's go ahead and just go ahead and click the play button here to continue and they're loaded. But notice how I clicked it a few times and it didn't work at first. I think we have another problem that we need to fix. And so let's go ahead and take care of that now. So I'm gonna stop execution and get rid of this brake point. Let's go back to this story board. I'm going to click view controller, go to the table, view the breathe cell and the contents of it, and I just click this thing here. It looks like there's a button there, so it looks like we have a but in here. And my guess is, since it's not being used anywhere. My guess is the developer who was trying to figure this out was trying to put a button and to get anything toe work. But we've got a button problem. So all I'm gonna do is delete this button, impressed save and then run the project again. Here it comes, and let's go ahead and click equal. There goes. It works. So we fixed the problem. There was a couple issues. You saw my thought process and how we started where the problem was. We did a break point all the way down to the screen just to make sure the screen was loading. Actually, before even did. That would check the preview mode to make sure the constraints were OK and secondly. Then we went into the detail view controller and said a break point to make sure it was even being called which it waas. But the data was empty, so we went a step back. Well, where's the data coming from? Well, it should be coming from did Select Row index path, but we found out that was not being called and So then we went in for two or storyboard and realized that it was a Segway tied to the table view cell, which is not gonna call, did select Row Index path. It's just gonna load the next view. And so we deleted that we made a generic Segway straight from the View controller and then , in our view controller right here we called the performed Segway with identifier. Finally, this was being called and we take that data, it gets passed right in through here and then prepare for Segway is handled as it normally would. We pass it over into the detail view controller. So pretty cool stuff. I hope this helps out a lot with some of your debugging and thought process and consume it . Appreciate it and go solve your problems. Mark Price Steps hopes dot com Signing out and remember to get your free live help, go to Deb slopes dot com and click on chat Room. I'm there all the time, as well as a huge community of other students
122. iOS 9 3D Touch App Shortcuts: Hey, everyone, Mark Price here in depth slopes dot com and we have an exciting episode today. We're gonna talk about Apple's three D touch with application shortcuts. And if you don't know what an application shortcut is, let me just show you. I put my phone here so you kind of press and hold and dragged down. But you can't press for too long, or the delete icon will appear. So then, basically there shortcuts for your application. And if you select one, let's say if I select notifications here, it opened the APP and takes you to the notification section. OK, also, if you're new to the force touch this three d Touch of Apple has, it could be tricky at times. Sometimes I find myself going five or six times before I could get that application shortcut menu to appear. So it takes a little bit of trickiness. I'm sure we'll get it over time. Now, in order for this to work or for you to build APS that have application shortcuts, you've gotta have a device that supports it, which is currently the six s plus and the six plus. Yes, I said that completely rock It's the six s and six plus s names. Six s and six plus s. Those of the devices that currently supported going into the future they were all supported older devices. Do not support it currently. And you need X code 7.1 to do this tutorial. And, uh, I was nine. So let's go open our X code here. Great. A new X code project. We're gonna do a tabbed application. We're gonna call this shorty cuts. That sounds so cool. Okay, click next. But you're my desktop. That is fine. Okay, this is realign the screen here, and ah, and then we'll talk about what we need to dio application shortcuts. They work in your app, delegate. Okay, so basically, the idea is when somebody loads up your app. Okay, using one of those shortcuts, it's gonna load here, and, uh, we're gonna implement a function in your app delegate that can hear or listen for when the APP is launched with a shortcut, OK? And then you conduce, um, a shortcut set up in your did finish launching with options. But there's one thing we need to do first, and that's set up our p lists are info dot p list. OK, there's two types of application shortcuts. There's static and dynamic. So if you have any static shortcuts meaning shortcuts that are not going to change, the only change when you change the version of your application. If you want to update your app, you come back in here and you change it. So in your info dot p list, this is where you're gonna put static shortcuts once. I don't change meaning. Whatever is here in the P list is gonna show up as an application shortcut. And so what we're gonna do in our app is we're gonna have to shortcuts one using a standard system icon that takes you to a search page and then another one. But we're gonna pretend that this is ah, like a dating app. Okay. And so the other one is gonna be dynamic, which means it changes on the fly based on how the current state of your app or however it's set up. Okay, so here in our info dot p list, we need to create a new item here to click the plus sign here, and we need to call it you. I application, short cut items, changes to type array and then expanded their click the down arrow and then click the plus sign again. Okay. And for each item in this array, or each item in this array is gonna be one of your static shortcuts. Okay, so what we're gonna do here is item zero. That's good. We don't need to give it a name. We're just gonna make it a dictionary and then expand this one. And now click the plus sign and let's put in some properties here. The 1st 1 we're gonna dio is you. I application short cut item icon type. Okay. With long one I know and that these are auto complete. At the time of recording, I'm gonna click this air, appear to this line, appear to expand it. They don't auto complete at the time of this recording. Maybe in the future, they'll support it. They tend to apple tens of support auto completion in these Ah, in these people s files over time. And this is gonna be a string. And this is where you set What kind of icon you want to show. Okay. And this could be system icons. Well, These are system icons here. So you have to know what kind of icon it is. In our case, we know it's you. I application Shortcut icon, tight share. Who? That was a mouthful. And if we pull open the apple developer documentation like so Okay, we can see what types there are. If you want to go to this. Just positivity. Look at the girl. Here. You get framework reference you applications Orca icon, class reference, By the way. It took, like, five minutes to find this dang documentation. Oh, Apple has a sample project for application shortcuts. It was like 200 lines of code. It was crazy. I've made it very readable and easy to do. So sometimes apple is not so intuitive and what they're doing here. But here are the system icons that you can choose in our case, we chose search, as you can see right here. So let's go ahead and hide this year. Okay? So you my application shortcut icon type share. That's the icon type. All right. The next one we're gonna dio is you. I application short cut frickin spell it right. Shortcut item. Subtitle sub tight toll. Okay, that's a string. And this is just the subtitle that you're gonna show are just we're gonna say, get top results and then we'll do another one, okay? And we'll call this you. I application Short cut item title. This is the main title, and this one will just say search and want to do one more. This one is going to be you. I application shortcut item type. Okay, that's the type. This is what we're gonna reference in our code. And we're gonna call the type search you can call whatever you want. Ours is gonna be called search. Now, you can do a custom image here so you can pick the image that you you can pick the image creating image. Excuse me? That you want, and you can select what you want it to be Here. Ah, and we're gonna do that. We're gonna do Arjun code on the dynamic icon. But you can also do it here, which is really cool. Want to do? An image was pulled The documentation here. This is the one you want. You application shortcut item icon file an optional string specifying an icon image to use from the apse bundle okay. And it also tells you what it needs to be 35 by 35 needs to be a single color. We're gonna create one in just a little bit, but we're not gonna use it here in the p less we're gonna use it in our code. But just know that you can put it here in the peerless file and point to the image that you want. Really cool. So what we have here is we've specified the type of iconic deists. This is a share. Icons. That's where our image is going to come from. We've given it a title, a subtitle. And we've given a type. Okay, this is search. I could have called it Search icon or whatever. Don't be confused that these both say search. They could both be different. Ours is just are just happened to be the same. So this is a static application shortcut. And so let's go ahead and build this on the phone and run it and see if it works. Uh, I need to change my deployment target cause I haven't updated my phone yet. I'm gonna change this to deployment targets from nine point. 0 10 or 9.1 tonight point. Oh, so I could build my phone. If you have that problem, just go to build settings your targets and change your deployment target. Okay, I'm gonna go ahead and run this on the phone. And what's gonna happen is your app is going to run. It's going to show up on the screen, but we don't care what shows up on the screen, because I'm just gonna close the app after it loads and then we're gonna do is just trying to the force touch the forced touch. We can put the action menu. And as you can see, there's our search icon. So that's really cool. So right on the box, it's working. The problem is, right now, though, we don't have any code to intercept this. So if I click it, it just loads the app as normal. Okay, it takes you right to the beginning point. Okay, which is not what we want. So let's go ahead and write the code to make it actually work. But we know the icons showing up. See how easy that was not a big deal. If you go look at Apple's documentation in their sample project. It was a nightmare, like it was a little bit scary at first. So it's real simple, actually. So cool going to stop that. And let's go into our app delegate now. So we now have our are, uh, static icon. Let's get the rest of our coats weaken, Support the dynamic icon, and then then we can load them both up. Okay? So when you want to create a dynamic icon, you do that here in did finish launching with options K. Okay, so when this is called, you're gonna instead of your code for dynamic app icons. And, uh, this, of course, will be called when you load your app. So let's go ahead and take care of this now. So what we need to dio say if let short cut items equals application regarding the application or giving shortcut items. And it says the home screen dynamic quick actions for your app available on devices that support three d touch. This is very important. We're grabbing the shortcut items, but do not get this confused with static shortcuts because this array is only holding the dynamic shortcuts. Okay. And so we're gonna grab it on Lee if it's empty. So we're gonna say we're short cut items dot is empty. So we're gonna grab the array of short items on Lee if it's empty. If it's not empty, it means we've already initialized this at some point in time. And ah, we don't need to do anything with it. So that's great. Assure Cahir dynamic short cut equals you. I mutable application shortcut item. It's when we want. And you could do it with just a string and a type or you could do with the string type and subtitled That's what we're gonna do. And so what is our type? Well, we need to have a second icon and river. How? He said we're gonna pretend it's a dating out. And so what we're gonna do is we're gonna have one called hookup like you want to hook up with someone. Okay, that's gonna be the type. The name that we're gonna give it, the localized title, this just the title. If we had localized strings, that's where you getting it from. But we're just going to say this and they're gonna call it Hook up. And the subtitle This is interesting So this is where I think dynamic icon are dynamic. Short cuts really take effect. Your subtitles where you maybe should have some type of writing here. So, like, if let's say it was a messages application and it should go to messages, we could say you we could say here something like this. You you know, you have 10 new messages. Okay. Ah, In our case, let's pretend it's a dating app and you got a message from a girl, okay? Or guy or whatever you're into. Okay, animals, whatever. I'm not judging and we're gonna say, start a fling with get to the rest of that in a second here. We'll just leave that there for now. Then let's go to the icon. You I application shortcut icon. So let's say you I application short cut icon, okay? And we're gonna do it with a template. Image name creates a home screen. Quick action based on an image in your APS bundle, preferably in the asset catalogue. And so we're gonna pretend we have already created an image. Let's just call this heart. It's gonna be a heart image and user info. We're gonna put Neil in here for now. And, uh, if you click on the right here to look at what it says AP defined information about the home screen quick action to be used with your up to implement the action. We don't need to do this right now. Okay, So, dynamic shortcut. There's our shortcut. Now what? We need to dio se application dot shortcut items. We're gonna create those short items and say dynamic shortcut. So this is interesting. Why use dynamic shortcuts? Well, I think a good use for dynamic shortcuts is when you want dated to be dynamic like messages . So, for instance, when we load the app you know we could do is grab the messages. How many messes? How many messages do you have? And you could put it in the shortcut icon. That's a good use for a dynamic icon or, in our case, started fling with. So let's pretend. Okay, let's pretend that we have downloaded the latest hook up and dynamically Ah, low downloaded the latest and dynamically load it. Okay, What else? Oh, are you know a good place where you could set this as well to like for your dynamic app icons. Whenever you're closing the app. So maybe when APP closes, update the latest hook up. So next time you launch, it has new data, whatever. I'm just giving you some thoughts here of what you could do. So in our case, let's pretend we went to the Internet or somewhere. And we found out that you have a new a new hookup or flirt or whatever. And let's say it was from Was from Kim. So, uh, does it say downloaded hook up equals Kim? So then what you could Dio is here in your in your text right here. We could just use string interpolation and put her name of their dynamically. And now you have a dynamic shortcut, which is really cool. Makes your app seem fresh and more updated. Okay, so we've got that here. That's that's good. Let's go ahead and get our image now. So I'm gonna go onto the Internet. Let's go to the noun project and let's find an icon that we like. We're gonna say flirt, flirty, Cool. I like this one. Let's click it and we're gonna give credit. Teoh simple icons for allowing us to use this icon in her application because we're giving credit, and I'm gonna do command shift four and just save this as a screenshot on my desktop and drag around it so I don't have to go through the whole download process. There's our icon. And now if you go over to our I was developer library. Okay? If we go to if you do a search here on the, uh, on the developer library for three D adopting three D touch on iPhone, Click that. Okay, so this is this is how you get to that screen, OK? And what we want to do is we want to create the right size icon, which is 35 pixels by 35 pixels. Oh, I always keys over here. Okay. On the information property Lyski reference. Remember where we saw this 35 by 35 over here for the U. Y. Application shortcut item icon file. There's a link here called template files. Let's click that. It's gonna download a Photoshopped file for us. Okay, If you don't have photoshopped, you don't have to do this party. You can get your icons. However, you're used to doing that. I'm not gonna worry about three x for right now. Let's just do two x and one X. I'm gonna open this with photo shot. Okay? It gives us a nice bounding box. Of what? Of where we should do our art Where we should not. Okay, it's loading. Loading. It's loading. Okay, enough pop ups had enough of those today. Okay, I'm gonna press Zito. Zoom in here. Come on. There we go. There's our Ikonomou Go to view and turn off extras because those blue lines are annoying me. If you look at the right hand side, they have some icon examples. So these icons have to be a single color. And by the way, doesn't matter what color you make them. It's gonna turn it black for you on the on the Iowa set so we can just leave artist black because we know it's gonna turn ours black. Don't even play around with coloring it. Okay, so let's go ahead and take our icon here and just drag it over and press enter. Turn off the layer with the eyeball queue. The other one when president I'm going to right click this layer and go to Rast arise later to make it creditable and then President W for the magic wand Tool. I'm just gonna press delete on that white and delete on that white hold down command plus t to go into trance remote. And while holding shift, we're gonna make this icon a little bit smaller. By the way, the reason why I showed these Photoshopped tips is because as an IOS developer, I've had to do this a jillion times. Like what? A pain. Let's go find the designer having designs up thing, ship it over to us, get back to us in two days. Let's or we could just do right here in five minutes. So there's our icon. If we zoom out, it starts to look nicer. Not so pixelated. So I'm gonna turn off these layers here. Okay? That's the one I want. And by the way, I did command a to select all. And then I pressed V to go into select mode and at the top here, I selected this line Horizontal centers in line vertical centers to center this icon. Okay, I'm now gonna go file export Safer Web legacy. Okay. And then on the desktop, I'm going to save this as heart at two x dot p and G. I'm gonna go a file export safer web legacy and this time to change it to 35 by 35. This is the one X icon, their press tab save. And this is just gonna be heart dot PNG. Okay, Looks good. Let's make sure my icons are here and looking good. That's my screenshot. That's my heart. And that's my heart at two X. Okay, Something looks off about these here. Don't they Just make sure. Okay, well, we'll play around here. I'm gonna close out a photo shop. So now that they just rendered differently on your computer, go to your assets dot Exe c assets and grab your heart at one X and drag it over here and then grab your heart at two X and drag it here in the middle. Okay. See the hearts? There they are. And, of course, interact Delegate, We did set the code for the heart. It's right there. So if I load this on my phone, we should see both icons there. The custom one, which is the heart which we created, and the search one should still be there as well. I'm gonna hold up my phone here and see if it works. So your abs gonna load? Then let's close it. Holding my thumb and dragging down so quickly. Okay, there's my search. And there's my hookup. Started Fling with Kim. Whom? Of course, again, it doesn't do anything because we didn't tell to do anything yet. So we're almost there. We got the images, We got the short cuts. That's dynamic shortcut right there. Let's go ahead and do the last part. The very less part. Which is really easy, actually, one more thing. First, let's get our storyboards ready. Go to your main dot storyboard. Okay. And, ah, we've got our tab view controller here, right? Let's just use them clean up here. We're going to call this search, okay? And on this one, I'm just gonna gear to the text here on this icon. This click it and let's change it from custom to search. Okay, there we go. And on the 2nd 1 here, let's call this one. Not this constraint. Let's call this one hookups, because that's where you hook up with people. And let's go ahead and click the icon here and for the image. Let's set it to the heart instead of second. Let's call it hookups. Okay, Okay. That's looking good surgeon hookups. All right, Now, let's go ahead and go back to her app delegate and we're gonna do is create a new function here. That it by default. It's not including the template, but you can use it. Okay, go right here and we're gonna Let's make this little bigger. There we go. We're gonna put it in here. Function is application. And remember looking for us. Perform action for shortcut item. And I spelled it wrong. Funk. There we go. Application. There we go. Perform action for short item. That's the one we want. And so this is called whenever you load the app through a shortcut. OK, so easy enough. So what we're gonna dio is if it's the search one, we're gonna load the search tab. And if it's not, if it's the other one, we're gonna load the other tap. Now, if we had more tabs, we could do those. If we wanted to show an alert, we could do that. We can do whatever we want here. Whatever you can think of you can do here in our case. It's a tab. Are so if let tab V c equals self dot window that review controllers, we're gonna grab the route view controller. Of course, in our case, since we're using a tab are we know the route view controller is a tab are so we need to cast it. Okay, you lie Tab, Bar controller. So we're gonna grab the tab bar and then what we're gonna dio say if shortcut item dot type equals search, let's do one thing. Now maybe you're wondering what shortcut item will here it is the U Y application shortcut item. When you click it, it passes it into your application. Really cool. And it has a property called type. That's where we said in the info dot p list. The type. Okay, Same thing here. When we said type, it took up. We can actually check for those strings there, which is really cool. And it is it is of type string. OK, so if it's of type search, let's go ahead and say, tab V c, that selected index equals zero. Okay. And let's go say else if short item type equals hook up. If it's a hook up. Then we're gonna select, have easy that selected index equals one. Then let's Then let's select the hookup step. Okay. So else if What is it yelling at me for Michigan? Missing condition in if state. Oh. Ah, yeah. There we go. Okay. So if the type of search go to the surge to have otherwise go to the hookup tab. Okay, let's stop our application. Now, let's go ahead and run it. Okay? So notice right now it's on the search tab. I'm gonna close the application or at least press the home button. I'm not gonna kill the APP. It doesn't matter. And I'm gonna go ahead and run the shortcut. Not see. It's hard, we go. And so if I click hook up, it should take me to the hookup tab. There it is. Hookups now selected. Now look at this with the hookups tab selected. That's what we left it on. Right now. If I do this shortcut again this time to search, we should see the search tab. And there s so it's working. So really, the idea behind shortcuts is you had to find a shortcut, its title and subtitle and the image and then you handle when you give it a type, and then you handle what happens when that type is selected. In our case, we're just switching tabs. You could do alerts, whatever you want. It came very important. Point. I need to tell you, this does not work on the simulator at least at time of recording. You have to do this on a device. Okay? The force touch has to be done on a device at current time of recording for the application shortcuts, toe work. But that's how you do it. Not that big of a deal. Pretty is pretty simple. And just to show you, we just let me show you the value you got out of this tutorial. I pulled open Apple's project. OK, this is this is how I figured out how to do all this. And, uh, yeah, look at this. Yeah. Come on, guys. Really. And not to mention this in this. Okay, so, uh, yeah, the sartorial is really short, but it wasn't that easy to put together. So anyway, now you could do application shortcuts. Make your make your aps better. I think users should I think developers should be doing this because it adds utility to your application. We're getting in a state of iPhone development and just in general, where we want information instantly loading multiple screens, things like that is becoming less and less a desired functionality for users that they wanted. That's it. Application shortcuts. I'll see again next time on death slopes with Mark Price. See you soon.
123. Swift & Objective-C in the same project: Hey, everyone, Mark. Pricier debt slopes dot com And today we're gonna talk about something that has been highly requested, which is inter operability between swift and objective seats. Now, the real test is if you can say inter operability 10 times fast. I tried it. It looked like an idiot. OK, so must deal while the ability to import swift code into objective see an objective C code into Swift. So I'm gonna create a new project next code here, and we're gonna create new project. And I'm just gonna do single view application and click next. We're gonna call this my O B J c ap and language we're gonna set to a objective C and I'll just put this on the desktop. All right? No big deal. So currently, right now, I have a strict objective c project, okay? And, ah, just like any single view application, If I load this, it will load my single view controller automatically. Now, let's say I want second view controller, but I want to do and Swift. And by the way, if you're not using Swift, you should be OK. Every project that I come on to every company I do contract work for? I do not let them leave until they allow me to convert their project to Swift. Now, you don't have to change your objective C code. That's the beauty. You leave it all the same. But any new code? You're right. I believe you should be writing and Swift because it's a much more powerful language and much safer. So and it doesn't do anything to your objective C coat. It all run just fine and great. There's no problem with having swift in objective C code based projects. So you should be doing that. That's my opinion. But it's my professional opinion, so Okay, so right now objective. See? How do we get swift in here? Good question. Well, first thing we're gonna do is we're gonna create a second view controller. Gonna right. Click my folder here, go to new file, and we're gonna do Coco touch class for Iowa's. And I'm gonna call this one second VC subclass of you have you controller. That's fine. And language is gonna be swift. Okay, create. Ah, interesting. Here's something very interesting that you want to point out. Would you like to configure an objective C bridging header adding this file to my o b do say Oh bjc apple create and mixed swift and objective C target. Would you like to x code automatically configure a bridging header to enable classes to be accessed by both languages? Yes. Now I want to point something out here though. There's bridging header. Okay, It's so your swift files can excess your objective C files. Okay, so I don't technically need this right now in order for my project to recognize swift files . But in the opposite, since I will. So again, this right here this bridging header file. Here's the thing. That right down is if you want swift to be able to access objective C classes. Okay, not vice versa. I don't need to do this for my objective. Seiko to excess a swift file. There's a different way for that. But I'm gonna add that Anyway, right now, I'm gonna click Great bridging header! And what it did here is it created a bridging header file. And this is where you'll import any objective C classes that you want to make available to Swift. But again, we're not there yet, So we have our second view controller here in Swift. Really cool. Very good. So let's go to our storyboard. What I want to do is put a button on here that will load our second view controller. So it's a load. Second VC looks good to me. Let's just go ahead and align it horizontally and vertically and give it a fixed within height. Okay, Cool. Dale, there's our storyboard, But let's go ahead and open the assistant editor here and I'm gonna control drag from the button over here to the code. And action is what we want and we're gonna call this load second view. See? So I've just created an ivy action in my objective sea view controller here. I'm gonna close the assistant editor go into view controller dot m and up here in the interface. I want to declare my second view controller. Right. So let's make a property non atomic strong and, let's say, second view controller, wait a minute. Why is it not pulling up second V C? It's not working, right? Well, the reason why it's not working is because we haven't allowed it to work, and this is how you do it. This is how what I'm about to show you is how you get objective C to recognize swift files . And here's the key. You you import. Hey, you ready for my o b g o b j c ap ok dot H Excuse me, Dash Swift dotage. So what you dio is in whatever objective c class that you want to import swift into you include this import statement here, and it's the name of your project dash swift dot h. Okay. And this is going to give you access to all of the swift classes so you will never, ever import individual swift classes into any objective c file when you want excess swift. Okay, you just import the my project named Dash Swift touch dot h into the top up there and you'll be able to excess it. So let's try this again at property on Atomic Strong, this timeless type in second view controller And there it is K. It is their second v c cool deal, and let's make sure it works. So when that button is clicked, will load that view controller and make sure appears on the screen. So what we'll do is we'll say, second V C equals second VC. Alec Initialize. Okay, we've just initialized it and allocated it. Let's go ahead and throw it on the screen. So self dot present view controller, we're gonna say second VC animated. Yes, completion. Neil, we don't care what happens after it loads. But one thing I do want to do just to make sure it works is let's make it purple. Second V c That view dot background color equals you like color purple color. Okay, You following with me right here. So what we're doing is we are We've created our second do controller, which, by the way, is written and swift. If you remember right where? So we're allocating it and initializing it. We're changing the background color to purple, and then we're showing it on the screen. So if I run this application here, we should see when that button is pressed, we should see it appear on the screen. Okay. And so as you can see, there's a load. Second VC button. If I click it, it's purple. So it worked. So are swift. Class was successfully loaded. Okay, Now let's talk about the opposite case where we have a swift project and we want to import objective seat. OK, I'm not gonna create a new project. I'm just going to show you in this one because it's the same principle. But just pretend that you have a swift project and you want to import objective. See, this is how you would do it. What you would dio is you would create this file right here. Okay? Goto right. Click your folder new file, and you would create a header file. Okay. And what you dio, as you would call it, just what are just called that? Remember how I x code was very helpful and did it for us automatically, which was cool. So my o b j c ap dash bridging dash header dot hk. So you would name it the same name. Is this right here? Okay. And maybe you're thinking oh, so automatically works now. Well, no, it doesn't. You have to actually go ahead and put that in. So let's go ahead and talk about that here. So up here in your project icon, go over to build settings and in the search bar, just type in bridge B r I d. And there it is. And objective c bridging header, and it's asking where you can find it. So what you're gonna want to dio is the name of your project slash the name of your project Dash bridging dash header dot h. Okay, Pretty simple. So again, name of your project Slush. The name your project Desperate bridging dash header dot h and ah, that's all you have to do for it to be recognized by the build settings in your application . And then over here this is where you import your files and show to show you that it's not yet working. If I go into my second view controller, which is written and swift and let's say I want to excess my objective C first view controller, see what happens of our first Veasey of type? It's called view controller. Look, it's not working right, Okay? Nothing's nothing's popping up. That gives me an air, OK, it can't find it. So what we need to dio is in our bridging header file. Simply import your specific swift classes. Now this one's important this one you have to import the specific classes that you want to use in Swift. Okay, so I'm going to say of import the u controller dot h. So let's just import that view controller h file here and go back to our swift class and see if it works now. Var were gonna say first Veasey of type view controller. And there it is. You can access it and create it. So anything I wanted to do in here with that I could so I could say first V c that background stop Viewed up background color, second excess everything just fine. So what you've just seen is us successfully uh, accessing swift code an objective C and accessing objective C code in swift and notice how here and Swift, you don't have to import anything. This header file right here is all you need. So any of the objective c files you want swift to excess you'll put in here and an objective. See if you go to the View controller M. If I want to import my swift classes here and this is for all of them, this will import all of them. Import the name of your app. Dash swift dot h. This is an auto generated file. If I command click it, it actually auto generates this and has your class information in here right here. See second NBC. So it's actually real files. Just hit and file. You'll never have. You'll never touch that manually. So that's how you do it. Not too big of a deal. I've done this in all of my projects since Swift came out very powerful, very important that you get swift in your projects. I'm a big advocate of Swift, and there's no reason why you shouldn't be doing it because interoperability is so amazing . And I'm very happy that Apple gave this so mark Price. Your death slopes dot com Go ahead and get swift in your projects now.
124. Mastering LinkedIn: everyone. Mark Price here. Deb slips dot com And today we're gonna talk a little bit about career preparation and linked in. So I'm gonna pull up in my LinkedIn profile here. And so foursome Preface. Lincoln has been a very powerful tool for me. I've gotten multiple projects, multiple jobs off of Lincoln, and, uh, Lincoln's not overnight type of thing. That's something you've got to start working on. So if you're interested in getting in the community of development, maybe you have never been a developer before and you want to start building up a reputation you want to start getting known linked in is the place to do it. At least one of the places. So, uh, if you haven't created account, just goto Lincoln dot com and create an account. I'm not going to specifically go over how to like, where do you click and where do you love load images and things like that? You can experiment with your own. It's not that hard, and they give you directions and instructions. But I'm gonna go click my profile here, and, uh so I have a few 1000 connections on LinkedIn, and, uh, it's basically has been a three year process. To get there, you can get there a little bit quicker, and, uh, you can be very effective in a much shorter period of time as well. You don't have to have that many connections to be effective. But the idea behind linked in is that you start making connections. And when I'm talking about Lincoln, I'm talking about in regards to development. You start making connections with people in your area of expertise, and you start rubbing shoulders with people that you might not know. So you can start getting involved and see what's going on in your community or in the development, the world of development. Eso, for instance, every single week now because I've built up my length in every single week I get people contacted me about jobs, but here's a new one. I've never even looked at it. Let's see you. Let's see what this person says. Um, this one's a solicitation. Okay, so this is a bad example. He he's saying I'm doing stuff. So, uh, here's Here's another one right here. We've started a project and need an IOS developer, and so he reached out to me, Um fact, every single week, I get emails from people on lengthen looking for android developers looking for IOS developers. I do enjoy development as well. To so point being, Islington could be job security for you if you take time to fill it out and take care of it . So let's talk about a few things. Unlinked it. Okay, so first off is your name. Obviously, it's your name. Secondly, is your title now This is important. So one of the things about length in is employers are often searching it and Lincoln searches, um, find you by search results by keywords. And so one of the most prominent and powerful ways of being found is your main title here. So right now, mine's a senior IOS and and an angular engineer, and in fact, I should probably change it. I'm doing a lot more teaching these days, and I should probably something about instructor, a boot camp instructor, online instructor, You timmy instructor, things like that. But at the time, this was the point. The reason why I put this on here because I was looking interested in getting contract projects and things like that. So what you want to do is the position that you're looking to fulfill is what you want to put their. And so if I was you, I would put on their, uh, IOS engineer or IOS developer. I would be very careful to put the word Jr. On the reason why is ah, sometimes Jr has a negative connotation to it. And, uh, sometimes employers really don't know what they're looking forward that just need someone to solve a problem for them. And so I would just put IOS engineer or IOS developer and, uh, then let that way you get into the interviews and then you can move on from there, and, uh, you know, your skills and personality, everything else could be the deciding factor. And so Number Jr on their keep yourself as an engineer, and, uh and then here's something interesting. The area you put on here, um, put the area on there where you want to work. So, for instance, if you wanna work in Los Angeles, okay, but you live in Milwaukee, the Los Angeles on here. Do you get more connections and stuff and then, uh, being conversations and discussions as your as your working with recruiters or whoever you can say, Hey, I need relocation And most companies these days are actually doing relocation. And by the way, there are a few different technology hubs. Were the the salaries air extra high where there's lots of jobs? Okay, and that's gonna be Los Angeles. Okay. San Diego, The Bay Area. Seattle. Austin, Texas. New York City, Salt Lake City and Provo, Utah. Um, that I say Boston, New York So and I already said Seattle. So there's about seven or eight major cities that are really hiring right now for, um, software engineers. And so, if you're interested moving any of those cities, those are great places to be. I will say I'm in Salt Lake City right now. So, like, city of all the cities has the lowest cost of living, but you get paid the same. So $110,000 salary in Salt Lake City goes a lot further than it does in Ah, in the Bay Area, where you're paying $4000 for rent a month or us out here to get the same house or whatever you're gonna live for, like 800 bucks a month. So big difference. But anyway, lots of different cities you can go to or you could stay where you are. Work remotely things like that as well, too. There's job scattered throughout. So anyway, location's important. Um, And then, you know, this is just your current where you're working, what you're doing. Ah, where your education is. You put that all in. Um, because you need Teoh. And then your summer is really important. Summary should be factual. Okay, Don't put I'm a go getter, results oriented, super powerful individual. My greatest weakness is I work too much. If you guys are still put in that kind of junk on your resumes Stop. Just stop. No one wants to listen to that. They want facts. No one cares about what you think about yourself. They care about what you can dio. So be very factual. I'm an experience mobile developer, app The app developer, blah blah, blah, blah, blah. I built 55 APS. I've done this. I've done that. I worked on this. I've worked on that very factual recruiters and employers. They want to be factual. They'll decide what they think about you. You don't need to explain to them what you think about you, OK, this is really important, actually. Like, I'm not just making this stuff up like you'll be meeting with the recruiters and send back your resume or some back. You're going to be like, Don't put this on your No one wants to see that. So, uh, stop with the 1995 resumes where you are great and powerful and amazing. Would you maybe. But you don't need to write that down. Just write down the fax. Also, one thing that's good to have in your summary are keywords for the technologies that you're interested in working on. So mine says IOS development, Android development, mobile programming, swift objective C, etcetera, etcetera. But the technologies here that you that you are a fluent in or that you're learning or that you want to learn because what's gonna happen is, um when people are searching for your for jobs and stuff like I need IOS developer, they're gonna type in Iowa's developer and it's gonna pull you up. So, for instance, here's something interesting. I get job offers or at least invitations for jobs every single day, almost for IOS. Okay, um, some for Android. But what's interesting is I've never gotten one for, like, pH B or for Java, like for Java enterprise or things like that. And that's because I really don't have an interest in working those technologies, and I don't have it listed in my portfolio in my summary. So summaries a great place also list actual keywords of technologies, you know, because just just so you know, you're like a you're like a a digital resume that's thrown in the world of the Internet. And when people are searching, they're gonna be searching keywords on your profile on get saved and things like that. So, by the way, all the information you put Arlington for the most part is public information. So if you don't want anything being in the hands of the world, the Internet, the government, whatever, don't put it on linked in just know, linked in is gonna expose yourself to the world. So just keep be aware of that summaries important. And by the way, these things aren't important in this. Someone's gonna look at this and decide to give me a job or not. It's more so. The more I have on here, the more impressive. I seem and look to the outside world so they may not read everything. But having all this stuff is very important. Of course. Um, you could put your experience like your past jobs and things like that. Okay, there's something really important about this that you need to know, though. Don't put all kinds of experiences absolutely not related to programming. So if you spent the past 10 years as a manager of fast food restaurants, you know, even though you may have done some great things, it's not super related, and I would highly suggest not putting it on their. What I would suggest, instead is, if you're brand new to programming, what you want to do is put projects. OK, say so. This is experiencing jobs and things like that. I would maybe break it up into projects as if they were products, okay, and that's why it's so important to build portfolio projects and put them on, get hub and release them. If you can release thanks to the APP store even better. Okay, things that are live on the APP store technically a product. So if you say yeah, I built and published this app. It's on the app store. Then what you can do is, rather than saying I worked at this company, you can say I worked for this product, which could be its own company. Okay, so if you had, if you had an app called recipe Time where you had lots of recipes and things like that, but recipe time on here the time that you can put the time that you worked on it, okay. And then be very factual. Implemented this in this. In this I was I was the lead designer and developer on and put make it project focus. So if you don't have a background in technology, Okay, first off, no one's gonna No one's going to really care about it when they're hiring you. No one's going to care what you did at your companies. I don't I know that sounds harsh, but they're not gonna care. So make it project oriented. And, uh, very factual. I did this and this and this meaning. Like I implemented web requests that talked to a server. I parsed the data. This APP has over 15,000 lines of code. Be a creative and think of factual things you can put on there. It's gonna be impressive. And, uh, it's It's the way to go when you don't have experience of the view of technology experience , let's say maybe it's not programming related, but you're in I t. Or maybe you do que way make it rewrite it to make a sound more geared towards what you're trying to do. So I worked with IOS engineers with Java engineers to build automated and Q A Systems and processes. Make your make your background in technology, even if it's slightly related, just barely related. Make it sound as much geared towards what you're trying to do. Is possible to show a clear path that, hey, I went from here to here to here. Anoma programmer. So again, The point I'm making here is if you have any relation in technology, even if it wasn't programming, try and make it as related as you possibly can eso. It shows recruiters and people that might want to hire you a clear path of where you've been. So if you don't have experience at projects, if you have experienced make a sound, make it pointed in the direction that you want to be at as much as you can again, the more stuff you have on, the better they may not read. People may not read every single thing that's on your profile, but the more you have, the better. And so for me, for instance, like someone will look at my profile to be like, Wow, this guy's been doing this for a long time just by looking at it, okay? And they may not have read every single thing, but they get a good idea that had need to talk to this guy. And that's what you want to do with linked in. So add your experience, your jobs, things like that. Also, you can add there is a separate section for projects to. So if you don't want to put your projects as experience, because let's say you do have some experience, you can add them as actual projects and load screenshots and things like that, and the more pop and flowery add there, the more you're going to catch people's attention. And that's why, by the way, in my courses I teach that user interface designed as a developer is so important because, especially the iPhone naps because the standards have gone up. And no matter what you say, even if you're like I'm a fantastic coder, but I'm not great with you. I'll leave that to the designers. Still, your think about this. You're looking at recruiters and CEOs who are looking for you, right? People who maybe maybe are 100% technical. And so what's going to draw their I too? Well, it's gonna be It's going to be things that makes sense, of course, the keywords and everything. But when you've got pretty graphics, things like that, it can only better bring someone's attention. And so the better you designed things out, the better chance you're gonna have a getting a job, and some people would disagree with me on that. But trust me, I know what I'm doing. I help people get jobs all the time. I know how to work with people that it's it's about psychology. How the human mind works. It's not just about I can program an objective C and Swift. I'm great with algorithms and things like that. It's cool that you know those things, but you still got to sell yourself. You know, the two coders have the exact same skill. Okay, One of them's fantastic at algorithms and hates, but terrible. Let you why the other ones also fantastic out algorithms, but is really good at you. Why? Who's going to get the job? You know, there's lots of factors, but anyway, take user interface design and graphics and think seriously. Okay, um So anyway, projects put him on there. If you have them, it has things for, like, volunteering things like that as much as you can again. Being as being as full unlinked in it's possible is great, Cause if you're Lincoln is absolutely empty, everyone's gonna be like he doesn't care or they're new. They don't know what they're doing, So fill it out. I got lots of projects online. Um, okay, so down to the bottom now, skills in endorsements, people can endorse you for skills like IOS development. Things like that, these aren't isn't really a big deal. In fact, they're kind of a joke that only do a whole lot for you, Arlington, because anyone can endorse you. So just so you know, you don't need to spend too much time worrying about skills and endorsements, cause people will endorse you for anything. And sometimes they even put random stuff on there like someone at one point in time put piano playing online. I don't even play piano if someone's being funny and they can just endorsed you for whatever skills and endorsements. Don't worry about it, Um, but do get rid of the ones that aren't super important. Put education if you have any. It's not that big a deal these days, so don't worry about it. Okay, here's a really important, though. Recommendations. So a recommendation is when somebody personally right to Bachu says, I think this person's fantastic. They did this. This and this and this when someone else is talking about you, that's a good thing. The more recommendations you have on your linked in profile, the more prestige you're gonna have and more desirable you're gonna be. Just think about this. I'm looking at one person's profile. They got no projects, no recommendations. You may have the best skills, but at a snap shots comments in 10 seconds. I can't tell anything about you versus someone who has five or 10 or 15 or 20 recommendations. Do you like Wow, this person is made a dent in the community, and I didn't even have to read it. But I just looked at the count of recommendations. So here's the trick. If you want to be recommended, okay, you go recommend somebody that is your mentor. Recommend somebody you're interested, or somebody that you know as faras in the field of technology. So, um, we're going recommend somebody, and they will recommend you back. And by the way, if you finish any of my courses, okay and you show me that you finish them and you want to give me a recommendation, if you give me a recommendation, Arlington, I will personally give you a recommendation back. I'll look at your code, and I will recommend you based on what I see and what I think you're doing. And if you've gone through my course on completely, you know, I'll have confidence that you're close. You're pretty close to being able to get a job. So anyway, just so you know, if you recommend me, I will recommend you on get you going on that path and journey. My goal is to help you get a job. So recommendations super important. Give people recommendations if you want recommendations back. Okay. So over time, what you're gonna do is you're gonna meet people you're gonna see friend requests. Think are linked in requests and friends. I guess colleagues, go ahead and meet people. Um, or add them. Meet them digitally. Okay, For the most part, I add most people who are in my field. So some people would say, I don't ever at anyone to linked in unless I know them in person. And that may be good, but I just want you to think about this, okay? When somebody when Joe blow from, you know, from Iowa State University computer science department, You know, some student he adds you, right? And you like, I don't even know this guy. Whatever. Well, think about this scenario. Let's say I add Joe Blow and he's a nobody, and I just say, hi. How's it going is meet him. I just sent him a message. Hey, it's great to great to meet your crayons and whatever. So now we're now we're connected on LinkedIn. Well, guess what? Maybe you don't talking for a few months or ever, but, you know, you were nice to him. You added him when he didn't have anybody. All of a sudden, Joe Blow comes up with a brilliant idea and meets this guy, this investor who gives him $10 million. And now Joe is looking for an IOS developer, and he remembers that he met you. Okay, uh, you're starting to see how this how this works. So the more people you meet and don't just don't just, uh, dropping abandon people. Try and talk to them. At least send a message, get to know him a little bit. But the more people you meet on linked in that, the better your situation could be. I have only been benefited by adding multiple people to Lincoln. Now, I don't go and add just anybody you know. You know? You know Steve. So and so fry cook at you know, Chili's like, that's not do me much good. They're gonna add much value to me. Um, and so make sure you find people that are gonna add value to you and where you can add value to them. But make connections on LinkedIn as much as you can, and it's gonna pay off also. So it there's also recruiters in Lincoln and they're gonna want to be your friends or your connections. And you need to decide whether or not you actually want recruiters. I add some of them, some of them. I don't, um and it just depends on the personnel and how they approach me. If they're approaching me personally, I will add them. Okay, if it's definitely generic, like so when Messages me a mass email there, like our mass friend requests and they're, like urgent, urgent need. Mobile engineer San Francisco By the way, I highly recommend any of those people who come to you, um, with the email or Lincoln request it says urgent. Need those exact words? Just ignore it. That is the worst way to get a hold of somebody. Um, find people who are actually interested in your recruiters can be a great benefit, but they can also be really annoying. And we'll talk about that in a different video. How to work with recruiters. But so make many requests as you can. Lincoln's powerful till they also have jobs if you know it's here in the right hand side, Um, there's there's jobs. You can search for jobs and linked in, um just by here. So if I type in IOS developer, Okay, here in the search bar, it's gonna pull up related jobs in the field. So on. And then people actually to, um where are we hear? So, Jobs, see how there's a jobs link right here on the left side. Look at all these jobs you can apply for. You can actually apply with your linked in profile. How cool is that? The more filled out your profile is, the better chance you have of getting recognized. Okay, um, getting APS on the absolute super important them or you can release the more you could say . I've released 15 naps. I released 20 APS. So take that cigarette suit. Even if your app is symbol, throw it up on the app store. It's a big deal. Very, very big deal. Couldn't stress that enough. Okay, um, lastly, um, on Lincoln, it's also it's good to meet people digitally, but it's also good to meet people in person. Okay, So, um, go ahead and look up your local events in your city or and nearby cities such as, you know, hackathons networking events for technologists, for business owners, app, developers whatever start going out and actually just just showing up. Just be there. Start randomly talking to people and you'll meet people in person. Add them to your profile. There's also lots of power by adding a local people to your linked in profile. And those actually have a lot more weight because you actually know the people in person. So that's kind of linked in it known. No one's probably gonna read every little detail about your profile, but the bigger your profile is, the more powerful it is. And make sure the keywords air on there. The better chance you're gonna have of getting a job of getting recruiters to notice you. One last thing. Don't ever say that you're looking for a job unlinked in ever, ever, ever, ever. You immediately destroy your negotiating power. Okay, don't ever say looking for work. Anything like that. One is. Someone may or may not even contact you based on that, but if they do contact you there like Ah, this guy's looking for work, I could get him at a cheaper price, So just keep in mind. Don't do that. Just make the connections and the job requests will come And, uh, so that's linked in very powerful tool. I use it every single day, every single day I'm on linked in. You should do that to make a goal right now to spend at least 10 minutes a day on linked in building up your profile, making new requests, things like that every single day. I'm on LinkedIn. I'm telling the absolute truth. I am building my profile every single day because it's job security. Okay, if you how cool is it how close it to be wanted enough where you're getting job invitations every single day. That's happening to me every single day. So when one's the irony and it's not necessarily because on the best programmer I know lots of programmers who are a lot smarter than me. But I always get the job over the other programmers because, uh, they a lot of them are introverts. They don't they don't take the time. Thio Thio practice getting better. And if you're an introvert, I'm not saying you're not going to get the job. What I'm saying is, you gotta build up your linked in profile. You gotta build a presence. You gotta start working to get over being an introvert so you can beat out the competition . Um, those are the ones who get the job. So I'm just trying to give you encouragement. You don't have to be the smartest programmer in the room to get the job. Not only that, as a new programmer you can get you can get fantastic jobs as a new programmer. Don't ever don't ever take a job less than $25 an hour. Okay, that is like the minimum going right. People who are throwing up fortunes that programmers Right now in the state of Utah, there are like three jobs, three development jobs for everyone. Programmer. Okay, people are getting desperate technologies only exploding. Don't take any jobs for less than $25 an hour. Even as a new programmer. That's pretty crazy, right? I think it's pretty crazy, so we'll talk about that more as well, too. But linked and fantastic tool for you Get started on it now, and I could give you tips and help. I'm on the chat room on the form, says anything you might have said in my way, and I will answer as best as I can. And that's it. Mark. Pricier deaf soaps dot com and Happy job Hunting
125. Resumes for Programmers: Hey, everyone, Mark Pricier death slopes dot com And we're gonna continue our discussion on career development and we're gonna talk about resumes. Put my resume here. This one is a couple of years old, but still highly effective. I didn't want to show my newest one. In fact, I probably need Teoh. It's probably about time to update. My resume should always be updating your resume every so often. And uh, so let's talk about resumes. What is it for? Well, you're like the annuity resumes for Well, yes, I'm talking in the specific context of development. So resumes. How it typically works is even though you have a linked in profile. When a recruiter or employer comes to talk to you, they'll still ask you for your resume. And why? Because resumes should be a stripped down version. Gone are the days resume should be big and powerful, and long have all kinds of crazy stuff in it. It should be short and concise. And what's gonna happen is your recruiters gonna hand that resume over to the company that's interested in talking to you and maybe the CTO or the managing? Uh, the manager, developer managers, there and there's gonna print out a copy of it. They probably haven't even looked at you yet. Until you even get there in the meeting, then they're looking at you analyzing it. So it's something they're gonna have in front of them so they can ask you questions. And also, your resume is also a form of S E O. When you publish a resume, it typically gets put in some type of database. And what happens is when someone is looking for an IOS developer, they're going to search all the annihilates developer who lives in, you know, Florida or who lives here or who has Iowa's development experiments with, Let's say JavaScript. So they're actually gonna put in keywords okay into this search database, and it's going to spit out people who match the criteria based on some percentage. This is the highest match group of people from most matched all the way down. And then they're gonna start making phone calls and things like that, so keywords and everything is very, very important. And, uh so let me give you history of my resume. So in the very beginning of my job searching, I put together this powerful resume with all my APS. I paid a graphic designer to design amazing graphics on. It was like, Wow, make it amazing. And then I started working with some top recruiters, one over at Disney in one for Electronic Arts, and they basically threw it in the trash can. I said, That's really pretty, but that's not gonna do any good. And so the resume you're looking at right here it was reviewed by three recruiters, one from Electron Arts, once from Disney and the other one I can't remember. And this is what they said is the ideal resume. So I'm telling you what I think. The ideal resume is based on experience and it's been very effective. So let's talk about it. So your contact information should be at the top, right? Very minimal. Just no, no designs, no graphics, nothing. Just plain all plain Janes stuff here. Okay, then, in addition, having your name at the top OK, you have your title just like on linked in the most powerful, the most powerful statement about what you're looking for in a job. This is your title. Okay? I'm looking for a job as a senior mobile developer or unity three d developer. That's what I was doing at the time. I was looking for a IOS job or a, uh, actually an IOS or Android job. Ah, and a unity three D developer. And so all of my applications were geared towards that. Now, what's actually interesting is I also was applying towards some very IOS specific jobs. IOS only so actually made a second resume that had a few different changes on it that matched better. What else I was looking for. So it's okay to have multiple versions of your resume that show different things based on the jobs you're applying for. Don't just send out mass resumes hoping to get the best. Make sure they're tailored for the specific jobs that you want to get. Okay, Makes sense. So that's your title what you're looking for. Okay, Now, just like linked in in the summary, we have these bullet points and what they are. Are there facts about you power statements that are turned factual so again, not the power statements that are like professional developer, super experienced, powerful and passionate? You know, no one likes those words. They're ridiculous. Don't. Even if you really want to write something about yourself? You know, maybe really nice. Maybe you're very compassionate. Maybe you are a go getter, and maybe you can learn faster than anyone else in the world. But the thing is, okay, you can't tell the about yourself. You can't say that about yourself. Okay? Other people need to say that about you. Maybe on LinkedIn recommendations. But you can't do that for yourself, and no one's gonna care. And if you do that kind of stuff, people are gonna laugh The worst thing you could ever dio. Okay, the worst thing you could ever dio is say, my greatest weakness is I worked too much. Or my greatest weakness is I'm a perfectionist or my greatest weaknesses. I'm an overachiever. If you guys have ever done that first you should be laughing at yourself. Secondly, uh, it's just ridiculous. Don't Don't do that. Please don't do that. If you If you want to get a job, please don't do that. Maybe I'm offending somebody now, but But that's the worst thing to say. People want honesty and integrity and real life factual things more than they want stuff like that. Okay, even if even if those things are true. Which, by the way, greatest weakness overachiever. Come on. Whatever. Like really, really. Anyway, um So, uh, by the way, I hire people. I had my own consulting coming. I hire people, so I'm not just giving you crap here. I have hired people. I know. I know what people are looking for in job interviews and things like that. And I've been through the interview process. So? So these air factual points about yourself for me developed and published 54 mobile APS. I started all mobile app development company that earned greater than $2 million in revenue . OK, these are fax fax about yourself. So in your case, if your brand new again projects or critical, you better have projects up. Get him on the APP store. Developed three APS to the apple APP store. Implemented over 15,000 lines of code. You've got to start thinking creatively of how to show facts about yourself that show that you're a developer. Okay, Uh, it's it's a big deal. Don't also, I put senior mobile development, but don't put junior mobile developer. Don't ever use the word Jr. Okay. And don't ever use the word new. OK, any time somebody asks you, you know, Are you knew how long you been developing? This is what you should say. You know, I'm not his experiences. Some people have been developing for, like, 10 years, But I'm really good. I've learned real fast, and I've been some great things. And here's some of the things I've done Don't ever say, Jr. The minute you say, Jr The minute your salary goes down in the minute, your ability to negotiate and the and your people's perspective on you goes down, we're not really looking for in junior program. Well, they don't really know what they want sometimes, but they really wanted someone who could just achieve results. But there's this taboo around Junior that was like, Well, I don't want to hire Junior because they're gonna be hard to work with things like that. And you're not a junior. You are a talented individual who can learn anything. Okay, anything. And so you're an engineer And don't say your senior engineer, because that's gonna really up the standards and they're going to really test your heart. But just say you're an engineer. That And if they ask you how long you been doing it, you can tell the truth. But don't say junior. Okay? Don't say anywhere in your resume either. So, um, understand, IOS and Android best designed the development practices. That's a little less factual, but still kind of factual. It just shows what you can dio, okay. Managed over 25 local and outsource developer noticed whatever anyway, faxes their facts about yourself. So someone's writing through, like, Wow, this is This is what they've done in powerful bullet points that are factual. Okay, Same thing is linked in summary languages and tools. Very, very important. You can call us whatever you want, but the important thing here is the key words. Okay, um and, uh, PHP I was talking about my other video. How I'm not interested in page, but in this case, at that point in time, I was I was willing to work on it, but I've grown to hate it. So, uh, anyway, uh, bullet points of the technologies that you're looking for these are gonna be sc. Okay, This is gonna be an SDO. They're gonna find these in the database, So if they're looking for somebody who is good with Iowa's development objective. C and Unity, three d. You're gonna pop right up to the top of that's on there. So keywords very, very important. And it didn't keep it factual. Now, how you're doing all this stuff, though? Easy, easy stuff. Bullet points, fax experience. This is important. Now, at this point, because it is gonna be read by whoever is interviewing you. They're gonna have it in front of them. They may have read it before they may not, but they are probably going to read it, and so keep it. Very simplistic. So the name of the company that you worked, and if it wasn't a company, remember, you got to use your projects instead. Make sure you have APS on the app store, and, uh, and then it's talk about the app. You know, my recipes. And I was the CEO. I was the designer developer. Whatever you want to say. Okay. And, uh, and then select founder here. You could say, founder of your app. And then, um then you could put a description. Mindsets have worn many hats contribute on every level app development as founder of fries , a on. Then you say your title, You know, So you could say this again. The CEO, our developer and designer or whatever and then facts about this app has 15,000 lines of code. It integrates with a server. It does this, it does that does that. So if you don't have prod, if you don't have work history, this is a great place to put your project and then the specific things you did on the project. If you do have work history, uh, that's your title that goes here. And in the things you did at the company, factual things. Okay, very factual things about that company. The more you could put there, the better. So it just shows your experience. Make sure it's tech related again. I don't see McDonald's on here. Guys came McDonald's, McDonald's or whatever else you did in the past. Before I was a programmer, I was a regional manager at a drug testing company. Um, and what was I supposed to put that right? What was I supposed to put their That's not applicable? It all. However, get this when I worked at that directors and companies is how it got in the programming we were taking in thousands of people a day as donors were doing all by hand, writing down their names on paper, things like that. I was like, This is ridiculous. So actually, I didn't even know I was programming at the time. Was like, How do I solve this problem? So I learned of something called Microsoft Access, and there was some programming language called Visual Basic for applications. So I started building this database, uh, this database application where people could sign and digitally with a signature pad, and it would print their names and things like that. And I made I automated this process I still don't even know as a programmer. And then later, when I started building my resume, I was thinking, Do I put drug testing on? There was no. But you know what? I did Dio. I actually build a database. So what I put on there is that I developed software for this company, which I did, and I explained all the facts about it. So again, if you have any tech related experience in any of your previous companies, put it on there. But Dr it just like I did drive it towards your goal of getting a programming job. Okay? It's absolutely not related. McDonalds, whatever. Don't put it on there. Trust me. Don't put it on their, um, go ahead and just focus on your projects. And if they ask about past history again, say, I haven't been doing this as long. The sun has been doing it for 10 years, but im getting really good at it. And that's a political answer. But you are. You're a lot better than you probably think you are. Okay. And it just takes practice, and you needed You just need a chance to prove yourself. So don't don't you don't shoot yourself in the foot. So list your experiences here. The company, the your role. Any titles you want, There are things you did. Um, and they just let your different companies by year going back and going back, um, again, Don't put unrelated stuff here. And if you have any education, you can put it there. If you don't, that's fine. Any certificates you want to show? Um, my four. Manning's a little off here should fix that. Um, and as this is really important, I know it's gonna be hard, but you need to keep your resume to two pages. Okay? No more than two pages that when I talked with recruiters, and by the way, I talk to recruiters frequently because one of my goals is to help people get jobs. And so I need to know what's going on in the industry. And so when I talk with recruiters, they say, you know, an average time if someone's trying to analyze whether they should interview or not. So this is the point when you haven't been having decided they wanted every interview or not, but they have your resume. They're gonna look at your resume for less than 20 seconds. 20 seconds. OK, two pages, 20 seconds. That's easy. Oh, okay. Yeah, yeah. This guy is doing What about this guy or girls doing what? I want them to dio any more than 20 seconds, you've lost them so two pages, two pages. If you absolutely have to put on three pages, that's fine. Just know that two pages needs to be what is going to sell you in 20 seconds or less anymore that three pages don't even think about. It's absolutely absolutely recommended against. Do not do that. Okay, um, so two pages only work history if you don't have work but your projects. Okay. This is a very key thing. This is how I hope people get jobs. Okay? They come without They come without any projects. Right? So there. I'm a junior developer. I just went through a boot camp. I just went through this course, I want a job. No one hires them, right? So what I say is, I take those projects you just built. Get them on the APP store. So critical. You better be getting these on the app store. Every app you Bill submitted to the APP store, get five app on the app store and then Lister projects and list of specific things about it . And all of a sudden it looks like you've done a whole lot. And you have, by the way, even if you didn't have those things in your resume before in your profile, look terrible on your resume, you still did lots of work. But you gotta show that you did lots of work. And if they're not published, then it's not as good as being published because publishers you went all the way through your released a product. So if you're on the app store, you're releasing products that could make money. Okay, You're not just building learning, absolute these air products. So get abs on the APP store. Factual bullet points up here, your keys, your key tools and languages here. The things that you want to be doing don't put stuff that you don't know. If they ask you about it, you're gonna look like a dummy. Don't look like a dummy asked. But things on there that you do know, okay. And, uh or at least that you want to know and then take the time to learn those things and then your past experience if it's work but work of its project. But projects be factual. No more than two pages. This is again. This is what recruiters have told me is the perfect resume Perfectly searchable, two pages, nice and clean. You don't need graphics. You don't need banners. You don't need one of those three D graphics bobbleheads. I've seen people put on their resumes where it's like this big head of them in this little body. And it's, you know, don't do anything weird. Keep it playing like this is all you need for resume. So trust me, I help people get jobs all the time. This is what you need to dio and then feel free to give this recruiters, by the way, the once this resumes out in one recruiters hands. Okay, it's gonna be in 10 recruiters hands. It's gonna be in 20. You're gonna be on the Internet. You're going to start getting requests for jobs all the time. Once you turn on the ones you like the flame. Okay, Once you like the fire, the flame and starts coming and those jobs don't stop until you tell people, you know, OK, leave me alone for a while, everybody. So just know that once this is out on the Internet, it's out there. People start finding. So that's a good thing. That's a good thing. You need a job, you're new. So that's it. Resumes. This is Mark Price with death slopes dot com, and we'll see you next time
126. Working With Recruiters: paper one Mark price here with death slopes dot com. And today we're gonna talk about working with recruiters Now, Recruiters, they are your best friend and your worst enemy at the same time. Maybe. Worst enemies. Too strong of a word. If I could describe recruiters, it would be They recruiters are like car salesman, and you're the car. Or recruiters are like dirty car salesmen and your of the car, and it's a used car lot. Uh, this is bad analogies, but if you are recruiter watching this, you're probably like, honest jerk, you know? But But so recruiters a fantastic. But there are. You also have to learn how to work with them, okay? And they are, like car salesman. So first, the first thing I want you to understand about a recruiter is their number one priority is their commission check. Okay, now, I'm not saying they won't care about you, but just like a car salesman, if you've ever been to a car dealership, you never You don't usually have fantastic experiences. You don't really feel a great connection with the person you're selling to. Most times you feel cheated, and I'm not saying that's gonna be about getting a job, because this is you getting a job and you're the car. You know, you just got sold. But with that being said, um, some recruiters make a lot of money. For instance, they usually make a percentage of the total salary that you are going to make. And by that, I pulled up Lincoln because I'm gonna show you a little bit about recruiters here, but they make a percentage of your total your yearly salary. OK, So, for instance, if you were to get a job for $100,000 a year, it wouldn't be too uncommon for a recruiter to make 20% of your total salary. So they're agency will probably get something, but they'll get something, too. So let's say the agency took 50% of their commission and they got 50%. They could easily have made $10,000 off you just by getting you a job. What, $10,000? That's right more than a car sales mix. So recruiters make a lot of money, okay? And so it's in there. So the good news is it's in their best interest to get you the highest salary possible. With that being said, I have met with many, many recruiters. Many, many, many, many and very common. Probably 70% of the time in my interactions with recruiters there are gonna try and get in front of anybody that they can without necessarily making sure it's the right job fit for you. That's your job, to make sure you figure that out. It's so you've got it. When you work with recruiters, you need to respect them. They're good people. They do need to make money, though, and you also got to defend yourself and protect yourself. Okay, I've had so many recruiters trying and dry and give me jobs. I just didn't care about her, weren't the right fit, but that paid lots of money or things like that, or they'll try and work the employers. I'll try and work for you to make it work out all they care about. That's not to say that completely, but what they care about most is getting that cell getting that thing close. So with that being said, okay, I've worked with some great recruiters as well to who really care about you. They're just very my experiences It's been very, very few. Okay. And there's all kinds of tactics that recruiters use. Okay, t get your attention. Like, for instance, lots of recruiters that contact me are very pretty women who are wearing low cut shirts. Why is that? I don't know. But, you know, they're trying to get my attention as a developer, and, uh, and, you know, guys will do others things, just different ways of doing it. And my point is, my point is, is to sell the whole thing's a cell. Okay, So just make sure that you know what you want before you start talked with recruiters and make sure that you get what you want out of it. Okay, Um and also, though with that being said, too, they're not gonna They're not gonna completely throw you down the wrong path because they have to work with employers. And if they keep sending bad candidates to employers, employers are not gonna work with them. Okay. Also, with that being said, employers sometimes don't care about the relationships with the recruiting agency, and, uh, so the higher as many bring on as many recruiters as possible. The 1st 1 to bring in the job gets it. So they're all competing against each other, Things like that. So that's kind of the real world there. I don't hate recruiters. In fact, I like I, like a lot of some of them are really fun on day. Could do you some great things, and you do make good connections with some of them. So Okay. So recruiters. Right. So how do you work with them? First off, you should make sure that your Lincoln's already up to date. You should make sure your resumes ready to go. We talked about that already. So when you want to start working with recruiters, one is first off. Once you've got those things up, they're going to start contacting you. They're gonna start contacting you, which is great if you do want to take that extra extra initiative. You know, you can search for recruiters here on linked in. You know, you can say IOS, recruiter. Um, are Maybe it's a technology recruiter. Here's one right here. Senior IOS, engineering recruiter, Engineering recruiter, recruiter recruited Recruiter. They're all over the Internet. You can reach out to them and they'll be happy to help you out. However, um I think it's better when they start reaching out to you. So if you're linked in profiles, fantastic in your resume is looking good. You're gonna have some great opportunities to work with Recruiters also, um, they're not paying me to do this. I'm just I'm just showing you here, k Another good recruiting sites, cyber coders. They're all over the U. S. For the most part. And now it's It's kind of a company, and they have lots of jobs, and you can apply through here, and then the recruiters help you out and help me find other jobs. It's really cool because you can apply. You can. And you could say your skills and things like that. There's another really cool website. Um, I think it's called hired. Yep. I've worked with them before. Israel to there, actually really fantastic. They have very high paying, high paying jobs. Um, you gotta be kind of good to go to higher dot com. I'm not saying you shouldn't apply over there and work through them, but you've gotta have some confidence in your skills because they pay high salaries and they put you they match you with really good really good employers who are looking for someone had candidates. I'm not saying don't do it. Just just be aware. Eso recruiters start getting in touch them. And how do you work with them? Well, they're gonna say, Hey, then a work you look at. What do you What do you want? I've got this awesome opportunities. Do you see? This is what I want. This is what I want. And if there is not a perfect match, what they're probably gonna do is try and say, Well, maybe you should apply for today anyway. Maybe should apply for genuine see again, you know, car dealership. Car salesman. Oh, I know you don't want this car. Why did you just step inside and take it for a ride? Yeah, you know, So I'm not saying don't apply. Don't, like, reject those offers. But if the job is clearly not what you want, don't work, don't do that job. And if that recruiter doesn't have any other jobs for you, you don't have to work with that with that recruiters. So take this down. Here's a note for you. Rule number one. The first rule of fight club before first rule of re working with recruiters is if they ask you to come down to your office to set up a personal meeting so they could get to know you and really tailor things to don't do it. Don't waste your time. Don't go on meet with recruiters. One on one. They're gonna They're gonna I've done this a couple times. They're going to sit you down. They're gonna try and get you in the office. Get you working with them exclusively. You know, they're gonna try make a relationship with you. Don't do that. If they ask you to come down to the office rule number one don't come down. Say, you know, I'm happy to work with you to find jobs, but I don't have time to go down to your office and meet with you. Okay, So rule number one do not go on meet with any recruiters in person because it's a waste of time. You could do everything over the phone and digitally and there. Probably cringing right now. Is there watching this? But I'm giving you the inside scoop here. So, um, again, your time is valuable. Very, very rabble. You're looking for a job so Okay, that's that's rule number one. So also, when working with recruiters, um, don't rule number two. I don't have a set list of rules care. I'm just giving you big bullet points to write these down K Rule number two is don't. If there's a job that you absolutely are not interested in, even if they tell you to go apply for it, don't apply for it. Don't do anything on the reason why is because there so many jobs in the market right now you can find what you want. So, back in the day when I first started learning programming before you could do all this online before there were school courses like this, um, I'd go work, I'd go apply for an engineering job or go work somewhere. And engineers were a bunch of jerks. They come from computer science degrees and higher than life. You know, you have to know this and this and this and this, and they would test your knowledge that make funny, even if you didn't know certain things. It was a really bad experience that a lot of these companies and you know nowadays, of course, everyone can learn online there's there's so much learning and so many things going on. And those guys were so like, very analytical. And I am I am nothing against analytical programmers because you have to be analytical and a portion to be a programmer. But they're very smart with math, science, things like that. Nowadays, anyone could be a programmer. Well, what do you mean? Well, you can go from working at McDonald's to change in your career as a programmer, and a lot of those old school engineers cringes. They still think you need to go to a computer science degree. You gotta learn, big o notation. You've gotta learn. You know, log arrhythmic timing. You gotta learn, uh, all every day to structure under the sun. You know, uh, hash tables, hash maps, binary search trees. Uh, gotta learn how you got to know how to create a linked list by scratch in your your head by memory. That's how it used to be. It's not like that anymore. Okay, What people care about nowadays because there's so many start ups since they care about the end result. So my point is, don't apply for jobs you don't want. Okay, if a job. Sins intimidating and terrible. Don't don't apply for Do something you want If you're gonna find the right job. If, let's say so for me, for instance. Take me, For instance. I am not a very, very integral analytical person. I learned a lot of things, but dark programmers who can run algorithms in circles around me and do it in their sleep. And that's okay. But you know what? I have other skills. If you put if you put me in another. So if let's say I was applying for a job and that one analytical programmer who's really good at algorithms okay, uh, got he could get this job right, because they give me a coding test. That's algorithmic base tonight. Let's say I fell it and he succeeds, and I said to give him the job. Well, in a different circumstance, let's say that a different company, uh, didn't care about that. They cared about the end result. So they put two programmers together and whoever built the best app, the quickest. Okay, best IOS app. The quickest would get the job. Well, I would win in that case because I'm very, very fast and very good at building fantastic applications and user experience. So my point is you gotta find the job and the people that are right for you Don't just take any job, OK? Don't just take any jobs. That's rule number two. Don't just take any job. Find the one that's right for you. Don't go and apply for jobs and growth to sit through interviews that you know you don't want to be there for Okay. So if a recruiter tries to push it towards a job that you don't really don't want to tell the no. And if they don't have any other jobs say, Well, what they're gonna say is, Well, let's see if we can get you somewhere else said, Well, I'm working with multiple recruiters. I mean, I'll be honest with you, and I just got to find the job that's right for me. And then they're gonna be all right. Thank you. And they'll come back to you. You know, they may be disappointed from it, but they'll come back Teoh whenever they have a new job, okay? And so it's really no different. Like you go to car dealership and you say no to car dealer. He's going mad. He may be in custody at you under his breath like they're not. They could not be nice people. Recruiters could be like that, too. There's are good recruiters, but they could be like that, too. But guess what? Uh, one minute they hate you. Then all of a sudden, a new job pops up for IOS development, and then they're calling you on the phone the very next day. Okay. $10,000 paychecks. Very motivational. Um, so anyway, uh, so working with recruiters, that's that's a big benefit. Okay, um, also So what? Let's say you're working with a recruiter and you found a job that you want, so work with them, help them out. Coach. That's great. Listen to all the recommendations. They know what they know employers looking for. So listen to their recommendations. If they ask you to make modifications on the resume, do it. They know their stuff, they know their stuff. I'm not trying to give you 100% a bad experience. I just want you to be aware of the reality. They know their stuff, and so do what they ask you to dio uh, and you can ask, You can ask me anything. That's one thing that's really cool that recruiters, you don't have to hide. You have to hide information from the If you're not a great negotiator, that's okay. Just be open with recruiters because it's in their best interest to make a much money as possible and to help you get the highest paying job as possible. So say you know what? You know, I've been doing this for a couple of years. I'm very good at this in this, you know? What do you think? And be honest, and then what will you do? You could have said, You know, I'm looking for at least $60,000 a year and what they're gonna say it don't say that. They're going to say they're going to say, you know, ask this employer asked for no less than 75. They're gonna tell you that. Okay, So listen to them be honest with them about your salary and things like that, because they will help you help you negotiate and things like that so you can be open with a recruiter. Okay, Uh, and the only defense that you need to have is Just don't go to jobs that you don't want and don't don't let them push you into doing things you don't want to dio. Just choose what you want to dio, but do take advice for them in regards to salary and things like that on your resume. When you do find the job that you want, I'd also recommend if you're actively looking for a job, they may say, Hey, can I pass my Can I pass your resume around my colleagues or associates things like that. If you're looking for a job, say yes because they're going to get it into more people's hands on often that offices. Since recruiters are commission based, there might be five people at an office, and each of them have managed different employers. And so if that one recruiter in that office doesn't have the right job for you there, associate may and then when they pass it off to the associated, actually get a still still get referral. Lead a commission based off a referral, so it's still good for them. And so yes, let them pass around your resume to do associates and things like that. Listen to them They're smart. They know what they're doing. They know how to get you the job. Eso eso, recruiters. They're they're actually great. Whenever I'm looking for a job, I always reach out to them. Just make sure you love follows two rules, okay? They're gonna help you get the best salary possible. If you ever feel like a recruiter is overly trying to sell you, like where you absolutely like. Can't do what? That what? They're trying to push you and like you can very much tell that they're trying to really just get any job. You've got to stop. Just let no hand not interested. You gotta be. You be a little bit firm, okay? And let them know in the beginning that you're working with multiple recruiters also. Okay, Don't. And don't stick to within. Recruiter. I know we're all human beings, but don't worry about hurting their feelings. Okay? You go talked as many recruiters as possible and to find the right job for you and the best man wins. That's how it is. It's at a car dealership anywhere else. The best men wins. Find me the right job. That's what's most important. Don't be rude. they're human beings or people being nice to work with them. But get what you want out of the relationship. You know, it's it's not fair to put you in a place where you don't want to be, and, uh, but you could have any job that you want because there's so many job opportunities available. So recruiters are a big benefit. You should work with them. But you know, just with that being said, I do want to say if you if you get any solicitations from recruiters that are just terrible , like trashy solicitations like you know where it's not written to you or une male or something or linked in, it's not written to you Or maybe it's a mass message that's sent out to like 1000 people don't respond to that joke if they if they want, you need to take the time to meet with you. Also, I get tons of emails from recruiters. These are the worst, and basically it's says urgent requirement, urgent requirement in this place in this place, you know, and just very impersonal don't work with people who impersonal because your best interest isn't it isn't at mine. OK, eso find people who work with you personally. Let them know your goals and desires to make sure you protect yourself So they're not pushing you what you don't want, but also be respectful, powerful tool. You could probably find a job in a week working with recruiters OK, a week or less. And if you do find a whole bunch of jobs that are kind of what you want, go apply for them, even even if you're scared. Whatever. Go apply for as many jobs as possible cause you need practice interviewing as well to so do go in as many jobs as you can and apply for them. Don't be like I'm looking for the perfect job. If it's slightly in the direction that you want and you feel kind of good about it, go apply for it because you're gonna fell many interviews before you get one. Okay, let me say that again. You're gonna fell many interviews before you get one. When I was when I was in Los Angeles, I wanted to get a big title under my belt. I had my own company before, do all these different things, but I really wanted a big title. So I applied for call of duty. I applied for Disney, and I applied for Nickelodeon, uh, working on working on games and cynical Nickelodeon. They didn't want me. It wasn't right fit. Um, they were looking for somebody who was who was very, very good with mathematics. Like it was it was the hiring engineer loved math, and that's what he was looking for. So it wouldn't have been a good fit even if I was working. Even if I could deliver, it wasn't a good fit on Disney. Um, Disney. They wanted me and I went through seven hours of interviews, seven hours of interviews, and then at the end, the recruiters like, last thing I want to tell you because Disney has their own recruiters is, you know, the days of owning your own business and going on break when you want to go on break and all that stuff has gone out the window. You know how you used to go take your dry cleaning out whenever you want. You can't do that anymore. You're gonna come here. You're gonna swipe a key card. You gotta log hours logged your time. You gotta come in at this time. You gotta leave at that time. Are you ready for this? And I was like, actually, I'm not that I do not want to do that on and then call of duty was actually right fit. I got my So my point is, uh I went through multiple and there's actually some other jobs to that applied for, but I went through about five or six jobs before I got the one that actually wanted. So practice as much as you can work with recruiters, go Does many job go to as many job interviews as you can that you're interested in because you need the practice and then it takes practice and get good at interviewing. It takes practice to do a whiteboard test. It takes practice, practice, practice, practice. And so I just want you to know you're gonna You're gonna fell some interviews. Don't get down on it. Don't ever let yourself down. No. Never say I can't do this. I'm not a programmer. I wasn't born for this. My mind's not meant for this. Don't say any of that stuff. It's all bs. OK, You gotta pick the job that you want to pick, go to as many interviews as possible, work with recruiters. Be a kind of respectful but also protect yourself. And that's the deal you can. You can get a job in a week if you work with recruiters in the right way. And so I've worked with probably over 50 recruiters in my career, many different times somewhere amazing. Some are not so amazing somewhere terrible. Um, so that's the world that we live in, and this is more price with desktops dot com, and I'm here to help you get a career. If you have any problems or you need anymore, come on to chat room, come on to the forums and get help, and I will help you as best.
127. iOS 9 Interview Questions: Hey, everyone, Mark Price here, Deb slopes dot com And many of you have asked me to give you interview questions and answers to those interview questions. And so this is part one in a series of multiple videos I'll be doing on common iPhone and I was development interview questions, and I'm gonna answer them how I might personally answer them in an interview. So I'm not going to sit there and read the textbook definition. I'm gonna give you the real world practical applications for the answers to these problems so you can use this in your interviews as you go in and let's go ahead and get started. So what is the protocol and when would you use it? So a protocol is very common on many different languages and platforms, and it's a pattern. And on IOS, a protocol is kind of like a blueprint of functions that a class can implement. So you kind of get rules or say Hey, these are things that you should call summer required. Some are optional and for a perfect example, au I table view can implement the you I table view data source protocol, which you'll implement in your view controller to get data into your table view such as self a row at index path or number of rows and section. Those are protocol functions that your view controller implements and that your table view will call. So anyway, that the overall purpose of a protocol is to say, Hey, this class will abide by these functions and some again are optional. You don't have to put him in there but could be helpers for you if you choose to implement them. And at some point in time, somebody will call the delegate of that protocol. And, uh, those functions will be called so very powerful tool. It's used used all over Iowa s development. What are the steps involved in submitting an app to the APP store? So there's quite a few steps and unless you've actually submitted an app to the APP store, you wouldn't ever really know the true experience of submitting an app to apple. It is quite the process. So first off, what you need to dio is in order to submit app to the APP store, you have to be a paid apple developer. So that's either as an individual $99 for an individual. I think it's $99 as well for a company, and if you do register as a company, there's a more of a process that you have to go through. You have to get a Dunnes and Bradstreet number, and Apple has to verify that it's it's could take up to about two weeks or so. Ah, but once you're in, you're in. And then once you've got your registered account, what you need to do is create an app i d on developer dot apple dot com This up ideas very specific to your application, and then you need to create a distribution certificate or certificate that allows you to submit an app to the APP store. When you create a certificate, it's tied directly to your computer, meaning your computer is has the security clearance to submit that app to the APP store. So you got a credit certificate and then you install it on your computer. And once you've created the certificate, then what you need is a provisioning profile, and this needs to be an app store provisioning profile, not a development one, and the provisioning profile will use the certificate and the provisioning profile will also use the app I d. Ok, and then you're gonna download that provisioning profile and install it that make sure it's set an ex code, and then you go into X code and make sure that your app I D in the X Code project is the exact same is the one that you created on the portal. Okay. And then in your build settings, you're gonna want to set your distribution profile to be the profile you use when you go to submit your application to make sure you set your distribution profile there and then you will make sure that your simulators not self selected, but the actual ah device, it could be generic device or if your device plugged in and then you're gonna go to product in the menu settings and archive it. And once it's done archiving, uh, it is ready to be submitted to the APP store. Now, if you haven't done this already, when you need to do is go onto iTunes, connect the apple dot com and that actually create an app on the portal there and make sure you sign it. The correct apple i d and the version of that app. It's gonna start at 1.0. You just need to make sure that in your project and ex code the version, there is also 1.0. Otherwise, it won't work. So once your app is created there and saved, then when you can do is go back to your ex code, you've archived it, or if you haven't make sure you archive your app and then once it's archived, the window will pop up and will allow you to either validate it or submit to the APP store . If you validate, it will just run some local tests on your machine to make sure it's ready. You might run that first to make sure there's no bugs or heirs or problems, and if it passes that, then you can submit it to the APP store. And if it rejects it as you're uploading it, it'll give you warnings wine. You go back and fix it like you have to have APP, icons and things like that. And so once it's approved, though through the submission not through the Apple review process. But just through the submission, it's gonna go on to your items connect, and it's gonna take a few hours for it to be available. Will stay processing. It used to take just a few minutes, but lately it's been taking a few hours, and so it's going to be processing. And once it's done processing, then you can select your build. Make sure you get all your descriptions and keywords and images and screenshots and everything into the portal there. And then you could finally submit your app to the APP store, and it could take anywhere between seven days and two weeks. I have never really seen to go beyond that, depending if it's getting close to the holidays, though. And that's how you submit. And I always up to the APP store. What do you know about arc? Well, Arc is automatic reference counting. You might also hear the phrase memory management on IOS, and basically what it means is on Iowa's every time a strong references created like a class that holds an object will automatically create a strong reference. Okay, whenever that's created, this retained count on the system level, it will increase by one meaning we're holding retained count to this object and don't throw it away until we're done using it. And so automatic reference counting councils references, and then what classes are the allocated? Those references are documented by one, so it's very powerful. Before Arc, you had to do all of your own memory management, and this was with objective. See, we don't have to deal with this anymore, but you had to do all of your own memory management. You'd have to retain objects manually, and then you have to release them manually. And you always have to make sure that you were at zero when when the classes would be allocated. Otherwise, they would be floating floating objects in memory that can no longer be access. And those are memory leaks, and you could still get memory leaks occasions from time to time. But it's It's not very common. In fact, when I switch over from Objective Seat a swift or even when I switched over to automatic reference counting from the manual reference counting, we did before, Uh, I hardly ever have memory issues or heirs, so it's very powerful. It works the same way on Swift and really now it is the only thing that you ever have to worry about is what's called a retained cycle. Okay, and what a pertain cycle is is when two objects have strong references to themselves. So, for instance, okay, you could have a class, let's say, person. And then you could have another class called backpack. But let's say in the backpack class it needed to hold a reference to person. Well, if you did that with a strong reference, both objects would be pointing to each other, and they would never get written that they never get released, and so you'd have a retain cycle of potential memory leak. And so what? You have to dio in those very few instances where you need objects pointing to themselves or to each other, you need to use the week keyword. And what that does is it will say, Hey, this is a week reference. And so when one goes, let's get rid of the other one more or less. So again, you don't ever have to worry about it too much, but just know that if you need to objects to reference themselves, one of them needs to be weak. And that's the most important thing in preventing memory leaks and other issues along the lines there. But again, arc. There's a lot of nice things for us, so we don't ever have to worry about that too much. What is a bundle on IOS? Well, in application development, it's very common to write an S bundle that main bubble. Your application has a main bundle. Okay. In a bundle, you can have more than one bomb that you can create your own bundles. But ah, bundle just stores. Resource is so the main bundle, for instance, will store your images and your P list file and things like that, and you can create your own bundle. Like I said, it's actually just a dot bund. If I you can put whatever you want and it really one common use for bundles. Aside from like, your main bundle that has your main resource is is for frameworks. For instance, let's say you you're creating a framework that you want to distribute so other developers can use it well. If you've ever done framework development, you'll know that you can't just use a storyboard for frameworks. You can't just drag and drop it. It's kind of a pain, actually, But what you can do is you can create zip files and put them in your bundle and then load those dynamically at runtime so you don't have to do all of your constraints and views programmatically you can create them in your ZIP files, and then your framework can calling to that bundle that external resource file and load those files up. So bundles are very powerful. They just hold your resource is when would you use a swift struck or structure versus a class? So that's a good question. The important thing to know is that Struck's are passed by value and objects or excuse me classes or passed by reference. So what it means is your custom classes. You know, the reference objects stored in memory with with pointers. Okay, whereas Struck's can only use value types, such a strings, integers, things like that would be more lightweight, depending on what goes into them. So, for instance, if I wanted to create some type of grid system using all floating point numbers, you know, X y coordinate Z coordinate, I could use a structure that because of all value types, and it would be quicker and more lightweight than creating a A class would just pass by reference. So I would say the rule of thumb If you're going to use a struck versus a class, there's lots of different reasons. But I would say the main one is If all of your data types are values passed by value, then use the structure. If you have custom objects that you're gonna need to use passed by reference, use a class. So that's kind of the difference between a struck and the class and then swift. They're very similar in many, many different ways. So there you have it with swift. What types are value types and what types are referenced types so similar to the notion of a structure versus a class there, certain types are passed by value and others that are passed by reference. And basically, anything that's a custom object is passed by reference your strings, your integers, your floats, your doubles. Those are all passed by value. So your your default data types that your swift data types those or what's going to pass by value and any custom object that you create is going to be passed by reference. So that's kind of the differentiating factor. How can you create a custom view? That's a good question, an important one to because you're gonna do this lot as a professional, Iowa's developer. And basically what you could do is just make a subclass that inherits from you I view. Or if you're subclass ing a button, it could be you. I button basically just subclass it and you can extend it. You can change its features right there from the code it on hair, all of the features that are already in the view. Um, and then you can add more to it and you can set the custom class in your storyboard. So you could, for instance, drive the U I view onto your story board and then go up to the identity inspector and change its class to your custom view. And it would inherit all those properties and then at runtime when the views loaded, it will be your custom view. What can you use to make http requests and parse Jason Okay. Very important question as this is what constitutes 90% of an iPhone developers. Time is making a P I requests, and so you can use an s u R L session. That's the new and improved apple a p I. For making http requests, and it supports http and https protocols. It doesn't support any other protocols and very powerful tool consent delegates. You can set base you RL's all kinds of cool things. Um, and that's what you can use. That's default to tap into an a p I. There's also really popular library. The Objective C library is called Networking in the swift version created by the same people is called Alamo Fire. And what that does is it wraps up an issue or else session and makes it a lot more convenient, functional user and points, meaning It's easier for you as a developer to go in and use the Mosul session AP ice and lots of cool extra features such as image cashing and things like that. And that's my preferred usage because it's so powerful. Ah, and it slims down the amount of work you have to do manually. Ah, and then two parts Jason I person just use the Ennis Jason serialize er that comes assed part of the I o s. A p I. You can also use Swifty Jason, which is a popular library, but I really haven't found a big need for that. It does make a few things more convenient, but, uh, IOS has some great built in Jason serializing options. Ah, and of course, with Swift, you would want to make sure you if let and do all your checks on that to make sure Make sure everything is parsing out as it should, but those are the common things that you'll do every single day. Is your iPhone development job? What do you use to show a list of data on the screen? It's a good question. Well, you can use a, um, table of you and you can drag it onto your story board. And then what you can do is you can said it's It's a delegate and data source to the view controller, which implements you. I table view data source in New I table of you delegate, and basically, you implement your delegate functions. Such a self row index path will display Self aurora next path, number of rows and section. All those different delegate methods or functions on you can implement it that way with the table view. Or you can use a U I. Table view controller, which kind of puts all those in there for you automatically so you don't have to do it manually. And so you can do that as well. Um, of course you can. There's other things you could do. You could even write your own table of you if you want it. But the advantage of using au I table view is that each of those cells there, they use memory efficiently. So right when they go off the screen and there d cute. Okay, you're not gonna get a list of 1000 cells. You're going to get a handful, huh? Vermin you can fit on the screen, and it's going to get d cute when it goes off the screen. And then you can reuse it because it's still a memory and put it back on the screen, which keeps your table views really fast. And if you didn't have you, I table view, you'd have to write all that functionality yourself, which you should never do. And so another option is you I collection view controller that allows you display a list of data in any size informant that you want vertically or horizontally. Ah, great four. Like image views or scalable segments, you know you could do little rounded squares and select options. You can do all kinds of cool things of that, and it's the same type of pattern. Or you have, ah, number of rows and things like that. And so those are the Those are the two common things that you'll be using on IOS to display data. What is polymorphism and when would you use it? So polymorphism is an object ordered programming principle. It's used in all Opie languages, and it's basically the idea of having two different objects apparent in a subclass that could be almost used interchangeably. And so here's an example of it. I could have a shape class okay that can calculate the area of that shape. And then I could have a subclass, for instance, like a triangle in different subclass of rectangle and the base class. Those shape has a function called calculate area, so those two sub classes could actually they could override that calculate area function, and they could create their own implementation of it. But what's really cool is that if I had a variable of type shape. Okay, I could actually cast a variable of type rectangle type shape and it would work out the same eso, for instance, if I wanted to have a function in a view controller on my coat somewhere. But I didn't know what kind of shape the user was gonna pass in. I could just have the function take a shape as a parameter, and I could pass in their triangle the rectangle a circle, and so long as their parent classes a shape, they would all work inside of that to function, and you could use them and cast them accordingly. Ah, very useful and powerful tool on you. Use it all the time. And I was development. What is you I window. Okay, you're gonna see this in your application, but basically on an IOS app, you only have one You I window. And it's the main window for your application in all views and view controls, everything you put in there is part of that main window and it covers the whole entire screen of your device on IOS. Basically, you don't interact with it too much. You can get the common thing. I see people interacting with on my window is grabbing its mane, bounds and frame. Because sometimes when you're rotating the device, um, the views within height will get switched around so you can always grab the proper dimensions by grabbing the you I windows main bounds. But basically it's just in the main window for your application and everything that you do goes on to that window. What is you? I application. Okay, well, your IOS app is gonna have one. You, my application. It's a singleton, and it is the starting point for your application. Everything starts there and what it does. Is it Ford's down events to your views and view controller? So there's ah responded chain that comes from the U application down. And so when someone taps the screen to just Ford's that tap all the way along until you intercept it or one of the classes intercepts it. For instance, if someone did a swipe down on a table view, it would start to you application that responded. Grab that and would go all the way down to tell your table view, intercepts it behind the scenes and then does the scroll based on how much of a flick they did and all that kind of stuff. So you application there, anyone in your app and you interact with it sometimes but mostly just works behind the scenes for you. Auto magically. So that is you. I application on a view controller. What is the difference between view? Did load and view will appear? This is a very good question, and this is a problem that lots of new developers have is they'll put something in view, did load. Okay? And then they expect every time the person goes back to the screen. And that view shows they expect that function to be called again to refresh the screen or do some type of action. And it doesn't work, and they're like, What's going on? It's not working well. Viewed it Load is called really only once when your viewers first loaded, meaning your view goes into memory. And once it's on the memory and loaded in memory, that view did load function will be called, but not again until has to be reloaded again. Now, of course, it could be unloaded in memory, and then when it loads up again, it'll be called, and maybe maybe you didn't notice it and you're thinking about maybe it worked. But really, it's a dangerous place to put things that you need to be called every single time the screen appear. So it's great for initialization for a view. Ah, good starting point of view loads. But if you want to refresh your screen every time it actually appears to the user. That's where've you did appear and view will appear. That's where you should put your code. Specifically view did appear, and basically that means did the view visually appear back to the user? And that's when you can do things like refresh your table views and, uh, address you I and things like that cause it's gonna be called every single time. The view is shown to the user, whereas View did load is only called once when the view first loads into memory. It's a very important distinction, and I use those all the time every single day in my development, what is N s notification center and when would you use it? So and it's notification center is really cool. It is basically the observer pattern. If you're into coding design, patterns. And basically what it means is you can listen for notifications in the notification center , so a class or an object and register for notifications and then other points in the application can post notifications to the notification center. And if your class your object is observing, notification will go out and in your call back method your function that you said, as the receiver will be called, and you can listen for that notification. So a very powerful tool to distribute messages across an application. In fact, some people action develop their whole applications around this observer pattern, and it's great. It's efficient, It's fast, it's it's really good thing to use, and you can also mix it with other types of design patterns as well. To And I pretty much used this in my application development as well as needed. Ah, most, most days. So a very powerful tool. And then what is the difference between? And it's notification center on and delegates Okay, so what's really interesting is that and it's notifications can or notification or observer pattern. It can go out to many listeners, right? So it's like a one to many relationship. Well, notifications posted, but many people can listen to it. However, the delegate pattern. Okay, this is a different design pattern. Delegate pattern is a 1 to 1, meaning we've talked about protocols, so you have a protocol and a an object and implement that protocol. And then at a certain specified point in time, whenever it makes sense, the particles delegate will be called, and those protocol functions will be called. And that's a 1 to 1 relationship. So, for instance, to your table view, you know yourself Aurora Index path. Your table of you will trigger that, but it's not sending out a notification and hitting 50 different table views. It's only hitting the one table view that eyes registered as the delegate and those functions Air called so a 1 to 1 relationship versus a one to many relationship, and you can use both of those in the application. Um, sometimes it's easier to use a notification than it is to go building your own protocols. Like, for instance, if I'm going to use, uh, something that one time, that's really small. I'm probably not gonna build a protocol for it, cause it just takes a little more work and it's a 1 to 1 relationship not as useful versus just making a quick notification system. Uh, there's there's frozen constant both, I suppose. But that's how notifications work. And that's how delegates work. How do threads work on IOS? Okay, so IOS does support multi threading, and I'm not gonna go into the depths and computer science outlook of it. But more of the practical application of how it works. And basically your application can have one or more threads or instances of code that are running independently of each other. Okay. And this is really important to know and use because one of the common mistakes that Brandon developers make is they'll do everything on the main thread. And the main thread is where the U Wise hosted. So, for instance, there's a thread being run continually for user interface. When you tap the stream, your or code needs to be able to respond to that handle that OK, but one thing that new developers do, they make this mistake a lot is let's say they're gonna make a network request. They're gonna go talk to an A P I and download data. Well, they'll do it on in the main thread. Okay. And so what happens is a request to the Internet goes out, and that thread is waiting for the message to come back. And of course, that's a synchronous. And so, uh, well, it should be a synchronous so but my point is, it can take some time. It could take a few seconds for that request to come back. So what happens if you are using the main thread? You send out a network request, but then the user starts tapping. Well, those taps are not gonna be registered and tell that data from the Internet comes back to that request completes. And so you're blocking the main threat and creating a terrible user experience. If you've ever used an app where you press save and all of a sudden everything freezes up for a few seconds and you're like, What's going on? Well, it's because they didn't They're not doing it correctly. They didn't spin off a separate thread. It's what you want to do is you want to make an asynchronous call on a separate thread. You want to basically have your requests running simultaneously with the U I threat. So Here's how it would work. Let's say the user taps a download button on your app will. Then we do an asynchronous requests on a separate thread. It goes to the Internet, Your you I is still responsive. And then the request comes back with a bunch of data, right? Let's say a bunch of facts and figures and maybe your l's for images. It comes back, but that's still in the background thread. And now we need to update to you. I So we're gonna dio as we're gonna take that data that just came back, and then we're going to shove it into our data source, and then we're gonna go back onto the main threat and refresh, refresh our applications so all that data shows up. And so when you do spin off a separate asynchronous thread, you also have to be careful of making sure that data gets back onto the main threat and updating your your you. I accordingly. So, um, if you use libraries such as Alamo Fire, which are very powerful, it handles all that for you automatically, which is really nice, so you don't worry about it too much, but it's very important to know and understand. What is the difference between Zip's and storyboards and zips being ex I B files? And so, before storyboards existed, all we had was IBS and Zip's Our layout files. They're based on a Necks ML format and defines attributes of those views such a size, height, color, things like that. And they're visual layout files, so meaning there specifically for user interface. And then, of course, they're tied to code, um, accordingly. Like you have you, you I But in things like that, And so even with a storyboard, all of your views are made up of zip files. And so the only difference is the storyboards was a new feature and choose by Apple a few years ago that basically allows your application to have a flow, a storyboard of your views. And so those views are still zip files there, just inside your storyboard, and it gives you a clear, distinct path. And for the most part, Apple is really encouraging everyone to use storyboards. Some developers don't use them still, and I don't use them all the time, but ah, I've I've uses ibs by themselves many times. Still, um, and so they don't even support out of the box anymore, where you can just create, uh, applications based on his IBS alone. But you could still do it. You can do it your store board and set it up for that. But the important thing they know is that it's all built on zip files, even in the storyboards and when you might really start. Using Zip files is especially if you're like making frameworks. For instance, let's say I'm building a framework that I want to distribute to other developers, and I don't want to write all of my u Y in the programmatic constraints. Ah, and loaded all from code I can create zip files. OK, so storyboards aren't supported and frameworks. I can create zip files, though, and put them in a in a bundle and then at run time, I can access that bundle for my framework and load those it files up from a user interface . So really cool Storyboards do have really cool features that sibs don't have, so I suggest that applications are built with storyboards unless you absolutely have to have zip files. But that's how it works. And remember to get your free live health, Go to Deb slopes dot com and click on Chat Room. I'm there all the time, as well as a huge community of other students.
 Mark Price, iOS & Web Developer / Instructor