Transcripts
1. Introduction: Have you ever wondered
how to seamlessly crochet mix the great designs
with two colors? Hi, everyone. Welcome
to my skullture class, where I'll teach you the
essentials of tapestry crochet. My name is Mahum, and
I work full time as a crochet content
creator and educator sharing my love for
the craft and all cute things across my
social media platforms, as well as tutorials on YouTube. I've also hosted multiple crochet clubs for
beginners guiding them through the process of creating their first outer
crochet projects. You can usually find me
crocheting outdoors with my favorite ice drink or
in bed with my crafty cat. My favorite thing about
crochet is the abundance of versatile techniques
that we can use to create and design
projects that we love. Nothing compares to the
satisfaction of turning a pixel grid into
a detailed piece of art to be used
as a room decor, clothing, or even a bag. So in this class,
I'll walk you through each step from understanding
how the boxes in a pixel grid can
be translated into crochet stitches to crocheting your first tapestry
crochet piece ever. So let's go ahead and
grab your materials, and by the end of this class, you would have crocheted
your first tapestry crochet piece with two colors.
2. Class Project and Materials: This class, we're
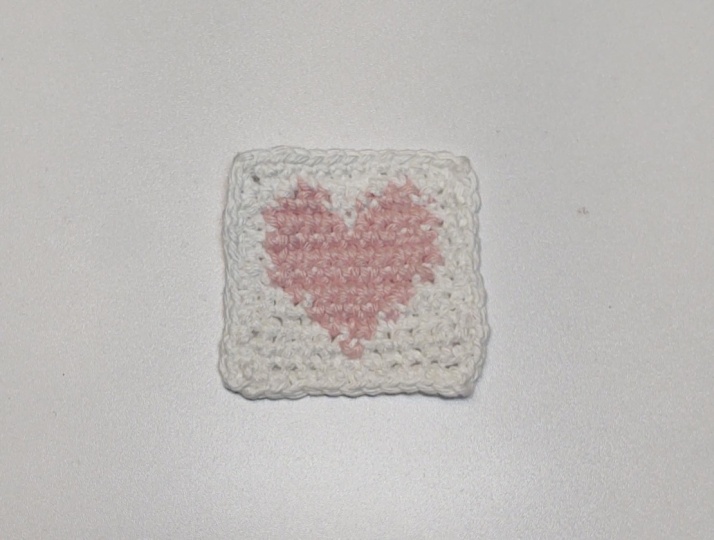
going to be using a small heart pixel
grid for reference. But after this class,
you'll be able to crochet any pixel grid design you
like with two colors. Go ahead and grab any two
colors of your choice, one for the background, and one for the color of the heart. I'm using DK weight yarn, but you can also use
any medium weight yarn, a size three or size
four works as well. Then go ahead and look at
the label of your yarn and see the recommended
crochet hook size for it. For me, that's going to
be a 3.5 millimeter hook. Your hook size can be anywhere
from a three millimeter, four millimeter or even
a 4.5 millimeter hook. Then you're also going to be
needing a pair of scissors. Once you've got all
your materials, you're ready to get started. But first, let's
break down this grid. When we're cushing
with pixel grids, each box represents one stitch. Most commonly used stitch for tapestry crochet is the
single crochet stitch. So each box in your pixel grid is one single crochet stitch, and each row in your pixel grid is one single crochet row. Another thing to keep in
mind is that we start from the bottom and follow a snakes and ladder style progression, going from left to right,
each time we start a new row instead of just starting from one
side each time. Last thing to know is
that we always switch colors on the last ditch
of the currents color. So for example, if you've got three boxes of white and
then two boxes of pink, you're going to switch colors
on the third stitch of the white since that's
the last ditch that we need to make with white, and so on the third stitch, we're going to switch
to pink so then we can crochet two boxes with pink. It might sound like a lot to remember, but with
some practice, you'll be able to
seamlessly crochet and change colors and add
some neatness into your work, which is why I highly
recommend finding some pixel grids that
you like the design of, even if they're really small or maybe they're
slightly bigger, anything that you want to
create and practice with them.
3. Crocheting with the Grid (row 1 to 8): Go ahead and grab the
yarns that you're going to be using for your pixel grid, as well as the
recommended size of hook that goes along with
the yarn that you've chosen. Don't forget to also
open up a picture of the pixel grid that we're
following for reference. So the very first thing
we're going to do is make a slip knot with the
background color. So my background color
is going to be white, and then the color of the
heart is going to be pink. For now you can put
the color of the heart aside and just work with
your background color. To make a slip knot, hold the yarn so that the
tail is facing you, hold onto it with your thumb, and then wrap the yarn
around your two fingers, making an X shape. Hold on to the yarn
with your ring finger, slide your hook with the
pointy part facing down, under the first loop, grab onto the second
loop and pull. Until it tightens into a knot, and that is your slip knot. Now, you can go ahead
and pull the slip knot a little bit tighter so that
it's close to your hook. Let's take a look at our pixel grid before we get started. So in the previous section, we broke down this pixel grid. So just a quick reminder
that we're going to be starting with
the first row, which is down over here. In the first row,
we have 11 boxes. That means that we're going
to be doing 11 stitches. So let's go ahead and first
make our foundation chains, and the number of
foundation chains will be the same number as the number of stitches that
you have down here. To make a foundation chain, hold on to your slip knot. Yarn over, turn the hooks that the pointy part
is facing down, and then slide that loop through the first
loop on your hook, and that is going to be
your very first chain. Once again, yarn over, hook facing down
and pull through. And as you're working, put your middle finger
and your thumb slightly up so that you can hold that tension in place so that your hook can slide
easily through the loops. Go ahead and make a
total of 11 chains. Once you've got your 11 chains, we're going to be making
our turning chain. Now, this turning chain doesn't count towards our stitch count. It's just there to help
us start our first row. So go ahead and make
one more chain. And now we're going to
be making the first row, which is this bottom
row over here. The foundation chain doesn't
count as your first row. It's just the foundation that
your work is built upon. To start the first row, skip the first chain and insert your hook into the second
chain from your hook. Insert your hook into that chain right
through the middle, then pull up a loop
through one loop, and then yarn over and
pull through two loops. This is going to be your
first single crochet of the first row and also the very first box
in your pixel grid. Now, you're going to insert one single crochet into every
chain all the way down. So insert your hook into the next chain right
through the middle. Pull up a loop and
then yarn over and pull through both the
loops on your hook. Insert your hook
into the next chain, pull up a loop, then yarn over and pull
through two loops. So right now, I've done
three single crochets. We're going to make a total
of 11 single crochets. So go ahead and
insert your hook into every chain and
then single crochet to complete the first row. Don't forget to
insert your hook into the chain that's right
next to your slip knot. This can be a little
bit confusing, but remember your stitch count and make sure
that you've got 11 stitches at the end of your first row. And there we go. Now we're going to refer back to our pixel grid over here. We're done with our first row and we reached this
corner over here. So remember that
we're going to be following the pixel grid kind of like snakes and ladders where
we go up to the other side, up again to the other side, up again to the other side. So let's count how
many boxes of white we have to do before we can switch to the color
of the heart. We've got one, two,
three, four, and five. That means we're
going to be doing five single crochets
with the white. But on the fifth stitch, we're going to be
switching over to pink or whichever color
you're using for the heart. There's one more
step that you could take to make your edges
a little bit neater, and that is to skip
the turning chain at the start of every row. This is going to make
your edges much neater, but it's also going
to be a little bit trickier to remember which is the last stitch of each row since it can become
really small. So if you want to avoid that, what I would
recommend is that you chain one before the
start of every row. Turn your work, skip the chain, and insert your hook into the very first stitch
to start your next row. And make your first single
crochet of row two. But if you're like
me and you would prefer to have
slightly neater edges, then I want you to skip the chain one at the
start of every row. So here's what you're
going to do instead. Let's say you've
ended your first row. You're just going
to turn your work, insert your hook into
the very first stitch, pull up a loop, and then make your first single
crochet of round two. So as you can see,
there's not going to be the bump of the turning
chain over here. So this is my first single
crochet with white. We're gonna insert our
hook into the next stitch, do our second single crochet, insert our hook into
the next stitch, do our third single crochet. And now we're going to do
our fourth single crochet. And now, finally, we reach
the fifth single crochet, which is the stitch right before we have to change colors. Every time you want
to change colors, you're going to make a half
completed single crochet. That means you're going
to insert your hook into the last stitch before you
need to change colors. Pull up a loop, but then you're not going to complete
the single crochet. Instead, you're
going to complete the single crochet with
the color for the heart. So you can lay your
work down for a bit. Grab the color that you're
using for the heart. Hold onto it by making a little
bit of a loop like that. Place it on your hook, hold onto it tightly, and then pull that color through the two loops
right through there, completing the single crochet. Now, you can go ahead
and tighten the white a little bit just to make the stitch a little
bit more secure. Let's refer back to our
pixel grid for a bit. Now we have to do one
stitch with the pink, and then five stitches
again with the white. But since there's only
one stitch with pink, we're not going to be completing the single crochet, and instead, we're going to be making a
half completed single crochet, because right after that, we've got to do a few
stitches with white. Also take a moment to
identify all the strings and the pieces of yarns
that you've got over here. You've got your pink. You should have the tail of the pink that we're going
to be carrying with us just so that can become a little bit more secure
before we cut it. I want you to pick
up your pink yarn, the one that's connected
to your ball of yarn, and we're going to be
working with that. So tighten the ends, tighten the white, insert your
hook into the next stitch. Make sure that the white
yarn is over your hook. So all your yarn
strings should be over your hook as you
insert it into the stitch. Then you're going to pull
up a loop like that, and now we're going to be
switching back to white. To switch over,
bring the pink to the front side and hold onto
it with your other thumb. Then go ahead and pick
up the white yarn, completely ignoring this
little tiny tail of pink. Make the white,
your working yarn, and then complete the
single crochet with the white. Like that. Now you've done five
stitches of white, one stitch of pink, and
now we're going to be doing five more stitches
with the white. It can get a little
bit confusing because of all the
strings that we have, try to pay attention
to which ones we're working over and which ones we're going to be using later. Now that we've got the
pink attached to our work, we are going to be
working with it. So you should always be carrying the color that you're
not using with you. That means it should
always be on top of your hook and you're
working it into the stitches. And that's basically what makes tapestry crochet invisible, so you can't see
the strings from the back side or the front side, and both sides are equally neat. So hold on to your white or whichever color you're
using for the background, insert your hook into
the next stitch, making sure that
the tails of pink are over your hook and
over the stitches. Then you're going to pull up
a loop with the white and then complete your first single crochet for the next half. Then insert your hook
into the next stitch. We're going to do four
more stitches with white. So that's our second. Insert your hook into
the next stitch, always making sure that
we're working over the pink. Now we've got two more stitches to go before we're done with our second row and one more. Now, the stitch at
the end can be a little bit tricky because
it just gets really tight. Make sure that you're
inserting your hook through the stitch and not through
any of the little bumps. And there we go. Once again, we're working over the pink, you're going to pull up a
loop and then yarn over, pull through two. There we go. Now we're done with
our first row, and we've got the little
bottom of our heart. You can go ahead and grab
your scissor and cut this extra tail of pink since we won't
be kneading anymore. Make sure that you don't
cut out your working yarn. We're still going to
be king both of those. Here's how to start a new row. Before you start a new row, whether you're chaining
one or not chaining one, you always have to cross
over the yarn that you're not working with
to the other side. So I'm going to cross it over, hold onto it with my other hand. And then if you're chaining one, you're going to chain one
and then turn your work. If you're not chaining
one, you're just going to turn your work
without the chain. Make sure that
you're holding onto the as you turn your
work like that. And now we're ready to
start our third round. Let's take a look at the pixel
grid before we start this. Started from over
here, went there, come back up right over here. Now we have to do four
stitches with the white, three stitches with the pink, and then four again with white. Insert your hook into
the very first stitch. And there we've made our first single crochet for
the third row. We're going to do
three more stitches. So let's crochet along. That's two. That's three. And now we've done four. But remember, after
the fourth stitch, we've got three single
crochets with pink. That means that
the fourth stitch is our last stitch with white, so we're going to switch
colors over here. So let's take a little bit of a recap on how to switch colors. Since you won't be
needing white anymore, you're going to cross it over
to the front of your work, and you're going to make
pink your working yarn. Then you're going to complete this fourth single
crochet with the pink. And now you switch over to pink. Insert your hook into
the next stitch, always making sure that you're
working over the white. That's our first single
crochet with pink. That's our second single
crochet with pink. And then our third
single crochet. But remember, after this, we're going to be switching
over to white. So that means that the
third single crochet is where we switch back to
white as our working yarn. So you're going to cross
over the pink to the front, hold on to the white,
and you're going to complete the single
crochet with the white. Now we're going to be
completing this row with four single crochets with white, making sure that you're carrying the pink yarn and
working over it. It's completely normal for your yarn to get
tangled as you go. I would just recommend that
after a couple of stitches, you start untangling
it, otherwise, it's going to form
a really big knot. Now we're doing our last
ditch of the third round. And there we go. This is what your work should
look like so far. This is the front.
This is the back. Now we're going to be
starting our fourth round. So let's take a look at what we're going to be
doing over there. For our fourth round, we're going to be doing three
single crochets with white, five single crochets with pink, and then three single
crochets with white again. Remember, before you
start a new row, just cross over the yarn that you're not working with
to the other side, then you can either chain one or you can just turn
your work like I am, insert your hook into
the very first stitch. Pull up a loop. That's your first single
crochet of the fourth round, insert your hook into
the next stitch. That's our second single crochet and into the next stitch. That's our third. But now we're also going to be switching to pink because the third stitch is our last stitch with white, and then we're doing
five with pink. So we're gonna cross over
the white to the front, grab onto the pink, and complete the single crochet with pink.
Now we're going to do five. One, two, three, four. And since the fifth stitch is
our last stitch with pink, we're gonna change it over to
white as our working yarn. Now we've got three more
stitches with the white. One, two, and three. This is what you
should have so far. This is the front,
and this is the back. Let's take a look at
Row five over here. We've got two single
crochets with white, seven with pink, and then
two with white again. So let's go ahead and do that. After that, for Row six, seven, and eight, we're going to be
repeating the same steps. That means one single
crochet with white, nine single crochets with pink, and another one single
crochet with white. Now, as you're crocheting, also try to follow along
with the written pattern on screen so that you can get used to following
those as well, because sometimes bits
of grid patterns are also accompanied by
written patterns. Those are really helpful
because you don't have to count the
boxes again and again, but it's also really
important to pay attention on how you're reading it and when to know when
to switch colors. Since we have two single
crochets with white, that means that on our
second single crochet, we're going to be
switching colors. So you're going to
pull up a loop, switch over to pink as
you're working now, and then you're
going to go ahead and do your stitches with the pink until the pattern tells you to switch
over to white again. Since the seventh stitch is
our last stitch with pink, we're going to be switching
over on the seventh stitch. So you're going to
pull up a loop, cross over, switch to white as your working yarn and complete the single crochet. Then you're going to do two more single crochets with the white. That's one. And two. For the next three rows, we're going to be
repeating the same steps. So refer to the
written pattern to guide you and really
challenge yourself to follow along without
referring to the pixel grid or only referring to the pixel grid without
the written pattern. So let's go ahead and
start the next row. You're going to turn your
work to the other side, insert your hook into
the first stitch. Now, directly after
the first stitch, we've got boxes of pink. So that means that on
this first stitch, we're also going to
be changing colors, so you're going to
cross over the white, and you're going
to switch to pink. And there we go. Now, we're
just going to be doing the stitches with pink until we reach our
very last stitch, which is going to be
a stitch with white. So that means that on
the last stitch of pink, we're going to be switching
over back to white. Let's switch over to white because we have one
stitch remaining. Cross over the pink,
grab your white. Complete the single crochet. Now we've got one stitch
left to go through. Always make sure that
your non working yarn is at the top and
complete this row. Now, go ahead and repeat these same steps for
the next two rows. And then in the next
section of this class, I'm going to be showing
you how to make multiple color changes for these rows at the top over here.
4. Crocheting with Grids (row 9 to 11): Now we're going to be starting
row nine, ten and 11. This is what you should have
after completing Row eight. Let's take a look at the
pixel grid before we get started because we have multiple color switches coming up. So starting off with Row nine, we've got one stitch with white, four with pink, one with white, four with pink, and then
one with white again. So let's do this together. Go ahead and start your new row with whichever way you've
been starting the other rows. Insert your hook into
the very first stitch. So we're going to be making
one stitch with white, but then immediately after, we're going to be
switching to pink. So we're making the top
corners of the heart. Once you've switched
over to pink, you're going to be doing
four stitches with the pink or whichever color
you're using for the heart. So that's going to be one, two, three, and here's our fourth and last with
the pink for now, so we're going to
switch over to white. Now that we've switched
over to white, we're going to be doing
one stitch with the white, but since it's only one,
we're going to be switching back to pink for the
next four stitches. So that's going to
be one, two, three. And this is our fourth and last stitch with the
pink for this row, so we're going to switch
over back to white. And now we've got one
stitch with the white, and we're going to complete
this since it's the end of our row. And there we go. We're almost done
with our hearts. Let's take a look at
what to do for row ten. We've got two white, two pink, three white, two pink, and two white again. So let's go ahead and do that. First of all, we're
going to be starting our row with whichever
method you've chosen. Insert your hook into
the very first stitch. That's our first single
crochet with white. Insert your hook into
the next stitch. This is our second,
and now we're going to be switching
over to pink. Next, we're doing two stitches with pink, so that's our first. That's going to be our second and switch
over back to white. Now we're going to
be doing three with white, so that's going
to be our first. And our second. And finally, our third, switch
over back to pink. And now we're going to
do two with the pink. So that's going to be
one and two. Oh, wait. Now we have to switch
over back to white. So don't complete your
second single crochet, cross over the pink and
switch over to white. That's going to be
one. And then two. And your last is for Row ten. And there we go. We're
all done with our heart. For our very last row, we just have to do single
crochets with white. So what you can do over here is carry the pink yarn with you, or you can cut it off over here. If you're making tapestries or room decor or using these
as pockets for your bag, it's completely fine to just cut the yarn once you
don't need it anymore. But if you're making larger
pieces like clothing that might stretch or
require a lot of use, then I would recommend
carrying the pink yarn with you for the next row as
well and then cutting it. Let's go ahead and do
our very last row. And this row is just going to be one single crochet with your background color.
No color switches. Just some single crochets
in every stitch. Here's what your finished
little heart should look like, and I'm going to show you
how to fasten off your work. So once you're done with your
pixel grid and you've cut off all the yarns that you're
now working with anymore, to fasten off, you can chain one or two to make
it extra secure. Leave a little bit of a string of yarn to weave it in later, cut the tail, pull
and tight to secure. And that's how
you're going to be crocheting your
pixel grid tapestry.
5. Adding a Border: One more optional
step that you can do after completing
your pixel grid, and that is to add a neat
little border around your work. This is perfect for if you're
going to be hanging this up in your room or
using it as a tapestry. Grab the iron that you want
to use for the border. It can be the same as
your background color or an entirely different color. And attach it into the
corner of your work. Now, the corner
doesn't really matter. You can do it over
here, over here, over here anywhere you like, but I'm going to be
starting from this corner. Insert your hook as close to the edge as you
can possibly get. There is no specific
guideline of where to insert your hook as long as it's going as close to the
edge as possible. Go ahead and make a
little bit of a loop with your yarn just so you can
easily slide it through. Pull it out. And then go ahead and tie a knot to
secure this in place. Then go ahead and insert
your hook back through that same place where you
inserted it previously. And now we're going to be single crochet all around your work. So to do your first
single crochet, you're going to pull up a loop, and you're just
going to chain one. That is how you're
going to be starting your very first stitch. Insert your hook back into that same place for
the third time, and we're going to be finally doing our first single crochet. So pull up a loop and then yarn over and pull through two loops. Like that. Now we're going to
be working along this edge, so you're going to
insert your hook as close to the
edge as possible. Pull up a loop and then yarn
over and pull through two. This is also going to work to hide in any unnat edges that you might have to try to stay as close to each stitch
as you possibly can. Go ahead and single crochet all the way until you reach the top, making sure that you're
not inserting your hook too below or too
much at the top. So try to find the little
spaces that already exist in the border and
inserting your hook through them as close to
the edge as possible. Now we've reached the
corner over here, and here's what I
would recommend that you do to make sure that your square or rectangular
piece maintains its corners. In every corner stitch or
wherever you insert your hook, I would recommend inserting two single crochets
there instead of just one. So this
is my first one. I'm going to be inserting
my hook back into that same space and then doing another
single crochet, as well. This is just going to
create a little bit of space so that it doesn't
go all the way around, but kind of maintains
that corner shape. And now we've reached the top of our work, and along this edge, I've already got
stitches to go through, so I'm just going to be going
in through the stitches. We don't really have to worry
about the edge over here. And you can go ahead and cut off this working yarn that you
were working over as well. Seems to be pretty
secure enough. This is also a great way to hide any ends that
are bothering you. So, for example, when
I come back over here, I'm going to show
you how I'm going to hide that in this
border as well. So I'm going to make
sure that this tail that I want to hide in my work is facing up as I insert my hook as close
to the edge as possible. So the tail is up, and then I'm going
to single crochet. So it's very similar
to how we were carrying the yarn when
crocheting the heart, and it's just going
to get hidden in all of these single crochet stitches
that you're making. Once you've done a
couple of stitches, you can go ahead and
grab your scissors, and then you can just
cut all the extra off. And you'd have a nice
little neat border. And then I'm going to be working over this end over here as well. So go ahead and
continue single crochet along the edges until you reach back to where you started. Once you've come
all the way around, here's how to end your works, you're just going to be slip stitching into the very
first stitch that you made. So I'm just going to be adding
one more single crochet over here just to
maintain that corner. And that was the very first
single crochet that we made. So you're going to be
inserting your hook through and then we're
going to do slip stitch, which basically means
you're going to slide that loop
through the stitch, as well as the
loop on your hook, and then you're ready
to end your work. You can chain one to
make it extra secure, and go ahead and grab your yarn. Cut it, pull it up. And there you go. You're
all done with your border. Now you can go ahead and add any other finishing touches
like weaving in the ends. So now you've completed your very first tapestry
crochet piece.
6. Final Thoughts: You did it. I hope you feel so proud of yourself
for learning a Butyle crochet
technique that's going to open the doors for so many
more details projects. Now, you can experiment
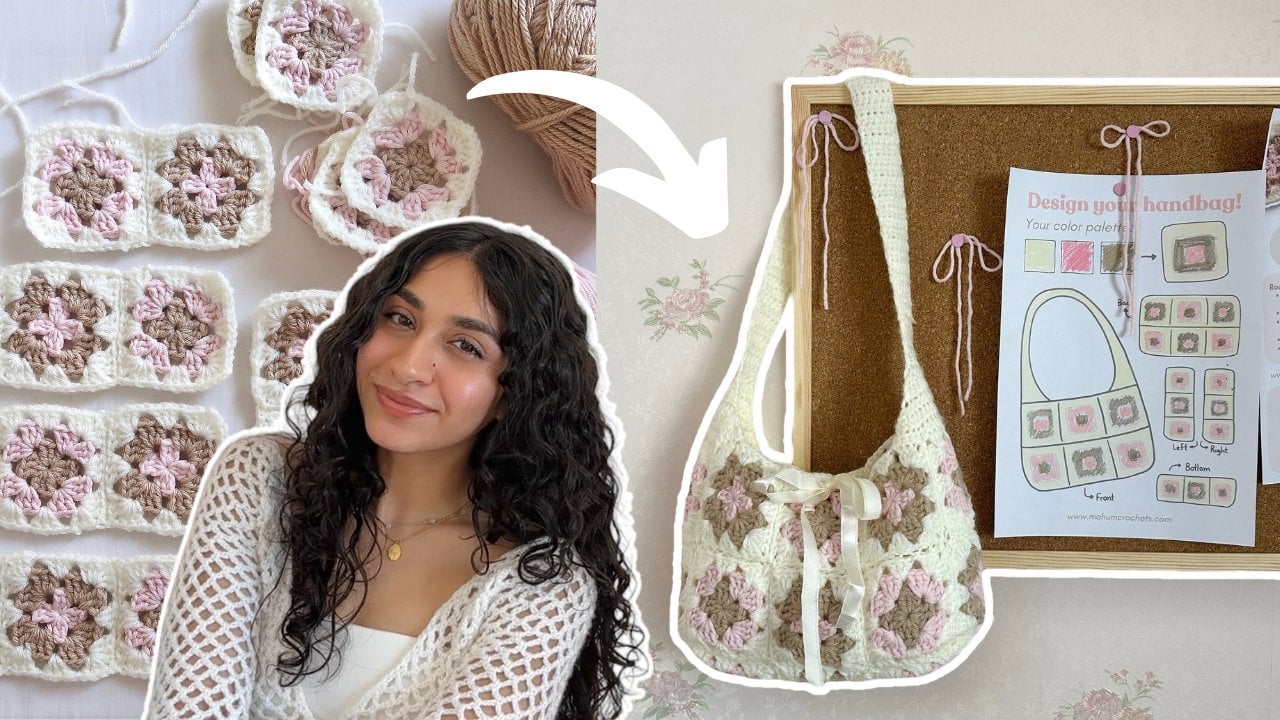
with pixel grids of different designs and turn them into projects like cushions, bags, use them for clothing. If you have any
questions, please feel free to ask me in
the discussion page, and I'll get back to
you as soon as I can. I hope you'll join me for
more creative projects. Don't forget to follow me
here on Skillshare, YouTube, Instagram, and TikTok to stay
in touch and get inspired. Now, let's see your first
tapestry crochet project or any other project you've made while practicing this technique. You can upload pictures to the project section
of this class, and I can't wait
to see what colors you chose. See you next time.
 Mahum, Crochet Artist and Educator