Transcripts
1. 1 Intro: Hello, and welcome
to this course, Intro to Affinity,
designing and takeout menu. My name is Ben and I'll be your instructor
for the course. I am a media design
educator with many years of
experience teaching people both in
person and online. Affinity is a new program as of the creation
of this course. It used to be three separate
programs, affinity designer, affinity photo, and
affinity publisher, and now it's been
combined into one. So in this class,
we're going to design a takeout menu because
that will allow us to take advantage of all three of these types of design
that we're able to do. We'll be able to edit
our graphics like logos and things like that inside
of the vector editor. We'll be able to
edit the photos for the menu inside of
the pixel editor, and we'll be able to edit the entire layout of the
menu inside of the layout and so this will allow us to see kind of the entire breadth
of what affinity can do by utilizing the
tools from each of those different personas or studios as they're
calling them now. One thing I want
to say is that you don't need to have any
prior experience here. If you have used the
old affinity programs, that will come in
handy because you'll already have a good
understanding of how it works. But this program is new, and we're all going to
be learning it together. So as we dive in, just know that you don't
need any prior experience, all you need is a computer that can run the new
affinity program. So that's affinity
with the green logo. Okay, I hope you're
excited to get started. Let's dive in. In
the next video, we'll talk about what the
project for this course.
2. 2 Project: Project for this
class is, of course, going to be to design
your own takeout menu. So this is going to
be one of those menus that you would grab from a restaurant to keep
at your house. Now, we don't use
these as much as we used to in the days
before cell phones, but it's still a
really useful kind of exercise to think through the process because
there's so much of the design work that you have to do when you design
something like this. So it's going to be a one or
double sided takeout menu, and it's just going to be one of those cards that would sit inside of a little stand on a counter or
something like that. So it's not going to be
the big fold out menu, just a little one that
people could grab and take for this project, you need
to make sure that you use all three of the
studios in affinity. You're going to use
vector, you're going to use pixel and you're going to use layout to do all of
these different aspects. You want to make
sure that you have enough things to have explored, not everything in affinity, but at least a lot of the things that we're
going to talk about here. Make sure that you include
at least one logo, text that you are going to use paragraph styles to control. Don't worry if you don't
understand what that means right now, we
will talk about it. Then you want to
have photos that you have edited in
the Pixel studio. Before you get
started this project, you want to make sure that you sketch out what
you want to design because that will
really help you once you get to
actually making it. If you have a good rough sketch of where you want things to go, it makes it so much
easier when you get into the computer and actually
start designing it. Okay, so now you know what
the project is going to be. We're going to go
ahead and dive in and we're going to
get a little tour of the affinity interface to help you get oriented
to where we're going.
3. 3 Affinity Tour: Alright, so here we are. We have landed inside of
the new affinity. And what we are looking at now is kind of the layout here. And we are looking at what we're going to do
during this course. So we are going to be
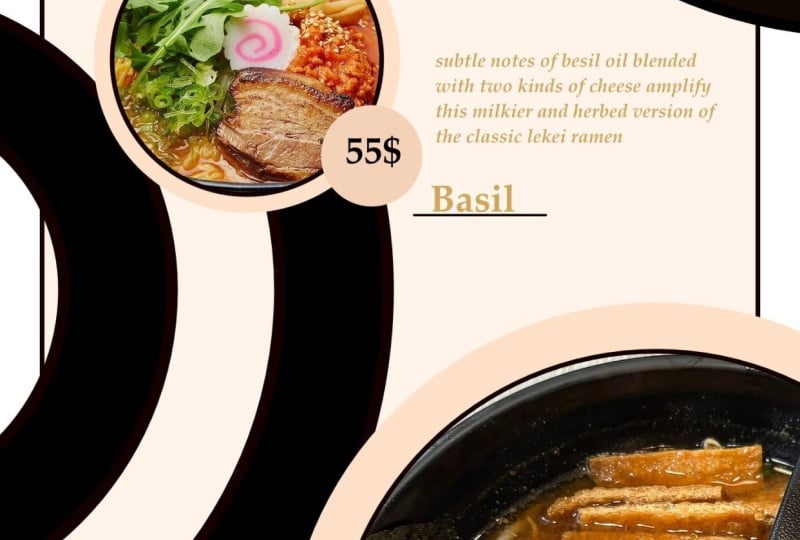
creating this takeout menu, and you can see that I've done a bunch of iterations on this. This is how design works.
You iterate and you iterate and you iterate in
order to refine your design. And you want to make sure that
you save those iterations. This is made really
easy in affinity by being able to duplicate
your artboard or your page. So I just duplicate this and then I make
adjustments as we go, and that allows me to see
where I've come from. So let's take a tour around the space so you kind of
know where you're at. Right, we're going to
start up in the top left. Now, I'm on a Mac. So here on a Mac, I have my colored dots to
close a window, minimize a window,
or expand a window, okay? That's what
you've got there. And you can see that it pops up and shows you
different options. You have the affinity logo, which you can pop open to see kind of the welcome
menu that you would have seen when
you first came into it. You can see that there's
different documents here, images that we're working on, and then you've got
your welcome to affinity things
down here as well. All right, we can X out of that. And now up here at the top, we have what are now
called the studios. So the studios are what used to be in the old
affinity personas. So right now we have
a vector studio, a pixel studio, and
a layout studio. And we are going to
use all three of these in order to accomplish
our designs here. Now, you may also see
the Canva AI studio. If you click on this
three dot menu, you can see that
I have turned off Canva AI because you
only have access to those tools if you pay for the premium Canvas subscription,
which I don't have. So I have this turned off. You can see there are a couple
of other premade studios, slice retouching, color grade. And you can turn those
on if you need to. And there's also
create a studio. So you can customize this to
be exactly what you want, exactly what you need,
which is pretty cool. So those are the studios uptop, and every time you change, you're going to see that
things adjust a little bit. Things don't stay exactly the same between studios
because it's changing the tools and the panels that you
have access to. Now, here you have a couple of options for your view mode. You have vector view mode and
you have Pixel view mode. Depending on whether
you're working with vectors or pixels, you
can switch between this. You also turn on Pixel view mode when you
want to make sure that you're getting
something pixel perfect for playing on screen. You want to know
exactly what it's going to look like in pixels, you can turn on your
Pixel view mode. Then along the top, we also
have some other features. There are a bunch
of quick menu items over here on the top right. These are things that you
might need to use regularly, and you'll see that those
change when I change my studio. So those are different
in each studio, and those can also
be customized. Well, then right
below that, we have what's called the
contextual toolbar. The contextual toolbar changes depending on what tool
you have selected. So our tools are all
on the left hand side. So right now I'm on this one. This is the move tool. And if you hover over
anything in the new affinity, it will give you a nice detailed view
of what that tool is. If I switch to my artboard tool, this up here in the
contextual toolbar above is going to change what settings are available to me because there are different
settings for each tool. So, again, the no tool is going to have
different settings. They're all going to
have different settings. Let's go back to the
MO contextual too for the move tool is also changing depending on what
you have selected. So right now I have
the text box selected. This will change if I
select an image instead. If I select an
image, I'm no longer going to have my font options
and things like that. So this is really important
because you need to understand that if
you change your tool, you might not see the
option you were used to and you might not have realized
that you changed tool. You might not consciously have
been thinking about that, so make sure that if you feel like you're
missing an option, that you check what
tool you're on. That can help with a lot of
frustration when you're first getting used to a program like this. So that's the
left hand side. On the far right hand side, we have what are
called the panels. Panels come in all
different kinds, and these help you deal with
the details of your project, things like your color,
your texts that are here. So right now, I'm in
the stroke panel, which helps me deal
with the outlines and the layers panel, which helps me deal with the way my layers are stacking
on top of each other, and I'm in the Transform panel, which helps me
deal with the size and position of my shapes. So there's lots and lots
of different things here, and I just want to
show you what will happen if I accidentally grab my layers panel and I drag it out. This
can float on top. Now, that's really cool because you can position
it where you want. But if you get frustrated
with that and you accidentally click the X because you think that
will put it back, it won't. It disappears. And a lot of people
can become very concerned about this
because they're worried, Where did that go and how
will I ever get it back? So I'm going to show
you how to do that. You're going to come
up to the window menu, and then you've got panels, and this is just showing
which panels show and hide. But then you have different
panels here, okay? So these are actually
the panels underneath. And if you look, you're going to see a
bunch of different ones. So under General, I can find layers. Okay?
So I pop that back. It goes exactly back to where
I had it the last time. And if I want to add it back into my docked layers
on the right hand side, I'm just going to click
and drag that over here. Pop it right back
where it was before. No big deal. We're all set. So that's kind of the layout here. There's one other thing. You will get some information down here in the very bottom. There's a little bar
down at the very bottom. I'm circling with my mouse, and that will give
you some information. It can give you some
help information. So it's talking
about picture frame. That's what's selected,
telling you how to utilize it. All right? It also shows
what page you're on. So there's a few things there. Warnings can also appear here. So just know that that's another little area that
people sometimes forget about. So that's the basics
here in affinity. That is how everything
is laid out by default. It can be customized
a lot, though. There's a lot of customization
that can go into it. And just so you kind of
know when you change, if I change to
layout here, I get a new panel on the
left hand side, which is my pages panel. That's more useful in layout
than it is in vector. So that's why that pops up here, and you might need it a lot. So it pops up on
the left hand side instead of popping up
in the right hand side. Of course, I could
grab it. I could drag it and I could
bring it over here, too. For those of us who used
Affinity Publisher before, it's very comfortable to have
it on the left hand side, so that's where
it is by default. Okay, so now you've kind of
seen where we're going and you know kind of what the
layout of the program is. So in the next video, we're going to go ahead
and get started by making a new document
for our takeout.
4. 4 New Document: Okay, now it's time for us
to set up our new document, the document that
we are going to use for our takeout menu. This can be a little
bit confusing in affinity if you're coming
from some other programs because vector programs
traditionally have artboards and layout programs
traditionally have pages, and pixel programs often don't have anything
like that at all. You just work on a
single image at a time. So this can be a little
bit of a new idea. But basically, artboards
are going to be pages, and individual photos
can also be pages. But you can use those all
kinds of interchangeably. You can see right
now I have the pages panel open, and I
have artboards. But we're going to create
a whole new document, and we want to create
it to the size that we want our
final document to be. So we're going to go
ahead and come up to file menu in the top left, and then we're
going to go to new. This is going to pop
up the new dialog box, and there's some different
options that you have here. You can see that you
have these page sizes. These are CMYK. CMYK is what you would use if you were going to print this
professionally. If we were actually creating a takeout menu for
a real restaurant, we would use CMYK, most likely because we would get those professionally printed. We wouldn't just print those
off on the home copier. So that's CMYK. There's also page sizes in RGB, as you scroll down,
there's also photo sizes, canvases, video on the web. There's a ton of
different options, including devices so
you can set up to do UI design in a
specific type of device. We're going to use page sizes, and we want to create something that is half the
size of a letter. But you can see that this half
letter here is 5.5 by 8.5, which is not what we want. We want ours to
be the long half. So if you cut that letter
sheet right in half, we want it to be the long half because that's more of
the style of a menu. Now, takeout men may not
be exactly that size, but I want to make this
easy for you to get set up. So we all know that a letter
size is 8.5 by 11, right? So that's 8.5 by 11 right there, and it's working in inches. You can change this if you
want to work in points, picas, feet, yards,
pixels, whatever you want. There's also a metric
here, millimeters, centimeters and for us, we need to put in
a custom amount. So right now we
have a page width of 8.5 and a page height of 11. 11 is what we want, but we don't want our width to be 8.5. We need to take
that down by half. So we're going to do half
of 8.5, which is 4.25. So I'm just going to
type in on my keyboard, 4.25 and hit Tab. And now that updated it's 4.25, and I'm still in inches. And because I didn't have
this link turned on, it did not adjust
my page height. We wanted to keep
our proportion, we would turn that link on. Okay, our color
format, CMYK eight, that's great because we're
going to print this. And then there's a bunch
of other things here. I don't want you to
worry about all of them but we do want
artboards turned on. So this Artboards one, we're going to click and turn that on so that we can have individual
artboards within this. Then as you come down here,
you're going to see margins. Margins are the space within the document that you
wouldn't want to work inside. Now, for this, 1 "
margins would be huge. That wouldn't make
any sense at all. So we're definitely
going to trim that down. We're going to turn that down to a quarter of an inch margin. So 0.25. Now, when I update this, it doesn't update
any of the others, and that's because that
link there was turned off. And we really want
to turn that link on so that we have all
of the same margins. So let's go ahead
and click that, and we'll put this in here, 0.25. And now they all update 2.25. Great. Bleed. What is bleed? Well, bleed, you can see here if I move this
out a little bit, you can see this
area that's blue around my selected
artboard. That is bleed. And bleed tells you
how far you need to go outside of it for printing. So basically, when a
printer prints something, they print it on a
larger sheet of paper, and then they're going to trim
it down because a printer, the machine can't print all the way to the edge of the document. And so they're going to print on a larger piece and
then trim it down. So bleed is what you need in order to make sure
that that trim works without ending up with white
space on the. So bleed. You have your left, right, top and bottom bleeds. I'm going to set all of that to a quarter of an inch right now. So let's go ahead and do 0.25
to a quarter of an inch. This was set to link, so
they all update together, and now we're going to
click Create Document. So this will give us
a new document with an art board that is 4.25 by 11. Okay, and now I have
a new document. One of the things
that you will notice when you see this is that we now have two tabs up at the top, where
we didn't before. Now we have takeout
Menu Practice file, which is this one that we
were looking at before, and we have Untitled, which is our new document. Alright, and that's how
you're going to go ahead, getting your document set up. Now in the next video,
we're going to go ahead and get started using some
of our vector tools. We're going to start out with the shape tools
because those are kind of the basic
building blocks of anything you do
in graphic design.
5. 5 Shape Tools: Alright, so now
it's time for us to start learning how the
vector tools work, and shapes are really
the building block of everything that you
do in vector design. Now, for us, we need to design
a really simple logo for this empanada restaurant in order to be able to
put that on the menu. Now, when you are
designing a menu, you may already have a logo
that you're bringing in. But for the purposes of
learning how to use some of the tools in each of
the studios here, we're going to design
the logo right. Important for you to understand
that I am not going to teach every single
tool in this class. The purpose of this class
is to help you learn how the studios work together in order to create one document. So we're going to learn
some of the tools, but we're not going to
do every single tool, and that's just for
the sake of time. We want to be focused on doing this project and learning how the studios work
together instead of focusing in on
every single tool, which is a ton within affinity. Of course, there are
other courses that go into different tools that
you can learn as well. Let's go ahead and get
started with shapes. Shapes are the basic
building blocks. So if we come to our tool
bar on the left hand side, going to go down
about halfway until we find something that looks
like a rectangle for me. Now, if you've already
selected a different shape, it might look like a
different shape for you. When we click on this,
that will pop out a flyout menu here of all of the different
shapes available. Affinity has so many different
shapes available for you. Rectangle is, of course,
a very basic one, and then you also have ellipse, which is right next to it here. Rounded rectangle triangle. There's just a ton
of different ones. You can get into some
pretty funky ones with the doughnut and the
double star tool, but you can get
exactly what you want. Now, we're going to
use these shapes to then create the
shape that we want. For us, that's pretty
simple. It's a half circle. Now, when you're designing
a logo or anything, you should have
sketched ahead of time. So we already kind
of know what we're going for from the example here, and we need a half circle in
order to make that happen. Half circle is not too hard. We're going to go ahead
and take our Ellipse tool here and we're going
to drag out a circle. You're going left click with
your mouse and drag out. Now, you can see I
can make this all kinds of different ovals, ellipses, whatever I want. But if I want a perfect circle,
which in this case, I do. I'm going to hold down the
Shift key on my keyboard, and that is going to snap
it into a perfect circle. Doesn't matter what size
this is because it's vector. Vectors are infinitely scalable. So I can kind of design this
at whatever size I want now, and I can scale it
to the correct size from my document later. So I'm just going to go
ahead and let that go. Now, there's a couple of
things to know about shapes. Shapes have a few
different properties. They have a stroke on the outside and a
fill on the inside. In order to mess with
those, we have to go into our panels on
the right hand side. That's going to be our
color panel over here. And we also have a
swatches panel right now. Now, when I am first designing, I'm not going to use
my color palette for my final design. I'm going to use blacks,
whites and grays. So if I click here
where it says pinatas, that's my special
palette for the menu, but I want to switch
to my gray palette. Okay, and this gives me
all the shades of gray, and this helps me to not try and include color in my
design too soon. It works better if I don't do that because
then I can just focus on what the shapes look like and how I'm working
with the layout. So if we want to just change
this to another color gray, we would just click here and it changes that fill to
another color gray. If we want to change the stroke, we would need to select the
stroke from behind the fill. It looks like a
little black doghut. Bring that up to the top,
and then we can change that. So if we want that stroke
to also be a gray color, we could go for a
dark gray color. And you can't see
it. Let me zoom in. You zoom by holding
down option on your keyboard and
scrolling with your mouse. There's no stroke
there. That's because our stroke in the stroke
panel is set to 0.2. We can't see that. So
if we want to see it, we would drag that
make it bigger. And this panel is where we have all the options for our stroke. Now, we don't want
a stroke right now, so I'm going to go
back to swatches and with my stroke on top, I'm going to select
this white circle with the red line through it. That says, no, nothing. Don't want it there. So
we're going to click that, and now we don't have a stroke. So now we have our circle, but we need it to be a half circle. There's a couple of different
ways that we can do this. So I am going to duplicate this a couple of times
so that I can show you the different ways you
could create a half grab my move tool from the
top left of my toolbar. And to duplicate this, I'm just going to
hold down Option on my keyboard, click and drag. Option on my keyboard, click and drag. So now I have
three of these. When I click on the circle, you are going to see a couple of options for this
shape in particular. It's up in the context
menu, of course. There's a fill and a stroke up here as well, and a stroke size. But right now, we also have Convert to Duut
and convert to Pi. That's because the
doughnut and the Pi tools are really just subsets
of the circle tool, which makes sense.
They are circles. We also have convert to
curve Curves basically says, Hey, I want to bake
these vector points. I don't want it to
be recognized as a special shape tool anymore.
So I'm going to click that. And now I don't have Convert to doughnut and
convert to Pi anymore. A lot of food metaphors here. What we needed was
convert tamponata. But I don't have convert to doughnut or Pi
because it doesn't recognize this as a
circle shape anymore. It just recognizes
it as vector points. So if you see these
four points around it, vectors work by
telling the computer, there should be a point here, and the line should exit
the point at this angle, and it should go this far
until there's another point. So if we click on this, we can see that these have
these handles, and the handles are what
tell it how far to curve. So a circle is made up
of four vector points, and each of those
has equally spaced handles on it in order to
create a perfect circle. Now, for us, we want this
to be half a circle. So what we can do
is we can click on this lowest most point, and we can hit Delete
on the keyboard. That's then going delete
it. Now, our circle is not a perfect half circle. It's kind of rounded here. And why is that? Well, if we
click back on our node tool, we can go ahead and
click on these, and we can see that we still have these handles
pulling outward. So they don't have a
point to go to anymore. So these handles on the left and right are interacting
with each other. To make that flat,
pull down Command on our keyboard and click
and drag that in. Can also hold down shift
to keep it in alignment. And once I get up here, I can make that
pretty much straight. It's not exactly straight. I'm going to zoom in option
and scroll to zoom, remember? And we're going to try
and get that all the way straight without
messing up the other one. So that's pretty
good. That's one way we could get to the half circle. Another way we can get
to the half circle is by using our
geometry operations. And geometry operations
in some programs are called Pathfinder
operations or merge operations. But basically, it allows us to combine two shapes
in different ways. So for this one, we're
going to need two. So let's click on
the second circle, drag this up to give
us a little space, and then we also are going
to need a rectangle. So we're going to go to our shape tools,
choose our rectangle. And we are going to drag a rectangle right
across the top. Now, you can see that
as I come along here, I'll get different options
that appear automatically. So this gives me a
red line showing me that I'm lined up with
the middle of the circle. And it kind of snaps to that. Now, I have snapping turned on. That's in the top right
corner of the screen, and it looks like a magnet. That is useful to have
turned on most of the time. But if things are kind of
like snapping together and you don't want them to,
you can always turn it off. So I want this to snap
right to the center, but I want to kind
of be outside it, and you'll see why in a second. When click and
drag through here, now we have a shape
stacked on top of a shape. If you look in the layers panel, you're going to see a
rectangle right here, and that is over this circle. You can select things by
clicking in the Layers panel. This will be easier
to see if we turn our rectangle into a stroke so that we can see
what's inside. So up here in my swatches panel, I can flip my fill and stroke by using this double headed
arrow next to the eyedropper. When flip that, and now I have a rectangle with a stroke around it and a circle that is filled in so that I can
see a little bit better. Scroll in here and in order to use this geometry operation, I need to have both selected. I'm going to hold down Shift on my keyboard and also
click on the circle. Now I have them both selected. From up here in the
top right menu, I have all my
geometry operations. There's add,
subtract, intersect, X or and divide. For this one, I want subtract. I'm going to click
subtract, and it's going to subtract the top shape
from the bottom shape. So the top shape
gets subtracted. The bottom shape stays
with whatever's left. And so now I have a
perfect half circle. This is going to be a little bit more perfect than
the one that I had up on top because I didn't
have to adjust the curves. I just did a flat slice across. So it's going to be more
of a perfect half circle. Now, there's one more
way for us to do this. Let's grab this third
circle, bring it up here. And we're going to do the
same thing as we did before. We're going to make a rectangle, and we're going to come out, and we're going to drag across this we could use the
geometry operation, but we also have another tool called the Shape Builder tool. But in order to use it, we need to have both of them selected. I can click and
drag around both of them and they are
now both selected. Now, the Shape Builder
tool is right below the shape tool. We're
going to click on that. Now we have the option to add or subtract from this shape. We need to hold down option
to change it to subtraction. You can see it turns red, and we can then subtract
from this shape. We want to subtract both
the half pipe thing here and also the bottom
half of the circle. I'm going to click and drag
through those and it erases. The shape builder tool is
sometimes more intuitive and a little bit faster than using
the geometry operations, especially if you're doing something more
complex than this. Alright, I'm going to go
back to my move tool. So now we have three
different versions of essentially the same thing. They are all just half circles. So that's going to be
how you use shapes. Now, there's a couple
of things I want to show you here just so you
kind of know about them, even though we won't be
using them in this project. Come to these shapes here, and I choose something
that's a little bit more complex than
our basic shapes. Let's say I choose
the double star. You can click and
drag that out. I can still hold down Shift to
keep it in proportion. But when I'm done drawing, when I let go, you're going to see little orange
handles appear. And these orange handles are special properties
that that shape has. So this one you can choose
how far in it goes. So this is your inner radius, and then you also have what's
called the point radius, and you can choose how far out these come these inner
star points here. So those are special properties, and different shapes have
different special properties. Those can be adjusted with
orange handles like here. But they can also
be adjusted up in the contextual tool bar when
you have the shape selected. So you can choose how
many points it has, and you can adjust the inner and point radius as well here. So there's going to be a
bunch of shapes that have those special tools
available to them as well. We'll go ahead and
hit the lead on our keyboard to get rid of that. So that's the basics of shapes. There's a lot more you
can do with them and just remember that using the
Pathfinder operations or the Shape Builder
tool is kind of the building blocks
of how you create the shape that you
need for something like a logo or an icon. In the next video,
we're going to go ahead and learn how
to use the Pen tool when we need a line
that's a little bit more free form than what
we get with shapes.
6. 6 Pen Tool and Power Duplicate: Now that we know how to
use our shape tools, we're going to go ahead and learn how to use the Pen tool. Now the Pen tool is how
we draw basically lines, free form shapes, that kind of thing inside of a
vector program. The Pen tool is the thing that causes people the most
trouble when they first start using vectors
because it can be a little confusing and it doesn't work like a pen in
the real world. So we're not going to go into absolutely everything
about the Pen tool today because that
would take a long time and divert us from our project. But I do want you to get a
basic familiarity with it. We really just need it to
draw a couple lines here. So let's go ahead and
select the Pen tool, which is about a third
of the way down on your toolbar on the
left, click there. And you can see when you hover over it that you're
going to get the tool tip, and it's going to tell you a
few of the things that you need to know as far as your
keyboard shortcuts go. So clicking and dragging, you can create a
point or a curve. Dragging with shift will
constrain the node to a tangent. So that will basically
keep your angle in a specific snap it
to a specific point. And then using the Control key, you can create a straight
line using the option key. You can ignore snapping, so you can kind of get
the point where you want. Using the command key, we'll actually give you the node tool. So that's the tool that we
used to go ahead and click on individual points and delete them in the half circle video. So now you can get
that tool from the pen tool just
by holding down command. So that's
kind of good to know. Now, we're going to go ahead and we're going to draw
a little line. We need to draw our
crimping lines here. But let me just show you how
the Pen tool works first. So if we click, we'll
lay down a vector point. So instead of clicking and
dragging to draw a line, like we would if we had a pen in our hand, we'd
kind of just drag. Here, we just click
to lay down a point, and if we want to lay down another point to create
a straight line, we'll just click again. Now we have this line here. Now, my stroke up here in my swatches panel,
this is my stroke. It looks kind of
like a doughnut. That is set to right now. So that is why my
line here is black. Now, if I continue to click, I would continue to draw a line. To get out of this line, I need to go ahead and hit
Escape on my keyboard. Now you see that square, that point became white now. And so now I can
draw a new line. So far, I've only
drawn straight lines. But if I want to draw a
curve, which is why I want for my crimping
on my empanada, I'm going to go ahead
and click, and then I'm going to click and drag. And as I drag, I'm going to pull out those handles
that we saw before, and that's going to
create the curve there. I can go ahead and I
could continue to draw, but this is all that I need for the crimping that
I'm going to do. But I can also, if I
want to adjust that, I can hold down command
to get that node tool. Let me zoom in a
little bit here, holding down option
and scrolling. And to get that no tool, I just hold down
command on my keyboard, and now it changes to the white arrow and I
can click and drag. It changes to a black arrow when I'm over the
point that I can move. I can move individual points.
I can move my handles. If I want to move the handles independently
of each other, I'm going to hold down
command to be in the no tool, and I'm going to hold
down option so that I can move that handle
independent of the other one. So then I'm only moving
one side of that. And that's how you can create
lines with the Pen tool. Now I want to go ahead
and take that and put it into my binata here. Now, in order to make this
a little bit easier to see, I'm going to go ahead and
click on my half circle. And I'm going to change
it to a lighter gray. Here we are with a lighter gray. Now we can kind of position
this where we want it to be. We can rotate an object by going up to this
top handle here, kind of above the
transform handle, and we can click and
we can rotate it. So I want to look
kind of like that. Now, eventually,
I'm going to use the subtract to make
this negative space, so I can kind of
overlay it here, and it doesn't matter if
it comes out a little bit. Want to do is go all the
way around this circle. In order to do that, I
need to be able to do what's called a power duplicate. I want to duplicate this
over and over again, but I want to
duplicate it with a specific set of instructions. Okay. So in order to do that, I need it to go instead of
rotating here around itself. It commands you to undo that. I need it to rotate around
the center point of this half circle so
that it can go all the way around and just make
copies through there. So in order to do that,
I need to actually use this gear icon up in the
top contextual toolbar. And you can see enable
transform is there. Turn that on, and
then you'll see a little point
appear right here. It's a little blue point, and that we can now drag to change what point
this transforms from. And we want this to snap right into the center of
this half circle. And now if we transform, we're going to transform
around that point. To get all of our
transform options, we need to hit Enter
on our keyboard. It's going to get this
move duplicate box. So that's Enter on the keyboard while you are using
the move tool. You can choose how you want to rotate and move your object. So, for us, we are
going to rotate it, and I have this set to rotate
at negative 15 degrees. And then if we turn on
the duplicate option, will show us how it's going to duplicate around
the entire thing. And currently we're
set to 11 copies. We can change that. We
could do less copies. We could do more
copies. We could adjust our rotation angle so that we
fit more or less into here. But this is going
to work for us now. So let me go back to 11 copies, and we're rotating at
negative 15 degrees. And we're going to go
ahead and click Okay. And now we have all
of these curves. And if you look in
your layers panel, we have curve curve
curve curve curve, and they all are slightly
different angle. So that was way
faster than us doing that in order to be able to
complete this subtraction, we actually have to turn
these lines into shapes. So right now they
are just lines. They have a stroke, no fill, and we need to change
them into shapes. So let's go ahead and make sure that we select all of them. This is going to be easiest from the Layers panel. So go
to the Layers panel. Make sure you clicked
on one of the curves, and then holding down Shift, click on the last curve. Now they are all selected. And what we want to do now
is we want to expand these. So we are going to go
up to our vector menu, and we are going to
select Expand Stroke. Click Expand Stroke,
and these all now become objects with fills
instead of strokes. You can see if we come in here, these now have a blue
outline around them instead of that line
going down the middle. Okay. Now, before I perform
any more operations, I want to duplicate
this whole thing so that I have a copy of it. I don't want to perform
an operation that's going to be destructive
until I have created a copy. So let me select over this, and then I'll just
do my copy again by holding down Option
clicking and dragging. Now I have a copy of that, and
my old one remains intact. So now we can go ahead and we can perform
our subtraction. So we're just going
to go back up to our geometry top right. We're going to subtract again. When we do that,
we've now cut this away so that now we have
this negative space, and this is one object. So that's the basic
shape of our logo. And now in the next
video, what we need to do is add text to it.
7. 7 Text Tools: All right. Now that we've got the basic
shape of our logo done, we're going to go ahead
and add in our text. Now, in this case, if I go
back to our example here, I want the text to curve
around the object. So we're called this
EmpanadaRstaurant, Ben pinatas, because
this is been Designs. So we need that text
to curve around. So let's go ahead
and come back here. And in order to do that,
we need to learn about the text tools in affinity. And in the vector studio, you have access to
the text tools. And you have a lot
more text tools in the layout when you're
designing like this, you really want to be in vector, and that's going to work
out just fine for you because you don't
need some of those more copy fitting features. You just need more of
the design features. So we're going to come over
here and we're going to go about two thirds of the way down on the
left hand side, and we're going to find
the artistic text tool. And if we hold on
that on the flyout, we can see that we also
have the frame text tool. Generally, when we're doing design like a logo
design like this, we're going to use the
artistic text tool because the frame text tool is more
for laying out body copy. Artistic text tool
allows you to come out here and when
you click and drag, you're going to determine
the size of the text. You can see it's showing
you the size and points that the text
is going to be. If we type out Ben pinatas here and if we come
and resize it, as we resize the box, we will resize the
size of the text. That is in contrast to
the frame text tool, which if we use that when
we click and drag out, we are going to
drag out a text box rather than a size of text. So now if we type
out Ben pinatas, you can see that it
fills in the box. But if we were to type
out a whole sentence, it's going to jump
down to the next line, and then if we resize it, just go and resize that text box and some of the
text can be hidden. We can make the line longer. Well, we can't resize
the text that way. So that's the difference between the artistic text tool
and the frame text tool. For our purposes, we want to use the artistic text
tool because we want to be able to control the
size and we drag out. But we also want to
be able to attach it to a path so that we can write along if I come in here and I try and
get onto this path, this path is not going
to work very well because we've cut out
these shapes from it. And so it would try
and put text all running along here. And
we don't want that. We really want to be able to do the exact half circle
that we've done before or maybe a little bit bigger so
that it sits outside. So it's a good
thing that we saved our half circle from before. We want to have the
exact same one. Let's go ahead and
grab our move tool, grab our half circle, and we're going to
duplicate it by holding down option and
clicking and dragging. And we just want to
bring that down here. We just need this
to make our text, and then we can position
our text along our logo. So this doesn't need to be
in the exact right position. Go ahead and grab our
artistic Text tool. We're going to come in here, and we want to do text on a path. So as we come along here, you're going to see that we get a T with a little
squiggly line on it. That's going to give us text on the path. We're
going to click on that. You can see we then
lose our coloring because we've now turned
this into a text path. And then we can type
in what we want. We're going to turn
on Cap Sock here, and then we're going to
type in Ben panadas. You can see it starts to
curve around the edge, which, you know, is cool,
but it's not what I want. I have two little arrows here, a green one and a red one. And one is the starting point and one is
the ending point. So if I click and drag
back on the green arrow, I can pull this back around. Okay? My red arrow, if
I click and drag that, I can actually start
to flip the text over because it's pushing
it into another position. Once I do that, you'll see I get another set of green
and red arrows that are slightly
different colors. Now, that's not important for
what we're doing right here, but I want you to
see it so that if you accidentally do it,
you know what's going on. You can always just grab that arrow and pull
it back again. Alright, so let's
position this like this. And then we can
use our move tool, of course, to bring
this down here. Now, when we do that,
because we used a half circle that's exactly
the same size as our logo, it sits exactly on top. That might be a
little bit crowded. So we might want to just enlarge this a little bit.
We can do that. Using our move tool
with the same kind of transforming that
we've done before. Click on one of these handles, and we can and when I
click and drag out, I want to hold down command
on my keyboard so that I can do this around the center
instead of from a corner. I want to do this
around the center here. Just give us a little
bit of breathing room. And now, if we go back
to our text tool, we're going to see our
green and red arrows again, and we can reposition
this to just get it nice and centered. Now, because we are
in the Text tool, we can now change all the
things about our text. So let's go ahead
and select it by clicking and dragging
across our text. When you turn off Capslock. And now I can change my font. I can change my style,
all of those things. So let's go ahead and
see what we've got. Now, I have a bunch of
fonts here that, you know, I've acquired over time, and you may not see all
of the fonts that I have. You may see different fonts that you've installed
on your computer. So for this, I want to use kind of one of
these rougher fonts, give it kind of a vintage feel. So this is barley aged. This is one that I got in a bundle of kind
of vintage fonts, and I like that, but you can use whatever you
want for your logo. Going to put this right here, and I could adjust the size
further if I needed to. Okay, I'm going
to take a look at my reference here and
see how close I am. It's looking pretty close there. Okay, and the last thing
that we would do with Logo design would be to go
ahead and add in some color, but we're going to
add color to this whole document all at once. And so we're going to leave
this like that for now. And in the next
video, we're going to switch over to the
layout studio, and we're going to
start learning how to lay out our document.
8. 8 Layout Studio: Alright. Now we are
ready to go ahead and start to work on the
actual layout of our menu. So we're going to switch
over to the layout studio. Up in the top left, we're
going to click on layout. This is going to change us
to pinkish peach color here. And now you can see we have
our pages panel on the side, and things have
just switched up a little bit in order to help us with the types
of tools that we have and things for when we
are doing layout design. Now, I need a new
page to work on. I'm not going to just delete everything on this page
and start working here. I want to save each
of those iterations, like we saw in the
example file here. We want to see each of these
iterations as we go along. Go ahead and click over here
into our untitled document, and we're going to
go over to the pages panel because we
need a new page, and we're going to click
the New Page button, which looks like a
page with a plus in the top right corner. We're going to click that and it's going to add
a new artboard, so we had Artboard one
and we had Artboard two. The reason they use our
artboards is because we chose to use Artboards
at the beginning. Now, I can still see my
Point transform here. I don't want to see
that right now, so I'm going to go back
up to the gear icon and deselect enable
Transform origin. We can always put that back
on if we need it again. I got this document that
I'm going to be working in, but I also want to
have some guides to help me as I'm
laying this out. Guides are super helpful when
you are doing layout work. For me, I want basically
a two column layout here so that I can set up my
menu in two columns, which will make it easier for the viewer to actually
use and read. We're going to go and get those. Got to go up to view, and
we're going to go to guides. Once you have your guides open, you can choose how
many columns you have, how many rows you
have, et cetera. I'm going to go ahead and
set mine to two columns. So you can see this
in the preview over here on the page that I
now have two columns. The trick here, though, is I
didn't keep the margins that I set up and put
them into my guide, so I need to add margins. Make sure that link is turned on so that they all get
set to the same thing. I'm going to put back in my
quarter inch margins, 0.25. And so those now apply
to the guides as well. So instead of going across
the entire artboard, they're set within the margins, which is really quite helpful. You can change the
color of this. If you were working in blue, you might not want
the color to be blue. So you might go ahead
and change the color of your guides to be
a different color. The next thing that we want to deal with is the gutter here. The gutter is set to
a third of an inch. Now, we've been using
a quarter of an inch for everything, so let's
just stick with that. That's the design
principle of repetition. So we'll go to 0.25
for our gutter. That's the space in
between the columns, and that shrinks that
up a little bit, makes it a little bit neater and more like what we have
going on everywhere. You can go ahead and
close our guides. Now we have these
guides to help us out as we are laying
out the document. Now, the very first
thing that I'm going to do is I'm going to go ahead and pull over
my logo onto this. So I, of course,
don't want to take my original, so I'm
going to duplicate it. Click on my text here
and also hold down Shift and click on my panada. And then I'm going to drag them over while holding
Option on my keyboard, and I can just drag between
artboards like this. And now I have this here, but I do want to
group them together. So I'm going to go
ahead and right click and choose group because I don't really want to
use those two things independently of
each other anymore. They are one logo, and I
want them to stay together. I can use my snapping to
kind of position this, and I'm just going to drop
it towards the top of now, you should be working
off of a sketch. When I did the original designs here, I worked off of a sketch, and that is how you
should always be working when you're
designing is make sure you have a sketch and then
create iterations and continue to reference those as you figure out what your
layout's going to be. I can resize this if I need to, but when I do that,
it's going to not resize the size of the text. So that's not going to work out well. So what do I
need to do there? Well, I need to go ahead
and expand that text. So let's make sure that we get here. Let's go
into our layers. We've got our group, open up our group and go to that text. With that text selected, we really need it to
not be text anymore. We need it to be set. We want to resize
with the object. We're going to go to
the vector panel, and we're going to choose
Convert to curves. Click that. I no longer
is text anymore. It is now a curve object, and you can see that within it, there's each letter is a separate curve. So
now we've got those. And so now if we resize, they'll resize
together perfectly. And that is exactly
what we want. Okay, so that's how we'd get
our initial artboard setup to start doing our
layout design. In the next video, we'll talk about adding
text to this document.
9. 9 Adding Text: Now it's time to start
working on our layout. And if I take a look at
the example file here, you can kind of see we've
got some different things. Now, I had tried kind of a title up at the top and
then the logo underneath. I eventually get rid of that title at the top and
just stick with the logo. But looking kind of at
the structure here, we have some bigger headings, and then we have some body text that kind of displays
the menu items, and we're also going
to have some text for our prices that kind of fall
in with the headings here. Just want to get this
basically laid out first. So we're going to kind
of drop those blocks in. We're going to
have heading text, we're going to have body text, and we're going to
have images, and we want to drop in that layout. And we won't worry too much about the style of
them at this point. We'll get to that later. In this iteration, we really just want to get
our blocks laid out. So, of course, have
our same tools, but they're no longer
nested together. We have our artistic text tool, and two tools above that, we
have our frame text tool. So let's go ahead and get
our artistic text tool right now because we're going
to be doing this heading. We're going to click
and we're going to just drag out that to a
reasonable size. We can always change this and the way I have this divided up, if we look back here is I
have this as early empanadas, now empanadas, and
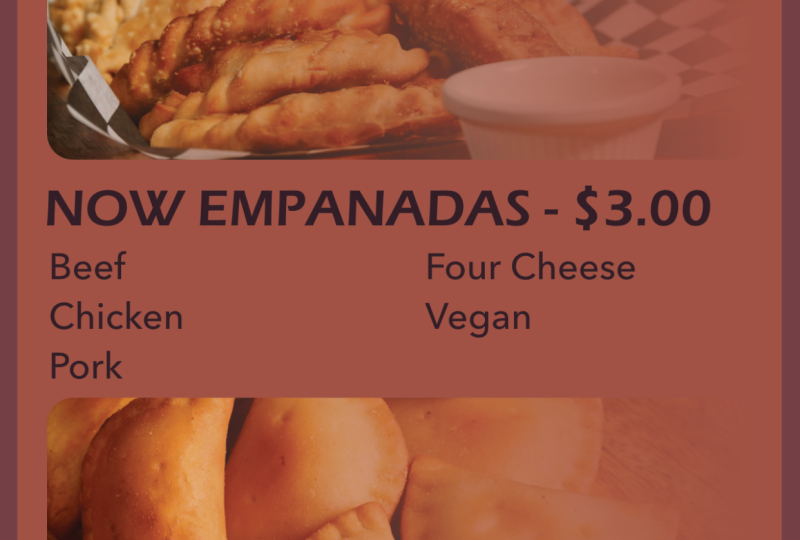
late empanadas. So our breakfast menu is going
to be the early empanadas. So let's go ahead
and type that in. And if we see that
that's too big, we can resize it down, and that's the nice thing about using the artistic text tool. Now, we do want to put
in our pricing here, which I think was $2
for the early Impinas. That seems like a
pretty good deal to me. Let's go ahead and type in $2. Okay, so we've got
that set there, and we can kind of see
where we're laying it out. And this, of course, is going cross column here
because it is a heading. So it's going to be able to
span our two columns here. But then when we go ahead
and lay out our frame text, we're going to lay that out
in two columns that match. Go ahead and grab
our frame text tool, and we'll click
and drag this out, and we didn't quite get it
to where we want it to be. Let's make sure that
we're matching that up, snapping that to the margins. And now we've only
got one column, so we really need to
get this to two column. So up in the contextual
menu at the top, you're going to see
a thing that looks like columns, and we're
going to go to two. And once we do that, we
get gutter controls. Now, you remember our
gutter was set to 0.25. It's automatically set this
to a third of an inch. So we have to type in 0.25 here. Now our gutters match the
gutters of our guides. Then we can type in
what we want here. I'm just going to go
ahead and look at this. I've got bacon egg and cheese, sausage egg and cheese, ham eg and cheese, and just
egg and cheese. I'm just going to go
ahead and copy that so you don't have to
watch me type it all out. I'm just going to go
ahead and copy that, and then I'll bring
it over into here. And I'll click Paste. All
right. So now we've got these. The thing with columns
that you need to remember is that you run through column on the left and
column on the right. You can't select
them independently. They're not two text boxes. And this is good if you want
text to flow between them. But if you want to just have a thing on the left
and thing on the right, then you need to use two
separate text boxes for that. Because if you can
see right here, if I shrink this down, going to start pushing it over, and then I will get
this red eye here, and that means
there's overset text. There's a red arrow
and a red eye, and that means that there's more text there than it can show. And that's because
it's going to push these between the columns. That's how we add our text in both artistic text
and frame text here. In the next video, we're
going to see how we add our blocks for images.
10. 10 Pictures and Frames: So we've seen how we can
block out text here. Now let's look at how we
can block out an image. We're going to go
over to our toolbar and just about halfway down, we're going to find
a rectangle with ex throat and a circle
with next throat. These are the picture
frame rectangle tool, and the picture
frame ellipse tool. These work like shapes, but they are intended
to hold images. That's the idea behind them. Let's go ahead and take our
frame tool and we're going to come out here and
we're going to lay out a spot for our frame to be. Let's click and drag this out. And we can always adjust
the size of this later. As you can see, there's
an X going through it to show this is where an
image is going to be. Now, we don't have any image in there right now and we
might want to put one in. Now, maybe we have an image, maybe we don't have an image. Kind of depends at what point you're working
on the layout at. Sometimes when you're
working on layout, you may be waiting
for photographers to actually deliver
an image to you. So you might not
have them, and you might want to put in something else or you may not have specific photos
that you want to put in. You might want to use
some stock photos. The nice thing here in
affinity is there's a stock panel that
can help you out. Mine is right here on the
left by my pages and assets. So I've got stock right
here. Now, if you've never used it before, you
might not see it there. You might have to go to
Window and then go down to. Want to see stock. If there's not a checkmark Byte, you need to check it, and then
it will appear over here. Okay, so you can see I've
already searched empanadas. There are two basic stock
sites that you can search for. This is Pexels right here, and you can also choose
to go to Pixabay. So there's Pixaba you can search for whatever you
want in either of them. Obviously, we are currently
searching for empanadas, and you can look at both
of them to see now, if this is the first
time you're using it, you will have to agree
to terms and conditions for Pixels and Pixab in
order to use them there. Now, the nice thing
about them is they are royalty free images, so you can use them without worrying about copyright
and that kind of thing. And it's nice to have access
to it right here inside of affinity rather than having to go out and get
it from somewhere else. For now, we're just
going to fill it in with just kind of
some random ones, but I want them to at
least look like they are because I'm not showing the process
of making empanadas. I'm trying to sell
actual cook empanadas. Okay, so let's go ahead
and grab this one here, and we can just click
on that and then we can drag it into our frame. And it's then going to
drop it into our frame. Now, let me show you how
that's different than just dropping it onto
the document generally. If I click and just drag
this onto the document, I get this huge thing I have to zoom way out Option
Scroll to Zoom, and it's because it is posting at full resolution, which
is not what I want. I just drag into the
frame and then it puts it there proportionally.
Let me scroll in. Now, image frames are
one of the things that mess people up the
most when they first get into layout that's
because it can be confusing because your image is actually separate
from your frame. It's very much like in the real world when you
put an image inside of a frame and you could put a mat around that, you
could crop it down. You could change the image inside of the frame. And
that's what you can do here. There's this circle in the
middle with four arrows, and that tells you you can move the image, not move the frame. So we can move the image
inside of the frame. But anything we put outside
the frame won't appear. The frame is like a little
window onto the image. And we can also, let
me just put that back in the we could
resize the image. If we double click here, well, we're going to need to
grab our Move tool. And then if we double click
here, we can get the image. So you see that bounding box get bigger and we can make
the image bigger. It's still cropped to inside of the frame, but
we can make it bigger. So if we want to be zoomed
in here, click out, click back on it, and now we can move it with
the arrows again. And we can kind of
get exactly the part of this picture that we want. You also have this bar
down at the bottom, that's the Zoom in and out bar. So if you don't want
to resize that way, you can zoom in
and zoom out like. If we resize the frame, we're going to resize
just the frame. We're not resizing the photo
at all. So you can see that. We can crop it way
down like that. I'll hit Command Z to undo that. So that can be really tricky
to understand at first, these are two separate
objects that are interacting. So when you resize the frame, you don't resize the picture. When you resize the picture,
you don't resize the frame. Once you've got
that figured out, then you can really get
it to kind of work. Now, if you do want to
resize them together, there's actually a
special handle for that. That is this little handle in the bottom right
corner of the image. It's off from where like
the regular handle is. You come there, and
that will actually resize the frame and image oh, that's a little trick for you just depending on
which thing you need. There's a handle
there for you, but it might not be
immediately apparent. Okay, so now we have
our basic layout here. We have a heading. We have some body text, and
then we have an image. We want to be able to duplicate that so that we
have three of them. So let's just select
all of them together. Click one, hold down shift, click the second, and
then click the third. And now hold down
option, click and drag. Hold down Shift to
keep it in alignment, and we're just going to snap that right into play we're going to do
that one more time. It's not going to
fit because there is more text here than we'll
have in the final document, but just kind of laying
this out roughly right now. At this point, we
can make a couple of adjustments here and
bring in our actual text. Let me go ahead and
copy my text here, and then I'll paste that
over into this spot. We can kind of tighten up our
spacing here a little bit. It's a little bit more room. These are going to be a
little bit more expensive, and you're just
switching back and forth between tools
all the time, but the move tool is kind of where you're going
to end up the most. Now, when I paste this in here, you're going to see
that now Apple and Natla are in the same column. And that's just
because this text box is way too big for them. So we can go ahead
and bring that up. Natla will jump over, and now we have space to bring
our image back up. I just hold down Shift to always keep it in
alignment there. Now we've got our
basic layout done. We basically translated
our sketch into a rough draft in
the digital space. Last thing that I want to
do here before we start on a new version is I
want to change out these images to be
different ampinata. This one here looks like a little bit more like
a dessert ampinata. Well, it looks like I forgot to change my text here as well. We do this. Double check
my pricing here, $2. Yes. And so now I've
got this image here. And I might want
to scale that down a little bit so that we can see a little bit more
of the empanada. Choose another picture of empanadas here. Go ahead
and go with this one. And we're going to have to scale this guy up so that he fits inside the frame and
reposition it like that. Okay, so now we've got some
stock images in there. We've got our text, and we're
ready to basically start modifying this
iteration over and over again until we
land where we want to. And we're ready to start
thinking about how we want this to look stylistically. So how we want the text
to look in particular. So we're going to start
learning how to use styles within affinity
in the next video.
11. 11 Text Styles: Now we're ready to start
styling our text so that it looks like
what we want it to. Right now, we've basically
just been blocking it out, but we haven't changed the font or the
size really at all. And so we really
need to solidify that and figure out how
that's going to look. But we don't want
to do this on this page because we want to save our iteration of
our original layout so that we can always
reference back to that. So we need to make a new page. So let's go back to
our pages panel, which is on the left hand side. In the Pages panel,
we have previously added a new page by clicking
this new Page button. We don't want to do that
in this case because we want to keep all
the content that we already have on Artboard two. So we're going to
click on Artboard two, and then the duplicate
button becomes active. So we can click that and we
will duplicate that Artboard. So now we have
Artboard three, which looks exactly like Artboard two. Now we can modify it with worrying about changing
artboard, too. So, let's go ahead and
we're going to zoom in, and we're going to
take a look at this. If you are working with a brand, you might have brand fonts
and sizes and things like that that you are already working with and you
know what to do. If you're not, then you might be selecting things on your own. In this case, we're going to click on here and we're going to set this heading to look
like what we want it to. It might take some
experimentation. There are a lot of
fonts in the world. Even if you haven't added any of your own fonts, there's
a lot of fonts. I have this set to
Arial right now, which is a very
standard computer font, but that is not what I
want it to be on my menu. So I'm going to go ahead and
click the dropdown and I can look through a bunch
of different types. And of course, each font
that point size varies, and so it may get
too big or it may get too small and we might
have to adjust it later. That's one of the
benefits course of the artistic text is it
will be pretty easy to do. I've used this barley
aged up at the top, and I could use that again here, but I want to create
some contrast between my logo and the text
of my document. And so I'm not going
to use that again. What I used before was
this Bloomsbury one. And Bloomsbury has a couple
of different types of fonts. We have Sands and
script and serif. I like the regular Bloomsbury, which is Bloomsbury Sands. I'm going to click on that,
and I don't want this extending out beyond
the edge of my column. So we're going to go ahead
and adjust this down. You can see as we do that, it's going to change the point size. Now I don't really love to be at kind of a weird
point size here. So I'm going to go
ahead and just change that to be 20 and see
what it looks like. And we can also try 21. Looks like we're
overset just slightly, but I can actually
see here that we have a little bit of space right here where we didn't
quite get that lined up with the margin. So now at 21, we
are exactly across. Now, that might change as we get into some of
our other headings, but for now, that's
looking pretty good. And if we take a
look back at where we were on the menu over here, we can see we were
at 21 there as well. Well let's jump you could
go and we could make those changes to each one of these things, but we
really don't want to. We really want to set this up as a style because we're going to need to use it over
and over again, particularly if we were going to do other types of signage, we would want to get this
setup as a style that we could use and then
in every document, we could set up that
style, and we could just use it over and over again. So let's go ahead and
make this a style. On the right hand
side, in our panels in the row with
our Layers panel, we're going to see TST. At least on my size screen,
that's what I see there. I'm going to click
on that, and that is going to take us to text styles. Currently, we are
set to no style. But we want to make a new style. And because we have
this textbox selected, it will base the new style on what we have in this textbox. So it's going to take the font, the font size, the color
of the font, the spacing. Everything that we have
here is going to take and pull into this new
paragraph style for us. So come down to the bottom
right of this textylesPanel, and you will see what
looks like a backwards P that is called a Pilcro
and stands for paragraph. And we're going
to click on that. It says Create Paragraph style. We can now name this style. So we're going to
call this empanada. Heading. And you can see it's got all of
these things set up. We're currently showing
the spacing on the left, and we are left
space, space before, space after all of that
is all set up here. If we go up to the top
to where we have font, we're going to see that
we are set to Bloomsbury. The style is Sands
and the size is 21. Alright, so this is
all set up here. We're going to go
ahead and click Okay, and that is going to create
the new empanada heading. Now, to apply that
to the others, we're going to click on them. Shift click so that we have
both of them selected, and we're going to
choose empanada heading. That then pops that in. Now, these are still set to 21, but they don't go
all the way across. 21 is basically as far
as we can go, though, because we don't
want these to be a different size
than the first one. But let's do line them up
with the margin on the left, just so that we are
in the correct spot, holding down Shift to keep them in their original alignment. That's what makes
this super easy. We just need to do
the same thing again for our body text. Let's go ahead and get in
here on our body text, and we're going to style
this to be what we want. Now, one of my
favorite fonts for body text for easy
reading is Quicksand. Now, Quicksand is one that is probably not on your
computer by default, but it is available for free. So you can get that through
a site like Font Squirrel. I'm going to go ahead
and click on Quicksand, and we have a bunch of different
options with Quicksand, which is what makes it really
good. It's very versatle. We're going to set that
to Quicksand there, and we can set this size to be smaller
than our heading size. So we're currently at 15. That's looking pretty
good. I'm just going to go ahead and check
where my size was at. Here on my other one. Yes, 15. And where I'm losing a lot of space here is in
this space after. So the space after the paragraph causing us a little
bit of trouble. So I'm going to show
you how to adjust that within the paragraph style. So we're ready to make a new paragraph
style based on this, and we're going to
go to plus that Pilcrow again and
pull that up here. And we're going to call
this empanada body. Alright, you can see it's set to Quicksand here, all of that. But what we need is to
go back to spacing, and we have this
where it says space after it's currently
set to 12 points. We don't really want it
to be set to 12 points, so we're going to
go ahead and set it to zero and see how that does. So then that pulls
it up. This is just going to give us a
little bit more space. But the problem is, it now makes it really difficult to read because it's
hard to tell where one begins and one ends because they're going on to
second lines here. That won't be so much trouble in the other ones that don't in this early Impinats one where there's a little
bit more to tell, it can make it hard to see where one starts
and where one. Order to change that, we really need to be able to do what's called a hanging
indent where we can get that text underneath to bump out so that it's clear
that it belongs with it. Then that's the design
principle of hierarchy. So this is still in
our spacing setting. You can tell there are tons of settings that you
can change here. You don't need to worry about all of them because a lot of them don't have to be set
for every single style, but just know that
basically all of the options that
you need are here. Now, still inside of spacing, we have our left
indent, right indent, first line indent, and
last line out dent. So what we want is that
left indent to come in a little bit.
So we can up this. But you can see our first
line is coming with us. So we need to get this
where we want, maybe 0.1. And then we can take
that first line in debt and we can set
that back to zero. And now you can
see we've created this little bit of
hierarchy here, which just makes it a little easier to tell what's going on. Now we can go ahead
and click Okay, that's going to
create that textile, and we can apply this
to our other textboxes. Shift click to select both of them and apply ampinata body. Now you can see
that what we've got going on under now
ampinatas because we got rid of that
spacing beneath is now we just have Vegan
on its own line here. So we can actually adjust
this textbox so that we can push that so that we have three on one and two on the other. And that's going to give us
a little bit more space. Now, we're going to need
a little bit more space because what I forgot to do was add in the hours and
the location of this. So we're going to need a
little bit more space here or to add in our hours and
location at the bottom. So we can always just re
kind of structure this here. Make sure everything
is lined up correctly. I also notice that I forgot
empanada emporium under here. So in the next video, we'll
do another iteration. We'll add in empanada Emporium, and then we'll add
in our hours at the bottom using our textle.
12. 12 Saving and Iterating: So now we need to do
a couple of things. We need to make a new duplicate artboard of Artboard
number three. So let's go back to
our pages panel, click on Artboard three
and duplicate it. We now have Artboard four, and now we can mess around with this without
worrying about that. And this just helps you to see your progression over time. If you need to get back
to an old version, you can easily do that. The other thing that
we haven't done so far is we haven't
actually saved this doc. Now it will try and recover a document if you have a
crash or something like that, but it's always
good to be saving. So let's save at this point. We're going to file, and
we're going to save. Now, this is a good
time to talk about what types of files
you have in affinity. So the new version
of affinity uses a new file type dot AF. And the AF file type is
exclusive to affinity, and this is the
only program that's going to be able to open it. The old versions of Affinity had their own file types that
could switch between them. There was a photo, a design, and a publisher file type, but they could all open
each other's file types. Here, because they've all been
combined into one program, the AF file it's just
that one file type. And the important thing
to note is you can bring old affinity files in
to the new affinity, but you can't take
new affinity files into old versions of affinity. So just note that.
Now, we've got this, and we're going to save this as our Ben Panata takeout
menu. Click Save. And now it's got a name up here in the little
tab at the top. Ben PanataTou menu.
And so now we're save. We're good to go. If we have a crash or something, we'll
be able to get back here. Now, let's add in our
Empanata emporium text and our hours text. So we might need to do
some copy fitting here. We might need to move
things around a little bit just to make sure that
everything fits nicely. Here, I'm just
going to duplicate my early empanadas by
holding down option, clicking and
dragging, and holding down Shift to keep
it in alignment. Get rid of the word
early and the $2. We'll call this
empanada Emporium. Now, this one could be
a little bit bigger. It is set to the
empanada heading, but that doesn't stop me
from changing its size. So it's still artistic text, and I can just
click and drag it, and I can make that
a little bit bigger. That's going to
take us up to 25.1. It's kind of a weird number,
so let's just go to 25. Now we just need to
move this to give this a little bit
more hierarchy here, and we can trim
down our box here. We don't want to go this far, but we can go that far just
so that it's just fitting. Then we can move everything. And a lot of layout
design is doing a lot of little movements to make sure
that everything is fitting. Can be tricky. When
you have a lot of information to convey, which is true of
something like a menu, even a simple menu like this, and there are much
more complex ones can be tricky to get
everything to fit. You've got a lot of
information to convey. So you've got to take your time really thinking
about how everything lines up, how everything is situated. Alright, so now I
need a body text box, so I'm just going to option, click on this and drag it down. Now I can fit in my hours here. Just go and go ahead
and copy these. And paste these in, like so. Alright, so now we've got our location and
we've got our hours. And now that we kind of see
where that's fitting in, we can adjust our position of the main part
of our menu here. I'm going to go and move this empanada emporium
down a little bit. So now we've got things set up pretty much the way we want, but we still want to go
ahead and add in color now. So we've designed without color besides the photos
up until this point, but at this point, we do
want to add in some color. We need to learn how to
create our own color palette so we'll do that
in the next video.
13. 13 Color Palatte: Now it's time for the
fun part where we actually get to add
color into our menu. I know it can be boring
to design in gray, but it's really important to do that so that you
can work through those designs before you start confusing
yourself with color because color adds in kind of a whole nother host
of considerations. So designing gray is
really helpful first, but now we get to
make a color palette. So we're going to come in
here to color.adobe.com. So this is a site that
anyone can use for free. You don't have to sign in for
it, at least not right now, and you can create
a color theme here, and then we will be able to screenshot that and
bring it into affinity. So let's go ahead
and find a theme. There's a lot of
different things you can do on this
website, but for us, we're just going to go
with this empanada menu, I wanted something that
felt kind of Spanish. So I was in Spain
not that long ago. I really enjoyed eating mpanada. So that's kind of
what I think of with mpanadas and that's the
feelings that I want to invoke. So I'm going to
type in Spain here, and we're going to
see what we get. You'll notice that we have
one that looks very similar, in fact, the same to what I was using in the example menu. Now, you can use any
color scheme you want, but I do suggest using one that's kind of thought
out and planned rather than just
selecting random colors because that's not
going to work so, this one right here was the
one that I ended up using, and I find the easiest way to do this is to just take
a screenshot of it. So screenshot command on
Mac is Command Shift four. And screenshot command on
Windows is Windows Shift S. So I'm on Mac I'm going hit Command Shift four to get
my cross hairs, and then I can just
screenshot this. Now for me on the
Mac, it's going to appear here in the bottom, so I'm going to jump
back to affinity. And I'm going to pull it in. You probably couldn't see
where it was on the bottom of my screen simply because of where the screen
cast cuts off, but it appears on the bottom
right hand corner on a mac, and then you can pull
it in like this. So now I have it. And I can go ahead and set up
my color palette. So let me go to my swatches
panel on the right. And right here, I'm
currently in grays, but I can make a new palette. If I go ahead and click on my dropdown menu
on the top right, then I can choose to add
application palette, add document palette
or add system palette. Add an application palette if I want this to be available in the
application all the time. But if I just want
available in this document, I'll just choose Add
document palette. I'm going to choose Add
application palette, and I'm going to
give this a name. I'm going to call
this ampinata class because I am teaching
you how to do it, but I already have one that's
made with the same colors. I'm going to click
there's a couple of different ways that we
could add our colors in. We could double click
on the fill here, and that's going pull
up this color chooser, and we could type
in the hexadecimals right here where the hex is. So that's one option
that we could do. Another one that
we could do is we could grab it with
our eyedropper tool, so we could click
on our Eyedropper tool right next to
our fill there, click and drag over
and we can pick up the color because we
were selected on it, it applied that color to it. So let's hit Command Z and
make sure we're selected off. Now we use our Color Picker
tool to pick that up, and then that pops that
into our fill there. And then we could
click this button that looks like three
squares and a plus. We can click that and that will add that fill in right there. This is the one that I
find to be pretty easy. So we can just go
ahead and click drag grab each of
these and pop them in. Drag, add and add. And then we get our different
colors, which is great. We've got our color
palette, and now we can go ahead and we can apply it. And one thing you
might find is that sometimes the hexadecimals when you do it with
the eyedropper, do not match up exactly to the hexadecimals that are here. So if you need it to be very, very exact, you
are going to have to type those in manually. Alright, let's go ahead and
change up our colors here. Now, we, of course,
want to do this on a new artboard so that we
have our iteration here, so I'm going to come over
and click on Artboard four. I know my face is
kind of covering up this part, but I will click. Duplicate, and now I
have Artboard five. Now we can go ahead and
change this all out. If I look at my example file, you can kind of see I have
a background color here. The way to do that is
to add another shape. So this is good for us
to practice with shapes. Even within the layout studio,
we still have our shapes. We're going to get
our rectangle tool, and we're going to drag
out a rectangle here. Now, it's using our last fill, which was the brighter
orange color there. That's probably
not what we want. We probably want a
lighter color for this. So we can just switch
that there in aches. But now this is in
front of everything, and we don't want that.
Let's jump to our layers. We need to see where
we're at in our layer. We have this rectangle
on top of Artboard five, and we're going to drag that
all the way to the back. So click on it and drag
and scroll down to get all the way down to the
bottom of Artboard five. Alright, so now we've
got a background that's already giving
some pop to it. And now we want to go ahead
and color in this logo. So on the logo,
we've got a group. We need to open that
group up in our layers so that we can
select our empanada. And for this one, let me
just check my example again. Yes, I used my lighter color. We're going to use our
lighter color there. And then for the text,
click on that group, we're going to use one
of our darker reds here. Now, as you are doing this, you might find that things start to get a little
bit cluttered with all these frames
and different boxes and things, and that
can be confusing. So sometimes you want to
see it without anything. For that, you're
going to go ahead and hit Control W on the keyboard, and that is going to
make those all go away. And then you can see it
without any of that stuff. So that, again, is Control
W on the keyboard. You can also find that under view and you can go
to preview mode. But you sometimes
have to do it a lot. So learning the keyboard command Control W can be really helpful. Now we're ready to add
color into our text. But remember, our text
is set up in styles. So the best thing
that we can do is go ahead and modify our styles. That will make
adjustments to some of our earlier iterations
that use the same style, but we can mitigate that
by duplicating the style. So let's go back to our
text styles panel here. And under empanada heading, we're going to go ahead
and duplicate that. So if we come here and we choose this menu on the
right hand side, we can choose duplicate
empanada heading. Instead of calling it
empanada heading one, we're going to call it
empanada heading color. Now, with this, we then want to select a
color for our font. We're going to go to color
and decorations, font color, and you shove all of
your color options here, but you don't need
to use the wheel. You can go to Swatches and
then you can select the color. Alright, we're going
and click Okay. And then we need to apply this. So let's click first here, and we will click
Eponata heading color. And you can see that what it did was it shrunk
it down because you remember that was set to be
left aligned and 21 font. So we'll need to adjust
that again because we'd made some manual
adjustments. So center line. And then we're
holding down Command to pull out from the center. We're right there. We're back
at 25 points. That's great. And then on these
others, we'll just select them all using shift, and then we'll just
apply Eponata heading. And now we get color there.
Same thing we're going to want to do here on
the empanada body. Go ahead and right click
and choose to duplicate it. And we'll call this
empanada body color. Now, for that one, we want
it to be easy to read. We can go ahead and
change that font color, be our darkest option from our swatches because
we still want that to have a really high contrast. And I currently have
this checkbox turned on, apply style to selection. So since this is selected, it's going to go ahead and
make it the darker there. We can go ahead and click Okay, and we can apply
that throughout. Now, I'm noticing it's a
little bit hard to read, so I'm going to
check here and see what I was set to here. And this was set
to Quicksand bold. So let's go ahead and
modify that one more time. At empanada body color, and we're going to change
our font from style regular. Let me move this over so
that we can see what it does to style bold. And that's just going to
make that easier to read. Now, if we want to apply
that to the others, we're just going to chip
click on all of them and apply empanada body color. Now, we're having
a little bit of trouble here on the address, and that is because it
wants to indent that. So we just need to
make sure that it is on its own paragraph. Alright? And now it'll start on
the left hand side. And now we're
looking pretty good. We can go ahead and hit again Control W on our keyboard to
see what it's looking like. And everything is looking
pretty nice here. And so with this layout
pretty much done, I want to go ahead and
start working on photos. So this is where we're
going to transition to the Pixel studio, and we're going to start
working on a photo of Empanats that's our own photo
rather than a stock photo.
14. 14 Opening a Photo: Now it's time for
us to jump into the third studio, which
is the Pixel studio. This is where we are
going to work on photos. Now, I want to show
you this working on one of our own photos rather than one of
the stock photos. Stock photos tend
to have already been processed quite a bit. They've already been
edited to look good. So we're going to
take our own photo and we're going to see
what we can do with it. Now, to work on a
photo in affinity, you could do it within the same document
because it's all here, but it's a lot easier to work on a photo and
make the kind of composite edits that you need to pick on it in its own document. And then you can place that document inside of
another affinity document. So I want to show
you how that works. Let's go ahead and open up
a photo as a new document. So we're going to go
to File and Open. Now, I have saved here a
photo of some empanadas. So I'm going to go
ahead and click Open. Now, this is a JPEG photo. Affinity can process
raw photos as well, and so it doesn't
have to be a JPEG. You can get more data
out of a raw photo, but this one that
I took in Spain happens to be a JPEG photo. So now I've got my
empanadas here, and it opens this
as a new document. Opens it so that you can see the full size of the photo here, and it just makes the size of the document the
size of the photo. So instead of placing
this into, like, a letter size, we're
a half a letter size, something like that, I have
just opened this photo and I'm just working with it
and all of its pixels. Now, you will notice that
I automatically moved into the pixel persona
for this document. Exel Studio is a huge studio, photography is really an
art form unto itself, and even compositing photography is an art form unto itself. So we aren't going to go
into everything here, just like we did in
in vector and layout. We're not going to
tackle everything, but I'm going to give
you enough to know what the basics are and kind of see the powerful tools that you will have
access to as you learn. So in the next video, we're going to get
started with that by talking about
adjustment layers.
15. 15 Adjustment Layers: So one of the really powerful
things that you can do inside of the Pixel studio
is to add adjustment layers. And those are going to go
over the top of the document, and they're going to change
how that document looks. So you can see we still
have a layers panel here and we have this
background layer, which is our main
photo, and we're going to put an adjustment
layer over the top. Think of this as if you took
a colored sheet of, like, see through plastic and
you laid it over a photo, it would change how
that photo looked. So let's see what
this looks like. Adjustment layers are found down at the bottom
of the layers panel, and there's a whole menu
of different things here, but we're looking for
the one that looks like a black and white circle. When we click on that,
that's going to show us our adjustment layers
all laid out before us, and we can do a lot of
different things here, just so you can kind of see
exactly what it's doing, we're going to choose
the black and white one. So if I click black
and white here, it's going to immediately make that photo black and white. Now, it hasn't changed
the photo itself. If you look in the layers panel, you still have your
background layer and you have a black and
white adjustment layer. Now, I can turn this layer off by clicking on the
eyeball on the right of. If I do that, the
color comes back. And if I click the
eyeball back on, then it shows the
black and white again. Now, each adjustment layer has settings that can be
changed about it. So this one, you can change how dark or light each
of the colors is. So there's a lot of
reds in this photo. If I make the reds more dark, this photo is going
to get more dark in terms of adding contrast to
that black and white image. You can always close out of this dialogue
by clicking the X, but it's not like you
can't get back to it. You can double click on
the adjustment layer icon. In this case, the
black and white circle next to Black
and White adjustment, and then you can change that
further if you need to. Also get rid of
adjustment layers. If you're selected on a layer, you can just hit
the trash can in the bottom right
corner of that panel, and that will go away. So adjustment layers
are very powerful. They can adjust all
kinds of things. One of the things
that we probably want to adjust on most photos is the brightness and contrast to kind of get it
into a good spot. So we're going to click here
and we're going to choose our brightness and
contrast adjustment layer. This one has different sliders. It has a slider for brightness. That's how much light
there is in the image, so we might want to pull that up and make it a
little brighter. And it has a contrast slide. Contrast makes the dark parts of the image darker and the light parts of the image lighter. So you can do this, and it's always good to just kind of go to the extreme to see what the
adjustment layer is doing. You would never use that
in your actual edit, but you can see how the
dark parts have gotten super dark and the light
parts are getting blown out. If you drag that down, though, it's going to make
everything more kind of washed out
and gray because the light parts are getting
darker and the dark parts are getting lighter and everything's kind of meeting in the middle. So this one, we would
add a little bit of brightness too and a
little bit of contrast. We want to pop when
we're on that menu. So we can add that in there. Now I can click out of here
and I can add another layer. But there might be
times when I want to adjust just a part of my image. I want to do that, that is
a time when I need to be able to use a selection to
select just part of it. So we're going to talk about
that in the next video.
16. 16 Selections and Masks: So say I wanted to be able to adjust just part of this image. I want to be able to manipulate
just a single part of it. I want to select something. Selections are
basically a way that you say just this
part of the image. Now, there's all kinds of
selections that you can use, and most of them are represented in their tool by a dotted line. So if I come over here,
you're going to see a dotted line right
here that says Object Selection tool
and one down here that says Rectangular
Marquee tool. Underneath each of these,
there are more tools. So if I hold down on it, I get a selection brush tool
and a flood select tool. Flood select is
what's often called a magic wand tool. All right. If I go down here, I
have rectangular marque, Elliptical Marquee,
column marque, Row Marquee, and
freehand selection tool. These tools will all be
used at different times, depending on the selection
that you're going to do, but right now I want to show
you the most powerful one, which is the object
selection tool. Now, Object Selection tool is going to use machine learning, which is a form of
artificial intelligence to figure out where an
object is in the photo. Is the only artificial
intelligence feature that is available without a Canva subscription
within here, and that's because it predates Canva coming in on affinity. So you can use this tool. Now, if you do, you have to enable the machine
learning algorithm. You do that by going up to
the affinity menu top left, and going into the settings. You have to have
this right here. So you're in machine
learning models, and this is segmentation. You can see where
it says install. I've already installed it, but it has to be
installed so that it can figure out
where the objects. See that there are
a number of other machine learning models here, and they have the little
Canva crown on them. That means those are for
premium subscribers. So you can't use them unless you are premium subscriber,
but this one you can. So now we can come
and it's analyzed the image to make objects. So as I go over these, you can see it selected each empanada as a
different object. So let's just say for
fun that I wanted to make some empanadas,
like different colors. And so let's select this
one in the back here. Click that. And now you'll
see these marching ants. That's what we call
this line going around. It's selected that, and it's done a pretty good job of that. You can use other
selection tools to further refine
that selection, but it's looking
pretty good to me. Now, if I go ahead and add
an adjustment layer, say, I want to make this
a different color, I'll come here to recolor. And it's going to apply
that to only my selection. So now I can make that
whatever color I wanted. Say I really want to
have a blue empanada, I wouldn't, not for the
menu that we're doing. But if I did, I can
adjust its hue, it's saturation, and
it's lightness here. Alright? So I've got that. Now, of course, I can always
get rid of that again. And to deselect something, I'm going to hit Command
D on the keyboard, Command or Control on
Windows, D on the keyboard. And now that selection is I can do another
selection, of course, with my selection tool here, make sure that I'm on my
background layer because it can't select on the
adjustment layers. And if I wanted to
make this empanada another color, I could
do the same thing. Add a recolor here, and I
can make this one green. Now, if I created the
adjustment layer first, it would have just
applied it to everything the way it did with our
brightness and contrast layer. It does this by creating
what's called a mask. And the mask is what this
black and white thumbnail is. If you look over
in the layers and you see the recolor adjustments, you'll see little black
and white thumbnails. Those are the down
option and click on it, we can see what it looks like. Basically, any place
where there is white, it is allowing the adjustment
layer to take effect. Anywhere it's black,
the adjustment layer is not taking effect.
That's called masking. Masking is a really
important idea whenever you're doing
photo compositing. Now, we don't really
need photo compositing for this particular project that we're working
on with the menu. I want to at least
introduce this idea to you so you know
what affinity can do. Now, I'm going to go
ahead and option click on that again to come
back and I'm going to delete my recolor adjustments because I don't
need those anymore. But you can see how
powerful this is. It can select the table,
it can select the board. I can select this little
bowl over here or just the individual you can
really dial things in, make different stuff happen using this object
selection tool. Now, if that's not
working for you or if you need to refine
things a little bit, your next best option is to
use the selection brush tool, which is found underneath
the Object Selection tool. We can hit Command
D on our keyboard to deselect and this is going to select things based on a number of factors
that it's looking at, but it's going to do it
where you are clicking. If I want to select
the Sempanata here, click here and it's going
to try its best as I click to select where it thinks
the edges of things are. I can always hold down
option on my keyboard to deselect part of an area if
it got it wrong a little bit. I can also make this
brush bigger or smaller by using the bracket
keys on my keyboard. Right bracket makes it bigger and left bracket
makes it smaller. The smaller it is, the
less it's going to try and select. We could
select it that way. Now, at this point
in this photo, it's easier to use the
object selection tool because it did a
pretty good job, but it might not do a
great job on every. I can create my own
mask manually at this point by going ahead and
clicking the mask button, which is found in the
layers and looks like a black circle inside
of a white rectangle. If I click that, it's
going to mask this layer. So instead of masking
an adjustment layer, it masked the background layer. When it did that, I now
just have this empanada. So if I just needed my
empanada, I could do this. Now, everything has
not disappeared. It's just been masked. It didn't delete anything. I can get this back by clicking this little
drop down arrow on my layer and clicking on
the mask and choosing delete. It then deletes that mask, and I can see my
whole layer again. Masking is a really
important concept. If you're bringing
two photos together, say you're trying to
replace somebody's face on something or
something like that, you're going to use a mask to hide most of a photo in
that kind of situation. I'll hit Command D
to deselect again. So now that we know how
to do adjustment layers and we know how to do
selections and masks, in the next video, we're
going to learn how to use a filter to kind of blur
out parts of an image.
17. 17 Live Filters: Learned about selections.
We've learned about masks. We've learned about
adjustment layers. Filters are kind of the
next really powerful tool. Again, in the layers panel, right in between the adjustment
layers and the mask, you're going to
find the filters. And they look kind of
like an hourglass. These filters can do
a bunch of things. For us, we might want to blur kind of out part of the image because we might want
just those front pinatas to really be in focus. So let's just try this
with a Gaussian blur. When we add this Gaugin blur, you can see it kind of
adds it as a layer. This is what's called a live can still apply destructive filters, but there isn't as
much of a reason to. Destructive filters
basically change the underlying image so that
you can't go backwards. Whereas a live filter is much more like an adjustment layer where you can go
back and change it. So let's go ahead and what
we have here is the radius, and we can just blur
this thing out. Now, the problem is, it's blurring our entire image, and we don't really want it
to blur out our entire image. So this is where
selection would come in. Let's go ahead and delete
this Gaussian blur. And let's go back to
our object selection, and let's select these
empanadas together. We want these to stay in focus, but we want to blur
out around it. Okay? So we've got our setup here. Now, if we come here
and we click on our filters and we choose our Gagen blur and we
bring our God and blur up, you will notice that
what's happening is it is basically blurring out
just what we had selected, which is the opposite of
what we want to have happen. So let's go ahead and hit Command C. We don't
want to do that. You can see that it applied
a mask to this filter, just like we talked
about before. So let's get rid of that whole filter there
by clicking Delete. And now, what we want to do is we want to
invert our selection so that we select
everything besides our front empanaus here. So from our pixel menu, we're going to have
Pixel selection, and we're going
to choose invert. Now, the only thing that you might notice changed
is we now have marching ants around the
outside of the image. So those marching ants
are telling us we've now selected everything
outside of the empanadas. It basically just flipped it. Now, if we apply our filter, Gag and blur, we can go ahead and we can blur
everything else. Now, I'm going to
the extreme here so that you can really
see what's happening. But I would just do a very
subtle little blur here. And this is just to put the
emphasis on those empanadas. Now, once we get back, of course, we're not going
to see all of this. We're not going to
see the elbows on the table and kind
of the edge of the table and stuff
because it's going to crop it in based on
where our frame. Just blur that out a little bit, gives us a little bit more
focus on what we want there. I will X out of
the Gaussian blur and hit Command D to deselect. And this is what our photo
is looking like now. Now, we can make
more adjustments. We can do lots of
things to this. The last adjustment, though, that I want to make here
is just going to be a really simple
temperature adjustment just because I think this is looking maybe a
little bit yellow. So we're going to
use an adjustment here and we're going to
go to white balance. This is where we have
our temperature control. They call it white balance here, but it's looking a little yellow so I'm going to
drag to the blue. Now, we wouldn't go all the
way to the blue, obviously. We really want to do this
in a very subtle way, but we just want to come
back here just a little bit, so we're not looking quite so on the yellow side of things. Do a couple of adjustments to get your photo looking
the way you want, and then you need
to bring that photo into your other document. So first, we want to
save this as an Affle. We don't want to
save it as a JPEG because I will destroy
the JPEG underneath. So we're going to come
and do File, Save As, and this will save
it as an Affle. I'm going to go and save this as Epanata edited and click Save. Now I'm going to have an Affle there that I can then bring in, which we will do
in the next video.
18. 18 Linking the Photo: So we're back in our
main document now, and this is where we're
going to go ahead and embed our photo file into it. So let's go and select. We needed to be
on our Move tool, and then we're going and click
on our image frame here. I want to replace
this middle one. And we get this option
called replace Image. Let's go ahead and click Replace Image.'s going to
pull up our files. I can choose
empanataEdited dot af, and I can click Open. Okay, so now that has
been placed in there. It's been placed at
the size of the frame, and I can zoom in, and now I can adjust it. Let's go ahead. We'll double click in here and we're going to make
it big so that we're just seeing these
empanadas here like. Now, one thing that I'm
noticing is that maybe it's, like, too much in focus here. There's too much contrast
between those two. Like, this is very
starkly in focus, and then this is out of focus. So we want to blur that
line a little bit. And in order to do that, we want to go back
to our original, adjust it there, and
then update this here. So let's go back to
the empanata edited. And we're going to go back to our Gaussian blur filter here. The thing is, there's just
no blur coming out in front, and that makes it
seem unnatural. So in order to adjust this, we need to actually
paint on some blur. So we're on this mask here. We can paint with
black and white. But for that, we
need our brush tool. The brush tool is going
to be on the left, about a third of the way down, paint brush tool. Go
ahead and click that. And we're going to go
to our color over here, and we have black and white. Now, remember, black is going to hide it, and white is
going to bring it out. We want to bring out
some of that blur. So we're going to change
white to be in front. We're going to make our brush
size a little bit bigger, and we're just going to paint
on just a little bit here. Just to make this seem a
little bit more natural. So then we need those updates to show up in our document here. Okay, so when we
get here, we can see that it has not
blurred out yet. And the issue is that it doesn't know that the
original has changed. Because when we placed this
in here, we placed it, and that photo was
already embedded. It wasn't linked. And linked means that instead of bringing it in and
holding it in this file, it's just linking
out to the original. In this case, we've embedded
it. So to change that, we need to go to what's
called the resource manager. The resource manager
is going to be under document resource manager. So when we click that, we're
going to choose Make Linked. So we're on ampaaadited dot Af, and we're going to
choose Make Linked, that then changes
to a linked file. Then we can go ahead and
click Close on that. And when we come in here, we'll see that now it's
showing the blur, and that is because it's a linked file. So
anything that we change. So you can see this
pretty dramatically if we come over here and we do something crazy like
a recolor adjustment. Let's say we come in here and
we do a recolor adjustment. We make everything red, and then we're going to
Command S to save it. And once we do it, you see
link resource changed. So the pinata file
has been updated, so we can pop over here, and we can see that
now it's all red. Now if I jump back again, of course, don't
want that to be red, I delete my color adjustment, say Command S to save, and it will once
again update it. And that is a super
powerful way to be able to work with
your images inside of affinity because you can make those really
detailed adjustments inside of the document itself, and then because it's linked, it'll just feed that back
in to this new document. So we've got a pretty
good setup here. Things are looking
pretty good, but I am not liking just how
stark the images are. I want to add some transparency
to them so that they'll kind of fade into
the document itself. So we'll do that
in the next video.
19. 19 Transparency: Main document, we are
once again going to duplicate our artboard
from the pages panel, and that's just so we can
go ahead and fade these out and still keep
this looking the same. So I'm going to go ahead and
click on my first image. And in order to make
these adjustments, I'm again in the
layout studio here, and looking down
the left hand side, I'm going to find the tool
that looks like a wineglass. This is almost at the bottom, and it's called the
Transparency Tool. Click on that, and that will allow us to drag
out a transparency, which is very similar
to a gradient. And as I do this,
you're going to see nothing is getting
more transparent. And the reason for that is
because I'm selected on the image frame and not
on the image itself. I need to apply
this to the image. Let's go ahead and
hit Command Z on the keyboard or
Control Z on Windows. And we need to go over to our layers panel on
the right again, and we need to hit that arrow on the picture frame so that we
can get to the photo itself. There's the photo, and now we need to apply the
transparency to it. So now we can click and
drag out a transparency, and you can see it
fades to the side. So this is actually very
similar to how masks worked. The difference is here,
black is showing the photo, and white is making
it transparent. So if we want to fade
from each side here, we and drag this all
the way to the side, and we need to add
a new what's called a stop or a little
circle in the middle. So if we click in the middle,
we'll get a new one here, and we need that to be black. But we can't use our
color swatches to do it. We actually have to
go to our color menu, and instead of changing
the color of it, we actually need to
change the opacity. So there's a little
opacity slider here. It looks like
a checkerboard. We drag that all
the way to the top. We're going to turn this
one black by doing that. And then the one on
the left hand side, we want to turn that one
white or transparent. So on the opacity slider, we'll slide it all
the way to the left. And now we have this nice
little fade going on here. And we want to use
that over again. So let's go ahead and click with our move tool on our
second picture here. And we want to use this
eyedropper tool here, but we want to use the
second one underneath. It's called the
style picker tool. And the style picker will
allow us to pick this up, but we got to make sure
that we are on the photo itself to make sure that
we're on the photo. And then we're going
to hold down option on a keyboard to do a pickup, click that now this
eyedropper tool has picked up that style, which in this case,
is the transparency. Now, this is a little tricky
because of the frames, but we need to get to our
empanata middle photo here. So we're going to
make sure that that's opened up in the Layers panel. Click on that and then
we're going to just click to drop this
style onto it. And the same thing
with the last one. Make sure that you've got it in the layers panel, open it up, click on the photo itself, and then drop that
style onto there. And now we've used that
style picker to make that style uniform
across the entire thing, which is the design
principle of repetition. With that all done, the last
thing that I really want to do is add a little
bit of a border to this. Just to give a little contrast between the page and its edge, I'm going to go ahead
and add a border, and we're going to do
that in the next video.
20. 20 Adding a Border: So the last thing
that we want to do to this document is to give
a border to it here. So let's go ahead
and once again, we will duplicate this so
that we have another copy, and then we can compare the two. We can compare it with
a border and without, and we can really see if it's
making a difference or not. Now, to add the border, I
really just want to add a stroke onto my
existing rectangle. Go down to our rectangle here, and we want to add in a border. So we're going to go to our
swatches and we're going to bring our outline or our
stroke to the front. And then we want to add in
our red color as a border. You can see that
that border is tiny. So we're going to
go to our stroke, and we want to make
that larger. Hold that. Nine. Now, currently,
our alignment for our stroke is set
to being in the middle. So it has half on one side of the line
and half on the other, but we can't see the other part. We can't see the outside there. So if we set this,
you would see how thick that actually is.
Now, this is important. Let me go ahead and hit
Control W so that we can see everything again because we have a bleed on this document, and we want this to
go outside of it, but it won't show us anything. There's some kind of bug in the affinity program
where it won't show you outside of your artboard when you
are looking at this. So there is a bleed it is going outside, but
we can't see that. We need to set it based on basically the width here
and know that half of it is outside that will allow it when it's printed
to have a nice clean cut. That's why we set that
bleed there to begin with. It's a little annoying that
we can't actually see it, but at least there
is a bleed there. That is how we would set
up our border around it. I think it looks better
with that border. I might even go just
a little bit bigger, maybe up to 11 and that will give it more pushout on
the bleed here as well. The last thing we
need to do with this document is export it, which we will do
in the next video.
21. 21 Exporting: So we're here. We
finished our design. Hopefully, you've been able
to follow along with me, and you are also
ready to export. If not, go ahead and go back and work through
your own project. You can do what I've done or you can design for your own
restaurant, whatever you want. But we're going to export now. So we're going to come
up to our file menu, and we are going to
choose to export. Export, and this is going to
open up our Export dialogue. Now, for printing, we are going to want to do this as a PDF. So we're going to go down
until we get to PDF. And then we have a bunch
of different options. We have PDF for print,
PDF Press ready. PDF Press ready is
probably what we want if we are sending this off
to a professional printer. You can see there's a difference here when we go to PressReady, we suddenly get that
bleed showing up around. And so, obviously,
our border doesn't go all the way through the
bleed. It's okay, though. I extends far enough
out so you can see the difference here.
Takes it a second. Much further out
our border extends. So now that will give us enough bleed that when they
cut it, it will look right. It will look like
it goes all the way to the edge, which
is the important thing. And that's the difference
between print and press ready. Press ready is getting Ray
for a professional printer. Alright, there are going to
be a bunch of settings here, but the main one you want to pay attention to is your area, and this is artboard seven. And you have preview
export when complete. If you turn that on,
you'll be able to see it when the export is done. Most of these you can leave
to exactly where they are at, and that's going to be okay. You do want to scroll
down here and make sure that you have
include bleed turned on. If you need that, if
you turn that off, you're not going to
see the bleed anymore, but we want that turned on. You are sending to a
professional printer, you often want to
include printers marks. This shows them where
they need to be at in terms of their
printing and their cutting. The last thing you're
going to do is click Export and then you're
just going to save this. You're going to save this as whatever you want to
call it and save. Then it should pop open and show us the file
here. There we go. I don't know why it
popped open Safari there, but now we can see
the final file, and this is where we go ahead and we would
check everything, make sure that all our
spelling is correct, and things are looking
right before we sent this PDF off
to the printer. That's it. We've done it.
We've used all three of the studios inside of Affinity to create a final takeout menu.
22. 22 Wrap Up: Alright, I hope you've
enjoyed taking this course on how to design a
takeout menu in affinity. I know that it's a lot to kind of take in all
at once because we are using what used to be three different programs
to design this. So it is a lot to learn. If it takes you some
time and practice, that is totally
okay, but I do want to make sure that you do
share your project with me. I want to see those projects
and be able to give you feedback on them so that you
can continue to improve. And also, I want to know
if you have any questions. Please feel free to reach out on the discussion tab and let me know if you have any questions, and I will do my best to answer. If you want to continue to
explore things further, I have a lot of other courses. Even my old courses
for Affinity Photo, Affinity Designer and affinity
publisher will still teach you a lot of the skills because a lot of the tools
have remained the same. So you can feel free
to check those out, and you just have to
do a little bit of translation for them
into the new programs. Of course, I'm making new
courses all the time, and so you will see new
courses coming out on affinity and the different
aspects of it as we go along. Alright, that's it
for this course. Thank you so much for
watching, and I will see you in the next course.
 Ben Nielsen, Good design is the beginning of learning