Transcripts
1. Intro: This is Hong Shu
from Motion Circles. If you ever admire those stylish eye catching collage animation and wonder how they're done,
you're in the right place. In this course, I'll pull back the curtain to show you
the exact process of creating a simple
and easy collage style animation from
start to finish. Collage animation is everywhere. Brands and businesses love
it because it's bold, artistic and leaves a
lasting impression. If you ever tried to
animate in after effects, you might have felt
overwhelmed by all the tools and settings
and technical steps. The good news is, it doesn't
have to be so complicated. I'm going to break it down in the most beginner friendly
way step by step, so you can start animating
with confidence. This course is designed
for beginners who already have a basic
understanding of after effects. We are not covering
the basic interface and how to set up keyframes. Instead, we're jumping
straight into the fun part, bringing your artworks life with smooth and
dynamic movement. If you're brand new
to after effects, I highly recommend checking out my beginner course first to
build a strong foundation. Then you can come back
and take on this one. Here is what you
learn in this course. You'll learn how to
prepare your artwork in Adobe Illustrator
for animation, animating objects along a motion path for
fluid movements, mastering the speed graph to fine tune motion and bring
energy to your animation, using plugins to speed up the process and
boost efficiency. Adding effects to achieve a
texture stop motion field, pro workflow tips,
shortcuts and tricks. By the end of the
course, you will have a clear structured workflow for creating collage animation efficiently without second
guessing every step. You will be able to approach animation projects
with confidence, focusing on creativity
and execution, rather than getting stuck
on technical hurdles. This course shows you
behind the scenes of how real collage stop
motion animation are created professionally. It's designed to challenge
and push you forward, helping you level up your skills and work on the
future projects with ease and maybe
level up your demo reel and open up new
creative opportunities. If you're ready to level up
your animation skills and add clouchdwn animation to our
arsenal, let's dive right in. I can't wait to
see you in class.
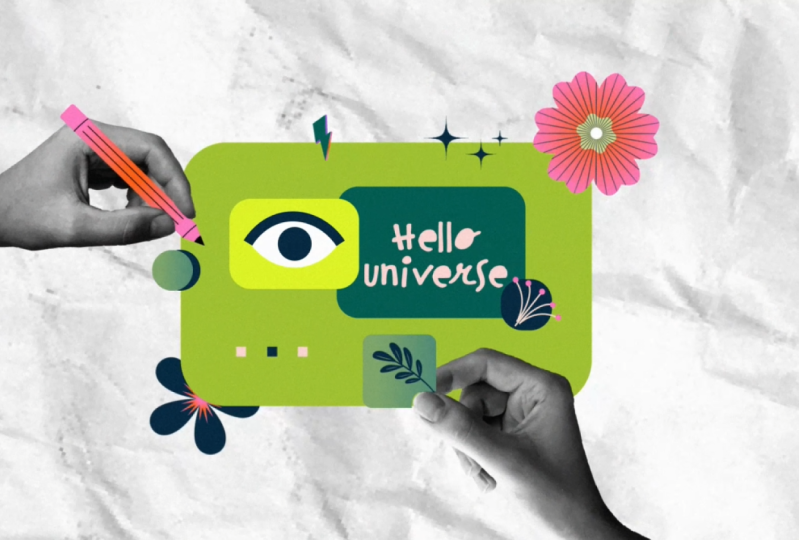
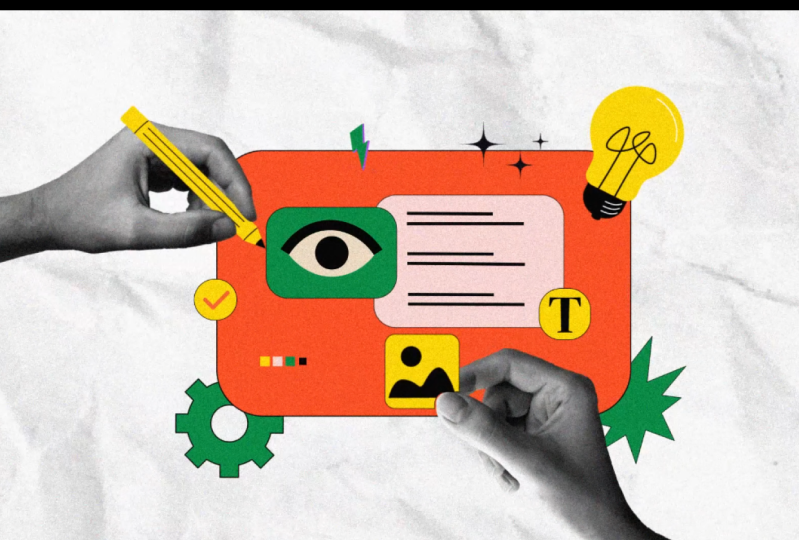
2. Project & Plugins: Mm hmm. Welcome to the class. Now, let's first talk
about the class project. This is going to be
the illustration that we're working with
in the whole course. I'm going to teach you step by step how to animate
this illustration from preparing the artwork all the way to the final
render of the animation. So for the project, you can actually customize this
design the way you want, maybe change the color
palette, change some elements, rearrange the layout,
however you want, or you can design your own
collage style illustration and animate your own artwork. Either way, just follow all the steps we
have in the class and submit a final video of
a clash style animation. That will be your
project for this lesson. Other than the project, I want to talk about two plugins that
we're going to use in this course to make our
workflow more efficient. So this is aescrip.com,
the website. If you want to get
the exact link, you can go to the description
under the course. So the first one we're
using is called Ease Copy. This one allows you
to copy the easing of certain keyframe and paste the easing onto other keyframes. And these are all the free ones. This one is name your own price. So if you put $0, you can
download it for free. This is for
educational purposes. You can download it for free and use it when you're learning. And this is called Ease
Copy, the first one. The second one is called
reposition Anchor point. Basically, this
one just help you reposition the anchor
point on a object. This one is also
named your own price. You can change it to zero
and then download it, but then you have to
create account first. And after you download it, you can install it
following the instruction. And it's going to be
inside your after effects. We're going to use
these two plug ins when we're animating. That's it for the plug
ins that I want to cover. And let's go to the next video.
3. Color Palette: In this lesson, let's
talk about color palette. There's a website called Cooler. It's a great resource if you are looking for a color palette. So essentially, it's got all these different
color palettes. Nowadays, everything
is a membership, but there's some free ones. You don't have to be a member
to access the free palette. You can even explore
your own palette. There's a lot of
different palettes. You just select
maybe one of them. Like, this one is really
good. Open palette. And then you can copy the hex code, so you
can just change it. I think there's something
that you can image picker. Okay, you can also
just input image to let the website to get the color from
that image for you. So if you really like beautiful image and then you want to get the color,
you just put it in here. And then it's going to get
the color palette for you. So it's a good tool. There's
a palette generator. You can generate some palette. If you just lock
a couple and then his space bar is going to keep generating the palette based
on the two that you locked. Or if you just unlock all five, it's going to keep generating
five colors for you. And then if you
want to say, Okay, I like this one,
I like this one. Don't really like
the first three. I'm just going to keep
pressing Space bar to generate more palette until I'm maybe I like this blue here, so I'm going to lock the
blue. I like the three here. So I'm going to just
keep generating more colors based on the three that I think
I like the three now. So yeah, I like five, and then I'm going to
use this color palette. Yeah. So this is like thing
about color palettes.
4. Design File Prep: In this lesson, let's
talk about how to prepare your Illustrator
design files for animation. Once you have a
good color palage, you just apply it
onto this artwork, and then what we need to do is we need to separate
all the layers, so we are going to
release the layer first. So over here, click on this and then click on
this drop down, go to release two
layer sequence. So I'm going to
release that, and then it's going to
release this layer. And then, so if I just grab everything just underneath and then drag it outside of here, I need to release it one more
time. There was a group. Before underneath layer
two, which is layer three. So if I want to I think I
only release one group, I just need to go
to layer two again, go release it again. And now I should be able to
drag everything outside. I think the last layer is empty. So I'm going to select
everything underneath layer two and then drag
it outside of layer two. And now I should have the
last two layers empty. I'm going to delete
the last two layers. And if I just click
visibility icon here. Okay, there's a line that's going underneath my background, so I'm going to put
it on top of that. Okay, it's here, this line here. And then we have all these
we have a background. We have some icons
that separated. We have a orange
colored thing here. We have a panel,
some panels inside. We have this light bulb. We have all these different
layers. It's good. And then for the hand, I did some grouping
for the hand. So basically, this pencil is always going with hand,
so that's what I want. And then for this part, I did a grouping previously with
the hand and the thing here. So, these two are all
going together for now. So yeah, that's essentially
everything we need to do before we hop
into after effects. Now we have everything
separated as one layer, and we can animate
every single thing. On its own, which is good. I'm going to save that
5. Animation File Prep: Okay, let's create
a new composition. Call this one main cop, and then we're going
to do 1920 by 1080. And for the frame rate, let's do 30 frames. That's an initial start. But for this animation, I actually want to make it 12 frames per second for the final because it's a mixed media. I kind of wanted to have a
jumpy feeling instead of 30, but, like, for now,
let's animate in 30. We're going to change
that later on. So duration, I will change
it to maybe 15 seconds. I don't know. Maybe it's
going to take five second, but let's have 15
second to work with. Background color can
be dark. That's good. Okay, we have this
dark background. I want to change it to black. It's really hard
to see right now. I'll change it to black here. Okay, that's good. We
have a black thing here. And then let's go to
project that will click on anywhere over here, and then let's go to here. Let's import my design. I'll make sure to change it to composition
retain layer sizes. Don't click on this
illustration sequence. Make sure you're not
clicking this one. Click on Open. Now we have
a demo composition here. I want to organize this panel project panel
a little bit more. So let's go group them together. So first one, I always do I
want to do like 00 render. So render would be
the main composition. We're working This
is a working space, so I put 00 because it's always going to
be in the top if I put zero, zero, and everything else is
going to come underneath it. So I will have a render folder with this one composition that's going to be
the final render. And then I need assets. So *** is basically
this folder here. If I toggle this drop down here, you can see all these
illustrator files or layers that we imported. So that's going to be my assets. I'm going to drop it
inside my assets, and then I'm going to create
this one called precoms. So this one, we have
a pre composition, which is this design demo. And if we create
new composition, new pre composition, we will
put it inside the precomps. And for now, we only
need these three. If you want to put in music, we can make a music folder, sound effect folder,
something like that. But for now, normally, this is the most
simplified structure you're going to have
for your projects. Uh, there's sometimes going
to be a folder called solid. When we create a solid layer, it's going to show
a solid folder. But that doesn't
matter. Like we only need these three
folders for now. And then next thing, we can start just putting everything to my main
composition, start animating. Let's go to design dimo here. This is all my layers
from Illustrator, so I'll copy them. When I copy them,
I try to select the first layer
first and then hold down shift and select
the last layer. That's going to maintain
the order of my element. Let's say if I copy
from bottom up. Let's say if I click
this bottom layer first and then click
this top layer. Second, Command C. Let's go back to my main
composition and copy it. So all the layers is going
to be reversed in this case, because I select
the last one first. That's not what I
want to do. I need to maintain the order to make sure I have the exact
same order of my element. So I need to click on
the first layer first and then click on last layer second when I select everything, come and see, and
then go to Mink. All of a sudden, we maintain everything in the same order. So that's very important. But I don't want to mess
up with my composition. Next thing, Where's
my light bulb? Oh, somehow this layer
is not selected. Okay, Layer 28, I'll just copy
my laptop here, layer 28. I'll drop it over here, so this is going to be
layer 28. That's good. And now, next thing really important before we do anything
is to rename your layers. So right now, they're
all just numbers. I have no idea what
they are. So what we need to do is to rename them. This is actually my background, but it's going over my texture. So since I already
have this texture, I don't think I need
a background layer. Delete that. So for this one, let's just go rename
them really quickly. This one called texture. Background. And then we
have swan called Line. Okay. This one icon. Setting icon or something. This one called star. We have orange panel. We have white panel. It's tedious, but
it's important. It's gonna save us
time going down the road. Yellow circle. Just call it one. Check
mark. Light bulb. Line two. Star three. So this is Star two. Star Star one, or this one we
call it burst or something. So now we have one, two, three. When we are renaming them, it's also good if we just group them by the label
color right now. Let's say, because these are
really four little elements, I can group them in
this color here. And the star, I can group them in maybe like
a yellow color. So I have three stars in yellow. So everything that's
really in a group, I can just group them by
changing the label color. These are just like
three squares, which, you know, once I group them, I don't need to rename them. Or if you want to be clean
and tidy, you can rename it. 1 second. Let's see.
This is going to be like dot one, dot two. Dot three dot four. So those are really
small elements. You can get away if
you don't rename them. So this is hand two. And then we have
yellow circle two. I have a T here, and then green panel, I lightning. And then I have all these layers as those lines on my panel. So I'm going to just select
a color, maybe a purple. It's too dark, to the green. So it's showing me those
groups of the lines, which I know they are the lines, so I don't need to
rename them anymore. And then we have the
hand one. And that's everything. Let me
save the project. So that's about renaming, and that's the first section, which is preparation
for animation.
6. Move Along Path: We already did the
preparation illustrator. We put it inside after effects. We make them into
different groups. We change the name
of the layers. So those are all very
necessary prep work before we animate to make sure we
save time down the road. And now let's start animating. We inside my main composition,
what I want to do? Let's analyze this thing
here a little bit. So what can we animate? I'm looking at this
panel, I feel like yeah, this panel can just maybe
come in a scale animation, something like
that, and then the hand can come in from this side, this hand can come
in like this side. And then I want
to be able to use both the speed graph
and the value graph. I'm looking at this, I'm
looking at this light bulb. I feel like this light
bulb can just do a curve motion from the
side and then maybe do, like, a rotation and then
come into this position. So once they come in,
I wanted to just, like, go here, here, like here. Thinking about the motion path. I have this light bulb
coming in like this and then it's going to do a
circle and then stop here. That's kind of like the motion I see from this light bulb. We can also do
something else like maybe dropping down like this,
but it's kind of boring. So let's do that. And then everything else
can be just maybe in the value graph where we
have things coming in. And then the hand come in with some drawing and
then the thing coming in like this maybe searching for a place
to put this graphic, maybe on top of here,
something like that. And then we have
the eye coming in, and then the eye can really just maybe blink and looking
to different direction. So something like that,
let's try to before animate, like we always want to
look for some references, based on the layout. You can also go maybe
pinches or Bhands to look for some references and see how other people are animating
all these different elements. Um, yeah, that's a
good practice as well. So let's get my let bob layer. I'm going to just drop it
all the way to the top using a shortcut command shift,
write script racket. I just need to have my
anchor point in the center. And let's do this
animation that's similar to the
rocket that we did. We're going to have it
outside at the beginning, like here, P for
position, add a keyframe. Let's go for 20 frames. In this case, I'm not going
to draw a path first. I'm going to show
you a different way to do this animation. Before previously, we draw
the path first and then we apply the path to the
bulb to the rocket. And now I want to show
you a different way, which is just basically
change the position property. After 20 frames, I'll
have it maybe go around here and then go
forward 20 frames again. Remember I talk
about how we want to animate maybe on 2020
frames increment. Let's try to animate
in 20 frame increment. I want the animation
to be gentle, right? I want it to be smooth and gentle, so that's
what I want to do. So after I have
these two path here, you see there's a point
here that's sharp. I don't want it to be sharp,
so I'm going to go to Pintol after I select
pentle I go here, it becomes this arrow that's
pointing to this vertex. And then if I drag
it, I can actually drag, you know, curve here. I need to make sure it's at
the bottom of the slope. I want it to be at the point where the speed is going
to be changing, right? So we need a point on the top and the
bottom of the curve. And if that's the case, now I change it to
the bottom here, and then I keep drawing. Let me just go back
to my Pentool. I'm going to draw this one here, drag it curve as good, and then I'll go for
20 frames again. Yeah I'll move this thing
maybe over it's too high. I can drag it here. I'll
move it here, maybe. So we can tweak the
curve later on, but I want to finish the path. At this point, I
want it to be here, and then let's go for 20
frames again, maybe stay here. And after I have this point, I still need to adjust
this point here. So I need to go to Pentool and then direct this curve out. So that it's more smooth. And then after I
have the pen tool, I'm using a shortcut
V on the keyboard. You can see here. V is going
back to your selection tool. Selection tool is V. So whenever you're done with the
curve in the penol, you hit D on the keyboard to
go back to selection tool. So you're always going to be
inside the selection tool. So you're always going to
hit V on the keyboard to go back faster so that
it's more seamless. You don't have to click on here. I'll adjust a curve like this, and then I'll do here, this is going to be the top, and then this is going
to be the bottom. Or we do this one at the bottom, and then we do a
curve like this. So it depends on how we want it. I feel like this might
be looking better, something like that, right? So that's going to
be my curve here. If I play the animation, that's going to be completely linear. That's not what we want. So we go F nine, go to Graph Editor, make sure we're inside
the speed graph. Let's analyze the
speed graph here. So when it's coming in,
this is going to be the fastest point because it's going to be
just shooting in. So I want this point to go up, and then I need to combine
the two point together. So click on this,
convert to BSA, and then drag it all the way
up like this, that's good. So over here, I want to smooth out this curve
a little bit more. Let's try to give it maybe 65%, maybe 60% of influence, and let's see what
this curve is going to be. It's around here. So I feel like the spacing might be too much
at the beginning. Or maybe not, Let's try that. Let's just move it higher. Move this point higher. That's good. It's fast. And then this slow
here, slow down. So this point is going
to be let me convert to autobzA and then
drag it all the way down here and try
to hang in the air. So I'm going to drag this
curve out to flat it a bit more so that there is going to be a hang in
the air like this. But I don't want it
to be zero, right? So I want to move
it up a little bit, maybe 100 pixel per
second around like that. So that's good. And then on this point here,
it's going to be fast. So I'll convert to all
the ZA, move it up. However, I can tell that this slope is not as high
as coming down from here. So the speed here should be slower than the first section. Let's try and see if I
can just make it slower. Well, still maintain the spacing, but
there's a spike here. So let's try. Let me pull this one
back a little bit. Every time you change here, it's making my point down to
zero, so I don't want that. I want to drag it back and then move it up slightly like this. That's pretty good.
I don't know. Maybe this is too
fast. Let's see. So from here, it's going to go down speed and speed again. So maybe I drag it here. It's going to stop at zero. So I want it to be smooth, so I will drag this
curve out more, maybe 70% of influence here, and then something like that. I think it might work
in terms of the curve. Let's see what it looks like. Yeah, I think that's
pretty smooth. That's pretty good, actually.
I'm surprised, actually. So you can see the
curve itself is really not that bad looking. So that's why we can get a
pretty smooth animation. The only thing I
would say is I want maybe just this part
to be a bit slower. So I want to drag it down
even more, maybe around 100. Let's see if that works better. Yeah, just a little
bit more hang in the air to give
it more contrast. I think that looks cool. Yeah, that's pretty
smooth. Let's save that.
7. Sync With Rotation: And then what I want
to do is in rotation, I want to rotate this
light bulb as well. So one is coming in, so I want
to rotate which direction. So it's going to be like this. So I'm going to do
zero over here, and then let's do negative one round rotation
at the beginning. I want to see what
that looks like. Okay, that's the opposite
way. So that's the opposite. I need to be starting at one, positive one, and
then going into zero. So from here to here. So let's see if I have
this thing start to rotate around here
around this point here. Something like that. So I still
need to apply the easing. But for now, let me just
figure out the value here. I wanted to start rotating
maybe around here, and then it's going
to turn one round. That's good. And then it's
going to keep turning. So I'll do at the
end, let's see. So it's turning from
positive one to zero. So if you want to keep the same direction in terms of turning, this thing should
go to negative one. Negative one and then stop at negative one,
something like that. So F nine, easy East, and then let's go to
the graph editor. Let's try to animate it in value graph because right now we only have
one value, right? So let's do it in
the value graph. So over here, I want it to
be a little more dramatic. Let's try to do a S curve like this so that we give
it a bit more easing. And then over here,
I want to hang. And I don't want it. So you see when the light
bulb is turning, it's when our curve is going
to be the most extreme. I mean, the curve,
the steepness of the curve is going to
be the most extreme. So this is a point where the light bulb is
going to be turning, and this is going
to be the point when the light bulbs
going to be turning. So we want to figure out where exactly we want
the light bulb to turn. Actually I want it
to turn maybe when the speed is the fastest
around this point. So we don't necessarily need to align this keyframe with
the position key frame. So right now, we're just trying
to figure out the timing. This part is going to
be more on just like, keep trying and see how we can get a synchronization between the rotation
and position. So essentially, I want this
labob to turn maybe where the speed is strongest and maybe it's around
be around here. So I will just try
to drag this curve. Let me try to dig this curve so that
the light bulb is going to turn
maybe around here. I'm going to match
up this curve, the steepest part of the curve
around the section here. Let's see if that works better. I think that works better now. So when it's coming in, it's
going to start turning, and then it's going to
turn one around here, and then it's going to hang
in the air a little bit. And then I don't want it to turn right there. It's
going to be too fast. So I want to turn where the speed is the fastest.
So I want it to turn here. So what I want to do is maybe
just drag this point out. And then direct this curve. So the steepest part
of the curve is aligning with my
position point here. Let's see if that's
going to work better. Yeah, I think that
looks better now. So there's more flow
to it, you can see. I just basically need to
match up my steepest part of the curve to the point where the light bulb is
traveling the fastest, which is the top
in the bottom part of the curve, the motion path. At the top point here, I want it to hang in the air, so I don't want it
to move that much. Another thing is right now
you can see at the top point, my curve is completely flat. And then this light bulb, all of a sudden staying
static and kind of, like, sliding a little bit. So
that's not what I want. I don't want it to slide. You
see that one frame or two, slide I don't want
it to be sliding. So remember, every
single frame matters. We want to make
adjustments so that this is not completely
flat within motion. So I want to first of all, these two handles are broken. So I need to combine the two handles. I want
to click on this one. And then now, I need
to make sure I have a similar curve of
what we had just now. And then now I just need
to give a slight angle, so there's still
continuous speed going on. Maybe a little bit more.
It's not too obvious. You see that? That little turn there really make a difference. That's how you make a
difference in your animation. You see that little just like turn almost
like the head of the ball is trying to shift its weight onto the other side. And then all of a sudden, when
we reach this point here, the weight is kind of like
shifting to the other side, and then it's causing another
turn because of weight. And now, with this
animation here, you can really feel the weight
of the light bulb, right? It feels really nice now compared to just now the
light bulb is sliding. And that's beautiful.
That's really, like, a great example here. And yeah, I'm happy
with that animation. You can see with this
complex animation, we only have, like, these
couple of keyframes. It's not much keyframes. A lot of things we do, we
don't need too many keyframes. We just basically minimize the keyframes and try to
work with spacing here. And the way how I adjust it, I basically just need to align the turning with
the position and then make sure we need to
analyze it based on physics and see where we want to
turn this light bulb. It's going to be the objects
traveling the fastest, this point here and this point here, that's where
we want to turn it. So we align the steepest point of the curve with
the motion path.
8. Animate Center Panel: The rest is going
to be easy now. I think this is going
to be the hardest part. And now let's go animate this orange panel
in the background. So select the orange panel. So for this one, another thing I can do is I can actually
solo this layer here, and then I can solo the
texture background. I can solo the one that we already animated,
which is a light bulb. So this way, I only
see two layers, right? So I'm going to work
on these two layers. I think I just kind of want this thing to slide
down from the bottom. Let's see if we just do position animation,
let's go to position. Recollect separate dimensions. So the only thing that
we need speed graph is when we have a curve, right, the curve path. That's where we can only
animate in speed graph. Everything else, we can just do it in value graph
at the beginning. And if you really want to start with the speed
graph on everything, that's totally fine as well. But to be easy, let's go
into the value graph and animate the position for
this orange panel here. So hit a keyframe over there, go 20 frames. Add
a keyframe again. Click on this button here to add a keyframe at the same position. So now I have an animation, and then going back to zero, I need to just shoot it up. Maybe outside, but maybe not. It doesn't matter
because I'm going to cut the layers around here. So it doesn't matter if it's going to be
completely outside. F nine, easy ease it, and then go to graph editor, make sure we're inside
the value graph. Click on the Y position only, hit fit the graph to view. When it's coming in, remember, we want extreme
easing coming in. So I want to adjust
this curve here. I steeper the slope,
faster the speed. I want it to come in fast and the easing into
position like this, easing slow into
position. That's good. That's my easing here
whenever it's coming. But then I want to
cut the layer here. So I don't want to show it's complete coming from
outside of my frame. One notion beginner has is that I always want my
frame to be empty and everything have to go 0-100 or everything have to appear
from zero and then or, like, outside of the frame
coming in like this. So that's not true.
What we can do is we can actually just let
it appear out of nowhere. It's going to give you a really kind of like
a magic feeling. You don't know
where it comes in, but, like, it feels so smooth. So something like this, right? You don't have to
have it come in from zero or just complete
it out of the frame, and then you see
the exact motion is coming in frame
by frame like that. That's really just kind of boring because you know exactly
where it's coming from. But then if you just
cut cut the layer, a couple of frames and
then cut it there, and then it can come in from
nowhere and then like this, it's going to be more dramatic. So that's kind of
like a rule of thumb. You don't have to have come in everything from
starting from zero or when the sliding doesn't have to come from outside
of the frame all the time. You can just cut it, and
then it's going to be inside the frame already.
That's pretty cool. And then I want this
to come in when my circle is kind of like
around this point here. I'll just drop it here. And then next thing
I want to animate is maybe everything
inside this panel here so I can turn a couple elements on
with my solo button. I don't know, so I
have the burst here. I have the thing here. And then those are
all things that we want to introduce
together with this. That's a lot of layers
that I turn on. But let's try and
animate this thing here. So the white panel, same thing. Go to P. It's going
to be fast now. So let me just drag it here. Or maybe just
animate it at zero, and then we're going to
move. You know what? Let me just go back now. I think what I want to do is
just hide the light bulb, and then we can worry
about the synchronization after we have the
keyframes, right? So let's animate
everything from zero. And then now we have
this thing come in. I turn off the light bulb, so it's not showing up anymore. And then let's do the same thing for this white board here. Go to separate dimension, hit the white position property,
make sure it's at zero, and then over here, click on
this point at a keyframe. And then for this one, remember, we talk about
reinforcing movement. So I want to reinforce the downward movement.
You know what? Because we still
have another layer. So I have the green panel and I. So this thing is coming down. I want to reinforce the
ampa down movement, but I don't want it to be
completely the same direction. Otherwise, it's
going to be boring. So I'm going to do this one
coming in from the bottom here like this and then
going up like this. However, easing is
going to be the same. So I will just select both, go to ease copy, I mean,
ease copy this one. Copy this easing,
apply to this easing. So now we have the same easing. Value graph. You see
that. Same easing. So I don't need to work
on the easing every time. I just want to copy because
I have this great base now. If we copy the easing, all our animation is
going to be consistent. Because sometimes,
even if you just go inside and slightly
tweak the curve, it's going to be a
little bit different. If that's the feeling
you're trying to get that's completely
okay if you want to just manually tweak
every single keyframe, every single curve you want. That's also okay.
But for this way, if we just copy the easing, it's going to make
every single move we have consistent with the
same kind of easing. So the animation overall is
going to feel a bit better. And at the same
time, it's going to save us time and effort. We don't have to go inside
every single keyframe to adjust the curve, right? So now I have a
similar curve now. I just need to cut
it here, same thing. I don't want it to come
in from the start. And one thing with
this thing here is that I don't even
want it to show up. When it's outside
of my orange panel. So go to track Mt. I need to go to the white panel
and then drop down, select the orange panel as the track mat or
it's orange panel, Layer 26, orange panel here. And then it's automatically
turning off my orange panel, so I'm going to turn it back on I icon and then turn
on the solo again. So we're soloing these
layers to show better. And all of a sudden,
you see it's only showing up whenever it's entering my orange
panel layer here, right? Now that we have this,
that's pretty good. So we have great easing here, and now I want to
animate this I here. So the I mean zoom in here. The I can just go
with the green panel. So I'm going to
just parent parent the e to the green panel here, and then we only animate
the green panel. So for position property, we go to separate dimension, only animate the y position. Go for 20 frames. We're animating only 20
frame increments, 20 frames, and then at the beginning, I wanted to go from
the top to bottom, so reinforcing that movement. And then copy the easing here, paste it onto the I Whoops. Why is it not moving? Okay,
the end position is wrong. So it should go from here
to here and then copy the easing like this. And then I want to paren
the panel, green panel. I mean, not paren, but
use it as a track mat. So make sure we're selecting
the orange panel as a track mat and turn back
on the orange panel again. So now there are only showing
up whenever is inside
9. Animate Side Elements: Since we already have
the basic setup, we can just go quickly to move across these
elements here now. We can animate the
setting icon here. The icon can just come in
as a scale property change, 20 frames, go back to 100%. At the beginning,
it could be zero. And then let me copy
the easing here. And then let's go to rotation as well because it's kind
of in a circular shape. I need to turn on this
solo button here. So rotation is here. I can do a negative one, I mean, negative one
round or negative two. Let's try negative two and
see what that looks like. So we copy the easing. We're using the exact easing
for everything for now. Maybe two is too much. I think it's too much. Let's do negative one.
Somehow, it's going backward. So you see my curve is too
much, so it's going backward. I need to put it down so
it's not overshooting. It would be better to have it
just keep rotating, right? I want it to kind of keep
rotating after this point. So from one to maybe,
like, let's say, if we want to animate it
for five or six second, I'll add one more keyframe here, maybe change it to So we're going from
negative one to zero, and now we're going
to do one round. And I want this curve to keep rotating but
slowly like this. That's pretty fast. I want to
drag it all the way to ten. So I want to come in and then
Look at this curve here. It's saying flat at
the last point here. I don't want it to be
flat, so I'm going to convert to all the Bezier, drag it, and give
it an angle here. So when I come in,
it's going to be fast, but then all of a sudden after, it's going to be slowly
just rotating like this. That's kind of what I
want. Maybe a bit faster. Drag this to eight second.
I don't know, six second. So even the last part can be more of a linear
curve like this. But still, we need
a continuation on the rotation from
this point here, so we need to adjust
curve to make sure it's going straight up with
an angle towards the end. So yeah, that looks pretty
cool. That's what I want. It's coming in fast, but then it's going to keep
rotating. That's good. And let's do this burst here. The burst can be just from a
scale property 0-100% scale. And then, let me just
copy the easing. That's pretty boring. I don't
know what else I can do. Maybe just I don't know,
rotation. Let's try. Copy the rotation animation from this rotation
of the icon here, copy that, and then
put it inside here. I don't know, these two,
like, keep rotating. Maybe that's what we want.
Let's try to keep it like that. All good for now. For this checkmark, I can pare the check mark
to the yellow circle, a small yellow circle, and then the yellow circle
can just do a scale change. So I already have the scale change animation on the burst, so I'll copy the
scale change 0-100%, copy the key frames,
and go back to my I need to turn
on my icon here. Solo icon is disappearing. So I'll copy it here,
so it's going to be coming up like that. So those are just like
a little simple element that I don't want to
pay too much attention. I want to make sure
the middle section here is more attractive, and then everything else can be just kind of sitting there, calmly sitting there, don't
want to distract too much. Make sure we have a
hierarchy, right? So all these simple elements, I just want to do
a simple animation to make sure they're
not too distracting. So for the same thing. I'm pairing the T to
the yellow circle two, and then I'll go back to zero, copy the keyframe, command B. I'm copying the skill
change from that icon. So everything is just
kind of coming in. 0-100%. If you want to apply the rule that
we have just now, cut it a little bit, so that it's not coming in from zero. It's kind of cutting
in like this. It's going to give
it more dramatic. You see that dramatic
feeling comparing these two together like that. So that's kind of a
dramatic feeling. I want to cut it here as well for the check mark.
I will cut it there. So both are just
kind of jumping in. Very simple animation, but
very effective, right? So we don't want to want
it to be too boring, but at the same time, we don't want it to be
too distracting. So I'm trying to figure out
where my four dots are. It's here. We have four dots. Same thing. I'm going to
copy the scale animation. You can do a lot more
fancy things with it, but, like, for the sake of time, I want to keep it simple
and then just showing you how we navigate through
all these different elements. So we have the scale
change for now, and then I'm going to cut
it a couple of frames in, so give it a little bit of
contrast when it's coming in. So it's now coming in from zero. And then at the same time, I
also want to stagger them. For this one, I want
to stagger right now because this
is a group, right? So I'm going to
stagger one, two, three, three frames apart. After three frames, I'll
use my keyboard shortcut, left square bracket.
Can see it here. To move this layer,
align with my indicator, and then go for three frames. Command right arrow,
one, two, three, and then move this one here, one, two, three,
move this one here. So we have a stagger animation. Each dot is going to
come on one at a time. And then for the dots, I actually wanted to disappear
after everything is on, I'm going to cut the layer
here. You know what? I should have just
before I stagger them, I think, let me just
move everything back. I should have just cut
it here at the back. So when I stagger, one, two, three, and
then move it here, one, two, three, three
frames, stagger them. One, two, three,
stagger this one here. So they're going to just come
out one at a time, and then
10. Hand Animation: In this video, let's keep
going and animating the hand. Let me turn on my hand
with the solo button here, and this is going to
be my first hand. First of all, I want to move this anchor point to
the wrist of the hand. So let's use this
pen behind tool, move it slightly over here
to the wrist of the hand. Now we can rotate the hand
around the wrist area. So that's what we want to do. And then we want to set up keyframe on the rotation
and position property. Let me go back to zero second, set two keyframes over here. Let me go for 20 frames first, and then the hand is
going to come in. So at the beginning, it should
be just outside like this. And then after 20 frames,
it's going to come inside, and the hand is going to rotate up a little bit like this. And then let's go
for 20 frames again. Move it down like this and then rotate it back to
maybe zero degrees. So we'll have this
hand just come in, rotate up and then go down and rotate back to the
zero degree position. That's looking pretty good. And I don't want this hand or pencil to collide
with other elements, so I'll move this one up a bit
more, the ending position. And over here, let me just move this one up a
little bit more. Let me zoom in here. I don't want this motion path to be this sharp around
this corner here. So I'll go to Pentl
and then just click on here to
drag a curved path. So it's more natural.
When the hand come in, it's going to go with
this curved motion path. It's going to be more
natural looking pretty cool. And then, let me just select
all the keyframes F nine. For the position, let me
go to the graph editor. Let's go to the speed graph. So I just want the
hand to hang there in the air a little bit
around this position here. So let me just
select this point, go change it to auto BEA, and then drag it
all the way down, and then pull the
handle on both side so that we can hang
there a bit more so that we have a flatter curve at the bottom over here
and then move it up slightly so it doesn't fall
to zero on the x axis. And then on the other side, I'll just dig this one
back a little bit. And then on this side,
on the left side, I'll just drag this handle
all the way to the left. So when it's coming in, it has some speed when it comes in. So let's play the animation
with this curve setup. I think it's pretty smooth. I'm okay with that. Let's move
on to the next hand here. Let me click on this one,
go back to the timeline, and then we can change the anchor point
to the wrist area, change it to this area here, which is good, and then let
me go back to zero second. At the beginning, I want to add a position keyframe and maybe a rotation keyframe
and then go for 20 frames, set the position
and rotation again. So this is going to be
the final position, and then let me go back to zero. At the beginning,
I want it to be outside of my frame here. It's going to move inside. And when it moves inside, I want it to rotate
maybe up a little bit, and then it's going to come back to zero degrees at the end. So let me select the keyframe
here and then F nine, easy ease it for the position. Let me go to the graph editor. I'll just pull the first
handle to the left and then pull the second
handle to the left as well so that this is
extreme easing in curve. The hand is going to come
in with some speed and then slowly easing into
position like this. And then for the rotation, let me go on the rotation. Let's click on the
value graph this time. I just want this
value graph to be a very smooth S curve like this, just drag the handle
out a little bit. Let's see the animation here. I actually don't need to align the end rotation with the
end position keyframe. I just wanted to land first
before it rotates back to the position so that there's
slight offset between the keyframe and the
position keyframe. That way is more natural
because we won't have two motion exactly
at the same time. I think that looks pretty cool. I think this hand is
a bit slow somehow. Maybe we can make the keyframe a bit closer,
select all the keyframe, hold down option and then direct the last keyframe
so that we can move all these keyframes closer together to adjust
the spacing evenly. Yeah, I just want to move closer so that the animation
is gonna happen faster. I think that looks better now. There you have it. That's
gonna be our hand animation.
11. Eye Animation: Okay, this is the
animation we have so far. Let's see where we are at now. So we animated the
hand first here, and then the second
hand, we animate it. And let's see right now, I have a couple
layers being soloed. So I'm going to turn
off my solo button to show all the layers for now
and see which ones left. Maybe just a couple more layers
that we need to do before we just start to synchronize
all the animation. So let's turn off
all my solo layers. And now we should
have everything here. I think the only
layer that we forget to animate is this
lightning here. So you can just quickly
do this lightning here. Do a position property. I want to still
reinforcing that movement. So I want to just animate
on the wide position, hit a key frame, move it up, and then go 20 frames forward. Move in position, and then I can copy the easing of
any of my key frame, just copy the easing and then
paste it onto this here. We also want to cut it a couple
frames at the beginning, so it's not coming up from outside of the frame
or anything like that. I'll move this a bit more up. I think that's it for
all the animation part. Now we just need to synchronize
everything together. We have animation now. It's looking pretty smooth. Everything is good. You know
what? I forgot something. I forgot to animate this e here. So that's what I want
to do. You know, this I it's really a focal
point. It's in the middle. So it's going to give
us some more, you know, just like a little
bit more fun or a bit more life to the whole overall thing
when we have an eye here. So to animate this eye here, let's go back to the eye layer. First, I need to turn
it into a shape layer. So right click. Let's go to create shapes
from vector layers. Create that. And then we
have a shape layer here. So let's see this shape layer. Inside the content,
we have three groups. One group of the eyebrow, we have a pupil, and we have just the eye itself
here, this background color. So what I want to do is I
think when it moves down, I want the eye to blink and maybe the pupil
to move side to side. Let's try that. So let's animate So I need to
modify this pupil here. This is going to be pupil. And this is going to
be the background. So let's say if I animate
the background this here, I want to animate the path so
that we can close the eye. If I go to this path
of this color here, go head on the path, I can actually modify the points here and then just
close it as I needed. So let's try to do that. Let's click on the keyframe on the path and go for 20 frames. And now let's try to
move this point down, move it down, and then move
this one up to close it here. And I need to zoom in really close to make sure I'm adjusting this curve so that we don't have much space or gap in between. I just need to close this curve so that there's no it's being, like, completely closed, the eye ismely close now, like this. But the problem you
see right now is that I don't want the
pupil to be outside. I want this pupil to be inside. So when I close the eye, I don't see this pupil anymore. And now we have a problem
because I need to use track Mt. The problem is two things
are within one layer. I couldn't use the track mat, so I need to duplicate this
layer and then separate the pupil and the
eye into two layers, and then I'm going to parent use track mat for this background. To be the alpha mat
of the pupil so that the pupil can
be just inside. When it close,
it's going to just close up without showing. So essentially, we need
to duplicate this layer, and then in this layer, I'll just delete the
pupil in the group. And then in this
layer, I'll delete the background and the
eyebrow in the group. So this one is going
to be the pupil now, and this one is
going to be the I. So now what I can do
is I can use the I as a track mat for the
pupil where my I here. So 11 here, right? Okay. And then I need to
turn on the eye layer here. And now I can see you can see
the eye is just inside now. Somehow, I think it's when
I'm adjusting the layer here, I feel like I don't know, it feels like a sleepy
eye somehow to me. It's really sleepy somehow.
So that doesn't matter. Let's just go forward
20 frames again. I'm going to open this
eye one more time. So just copy the key frame in the front and then
paste it here, close it and open it. And then for the pupil, I'm going to just do
a position property. Let's do a at the beginning, it's going
to be in the center. And then over here, let's move it to the side. And then when it opens, I'm going to move
it to this side, and then over here, maybe 20 more frames, and move it back to the
center, something like that. Something like that.
And then for now, let's try to add some
easing to both layers. Let's go to the I layer. Just ease it. I nine, Easy Ease, go to
the value graph. For the path property, there's actually no value
graph for the path property. Whenever you animate path, there's only value graph. I mean, there's only speed
graph you can work with. So we're on the path now,
and then there's animation. However, if you go
to the value graph, it's actually showing
you the speed graph. Even if you're inside
the value graph because the path property doesn't
have a value graph. So in this case, we are only able to work
within the speed graph. So I just wanted to maybe
somehow, when it comes in, I don't want the eye to be
closed when it come in, so I want to move all the
three key frame forward. So when I come in, I want it
to be open like this, right? And then when it settles, I want it to close
one more time. So over here, when it close, I wonder if I want to do,
like, a curve like this, let me test because I
haven't sometimes, like, I'm not very sure of the animation that I
want to get in terms of, like, logically analyzing it. We sometimes just test the curve and see
if it looks better. So now let's see if we have
a curve like this where there's going to
be a hang when it close and see what
that looks like. I think it's gentle.
Maybe, let me just pull these two curves
to the side more, and then we have really
extreme easing in the middle and then extreme
easing on both sides. Let's see if that
works well. I think it's too slow, in this case. What if I move this
one the opposite way? Like in the middle, I
want it to be fast, just a quick blink. And then on both sides, it's going to be slowing
down, like easing. I think that looks better. I
feel like I like the blink better than the close
almost like sleepy thing. So I just wanted to blink once. So once I blink, I feel like the spacing I mean,
timing is too much. Maybe I should close these frames a bit more
to make it faster. And even I can
duplicate this one, and then over here, I'll have it blink two times. I think the eyelid is
working great now. Now I just need to
animate this pupil here. So for the pupil, let's try
just do easy ease for now, and then when it's coming in, like this, I'm going to just try to hang at each position. Basically, I'm going to hang
here and then hang here. Every position I go, I want it to hang in there. And then at the beginning, I wanted to shoot
in to the position, and then hang there on one side, look at it, and then
go to the other side, look at this side, and then
go back to the center. Let's try. Maybe at the end, I want a bit more
easing at the end. I don't want it to
finish so abrupt, so, jarring. So this
is a curve I want. I want this thing
to come in moving because this is going to
be easing in coming in. When it's coming in, it doesn't make sense
if I do a curve like this because you won't
be able to see the front end. So it makes more sense if
we're just slowing down. And then I want it to
hang at each side more. And then go back to the middle. So that's kind of the
animation I want. Let's see if that makes
sense here. Let me zoom out. I don't know. Maybe
I should move these keyframes forward more so that it starts in the center. Let's see if the eye starts in the center, if it
makes more sense. Or just slightly drag it back. So it's already in motion
when it comes down, so that it's not
completely in the center. Or what I want to
do is just move this center key frame all
the way to the beginning. And then when it comes down, it's already still moving to one side instead of
staying on one side. So we have a bit more movement. I think the key is to have
a little more movement when it comes in instead
of being static. I think maybe it's because
the timing is too long. Somehow, there's one
more keyframe here, so I need to leave that. But I think the
timing is too much, so it feels really
just too slow to me. So I think I just select all
the keyframes and then hit an option to move them together so that we have
a faster animation. Yeah, I think that looks better. It's just at the beginning,
timing is too much, and then it just feels really
slow, feels really sleepy. Just a little bit twiking. We speed up the animation more, and then we just have the
eye over here in the center. If you want this animation, just to keep moving forward. I don't know,
maybe, like, a copy all the keyframes
and let it just keep blinking for 5 seconds because everything else
is moving forward. If this eye staying static, it looks a bit weird. But let's stop there for now, and let's synchronize
all the layers and see if it's going to work better after we
synchronize everything. So that's it for all
the animation part we done. There's one more problem. You see the eye outside
of showing up over here. I can either just cut the layers or I can
use a track mat. I think what I want
to do is maybe I just cut the layers, maybe here. Let me cut the
layers here so that it doesn't show up
before that layer. And then Yeah, I think
that works better now. Now that we finish
all the animation, next thing is we just sin
12. Synchronize Motion: So let's go to the light
bulb that we have, which is on the first layer. It's going to be
the first layer. I want this thing
to move in first. So the light bulb move in first, and then around this part here, when it's reaching
the max speed, I want my orange panel my
orange panel here to move. So I will cut this layer. I will move this layer to
my timeline indicator. To move this layer, I can use a shortcut less square bracket. Less square bracket,
it's going to move this layer to my
timeline indicator. So I'm going to do this. I think I'm going
to cut one more. So I don't want this edge to
touch my edge of the frame. That looks really weird, especially if it's
a first frame. So I'll cut one more layer
here, one more frame, so it doesn't touch that edge
there. So it's like this. And then after we have
this one come in, I'll go to the eye animation. I have the pupil, the eye, the green panel
come in from here. So it's going to be like this
and then these two come in. And then after these
two, I'm going to have this white panel
come in like this. So this one come in,
and then the white coming in, right, like this. And then when the
white coming in, I want all these lines
to start drawing on. So the lines start drawing on. When this one come in, the line should
draw on from here, start to draw on. That's good. And then when the line
start to draw on, I want everything
else kind of come in with a line drawing on. So I want the lightning to
come in maybe here like this. And then I want this T
come in just on the side. After this white panel length, I want this T to come in, and then I want this checkmark
to come in like this. I'm going to move it
here, checkmark come in. And then the icon at
the bottom there, I wanted to maybe once
the orange panel come in, and then almost sliding
down into position, I want this setting icon to
pop behind this thing here, almost like this
panel orange panel is triggering this icon, and then it's also
triggering this burst here, but I don't want these two
to come at the same time. So I want them to come
at different time here. And then we have this dot
here where it's my dot group. So the dot group should come
in as my eyes is landing, so I'm going to let
it come in here. And then I feel like
this one's weird now. The lightning. I introduced
the lightning a bit earlier. So as this thing comes in, there's still some problem
with the eye here. It's outside, so I need to cut it a couple of frames more. Maybe just cut it here. So it doesn't show up
previous. Yeah, that's okay. So it's going to
come in like this. And then, looking at this, I might want to move the pupil position key frame
to the start here. So it starts to animate
from this point on. And then when it's coming in, just give it like two frames. So when it's coming in
it's moving to that side. There's a little
bit more movement on the pupil when it comes in. Like this, it's going to
slide to the right like that. It's okay. And then we
have these stars here. So I want the stars,
W's my star star one, two, three, so I want this
thing to come in like this. And then from this point on, I want the star to appear
one after another, maybe like this one
first, this one, second, this one third, one, two, three, that's good. And then next thing is
going to be the hand. So the hand should come in after everything lands
from this point. When the eye is
looking at the side, I feel like maybe
the eye can look at this side because there's
hand coming in, right? So I want this eye to
look at this side to lead our eye to this side so that to indicate something is
going on on the side. And maybe I can introduce a second hand earlier so that when the eye is
looking at this side, I'm going to have
this hand coming in, try to put the thing
on this panel, and then coming here, this eye is looking
at this side, hand is coming in,
doing a move here, and then everything
settles around there. So if I have six
second for animation, I think I already
synchronize everything. Let's see the
animation, see what it looks like after everything
is synchronized. I'm going to fit this
to the view. So, look. Uh,
13. Wrap Up With Effects: A couple of things
I want to change. So the stars is not
really moving much, and there's not much motion going on after everything lands. So I want to introduce
effect called wiggle. What I want to do is
let's go to the hand, and then let's go to effects If you go to Windows
and then you can go to effects and
presets over here. Over here, you can search
for wiggle effects. We just need to add a wiggle
position to the hand. So essentially, I want this
hand to just keep moving. Maybe like right now in
the wiggle position, it's giving you a
speed and the amount. So speed is basically just
how many wiggles per second? I just want one
wiggle per second. And then the pixels is a
range of the wiggling. So I want it to be gentle, maybe give you 30 pixels. It's going to move
up and down or left and right within
the 30 pixel range. So after I add that, this
is what it looks like. My hand is going to be just
kind of like moving around, floating around in the space. To add a bit more movement as if it's kind of
like hanging there. So that's kind of what I want instead of being too static because
everything kind of lands, and then there's
a couple elements moving, but still too static. So I will copy this effects and then put it on
the other hand. Over here. So now we have two hands that's moving,
floating in the air. That's pretty cool. And also want the stars
float a little bit. So all three stars, I'll
add those expressions. I mean, that might be too much. Maybe I want to start to float like two wiggles per second, and then I will float
it to maybe ten pixels. So it's less dramatic copying this two wiggles per second, ten pixels within the range. So I want the three to kind of float like
that. That's good. And then I also want
this light bulb to float. So copy that. Let's see if that works well. So now the light bulb is moving. That's pretty cool. Everything is kind
of moving, floating. We have this thing. This dot thing is, like, moving. I want to extend the dot more. So the dot right now, I'll just extend it more because right now we have six
second animation. So I want to give
it more loop here. Extend it all the way to
maybe six second here. That's nice. Oh, we actually have 8 seconds, so we
can cut it to seven. Let's cut it to seven. So now our animation is looking good. It's not too static
after everything lands. Everything is moving in the
space, and we have this. The only thing that's a
bit static is the eye. So I think what I want to do is, I'll just keep duplicating
those keyframes on the eye. So let's duplicate this.
Try to duplicate this. I don't know. Maybe
it's going to work. Duplicate this so I want these
two frames are the same. So these two keyframes, you see, the eye is
like, completely static. That's what I don't want.
So I'm going to just try to overlap these two
keyframes, so it's moving. After it lands in the middle, it starts to look on that side again so that it's a loop again. We're just animating
with a loop here. And then I just giving
it a bit more loop here. And for the eyelid, I also want to
give it some loop. So now you can see, it's always just keep looking. It's a bit dramatic, maybe. We can still fix that, but I don't want to do it right now. And last couple of things I want to show
you to finish this up. So I want to animate
the background to be a bit more playful. So to animate the background, let's go to the background here. This is our background texture. So the way I want to do is
by using hold keyframes. I just wanted to kind of, like, be more animated
in the background. So let's go to
rotation and scale. And let's make it bigger. I don't need to animate skills, I just need to make it
bigger and then hit on the rotation property and
go forward five frames, one, two, three,
four, five, I'll just rotate it like
this and then one, two, three, four, five, I'll
just randomly rotate it. Maybe the size is
not big enough. I'm going to make
it size bigger. Let's go forward five
frames again and then just randomly rotate
it one, two, three, four, five, rotate
it, one, two, three, four, five, rotate it,
that should be okay. Now I want to right click to hold keyframes and let's
play the animation. I have this funny background
just keep rotating. Somehow, it's almost like
a stop motion like video. That's the feeling
I want to get. And then now I can just copy these keyframes and then
keep duplicating them because it doesn't
matter which way they rotate as long as
they keep rotating. I'm just duplicating
all these keyframes and then copy all these duplicating. Now we have 7 seconds of background animation
that's keep rotating. In the background like crazy. That's pretty good. We're
adding some fun to it. And then another
thing is, right now, the graphic in the
front is too clean, so I want it to be more grungy. So I'll add an adjustment
layer, add an adjustment layer, put it all the way to the top, and then when I go to
effect, add noise. Noise effect. So there's a
bunch of noise and green. I want to get this noise, just like a noise and
green the noise and green. I want to get this
noise here. So for the noise, if I zoom in, we can actually get maybe
10% of noise so that you can see there's more noise
texture onto my composition. I just blend everything better. Maybe you can do like 20%. Or, like, if you
want to go crazy, you can do 50%. Maybe
that's too much. Maybe 20% is good, a very slight noise to blend
the scene together better. Almost like a stop
motion thing, right? So another thing is, since
you want to do a stop motion, I need to decrease
the frame rate. We originally animated
at 30 frames per second. But I want to do it more
like a stop motion thing. So I want to decrease
the frame rate. The way we want to decrease
the keyframe, I mean, decrease the frame rate is by using a effect called
polterize time. It's under time.
Is posterize time. So in this case, if
we polarize time, we can actually decrease the
frame rate of our animation. Let's say if we do it
12 frames per second, and let's see what it looks like after we do 12
frames per second. You see the animation, all of our elements are becoming
12 frames per second, and then the light
bulb is more playful. Everything is more playful now. And it kind of synchronize
everything together more based on the background animation
because it's more grungy, it's more just stop
motion like animation. So that gives you, like,
a stop motion feeling. If we decrease it to, let's say, eight frames per second, let's
see if that works better. That's almost like more extreme. Everything is just stop motion. It's not so smooth anymore, but I feel like the background
is moving too fast. Maybe we should just
delete a couple of keyframes and then
so like everything, hold down option, drag the last keyframe to
space out a bit more. Yeah, the background,
it was moving too fast. Let me just delete
a couple more. Slow down a little bit.
Yeah, that's better now. And right now, the contrast in the background is
too much as well. So I feel like we can maybe
go at a curve adjustment to try to kind of get rid of some of the
shadow in the background. So it's not too distracting. Right now, the shadows too much. I feel like it's a
bit distracting. I'm just going to make it more bright so that
we have less shadow, and the background can
be less distracting. Just have a hint of
the paper animation, the background, and
that's pretty cool. So I think that kind of wraps up everything I want to
cover in this video. After we animate everything, we synchronize it together, and then we animate the
background texture, and then we add two effects
onto my adjustment layer. One is a noise effect
to add some noise on the texture to texture
our animation. And then we add posterize
time to give it a less frame per second so that we have a stop motion field to all the animation.
Yeah, that's about
14. Export: In this lesson, let's
talk about how to export our animation
into a video. You can see if I play it, we already have our
animation done. This is going to be
our final animation. Before we export it, we need to select the range
that we want to export. And from the beginning, we want to export
from 0 seconds, so be on the keyboard to set the preview range to the
beginning of the timeline. Then if I have this range
all the way at 12 seconds, and I'm going to go
around seven second. I'll hit E on the keyboard
to set this preview range or the export range to seven second so that
right now when I export, I'm only exporting 0-7 second. So this is going to be the
range that I'm exporting. And to export, let's
go to composition. I'm going to add it to render Q, and then let's change
the output module. Click on this here. We
can select the format. Within the format, we're
going to select the H 264, which is the MP four format. You can also export to a
QuickTime format as well, and there's some other ones. But for now, we're
going to go with H 264. Everything still keep the same. Click on, and then we
can change a Out folder. Click on this one here.
We're going to call this one final animation,
click on Save. Now, all we need to do is to
click on this render button. It's going to start rendering.
After a couple seconds, it's done, let's go back to
my folder and check it out. This is going to be my final
animation in Pour format. That's looking pretty cool. There you have it. That's
how we export our video.
15. Congrats: Congratulations on
completing the course. You've taken a big step in
mastering collage animation, but the real progress happens when you practice
what you learned. So don't forget to work on your class project and
submit it for feedback. I'd love to see what you create. If you're eager
to keep learning, be sure to check out
my other courses on motion design and animation. And for even more tips, trends, and up to date techniques, make sure to follow motion
circles on YouTube. Thanks for joining
me in this course. I can't wait to see
you in the next one.
 Hongshu Guo, Motion Designer