Transcripts
1. Introduction: Hello and welcome to this
course on iphone videography. My name is Ben Nielsen. I'm a media design educator and I'll be your instructor
for this course. In this course, you can
expect to learn all about the different video
features on the iphone. Now, you don't need any prior experience to take this course, because we are going to be starting right at
the very beginning. So even if you've just barely opened up a brand new iphone and you're just looking
at that camera and wondering how you
can shoot video on it. Or if you've already started
experimenting a little bit, it doesn't matter because
we're going to start right at the beginning
and go over all of the little things that
happen in the iphone for video so that you can
feel like you have a really comprehensive
view about everything. Some examples of things
we'll be going over are what all the different lenses
on the iphone do, how the different
cameras work there, and all of the different modes and settings that
happen in the iphone, as well as the
basics of shooting video on your iphone
in real life. Now, you also don't need any
prior experience with video. You don't need to be
a videographer or have done anything
with other types of cameras or
anything like that. All you need is an iphone. Now, most of what I teach in this course will apply to
whatever iphone you have. But it is good for you
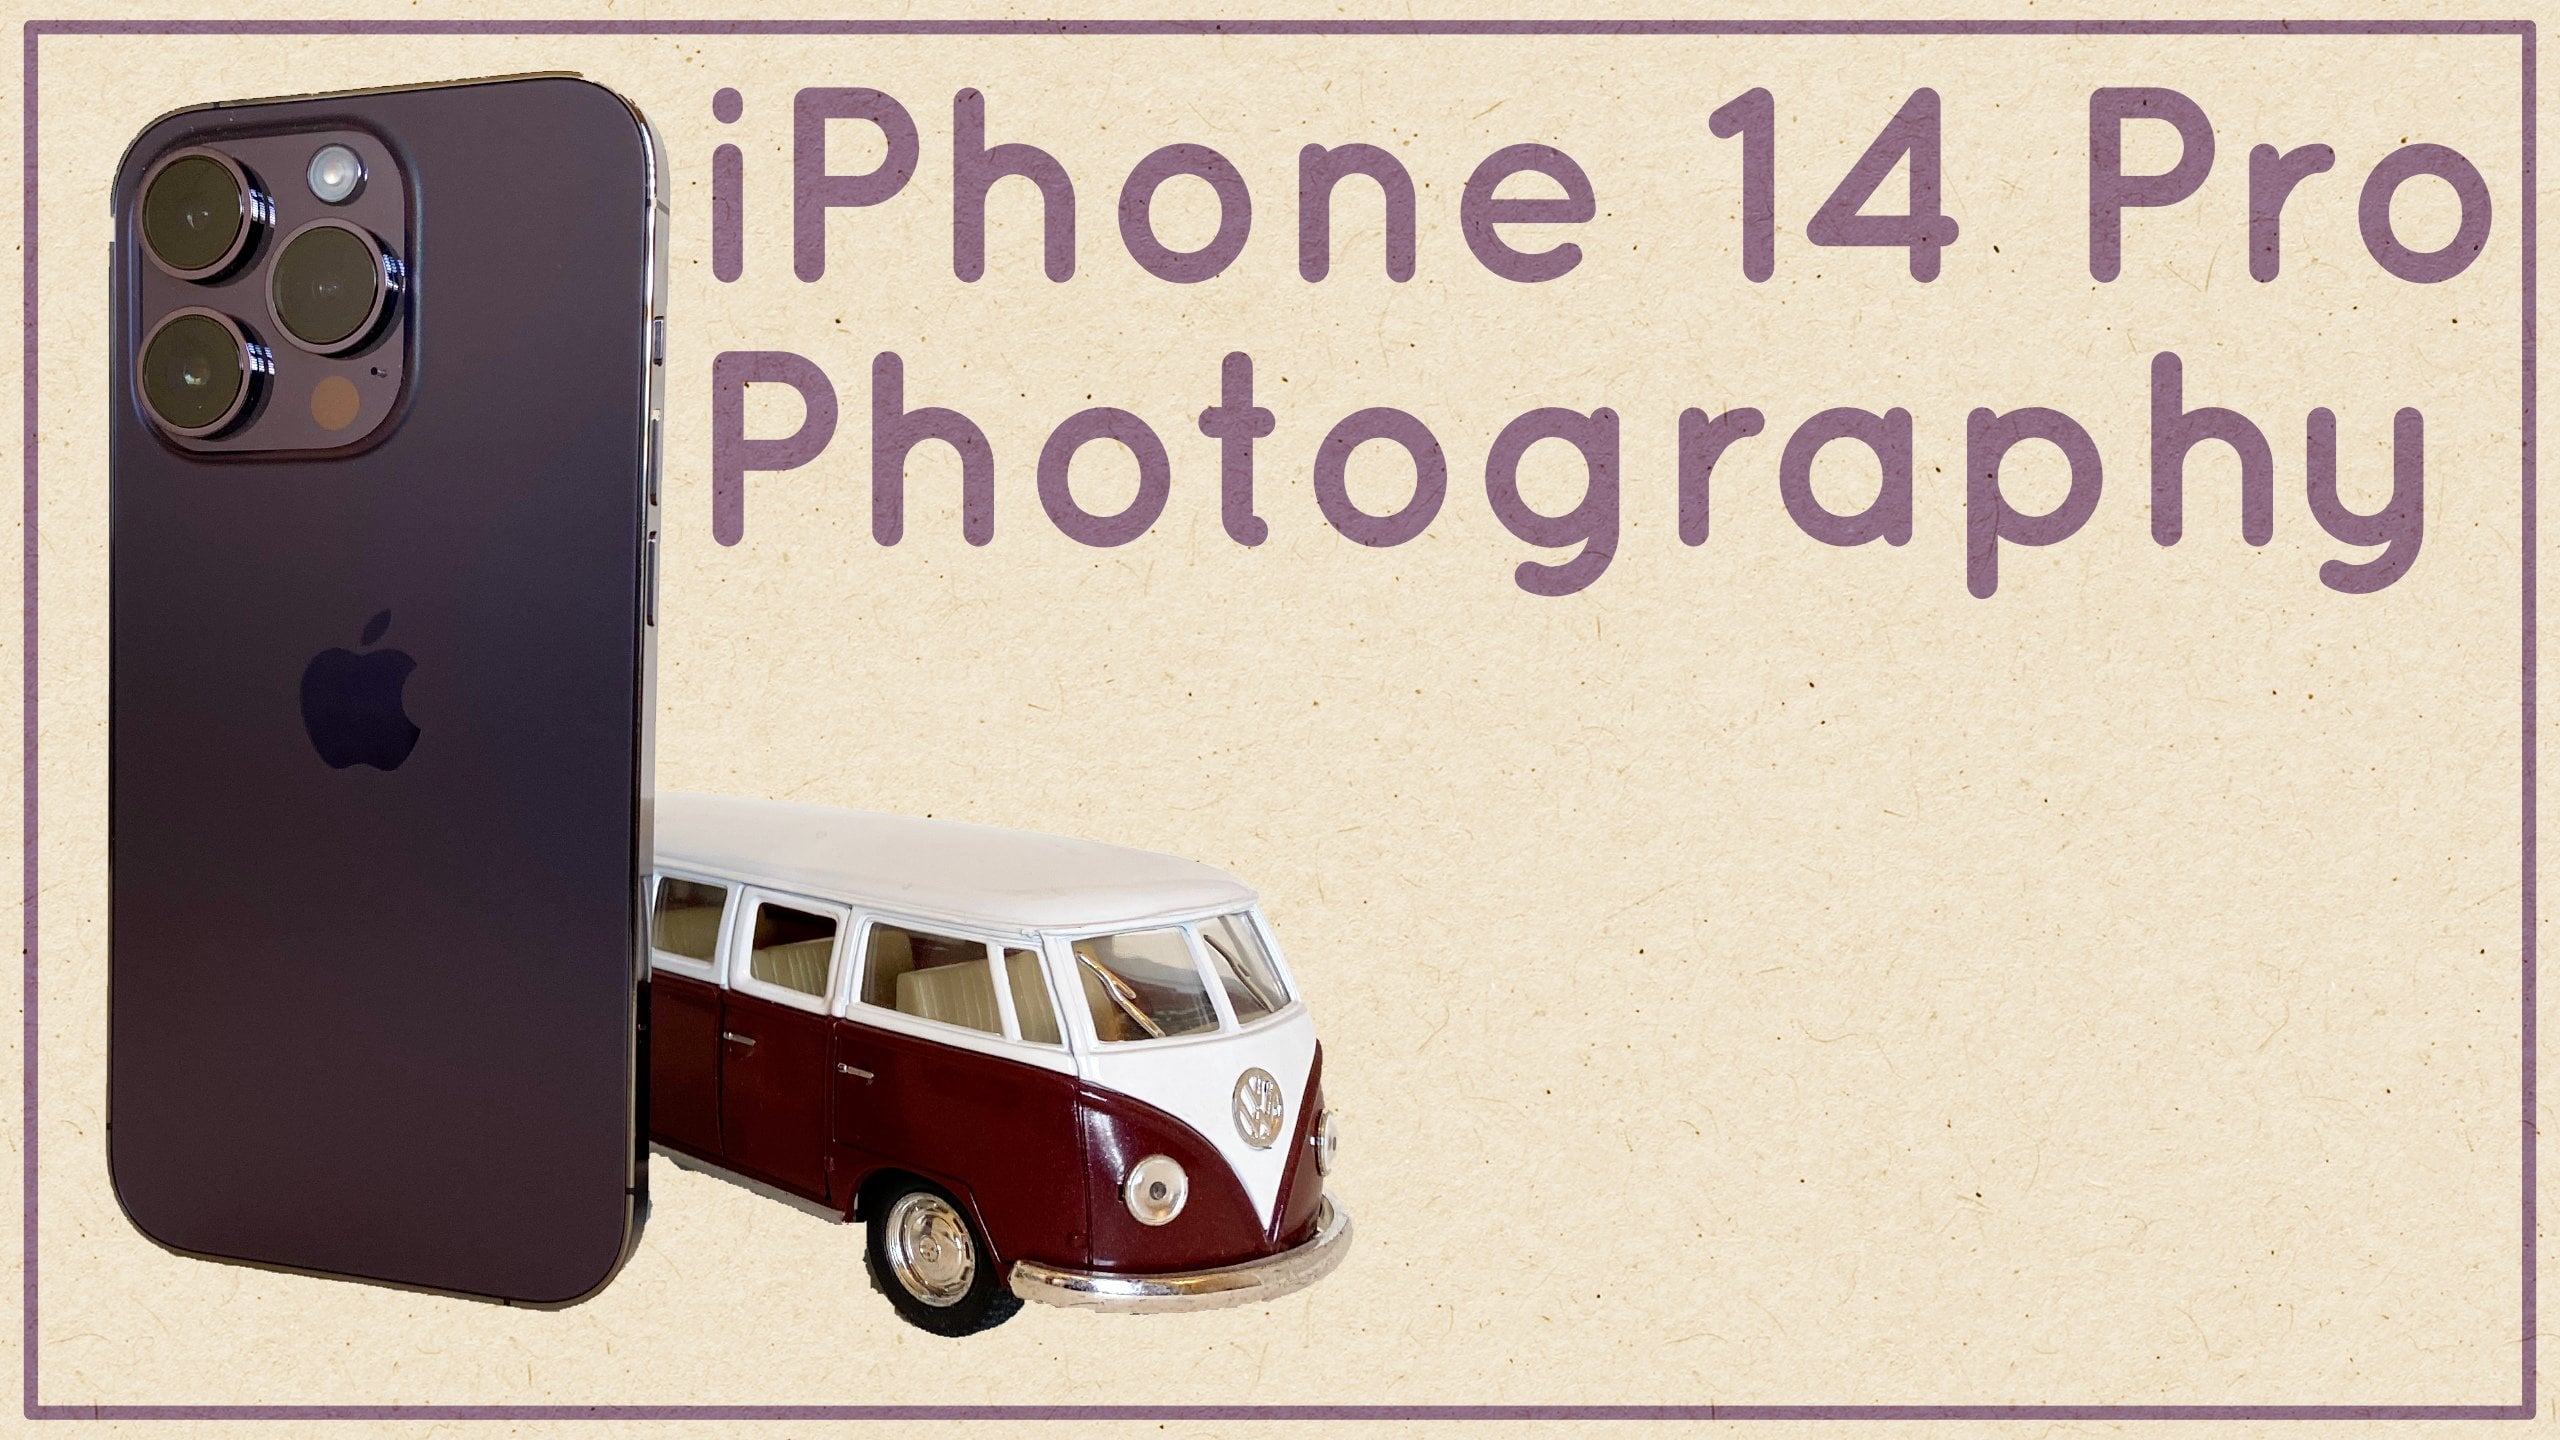
to know that I will be using an iphone 14
Pro for this course. What this does mean
is that depending on your model of iphone, there may be slightly
different features. Some of the lenses or cameras on the iphone may not
be exactly the same. And some of the features
that are available for my iphone may not be
available for your iphone. As a general rule of thumb, the last several
generations of iphone, the pro model of the iphone, has had more lenses on it than the regular
version of the iphone. So the iphone 14 Pro
has three lenses on it, and the iphone 14 just
has two lenses on it. And then there are iphones like the iphone SE that just
have one lens on them. So things may vary a little bit, but if you have any
questions along the way, please go ahead, drop in the
discussion cab and ask them. Because it may just be a
simple answer to, well, that feature is in
a different spot on your phone, not
available on your phone. And there's no reason
for you to spend a lot of time worrying
about it and getting frustrated with that
when you can just hop in the discussion tab and ask me, remember I am here to
help you on your journey as you learn to shoot
video on your iphone. Let's go ahead and
get started in the next video and talk about the project for this course.
2. Project: Okay, now it's time for us to talk about the project
for this course. Now you learn a lot better by doing than just by observing. And so it is really important that you do make the project for this course so
that you can really internalize the things
that we're talking about. The good news is all
you need to do is follow along with what
I'm doing in the course. And by the end, you will be able to put together your project. Now the project
itself is going to be just a compilation reel of different shots that you've
done on your iphone. And it doesn't need to be long. The purpose is just for you to demonstrate that
you've learned how to activate the different modes
and be able to film in them. Okay, So there's four
different shots that you should have in your
reel. At least four. You can have more
if you want to, but at least these four. The first one is
going to be an action shot with the action
stabilization turned on. And don't worry
if you don't know how to do any of
these right now. That's the point of this class. I'm going to teach
you how to turn them on and how to use
them in your videos. The second shot is going to
be using cinematic mode. Now that's going to be the
mode where the background is blurred out behind the
subject of the video. The third shot is going
to be using slow motion, so you're going to want to shoot something that is slowed down, so you're going to want
to make sure that you use that slow motion mode to
have a nice slow down video. And then lastly, I want you to choose a shot that will help you to express your creativity using whatever mode you want. So those are the four things. Now when you're done,
all you need to do is put these videos together into a single reel using some kind of
editing program. You can just use movie, which you can get for
free on your iphone. Just put them together,
you don't need to do any other editing to them. And then go ahead and
upload that to Youtube or some other video sharing site so that you
can get the link, copy that link, and paste it into your skill share project. And then I'll be able
to see that and I can give you any feedback that
you want on those projects. Now, it's really important to understand that at this point we are not worried about the
story your video is telling. We're not looking for it to be cohesive or
anything like that. So even if the four shots have absolutely nothing to do with each other, that's totally fine. They don't need to be good. They don't need to be cohesive. You're just showing that
you know how to use the modes on your
iphone to shoot video. Remember if you have any
questions along the way, go to the discussion tab and you can ask me those
questions there. And I will do my very
best to answer them. Okay, I hope you're excited
to get started learning. In the next video we're
going to talk about the different lenses and
cameras that are on the iphone.
3. Cameras: Okay, now the first thing that you might be wondering
about when you start getting into iphone
videography is what is going on with all of these lenses
on the back of your camera. So let's go ahead and
start out by talking about what each of these does
and which ones which, and let's also not forget
that there's actually another camera on the
front of the iphone, which is the selfie camera. And that can be used to shoot video as well if you need it, although it's not
always the best option. And we'll talk about why. The first thing to note is that I am using an iphone 14 Pro, depending on which
iphone you're using, the number of lenses on
the back of it may vary as well as the attributes and
qualities of those lenses. So it's going to be important for you to just go ahead and Google which lenses
your iphone has. Now right off the bat, we can talk about the
difference between the regular iphones
and the pro iphones. Pro iphones for the
last several years have had three lenses, whereas the regular iphone
models have had two lenses. And that's one of the
things that separates Pros from the regular. Generally speaking, if
you have three lenses, you're going to have a main
lens, which is the wide lens. You're going to have
a telephoto lens, which is the zoom lens. And you're going to
have a super wide lens, which is the one
that goes way out, lets you capture a whole scene. So let's talk about
each of these. Bear in mind, like I said,
this is the iphone 14 Pro and your specific
model may differ. For example, on the
iphone 15 Pros, which just recently came out, the zoom lens is a much, much further in zoom lens. Now one thing that I want
to say is that when we talk about lenses and cameras
and things like that, we can end up talking about
a lot of numbers which can be confusing to people who
are new to videography. I know that it was confusing to me when I first started out, so don't worry if you don't comprehend what all
the numbers mean. Right now, the
numbers are really equivalence because this
is not a regular camera. So we're really talking
about equivalence. They're really only
useful for people who are coming from traditional
videography so that they can kind of know
what they're working with on a phone camera compared to what they were used to on
their big cameras. Don't get too caught
up in the numbers, but I will tell
them to you so that you start to become
familiar with them. And if you are coming from
traditional videography, you may find them helpful. The next thing that we
really need to know is that each of
these lenses is not actually a separate lens so much as it is an actual
separate camera. Which means that
each of these lenses has a different
sensor behind them. Whereas on a regular camera, you will switch the
lenses out and all of those lenses will go
over the same sensor. Each of these has a
different sensor. Why is that important?
Well, the quality of each sensor is going to vary in terms of how
many megapixels it has and how large it is. Large sensors tend to be
better than small sensors, so we'll talk about that
as we go through here. Let's start with this
main camera right here. This is the main camera. And on the iphone 14 Pro, it is considered a wide lens. Not a super wide lens,
but a wide lens. It's a good field of
view for most shooting, which is why it's
on the main one. This is the equivalent of roughly a 24 millimeter
field of view. And it's on a sensor
that is 48 megapixels. And it's the largest sensor
on this model of iphone. Generally, if you have
a pro model of iphone with a larger sensor, it's going to be on
the main camera. And so the very best footage is going to come off
of this main camera. And it's kind of the default
for most iphone shooting. Likely you're going
to want to shoot on this camera more than
any other camera. Now, the aperture on
this main camera is an F 1.8 What that means
is that it is a fairly wide open aperture
that can collect quite a bit of light based on the size of the sensor that it
is in front of. If you don't really understand
aperture right now, don't worry a lot about it. But this might be
useful information if you're used to working
with traditional cameras. All right, next
let's go ahead and let's talk about
the middle camera. The middle camera is the
super wide angle lens. This is the best one for
getting really wide shots, which sometimes you need to
do when you're videoing, particularly if you're trying to capture a really
expansive scene. This is a 13
millimeter equivalent and so it's going out very wide. And it also helps to get
really stable shots, because wide shots just tend to look more stable than
zoomed in shots, because when the camera shifts, it doesn't shift as far. And so it just tends
to look a lot more stable coming off of
the super wide lens. Now you'll notice
I'm using lenses and cameras pretty much
interchangeably here. That's generally we think
about them as lenses, but they are actually
separate cameras. All right, We said this
is a 13 millimeter equivalent that if you're
thinking about degrees of view, is about a 120 degree view. And this camera
is represented by a 0.5 symbol in the camera app. Now this one has a 12
megapixel sensor behind. There is a 12 megapixel sensor. It's a pretty good
sensor, but of course, it is not nearly the size of the 48 megapixel sensor
on the main camera. So you may notice some
difference there. The thing to remember
though about that main camera is
generally it's cropping down either to a 12 megapixel image by using four pixels
as one pixel. Or a 24 megapixel image by
using two pixels as one pixel. And so you're not often getting the actual 48 megapixels
off of there, because those files would
be super, super huge. We'll talk more about
file sizes as we get into the settings
for iphone videography. And this one has a 2.2 aperture, so the wide angle
has a 2.2 aperture, which means it's a little
bit of a smaller aperture. It's not receiving
quite as much light as that main camera is. All right, now let's
go ahead and let's talk about this top lens here at the top lens is going
to be your zoom lens. So the zoom lens is where you're going to get in
really tight on the subject. And having a zoom, or sometimes called a
telephoto lens on a phone is so useful because you often see people trying
to pinch to zoom. And that's just digital
zoom, it's just a crop. That's all digital
zoom is, is cropping. And really you want
to actually be able to have a lens
that can get closer. This lens is really,
really useful to have. On the iphone 14 Pro, this is considered
a three X lens. But on others like
the iphone 15 Pro, it's considered a five X lens. And on some older models it's considered just a two X lens. So that just depends on which
lens they had on there, how close it's going to
get to your subject. So mine here is considered
a 77 millimeter equivalent. Some are considered a 50
millimeter equivalent. It just depends on what
camera you're working with. So make sure that you look
that up for your own phone. This one is also a 12
megapixel sensor up here, but it is actually a
lower quality sensor than the ultra wide on
this particular camera. So you just want to
be aware of that, that the quality of your videos coming off of your
telephoto is going to be the least quality of
any of these back cameras. And it has an aperture
of 2.8 which means it is gathering the least amount of light of any of these cameras. Okay, so that is your telephoto. Then you have the front facing
camera, the selfie camera. As it were now, for a long time, this camera was
considered really bad. So if you have an older iphone, like a 789 or ten, I would not even think about using this camera for
anything in video. But around the time
of the 11 and the 12, it started to get improvements
and it has gotten better. So it is in some cases, particularly if you're logging, you might want to use it so
that you can see yourself. It's not one that
we'll be using a lot. We probably won't use
it again in this class. But let's just
talk about it real quick so you know what it is. This is a 23 millimeter
equivalent camera, so it's fairly wide out, just a little bit wider
than the main camera. And that's so if you have
somebody next to you, you can get both of
you in the shot. It's a 12 megapixel camera. Again, it's not a super high
quality sensor because it is packed in there and it is the smallest of all of the
sensors on the phone, but it will do in a pinch. Its aperture is an F 1.9 so it is gathering
quite a bit of light. Not as much as the main camera, but more than the ultra
wide or the telephoto lens. Okay, So we've gone
through all of these cameras and all
of these numbers, but the really important thing to remember is just that you need to use the camera that's right for the shot that
you're trying to get. Now in video, I'm
going to say that, generally speaking, it's
going to be that main camera. But not always, I
think that sometimes you'll want to use that
ultra wide lens to really capture an expansive scene and
sometimes you will want to use the telephoto to really
get in close on your subject. The other thing is these
cameras work together to be able to feed lots and lots of information
into your camera app, which your phone then uses to do computational
photography to figure out how things work best, particularly with
lighting and things like cinematic mode that
we'll get into later. Now that we've gone through
what the cameras are, let's go ahead and
we'll jump into the settings on the
phone so that we can figure out how to
get our phone set up correctly for the
videos we want to take.
4. Storage Settings: Now it's time to talk about the settings available
to use on the iphone. Cameras settings may
not seem as fun as getting out there and shooting videos, and you're
right, they're not. But knowing the settings
is what takes you from just pulling out
your camera and shooting, to actually making intentional choices about your filmmaking. So we're in the Settings
app on my iphone, and this is again
an iphone 14 Pro, and I'm running IOS 17 on it. So yours may vary a
little bit depending on your model and the operating
system that you're running. And when you're watching
this, I know it can be a little annoying that the
settings are in a separate app. Not just there in
the camera app, but that's just the way it is. In this case, it's
actually useful for us because before we get
into the video settings, we really want to
talk about storage space which is going to be found under the general option and
then under iphone storage. The reason we're going
to start out talking about storage is
that I want you to realize how much space you have on your phone before
you start filming. Because that will determine
how much video you can take. A lot of the settings
we are about to see will have to do
with the video quality. And the quality of
your videos will determine how much storage
space they take up. So it's good to have an idea
of what your storage space is like before we make it
into the camera settings. The iphone I'm using has 256 gigabytes of
internal storage. Iphones come in many
different storage options. This model can have
anywhere 100-28 gigabytes of storage and 1
terabyte of storage. But if you have a
different model, your lowest and highest
storage options will vary. You can see here that my phone
is using 117.53 gigabytes, the 256 gigabytes,
which means I have 138.47 gigabytes
available to be used. I can't use that all
for video because this storage has to handle
everything I do on my phone, not just my videos. So I have
to be conscious of that. Many people were surprised when they first get into
shooting video, just how much space
those files can take up. Unfortunately, if you start
running out of space, there's nothing you can
really do except to start offloading and
deleting things or purchase a new phone
with upgraded storage. I know that it isn't
fun to pay for storage, but I've seen so many people
just buy the base model of a phone and then decide they like taking pictures or videos. And then be frustrated
that their phone is always running out of space. So the next time
you're buying a phone, be sure to keep that in mind. Thing that you want to
consider when thinking about storage is
whether or not you are using cloud to sync your photos and videos
across your devices. This is really important thing to consider because most people don't have as much storage in cloud as they do on their phone. If you have it turned
on, your cloud can suddenly be very full
and stop sinking, which can affect things like
your messages as well as your documents and even e mail if you use cloud
for your e mail. So I would suggest making
sure that you know how much cloud
storage you have and probably turning off
syncing the photos app. If you are planning
to take a lot of high resolution videos. This setting is found
under your account in the settings cloud. Then going down to Photos
and sync this iphone. Now this setting is a little bit misleading because it
says Cloud Photos, but it actually will
take everything from your photo library which
includes your videos. So I would suggest making
sure that you know how much cloud
storage you have and probably turning off
Sinking the photos app. If you're a planning
to take a lot of high resolution videos,
that's what I do. Okay, that's going to be it
for the storage settings. I know that is not
a super fun video, but it is important to help
you avoid frustration. Later in the next
video, we will talk about the actual
settings for videos.
5. Camera Settings: Okay, now let's talk about the actual settings for the videos you are going to shoot. This is found in the
settings app under camera. So the first thing that
we're going to talk about is the formats section, which is fourth
down from the top. So go ahead and tap there. This first option up here called camera
capture is going to determine the file formats for both your photos
and your videos. It's unfortunate that these
cannot be set independently, but that is just the way it is set up at the time
of this recording. There are only two options here. There's either high efficiency
or most compatible. These terms obscure what
is really going on here, which is why they now
feel the need to put an entire paragraph of text
underneath to explain it. Basically, if you
choose high efficiency, your videos will be taken in the high efficiency video codec, which is known as H 265. Apple prefers this
format because it takes up a lot less
room on your device. Unfortunately, it also isn't super compatible
with other systems. Although this has started
getting better lately. If you instead set it
to most compatible, it will use the much more
common format of H 264, which almost any video player or editor will be able to read. But it will take up more
room on your system. Probably wondering which
one you should choose. Basically, if you're
planning on mostly just using your iphone
for your video editing, you can keep it on
high efficiency, but if you're planning on
editing somewhere else, you should test and see if
that system and software can handle H 265 videos
without a problem. Generally, Apple products like Imax and ipads will
handle them great. Non Apple products like PC's and Android phones will
have more trouble. But that can also
vary by software. The other thing to
consider is how it will affect your photo format. Since this one setting
controls both photo and video, they can't be separated. If you leave it on
high efficiency, all your photos will be
taken in the Or HE IF at the high efficiency
image format, which again uses less room but isn't compatible everywhere. Although that has been
getting better as well. If you go with most compatible, your photos will be taking using the standard Jpeg format, which can be used
almost anywhere. The last thing to know is that regardless of what you choose, some types of video can only be captured using the high
efficiency video codec. These are listed at the
bottom of the paragraph. This is to help
protect your storage from extremely
large video files. Those types of videos will
produce if captured normally. So you will need to make
this decision based on your own editing needs and
storage space considerations. I normally leave it
on most compatible, so that my photos will
be taken as Jpegs. And I just know that when I use mode like cinematic video, it's going to shift to
the HEVC file type. The next setting
is just for photo, so don't worry about
that right now. But the last setting on the
page is for video capture. That is the option to
turn on Apple Pro Rez. This will allow you to
capture ten bit video, which is really awesome
because you can edit a lot more
than regular video, but as you will see below, it takes up tons
of storage space. We're going to turn this
on so that you can see it, but in reality, most of
you probably won't use it. As you can see, if you
have pro res turned on, a minute of HD video would take up to 1.7 gigabytes of space. Meaning that on a
128 gigabyte phone, you could capture less
than 10 minutes of video. It is good to know this
switch is here though, in case you need it or in case your video files start
taking up a ton of space. Chances are this
accidentally got turned on. One thing to note here is
that if you happen to be shooting on the brand new,
as of this recording, iphone 15 Pro or Pro
Max with a USBC port, you can actually record out directly to an
external hard drive. You may be able to shoot
your Apple Pro resin to an external hard drive and
save storage space that way. That was probably
very confusing, so feel free to ask questions if you need
some help on that. In the next video, we're going
to finish up the settings by talking about resolution
and frame rate options.
6. Resolution and Frame Rate: Okay, this will be
our last video in the settings that back on the
main camera settings page, we can see that there
are three settings at the very top that deal with the resolution and
the frame rate. Before we make a
decision on these, I'm going to really quickly explain what resolution
and frame rate are. Because if this is
your first time really doing video, this
might be new to you. Let's start with resolution. This is described
as either 720 P, ten P, or four K on your iphone. This determines how
many pixels will be recorded on each
frame of video. You really don't need to know
all the technical things that go into these
numbers for our purposes, just know that the
higher the number, the more resolution
your video will have. Basically, the more clear
and crisp it will look. The second piece of
this is frame rate. Remember that all
video is just a series of still pictures shown
in rapid succession. The frames per second, or FPS, is just how many
images your iphone is going to take for
each second of video. For example, a setting
of 30 FPS is going to take 30 still images in
each second of video. And a setting of
60 FPS is going to take 60 still images in
each second of video. Now the key to
understand here is that most people have settled
on 30 FPS for videos, although a lot of movie makers enjoy using 24
frames per second, which is why you will
see that sometimes this means that shooting
higher than 30 frames per second gives you the opportunity
to slow down the video without going below
the 30 frames per second in your final output. For example, if you film
at 60 frames per second, you can play that back
at half speed and still have 30 frames per second
of slow motion video. If you film at 120
frames per second, you can play it back
at a quarter speed and still have 30
frames per second. Of course, the more
frames you capture, the more space these videos are going to take up on your iphone. Okay, with all that
being said, let's go and take a look at the
actual settings first. Here we have record
video, let's tap on that. You can see here that we
have a bunch of options, but that you cannot choose the resolution and the
frame rate independently. Because not every resolution
goes with every frame rate. The standard is
the second option, 108 P at 30 FPS. But you could choose different options depending
on what you want. I really wouldn't
suggest choosing this top one and going down to 720 unless you really don't
have any space on your phone. And you will notice
that this last option, four K at 60 FPS, is actually limited to the high efficiency format that
we talked about earlier. That is simply because it
takes up so much more space. It's a very high resolution, at a very high frame rate. I don't want you to get super
hung up on this right now because I know it can be
confusing and annoying. And the truth is that
for most people, the standard 1080 P at 30
FPS will be just great. And we can actually adjust this in the app later if we need to. So just leave it set
to that for now. The other thing we
need to know here is that if you the United States, you might want to turn on show Pal formats with
this toggle here. When you do that, you
will see two options with 25 FPS added to your list, which you might need in other countries outside
of the United States. I'm going to turn
that off because I am in the United States. The next options are toggles
for various settings. You can turn them on if you
want to use that feature. First is Enhanced Stabilization. This will help your
videos look less shaky, but it will do that by
zooming in a little bit. I personally like to
keep this one on. Next is action
mode, lower light. This just means that if you
are using action mode to get super stable footage while
running or some other motion, it will decrease that
stabilization when in lower light so they can gather more light and produce
a brighter image. The next setting is HDR video. Turn this on. We're
going to record video with high dynamic range. Basically, we will
get more detail in our shadows and
our highlights, but it will only record in the high efficiency
format because this is another thing that
will take up a ton of space if it was in the
compatible format. Next we have Auto FPS. This is a setting that will
allow the foam to reduce the frame rate in low light in order to make
a brighter video. This can be set up
for 30 FPS or both 30.60 FPS or it can
just be turned off. I leave it set to auto 30 FPS. Lastly, we have two options for locking the camera or
locking the white balance. Locking the camera will stop the iphone from switching
cameras when you are filming. For example, if you
start filming on the wide camera and
then zoom into one X, normally it will
switch one X camera, but that will
produce a flicker in the video when the
camera switches. So if you don't want that,
you can turn this on, then it will only
use digital zoom based on which camera you
started filming with. Locking the white balance
just allows it to not change the white balance
while it is recording video. So whatever white
balance it started with, it will continue with throughout the duration of that video. Okay, let's back out of these
record settings here and we're going to look
at two more frame rate settings that we
need to deal with. The first one is record slow Mo. This determines what
resolution the frame rate will be when recording
slow motion video. You can record at
ten DP with 120, which is a four time slowdown. Or you can drop
the resolution to 720 P and record at 240 FPS, which is an eight time slowdown. If you want to use high
efficiency format, you can also choose to record at ten eightyP with 240 FPS. Now we can adjust this. While we are in the
camera app though, it's not super critical that
you choose this right now, unless you want to switch to the 1080 P at 240 high
efficiency video format. So now I'm going to set mine
to 1080 Phd at 120 FPS. The last setting here
that we need to deal with is our cinematic setting. This is what your
camera will use when recording in
cinematic mode. You can do either
1080 P at 30 FPS or four K with 24 FPS or
30 FPS for most people, most of the time you will
probably want to leave it on the first option so you don't completely burn
through your storage. Okay, that's going to be it
for the settings app here. There are other settings. Most
of them deal with photos. You can take some time to look
through those if you want, but I don't want to
overwhelm you by talking about tons and
tons of settings here. Just the most important ones. Now I know that going through these settings isn't super fun, but it is important to
know where they are so that you can deal with
them as you need to. Remember that with most
of these settings, you're choosing to
make a compromise between quality
and storage space. Okay, that's going to
be it for the settings. And in the next
video, we'll get into the actual camera app and start learning how the app
interface works.
7. Camera App: Okay, now that we have dealt
with all of these settings, we can finally see
how the video options are set up on your iphone. Now remember the app interface can change based on updates. And some features may only be available on certain iphones. So if yours doesn't look exactly the same as
mine, don't worry. Just hunt for a minute and
see if you can find it. And if you can't, just
go ahead and ask me. Just make sure to let me know which iphone you are using
if you ask a question. Now I'm going to show you
the interface here in vertical orientation
because that's kind of how a lot of
people start out, because that's how they're
holding their phone. But it's important
to note that when we film with the iphone in a
horizontal orientation, everything stays
in the same place. But some of the buttons
will rotate 90 degrees. As an interface element, the first thing we want to
notice is our camera modes, which are located along
the bottom of the screen, right above the shutter button. We're currently in photo mode. To get to the video modes, we're going to swipe
over to the right, which will move us
into video mode. Yeah, you'll notice
immediately that video mode crops in a little bit and
gets a little bit closer. So you might need to
readjust where you're at. I have my phone
on a tripod right now just to help hold it steady. I'm just going to reorient
a little bit there. We'll talk about each of these different video modes that are here in
a separate video. I'll just show them to
you real quick right now, Cinematic, slow mo, time lapse. Right now let's go back to
the standard video mode because that's going to show us the most interface elements. But if you ever feel like you're missing a feature,
don't see something. It's probably just
that you're in the wrong mode and
you should just swipe in between them until you find what
you're looking for. Now, one thing that
you might have noticed when we swiped over from the photo mode is
that the button in the center changed to red. This is a good visual
indicator that you are about to take a video
instead of a photo. When you push that red
button in video mode, it will begin recording and
the button will change to a red square to
indicate that pressing it again will stop
the recording. Let me show that to you. Pressing that red
square stops it. To the left of this
is a small square that takes us to our camera. Roll right here where
we can see our videos. And to the right of that is a button with two curved
arrows in a circle, which will switch
between the front and rear facing cameras. There's me and then
we switch back above. The camera modes are four
numbers on my screen. You may have
different numbers or less numbers based on
which phone you are using. These essentially
represent our zoom level, with one being the
regular main camera like we talked about
in the camera video. 0.5 is the wide angle, which will show us a lot
more of the shot here. Three is the telephoto
zooms way in. Two is the 50% crop
on the main camera. It's not really
changing cameras there, it's just doing a 50%
crop on that sensor. Continuing up, you'll see this main area with these rule
of Thirds crosshairs here. This is the viewfinder that
you've been looking at this whole time
and this is where you'll see what you're
actually going to capture. The rule. Third set up can
be really helpful because it can help you know where to place your shot when
you are framing it up. Now the thing that
you can do within this area is tap to go ahead
and set your focus point. So if I want to focus right
there, I can tap to set it. I can also swipe up and
down to my exposure. Or swipe down to
lower my exposure. You can see the little sun
going up and down there. Now, the iphone tends
to do pretty well, setting both focus and
exposure for these videos. So I don't use that a lot, but it's good to know that it's there just in case you need to. This brings us to the top
of the screen where we have access to some quick
settings up here. These can change depending on
which video mode we are in. Currently, we have the
flash option up here, so we can turn the
flash on and off Pros option because we
turned that on before. So we can turn that on or off. You can see that
it has to change a little bit when you do that. And there's a little chevron which we'll come
back to in a second. Then there's our
Action Mode button, which we can turn on and off. Remember we'll talk more
about all of these later, and of course our
resolution and frame rate. So you can see we can
change between HD and four K and 30-60
on our frame rate. Remember that here when
we say HD that means 108 P. Now the little chevron will open up settings
along the bottom. Some extra menu options here. These can change depend on
which video mode we're in. So don't ask me why
is Chevron at the top opens up a menu on the
bottom. I don't know why. It doesn't make a lot of sense, but it's good to know
that it's there. Unlike with photos where
there are a lot more options, this sub menu for
videos only gives you settings that you already had access to elsewhere
on the screen. So it's not all that
useful most of the time, unless you just find it more convenient to have that there. Maybe your thumb can reach it easier or
something like that. But you can see we have
flash exposure turn on pro res and the
action mode there. And that's going to do it
for the interface tour. In the next video,
we're going to go ahead and start talking about
actually shooting the video.
8. Video Basics: All right, now that we know
about the app interface, it's time for us to actually
start shooting video. So we're going to start here
in the regular video mode. But I want to talk to you
about what you should think through when
you're starting a video. Now you can see I
flip horizontal so that you can kind
of see how that looks and how some of the icons have changed,
but not all of them. You can see that
Prores is still in exactly the same orientation
that it was before. So when you are shooting video, the first thing that you want to think about when you
get in there is, am I in the right mode? Right now I'm in the
standard video mode. Cinematic, of course, is going to give me more of that
blurry background. Slow mo is going to
allow me to slow it way down like we talked
about in the settings. I now can change this 240
at 07:20 or 120 at HD. And time lapse which will essentially be the opposite
and will speed up time. So you really want to think about that mode that you're in, the standard video
mode is going to be your best bet
most of the time. But sometimes you'll
want to be doing something else for
specific reasons. You want to make
sure that you're in the right mode for
the settings that you need as far as your frame rate and your quality are concerned. Because of course here
I can only go up to 60, I can't go up to 120
using my regular mode. Also, remember that
pros is over here. Pros is going to, of course, take up a lot more space, but it's going to bring out
a much higher quality video. So you just want to be
thinking about that. Want to think about
your zoom level right here. My zoom level. It's not great for the shot
that I'm trying to get. I'm going to go ahead
and check what it would look like at two and at three. Now at three, that seems
to be much better for the panning shot that I'm trying to get across
these figures. I'm going to use three here now. Is three the best
camera? No, it's not. But it's the best camera
from you right now, because it can get
the shot that I need. Let's go ahead and let's just
take a shot with this now. To take the shot, you're
just going to press record, making sure that you have
all your settings in place. I'm on a tripod right now, so I'm not worried about
turning on an action mode, but we'll talk about that later. I'm not going to use the flash. The flash is really not very
useful most of the time. We're just going to go
ahead and hit Record now. And then we're just
going to a panning shot and then hit the
square two. Stop it. You can always go back to
play back through that. Remember, it doesn't
matter if you have some empty space at the
beginning or end of your shot. In fact, that's pretty
good. You can always cut that later when you are editing. Okay to go back, we'll
just hit the back arrow. Sometimes you will
want to take a video, but you won't have time to go through all those
things that we just did because sometimes something is happening and you
need the video right. Then in that case, you'll
end up a photo mode. And what you want
to know is that you can start a video really quickly by just sliding
your camera button. So you just need to
take your photo mode and just swipe up
or to the right. And then that's
immediately going to start taking a video. That can be a really useful
trick to know as well. A couple of other things to note here are the rule of thirds, if I in video mode
and I zoom in here, if I want to put this guy
right on the rule of thirds, I just line that right up there so that he's right on
that rule of thirds line. Now a couple of other
things to note. Now I'm on a tripod, so I've got things pretty
stable right here. But when you're not on a tripod, even if you don't
have this action mode button turned on here, it's still going to
stabilize your footage. So the iphone is
always stabilizing, but if you are in action mode, it will apply even
more stabilization. So that's the basics of shooting
video with your iphone. And in the next video,
we're just going to go ahead and talk about
some considerations when you're thinking
about shooting in vertical mode or
horizontal mode.
9. Orientation: Okay, so now that we know how to shoot video on the iphone, I want to talk to
you about one of the most important
considerations you're going to make every
time that you shoot. Before we go into all of the different specialty modes
that are available to you, this consideration is
whether you're going to shoot horizontal or
vertical orientation. This is really important because it changes dramatically what your camera sees and where the footage is
going to be useful. So just to illustrate
this for you, I'm currently in a horizontal, or what we call
landscape orientation. I'm going to switch this
to a portrait orientation. I am going to swap this. And when I go over here, the field of view that you
can see changes a lot. So let's swipe this
back over and you can see that now
you can kind of see the legs of this stool
that's holding it up and more of the up and down, which might not
be what you want. So you really want to
think about that as you are working on your videos, because it's really
going to change what you are going to get out of it. And when you're shooting video, the thing to remember
is the only stuff that matters is
what's in the shot. It really doesn't matter if
these legs down here exist. If they're not in
the shot, right? You can use whatever
you need to try and support your shot
outside of the frame, But what's in the
frame really matters, Whether you're
shooting horizontal or vertical, really makes
a difference there. Let's pop this back and you can see that little level
bar right there. I'm just using that to
level off my shot here. That horizontal
orientation really makes a big difference in
what we can see. It also makes a
really big difference on where this footage is useful because different places cater to one of
these or another. Now of course, you
can always crop your footage later to
change its aspect ratio, but when you do that
you're going to lose lots and lots
of resolution. Not normally
recommended. If you can, you want to shoot
in the orientation that you're actually
going to end up using. The biggest consideration
with this is what you're planning to do with the
video after you shoot it. The end destination
needs to be considered. People view things
on their phone. They often view them in vertical
or portrait orientation. Whereas when people
view things on a TV, computer or tablet, they're usually viewing them in landscape or horizontal
orientation. This has led to
different platforms working in different
types of videos. If you're taking a cute
video of your child or pet to send someone
via text message, you'll probably choose
a vertical orientation. But if you're shooting a
scene for your short film, you'll probably do
it horizontally. The second consideration is what you are trying to capture. Maybe you're trying to capture
a view of something that requires you to see
wide on both sides. So you can see how
much wider I can get here in the wide with
my super wide lens. Then if I go ahead and
if I rotate this here, pretty much my field of
view is still the same. I'm just getting more
on the top and bottom. You really want to consider what your subject is and what's
going to work best for it, as well as which platform
you're going to be in. So keep in mind some common
orientations for platforms. Short form video like
Tiktok, Youtube shorts, and Instagram stories and
reels are all vertical. Whereas longer form video
like regular Youtube videos, Vimeo, short films, and feature films are
normally horizontal. So just make sure that while you are filming on your iphone, you're being conscious
of which way you're holding the phone based on the end result
of your footage. Now it's time for us to get into some more specific modes
for filming on your iphone. So we're going to go
ahead and take this outside and get started by
talking about action mode.
10. Action Mode: All right, now it's time
for us to start talking about the modes you have
when shooting on the iphone. And the first one
we're going to talk about is action mode. Now the iphone does a lot of stabilization to start out with, but when you turn
on action mode, which is done here by pressing
this little action button, it's going to actually do a
lot of extra stabilization. So we have my daughter here and we're going to see what
action mode looks like. Now you would use
this when you're like running along a subject, trying to keep up with them. It's really you that's moving while they're moving as opposed to if you were just filming her move without
being next to her. You wouldn't need action mode. You could just be stabilized
right from where you're at, but when you are moving
as the videographer, you want action mode
on to stabilize it. So we're going to film
her running along here and going up
the monkey bars. Al right. Are you ready? Yeah. Okay. Let's go. Okay. So now we'll go
ahead and we'll take a look at that footage shot with action mode so you can see how stabilized it is even though I am
running behind her. This footage is really
nice and smooth. Now, one thing that you want
to remember is that you need plenty of light
when you are doing this. And sometimes if you turn on an action mode and
it's too dark, it will tell you that you
need to get more light. Now, right now we
have an overcast day, which is really
great for filming. And there happens
to be enough light because we're outside
that it can pick it up. But if you were
inside, it might tell you that you needed to turn on some lights in
order to do it, because it needs a lot of
light to process this, Okay, So that's action mode,
which is really, really useful when
you need to do something really smooth where you are running along or moving along beside
the participant. One of the things to note
about action mode is that it's not a separate
mode on the mode dial, You turn it on by
pressing a button, But it's not available
in all modes, so you really want to be on
the main camera for this. Now, in the next
video, we'll go ahead and we'll talk about
cinematic mode.
11. Cinematic Mode: Okay, so now we want to
talk about cinematic mode. Cinematic mode is what happens when you swipe up if
you're holding it horizontal or swipe over to the right when you're
holding it vertical. So let's go to
cinematic mode and we're going to go ahead and
show you how this works. Cinematic mode basically works
a lot like portrait mode. When you're doing photography, it's going to blur
out the background. So you can see here
that it's focusing on her face and it's
blurring out the background. Now you can change focus. Say I want to focus on
this swing set over here. I could tap over there, and it's going to change focus there. And then she's going
to go out of focus. So this really makes your
shots look more like a movie, more like they would
do on a movie set because it gives you that
nice shallow depth of field. Now you'll notice you only
have two lenses here. You have the one X
which is normal, and the three X which
is super, super close. So then we can really
see her up close. But let's go back to one X, okay, And let's focus
in on her face. Now, when you tap
to change focus, that's called pulling focus. And it really makes your
shots look professional. So you can see I can pull focus
to these trees and then I can pull it back to her and
I can do that wall filming. So let's go ahead and
see how this works. We're going to go ahead
and press record. And if we wanted to show her, we could just do a nice
pan around her here. And then if we wanted to
pull focus to this tree, we could do that,
focus over here. And then we can pull
focus back to her face. So you can get some
really nice shots using this cinematic mode to focus in on your subject and kind of blur
out the background. Another thing to note here is if we switch this to four K, we can then change this
to 24 frames per second. 24 frames per second is what's used on a lot of major
motion pictures. So it's really nice to have that option if you're working on a short film with your iphone
or something like that. You'll also notice this
option, this is the F Stop. This is how much background
blur you're going to get. So if we go look at her
here and we move this up, the background is going to
come more into focus as we raise our F stop up so you can see the
backgrounds more in focus. Whereas if we go all
the way down to two, it's very out of focus. And that's basically what
cinematic mode is for here. You're going to be able to
get those nice shots with that blurry background and
it's a really nice feature. It really ups the professionalism
of your video shot. On iphone, you will notice that there are some features
that are available, like you can't shoot
action mode here. That's because
cinematic mode already requires a lot of
light to make it work, so there just isn't
enough light for it to do cinematic mode and action
mode at the same time. So in that case,
you're going to have to choose which one
you're going to use. And making films is all
about making choices. Okay, that's it for
cinematic mode, you will need to take a shot with cinematic mode
for your project, so make sure that you
get comfortable with it. And now we're going to go ahead and move on
to slow motion.
12. Slow Motion: Okay, now it's time
for us to talk about another mode here on the iphone, which is slow Mo,
short for slow motion. So let's go ahead and swipe
up to get to slow motion. And we're now going to
shoot in slow motion, which means that our frame
rate options are different. If you look over here
at your frame rate, you're going to see
that you have HD at 01:20 or we can
change that to 720 at 02:40 Now one of the things
to note is that if you enable the high efficiency
video Kodak in your settings, then you can get HD at 02:40 but you have to be using
that HEVC video codec, which is a little bit more
difficult to work with sometimes in post
processing, okay? So, slow motion
will start out with the very beginning
being at regular speed, 30 frames per second. And then it will slow it down to whatever you have it set to. In our case, it's
going to be 120 at HD. Now remember when you play back 120 at 30 frames per second, that's going to be
four x slow mo, because 30 times four it's 120. So let's see how this
works in practice. We're going to do a slow
motion video of her, Okay, go ahead
riding this horse. So we're going to do just a few seconds of that
and then stop it. Now when we go back
and we look at it, it's going to be slowed down. And it automatically
slows it down. So you can see we're getting
that nice slow motion there. As she goes back and
forth on the horse. Remember that it's automatically
already slowing it down. If you were shooting
on a regular camera, you would need to slow
that down yourself. But the iphone automatically slows it down and it gives you a little speed ramp at the
beginning and at the end. Note that you have three
lens options here. So you can go super wide, you can do the regular wide, or you can do the very close up. Number three, okay? So those are your three options in slow motion and
that's pretty much it. You can't do action
mode in slow motion. You just have those
three lens options. And you do have the
option to use the flash. But again, I wouldn't do that because I don't really
like the flash here. So that's slow motion. In the next veo
we're going to go ahead and talk about
the time lapse.
13. Time Lapse: Okay, so now it's time for us to talk about
the last mode here, which is the time lapse mode. So we're going to go
ahead and time lapse the sunrise because that's a really great option for taking a time lapse because
it's something that happens over an extended
period of time. But you won't want to
film the entire thing in real time because that would take too long
for your video. So I'm on time lapse, which is the last mode
after slow mo here. I'm just going to time
lapse the sunrise happening here. So
sunset or sunrise. Great things to do
also like movement in a car or something. A
great thing to time lapse. So let's go ahead and
start this and then we'll see what we get
at the end of it. So one thing to kind of
know about time lapsing on the iphone is that it's
not very like settable. There's not a whole lot that
you can do with it in terms of actually adjusting the
settings as it goes along. It's going to take
a lot of photos, and then it's going to
go ahead and adjust the frame rate after
you're all done with it, in order to kind of keep it into a reasonable
amount of time. You aren't allowed
to manually set up the interval for taking a photo like you would
be on a regular camera. Basically, you're
going to set up a time lapse and then you're
just going to let it go. Now another thing
to note here is time lapses work best when
you are using a tripod. So I have the phone
on a tripod here so that I'm able to steady as
it's taking the time lapse. So that really works best, particularly if the time lapse doesn't involve you moving. It's a little harder to do
that if you're like doing a driving time lapse or hiking time lapse or
something like that. Okay, So we're just going
to let the time lapse run. Now you can see that the only
controls you really have while the time lapse is
going is the stop button. So you can watch as the
little wheel moves. But really that wheel doesn't actually tell you when
the photos are being taken because it's taking a lot of photos and
then it's going to figure out how to put them
together after the fact. Which does mean
that it might take a little bit of processing time. So of course, I'm
not going to make you watch this all in real time. We'll just skip ahead and I'll show you what
we got from it. Okay. So we've been running for just about 20 minutes
here on the time lapse. So we're going to go
ahead and stop it now. And all you do to
stop it is just press the little red square. Okay, now it's stopped. And we can go ahead
and watch that in playback right now,
check this out. Let's just look at how
long this is here. This is about 20 seconds long. That's good to note because the iphone will
almost always try to make your time
lapses come out to be 20 to 40 seconds long, depending on how long
you've filmed them for. But it's important
to know that they're always going to be coming back at 30 frames per second
no matter what you do. It's going to be a 20
to 40 seconds and it will always play back at
30 frames per second. A couple other things to
note here is that you have all of your different
focal links here. You have super wide regular, the two X crop and then the
three X telephoto lens. You can use all of
those in this mode, but those are really the
only settings that you have. If we hit our little
menu button up here, the only thing that we have
is an exposure control, and that is the last
mode here on the iphone. In the next video,
we're going to go ahead and wrap up the course.
14. Next Steps: All right, I really hope
that you've enjoyed learning how to use your
iphone for video. And I hope that this has helped you to improve
and helped you to feel more comfortable shooting
video on your iphone. Now let's talk about what
your next steps might be. Well, the first thing
is that you need to practice more if you haven't
completed your project, make sure that you do complete your project for this course and upload it to the
project section so that I can see it and I
can give you feedback. The next thing, if
you haven't already taken my iphone
photography course, you might want to
take that as well. Because that goes
into how to use your phone better
for taking pictures. And so if you're taking video, you're likely going to want
to take pictures as well. So you might want to go ahead
and check that course out. Lastly, this course
did not deal with the theory of videography
really at all. We didn't go into how
to get the best shots, and that's something that
you might want to learn. There are lots of courses
on videography here, on skill share that are
not specific to phones, but can teach you the
theory behind the shots. But if you are interested
in having a course specifically on how to apply videography theory
to your iphone, go ahead and let me know
that in the discussion tab. And if there's enough
interest, I may be able to develop a
course on that as well. I can't wait to see what you're going to make on your iphone. And I will see you
in the next course.
 Ben Nielsen, Good design is the beginning of learning