Transcripts
1. Intro: Hi, my name is Ada. I've been a one line illustrator and director of social media
for the past four years. I have been using
Instagram since 2011 and have been running my
business there since 2018. In the last three months, over 200, 000 people saw, liked, or interacted with my art
account on Instagram, all because I started
making reels. Instagram is a powerful
tool for artists, but growing a solid following
and keeping up with the changes in the algorithm
can be challenging. Instagram reels give you
the opportunity to showcase your work and get in front of people who don't
even follow you yet. I'll show you what reel styles are working for artists
like us out there, how to make these reels, and how to keep an eye
out for the reels that have the most potential
to make you go viral. If you're an artist and you're trying to
grow on Instagram, this is the class you
should be taking.
2. Project: For this class, we will have four main projects instead of just one big one. We will be creating four
different reels together, following four
different reel types that serve four
different purposes. You can follow along and create one like the
one I'm creating, or use it as a guideline to create your own in
the same style. We will start by understanding what Instagram Reels
are and how they work. Then we will start exploring
reels that will help us showcase new art collections
or your most recent artwork. After that, we will analyze
reels that help us promote a course we're teaching or show how much we know
about our art style. From there, we will move on to reels to help us build
a solid community. Finally, we will end the
course with reels that wow the viewer enough to
get them to follow you. This class is made for
people who have already used Instagram and are looking
to get more followers. I'd recommend intermediate and experienced users to take it. For this project,
you'll need the app, Instagram and an
Instagram account, the app, Videoleap,
and your smartphone. Both these apps are free on the App Store and
in Google Play. Download your apps, prepare your creativity and see
you in our first lesson.
3. How do reels work: Reels are a relatively
new feature of Instagram that is an entirely separate category from your feed and your
Instagram stories. Instagram reels live
in a separate tab and they are shown
to anyone that, a, likes the sound you
use on your video or, b, likes content like
the one you produce. In this case, art. People falling on their any of these two categories will
be shown your reels, whether they follow you or not. Think of it this way. All 1.3 billion people on Instagram are in a gigantic
theater and you get 30 seconds to show
them what you got. In addition, reels have a longer exposure lifetime than any other type of
posts on Instagram. Stories are visible
for 24 hours. Posts are relevant for a few hours before they
get buried by newer posts. But reels, they are shown to people for weeks on end
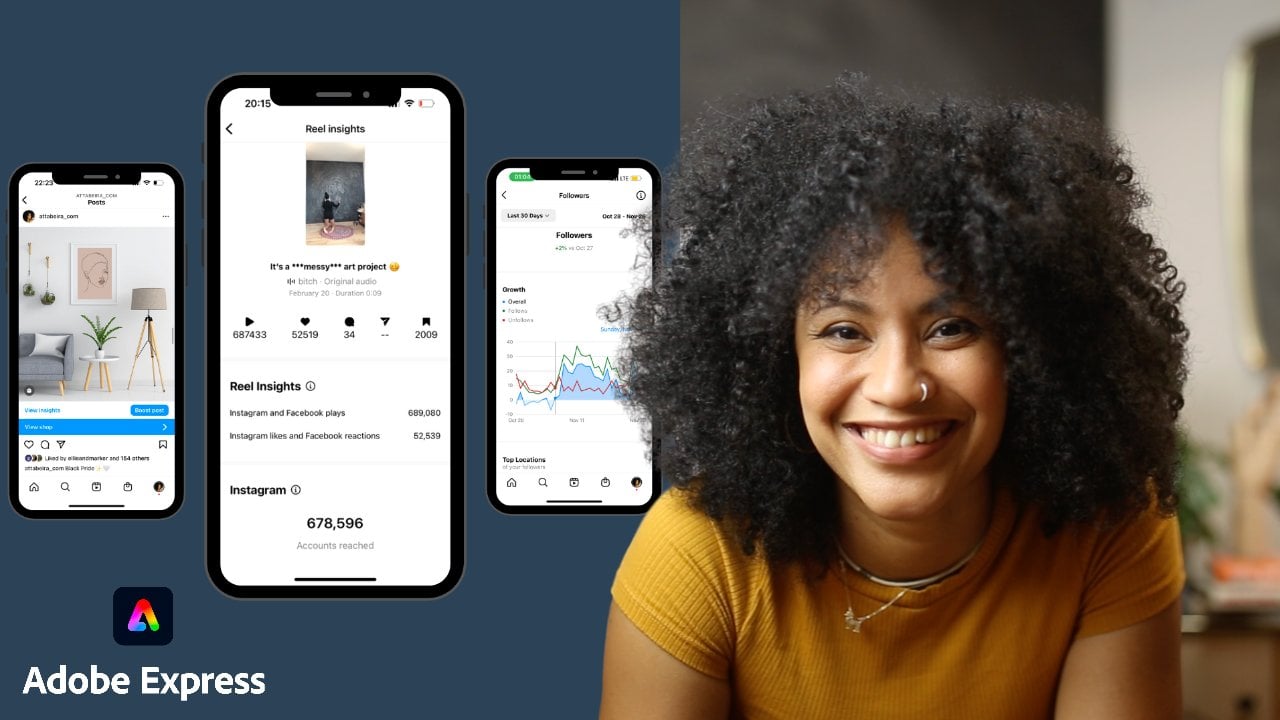
if they are performing well. Take this reel for example, I posted it on December
25th and people were still discovering it and
commenting it on January 15th. That is three weeks long. The last comment on these
reel was one week ago. That is, let's say, the last week of January. So if I go to my insights and I check the last 25th of December when I posted this reel to the last week of January. One week ago, let's say this was on the
24th, so one month. I grew a total of 2,261 followers just
in the last month using that reel that was engaging people
for a whole month. This is major
because in the past, you will most likely not growing because whatever you post it on your feed was only seen by the amount of
people who followed you, or the people who knew
about the tags you used and saw it on
their tag section. Tagging is extremely
complicated. Hashtags are too reliant on keywords and language matching, whereas music and
interests are universal. Now that we've discussed the
basics of how reels work, let's move on to what
makes a good reel. If you have any questions on
what we've discussed so far, makes sure that you write it on the discussion session below so that I can answer it.
4. 1...2...3... Reels!: Virality cannot be predicted. If going viral had a recipe, then everyone would be
going viral by now. What can be done though, is follow best practices that guarantee more exposure
for your Reels. If you have taken any
other classes with me, you would know that
I love recipes. Here are the top
three things you must consider before
posting any Reels. Number 1, sound. Choose your sounds wisely. We all have an urge to
choose music that we like or think fits best
with the mode of our video, but in this case, that is not the only
thing we should consider. The more people have used
the sound, the better. The more viral the sound is, the more people the algorithm
will show your Reel to. Viral sounds are more
liked and therefore, any content with that sound
will be pushed out much more. One thing I love to do
is go to my Reels feed, and if I like a sound, I check if it is
viral by tapping on the song and seeing how many Reels have
been made with it. Anything above 5000k, I save so that I
have a nice pool of sounds that are viral
to choose from. This way I have several options when I'm creating a new Reel. The way that I save
sounds that are trending is by going
to my Instagram, going to my feeds of my Reels, and putting the sound on. [MUSIC] This one sounds okay, looks like I can match
it to many things. I click on the sound button. This one is actually
pretty good because it has about 20,600 Reels
done with this sound, so it's pretty popular. You Right is trending. This one is 130K. I definitely had
it saved already. The way that I go to
my viral sounds is by going to my hamburger
menu here on the right. If I go to saved, I have a whole tab that's
just saved audio. Here are all the songs
that I have saved. Whenever I don't
know what song to use for a Reel that I'm creating and I
don't have enough time, I just go to these ones
and I know that I'm going to use one that's
already trending. Number 2, time. How much production
time you want to put in it or can put in
when creating a Reel. Spending dead hours or
days into producing a Reel does not guarantee
that they will do better than a quick one. Posting a Reel a day is only doable if you
can post them easily. If you try to make a
full-blown production, every time you make a Reel, then it is less likely
that you will be putting one out every day. Number 3, purpose. Choose a Reel type that goes
with the goal for that post. If you want to showcase
a new collection, then uses scrapbook style Reel. If you want to promote
your next art course, then do an educational
type Reel. If you want to
create a community, then do relatable
Reel and if you want to show your skills, then do a demonstration Reel. I will be going back to this three concepts for all the Reels we will
create in this class. You will learn how to keep them in the back
of your mind and how they will become second nature when
creating them by yourself.
5. Scrapbook Reels: This style is great for when you don't have
time to paint anything new. This is great for
when you're feeling uninspired or you are
simply too busy with life. This is my go-to style when I only have 10-15 minutes or so. Here's how to do it.
I go to my camera, and I start recording
vertically. As you guys can see, I have a white piece of paper, but is exactly the same
paper I use for this piece, which is the piece
I want to show. It's the same size
and everything. It's exactly the
same type of paper. I'm going to put this here, and I'm going to record myself, my hand going in and snapping. I want to start recording. Sorry. One more time. I'm going to go in and snapping. Now, I'm going to
stop the video, put my artwork exactly
where the other paper is, in a way that it doesn't show, and then I'm going to record
again and I'm going to snap. I'm going to stop it. Now, I'm going to
go to Instagram, and I'm going to go
to my saved sounds. I'm going to go to
my hamburger menu on the top right corner, I'm going to go to saved sounds, and I'm going to
get something like this one. Let's use this one. I'm going to use audio, and I'm going to
add my first video. I want to add it and I want to
cut it to the moment that I snap my fingers, but not the end of the snap, so the beginning of this snap and that. Then I'm going to to add
it, and then I'm going to go on the plus sign again
at the bottom left. I'm going to add my second video where I'm going to cut to the moment that
might snap ends. This will take really
no time to do. Then I hit "Next",
I write a caption. I usually have my
hashtags in the note, so I just copy paste
them from here. Select all, copy, and I paste them here. Let's say a golden girl,
I'm going to call it. I'm going to separate my
hashtags with a period and then I'm going to paste them
here and I'm going to change my cover, something attractive that
shows the actual art. Something like this. Then I'm going to share, and that would be it. This style is great to show a lot of art
pieces in the same reel. It is also great
for when you have new collections or flash sales. Moving on to the next style.
6. Education Reels: [MUSIC] The following type of Reels can also be made quickly and they're the
easiest to produce. You can just record
yourself talking or showing a tip or trick you
use in your art style. This Reels look a lot
like a story and they are often liked by people who can
become potential students. Let's make one together. The way I create
educational videos for Reels is the following. I've already set
up my camera from my phone on top of
my iPad screen. I usually record my
iPad screen and then cut it but that's very specific to people who use their iPad as
their drawing tool. I am not going to get
into that right now. If you are teaching something
that's on a screen, I suggest you
record that screen. But for the sake of education, for the sake of this course, I am going to record this
Reel directly with my phone. As you can see, I've already made sure that my phone
is recording vertically, not horizontally because
that's the aspect ratio that Reels use and I am
going to get started. For this Reel I'm going to
be recording my own voice. I'm going to be using the voice that's recorded in the
video for the Reel, so I am not going to just be talking randomly behind the scenes because I'm not going to
have that muted. I'm actually going
to be giving the tip with my voice so that I
don't have to show my face or so that I don't have
to do extra editing in the part of actually
making the Reel. I want to keep these
processes as short as possible so that it's
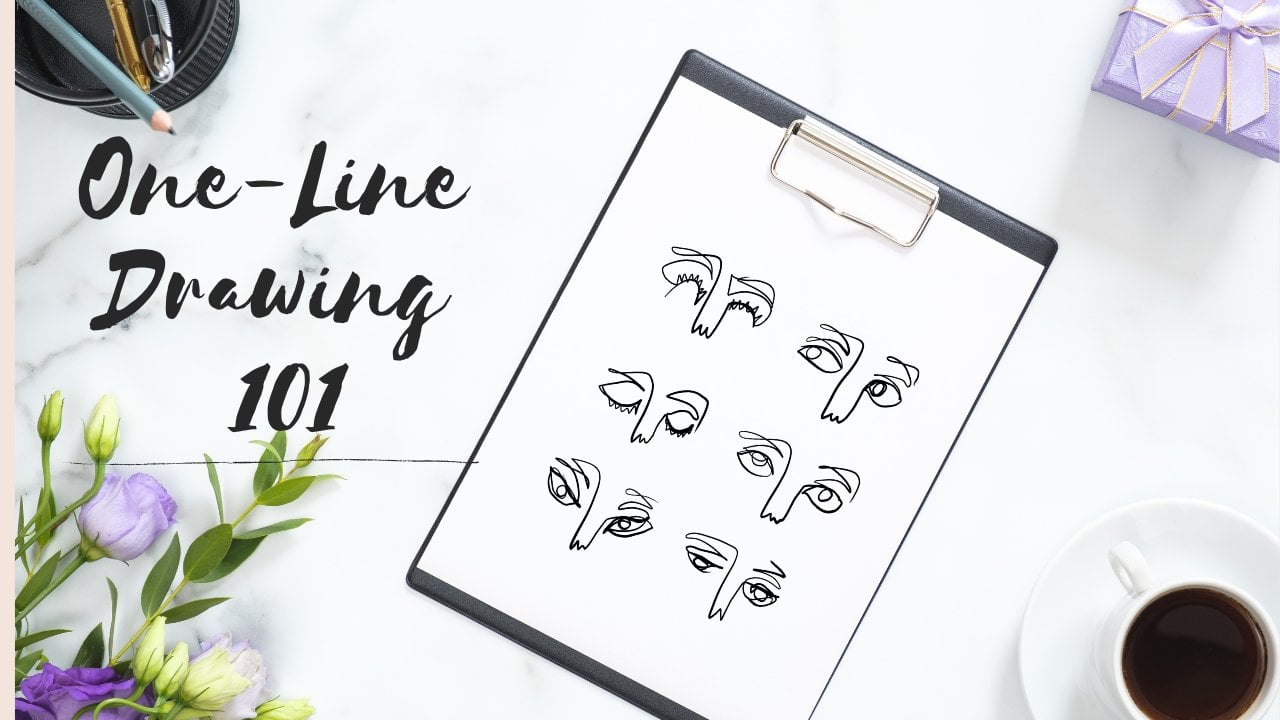
really easy for me to create Reels on a daily basis. I'm going to start recording. I'm going to give a tip on
how to do one-line drawings. The line in the
one-line drawings more smooth in the appropriate. I'm going to record myself now, I'm going to start
recording there. If your line looks very jittery when you are trying
to do one line on Procreate, it's because the
stabilization is very low on the brush settings. You just have to go to
Brush Studio stabilization for whatever brush you're
using and in stabilization, you just have to toggle that and immediately you
will see that's easier. Look how straight
that line looks as you changed the
stabilization. You're welcome. Then I just go, I have that video saved. I am just going to
go to Instagram. I'm going to again,
same process, go to my sounds saved. I'm going to go to my
pool of popular sounds and I'm going to
choose this one. [MUSIC] Yes, pretty good because this one doesn't
compete with my voice so much. I'm going to use this audio. I'm going to upload this video [MUSIC] and I'm going to just check that the music goes all the way
to the end of my video. It does, so I'm going to go Add and I'm going
to hit ''Preview''. In the preview you
can actually click on the Music and [inaudible]. It's because the
stabilization is very low and then just hit ''Done." Maybe you want to add
some texts, for example, how to fix your
jittery one line art, that's much better because
it's not condescending. How to fix your jittery one line art. Always this is my
signature sticker, so I'll put that here
and then I'm going to next and that's going to be it. Like you guys know, I'm just going to
put in a caption, put on my tags and publish. This is a great style to
show people how well you know your craft and how
experienced you are at it. Use this type of Reels to
promote a class you're going to teach or to get people learning the style that
you are working with. This is great for upcoming
artists and people who want to connect and want to become as good
as artists as you are.
7. Relatable Reels: These reels are the reels that show viewers you understand
exactly how they feel and the struggles they have to face as fellow artists, commissioners, or buyers of art. These reels tend to be funny, cheeky, but above all,
they are relatable. Show your messy studio, how many times you've failed before getting to that point, mistakes you often make, etc. These reels show you are human. Here's how I do them.
The reels that are good for relatability are
usually not sounds. They are people talking, or inviting you to do something. I'm going to be using this one. It says, "Hey artist,
I've got an idea. Show us what your workstation
looks like and be honest, don't clean it beforehand." Exactly. I'm going
to choose that one. I'm going to use this audio, and I'm just going to
show my workstation. I'm literally just going to pan my workstation like this
with the recording, so 3, 2, 1, record. Sorry, I have to delete
that and start again. 3, 2,1. "I've got an idea. Show us what your workstation
looks like and be honest, don't clean up beforehand." I'm going to go to Preview. "Hey artist, I've got an idea. Show us what your workstation
looks like and be honest, don't clean it beforehand." "Hey artist, I've got an idea. Show us what your
workstation looks like, and be honest, don't
clean it beforehand." I'm going to write some texts like art
studio/recording studio, and of course my little, "Hey artist, I've got an idea. Show us what your workstation
looks like and be honest, don't clean it beforehand. Hey artists, I've got
an idea." That's it. Write your caption, write
your hashtags and publish. These reels are great for connecting with your followers and building a loyal community, people who appreciate your work and are more likely
to support it. This style lets us connect.
8. Demonstration Reels: These reels can be
quick or complex. Therefore, showcasing
your skills and make you seem
great at what you do. These are show off reels
and they're necessary to keep the magic and
make you fit the deal. This is for you to be the
artist people look up to. Let's learn how to do them. Going to get right to it. As you guys can see, I've
already set my canvas and I'm going to be
just drawing here. I'm literally just going
to record myself drawing. Just make sure, again, I've made the mistake too many times to record vertically because that's the
ratio used in reels. Let's get started. I make a video drawing
like I just did now. It's usually very long. So I look for my app, Videoleap. They have a paid version, but they also have
a free version up to one minute and a half, which is great because reels don't last more
than one minute. I usually just go here, get my drawing which took me a minute
to draw. I select it. I change the speed to half
the time for example. It goes just much faster, so a video that was one minute, now is 30 seconds. I'm going to export it. I going to save it. Now, I'm going to go to Instagram, choose a sound from my library, and I'm going to use this audio. Then I'm going to put the shortest version
which is faster and I want to get rid of the time that I'm
not drawing at all, so I want to start when
the pen touches the paper. [inaudible] I'm
going to preview it and I remember to change the cover because usually the cover that it chooses the first frame which
is not exactly great. But for example, something
like this that's unfinished but sparks curiosity. Yeah, just hit done and share. Process videos with
complex techniques or displays of mastery,
work best here. Use them to wow and
convert people who like your reels into
actual followers.
9. Conclusions: Before we finish our course, I want to leave some
thoughts with you. First of all, you have
to stay consistent. Instagram reels are
great for growing, but if you don't do them on
a regular basis you can't pick up where you left off, meaning it's some sort of
upwards hill, I would say. If you stop going here,
you would go back down. You're going to have to
start doing all the efforts that you started with again. Every time you let it
go and start again, you're going to have to
start from the beginning. Second, use your insights. Inside each reel there is information about
how your reel is doing, how many people are watching it, those are the impressions. You have impressions, reach, and likes or saves, and you will be able to see an in-depth information of
how your reel is doing. Use that information to help you decide which reels that do best, which reels worked best for you. The third one is to not give up. Be patient. Rome wasn't built in a day. You are not going to go viral on your first reel or
maybe you will, but you have to stay open
and consistent because it takes really small
steps every single day, little effort every day. That's the most important thing. I'm really glad you took
this course and I can't wait to see you
again. See you soon.
 Attabeira German, One-Line Illustrator