Transcripts
1. Introduction: Social media, especially Instagram, is nowadays the perfect way to get your work out there and be seen by millions of people around the world. But it can also be really time consuming, overwhelming, and frustrating if you don't know how to use it to your benefit. You don't need 20,000 followers to get eyes on your work. If you're just starting out or you have a couple of 100 followers, you still can have success and get deals and commissions. Hi, my name is Lucia, and I work as a freelance fashion and textile designer, under the name Deinki. I'm originally from Argentina, but I've been living in Northern Germany for the past decade. I love helping brands develop token collections for babies and kids. Since 2018, when it fell in love with surface pattern design, I spend my days creating playful and colorful prints and patterns for apparel, home decor, and other industries. This class will show you how to make your Instagram presence work for you and your goals as a surface pattern designer. Throughout the lessons, you'll gain knowledge about how to invest your energy wisely on Instagram and show your work in a smart and creative way. You'll save a lot of time. Together, we'll go through how to set your goals for your Instagram profile, how to set it up correctly and present yourself and your work in a creative and professional way. I'll walk you through the different features that Instagram offers and show you with examples how you can use each of them to your advantage as a surface pattern designer. We'll also go through some of the best practices that got me good results as well as mistakes to avoid. Finally, I'll show you my process for planning your posts ahead in order to save you time and effort. Are you ready to get started? In the next video, I'll tell you more details about the class and the class project. So keep watching.
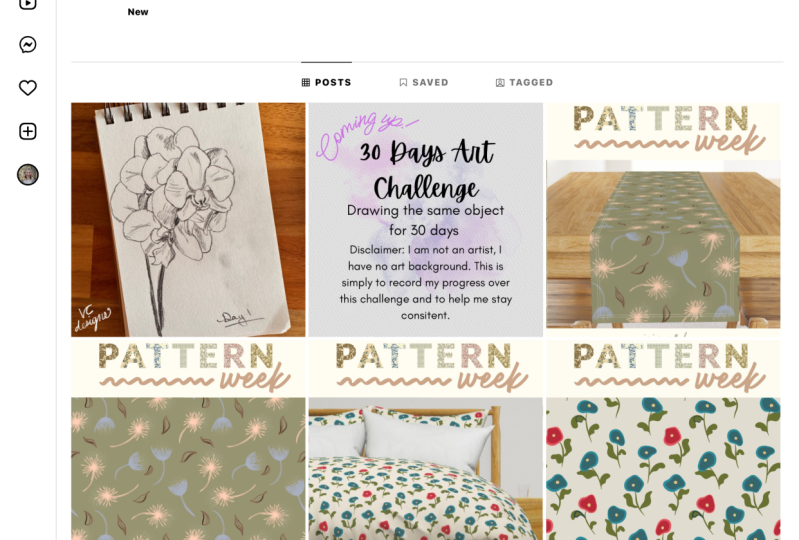
2. Class & Project Overview: The class project is to set up your profile and to plan and share nine posts for your Instagram feed. Studies show that a person decides in just a few seconds if they hit Follow or not. It's based on the first 9-12 posts of your feed and the way you present yourself in the bio. The class project consists of applying what you learn in each lesson to your own profile and creative work. By following the workbook, you'll complete the project by uploading a screenshot of your Instagram profile showing your bio and the first nine posts on your feed. Having a purpose always helps to go through with the plan. That's why I ensure this class will help you gain some clarity to start having fun showing your work and building a community on Instagram. Don't worry. We'll go through all that together in the different lessons. Your username, your profile picture, your description or bio, your website, then we'll set clear goals and your main purpose for using Instagram. We'll go through the different kinds of posts along with Reels, IGTV, guides, etc, and I'll give you some ideas for how to use them wisely as a surface pattern designer. We'll move on to the planning, where I'll show you my process and some tools to plan your posts, understanding how hashtags work. Next, I share some thoughts about giveaways, contests, and challenges, in addition to common fears and worries that we have as creatives about their work and suggestions on how to overcome. For this class, you'll need a phone or a computer, an Instagram account, your artwork, and the exercises from the workbook that I've included in the resource section. Remember to download the workbook before class so you can fill it up as we go through the lessons. Make use of the spaces for your comments or your own ideas. Are you ready to plan your content and kick some algorithm's butt? Let's do this
3. Setting Your Goals: Starting out, I watched so many classes and webinars about Instagram, but none of them really apply to service pattern design. With time, I took the useful tips from here and there and develop my own strategy that got me licensing deals, studio work in a beautiful and supporting community. I see so many talented artists and designers out there wasting time dealing and worrying about the algorithm, having fear about showing their gorgeous work and wanting to give up. I just want to tell you it doesn't have to be complicated, and the most important thing is to have fun and create. Let me help you by showing you how. In this lesson, we'll set the foundations for your Instagram account: your goals, your industry niche, and the posting frequency. Setting and acknowledging your purpose for the use of the app will facilitate the way you approach. Take a look at the workbook and go through the different goals. Which of these resonate most to you? Pick one main goal into secondary goals, at least for now. Of course, we want to do it all, but focusing on your main and secondary goals will give you clarity and bypass overwhelm. Also, if your main goal is to sell products, for example, your approach to Instagram and your content will be totally different as if your main goal where to show your creative journey. Your goals can change with time, and that's okay. If you feel the need to change the course, review your goals and plan your content accordingly. Do the same for the industry and market. I know it's hard to narrow those down, especially at the beginning when you want to try everything. You want your artwork to be an any kind of product, and you think you might miss out on big opportunities if you don't offer everything. But the truth is, when you try to listen for everyone, you end up designing for nobody. Imagine you go to the street and start screaming, "Patterns for everyone." But there are thousands of people, so much noise out there, so many other artists and designers screaming the exact same phrase. Do you think anyone is going to turn their heads? Now think about going into a room with, let's say, 100 people. You go in and you don't have to scream because it's not allowed loud anymore. You can say, "Hey, I know you're looking for this certain kind of patterns, Here are mine." How many people do you think will turn their heads? Now, for example, since I am also a fashion designer, it makes sense for me to go for apparel and textile: bolt fabric, home textiles. That's my focus, even though I'm open to other projects as well. I usually think about my skills. For example, since I'm not good at lettering yet, I should probably leave greeting cards for later. Tip, if you find difficult to pick the right ones for you, try crossing off the ones you definitely don't want to do or the ones for which your art work doesn't fit. As an example, here are a few of my favorite designs. Since they are pretty detailed, they would never work for a minimalistic brand. They are also quite playful and sweet. I know this one work for man. Trust me, it took me a while to learn in Lesson 2, but it's true. Besides, nothing will be written on stone, in fact, it may vary with time. Ideally, you should post once a day everyday, but that's not possible for everybody, besides not everybody wants to, and that's modern time. When you pick your posting frequency, choose the option you feel comfortable with and that it's doable for you. Consistency is key. Posting three times per week consistently is way better than posting twice a day for a week and nothing for a month, and then again, everyday. The content you'll post, the tone you'll set on your profile and on your feed would be directly affected by your goals as a service pattern designer, by the industry you decide to focus on, and of course, by your skills. Now that you have set your goals, narrow down to an industry and niche and pick a posting frequency, it's time to move on to the next lesson where we'll dive into your profile settings.
4. Setting Up Your Profile: Have you ever gone to someone's profile and wonder, what the heck does this person do? That's why setting up your profile clearly is so important. You'll be able to present yourself in a creative and professional way and attract the right kinds of followers and hopefully also the right clients. There are three types of profiles on Instagram, and each of them has its own special features. Personal: it's private, you can link to multiple Facebook pages and you can use music on your stories. Creator: it's more thought for influencers, you have a studio dashboard where you can see your insights, you get the feature shopping from creators plus profile labels. Business: you get the professional dashboard plus the Instagram insights, Instagram shopping, ads, promoted posts, contact options and action buttons, quick replies, branded content approval, by more than 10,000 followers, you get links on stories, inbox management, auto publish in some scheduling apps. My tip is to go for the business account, because it gives you a lot more features than the others, especially the insights are really helpful. Picking the right right and username. Please note that these are not the same and that you should leverage each one for your benefit. Regarding the username, you can go with the name of your brand, your studio, or your personal name. Just try to keep it simple since you may have to spell it, it doesn't recognize capital letters, so make sure it's clear and legible. On the other hand, the name field will do you a service as an SEO feature, so make sure this one is optimized with your name and searchable keywords. Here are some examples of other surveys about designers. They all have a very clear and well presented bio, stating who they are and what they do. They even added a bit of their personality and style there. You can also pick a category for your profile, go to Edit Profile, Category. Here you get a lot of suggestions and here you can search for something. Are you a small business a fashion or graphic designer, which category fits you better? Writing your bio: the bio on Instagram is like your personal pitch, squeezed in a 150 characters. It has to be clear to the point and ideally attracts the right kinds of clients, customers and followers. Another important aspects of the bio is a great call to action. What should the person do next? Should they contact you? Turn your email list? Let them know. You can and should update the call to action every time you offer something new. The bio in general should be updated if anything changes. Explain briefly what you do and who is it for, you can have hashtags, emojis, and symbol, but don't go overboard with them. Also, if you choose to use personalized fonts, just know that not everyone can see it. I suggest sticking to the normal font so everyone can see. Contact information: people can contact you over DM, that stands for direct message, but this is a great feature for Business profiles, add at least the email button, phone number, and address buttons may be a better fit if you have a physical store with your products or even an atelier. Links: Instagram only allows one link on the users profile, so you have to choose wisely. Link tree allows you to put a personal [inaudible] for you where people can see a list of different options and by clicking on them, they get redirected to the right place. Link in bio works in a similar way, only that you can set one link per post. [inaudible] links and your audience will already be on your website. There are several options for this. Pros: you can use different links for your different services, products, or blog posts. Cons: on the other hand, it might get messy really quick. Besides, the app has been down before and during that time, people couldn't access the links. These options are gray, but why drive people to a third party, if you can directly drive them to your website. Profile image: what's better as a profit picture, your logo or showing your face? Any option is good. I will recommend showing your logo only if you're a studio, a brand, or a team working together, but if you're an artist or solo designer, it's great to show your face. Pick a nice and friendly picture of you, a good light, a quiet background. Make sure it's the same picture you use in other social media accounts, so it's easier to recognize you. Are also a part of your profile and we will cover that in the next lesson. You've already explained who you are and what do you do in your own personal way, you've targeted your industry niche with specific keywords, you have a link to your website, you've provided additional ways for followers to get in touch, and you've shown your personality through your description and profile picture. Now that this is taking more shape, we'll move on to the next lesson where we'll get to know more about all the different posts and Instagram features.
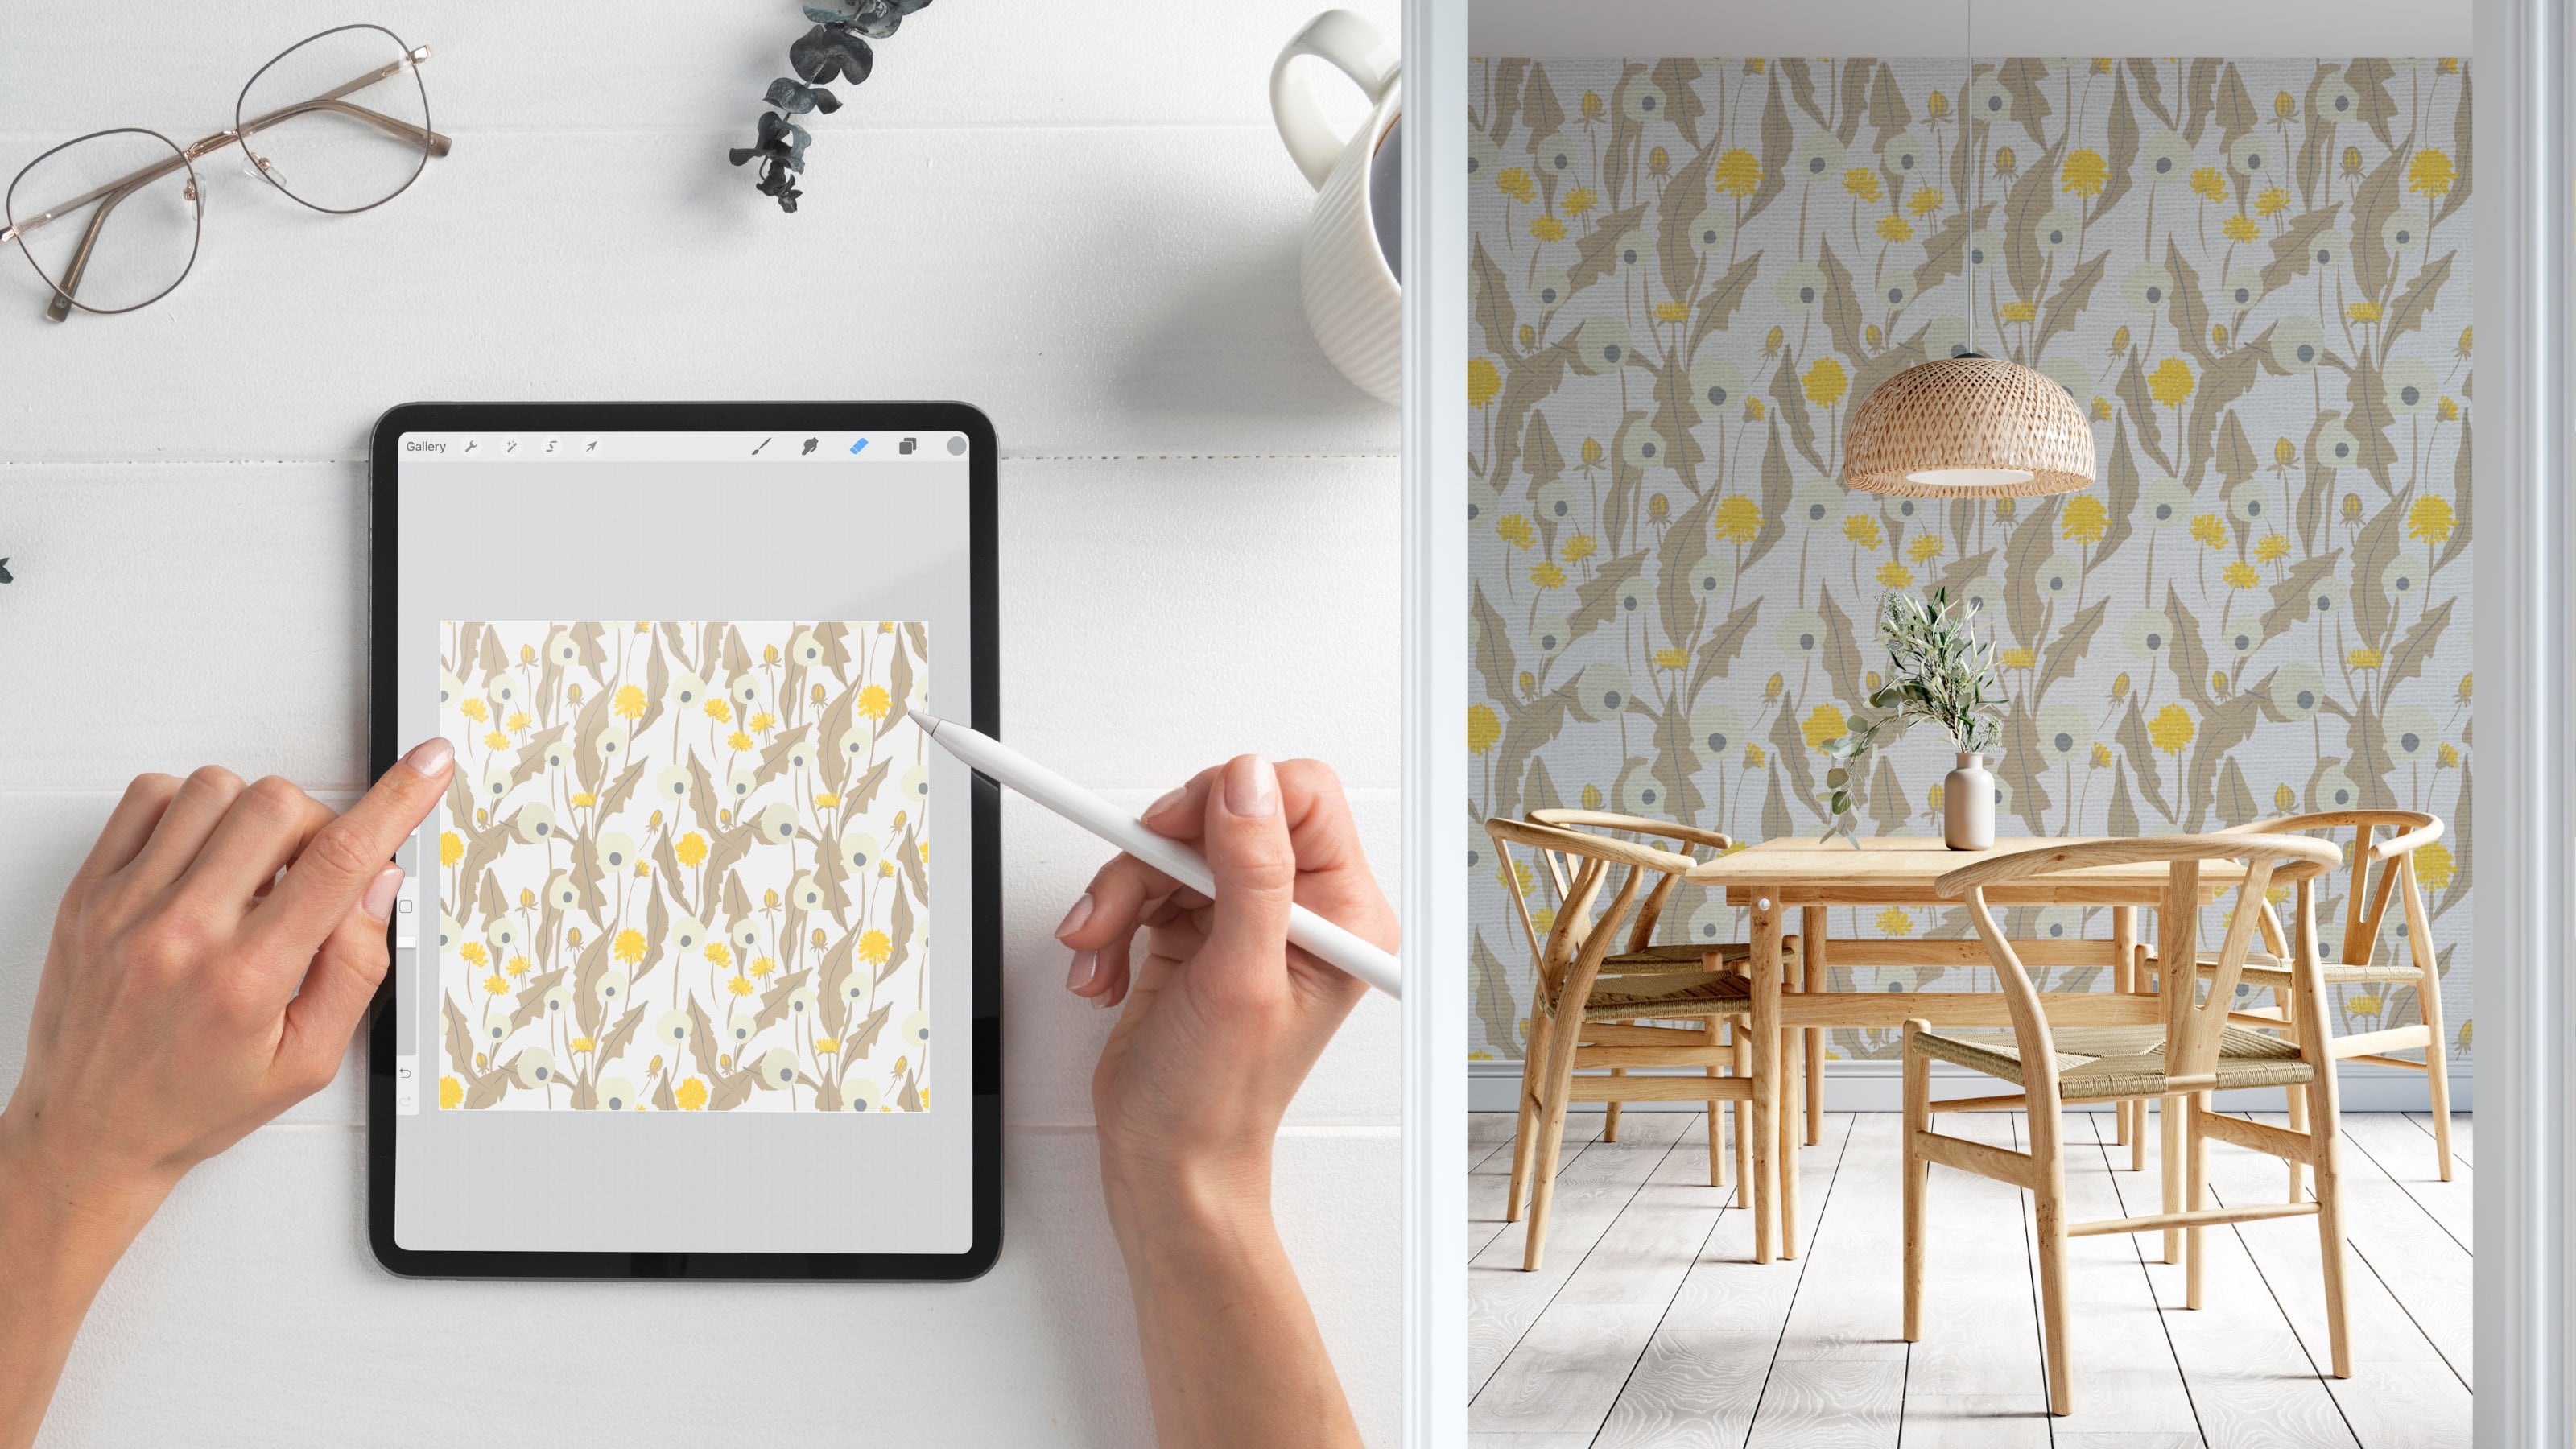
5. Knowing the Different Kinds of Posts: Now that you've set your goals and your profile with purpose, it's time to get to know the different features offered on Instagram and most importantly, how to use them as a Surface Pattern Designer. Feed posts. These posts will be visible in your main feed, and they can be a picture, a video, or a carousel made of up to 10 pictures, a video, or a mix of both. The goddess in the mix. Carousels have, in my opinion, great potential, and you can use them for many different ideas. You can post several colorways and have your audience pick their favorite. You can post the pattern on the first slide and show the products you offer with that pattern on the following slides. You can even offer your expertise with the tutorial carousels. Make sure you take the resources file to get a template for a continuous carousel. Stories are one of my favorite features on Instagram. You can post pictures or videos, but they'll only be visible for 24 hours. There are so many different options that really allow your creativity to go wild. For me, this is the place where it can get a little bit more personal, or you can show a bit more about your everyday life. Again, you don't have to show everything if you don't want to. There are also a lot of stickers available as well as fonts and filters. That can be overwhelming. My advice is to keep your content branded here to pick a font and stick to it. Pick some colors or a filter and stick to them. Since there are so many stickers and they are not all available everywhere, plus some come, other go, let me list you the most popular and help to use them as a Surface Pattern Designer and the ones that get more engagement. Questions. Great for interacting with your audience. Ask what they would like to see from you next, also to connect on a more personal level. If you don't like how the box looks, you can always write the questions as a normal text, and leave the box only for the answer. Poll. A more limited way to ask opinions or preferences to your audience, but also really effective. This one is ideal for choosing between two colorways, for example, or two different designs. If you have more, you can do several rounds. Or number your designs and use the question sticker asking, one, two, or three quizzes. Many use the sticker as a poll with more than two options but there is only the chance of one right answer. Either you clarified pick one, there is no wrong answer, or you use the previous two options. Countdown. This one is great for lounges, promoting your life, or goodness in general. People can get reminders when the countdown is up, so tell them to do so, if they want to. Big deal, make sure you always think your followers for taking part in answering. Highlights. In 2017, Instagram introduced stories highlight as a way to keep your stories around for more than 24 hours. Stories highlight appear on your profile below your bio. They are often underestimated, but they can add so much value to your profile. You can explore the highlights and use them as an extension of your bio. You can introduce yourself and your creative business, list the services you offer, as well as gathering special moments such as features on blogs and magazines, awards or recognitions you've received, etc. As usual, try to keep them simple and only the most relevant ones. Remember that you can have a custom highlight cover for each highlight. To do so, do a long tap on the one you want to change. Go to Edit highlight. Click on "Edit cover" and pick an image either from the highlights themselves or from your files. Click "Done", and that's it. I encourage you to create some pretty on-brand covers. Reels. Similar to TikTok, Instagram users can record and edit together 15-30 seconds video clips set to music and share them to their stories, their feed, and the reel stamp on a new service profile. But how can you use reels as a Surface Pattern Designer? Reels can be a great way to get creative and show your work in an unexpected way. Some ideas for reels could be showing your process, show the steps from sketch to pattern, showing different colorways, etc. IGTV is a feature on Instagram that allows users to share high-quality videos up to 60 minutes long and for both vertical and horizontal viewing, what about using IGTV to upload a time-lapse video of your wall process. This feature is also a great fit for you if you're planning to the tutorials of some kind, maybe an introduction of yourself and your services, or an unboxing moment when you receive samples of your first lessons and deal. Instagram live. This one may sound terrifying for many users. Instagram live. When you pick that feature and press the red button, you're broadcasting live to the whole world. You can go live on your own or invite a guest to go live with you. Once the live session is over, you can save that as an IGTV video. As a Surface Pattern Designer, you can use this feature when you launch a new collection or product, but also if you went to interview an industry expert or a fellow designer. Another possibility is doing live Q&S. Be sure to announce it previously ideally with the countdown sticker on your stories and to ask your followers to submit some questions beforehand. We've covered almost every different kind of post on Instagram: feed posts, stories and highlights, reels, IGTV, and Instagram live, and how you can leverage them for your art, your work, or your brand. Join me in the next lesson to find out more about giveaways, contests, and challenges.
6. Giveaways, Contests, & Challenges: In this lesson, we'll go through the different practices or activities on Instagram that you might have heard before: giveaways, contests, and challenges. Giveaways. That sounds fun. It seems like everyone is doing them right they are a great idea, of course, but again, you should ask yourselves the purpose behind that. Maybe you want to celebrate that you've reached a milestone in your business or it's your birthday, maybe you are so happy about your new product that you want to give it to someone special in your audience, and that's great. But my advice, don't do it for the sake and only purpose of getting more followers. Think it more as a present for your followers and a chance for them to recommend you to others. If you're planning to organize a giveaway, you have to consider the following: 1, use the right legal terms to avoid confusions. Instagram has some guidelines. 2, choose a goal. 3, Instagram regulations require you to include your company name or brands hosting a giveaway on Instagram. By law, people need to be informed about who or what is hosting the giveaway. 4, if you want to have a successful giveaway, you need to give your followers clear and precise instructions. If participants have to take multiple steps to enter, be sure to make the instructions as simple as possible. The easier, the better. 5, when you're hosting a giveaway or contest, you have to let people know the dates the campaign will be running on Instagram. Participants need to know how many days they have to enter and when the giveaway ends. 6, state that Instagram is not associated with your Instagram giveaway. 7, take time to share the details about how and when the Instagram winner will be announced and how and when the winner should claim their price. When you outline how the winner will be chosen it helps participants to know what to expect if they did or didn't win. 8, if you plan to ship or giveaway products, you have to tell your followers details about how the price will be delivered, including whether or not the winner will be responsible for shipping costs or pickup. Partner up with a fellow designer, or maybe with a brand you've worked with to reach more people and make it more exciting. Contest. This is a big one. At first you see opportunities everywhere and you believe and try everything. With time and maybe after some bad burns, you learn to analyze and decide if the opportunity is worth it or not. There are lots of different contests going on at the moment and they're fine. I have nothing against them, if only they were all fair for both parties and well compensated. The decision is yours of course, if you participate or not, but it's good to know what to be aware of. My tip, don't participate if a, entering the contest means creating something custom and specific for them and ending up not being compensated if you don't win or get selected. B, you lose the copyright of the artwork and the price is really low. C, they have a weird public voting system, unless you have thousands of followers you can send there to vote. Do participate if a, the terms are fair for both parties. B, if you have already a piece of work that would be a great fit for what they asked for. C, if it's your dream client, but still make sure it's fair and well compensated. Challenges. I love challenges. I participated in a few and hosted a few. They are fun and inspiring. In fact, one of my first pieces of advice I give artists and designers starting out when they ask is do the 100 Days project. No matter if it's about creating patterns, painting florals or learning lettering. It will get you creating, exploring, experimenting, honing your handwriting as an artist, and improving your skills. It's also perfect for sharing your progress on Instagram. You can post your work under the hashtag, your process and finished work and also discover new rising artists. The other one I enjoy a lot is draw this in your style, where someone posts their own artwork and challenge others to draw the same image, but in their own style. I also host one big fat challenge a year called 30FlowersInMyStyle where I put together a list of 30 flowers, one for each day of September. The participants will upload either a print, a pattern, a painting, something including that particular flower each day. My tip, do them, pick one that fits your way of working and go through with it. There are lots of great challenges out there. Some of them are weekly, other monthly like Inktober or Drawktober. Another kind of challenge is the SpoonFlower Weekly design challenge, where there is a theme and they are usually quite trend-driven, and the briefing to follow. After the submitting deadline, the designs are visible to the public and the voting begins. We've covered big subjects in these lessons, such as giveaways, contests, and challenges. But there are still two important features that are worth exploring as a surface pattern designer, and I'll talk more about them in the next lesson.
7. Using Guides & Instagram Shopping: Even after going through the different kinds of posts, there are two big features that can bring a lot value to your Instagram account depending on your goals. Guides and Instagram Shopping. Guides. Guides allow users to photo a curated plow of posts with commentary, which is great for step-by-step guides, tips, and recommendations. From here, you can choose from three different guide formats; places, products, and posts. Products can only be used to create products available in an Instagram shop, which we'll cover in a few minutes. Tip, as a surface pattern designer, products and posts guides are the most suitable kinds. For example, you could gather your posts per collection or types of patterns, even as categories, illustrated quotes, place prints, floral patterns, your columns, etc. You can even share your guides on your stories. Instagram Shopping. Instagram Shopping was introduced shortly after COVID-19 hit, mainly as a way to support small businesses during the pandemic. But almost every brand out there, big or small has the Instagram Shopping feature on their profiles. But it's not that simple. You have to be eligible for it and once you've been denied the permission, it is really hard to get it again. How does this affect us as surface partner designers? Now you're able to have your Instagram shop even if you offered products through a POD site, that has changed now and only those offering their products on their own websites are able to do it. If it works, then it can be a great way to increase your sales. The process is quite complex, and since it's linked to your Facebook account, you have to set up a lot of different things before you can even apply. If you want to give this a try, go to the Resource page and click the link for Instagram Shopping to go through the instructions. Now you have insights about every different kind of post and Instagram feature, and more importantly, how you can implement them as a surface pattern designer according to your goals. I'll see you in the next lesson to show you how to plan your Instagram feed.
8. Planning Your Feed With Adobe Illustator : It's time to put all that knowledge in practice and plan your own feed. In this lesson, I will show you step-by-step how I do mine. By having most of my artwork ready, planning content for a month usually takes me a couple of hours. Clear a day in the month where you'll bet working on your feed. Let me show you how I plan my feed. I usually start backwards, this means at the bottom of the page. This is day one at the top, day 30 or whatever the last day of that month is. This helps me visualize how this would look on my feed later. This example is for a whole month, so you can use it if you want to post every day or less frequently than that, you just take the days where you will be posting. Depending on what you're posting, it is helpful to know the days of the week. If for example, let's say, you have a new blog post every Wednesday, you'll know how to plan your feed accordingly. In my case, I like to offer some knowledge about the sign or insight, so I came up with four topics this month that I would like to talk about. This would be carousels. Don't worry, I will show you how to do them, but I can already write them down. I know I want to post them on Wednesday for April, this is the 7th, the 14th, the 21st, and the 28th. I will write down that. I will make it carousel out of it, C for carousel, and I will put that C. Then I place my patterns, for example, I don't put them altogether at once, instead, I distribute them all over the feed. After that, I think about prints and illustrations since there are still a lot of days to cover, and I want to also show some mockups, I include them filling up the empty spots. You can tell I love showing mockups. I'll do the same with reels for the last two days left. That's it. I always try to include a mix of pictures, carousels, videos, of course, as long as my content allows it. I always like to open with a month title card, and lately, I think ending up the months with either a reel of the whole collection or a top nine post with the nine most liked pictures of that month. This is another page of the workbook. These are the templates for carousels. As you can see, there are plenty of them. You can use them as you like. These are 10 possible pictures. That's the maximum number of pictures that Instagram allows for carousels. In this case, I will show you an example of tutorial educational post I love to talk about. I know I want to talk about colors, and where to get really cool color palettes, and how to build them. I know I want to make a carousel to show all the options. I will take five, artisan plus the cover, so that makes six, 2, 4, 6. I'll make like this. Here is the cover. I know I want to talk about, for example, Pinterest, colors, [inaudible] connect. You don't have to write everything down here, but one thing I really like about carousels is that you can connect all the slides. I'd like to make connecting elements here, for example, and then here maybe. Some elements, some flowers, some graphics that allows you to follow a thread. Then another thing that I think it's really practical is when you indicate in the cover, as well as in the end, and what your audience should do. For example, here below, this would be where the bookmarks sign is, so you can point to that and say save for later. Here is the like button, here is the, I think, this is the comment button and the share. You can also indicate share with a friend, leave your opinion. It's a very good way to interact with your audience and to engage with them. Like I said, I put keywords, I know I want to write something here and here, and then there you have it. As you can see, I have my patterns here. I have some prints and illustrations, mockups, and the cover image for the carousels. I'll take my planning sheet from the workbook, and I will arrange the posts in a way that color flows, but this may take awhile. Let me show you the process in time-lapse. As you can see, it takes a lot of trial and error, but I think now I'm happy with how it looks. We have our carousels here that was fixed from the beginning and then a lot of moving pieces here and there to make here a pink theme, going to a mint green, then a little bit multi-color, and then some dark and blue, and that way we can create some movement there and a story as well. I will now put my logo on each of the posts. Now, that you have all your feed plan, you have to go to file, export, export as, then you choose your folder. You pick saving each art board, all of them, export. Then you're going to pick RGB because it's for screen. Then you pick 72 PPI, then a little bit smaller files. I would say three, something like that, and you click "Okay". Then you'll see you have every post done. These are the one that you're going to upload. Remember, gather your work, decide up front how many post and what post do you want, see if there are special holidays or occasion, mix it up, play with color, and offer variety. When it's ready, export. Hopefully, now that you have seen how I plan my feed, you'll be able to start planning yours too and get a batch of content ready to post. Remember to get your template from the resources to save time and start right away. Next, we'll go through the process of posting the content you've created in this lesson, so come along to the next video.
9. Posting Your Content: In this lesson, we'll go through the different aspects to consider about how and when to post your feed content. We'll cover subjects, the hashtags, and engagement. When should you post your content for it to be seen by the most people? This is where all those graphics and stats come handy. Go to your Insights, your audience, see all, scroll to the bottom. You'll see the most active times each day. This only appears once you've reached your first 100 followers. If you haven't yet, try to post every day at the same time. Once you can see the stats, it is really helpful. When I started, I would post every day at 9:00 AM. As you can see from the graphs, that wasn't the best time at all. The times can change within a week. For me, it has stabilized to 6:00 PM. But at first, there were days when the best time slot to post would be 3:00 PM, others 6:00 PM, other 9:00 PM. This varies according to your audience and where in the world they're based. I say it again, you don't have to follow it to the latter if you don't want to. This just gives you a better idea. Scheduling tools: There are different tools that can help you with posting, like Later, Tailwind, Planoly, and others. Most of them offer a free plan and a paid plan. Of course, with the paid plan, you get more posting options and sometimes even more stats. But that's up to you and your goals if you want to try them. You can either post manually every day, post from drafts and plan the post ahead, or you can use the automatic posting option of the tools. Let me show you how I do the scheduling on Later. This is the calendar view on the desktop version of Later. If you go to media library, you'll be able to upload the post you exported from Illustrator by clicking on "Upload Media". As you can see, I have already done that. Now. I'll pick the first post of the month to show you how it goes, here. Then, view on calendar and create post. Here, I paste the caption I wrote for this post. If you want to paste the hashtag on the first comment, to keep the caption tidy, you'll need to upgrade to the paid plan. If you chose to use link in bio as your link source, you can also enter it here. Otherwise, you leave this blank and you go to, add your location. I think this is really good to be seen by people from your area. Also for others to know where you are based. Let me enter my little town. Next, I'll pick a date and a time to post. As we spoke before, you can see the best time to post for you in your Insights. You can also choose between getting a notification and post it manually or to post it automatically. The hashtag suggestion is also a paid feature. But here below, it says how many hashtags you have left to include, which is great, go to "Save" and that's it. It's scheduled. You can do that with every post in advance and then you have a month of posts already scheduled. Not every caption needs to be a storytelling moment, but think of your social media captions as a way for your followers to get to know you or your brand a little a bit better. Studies have shown that longer, more thoughtful captions can be great ways to connect with your followers and foster a higher level of engagement. The followers who are likely to read your longer captions may also be more likely to leave a comment responding to your caption. This doesn't need to be done in every post, but a nice, occasionally storytelling moment can be a great asset for boosting your social media engagement in the long run. Call to Actions are a way to get your audience to take action on certain prompts, questions, etc. This is an opportunity for you to have fun with your audience or to know their thoughts on whatever topic is at hand. Hashtags. Using relevant targeted hashtags on your posts and stories is one of the best ways to get discovered by new audiences on Instagram. This can translate into more engagement, more eyes, and more customers for your work. Since hashtags are used with an intent to discover content, the right hashtags can put you in front of your target people, even if they haven't connected with you before. You can use up to 30 hashtags on a post and 10 on Instagram stories. But in order to be successful with hashtags, you need to be strategic about what hashtags you use and when you use them. While the most popular hashtags on Instagram have been used millions of times, that doesn't mean you're going to get a ton of likes and comments simply by adding hashtag pattern, hashtag print, or hashtag illustration to your post. Instead of using the most popular Instagram hashtags, it's better to find and use hashtags that are smaller, more niche, and have an engaged audience that's relevant to your industry. Find a list of industry relevant hashtags in the workbook. While adding hashtags to your post is one of the best ways to boost your engagement and get your post in front of your target audience, too many hashtags in your captions can look untidy or worse spammy. Instead, posting your hashtags in the first comment is a great way to make your caption to start off the show without compromising any of the engagement you can get with hashtags. The most important thing to keep in mind when deciding what hashtags to use is that you're being intentional. As in, you're using hashtags that your target audience is actually searching for and following. But this doesn't end with you posting your content. There is still one big topic that we need to cover. Follow me to the next lesson, where we'll talk about engagement.
10. Engagement: Engagement. We hear this word a lot, but what does it mean in this context? Engagement is the way people interact with what you post in your account. If they see it, if they leave a comment, if they save it or send it to someone else, and the same applies to how you interact with other accounts. It's the time and effort they give you and you give them. Your engagement not only depends on what you post, but also on what you watch on Instagram and who do you follow. The algorithm works in a way that shows you what it thinks you want to see. This is based on who you interact with and which posts you engage with. That's why it is probably a good idea to try to keep your personal and your professional use of Instagram separated. In your personal account, you can follow your family, your friends, bands that you like, even that inspirational business coach that give you such practical and useful advice, and your professional account, you will want to follow and engage with people, artists, brands, and companies that are related to your own goals as a surface pattern designer. Engage with the content of the dream company of yours, and smaller brands, you might catch the attention of the business owner. In bigger companies, there might be a social media or marketing manager behind their posts. But you'll start seeing more related content in your feed. Let's say, if your niche is eco-friendly, minimalistic kids wear, you'll start seeing more content related to kids, sustainability, minimalistic aesthetics, and so on. Instagram will also suggest you to follow similar accounts, which might be a great way to learn about new companies and to increase your potential plan this. You will be also able to see which hashtags they are using, which you also can add to your hashtags list. How should you engage? While this may sound like a no-brainer, it can be easy to overlook. As a simple rule, try to reply to every comment, DM, and story reaction that you receive. If people are willing to engage with you, it means they care about what you're posting. Engagement means more than just leaving a heart eyes emoji when somebody comments, I love this, on your post. Instead, reply with, I'm so glad to hear that, thank you, name, or something similar to that. It's important to show that there is a real person behind your account. The same rule applies to the comments you make. What do you like the most about that image? What makes it so special to you? One of the best ways to improve your engagement, at least for year 2021, is to create more content that encourages your audience to tap the same bookmark button. This statement relates to the overall idea of offering value to your audience. How can you do that? Well, by inspiring them, showing them new techniques, sharing tips and the materials you use. You can help others by sharing your experience. Have you made a mistake in the past regarding your career or some specific artwork? Share it along with the learning experience and prevent others from making the same mistake. Using carousel posts to share valuable tips and information can lead to more saves, as your audience can refer back to the post when they want to act on this tips. Similar to create unsavable content, shareable content needs to be highly related to what your audience likes and needs. Think about infographics, data that could shock or spark, intrigue, fun memes or relatable quotes. High level of authenticity can go a long way in building a stronger connection to your audience, which in turn encourages more engagement. There is one last way for you to engage and help others increase their reach. Send content to others who might find this beautiful or useful. To do that, click this paper plane symbol and choose who you want to send this to. This option may be restricted in some accounts. With that button, you can also share that post in your stories. Great. Now you know all you need to know to start posting your content, engaging with your followers through the caption and comments and increasing your reach with the hashtags. You've done so much progress already. Join me in the next video, where we'll go through some of the best practices to make your Instagram usage as beneficial as possible in the long run.
11. Do's & Don'ts - Instagram Best Practices: At this point, I'm pretty sure that you know a lot more already about Instagram that you did before starting this class. Nevertheless, allow me to share with you some good and bad practices regarding the usage of Instagram. Avoid the follow-for-follow and likes-for-likes, as well as like groups. They're boundless. You don't want just any eyes on your work. You want the right eyes on your work. Besides, your account's visibility is also affected by those who follow you and their interests. Make sure the likes and follow are authentic, not only the ones you receive but the ones you give. Don't copy-paste comment, it's also pointless. If you don't have anything good to say, move along. Like I mentioned in the previous lesson, as I was talking about engagement. Try instead to elaborate the comment. What do you like the most about that image, the colors, the idea, the technique? You can even ask questions, respect your fellow artists and designers. If you want to repost images from other artists, please tag them or even ask them first if it's okay for you to share it, which leads us to another common worry. I'm sure you sometimes wonder what would happen if your work ever gets stolen. First of all, and sadly, you have to come to terms that at some point that might happen. There are many people out there that have absolutely no clue about copyright and copyright infringement and will use your work only, "because it's on the internet." Don't freak out, at least yet. Remember that your work belongs to you from the moment you've create it. No matter if you registered it or not, the copyright belongs to you. You can first contact them and ask them to take it out or directly send them a cease and desist letter disclaimer, I'm not a lawyer, if this ever happens to you, contact a lawyer. I strongly recommend you to read some amazing books about this topic though. "Show Your Work" and "Steal Like An Artist" by Austin Kleon, as well as Big Magic, Creative Living Beyond Fear by Elizabeth Gilbert. You can always consider some things when posting, like adding your logo, not showing the whole repeating a pattern, or show it as a mock-up, for example, and never post high-risk files. Connect with people, we are all humans. The first month I had Instagram, I would send a welcome message to each person that followed me. Many of them ignored it, but others would reply and we would get into a nice conversation. It doesn't have to be too long or complicated, just one or two lines and a thank you is enough. One option for those who want to increase their reach is to tag special accounts that feature other designers. For example, about pattern surface bottleneck, pattern designers, pattern designers club, and many more which are listed in the classwork. They normally offer a special hashtag for you to use in order to get featured. I hope this advice about Instagram best practices was useful to you and that it leads you to reflect how you interact with others on the platform. But all this information we've been going through in the last lessons raises the question, is Instagram really everything you need to succeed and feel great as an artist or designer, and is it always so easy and perfect? I'll answer these questions in the next lesson. I'll see you there.
12. Thoughts on Worth: After going through all the Instagram features, settings, and general advice, I didn't want to miss the opportunity to address some common beliefs and fears revolving around Instagram. Also, Instagram is not everything and by far not the only thing you need to have a thriving, creative career. See it just as another wheel of the machine. You will still have to beat your work to companies in order to get contracts and offers. But I'm pretty sure they will take your Instagram too. Another thing you must remember, you don't own your followers, Instagram does. If the app goes down, you would probably lose almost every content. For that make sure you start gathering email subscribers from the early stages and when the time comes, developing a newsletter strategy that fits your needs and the ones from your clients or customers. This will also depend on your goals. This thought leads to another common fear that you have to have thousands of followers in order to companies to license your work. That's not true. Don't see the followers number as a volumetric. Same thing with likes. Don't obsess over them. I know it's hard as an artist or designer not to pay attention to it because most of us are really attached to our work. But for the sake of your mental health, don't use it as a metric. You can always hide your likes if you want. This applies for the so-called imposter syndrome as well. Comparison kills creativity and we don't want that. We might get overwhelmed by all the talent out there. This will impact us in a negative way. When you think it's happening, turn it up, shake it out and keep going. Last but not least, be patient. Some things simply takes some time, we all started at zero followers. This is where consistency and purpose will serve you well, trust me, show up and show your work. When I first started, every like and follower was a victory. I soon started planning ahead and posting. Slowly I started getting more likes as well as more followers. Some months later, I started getting requests from clients over Instagram, but everyone's path is different. I hope this last thoughts help you establish a more healthy use of Instagram and decide how much thought and effort you want to put into it.
13. Conclusion: Yes, you've made it. Let me congratulate you for completing the class. After this lessons, you're ready to start planning and posting your work on Instagram with clarity and purpose. This way, you can stop worrying about the algorithm, not knowing what to post and start having fun and connecting instead. Feel free to ask me your questions on the discussion section of the class. I will get back to you as soon as I can. Don't forget to tag me and follow me here on Skillshare. Also, if you want to, you can follow me on Instagram at deinki_com. This way, I can start following your journey as well. Take care. Bye-bye.
 Lucia SJ, Fashion & Surface Pattern Designer