Transcripts
1. Illustrating with Layered Texture and Color in Procreate: Hi everyone. I'm Liz Colin Brown. I'm an artist, designer, and teacher. Today I want to show you how to combine layer, color, and texture, to add depth and visual interest to your illustrations. We will look at how to create overall textures, how to use texture to create highlights in shading, and how to use single and multi-colored texture to bring out warm and cool tones in your illustrations. When you watch this class, you'll get all of the texture brushes I created that will help you add beautiful varied texture to your work. The set includes 12 different textures that range from bold, scratches, and scrapes, to subtle water spots, and speckles. In the class we'll look at a lot of different ways to layer texture on illustrations, so you can find a texture process that works for your personal style. I'll also share loads of ideas for illustration topics and reference images with you, so you don't have to start from scratch. First, we'll create a simple fruit illustration, and look at how to use texture to add highlights, and shadows to shapes. I'll show you a set of vintage fruit illustrations that you can use as inspiration for your drawings. Next, we'll use a multi-colored texture process to bring out warm and cool tones in your illustrations. We’ll look at ways to use colored textures that take a flat illustration, and give it beautiful highlights, shadows, and variation. Next will combine all of the texture processes we covered in the class, to create a multi-layered illustration. We'll look at how combining multiple texture processes and the same illustration, can add so much depth and variation to your work. Throughout this class, you'll see how simple flat shapes can easily be turned into varied illustrations with depth and contrast, with just a few swipes of a texture brush. You can use the illustrations you create in this class for posting on social media, adding to your portfolio, or using on print on demand sites like [inaudible] bubble and society-6. All you need to take this class, is your iPad, and a stylus. I'll be using the Apple Pencil, but you could use any stylus or even your finger. So let's get started.
2. Downloads and Resources: The first thing I want to do is show you how to get all of the downloads and resources that you'll need for this class. You can find the link to get to the downloads page in the project section on Skillshare. Make sure you're using Skillshare in a web browser rather than the app because the project section doesn't show upon the app. Once you click on that link, you'll see that you need a password to get into the page and I'll show the password on screen right now. Once you get into the page, you'll see that there is a list of downloads. The first is the brush set, so if you just click on that. I'm using Chrome as my browser, so if you have any trouble try Chrome. I'll click download at the bottom here. Then you'll see the option to open in an app. I'll click on that and then click more to find procreate, copy to procreate. Then it'll show up at the very top of my brush library. To use all of the color palettes that I'll be using in today's class, you can do the exact same process. Color palette one and two, color palette three and four. Just click on that link, wait until it downloads, tap download, tap open in, and then choose procreate as the app. Then if you go to your color palettes, you'll see it show up there. There are a couple other downloads and resources on this page. You'll see the Pinterest inspiration board, which we'll be looking at in a little bit. You'll also see the workbook, which contains some color palettes that we'll be looking at. You download these in the same way, click download an open in procreate. The last item on the list is how to make any brush in procreate. I created a blog posts that links to all my tutorials for brush making, so if you're wondering how I made the texture brushes that we'll be using in today's class, you can find all that information there. Let's go ahead and get started.
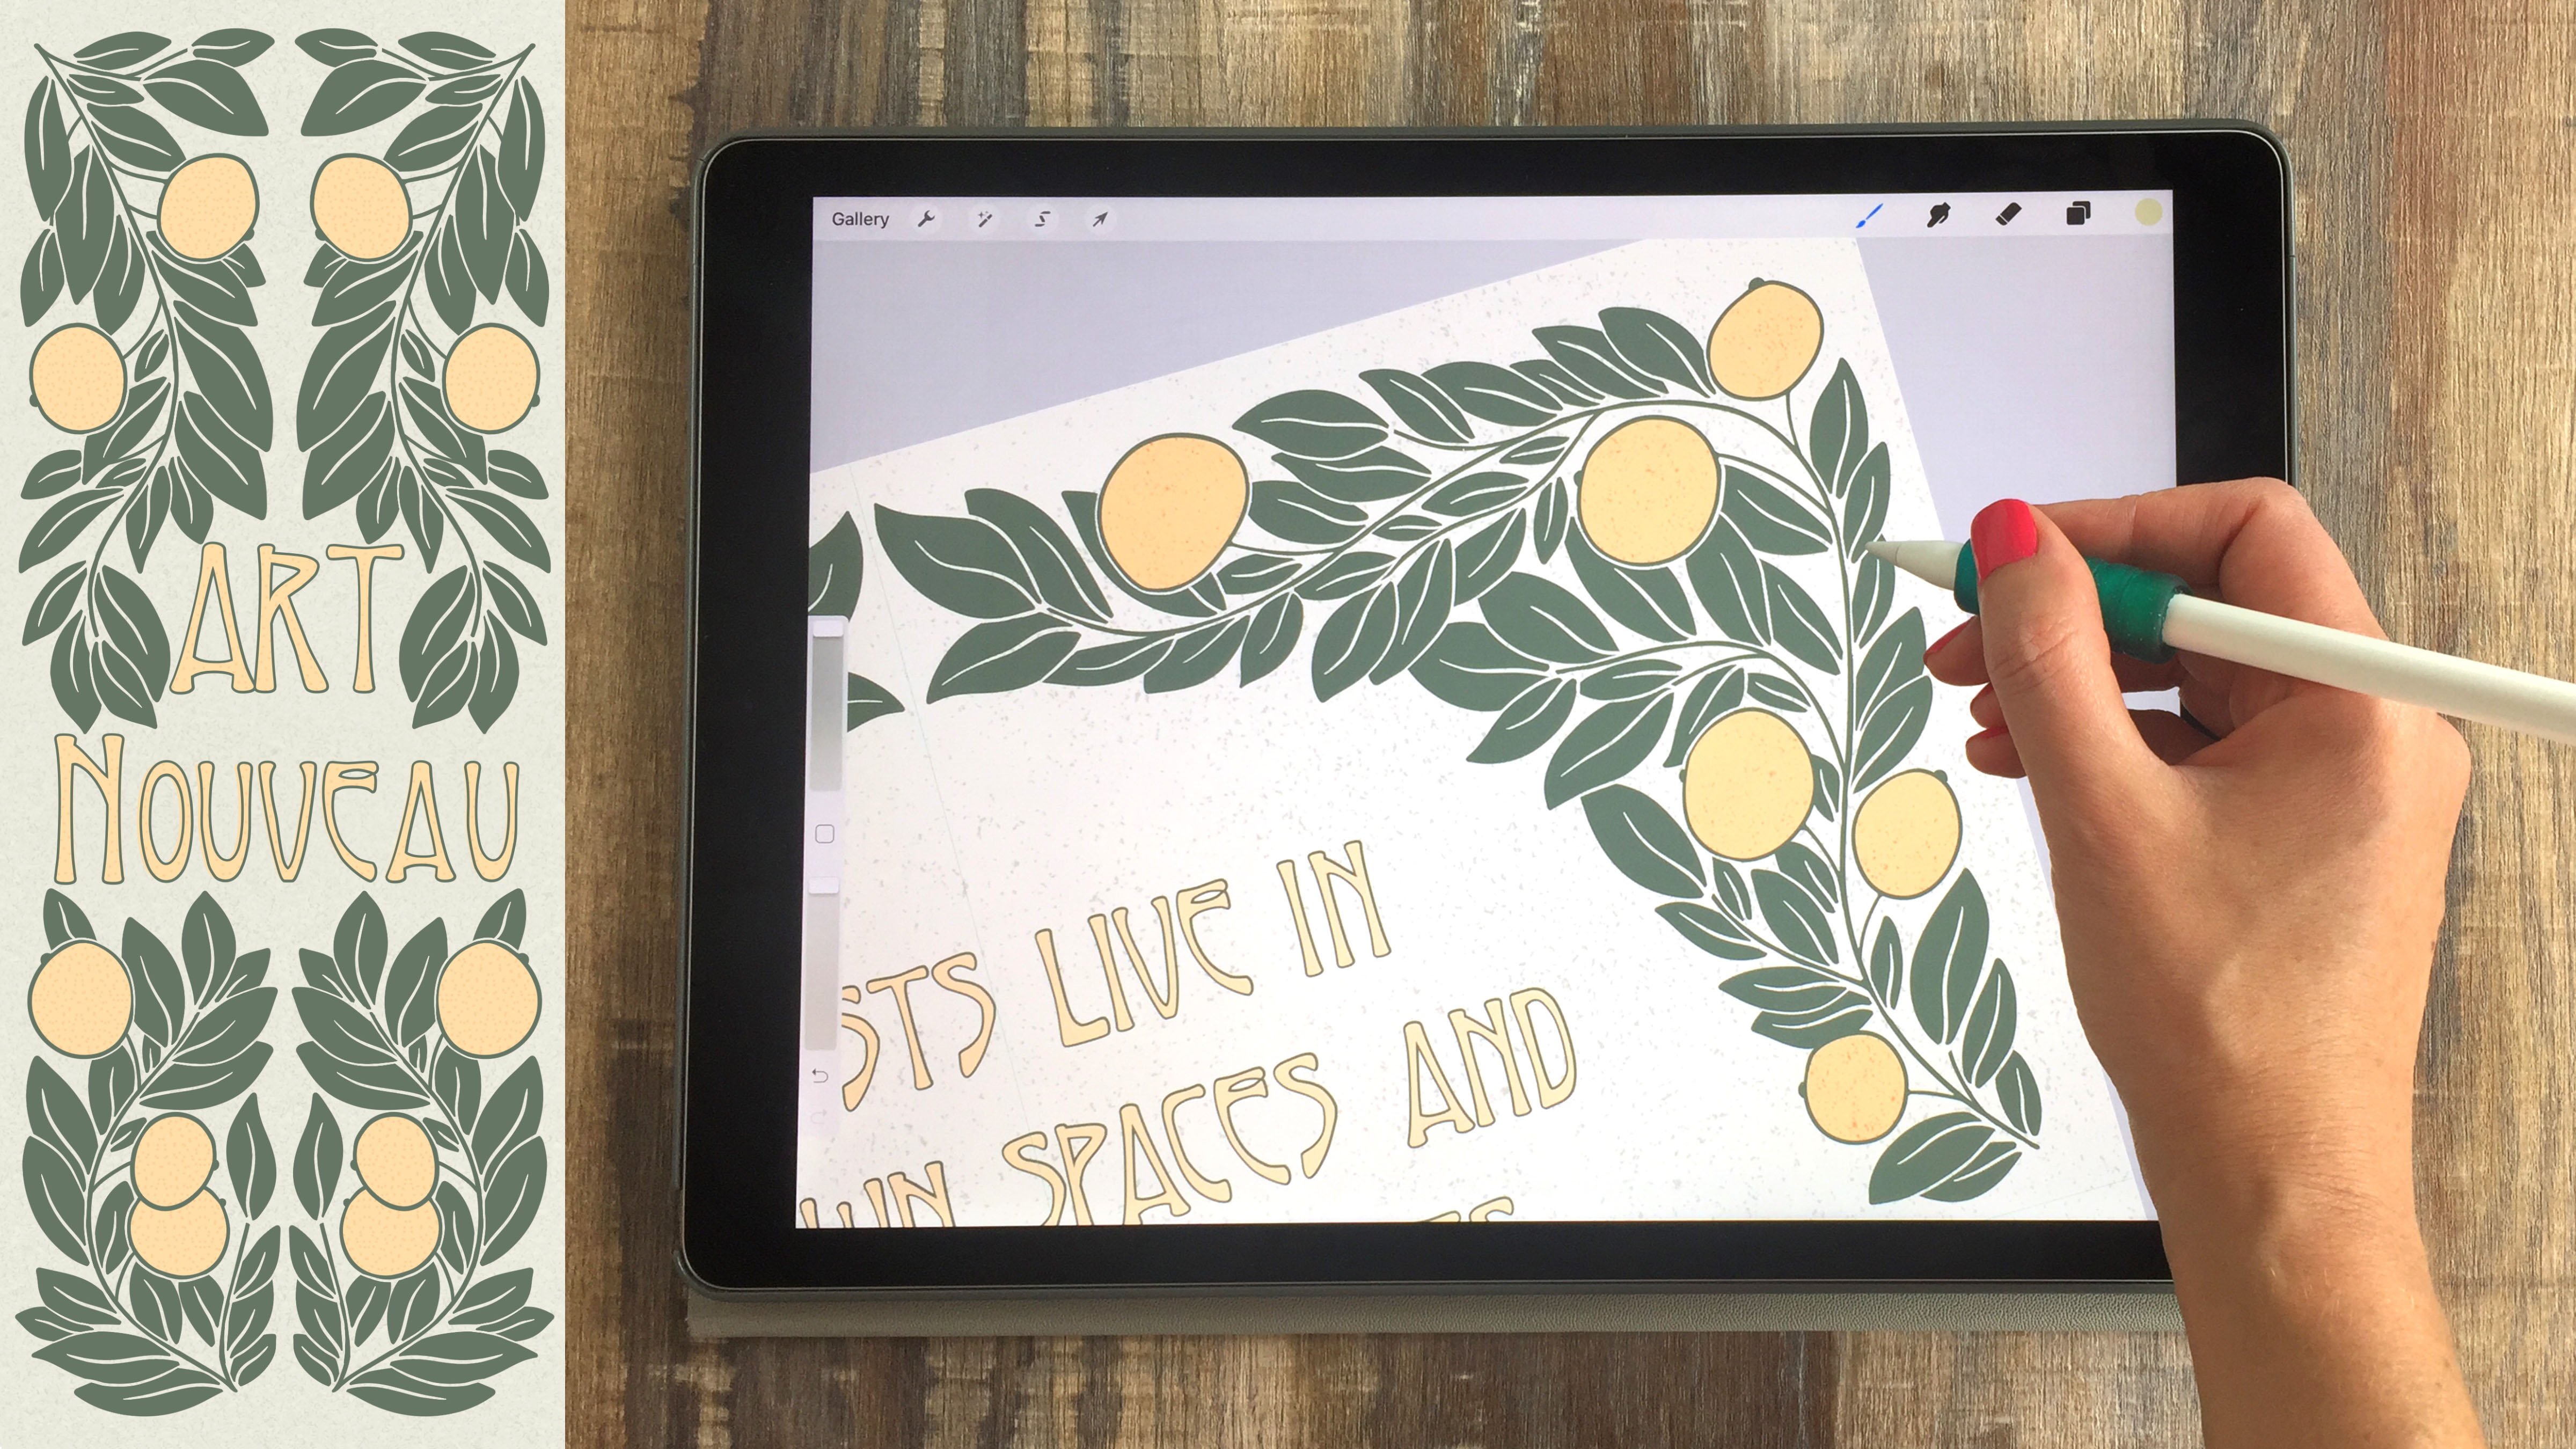
3. Inspiration and Sketches: Before we get started on our first project, I want to tell you about a drawing challenge I created to help you brainstorm some drawing topics so you can practice this texture process on your own. These drawings are great for sharing on social media or adding to your portfolio. Doing a challenge is a great way to get motivated to complete a series of drawings. For the challenge, I recommend you choose a color palette and stick with it for the drawing so that your set is cohesive and all of the drawings work well together. We'll talk more about color in the class and look at how to choose a set of colors that compliment each other. The drawing prompts are simple and open-ended, so you can really put your own spin on each of these concepts. You can share your drawings on Instagram or Facebook and use the #ipadtexturechallenge to share your work with me and everyone else in the challenge. For this first project, we're going to create a simple illustration and then use texture to add highlight, shadow, and depth to the object. I'll be using fruit as my subject matter, and I'll share some vintage images with you that you can use as inspiration. But of course, you could apply this process to any object at all. I'm starting out here on the Downloads and Resources page, and you can see the Pinterest inspiration board is the fourth item here. I'll click on that, and that'll open a Pinterest board that has three sections. You'll see building illustrations, greenhouses, and vintage fruit images. For this first project, I'm starting with vintage fruit images. If you scroll down here, you'll see many different styles and types of fruit, color palettes, different types of shading. You can scan through here and find something that works for your personal style. I'm going to go with a lemon because I'm in the mood for something really bright and bold. I'll click on this lemon illustration and take a screenshot by tapping the home button or the power button. That's one way to capture this image. You can also click on it to go to the image on Flickr. All of these are in the Creative Commons. There are over a 100-years-old, so you can feel free to use these as reference images. Of course, we're not going to copy this directly, but this is a great place to start. I'll click the "Download" button over here and have original. That opens the image in the Pinterest's browser, and then I can click "Add to Photos." Now that I have my image ready, I'll go to Procreate, go to my gallery. Tap the plus symbol, and I'm going to start with 3000 by 3000 pixels as my size. Of course, you can work in any size here, but I find this works well for printed and digital uses. I want to be able to see my lemon image. I'm going to swipe up slowly from the bottom and then pull that Photos app over here. If the Photos app doesn't show up, you just need to go open it and then come back to Procreate, and then it'll show up on your recent apps. I'm going to open that lemon image, make it a little bit smaller. Like I said, I'm not going to copy this directly. I want to take some inspiration from these shapes, but I'm really going to make this my own here. I'll open the textured illustration brush set, tap these "Sketching Pencil Tapered." I'm just going to do a really simplified version of what we're seeing here. There are a lot of leaves and lemons in this picture. I don't really want to go that far. I want to do much more simplified version. If you've taken any of my classes before, you know how I like to sketch. I start really rough and loose, and then I work my way up to more complex shapes. Right now, I'm not trying to get these shapes perfect. I'm just playing around with where things are going to go. Where my leaves are going to be, where my lemon is going to be. I'm also thinking about variation. I don't necessarily want to have lemon leaf, lemon leaf like a predictable pattern. I'd rather have a few leaves and then a lemon, one leaf, and then a lemon so that it breaks up the image a little bit. What I do after I just sketch in these basic shapes is come in with a slightly darker, heavier hand here, so that I can start getting a little bit of a better idea of what these forms will look like. I'm also going to add in some little flowers here. I feel like these are missing something. I don't even know if lemon trees have this kind of flower, but I just want to add it, so feel free to add things in. Nobody's going to reprimand you for adding something just to add a little visual interest. Just do whatever works for your style here. Don't worry so much about this being a perfect depiction of that plant. Another thing I'm thinking about with variation is the direction that these leaves are pointing. If I have some pointing over to the left, then I'll try to have a few more that point over to the right so that they're not all pointing in the exact same direction. These are problematic. We've got one, two, three. They're all going in the same direction. I need to change this one. That's just going to help break up the image a little bit and make it a little more interesting for the viewer. You can see why I keep the sketch really rough at this point because I'm already changing things, and if I had gone to a lot of effort to add some extra detail to these, then I would have wasted a lot of time. It's really important in this phase to keep it super loose and just look at the overall composition. I'm happy with that basic sketch. I'm going to tap on the Layers panel, reduce the opacity of that layer, create a new layer above that, and go a little bit more detailed. I'm especially thinking about my curves here. I'm trying to make a nice smooth curve, nice graceful shapes. That may not be your personal style. You may like things a little more chunky and rough. That's fine. This is a great time to add whatever detail or shape you like into your illustration. You can see how much I'm simplifying this from the original. I really just want to show you the texture process and give you a chance to practice the texture process. Don't feel like you need to create a huge complicated drawing for this first project. We're going to get to that later on, but for now, I'm just going to show you the basics of using texture to add some shading and highlighting. You can see already how much more refined this sketch is, and I'm just using that rough sketch, which was super rough and taking cues from that shape. But also changing it a little bit as I work because you always notice things as you're working, things that just don't quite go together, or shapes that are just a little bit off. This is a good time to work on that. One important part of drawing that one of my favorite drawing teachers told me is if you're drawing a line that goes behind another line, go ahead and draw it anyway. Go all the way through, even though my lemon is behind this leaf. Because if you don't, sometimes you risk having a fake-looking connection here. I'm going to go ahead and draw my whole lemon and then erase. That's better than trying to draw it here and draw it here. You're going to get a fake-looking outcome. Go ahead and draw all your shapes and then erase the overlapping later. It's so much easier. I'm also changing the shapes of these lemons. I didn't really like the shapes of the lemons in this drawing. They're rounded. I've honestly never seen a lemon like that. Maybe that's a certain variety that I'm not familiar with. Another example of how I'm just using this image as a starting place, but it's not my ending point. I'm actually going to let this lemon be on top, so I'm going to erase that leaf instead of the lemon. That's just a little bit more variation. This lemon's on top. This lemon's on the back. You can see that this flower overlaps a lot of different parts. I'm just going to go through and erase all those little overlapping areas. I'm happy with how my sketch looks. Of course, at this point, if you're not happy with your sketch, just do another sketch layer. You can make your original invisible, reduce the opacity of this new one, and then start working on a new layer. The more experienced you get, the less layers you'll need. But when you're first starting out, take all the layers you need to take all the time you need. Feel free to pause this and come back later when you feel like you've gotten your sketch a little more refined and closer to what you want your original to look like.
4. Color and Masks: I'm going to go ahead and dive into color. I'll grab the wet paint brush here, wet edge paint brush. I'm on a new layer. I'm going to pick my first color. I'm going to be using basically the same three colors for this entire class. We looked at how to download these color pallets in the first section of the class. I also mentioned that you can download the workbook. I'm just going to slide this out of the way to preserve my battery. The class workbook, once you open that add up you'll see there's a layer called palettes. These are four different palettes I've created for you. These are the same palettes that are in the downloadable palettes on the resources page. I'm going to be using this color set for all of my drawings. You could use any of these or you could create your own. If you're not sure how to create a palette like this, I have a class on limited color palette illustrations, where we dive into building palettes in several different ways. If you don't like any of these or if you just want to learn how to create your own, checkout that class. For today, feel free to use these. Also, feel free to adjust these. If you open the Layers panel for this document, you'll see that every single circle is on its own layer. Let's say you like this palette but you don't like that muddy yellow, greeny color, you can tap hue saturation brightness in the adjustments panel and just start playing around with color here. You could do that with any of these palettes and then adjust all of the lighter versions as well. Back to my document, I'm going to be working with that color palette that I showed you. I'm going to start with a light yellow for this lemon. Again, I've got the wet edge paint brush on a new layer. Make this a little bit bigger. I'm just doing a simple rough shape. I'm not trying to make this perfect. I'm not trying to perfectly follow my outline. I'm just going with a rough general shape. Then you can just drag to fill that in. I like to go ahead and fill in all my shapes first. One thing to double check is that you're always putting each new color on a new layer. You don't want to put multiple colors on the same layer because that's going to prevent you from doing the texture process. I'll create a new layer. Now I'm just looking for a brown color. I want to stay in the same yellow range that I've been using. I like this yellowy muddy brown color so I'm going to use that. That's going to be my stem. The stem layer needs to be below my lemons so I'm just going to drag that down. I'm just doing the same stem color for all the leaves and the flowers as well. I'm also going back in on that stem and just doing a little cleanup because stems on real plants don't have this super sharp meeting space. They have a more rounded space like that. I always go back in and just add in that little bit of a curve to take away anything fake looking with that meeting spot. I'm going to continue this same process with each of the colors in my illustration. I've got this one leaf that's below the other leaf. I don't just want to fill that in on the same layer because then I can't do different texture treatments to each leaf. I'm going to create a new layer below, that currently flair. That's where I'll use the same color to draw this leaf. Now that allows me to go through later and add different textures to these two leaves so that I can differentiate the shapes otherwise it just looks like one big blob. What I might do for now, just so that I can see both shapes, is reduce the opacity of one of the layers. Now I can at least see where that is as I'm working. Last I'll go ahead and color these flowers. Next, I'm going to create a new layer above my leaves and just add a little vein across these leaves just to give them a little bit more visual interest. I'm going to go with the brightest turquoise here. You'll see that it's just going right off the leaf. If I turn this into a clipping mask layer by tapping on the vein layer and tapping clipping mask, then it clips that shape to my leaf. That makes it a lot easier for me to come through here and just add these little things. You can see I'm not even using my reference image anymore. I always abandon the reference image after I get my basic sketch because I really just want to make this my own. I don't want to have any chance that my drawing could be similar to the reference image. Also, I didn't really like the veins on that first leaf so I'm going to try some other variations. You can look at some leaves online. You can get inspiration from leaf drawings that you see. I like this way that it comes out from the center. I'm going to apply that to all of my leaves. I'm trying to avoid having these veins meet each other like this because I'm trying to differentiate these two leaves, make it really clear that they're separate. I'm just double checking as I create these veins that I don't make any weird connections here between this leaf and that leaf.
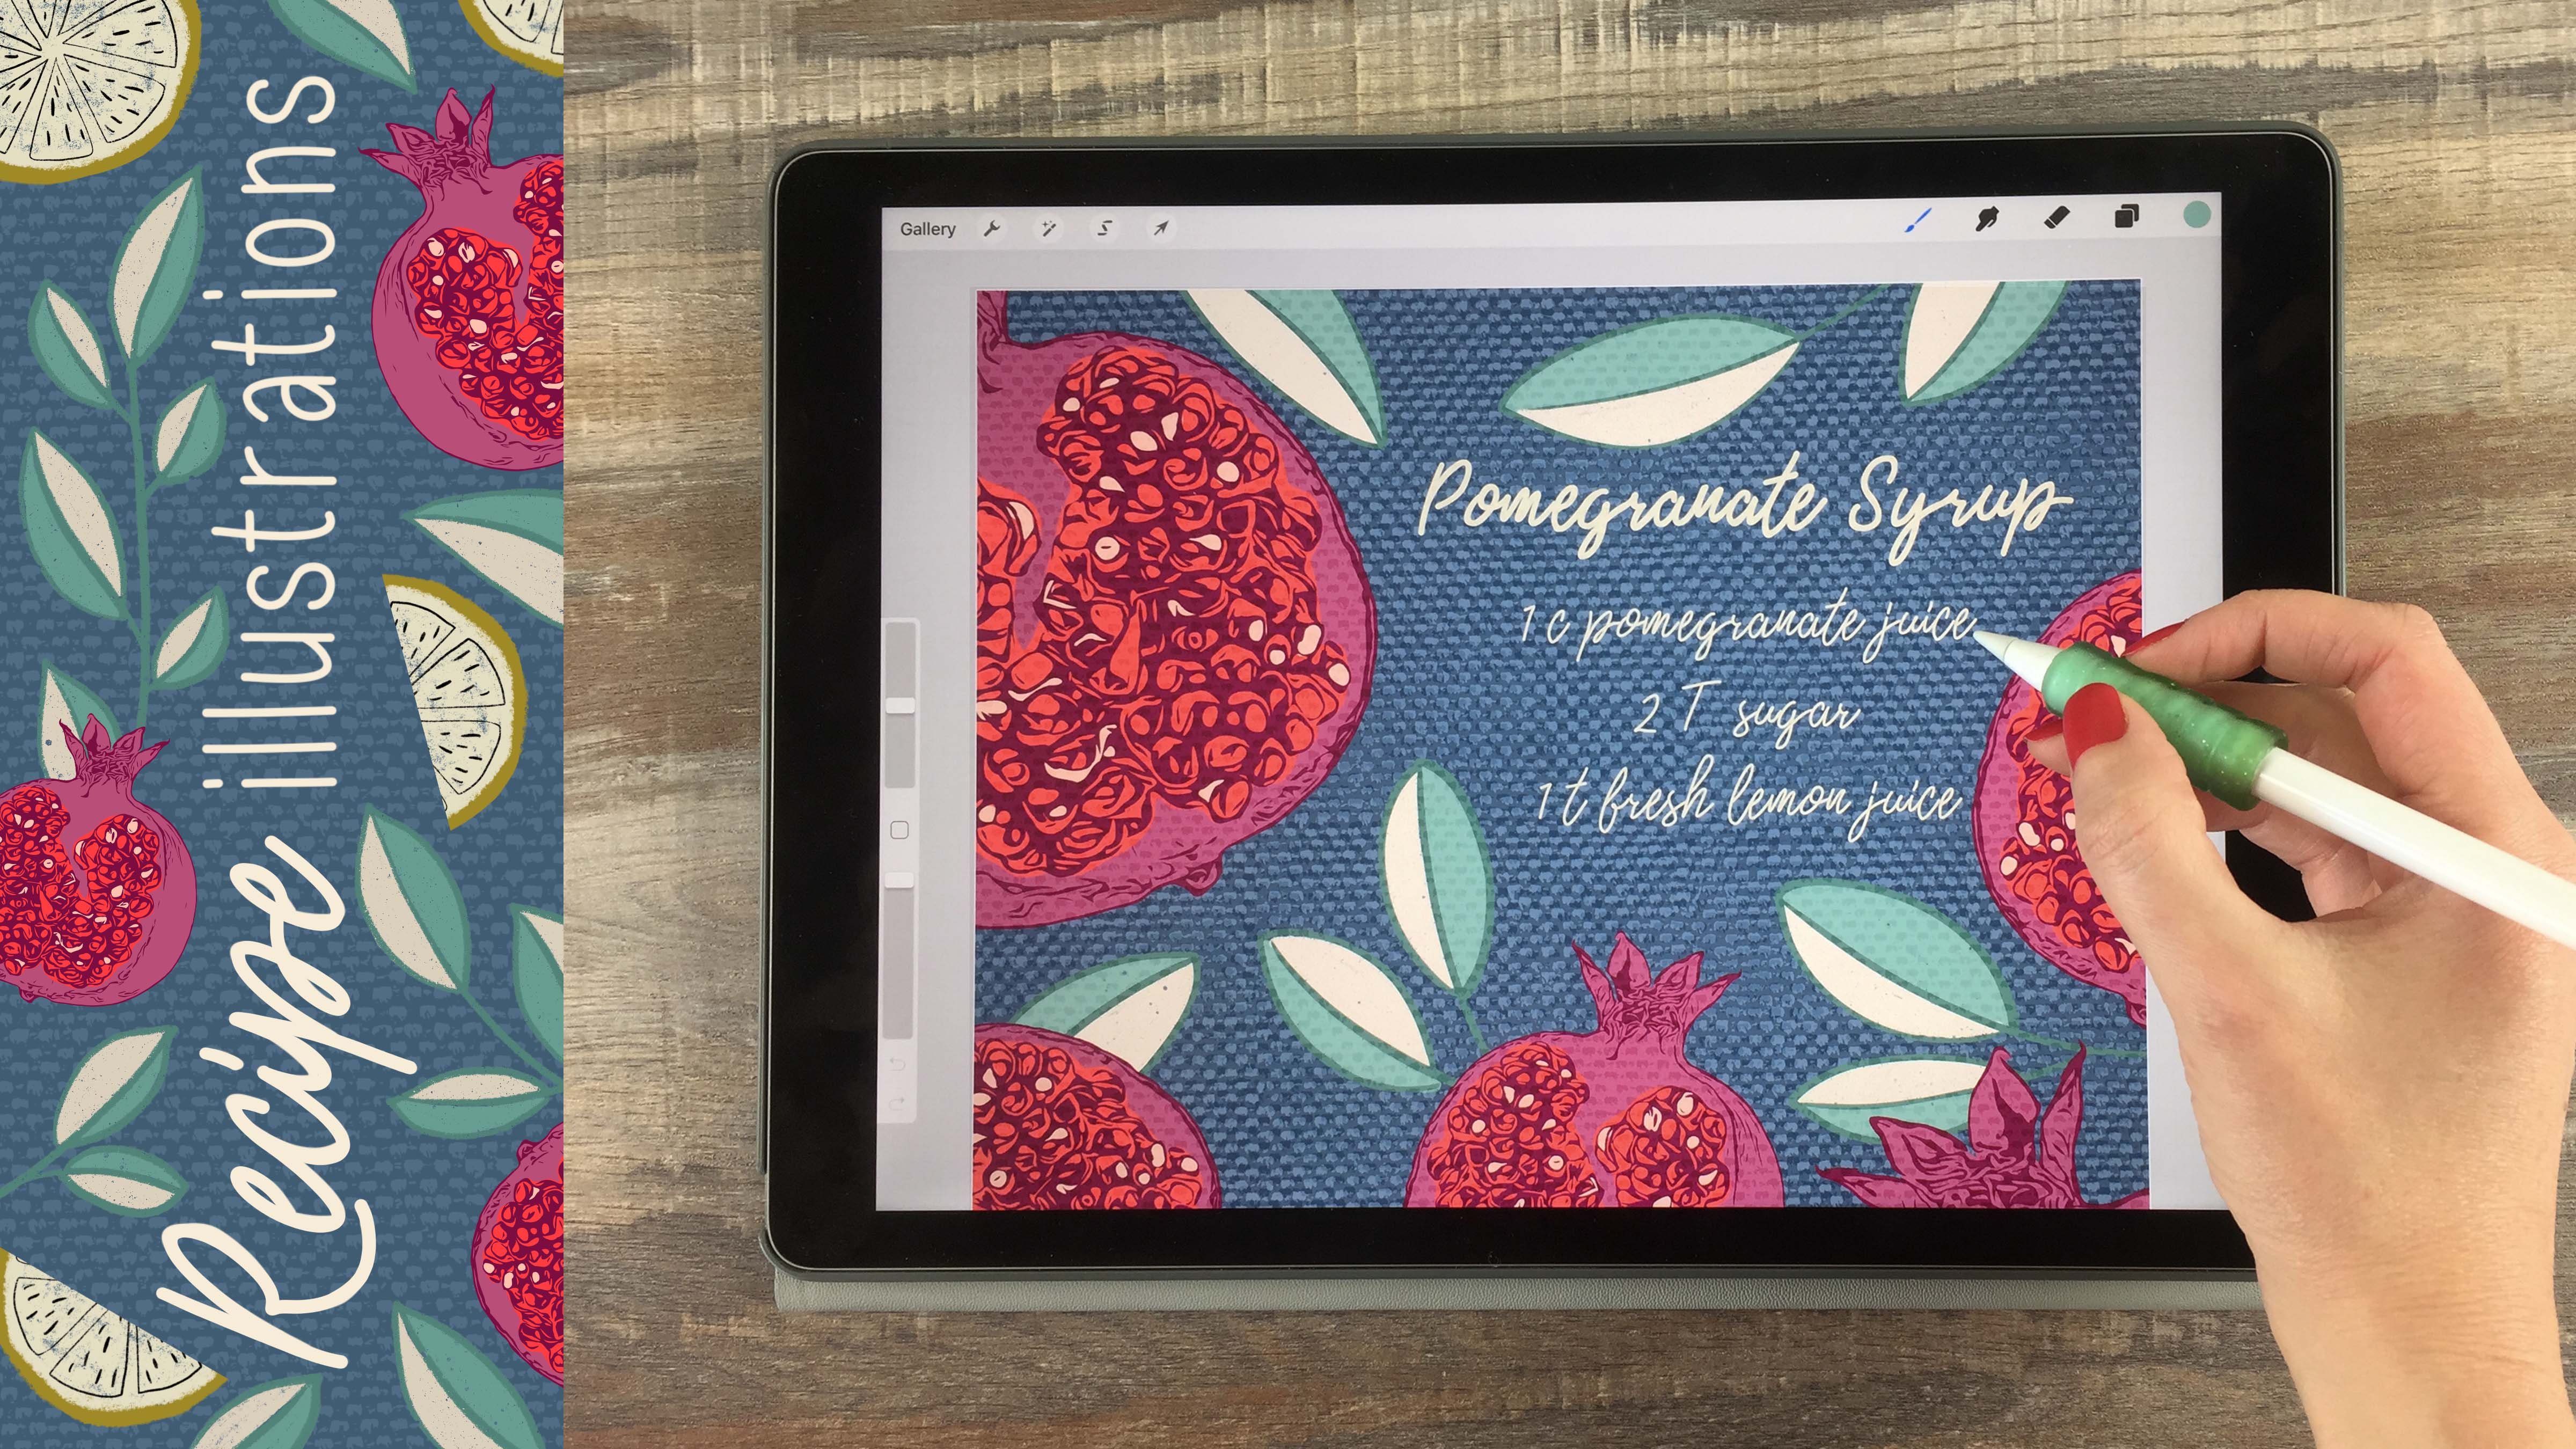
5. Texture Shadow and Highlights: I'm happy with how this looks, but obviously this is a little bit flat. It's missing some dab, it's missing some shadow. Let's start looking at a couple of different ways to add texture to this drawing. I'm going to start with the lemons. I'll create a new layer above the lemons. I'm going to grab that lightest yellow as my color and then you can just scan through here and find a texture that works for your style. It's a good idea to try it out on your drawing and see how it looks. See if that's something that works for your style. If not, go with a different brush, obviously. I'm going to start with this brush called asphalt. Again, I'm going to create a clipping mask layer. This is a layer just above my lemons. I'll tap on it one time and tap clipping mask. Then when I draw that onto my lemons, it only appears on the lemon and not on the background or the leaves. The first thing I'm thinking about is where is my light coming from? I'm going to have my light coming from this top left corner. The lightest areas will be up here, the darkest areas will be down here. I'm going to create a new layer, that's a clipping mask layer, putting each new color on its own layer. One trick here, if you click on your lemon layer, tap "Plus" that new layer automatically becomes a clipping mask layer and just shifts the other clipping mask up. That's usually how I create my new clipping mask layers, is I just click on the original layer and then click "Plus" to create a new layer. You can see that muddy brown works well but actually I want to go with something a little more saturated. I really like highly saturated colors on these drawings. Just going to try a few different colors. Obviously, you can just go with whatever works for your style here. I did a medium brown and a darker brown and you can even create another clipping mask layer. Let's get a bold yellow and just add another dimension of color in there. I like to layer these a lot and then I also like to play around with reducing the opacity of each texture layer and then sometimes playing around with the blend modes. If you tap on the end symbol and scan through the Blend Modes, sometimes you'll find something really interesting here. I really like this one. It creates just a bright highlight, but keeps that shadow down at the bottom. I'm going to make my sketch invisible and repeat the same process on my leaves. Again, I'm just tapping away leaf layer tapping plus, which turns that into a clipping mask because I already had that vein clipping mask layer up here. Then I'll just play around with some different color textures on these leaves. What I'm doing for this piece is I am using the same texture over and over. But certainly you could try a few different textures. You could play or multiple textures on each other. You could layer multiple colors. For this piece I'm using the same colors, light and dark versions to create highlights. But of course go with whatever fits your style here. I just broke my own rule and I added two different colors to the same layer. Sometimes that happens, it's not the end of the world. It's just taking away your ability to later go in and change things. I try not to do that, but of course, when I get into the groove of creating, I tend to forget my own rules. I'm going through with almost a white, green and just adding a little bit of highlight the very tips of these leaves. Almost just making them blend in the background a little bit but I just don't want to go too far with that so that they do actually blend into the background. I'm going to repeat the same process with my flowers. One thing I want to note here is that depending on your iPad, you may end up running out of layers. You can work with the smaller canvas size, that's one option. But one way to get around doing all of these different clipping mask layers is to just alpha log a layer. For example, I'm going to create a new layer. Let's pretend that this is a lemon. This is a big lemon. I'm going to alpha lock this layer by tapping on it and tapping "Alpha lock", or you can just swipe two fingers to the right, either one and on that layer, I would choose a new color then I can do my textures. Keep in mind here that when you do that you're losing the ability to edit this color and the texture color but if your iPad's running out of layers, you may not have much of your choice. For my iPad, I think I can do about 50 layers for a canvas the size. Yours may be a little bit less depending on the size of your iPad. Using that alpha lock option instead of the clipping masks is a good way to get around that. One last thing I'm going to do with this drawing is go to the background layer and just get a light gray. Then I'll create a new layer above everything else. Get black as my color and I'm just going to use this tiny specks texture brush at the bottom of the set to add a little bit more visual interests to this piece. I want to note here that with any of these texture brushes, you can tap on them, tap "Grain", and then reduce the scale, and you can see how it's changing here. The nice thing about that is you can choose how big these little specs are, and that goes for anything here. If you feel like the texture just looks way too big and you want it smaller, just click on it and reduce the scale. You can see this is a really quick and simple way to add some highlight and shading to an illustration but we're also creating a beautiful illustration, even though it was a somewhat quick process and simple execution, the result is beautiful and this would be great for posting on Instagram and Art Print or whatever you'd like to use it for. You can see that I use the same process for this card series that I created. I did both some fruit and some flowers and then just added in some hand lettering. I have a book on hand lettering if you're not sure where to start with that. I won't cover that in the class today, but you can check out the book if you'd like to try that out. You can see in this card series, I just apply the exact same process that we just used. But instead of the white background, I did a black background because I thought these highly saturated colors looked really nice on the black. I want to show you the time lapse of one of these drawings just to show you how simple this illustration is, I started by adding in the hand lettering and then I just did a simple sketch just to mask out where these fruit and leave shapes should fit around my lettering. Then I blocked in all of the color, added some texture, added some little highlights to each of the berries and that's really it. Even though these are pretty simple shapes, this texture really takes them to the next level and give some beautiful highlights and shading to the illustration. Let's go ahead and move on to the next project, where we'll take a look at how to go little bit deeper with your texturing.
6. Greenhouse Shapes and Sketching: Next we're going to take our texture process one step further by introducing multicolored layered texture. You can use multiple colors to add warm and cooled tones to your illustrations, which gives them so much more depth than single color illustrations. We will be using a greenhouse with some plants in it as our subject matter. Let's get started by taking a look at some greenhouse style inspiration. I'm back here on the Pinterest inspiration board and I'll tap on "Greenhouses". You can scan through here and find a greenhouse style that works for your personal style. Of course, you can go with something really simple or really complex. It just depends on how far you want to go with this project. I'm going to show you a simple option and then I'll show you a more complex one at the end in a time-lapse. I'm going to go with this one because it has just really simple bars and lines. It's going to be easy to map out. So I'll tap the home symbol and the power symbol at the same time. Then you can go to your photos app. Tap on that photo, tap "Edit", crop, and then crop that image. We just have that greenhouse, and again, I'm not copying this image. I'm just using it as a framework to get started, get brainstorming. I think it's really hard to brainstorm a visual image without seeing something visually. I always start out with looking at some images, looking at some inspiration. I really think that's the best way to get your visual side of your brain working. I'm going to start by sketching this basic shape. I'm not going to perfectly match what's going on here. I might go a little bit more simple. I think when you start illustrating, it's really important to start simple so that you can spend a lot of time on the fundamentals. Rather than putting all of your work into creating a complex composition without getting comfortable first with color and shading and the basics of drawing. I'm happy with this really simple basic structure. I'm going to reduce the opacity of that layer and create a new layer. I'll grab the sketching pencil and tapered. This is going to be the frame of my greenhouse. Because this is a symmetrical object, I'm going ahead and turn on the symmetry feature. I'll tap the tool symbol, tap "Canvas", turn on the drawing guide, tap edit drawing guide, cemetery, and under options making sure vertical is selected. Then if I tap done, I can test that out and that looks good to me. I'll start by getting the sides of my greenhouse. I'm using black here instead of white. But certainly go with whatever color works for your style. You can see how my sketch is really just a guide here. But I'm not following it exactly. You can see that I need some perfectly spaced bars here, so I'm going to turn on the grid to help me with that. I'll tab the tool symbol, edit drawing guide, 2D grid, and then on grid size, I'm just going to increase that until it's the size that I need here to measure out my bars. I need three bars. I'm trying to get my squares of my grid to fit perfectly on the edge here so I can get my three bars across. Now I can go back to my symmetry option again at a drawing guide symmetry and get my door in there. Putting down two fingers to make sure that's a perfectly straight line. Then with my eraser, I can just remove all these extra little bits. So I'm happy with my frame. I'll make my sketch layer invisible. I don't really need this anymore that drain battery anyway, so get it out there. Am going to create a new layer and grab a different color with my sketching pencil tapered, and I'm just going to go through and sketch some planters and platforms that I want to add in here. Start with my planters. I'm looking for some nice pots in my greenhouse where planter would work. Again, I'm thinking about variation, I don't want all my planters to be the same size. I'm going with totally different size for each planter. Of course, if you want all yours to be the same, you can. But changing it up a little, add some visual interests and just help the viewers eye bounce around the Canvas rather than just being stagnant in one place. I'm going to do a hanging pot up here. I'm not going to do one on the other side because I'm really going for lots of variation here. I'm going to do a nice vine plant coming out of this piece here, and let's do some really big chunky leaves on that one so we can really see our texture. As you can guess, texture works really well on bigger, wide open objects. That's why I chose fruit and plants and things that have big wide open spaces. Things that are really tight and small don't work as well with texture because you can't really see the texture very well. Obviously, that's not a great option. But of course you can use whatever leaf size works well for your style. There's one big vine plant. I'm also going to do a totally different type of plant here. Just like with everything I do with illustration, I'm always thinking about variation and movement. I don't want to have five things in a row that all look the same. I always think about it as setting a rule and then breaking the rule. If two leaves go to the left then the next leaf needs to go to the right. I'm trying to avoid predictable patterns. Let's do another semi vine plant over here to balance out the one that's on the other side. But I'm making it very different than the one that's on the other side so that they don't seem too similar. I'm going to do one plant that has sort of smaller leaves. Just so we have a little bit of variation in terms of the leaf size. My hanging planters seems a little bit big, I'm going to grab the selection tool, circle around that shape, tap the "Move Tool" and just make it a little smaller. That gives me a lot more room to have my hanging plant leaves coming out. I'm going to sketch one of these ends. I have an idea of what these leaves are going to look like, but I'm not going to do them all, I'll do that when I do the inking process. This point, I'm just looking for balance and making sure there's the same amount of plants on each side. But that there's a lot of variation between the two sides.
7. Multi Colored Texture: Reduce the opacity of that layer. Then I'm going to create a new layer below my greenhouse layer. That won't be for my plans. One thing I'm going to keep in mind with these plants is again, the variation that I keep talking about. I'm going do a different color on each plant. I'm also making sure to use different size leaves, different widths for the stems. You get plenty of variation with each piece. I'm also using the sketching pencil to color rather than the wet paint brush that I used last time. The nice thing about that is it has a texture built into it. You get just a little bit more texture than you do with that web paintbrush. I recommend you try both the wet paint brush and this, so that you have a feel for how they each work and which one works better for your style. Again, new color, new layer. I'm going to grab a totally different shade of that green, but I'm still using that green because as I told you, I'm using the same colors for this entire class. You'll see that all these colors look a little different. They're really just varying shades of the same color. You can see that vibrant green contrasts really nicely. Both with the black and with the darker green here. I like having that little bit of variation in here. You color your layer I'm going over to the other side here. Now that I have all of my plants taking care of each plant on a different layer. I'll create a new layer, and start filling in my pods using the same process. I'm going create a new layer below my greenhouse layer and just add some little strings that connect this hanging plant to the ceiling. I'm going to start with the leaves and I'm just going go through each layer that I've created and add a little bit of texture. Let's start with the darkest leaves on the right here. Again, I'm going to create a clipping mask layer. I'll start with some veins. Like so create a new layer above that layer. I'm going to grab a lighter turquoise. I'm going to use a different texture on this one. I like this doggy door scratches and crayons streaks. I'll play around with those two textures. One thing I'd like to do with these is an overall texture. That would just be painting the same texture over the entire thing, not thinking about highlights and shading. That is an option for you. Another thing I might want do is change the color of these veins. I feel like the textures really overwhelming the veins. I'll go to that vein layer. Swipe two fingers right to alpha locket, tap one time and tap fill layer. Now I've got a slightly brighter vein. Now when I go through with that texture, I can use a slightly darker color. Then I'm getting a totally different effect. The lesson here is just don't go with your first try. If you put something down and you think, that overwhelmed the veins I just made. Then try something else, change it. Change it from your original plan. You can always change your plan as you work. When I create these pieces in the class, I plan them ahead of time because I don't want you to have to sit and wait for me to figure stuff out. But as I'm doing these for the first time on my own, it takes me a really long time to make all these decisions. Take your time here to make all the decisions you need about color and layering. You can see what I have going on here. I did some light veins, some medium texture, and then I'm coming through some darker texture. I'm just doing an overall texture for this piece. I'm not doing the highlights and shading like we did for the last piece. One last type of texture that I'm going to bring into this piece by creating a new layer above that leaf layer is I'm going to bring in a different color. For my purposes, I want to bring in a yellow. I'm going grab some texture that I think will look good with this yellow. This body texture looks nice. Cracked porcelain that gives a nice varied look. I think I'm going go with that. The crack porcelain. I'm only going do this on some spots. I'm not going do it over the entire piece. I'm just going to jump around. Then it has that like real life variation that a plant would have. Let's go with a lighter yellow to and just stamp that around. You can see this is really the fun part. Once you get your basic structure down, you can just start going crazy with color. I could even do like pull this pink that we're using for our pots. I could pull some of that in as well. Go as far as you want with these, I'm going to keep it simple and let yellow be my additional color just to warm this up because there's so many cool grains on this composition I feel like I need a warm it up with some yellow. I'm going to repeat this exact same process with each of the leaves, creating a new layer, that's a clipping mask. Then creating my veins. If that plant has veins and then adding in some texture. It's always a surprise how these pieces turn out. I really don't know until I get into it what the texture is going do to that piece. It's a fun discovery process where you just keep layering until you find something that works for your style. For this piece. Rather than doing a vein, I'm going make one side of the leaf a different color. I'm just going go through this slightly darker color, I just cut across the leaf like this. Again, that's a way of adding variation. If I do veins on every single leaf, then it becomes predictable. It's like the viewer can guess what they're going see as they look around the piece. Whereas if you really switch it up, you're creating a more interesting experience for your viewer.
8. Texture Options: I like how this looks and I want to be able to add texture to both this side and this side of the leaf at the same time. So I'm just going to pinch this leaf layer and this clipping mask layer together. That makes this plant one layer. Now we can create a new clipping mask and that becomes the area where my texture falls. I really like that super dark color against that multi toned leaf. I almost don't want to add any other texture except a little bit of yellow to that because I just like how that really simple texture ended up on there. I'm going to go super light with the yellow on this piece, I'm just tapping it. Because, again with variation, I don't want it to look exactly like this other side. I want to have some interesting change going on here. I like how those look and I'll repeat the same process with these other two plants. You can see that I tend to be really messy with this process. I think this process lends itself well to some intentionally messy marks. So don't feel like all your marks have to be perfect with this process. The texture is so rough and gritty. I think it almost looks better to have this rough gritty sketchy marks all over it. I'm not going to add a lot of texture to these plants because they're so tiny. They almost get overwhelmed by texture, so I'm just giving them just a tiny bit of variation. Same thing for these little ones. I think if you add a lot of texture to a really tiny thing like this on the Canvas, it just gets confusing. Whereas one tiny little mark to show vein, that's going to be a lot easier for the viewer to read. Next I'm going to do the same process with my pots. I also need to make it clear on these pots where the top is. What I like to do is just select that color, get a slightly darker color, and you can see the color tool gives you a nice comparison of your first color and your second color. So I'm going to go a little darker, and then on a clipping mask layer just above that pot, I'm going to circle that area, and I'll do the same thing on my lighter pots. Selecting that color, getting a slightly darker color, using this as a comparison for the two colors, and then on my clipping mask layer just above my pots, drawing in the top of that pot. Of course, I'm going to add my same texture concept to each of these pieces. Just like we did for the multicolored leaves, I'm going to merge the pot and the pots' top so that I can texture these together. Create a new layer above that pot and just get a light color. I'm using my same texture. You've probably noticed that I use the same texture on an individual piece. You don't have to do it that way. You can use multiple textures throughout the piece. It really just depends on your style. I want to get a little bit more of this lighter texture over here without getting it on the top. What I can do is tap the freehand selection tool and just circle around that pot. Grab my brush and I can brush in here without getting it on the top. Let's do that same thing on this side. I'm just making a circle, making sure freehand selection is selected with the selection tool, and then giving that highlight over here and it's not getting on the top. I can do that same process to differentiate these leaves that are laying on top of each other. Let's go over to this leaf layer. Create a new clipping mask layer right above it. I'm just circling this leaf shape so that I'm cutting it off from this other leaf. Let's get a dark color. Then I can just add a lot of shading over on that left side. That differentiates those two leaves from each other. That freehand selection tool is really helpful here, especially when you have some overlapping objects like I do in my composition. Again, I'm going to come in with that yellow. I like to do the yellow, the different color that's popping through under my other texture layers. I do that because I like that color peeking out from below the other colors rather than sitting on top of them. But try it both ways and see what works for you. Again, I'm going to finish this off with the same thing I did last time, which is creating a gray background by grabbing gray as the color. Just a light gray. Tapping on the layer and tapping fill. Then I'll create a new layer above everything else. Get black as my color, and use that tiny specks brush. I'm doing that treatment, the gray background and the black specks on all of my compositions. But of course you don't have to do that if you really dislike the texture as it is. Don't use the speckles. Try different backgrounds. You can stop here. This can be your flat 2D illustration. Or you could take this to the 3D level by duplicating this greenhouse frame, tapping the Move tool, making sure magnetics is on, and then pinching to make this smaller. The smaller you make it the bigger your greenhouse is going to look, so I'm just going to do some little bit of a shift. Then you can play around with where this frame lies. That will depend on the perspective of the peace. Then I can move this smaller one that I just created down to the very bottom of my layers panel. It's behind everything else. I'll grab black as my color, get that sketching pencil untapered again, and just connect these two pieces. These bars have to connect to each other for the 3D piece to make sense. Now we've got a nice closed-in greenhouse. Of course, we could add some more pots. Now we've got that little space back there where we can add some extra plants, or you can just leave that open so it's just a nice greenhouse that you can walk straight into. I hope you like playing around with this multicolored texture option. I want to show you a couple more options. Of course, you can apply this process to any object at all. Here's a roller skate, a bird and some fruit. I just wanted to show you how varied the options are when it comes to what you can apply texture to. Again, you'll notice that these big wide open spaces like the roller skate and the bird's body look really great with texture, whereas tiny thin little objects like the branch don't work as well. So when you're thinking about Illustration topics to use with this textural process, just think about looking for objects that have wide open spaces. Also, if you enjoyed this greenhouse illustration topic, of course, you could do a whole series of greenhouses. There are so many different styles and layouts that you could do. Here's a slightly more complex piece that I did. Where I added in some brick and frame. I just used one of those greenhouses that's on the Pinterest board. I bet you can figure out which one it was. Just like we did for the other greenhouse, I added in these simple plants. Some touching the roof, some sitting really low, some hanging, so I'm getting all that variation. Then I spent a little more time on the greenhouse itself. Coloring those bricks and adding some nice texture and variation to the bricks. But then when it comes to the leaves, I did the exact same process that we did just now. I added in some veins on the clipping mask layer, and then I started adding in my texture using yellow as my secondary color just to warm up all that green space. Now that we've covered a few different ways to add texture to your compositions, let's take it to the next level with a slightly more complex illustration with lots of layered texture and overlapping elements.
9. Creating an Inspiration Board: For this next project we're going to combine the single and multi-colored texture processes and start introducing some more layered illustration elements. You'll see when we combine these two processes that it adds so much more depth than movement to your illustration. I'll be using architecture as my subject matter and you can follow along with me or you could do something else like a local coffee shop, a bookstore, or even your own house. So let's start by gathering some inspiration for this project. Back on the Pinterest inspiration board, you'll find building illustrations and I just pinned a lot of different building illustrations that I'd like,,, you may find something that fits your personal style as well. Of course we don't want to copy any of these people, but this is a good way to start thinking about this type of style. You may want to do a three story building with a bicycle in a figure, maybe you want to do multiple buildings all together, or maybe you just want to do an illustration of your own house, maybe you want to add some plants and bushes and things that aren't really there but you want to do your house or your neighborhood something like that. So what I'm going to do is some buildings inspired by Santorini, Greece. I went to Greece a couple of years ago and I was so inspired by the architecture, I especially loved these walls that are wavy, they're made of some stucco or cement and so they don't have the traditional sharp edges, they have these rounded tops, rounded edges. I also love some of these colors, this pink, these tan colors, this darker orange color so I'm going to stick with this color palette and what I like to do when I'm planning an illustration like this is start with a bunch of different images. So I'm going to take a screenshot of this image, I'll do the same thing for this image so I'm just going to go around and take a lot of pictures so if you're doing your house or maybe something in your city, you could go outside and take some pictures of that exact building to start getting some inspiration. So once I get all my pictures, I like to combine those on a single document that I can see while I'm drawing. One easy way to do that, same thing we did before with the split screen, I'm going to go to where I have all of these images tap "Select" tap on each of them and then drag and drop them onto the Canvas and that's going to drop every single picture rather than having to do them one at a time. I'll swipe to get rid of that split screen and now I can just go to each image, tap the move tool and then put that in place. So I'll take just a minute to organize these images in a way that makes sense for me while I'm drawing. I also wanted to note here that I have some other objects and plants, a little cat, a bicycle, some things that I know I want to include in my illustration, I just threw those in. If you go to the class workbook, you'll see that I have a list of ideas for things that you could include in your buildings, potted plants, laundry, people, animals, chairs, and tables, bicycles, cars, bushes, rock walls which you'll see I did over here, stone or brick path. So those are just some ideas to get you started to start thinking about what could you include in your illustration? So back to my inspiration board, I need a little more space and I like to use vertical images because they fit nicely on the split screen so I'll tap the tool symbol, tap Canvas, tab crop and resize, and then just pull this down so I have a vertical image and that gives me a little bit more space to work with. So there are all of my images that I'm going to need to inspire, meanwhile I create this illustration so I'll tap the tool symbol tap share, JPEG and save image then I'll go back to my gallery and start working on my illustration. Again, I'm using 3000 by 3000 pixels, that's a size that I like to use but of course, work at any size that works for you. There I've got my inspiration over on the left here and I can just scan around and use that as I'm working. I also like to do this because I find that drawing and planning at the same time is nearly impossible for me, I like to split things up into different sections so that I'm doing one task at one time. I think it's a lot less stressful when it comes to building a composition.
10. Sketching Architectural Features: So looking at some of these buildings, I can use some of these windows shapes, I could use some of these colors, door shapes. Whatever you want to do here, you can just get inspired by the shapes that you see in whatever images you've used. I'm going to get the "Sketching Pencil Tapered" again and start playing around with some shapes. Just like I did last time, I'm starting with some really simple shapes. I don't want to commit to too much detail until I get a little bit deeper into this process. I know I want to have a little porch here, I think it's going to tie the porch in nicely if I bring it over on the other side too so that we have a nice balance going on. I'm going to do this interesting porch thing that you see a lot increase. You see these rooftop porches. I'll tap the "Move tool", make that a little bit smaller so we have some more space on the Canvas. I love these rounded windows that you see in this architectural style. They are unusual, you don't see those in the US, but I love these rounded edges that you see throughout this type of architecture. As I'm creating this, I'm just trying to think about, how can I use the shapes that I'm seeing in my images to inspire me? Without copying an image directly more, just taking inspiration from the shapes and colors. I'm happy with that layout. I'll add my other objects later on, but I know I'm probably going to have something like a plant and maybe a bicycle. It's a good idea to at least have a general idea of where you want your other objects to be so that you leave plenty of room, but of course, you change your mind as you work and that's totally fine. So I'll reduce the opacity of that layer, create a new layer. Then I can start refining this sketch, putting two fingers down to get that straight line. You can see why it's so helpful to have that rough sketch. It prevents me from having to do a bunch of difficult detail work without knowing for sure that that's what I want to have in my composition. I try to always start with things that need to be measured. So for example, these stairs are going to have to be measured. So before I do anything connected to the stairs, I'm going to do that. So again, I'm turning on the drawing guide just like we did in the last project. I'm trying to get the drawing guide to be about the size that I want my steps. So that looks good, I can use this little blue dot to drag it into place. Now I have a nice guide that's just going to help me keep the stairs in line. You can see I'm really using this grid now. I'm putting these three points on the grid, and then I can also put some detail pieces on the grid as well. So this grid is helping me keep things somewhat even. Of course, they don't have to be perfect. We're not going for perfection here, we are going for handmade. You want to get close, so there's not too wonky, but also leave some room for variation. I'm going to adjust my guide just a little bit for my porch rounds. It's important here for the porch rounds to reach evenly across. I'm taking a lot of time here to adjust these and making sure the grid is lined up with the edges of the porch. I'm going to create a new layer for these windows because I want to do a couple of tricks to make these even. So the first thing I'll do is draw one side of the window, that curve exactly as you want it to be. Then we can duplicate that layer, tap the "Move tool", flip horizontally, and then shift that over, merge those two together, and then finish out my window. I've got this nice window. I can swipe left and duplicate, tap the "Move tool" making sure "Magnetics" is on and shift this over. I can merge those together, duplicate and shift these down. I like to do some little shortcuts like that so that I'm not redoing a lot of things over and over. I'm going to merge those together, but I actually want an enlarged version of that over here. I'll tap the selection tool, make sure "Freehand" is selected, circle that window, drag three fingers down the canvas, and tap "Copy" and "Paste ". I'm copying it from one layer and pasting it onto another. Then I can use the "Move tool" to make that bigger. Normally in digital art, we never up-sized, but when it comes to a sketch, really doesn't matter if your sketches blurry. Don't worry about that up-sizing rule when it comes to sketching. I'm making my door using the same process, make one side and then flip it horizontally. I Want to zoom out and I make sure my doors in the right place. I'm going to do my circular window here. So I'm adding in these little details, and you can go as far as you want with this detail work. You can add a ton of detail or you can keep it super simple. Whatever works for your style.
11. Applying Layered Color: I'm going to merge all those sketch layers together, and on a new layer, I'm going to start sketching my plants and extra pieces that I'm going to add here. I'd like to sketch those in a different color just to help differentiate it from the actual house. Things get a little confusing when you get a lot of different elements on the page. I think it's a good idea to just split things up in different colors. Let's start with that. I'll create a new layer and I'll put that below my sketch layer so I can see my sketch layer as I draw. Then I'm just going to start filling in with color. This is where you, as the illustrator, you have to start making some decisions. Do you want to use the wet edge paintbrush, which is solid? Or do you want to use the tapered, which has a little bit of texture to it? You can decide here, we have used both methods in this class, and now you just have to go with whatever works for your style. Take some time here to fill your building in and then we'll pick back up after that. I wanted to note here that I don't like to use quick line to help me make straight lines when I'm illustrating, I like the fluidity and variation that you get when you draw lines by hand. You can see the difference here. If I use quick line to make a perfect line, or if I use a varied line, that one is not a very good example because it was too close to being straight. But you can see that you get just a little bit more visual interest when you actually draw the lines yourself. For the windows, I'm just using the color of my background, which is light gray, it's the same color I've been using in all my illustrations so far. You could also do windows in yellow if you wanted to show a light being on, you could do them in blue to show that the glass, or just the color of the background. There's a few different options there with the windows. Maybe try each one and see what works for your style. I'm just going to freehand some of these plants. You can certainly go in and sketch these in, but for time's sake, I'm going to just freehand them. I want to show you one little trick here that I like to do with this texturing process. I'll start by just adding some leaves, and now we want to have some leaves that are behind those and make it really clear that they're behind. I'm going to create a new layer below that layer, get a slightly darker version of that same color, and just add some of those leaves in here. I like doing this with this texture process because it adds just that little bit of variation and different color movement that I want to see up in that corner. I'll do that same process on some of these other plants as well. You can see for this leaf shape, I'm just drawing the veins first, and then going through and following that shape with a fluid leaf. I just get inspiration from these platforms by searching online for things like potted plant, plants, house plant, jungle plants. There's so many different search terms you can use and then just create a simplified version of that. Feel free to copy the platforms that I'm using today, but also you'll eventually probably want to get your own and start thinking about what shapes fit your style. I've got one potted plant that needs to be above the others. I'm going to get my freehand selection tool, circle that pot, drag three fingers down, cut and paste, cut it off one layer and paste it onto another. Then I just need to move that on top of my house. This is why these more complex illustrations get a little more difficult because you've got so many different layers to think about, so many different levels of plants and illustration elements to think about. I'm trying to create these plants in a way that adds to the illustration, but doesn't cover it up. We're trying to emphasize this house here, and I don't want to get too crazy with my plants and ruin what we have going on with the house.
12. Mixing Texture Styles: You could keep going with this. You could add a lot more detail, you could add any of the items that were on that list, you'll probably think of some more items that you could add. But for now, I'm going to go ahead and start playing around with texture. I'm going to do a combination of the overall texture and the highlight texture. I'm going to start with the asphalt brush and just give a little bit of a dark hue over here. I have to make sure that's a clipping mask layer. It always takes me a few tries to get this texture how I wanted. You'll probably find the same thing that you think you know exactly what you want your texture to be and then it just take some time to refine it. I might try adding in some of that yellow texture under just a really subtle dab of that yellow, I think makes a big difference on illustrations like this. Then I'll do the same thing on each of these plants, giving it just a little bit of visual interests. If some of these items that aren't as important to the composition, I'm going to do the overall texture. Whereas things that are really important to my composition, I'm going to do the highlight texture. That's just how I choose to do it. As you get through this process, you're going to start finding your own style for texturing and you'll probably find a whole new way to pull these together. Go with whatever works for you and definitely try everything you can think of. You may think you've tried everything, but there's always something else to try. Another color, adding another object, playing around with different ways of using these textures. Another thing I might do, if I go to this yellow layer that's on my house, I can tap the adjustments menu, hue saturation brightness, and play around with the color. Yellow isn't the only color you could use, you could use blue, you could use purple, green. I mean, any color here that works for your style. I like this orange. It just adds a little bit of a great which you see a lot in Greece. I really like that orange color that is coming out right now. One thing you'll notice is that sometimes you have a clipping mask layer and you need to put a clipping mask on that layer. You need to turn it into a non clipping mask layer. What I mean here is you can see my door when it's not a clipping mask, it comes past my house here, so it's a little bit messy. When it is a clipping mask, it's nicely cut off with my door. What I can do is go to my house layer, the pink background, tap one time and tap select. I'm selecting my pink house, go to my door layer, drag three fingers down, cut and paste. I cut the door off one layer and paste it onto another. Now, I've got this nice new layer where I can add a clipping mask to this door. These are the issues that you'll run into as you do this process. You'll see that when you get this many layers, things get a little confusing. It's important to stay as organized as you can with your layers. You can see here I've used a different texture on the door, so that gives the door just a different feel. That's another thing you might test out here is combining different types of textures. I've got the asphalt texture on the house and the woven texture on the door. I'm going to do the crayons streets texture on the pots, you can see that adds another interesting layer of texture to this composition. Definitely play around with layering these, play around with adding different objects and just see what comes up. You can see three different levels of difficulty here, the piece that we just did is a very simple version of this house with just the basics and just a tiny bit of detail. You can also go more complex by adding more parts to the building, you could add stairs, you can add people. There's so many different things you can add these to make them more visually interesting. You can see here that I decided to do a whole neighborhood. I added several different types of buildings and got those nice rounded tops that you see a lot in Greece. Just played around with what could I add to this composition to make it a little more interesting. I thought having some laundry hanging across just added a little bit more visual interest. These stones just break up the solid pink back ground of the house. If you're having trouble piecing these neighborhood illustrations together, having different types of surfaces on the walls can really help. Then I just took time to play around with a lot of different textures, layering the color and texture, and playing around with different ways to represent the windows in the different platforms that I included. I hope you enjoyed this class and that you feel inspired to start adding all texture to your illustrations. If you liked this class, you may like some of my other classes where I cover a lot more ways to design an paint on your iPad. How to use bold inclines to create highlight and shadow in your illustrations? How to illustrate and animate insects, and how to design a pattern collection on your iPad. Check those out on my profile if we want to see more. Also I share a lot of free downloads and resources for iPad artists and designers on my website, if you'd like to get more resources like the ones you've got for this class, check out my site. I would absolutely love to see the final project that you create after you watch this class so please share what you make. You can do that here on skill share in the project section, or you could tag me on Instagram or Facebook. You could also join the Facebook group I created for iPad artists, designers, illustrators and digital planners. It's a place to get opinions and advice on iPad, drawing, painting, and digital planning, and get inspired by digital creations from around the world. If you love creating things on your iPad and want to join other people around the world in conversations, sharing ideas, and seeing each other's work, check out the group through the link on my website. If you have any questions about the processes that you learned in this class, please feel free to reach out to me. You can do that here on skill share in the discussion section, or you can contact me through my website. Thanks so much for watching and I'll see you again next time. Bye bye.
 Liz Kohler Brown, artist | designer | teacher | author