Transcripts
1. Introduction: Things Thank you. Hello. This is Alan AUB, and I credit this class
exclusively for Scale share. In this class, we will be doing something fun in
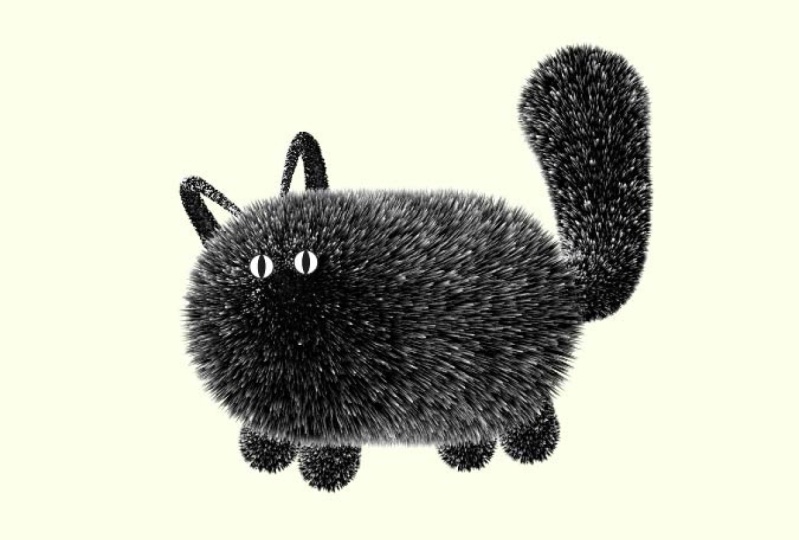
Adobe Illustrator. We will be creating
this fairy cat. Throughout this
class, you are going to learn some tips
and tricks that will allow you to create this exceptional look
in Adobe Illustrator. And you will be able
to use these tips and tools in your future
graphic design projects. By the end of the class,
we have a class project. Each of us will create
our own ferry friend. It's going to be
a very fun class. I'm hoping to see you inside.
2. Mastering the Tools : Everyone, in this lesson, I'll be covering
all the tools and effects that you are going to
use throughout this course. I'll make sure you
understand each of them, and you know how to use
them. Let's get started. This listen, we are going
to cover all the tools and effects that we're going to use to achieve our final project, which is this
beautiful ferry ball. Even though this course is not
for the absolute beginners as you are not going to cover all the basics of
Adob Illustrator, but I'm still going to cover all the tools and tell you
exactly how to achieve this. Even if you don't have any knowledge about
Adobi Illustrator, you will still be able to follow me and create
this artwork. Let's start with the first one. The first one are
shaves and line. Basically, we'll be creating
some shaves over here, and specifically, you will
create some circles like this. And then we will
create some lines, you're going to use the pen tool and create some lines like this. Of course, we only
need the stroke. For that, we are just going
to click on this one, we only have the stroke. Then you will press on the V on the keyboard and
select it again. Now you have the
settings for the stroke. Basically, you're going to
deselect and then select it again to be able to see the
sittings for the stroke. Here we can increase
and decrease. But for this project, we don't need to play with the width of the stroke
as we don't need that. Okay, so now this is covered. The next thing that we
need to use is blend tool. How the blend tools work, Blend tool basically combines
two shapes together. I'm pressing on the option, and I'm going to
duplicate this one, and I will change the
color over here to something. Just like this. And now I want to combine
these two shaves together. Bland tool will create copies of both to combine
both of them together. So this is how it works. Now I'm going to use that tool so you know exactly
how it works. All I have to do
is come over here. This is the Bland
tool. Click on it, and then click on the shaves
that you want to combine. We want to combine this
one with this one. Just like this, we combined
these two together. As you can see, we've created a smooth line because we've
created so many copies here. If you want to change this, you just come over here
and double click on it, and then we are going to change
this two specified steps. Just like this, we can
change the numbers. As you can see, now we are
going to add more copies. Now we know how
blend tool works. Now let's move to the next one, which is blend replace
with the spine. What this does, it
allow us to replace our blend object and put it
on a line that we have drawn. For example, we have
drawn this line, I want to replace this and to be the exact
shape of this line. What you're going
to do is to select the line and your blend object
and then go to the object. Here we have the settings
for the blend tool, and we are going to make
it replace with the spine. Just like this, we moved our blend object and replace it with our line that
you have created. The next one, before I talk
about the raffen effect, let's talk about the
gradient, The gradient, you might know if
you have ever worked on any design toll, you know what is gradient. Basically, this is a
gradient that we have. It's not made with
a gradient toll, but the fit between two
colors, we call it gradient. How do we create gradients? For example, I'm going to
create a shape over here, and I will add gradient to it. Well, your shape is
selected, come over here. This is the gradient
toll and settings. If you don't have it, you just go to the window
and enable it over here. This is a gradient, and
if you don't have it, it will appear over here. Let's add some gradient
to this shape. While shape is selected, I'm going to add a gradient. We have linear gradient. We have radial gradient, and we have free form gradient. With this one, you
can add points and create any combination
of colors that you want. For this course, we are going
to use the radial gradient. Over here, you can
add more colors, and double click on them to change the color to
anything that you want. This is how you use gradients. By the way, you can also play with the
gradient if you want. You can make it bigger, smaller, or even distort it like this. Finally, let's talk
about roughen effect. This basically makes your shape rough, something like this, and this is crucial to achieve this fur effect in
a Dub illustrator. Let me tell you how it works. You just select your shape
and come to the effect and then distort and transform,
and then roughen. Just like this, we can roughen
the edge of our shape. Okay, so now we know
all the tools and the effects that
we're going to use to achieve our final project. Before we create our cat, in the next lesson, I'll show you how to achieve fur effect. So I'll see you in the
next one. Bye bye.
3. Structuring the Cat : Hello, everyone. In this listen, we are going to get
into the real deal. We are going to create
the structure of our pet, and we are going to apply
the fur effect to it. In the previous lissens, you learned about all the tools that we need to
create our project, and you also learned
how to achieve the fair effect or fur effect
inside Adobe Illustrator. In this listen, we are
going to create our cat. And we are going to start
with the structure. We are going to create
the structure of our cat using circles and lines. Why? Because with the lines, circles and blend
tool and gradients, we are going to achieve
the fair effect, and we want our cat to be fairy. So we're going to
create the structure. I'll start with the
tail of the cat. What I'm going to do is to
create a line like this. Like this and this. Now we have the
structure of the tail. I want to make this one round. I'll press on the option
while I'm also selecting the pen tool just to make
it a bit round like this. Now I will add a bit of the strokes we can
see, make it black. Okay. And of course, you can always play
with the structure. For now, I'll keep it like this and later you're
going to refine it. Okay, now we have the line. I'm going to create circles. So come over here
and click here. And the end of the tail, I want it to be big. Actually, let me bring the
original artwork that I have created so we can follow and tell you why you are
doing what you are doing. Okay, so I brought the cat over here, the one
that I created. As you can see, we
want this part of the tail to be
thick and then over here a little bit less
thicker and very like small. So we're going to do that
based on the circles. Circles will decide how
thick the tail will be. So we want this
to be this thick, and this one to be around this. And of course, we
can always play with it once we applied
every effect on it, and we have a final work. We can always play with it. This one will be very small, so I'll make it very small. So we have this one. Now I'm going to
create the body. For the body, I'll
start with the circles. I'll make two big circles. I'll just come over here. Something like
this will be okay. Yeah, I think like this is good. Then another one like this. This is the tail,
this is the body. And then I'll create another
small one over here. I'll just copy, paste, Control C, Control F, and I'll make it very small. Now, I'll put it over here. This is because I
want the fur effect for these two to be equal. And I don't want this
effect, let me show you. Over here, remember when we
fix this with this small one. If you don't have this,
it will be like this. So here we are doing the same. I'm creating the small one to avoid that gradient appearing. Okay, now we will move to
the legs and the hands. I don't know what to
call them. The pose. But before we do
that, we need to create the line for the body. So the line for the body
will be something like this. Of course, this is
the basic structure. Once we applied all the effects, we can always play
with it and refine. Okay, for the legs, I'm going to create
circles over here, so I want them to be
small from this side. Copy it. We have this
I'll make it bigger. Something like this is good. I'll duplicate this
and put it over here. For this, I want to go over
here and this be over here. Actually, I'll move this
here. Discount here. For this one, we
need to play with it later after we
add the effect. I'll do the same for the hands. I'll just copy this actually. Paste it over here. I'll just rotate it a bit. For this one also,
something like this. And then we need to create
lines connect them. This hand is Then we
need to create the ears. I'll make two circles. I'll just doblicate this one. This will be small,
this will be big. And we will do the
second one here. The big one will be here, small one will be here, and then we're going to create the lines. I'll make something like this. And something like this. Then I'm going to
make this one round. And we are going to make
this one round as well. So just click on it. Come over here and make
it round like this. So this is the basic
structure of our cat. Okay, now we created
the basic structure. In the next lesson,
we are going to add all the effects to
achieve the f effect. So I will see you
there. Bye bye.
4. Applying the Fur Effect : Hello, everyone. Welcome
to this new listen. So in the previous listen, we created the basic
structure over our cat. Now all we have to do
is to add the effects. Now, let's start with the tale. I'm going to select all of them. And we're going to
add this gradient. So we've created this gradient already in the previous listen. And this is how it looks. This is it, the positioning
and the colors. I'll just press on the eye to
get the eye drop and click. I'll do the same
for the other two, and then we are going
to use Blend tool. But before I do that, I will
select this one because it's always a bit hard to use blend
tool and the smaller ones. I'll just select it
so we don't miss it, and then I'll go
to the blend tool, and then we're going
to click on this one, then this one, then this one. Now we have something like this. Double click on it,
and you guessed it, we'll make it specify
steps and 121. Now we have something like this. The next step, you're
going to select the line, actually, I'll select
all of them together. So now we have the
line and the object, and then we're going
to go to the object, blend and then replace spine. Now we have something like this. The next step, we're going
to go to the effects, and then fen, and we will use the same settings
in the previous listing. So the 18 and smooth. And now we have something like
this, which is very good. As I said, you can
double click on it, play with the size, whatever you want,
or move them around. Like this. Very good. We will
do the same thing for this and this one. What I'm going to
do is to press on the eye and give all of them the same
gradient that we have here. Then I will slick this one
just to avoid missing it. Then blend tool,
click on this one, then this one, then this one. And then double click. Specified steps 121, and we
have something like this. And then we are going to apply Ruffin just like the other one, and we have something like this. Here I want this to
be a bit darker. What I'm going to do is
to make this smaller. Of course, you can move
this around by the way. You can Let me see. Just like this, you can put
it anywhere that you want. But the aim here is to make sure that this
is not appearing, and I want this to
be a bit darker. So I will move this over here, make it less Now we have something like
this, which is very good. Then I will select the
line that we have, and this one and then go
to the object, blend. We have something like this now. Perfect. Now let's do the same thing for the
legs and the airs. I'm going to do is
to select these. Again, we are going to
get the same gradient, and then blend, this one, this one, the same steps. T then apply roughen. As you can see here,
we have an issue. I want this one to be behind. So what I'm going to
do to double click, we are inside the blend, and then I'm going to
press on the comment and bracket on the
keyboard to send it back. As you can see, just like
this, you're sending it back. And then we might not need to apply to the line because
these are straight ones. Now I'll just keep it like this, and now we're going to
move the whole leg behind. So what I'm going to
do is to select it, right click, arrange,
send it back. We have something like this now. So I need to make the
legs a bit more fluffy. Make it bigger like this, and this one also a bit bigger. I wanted to come over here. Something like this will work. Instead of doing the same steps, I'll just doblicate
this and bring it here, and for this also. Just remove this one. We have this. You can always play with it, make it bigger or smaller
or move it around. We have another one like this. Now we have the pose. I'll bring this down a bit. We are going to
create the heirs. Same thing we are going to do. Oh, I We have this now. Then steps 121, and we
will add the roughen. And then we're
going to replace it with this blind or the spine. Blend, replace spine.
Now we have this. If you want to make
thee a bit thicker, we can always double click on it and make the size bigger. And we can also move
them around like this. Of course, I want
this to go behind. So I'm using command or
control with the brackets. I'll move this over here, and we're going to
rotate it like this. So I don't need to recreate it. So, just like this,
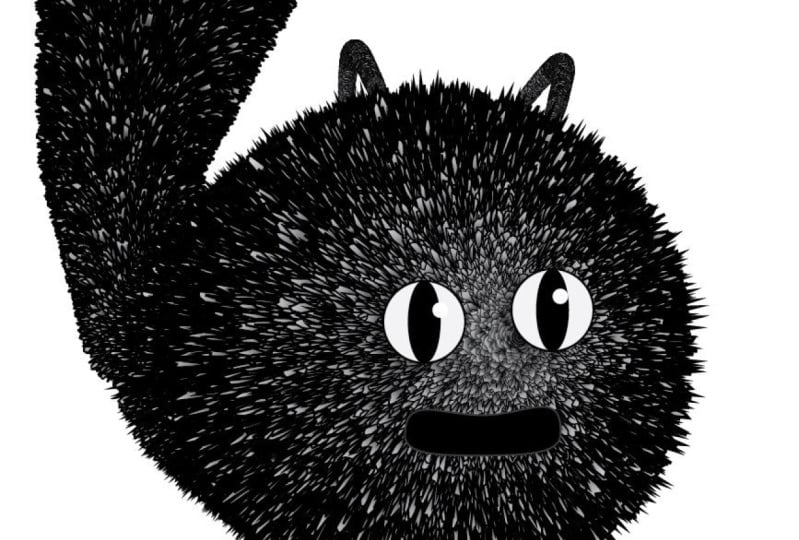
re created our cat. The last thing that
we need to do is to create the ice just
like this one. Finally, let's make some ice. I'll the circle,
something like this. Make it white. I'll give it a bit of the stroke
so we can see it. Now we need to make the pupil. I'll just use the circle again and create
something like this. And we are going
to make it black. I will disable the
stroke as well. Just like this, we have the eye. I'll group them together. And then one effect
that I didn't explain to you is the shadow. We are going to add the shadow. It's over here,
stylized, drop shadow. And, you can do
the offset for it. Something like this is good. And I'll just bring it
over here to make two eye like this beautiful,
small, cute ones. You can always play
with the size, and you can also
stretch it if you want. They need to be close to
each other and a bit up. Okay, so now we have our cat. There are some adjustment
that I want to do. For example, this one, I'll just double click on it. I want this one to be big, just like this, and
this one to be small. Just like this one. You may also play with
the gradient if you want, because I can see it is a bit darker or is a bit too dark. We can always play
with this one. Make it better, and you can do the same
for the other one. One more thing that I want to do here is to hide this one. I'll bring it over here to
be hidden behind the eye. Okay, so just like this, we created our cat. I'll see you in the
next one. Bye bye.
5. Your Class Project : Hello, everyone. Now it's
time for a class project. Let me share with you what will be the class project
for this class. Congratulations for
finishing this class. Now it's time to give you a
homework, the class project. What I want you to do is to
create a cat like this one. Now you know all the steps you need to take to create
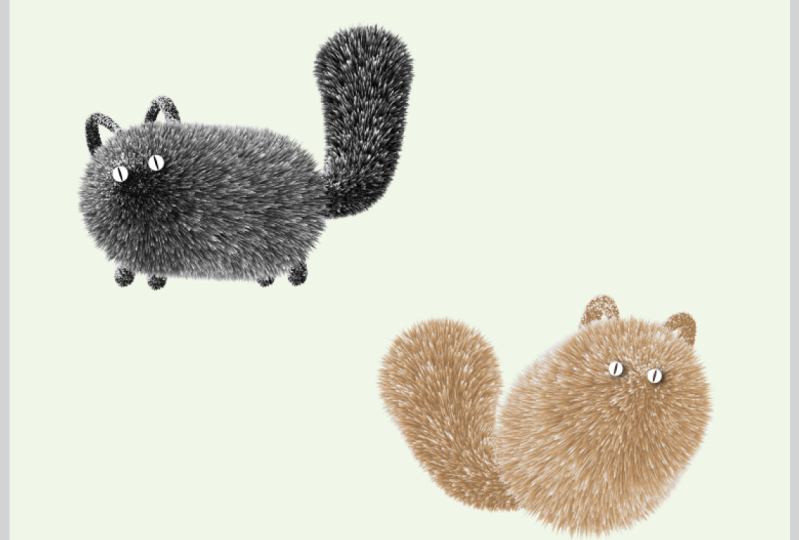
something similar. You either make this
or make anything else, make your pet, do
something different. I want you to experiment
with the shape and also maybe with the colors or anything else that
you can play with. And finally, before
I finish this, if you want to master
A Dub Illustrator, I do have a mega course
about Adob Illustrator, which will teach you from
absolute basic to advance. Till now, more than 50,000 people have joined this
course all around the world. And it's the only
thing that you need to take to master Adob Illustrator. So if it's something
that you are interested, you can get it on my
website 92 learns, and I'll add the link for
the course to this listen. And for everyone who's
taking this course, we'll get 50% off on my
Adob Illustrator course. Okay, for now, I'll wait
for your class project. Make sure to share it with me. I'll be personally looking at them and give
you my feedback. Hope you enjoy the
class. Bye bye.
6. Final Thoughts : And now we came to the
end of this class. Hope you enjoy it and
learn something new. Please don't forget to share
your projects with me. Hopefully, I'll see you in
another class on Skillshare.
 Alan Ayoubi, Motion Graphic Designer and Photographer