Transcripts
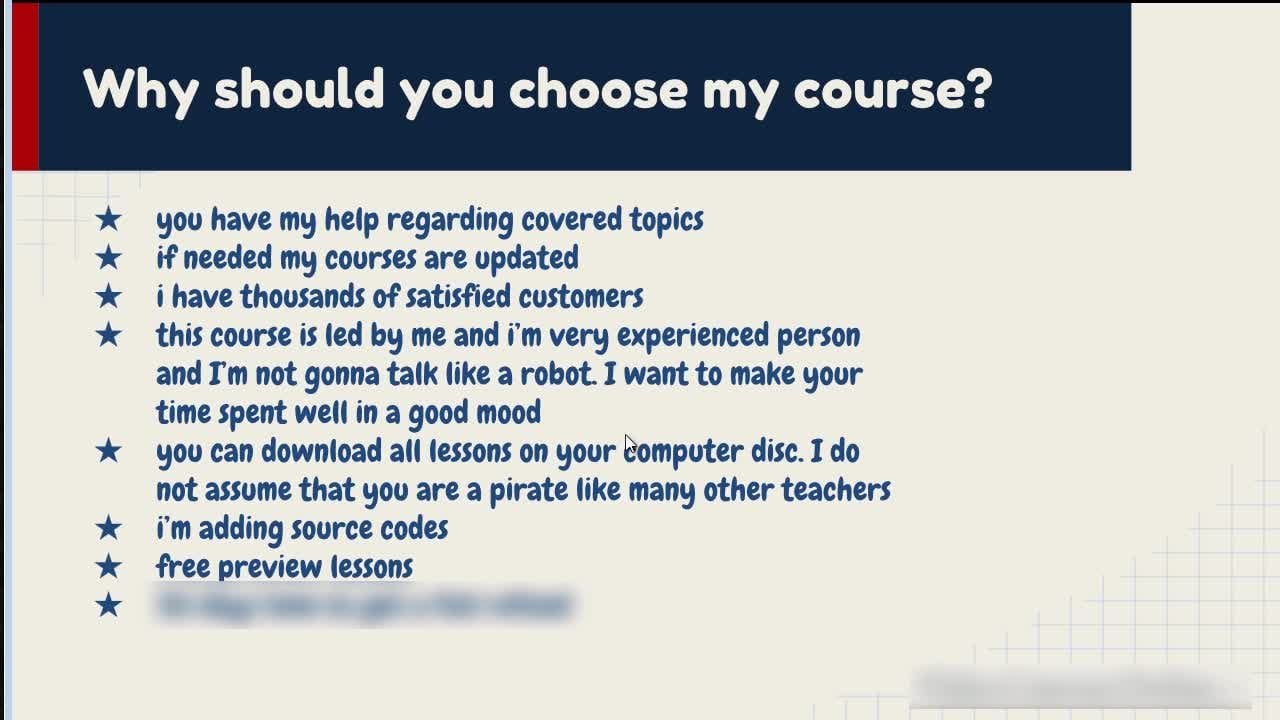
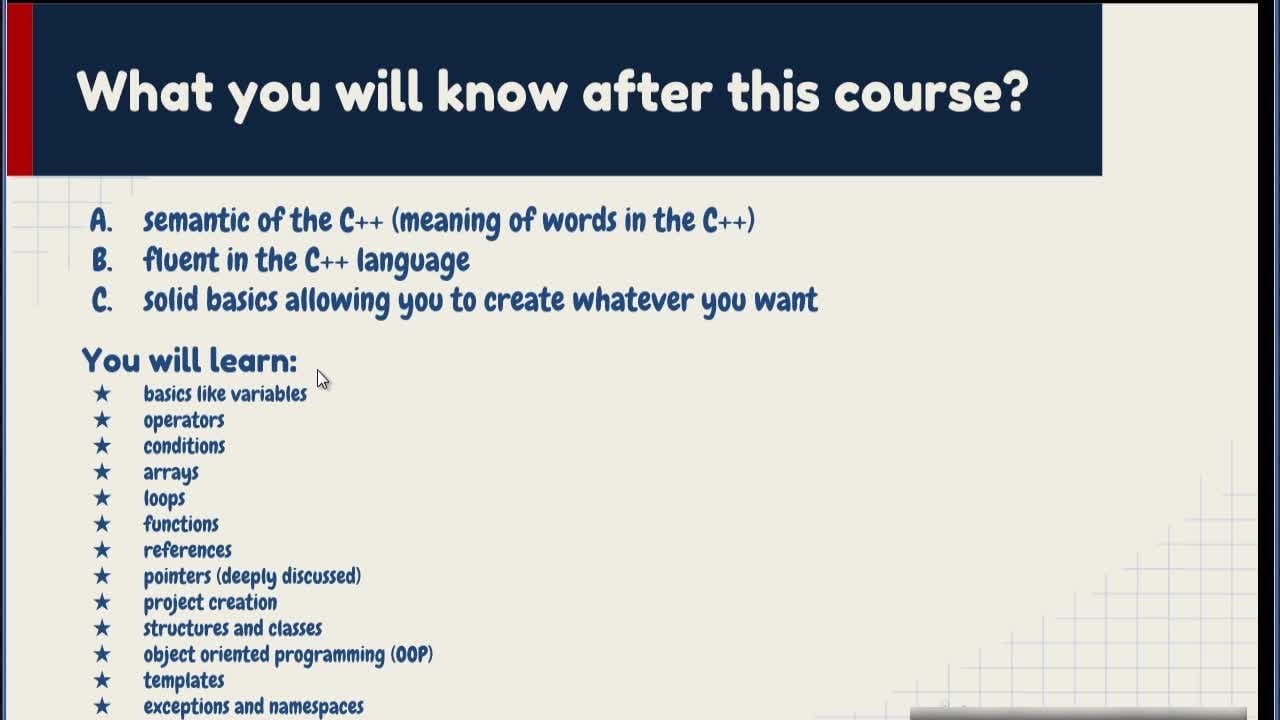
1. Introduction: Hello my friend. This is their first few seconds when I should get your attention or you just close these videos. So did I do it? Well, I hope so because there is so much fun we're going to have in these cars. Firstly, notice that, well, I do not talk like robots, so that's the main difference between my curves and the others. You just won't go get bored. Okay, this is not a boring next course. This is pretty cool course. So if you are asking yourself each time when you learn something new, questions like, why do we need attributes? What are selectors and why they are named selectors and so on, so on. Then you are in the right place because I will answer all these questions and explain you everything from scratch. Okay? I believe that everyone has the ability to develop software if they had taught properly, and it's including you. So after my course, you will finally understand everything that you create. So what you will know after this particle, our course, well, you will know how to use HTML tags, attributes, and CSS selector. You will know how to install and set Visual Studio Code. You will learn super, really super efficient shortcuts that are called emmet. And you then how to add image on your side, how to create internal, external links, how to create user forms with inputs and so on and so on. So there is pretty lots of counter to you, right? And the question is, why should you choose my course? Well, because you have my help regarding covered topics. Ask a question in questions and answers section, and I will help you as fast as possible. My courses are updated if needed. I have thousands of satisfied customers, okay? So what should you know before this course? To be honest, just good intentions have needed, so nothing is needed. Okay, you can just be total big beginner, okay. And who am I? Well, I am our Kaddish would Arctic. And I have got enormous experience in programming, as you can see here. And I have taught lots of people already, and most of them are pretty happy. You can read reviews on the internet, are really love teaching other people and that love helping other. So remember, if you have any questions, feel free to ask. You can send me a message and I will respond as fast as possible. Thank you for watching this first video and have a good day. Good luck.
2. Download and Installing Visual Studio Code: Hello, my friend today. We are going to talk how to
download Visual Studio code, which is, as you can see, a code editor. But
what does it mean? It is an editor? Editor, as the name suggests,
look at the names. Always look at the names. Editor is a program
used for editing, nothing surprising here, right? But what can it edit? Can it edit only
websites or maybe text? To be honest, this
editor, as you can see, can be used not only for HTML, it can be used for
Python, Java Scream, CSS, Java, typescript,
and so on. This is a pretty big thing. And you might be asking, why should we use
editor like that? Why should we download it? Why can't we write
websites using, for example, note pod? You can't do it using notepod. You can to be honest, use any text editor
to create website. However, when you use editor, like for example,
visual studio code, you will save lots of
time and time is money, because well, for example, your code will be
colored, make it clearer. The editor will suggest you, what should you write next? It will close the text that we will talk about
later, and so on. So editor is something
that will do work for you. So it's nice to have
something like that, right? It's good to know
that it doesn't matter which editor
you're going to choose. Let's start, you can
choose Visual Studio code. You can choose, for example, net beans, and so on. The most important thing for you is that it should suit you. It all depends on your
taste, what should you use. To be honest, you can type in
the Google web development. Mm. Editors, and you can
look for a few of them, open them, play with them. But to be honest, at start, just open anything. Just start to code because this is the most
important thing. Start coding, later, you will see what is
important for you. I think that Visual
Studio code is really one of the best editors. What's more, if you
learn how to use it. Well, you will not need to learn another editor if you want to change the language that you're going to
programming, right? Because you can program in it in almost anything you want. So when we type on
Visual Studio code, we can download it for windows. When we click here,
as you can see, you can find links, for example, for Linux or Macintosh. So let's click here, and let's just save the fight. So after the file is downloaded, we can click open here, and now it's the important part. We should read the
license, okay? That's a really important part. And then click next, next. And then next. And you can create a desktop
icons on the desktop. So you can pretty
easily open it. Click next, install and
to be honest, that's all. You editor is going
to be installed, and we will talk. Well, now when we click Finish, as you can see, it
looks like this. We'll talk how to use
it in next lecture. That's on the lesson.
Thank you very much.
3. Creating project en: Hello, it's time to
create a website inside our visual
studio code editor. How to do it. Well, firstly, we need to operate on files. How to operate on files with
so many buttons around here. What should I click? Well, firstly, don't worry. You do not need to know
where you need to, you know, find everything
in this editor instantly. Okay okay? When
you're looking at it, don't worry. There
are many options. You don't need to
know all of them. We will use the most
important ones in future. I will show you
the step by step, so you will not
feel overwhelmed. So firstly, we need
to operate on file. But how do we add a file
to our visual studio code? You can do it in two ways. You can create a new
folder, new folder. Let's for example, create
a folder called CATs. Now we're going to just move
it here. I just move it. I'm holding the
left mouse button and just putting it here. Hello. This is now
inside our editor. Here, as you can see, CATs. And as you can see, this
thing expanded here, okay? This is explorer,
so the thing that allows you to explore
things inside the folder that has
been attached that has been added to
your editor, right? Same like you have got
in windows, for example. But this looks just
a bit different. And here you can do what. You can create new file, you can create a new folder. So let's just do it.
Let's click on new five. As you can see now, we can
type here the name of our FI. So for example, sample, and when I just click enter, as you can see, I
created a five. Sample, the problem
is that, hey, we are going to write inside
what inside HTML in future. You don't know what is
that exactly right now, but we are going to
write code in HTML. So we should change
the extension here. How do you do it? Right click, rename, and let's
type your HTML. As you can see, this has
changed the icon here. Now we are writing HTML. And we can type here
whatever we want. As you can see
when we are typing things here on this right side. We have got here
something like this, this white thing around here. It suggests that there has
been a change inside our code, and it has not been saved. We need to save this in
order to see the result. So we can click file and save or use the shortcut Control
plus S from safe. As you can see, now
we have just said, and we can use the
open this file. So, how to do it, we can
minimize it. Open cuts. Right click, Openwave
For example, Firefox. As you can see, this
is our Faces website, which is pretty weird because it doesn't say anything
interesting, but don't worry. Here in future, you will
learn how to create websites that has got
some meaning right now. It's just for fun. Fun fun fun. And the question is, now, is this the only way
to add a folder? That's not only
the way to do it. We can close the folder that we have got already opened here, as you can see
file, close folder, and in order to open
the file again, but not by moving it here, we can just click
here on the Explorer, and then we can click on open
folder and just find it. Here is where it cats. So like the folder,
and as you can see, we have just opened it again. You can just move it to
the Visual Studio Code, or you can just open it using as you can see
the Explorer, right? And so in order to create
Files, you can do it this way, but also remember, because you don't need to create website
in Visual Studio Code, you can create it
even using notepad. So you can click on New. And you can just, for example, use the note pad. It's document textv, it hasn't been
translated to English. I don't know what, but
it means note pad. And here we can, for example, type something like sample. Let's change the
extension to HTML. The problem is that I called
it the same like here, maybe let's change it
to sample two, right. And as you can see, it's also available now here, and you can jump between
one and another five by just clicking here. Okay? You can
minimize this thing and still work on your project
in your side, your folder. So you have got more
space here, right? That's pretty useful. Most time we'll do it like this. So we know how to
now watch the file. But remember, also,
this is also important. It's important that when you open your file
with the Firefox, as you can see, there
is nothing here now. Why? Because we have
not saved the file. It's important that you
always need to save the file. You have got the
suggestion here and here. It also says that one
file has been unsaved. And here we have got
information which one. Control plus S, and as you
can see it's saved now. And here we need to now refresh the page in
order to see the change. So we need to click on reload current page button or
control plus r from refresh, and as you can see, we have got a result. So in this lecture,
you learned it. We have got something like
explorer that allows you to explore the folders
on your computer. And to be honest, it really simulates
at project, right? We have got to hear a
project regarding cuts, so we could create
a website regarding cuts inside this folder
and have some fun. But things like that will
do in future lectures. If you have any questions, as always, feel free to ask. Thank you very much.
Have a good day.
4. Setting your first project: Hello, today, you will
learn basics of HTML. So firstly, you will learn
what is HTML and what is Tech. This is probably the
most important word that you need to understand
in order to create websites. When you understand it properly, everything is going to be easy. And don't worry. I will do everything I can in order to make sure
you understand it properly. Okay, so what is HTML? HTML is really hyper
text markup language. So that's how it goes. This is a shortcut
to this thing. And what does hyper mean? Hyper means that this
something super, right? It means that something
is very good. But how text can be hyper? This is pretty weird, right because text is just text, when we are looking here,
where we have words here, and this is just simple text. How can it be hyper? How can it be the
super very good text? Can you do something
that other texts can do? Well, when we have a book, and when we go to the
index of this book, when we want to find the Section four and look for
the answer there. We need to what? We need to do it manually. We need to use our hands to jump to Section
four of the book, Because this is
just a simple text. However, this time, when we are looking at
the hyper text, this is an advanced text, Because this is an HTML, it allows you to jump
using hyper links, right? That's why they are called hyper links from one
text to another text. We are just used to
using the hypertext. Look, when we type
here Poland, right, for example, and here
we have got what links, the hyper links
that allows you to jump to one place
to another place, and another place,
and another place. We can just jump here as
many times as you want, and we do it fast. This is pretty col.
We are used to it. But hey, text normally, when we look at books, don't do things
like that, right? So yeah, this is a hyper text. That's why you have got here a hyper inside this
shortcut, okay? This is really advanced
text that allows you to do really cool stuff that we
will of course learn about. So what does language
markup means? It means that it
needs to be mark up, so it needs to be marked. So it needs to be tacked. Tuck really means markup, because it allows you
to mark things up. It allows you to mark things up. It allows you to tell how should something
be interpreted? When we have a text
like this, well, we would want to make
it work differently. For example, hey, we
have got here HTL, and I would like to
have it bolded, right? I would like to have
change the font here. So how to do it, you
need to use tax. You need to mark. That's why
it's called markup language. And how to do it. Well, we need to use tax. Let's say, let's call it bolt, because it's going
to bold this thing. And let's add here
column like this, and let's open it
in the web browser. When we do it like this, you will notice that what
nothing has changed. Why? Because every tag inside HTML must be looking like this. Okay? The tag name must be
inside something like this. And will it work? No,
it's not going to work. Nothing happened. But hey, the bolt thing disappeared because right now
our web browser, the Firefox, is trying
to interpret this, but he doesn't know
what does it mean. We need to use tax from
some kind of reference. And you can find this reference, for example, on
this website here. And as you can see,
there are many tags. And this tag that we are
looking for is called B, which defines bold text, and we need to do it like this. So now when we refresh our page, as you can see, yes. This text is bolted. But hey, I wanted to bold only this part of
text, not everything. Yep. That's why we need to close the tag that
we have opened. Okay. We need to close it
using the slash B inside. It says that, hey, this
is the closing tag, this is the opening tag, this is the start,
this is the ending, and this thing here
totally is called Aliment. It's called Aliment. This is going to
right now say to the web browser that it needs to interpret this
part, the content. To be bolded. And we
inform it using the tak, using the markup language that we're going to learn
about in future lectures. We need to learn how
these tats work. That's how you create websites.
Using tats like that. In future, you will
learn how to make the hyperlinks that
will allow you to jump from and one to another
place inside your text. You have probably noticed that the enters the white
spaces, right, the you know, the spaces and so on are not
interpreted here, right? Everything is in one line. That's why we need
to learn how to, you know, make it look good. And you make it good using text that we will
learn about in future. Created something like
that that will help you remember that the element, so everything consists of start tack of the
content and end tack. There are names that you can
find in the reference that I showed you, like, for example, B, that changes the content, we need to end the tag. Otherwise, if we do
not end the tag, we will bolt everything, which is not what we want. We need to finish
what we started, like in real life while. Of course, it doesn't
work every time. That's HTML. This is just
hypertext markup language. It is a language
where we use tax, to mark up, the text, to make it hyper. That's only the lesson.
Thank you very much.
5. Basic HTML document: Hello, my friends.
Today, I will show you a few more tags that
will allow you to create the basic structure
for your HTML f. Every HTML f should be
started with HTML tag, okay? And this tag informs web
browser that it's going to interpret the HTML language. Later, you should create
something what is called head. Like, we have a head on
our shoulders, right? So this place is
going to be used to store the in additional
information about your website. Like, for example, title. So you can create a title
for your website here, and you can put it between the opening and
closing title tag. And here, you can, for example, let's call it the funny
images of cats, like that. And now we can open it. I save the file using
the Cro plus S shortcut, and as you can see
here, we have got what. Right now, it's the
five path to our file. But when I refresh the page, contro plus r, as you can see, funny images of cut, yeah, we can now change the
title of our website. This is pretty cool.
So inside heat, we put information like this. There will be more tax
that will come here. We'll talk about them later. This is the basic
most important one. We are creating some kind
of template that we can use to create websites
that you can copy. Now, we're going to create next act that is going
to be called body. Like we have a body
in our real life, when you look at humans, then you will notice that
they have got their some kind of content inside their bodies. Yes, this is the
same situation here. We have got what, the main HTML. Side inside of it, we
have got head and body, which has got a content, right? Here goes content
of your website. Now when we refresh it, as you can see, here we
have got information. Here goes content
of your website. And you are probably
wondering why before when we did something
like this. Why? There is still content
here when I said that we should create
websites like this. That's a good question. And what is the answer? Web browsers are
pretty intelligent. They can interpret almost
whatever you put here. You can put the title in
the wrong place like this, and it's still going to
be here. Let's change it. You can see.
Everything works fine. So why bother doing
it like this? Firstly, let's be a good person to another coder of HTML file. We just assume that when
we look at the head tag, then we're going to find information here
about the website. Imagine that your code
is py long, like this. And some people would put title here and some people would put it, I know like here. Somewhere in the middle. That would be horrible
for us, right? I things would be in
weird different places. So this is some kind
of standard, okay? So let's just do it this way. But if you still think that
it's not enough for you, then imagine for a second, then there are some kind
of robots in Google, and they are searching the Internet and they
are analyzing Internet. And they're analyzing
sites like you create. And if you do things that
are weird on your website, like putting the
title in weird place, and you do many
mistakes like this, then they can just give you some kind of minus
inside the ranking. Okay? You are creating the
websites to make it visible to make sure you have clients to make people
watch your content, right? So you probably do
not want to have Not enough people looking
at your website, right? So this is a good reason
to create a content that looks good also
behind the screen, right? Not on you do not need to
care only what is here, but also what is in
behind the scene. So yeah, you can put it here. That works fine. But now this is better when
you do it like this. And also, there are
new web browsers that, you know, can interpret
things like that. Some older won't do it properly. You also find scripts in future. You will learn how
to create scripts and they will analyze your
code by going into the text. This is a pretty advanced topic, but just tag in mind, create content like
it should be created. Inside head, we put
text like title, inside body, we put content. So we can, for example, bolt the content
here, like this. Bam, as you can see, here goes content
of your websites. There is one more thing that you should remember about standards. You could create your
HTML file this way, okay? So start it from the uppercase. It will work fine.
You could I know, change the to like. It still work fine
even though we didn't close it the same way. So you can do many
pretty weird things in your code.
Please don't do it. Okay? You can but
don't never start, I know title from the uppercase. Maybe this looks good for you, but the standard is
to just, you know, start everything from
the small case, ok? So don't use uppercase
inside tag names. It's also good to know
that whatever you put here in the title is shown here, and this is pretty important what you put here because if
you put here, I don't know, something like web page one, this is not useful for you, and it is not useful
for the user. And it's also going
to be not useful for the robots that are
analyzing Internet. So when Google Robot finds your website and
sees web page one, he's like, what is
that web page about? He will try to analyze
the content here. But when he sees the
title looking like this, he will not be 100% sure, and he will not give points to the things
that you put here. If you have page about cats, it's a good idea
to put here cats. If you have a website
about bicycles, put the bicycle here. Don't know repeat
itself that cats. Cats, cats, cats, cats. That's not good because
then Robot will be like, Okay, he's repeating it. I think he might be cheating. This guy is just not cool. So we're going to ban him. Let's put here one word, maybe two times the word that is describing your
web page properly. The content really
should be here, and this is going to improve
your ranking in the Google. That's all in the
lesson. Thank you.
6. Nested tags and FAST wrapping existing text with tags using EMMET: Hello, my friend.
Today, you will learn new tag the eye tag. You will also learn how
to close your nested tax, what our nested tax with
our nested elements, okay? And also, you will learn very, very important shortcut
that will allow you to wrap to insert the tag on the text that has
already been written. It will save you ton of time. The eye tag looks like this. So we are opening the
bracket closing one and notice that we have got
here the auto closed tack. The closing one is just automatically added
by the editor. And when I put the content
here, so inclined content, you will notice that the content here. Is really inclined. So this is really a shortcut
for the italic word, okay? So it creates inclined
words, inclined text, right? And that's how it works. But the question is, can I put the inclined tag or the bold tag on the text
that already exists, right? For example, remember here. I want to make it bolded. How to do it fast? Well, We could, you know, type A, then the closing tag, and you can see that
now that tag that has been added here is not
good for us because well, we want it here, right, right? We want to copy it, so we need to, you know,
cut it contra plus X. And paste it here. This takes time, Counter plus z, we can
come back to this. Well, we can do
it also this way. We can put B, then
counter plus Z, and then type it here. This is a bit faster, right? As you can see when we type just the opening attack and opening bracket
and then the slash. This is going to be
closed automatically. Which is okay, but
this is still slow. It would be best
if we could just somehow wrap the element, the text that already exists on our website with
this t, right? Is there a shortcut for it? Well, yeah, the good thing
is that there is a shortcut inside Visual Studio code using something
what is called ET. We will learn about
ET shortcuts during lectures because I think that if I use every shortcut
in one lecture, you will never remember it. Need to see the importance
of using them, right? So let's select this word here and use the
shortcut Control plus Shift plus P. And as you can see here are many shortcuts,
that you can use. And when we type the wrap with abbreviation,
as you can see, it's been recently used by me, and I click on it. We're using the left click on mass button or clicking the er. You can see now it is waiting
for the abbreviation. Now when we type whatever
we type, as you can see, it's going to be what
it's going to be the opening and closing tag instantly on the text that
we had selected, right? That's pretty cool because
now we can just put B here, and this is going to be bolded. I do not need to remove the closing tag and and copy
it here or put it here. That just takes long.
We can use shortcuts. This is pretty cool. Enter end. The job is finished. So this is very good, very easy way to well, wrap your text into the tax. The question is, can we
make it even faster? Contra plus z, let's come back to the contra plus plus
P. As you can see, here is some kind of gear here. You can click on it and
configure the key bindings. When you click here
and add key binding, You can press desired
key combination and then press enter to make the new binding for
this rub with abbreviation. So we will not need to use the shortcut contro
plus sheaf plus P and then find the command. We just need to, for example, type contro plus sheaf plus plus E. Why did I bother to use the control plus
shaft plus A plus E? Because well, notice that Many shortcuts are already used. Example, contro plus A is used
by two existing comments. You can see by what, select all. This will be stupid to
remove the shortcut like this, from the shortcuts. So this is better
to use something that has not been used
like for example, this. Now when a click enter, we can do it a bit faster. Cro plus Shift plus,
and then B. Ba, this is pretty cool, right? And now let's talk
about the nested tax. Notice that let's say this text is inclined and
in the same time bolded. So I want to make it bolded
and it in the same time. So when we type B this way, and then here, As you can see, this is going to be bolded. This is bolded. Text. Now
when I want to add italic. Notice that when I
do counter plus, where should I put the eye here? Should I put it here? As you can see, even the editor is telling you
something is wrong. He's trying to close the
body tack here, the italic. Because this is the wrong plate, you should always remember the order in which the
tax should be closed. We close the outermost
tack. The last. Notice that the last tuck is
or the first tuck here is B, and the last is I, and we should change it, right, this two B. That's the order
that you should use. So when you close the, when you open theta, you
should close it first, right? If this is the inner tuck, it's an outer tuck
like this one, it should be closed
as the last tuck, And you might be asking why did I haven't
used the shortcut? Well, because we need to
know a bit more things about shortcuts about
MD in order to do two tags using the shortcut
that we've learned about. So Sample text, let's
do something like this. Select it, contro plus
shift plus plus E, and it's waiting for
the abbreviation. Notice that when I type B, and then I, and then B, well, nothing
happens good for us. We want to have two
tags, the nested tax. How to solve this problem using the shortcut that
we've learned about. We need to type B,
and then this signed, which is the greater then sine, the angle bracket,
and now we type I. As you can see, it says
that B is the outer tag, I, is the inner tag. Well, we could you know,
make more of it, right? But that's the result
that we are looking for. We want to have the text that
is bolded and also italic. Notice how fast it is to do
things like this, right? We just do B, I, and that's all. Now, let's do it again manually. B counter plus B. I down. Mmm. Okay, and now again, with the shortcut. Sample text. Let's select and this bump. This is pretty cool, right? So this is the shortcut that
I highly recommend using. Now you know what
are neese tax notice that we've already used them, like here, for example, we have got head
and inside title. And this didn't look you know, hard to understand when
you should close which one you should close first because we use the
enter here, right? Notice that we can
also do it here. And now if we did it like this, This would look, you
know, weird, right? So this is a good
idea to sometimes add indentations inside
your code to make it a bit easier to read, right? And notice also that when
you add indentations, this editor is pretty
cool because we can fold and unfold the text. Like this. So why is it useful? Well, imagine that we
have got here head tag, and let's say that
we have many tags here regarding the
head of our website. So I remind you this additional information
about your website. And to be honest when
you write it down, this is not going to be
needed for you anymore. And you just And this
is just folded, right? And you don't need to
see it every time. So this is pretty cool, right? You can just make your
code easier to read. You can make it
easier to jump from one place to another because
you don't need to read things that are not
needed for now. Okay, that's on that lesson.
Thank you very much.
7. Creating paragraphs <p> | What are white spaces?</p>: Hello, my friend.
Notice that when you look at this text,
text is in line. But when you look here,
it's definitely not, right? We use enters here. So we use some kind of the key that should
break the lines, right? But it didn't. Why? Because HTML does not interpret something what
is called white characters. White characters are things
like enter tabulator. So when you click on Tap, this is tabulator, like
for example, here, right? And also, space, but not space like the
single one right here. Be well, you need to somehow, be able to use space without having to put
something strange here, right the single space because
this is pretty often new. So space more than one
after another. Okay? So when you have
something like this, then all these spaces, but one will be removed. Notice that here we have our
sample text, sample text. And well, there is just
no space here, like this. There's just a single space, not so many spaces. Okay? So these are white
characters and they are not interpreted by HTML, right? Well, by the web browser that interprets HTML to be precise. And well, how can
we break the lines? We can break the
lines using something what is called
paragraphs, right? These are used to
create sections, right? And the tag that
create paragraphs is called P. From it
stands for paragraph. And well, we can put it here. For example, this
let's see here. As you can see, we
put the paragraph, and yeah, it works fine. We have got here
now the line break. This line is here
and the content that is after this tack, so all that content is
just underneath this. There is also some kind of
margin between this and the rest of the content of our
side when we added the ta. Let's add it to other
parts of our k. Code. Let's for example,
do it on this thing. We need to select it or
we can use the shortcut. There is a shortcut that you can jump from the
place where you put this blinking thing and
use the Shift plus n, you can then select
entire code here, and then you can use what
control plus shift plus P, and use the MED rub with abbreviation or use the shortcut that you
have programmed here. What put the P. Now when
we refresh as you can see, the same thing happened to this. We have got now
the margin bottom to the bottom of this here, and now it looks better, right? That's why we use
paragraphs to to be able to break the lines to make
them a bit easier to read. Let's now put the
paragraph also here. I suggest taking entire all sample text
into one paragraph. You can also do it. This thing I think also should be
like this and like this. No refresh. As you can see, this text is a bit
easier to read.
8. Void tag and breaking the line <br />: Hello, my friend. Day. We are going to talk about something, what is called void tax. Okay? What is void? Void is just emptiness, right? It means that the tag
doesn't have ending. So yeah, this is a tag that has got opening but
doesn't have ending. And there are many
tags like this, but we learn only
one in this lecture, and we'll talk about tag that is called beer that
stands for break. As the name suggests it
breaks the line, okay? And it just doesn't
do anything else, ok? It just breaks the line. That's why we do not need
to do something like this. Break break, right? Because well, there is just no content to
be put here, right? So that's why we're just
going to write it like this. This is just a void deck that
doesn't have ending, okay? And when you use it, you
will add the brake line. Like when you use the paragraph. But when you use
paragraph, notice that There is also margin between
one text and another. Right? Sometimes you do not
want behavior like this. So let's imagine we have got your sample text sample
text sample text. Let's say we want to have what a break between each
of this line, right? So we will just do
something like this. And now, well, from the last, we do not need to add
because there is paragraph you can see, we just
broke the line. And just single one, right? Line, and we didn't
add the margin. That's how the brak line works. You can you know, add
as many as you want, brak lines, as you can see, this will just break things, as many times as we type the BR. You will see in future
that some people write the void tax using something like the
slash here at the end, okay? And why is that so? Because it suggests that this
tag doesn't have ending. But there is so small amount of the void tags you
will learn in future, that I think it just
doesn't look good. Look, the code like this
above would be bigger, right? It's not as easy to read. In my opinion, we
shouldn't just use it. In something what
is called HTML, there was a mandatory to use
something like that, right? It was required to just inform the brother that
there is a closing. This is the attack that
doesn't have ending, okay? But since we are using the
newest version of HTML, this is the older one. We just can write BR, and we do not
need to add here the slash. I'm talking about the slash
here only because well, when you look at the code that is going to be
written by somebody else, well, it's a good idea
to understand it, right? You would be surprised. Hey, Why did this guy add here the slash? Now, you know, he
added it because well, he probably is trying to meet some additional requirements
added by the HTM. But it's not required now, so I think let's just
put it like this. So BR, new TA that
just breaks the line. It doesn't add the margin
like the paragraph. That's only the lesson.
Thank you very much.
9. What are attributes? [title] and [lang]: Hello, my friend. Today,
you will learn what is an attribute in HTML? You will learn attribute that
is called title language, and you will learn a
shortcut that adds an attribute with the help of something what is called met. It will speed up the
way you code your HTML. So let's start from the
attribute. What is that? Imagine a person, a
person in a game, so some kind of character. And this character
has got some kind of vitality, reflex,
intelligence, charisma. This is attributing game. So what attribute describes? It describes additional
additional information about character. And the same thing happens here. If you want to add additional information
about HTML file like this. Like, for example,
we want to inform the web browser what kind
of language we are using. We're going to use attribute, that is called language. We do not type language, but the attribute is called ang. It is a shortcut,
so we type lang. And then we need to type
the equal sign, quotes, and then we put inside
the value which represents what language
we are using on our side. In our case, it is
what, it is English, so we're going to type E n. So this is the name
of the attribute, the equal sign,
quotes and the value. That's how you create
attributes which are additional information
about the tack. Same like on the character
from the computer games. So the question is, where does attribute comes from? Okay. Let's delete
it and let's use the shortcut control plus space. And as you can see, we
have got many of them. The question is, do you
need to know all of them? No, there are a few
that are minus, and you need to
learn mainly them? Sometimes you will need some rare attributes
that are here, but you don't need to, you know, learn it by
heart. Don't worry. This is not something that
you're going to need to learn and remember
everything by heart. This would be hard, and I don't think
it's totally edit. So don't worry, okay? We're going to learn
the most important one, and this is totally
sufficient to, you know, code in HTML. So let's back to language. And as you can see, we
can now put your value. The question is that what kind of value
should we put here? Is it is this right value? Well, no, values for the language are in the HTL
language code reference, you need to type
something like that in Google and type the
language codes, and you will find the
corresponding codes for the language that you are creating
your website about. So for example, let's
say, Polish is P. This is the language
that I will use. But for English, as you can see, it's E N. Also if
you are from French, F R, and so on. So this is the value
that we're going to use. But let's learn about next attribute that
is called title. Title. Let's say we
want to put title here. Arcadis dat has
married since when. The title is an attribute that is going to
create some kind of tooltip with the value that we going to put to
the title attribute. Let's wrap merit with some kind of tag
like, for example, B. And now we can put here
the attribute title, which is the name of attribute, and value in this case
is whatever we want. In this case, we want to put since when I
married, for example. Since this is pretty
important to know, at least for the women, so I hope I have
not made a mistake. Let's go here. As you can see, when we refresh our
page and we hover, we move the mo over
the text here. We have got the
tooltip since 2017. This is the time when I married. And that's how it works. You give additional
information for the tooltip. Title, really, I think
it would be better name, but they call the title, and this gives additional
information about the tack, like, for example, B, and
the text inside of it. In this case, it
creates tooltip. This is the next attribute
that you have learned. Now we'll learn a shortcut that adds an attribute
with the help of MET. This is pretty cool. Look, when you have ET, we can really do
something like this. For example, P, and then we can use the square bracket and we can type the
name of attribute. Then when we hit
Enter, as you can see, we have got the name
of attribute inside. The opening tag. We can put the value here. Well, we can put the value
here also, like, for example, since 2017, but as you can
see, this is not good. We need to use the quote scheme, and to be honest, control space. As you can see takes some time. I prefer to put the
value manually later. So to square brackets in order to put the attribute
inside the opening tag. But there are times when
you can even improve it. You can see you can multiply how many times you want to see the tag repeat it. So this is the easier version, but you can put also the name of the attribute and you can
repeat many times something. This is making you code faster. But it's not like you need to you must remember
all these shortcuts. It's good to know them, but you can code manually,
nothing will happen. This is pretty advanced things that I'm showing
you here right now. This is just going to
speed up your job. But if you are just happy to have fun with HTM don't worry about the
shortcuts that I'm showing. Making things faster, but it's not like something
that is needed. You can just type
everything manually. But this is cool to be able
to wrap things faster. You can just double click on it, then use the shortcut with
the MSO Control plus C plus B and you can
use the wrap with abbreviation that
I talked about, you can keep bind it, and then you can just type B, the title, and you can
just type here like this. This is a bit faster
than doing it manually. But it's not like you
can do it, right? You can touch
something this title. So, it's like one, 2 seconds faster, but,
time is precious. So it really depends on you. You learn what is attribute. This is additional
information that you add to tax. That's
only the lesson.
10. Neutral tag <span></span>: Hello, my friend. Today,
you will learn about attack that is
called span, okay? And what does it do? Well, it does nothing. The question is, when
would be a time that you want to create
attack does nothing. Well, notice that when we
wanted to add attribute title, which shows a tooltip with
the value since 2017. Well, we had to add a tag B, for example, or we would need to use here other tag
that we learned about, for example, A, right? Or many other tags
that are in the HTML, but most of the tags in HTML does something
to the content. Like for example, the
content merit was bolded. And that's not something that
you always want to have. Like for example, here, you
don't want to have it bolded. We want to make it
just a simple text, but we want to still
add a attribute. And that's the time when you use a tack that is called span. As you can see, we didn't
change anything in text, but when we move the
mouse over the text, still we have got the tooltip. So yeah, that's the time
when you use the span. This is something that
just does nothing. So to be honest, span is just neutral tach. It just does nothing, but it gives you opportunity to add attributes like here, without styling, without, for example,
bolding the content. That's all in that
lesson. Thank you.
11. Installing extensions in VSC: AutoRenameTag: Hello. Today, you
will learn how to install extensions inside
Visual Studio code, based on the problem that
happened in the last lecture. Notice that it takes time
to change the spam to be. We had to change it
in two places, right? And time is precious,
as always I say. So Is there an extension
that could do it for us? Well, we could look for it. Notice that here we
have got something like the button that has got extensions
toll tip under it, when you click on
it, you can search for extensions and install them. You can look for
extension for HTML. As you can see, there
are many of them. Well, you can install
them if you want. You can check them out,
have fun with them, you can read about them, what do they do and so on. But don't focus on it right
now because you need to first learn HTML and know
what could be useful for you. I will show you which are useful for you when
the time comes. Like now, we want to
have the tag like here, automatically changed
when I changed it here, I want it to be
changed here, right? So how could it be called? Maybe let's type Auto O here. Auto rename tag. Yes, we want to automatically rename the tag.
Let's install it. And let's wait a
second. It's installed. As you can see, here you can see Even somebody showed what
happens when you use it. Look he's typing here, also the he's typing up here. Right now, when we want
to change span to, hey, it's V to Italy.
Hey, it's Italic. Maybe to the span
again. It's Span again. That's pretty cool, isn't it? So, extensions are
pretty useful, but you need to know
what you're looking for. You know how to install
extensions right now. You know that you can
read about them here. And well, you know how
to use them, right? You just install, and they're installed
that's pretty easy. And as you can see, we
have installed something. That is pretty useful, right? We we don't want to
use the p tack here, we want to change
it to something new that we learn in future, for example, Section Or you
all will do it pretty fast. That's on the lesson.
Thank you very much.
12. Attribute 'style' - How to change background colour? - IMPORTANT LECTURE: Hello, my friend. Today's
lesson is pretty important. Why is that so?
Because you learn about the attribute
that is called style. It is pretty important attribute that you go to see
in future a lot. Also, you will
learn how to change the background of your page. And you learn about the Big cool attribute which
is deprecated, and you learn what
does deprecated mean. So where do you
think you can give additional information regarding the
background of our page? Where is an attribute like this. It's inside body tag, right? Be well, body is
body of our website, and also you can put here and change the
background color. So when we use the Cro plus
space, as you can see, you can choose the
BG color attribute, which stands for
background color. When you move the mouse here, you can see that background
color for the document. But also there is some
more information here. This method is not conforming. Use the CSS background
color property on the element instead. Because, well, this
is deprecated, which means no longer
used attribute. So why am I showing you this? We should just learn new things, right? Well, that's true. But there's always bad. It's good to know that there
are attributes like that. It's good to know that
there are tags like that. And when you see them in future, will understand how
they work because well, we can learn the new ways, but it doesn't mean that other people use
still the old ways, that's just not going to
happen that everybody we stop using BG color suddenly,
for example, right? So it's good to know
that they exist. Also notice that even
the color here is red. So you can see pretty fast, what is not, you
know, used anymore. So this is deprecated. But well, you can change
the BG color too soon, so something like, for example, red, or you can
change it to orange. So you can use the
simple color words here, and you can change the
background color like this. Pretty easy
straightforward, right. But there is a new way to
change the page background, and we're going to use it now, which is called the
style attribute. And when you use the
quotes here, whoa, you can do much more things than just changing
the background color. And we're going to talk about these other properties
here in future lectures, but still don't feel
overwhelmed right now. I know that you have just seen
a lot of properties here, and you might be thinking, no, no, no, no, no,
this is not for me. I'm not going to
remember all of that. Don't worry. You will need
to remember only the most time used properties in future. You will learn about
them. And all others. Well, you can find
them pretty fast. Look, you can type in Google, how to change background
color in HTML. Bam. And as you can see, you can use CSS property
Background Color, which we use right now. This is pretty fast, right? You can just type
in Google, how to, and you will find out how
to do it. So don't worry. You don't need to remember
everything by heart. Okay okay? You will get used to the properties that you
use the most often. So as you can see, when
I click the Enter here, let's go back here, Background
Color, I hit Enter. I added the colon here
and the semicolon, because this is the place where we put the value for
the background color. For this specific property that changes the color
of our website. And when I use the Control
plus space, as you can see, now we have got lots of colors that you can
use here, right? Like, for example,
for example, Aqua. Now when we come back here, as you can see, we
change it to Aqua. You can use whatever
color from this list. But there is also not only this, notice that we have
got the color here. This is cool because
you can instantly see what the color is
next to the name. But also notice that when I
move the mouse over here, we have a color picker. That's cool. We can
move like, let's go, maybe maybe greenish, maybe let's do something like
this. And click enter. Well, I didn't need
to click anything. I just move the mouse over
not here, here, for example. As you can see, I
can change color. But you will notice that our color changed
to something weird, which is called G B, red, green, blue, ok? You can mix red with
green and blue. And depending on
how much redness there is or green or blue, you can create colors. You can put, for
example, one here, as you can see, now
there is not much red. Now we're going to put one
to blue, and as you can see, this thing is going
to get more green, This is the maximum value as you can see now, it's pretty green. When we put here
one, it's black. When we put here 255,
it's going to be red, red, with 25, it's
going to be red, but not so much, right? For example, 19, as you can see, we are getting to the
red color pretty fast. But to be honest, why even bother learning all of this when we can just
use the color picker. This is pretty cool. But this is inside the visual studio. You are using different editor,
don't worry, don't worry. Totally, don't worry
because you can find color pickers in Google, you can type Color Picker HTML, and you will find
one pretty fast. So that's how you change colors. Using the red green blue. But there is good to
know that when you, for example, HTML cool names, there will be a
website like this. As you can see, each name like this has got a
corresponding weird thing like this. What is that? Well, let's use the
chocolate color. Like this, this time. As you can see, we got
the chocolate color. If we type chocolate, it's also going to be the same. This thing is called X. And to be honest, it's the same like
red green blue, this d two when you change, let's type hex to that. As you can see, let's
type d two, and it's 210. If we had red green blue, like this, it will be 210. Then we'll need to
translate the next part, which is 69, 69, which is 105. And then we will do
the same to one A. This is just x, and this is just different way
of representing, as you can see, I referred
it the same things. Here, when you use the color
converter a bit faster way. I just wanted to show
you how it works. Let's copy this Here, as you can see, it's 20010530. The same we have here. So this is just different
representation. Is hex. It's called hex representation
of red green blue. Way of changing colors. So you can change
color using the RGB, you can change color using
the X or for example, HSL, it really depends
on what you want to do. Are the difference
to be honest not, I prefer this thing
because it's the shortest, and it takes the least
amount of space. So I prefer using
this the X one. Okay? However, is that all two colors? Well, we could stop this lecture because we learned how to
change the background color. We know that PG
color is duplicated, which means it's no longer
used, but it works. But it might stop working, so it's good to change to things that will work for future. We know that the stall
attribute has got many at properties that
you need to remember. However, how do
we choose colors? Is that all two colors? Well, as you can see
here on the left side, you can read many
things about colors. I recommend reading them. But the most important
thing from this here, I think is color wheels. Notice that we have got
RGB color wheel here, and this looks
disgusting, right? But when you move here, this looks awesome, right? This will used by painters,
artists and designers. Why? Because this looks awesome. And these are colors that just blend together
very well, okay? And these are colors
that you should use. And the cool thing here
is look color schemes. When I click on it, and I go to, for example, monochromatic
color screams. W, we can choose the theme of color for
our entire website, we can look how would it look
like in different places, like this, we can move
and we can make it a bit, for example darker, like this. For example, I like
this thing. What now? Well, I would just
choose these colors here and copy it to my
website, and it will work. If I want, for example, this in our background color, I would just copy this here. Like this. And hey, that works. Pretty cool. Of course, in future, you learn how to change the part of the color of
the website and so on, so don't worry, how to
change the color of the text and so on. In this lecture, you learned how to pick colors for future. So there are many other schemes, like, for example, this one, as you can see, this
looks a bit different, but still it looks good. You can make it look the way you want and make the
colors blend together well. Normally, it is pretty hard, really, even using the
color picker like this. You're going to choose one or maybe two colors pretty well, but if you want to have a few more colors that
blend well together, then it's pretty hard. Just use the color scheme. It's going to save
you lots of time and your website will
look pretty cool. That's only the lesson.
Thank you very much.
13. Adding image to your site : Hello, my friend.
Today, I will show you how to add a photo, an image to your website. Firstly, we need
to use a new tag that is called IMG,
okay like this. So IMG stands for image. So easy to remember. Okay. But notice that there
is no ending tag, right? The same like when we
use the brake liine. So there is just no ending tag. And well, you can close the image tag using
the slash like here. This is the information that this tag is closed
in the same place. But you don't need to, okay? That's not required. It was required. If you were using X HTML. So if you meet somebody who
does something like that, then don't worry we
will work, right? You can do it, but we do not
need to. So don't worry. Don't do it. And now
there is important thing, how to add this image? Well, if there is no ending tag, it means that everything connected to image
is inside this tag, and we give this
additional information using the attribute, right? That is called S RC. Source. It stands for source. So we put here the source, so we put the value from where
we want to get the image. Well, where is our image? First, we need to put
it into our folder. As you can see, we have
got here, for example, the one that JP G, and we can put it here. So just move it to
the cats like this, or You could just
do it like this, move it to our editor
and move it here. And as you can see
it's now here. As you can see, we can open
it, you can look at it. We can see some
information about the image here, the
size, the width, the height, and how
much does it take on our disc and its name. Now when you use
the shortcut contro plus space, as you can see, it suggests me that I can
add the one that JP here. And to be honest, that's all. As you can see, we added
image to our website. It's pretty big, but we
added it and it works fine. The question is it all Firstly, let's focus on the name. Do not name your
images like this, ok? This is a bad idea. You should rename it
to make sure that the name represents
what is on the image. This image represents
the bass guitar. The type of guitar is bass. I think we should just
rename it, right click, rename or the shortcut F two, and let's call it a bass guitar. Or the guitar bass, whatever. Notice that I didn't
use the space here. I didn't do it like this. Every word, you should connect using the
dash here like this. You shouldn't use spaces
inside the names. Also, do not name
your files like this. Do not use the upper case. Just small case. And well,
that's how we do it, right? If you just name
it, it's more self descriptive now. So
we change the name. And well, it doesn't
change anything here, but it looks better
now for not only us, but also for the boats from Google that when
they look at the name, they can, you know, see what is this page about and
what this file holds, okay? Maybe bots can analyze images
that are frequently used. But the image like this, well, it's hard to interpret
what exactly is here. It's a bass guitar. There
are some kind of candles, it will be hard for
him to interpret it. But here he can take this
bass guitar from here, and he knows that,
that's a guitar buzz. This page is probably
about guitars. So it's good idea to
name your pis like this. So we know how to now
attach the image. The question is,
what do we do when, for example, something
happens like this. So the image will not low. As you can see, there is
something like this here, and we could put here
an alternative message. So A stands for
alternative message. So the other message, what should do the computer when there goes something
wrong with the source. Maybe the server went
down, something like that. Should type here what
is represented here. For example, bass guitar, p. As you can see here we have good now
information bus guitar. The problem is that also now is that this thing
took some space. Notice that it took
so much space. If you had text here, you would want it
to be still here. You wouldn't want to destroy
how your page looks like. And that's why you should always specify the
with property, which we give the
width of your guitar. It's 680 and the height
is how much 1024. And as you can see, now when we make an arrow
here, as you can see, we have good bass guitar
here, the description, and but there is something that holds the place
for our image. So this specifies
the wave and height, and it's also good for making your website load faster
because it's going to render, so it's going to
create the content of your website faster
when it knows what size are images
on your side. The speed up loading
of your website. You could change, for example, with to something as, not the size that is
here, like this. Let's put it like that. As you can see, it works fine, but it doesn't look good. However, if you remove
the hide, notice that, it's going to be
proportionally. Change, right? The size is
proportionally changed. So it means that when
you change the with, the height is going to go
accordingly to the wi, right So that's
pretty cool, maybe. You might be thinking
can set also the height and it's going
to change the with. So it looks good. The problem is that you shouldn't use this. Well, maybe if you use it once, then nothing bad will happen. But if you use it very often, then you are making your
website load slower. Why? Because we the web browser had to do the job for you, I had to change the
size of your image. So it takes sometime. The next thing is that
notice that this image takes about half of the
megabyte, 462 kilobytes. If you had changed
the size here, for example, like we did here, the with to 320. It has got the with that is
two times smaller, like this. Then this image would take only 250 kilobytes
about like this. It's two times smaller. Your
website, we load faster. If you have to change the size of the image, do it manually, open it in some kind of editor that edits images
and do it manually. Don't do it through can
do it through here, but try to avoid it. It's best to just put
the values that are here to speed up your website to make sure that
everything looks okay. That way, your website will be easier to read for robots
for bots from Google, and your website
will rank higher. That only to the lecture? Well, no, we can
insert images faster. Notice that when I open using this lower and lower than sign, the tag, when I open like this, I need to do manually what I need to manually access
all these attributes. However, when I do it like this. I do not use this sign
here and just type IMG. Now I click Enter. As you can see, it will put
something like this here, and I can put the source and use the tab keyword and jump to alternative
message like this. It's a bit faster, I do
not need to type EMG than the source Then I
just type EMG bam. Buzz guitar bam buzz
guitar. It's faster. So you learned that if you want to put using the MET feature, that is installed inside the visual studio
code by default, you just do it this way. This is, also. Also, it works for other types. For example, If I wanted to create the metatype that
we're going to talk about, as you can see, we
can, for example, create it with
additional attributes, and you do not need to
think how to create how are the attributes even
called inside this metatype. You just do it like
this and something is filled by the editor, which is gat because you
don't need to remember that. And I reve the
features like this. Because remember, you are a p, the creative person that
should create things. You shouldn't remember
everything by heart. This is not needed in nowadays. You need to know how
to look for things and you need to know
how to use them. That's only the lesson.
Thank you very much. And that's always, remember, if you have any questions,
feel free to ask.
14. BONUS: Where to get FREE pictures on your site?: Hello. Today, I will show
you how to get free, totally free photos
on your site. You can use for that site
that is called pexels.com or pixel.com or unsplash.com.
Let's use one of that. Let's say we are
looking for the CTs. Okay? I want to have
a site about CAT. So let's say we want to find a cat that will be
on our website. As you can see, these pictures,
they are gorgeous, right? They are pretty awesome. This is not This really work that normally you will need to pay for. These are free. You can just click
on it, click on the free download or
move your mouse here, and you can even change
the size of the image, so it's going to
be a bit smaller. I think the smaller
version is better. Let's click on the free
download, click Okay. And as you can see, we
have downloaded the file. As you can see also, the name of this file is not good, right? Because well, here
we have a cut, and the name should always represent what is
on the picture. The color of this cd is ginger. Maybe let's call the
file ginger cut. Let's go here again, and let's call it ginger cut. It's better, definitely
better name. Also, you should add
an attribute when you're attaching the
image on your side, alternative and type the
ginger cut, for example. So just do it on your own right now because
you need to exercise. You need to type the code. You can just watch the video. Copy it into your folder. Keys, and just add
it to your website. I think you should
practice it a bit even more and play
with these sides. Have fun and look for some
inspiration because really, you can find lots of cool photos here and here and
here, play with it, add some to your website, so you can have fun and know how to do
it without thinking. That's like that lesson.
Thank you very much.
15. Getting img size using VSC shortcut: Hello. Today I will show you how to set the width and the height of the image fast and easy way. Because normally you will need to open the image. You can do it a bit faster, not using the File Explorer by using their control and left-click on it. And as you can see, the image has opened. And here in this corner we have got the width and half. The problem about this solution is that we need to memorize it now, right? So when I click here, I need to remember the width is what I think see scanner and 80 then I don't remember the height, right? I need to click again here, so it takes time, right? And we don't like things that takes time. Put their cursor inside the image tag and then use the shortcut F1 or contour plot x3 plus b. And now here you can type update image size or you can just type image. As you can see, there is only one thing like this. When you click Enter, we have good the width and height set. This is pretty cool. And also notice that you can set the key binding here to something that will make it even faster. However, I do not recommend it in this situation. Why is it so? Because situation like this is not like you do it every day, you are then image and you forget about the most time. So maybe 23 times per page, something like that. And when you use these things or when you use just what? F1 and then type image and when you click Enter, notice that this is the first thing. Now, after I open this top right, it says the recently used, so this is really faster using our right is just F1 enter if you have another image. So let's say Look like this. So F1 enter, F1 enter, It's pretty files, right? So don't worry about setting it. The shortcut didn't know that. So thank you very much.
16. How to link to DIFFERENT folders? Creating PATH theory: Hello, my friend. The thing, the value that we put here in the source attribute as
a value is called puff. Why is it called Puff because it represents a way to
find the file, right? So in order to find the
file bas gitar do JPE, your computer needs
to look where. Well, in the same folder where this document that we're
writing in some sample, that HTML is currently
in. Where is it? It's inside the CATs folder. Okay So he jumps
from here to here. Everything is okay because well, the image is showing up. The question is, what do we need to do when
there is another folder? For example, let's create a new folder, but not from here, but using the Visual Studio code in order to learn how to do it. We just need to click
on the Nut folder here and let's call it,
for example, images. Because this folder
will hold images. Right? Well, in
normal situation, it's not a good idea
to put every type of file inside just
one folder, right? Because, well, if
your project grow up, you will just get lost. So let's put images
inside the images folder. Let's move it up here, and let's click on Move. Okay, so now it's good, but the problem is that
our images disappeared. In order to get to
the folder images, we need to create a path to it. And in order to do it, we need to type images. As you can see, our
visual studio code is giving us a hint, and then the slash, and then the name of the file. Now as you can see, we
have got our image back. This didn't show up because
it's improperly written path, but here, everything
is properly written. And this is pretty
simple, right? We just need to type
where we should look from the file here. But this is not
all in this topic. Do not stop this lecture because there are
situations that are harder. Like, for example, let's
create a new folder, and let's call it, for
example, articles. Let's say that we're going
to put their articles. And let's move this file
here to the articles, and well, let's delete this, and let's put this here. So let's copy it here. And as you can see,
let's open it articles, and let's open it with Firefox. As you can see, there
is just nothing here. We have got only the
alternative message, right? So that's not good. Why it's not working Because
you need to remember that your computer is looking for the bass guitar
and the images where. When we are in the
articles folder, and the sample that
two HTML is here, it's looking for it here, where the HTML file is
represented, where it's created. So we will need to have it here. The images should be here. But it's not here. It's folder one way up. One time, we need to go up. But how do we go up? And that's a good question. We need to use two
dots and then slash. And this things means, hey, let's go one directory up. So F let's close this, and let's go into CATs, and then we are going
to look for images, and then we are
going to look inside the images folder for
this particular JP five. And as you can see, now it works fine. Okay? So there is some advanced
ways to move in folders. That's only the lesson.
Thank you very much.
17. Viewing the source code of ANY site. What are comments?: Hello, my friend, did
you know that you can view the code
of any website? Yes, you can go to any
website, totally any website, and you can look at
the code of the site, you can go even to
Google and look at how it was written, right? But only the visible part, okay? No the background of the site. So you can look at the HTML
part of it. So how to do it. Use the shortcut,
the Control plus U. Okay? And as you can see, this site is really a
script site, right? Be, well, this site is
pretty advanced site. But when you go to
the site like this, still a bit hard. You can see here a few things that are probably
not understood, but you can see things that
you know about example, body, the head, you can
learn from things like this. We'll learn about things that you can see
here, most of them. Well, because we'll not talk about, for example, Javascript, code that allows you to dynamic change the
things on your side. This is totally topic
for another course. I have a course
about it, so you can find it or learn this
topic from another place. But well, you can
see the source. This is the most
important thing. When you go to our side, one that we wrote so far,
when we go to the source, you can see this is exactly
the thing that we wrote here, and we can copy
paste it here and work the same. We
code like this. No, this is not going
to happen because well, there are some references,
as you can see, there are scripts that are
in the file like this, and you will need to download all the files that
are connected to the side if you wanted to
make it work the same. There can be also some
kind of language that works on the server
side of the site, like for example, PHP
or maybe the Python, well, you do not have it, right? So advanced signs, you
won't be able to copy it. But you can learn by
looking at how people are, for example, using the
DPs that we'll talk about how do they
use tags, right? And how do this sit things
that we'll talk also about. That's the things
that you can learn from code that is
written by others. So this is pretty awesome. But the most important part of this lecture is what are
comments and when to use them. So comments, as
the name suggests, are things that allows you to
comment some kind of code, for example, so let's say you want to comment
the image, right? What is the image about? So how to do it. You use the signs like this, the lower sign, then
the exclamation mark, and then d. And as you can see, the closing for this thing
is d and the greater D. And whatever you put here it's not going
to be interpreted. As you can see, when I
refresh it, it's not here. And well, we can even put all these things here under
the command. How to do it? Well, you can use
the shortcut that looks like this,
Control plus slash. So I just salgate, and as you can see, now
it's under the command. Anything between this and this is going to be
under the command. As you can see, all the
texts disappeared here. But it only disappeared where
from the view of the user, but not from people
who knows how to code. When you go to the source, using the shortcut Control plus, I see, well, these
comments are here. So don't put here
whatever you want. You shouldn't put here
some secret things, because everybody can see it. So when really use
something like that? Would it be a good
idea to describe the image that I
said about Earlier? Well, you can do it, but maybe only on
development code. Development code is the
code that we have got here. But when you pass our side, when you transfer it to
Internet, to the web server, that's not a good idea to pass all the text because
your website is going to be bigger
because of text like this. Well, it's not much, because one character
is very small, is not taking much space, but when there are many
characters like this, imagine that we have got man many comments and you
comment everything, then your website will
load a bit bit bit, bit bit fast, slower. So this is going to just
not work fine for you. Because the speed of website is very important for
ranking high in Google. So don't comment everything. But for the sake of learning, when you are learning something, or when I'm teaching you, it's pretty good idea to
use comments to tell you, IMG stands for image, SRC stands for
source, and so on. It's a good idea to use
comments for that because well, It's not cool to have
it visible here, right? Because I just wanted to teach
you how this works, right? Not to show it here. And also, most time
when I use things like that is let's say I don't
want this image for a second, and I just use the shortcut
control plus slash, right? And this image disappears. And maybe later, I want to
come back to this code, and I want to have it again. So, it's coming back. So most time I use it for this, right for just commenting
it for a second, and then I'm coming back
to it or I just want to describe some things
for others or forms, but just for the
development part. No when I'm transferring
into the Internet. That's all in the
lesson. Thank you.
18. Meta tags: Hello, my friend,
we learned that in the head section of our website, we should add
additional information regarding our website, and we added the title. There are tags that
are called Meta, which are used for this sake, for adding additional
information. And as you can see, this
tag doesn't have ending. You can end it like this. But it's not required, right? Because we are using
the news HTML. So the meta tag. And because this is the tag
that doesn't have closing, we will use attributes to specify the additional
information regarding our site. Okay, so what kind of
information we can put here? Let's start for something funny. Like, for example, the
author of this site. Okay. So how to do it. We need to use an
attribute that we give additional information
regarding the meta tag. And this is called name. And we specify here things
like, for example, author. There are many other names
that allows you to specify, for example, description,
for example, keywords, and so on. We will learn them
when they are needed. In this lecture, we'll learn a few of them, but to be honest, you don't need to remember
all of them because This is simply something that
you will probably copy paste from one side to
another side, okay? So, don't worry, you don't
need to remember it by heart. Okay, so name author. And now, the problem is, how do we put the content? How do we put the value
for this author here? We need to just create another attribute that will just hold the content
for the author, right? In this case, I am the
author of this side. I will type Arcadis Vodac This information is not
visible for everybody. You need to go to
the source code, and then you can
find it here, right? And the information
like that can be used by programs that
analyze the site, and they can, for example, show now that the author of
this site is Arcadis Vodach. To be honest, this meta
specifically is to brack hey, this content was created, that site was created
by me, right? You can type here the name
of your company and so on. But there are metatacs that are used by, for example, Google, when it's looking for things, it looks for something, what is called meta
description tag. As you can see, we
can use the MET here for some of the meta
tags, unfortunately, not for author, but
for the description, which specifies
description of your site. What is this description? When you type here cuts, notice that we have
got here a title, which is the thing here. And we have got something like
description of your side. Yes, you can specify
description of your side here, in this content attribute.
Let's type somethin. Cats are pets that we all like. Let's minimize this
thing that we all like. The kitties are adorable. For example, let's
do it like this, so we can see all
text and they love to it snacks from our cty
side, something like this. Okay, and you might be wondering now why this looks like this. Well, when you are
creating a description, you should focus on
making it friendly for the person that is looking at description
of your side, right? And you should use the keywords that he
probably would write because this is
something that can be taken into the ranking
of your side, okay? And also, when there
is something you know, funny here or maybe there is something that takes
the attention of the user. He will click your
side in the ranking. Mm. There will be a bigger chance that
he will do it, right? So this is pretty important to, you know, I use the
cats, the kitties. I use the ti, right? I didn't use just, you know, because some people
would describe the site about cats like Cats, cats, cats, cats to, you know, get higher in
Google because Google takes into consideration how
many times the cats were, for example, spelled
in your site. You overdo it, that
won't be good. This is a great description,
which, you know, doesn't look like it's being
created for the robot. It's been created
for the person. And now, well, we do
not, for example, create a side about funny images of cuts,
but we are what? They love to eat snacks
from our cutty sides. For example, let's change
the title to Kitty. Snacks. You can best get the snacks or something
like that, right? And this will get you
higher in Google. This thing can be taken
by Google a suggestion. What to put here? Why did I say suggestion? Because well, Google
might think, Okay, you are lying or maybe
there is a part of website that describes
your website better, and he will not include it. But most time it will take
this into consideration. So it's a good idea to
take some time to put here what is going to improve
the rating of your side. There is also a meta tag that
is called the keyword tank, it specifies the keywords. The words that are
key to your side. In this case, it would be cats, keys, snacks, and so on. But well, it doesn't take
into consideration this anymore because people were
spamming here keywords, like for example,
Cat Cat CCCC cuts, and it could lead to some, you know, spammy
Internet, right? So it doesn't take
into consideration. But You can specify the
keywords for yourself here, just for the sake of knowing
what is this side about, but it's not needed
to be honest. So there is this description, and note that I put
it under the title. You can put it anywhere
you want, right? But to be honest, it's best to put it under
the title because You exactly can see now the title and description
in one place. If there were more content here and you would have
description here here title, this would be a
bit messy, right? This is not a good
way of coding things. So put description here. There are autor
for example here, and that's pretty. Okay. There are some other metatags, but we'll just talk about them when they are needed, okay? I think this would be the
best way to learn new things. The on the lesson.
Thank you very much
19. Charset - proper encoding on your site: Hello, my friend. Today,
we're going to talk about proper encoding
on your website. Imagine that you
have got a forum. On this forum on this board, there are many topics with people from
different countries. Like, for example,
from Poland, right, notice that we are using here a character that is
called L in Polish, and this is a character that is not on every
keyboard, for example, right? So there is some kind of
encoding that happens in the background that
shows this letter. Normal letters like this, like AB CDFG and so on, the one that are in
almost every language, they are going to be interpreted
without any problems. But like this one, this might give
some bad results, this thing can be interpreted. I will do something
very fast now. Notice that, that
can be like this. I'm coming back to
what was before, and I will soon
explain what happened. So This can be rely interpreted, and we should avoid
situations like that because we want
to be professional. We want to have encoding that we always make sure that everything is looking
great on your website. In order to do it, we need
to encode your website, the same like the
file is encoded. As you can see, basic encoding, which is said right now, is called UTF eight. This encoding is pretty cool because it will always
interpret everything properly. But you need to also add here
in the metatag using the. As you can see, EMT, we can use this thing, the shortcut here, and we'll get a metatag looking like this. And this thing, as
you can see, says, HTTP equivalent content type, and the content is Tex HTML, and the car set is UTF eight. Be honest, it's
hard to remember, I always copy and paste
it from one place to another because this would
be horrible to remember it. And this thing, make sure that everything is going to be
interpreted properly, ok? But you need to always
remember this the file, and here we have
got the information must also be in the same
encoding like this. When we refresh it,
as you can see, here, we have got
the proper encoding. However you might be wondering before that latter was
also interpreted properly. Yes. But Firefox, in this
version is pretty new, and it's going to just make sure that the default version
and it's going to interpret it properly
because this encoding is pretty known and just
going to guess it. But there are many programs, ways of opening your site. Believe me. In future,
learn about them. I don't know, looking at HTML through some kind of program that
interprets e mails, and Then you would have problems with letters,
for example, like this. So it's a good idea to
put the thing here. And your website will
look always good. You should also
know that this way of writing encoding
is pretty old, and it works on old web
browsers and old application. But somehow it's suggested
by Visual Studio code. I think it's just because well, they want to support and
always have a proper encoding. So if you want to support every totally every
web browser and so on, use this method. However, if you want
to go with time, then you can use
something like this. Car set attribute car set
that just sets the car set to UTF H. So this
is equal to this below, but this is not
supported as well as the above tack, with
this attributes. So you might be wondering how
badly it's not supported. To be honest, almost everybody will support this
thing, almost, right? So it's up to you. So we will use
this thing because I think it's easier
to remember, right? And it looks better. It has got less characters, so your website
will a lot faster. Maybe not by much,
but, you know, letter to letter and your
website will be smaller. You have probably noticed that I clicked here at start,
something like this, and I re opened with encoding with different
encoding our website. Look, we can use,
for example, 8892, which is the central
Europin encoding, and it has got characters from this place in
the world, right? And when I use it, notice
that the L character change. When I use the control plus Z, I'm going back to the
encoding that we had before, but when I refresh here, as you can see, we
have got wet letter. Because the file is
encoded in this encoding. So we need to also here have the same encoding, like this. As you can see now,
it works properly. So remember, you need to always have the same
encoding like your file. Most time you have this with UTF eight and you don't
need to do anything else but just add the Carset to UTF eight here and
everything will work properly. Let's go back to the thing
that is supported everywhere. Like this and
everything is okay. This is also important to
know that this met attack, exceptionally, should
be always here. After the first metattack, why? Because, well, if you put
it here, for example, notice that the L
character or it's here, and The program will know about what
encoding we have here. This is not a good idea because we can have
letters before. And what's more, the programs are looking it as
early as possible. So some programs
won't even be able to interpret it if it's later. So just put it as the first
thing in the head section. That's all in that lesson.
Thank you very much.
20. HTML doctype: Hello, my friend,
today, I will tell you, why should we add Doc
type to HTML five? Why should we specify what
type of document we are using? And it's pretty good
question because when you look at the HTML
file extension, we can see that it's HTML. Why do we even bother
need to tell that this type of document
is HTML, right? Hey, this is pretty
stupid, right? Mmm. Well, it would be. But the problem is that HTML
is pretty long with us. It's about 30, 40 years with us. And, you know, people,
long time ago, couldn't, you know, expect that even Internet would expand, like it expanded,
and they didn't know what type of HTML versions
will be in the future. Yes, versions of HTML. And this is the cause
of this problem. We are using the
new S HTML version, and this is called HTML five. And in order to specify
document like this, we need to type here only
something like this. As you can see,
exclamation mark Doc type, which stands for document type, and just type your HDML. And that's all pretty funny. To be honest, you can
finish this lecture. You need to add it here at the top this thing to just
say to the web browsers, we are using the new SHTL. If you are interested in
this topic a bit more, I will tell you about the
older versions a bit. Because well, when you go here, you will notice that there
are many HTML document types. And the most popular one is HTML for which is
pretty pretty old, which you do not need
to even know about. But this type like here is pretty often
used nowadays still. And in order to use it, you just copy this thing here, and you are using X
X HTML right now. But what's the difference? When I refers this page, it's still working
pretty fine, right? When I use di version before it. As you can see, it's
still working fine. So is there no difference? Well, web browsers are pretty, you know, good nowadays. And even though you are not
using the proper standard, everything will work properly. So I bothered the adding
this here because well, they need to guess now, right? The browser knows which
version we are using when we specify it here and
it doesn't need to guess it. So you know, it will
take a bit more time, for example, to
load a few things. Something might be
incorrectly interpreted, especially in older
web browsers, okay? So still too big, you know, to compile
with the standard. We should use the dot
HTML and add it here. Okay? You should add at
least information here. This doesn't take much time, so just add it here. And to be honest, you can make a template for
your next website. You can just copy it
on the next website, and you don't need to every
time, remember about it. You just copy it to
another website. But let's go back to the
version which is X HTML. What's the difference
main difference? Because you will see
sometimes pages like this, and you then shouldn't be
surprised by this, okay? When you are using HTML, you should add the slash at
the end of every void tag, so the tag that doesn't
have ending, okay? It informs that this
tag is ending here. So this is pretty popular, and you might meet something with something like
this in future, okay? In the new SH TML, well, we have got the support
for many things from JavaScript that I talk
about in JavaScript course. That X HTML doesn't
have support for. But as I said earlier,
even though if you use the XHTML with
the new S web browsers, it will be supported. M time. So don't worry. You need to know that XHTML is nowadays still used
most time because well, HTML five is not supported as well so well in older
web browsers, right? So people use XHTML if they want to support old web browsers like
Internet Explorer. Six, maybe for you, this is even unknown
name for right now. But there used to be
a time that there was a web browser that was
called Internet Explorer, and it made the life of web
developers really horrible because really many
things were not interpreted the same way
like in other web browsers. And well, if you
want to support it, then you need to use X HTML, for example, to make
sure everything is properly shown, okay? But well, is it really
important nowadays? Well, if you are writing an enormous site
that is visited by, I don't know, 5
million people a day, then maybe you want to
support these people, or you can be a person
that tells others that we are moving with innovation and we are not supporting
them anymore too. Depends on the client
that you have. So if you have a client
that really says, Hey, you know, I want to
support e web browser, so don't bother with
using HTML five, just copy this at the top and try to use the tax that
are listed here, right? But don't use the new tags
that are listed in HTML five. Be HTML five s shows new tax, like, for example, section, which is totally not
supported in HTML. So HTL five is
really just new tax, new ways of using Java
script with HTML and so on. Okay? And this is the one
that we are going to use. But it's good to know. There used to be a time where people were using
other document types. And now you also
know why you need to specify something like
this at the top, right? Because if you don't, web browser or any other
program that is analyzing your HTML would need to
guess the HTML versions, which is not good for you, okay or the user is
going to see your site. So anything that is not good
for the user is also not going to be good for
probably ranking in Google, because Google likes to, you know, they like
professional website, right? So specified document type, everything is going to be Okay. That's only the lesson.
Thank you very much.
21. Live Server & Auto saving code feature: In order to see the result
of our editing here, Let's say we add
the question mark here. We need to do what. We need to safe defy, so we need to use the
control plus S shortcut and then go here and then use the contro
plus a shortcut. Wach takes some time. Wouldn't it be better
if anything that happens here is already
happening here. Let's make the
change here visible instantly here. Would be great. For that, we need to use extension that is
called live server. We type in the Search
book life server and we call click Install. As you can see, it's
already installed. And now, what changed? Well, we need to run it. In order to run it, we need to hit the button go live here. Or you need to click
right click here and click on Open W Live Server. Before we do that, I'm going to go into the settings
of the extension. In order to go to
the settings of specific extension like Live
Server, as you can see, you can click here on
the manage button, and we need to refresh it. Let's go back there again. Mm hm. Now it's here.
Extension settings. We click on the
extension settings. And as you can see, now we
have got only settings that are connected to this
newly installed extension. And here we have got something
like that. Custom browser. Specify custom browser
settings for life server. By default, it will open your
default favorite browser. I have got by default
set Chrome web browser. But if you don't want to use the default browser,
like, for example, we are using Firefox
in the course, we're going to click
on the Firefox here. And now, when I go here
and I click go live, as you can see, it's
starting it, and bam. We are now right now
on this site here. And well, we can now do
something like this. Let's make this smaller right. Put this window here,
for example, like this. And now when we do
something like this, we remove the
question marks here, and I just save the file here. I do not need to
refresh the file here. Okay. So whatever happens here, like, let's for example, bold it, Now, I save the f, Control plus S. As you can see, the result is visible
here instantly. That's cool. But hey, I told you that this thing could be done automatically,
Instantly. Visual Studio code is
pretty cool because we can set the autosave feature. In order to do it, we go into
five, preferences settings. As you can see the shortcut
is control plus coma. And here in the search box, we go to type auto safe. And as you can see here, we can control auto safe
of dirty editors, right? And we can change it
from off to after delay. It means that it's gonna
save your f after delay. That is going to be specified
here in many seconds. 1,000 milliseconds is 1 second. We can leave it like this. And now notice that when
I add the question mark, as you can see, it refreshed
almost automatically. After 1 second, if we put here, for example, 2 seconds, right? This will take a bit more time. But now, as you can see, this white thing
here is up there, and it was removed
after 2 seconds. And the change here is also
visible after 2 seconds. So we can also
enter the bolded y. Can see it's now bolded
after 2 seconds. I think 1 second is pretty okay. We can leave it lightly. We learned how to
save it after delay. And this is pretty cool, because you can see instantly everything that you learn on the right
side of your monitor. The problem is, as you can see, we don't have much space, because we are using
the Fu HD monitor. You have that's why I
really recommend buying monitors that that
have got larger view. You can use the
21 to nine aspect right ratio or 32 to nine. Right now, I'm using 16 to nine. There is not enough space
on the left and right side. We could also, for example, make something like
control plus minus. We can do it like this,
and then we have got more space for our website. Problem with the
solution is that, it's hard to see the phone now, not only on the video, but in real life, right? But maybe you have
got good eyesight, so you can play like this
on your own computer. Even if you don't
have big monitor, you can still have your
web browser set like this. It's still pretty helpful
because right now, whatever you do here, right? When I remove this
question marks, I do not need to use the
short cut control plus S, and the result is
instantly visible here, when I just switch to
the browser, right? Mm. I go to the browser, and the result is
here instantly. So I do not lose my time. But I highly recommend having bigger monitor
or even two monitors, or even three monitors, right? Because this speeds up and well, if it's going to be your job, it speeds up your job
when you are working with HTM Melfis when you can look at what
do you do instantly? No when you need to jump
like this, right? Okay? That's all the
nesson. Thank you.
22. Entities & HTML validation: Hello, my friend.
Today, you will learn what is entity. When to use it. How to use it. Well,
entity is just a name. Character signs that you
can type on your keyboard. So in order to achieve the less than character,
you need to type this. The first thing, you
might be thinking, why even bother doing
something like this? Why not just type
the lower then here. Notice that our editors notice that something
is wrong here. Well, the character is here. When I use the entity, so in order to use entity, you type the ampersand
using the shift plus seven, on your keyboard then
the name of the entity, and then the semiclumn. As you can see, M We
also have the lower less than character. Why even bother? Well, what will happen if I
want to create a website, where I will talk about HTML. I will say, for example, this thing bolts the text,
for example like this. As you can see, everything
is bolted afterwards, the being, and we can see the beta here that
we are describing. If HTML is using some kind of co actor like the less then
for things like the tax. Then this is a good
idea to escape. This is the process of
changing this into this, escape the character, and
then in order to do it, we will just do something
like this, lower then. We're going to use the entity. As you can see now,
this f bolts the text. I didn't bold
everything afterwards. We we could just give the
information regarding this. Right now we can bold
the text, like this. But this thing is
not going to be interpreted by the web
browser as if it was a tag. There is a time when you want to do something like
using the entity. Are there any other times? Well, notice that
here I did something like since 2017 set R. Well, we are quoting myself, Arcadis. And to be honest, we should use to make it
proper the quotes here. The problem is that
HTML when it says attribute is looking for the
value inside the quotes, and the value is right now here. The text here is just something that It doesn't know
what to do with it. It's maybe next attribute, but we don't have
attribute name since. Now as you can see when
we move the mouse here, there is nothing here.
There's just an arrow. How to solve it? Well,
there is this here. We can use the quote like
this, and like this. We can represent the quote. S quote. As you can
see now it works fine. Well, to be honest, this specific case can be
solved a bit different. For example, you can use
the apostrophe here. Because when you use
apostrophe here, you can use quotes inside. But when you use the
epostrophe here, you can use epostrophe
inside, right? So if there was a time when you need to use epostrophe and
quotes in the same time, it would be a bad thing. And also, I think that
it's best idea to start every attribute
with the quotes, especially to make your code, especially because
things like that doesn't need to be typed
manually like that, o? They can come from
database or and so on. Always, you need to escape so change the quote
into que like this, if you are using
it in attribute, don't bother using it like this. Here, you can use quotes. In the text where
there is a text, or you can use quotes, however, in case of the lower then. Well, if you use it like this, for example, six is
lower than seven. As you can see, we have got a sign that something
might be wrong, but it works fine. However, if we copy our side. Its entire content
to something what is called HTML validator, and here we can choose
the validate by direct input and copy our code. You will notice that we
have got an error here. Always, you should escape the character lower than to make sure your code is
properly validated, let's copy it again here. As you can see the
error disappeared. You can use this tool to check if everything was
written properly. Well, visual sudo code, you can see also notice that
something is wrong here, but there is no information. So for this lower then, you should use this
entity always. And there is something
is called Ampersand. So you should escape Ampersand always when you are
passing the links, when it's inside a link. No here, HTML and CSS is proper. But when you are
passing it using links, like here, for example, is a link, This is a
pretty advanced topic, but you should just remember that someday when
you're going to pass a link, something will not
work, and you have got a sign like this inside a link. Remember about this lecture
that you need to come to it and use this
person instead of this. There is also a non
breaking space. Look, normally,
when we add spaces, they are not interpreted. There are no spaces here. And this is a good thing
that it happens like this because we can now
pretty easy format our code, like, you know,
maybe I wanted here. And HTML, the web browser
will not interpret HTML spaces inside
the file like this. However, maybe some day you
want to have something, what is non breaking space, which is a space that
will be interpreted. Then you can just copy it
and as you can see, now, every space that I added using
this entity is interpreted because this is just
a character that we put and inside the text, and we know what we are doing. We are telling, Hey, I know what I'm doing,
I want the space here. So the non breaking
space can add a space the normaa
wouldn't be there. As you can see, it's
aligned now here, so maybe I want something
like this. Is that all? Well, there are many other
entities, for example, you can find entity that is
going to create integral, the symbol from the
math, like this. However, we are
using the UTF eight and on this website,
you can find it. You really just can copy things, like for example,
I want this sign, so I'm going to
just copy it here. And it's going to work fine. Notice that this sign is here. When you're using TFA, you don't need to
worry about it. I think it's better to just
copy the sign into your HTML. The good thing is, you
can go, for example, here to the MOG Smiles, and you can get all
these things using, for example, the number that
is assigned to this MOG, but Funny thing is that you can, for example, copy even
the mod inside editor, like this, and you will notice that this
is on your website. This is pretty cool. You can find many funny
things here, for example, ROs, like for example,
some geometric shapes. This can be pretty
useful, I think. So currency symbols,
which you can just copy pas into your
website if you need them. That's all in that
lesson. Thank you.
23. How to properly name your files? Why main page is called index.html?: Hello, my friend. Today,
we're going to talk about how to properly name the Pis, how to name your HTML
phis, okay? And why? The main page is always
called index HTML. So let's start from how
should we call our names? It shouldn't be called
like we did before. So sample sample two, come on. Nobody knows what is
that fight about, what that page is about when he looks at
the name like this. Always name should describe
what is your web page about. In our case, it's Kitty Sacks. Question is, should we
use spaces like here? No, every word should be
separated by the dah. You not use spaces, you use des to separate words. Well, you shouldn't
use here the letters that are not basic
in the alphabet. Like this one, do not use them. Only use AB CDF G.
The basic alphabet. Well, you can use numbers, but only use them when
they really talks about something in your describe something regarding
your website, right, for example, the number of the product
or something like that, that could help find it, but otherwise, try to avoid it. So that's how you call
your website. Okay? Like Kitty Snacks. And now when we go live, you will notice that
this name is here, and it's helpful for the users that are
visiting your website. Because when they copy it
and pass it on to somebody, they can see from
this name of the URL, so from this link name. What is that link about, right? So it's helpful for
the other users, and also it helps navigate
on your website to people. So anything that is useful
is also going to be good thing that is considered as a good thing
for Google, for Google both. So it is something that
will be taken into consideration by Google Ranking. So it's a good idea to use here the words that
represent your side, but Remember, do not put
your description, right? It would be very stupid to
do something like kits, other able, love
to eat and so on. This is not a place
to spam the keywords. You just put here
Mainly the title, or something connected to title. This is something
that should be short. So that's how you
create the names. But one side, on the one side should always
be called Index dot HTML, and it should be the main
page of your website. Why is that so? Notice that when we come here and we
remove this part, We'll get the structure, the index of our folders
of our web server. When we go here, we
can find the images, we can find articles, and we can find
another website here. So the server is
looking for index, and he didn't find it. So he puts what is
inside the main folder. So the folder cuts in our case. But if we provide the index
that he's looking for, so when we change the
name to Index that HTML, you will notice that
when I refresh here, it found Index at HTML. We can type also
here Index at HTML, and it will find But
you do not need to because this is the way every web server
is programmed to. It's looking for
the index dot HTML. Maybe Index dot PHP, if you're writing in
another language, but it's looking for the index. So that's why the
main page shouldn't be a self descriptive name like Kitten Snacks, for example. It should be called
Index at HTML. However, the pages that are under the folder,
for example, articles, let's say that we want to
create another website, so well, let's copy
this thing here. And for example, it's going
to be not about kitty snacks, but, for example, funny
images of cats, right? So here, you should create a description, try to create it. Of course, create it and name
yourself here as an author. And let's rename it to what? Images of cats, for example, right? Or funny images. Cats, something like this. Because this describes what
is this web page about. But this page, the main one should have something
what is called menu, that we will talk about
how to create in future. And it is like an index. It is like an opening
to every other subsite, the page is connected to your
web page, your entire site. That's all in that
lesson. Thank you.
24. EXTENSION: Sweet icons in your VSC: Hello, my friend. I think that the default icons
that are next to the name of your page or next to the name of the
JPE five and so on, are not so good. You can fortunately change
them. How to do it? Well, you can use the
short cut control plus three plus B or the one shortcut and type
the five icon team. When you choose it,
as you can see, you can change it to nothing. If you don't want to
have them at all, or you can change
them to minimal. This is pretty cool. Or you can change them to
this that was here. But fortunately, there is
also option like the custom one where you can install
additional icon teams. When you click on
it, you will find all the icon teams that you can install from the extensions. And the one that I
prefer is this one here. When you install it, you will have an option
here to choose it. Remember to choose it because
currently it's the setting, so change it to Viacde icons. Now look how cool they are. They are so colorful and also even though
they are colorful, they are not taking
too much space. They are really, really good. I highly recommend this one. However, if you want,
you can install, for example, material icon, install, and then you
need to change to material. There a
big difference? There is some difference.
Let's do it a bit faster. Counterplat shifts P,
and let's change from material to the Vos code. As you can see the difference
is mainly in the folders. I prefer this one, but maybe
you will prefer this one. To be honest, there is
just many to choose from. So play with them, right? And choose the one that
you like, because, well, the editor is mainly for you, not for me, right? You have got your
own preferences, and that's cool about visual
studi code that you can do almost anything
to this editor to make it look like
you wanted to look. I highly recommend this one, and we'll use it since now. That's only the
lesson. Thank you.
25. LIST: ol vs li: Hello. Today, I will
show you how to create list of
items of elements, of positions that you want
to present to the user. When do we use list? Well, for example, to show the students what we will talk about in
the specific lecture. This is the time
when you use list. Also, you can list, for example, students in class. When somebody calls number 14, he knows that he is
coming to be questioned, and he is going to fidget a bit. It will not be a
pleasurable thing. So you use list to
list things to show people what he is
going to see on your, for example, website, right? What he should do in the
first thing in the morning. For example, he need to wake up, then he should brush
his teeth and so on. So you know now
when to use list. And what do we use them? Well, we use them to
present things in, for example, ordered manner. When you look at ordered things, it's easier to read, right? So to be honest, you use lists to make
things easier to read. This is the main
reason you use them. Otherwise, you can put
everything in paragraph. But as you saw here, it's unprofessional in HTML, you should list specific tag, which is called UL or OL. So the first thing stands
for un ordered list, and the second thing
stands for ordered list. And what's the
difference? Well, when we create ordered list, so we just create
a tag like this, and we put list items inside. So I As you can see, we have got the number here, which means that we can
put here something, and when we copy
it, as you can see, we can put many more somethings, and they are numbered
automatically, and this is pretty cool
because notice that before, when we use this here, let's say these two points
are not from this lecture, so we should remove them. Let's remove them.
But now I do what. Manually change numbers,
which is not cool. The cool thing about the
solution that we have just learned is that when
we copy the text here, like this, you will
notice that what? This is number automatically. If I change, well, let's
say that I want to start talking about this first. So I copy it here. As you can see, the numbers
are changed automatically, and this is pritical. So this is the first thing
that is cool about or release. The second thing is notice
that we haven't brake line because every this item
is automatic brake. Okay? So this is
also cool, right? So you don't need to
use brake line here. And look, you can use
the cool shortcut, which is a plus arrow on the keyboard to move
things up like this. Let's say that I
want this first, as you can see it's
first now here. But if I do it here, right, like this, I need
to again change numbers. So this is pretty cool feature from the visual studio code. You can move things up or down after you decide which order you want
to have things here. If the order of things
doesn't matter, you can use underly. So you just change
the OL into UL. And then you are just changing the thing that is presented
before each lease item. So you change the number into
just the circle like this. You can change what
is visible here. You don't need to
show the circle, you can show other things, but things like
that, formatting, like coloring and other
things like that should be draw through something
what is called CSS, and we're going to talk
about that in future. So don't worry if
you're looking at, for example, the circles here, and you are like,
I would like to have here something else
because I don't like it. You can do it, but not now. Tags are just used
for formatting to tag so to give additional
meaning to the text. And this meaning is
not only for us. For people that are
looking at our site, but it's also for Google Robots, for Google Robots, because
they are looking at your page, and when they see
an ordered list, they can see that you
are listing something. Some crucial things
about your site, well, about the
things in article. So if you are using paragraph, they can see that you are
creating some kind of text. So this is not a good idea
to use paragraph to listing. Well, there are other texts
that you learn in future, like for example, address. And if you put address here, google knows that
here is an address. So this is just
additional information regarding what type of
text we are formatting. What type of text we are
showing to the user. However, if you want to
change the way it appears, Most time, you're going
to d it through CSS. Why? Because it's better. Why it's better, you
will learn in future. As you can see in
our list of items, we also should learn
about useful shortcut, which is called Shift
plus tab in this lecture. And what does it do? When I select everything and
I use the Shift plus tab, as you can see, everything
moved one level to the left. So let's say here, as you can see, one
level to the left. Indentation exchange.
When I use the tab, I can go back to the
thing that was here. I think it's better to have the head in the
same level like head and body because we're going to have more space here,
right for the text. It doesn't really matter for us to have it on the level
like this, right? We can go back like this. Using the tab, you can
go right one time, because well, The
tag is always there. We even don't look at this. It's just there.
So this increases the clarity of our
code, I think. The lesson. Thank you very much.
26. Fast tricks with Emmet to use with lists: Hello. Today, you will learn
a few shortcuts that will improve your life as a
future web developer. So let's start from
this shortcut here. Notice that well, we can create the least item inside UL
doing something like this. UL, then LI, and then we need to format the debate because
it doesn't do good. And then if you
want one more LI, we will do what Contro plus, Control plus V. Control plus V, we want three of
them, for example. It's okay, it's okay
to do it this way. But if you know that you're
going to have two free Is, then why not to use something
what is called this sign? Well, this sign, when
we go to this website, notice is called the child sign. Why is it called
so? Well, it allows you to create a child
inside the parent. Parent is a tag that is
just above another tag. Child is just inside
another parent. Well, parents gives birth
to childs, to children. So well, when you type
something like this, NAF, which is a tag that you
will learn about in future, it is used to create navigation, and you type what? This sign, then you're
going to create a child inside NAV
that is called UL. Then you can create next
hit, that is called A. As you can see, this is
a cheat sheet that is added in the resources
tab of this course. You can go to this website here, open it and well, you can even download
it and print it. There are a few
more things here. You don't need to know
all of them, don't worry. But there are things that are used here that
you don't know right now. For example, the D and
so on, don't worry. I will show you the examples like this
when they are needed. So we can do what? UL and inside UL, we can put a lie. As you can see, we have got here MA abbreviation shortcut. In order to show it because
you might have it like this, you need to use the shortcut
control plus space. As you can see, I hit
control plus space, and then you can see how this
abbreviation is going to look after expanding it
after hitting Enter. So you don't need to hit enter
to just see how it looks. So now when you hit
enter, as you can see, we have got one Ai, so we still need to copy it. But I was talking
about something like this in one of the
lectures before that you can multiply one
of the tag, right? So we can multiply paragraphs. And also here, we can
multiply what the ally. As you can see, now when
we type the number here, we have got more and
more allies, right? So we needed three of them. So let's just type like this. And what's more now is that
notice that we can hit tab on the keyboard and jump
to next, y, right? So this is pretty
cool because well, we do not need to use our keyboard and mouse in order to jump from
one ally to another. So this speed up things
even more, right? We can put the content
of each ally instantly, right? This is pretty cool. Okay, but let's say
that we made an error. Like, for example, let's say
we did something like this, and then I jump here. What do we do if we
want to come back to this shortcut here
and make it work. As you can see, I do not
have any hint right now. In order to get into it, we need to use also the
shortcut control plus space. As you can see now,
we can now hit enter and everything will
work fine. Okay. Now, let's see what
if I wanted to, for example, have one
more y here, right? Normally, you will do what. You would copy it,
like for example, this select and contra
plus C contro plus V. But well, it takes time. We can use the shortcut which is called Shift plus l plus arrow. It copies a given
line up or down. When I have tap here, and I use the shift
plus l. Arrow key, as you can see, I copied it up. If I use the shift
Alp arrow down, I copy it down. Pretty
cool, isn't it? Okay. Let's say that we have got empty LIs and I don't want to jump to the
abbreviation again. Can I change in the same time, every value inside, Can I add the content
for every LI element. In the same time? Yes, you can. You can use the shortcut lplus mouse click, left mouse click. When I hold them a
button and I click, We have got more cursors, right? We can now type sample, and I type it everywhere. Notice that you can put
cursor anywhere you want, and you are going to type
in every place like this. Control Z to come back. Again, Control Z is a
very important shortcut. If you make a mistake, just use the Control plus z. So you know now,
this, you know, now, this, this, and here is
also something like this. Control plus k plus
S. As you can see, there are shortcuts
that you can, read about here, and you
can also change them. When you could right click here, you can remove them or
you can change them. But also, there is a
website like this. Are we added to resources, where you have got
them grouped a bit, it's easier to find things here. Notice that you have got here,
for example, delete line. And when I go here,
and I type delete. Can see we can find it
and you can change it, right? Or we can use it. For example, let's say we do
not want this thing here. Normally, you would need to select and click pack space or use the Shift plus
home and pack space. But you can use just what the control plus sheaf plus key. Control plus sheaf plus key, and you are just removing the line where the cursor is at. Pretty cool, right?
Okay, There is two more shortcuts that are
going to improve your life, which is the square
brackets and curd brackets. Well, notice that when
we are creating a lie, there is no content
inside the line, right? Let's say that I want
to have content inside. How to provide content. The content is the
text inside, right? You need to use the
curly brackets. The content goes here, right? As you can see, we put inside LI the content. This
is pretty cool, right? Content plus space enter, and we have good content inside. You can put content
into any tag, right? So P content of P.
As you can see, it's the content
of P. Pretty cool. This is useful when you
want to multiply it, right because you can
now multiply it by four, for example, and you
have a sample content for every LI. Pretty useful. Cro plus pase, enter and
we have got more of them. So the curly brackets are
used for the content, but this one is used
to add the attribute. So when I do something like
this, I can, for example, create attribute code title, and I can say here is title. As you can see, we have the hint that the
attribute is going to be added to the LI element because I'm holding
the cursor here. But when I jump here and I
use the contro plus pace, we added the title to every
Li pretty awesome, right? I can click enter counterplus
space enter and it's here. Notice that you can add the attribute to any
at tack you want. If you want to add
the title to the UL, you just put the square
brackets next to U. When you do it like
this, we're going to have a title next to UL. The tack that will get the title of the attribute from the square brackets is the
one that is next to it. So This is next to this, and of course, it's
next to the left of it. This is it. Also, there
is a very cool feature, which is dollar feature, and what does it do? Let's go into Ai
and let's say we want to put content sample, like for example, one, and I want to have it
multiplied by four. Notice that we have got
here number one, one, 11, and now we will need to do manually it like this if
we want to number it. But thing is that we could use instead of
one, the dollar sign, and it's just going to
be, as you can see, replaced by the numbers, something from one, pretty cool. Content sample, one,
two, three, four, great. We've learned about a few
shortcuts in this lecture. As you can see, there
are many many more. I will show them only
when they are needed. As you can see, after
the lecture of LI. These are cool things
that are cool to know. It's going to speed up the
process of creating content. But learning new
shortcuts takes time. So don't worry if you
don't know them instantly. And also in order
to learn shortcuts, you need to go out of
your comfort zone. Yes, you are in the comfort zone when you are using the things that you
learned long time ago. So you might want to
even copy things like this, copy and paste. This is just okay, but really, it's good to lend shortcuts
because you're going to spend creating websites
lots of time in future. These things are
going to save you time and time is money. T is not only money,
time is happiness. If you have time, you
can play computer games, meet with friends, and so on. But in order to save time, you need to learn shortcuts. You don't need to learn
all of them, right? Because, for example,
situations where you need to, I don't know, number
things like here. They are pretty rare, but at
least learn about this one, this one, and this one, because they are
pretty often used. You can also try to find things that are
useful for you in the cheat sheet shot
like this, right? Okay. That's only the
lesson. Thank you very much.
27. dl, dt, dd - definition list: Hello, my friend. Today,
we're going to talk about what is tag DL and
when should we use it? Tag DL means definition list. So this, this tag describes
a list of definitions. Okay? So here is the first term that is
called definition term, that is going to be described inside a definition description. So we put in DD the
thing that you want to describe and then DD
the description, right? And everything like this is put inside the definition list. So the difference between
this and this is that we can connect terms
to description. Here we have just
list of single items. But here we have a list
of definitions, right? So this term is
connected to this. This term is connected to this. But you might be asking
yourself, come on. Why even bother doing something
like that when we could, write it like this, for example, lower than P and then put
here, the definition. Then we can put it
into the paragraph. And as you can see, M We
have got it like this. As you can see, the
first difference is that the definition list creates
some kind of formatting. Here, we have got some
kind of indentation for each each description, each DD tag has indentation, and the definition term is up to the left of
the definition. Is it just a formatting? Is it just this that
would be a plus for you. The advantage of using
something like that. You wouldn't bother to use
it if it was just this. Well, the first thing is that Google can connect that hey, the first thing that you
are defining something, so you're describing something, and it knows that this
is described here. He knows what is the term
and what is the description. Exactly, he knows it. So this is the first thing. But the second thing,
I will show on the example that is shown on developer
mozilla.org website. This is a pretty cool
website because, well, you can learn here
in HTML if you want. But I would mainly use it for looking at examples that are here, which
are pretty good. Notice that they have
got here example of a definition list like this where it's a
scripts of Cornwall, and then there are definitions
of each thing like this. But here is an output, so how it looks like
when it's on website. You can notice that each
of that term is bolded. That's cool. But hey, there is no tag B here. We will need to do what. We will need to do
something like this on each one in order to
get the bolded term. But it takes time, and they
use what is called CSS, which we're going
to learn in future. CSS allows you to
choose, for example, dt and put font weight to bold, change the font to make it bold, but for every dT element. This is pretty
cool because here, if we did like
something like this and we will describe the BR
tag then the b Dag and so on. If you wanted to
choose just this part, we wouldn't be able to do it, and we would need to
manually, anyway, do what do the bolding. So the cool thing about CSS is that it can choose
every tag that is, for example, DT and change
it to make it bolded. We have got two advantages. One is that well, the Google
will know what's going on. The second is that in
future when you learn CSS, you can choose this
specific thing and make it look better, right? And also, when you are
using something like that, you are showing to yourself and other
people that are going to read your HTML code that you
know what you are doing, and they will know, so here
are a few definitions. Here is a definition list. When they are looking
at something like this, they just know that
it is a paragraph, and paragraph should
be used for putting text that is about Well, you might say definition is also some kind of
text, and it's true, but we have got a
specific tag for this specific case that makes
your code cleaner, right? So it's better to use
this over this in case of defining some
things on your website. As an exercise, create three more definition
terms, regarding, for example, the title tag, the head tag, and the
document type HTML. Just put them in definition term and type
some definition description. It's a good exercise to learn how to create this kind of tax, but also you will try to remind yourself how these taxs work.
That's on the lesson.
28. EMMET: creating siblings and treating two elements as one: Hello, my friend. In
the last lecture, we learned how to
create definition list. The question is, how to create
definition list using Et. How to use the MET in
order to create this. There is a small problem because notice that when we are
doing something like this, DL and then we want to
insert, for example, DT, then we have got
a solution like this. But how to add now the DD, how to add DD here. How do we add something
on the same level, not inside another tack? In order to add one tag
next to another tag, we need to use the plus sign, which is used for siblings. The tag that is on the
same level like this one, DT is on the same level as
DD is called a sibling. So when we do something
like that dT plus DD, as you can see, the
solution is DT next two dD. When we type P plus B, we have got P next to B. And for example, next P, we have got next P. Okay, Let's use what we
have learned in order to create the thing
that we did up here. So DL we have inside of it, so we're going to
use this sign here. What DT, and next to it, DD. Okay, that's what we
would want it, right? Okay. But if we
wanted more of them, we would need to
copy it like this. And to be honest, it also takes time. But we learned that we can multiply things
like this, right? So let's go back to this
and multiply it by three. There is still a problem because
we multiplied only one d d. So multiplication only
affects one thing to the left. If you want to group dt and DD. If you want to make it like a single expression
like a single thing. You need to use the same thing that you use in math,
the parentheses. When you do it like this, then when I hit
control plus space, as you can see, we have got now three times
multiplied this thing. Eentire expression like this
is multiplied by three. Now we can even choose it five times ten times
whatever you want, and that's the cool
thing. Guarding it. So to sum up. In order to add multiple
tags at the same level, which are called siblings, we need to use what
the plus sign. So you just add. That's
why it's plus sign, one next to another. In order to group a few lemons and make
them work like one lemon, you need to use parentheses
like in math, right? In order to create one
tack in another tack, you need to use the
greater den sign. As an exercise, try to do the same thing I
did in this lecture, but also try to put inside
of the created DT and DD, some sample text, but using m. The solution should
look like this. Try to do this as an exercise. If you have any questions, as always, feel free to ask.
29. Creating internal links: Hello, my friend. Today, I'm going to explain
you what are links, how to create them, and
how to create a back link. So when you have
got many websites, it would be great to
be able to back to the first website
to the index that HTML to allow the
user to do it, right? Okay, so what are links? As the name suggests, a link is just something that connects. Two things, a link, links, connect two things. For example, website. Well, we can't have
everything on one side. Well, we can if the
website is small, but if we have a big site or
even when you have a forum, Forum is full of subsides. When you have got site, a big site, we need
to create links. Well, we also need
links to, for example, connect another site
created by another person, so we need links for that. How to create a ring? Well, we need to use for that anchor. Something what is called anchor. The tag A stands for anchor. So when let's say we want to link to the
funny images cats. Funny images cats. Let's say we want to
link to this side. Then I'm going to type
a name like this. So if we want to see more fun
images of cats, follow me. Something like this. When
somebody click on this, I would like him to
jump to this place. We need to link this. We need to do
something like this. We need to throw and anchor
using the tack A like this. Or we can use the
shortcut control plus **** plus P and
wrap with abbreviation, and just put A here. As you can see, the abbreviation added something like
this, the age reference. Let's remove it for a second. Let's see what will
happen when we just put an anchor on the fan images of, well, I wanted to have
it on entire text. As you can see, nothing happens. This text is still simple text because we need to
say where we want to link it and that's that we provide using
the re attribute. He ref stands for
hyper reference. So we need to provide
the hyper text. So this thing makes
your text being hyper, which means this super text that allows you to
jump to another place. As you can see, this link
is now style like this. You can change how it's
style in the future, using, for example,
CSS that we're going to talk about in future. But for now, You can see, we made it being
clickable, right? We have got now
here the mouse is being changed when we
move the mouse over it. So this text is now hyper. That's why we say
it's hyper reference. It's something that allows you to jump from another
side to another. And it's hyper because normally, it's not possible to do
things like that, right? When you have a book,
you can just jump one place to another in book
just by hitting text in it. This text is really hyper. And that's why even
the HTML is called HTML, hypertext markup language. It's hyper because it
allows you to jump, and this thing is
called hyper reference, because it allows you
to jump to link things, and now you need
to provide here in this quotes where we want
it to link to, right? Because right now
nothing happens here. So we need to use the
contra plus space shortcut, as you can see, now we can choose
that we want to go to articles and now to fun
images of CATs, for example. And now when we are hit and I click on it,
as you can see, we are jumping to another side, and we can go back using
the back button up here. So that allows you to jump to the place that we
provide here, right? We need to provide the name
of the folder where you want to go and the name of fd
that you want to jump. That's pretty straightforward. But the good thing is that
you can put it on anything. So let's say that we have got
image, like, for example, the one that we have got now in images, like the bass guitar. Let's say this is bias guitar, and we want this entire
image to be linked, something that we can click
and jump to another place. Let's put an abbreviation
on it like this. Let's put the age reference. Let's say that let's
just go to fun images of C because we don't
have anymore HTML fs. Now, as you can
see, when we move the mouse here and
I click on it, I will jump to this plate. You can put it on text, you can put it also on images. So you can put it on
anything you want. Let's come on it, and let's
go back to this thing. Notice that when I go here,
there is nothing here. Now, what if I wanted to
be able to back to here, but using the link. Because we should provide a user a way to jump back.
How to do it? Well, let's create a text back. Now, let's create a link. Let's put an anchor in on it, and let's say where
we want to jump. And most of you would put
here something like this, in text dot HTML. Notice that when I click on it. There is something I
cannot get articles index. That's because the index
is inside the main folder. It's not inside the folder
that is called articles. You need to somehow be able
to jump from here to here. In order to do it, you
do the same thing that we did when I was
talking about images. You can do something
like that and the slash. It means that we jumped
to the main folder. Now when we are here
and I click back, and to refresh, as you can see, now it works fine. You can jump from
one side to another. But this is pretty long, and to be honest, we can make it a bit shorter. Why? Because the main folder is always under the
single slash like this. So you can just
put the slash and then the name of thing
that you want to refer to. For example, index HTML. Now as you can see, We
still are going back. The even more cool thing is that you do not need to provide
Index at HTML here. You can just type the slash, and it's still going to work. Why is it so? Because I
told you that Index HTML is the first thing that is being looked for on the server always. So you can put the Index HTML, but you do not need to, right? You can just put here nothing because the
server is going to look always for this special
name, Index at HTML. So you can just put it like this and it will
work fine, right? So pretty cool. It's I think easier to read. As an exercise, I want
to create a logo. How to create a logo, Well, try to find in Google something that is called logo generator, or just type in YouTube how to create a logo and
create a logo of your website and put it inside your website
like fun images of CDs, when somebody clicks
on this logo, in order to allow
it to be clickable, you need to make a link of it. He will be back to
the index at HTML to the index to the main page
of your website, right? Why is it cool and
why is it important? Because notice that somebody can come to your website
here, right? As the first thing that he
sees can be your sub page, can be one of your pages
of your entire site. You can have thousands
of pages, right? And when he sees
this landing page, that's why it's called landing because he will land on it, he needs to know how to
jump back to the main page. And it is pretty well known that almost always
on every website, when somebody click on Logo, he will jump back to the
what to the index DadH TML. The back button, the back text. Doesn't mean anything for the person that
visit your sub page. Here when he jumps
from here to here. He knows the back means that
we are going back here. But to be honest, he has
the bag button here. But if that's the landing
page, that's different, right? He needs to know how to jump to the first site where he
can find every other link. So to the index HTML, right? That's why it's called Index. You can find every link
there to another site. So create a logo, put it here, and allow the user to go back to the main side
of your website. That's only the
lesson, thank you.
30. External links | _blank: Hello, my friend today.
I will teach you how to create a link
to external site. Because sometimes you want
to recommend something, or maybe the user of
your website is on the forum that you created and he wants to
recommend something. So that's the time where
he needs to be able to link create a link
to another place, to external site.
So how to do it. Let's say we want to
create a link to Google. So let's call it Google. And now let's select it, and let's create it anchor. And now, the first
thing that you probably think is proper is
to type something like that. Google that Come. Okay? And let's click on it.
Let's see what will happen. As you can see, well, cannot get google.com.
What happens? Well, to be honest, Web browser is looking in this
catalog for the google.com file because he doesn't know if it's text
or it's a website. In order to say that this
is a website that he needs to open here,
in the web browser. So it's not file a single file. We need to add here
a protocol this. Now when I click on
it, as you can see, we are on Google, and it opened in the same tab
that we have got our website. That's how it works. You
need to add here HTTP, not like when you type here. Here we don't need to type it because it's added
automatically. However, you have
probably noticed that this site is opened in the
same tab as your website. If you want to open
it in the new tab, the blank tab, it's
called the blank tab, you need to target it, okay? So you need to provide it
with the anchor tag with additional information that is provided with that
attribute called target. By default, it is set to self. So when somebody click on it, as you can see it targets
the tab that somebody is in. But when we type here blank, you will notice that when
I click here left click, using the left mouse button, will open in the new tab. This is a behavior that
is saved for what, for the middle mouse button. Normally, we will
need to click on the Middle mouth
button in order to open it in the new
tab, like this. To be honest, I think that
you shouldn't use it. Some people will use
it because they think that day website is the
most important site. But I think that it annoys
people when they know that the default behavior is to open the site in the current tab. They know that if they want
to open it in another tab, they will just use the
middle mouse button. Leave the default behavior. I'm showing you it
is because you will 100% mid it somewhere
in the Internet. That's the first
thing. And well, there are exceptions where
maybe something like this is good thinking. It's a good solution. When? Well, imagine
that the user of your website has got some kind
of progress on your side. Like, for example, he is
watching a movie or above, he is taking a form
that he spent life, for example, 10 minutes
typing everything, and he mis click and he
is now on another side. If he has got it like this, then he just loses
everything, all the progress. When he has got like this and he mis click using the
left mouse button, then he's on another side. That's a good solution for that. Well, it's a simple solution, but yes, you can
do it like this. How to know if somebody
is doing something? Well, for that, you need
to know Java script. In order to know what the
user is doing on your side, you need to know Java script. It's a topic for another course. But hey, that's the time
when you can use it. Otherwise, I do
not recommend it. You can use a shortcut from Met, as you can see to create
links to the internal ones, and what is school when you add here a column like this, we can As you can see, create an
external link a bit faster because the HTTPP
protocol is added. So you can now type on the name of the side that
you are linking to. But there is also one
that is called blank, and you might be wondering
why there is something like this here that we
didn't use here. To be honest, this is totally
additional information. If you are not interested in
it, you can just s kve it. If you are interested,
then listen. L, stands for relation, right? And this attribute gives
additional information, what are the relations between your site and the site that
you are referring to, right? So for example, when you
are referring to Google, and these values here are here because you want to
protect the user of your site. What Well, Look. When somebody clicks
on this link, imagine that this
website was malicious. The user wouldn't
know it because everything would run
in the background, right in the background
of the site. That website could
change this tab. Imagine this tab can be changed while the user is
watching this site. And when he comes
back to this place, he will not notice it
because somebody will change only the Link Pi, for example, changing index to Index dot two, right, or the name of the domain to
something very similar. And he will also, of course, make it look like it's the same. But that the user will be
on another website now. And, you know, he can type some traditional
information here. He can type some things that shouldn't go to the
malicious website, right? Of course, when you
are looking to Google, you do not need to worry
about anything, right? But when you are linking to
some place that you are not, you know, 100% sure and it's a good idea
to do such thing. To be honest, the problem
about this solution is also that it's been fixed, like five years ago, that it's not possible
to do it anymore because News web browsers
just add it automatically. So there is just no need
to do it because it's a default behavior
of your web browser. But if you want to support
old web browsers like that, like the Internet
Explorer and so on, then it's good idea to
add something like that. Especially when you are creating something
what is called forum. Because on the forum,
you have good users, and these users can
link to websites, recommending things that you
do not have a way to check, because there are thousands of users on forum and they may link to many places and you don't know what
they are referring to. So then it may cause the problem for
the users of your forum. You have got many
users on your forum. And maybe they are using
the older web browser. Then adding something like this to every link added by the user, then it's a good idea. Otherwise, I think that
we can forget about it. I think because it's
not so much needed. Well, you know, when
you are using image, you can just forget a bit it's
just added automatically, you don't need to
think about it, right? But when you are
doing it, manually, it just takes more
time to type it. For forum, yes, otherwise, no. But anyway, as I said earlier, notice that we're still
using the blank here, right? Well, It's only problem
when you are using it. I said we should avoid it. So just don't use blank. Use it only in situations
when somebody have a progress that could potentially lead to a problem that somebody
would use the progress. And this is only just
a simple solution. There are many other
ways to do it, not doing this way. That's on that lesson. Thank
31. #labels: Hello my friend. Today you will learn what our labors and why even bother creating something like this? Well, the labels allow you to jump on your side to the specific place on your site dead you want the user to jump to. Okay, when something is the light that is useful. Let's go to Stack Overflow. This is a great website where you can find lots of free knowledge from other people like you. The one that are learning, the one that lend something. So people share her knowledge for free. And to be honest, this is the place where you spend most of your programming or web development adventure. So let's say here is a topic how to horizontally centered on element in future, you will want to learn this using, for example, CSS. And there are many answers here, right? And let's imagine the dye want to share this answer. And let's copy it, and let's put it here. As you can see, we are at the top of the website. So sharing something like this is jazz, not good, right? Because you will need to send the person that you want to share it with where this being nice, right? Use the solution number baba, baba brand, he needs to scroll to the solution that would be stupid or use the solution that was created by the person. Stupid, stupid. Here we have a Share button. And when I copy and I paste it here, bam, we are instantly at this answer. What has changed? Look here at the link. We have got something like that. Hash and the number. And this number after the hash says that we need to jump to this specific label. Whereas this label I can see, you can do. Okay, let's use the shortcut Control please. Plus three plus i. Let's use the inspector here. In the Chrome, it's Control plus 3 plus j. Okay? And let's jump here. Maybe be pyre is key. Here. As you can see here, we have this number here. So in order to create a label, you need to type what? Angkor type, the name of labor. And then someone in the browser needs to type something like this, or you can type it, right? And then the web browser will jump to this specific place on your site. This is how it works. Okay, Let's do it. Let's do it. When we are on our side, we do not have a scroll because we do not have content. So we need to make content or create some bread line tags like this, for example. Okay, let's create a few of them. And so let's put here something like this. Go to top. So let's create an anchor that will allow us to go to top of our site. Okay, so let's do it. Not what? Go to top, something like they'd go to top. Now when we hover here, go to top, as you can see, we are not at the top, Garcia, at the bottom of our site. That's because this thing has been added here, but we do not have anchor that b can go to, right? We need to create the same thing like they did here, right? What did they do? A name, right, so anchor with the name attribute. So let's create it name attribute and let's call it goes to top. Now, we'll go here and I click on it. As you can see, we can jump to dope. And this is pretty cool, right? We can jump to any place we want so we can, well, this is pretty useful to write because we can put, for example, at the bottom right corner that go to dub when somebody scrolls very far away and he wants to go to DAPI, can just click on it and jump to the top. But it would be great if these button go to top would move with the scroll. But we will learn about things like that, how to put things in the bottom-right corner and how to move them when somebody scrolling in future. So That's not the topic of this lecture. However, these pretty useful also, right, because it makes your call, your website a bit better for the user. So go to dub, works fine. But let's imagine that we have got the posterior somewhere, right? So let's imagine that we have got the polls about Knaflic. And let's say we want to jump to it, right? So what we need to create an anchor, and let's go to post, for example, number 45815, right? I don't know. Maybe let's say that this pulse is this number. So now let's create rate anchor here, and let's name it like this, right? And as you can see, it works fine. When I click on it, I got to pause About Nothing. When I click on, go to a top, I go here. But there is a problem because we use anchor for Walt, for entire text and should be used for links, okay, not for entire text. So called solve this problem for example, like this. As you can see, it works fine. However, let's say that in the future you then JavaScript and you want to, for example, extract the text here, right? So in endeavored tagging side, here is this pink. Believe me, it's not call that something like this here. So maybe let's put it here. Let's see what happens. We have got space here. Why is it so because the paragraph just add some margin to the top and bottom. Okay, so this solution is also not good. These are not a solution. Yes, we can use ID, the attribute ID, and that's called he'd go to top. I mean, no good at about 450. As you can see now we are here. You can't use name attribute here. It just won't work. As you can see, it doesn't work right? To go to TEM works because it's under a name, works only on the stack, okay? So you need to use ID in order to do it like this. And you might be wondering why even bother using this link right here. And we could just use the ID that can views on anything. To be honest, that's a very, very good question. And you can even find a question like this on this stack overflow. If you want, you can read it and find it. That's an exercise to realize. Just so go there and try to find this topic because, well, you know, you need to know this website. Really good evening. This is one of the best websites where you can find solutions. Okay, So read about it. But I will say also something from myself, okay? And the first thing is that when you are using the anchor tag in future, you will learn something with the CSS and Eve you want to, you know, style every anchor, so every link, then this can cause some problems, right? So the solution like this is better than, right? And mostly the solution will be the best. But there is always bad, right? There can be a situation where you want to put two values here and other value, for example, for the ID. And the problem is that you can have two values in ID, okay? It will just not work if you stop working. When I click on this, it just doesn't work. We can have only one value here, okay? And this causes problem. And I think that's why the Stack Overflow have the solution because as you can see, it has been very similar tack here. And you can see that I'm sure they are using something in the background. And they just don't want to repeat itself. So there might be a time when you just can't use ID. Most time you can. Okay. And I prefer using the ID version. But IV, there is some day time where you may be wondering hmm, I need to add here another ID. Then you need to stick to this solution, okay? This is also better supported. But to be honest, this is supported, I think even in Internet Explorer 6. So I don't think that we should care about support right now. You can just over, over, over doing everything. So most time use the solution. Good to know that there is a solution like these because you will need with other people who are using the solution. And that's the difference. I would like to also add in this lecture that you can go to top a bit faster. You do not need to do something like this. Because imagine that, Hey, let's say that we added some content here right later to our website. And our top is where It's not in the same place, right here, right now. And if you type here top, you always jump to top. You do not need to, you do not need to even create the label. It will always work on our website. You typed up, you are at the top, okay. You can also type the hash, and they do also counted it up. So there are two versions, top or the hash single Tosh, okay? I prefer this one because well, it says what we want to achieve here, right? Okay, so send somebody to the top, right. This thing is a bit less of descriptive, right? So use this version, I think, for sending someone to top. That's only good lesson. Thank you very much.
32. How to create a link to email?: Hello my friend. On every side, you should always provide a contact information to you, right? So you should provide there at least an email, telephone numbers, sampling like that, right? Because it increases credibility of your side. How to do it properly? Well, you could type something like that. Your email name, domain.com. Alright, sounds like this. And the program is that is just a text, right? I think that it will do better that when we click on it, we execute their program that is installed on the user's computer that allows him to send emails. That would increase that would decrease the time he needs to email you to contact you. And, you know, time is money, right? For everybody. And they will appreciate something like this. How to do it? Well, in order to do it, you need to create the anchor tag. And you can use emit for that to help you with the male 2 value for the attribute of a reference, right? And here you put the name of email you want to send him into. And then here you drag the text. That must be that that should be visible like for example, e-mail, whatever, right? And now as you can see, we have get something like this here. When I click on it, I have got a ton there, bert program installed on my computer and now I can send here instantly their main. So this is pretty cool, right? Because it executes the program that is installed on my computer. If somebody's using the mobile phone, it will execute the mobile application that allows him to send the email that. So this is pretty awesome, right? And is it all to this lecture? Well, the first thing is that when you select the image like this, this is cool that when you add aggravation using here, it will notice that the text was email and it will put the email instantly here. That's cool, right? It's speedups, even things a bit more, right? As you can see, it still works fine. You can also add the subject, okay, So we can do something like that. This is like for example, Question, subject equals question, question from this side. About cats, something like that. So this is a default subject. Now, when I click on it, you'll notice that here in the map them out in poetry seeing is subject. And we have with your question from this side about GOT, this is pretty cool because some people do not put subjects of those. So some of them pulled with subjects that doesn't connect to the text. And this thing allows you to have some default topic that will at least connect the Me Too from, well, it came from right? So you can put here the default subject using the construction like this, okay, so made the colon than male, then the question mark than the subject equals sign, and then the content of the subject. The default, while I highly recommend doing these swing, is it onto this lecture? Note, we can use the address back. This is pretty useful so we can put other stack like this on this. I like to have it formatted like this and y to even bother doing it. Well, you inform by adding the address tag that the content of it is just an address. Okay? Why even bother doing self needed? Because Google knows now that this is address, okay? So you could provide him more information like for example, your name and surname. And for example, you can put here, Where are you from, where your company is prospering? Or you can put that often number and so on, right, in the address stack. And then the Google will know that, okay, this is not a text regarding the article that you are, for example, showing on their side or a Regarding there product you want to sell. This is just an address, okay, this is an additional information for Google. You have also probably notice that the content here is now written using the italic tag right here is like an ethylene set on every think. Nothing has changed right? When I put the I or when they remove it. So can you change the default behavior? Yes, you can do it. But in order to do it, you need to know the CSS we're gonna talk about in future lesson. Thank you.
33. Telephone link: Hello In the address. I think it's good idea to also provide the telephone number to you. It also increase the credibility of your website. It's very important, I think, to include telephone number. Don't worry, even if your site is very popular, you want good manacles. Believe me, I provide the phone number and many, many people visit my website and it's rare that somebody calls. It's good idea to have a business telephone number of co, of course, it's not a good idea to provide the personal a telephone number here, because sometimes you might get somebody that you wouldn't want to be called by domain attacks. In these days, you can't even been people, so don't worry, just provided because it really increased the credibility. Okay, So how to do it? Well, you can put the number, for example, here, like that. It's important to add the spaces. I think because it increases the visibility of your number of it's easier to write on paper when somebody says the number like this, we have this base is not without them, right? It's easier to read and remember it. So that's how you do it. But the most important thing for us now is that we can create a link. Okay? So let's agree the link. And in order to create a link to number, we do not type male 2, but we could type that tell. So it's shirts for the telephone, right? And then the colon, it's important to put the colon here and then the plus sign. And then you need to type here the country code that you can find in Google. You can just type country codes. And for example, for Poland, it's what? It's 489. So four to eight and then the number that is yours, right? And now as you can see, when I click on it, it wants to pick an application to run. Well, if you have a web browser connected to your telephone, then you can send the number instantly to your smartphone. This is pretty cool, right? That's the first one, is somebody's visiting your site on smartphone. He can just click on it and instantly cold you. That's also pretty cool, right? Because he doesn't need to do I'll write it on paper. He doesn't need to memorize it. So it's pretty cool that it can be just clicked and then choose, for example, the application like here. What kind of application, you know, Skype, whatever the people can have an installed app that allows them to call using the microphone on the computer also, so they can just click on it and the call you from the computer. So it's also make it easier and anything that makes it easier for them will be appreciated by them. So remember, it's cool to add something like that. So in order to do it, you need to adjust IPS, tell Scollon their country code before the plus sign, right? And your number. And here of course you can type whatever you want, write whatever, or you can type the font, for example. But I think it's a good idea to repeat what this here, because well, maybe somebody that doesn't want to use application, maybe somebody wants to write it down. So then it's good idea to put it like this. You can also use the image for that if you don't want to remember this. So you can just use the a colon and then telephone. And as you can see, this part of the link to the telephone is instantly put here. You just type your day Country Code and the number that's on that lesson. Thank you very much.
34. headers h1 to h6: Hello, my friend. Today I will teach you what our headers and when should you use them? Because headers will improve their content of your website because you make the user experience of your site better. Why is that so? Well, what is a header? The header is just a plain texts. Yes, it is. But it's big. It's enlarge and is also positioned above our text. Okay? And this magnification, this enlargement, makes ask the user to focus on this type of texts more than what is under the heading. Okay, so how do we create headers in HTML? In order to do it, we use tag that is called, for example H one. And whatever I type here is going to be a header, header. The most important one. Let's see. As you can see, we have got here a big texts, as I said, and it's also bolded, right? And also we can see that merging added up and down. So this is a header and these pretty sure is gonna make the user focused on it, right? He's gonna read this first thing is not going to focus on things here and he's going to focus on this one here. And that's why we are using headlines, right? We create them in order to focus attention on the key, the most important message of the text. Some parts of the texts may not interests salmon and headings allow you to quickly jump to the specific part of the texts that interests the user. The headline tells the user briefly and in a brief way, what the next paragraph will be about, which makes your text easier to read. And if it's easier to read, the user is what? Happier. He is happy men. Now, this is crucial to any good article. Okay? So where our headlines use, for example, a headline can be texts written in a much larger font in the newspaper, as if it were the subtitles of individual texts. Such a headline is used to attract attention or increase readability of texts, right? Okay, So this is how you create a headline, a J1. Why is it a J1? Well, h is the first letter for from the word header, right? Header. Okay, That's why it's age. And the cool thing is that there is more than one H header. Well, you can type a1, a2, a3, 4, 5, and 6. There are six versions of headers. What's the difference? Well, this is a bit smaller than one. This is a bit smaller than h to, here, we're going to change it to age free. This is a bit smaller than h and so on, right? So you can see this, the most important one, and they are getting smaller by default. You can change the default behavior, but you shouldn't do it from this space, from the HTML body using CSS that we're going to talk about in future. Let's jump to the article about the lecture that you're listening to. Notice that I have got here some texted you have heard in this lecture. And notice that I have good headers here. And as I said earlier, when you see the header, you can instantly see what is under, right? Because the AGI, so why do we create header it? Okay, So this part is about this. So you don't need to read the entire article. You can just jump to the specific part of Article and just read the part that you are interested in. So this increases the readability of your article and user experience and whatever, remember, whatever increases the user experience, makes your website more demanding. So Google will rank higher, and also people will visit it more. So it's pretty important to use headers. And the header that is H1 should be used only once. This is just something that you should think about regarding every sub page on your side, Okay, website. So this is like the most important message regarding the article that you are describing on your side. Okay? Also notice what would happen if I go back, let's say it is not going to be a header and M, all right, it's going to be here like this. What will happen? You can see instantly that this text is not as easy to read as before, right? It's always better if at least this thing would be bolded, for example, right? This is pretty important to create headers, okay? Above the texts that you gonna have below the header. So let's go back to this. So as you can see, the header could be styled differently. Right here, it's all here, it's bigger. And it's not bolded even right here, as you can see, it's bolded and bigger and then it gets smaller with each header. But you can change this behavior to make it what you want it to be, but using the CSS that you cannot learn in future. Okay, that's time for an exercise. As you can see here below, is a text that we go Now. Format the beat, right? Because everything is in one line here. This is pretty not reliable at all, right? When somebody sees a big chunk of texts, he's not going to read it. Remember about it. So we need to format it. As you can see, I have already formatted the beat BAD in Visual Studio code. So I could do it as an exercise. Okay, You can do either alone or we've mean if you want to write. And as you can see here, we have something like the basics of page creation, brief introduction. I think that these seems like the good thing for the header, right? This is like the main topic of everything below here because we're not talking about what is an HTML and CSS. So these things, I think are connected to the main header, so we cannot call them H2. And this wing we're going to call also H2, right? And as you can see, this is getting a bit better, right? Because we have the basics of page creation. Brief introduction. What is HTML? Okay, so cute are things regarding HTML or the CSS. Okay, so here we're going to talk about CSS. It's getting better. Okay, Let's now, for example, do what? I think that here we have got what some kind of question that is answered by the law. So what are the tax? Okay, so I think that this thing can be h3, right? Because this is connected to H two here. So let's change this to H frame. And also what is a selector H free. And how do I include the CSS file pij a tree. And now it's getting better and better. As you can see, all these things here. I think they are paragraphs. So we can say that this is some kind of texts, or we should select all of them and put them into the paragraph. So the Google knows that this is text. Okay. We don't need to do it. As you have noticed, probably even order to see that this is text on the page. So when you look here, but Always remember that text. If it's a text like an article, it's good idea to putting it into the paragraph like this. And you'll have to go up, notice that this is not as reliable, as good to read as before, but it's because, well, the default behavior for 3, 2, and 1 in this case is not as good, right? Probably for this, what is Selector? It would be better to make it, for example, here at the center, right? Center it for example. And you can center it using some kind of a tag that is called center. As you can see, it's a red DAG right now. And it's red because it is not used anymore because things like that should be done through CSS and we're going to talk about that in future. So this I kind of cheated was used long time ago in HTML, but nowadays, don't use it. And probably, well, these would be a bit easier to read if there was more texts, right? This is very short texts. So if there were more texts here, this will get easier to read each time, right? You could also, I don't know, noun-verb that whatever, this, this is going to be better when the text is bigger, right? So maybe the edge rule three is not needed here in this particular case. But well, probably nobody would just type something like that to attach a fighter pilot, use the link tag in the head section. You will then give you an example how to, how to do it, right? And this thing, would it take some space? We can even do something like that using something like Lorem, Ipsum, Emmet shortcut. As you can see, this is getting a big, a bit bigger right now. We can type Lorem and we can, for example, multiply it by 50, as you can see now it's bigger and okay, how do I could see is this fine page and now he's big. Probably texts like that would need to be split it anyway. So these will also feature night when you want some placeholder text. And well, the next exercise I want to show you is how to create the headers from H1 to H6. Tried to do it alone with the help of emitted we talked about before, how to do it? Well, h multiplied by 6, as you can see, maize us seek stacks called h, right? But we want numbers there. So let's do it like this. These are numbers like 1, but we want 1, 2, 3, 4, 5, 6, 7. And I told you that is used instead of number the dollar sign, we're going to count from one up to the number that is here, writer. So we have six and 12, 34, 56. Okay, that's, that's pretty cool. Now we need the content. So how to create a content? Well, when you use the curly brackets and put the contour here. And as you can see, here, we have got the text here. Oh, sorry, this is in the wrong place. The content should be here, right? As you can see, we have a text here. And also we wanted numbered, but starting from one up to six. And as you can see, it works fine. H1 to H6. You have probably noticed that I made a mistake and this is totally okay because I'm human, right? I'm telling you this because probably when you are trying to write your code, when you are trying to write something for Scott would your lettering just now? You're gonna make mistakes. And you need to know that I'm prepared before the lecture, right? And I make less, less of them, less mistakes because I am prepared and also I have experience in this matter, right? But we humans tend to make mistakes on don't worry, and don't feel overwhelmed when you don't know the answer instantly. When you are when something is not working properly, this is pretty, pretty normal. Okay? You are at the beginning of a journey and even if you are at Vance, if you have advanced experience in something, you gonna make mistakes, maybe less of them, but you go now make them and not no answers instantly. Also, I'm telling you this and I almost not fixing every mistake in the post-processing right. Because I could just delete the last second where I made a mistake like this here and show you that I am not making any mistakes, but it would just make you feel wars, right? Because you'll be like, Okay, this guy doesn't make me sick. How the hell is he making everything all the ways properly, right. I'm not going to be ever like him. To be honest. You are the same like me, but I have just as a bit more experienced than you. In future. You gonna do all the things that I do as fast as I do. There's also a cool shortcut that I didn't talk about. It's our class Z. When you have text like this. And it goes up here. As you can see, it's hard to read orange. Check, change something even in this text. And in order to change it, you can wrap the text using the Al plus Z shortcut, as you can see now everything here is wrapped so when the text is just a bit too big on the screen. So when you need to scroll, it's just gonna be wrapped like this, right? And you need to know that it changes the appearance of text over here right here. It's not going to be changed, but here it easier to now change something, add a new text, right? So I highly recommend using this mode. That's only the lesson. Have a good day and there's always, remember that I am here to support you in case you have any questions. Have a good day.
35. cite vs blockquote vs q - how to cite others?: Hello everybody. Today I will teach you the difference between the queue look good and the site tax. So today we will learn how to cite somebody like for example, Albert Einstein. As you can see, in order to assign somebody that we should use the tack on his name or his name and the book that he wrote it in or Sunday URL, right? We need to type in the site like where does the text that is in blockquote or the q tag comes from. So the site dark content is, for example, the name of person that we are sighting. And then the content is inside the blockquote. In the q tag. We also quoted somebody in and here we provided who said it, right. But we did inside him because he's like Just Adam right here. We made a quote, better to belong to some than to 0. And then we said that the IED was set by Angie Sepkoski, which are blood evolves book. So we provided also the book. It's pretty important to say, to say where it comes from. Well, we don't know where these texts comes from. Well, at least I don't know. This thing was said long, long, long, long time ago before the internet, right? So we don't know exactly so sad to say that it comes from the book specifically, like we can say here, right? What's the difference between the Q and the blockquote? Well, as you can see, blockquote is block quote. It means that when we go here, it is a block, which means that we have margin up and down. It means that the text is not next to each other. It's not in line, like in case of the quote. Back. As you can see, the q tag, which is here, it's inline, right? It didn't added the bright line, right? So that's the first difference. The second difference is that, hey, notice that we have got here, quote, the quote signs, they are not here. So that's the main difference. And people recommend using the code tag for things that are just 94 short, things like these one okay, for bigger one. Is this because this word was intended when somebody created this dark. Okay. You can read always when something should be used. When you move the mouse over the tag, as you can see, the side element represents a reference to a creative work. It must include the title of the work or the name of the author, or an URL reference, right? Or, and reference in abbreviated form and so on. But you can see the how something should be used when you move the mouse over into Visual Studio Code, it's pretty useful thing. And also when you click here on this link or you copy it right to your web browser, you can read more about this. I think this is pretty, pretty cool. So let's read this quote because I really like it. Let's end this lecture. Thinking. It is known that such and such an idea is impossible to implement. But there is some ignore animals. So somebody who is ignorant, so somebody is maybe stupid, who doesn't know about it. And he's doing this inpatients. So maybe he wasn't so stupid, like everybody told he's right. It's very cool, quote, because it shows that we shouldn't look at definitions and believe them 100%. Because, well, we know what we know at the current, not with our current knowledge is true, but maybe, maybe there's something that we are missing. So there may be a guide like this one with ignoramuses. And he's ignorant and he will not carry about the things that were said. And he will invent something. That's how invention comes to life. I really love this thing. So don't always listen to things that are available to us because maybe, maybe they are not the right Always. Do you have probably noticed that the block code is what's tied somehow and maybe you don't like how it is style. Maybe you prefer this one. Always. You can change the default behavior like that, but in future using the CSS. So don't worry, it's good to use the tags like this for the sake of informing what kind of text inside your bigger text is, right? You inform the Google board, inform other people what kind of text is that? It's really important to do things like this to make your code a bit more semantics. So when you give it meaning, semantic meaning, you can, however, we have our CSS also add the quotes using entities that we talked about. So there are entities like bottom double-quotes and right double quote. Then we'll create a quote sign like this. So you can achieve things like that. But as you can see, it's a bit harder and it's not the best solution. Sss is always better in cases like this. That's a a dozen. Thank you.
36. abbr | dfn: Hello my friend. Today I will show you how to properly define and use shortcuts in HTML to make sure that robots understand what you are writing inside articles. So in order to define something like we have here, HTML is a target language use for creating websites. We should say that, Hey, we have defined something here. And in order to do it, we use a tag that is called HDFN, which stands for define the f n, right? And how do we show that? We just put the attack define on the thing that we are defining inside the tag. Like for example, paragraph. Okay? So this is a par and stack because this text is inside the paragraph, right? And we need to define the HTML in there in that paragraph now because the stack is inside this, okay? So now we can clearly see that here is a definition, so we shouldn't define it later in your article. But here next to where we told that when we said exactly where we specify that Haidt here is a definition. Okay? Why do we do so? Because robots live, for example, from Google when they see your website and they see that you are defining HTML. And somebody, for example, wants to find the definition of HTML and he types in Google, what is HTML definition? You have a higher chance to be shown right? Because Google will know that you define it. You didn't just make an article regarding HTML. You define the HTML. Okay, That's the difference. Here we have good something like what we use is called JS in this text here. And you can notice that we have got here a shortcut abbreviation, every abbreviation when you use it to make it easier to understand for others because not everybody needs to know what is JS. You, then you should use something we'll discard, attack a baby hair, which its abbreviation, right? And we do it like this. As you can see, we have got here instantly added what the title attribute where you specify what these shortcuts stands for. Java script, okay, This stands for JavaScript. Let's see what has changed when we open the Firefox. As you have noticed, HTML is written by default in italic, right? Because it's not stride letters, right? It's Italy. Try now. And here js, when we move the mouseover, have information that okay, so the shortcut is stands for JavaScript and also we have got killed the small balls right here, right? So it shows up that it suggests that something might be hiding there, right? When you move them all over, you will know what is this shortcut about? And this really good idea to do such things. Why? Because as I said earlier, well, your students, people who read articles doesn't need to know every shortcut. And when you use abbreviation tag, you showed the Google, did you care about the people, about the users of your website? You increase the readability of your, of your articles, right? If you increase the chance of being somebody happy, and if somebody's happy, google these Hapi, okay, That's, that's when people will use the Google services. And that's why using abbreviation is a good idea. I'll never abbreviation. You have probably noticed that HTML is also an abbreviation. We have not only define it here, but it's also an abbreviation, right? So you can also put a tag inside another tag, right? We talk about it. It's like a nested tag. So we can put her abbreviation also and say that it is the Hyper Text Markup Language, right? Like this. And here, as you can see now when we move the mouse over, we have got also this information. So we use the defined here because we are defining it and we use the abbreviation tag. Because, well, this is an abbreviation, right? So it's good idea to show what it stands for. Here. We just use the abbreviation tag because well, we didn't define what is js, right? We just say, Hey, we using this particular case, JavaScript, that's all part. We showed that it's JavaScript for people who doesn't know what this shortcut stands for, designing the lesson. Thank you very much.
37. Semantic tags <strong>, <em> and vs <b>, <i>, , </i></b></em></strong>: Hello my friend. You can create articles on your side without formatting, and it will be just a plain text. But when you look at plaintext without formatting, so we've out, for example, Bolding texts. So we've had, for example, telling the user, hey, you know, here this C as says, is the first letters from here, for example, like this. So when your texts is just a plain texts, it's just harder to read, especially when it's a longer text, right? Not is that the recreate, for example, using emit, for example, using the forum abbreviation. And when we do it like for example, 30 times the text like this is just unreadable, right? You need to use formatting like for example, header that we talked about. You need to use all saw something. What are these called? The strong and bold and other things like this, but we will not talk about in this lecture. So there is a tag B, I did we know about the first one. We'll make the texts cobalt the second we would make it go. Eight Alec, there's also something like underline and strike underlying just make an underlying below the text and the S stands for strike, and it just strikes through the text. These four tags, as you have probably noticed, are used only for formatting text. So they changed how the text appears and for the sake for changing appearance, you shouldn't use them. Yes, these are old tax, very old and well, nowadays, we just use CSS to achieve what these tags do. Almost always. Soon I'll show you some kind of exception. But most time you will use the CSS. Why is that? So because CSS allows you to create external phi where you can change how things appear in every webpage you have. Well, we have good now only a single page. So you don't let him changing manually be to iOS. I think this is just nothing. But later when you have, for example, 400 pages, right? Then something like this is really cool because you can change from one external file how something is gone, our logline, right? Because maybe later you don't want something to be bolded or maybe you want to change from ball2 data lake or something else, right? So these things should be done, may only through CSS. But there are tags that are called semantic tags, which means that at part from formatting, they have also additional meaning. What kind of meaning can have a tag that is additional? Well, there is a tag that is called strong, which by default have a b as formatting. So as you can see here below, before doing so, make sure you read the instruction manual when we use the strong tag on this part of texts, it's also bolded, right? It would change it to be, It's also bolded. So why even bother using strong is because it has an additional meaning. But you might be now, like, what, what kind of additional meaning? This, this doesn't really mean anything to you, right? Because, hey, this thing balls, these big balls of the same thing, why even bother? Well, these meaning is not for the user. This meaning is for devices, for programs, for robots like the Google robot that visits your website and analyze the text that you provided for the user. Okay. Then that might be something useful, right? Yes, because when you, for example, make these things using the strong tag and for example, when somebody is blind and he has good a device that reads it to him, This will be accented, for example, it will be read it, read differently. Before doing so, make sure you read the instruction manual right. Instead of before doing so, make sure you read the instruction manual, okay, You may get important. Well, to be honest, It's not ask who decides how it's going to be red because it's for the guys who create programs that we will read your text right butt. It, maximus, call your texts important. And also throng is used to show the user that reads your website. Dead. This part of texts is important when he read some kind of part of code of texts and he sees these, okay, this is important. And why is it important to do such things? Well, when somebody has got a text that has good no formatting like this one, he will leave your website, verify. If he says that some things are bolded, it will make him be able to jump in your texts from one place to another, easier. He will, he will know what is important for you, right? Because you can say, Hey, this is important and your texts will be more interesting because of it. And it has got an influence on increasing your position in Google ranking. Why is it so? Because when somebody doesn't leave your website instantly, when somebody well stays at your website, site for long, Gooten can know it and they will know that, hey, this is a pretty cool website, right? And the second thing is that notice that there are many sites that doesn't use formatting properly and dark. Well, a big competition for you when you are creating an article, right? Because an article that gee, that you cannot create about, for example, HTML can be found on the Internet on, I know, 100 thousand webpages. Why would Google recommend you? Well, may raise because you are using packs like this, right? This is one of many factors that can be taken into consideration, right? Butt, hey, these small factor and every factor, when you add one to another factor, then you have a higher chance of appearing in Google for the users of the internet, right? So it's important to add the strong tag on your website to show Google that you know what you are doing, for example, right with your texts. It means that hey, you are really and a person who, who, who wants to show other people some value on your side, right? You didn't, you pay attention to what you are creating. It's not like you have just created an article and you want to sell something. Hey, I paid attention to everywhere that I created and I know which part is important. That's why I'm gonna, every important part of my text make it strong, for example, right? Okay, That's why you do it is important to know why you do something. Because otherwise you just forget a value, right? So that's a big difference between reading strong and B. So we're gonna use strong instead of b in case of when we want to make something important. There is also something like M, which stands for emphasis. It means acts and pressure and default behavior for it is, well, the Italy. Notice that I can read this thing like what? Let's say. I do it like this. I love cats and dogs. I laugh, cats and dogs. I love cats and dogs. Okay, So this thing, it just is useful to show how something should be red. And this is mainly used by other programs, right? It doesn't show an importance Reich the strong tag, right? Because E, you can clearly see that when something is bolded on your website, but when something is use like these when the emphasis is on it. So when the text formatting is intellectually, it's not as easy to spot, right? But we just show that these things should be read differently. Also. Use it when you feel like that something should be accents. Accents it differently. And there is also some kind of something like called Mark. And usually use it to mark things that are interesting and worth noting. So imagine you have a book and a yellow marker. And think about what parts of texts you feel you would like to mark as interesting so that, you know, lay there what is worth repeating, right? So when somebody wants to repeat something from your texts later than it should be marked. And the texts like these looks like this. In my humble opinion, should be used only in some kind of tutorials where you want to show that this part of the definition is pretty cool. Okay? Otherwise, I don't think that it should be used. Why? Because everyone may consider something else worth noting, right? Why should you decide about it? So that's my opinion about it. We have also here an example like this. Css is responsible for the appearance of your website. You want to say that. This CSS is responsible for appearance. You are like making sure that other people know that this is important for you. Okay? As you can see, this example looks like this. So we have got here the bolded CSS. When I move my mouse over, we have information. This, this is a cascading style sheet and it stands for and here we bolded the first letters in order to, you know, like show the user, did. This first letters are from here. It's called because it's emphasize that this is important, right? For, for, for, for the, for the user. And let's create it on our own. How high did it, right, so let's remove it. And notice that when you want to remove the tag, we need to cut it right here and then from here. But we can do it faster contour plots Shift plus B and just type removed attack. Okay, counter plus 3 plus p removed, it acts critical. And now let's do that we had before. So you want to put the strong tag on it, right? Because I think this is important. This should stand out from all other text. Css stands for Cascading Style Sheets. Well, we are what? We are defining something here soon. So I think it's a good idea to use the define deck, right? And also this is an abbreviation, right? So probably it will be a good idea to use an abbreviation and type here that stands for Cascading Style Sheets. These, okay? And notice that I had before use here the Beta. And this is an exception where you can use the Beta because, well, you are using these just a single time in this particle, our texts right eye, you want to bold the only three letters. It would be stupid to create special selection inside the CSS file just for this sake, okay, if there is a single use, just use the bolt deck. We are not using the strong tag because with the single letter is not important, right? So there are cases when you can use the BI, you are asked to act right? But these are rare. But it's good to know that they exist like this. And as you can see, now, it looks like this. Great. So as I said earlier, you want to use it because if somebody sees cool texts, there is less chance that they will close your website and they will spend longer time on it, which has a huge direct impact on your Google ranking, Okay.
38. sub vs sup: Hello. Sometimes in your article you will want to print. You will want to ride the letter, the single-letter below the line of all other letters. So for example, like in this situation, right, right now we have here H2O. Well, the two should be below the line, right, of all letters. And three here should be above the line, right? So it should be above x like this, small free she will be here. How to achieve this? Well, you need to use the subscript to print below the line, or a superscript to print a bolder line. Okay, so let's put the pack here, the subduct, and here this one. And yes, you can see here we have as a result the thing that we want when something like that ease useful also, notice that on Wikipedia, when we, for example, have here one free right to that, that these are references, right, that are used like this. Inspect it. As you can see, they are using this soap here, right? Don't make this one look like it's inside of the main text, right? It's just referenced, right? And when they click on it, they jump to their reference, right? Right. And well, this is a good exercise that you could do. Create an article, made a few references using the SAP stack and also the h reference type to jump to the place that the user wants to jump when they click on it. It's only listen. Thank you very much.
39. Preformatted text, tags: pre, code, var: Hello my friends. There is sometimes a situation where you want to paste the text from another place. Like for example, you have a program that you want to show to others and you want to keep the formatting is not only an institution like this, where sometimes you have, for example, some kind of poem, the verse that you want to show to others and you want to keep the formatting, right? The form by formatting, I mean, all the indents that are here, right here we have doing then we want to keep the spaces where they are. So when I do something like that, when I copy it here, you will notice that, well, it doesn't look as good as it looks here. And in cases like this, you should use something gold is called preformatted stack. So we're going to select this and type the prac TAC. As you can see, now everything is formatted the way it looks here. So this is a tag you use when you want to keep formatted text, okay? Notice that now every indent is Kept right, and well, there are too many indent. What did I do here? I use the shortcut which is called Shift plus Tab, okay? It just deletes every indent in the selection once. So we need to do it one more time and one more time. As you can see, now it's back to these. If you want to have one indent here, right? In every place, you can trust trust type top again, right? So in order to do it, you hit the tab. So Shift Plus top is go back one indent, and here, add indent, right? And that's how you use the pre-tax, not these dead. The thing that we have got here is actually a code, right? So this is a good idea to show to Google that this is a cout. And we're going to pipe that this is code by using the coat back. What does the code? Do? You inform the Google that this is a cultural Google? Please do not interpret this as a text, okay? Now know things that you should interpret. Focus on other parts of the article, okay? So this information for the robot to inform them that this is a cop. The pre-formatted is just gonna change to how things are going to appear on your HTML. So we just combine these two in order to make sure that everything goes good. And in the same time to inform their Google that this is code. The code can be used on single lines, right? Like for example, like if we have this part only and we could put it into the code, we don't need to use the preformatted talk here on this, right? Because this is just a single align, right? But you can use the code for this single line. So that's the difference. And there is also something will this called the FAR. It stands for variable and it is used to show that there is a variable in the text. Notice that here we have something like that. The number 70, 40% greater than the number c. Okay? So here is a variable, right? We know that as humans, but we'll say that this is not a single letter like C. Or for example, like a, right? Because, well, a is something that is used in English, right? Let's call it a. And Google would. Good thing that did is like some kind of misspelled word, right? And the misbehave letter, these shouldn't be after hearing this place, right? So we should just inform them that, hey, this variable, right? So we're just going to do something like this variable. And this is variable. Notice that I had to do it two times in order to inform Google about the situation bonds, there is something like multi cursors, and we can select both of these things at the same time and add the tag in the same time. That's pretty cool. How to do it? Well, we use the out. We hold the out, okay, hold the Alt on keyboard and then make selection here and still hold the Alt. And we can make two selections at once. And now we're gonna hit the Enter, abbreviation, shortcut, and type variable. And we just typed in in both places at once. Pretty cool, right? Notice that this letter here now is written in Italy egg, right? So the difference between for formatting, but they also informed Google that this is variable. I know that you might be thinking, well, I don't want to lose my time and things like that. Why even bolder? Maybe it will improve the readability for the robots, but I really don't care about it. Okay, That's a fair point. But remember that in future you will learn something or this code css and Eve, you four examples state using the VR tac every variable on your side. So when you add this tag on every variable, then in future you can, for example, select all of them at once and change how they look like. For example, you could change them to be the red color or something like that. And, or make some underlined. But below the letter and people would instantly see that. Okay, So this is variable and date, mood make your code, code well, entire article easier to read the entire exercise. When you even bold things like the rind, even bolded manually like this. You can easily see, okay, So we are looking for a, right, but you can change the behavior how it looks like, not here from the CSS that we got talking future. That's another lesson. Thank you very much.
40. Multicursor | Searching and replacing text in VSC: Notice that in the last lecture we pasted the code like this. And some of you have probably noticed that some things were not interpreted. Like what? Well, like things here. Why? Because HTML thinks that this is a tack. It doesn't know what type is it. Bad? Well, it thinks that it's a tack, right? Because we have got here the opening bracket that opens the attack. And the preformatted is just four preformatted text. And it doesn't mean that it will interpret everything as sex, okay? It would just interpret whitespaces. So for example, indentations and spaces, and so on, right? So how to solve this problem? Well, we need to use the entities, right? The problem is that the arm and that is to replay it so we can do it a bit faster. But doing these bots, the yield, this is spring. A lot of them to reply. Well, we can do it a bit faster. How? Well, we can use the multi cursor, all the Find and Replace feature from the Visual Studio code that's used first and multi cursor. So we can select more than one angle using the right, the Alt key on the keyboard. So when I hold the Alt, I can select more than one place, like for example here, and then I can change them into this. Now here we need to do the same for these things. Here, I may sit, as you can see, it is prone to errors. So we can do it like this. It was pretty fast, right? We did it properly now everything is interpreted. Correct. Okay. But I don't think this is a good solution when there are many appearances of the finger, do you want to change if there are free? Okay, this is going to be a fast institution like this. You could even miss something right there is lots of them. So how to solve this problem using the Visual Studio Code? Well, we can use something like control plus F shortcut or Control plus h. Okay? This stands for find. This is just close to f. So that's why it's a shortcut like this. When you click that control plus F, you can try to find things in your code, like for example, this sign. The problem is that we are trying, we found every car occurrence of this thing, right? So even in places like this, bad, we can change this behavior. So new we find how you can use the shortcut Control plus h in order to tell the viewer has to be or what should be placed in places where these finger is used. So we can put here, there entity. And now when I click on this, I will replace everything in my code to death. As you can see, this is a problematic thing because we don't want to replace it in places like for example, that talks, that are redox. So let's use contour plot Z to come back to the thing that we had before. And now you want to select only what the Sphinx that are here only. Then. So we're going to select it. And before I click on this, I will click here. Here, as you can see, is something like find in selection. There is also shortcut to it. But I think it's faster to just click on it. When I click on it. As you can see, we selected only occurrences of this bracket here, right? Note the entire far only in the selection that we had. As you can see, it found 16 of them. And when I click on this, BAM, and that's cool. It didn't refresh. Refreshed properly. So everything works fine and we did it pretty fast, faster than using the multi-modal multi cursor, right? Because now it's just one click. But of course, you will use probably a multi cursor faster if there is just free. Occurrences are two of them, right? So it's faster to just quickly Greek and down, right? Then using this feature. But when there are many occurrences to change them and things like that are pretty useful, aren't they? There's only did listen. Thank you very much.
41. What is form? Forms Basics: Hello to the NG. Going to tell you what is a 44 is just a simple document. Some kind of sheet of paper, for example, in real life, that allows you to collect data from the user, right? Document that collects data. And it does so using the places to fill in which are cold inputs. So document that collates data using something what is called inputs. I am sure that you have mad with forms in your life, probably when you had to enter various data about yourself, for example, or where you had to log into the website, right? This is a form, this is a sample of form. The other samples, for example, the contact, the top on the websites requires an e-mail name and the content of the email, right? The text to be written and posted as a forum post is a farm. So you can see that form are widely used. How do we create a form? In order to create the form we type form. Okay, so this is the most simple form created. And now when we run it, you will notice that there is nothing. Why is it so because it is just a container for inputs. So for thinks that allows you to put inside things like data. Okay, That's creative, simple inputting side. And let's see how it looks like. As you can see, it is a place where you can fill in text, right? Sample text. You can write whatever you want. And when I click Enter, as you can see, either refreshes because it tries to send it somewhere, but well, we didn't specify where. So this is a default input that you can create in the form tag. Let's call it login. Because well, let's create a login and password form in this lecture. As you can see now we have got logging before. So now the user knows that he should tie the login here, right? So this is a place to type a login. Okay, Let's now for example, ask for password, right? So how to do it? Well, we could type these manually from the scratch or we can copy it like this. Or we can use the Visual Studio Code feature that allows you to copy we felt selection an entire line where you have these cursor highlighted. Okay, so when I hit the Control plus C button now, I can just control plus V now and have you copy entire line. Pretty useful, right? Many people doesn't know about it, even I didn't start. So here we're going to type password now. And you will notice that you have good now two inputs, one FERPA login and password. Let's add here the bright-line, so they are in another line. The problem with this is, as you can see, the, well, this is not aligned properly, but things like that are done through CSS. So don't worry about formatting, about how it looks like, things like that. You sold them in future. Okay. So here's login, here is the password. And well, let's put something into the login and put something into the passport. As you can see, whatever I type here is visible and that's not how you should make a password field. The input. Why is it so because if somebody's behind the user in behind his back, he can see his password and Hamada would like that. So you need to change the type of input. The cool thing about inputs is that you can change the type using the attribute type given, and you give an additional information regarding input using this attribute, right? And you can change it to what? To, for example, the password. And what does it change? As you can see now when I type things here, the possible these hidden. So we solve the problem. So there are many, many more inputs. And as I said earlier, the default one is text. So when I change it into text and nothing will change this chance at text inputted text field that you can fill in. The user can fill in, right? Well, let's make it, for example, like this. So it looks better in our HTML. And while there are minimal types, but we learned them in future, these like basic lecture regarding how to create a panel with login and password. All right. And there is also one more thing did you might be wondering, right, we had good data now, but what do we do with these data? Things like that we'll solve in the future lectures. There's only lesson. Thank you very much.
42. Submitting form: Hello my friend. We've created a four, but we cannot submit it, we cannot send it, right? So this form is used less in order to change it. We can create a button that we allow to submit entire content like this. So how to do it? Well, we can choose from the emit, the submit. And as you can see, then we've got an input that type is some, and it allows you to click on it. As you can see here is this button. And by default it has got now no text because there is also an attribute that set the value to laughing at stat. If we remove it. As you can see, the default value is subband choir. I think this is very bad value as a default one. So that's why emit tells you to change it to whatever else. So in our situation, I think it would be best to call it logging write, lock in, maybe with the space here like this, right? We have good now here button that we can click. And as you can see when we click on it, nothing changes. Okay, but where we can click and something refreshes into burg runtime. So we are trying to send something, but we haven't specified how to send event, where to send it. And what do we sent. Let's make here a BreakLine cell. It looks better like this, right? And now let's specify where do we send information like this. We do such thing by using the action attribute on the form tag. It says that we should provide here the file or the path to the file that we process this information. So imagine that you have gotten your server something like process login dot PHP, right? Why PHP? Because, well, you need to unfortunately do such things in the server-side languages like PHP or Python, right? So you need to send your values to the programming language that will process it. So unfortunately, yeah, you can do it using HTML. Remember that HTML is only responsible for how things are represented for on your website. So for the content of your website, CSS is responsible to make it look better. But you also need to know, for example, PHP in order to know how to process things. But still, you need to first learn how to create forums, right? So these things that I would tell you are pretty useful. So this action says that we're going to send the content from here to this phi. And in order to process it, you need to know, for example, PHP, right? But do not stop this lecture because it's important, even if you don't know pH being as a person who knows HTML and CSS because sometimes you don't need to know other languages like PHP because well, maybe you are responsible only for creating HTML and somebody else is going to process it, then you need to still know how to send these properly because it doesn't end here. Look, when I click on Login now we are getting sent to this process logging dot PHP. And here is a question mark. And after this question mark, we should have values from here. But we do not. Why is it so because we didn't name the input, you always need to name the input. Otherwise, the computer wouldn't know which input is going to be sending out which one is which, because, well, we type here logging, but it's not inside this tag, right? So we need to name it. And let's call it logging for example. And here let's call it, for example, well, password or we can call it PW. I think let's call it w, So we do not get confused by having free times password. You can call it whatever you want, right? But it should be self-descriptive name. So when you look in it, you know that Okay, here is possible. And what changes now? Now when I type something and I click login, as you can see, the first thing is that Firefox, notice that we typed the password is because we use the input type password and he knows that there is a password, right? So we cannot visit by. The second thing is that here, after the question mark, we have good something like that logging that we type here. And the value that I typed right after it, we have good sign that is used for connecting more than one name like this. And here we have BW, right? The thing that we type here and the value for it. So PHP nulls now that here is hidden the value for these and here, here is the value hidden for these. And the ETE can do whatever you want with it. You can changing the database that if there is a log-in like the, the, the PW is connected to this login and so on. But there is one small problem that we did here we use the default method, which is get, which sends values like this. Inside the link. Problem is with that is that it's not secure, secure, right? And somebody copied and send it to defer hand, he could see somebody's password. So for situations like these, never use the getMethod, use the post one, which as you can see now, when I do something like this, it still send everything to the process that login dot PHP, but it's not visible here. It's in the background right now. It's can be interpreted, so don't war, right? So you should send using this method. Notice also that the problem with sending this way is that we are being sent to another website. Well, we could send us the same website. But the problem is there is always a reloading of website. If you want to send things into backgrounds or somebody will not see it, you need to learn JavaScript line and you need to land the ajax or something. Now that we have to use this feature that allows you to send things in the background, okay? Then you do not need to specify this. You just catch things and then send them into background using the JavaScript and this feature. So this is maybe even better way, right? But still, as a person who is learning HTML, you need to remember about naming every input, okay? And of course, making an input type submit that allows somebody to click on it and send things. Lenses. It has less than Thank you very much.
43. Radio type input: Hello my friends. Today I will teach you how to use and when to use radio input, how to create it? Well, we use the input and we can use the Emmett and created using that radio type, as you can see here, we have two additional attributes. There we go. Now talk about soon. So how does it look like? As you can see, it's a dot that you can click on. So this is something that you can choose, right? If we create more of them, you have three dots, right? And next to these dots, you can type, for example, the lever type, right? You can ask people about what type of delivery they want to have on your shop, for example, if they wanted to use the career of IBD, want to pick up from some point or maybe the puzzle fees would use cheaper and so on, right? The Korea tab and so on. So you can use that in shops. So for example, let's say here is that Korea, here is a peak up point and here is a pulse office. Right? Now we have got what? Text next to each button, like these, next to each radio type, right? The problem is that when I click on one of them, we can choose all of them at once. And that's not what we want to achieve, right? When somebody is going to show up on your website, he can, he should be able to choose only one type of the lever arrived. He can choose career and pick. I point at the same time at dad's when you should use radio inputs. But in order to make them work like this, you need to tell which radio input are grouped together. Okay, so that's when you should create something. What are these called? The name attribute, and you should have all these names set to the same value. So for example, delivery type like this. Notice that when I am creating delivery types, I do not use spaces here, right? So I am not doing something like this. I am using the underscore when I'm making another award as a value inside this name, right? Or you could do something like this, but never use spaces. Okay, so now I told bro web browser that this is one group of radio buttons, right? So we'll now when I click on lang of them, the others are not checked NMR, right? And that's what we want to achieve. So we can ask, for example, what type of delivery do you want to choose? Write, something like this, okay, so I can choose these, these or these. We could make it a bit, but they're looking by adding some breakpoints, right? Like this. And as you can see, it looks better. There is still one problem. Notice that I can't click on texts and I think this is not good for the sake of your website because this most people who just click on text next to these buttons, right? In order to make it work, you need to somehow connect this text with this specific input, right? And in order to do it, you need to use a tag that is called label. So we say that this thing is a label for, and here we specify for what. The problem is that we do not have anything that we can refer to in this input, right? All this input looks the same. So how can we say that these label is for this input? In order to do it, we need to create ID attribute and make it unique. We can put here whatever, right? So for example, like this. And now when I click on these and I can go by clicking on this, here, it doesn't work, right? But here I can go on texts and it works fine. But, you know, typing whatever here is not a good idea because it's not how your code should look like, right? So I suggest just typing here also the same thing that is in the name, but out here a number like for example, deliver a type 1, right? Like this. Okay, So we need more of this. So let's copy this as you use the Alt. And Let's copy this here, like this. Let's select this and using the answer like this at the same time. And let's create labels. And let's just copy this here. As against these shortcuts are making a typing and while creating the code bit faster. So we have got this and now we can create on click on texts and everything works fine. But unfortunately it's not all looked well and create an input that is the submitting book. And we, for example, say here sand and well, let's put it into the form right? And action with a B for example, form that PHP. Notice that when I click on Post Office and thank click Send, we have got here something like delivery type on grade when I type won't click on cool here we have delivery type on. Does, does it help anything? We just know that the lever to retype was chosen right? And there's all, we don't know which type of career was chosen, right? This one, this one or maybe x1. And this is pretty important, right? Because we can't process this information. In order to be able to process these information, we need to show when to set something like violet again. And well, we can call these what called here, right? Because this is a caldera like the same length was here. And we need to repeat this also in this places. So this is peak up dash bond. Remember that I do not use this basis here, right? Dash point and the post office like this. And now not this dead when I, for example, choose the pickup point in a sand. Now we know that the delivery type is equal to pick a point and I can process it right? I can now show that the guy points to the user, or I can say to award the prizes and so on, right? So now it works fine. So as you can see, we need to DIBL loads of things here in order to make it work properly. We can still improve all of this by putting everything into something what is called a field set. As you can see, now, we have got some kind of border around all these things here. And this way we can say that this is about this specific thing, right? This, this group. Now when we have more of it, we had more things to choose from. As you can see, you can clearly distinguish this for these formed from these one, right? Well, this field set, right? This group of things, not because we have got everything in one form. So that's why I feel sad. It's pretty cool. And also we have got something what is called a legend. And look, I do not need to use burglary. Dan, and I can do something like this. And as you can see, this text went into the border. It looks even better right now. So this is used for this thing. In the next lecture we will talk about checkbox, how to use them and how to properly make them so they can be usable. When you are processing the content later in the lesson. Thank you.
44. Checkboxes: Hello, my friend. Today you are going to talk about checkboxes. Well, let's create another field set and let's use the input that is called checkbox. So the type is checkbox. How does he look like? As you can see, we have got here a box that we can check and we can also uncheck it. So the difference between this and the thing they evolve here is that radio. When you choose one of the things here, as you can see, I can't and choose it. I need to pick at least one of the option right here. I can check and I can uncheck it. Okay, This big difference. And also when you create many checkboxes line, then you can pick Mad Men of them at once, right? So you can use these four situations like these, for example, what is your hobby, right? Well, somebody can have more than one hopping, right? For example, somebody likes swimming. He likes video games, and he likes, for example, programming, right? And well, he might want to choose all of these options because that's all of his copies, right? So that's when you use the check boxes because here you need to pick one and you need to pick one. Maybe here, maybe somebody doesn't like any of this, right? And it's not the case hobby, so he doesn't need to choose anything. Right. So that's when you use the checkbox. When can you use checkbooks? Also, let's say that you ask somebody for something like, do you want to issue an invoice, for example? And he can then check and see if there's something like that. And he will show the form for putting the data regarding the invoice, right? If the person uncheck it, the data will disappear. Okay, now let's focus on, well, making this thing here properly because notice that, well, we should put the input here firstly, because this is input for everything like 14 tire far. And let's create labels, right? Four. So let's create a label that will be four, will make it less grateful for all of these things that wines. So label for and for swimming. Here we video games and programming. Now when I click on text next to it, as you can see, I can choose it. So now let's focus on name because well, when to send data and somehow analyze it later, right? Well, not ask. But maybe somebody, that's why we need to know how to name it properly. Because right now when I send it, as you can see, well, deliver the type is here part and our hope is not. So how can we call it? There are two ways of sending checkboxes. Well, the first way is to just name it the same like the IDs. Notice that when I choose, for example, the programming and video games. Now, you see that video games is on, programming is on. Now somebody on the server can look for things that are all right. If they are on, it means that somebody checked it, right? However, well, analyzing something like that is not always easy. Okay. We goes, you need to know exactly what kind of names are here, okay? Just believe me that it makes things a bit weird and on the data part, okay, You want the server side. So Maasai and people call everything the same like for example, in this case how BIM. But there is now a problem. And I got, when I click Send, as you can see, Hobbes and Hobbes on that. We don't know which copy zone. And that's why we need to now create value for each guide. So we need to do something ideas. So for swimming video games and programming. And now when I choose the video gains in programming, we can see here Hobbes video games and Hobbes programming. And now on the server side, we can just look for the hobbyName. And we know that video game and programming for your sample was chosen. However, you need to know. It's good to know where the sound languages won't be able to analyze it properly. If you don't add here square brackets, okay? So either you use the same name, remember that you might need to, doesn't mean that always need to add these brackets here. So this would be like on the server now, ligand Guan variable. So it would be some kind of RA, the values like this. Don't worry if you don't understand you right now because you should focus on HTML, okay, on creating things like how to present the data, okay? But you just need to have in mind, maybe someday when you want to process this data, when you are going to learn the PHP, for example, JavaScript. Maybe you need to add this, not always. Maybe you might need to add it, right? So that's how you add the checkbox and also make it that way so others can process the data that these cannot be sent. That's only the lesson. Thank you very much.
45. Most frequently used attributes in forms: Hello my friends. Today, how will teach you the most frequently used attributes in input forms? Let's focus on the checked one. Notice that when we are here, we are asking somebody what type of Delhi very do you want to choose? And always in cases like these, we should choose something by default. We should check something by default. Why is it so? Because imagine the form where people are there things. This form is pretty long. And by default, for example, most people will choose the career, right? And based on that, you can show something else, right? If somebody chooses the pig I point, you can show something else for him. So we should choose a default option so he doesn't need to click on it right here. You can change it later, don't worry. We can by default set for example here, checked. So now as you can see, these first thing is check when I refresh the page. Always distinct by default is set, but of course we can change the to something else later, right? But by default, we set it to Kourion. In situation like this, it's good idea. But in situation like What is your hobby? It's still pit, right? Because what we can do it using something like this. But the problem is that why would we choose somebody's hobby, right? It's day Hub be not ours. We shouldn't do it. But in case I see like, what type of delivery do you want to choose? It's good idea to peak one of it too. Because most times you would choose Courier anyway, for example, right? Okay. So that's one, use the checked. You probably notice that, well there is no value for this attribute. How is it possible? Because there are some attributes that volume is the same as the name of the attribute, like these, checked equals checked. And to be honest, is this self-descriptive enough? When you look at it? It's enough When you to see that we just added these attribute. And you don't need to just put this thing here, okay? Browsers, we know that when you put it like this, It's you just like added this link here. Okay? Now a few more, a few more attributes like this that we've talked about. So like for example, required. What does it do? Well, imagine that you are creating an input, input type text. And you are asking somebody for the street number, street number, right? And for example, street name like this. And believe me, when people type here the street name, whatever, they tend to forget to put the street number and later, things like that cause problems because when somebody order thing and he pays for it, you need to call the guy and ask him for the street number because you can't send him a delivery, right? Because you don't know where to send. That's why inputs like that should be required, right? We need to add the required attribute. And what does it change when I click Send button? As you can see, we have got q now a message, please fill out this field. Pretty cool, right? If we remove it. So you can see, we can just go and send the order, right? However, with it, we can't do it unless we put something. Q. So this is pretty cool, I think, to put here required in cases like this. Next thing is autofocus. Autofocus, as the name suggests, focus on one of the input. When somebody refers to the patch. Something like this is Yoast, let's say you are creating a game and you are asking a person, the user, to type how many units, horses, for example, he wants to buy, right? And you create the input for this live in harmony unit horses, right? And he needs to walk, he need to click on it in order to put number here, right? That's not cool when he does these things. For example. Every time he comes to these subside, right, he wants to buy horses. So he clicks, for example, on the link gold horses or the state ebola, something like that, right? And he clicks on it and he wants to buy horses. And why does he need to click on it? Again? This just takes time. You can recall and do something like this auto focus. And now when I refresh this page, when I do anything on this page, right? And I refresh it, always the focus in here, right? You can see that it's highlighted and you can type the number here. So that's when you use the autofocus. You want to put the focus on one of the input instantly and you help others to feel the form. I think it's pretty cool. The next thing is the size and max length. Notice the head right now, when we are asking how many you need somebody wants to buy, we can put here big number, that's the first thing and the size of the these just to vk. So we can change it by adding the size attribute. And we can, for example, type their form. And this can see it's smaller number, you can put two, it's even smaller, right? So this just defines how big the input is. But we can still put here a big number. You can limit this number by using something called is called maxlength. And as, as the name suggests, you put here how many letters can be put into the input. So if I say one, as you can see now, I can't put more than one, right? I can put any number here, right. But I can't or a latter part, I can't put more of it. You might be thinking, okay, but why he can put letters he right, because it's M, text input. If you want to validate, if some things that are put here, like you want to have only numbers here you need to use for debt JavaScript and later, it will be also a good idea to use some server-side programming language like PHP, because well, things like that can be cheated pretty easily, okay, people can type things here even using the inspector, so you can't believe all the information that comes from here. Bad. Well, for some basic users, things like that are pretty cool, right? It goes, they know now that they can put on the numbers from one to nine. And well, there is something called satellite place holder where you can suggest, for example, say, hey, are we put here 129, allow numbers 1, 2, now, nine, only. Now as you can see, we have got here the grade texts 12, 9, and when I put the number, it disappears. So it's just a suggestion what can be put here? And think like that is pretty cold in cases like for example also here. So I can, for example, create a placeholder. And for example, this is required, right? And he nows naught, okay, these requiring it to put put the street number, but don't overdo it because placeholder maybe is called. But let's imagine that you create a password. Let's create some breaklines because it's not looking good right now. Like this. Let's create password. So in port password. And as you can see here, we have password. And let's imagine that we put into place holder thing slide a laters, two signs, uppercase. Three times. Around the world. You've put here some kind of requirement about how possible it should look like and when somebody looks at it. Okay, so I can put eight letters and heat starts typing and he's like, how many letters was that? How many should be uppercase? How many signs through that use like the exclamation mark or so on, right? This, this is a place holder where US chess thinks like this, okay? But don't overdo it when there is much Fink's to write. Don't put it in the place called the reads. Better to put it like this. Or for example, later you will learn that you can, for example. The mouse over something and you can create a tooltip where you can show the person how possible it should look like, okay, this is better than using the placeholder in case like this. And you have got something, what is called value is the default value for something. Well, in cases like these before we use it to set the delivery type to a value that these sent to server later and then process write. The value here is going to be visible to the user as a default value. So for example, street number, Let's say that we have good value 92, all right? And now as you can see, we have got here 92 as default value. It's not a place holder. So when I type something here, it doesn't disappear right? Here it disappears, but here it doesn't. So I need to do it. And you might be wondering when something like that is used in cases of texts. Let's imagine that you are creating side where people can create an account, right? And they put some kind of data like street number, where they leave what's their name and so on. And now imagine that you have got a top where you allow people to change their data, right? And when they go to this tab, they can see a form with many inputs where they can change the values, like the word they leave and so on. And in case like this, I think it's good idea to put by default what they had written before, right? Maybe they don't want to change every input, right? They don't want to change every data about them. Maybe they want to change on LET the telephone number for example. So they will change only telephone number by other things should be, you know, typed already there. So the default values should be set here. And these way. So they don't lose the precious time, right? Because they will need to retype everything from scratch in order to change just one thing, right? So it's good idea to do such thing to make it like the live better. So these are the most important attributes that I think are important, but there are many more of them. You can go to the Mozilla Developer side, then go into HTML elements reference to the input. As you can see, there are many more are also types of inputs. You can see the examples here, but also there are many attributes and with some short description. However, I showed you the most important one. It's just full of time to learn every possible attribute, if you probably will never use some of them in your life, right? If you need them, then you will find them on Laura pretty fast because you bought the Pope holding this tag in the Google. Some question and you will get into this flag over workflow website and you will find the answer here pretty fast. For example, like this. But some things are not only connected to how did the war, but when should you use them? And that's when it's good to have video cars like this one, to see hints regarding when to use things. Because if you, for example, overdo the placeholder, your forms will not be coal, right? That's only that lesson. Thank you very much.
46. EXERCISE: How to create a contact form on your site?: Hello my friends, it's time for practice. I want you to create a contact form on your website because well, every website should have something like that. You should allow the user of your site to contact with you, otherwise, you might not look credible. Okay? So in order to do it, you go now use some inputs. And also something like this here that we haven't talked about yet. If this thing is called text area, you can read about it. Google. And this is also your exercise because sometimes you will not know everything, Believe me, okay, so read about it or even when you're typing something. But instead, there are information about things like this. Here also, look and you can click on it. So don't worry, you can read about it, right? Of course, we'll do. It's also in this lecture. So don't worry if you don't want to do it on your, on your own. But it's good thing that you practice on your own sometimes. Okay. So try to do it on your own. Okay. Do the same thing that is available here on the right side. Okay, let's do all these things now from the scratch because that law and that way, we'll then lots of more than just by looking at the SCCOE, believe me. So we need to create what form, right? And as you can see, there are two types of form. Get and pulse will use the post method because, well, we don't want to send the content of email inside the link. As I said, post makes the data that is sent hidden, right? So we're going to use the post method and the action sets where we want to send its own. Let's say for example, that you have on your servers something called like process, Send, e-mail like this, right? And PHP, because it's going to be processing the PHP language. So we have got now our form. We should be able to send a form like eat it. So let's create a submit button that is going to have a value of sweat. But maybe let's put everything in the field said, right, because, well, this is going to be a bit bigger. So let's do it like this. And now let's allegiant here. And let's say, for example, contact with us, right? So it looks better. And now we need to ask for things like, well, like for an email, right? So let's create an input that these cannot be type in. What is the difference between an email and a text? As you can see, when you look at this, firstly, you don't see any difference, but there is a big deal. Was the difference. Well, the first thing he said, if somebody is using his email frequently in the forms, he might get a suggestion regarding keys e-mail. So that's a big advantage, right? And the second thing is that we need to type you an email now. So this thing is not going to be said please enter an email address, right? You need to type an image. So something that is, you have got this sign here inside right? Now. We can send it. Otherwise it's not going to be sent. However, you can send empty image. So this is not also something that we want to have because we want to contact with somebody that send us an email, right? We need to reply it could again, that's why this field should be required, right? Okay, Let's call it email. So somebody who didn't know what to type here, and the name is going to be email. And we can also set the ID to email if you want to. Later acts as this field true, for example, CSS. Right now, well, we don't need it, but who knows? Maybe we will need it. Maybe you want to create a label for it, for example, email. And that way when somebody clicks on it, he's going to select the form here, right? So we can leave the id the same night, their name and the type this time. Okay, So we have got email and now we need to ask for the username. So we're going to create a typical text with the name, name. It because when we ask for the name, so it's going to be called name. And well, this also should be required. I think later we go now ask for the topic. So let's do it like this. Well, I think we should use some break, break length, right? So let's for example, I had to break lines like this. Now we have got email name here. We could use one more break line like this. Well, we asked for to topic and we also should ask for the content of the email, right? And for that we will use the input that is called text area. The difference between text area and the typical texts is that look, if I do something like this. Content, content. Notice that this is small, right? You can type here many things, right? Like the content of email, right? Or it's some kind of post on the forum. We can require somebody to type things in one line. That's the first thing. The second thing is when I click the Enter, as you can see, our form is B is going to be sent. Well, we didn't type here everything bad when we type everything that is required and I click here, enter, it's going to be sensible. The text input is going to invoke the send action when somebody hit Enter. So it's also not something that we want to have here, right? That's why you're going to use something called disco text area. So we're going to remove this. And we go now create text area. As you can see, we have got here a few added things. The first thing is name, because well, we need to somehow interpreted in the Send Email dot PHP. So for example, in a content we've got it in my content. And I didn't identify Kate or while we can remove it for now. And here's something like columns and rows. Notice that this pink is pretty big, right? It's because the columns is set to 13. When I change it to 10, as you can see, the size is being changed, right? So this says how big horizontally should be our text area. Okay. So let's leave it like it was before. I think it's pretty good. And they're all says how many rows of can, can, can, can the user type, right when I use only one, so there is gonna be only one wrong without the scroll here, right? We've got the scroll here. When I type tool, as you can see now we can take two rows, but the third row are the scroll here automatic. I think 10 is a very good spot to start. So maybe let's make it a bit better by adding the brake line here. I think we should add here a breakdown here too to make sure that if somebody resize it, it's gone along. Okay. And the difference between a text area is also these that notice that I can hit the Enter here right? As many times as I want. And that's how it should be, right? Because right now we wanted to create some kind of text, really tags, not, not just simple word liking, tip, topic, write a few words. So that's how we create the text area. And also notice that when I type sampling here, it's gone on. Refresh rate control plus shift plus R. As you can see, it's going to be shown here. So this is a default text, not here. We do not put in the value, like in the inputs to become inputs. But we put the value here. Why? Because every space in the text area is interpreted. That's the big difference, right? Ever enter is also going to be interpreted. Okay? So this is important to know that it works like this. However, I think it's good idea to adhere a place holder and ask the users for something like, How can I help you, right? I think small things like that makes your website while the contact form better received, okay, people will think better of you when you do such things. So how can I have also, I can type here of a few things and somebody will hug me, right? I'll just small things but they really matter. And for example, in the email, you could also add the placeholder. For example, out here, the e-mail sign like this. So you suggest, okay, here is a place for e-mail. You could also add, for example, auto focus. So when I refresh this page, as you can see, somebody doesn't need to click here. He heat, he just starts from he can, he can instantly dive the email, right? So we have created a structure. It doesn't look good because things like that do not align here. You can change it, Don't worry, using CSS later. Also, it doesn't work right? Because when I click on it well, when I click on it and I put everything Q because it's required now, we are being sent to the side like this and it's not being processed. But don't worry, you will learn how to do such things or somebody else will do it for you. Okay? For now, you are letting HTML. So you learn how to properly put everything that content on your site does longer lesson. And as always, if you have any questions, feel free to ask. Have a good day.
47. Basics of creating tables: Hello, my friend. Today I will show you how to create a table. But firstly, what is a table? Table is a representation of data in columns and rows. Okay? So it allows you as the web developer to arrange data in a good manner, right? Because this looks like it was meant to be shown this way, right? It's not like somebody just put data in text. And that's all right. This looks good. You know exactly now, okay, So the name of the course is this, the prizes this for this course. And we also know that this is a table regarding video tutorials. And he also looks pretty nice. And you might be wondering why is looking nice when, hey, we have got here own HTML is because it's a sneak peek to CSS. Notice that something can look horrible and you can change how it looks when you use CSS pretty fast, right? So this thing links to the style CSS file that we will learn how to create in future lectures. So for now we'll know only how to do it this way. I'm sorry. But you can see how powerful CSS now and you can see that it's good idea to learn from this course. Because well later you learn cool things. Okay, so let's remove it. I'm sorry. Let's make it look like this. And let's remove this table here. And let's try to create it on our own. So let's create a table. In order to create a, create a table, we need to use a table tag, which is used for representation of data in columns and rows, right? And well, in order to create table row, we need to use that tag that is called table row t, r. Now we can put inside table row, which is something that is horizontally put inside the table. Some kind of data. We need to do it using td table data. Table data pack is also called cell. Okay? So we're going to put a table data here and let's call it, for example, name. As you can see, we have got here a name now. We can put as many as we want. Table data's here, okay, so we can put another one and call it, for example, price in dollars, right? And we can put another, another, another, another another as many as you want, and everything will be present in one row. You might be wondering, now hate scolded, It's in Rao, now in one row. But why even bother using tables? Well, we could write everything like this, right? Well, it looks almost, almost the same, right? Well, let's remove it. And notice that you can add border to table using something called It's called attribute border. And now as you can see that every text is inside table data, which is a cell that has got some kind of border here, right? And well, you normally don't do things like this from HTML, okay? You do it through CSS, but we will live it. As you can see, it's even on the red that you shouldn't use it. There are better ways to do it through CSS, but we live it just for the sake of learning tables. Okay, it will be easier for us to see that, hey, this name is inside, these particles are a table data, right? So you have got that name and price. And Eve we want to put now what? The name of the course. So for example, C plus plus, we can't put it in the same table row, right? We need to somehow jump from here to here. And in order to do it, we need to create another table row. So we create another table row. And then table data, which is C plus plus, and another table data, which is the price or for example, 19, $99 for example. And if you want to put more of the courses, then we need to copy this a few times, for example, like this, and just change the data. So for example here to Java, the prize, and for example here to pi ten and the price, right? So we have good, now a table with table headers and data inside. Notice that I said that this is not data, this is table headers, right? Because these two titles describe what is below. And because of that, you should name these guys table headers, okay? Th stands for table header is also good to add something what is called caption. Caption should be a tag that these afterwards, the table tag inside the table tag, but the first tag after it. And well over here we can make a caption so we can name our table. And for example, let's call it a video tutorials. So now we present the data properly and lighter. When you learn CSS, you could just do what link to the style.css and change how it looks like, right? Which is now pretty good. We're going to remove the border if we don't want it from here and it looks even better, right? So unfortunately, this is not what do you do now. We need to stick with it. It's good to know that you can specify which part of your table is table header or table body. So you can do stuff like this. These is table header because we have good headers here. And this part is table balding because this is the content of your table. And you might be like, Why would I do that? Well, you will make your life easier if you want to process this data in CSR or JavaScript, okay? For example, just for the set. But what, it is not something that is required by HTML and war. Okay, so can we create a table and now it's time for exercise. Create manually. And then using M at a table with three rows and five columns. Okay? So manually you'll do a table. Table are all table data and you just copy these five times 1, 2, 3. That's made me do it this way because otherwise where I am so table data, table data, table data, so one mole. And then you would copy this like this, right? We need three rows of zeros, so like this, okay, So we solve it. But you can also use Emmet, right? So inside table, we have good old table row. We can see that now we have table wrong. We need inside what table data, we need it five times and we need to multiply everything by three. And that's when we created it a bit faster even, right? And it also looks pretty good, right? Because we have proper indentation seem does only the lesson, thank you very much. Have a good day.
48. How to stretch cells using rowspan and colspan?: Hello my friend. Today we are going to talk about how to make one cell to stretch, to extend itself. And when something like that is needed. To understand this, I will show you a practical example. Look, we have good now free courses here, C plus, plus java and Python. What type of courses are they? They are the programming courses. Imagine that we have got more courses like, for example, let's say we have got C plus, plus java, Python. And let's say that we have good HDMI, css, and for example, JavaScript, right? As you can see, this is programming courses. And here we have got the web development courses. So they have different type, right? Type of course. So we can create another here. Table header. For example, say type of course, right? Okay, so we can specify now, so all these one, well, good 32 and foster this td. And this one is programming, right? And here we have got what then? Web development, right? Let's say just wet. As you can see, we are repeating ourselves here and this definitely doesn't look good, right? Because we sorted them by the type right now. And repeating like this makes your table just not low gold, It's just not prefer shopping. I think that programming here should extend, should stretch right from one cell to second cell to cell, right in this case. And for that we are using the span attribute. Span means stretches up to it's a range. It's to what extent write something extents. And well, in our case we want to span. So we want to extend stretch in the role, right? Because we wanted to have like instead of one role, does should take 1, 2, 3 rows, right? And that's why we gonna remove programming from, all right, from here. And we're going to choose this cell here, this specific cell, and you want to extend it two times down here. So we're going to type their rowspan attribute and type here not two, because two means that it's going to extend to two cells, including itself, but to free. And now it looks better, doesn't it? Okay, so let's do the same to the web, right? Like this. And now the row span to free write, if there were more of them, then, well, let's for example, say we have good. Now, note that the js, then we're going to just extend it to four cells. One cell extended to four cells. It just takes entire space now. And I think it looks better, right? Because we are not repeating the same information many times. It's a table that looks professional. So that's when we use the row span or we use the colspan also to what? To stretch up in case of colspan columns, right? Because it's called stands for columns. Right? Imagine that you want to give additional information regarding this table. Like for example, all these courses were created in English language or for example, that they were created by me, are catches without chick. All right, so what would you do? Well, you could dive in text below here or you could include this information inside the table. But you'll need to somehow do it probably where he ride to make sure that nobody thinks that this is like a data inside the table, right? That represents the name, price, or type, right? So we will need to connect all the, the cells here at the bottom. And while we would need to stretch them right, so we need to make the span right? So let's create a table wrong table data. And let's say that everything here was created by me, right? So created by Al-Qaeda. And the problem about is the, is that now this table data cell is extended everything, right? Because everything needed to be inside, well, one single cell. And we have got here a big gap, right? And the second thing is that we have got an empty space, which we don't need, right? That's why it would be great to fix it. Well, you could fix the empty space by including two additional table data, right? But we're not fixing the biggest gap that we have got here. So we need to make a stretching. So we need to use colspan. We need to span our cell. How many times? Not two times. Because we're going to just ban it on two cells then, but three times. So we have got it on our entire table, right? So this is like an additional information now regarding this table, specific this table. Or you could just type here that this was created in English, whatever, right? This is information guarding entire table. And well, you could align it like this center to make it centered right? There are many other values here that you can choose from online. As you can see Derman, other, but the most useful one is centre. And to be honest as you can see, it's red. It means that shouldn't use it. And the more it's better to use CSS in cases like that. However, I think that for small things like these one when it's rare, only use, it's not good idea to go into CSS and create specific rule that we cannot talk about in future, okay, for just single case like this, if this table is never going to be repeated, then maybe you just, you know, just I didn't everything works fine, right? So that's how you create colspan, which stretches the columns, the cells in the horizontal way. So from left to right three times in this case, as an exercise, make the type column on the left side, not on the right side, I want to have type, name and then the price. Okay? There's only the lesson. Thank you very much.
49. What is CSS?: Hello my friend. It's time for a super important lecture because today we go out talk about CSS, which stands for Cascading Style Sheets. We will focus on these two words in this lecture. Style sheets into second wheel. Focus on this one. So what is a style sheet? It is a file that describes a style for your entire web page. Okay? And the styles look like, for example, here. So for example, we say, hey, I want every table to make the border color elapse to collapse. You want it to have font size equal to this. We want to have minimum width equal to this. And we will also want to have the shadow box be high. Don't worry if you don't understand, what does it do exactly because we, you know, explain all things like these in future lecture. But for now, I just want to show you that this is a file where you can change how things appear on your website. How do they look inside one single Phi? And why is it so important? Okay, let's create a few paragraphs, okay? Like for example, this is sample text, and let's copy these texts a few times. And now let's say that we have good this tags. And do you want to make the text inside bolded? So how would we do it? We go to something like, for example, this right? So it takes a few seconds to do such thing. Well, we could speed it up if we knew a few shortcuts like for example, this. And I made a mistake during making these. So it's also, as you can see, prone to mistakes. So I will not delete this part of video because I want to show you that this is not good, good idea. As you can see, we bolded it. We have a solution that works fine, right? Okay, so I want to make it, it'll take, and then what I will do, again, I will select all these things. All right, This, OK, and now it's time to what? To change your mind and say, I don't like it having it, right? Okay, I can use a contour plot z, but let's say that you reopen these 52 days later and then you need to remove it. So you will need to delete it like this, or you can use the F1 and then remove the attack. So let's say that, Hey, we know some shortcuts that will help us a bit. But the problem is that it's still taking lots of time. So let's just remove everything from here. Okay, now let's do it like a pro. So how does produce it? Use CSS. Okay, so let's create a file that we cannot put the CSS. So let's remove the folder here because we need to do it from scratch. And well, let's create a folder, right? Why do we create a folder? First? We create a folder because we might have many stylesheets, not only one, right? So let's go to the folder that we hold, all the stylesheets the same like for images, right? We have got the folder here. We have got only one in each group by the peg. Maybe you will have more of them. And it's good to keep your project clear. Okay, So we have got the folder css, and the inside of it, we're gonna create a file, needs to have extension like this, CSS, and you can call it whatever, right? But do you gonna call it style because this is our main style, dot css, fine. Okay? Of course you can call it whatever you want, but this is something that we are used to as creators, Okay, Call it's tight. And now it's time for magic. It's time to select all this power bar graphs. How do we do it? We use something what is called selector. Okay? There are many selectors in this lecture you will learn the simple selector we just call select or attack. How does it work? Well, you just type the name of Jack that you want to select, Okay, and it's done. And then you create these curly brackets. I do. You create them because you want to put here properties that will affect these particle heart attack. Okay? Well, you can have more than one thing selected, right? So we'll maybe later you will want to select the BDI, that table, DAC, the caption tag, whatever, right? And inside these curly brackets, something that analyze the CSS. It knows that it needs to apply all the properties that are here to this specific, right, the Pacific selector. So the stack in this case. And so we selected the paragraph and we want to what? To change the text appearance to make it bolded, for example. So how do we do it? Well, we type the name of the property. That we find where what we can use Control plus space. And as you can see, we can find many properties here. And you might be like now, OK, OK, So you need to memorize all of these things, not the first thing is that as you can see, we have got what hints here, right? So it would be stupid to remember all these things. It's good to know the basic ones, to know where to look for them, but you don't need to memorize all these things. So don't worry. So you will see soon that it is pretty easy to use because imagine for a second how a property could be called. If we want to change the font appearance as well, It's called font. Let's type font. And as you can see, there is a fam mili of font changing properties. So when I type dash, as you can see, we have got here font size, which changes the size, right? So this is pretty self-descriptive in this is pretty cool because of that. So let's change font-weight. Font weight changes then. How much ink is inside of font, right? We can type the number hereby, we will choose the texts like bolt here, okay, and it will just make the text bold letters. You can see nothing has changed. Why is that? So it's because we didn't connect this file to this five. Html5 is what is here. Write the CSS file is in the folder CSS. This fight doesn't know about this one, right? Do the stupid. If something would connect automatically, it goes, well, maybe you wouldn't want these particular style to be connected to these five, right? So you need to say, you need to say that you want to link to it. And in order to do it, we use the link tag, which MME helps us due to do the linking using the CSS, as you can see here. And when I click Enter, we have got here what the attribute relation, which Shays says that HTML has got a relation to the file that is specified here as a stylesheet. So yeah, the style sheet, right? This is from this name. So this is a file which describes this type inside a sheet, okay, So size sheet, and here is the link to where it is. Notice that it still doesn't work. Why is that's all it is? Because, well, this index.HTML is in the main catalog, right? And we need to somehow link to this specific location. And we do it the same like when we did with images. So we need to remove it and type what CSS. And we need to go into the folder of CSS and choose the style.css. And now look, it's bolded. It's pretty cool. And what is more cool that we can change many more things here. So font size like for example, I want to make it 30 pixels. Let's make it big. As you can see, it's big now and you can change your mind as many times as you want. And you do a change here in one particular file, you might be like, Hey, there was only five a paragraphs. Why would I even care? This was pretty fast and away? I would need it to create the side CSS for the command. Learn a new language for like selectors and properties. Okay, but we have got here on the five-paragraph, imagine that you have got aside that consists of, for example, 500 sub-pages. When you do it, then I'm sure you all not. That's why style.css is great because it allows you to change from one singular fire, all these things and what's more? Notice that this HTML5 is so clear now, before that we had worked on average, on every tag, we had something like this, right? And when we looked at it, it was hard to focus on the, what is the text here and what we wanted to show to others that we are creating a paragraph here, right? So this describes the appearance of the other side. This describes what kind of texts is skewed, right? We say, Hey, this is a header right here, we have a caption. So we don't have this additional mass here right now. That's why use the style.css. So notice that in order to select something, you need to type the name of the tag you want to find. Then you create the curly brackets and then the name of property. There are many names like that and we learn most of the most important one in future lectures and then the column, and then we add the space. Wood is not needed. As you can see, nothing happened bed here, but we add it to make it look better. Of course, you can host so you'll have everything in one line. But these also doesn't look good, right? Right, to make your code look good. And then we have got the value, the value for the property, which can be found where. When you use the contour plots space, you have got every value that can be put here, right? Or maybe when you forget something, you can also do what? Font size and then type from scotch font size. As you can see, we can click here and we can easily read about it. So don't worry, you don't need to memorize all these. I don't remember everything, so don't worry. Most important one, yes, but not everything. Nobody can do it down the war. Eg could finish the lecture now, but I think it's a good idea to give you some ideas of how CSS could be used other than jazzy changing the appearance in landfill. So what is that? Imagine that you have got a site that looks pretty good but good for you. There are many users on this side and they use this site frequently. Some of them do not like how it looks like. Maybe they would like to customize how it looks. Is both evil. Yes. They, you could allow them to modify the style.css and include just for them. The sides here says that they want to include, right? They could make your site the different, different colors. Pretty awesome, right? You should also know that you could change the appearance of your website on the smartphones. When somebody have got the big monitor, you can scratch all elements on the entire monitor and they will look pretty good. But later when somebody opens 0 website on smartphone, do we not look good? So sometimes you need to even remove something or change the appearance of it and you can do it, right? You can specifically say that, hey, this wing will look this way on the smart phone, okay. Although you can even change how your website looks like when somebody's printing it? Yes, you can remove every logo, every image saw, and just leave the article for printing when somebody use the shortcut Control plus three plus B, or maybe control plus b, they see only the texts, right? Not every, every other things like images and so on. Maybe something like specification is not needed, right? So we can remove it just for printing so somebody doesn't lose his ink. Pretty awesome, right? So to sign-up, css is something that changes appearance in one fine. And you save lots of time, and time is precious, time is money, right? You can control your layout. So how the site looks like from 15, even if you have hundreds of sub site. And also, it's good to know that your website loads faster. Because when the CSS is loaded, once, it's going to be in something that is called cash. It is some kind of memory inside your web browser, inside the user web browser, which holds the CSS. So when somebody jumps from one side to another side, this phi doesn't need to reload. It's just in the cache. It's in that memory where the web browser can use it whenever it wants to use it, right, so load ones and just use it. That's cool. That's only the lesson. Thank you.
50. CSS placement & CSS priority (cascade): Hello my friends. Today we are going to talk about never-ending war between the arrows. What? Yes. The rules are fighting with each other. The rules that you are trying to apply using something like this. What does it mean? Well, let's add a few more rules. Like for example, let's change the size to live for two pixels. Let's make it big texts. And also let's change the color. In order to change the color of the text, we use the color property, and then we can choose the color from here, like for example, blue. You can also change it using Cuba. We'll talk about this later. So we changed a bit and as you can see, we have got now a big text that is blue. The problem is about this war between roles is that you can create size not only here in the external CSS file. No, no, no, no, no, no, no. You can create them inline, right? Or you can create them here. Inside the head tag inside them. Pack gold style, or, well, there are some default values, right? Notice that the paragraph has got some kind of margin, right? Notice that we have good margin between this text and this. We didn't need to add the break line here, right? To make the line enter, right? So there are at least four ways to do it. So what will happen when I, for example, type here paragraph and I will change the color to red. Okay? Here we have blue color. Here we have what? Red color? As you can see that X is red. But why? And also notice, which is very important thing is that we kept the font-weight and font size, right? So we kept whatever was app, right? But we changed the color to red. And this Fink is called cascade, okay, the way you choose which size should be apply, right? In specific place is called cascade. What is a cascade? Because it's very rarely use word, right? Cascade. Waterfall when you type in Google, is a waterfall that has got something like steps, Rock steps, right? And the water flows from up to bottom. And in the CSS ward, It's pretty similar. Cascade is a never ending war between the rules. You have got the browser default styles. Imagine that the water flows here, right, is a step like on the cascade, right? And the waterfalls down, boom, boom, and boom, right? And it takes like water every style it was before, right? So browser has default style and it sets the margin right? Notice that we didn't remove margin or other styles from the paragraph when he added here and other sides, right? We didn't remove the font-weight and font size when added here, the color, right, we just replace the column, right? Bad, we didn't remove other stuff. You can also make an inline style like this when you type the site and change the color to, for example, purple, right? And we're going to change only the color, right? But we still gonna keep this. And we're gonna keep whatever is up, which is margin and other things like that. So as you can see on the, the first thing is purple. So the first thing in the cascade is browser, then the external CSS file, like the style.css, which is here, right? And then we have got the style defined in the style tag. So this is here. And then we have got at the inline style, which is here. And the thing that helped me understand it more is that look, when I move this box here, I am like over riding this, right? Like this. Which means that when we type, for example, in external CSS, file, style.css, what the font-weight, bold font size 40 pixels, and color blue. We are just doing this. So we keep whatever was in browser default size, right? But we are adding new layer, right? So we are adding new things like font and font size and color. I could change whatever was set by default, right acts for example, margin. I can change it. Let's change it to 50 pixels. You can do it, right? Doesn't mean that you can't do it. So as you can see, we could change it to kindle and set it to 100 pixels. It's up to you. But you don't need to. This is important because we keep whatever was up, right? That's why it's called cascade. Because well, imagine that water is pouring from top to bottom and it takes whatever was before that, right? So it takes every rule that was before, but if something is new, it's going to be replaced, right? So now you know what does C means in CSS? So CSS is stylesheets. So phi's with rules that are representing this tight and they follow the cascade role, right? I have simplified this topic a bit. He has to say this is simplified because there are more to this, but we're going to talk about this more in future lectures when we learn more types of selectors, yes, there are more of them. So in time, you will learn more about what kind of how does start prioritizing works, Okay, so which should be prioritized first one. Now notice that this is pretty logical because, well, it would be stupid if you couldn't change what is default behavior by the web browser, right? You can even check the default behavior in Google Chrome. You can use the Control Shift plus j. And when you inspect any texts like for example here, you will notice that here is a default behavior like display, blog, margin, doc, start one. Am, I am. We're going to talk about what does it do. But as you can see here, our user agent style sheet, what was added by the web browser. Okay? So we can change this behavior Pretty easy, right? By, for example, using the external CSS. And also IV, you have, for example, external CSS. And you have got one simple thing that you want to add inside specific HTML5. You can use this style inside the head tag. Why? Because, well, you don't need to then load it in every subside, right? And also, if you have something very, very short and it happens only once, then maybe you can use the inline. However most time the recommended way is this thing here. So using the external CSS, because, well, this gives you the most benefits most time, right? Because when you change here something, you change every HTML file that includes the CSS file. Okay, Does the on the open-ended lesson. Thank you very much. And as always, remember, if you have any questions, feel free to ask.
51. class vs id : Hello my friends. Today we are going to talk about class and ID attribute, this bruit important lecture. So focus. What is a class? Class is something that classifies things. Does it mean? It means that it arranges things in groups. Okay. Groups. Alex. And when something like that is needed. Well, look, we have got a few paragraphs. Let's say that you want to center all of them. So you want to have the text in the middle of the screen. Right now the text is on the left side of the screen. I want to have it in the middle. Okay, so how would I do that? I need to choose the paragraph and I will use the property that is called text align. Text align allows you to change where the text should be, right? It's going to be centered live, right? Let's just put center here. And this, you can see we did it. So we solve the problem. It's too. But let's say that we have good now address. And inside address we have got, for example, my name and the surname. And imagine there is more content here. And I want to center this also. Okay, So maybe let's do it this way. Address and let's type text align here. All right. Okay, we solved the problem. But we repeated hours of 2 times imaging that there was morphine. Like for example, I not call our phone size, write something like this. So we would need to do such things like this. Not good, right? So we can solve this still, bought. In order to do it, we need to use the multiply selector. In order to solve it, we use the comma here and we type the name of Jack that we want to choose to write. So it means that we choose paragraphs and choose addresses and do such thing like it is here. And okay, we solve the problem. What E, If I want to apply the things that are here, do many, many more tax right? There are many taxa. So I would need to go to CSS here and then add another tag, another tag, another deck. And go, right? That's the time to classify things, to group them up, right? Notice that our main reason we did it was to center things. And well, we could classify all the paragraphs into a group and do it like this using the class name attribute. And then the quotes. We're going to type the name that we invent, right? So we diaper example centre. And we can do such thing to, well, every place we want, like for example these. And now instead of writing this, we go not type dot center. In order to choose tax that have good class, we've done named center, we need to use the dot sign and then the name of the class. As you can see, the solution is similar. But now I can say, Hey, I don't want this guy. There'll be centered and it's not. So you can decide now what to center on your site and you don't need to care about the name of the tag now, right? So that's how it works. If you want to specify, I want on the paragraphs to be centered. You can say, right, by adding p here. So p dot center is gone, center on the paragraphs. However, in our case, we wanted to center everything. Notice that this name can be whatever you want, okay? So you can change this into this and it's also going to work, right? But do not add spaces here, like for example this, okay? Because now it's not working because we have good. Now here two classes, okay? This class and this class. You can have multiple values for the class. Soon you will see why it's good. Because maybe you want to make the text larger, for example, right on it, make it larger. So let's create a class that we call larger and we go down to 79 Act font size and make, for example, 40 pixels. And now I can say, Hey, I want this one to be larger, and for example, this one to be larger, right? So we add the space between the values. And as you can see, this is larger than this is larger. And we can use these class on any type of top, right? So class is used to what? To classify things. So we arrange things in groups, catalogs. Okay, now it's time for ID. Id. Identifies things. So you have got, for example, something good is called ID card, and it identifies you only you write the single unique person. You can be replicated. And as you can see, we can use class magnetize. However, ID can be used on your side. We've specific name, only ones. Okay? So when do we use something like that? Let's say we want to choose this address or maybe this particular paragraph, right? You can then say that id of this paragraph is, for example, unique text on these one must be selected. And then you go here and in order to choose it on these guy to make it different, not the others. You're going to use the hash sign and then the name. And now you can do whatever you want to write it and make the color red. You can change whatever you want. I know font-weight, bold. There are many more things, but I don't want to show all these things here now in this particle electrode, right? But you can do whatever you want. This specific guy, this you can see it's now read. It's also bolded, right? The others were not affected. So you use ID to choose specific one single element, right? You want to make it a bit different. This one identified and change it. And remember, you can't have two IDs on your side like this. Okay, this will work fine. As you can see, it's bolded and right now, but it will cause many, many problems regarding selecting unique ID using JavaScript that you will in future, I'm sure lamb. So remember that ID only exist once with these unique texts. Of course, you can have other ideas like ID, different name, right? But only ones with this name, okay? This is pretty important for you to remember it. It's like you, you are unique. You have the ID card that identifies you only you. Let's practice this a bit and let's create a form. A form. And inside of it we go now create free inputs. And well, we have got three inputs. And I want to choose only inputs in this form. Not in this form, right? Because normally you could type input, right? But you now choose this input and this input when he died. Okay, So this is a problem. Let's say we have got a form that ID is, for example, basket. And here we have got a form that is called order. And you now can choose only inputs from this particle are four. You can now type basket, right? And inside basket, if you want to choose inputs, you type the space, okay? So if you wanted to, you know, go into the dark. So you want to do something from inside. You type the space, and then you type the name of tagging want to choose. So input. And now we're going to have, for example, change the color to blue. And also we can not change, for example, with 250 pixels. As you can see, the first form was affected. We can type here in blue and they are smaller. The second form was not affected, right? So ID is also pretty cool to distinguish one from another. Okay, That's a really good lesson. And as always, you have any questions. Feel free to ask.
52. Useful CSS extensions to speed up your work: Hello, it's time to learn to useful extensions that would save your precious time. One of it is called HTML CSS support. What does it do? Notice that when I'm here and I would like to add, for example, another class name. And I use the Control plus space shortcut. I could hear many different words because, well, the basic version of the sutures box is just bet. When I, when I just start typing larger as you can see, okay, it's here. But it also tries to choose from the text that is within HTML and that's not, not, not good. As you can see, you should have only classes that are available to you from here, right? That's that's all. So in order to change it, we just cannot install it. And now notice that when I use the Control plus space shortcut, I have got the center and larger. So n is style. From here. That has got class, right? Pretty awesome. Bomb, larger, and that's all. Okay, so that's the solution for this and also for identification. Or as you can see, you can have got here on the IDs that you can choose from basket and unique texts, right? Because you have gone to two IDs here. The next thing is called CISSP. As the name suggests, it allows you to pick how your well, CSS is written without having to go into this CSS file. So this is pretty cool because now when I'm really wanted to see how, for example, larger works, I need to open slices as and look for it. You might be okay, but it's pretty fast, right? Okay, It's files, but imagine that your CSS is a BBB bigger, right? Like this. And then you look for the specific gas. That's not cool. Okay, so let's just go back to what it was before, okay? And let's solve the problem by using the CSS peak. So CSS peak. And as you can see when after installing, good. Now when I use the Control on my keyboard and I move the mouse over this, well, we need to reload our Visual Studio code so I'm going to close and reopen it again because sometimes it's good. Boogie after installation. Okay, I did it. And now, as you can see, now we have got here some kind of information regarding how something looks there. But the problem is, as you can see, we can just see what not and not entire thing, right? The problem is that this specific extension likes to have everything ingredient here like this, okay? So we need to format it this way. I prefer like formatting like this because I can clearly see that these extensions are here and I have opened and closed a curly bracket, but sometimes like things like this. And as you can see now, we have got here information regarding how Center looks, how larger looks. As you can see, it's a bit buggy sometimes maybe do we fix it? But I use this mostly not to peak, but to go into this tie CSS to edit things and how to do it. I hold the Control shortcut and then I click on logic and I am instantly in the place where I want to update it. So this is pretty cool, right? So I want to edit something. I just hold the Control and I can go there and edited. This is very awesome. You can also add it, it from here. In order to do it, we go select something, right-click, go peak, and then Peek Definition. You can use the shortcut outputs at 12 while I think it's hard to hit N on the keyboard. And then you can, as you can see from here, edit a sampling, right? So you can, for example, phoned way bolt. And you can double-click to enter the STI CSS like this. And you can edit here also, but you could edit it from there and change the size, as you can see are the font-weight to something else. That's only lesson. Thank you very much.
53. div vs span | inline vs block: We don't use that means the event or a span and the achievable it's auto years def I'm sure Cassie dovish, it's autosomal them into local or us in line. Please borrow the vagina flagship Coniacian. Go Neat on next thing. Okay. Span, kidneys, the tech crash each to type Jonathan, E dot H attribute. I'll stagger them a lot of money. Status, the stack will ban auto Razumovsky donation. Estella, ducks been his proposed to the key neutron. You should all know shuttle dark, mama to Krishnan and attribute data. Now Thomas Shabbat, grown-ups got to tie mama are copied it and I copy the actual tax us tunnel vision at all. Akashic each text Turkey, since all non obvious triggers to push them their syntax texts, the echo article, not taught me ask me is sloppy, have no choice but to call. Staff can usually search. Socialists thrown yet I'll externship at the Buddha can neutron mini our target. So the DIA, NumPy Air Act or ADA diet control Shift E, EPA Germans picked on and to Titus Martinez to time and VDJ route that it's just silly, although it, so it's not as we usually do dash to call plain text an option called fascia, the stove, the text. Those are volume measure mama to take back the old stump. It research should be to blow call the neutron Washington tac toe fashion. If the decoder such as the boundary 2 is 4 plus 2 neutron and aeruginosa is stuck on it, which tells the Nigerian not taught mama to pay to go together, push it longitudinally. Bs contact. Yeah. Could usually moment that has two Martinez of time. But he's a Christian, you're Martinez. And a dollar a year still block salts natron block was not taught told us. She scheme not going to use the Nevada enter near tend to store the text nice day, some alienating. Attention to that covers the same we're to pick festering saw on those stamped on premium directly. The last digit could be attitude pays me sham took an EBS give to that. She's me, shoved us strong. Alberto Lepidus of Brazil regimen. So bin Dustin, treasure tumors will be still a province movie. The children's own little beam attack. Eve a geometric. They don't develop a ten hours or omission, don't you? Golf, tennis ball. So it's minimum color. Wash to wash bucket grant, Colorado. Someone owes us because we have in each color, one like some agribusiness bone little they've bolded opec is minima to Dinah not required to be met of tens puzzle out to tinnitus the outset driven and they said, yeah, well trashed. It tells us that as our version measure mama two data sets is spent on Amanda proposed to flat jackets or maybe escape directory block to essentially saying we're dose tympanum, gesturing, sow is thrown the Internet Dolly, anatomy us inline, proven. It is minima call or a span on trigonometry got spans minimum and not background color of red. Those are on Zoom. We had to go to them Easter in a mass of artist shortcut to do coincide to go back to Kotler, Kong gets nothing else block to block me. Today is those temperature angle. You do not cover login and I'm going to enter attack textbook bottom he's at but not mama. Bit gesturing. The new momentum Martinez, little dot Kovach gone through but Coupang, devious things like the neutron and type, def East Ponto, no brown baggie to the mock pockets, osha, span, tags, volume, display, inline, a def, use taxon and display block to block off this crazy shit. London. There are some partnership above him attempts but corneum. So the Propylaia gives to his statement both Professor Ananya, we will match color struggling to that of a stego me sad that she region soviet to type II background color was Nino and La Nina. Thank to restore law, taco Bodhi tree. If the bid amount of a prototype body, Islamic color of dance pose, those integrals of enzyme. I installed the binge Israel and Kalina put strong it up across to the database yet still it says as usual the results thing is accept the run finished colors thrown after me, Susan, initial trauma sits at the monitor residents on his lip shade we use SCADA stands as it says, number. But that's ions DO tomato. Inline block above machines should trashcan is over 10 to the texts puts pull them. Yes. Dish tax van them in. So the liquid texts propose to your digital persona key actin Yes. Inline. Thank you, Jacqueline AGMA on map pro-social awkward. So Kush tiller, either damsels tau2 should be Santa Maria del dot VNC ticker text often as possible. E, to tie your shoe. Yucky demon. Often as possible. The original drowsy Giotto, maximum Sherlock, tympanum. A moment to tie off stamping. Finding Krista, is that as DACA Germania statement, stan yeah. Zooming edge. Not an option. Rename Ivana and trust them. Block option is that you have Sania trip or motor triggers tacky ago Yad Vashem. We've we've longest gigawatts. Metope show brass crack tactical after the aquatic reboot, a high dist of the socket E, huge matrilocal to lead to Caltech to resonate. Dorian shifted me so tree some of your brush to put a div tag. Events, not Dhamma insult, cluster when you measure with the Star Wars me and attendees to go to Caltech tourism concrete near me. So to start a text message to date. So text, jack says, it has a very large stone class with ischemic crop context. It does, yes, Minimum in shadow caused an option called Statista pick setting. Those are washer method so she Jia just mean management or those tempted to type option transpose. Test of a text is polymerase throwing a die that has huge need out of their asthma symptoms. Freshman, division two's mini naps, chimps that peak selling the vast open the two-year HOW TO start, I was still on a tree to ship. We have I wish scroll back up. We have an option to scroll magic. It is me, Sean, also coastal erosion or conduits or chimps that pixel. Cosmologically TEN years was done on those iMovie and unpopular, stamped on Cellco Vicent to pain. Chicago, Washington textbook. Now central trunk vertebra bourgeois register. Mamta can vasoconstriction or text align the roof. Now you get an official center of dementia or Benji. Nirvana don't tag of washing your shadow to the tutor. Yes. He talked, rationing is actually not done yet ago colonial. That they got auto BWM book, which was actually the son of national tributaries fits into Ravana Zaption, the ego. Yeah. Call me Mama shadow question. Washington gluco vehicle elemental. Boy, yeah. Natalie, total Diego de VO2, time to the Memoriam and apps cut and that knowledge ID. Policemen. Diamond will manage a unique sample. Permissions in your DAW is only call not rush to cosine 2 could take us. It tells us the illusion. Some dynamo washing. It sends data to text align, center. Palo verde measure that central vowel non total stamp name populace to threshing. Ii. Ions, shuttle coach stack, not a Bengio proposed to central vowel. Dr. go to mama, stamp, Tegel, Lisa. Okay, chief dense possible. Washington, Java, the roof, Nile, backs text align. The overseas she is a partner to pay much. Zionist animal vision does tympanum shadow cost per virality much Italy Shara to take to them. She's good tagging, Aikido, Mishnah, watch TiVo shear Guo means in the middle near border. You see you still hexagon and Martina. Martina is mean is not 0. The border. To do an automatic genius who study on another and pick the data of working Jackie Martinez Austin, that as a good dish, the gold stamp Kanyama Envato to Samhita set of algebraic to reduce much TOC. And it usually says resulting Spanish colonial, not all vertebra boy, also launch the question is let a spray strong. Michelle Martinez like the jamovi me, some of you do Giotto is the Kotok social values between x1 and Barbados then display them that they go Washington, US, auto detect. Yes, issues are stuck egoic, inline-block are the Benjamin's automobile is not simply that thing. Now to my state actors government would be supplemental to Soviet. He has shut us both drama. Span, sudo nano triangle trick. That gets which Vietnam Illini diagonal momentum. Can they visually to take just go non-spam to the volume measure mom at all, just computing the linear model Domingo antenna time. And if she's COVID-19, East Chicago goes over the gesture, Tasha Prakash to time. And these are stars octet of Anna. Romantic, touristy contacts, van, inline, nice, tiny minute. You should have cost sheet written. So CAUTI for pros to my ON taco visa issued or yak. Yak comes Stan. Another unambitious elemental, irresistible to not be santa time machine that takes us to an episode of intima Takashi Murakami, element of Revlon corneas crop. That the mass momentum. The Spanish not diva. New project. You have avalanche tactical, opcode, Chautauqua, UV. So coached Albo, the Golem and visually balls on then go to the eve of the particle to bore Borden. Our budget is popular. Suits are nauseous. 39 Internet of avians. Tag is Domitian here and the Muslim is mean each shuttlecock In Washington take multiple taboo yak, block of Virgo. Now in the TAC pair, touchable block of attack to the routine attacking, block of erosion attack the inline. Though Ashish establishments bad. Not all potentially stuck inline tag now, but you still have Leaning Tower to pay down any Iraqi intelligence system doesn't treat dots are actually Domitian his or her via def is a key piece stego know Salam. So yes piece Montessori version option whatnot onto taster on the Internet or at least risky inline element or too much whiskey, elemental, local, true pavilion issue trich taken up. Not really shinier. But hopefully soon, identity is disingenuous ship cheaper plus two of the sides of the ship quiz about regex shared or benches or hover verge. Part of the what for is to use bloke over to inline, tag. Those bartering to eat. Seen a shot for you guys which I transferred to do or not, those are doing even Vick, which families not individual. Yellowstone dictates us on a transfusion. Wanted to propose to anchor this in line diagonal. But sensible boy. And the linker does this into it's seen and automatic machines, VGG, sociology of Washington, Dr. Gautam, text flashing does not cut central Vanuatu is central. Wanna do triangle and other technological its interior. So text images, video, so xi j, there's some good discussion starts an option for today's panel, the proximal, not the central years. And even though don't you triggered to Chautauqua, you have the so-called stack cognac totals. And we should take text and reactivate central vital to our She does template strand, even propose to Anita, Anita honey. Java. Dadaists are some other dot-dot-dot. Any Java. Java upto is vulnerable, says I should translate social VFB, Swedish, she just gentle done in Java. Then as usual, top concrete now changed in Java. Okay, the left directing.
54. CSS: display property: Hello my friends. Today we are going to talk about the display property, which changes as the name suggest how something is displayed. So how the tag is shown on your website. By default, div tag has good display block. So because we have good here now, only div's with different texts. It doesn't mean that it will be shown differently right? Then the block. So when I open it here, a view so you can see everything here is displayed as block, right? There is different text here that suggests that maybe we look different, but it doesn't matter. The most important thing is what is the default display set by web browser? And we can override it right later by, for example, accessing type 1 or type 2 or type free using CSS. Let's change display to block everywhere. Okay, like this. So we're going to do the same display in every case, which is block, would just default values. You can see nothing has changed, right? Because we just did the same. What does the web browser. But when we change type 2 to inline, what will happen? As you can see now, everything here is displayed in line, so one after another, right? Green is the background and the text is within these background and what it doesn't take entire space like in case of block. Also there is no additional enter after each div, right? Because we change the default behavior. Now we display it as inline. Think. Okay? But there is one more thing like display inline-block. What will happen? At the first glance, when you look at it, you might be like a K. It works this same light inline, right? Because everything is after one another. There is no additional enter and will. It has good background, same as in the inline, inline element, right? And it's true it works the same as inline, but it also has a feature from the block. What kind of features? Well, I told you in the last lecture that you can't change the size of inline elements, right? Well, when we do some flight with 300 pixels, then it will stay free 100 pixel. However, in case of inline-block, these changes, we can send the set the width and we can change them, for example, hide pretty easy to something else, right? Notice that now we have got inline blocks that takes space, but they are displayed as inline because they are one after another. There is no Enter after each block, right? You can see that they are jumping when there is not enough space. That's how it works. Okay, because that's how inline elements works. Also, if I had here a bit more of them, like for example, if we hit moral than like this. You will also notice that when there is not enough space that we jumped to another line, right? So to stop showing everything in line like in case like here is we want to break the line. We should use the break tag. That's why we use the break line, break line that D, our talk right. Now as you can see, that we stop the process of putting everything in line from here to here. And when we set the size to, for example, 250 pixels, you'll notice that we have got three blocks that are displayed in line. That's why this is called inline-block because it has good features from inline because things are displayed in line. And it has good feature from blog like allowing you to change the width and height, right? But it doesn't app and enter at the end, right? By the default block is doing.
55. EMMET | TRICKS creating tags with id and class: Hello, my friend. Today we are going to talk about MHC drinks that we allow you to create, tax, including the class attribute without having to write things like div, then we would need to add the attribute iCloud, then the name of class there will be horrible to create things like this, this way, right? That's why there is a special way of doing it. And you need to jazz ride name of glass. Great. It's a bit faster, right? So the same way, like you select glasses, you can create the right. So use also dot and then the name of the class. And you have probably not. This debt is inserting the class attribute into the div tag. Why is it so it's because he's guessing it. There is something God is called, like implicit tag names. Emma can guess. It is intelligent that when you are creating a class and you didn't specify name, you are pro probably want to create it inside div, okay? So we can write it like this name of glass, right? But you don't need to. You can just type the dapp. Of course, if you want to add class to folks, for example, paragraph, then you need to type the name of the tag and then the name of class, right? So this is only for situations where you just want to create a div. But if you want to put it into the paragraph, then you need to manually type 2 what type of tag you want to add the class attribute, okay? So that's how you create class and guess what, in order to create the ID, you type, what if you want to create inside the paragraph, for example, you use the hash. So name of ID, right? So the same like here, right, in order to select, you use the hash. Okay, pretty easy to remember. However, is the dominant to this lecture? No. What about if I want to add more than one name of class, what you can do it this way, right? I think it's easier to do it this way because you have good suggestions then here, right? You can all buy, can choose Taiwan, I can choose Type 2, right? If I use the Control bar space shortcuts. So I think it's better than doing it like this. Type one and type two and type three, right? I didn't like this way. I think it's better. However, if you want to create many at once, then, you know, things like that can save you time because you can do type two, type three, and multiply it by 10, right, then you're saving time. But do you want to create a single element? I wouldn't bother using typing the class name inside here, right? I would just use the data to create attack. And there are more implicit tag names way of creating using Emmet. Because notice that we have got here, for example, unordered list. And always inside unordered list, you will have list-item, right? Because that's how it works. You have good that you are unordered list and inside of it, you type list items one after another, right? So you're doing something like this. So that's why when you do something like U, L and then you want to create a class for each LI. Then you just type that. You don't need to type LI dot name of glass, right? Yeah, Oh, Jazz this and it will work the same. And you can multiply it by five times and you have got the name of class for each ally. And what the school is. You can, for example, use other features. Look now we have got the type. When we type 1 here, you'll notice if you look at type 1, but we can use dollar sign like we talked before, and as you can see, we have good Now Type 1, type two, type three, type four, type five, something like that, is useful most time not for the sake of CSS, but when you learn the Java script, something like this will help you choose the specific ally and the information that this here can be used in JavaScript, for example. Okay? Because you might be wondering why would I even bother creating something like this? There is a situation like this went something like this is needed. Okay, So you all and we could also table row. Notice that we insight table, we have table roles, right? So you don't need to tie table row table data when you are, I'm going to create the class for lamb, right? So we can just type a role for example and column, right? And as you can see, we create a table with one table row and one table data. If we want to have more columns, we can just multiply, for example, column by five. And this you can see now we have got 1, 2, 3, 4, 5 table data. If you want more rows, then you can multiply it by 10, for example, now we have got ten table rows with each of them having five columns, right? Pretty fast. And also they are named and of course you could, you know, use the dollar sign in order to have each row having different value. Pretty awesome, isn't it? So that's it. And also there is something like this. We can know if you want to add an inline element inside inline element, because E m is the inline element. And inside in. And you can't put the block right, like def, right goes with it wouldn't work properly. That's why you can do something like am EM, and for example, name of glass. And it will put just the span inside of saying goes for example, the beta, right? Because it's also in Ireland and any other inline element, okay? You don't need to specify that you want to put this path, if you want to know put inside B, m, then of course you need to name it, but otherwise you don't need to type this pump because it will be the default value that will be it will guess what kind of tuck it should include. Okay, That's only that lesson. Thank you.
56. Rules for selecting tags based on the importance of CSS rule: Hello my friend. The dairy is going to be a situation when you are like war is going on. Why this rule is not working, why I'm doing everything properly and I just can't find a way to make this rule working. And it happens because, well, you don't know about this thing that we're going to talk about in this lecture about priority importance of rules when you are selecting things, okay? And this is pretty similar to how the cascade works, but this is like, you know, a bit more precise thing because what we know now that when you create a style here, right? And when you access type 1 and when you change the background here, it means that this is more important than this thing from the external source, right? That's all. This is just more important, okay? But what if I do similar things here, right? What will happen when I do self-diagnose created type 1? And now here I changed the background color to blue, for example. Which one should be chosen days one on this one. And as you can see, these one at y 0, let's maybe do it this way. Now, it will be read. Why is that so because when you look here, if the priority importance is equal, so what we have got the selector which does the same, right? And this is called the class selector and it is the same. It has the same importance. Then the properties are combined and those that occur later overwrite the previous one later. So it means that, hey, this one is later in the file styles.css, then it means that the background color is going to be red. Okay. And well, otherwise, it is not the order that counts, but the importance or does it mean, well, if we had an ID selector here, so for example, I will say, Hey, you know what won't add these one is going to be pretty important guy. So I'm going to call it like this and I want it definitly to be, for example, chocolate, right? And it's chocolate. This one is chocolate and it doesn't matter right now where these fingers plays, I can place it here, is going to be chocolate. I can place it here it's going to be chocolate. Why? Because this is the id selector and the ADC in the cascade. What a more important thing later there is inline CSS and lighter there is important features. So if I do something like that, you know, I launched this guy to make, for example, have the background color to be, I don't know, console. You'll see that the discount signal, okay? And because this is the most important thing, but if they have sometimes situations when you might be confused and even these will not change the color, then it's time to use something called a keyword important, okay, the exclamation mark important and it should be placed before the semicolon, okay? And this is even more important, but don't, don't, don't please don't use it. If you see it, you will know why something is not working. That's why I'm showing it to you. Okay? Because sometimes you might do everything properly here, right? And something. And this rule is not applied to the tag on your side. And then you are like What is going on, then it's probably time to look at HTML5 and look for the person who did this and, and, and fix either a hint, look for the, look for the look for the fingers like this, and fix it by removing it and doing everything fine. The external file do not kill anybody. I was just joking. Okay. So there is multivariate what is more to it? Because, well, we have got the body tag, right? And notice that here's something like inheritance. What does it mean? It means that some rules which are like, for example, coal or all of the font are inherited. So for example, when I type here and I change color or two, something like this, it means that this color is going to be inherited in every tag that is inside the body. That's like when we have a father, mother, we can carry the color of the eye or the big doors for you. But, you know, we inherit things from the parents and diff is a child for body. So boda is apparent for deep and dv inherit things from body. It doesn't mean that it is going to inherit every rule because some rules doesn't. If they were inherited, it would be just stupid, right? But things like coal or of this, of the font. It's pretty good idea, right? Because it would be stupid if I had to change the color for every possible time. Right? So I do not remember which one is inherited. I just think in my mind, which is what would be a good idea to inherit it, right? So color is a good idea to inherit VD by the node, for example, border around the body would be stupid to inherited in div, right? Because everything lighter would have a border around the, that would be stupid, right? That, that's how you remember what is inherited or not. And as you can see, it is the highest thing here. And it also means because this is the cascade, it is the least important that list, it's not important, right? So it means that if you use the selector attack, right? So if you use the Type 1 for example, and you change the scholar writer to something guys like, for example, fire brick. You will notice that the scholar for the type one, the font has been changed, right? You can change it to anything you want because maybe we inherited it. But this is more important what I say in deck, class selector, okay? This is more important. The class selector. Then I deselected and inline CSS and then the important, So that's how it works. I also want to show you something pretty awesome. Notice that we could do something like that, type one and type two years. So it's, it's, it's pretty properly refund because we'll class can have two values free 45 days up to you. And now there is a problem. As you can see, we have type 1 and type okay, because we've had Type 1, Type 1, and Type 2. So the first thing that happens is that we are connecting what is combining, what is not present in all of them, right? So Kohler is going to be like, you know, in this and this right now. So we have got the color indigo, that's for sure. Then later we can see that we have good type one, which has got the background color blue, then we have got the red color, and then we have green, which is the guy, which is the background color that these last in this tight CSS, it's this one, right? So that's why, as you can see, the background color is Jasmine green. We said this is going to be green dazzle. If we change the order like this, then it means that this is the last one and we have got here read, okay, in the type 1 and type 2. So the order is what matters when we have got the same priority, right, one, because we use the class selector In both cases. That's how it works. And you might be wondering, how can I remember all of this stuff? Well, imagine that you are programmed processor right now. It's some kind of analyzing program. You are a program, okay? So if you're a computer and you're analyzing the stuff that is written here, you are reading things from top to bottom right? And you are like, okay, so I need to change the background color to blue. Okay, I changed the background color of design tableau. What later, I need to change the color of the font to indigo, OK, and do it. And then, oh, there is one or fingers like this and I need to change the background color to red now. Okay, So I change blue to red. Okay, then I have got the class type two. Okay, So I need to change the background color to green, okay, then I will change it to green because it's later, right? That's how you remember it because it's the computer analyzes everything from top to bottom. Okay? So the last thing is always the most important, but only if we have the same selector. I'm telling you we did again because either you use, for example here, IID sample, right? And I choose it by sample. This thing is the most important thing right now. We can change the background color to a light sky blow, right? And as you can see, it's light sky blue. But I can put it at the top of your style.css, It's still going to be light sky blue is because as I said, if the priority is equal only, then the properties are combined and those that occur later overwrite the previous one. Otherwise, it is not the order that cans, but the importance. And here is just a hint. The more precise the choice, the higher its value, right? Notice that inheritance is something that you can change later in your life. If you are stupid, then you can if you're paras worse, you physically can become smart. You know, some things can't be changed. For example, color of the eyes, right? But some things can be fixed. So later when we have got the selector tag, this is more precise, right? Class selector is more precise, id selector is even more precise. Inline CSS more precise, important, these more precise. So the more precise something is, the more important, the higher its value. And the thing that the rule that is going to be applied is the one that is more precise. It's only that lesson. I hope you now understand the problems of every CSS creator. Thank you very much.
57. Selector practise: Hello everybody. It's time to practice. Remember the DV want to be somebody who creates websites. You just cannot watch the videos, like on autopilot. You just skinned watch them and do not practice. You need to practice what you see because otherwise you will not remember all these things. There are many, many new things coming age lecture and you need to practice them. Do at least what I do in the lecture. Play with selectors, play with the tax, remember about it. So this is some kind of reminder lecture. Okay? I want you to create a table that I did here. Okay, do it manually, also alone. And you can copy the selectors part from here by tried to create a description of each selector on your own. Okay, so you can then compare to what is here and see if you understand, okay, The free first one is pretty simple. When you type the P in here, you're just going to select what every paragraph. So every paragraph, which is, for example, inside this div or inside, for example, body tag, right? Whenever it is, you're going to select it and you can change the color of the paragraphs. Do for example red. And as you can see, we refer to the n. These are red because these are paragraphs, right? We can clearly see it also when you use the inspector. And we can see that this is paragraph this paragraph this paragraph is is not paragraph, this paragraph. Okay. Now, let's go to select all elements. That class is f2. So in order to select only the guys that class is for, we need to use the dot, right? And it means that we're going to select what the class for, and we do not care if this class Foo is inside the paragraph or D. It doesn't matter. We just said, hey, select class foo, that's all. And as you can see, it works like this. If we want to select only paragraphs, remember that you need to specify it before the data. So you need to type the power our graph here, right, the p tag here. And now, as you can see, we selected only the paragraphs. Remove it. We're going to select the div and paragraphs, okay, because this is a div with the class foo. Okay? If you want to select all alignments, that ID is equal to, you, just use the hash, okay? This is pretty simple, so we're not going to do it. And here is something that allows you to select all elements that are deep and be in the same time. So if you take the pain, as you can see, we're going to select all elements because, well, the truth is that P is inside div, but it doesn't matter, right? Because we're going to select D and P whenever it is, right now. However, if we remove the comma, you will notice that we selected only paragraphs that are within, that are inside of the, this is important. The pretty big difference. So this allows you to select the end B and apply the rule here. However, when you do it like this, it means select all p's that are inside the if and only inside the div. Okay? So this one, this one, this one at all. This is not inside the if this paragraph inside the body, right? That's how it works. And if we change it to, for example, dot foo, you is select only elements. That class is equal to 4, but they are inside of death. They must be inside of the right. So if I add here class foo, these will not be selected, but this, this, this, and this will be selected. As you can see, it's through. Okay. What else do we have? As you can see, we can specify it. We can say that, hey, I want only paragraphs inside the div that has got the class foo. So it means that this will not be selected now, but this and this wheel, as you can see, it's through. So that's how these basic selectors work. But we have got here also something like select all elements on side, which is the asterisk sign, okay, the multiplication sign. Let's use it. So when you do stuff like that and you say color red, you'll notice that everything is red right now. And well, to be honest, this is not only the place where it is used. Notice that when we do something like this. So we select only the class foo inside the right. So we select on this, this and this. To be honest, here is something like the asterisk. It means select all elements. That class is equal to foo. And this is, you can see nothing has changed, right? This works the same, like if it's there or not. But well, because this is so frequent operation when you use the CSS that people decided that it can be omitted. Okay? So you don't need to put it here, right? But if somebody uses it is good to know what is going on, right. Because if you had seen something like this and I didn't say you did, something like this exists. You will be surprised you wouldn't know how it works, right? So now you know that this thing selects every possible alignment, right? And when you use it with the class is going to say every possible element, but it needs to be equal to this class. And also in this case, it needs to be inside the div, right? But we don't need to use it, right? It can be omitted. That's all in that lesson. Thank you.
58. Borders around elements: Hello, my friend. Today I will show you how to add border on elements on your side, like for example, div or table that we will add border do in future. So in order to add a border, you need to specify its type. Dharma line that dotted, dashed, solid double groove, ridge ins and outs at and so on. When you use the Control plus space, of course you go in and get some hints what you can choose, right? So you don't need to memorize them, but it's good to see at least once all of them in one place, because it will allow you to choose one of them when you Need of the right. So it's good to see all of them at once. The problem is that because we remove the margin here, we should add margin inside our elements that are diff. So we'll add a space that is gonna be equal to 10 pixels between each div and our entire body. And as you can see, we added a margin using this rule and now it's easier to analyze it. So as you can see, when we add the salted, we have here a solid iron. When we use the dotted, we have dots right around or border dashed. We have dashes, double line, we'll have the double line graph looks like this inverse of group is called the reach. And it looks like this inset outset. And of course, you can mix things up, which didn't work because I didn't add here the style. As you can see. Now, we have got here, the dashes here, we have got at the bottom growth so you can mix things up, okay? But it's not all things that you can do with borders because, well, you can set specific border, you get and set, for example, left of the border to be read. And you can, you can just not set any other border. As you can see, there is only border on the left side. And we use it as a decoration which shows that this is important text messages, like for example, a definition, right? So here is a border that we also change the color. So how to do such things? Let's, for example, remove this thing from here. And notice that when I type border, we have got here many hints. And we can choose from here something like top, left, Right, And button. And it allows you to change the specific border right, up, right, down, and left. So we can set, for example, border bottom two As and of course, the style to something like, for example, insert. And you will notice that now here, so here we have got only border at the bottom, right, not everywhere. If we remove the bottom word, you'll notice that we have good it every where on the top, right, bottom, and left. But we can specify which style you want to set. That's the first thing. You can also set the color for it. So you can say something like border, dash and bottom and well, and we don't want to sit this time now, but we can set the column and we can set here, for example, the color like chocolate. And as you can see, we have good here, the color change. We can also change the border Bolton width. So we can change how big is going to be their border. So for example, we can set it to 10 pixels. And as you can see, it's 10 pixels, it's a bit more Vk, right? The WAF has changed. The problem about the solution like this is that we really typed a lot of things for just specifying the bottom of border of this class, right? There is four. Good for us, something like a short hunt property for setting the border. As you can see, first you need to type the width, then the sign, and then the column. So we just use the color here. And then we need to type the width, so 10 pixels. Then we need to type what star it's going to be. So in our case it's inset. And then we need to type the color. So in our situation is chocolate. So now we can just remove this, and this is really, this is equal to this thing here. But notice that I didn't add button here. And because of it, we're going to set all these values to every border in top, to the right, the bottom, and to the left. So if you want to say, hey, Island, to choose only bottom, and then I'm gonna say a border bottom. And now, as you can see, we changed only the bottom of the The thing here, as you can see, I use it here to set the border left to 50 pixels, and then I change the background color. And because of it, this looks like it's more important texts, right? It has these red thing here on the left, which is a border, right? So this is, this can be pretty useful. Notice also that you can change the width of our blocks like this, right? And it's going to look better when you do it. Most time when there is not enough text, right? So it's good idea to remember about it. You can do such things. It's also good to know that, well, notice that when we set the border like this, so to everything, we can remove, for example, these one and this one by using what border. And we want to choose the top, then the style, and we can set it to none. As you can see, we remove the top border. Now. We can remove the border style. Border, right style to also none. And as you can see, I remove also the right side. Remember that it's very, very important which order you type all these things because Eve, we start from this and then we add the border. You will notice that we didn't remove anything. Why is that? So it's because the CSS is gone up, be interpreted from top to bottom right. So when we are in this selector specifically, computer will read that. It needs to remove the border on top on the right. And then it will read it. It needs to add the border on top on right, on bottom on the left, right. So we just didn't do anything that we wanted to do. So this lecture is also important not only because you learned what is border, but you need to remember in which order you put things because sometimes you might be like, why is that not working? It's not working because you put things out of order. This is pretty, pretty important. It's also good to null. Well, we're gonna commented that when you are setting border style, you can put here value one and value two. Okay? So it means that, well, you could type something like, thank you, That's great. Another definition, definition two. And notice that when I type border style, for example, solid, we're going to have fear everything solid. But when I do solid. And then for example, man, as you can see, we have good on the border at the top and bottom. Why is it so? Because if you put only, if you put more than one value, then value one is gone up, effect the top and bottom. And value 2 is going to affect the left and right. Okay? So if we type here may be something different like solid groove, then it's going to have solid here and groove on left side. So you can mix things up, right? But also, it's pretty useful to just remove, for example, left and right. Notice that when we do stuff like now we, for example, 500 pixels and then with text align, so we center the text inside there, if it will look pretty cool, right? Because you have an important message and it has good borders on top and bottom dead, like SAS that is important, right? Because without them, you wouldn't even notice this desks, right? But now it's easier to notice it, right? So borders can be used for decoration, but also to make sure that the person that is reading the texts sees the text, right? We just important for him. There's also one more thing that the scold them. Clock or role. Notice that we can put her more values like value-free and value four. And then the value one is responsible for the top. Value 2 is responsible for the right. Like the clock goes right to the, it goes from top to right, right? It goes in the right direction. So it goes first the top, right, then the value f3 is equal to the bottom, and then the value four is equal to the left. So we could set something like solid none, none, none, right? So it means that we're going to have only the solid at the top. Other things are going to be removed by Kiel, Right? And we can, for example, set, let's say that we want to have eat on left and bottom right. So how would I do this? We need to have solid here and here, right? In other places, we want to have it none. So it's now like this. So you can decide which style is going to be presented or which is not going to be present, right? You can also say now something like, let's change the border. Left, coal or two, for example, crimson, right? And as you can see, we changed the color all of these guy here. And also remember that the order matters right? When we do it like this, it's gonna work this time because we didn't change the color later, right? But if you did stuff like border color and change the color to, for example, black, right? Notice that because we change everything to black and then the left two queens, and then the left is going to be creams in bad when we put it here, right? As you can see, nothing happened because we changed the left border to Crimson, but later we change every border to block. Remember about the order, okay, this is pretty, pretty important. That's all in that lesson. As an exercise, try to play with all these things that you have learned in this lecture is good idea to play with it because then you will remember it better. So try to create a definition that guy's got, for example, different color on the left side. And maybe make a border button that is a bit more narrow. Write it so it's not as big as this one. So maybe different, right? That's on the lesson. Thank you very much.
59. Rounded corners: Hello everybody. Every corner, which looks like this, which is squared right down, can be rounded. In order to do it, we need to use the rule that is called border radius. So we just like border-radius and then we type, for example, 10 percent, which means that we want to have it around it by 10 per cent. And as you can see, all corners are rounded by 10 per cent. But I think in this case, it's better to use, for example, pixels. And then you will notice that, okay, we run the DEM by 10 pixels and as you can see, they are pretty better looking. The first thing that you'll notice probably is that this border-radius is not collect connected to border left, right. Notice that we can remove border and still this box is going to be rounded so you don't need to use borders, right? Even the entire box or like this in order to have it rounded. Okay? This is pretty important, which means that you can, for example, create free inputs and then get two inputs. And then, for example, set the border-radius for them. We just 10 pixels. By default. Let's see how it looks like. As you can see, this is how it looks in how input looks like. But when I add border-radius, they have different looking, pretty cool looking. You can create your own input. How do, how will they look like? It's good idea to add some margin. So there is some kind of space between them, right? As you can see, we have run the inputs are enough. When CAN something like that also be used? Let's create a class that will be called, for example, hint. And let's say here is important hint like this. And let's act as the hint. And now notice the weekend do something like, for example, background color. Let's change the color of the hint. So it looks like very bad. Now, let's make it 300 pixels like this. Then we'll, let's, for example, texts aligned to the center. And as you can see, it's now centered. And now we'll make Deb border radius length, for example, 10 pixels. As you can see, it's looking better. But still. Let's make something that we'll learn in future, which is called padding. And let's set budding to, for example, 20 pixels. As you can see, padding added. The background on top and bottom is added the space which is equal to 20 pixels right now. And then this really looks like an important hint, right? It says bare ground and also it has cornered the rounded corners, right? When I remove the border-radius, it looks weird. Right now. It looks better. However, we can make it even better. A look, even better. Look, you can put here the value like 10 pixels, but what will happen on our ad here, the second value like 15 pixels, we have banana. What happened? Notice that 10 pixels affected what? Left upper corner and right, bottom corner, right. And 50 pixels affected their right upper corner and left bottom corner. Okay, So this is how it works. We can say here that when you type something like this, it means that first value is going to affect the left upper corner and right bottom corner, right. When you dive the value two, you are going to affect the right upper corner and left bottom corner. Okay? That's not all. You can also do something like this. So if I type something like this, this is equal to this. Again, this is equal to symphony. That date is equal, okay, is the same. Which means that when you type something like that, volume number one is left upper corner, right here. Is that right upper corner? How do I remember this? Am I so good? So good. Pricing, things like that. Do I have a text below me? Know, I just use the clock clockwise order, right? Because notice that this is the left upper corner, then the right upper corner, then what? The right bottom corner, right. Then the value for force is equal to left bottom corner. That's how the clock works, right? 0, 0, 0, 0. And the cool thing about this is that we can, for example, set one of the value two, for example, 0, 0 pixels. And now notice that we get something like this, right? So this is rounded a bit, this is rounded a lot. These rounded a bit. And here we have got jazz the square corner, right? And we created our custom hint. That looks pretty cool, right? That's how you can change the border radius. There's only that lesson. Thank you very much.
60. Tables & padding: Hello my friend. This table here looks horrible right now. Let's improve it using the CSS. In order to select table, we just need to dive in hours here this table. Or if you wanted to name it, you could use the IV, right? And so I get a ride like this. But we want to select any table that we have on our side, so we're not going to add the ID. So we have select table and now it's time to add, for example, a border like this white border that is just one pixel. And as you can see, you have border around our table. Okay, everything works fine. But first problem is that we do not have the space between our web page on the left side and these particle, our table. So in order to change it, we're going to add the margin ten pixels. So this looks better, right? We can see clearly that we have got a border here. Now, let's add, for example, border inside every table data. So let's do it like this. One pixel solid black. And you will notice that there is a problem because every table data has got its own border, right? And to be honest, it doesn't look good, right? It would be great if this border on the right side connected to this border on the outside. If it, if it could somehow connect, collapse into each other, it would be great. And there is a rule that is called border collapse, which by default is set to separate, which means that they are not connected. But when you change it to collapse, as you can see, we have connected the border from table data to any other border and now it looks better, right? Definitely better, but still not good. Now it's time to add a space between what, between the text, the content of each table data, and the border around it. And this space between the content and the border is called padding. Padding. So there is a rule that is called padding and you can add, for example, 10 pixels are for example, 15 pixels between the content and the border of this table data. And as you can see, now it definitely looks better. We can bit change it to 100%. You can see here we need to reset the Zoom. So it looks now like this or this definetly looking better than when we do not have padding, right? Notice that when you use the Web Developer Tools and when I use the Control Shift plus I or j in the web browser, I can select each item. And as you can see here on the purple color, we have good padding. And as you can see, the spotting is around what the content, right? The content is right now select all elements named b. And this is this text, right? And when I move the mouse here, as you can see, we have selected it. When I move here, we have got here a padding, right? This is just some kind of extra space between the text and the border. And it's pretty needed because otherwise, this just looks bad. Now it's time to change it a bit more by, for example, removing, removing the border of all. Notice that, hey, we've just pardoning, this looks pretty good. But there were, it would be good if there was some kind of separation between each row, right? So let's just choose the table or all. And let's add the border at just the bottom of each table row, right? Like one pixel solid block. And now you will notice that this looks pretty okay, right? We have separated each table row and there is no just overhead here, right? Like for example, the left border, right border. I think it looks better now. And this is pretty important to know that you have to use the border collapse here. Notice that when I remove it, We just not work. When I added by, it works fine. So remember about adding border collapse in order to be able to even create a border inside table rows. Okay, so that's how it works. I think we should also choose, for example, caption. Let's choose the table th. So we select the table header. And let's make them a bit bigger, right? Like for example, font size 24 pixels. As you can see, they are bigger now. So we can clearly see that these are headers. We could set for both of them, the font weight too bold, so they are bolded. Not only these one bundle, so the one above here, well, maybe not, maybe this is better. So that's how you can change it pretty fast. You can change the colors here, you can change the background color too, for example, I don't cut it blue and the color of the things that are written her to Crimson. And as you can see, it looks now very bad. Remember that when you want to choose colors, you should try to choose them from the plot. So it's best to use the size like this one, right? They've color schemes and choose the colors accordingly from here, right? Because as you can see, for example, on orange. So in the background color like this, it's good to have the colored like this, for example, right? So I cannot put it like this. And this is going to look a bit better now. It still doesn't look very good. It's because to be honest, you should change the color of even table roles, right? So change the color of these one on this one, this one. And this one should be different color or there should be some difference between them in order to make it the good, in order to do it, you need to learn about things that are called pseudo selectors, but we'll learn about them in future. So for example, notice that I'm just gonna give you a sample when I have your table, table data, Let's say that I want to make all of these guys bolded, but only for only that table data that is first, right? Not this one. Only this one. How to choose it? We have a table, 2 D, so we are going into table, then we are going into 2D. And we have both of them. I want to just this one. In order to have just these one are you use the colon here and then use the first child pseudo alignment. And this way we change only the first guy. Okay? So let's do stuff like table to the TD first child. Because here we're just changing the padding, right? So, um, but we want to have padding for both of them as the same. But we want to have the font weight bold on the first chart. So you can see now these guys are bolded, but it's also would be better. It went on even in table data from first child would be bolded, right? It will be looking lots of better, but we learn things like that in future lectures. There's only a dozen. Thank you.
61. How to create horizontal menu? States of links: link, visited, hover, active: Hello my friend. Today it's time to what, to, how to improve the look of our anchors. So the links, okay, we're going to create a menu by using something called states of the elements on your side. Okay? So let's firstly use the anchor and let's access, for example, these falling images, right? And by default, the link looks like this. And it's blue. Why is that? It's because it is unvisited side. However, when I click on it and then I go back, it's now purple is because the state has changed into visited. Okay, so we have two states. One is link, the second is visited. Link is just unvisited default way how the link looks like. And we can access the state. How do we access it? In order to access it, we type the name of the anchor and then we type the visit. Okay? And also we dive the link the same. And now we can change how they look like when something is visited or not. So let's change. Firstly, the visited thing because where we have good now only visited in Q. So let's change the color to live. For example, brown. As you can see, it's now brown, right? So we change the default behavior. Let's create another link. And let's, for example, sent him to fund a medius cut-stone. We do not have a paid like this, but it's unvisited in our web browser right now because nobody has clicked on it. And as you can see, it's blue. And we can change also the unvisited steady state galore to, for example, I know aqua, as you can see, it's now aqua. Okay? So that's how you change the how they look like when something is visited or not, right? There's also something called is called a and then the hover. And this is pretty cool because this state is really a state that you can put on almost any attack. And it stands for hand over. So when you move your hand so you move the mouse over something, this thing should happen. This is pretty cool. Why is that so because the state invokes when you move your mouse over the link. So we can create some kind of animation that this instance. So it's just gonna show instantly, right? And let's say we're just going to change the color to, for example, let's say like this. And as you can see now when we move our mouse over the link, something happens like this, for example. And you can do really whatever you want. You can change the bar ground call or write. And we'll use old, oldest soon to make this look better. Okay? However, there is one more state I want to talk about which is active. And as the name suggests, it's gonna invoke when the link is active. But when the link is active really. Well when we do something like let's change the color to blue violet. So it's easy to notice. When I move your mouse over, the link is not active, listening is active when I click on it, as you can see. And this is only the time when you click on it. Okay, so it's hard to spot. Let's maybe they know something, creams and let's change the background color to rent. As you can see, this happens only when I click, left-click it and you know, I move the mouse here. So this is still in the active mode, but it's only not disable. As you can see, only four millisecond when you click on something, right? So this is when the link is active. So there are four states like this. And we can use this knowledge now to make some kind of manual. Okay? How are we going to do it? The first thing is that we should remove these texts declaration below there. Link, this underline here is really not looking good, right? So we're going to access something or just called the text decoration role. And we've got to change it to none. We don't want to see it. As you can see. We click on funny images, right? So why it disappeared also in the unvisited state? This is because text-decoration is inherited in these states here, okay? However, it's not to all other things. When I change, for example here to aqua color. Only the visa on the unvisited link will change, right? So to be honest, I want to keep adding, look the same like a visited. So how would I do this? So when normally I would need to do something like this, right? But if I stopped, I start typing something here. I need to also do it here. That's not good. That's why we're going to use the multiple select or like this, right? And now when we type anything here, it's going to affect this and this state in the same time. Now we don't need to worry about anything. So, okay, let's, for example, change the color to white. Okay, like this. But we need to also change the background color so it's a bit visible and I'm going to use the colon 059555. This is a green color like this. Okay? And you can choose, of course, the color from here. I chose these before, so it looks good. Okay? And now when we have a background color, you will notice that what the links are really an inline element, right? So when I can't change the width, I can change the height of the element. And also it will make the padding barked a bead. Notice that when I use the popping in order to create a space between the border and the text. We have got the polygon left, right, and bottom side, but there is no padding at the top. And what small. Notice that when we do something like this, so I put everything into the div and when I copy it one more time, we're going to have funny things. It's because, well, we have got here by default display set to inline, and that's how it works with padding. This is a bit bargainer. But when we change it to blog, It's gonna look better, but well, we don't want to have links over entire side. We want to have something will display inline-block, right? So they are inline, but they are blocked. And now potting everything works fine, right? If I copy this one more time here, it's going to work fine. So, okay, so we change the display inline-block. And also we're going to set, for example, the border dome, for example, wide. As you can see. One pixel solid, one pixel solid white. Something like this. As you can see, now we have good border around it, which is white. And now it's time for the best fit. Let's do the same with the a active here. To the hover effect because this is the most important thing. So when I move the mouse over here, I want to change the color of the background first. So let's change the background color to, for example, white. And as you can see, it's not wide, but the problem is that our texts disappeared. So we need to change the color of our text back to what do, for example, what was the color of the background before? And now it's pretty cool, right? Because we changed the background color and the color of the text in the same time. We could also do the same to, for example, the border. So we can, let's copy it. And we're going to just set here the color like this. And as you can see now is even better, right? So we create some kind of manner here. We can send people to other websites. It doesn't need to be the SAP site of your side. You just need to change the text scheme rights. But we created a man. And notice now that there is some kind of problem. What if you had some kind of texts like, Hey place clique, please click here and subscribe for example. And you want this, for example, this thing here to be a link, right? The problem is that this behavior is now everywhere on your site and it's probably not. What do you all had wanted to achieve, right? So it's good idea to use the, for example ID and say that this is the menu, right? And now we're going to change the behavior of links only inside the manual. Okay, so we're going to do something like this, like this, like this. And as you can see, now this thing is unaffected by this. Inside the manual are affected. Remember the EV wanted to have more than one manual. You shouldn't use the ID, you should eat, use instead class then, and change here in every protease, the hash into the data, right? Like this. However, most time there is only one single man, right? So we can go back using the contour plots z. So that's how you can change the way links look like. That's only the lesson. Thank you.
62. Changing default list icons | :: before selector: Hello, my friend. Today I will show you how to change the appearance of the markers on the left side of the list. And we will do it in two ways. So you want to change this into something that looks good, okay, so to something that looks, for example, like this, that's definitely better. Okay, so how do we do things like that? Firstly, we need to select the unordered lists, for example, right? And inside of our unordered list there is something like Elise style. And as you can see, we have got here free rules. One of it is the type which allows you to change the type of your release to things that are available here. For example, for unordered list, the most popular one is square. So we can not change the default marker that is on the left side here to the square. As you can see, we change it from something that is called the SQL, okay? There is also something that is called circle. And there are a few more, as you can see available here. However, most time these ones are the ones that are used most often. However, there is also one more that you should know about that is called non would just removes the marker. This is pretty important sometimes because you want to get it here, a custom one, or you just don't want to have a list. We have the market on the left side. So this is when you use Sony. You will see a practical example when something like this is you notice that this is an unordered list, which means that we do not care about what kind of order is inside of a lemons here. But we could easily change this into the OrderedList, right? The orderlies by default is number. However, we can also change the list style, type into something like for example, upper alpha, which will change it to a, B, C, D, E, F, G, and so on, right? Or we can use them, not upper body, there is also the lower Alpha. Write something like this and this is going to be smaller letters. There is also something called the law, like lower Roman. So we're going to use the roman, the number, numbers and resource, or lower Greek, which is looking like the things from the mouth. There is lower latIn, write something like this, so you can use this also here. But the problem is that I don't know the recommended because this is orderlies and you should use types that are connected to numbering things here, right? The, the order matters here. There is an under this, so we could use some icons, some things that are not connected to IBC, the win-win, something when you see the order, right? So let's just go back to unordered list, and let's go back to creating what an image like. For example, the one that I put here. So here we have a tick, which is the extension of tick is PNG. And that is pretty important because there is no, as you can see, no background here. And because there is no background and PNG allows you to do it, it's going to look good on every bar ground, right? Because it will just take the background of the thing that it appears at, right? So this is pretty important to use PNG file and you can resize it to something glide 12 pixels for example. And to resize it, I highly recommend the program that is called Pine dotnet. You can find an image on internet, which is the, which has the PNG extension and resize it to something small like this. Lighter. You can choose it doing something like the least, style that image. And here we can use something what is called URL. Here, you put in the quote marks that path to where the image is. As you can see, our image is where is here. So we need to first jump from the folder CSS to what do the main page 1 line right to the main folder and then go into images. So in order to do it, we need to use what to that and then the sludge. And as you can see now, we can go to images, then the tick PNG. So our path looks like this. And now as you can see, we have a beautiful marking on the left side that looks like this. And we can put here an image you want, right? But remember that it should be PNG, otherwise it will not look good on every Bagua, right? So this is how you add the image. But there is also another way, which is I think for most Stein, even better because you don't need to look for the image. Okay, so how do we use this method when we do something like u and then Ally. So we choose what the LI inside the URL. We can change, for example, the color to yellow, right? And as you can see, we changed the color of what of text here, right? But there is also something that is called the before selected. And what does it do? As you can see, almost as if nothing happened, right? Because when you add them before you are entering some kind of mode, the mode that allows you to insert, to, insert content to E, But before it. Okay? So where is this? Before? It's here, okay, we want to put the content here. And, but how do we put the content here? We need to use something called is called the content. Okay? So the content allows you to add something queue and you put the content in the quote marks, inside the quote marks. And here we put the content right, so we can even seeing singing le, le, le, le, le, le. So this thing will show up here, okay. As you can see, we seen and what's more is yellow. So anything that you do to feel right? So for example, we want to change the font weight to, for example, ball. You go not change on here now, right? So we affect only the content with the rules here, okay? This is also pretty important. So it means that we can put anything we want. But that is where can we find political things for them? The cool thing is that entities allows you, when you go to a website like this above, to put really lots of feelings, right? There are arrows that you might find interesting, like for example, this one or this one. And in order to use it, we need to use the hex value from here, okay? Not then TT, but the x value from here. So for example, I like this arrow here. And in order to use it, I'm gonna use the backslash, not the sludge but the backslash. And then the number from the side that I showed you. And now you will see that we have got yellow arrow that looks like this, but we have got also the default style here, right? So let's remove it, list style, type, Let's set it to none, right, So we want to remove I did it in the remove it. Okay, because we need to do something like this, right? So this is the URL, URL. So when we do things like this, we have got this. When we do like this, we have got this and we want to just remove it, right. So we'll east side up died. None. So there is nothing like this here. And we have got only a year old arrows. We can use even any emoji icons or hey, I want to have this thing, then I will have it here. As you can see. That's how it looks like. So it's up to you what you're going to use, right? You want to have a teak that looks like this, then you're going to have a tick that looks like this. There is all manner of this. The law really, you won't even have time to check every possible from here. This is great amount and design the emoji right? Image Smyth, whatever you can put, whatever you want before the contract. And what's more, remember that before thing, this thing works on any element, right? Not only have here n element, but this is a practical example how to use it. There are things that are ward remember, because most time we are using the ticks sign and tick is reserved under this number. As you can see, we have a tick here, and the bolded dQ is under 27, 14, as you can see now it's bolded is even more visible, right? So remember when you use the before tax, before selector, you need to add the content. And the content is going to be changed according to the rules that are below, right? So I want it to be below. It's going to be blue, right? We have a blue guy here. And notice that it will be graded. There will be some kind of space here, right? And you can put the DSpace here using the 000, okay? Now as you can see here is a space between this new tick and the content, right? It looks a bit better now, I think that list, but it's up to you, right? So we want to have more spaces. You can do something like this, right? If you don't want and then just don't doubt it. But this is space and that's where it's hidden. There is also something like 000 BBM, which I recommend using, which is looking pretty awesome, right? It's like, hey, this is the first element loses, the second is the third one, right? On in unordered list is pretty cool. So let's say fewer than 2713 is thick. 2714 is bolded, tick write 000 BB is what? It's just something like this, very similar to this. And 000, 000 a, a 0 is just spent, right?
63. Making elements transparent: Hello, my friend. Today you will learn how to make something transparent. It means that the background will be a bit blurred, right? It will be blurbed. So you can see through the background, right? And we're going to use for that opacity and the RGBA row, I will tell you the difference between this and this. But before we do that, let's practice a bit. It's good idea to do what I do now. Manually. So don't download the source code, try to do what I do. Okay, This is a good practice because we're going to add for images to make a practical example manually here, now, but using Emmet. So how do we add images? We can type image, right? And then the, put the values for the attributes. But hey, we need for images, so image multiplied by four. And now we're going to go into the images and then we choose the file that we wanted to have. Then we need to put the video course C sharp, the version that use the output Z shortcut to make everything visible on one screen. And let's hit F1 button and type your update image size. So we have the size of the image, okay, then hit the tab button and we need to go into another course. So like this and video course, video course C plus plus. And then what? Update image F1, Tab. And again, images. I can use the space so I will get the hints, Foster and video course Java. I think I hit the wrong button. I need to do manually it. So video occurs. Java and images. Speech be video, of course, PHP. And we need to update the image size. And it's a good idea at art here, enter, so it looks at it That like this. So we have four images and imagine that you have got side where you allow to click on every image like this to get the user to a specific site where he can buy the course like this. And in order to do it, we need to put that into the ankle, right? So let's use the anchor on well, all of these guys, so let's use the out key, and that's the angle. And here we need to, I think that the HTML5 should be called very similar like here, right? Because, because of that, it will be easier to make your site higher in Google like this. So we have got now links. So when I move the mouse over things here and I click on it, we are going to be sent to the page like this. The page doesn't exist. Well, you can create it manually, but we won't do it because this is not the directory is not about death. Imagine the user on the side, like here, and how would I suggest for him that he can click on something like that? Okay, We changed the course cursor into the pointer right? From the like this to hunt. But this is not enough. I think we should change the opacity, so we should make it transparent how to do it. We're going to select a and inside. If there is inside a EMG, we're going to change the opacity. And as you can see, the values for the opacity from 0 to 11 means that nothing has changed. However, you put, for example, zero-point one. You'll notice that her pretty transparent, right? You can see through them. So let's put here, for example, 0.7, okay? And now it's a bit transparent, right? I want to change it to not be transparent and more when somebody move the mouse over things here. Okay, So how do we do? We're going to use the hover. Okay. So hover is hand over. We talked about it when we use it on the ankles, right? So when somebody move the mouse over, it, eat, it, applies the rules that are inside where you put the hover, right? So when you do something like a EMG and when somebody move the mouse over, right the handover, then the opacity is going to change back to one. And as you can see now, this suggests that, hey, this is a link, right? Because when somebody moves the mouseover, he, he clearly says that something changes here. Okay, so Islands, I will just click on it. And this is a good suggestion for our user. So that's when you use, for example, or pass it. Whenever we have got here something also like RGBA, look, let's say that we want to warn somebody about something in our website. So let's say that we're going to create ID warning. And let's say this is warning. Be careful, very important message. Okay? And let's make this messaging portal. So let's get into warning and let's make it bold. For example, let's, for example, increase the size of it. Let's, for example, add the padding to make it look better. Right on, this is a warm gray. Let's make background color, for example, brown. Let's do something like this. This is warning, be careful, very important message. Let's set the width to, for example, 5000, 500 pixels. And let's center it, right? So it looks like this. Great warm, right? And now I will use something what is called opacity on it. So I will use the opacity to, for example, 0.6. What will happen, as you can see, the problem about this message is that change the transparency of anti or think with the content, including the content and not something that we probably won't because we want to keep the text to be bolded, to be easy to see, right? And in order to just change the transparency of background, we use the RGBA, okay, So we do not use this. We're gonna use Hill Air GBA. However, we can also just click here, okay, move the mouse over here and choose the color that we want. And here we can, as you can see, send the fourth argument, right, the four value here that we set how something transparent should be. And you can see the smallest value means that it is more transparent. The bigger number up to nothing is that it's not transparent. So let's say that we want to set it to something like this. And as you can see, I'm going to remove this. The text is still bolded, it's black. We didn't change the transparency of this, right? However, we change the transparency of bargain. And you might be wondering why would I even make the warning transport? Okay, that's a good that's a very good question. Because most time warnings like these should be, for example, in the middle and here should be a lot of texts. And probably warning would be over other texts, right? And let's simulate this, but I'm sorry, but I will not explain you everything would I do right now because we're going to talk about these in future. We're going to use the position absolute. We gonna move the object to the middle. And we go Now make sure that it looks properly. Doing something like this, this thing. Left top. Translate. I should use here translate like this. As you can see, this pink makes your text in the middle, always in the middle. Even I have, I changed the size of our web browser. It's always in the middle. So in future I will tell you how this works properly. But for now, you just know that you should just set these rules. You will make something to be in the middle, right? And as you can see when I move this over, for example, images here. Now I can see these images, right? I think that when you put a warning on your side and you do something like this, this is bad idea because the user is like, he doesn't know what is behind, right? He, he's like he lost the entire content of your site. I think that you should always at least apply the Alpha to 0.9, something like days, right? So he is like, okay, this is an warning message, but I can still clearly see what is behind, behind the screen, right? I will also show you one more thing now because I think that some things that you might be learning right now are boring, right? But unfortunately, in order to create things from scratch, you need to then sometimes boring stuff, but I don't link things now, a bit more cool. Look, let's create some texts here. In order to create texts, we're going to use the M at Lorem, okay, it creates some texts, but when we multiply it by 50, creates even more texts. And the problem is here, as you can see, we have got this message in the middle, but when we scroll, it doesn't look right. And we can change the position from absolute to something what is called fixed. And now these measures such as moving with us, That's cool, right? So we can, for example, create here the x. When somebody clicks on the x, it's gone up, for example, disappeared, but only when he read it and he knows what he is doing right when he accepts whatever is here. So as you can see here, even putting a bit bigger, right? For example, 200 pixels, right? This is pretty, pretty important. And we change it back to one. You will notice that the user is leucine, right? Everything from this page, right? So it's good idea to set something like this. Okay, that's all in the lesson. Thank you very much.
64. Changing cursor | creating hint box: Hello. Today I will show you how to change the cursor, the pointer to something else. Like for example, we have got now here a default pointer one, I move the mouse. Here we have a pointer with the question mark that suggests that there is additional information, like the one that has shown up with the video course, the bus bars, it's on promotions and say that whatever here when we move the mouse over some texts, we have information was going on so we can put anything in the box like this. So we show you how to create a box like that also in these extra, so this is going to be a very interesting lecture, right? Okay, so let's go on how to do it. Firstly, we remove everything that I did. Why did I do it? Big goals. When you watch how I do something from scratch, you learn lots, lots of more rather than analyzing the code, okay, So this also means that you should try to do everything that I do in this lecture manually later, after you bought it. So claws the lecture after you watch it and do everything I did in this lecture on your own, try not to look how I did it, right to repeat what I did, but don't look at the solution. Okay, so let's start from, for example, helping. So if you want to change the cursor firstly, we need to put it into some kind of all m and write that we can choose from the CSF. I suggest starting here a class that will call, for example help. So when we have more expound, like for example, here, I would like to be able to change the cursor on all of them. So how to change the cursor? We cannot choose the hub and we're going to use the rule that is called cursor. Pretty straight forward, right? And now here we have good man, a cursor that we can choose from. The one that we're going to choose is called Hub, which suggests is used when we want to and give additional help for somebody right inside the text, for example. There are many more. The most useful one that I use most time is called pointer. So the pointer changes into pointer that has good hand over the text. And it suggests that you can click on sampling right? Next one that I use most often is weight. This is pretty cool because when you are making some kind of loading in the background, you can make the user this loading. Think on his screen and he will know that he needs to wait for something, right? This finger, a sphinx are used most time when you know JavaScript, when you load something that Bergen some, some data or something like that. So these pretty advanced. And there are many, many more. And to be honest, it's not like I remember all of them because most time you do not use them in your project, but it's good to know at least that they exist. So try to play with them. Okay, So go through L of them like for example, I don't know. Let's go into copy and you move the mouse here. Okay, So copy looks like that or this is also a good idea because as I said, you don't remember everything. Usual typing Google car source and CSS. Okay. And you will find there, you know, every cursor, how it looks like somewhere on the GPU. Remember the sunlight, you're gonna watch my entire video every time when you need to find the specific cursor, you will still get, you watch my video because I show you how to do things, right? I do not show every cannot show you every possible cursor because this is just your loose of your time when you are watching me, I will show you how to use some things and tell you that they exist. So now I will show you very good thing that is hard to find, like for example, how to create a TPP, right? Let's say that we have got a title here. And let's say that here is more information, right? And now let's copy it and let's put it here and here, and here, for example, was going on. And here we will type something else. By default, there is some kind of box that shows up as you can see, what's going on. Here is more information, but it looks horrible. You would like to have it look better, right? Let's change it back to help. And how do we do it? Well, firstly, we need to choose the hub. Then we need to make the changes when somebody move the mouse over the hub, right? Because otherwise, we would add everything. All. We would add the box always right? Not only after the, somebody move the hand over the help element, right? So we want to add the content. And the question is, what kind of content? Let's say sample. And you can see now when I move the mouse over here, and nothing happens because we didn't say where we want to put that content. And there are two places where we can put them before the text or after the text. Please notice that here we use the single column and here we use the two columns. Okay, This is very, very important. The, otherwise it will not work. And also this should be firstly, how hover and then the after. So after the text that has good help, class. I would like to add the content sample. As you can see, it shows up. The problem is that we want, we don't want it to be sampled, we want it to be defeated is here, right? Exactly the thing here. Is it possible to take it? Yes, it's possible. And this is pretty cool. We can type stuff in like a TTR, which stands for attribute, right? So you put here the name of attribute and the title is at an attribute. And that's all. You just took this text and put it after the text that is here. Right? Because you said so when somebody moved the mouseover bomb, something else was going on. Here's more information, pretty awesome. Now it's time to change the appearance of this thing, right? So firstly, what should we do? I suggest that we should first secretes some kind of background color, okay? Like for example, aqua. Let's say something like this, okay, The second thing I think we should do is add some kind of padding. So it looks a bit better. Okay? It's better right now. The second thing is, well, I think the border radius would be great here. It will look better when there is a border-radius on it. Okay, it's even better now. And the second, the third thing is that the notice that when I move the mouse over and I think it moves everything forward, right? The problem is that this content is added into the flow of all elements. If you wanted to make something absolute, absolute, so you want to take it out of the flow of all elements. Use should use something called the scold, the rule called position and set it to absolute, okay? It means you take it out of the flow and as you can see now, it is all over every other finger on your side. The problem is that this background is now what? Hiding everything behind. And I think it's good idea to make it a bit transparent. So I move the mouse here and I make it a bit transparent by doing something like this. And as you can see, the color change from Aqua to RGBA, and this is aqua, but it has got a setting here that is set to 0.7 for example. And now it's gone up be what? Transparent. You can see the information in the background. I think it's a bit too transparent right now. But let's say that for example, 0.9, okay? So here is more information. So we created this pretty easy. There is however, one problem. The problem is that let's say that you have got an image right, and you're going to access diseased or injured. Say that you want to access the video course C plus plus VD0 car C plus plus. And let's say that you go now added the class like this. And here you say today is promotion. It's still say L. And so whatever, you give additional information like this, and when you move the mouse here, nothing happens, right? And we can solve it by putting it into the span and putting this class and the title into the span. As you can see, now we can see today is a promotion. It's unsafe. Why? It didn't work before, because image is not a text. And this thing, the after, works only on text span. So just like there is a text inside here, okay? And we just some kind of playing with the web browser, okay? We just fix it by adding it to the lemon that can have text image, can't have a text, right? If the fun thing is that if you remove the source tag, it will work because we have the outer native message on most web browser. Okay, do we work? This is some kind of fix that you need to know that if you want to add and made the after effect or the before affect work, you need to use the span or an element that can called text. Image is not a text. They can see everything here is in line right now because well, we have good all spots here. So we can make for example, BreakLine. And now it looks like this, right? So we created a box, but there's still a problem, a problem that we can solve. All we know how to create custom attributes, how to play with them. Notice that we always need to use the class wouldn't even better if it takes the title from here automatically. And also it will be Grade IV. When you move the mouse over, you don't have two boxes now, right? We have a box that is created by us. We just beautiful. Well, maybe you can kinda make it even more beautiful, right? If you play with it. But there is another box, but below the cursor, today is Promotional in his own site. As you can see after a few seconds, we have good toolboxes and this is not good. We want to solve it, but how to do it? We'll learn in the next lecture. Thanks.
65. attribute selector | custom named attributes in HTML: Hello, my friend. Today you learned how to create custom named attributes and how to select from CSS based on the name of attribute. This is pretty good. Okay, So the first thing is how to create custom named attributes and why would we even care to create them? Notice that in the last lecture, we use the title in order to, to use the value from here, right? The problem is the title is really reserved for something else to show a box. The wide one, right, the small one here. And three seconds today's promotions on cell, but these small one, not the one that we met the customer. Right? And we would like to make it removed, but we don't want to lose the content from here. And that's when you can use custom name attributes. It means that you can create your own attribute name, but you don't create it like this, for example, okay? But you created ideas. You type the data word and then the dash, okay? And then you can call it whatever you want, even the way did we did here, right? So we can do something like these now. And as you can see, it works, but we do not have these basic default behavior now. So we took the information from this attribute data a as the F. Of course, this is not the way you should call it. What I showed you that you can invent here. They whatever name you want, we can call it, for example, data help, right? So let's call it data help. And now, of course we need to take it from the data help, right? And it works fine. So we have good now the custom name attributes, It's not only using places like that is also used for some kind of scripts made in JavaScript. But these things do not think you will learn in this course because this HTML and CSS goes. And what we have got also something wood is called attribute selectors. And in this case, this is going to be awesome. Why is that? So we go what we need to add every time this class have in order to make this thing work, right? And I think it will be better if we just added the data, help with the texts. And these things should automatically work, right? As you can see, it doesn't work. So how to make it work? We need to choose by the name of attributes. Okay, this is good. Look, we gotta put here in the square brackets the name of the attribute. And this is gonna choose NLM and that has good the name of attribute like this. And as you can see, now, we change the mouse cursor to this one with the question mark. We also going to do the same thing here. So now when somebody move the mouse over, we will show that text, the content like this. And we're going to change this content according to the rules but below. And as you can see, it works now fine. And this is cool really because you know, this thing called being some kind, for example, power our graph. There could be air cooled, be more texts here. And for example, what is that? And you go deciphering this span and the satellite data help. This is really something That's right. And now it's cosine. We can see here this is something, really something else. But here we use the break line, make it look better like this. Okay? Pretty go. And it shows only on this right now on this, but on this, what we call TO change it to, for example, have a border bottom, one pixel, solid, red omega d v defeasible more, right? So it suggests that when you move miles offers things like this, you're going to get some information, data that suggested even more, okay? So you can see it suggest that hey, move them out here because there is some kind of more information here, okay? Here that there are, there is not here we have information and now it's pretty fast, right? Because we can add information so we can create content on HTML site. But this Fink takes care of how it looks like political. That's only good lesson. Thank you very much.
66. Text formatting and decoration: Hello my friends. Today we are going to talk about a few rules that will allow you to affect how the text looks like. Firstly, we will talk about text decoration. Look, we added here the border at the bottom of each text. But did we do it really? Notice that this is a border and border is around the box of the content. So the problem is that if we add here, for example, padding 10 pixels, notice that our border is now really far away from the text because this is a border of entire box here, right? So this solution is not so good. However, there is something called this called text decoration that can help us. Okay, let's create here some kind of text. Let's call it class sample. Let's choose it. And let's say here is text about nothing. And now let's put it maybe impeded here because I want to be refreshed, incenting. And now let's maybe do something like padding 10 pixels. Let's start here. Background color, for example, this. And now we can work with this. Notice that we can use something called a text decoration line. And it allows you to add a line. Like what kind of line? Like all of our line that is going to be above and tire texts. But this is above the text, not above. It is not it. Above the contents of the box, right? Is not here, right? It's above the text because these text decoration underline, it cannot be under the text, right? When I say the line true, it's going to be aligned to the text. The cool thing here is that we can connect it. So for example, you want to have our line and you want to have underlined. It's going to be overland underline. You can even add the line through here, but it doesn't look good, right? But you can connect it is. So that's a big difference because, well, when I do border bottom, one pixel solid, the black, for example, you will notice that this border is here right on entire box. And this thing is going to help us soon here to fix this problem with this here, right? And, but before we go to dead, notice that there are moral rules regarding the text decoration. Like for example, text decoration side, right? And we can use here, for example, the dotted version, right? So we want to have dots or we can use, I know that double, so it's going to be double lines. You can use the wavy. So it's going to be wave, right? Like this. And so it's up to you what studies can be yields, right? The dotted or dashed. It's up to you. This looks similar to the one that are available on borders, right? So we're going to stick with, for example, data, right? And also you can change the color of text decoration to y. And also I feel like orange for example. So it's going to be orange are done. It's up to you what kind of color you're going to use. And well, the cool thing about the text decoration is there is some kind of shortcut for this Fink. Notice that you can put after the comma, after the column, first line, then the style than the column. And it means that you can do something like, for example, I want under line, dotted and for example, the color that is here, right? The cool thing about it is that it takes less space. I think it's easier to read and we'll take this Bayesian or CSS is going to be smaller. If something is smaller is going a lot faster. So I highly recommend using this shorthand version, right? And now we can use this knowledge and copy these here, right? And the cool thing that we replace this border now is that when you add the padding here, for example, 10 pixels, we have steel what? The underline under the text. Okay? So this is the first rule. The second rule that we're going to talk today about is text transform. Look. We can transform so we can change the text using CSS. This is pretty cool. When I choose a sample and I use that text transform. We couldn't nebulous, but just Here, you can choose something we'll discuss. For example, lowercase, What does it do? You have probably noticed that the first letter here change to the lowercase, so it's not the uppercase, it's not the big letter, right? If I put here big letters now notice that all of them are typed in lowercase. If you use the uppercase, everything is going to be in the uppercase. But the coolest thing here is something called, It's called capitalized. It's going to change every first letter of each word to uppercase. I really liked why? When something like that could be useful. Notice that I created an input here. And let's say, Well, it's just a few lines because we want to have some content here. And let's say that I want to ask for the name of somebody. Noticed that when somebody types the name, the name is type from the smaller case or if he types the iodixanol, the name of the street, and he starts from the lowercase. And you didn't print the order like this. It's not looking good, right? Is that will be great. If all the ways there is an uppercase letter, the first letter of each word will be uppercase. And we can easily change it by just choosing the input and then do the text transform capitalize. And now notice this one I'm typing. The first letter is big, right? I can not sit when I add spaces always the first letter is big, right? I can't change from shift to shift so far has a soap. I am not lying, right? So now somebody typed in the name, it's always uppercase. Somebody that lives the street name is always uppercase. Pretty awesome, right? So this is a text transform. The next thing that we're going to talk about is them text align. Let's copy this a few times here. Maybe let's do it even. So I think it is. As you can see, we have good. Now here are some, some text. Let's remove the text transform text decoration. And let's play with the text. Line. Takes a line, allows you to align so to move the text to, for example, left side. And this is the default behavior, but you can move it also to the right side, as you can see now, all the text is to the right side. And here we have also the space, but we can also center something. And this is the thing that we have used so far. But remember that when you're centering, something is always centered to the box that these around the text, right? So for example, 400 pixels. It's going to be centered around this box. So remember that it's always like this because, well, for example, by default the PE, display P of B is display block. That these play is called block. It means it takes entire space of the web browser. So to the right and left, right. So center means that it's going to center text around these books. These books is not Malin, not visible, right? We can remove the background and it's not visible. And you might be wondering why something looks like this. However, there is very, very, very cool text aligned feature, which is called justify. I highly recommend using it because not this. Let's copy the div and long like this. Notice what happens here. We have got now here tags that dislike connect it to the right side of the web browser. Bad when we use the default behavior. As you can see, you have got here space, right here is some space, here is some space. And always, when we move it like this, as you can see, there is space here. And it doesn't look good to be honest when you use the justify feature texts we always like connect to the web browser and I think this looks better, definetly better. Okay, So justify a highly recommend using guns, some kind of articles, pretty awesome feature. And there is also something called, It's called whitespace. Whitespace rule, as the name suggests, works on the white spaces. What does it mean? It means it works on white characters, like for example, spaces like anthers, like, which are new lines, right? Or some kind of taps, right? So what does it do? Notice that we have got here now text and we have good here. For example, if you've spaces and everything is own newline. And even though it's, everything is visible here in one line, right? We're just not always something that you want to have. Maybe you have, you have got some kind of verse poem you want to paste into your code and you don't want to, you know, bread line everywhere. Then you can do something like whitespace and you can use the pre line. As you can see now, every line is here when it's here, right? So when I add here a few enters, they are going to be interpreted right? So every line is predefined, right? That's why it's the word pre here. It means that it's going to be taken into consideration, but only on the lines. So when there is something like this, it's not going to be interpreted. And this is pretty cool when you are pasting some kind of poem. And you have got also something which is called pre wrap. And this thing is going to interpret every space and ever enter. The problem about this solution is in texts like these, you need to then do something like for example, this, alright? So it's in one line. It takes time to preform on something like that in your HTML. However, this is still useful when something like this is useful when you have F side about, for example, coding. Notice that here's some kind of definition of function and the indentations like this, right? So the spaces here are very important in languages like this. So if you use the pre line, everything is going to be just in one line. So this is not good, right? So if you paste the code, I think it's good idea to use the Arab version. Okay, there is also no Rob, you'd means that I want to have everything in one line. So I changed this into one line, of course for the code is not something. But there is a feature like this. I highly recommend for you to play with all these features. Okay, So do the same thing that I did in the lecture. It's good idea to practice because then you will have somewhere in your head that, hey, something like that exists and when it is needed, you're going to use it. Otherwise you just forget it. So try to play with it. That's only the lesson. Thank you very much.
67. Paragraph indentation and ::first-letter selector: Hello. Today we are going to talk about text, indent and the first letter selector. Look, we have got here some sample text, okay? These are block of text, and each of these blocks of texts has got a few lines inside, right? But the first line is affected by something will these called text indent. Indent is just a margin for deaf first line of block of text. Okay? So we'd means that we can, for example, select the sample and we can do what? Text indent. And then for example, set it to 30, 40 pixels. And as you can see, now, only the first line of H block of text right, has got some kind of margin here on the left. So it just makes your life easier to read some, some block of text if it's big, right? This is just one way of adding paragraphs into your website. Some people like it, some people don't. So that's how you achieve it. But there's one thing that I really love. It's the selector, the discard first letter. And it works very similar to the before one because you can adjust, select only the first letter of each, for example, class sample. So when I do something like this, and I now select the first letter, I am now inside like the first letter of each paragraph, okay. And it demands that, well, I can do such things like changing it, right? So I can, for example, say font-weight two volt, right? And now the first letter of each paragraph is bolded. I can also make it bigger. So I can, for example, make it font size 24 pixels, right? And it's bigger, right? Only the first letter of each paragraph. This is pretty cool. What I like it because it makes like every paragraph entrance bit different, right? So remember that text indentation affects on the first line, right? You can still add, for example, on each sample poverty in life, for example, 10 pixels, right? It's still available, but it will affect only these guys here. Of course, this one is also affected by, but it's not visible here, right? Because when I type, for example, 100, it will be a bit easier to see, right? So we have 100 pixels for each line, but text indent affects only the first line of each park, right? This way. Okay. That's only that lesson. Thank you very much.
68. CSS units: em vs px vs %: Hello, my friend. Today we are going to talk about the unions, that Px, which stands for pixels, that EM and the percentage sign and when to use it. Okay, so first let's focus on pixels. We have used it so far, right? We use it to, for example, put the image on your side, right? When we use the image, we can set that wave and the height of the image using the pixels. We do not dive the Px there because this is just a default unit for almost anything on your computer, right? This is something that we are used to because we have good something. We'll discuss the resolution on our computer, right? I am using raw and right now the resolution like this on my monitor. Okay. But well, I just saw I just use this part of my morning TO to record it because this is more supported resolution. And this is what you see right now here. And I have got what, 19020 pixels from left to write. And I have got 180 pixels from top to bottom, right. And this is the available space here, the one for the dual record. When I open the web browser, we have good, a bit less of the space because well, if you have good here, the address we have got here, the top name of the tab and so on, right? And we can even decrease it when we weren't, when we do some things like that, right? So we are decreasing the amount of space that we have got here. Of course I am simplifying these right now, but for the sake of learning how to use it, I think this is enough. It goes, you can have high pixel density devices that has got more dense pixels, more pixels on one inch then normally, right? But not the topic of this lecture most time, the problem looks like this, okay? And well, you, so we have got this valuable space that we can use. And for example, when we have good here the sample by default because these paragraphs or its display is easy, ease block. The width is set to 100% percent of the web browser. Okay? So it changes. When I go into the inspector, you'll see that the size is like this. And when I change the size of our web browser, is this value here, right? Changes with the size of the web browser. Because it's set to 100% of available space for the part. The body has got also 100% and HTML is the parent for the body, and it also has 100%, right? So we have got num, just the size of our entire content using the percentage sign. We can change it to, for example, 50 percent like this. And now we just take always 50 percent of the content of our web browser. And this is cool because when you send, for example, to what free 100 pixels, the problem is that, well, it always looks the same. Sometimes you might want to achieve something like this, but it's not something that you always want to have, right? Because people can have different monitor sizes and something like this might look small. However, right now, people can also use the zoom, right? And they can increase everything according to what they want to see. But by default it will be but best to show something that looks good everywhere. So I think for a week It's good to use the percentage sign. Okay. But it's not good to use, I think percentage sign for everything. Look, here is something called is called EM. What is the n? Notice that when we have got here the font size, 24 pixels. We counted these volume by knowing that the body tag has good by default font size set to 16 pixels. And this is a default value for web browsers. As you can see, nothing has changed here, right? And well, when we change this font size, so something goes like, for example, 80 pixels, what will happen? Notice that our beak first letter is not big NMR, right? So this letter is not changing its size according to what happens on the other side with the font size that the set in both the dark. Because the body tag. When you set the font size in body tag, everything done or so then the p tag. And there was a tag inside the p tag would inheriting the size, right? So it means that we like did something like this and something like this and something like these, right? We compiled it here. What here? We did it. Why? Because we override, right? Because what? This is like, the cascade, right? We say that this is more important. We send the font size to 24 pixels from 80. Of course, if I remove it, it's going to be set to 80, right? We change it to 24, but we don't want it to be so small right now, right? So we would need to again count it. So 80 pixels multiply by 1.5 is 120 pixels. The problem is that, do I need to always candy like this? That would be stupid. It's best to use hear something or this called ENM. Em can be set to, for example, one E m. And what will happen, as you can see, it's the size of the finger here, all on the right side. It's 80 pixels right now, because one em is really something like that. It is really one multiplied by 80, okay? Y multiplied by 80 because here is 80. So when I do something, 1.5 is 1.5 multiplied by 80, and now it's what? 120. So the cool thing about using EM is that when you change here the size 2, and I think this is always going to look good, right? The first letter is always going to be 1.5 bigger. You can make it a on phi times bigger if you want. It's up to you, right? So it's like 50 pixels now, right? Because it's 5 multiplied by 10, because 10 is set here. So it's really 50. Okay? So this is like relative unit. So it changes according to what size of the font is set in parent. Okay? So I think in cases like this, it's really good idea to use EM because your size is gone up, change according to what happens with the font size here. And you might be thinking, but when something like that would change in future, you will learn how to, for example, change according to the size of the web browser, of the user, the font size. And then you can just change it in one place, not in every possible place. You would not need to change it in every possible place, the font size, it will just change the index at Baldi, right? And everything in other places will be changed automatically because what this Fink, we'd calculate it, right? So you can, for example, on small devices like smartphones, you can change the font size to 10 pixels. But for people that have got very big device by default, wipe and said, I don't know font size to 24 pixels, right? And this link will be automatically changed and you will not need to then get into the sample first letter and then don't change the font size. It just takes time. So I think it's good idea to use yen. So we use the M in cases like this. We use pixels when you want to have some value to be absolute, right? We, we just want to be like for the images for example. And we use the percentage sign when we want to make sure that something like, for example, the sample will take far too territory percent of 40 or 50 percent of entire web browser. And it always takes this, pays like this. So we are sure now. And remember that the percentage sign is gone up, take 40 percent of the parent and the parent in this case is bolded, right? Body. If we change the parent, let's say that we do some fun. I did. And I said here the ID to new parents. Now, nothing has changed. It's only because you go into a new parent and we do something like background color red, you will notice that the DFF is really a blog. By default, 100 per cent of wave, right? Bot, hey, look, now when we do something like with, let's say 700 pixels, what will happen? As you can see, this thing inside, which is this paragraph, takes only 40% of this value here, okay? Lets say to 50%. So it means that this thing takes what, zero-point 85 multiplied by seven hundred, three hundred and fifty pixels right here, because it takes 50 percent of the par and size. Okay? So now it takes 50 percent of this red block around. Always when you don't know what's going on. Remember what this background color, it helps a lot, Okay? You will get lost many times when you are creating something in CSS and HTML, use the background color to make sure what's going on with the items here, right. Or use the inspector to see, okay, So this parent here, I think the div is 700 pixels, right? That's on the lesson. Thank you very much.
69. Playing with fonts: Hello, my friend. Today you are going to talk about phones. Firstly, let's think for a second. What is a font? Font is something that describes how each letter of alphabet or a character that you want to use should look like, right? And it is described in some kind of plays in your computer. You have got the folder on your computer, for example, on Windows we just called phones. And inside the VDD you have good Fives that describes each letter. Inside a five, for example, Times New Roman. And it says how it should look like when you use this particular font. Oh, when you use this one or this one, whatever, right? So the font changes. When you change the font family. How do we change it? Let's say, firstly, we go into the style.css and we type something like font dash family. And here as you can see, we have good suggestion. You can use these suggestions as you want. So for example, this one and you see differences. But firstly, we need to know, Let's see why do they even bother typing so many type of font ski, right? And which one is going to be chosen? What's the difference? Why is it even called family? You see, there are many types of phones, but they are a bit similar to each other. Sometimes they have some similarities and dissimilarities are connected into family of fonts. So for example, here is a monospace font. And monospace font is having something like space. These model between each character, right? And anyone who wants to create a font in this particle or family that is called monospace, should follow these rules, okay? To make this space between, they can make some differences in, into each character, right? How do the logline that they should follow these rules? So that's why it's called font-family because, well, there are many families, bots and they follow some kind of rule that is similar to them. And, and they are named somehow, right? For example, you have REI, has Verde, gotta home and other things like that. So in order to choose a font, you just type the name of font by default. The first funded is that these here, by default, that is loaded by the web browser, is called Times New Roman. It is the most popular one. As you can see, nothing has changed. And notice also that I use the apostrophes here. Because when you use more than one word, you need to somehow connect them to say that this is one single font. Not, does not free different fonts, right? When I type something like that, computer will think that these are three different fonts. This is working only because when nothing matches the fonts that are available on your computer, the default version is going to be chosen. So by default is going to be Times New Roman. But if you type here will always have like this. All of these fonts doesn't exist, right? There are no phones are called like this and Times New Roman is going to be chosen. So when you type here something like, for example, Helvetica, you'll notice that I think I typed it wrongly. All right. As you can see, it changes, right? And the cool thing about this is that you can type here many fonts at once. And you do that because sometimes somebody will not have one of these folds. These are safe fonts. The one that I showed you here, say font, that means that most time almost everybody will have them write. However, there are phones. I don't know when I use, for example, this set of fonts, like these one here, it will not be available everywhere, wherever. Most time somebody will have it and you can use it. Right? And if this fund will not be available, this one will be used. If dizzy will not be available. This one will be useful. If not, then this, if not, then this, okay. And this one is just called sans-serif, means that this is like family. That is connected to all these fonts here to the left. And when somebody, when, when, when the computer sees this, he needs to load the default san-serif. Font, okay, so this is like backup version and you type it here in case all others will not work. Okay? Try to play with the fonts that are available here. Okay, see how do they look? I, or maybe if they show up at all. Because as I said, when you make an error here, as you can see, now we use the hallmark. Now we use the Geneva. Now use the Verdana. And then we use the san-serif. Okay, So when there is an error misspelling, then you use the one that is similar to this one, right? That's why we use a few of them here because if somebody doesn't have it, Let's make it look a bit Good. All similar to the one that you want it to look it like, right? That's why you choose always the phones that are from one formula because it would be stupid, you know, to use the mono space, for example here, right? Because this looks definetely, right? That's why you use the similar phones in one line from one. Fine. That's why it's called family. Okay, we have got also something we'll just call font size. We have used it already many times. However, there are also, you know, things like, for example, larger. So you make the font size larger than it is now. You may get even, even larger. I don't like it, never use it. I highly recommend using 1.5 AM or something like that because you know what you are doing them and when you read it, you know what's going on. Okay? There's also something called font variant. I really loved this one. Notice that there are a few options here, but to be honest, the inherited option is just saw these inheriting world is in the parents. So what is embodied the, the answered means that there is nothing. The narwhal is just floats normal. So nothing has changed. And initially it's the default value from the web browser, right? And this is just the single thing that we can choose here. We'll just call small caps, and I love it. Notice that this looks like why we created a book now, right? Because books are written like this. We have got here the first letter like this, and later, every character is capitalized. Okay? That's why it's called small cups, is because it's capitalized, but it's making It's small capitalized letter. Notice. Notice that when I don't use it, for example, the eye has good a dot here, right? So the bigger version doesn't have it, right? So to be honest, this thing makes all fonts capitalized, but it changes its font size into the smaller one. And that's why we have a cool effect like this. I really love it to make some page. When you make a page with some stories, this is pretty cool to really like this, right? And what's more, we added the effect for the first letter, right? And it made it even better. We can remove it. And still notice that the first character of that we use like here is a bit bigger. That's why it's called Small Cap, small capitalized letter, right? So let's go back to here. This effect really connects very well with this. Okay? There is also something which is called fond wet and we have already learned about DID, but there is more to it. Notice that we have got font-weight and we can set it not only to bolt, but there are some values here from 100 to nine hundred. One hundred means that something should be as thin as possible. 900 means that it should be bold as possible. The problem is that not every font-family where the particle of formed supports every number from here. Especially created here at the bottom, a few classes where I said font weight from 100 to 900. And here I create that hour I didn't create, so let's create it very fast. So let's create a div. We can just do stuff like that, that call it weight, right? And then the number we number so we cannot use the dollar sign. And we need how many of them? We need nine of them. And we some content, right? So content, text. So now we have got it. And as you can see. We changed just the text here at the bottom from one hundred one hundred two hundred three hundred four hundred five hundred, six hundred. So it means that weighed six. Okay, we applied some bold text here. But the problem is that we use in our DFF, not the font-family that is here. We'll use the default one, which is the Times New Roman, right? When we access the div, this is a default one. So when we go into font, font family, and we said it two times, Times, New Roman, you will notice that nothing has changed. However, if you use the one that is here, okay, Let's copy it. Notice that now there is a difference in many more levels. Right here. We do not see difference, but here it's a bit more bold. Here is even more, and here's even more bold. And here it's fairly bold, right? So this one supports it. Let's remove it for a second. Notice that these one doesn't, right? So there is a big difference between this and this font, even if there is no big difference in how they appear. First one, right? Because this one supports many bold levels. And to be honest, sometimes you don't want to have text to be bolded like thes, right? This is really rough. You want to have a text like this, for example, right? Just a bit bolded. Okay. So this is font-weight. And we've got also something we'll discuss. Old font style. Font style allows you to set the font to be written like eight alike. So it is sloped a bit, right? And we have got also hear something we'll discuss oblique. And to be honest, it's very similar, right? Almost like nothing has changed, but there is little difference that maybe you don't need to even remember, but it's worth to know. When you see that somebody uses Oblique. Eat alike is just the version that was created inside this font. Okay, there is a file that has good every character, how it's represented, right? And it's also, it also has a five where it shows how it should look like when somebody use the font style Italy. But you know, sometimes there is no phi like this. Note that there is a file like this for every font. And then you can use the oblique to just make every letter to just look like this, okay? And you don't carry about how it looks like. You just say, Hey, I want to have it written like Italy, but it's not, doesn't need to be implemented, doesn't need to be created like the creator wanted to. Make it look like. Okay, that's the difference. Okay, So we have the font-style and to be honest, like incase of the border, for example. Do remember we had a bolder and we could make a short version like these of border, right? We could use the varnish, that specific rule for this, for this and this, but we can make it inline in case of fonts, there is also the same thing here. We can copy this here. And now we know that firstly, we need to send the font-style and we don't change it so we can send it to to normal. Then we're going to set the small caps because we want to keep this small caps. And then we can send the font-weight to, for example, 600. And then we can change the font size, which is for example one M. So we don't change it at all. And then I didn't copy it somewhere here. Okay. Then we have got what? The font family name so we can copy it from here, like this. And as you can see, we set all these things. We can remove this from here up now in one line. However, let's take it into the comments so you can refer to this. I don't like this version because it's long and to be honest, it's hard to remember which, which is wheat, right? Well, we can move the mouse here and then see which one is which. But still, Somehow I prefer in case of fonts because, well, you don't send them very often to have all this values separated. Well, if you are moving your code from your computer to the server, then filmmaker, for example. I find a bit more, a bit more small, right? So to make it smaller, sorry. Then it takes less space, right? Style.css load faster than maybe it's good to have it in one line. But there are programs that will make your car or your CSS smaller for you. I highly recommend using this field. However, the sport to know that something like this exists because when you see something like that, you would not know what it does. It's good to know also that you can send font-size, line-height here. So here, when it's one I am. And when you set the size of the phone, right, you can also set how big line-height is. So what is the size that the space between each line? So 1 for example, 5PM. Why this? It works fine here. Or 150 per cent, it's up to you what kind of value you're going to use it. That's all good lesson. Thank you very much.
70. Custom fonts - Goofle Fonts: Hello my friends. Today
you will learn how to attach custom fonts
to your website. Because let's say
that you don't like the default forms
that you have got installed on your
computer, right? So you need to somehow allow the user of your website
download new phones. How to do it? The easiest way you can use the side that is called
fonts.google.com. This is pretty awesome because the fonts
here are free to use. They are super easy to set up, and also they will load faster because of something
good is called the pre connect technique that
we cannot talk about. Okay, so what do we do? Firstly, type
something here because you want to see how the
font will look like. Will the text is
you want to check. So e.g. this is a
sample texts, right? But remember that here are the typical letters that exists in almost every
alphabet, right? So this is a good
idea. If you are e.g. from Poland to type the
Polish letters e.g. as you can see, this
one doesn't support it. Or you want to see
how they look like. And of course, there are many other countries has got their own special characters, so check them out before applying the font
because you might be surprised that
it doesn't work for every single
character properly. The second thing is that
you can check the size, the size of each formed, how it looks like. Because maybe you want to use this for the header
on the right. Maybe this looks
better for Heather, but also it looks bad, e.g. when it's small, right? So you decide this way. You can also hear switch
to the dark theme to see how it looks on the darker
with the type of website. And here you can
choose the categories of the things that you
want to look for, e.g. you want to look for
only handwriting. This is pretty cool, right? You want to look for the
hand-drawn, handwritten texts. So example, I really
love this one, let's say the Pacific. Yes, this is the
thing that I want to use from my side because I write poems on
my side and wow, this is gonna look awesome. So how to use it? Well, you're going
to click on it. And then you can
download the family, and then you can extract it
and so on, so on, so on. But don't do it this way. Because the font, we
load slower this way. So I will not even talk
how to do it this way. Because the way
that it should be done is to use the
plus sign here. And then as you can see, we have got here expanded way of importing it on your side. So it says to you that
you need to embed a font in the hat
using this code. So we just going to copy it, clicking on this button here. And we're gonna go into
Visual Studio Code. And we can adjust, put it where before the CSS. Why before the CSS? Because, well, we
don't want to load the default font right? Before loading this. So let's just put it here. And after that, what we need
to apply the font, right? And the order to apply it, we need to type the name of the font as the first line here. We cannot do it like this
and just put it here, right? Font family, we want
it to be Pacifica. And let's see if it
works on our site. As you can see,
yes, it works fine. We used the Pacific
go right now. If you want to use
another Google form, then you need to go to
the Google Fonts and e.g. let's say that we want
something different. Now. Let's reset everything. Let's say that I
really like this one. I can now add it here. And as you can see, now we
can use both of them at once. As you can see here, we have got wrote
or what the Bruno A's and also the Pacific. And in order to use it, I will just copy it into our
Visual Studio code here. Right? Now, if I want
to use the Bruno as C, I would meet to use here what? This font family. So like this. And now I will use the
Bruno A's. As you can see. Now, is Bruno, if I want to use the Pasiphae
call in other place, or maybe you want to use
it for something else. Like let's say that
you want to have here something else, right? I just want to access this one. So I would just do
something else. And I will just
change this one too. Because this is going to be e.g. the header, right?
That Bruno a's. So maybe it would be even better if I type
something like header. And here I will do
something like cat, right? So for headers, I want to use. This after school for tax, I want to use this. And if you want to stop
using one of them, right, you need to just
remove this part, right? I don't want this one. Or you can just go
to this website and it will generate
the code for you. You want to e.g. stop using the Pasiphae core than
I will just remove it. And as you can see,
this code update. The installation is pretty cool. And this part of code
that we added here, what is it The responsible for? Here we have got something,
my message like pre connect. What does it mean that
something is pre connected? It means that it's
going to be loaded. So before connection, before
downloading the D contents. So before downloading
the phone and it speeds up the process of
loading your website. And if somebody speedups
that all the ink of your website is going to profit you because your website is going to be
visited more often, because that's how
Google works in our speed is very,
very important. But how does it work? If you want to understand
it keyboard and if not, then just keep going. You just need to add it and don't don't, don't
care about it. But if you want to understand
it, keep listening. So when a browser
loads your webpage, it has to fetch, it has to get many different
resources such as CSS files, JavaScript files, your
images on your site, your font, like this one, and many, many others. And all of that takes time. There can be e.g. 100 resources
of your, on your side. Moreover, too fat. Each of these resources, the browser has to
establish a connection with the server where these
resources are located. And this also takes time. They can be located on
many different servers. And it takes time to just
connect to the server. So the pre connect
technique involves the browser establishing
a preliminary, so an initial now
our connection with the server before it begins
to fetch specific resources. Okay, so it's just
gonna establish connection before it begins
to fetch specific resources. So why the browser
is busy loading e.g. an image from your side, Okay? The connection to the
font that we have got here has already been established with the
help of reconnect. This means that when the
browser starts fetching the actual specific font file, the connection to the server is already established
and ready to use. So you don't need to
connect and then fed, you have already
connected to it. So it reduces the time it
takes to download the file. And because there
is just no need to establish a sudden
connection with the server, the browser only has to perform
the data download itself, okay, So without having to
connect to the server again, I repeat because this action was already performed
by the prokinetic. So all in all, this just reduces the load
in tank of a webpage. And that's why this is the way to use the custom font size. You can of course download when others that you buy,
buy some of them. Don't do. Look how many
families of phones are here. Why even bother looking
somewhere else? You have got to keep free
content, lots of them. You will definitely find
something that will suit your website if you
don't like the default font. This way, it's going to
load fast and this will make your site visit more often. There's only less than
Thank you very much.
 Arkadiusz Włodarczyk, Professional teacher