Transcripts
1. Getting Started- What You Will Learn: Hi everyone and welcome to my video blogging course because designed to help you kickstart your video blogging journey. My name is Brad and I, my fitness and adventure video blogger. Hovering find out right now my very fine by me. In the past 5.5 years, I've produced over 1000 fitness and adventure videos with ever 19 publications on Amazon Prime. I've designed this course to show you how to use a video blog to build your brands and share your story with the world. By the end of this course, you'll be equipped with the knowledge to start creating and sharing your videos on your very own YouTube channel. In this course, I'll talk about the mindset of vlogging that nobody talks about, such as ignoring the vanity metrics of views and subscribers, dealing with friends and family, judging your videos. I'll teach you ways to become more confident on camera and avoiding embarrassment in public. You'll learn how to edit my videos and the best video editing software for vloggers. You'll learn about the equipment I use to make videos. And finally, I'll teach you only what you need to know when setting up a YouTube channel for vlogging. So if this sounds exciting to you, enroll now and let's start your video blogging journey today.
2. Getting Started- What Should I Vlog About?: Brad, What should I vlog about? What should I create content around? I don't know. I still get this question. I'm remaking this video in 2021 to make my message perfectly clear. I've been doing this for five years consistently. I've made over 1000 videos of all different types of things you can imagine. My message is the same. Always make content around the thing that you're passionate about, that you enjoy talking about that interests you the most. And today, some people ask me, well bred, what if I create content about this thing like cryptocurrency? Because if theorem is really, really going off right now, but six months from now, I want to change my mind. I want to talk about something else. I always tell people the same thing. It's okay to change your mind if you decide six months from now or two years from now that you want to talk about something else. Don't overthink the kind of content you want to create for your channel. Just start with what interests you now, what inspires you now when you go out with your workmates and have a few drinks or you're at work with your colleagues or with their family, what is it that you talk about with the like, what interests you the most? When I first started my YouTube channel, for me, it was about fitness and only fitness. That's all I talked about. Well, I talked about were supplements like Oh, glutamine and protein powder like this. And this. That's all I talked about was training and supplements and bodybuilding and that kinda stuff. But then 12 months later, 18 months later, I wanted to talk about other stuff. I didn't want to just talk about L glutamine. I wanted to talk about meu tie kick boxing in Thailand. I wanted to share my scuba diving adventures. I wanted to share my flying and videos because I'm a pilot and that was a big part of my life and still is a big part of my life for 18 months or so. I never talked about flying on my YouTube channel. So I felt like I was like I really wanted to talk about it. So I started talking about it. I gave myself permission to talk about and to change my mind. So now my YouTube channel is a mix of things. It's my travel adventure and my fitness adventures all in the one channel. But it's okay to change your mind down the track if you decide you want to talk about something else. I always tell people you're a human being. You're allowed to change your mind. Don't get fixated on only talking about one thing because the world tells you you need to only talk about one thing. Humans are multi-dimensional, we're multidimensional creatures, were allowed to have all these different layers of our personality. That's what makes us unique, what makes us human, that's what makes our personalities so different from everybody else. I'm different from you because I love training, I love fitness. I love staying in shape, but I love flying planes. I'll have scuba diving off travel adventures, olive meu tie. That's what makes me unique. You need to really think about all the things that you enjoy and talk about those things in your content. I also think about the value that I can bring to my audience or my potential audience. You know what, I first started my YouTube channel. I was only creating content that was really educational and entertaining. When you're thinking about the content you're creating for your channel, think about it like in two buckets. Are you going to be creating content that's educational, tutorial videos and how to videos and guides and that kinda stuff. Or you're gonna be creating more entertainment content. Now, entertainment comes in many different forms. You don't have to be a comedian to be entertaining. You can make a video of a cat stuck in a tree. And that, that could be entertaining for a lot of people and that gets millions of views. So entertainment comes in many different faculties. It's not just about making. Some are laugh with my Youtube content, my travel adventure content. I take people on a journey with me, traveling, whether you are in a plane, flying with me in my small airplane. And that helps you escape from your day-to-day life. That is a form of entertainment I am making on helping you escape from your reality. And you're coming into my reality, into my world and I'm sharing my passion with you. And for three minutes, for five minutes, you can escape your reality. And that is a form of entertainment. And another reason why you should really be creating content around what it is you're passionate about and what you're interested about today is because making the videos is really tough. Like when you're just starting out your YouTube journey, like you are right now, I've been in your shoes. I have made most of my videos on my YouTube channel, over 6700 videos across two channels. Now, most of those videos, 99% of those videos were made after hours between 830 at night and seven in the morning when I was doing night shift. Yep. I have my laptop there and I was making these videos at 2345 o'clock in the morning, my laptop would crash, the editing software would crash. I would get upset. I'd almost throw the laptop out the window because I was so passionate about the thing I was sharing with the world. It was okay, I let it go. I didn't let it get the better of me. So if you're making content around what you're passionate about, It's going to help you get through the really tough times when it comes to editing your video. If you're making videos around something you're not passionate about, then when you go to edit those videos, which can sometimes take four hours, six hours to days, three days. Sometimes my videos take me a week to make. If I wasn't passionate about it, I wouldn't even want to make the video. So pick your passion. It's going to help you get through the tough times editing those videos. And then sometimes people say, Well, Brad, it's been done before. I've I, you know, there's so many people talking about cryptocurrency now because it's completely going off here in 2021 with a theorem and dogecoin and all the rest of it. You know, Brad, there's so many people talking about cryptocurrency. Why wood? Who's going to listen to me? And I always tell people, well, if you're copying somebody else, if you're watching somebody else and you're looking at their delivery style and you're copying that delivery style and you're trying to be like somebody else, of course, has been done before. But if you're being you and your unique personality, he might have this quirky personality which you don't like. But once you embrace that, you can bring that into your narration of Dogecoin and the theorem in Bitcoin. And that is the uniqueness that makes your videos more interesting then somebody else's videos, you know, for me and my personality. I'm different to a lot of people that watch me and that are in my space because, you know, I don't just talk about fitness and training and bodybuilding and that kind of stuff. And staying lean, you know, that kind of stuff. But I'm also a commercial pilot. I'm also into more tie kick boxing. I love flying planes or love scuba diving. And I put all that together. That's what makes me unique. And I have an Australian accent which is, can be pretty hard to understand. Sometimes. Australia might use in a red box and never ever do it for the views or the subscribers. Never ever pick a topic that you think is going to go viral or that's trending at the moment because right now, as I said before, cryptocurrency, a theorem and all that, all trending at the moment, everybody's talking about it more so than the previous years. That doesn't mean you should jump on the bandwagon because everybody else's and because you think you're going to get all the views and because it's hot, a hot topic right now, never ever pick a topic because it's hot. Never, always pick what you're passionate about, even if it's not hot or trending. So I know this advice is pretty hard and I know it seems pretty brash, but I want to communicate this super clearly. Just make content you're passionate about. And that is it. Even if it doesn't pull them the views, even if you're not gonna get the subscribers. Because all that stuff, it comes much, much later on for most people. So I hope that was helpful. If you have any questions, let me know and I'll see you in the next video.
3. Getting Started- How to Start a YouTube Channel (with Zero Subscribers): How to start a YouTube channel with 0 subscribers as of May 2021. Let's talk about it. So it's hard to believe that I've been doing this for over five to six years now. I never expected in a million years that I'd be doing this full time making videos, editing, and not working in a corporate job anymore where I first started my editing journey 56 years ago I had a full-time corporate job and I was making videos every day for the first 14 months, as I've already mentioned in previous videos, I'm going to share with you some things to think about, things that I wish I knew when I first started. And hopefully this will give you some insights and some wisdom that will really get you started on the right foot. Couple of things is that when I first started my YouTube channel years ago, I didn't know what I was getting myself into. I just thought pretty straightforward. I'll set up a YouTube channel. I'll upload some videos. And back then, I was talking about fitness. I was helping people getting, wanting to get into shape and I'm sharing my fitness content with the world. And I didn't think much more of it than just wanting to help people with my content. So the first thing to think about when you're getting into this YouTube journey is not so much how to start a YouTube channel because that's pretty easy. You just set up a Gmail account. You create a channel, you give it a name, you create some better art, you get a profile image, and that's pretty much how you create a channel. The biggest question is why lead with, why, why is it that you want to get into this journey? Now, it could be a number of different reasons and that's completely okay. And they can change over time as well. But today, as of 2021, as you watch this video right now, what is the number one reason why you want to do this? Once you get super clear on that, then it's going to help you push through very difficult times because this is a very difficult journey. Irrespective of what many other YouTube is out there, will tell you, this is a very difficult process. There's a lot to learn and a lot of things will come up that you never would have expected. Now I'm not saying you're going to learn everything overnight. When you're setting up a YouTube channel, you literally starting a business. That's what nobody tells you. The primary thing to think about is why you wanna do this. Now for me, when I first started my YouTube channel back in 2015, Maya, primary reason why was I wanted to help people with a fitness transformation, right? So I was doing a lot of fitness competitions. I was competing and amateur bodybuilding competitions. And I wanted to share with the world, my world, my experience of doing competitions and helping other people get in shape and that kind of stuff. And then as time went on, I wanted to talk more about other things that I was passionate about as well. I end up rebranding the channel going from seek fit life to Brian Knutson blogs, which I talked about in another video. So an exercise for you to do after watching this video is to sit down, get a piece of paper out, and ask yourself, why do you want to leave your corporate job and do this full-time? That's a good reason. That was one of the reasons why I wanted to create a YouTube channel because I wanted to escape my corporate job. I was sick and tired of it. I've been doing it for 9.5 years and I wanted to do something for myself. So that was one reason that I had. The bigger reason for me was to help people. But what is your reason? Do you want to help people with your knowledge, your expertise? What is it that you can bring to the table? What value do you have that can help people? In some way. We all have something. If you sit down and think about it, I'm sure you can come up with your unique experiences that you can somehow help people that are watching your videos. You might want to be an entertainer, which I talked about in other videos, which comes in many different forms. By being a vlog, you are kind of entertaining people. You're a storyteller. And so is that what you wanna do? Why is it that you want to do that for me? I wanted to bring people not just on a fitness transformation journey, but also on a travel adventure with me, which was the later stage of my channel, became more of a travel fitness adventure channel. So that's the first piece. Start with why. The second piece is that I think you should, if you don't know what it is you want to talk about and you have no idea the kind of content that you want to create, then I always tell people, start with what it is you're interested in today. Get at your camera, get out your phone and start filming, and then start uploading. I guarantee you, not many people are really going to watch those videos because you're not going to have any subscribers. So what the Y ICA is that it's a little bit of a dress rehearsal, right? So even though you don't really know what you want to talk about, but you have some kind of an idea of what you like. I think that's a good place to start. If you're kind of interested in Lego. If you're kind of interested in war planes. If you're kind of interested in upgrading and repairing PCs, if you're interested in something, then you should really start with making content around those things and just see where it goes. See how you feel about it. You know, you don't really know until you start making the content. That's when you'll get a better idea whether that's the kind of content you want to continue to make or not. I always say to making scuba diving videos on my YouTube channel years ago. Now I spent time thinking about, or I really love scuba diving. Maybe I can make scuba diving vlogs for my YouTube channel. And it wasn't until I made about 20, 25 videos that I actually didn't enjoy it anymore. I was like, I don't want to make these scuba diving videos anymore. They took way too long. No one really watch them. And by the way, I wasn't very proud of those videos anyway, but I didn't know that I would not like it until I tried it. So you have to try to know if you're going to enjoy something or not. Start making videos around the thing that you're kind of interested in. C, you, that takes you, if you find that you are enjoying it more and more and more, keep going. Otherwise, change to a different topic and try somebody else irrespective of what you learned from other creators on YouTube. And there are hundreds of people out there that will tell you how to set up the perfect YouTube channel and how to get everything perfectly right and how to figure out the algorithm and all that kinda stuff. I take a very different approach on Teams. I like to just start, just kind of feel it out and then experiment a lot and see what feels right for me. Because when you're starting a YouTube channel, there's no one size fits all. Everybody's different. And if you're a blogger or want to become a video blogger, then your unique personality is what's going to stand out. Above all else. You have to try different things and you have to make lots of different content to figure out what it is you enjoy and also what people also enjoy watching. And yes, when you're starting a YouTube channel, as I mentioned before, you're starting a business. No one told me this when I first started, I just was like creating a channel and then uploading fitness videos. I didn't think about anything else. But here's down the track. I started making money from these videos. And then of course I had to start paying taxes on these videos and then I had to go to an accountant and I had to explain to them what I was doing online with these videos and I had to explain to them how I was making money online using video content. And so I had no idea what I was getting myself into. And also, not just what am I going to talk about, but then there's filming the videos like this and then editing and then storytelling. And then I've gotta do the thumbnails. And then I have to manage the comments and emails and the social media and reply to everybody. And then I've got to look at my competitors and what my competitors are doing and make my video is better and then innovate the product or innovate the video content. There is so much, So there is definitely a lot to think about as I put all that out to you right now, it's probably going to make you really overwhelmed. But don't think about any of that right now. Don't think about taxes, don't think about making the perfect thumbnails. Don't think about finding the best editing software. Don't think about the best gear. Don't think about the best cameras, don't think about the best lighting setup because right now as I film this video, I'm using natural light from the window is right here. You don't need fancy lighting, you don't need fancy gear. You don't need fancy editing software. Yes, sure. Later on down the track, of course, get better with your video content. You do need to get better with your video content because that's part of what business is all about. It's about being better than your competitors who are also are in the same niche, making the same type of content, is you? Yes. You do have to get better at making thumbnails. Yes, you do have to give better at engaging with your audience, of course. But when you're just starting out, do not put the pressure on yourself by looking at accounts that have big followings, big view counts, and that I'm making thousands of dollars per video. They're not the people too, necessarily be overly obsessed with. You really just need to be in your own world and start your journey and realize that everybody, even the people that you look up to, started from the bottom as well. Everybody start at 0, everybody starts with 0 subscribers. You're starting with 0 subscribers. I started with 0 subscribers. Like everybody starts somewhere and take the pressure of yourself. Get the camera out, start making videos and enjoy the process. And that's why it comes back to not how to start a YouTube channel. It is why, because when you figure it out and you get clear on why you're wanting to start this journey, then it's going to motivate you to get through the tough times because I guarantee you there's going to be times when you're editing your videos and the software is going to crash. There's going to be times when you're editing your videos and then you put your memory stick in your laptop and then the card is corrupted. That's what happened to me when I shot a bunch of videos on Mount Kilimanjaro, a mountain in Tanzania which are shooting videos there. I lost all of my content from the dissent, from the summit all the way down to the bottom of the mountain. My memory card was corrupt and I can never get that footage back. I almost cried and I was just starting back in 2017. I was just starting to make that kind of travel adventure content. I almost gave up when that happened. So you're definitely going to have rough times. You definitely have times when the software is going to crash. Your memory sticks gonna be corrupted. Door, not going to be inspired to make videos. You're going to have craters block and not think of anything that you can make content about. You're gonna have times when you're gonna go for super long walks, do a bunch of yoga classes that try and unblock your mind to get that creativity flowing again. Yes, you're going to have all of that and much more. That's why it's about enjoying the journey, enjoying the process, and just having fun with it. And yes, you're going to have bad times. It's part of the journey. But I tell you right now, this is much more fun than like working in the corporate world. You know, I've experimented with many different types of content on this channel. I've spent thousands and thousands of dollars of my money that I was making from my corporate job, making videos for this channel, just to experiment to see if that content would go anywhere. Like for example, the fitness streets series on my YouTube channel, that was probably worth over $20 thousand making all that content each trip to fitness cost me around four to $5 thousand. And that was literally money from my savings account just to see if that content will resonate and just to see if anybody would watch it. There are times you're going to make a gamble. You're going to try different types of content. If your experimental like me and it's not going to work. And that's completely okay because that's part of business. There are things that you come up with in business, ideas, products, and services in a normal business that may not work. People may not buy them. People may not care about them. Dashed is part of business, and YouTube is just another business. You might make content that nobody cares about. You might spend hundreds, if not thousands of dollars making one video or making a series of videos that nobody cares about. What I climbed Mount Kilimanjaro in Tanzania back in 2017. That was a 8 $9 thousand project. Yes, I wanted to climb the mountain, but I also wanted to create videos on my climb of Mount Kilimanjaro. I wanted to make a daily video of my experience climbing Mount Kilimanjaro. Now, those videos performed terribly. Nobody watched him, nobody cared. And always kinda heartbroken because I really wanted those videos to work. I spent almost $10 thousand on flights, accommodation, the trek, the gear, filming all the content. I spent so much money on batteries and cameras and backup batteries and memory sticks to try and capture my entire experience of climbing Mount Kilimanjaro. And yes, it took me months to edit that footage and nobody really watched those videos. Yes, that can happen. But as of 2021 on still going. And I've fitness street is the latest project that I've been working on and that has been a success. So the point of this conversation is to really share with you that there are going to be many times when you're going to fall down, there's going to be content that you try that no one's going to watch, nobody's going to care about, but that's part of this journey. You're going to make videos. They're gonna get three views. You're gonna make other videos that are going to get 300 views. And the other videos any at tens of thousands of views. And maybe you might be lucky. You might get a viral video that gets a couple of million views. So your little project after this video is to sit down, grab a journal, and, or write it down somewhere. Why is it that you want to start this journey? Why? What is the reason? Because that is something that you're going to continually look back on when you're going through the tough times and you're going to forget the reason why the boys go back to your journal and reference that and go Actually, it's tough now, but I'm doing this for quite a cause and doing this for a grad admission. And that's what's going to keep you going for the tough times. So I hope this is insightful. Do you have any questions? Let me know and I'll see you in the next video.
4. Getting Started- My Minimalist Vlogging Gear: Welcome back everybody. I want to share with you my minimalist vlogging gear setup as of 2020 one. I've been doing this for over five years and I'm going to share with you a very simple, lightweight, compact, very cheap way of getting started with your vlogging journey with the equipment that I'm about to share with you in this video. As I said, I've been doing this for about five years now. And I started with very, very simple equipment. In fact, in 2016, or throw the image up on your screen. I literally had just a GoPro where the bedside lamp as my light source. And that was mounted on top of a guitar case. That was my tripod. So literally when I started, I started with whatever equipment that I had at the time. And also a lot of my earlier videos were shot on my mobile phone device. And as you know, mobile phones these days have incredible cameras and video capture ability. So I do recommend start using your phone and start practicing shooting videos with your phone. That's how I started. So let's go through my minimalist walking equipment and I'm going to share with you what I use. And at the end of this video, I'll share with you some other equipment that I now use which you can work toward once you've got a couple of years of experience in creating videos. So let's go. Okay, so the first bit of gear that I've been using for years now to make my travel adventure and fitness adventure videos for YouTube and Amazon Prime has been the GoPro. I've been using this for over five years and I started with the hero three. Now I'm up to the hero seven black fantastic camera. It's been flying with me, scuba-diving, snowboarding. It's been to meu tie kick boxing camps in Thailand. I've shot hundreds and hundreds and hundreds of videos with literally just this little camera. I actually have several. Gopro is now just in case I lose one, I have backups. But if you're just starting out, you only need one. Also, if you look at my older videos, they were shot on my mobile phone. And so this is a fantastic, often underrated camera you can use to ship, to start shooting blogs. Most people have a mobile phone, most of you have a mobile phone. This is fantastic. I highly recommend that you start with this. So once you have your camera sorted out, now it's time to get a tripod or a gorilla pod and so or a selfie stick. So the ones that I've been using for over five years now have been the gorilla pod right here. And I'll link these up on your screen. And I bought these off Amazon. And this gorilla pod here cost me around $30 from memory, maybe $40. It's a fantastic little little tripod that you can also turn into a bit of a selfie stick. Grab all three legs like this. You can kind of use it as a bit of a selfie stick or you can kinda mounted on a pole or you can mount it off a tree branch. I've done so much with this fantastic. You can kind of bend and buckle these legs anyway, you wish, depending on what you're mounting it to, It's brilliant. This is an absolutely awesome must have if you're getting into video blogging. And also if your video blogging with your camera, you'll notice there's an attachment on attachment on the top of this. It's a little tiny attachment that you can put your mobile phone into the sea that expand out there. I can easily get my mobile phone and I can just drop it into this attachment. And there we have it. So this little attachment here costs about $5 from Amazon. And I'll also throw that up on your screen there. I highly recommend this, especially if you're planning on vlogging with your mobile phone. And so literally all you need to get started with the minimalists blogging setup is a gorilla pod like this with that little tiny five-dollar attachment, that of course, most of you guys have a mobile phone. It is that simple. If you don't want to spend the 30 or $40 or so on this little Gorilla Pod, then you can opt for the cheapest 10 dollar versions of the gorilla pod. I paid $10 for this off eBay. And this is also fantastic. What I go traveling pre pandemic, Not right now. I usually take two of these little tripods just in case one breaks, I have a backup. But if you don't want to spend the $30 on the job, then, you know, $10 will do the job. And of course, extra batteries and extra memory sticks. So this kind of goes without saying if you're doing a lot of travel adventure or outdoor videos, of course, take lots of batteries with you. Now for me, I have four extra GoPro batteries here. Now, I did have more but you do lose them. So I usually carry 464 to six go pro batteries with me. I take all my go pros with me. They also have batteries in them. So if I need to use those batteries, I'll just pull them out and also extra memory sticks. Now, this here is a memory stick case. I do highly recommend this. I don't know how much I pay for this. I can't remember, but I'll throw it up on the screen. So this is where I store all of my two memory sticks. As you can see, before I go traveling, I do take around five or six memory sticks with me, but this is a perfect little hard case. There has a nice solid clip on there. And this is fantastic if you are carrying lots of memory sticks. And of course, if you're making lots of travel videos or lots of logs, then you're going to need somewhere to store them. Once you take them off the memory stick, what are you gonna do with them? So when I first started out my vlogging journey back in 2016, I was literally using these hard drives here. So these are five. I think there's a four or five terabyte heart. No, these are four terabyte hard drives. These ones here from Seagate. And I put labels on them so that I know what videos are on these hard drives. And actually over the years you do accumulate lots of these hard drives. There's another one here. So I've got here two hard drives here, about four terabytes each. So there's actually another type of hard drive which are throw it up on your screen, which is actually more sturdy and durable for traveling. It can get knocked around and it will most likely survive a couple of NOX. Whereas if you drop these hard drives they will damage, which is why I take a little carry case like this and that helps to protect this hard drive. Now, I will point out that you'll get to a point where you have too many of these hard drives and you will have to make the decision of upgrading to a some kind of symbology system or a redundancy system, which I'll talk about in another video. But I actually have the phonology system down there in my living room and I spent a lot of money on it. It's definitely not for somebody who's just starting out a vlogging journey. But I only bought that last year, so I'd already been making videos for four years. And I had about, I don't know, nine or 10 of these hard drives. And it was starting to worry that if I lost one of these hard drives that I would lose a lot of content. So now I have a redundancy system and now to have to worry about, you know, one of those hard drives crashing. Because if one of those hard drives crashes in the symbology system, then I don't lose all of the content, which I explained in another heart and another video talking about the phonology. And lastly, of course you need an editing laptop. So an editing software. Now, to be honest with you, when I first started making vlogs, I actually started by making them on my mobile phone. So I know that sounds crazy, but a lot of my fitness Street videos, if you're familiar with my fitness streets series on YouTube or Amazon Prime were actually shot on this mobile phone, right? And I actually edited those videos on this mobile phone. And I uploaded it in from this mobile phones. So to be honest, you don't need a laptop if you're just starting out. I have a laptop now and I make all my videos off my laptop now. So I'll throw up on the screen what laptop I use, and I've been using this laptop for years now. I have the Zeus Jill 1750 to v w. So I've had that for years now and I've now edit with Adobe Premiere Pro. I actually teach people how to use Adobe Premiere Pro in other videos. But I've been using that software and that laptop for years. So start with making videos on your phone. You can get apps on your phone to edit those videos. But eventually you want to use a proper editing laptop, which has a really powerful graphics card. Okay, So a few other accessories that you might want to consider when you're creating your vlogs and you're just starting up your vlogging journey that some of you guys asked me about is the microphone that I'm recording on right now. I know some you guys life the quality of this audio that's coming through my videos right now. And so if you wanna do vlogs where you're using this microphone, it's a little lavalier microphone that's clipped to my jumper here. I paid $50 from Amazon and it's what they call a boiler M one microphone. It's a really, really simple microphone. It's literally just a microphone with a clip. And it's got like a little battery condenser sort of thing here. And it is a wire that connects back into the main camera. And you can plug that. You could plug this microphone into recording device like this as a little recording device that are used for some of my videos. You can plug that into your smartphone. You could plug it into any other camera, and generally it will work. And so the audio quality is fantastic. There's a little tiny on-off switch here. Says make sure you turn it off when you're finished with it. Don't leave it on overnight. Otherwise, you'll flatten the battery. Another fantastic microphone that will help you make really amazing high-quality vlogs. If you're doing voice over work is the Blue Yeti USB microphone. This is incredible. I've had this little microphone for about four years now and are paid a $180 for, I think Australian dollars, a hundred and eighty hundred and seventy Australian dollar. And this is literally just a USB microphone that plugs into your laptop. And you can make some really crisp voice overs with this simple microphone set up here. And there's like a little bit of a foam covering that I purchased as a separate thing, but that's the exact one that I've been using. I'll throw up the link on the screen so you can buy it on Amazon if you wish, with a little bit of a foam cover on top. Like that fantastic microphone. And two other bits of equipment that I use now for my vlogs is the camera that I'm filming on now. It is the EOS m5 camera by Canon. It is a fantastic camera. You don't need to run out and buy this camera for day one of your videos. I only bought this camera like 2.5 years ago. So only when you start getting more serious should you invest in a camera like this. But if you like the quality of this video, if you liked the quality of a lot of my recent vlogs on the YouTube channel that was shot on that camera is a mirrorless camera. I can change the lenses in an out. It is a lightweight camera and the autofocus is super fast. And so if it loses focus, it gets back in focus super quick. And you know, it's a, just a brilliant camera. And coupled with that camera, I use this microphone. If I'm not using this microphone here. So this microphone is actually plugged directly into the EOS m5 camera now. But sometimes I use this microphone here. If I'm shooting videos outside on the run, this is the Rode Video Mike ProPlus and I did spend quite a bit of money on this. But definitely you don't need this microphone if you're just starting out your journey. But this microphone has unbelievable audio quality, right? So this just sits on top of my EOS m5 camera and they just plugs into the side of the ESM five camera. So that microphone is awesome, totally awesome. As if you want to look at other popular vlogging cameras that you could use if you don't, if you don't want to use a GoPro or your mobile phone, you could use the G7 X mark three. Another fantastic camera that's easy to use. It's super cheap. It has a flip out screen. And so that's another popular one that guys use as well. Another one is the 86400. It's a Sony camera and another camera that bloggers use, and also the A7 S or so by Sony. You should look into those cameras as well. I'm not going to talk about them in this video, but definitely check out those are the cameras. So that is it. I hope this was helpful. This is the little bit of an insight to what I use. And I might make some separate videos on my laptop and also the lighting and how to set up your lighting as well. Otherwise, I hope this was informative and I'll see you in the next video.
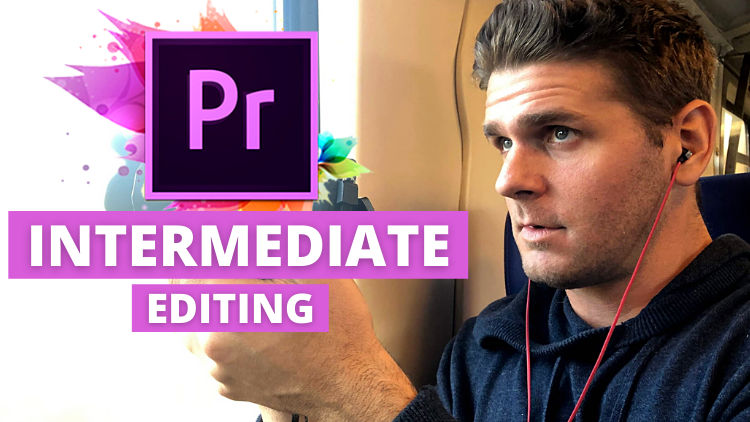
5. Getting Started- Join Me! Beginner & Intermediate Video Editing: I hope everybody is enjoying this course. I just thought I quickly jump in and let everybody know that for the last 5.5 years, I've been using Premier Pro to edit my videos and my vlogs. And I also teach absolute beginners like yourselves how to edit inside of Premiere Pro. I have a course here on Skillshare, which you can come and join me in if you wish. It's called Adobe Premiere Pro CC beginner video editing. So this is the thumbnail, or you can search for it in under my profile name here. But before we finish this course, come and join me in this course, get it ready to go so that when you finish this one, you can come and join me in the beginner one. But essentially I cover everything from the fundamentals right through to really cool effects, sound effects, background music. I keep it really simple and really straightforward. There's over 14 hours of video content, over a 120 video tutorials. So come and check out this course. And if you're really interested, you can come and check out the intermediate one, which I just released as well. If you want to take your editing skills to a whole new level. So come and join me in the beginner and intermediate course when you finish this course that you're on now, and I'll see you over there.
6. Mindset- Just Start Making Videos: Just start filming. Just start making videos. Just start making videos. Right? I get it. A lot of you guys overthinking your first set of videos here. You've got this YouTube channel now. And you're still thinking about what gear to use, which by the way, it doesn't really matter in the scheme of things. I still get that question. What camera you use, what lighting, what microphones, what editing software it look, it doesn't matter, right? It doesn't really matter. You're overthinking this. There's no need to overthink this. I have a really interesting way of looking at this. I like to think of the beginning stages of a YouTube channel journey as almost like a dress rehearsal. You have 0 subscribers. Therefore, no one's watching you, right? Which is a good thing because in the very beginning stages of a YouTube journey, you're actually still learning how to talk to a camera. Like you're still learning how to articulate your thoughts on camera, comfortably, taking and being able to breathe, you know, like just getting comfortable with the camera is not easy for most people, right? And being able to speak coherently message across, you know, it doesn't come naturally to a lot of people. Your first set of videos, the first 5000 videos are, so I literally just going to be really just you practicing this by talking to a camera, right? It's a dress rehearsal. I think of it like an athlete. Almost. As an athlete, you're training in the dark, right? You're doing the reps, you're in the gym, you training, no one's watching you. And I did competitive like bodybuilding back in the day. And I was in the gym late at night. No one was watching me. Nobody was in the gym but I was there on my own, lifting training, practicing, practicing, practicing. Nobody was watching me at all. All dress rehearsal stuff or preparation. No one saw it. And then I would come out on stage in front of hundreds, hundreds and hundreds of people in front of judges getting judged on my physique, right? And then I want a bunch of competitions. It was literally like a hundreds and hundreds of hours of in the dark dress rehearsing, practicing behind the scenes. Nobody was watching me. And then I came out in the spotlight with judges and all that kinda stuff. So I see video creation no different. I see this journey is literally being the early phase is, is literally a dress rehearsal for like the latest stages of your journey when you have a few more subscribers and a few more people will see your content. By then, you'll be more comfortable talking to a camera. You won't be as intimidated. You'll feel more yourself, but you just have to start making videos to get that wheel going so that you can get this journey up and rolling. So to stop overthinking, there's, this is a dress rehearsal, just not making the content no one's going to watch anyway, which in need to have, you need to have that dress rehearsal period. And there's no perfect time. There really is no perfect time. You know, they say the best time to plant a tree was I ten years ago, and the next best time the planetary is now, right? For example, I'm shooting this video and I'm actually holding this microphone. You probably would have noticed. I'm not going to wait for the perfect time for new clip to arrive in the mail so I can have it here. Um, I can just hold the microphone and say the same thing anyway. Like it doesn't really matter. You don't have to have the perfect setup all the time. You just have to start talking, start making content. For example, I started with my phone, literally everyone has one of these. I'll do right now, like my phone set up here. This is how I started my channel. So we'll get a selfie mode like this. Or I've got a video doing this live. I guys, This is my first YouTube video. Brad said I had to make a video for you guys. It is the 26th of May 2021. We're in a pandemic right now. And so just sitting here that I've set up a YouTube channel and brands that I should stop overthinking and just start filming. So here I am on my phone. I know nobody's watching this, but I also love flying planes. So if you enjoy flying planes or aviation, maybe subscribe and we can chat about it. If you are fitness and subscribe because I also love fitness. If you love supplements and trading, love that too. So anyway, this is my first video, super awkward, super weird data. What I'm doing, just using my phone here. Yeah, Brad, Tom and I do this. Yeah. Thanks for watching. Yeah, ciao, bye. Bye. Anyway, you get the idea, just messing around, but that's how you do it to start with the phone, start making content stopover thing in this, and feel free to share a channel with me in your first set of videos with me, and it's all good to start making videos.
7. Mindset- Don't Focus on a Niche: Sometimes it gets confusing about creating content. Some people will say, you know, just pick a niche and make content on that niche. Other people will say, no, don't box yourself, don't niche down. Just talk about everything that you're passionate about. And in my opinion, I think if you're somebody who knows what you want to talk about and what you want to share with the world, what you want to educate the world on, then that's amazing. You just pick that niche and run with it. And I'll talk about that in another video about just talk about the thing that you enjoy and love the most. But if you're someone like me, I have multiple different passions. I love flying planes a lot more TO kick boxing. I love traveling, travel adventures, flying drones, training and fitness and all sorts of stuff. So when I first started my journey, it was mainly fitness, but then I incorporated many different types of content in my channel. And so I always tell people that are just starting out, you don't know what's going to resonate with you as someone who's creating the content or even people that are watching the content until you start making the content. So right now in the beginning stages of your YouTube journey, you should be making content. If you're one of these people like me, you should be making all different types of content around the things that you enjoy the most. And then just seeing what resonates with you and what seeing and see what resonates with your audience. Don't just focus on one particular niche, right? If you have multiple different passions, if you loved multiple different things and you're just starting a YouTube journey and you don't know where to start. Brad, watch it and make content on. I have seven different things that I'm interested in. Should I pick one thing and stick with it and just write that one out? Should I have seven different YouTube channels? I was taught people when you're just starting out and you have multiple different passions, multiple different interests, and you don't know where to start. You just got to start somewhere. Make content on all of those things that you're passionate about because you don't know where it's going to lead. You know, there's a thing that I find interesting is that, you know, for, for me, I really love scuba diving. I love scuba diving. I've done almost 1890 divs. And I started making scuba diving videos on my YouTube channel. And I got about 20 something scuba-diving videos. And I actually didn't like making those videos anymore. And at the same time, people didn't really like watching them. And so I ended up just moving into something else. So I still love scuba diving. But I had to make 20-plus videos to figure out that. I don't, I don't want to make those kinds of videos. I'll go scuba diving, but I just want make the videos. So rather than me just sitting down and going, Should I make scuba diving videos? I don't know. I just did it and then I made the decision after the fact. And what you'll find is that as you're making videos on all different types of things that you're passionate about or interested in, is that over time, you know, videos will start to pop, right? And if you have hundreds of videos on your channel of all different types of things, some of those videos will pop. And then you can sit back and go, you know what? That video is done pretty well. And at the time I actually enjoyed making that type of content. I might make more of that. But you don't know until you make the content right. Rather than sit down and try and my asha do this, should I do that? Should I make this type of content and then work yourself into a frenzy? And then you spend weeks and months and you procrastinate and you don't make any progress because you're inside your head trying to figure out, should I make content on this? Shouldn't make content on that. Should I do this? And then you're looking at the competitor or other people and you try to copy them, but you're trying to get inspiration. Just make content on everything that you're passionate about. If it's seven different things, amazing, makes seven different types of content. Play that out for 50 to a 100 videos and then reassess. And then when things start to pop, you can go deeper on those areas. My YouTube channel started as a fitness vlog. Specifically, I was only talking about bodybuilding and getting ready for competitions and local competitions in the world titles. And my journey to competing in all these different competitions. I had no idea that my channel would evolve in a way where I would be known as the fitness street guy, right? Which is a whole other discussion point, but I had no idea that that would happen to me. But I had to kind of allow my channel and my personality to grow with my channel. And so my channel kind of evolved into this niche where I'm known as fitness street guy. But I had to start at the very beginning talking about other stuff and then just kinda naturally let it move into where it is now. And to be honest with you, I don't know where it's going to go in the next couple of years because we're in a pandemic now. I don't know. I can't travel. I can't go to fitness straight anymore, so I don't know where it's gonna go. And you might be thinking, Well, Brad, All, you might be trying to figure out that the ultimate direction of your YouTube channel. But even now 5.5 years later in a pandemic, I don't know where it's going to go now, but that's kind of exciting. Really. Don't know, it's exciting, but it's a little bit nerve-racking. I mean, even with Mr. Beast, he started with just making gaming videos and then he's channel evolved into what it is today. But people that don't know, Mr. Beast, this history that don't know that he started by making these gaming videos, right? So once again, if you don't know where to start, just dart, make videos, and see how you feel about the content you're making and what resonates with your audience and just let your niche evolve over time. That's it.
8. Mindset- Quantity over Quality: Quantity over quality, or quality over quantity, which one should I focus on? Here's my opinion. Made a lot of videos over the years and I'll tell you straight up point, you're first starting a YouTube channel journey. It's a quantity game as a game of putting out content around everything you enjoy. If you only have one particular niche you want to focus on put as much content out around that niche as possible. As many videos as you can possibly put out within a week or no, you, most people watching this have a full-time job and you, maybe your parents, or you have a social life and you want to have a bit of a community and social life, as well as make videos. So you need to figure out a schedule, but I always tell people when you're first starting out quantity, quantity, quantity, make as many videos as you can for me, I made a video every day for the first 14 months, pretty crazy. Not a lot of people are going to do that and that I completely respect that are probably would never do that again. But the point is, is that when you make more videos, in the beginning, you learn very quickly how to edit videos. You get very quick. We get better actually at not just making videos be get better at talking to a camera. You get really comfortable very quickly talking to a camera. At the same time when you're making lots of videos, your quality will, the quality of that content will naturally get better? You know, of course, it's like reps. You and you go to the gym and you do dead lifting or bench press three times a week. Of course, if you do bench press or dead lifting three times a week over a period of six months versus somebody who only does dead lifting a bench press once a month over six months. Of course, the person who's in the gym more often is going to get better at those lives. So I think if making videos like doing reps, you know, the more videos you make, the more reps you're doing, the better you're going to get over time. That is his what happens? Now? Of course, later on in your YouTube journey for me, this was around 15, 14, and 15 months. In. Then I took a step back and was like, okay, now I need to really get better with the quality of my videos. And so I went from doing a daily video to doing a video like once every now it's doing a video three to four times a week. And so that allowed me more time to improve the production value of those videos. Another benefit of quantity over quality when you're first starting a YouTube channel is that you're also giving your channel more of a chance to take off. Because the more, the more videos you have in the system, right, the greater chance that YouTube's going to pick up one of those videos and really propelled that video forward. And that video is going to help bring the rest of your channel up as well. For my YouTube channel, there's only, there's only like four or five videos that are really heavy hitters that are really like bringing the whole channel up. I've got almost 700 videos on one channel and is literally around 67 or eight videos that are doing most of the work to bring the rest of the channel up. But had I not made hundreds of videos, I probably wouldn't have had those couple of videos. I would have done the work for me. So you're going to make lots of videos. By making lots of videos. There's more videos in the system to allow your channel to grow.
9. Mindset- Don't Focus on Vanity Metrics: Don't worry about the numbers. Don't worry about subscribers, don't worry about comments, don't worry about views, don't worry about how much money you're making per video. Don't worry about all of the vanity metrics that a lot of other creators tell you are important. There are so many people on YouTube that make videos on how to get your first 100 subscribers, thousand subscribers, 10 thousand subs. How do we get more views in 30 days? How to get more comments, had to get more engagement, how to make money, more money on YouTube. There is an overabundance of content that feeds to your desire to achieve certain vanity metrics when you're first starting out your YouTube journey, this is absolutely essential. You can't watch any of those videos. It will throw you off. Because what will happen is you'll start making videos and then you jump into the analytics and you'd go, how many views as this video got three views. And then you start looking at other kinds of videos that your competitors making. All your people that you admire and your, they're getting millions of views. I'm only getting three views, or they have 4 million subscribers. I only have four. And I've spent three days making this video and no one's watching it, I'm wasting my time. I'm working full time job. I might as well do something else and then you delete the video. This is what happens to most people. This is why I tell people, you know, you can't focus on any of that stuff. Views subscribers, how many comments are getting, how many shares you getting? Because for the first six, 12 months, even a day months, you literally have to go in blind folded to analytics. And just focus on what really matters the most that is, getting better, making content, getting used to talking to a camera, getting used to articulating your thoughts. A camera, this is what matters the most when you get good at this sort of stuff. And I haven't mastered it, I'm not, I'm nobody special really. Like I've done I've done this a lot, which makes me a whole lot more comfortable than when I first started. But when you get good at this and you get, you focus on the message that you want to share with the world. And you get better with your content and your storytelling, then all of the other stuff corner just happens naturally, right? When you get better making content like this and sharing your experiences. The views come, the subscribers come, the money comes. But when you go and chase that stuff directly, then you would just give up. There's a period of time where no one's going to watch your videos and that's you have to accept that you cannot look at the analytics for, for a period of time when you're first starting your channel, I would, I would argue the first 12 months of not looking at your analytics at all, just make videos around the things that you enjoy would be equipment that you have. And then later on, you can look at stuff like that. But not when you're first starting out. I think you'll find this interesting according to Tube Buddy, right? Channels that have between 1010 thousand subs have an average of a 152 videos on their channel. And you can see the other stats there for the bigger channels, how many videos, on average, channel hovered over a million subscribers. Don't complain to me that you're not getting any subscribers. If you've only made ten videos, make a hundred and fifty, two hundred videos, and then start looking at where you can make tweaks and changes and improvements in your video content, in your storytelling, in your editing and all that other stuff. Make videos. Make videos, make videos.
10. Mindset- Results Don't Come Instantly (Patience!): I know exactly how frustrating it can be when he's spent so much time shooting a video and then editing it, and then doing the thumbnails, doing the titles, doing the tags, doing the research, watching tutorial videos on how to try and rank that video, the algorithm, it goes on and on and on. And then you publish the video and then nobody watches it. Seven views, 14 views, 33 views, 52 views. This was my life for the first 18 months on YouTube. Most of my videos got no more than 50 to a 100 views of peace. Some videos got over a 100 views, but most got no more than around 50. And so this video, to give you real life examples, I'll show you in just a second on my laptop, where even if you publish a video and nobody watches it for the first day or two days, or six months, or 12 months, that that video can still pop. So I'll give you real life examples where this has happened to me. I've made over 600 videos, 700 videos on my main YouTube channel. And I've made many different types of content. So I've done a lot of different experiments. And so I'll show you why you should just keep making content even though nobody's watching. Because eventually that video could pop, doesn't mean it will definitely pop. It could explode. So I would jump into my laptop now and I'll show you some videos and I'll show you where this has happened. And I'll also show you where videos have just died. I've published the video and I've spent a lot of money making that video, a lot of time editing that video, and then nobody watches, at least six years later. So the first video I want to show you is a video that's part of my mind, my series that I shot a couple of years ago. And when I publish this video and I'll bring it up on your screen right now if he can't see it. When I published this video, it I published it back in April, early April. And if you have a look here, when I published it in April, May, June. Alright, so around here, end of June, right? End of June. So that video, 87 days after I published it got no more than about 5.5 thousand views right? Now we're just talking specifically about views. And I talk about why quantity of use doesn't really matter in the scheme of things. And I'll talk about that in another video. Have a look at what happens here. June 29th suddenly happened in the algorithm and I made no changes to the thumbnails. I made no changes to the video itself for this to happen. I did nothing on my end, but something happened in the algorithm. And all of a sudden this video ballooned out to 43 thousand views in a period of around a month or so, it just completely blow out. And then since then it's kinda just been steadily growing over time, right. So sitting at 75000 at the moment. And who knows there could be another pot that will come up at some point in the future, but who knows? So this is an example of where you just need to be patient. I keep putting out videos and you just never know when a video can pop, even though it hasn't popped in the first day, two days month, or two months, or six months. It doesn't mean that video will never pop. So this is a classic example where this has happened to me. I'll show you another video. Now, this is a classic example. This is one of my favorite examples to show people. This is a video I shot back in June 2017. So four years ago, I made this video when I was doing supplement review videos on my channel. So this video I made back in June 12th, 2017, when I published that video, it got no more than 0 views. One view, Here we go. One view on that day, 000 to 0. So if you have a look closely, most days, that video got no more than one to two views a day, right? Some days he got no views, you got nothing. And I spent time making these videos, right? And so if I publish this video, what, June 12th, 2017. Let's go to the timeline here. Right. So around here, February 14th, 2018. So well and truly, you know, six months, seven months later, starts getting a couple more views. 12, use six, fuse three views and I'm views really not much. Now we're in July 2018. June, July 2018, right? So that's 12 months after I publish this video. This video is getting no more than a couple of views per day and that is it. Watch what happens now, I don't know what happened in the algorithm. Again, I made no changes to this video. It all of a sudden started popping a little bit. As you can see there, it's growing, growing, growing. And then around here, around November 2018, I got an email from optimum nutrition, the company. I did this review video of now it wasn't paid or sponsor to make this video. That's a supplement that I have I've been taking for years because I have a background of fitness and also passionate about talking about these supplements. I made a video on it and nobody watched it. And then someone in the marketing team and optimal nutrition saw the video around November 2018 and they contacted me and they're like Brad, We saw your video, it's amazing. We want to use this video in your upcoming marketing campaign. Do you mind if we use it in exchange? Will send you some stuff in the mail. And I was like, surely this is a scam, right? Like are probably okay. All right. So as I okay, send me the stuff and then they use the video in their marketing campaign. And they said this to me in the mail. So that's why I'm wearing it in this video because I thought was pretty cool that I made this video. Nobody watched it for the first 12 months. And then optimum nutrition watched it in a torments later. And then they said this to me in the male, this nice little op nutrition Jersey, which I still wear every now and again. And I thought ever since that happened, it changed my perspective on views on YouTube. This is one of the biggest lessons I've learned from YouTube. And that results don't come instantly in. You have to be patient. And that is, it's not about the views, it's about the right kind of view. Because even at that point around November 2018, there wasn't a lot of views on that video. You know, they probably would have been like a 1000 videos map, sorry, 1000 views or 2000 abuse and max at that point, lifetime views at that point. So one of the biggest lessons for me after their happened was that it wasn't about viewCount. It wasn't about quantity of US. It was about the right kind of eyeballs. It just takes one person, one view. That's the right kind of view that can completely change the trajectory of your life. And in this case, it didn't change my life, but it definitely changed my perspective in that even though a video and you had a couple of thousand views, it was from accompany that are absolutely love. And they said this to me in the mail. And so that's something to keep in mind. The right kind of view is something to think about That's continue on. So as you can see with that video, I mean, it's got 32 k now and it's kind of just been up and down over the years. But I always use this as an example when I show people this took 12 months for this video to go anywhere and for someone to see it at optimum nutrition. The next video is a video that I shot when I was in the Philippines in one of my Philippines series. And this video, again, sitting at 45000, 46000 views at the moment. Now, when I shot that video back in February 2018, again, I put it out there, 26 viewed as nine abuse, 10 views. Like it really gotten nothing at all. It was quite a dead video. And so if you're in this situation, I know exactly how you feel. I have been there are a lot of my videos did not perform at all for the first few months, six months, 12 months. And I'm trying to prove this to you using actual examples, that it's okay to feel disheartened. It's okay to feel discouraged. I know you feel like giving up. I know you feel like this is a waste of time, but you just got to be patient, patients, patients, patients because this video, same thing happens right? Now. This video is a completely different video like this video is at one of my travel videos. Completely different to my settlement review video, which is very different to other videos I've filmed on this channel, but have a look. I publish this video in 2018 and then have a look around November, December, December 2019. All right. So look look at this I mean, this video all of a sudden started popping around here. December 2019. So what's that? Almost two years. Almost two years. This video didn't do anything to years. And then all of a sudden starts popping a little bit. So it's popping a little more. And then it settles down and then it spikes again and then spikes again. Now, this video was put onto a Reddit forum. So every time this video spiked, it was somebody who was sharing it on Reddit. So it's getting a lot of people from Reddit watching this video and leaving comments. I was who's here from Reddit. And so that's why these videos, this video has spiked a few times. But the point of the matter is, is that as a result, this video has got 4,546 thousand views. But for the first two years he got nothing. So again, patients. Next example. So this example is my Kilimanjaro sues were to talk about in another video. Which was unfortunately a series that did not do well at all. So this is an example where I spend almost $10 thousand going to Tanzania taking all my filming year. And my intention was to make a daily video of my climb up Kilimanjaro because no one at the time had made a daily video climbing Mount Kilimanjaro. And I thought that'd be cool. People probably want to watch that. You know, it'd be pretty cool to see someone climb the tallest mountain in Africa every day. What is it like a daily journey of climbing a mountain That'd be cool. So now no one ever done that before and I thought, well, I'm going to be the first to try it. It was a $10 thousand risk or $8 thousand risk. But I did it anyway. Long story short. This series did not work. So this was a series I shot end of 2017. And as you can see here, we've got day 1, day 2, day 3, 4, 5, 6. The summit night was day seven. That was the only video that got a couple of thousand views, right? That was the only video that kinda performed. Performed couple of thousand views, right? I'll give you an example of a video that just did not pop, at least as of May 2021. So this is day 4 of Kilimanjaro has a lifetime view count of 926 views, right? But have a look here. You can see here almost 013 and so on. But as you can see as we go through the years, it just gets less and less and less and less and less. So this is an example of a video that started off kind of strong, but then just completely nose dived, right? So that can happen. And this video made $2.89, $0.02 dollars, eighty nine cents. As I said in other videos, you have to take the risk, right? When you're starting a YouTube channel, you become an entrepreneur. As an entrepreneur, you are a risk-taker. That's the inherent nature of being an entrepreneur is being a risk-taker. That's go to the next video. So this video is one that has performed reasonably well from the very beginning. So this is another type of view velocity that I found on my videos, where this video here was shot in London. So this is one of my London vlogs. My first time in London with my girlfriend or my girlfriends, half British. So she was taking me on a tour of London. And so I made this vlog. As you can see, I published the video back in January 2019. And as we have a look through here, it's kind of grown steadily and quickly over time. Now this is definitely not a reflection of all of my videos as you've seen, a lot of my videos have flatlined. A lot of my videos have died and then popped. So I'm just showing you different kinds of u velocity behavior that can happen. And because I've shot so many different types of videos now, scuba diving, flying videos, meu tie, kick boxing, travel videos, Southern Review Videos, reaction videos. I've done almost every kind of video you can imagine. I've got to see how the stats are different from each video and how they play out over a long period of time. And of course, this is my experience. Everyone that creates videos has a slightly different experience. But this video is done reasonably, consistently well over the period of time. You can see the typical, you can see this little shaded part of the graph here, which kinda represents the typical video performance on the channel. So if you have a look closely, I'll try and zoom into that part of the graph there. The bottom part that I'm sort of moving my mouse around is the typical performance for this channel. So this video is performing way above the typical performance for this channel, right? So if we go to the next video example, and this is a video where it's completely flatlines. So it's the same style of video that I shot in London. And then I've shot in Amsterdam and other parts of the world. This was a city vlog. My first day touring my girlfriend around Sydney. And this was an example of a video, exactly the same kind of storytelling, the same cast, my girlfriend and myself. And I put out this video back in April 2019, and it pretty much died flat. As you can see, it's pretty flat. Not much has happened, right? And you can see the typical performance of the channel is that shaded part of the graph. And it's, this video's performed below the standard for this channel. So again, same kind of storytelling. You know, just kind of a similar, similarly story told video, but just performing terribly, at least for now, it could pop in the future, going back to what I said before about being patient. And then of course. The last example I want to show you is a tutorial video. I teach people how to edit videos in Premiere Pro. And I put out that video. This video is put out one January 2021, and it went off to a slow start. And then it popped around here from 778 views, it popped up to 1400. And the now it's kind of consistently growing. But then every now and again it pops a little bit. So as you can see, the performance of each of these videos are quite different, right? I'm the same person, right? It's a vlog. They're all vlogs of different types of things. Supplements, travel videos, tutorial videos, supplement review videos that are all different types of videos. But they're all vlogs. Write my own personal experience with all of these different things. And some videos have not perform very well in the very, very beginning. An energy source six months, 12 months to years later, and then the video just popped. So the point of this video is to encourage you to keep making content. Don't give up if your video has not got the views or the minutes watched, or the subscriber count that you expect it to have in the first month, two months, six months, 12 months. You just got to keep making the videos. You just never know what's going to happen. You never know someone could pick up their video and share it on an online forum, which is what happened with the video of the tarsiers. So this video on your screen right now, this video got shared in a Reddit forum and it got blown up to 46 thousand views just because someone decided to share that video inside of foreign. You just never know this YouTube world is so vast that so huge. And no one really knows how the algorithm works. We can get sort of ideas about how the algorithm behaves. But no one knows, even for me after six years, 56 years now, five years, 5.5 years and 706700 videos on just one channel. I still can't tell you conclusively how the YouTube algorithm works. I have an idea of how it behaves at certain times, but I can never predict if a video is going to do well or not. I can spend so much time shooting a video, so much money making content and have no idea how that video is going to perform in my head. I think it's the best video on the planet. But then I put it out there and nobody watches it. And then I think to myself, well, clearly people don't like the video. I was deluding myself. But then towards months later, two years later, people started watching it because he can share it somewhere and people love it. There are videos which I think to myself there absolutely like terrible videos. And if for example, this video here, the tarsier monkey video, I film that video on my phone, on my mobile phone, which I don't have with me. I shot that video on my mobile phone and it was so obvious like holding it like this, it was really, really rough. That video cost me nothing to make, really just my phone. But as you saw the Kilimanjaro series, which I thought was going to blow up. I thought that series was going to be people going to watch it and it didn't work. You just never know what's going to happen. You've got to try take the risks, make the content be patient, be persistent, enjoy the process. And good luck. And I hope this video was insightful and motivating, and I'll see you in the next tutorial.
11. Mindset- Dealing with Friends & Family Judging Your Videos: I started my YouTube channel in December 2015. I didn't post my first video until six months later. One of the main reasons for that was because I was freaked out about how people would judge me and my videos, namely work colleagues, mates, certain family members. And so I delayed hitting the Publish button for six months on my first videos. So in this video, we're going to talk a bit about my backstory and how I got through that massive roadblock. And I'm going to help you try and get through that as well. Let's go. The first thing you need to know is that you're not alone. Almost every creator goes through this. Almost everyone that I've spoken to, I went through this. If you're going through this, it's completely normal, right? When I set up a YouTube channel in December 2015, I didn't post my first video until six months later, 78 months later, because I had this thing of my head of who's watching. My parents, my mates, my work colleagues, my boss. And so I kept it to myself. You know, I didn't tell anybody about my YouTube channel for the first 12 to 18 months. I didn't care about people that I didn't know watching my videos and judging my videos. I just cared about the people that knew me judging my videos. It's already difficult if you're self-conscious like I was around how you sound, how you look, what you're saying. Are you repeating yourself? Are you using too many arms as buckets? Like too much? Like Yeah, that's completely normal to have all of these thoughts and fears around how you sound, how you look, and being really self-conscious around that. It's really not easy to get a camera and start talking to it around the things that you love. If you've got these fears in the back of your mind, as I said before, the way I got through it and everyone's different. But for me, I just didn't tell anyone that knew me about my channel for a long time. I needed 12 to 18 months to get used to speaking to a camera and really getting down to my truth. And back in those days, the first 12 to 18 months, I was talking about a lot of personal things. I was going through fitness and amateur bodybuilding competitions and I was talking about dating. I was talking about, you know, problems that are had with eating and just really personal things that I didn't want my mates to know, certain family members to know, and definitely my work colleagues. I didn't tell anyone about what I was doing. I kept it to myself and I had to do that because I felt like I couldn't fully express myself if I knew these people were watching me. So I had to build up the confidence in private, if that makes sense. I know it's kinda weird because when you put in these videos onto YouTube, it's not private. The whole world can see it. But when you have no subscribers or very little subscribers, then really nobody's watching it anyway, right? But I needed that air cover, that 12 to 18 months to build up the on-camera confidence to really speak my truth and get better at that. And then over time, I started telling people at work, I started telling certain maids to, hey, I've got a YouTube channel, go and check it out on my own. I hope that ONE scroll right back to the first couple of videos. So there was a little bit of that feel like I'm telling people, but then what if they watch that video that I posted about my ex girlfriend, or what if they watch this video? There was like a little bit of anxiety about telling my mates. And then they're going to watch this video or how they're going to judge. So it didn't go away completely, but it did take time to get over completely. And something that I didn't learn until later on in my YouTube journey is what social psychology is referred to as the spotlight effect, right? Which is the tendency to overestimate how much people are judging us and looking at our flaws and our weaknesses and critiquing us and spending all their time focusing on us. We think that the spotlight is on us at all times. And that spotlight is highlighting all of our floors, all about insecurities, all of our problems. And the truth is, everybody has their own problems. And if I have that self-awareness of people having their own issues, having their own problems, and not really caring about what I'm going through and not really sitting and watching my videos going on, look at that uneasy sort of stain on his T-shirt or his lighting is not perfect. People, I'm not gonna do that. People are going to watch your video. They're going to get three-quarters of the way through it or a third of the way through it. Then they're going to close it and then they're gonna go, All right. I'm going to take my kids to school over to pay my mortgage or I'm about to lose my job, I now need to find another job. So what I'm trying to say is that we think we have the spotlight on us at all times. When in reality, people have their own issues that they're trying to deal with. They've got their focus and their attention on their own dramas, their own problems. They're not trying to find flaws and insecurities and weaknesses in you and your content. When I started my YouTube journey, I thought the whole world was seeing the way I sounded. And all my flaws and weaknesses. Just something to keep in mind. So just a word of advice. If you do make videos at the time you make the video and you feel good about making the content. And then a few weeks later or a few months later, you feel embarrassed and you want to go back through and delete that video. I suggest don't delete the videos that you feel embarrassed by because you're fearful about you're made so your family watching those videos, set those videos to private, go behind the scenes, go into YouTube Studio, and then set the video to private. Because you just never know years down the track, you might want to watch that video. And you might want to show your kids that video, or you might want to just look at that video for your own reference in years to come. So I find a lot of people when they delete videos because they're fearful, they're embarrassed by them. Later regretted years down the track. So set your videos to private. That way you always have a record of them for your own personal reference. So just put your content out there, right? Just put it out there. And for me, I didn't tell anybody. I didn't care if like people I didn't know, came along and watch my videos. In fact, that's what I wanted. I wanted people, I went to lots of people to watch my videos, but just not close mates, close family, and there are certain family members and work colleagues, right? And I just needed 12 to 18 months to build the confidence and the courage and the inner strength to speak my truth. And then later on, tell everybody. So right now it's five years in 5.5 years later. Pretty much everybody knows about this YouTube channel, right? They know about the vlogs, they know about my girlfriend is a lot of personal stuff on there. And I've come to a place where I just don't care. And it takes time, it takes months, years, even to get to a place where you can be completely comfortable putting out content that is your truth and not worry about what your closest mates think of it when they watch it. I know you're thinking that is bad is impossible, but I'm telling you, you will get there. You will get there eventually we all start at the bottom. We all freak out. When we make in this video, we're about to put it out there for the first time. But it is definitely a process. You have to be patient, but I can assure you, the more you do this, the better you'll get, the better you'll feel. And eventually you can tell everybody, your classmates, your close family members about all of your videos to whole channel, and you're going to feel completely okay. So I hope this was helpful and I'll see you in the next video.
12. Mindset- 5 Ways To Feel More Confident on Camera: Welcome back, everybody. I'm gonna give you five ways to help you feel more confident on camera when creating of logs. And I must admit, this didn't come naturally to me either. When I first started my vlogging journey, I felt really awkward and not very comfortable speaking to that, I started in my bedroom. But even prior to 2016 if you look in my old of lochs 14 4015 When I was doing a couple little vlogs here and there just in my living room, I just I can't even watch those videos. I was really awkward. I wasn't looking into the lens. I was looking around a lot. I was just not comfortable at all. In fact, I might even just cut to some of those videos right now so you can see what I looked like back in. I think 2014 just checking in. Decide that today is the 26th of November 2000 and that saying and the times better eight oclock at night and my a T field performance leading exam this afternoon, one PM and to my dismay, found exams. All right, so I like to think that I've come a long way since those early days of shooting videos in my living room in a dark room and talking about my personal struggles back then. But I must say that I'm not an expert on this. I haven't completely mastered confidence on camera, but I definitely have come a long way over the years. So I do need to reassure you that this does take time, and with practice and consistency, you'll just get better and better with it at over time. It's just like going to the gym. The more you go to the gym and trained, the better you become at lifting. That's just how it is. So I'll give you five tips now. The 1st 1 that helped me a lot was I set myself a daily video challenge. Now. When I started my YouTube channel, I said I wanted to make a video every day until I got 1000 subscribers. Now I realized when I got to 1000 subscribers, which took me 14 months, that it was not the right strategy because I was chasing subscribers. I wasn't focused on the quality of my content, which I do talk about in another video. Why you shouldn't be chasing subscribers directly right? But that's what I did when I first started. I didn't know any better. But the point of this exercise was that through doing daily videos every day for 14 months , I practiced not just how to edit videos, but how to speak to camera, how to conduct myself. I learned about myself. I learned about my strengths, my weaknesses. I learned it was a personal. It was a personal growth challenge for May, And so when you're shooting videos every day, you only get better at shooting videos of yourself. So what I suggest you do as a really good challenge is to make a video a day for a week or a month or two months or six months. But I'd probably suggest going a daily video challenge for 30 days, and by doing that at the end of 30 days, you don't have to post to publicly. You can just shoot the video on camera in your bedroom. Believe it on your hard drive. Don't uploaded. If you don't feel comfortable, just practice every day, making a video like court. The 30 day Video Challenge and I can assure you that you'll just get better. You would have made huge progress in those 30 days. The 2nd 1 that I have is look at the lens now. This was something that I was not good at doing when I first started my blogging journey, when I was creating videos by would often look over the wall after one side of the camera wasn't always focused on speaking to the lens, speaking directly down the barrel of the lens. And it's definitely a skill and a definitely takes time Teoh get better at. But when I first started, you know I looked after one side quite a lot, so it's no more. You know, when you're speaking to camera on, you feel intimidated by it. It's quite natural to not want toe engaged with the camera because you see it as very intimidating. I understand, but just get yourself into the habit of like whenever you start to pull away, you know, in shoot videos and what's your own videos and see how you can improve on your own videos and notice these things about yourself and realize all I could do better in the next video . I just need to focus a little bit more on the camera lens now. I'm not saying you need to stare consistently at the lens and never break eye contact, because when you talk to the camera lens, it's almost like you speaking into the eyes of just a normal human being. And so we all know that when you stare into the eyes of a person without breaking eye contact, you can come across a little bit creepy. So every now and again, just break off and come back to the lens just as you're having a normal conversation with somebody. So and a lot of loggers when they're starting their journey and they have cameras for flip screens and the flip screen comes after one side. Often what bloggers do is they talk. They look at themselves talking and they talk into the LCD screen. And when people watch those videos, you don't feel actively engaged in that blogger because you don't feel like the blogger is talking to you. You feel like they're talking over your shoulder and you know what I'm talking about when you see those videos where the bloggers like looking off to one side of the lens because they're looking at themselves in the LCD screen. So that's a really bad habit. Make sure that you just get either Don't use the flip screen right? Right now I'm not using any flip screens. I just know that I'm in frame and you won't have that problem. So the third tip that I have is pretend that you're speaking to a friend. So this kind of touched on this in the second point. We know speaking to a camera is not a natural thing to do for a lot of people. What I did when I first started my journey was that I pretended when I was making all those fitness videos, I just pretended that I was speaking to one of my mates who needed help getting into shape . And so I would pretend that I'm speaking to one of my mates and giving him personal advice , pretending that, you know, he was standing on the other side of the camera lens and I was like, All right, mate, So this is what you need to do. X Y zed with your fitness, with your nutrition, with your training with you, this with your that. And so the moment I made that switch in my head off speaking to a camera which is just a camera to speaking to a mate who would be standing just behind the lens, it made me feel more confident, more comfortable speaking about fitness principles back when I was shooting a lot of fitness content for my channel. So that's another skill to work on as well. The next tip I have for you is make two or three bullet points. Now make two or three bullet points off whatever it is that you want to talk about now, off course, for the sake of practicality, I've done the exact same thing with shooting this video. Right now I have all those five things. This is bullet points to help guide me through creating this video. So I don't forget those any of those five points. So just a good exercise for you. Think about what you're gonna talk about before you turn the camera on. But don't overthink it. Just think to yourself when I'm out in public shooting videos before I turn the camera on, I quickly think to myself. OK, I want to talk about this, this and that. I don't think about it any more than that. I turned the camera on. I shoot those couple of things and then unfinished. So one of the things that I did this is a funny story. Real quick was that when I first started my journey, I thought that I had to, you know, get all of my content out in, you know, everything concise everything out there in one take. So I actually invested in a TelePrompTer and I had a TelePrompTer set up in my bedroom and I spent so much time wasted time figuring out how to use a teleprompter riding everything out. I'll throw photos up on the screen so you can see this. And I was literally trying to talk with a teleprompter, and I said, It's so ridiculous. It was so unnatural. I did a couple of videos using a teleprompter. If you've ever used a teleprompter or thinking about using a teleprompter, I don't recommend using a teleprompter. I just don't for the kind of videos, especially vlogs. Don't you just come across his robotic and you know, just don't do it. I don't recommend it. I did a couple of videos and then I sold the teleprompter because it just wasn't my style. I rather just leave it, make a couple of bullet points and then just talk. You know, just whatever comes to my mind around those bullet points. So that's a good thing to keep in mind. Make bullet points. The last one on my list is staying in your lane. What I mean by staying in your lane is when you're making a travel video, don't go off on detentions or topics or areas that you're not confident, confident talking about or comfortable in talking about. You know, for example, if I start shooting a video and I start talking about politics or human rights or animal rights or any of those controversial topics that I don't know enough about, you know, then I'm gonna feel really awkward talking about him because I don't I'm not in my lane. They're not my areas of expertise. So you know, when you look at my videos and you got well, this guy, like for May I feel really comfortable talking in front of camera with all my videos because I only talk about the things that I know about will have a lot of experience in Andi even when I do my travel videos and I take my audience to places where I've never been before and I don't know the history of the place that I'm doing my vlogs on because I haven't done my research. I don't pretend that I know I don't talk about things I don't know. I just tell people my roar experience. I'm like, Hi, guys, I'm here in this place. I've never been here before. It's my first time here, you know. It's a beautiful clear sky. It's nice and humid. It's super hot. Robin, Here's my my girlfriend. She's here right now. We're here for three days for having the best time of their lives. I literally just talk about my my experience because that's my truth. My experience off that location is my truth. And as long as I don't veer off out of my lane and talk about things I don't know about, then I know that what I'm saying is true to my word. I feel confident what I'm talking about, and there's no reason to feel awkward or out of place, so it's something to keep in mind to their the five points. But the last one is a personal challenge to you. So rather than just sit passively and watch these videos and go, Oh, that's nice that they're really good tips. Oh, I keep that in mind. Or, you know, that's really great advice. What I challenge you to do is turn your camera on and start making some videos. I would make two or three videos just on your phone just on your phone and just start talking about something about your day, right? You didn't have to post that video anywhere. You can send me a link to that if you like, but you don't have to. There's no pressure, but literally, why not call it one video every day for the next seven days, and what you're going to do is you're gonna talk to camera, which is your phone, and you're just gonna express how you feel in the moment. Whatever that is done posted. Just keep it to yourself. If you want. By the end of seven days, you'll find that you'll be a little bit better than what you were prior to starting the challenge So I challenge you to do that. Makes and videos apply some of these tips and let me know how you go if you want. Otherwise, I hope you enjoy this and I'll see you in the next video.
13. Mindset- Don't Do It For The Money: So they say that you should never, ever work for just the money. You should never, ever just do something for the cash. This really does apply when it comes to you achieving because for me personally, after making over 700 videos, 800 videos, something like that on YouTube, you know, over 1000 on many other different platforms. I've not made any more than that between 101 150 years strolling dollars in a single month in Google AdSense revenue. So, you know, some people watching this guy. I just want to be I shouldn't make all this money. And, you know, I I respect that. Some people are watching this and they're really difficult financial hardship. And you might be working a corporate job or you might be working a fast food restaurant and absolutely hate it. And you're sick of getting paid $8 an hour. You just really paid, you know, you look on YouTube and ago how they making all this money that making thousands of dollars every month. I make $8 an hour. I want toe on what they're earning, and I get it. It's so tempting But the real truth is that you're not gonna make a lot of money unless your extremely talented and you're getting millions of views, millions of views on your videos. That's what it comes down to, getting millions of views or you have some really good brand deals or sponsors or product. You could do product placement on your YouTube channel, which really only comes when you have enough of an audience anyway. So if you're just starting out, you're not gonna really get any product placement deals off brand deals because nobody knows you. Nobody's watching you anyway in the very beginning, so not much of anything is gonna happen, you know, for a long time. So I did a separate video on my earnings report because some people don't believe me when I say I make no more than 150 bucks a month. I just don't get enough. I don't get millions of views on my videos. That's why I make thousands of dollars channel, So I want to just keep it real with you. Don't do it for the money. Please just make the videos and put your heart in your soul into making videos I have been doing this for over two or three years now, and I make the videos for the love off the art. I love sharing historial of sharing my adventures. I don't think about $150 at the end of the month, but in saying that you can make money through Google AdSense, as I said, you need millions of use to make it happen. Or a good brand deal or a branch of brand deals or product placement. Literally. When you create videos on your YouTube channel, your branding yourself as a certain person, whether you're your brain in yourself as an expert in slime or whether you're branding yourself as a fitness person or someone who is a pilot, you know whatever content you're putting out, your branding yourself a certain way, and therefore, when people watch your videos, they're gonna perceive you a certain way. So when I look at YouTube for me personally, as I said, I didn't do it for the money or the 150 bucks a month is amazing. It pays my mobile bill great, but I use YouTube predominantly as a brand awareness tactic, so people get to learn who I am, what I'm about and what I love doing. And they get to see what I'm passionate about. And the few people that watch my videos can be inspired enoughto. Either start a fitness transformation or go on an adventure somewhere around the world, whether it be a country that I visit in my videos or another country that they always wanted to go and see. But they needed to see me climb a mountain in Tanzania to make that click and for them to take action. You guys were at the summit tough. Come enjoy Christmas Day. It is 7 39 AM December 2017. It isn't Monday. I think on, uh, I have no words cause a lot of energy. It's freezing cold. You need to think about for yourself. You know, when you create videos on your channel on your brand new channel that you're gonna be branding yourself a certain way and the products and services that you offer, if any, on your website or somewhere off you choose. That is where you'll be generating your profit or your income from, and that takes time to build. If you don't have a product or service, then that's OK. You can make a product or service later and just start making videos on your YouTube channel and then eventually. If you want to get into online coaching or online fitness coaching, for example, then you can use your YouTube channel to literally talk about things like macronutrients protein requirement, protein intake. Had a train without getting injured. You can literally just quite a body of work on your YouTube channel to build brand awareness around the fact that your online trainer and that if your videos they're good enough, people will click on your videos that will go back to your website. See that you offer online coaching services and will convert that way. And that's where you'll make your money off YouTube. So I hope that was clear, as I said, just to recap, Don't do it for the cash. Although the cash is nice. Do it for the love door for the passion and the money will come, but not necessarily through AdSense. It will come to you off the platform off YouTube, so go and create videos. Don't look at the dollar signs, and I'm sure the dollar signs will come. Thanks for watching. Enjoy
14. Mindset- Stop Copying other Vloggers: so just a short piece of advice for people just starting of logging journey. And there's Do not copy other bloggers and what they're doing with how they edit with how their story tell with the color grading style with how they do their transitions. When I first started blogging several years ago, I wanted to see who was already successful in the space, right? And so of course I did my search, and I found Casey Neistat, who you may have heard is quite successful as of Logar, is considered to be one of the grandfathers off logging and, you know, fund for Louie or Louie Coal. You know, again, the grandfather of logging has been around for many, many years and has surmounted huge success. Huge audiences, massive engagement, both just able to really tell captivating stories to really pull their audience in and make their audience feel like they're going on some kind of adventure. And you feel like you're in the living room off their houses or their apartments. Whenever you have any creative space, the same thing happens whether it be digital creative, I instagram or Pinterest, you know, Tic tac or YouTube. The same kind of thing happens whenever someone just starts the journey off that thing, that process and they look up to someone who's very, very successful. The same kind of thing happens. Some beginners feel like they need to copy or imitate or take certain ideas from the person at the top, the creative at the top to get the same kind of success. And so my biggest piece of advice for you is that there's nothing wrong with being inspired . There's nothing wrong with looking at an Instagram er or YouTube R and go wow like I really love his or her hairstyle or love his or her personality or love how they, you know, edit their videos or how they do their transitions. Or I really love how they use color grades for sunsets. There's nothing wrong with being inspired by someone that you look up to. However, you cross the line when all you do is obsess over that person's content and always look at that person's content as a yardstick for your own success. And this is, in my opinion, the number one reason one of the number one reasons top three reasons why people that are just starting out never really succeed because they spend way too much time over consuming content from the people they admire the most. Therefore, they spend no time creating something for themselves. The more time you spend on looking at other people that you're inspired by it, the less time that you can spend on creating something for yourself by getting really creative by, you know. And it's really important, you know, be inspired for five minutes and then don't look at that person again. Go back into your own little world inside your head and start coming up with your own ideas . And it's so amazing. The less you focus on other people, the more creative you actually become. This is something that I've noticed, you know, I don't spend really any time looking at what other of loggers air doing. In fact, I don't know what Peter McKinnon's doing. I don't know what Casey's doing. I don't know what Logan Paul's doing. I don't know what Alex was obvious doing. I don't know what same cold is doing. I don't know what you on Olson's do it, I don't know, but I almost do it deliberately because although I respect their creative prowess and their ability to tell stories, and I think they're amazing creators at the same time, I don't know, lose my own creative juice budgets over consuming videos from everybody else. And so just something to keep in mind. There's nothing wrong with being inspired. There's nothing wrong with looking at an editing style or a color grade or a transition and going Wow, that was. I love the way he mixed those two clips together. I love the way he did that transition. I love the His hair style was incredible, like there's nothing wrong with just being inspired. But don't let it over consume you. That's all I have for you. So if you have any questions, let me know and get back into blogging. Start now and you win. You
15. Mindset- Gear Doesn't Matter: One of the most common questions that I get when people are studying the YouTube channel for the first time is bread. What do you do you use? What camera do you use? What microphone to use? What lighting do you use? Well, what's this microphone here? What editing software do you use? And is one of the most common questions. I always tell beginners. It doesn't matter when you're first starting your YouTube journey and you're making vlogs, you making videos. In just starting our day 1. It doesn't matter. You just need to start with whatever equipment that you've got. You saw the photo of me, my first camera on a bedside lamp using a guitar case as my tripod. I've never had a tripod or used a guitar case. I didn't have I have a tripod now. I have microphones here and another microphone there. But I've been doing this a 5.5 years for the first so many years. I just use my mobile phone and my GoPro. Lot of people don't believe that for the 1.5th, two years I only use my mobile phone and my GoPro. This big camera didn't come along until years later. So one piece of advice though, when you're looking at upgrading your equipment later on is upgrade your microphone first, right? Upgrade the audio first because people are more likely to stick around and watch your videos if the audio quality is amazing, but the visuals are pretty terrible at the lighting is really bad. You can barely see your face. But the audio is crisp. People will stick around. If it's the reverse, people will leave. People hate shitty audio. That is the truth. You can have the best visuals, but if your audio is terrible, people will not stick around. So I have a background in fitness and I went from someone who was really out of shape and end up competing in the world titles representing my country years ago. So a number of these fitness competitions, and I use this as an analogy because I didn't just go from sitting on the couch one day going, Oh, I want to compete in the wall tiles and represent my country. No. I literally started with what I had. I was like, What can I do today to make small steps and progress toward that ambition of getting into shape. So I literally went from the couch to the kitchen. I reduce my sugar intake a little bit. I included coconut oil in terms of my training. I didn't have a gym membership. I didn't wait until I could go to the best germ and get the best trainers and the best coaches and the best this and the best that I just went to any ordinary Jim. And I didn't know what I was doing and I started lifting and I didn't know what I was doing. And eventually over time, I've got better and better and better. And years later, I went on to compete in local competitions and the world titles. And I want a bunch of competitions. But the reason why I told that story is because I started with what I had and what I knew. And I slowly, layer by layer, I grew, I learned more. I upgraded, I upgraded, I upgraded my gym membership. I got a proper coach that I got another coach, and then I did this and did that. That's really what this whole user journey is about. It's about starting small, starting with what you have, start with the phone, start with a GoPro, whatever you, whatever you have in your pocket, start with that, start making videos, start talking to the camera. I feel like this is a rant. And then eventually you'll build the layer upon layer upon layer and you'll get better and eventually you can upgrade the equipment. So I hope this was helpful and insightful. A little bit of a rant. If you have any questions, let me know and I'll see you in the next video.
16. Mindset- Vlogging in Public without Embarrassment (5 Tips): Welcome back, everybody of logging in public without embarrassment. I'm gonna give you five tips in this video that will help you feel more comfortable, more confident and less shy when shooting videos of logs off yourself in public with complete strangers around you. Yes, they might be looking at you. Yes, they might be asking questions, but I'm gonna help you get through this real challenge that a lot of loggers struggle with when they first starting their journey. So don't worry, You're not the only one. I went through this a little bit in the beginning. Most of my blogger friends have also been through this as well. It's literally skill that takes time to develop and get good at. But hopefully these five tips will help you feel more confident and more comfortable early on in your blogging journey. Just a quick back story. I started shooting videos in my bedroom 3.5 4 years ago and I wasn't really that confident talking to a camera just in my bedroom just like this, let alone speaking to camera with hundreds of people walking past me and looking at me. It was definitely a journey. I'll give you five tips and the 1st 1 being super important. And you might have noticed this in my blocks always focus on the people that matter the most in the moment. What I mean by that is when you're shooting of log right now, I'm focused just on you, right? I'm delivering a message to you. So you know, if I'm out in public and I'm talking about some travel experiences and I'm in the busy streets off London, for example, on Oxford Street in the middle of Christmas and I'm talking about my experience in London for the first time. I'm only talking to the lens, only talking to the people on the other side, off the lens. I'm not thinking about other people around me that might be looking at me or questioning me or laughing at me. I'm literally just in the moment. And when I should videos with If I do interviews, they are also people that matter the most to. So if I'm interviewing someone on camera for my audience, I'm only thinking about this person that I'm interviewing and my audience. So it's like a triangle. So I asked the questions. I speak back to camera and it goes back, like in a triangular fashion. I don't think about people that are walking past that, a questioning that all laughing, that of smirking, that chuckling on it. See any of that? I don't see anything beyond this, and that's a skill. It takes time to develop. But it if you work on that overtime just when you fire up the camera in public, just literally speak to your audience. Don't think about other people around. That will help you remain present. That will help you remain focused. And that will help you remain, you know, concise with your message. So just something to keep in mind. The second tip that I have record short segments. So usually what I do when I create my travel videos is that I before I go out into the world, I do a bit of a plan off where we're going to travel to unusual with my girlfriend in my travel videos. And so, for example, London. And so the first time in London, I asked her she lived in London. Okay, so where we're going to to write all this down off different places that she was going to take me to, and then when we got to each of those locations, I literally just fired at the camera and I said Everybody the time is such a such wear out Piccadilly Square right now. As you can see, the traffic is insane. That's cars everywhere. It's peak hour traffic into the middle of Christmas. Have you guys been here before? What do you guys think? Do you guys have any other suggestions? I literally keep it like a minute to two minutes max, and then we move on to the next location, and then we turn the camera on everybody where it's, you know, Oxford Street. Check out this place. Look at these buses, these double decker buses. How cool are they with my girlfriend, and then I might chime her in a little bit. She might talk for 30 seconds, and then I talked for 30 seconds and cool finished. It's no more than a minute or two minutes. If you stand there and talk for 10 minutes straight without taking a breath, then that's gonna be much harder. So what I suggest you do is just experiment with just shooting short segments or short highlights off your locations in terms of your travel, blogging, for example, and then move on to the next location. And that is it short and sweet. Third tip that I have for you is used a small camera. Now there's two reasons that I like to use a small camera. When I'm shooting my dialogues on my monologues to my vlog, I literally, as I mentioned in other videos, I literally shoot my monologues to my go pro. The reason why is because if I'm shooting with a big camera, it's very heavy and I can't hold it, you know, for any more than a minute before my arm gets lazy. The second reason is because it's less intrusive when I'm blogging with that in public. When I went into the U. S. A adventure with my girlfriend for a month, I use the big camera and I was literally like this big fat camera, you know, in San Francisco and in New York and was just really, really cumbersome to have. Whereas I went back to this, my GoPro, which is what I started with and what I've gone back to, not only is a lightweight and I can easily fire, turn it on and then shoot a quick short video and then turned back off again. But it's also less intrusive. So when I'm interviewing people on the street or in my vlogs, it's actually more comfortable for them, because when they're talking to a small camera, don't feel as intimidated. When I was interviewing people with my big camera, the people that I was bringing for the interview felt really intimidated because it was a big fat lands with big microphone. It's just not as welcoming to other people as well. So I suggest experimenting with something like a GoPro phone. Ah, G seven x. Just start small and then, if you want down the track, get a big camera and play with the big camera. But that's something that I've done as well of last few years. The next tip I have number form is practice and consistency. Now this seems like a run of the mill piece of advice, but I've literally shot, you know, 600 something videos now. In the last few years, and hundreds of those videos, maybe 500 or so of those videos were shot in public with people around. I've had people calling out to me on the street while I'm shooting my videos. People jump into my videos and you'd escape good at and better at incorporating the audience until videos to a point where it just becomes second nature. And you might not think that now you think I'll never get to that point. I'll never, ever break through that fear, but literally, it's like anything else. You have to trust me on this. If you, you know, you get out there and you just keep doing it. Keep practicing. Being consistent, you know, slowly but surely video after video. After video, you'll feel more and more confident and more comfortable speaking to camera in public to a point where you can fire at the camera and without being disrespectful to other people around you. If it's a quiet place that you're in, then you'll find that you'll be able to do so very comfortably. So just be consistent. Be patient. It does take time. It's easy for me now because I've done hundreds of these. So the next tip is the last one. Number five. This is what helped me a lot of logging in a quiet place or a side street or a park going somewhere in public. That's not necessarily the busiest street in the city, but a side street where you can talk to camera. You're out in the wild. You're still talking about your experience. But you don't have 50,000 people walking past you. So what? I was, you know, back in the day, I think I did a lot of this. When I was in Zanzibar, I would go down side streets. I would then fire the camera and start talking. And then every now and again, one or two or three people would well past and I just get used to it. And then, obviously, you know, went from side streets to parks to then going into crowded places. So that's something to keep in mind as well. So I hope that helps again. And I really do stress this a lot. Practice is key. Practice, practice, practice. Consistency, consistency, consistency. Right. Start stopped. You have to start. You have to do it. Just go out there. Shoots and videos. Keep them short and sweet. You know, we have 1 to 2 minutes each on a side street. Even another bonus tip actually is to start filming. When you're in a side street, you know, it's everybody how you're going. I am at such and such. I'm in this side street here and the main streets just over there. So what I'm gonna do right now, I'm gonna take you to the main street and you get to see how busy this places. And as you're talking, you'll take people out onto the main street. Everybody see among X y Zed Street here in Italy, this place is crazy. We're in peak tourist season right now. As you can see, this restaurant, restaurant, restaurant, there's a little place called X Y said we're going to go there and you literally stopped the vlog in a quiet location. And then as you're filming, you walk into the busy location. It's almost like you warm up your warm up your muscles on a side street, and then you walk into a busy street rather than just going into a busy street, turning on the camera and going How everybody Yeah, I'm here on the street here in Italy. It's pretty, you know, it might come across a little bit more clunky until you get a little bit more experience where you could just boom, turn the camera on on, Off you go. So I hope this was helpful. If you have any questions, let me know. This will help you practice, practice, practice and I'll see you in the next video.
17. Production- How I Edit Vlogs: So how to edit of log? So I'm going to give you a quick walkthrough of how I edit my vlogs. There's no right or wrong way of doing this. Everyone has their own style, but I just want to introduce you to my style that I've been using on and off for about five years now. But I'm going to show you an actual project. Fitness treats season two that I shot end of 2019, which has been a pretty popular series. And I'm going to walk you through that vlog series. And I shot a daily video there, which was a lot of work. So if you're thinking about daily vlogs or daily videos, strap yourself in because it's super hard work. But I did it for season two of industry. And I will show you how I structured my daily videos in general. So this is not a tutorial on how to edit videos in general. I teach video editing and another course on Premiere Pro. So I'm going to show you how I edit in Premier Pro, my vlogs for fitness story. But you don't need to have Premier Pro to understand this tutorial. So again, there's no right or wrong way. It's just my particular style. So you may want to use this or try it. We'll try something else. It's completely up to you, but I'll use fitness Street episode 11. Let's jump into my laptop and let's have a look here. So they're typically with a daily video or a daily vlog. I take all of my footage and I drop it onto my timeline, right? So first thing I do, and as you can see on your screen right now, there is a ton of clips and there is a lot of stuff that happens during Episode 11. And I just dropped everything onto my timeline and then I just cut remove, shift. I sought and I sift and I trim all of my footage. And then what I like to do is I typically like to color code all of the footage that relate to a particular type of theme or a particular type of event that happened within the day. So when I'm editing, I can quickly jump to this blue area here. Because the blue area represents one particular theme or one particular chapter within my day, it's just much easier when it comes to organizing my footage. I just select all of my footage here. And then I right-click and then go to label. And I just give it a color, and that's it. I then continue to sort my footage and color-code my footage. In terms of music, the music, as I've mentioned other videos comes from Epidemic Sound. And I usually get that music kinda later on. I wanted to just get the footage onto the timeline, trim it up, chop it up, sorted, and then color-coded, and then I start bringing the music in. However, there is a piece. As I'm going through my footage of the day, I'm looking for a hook. So I'll hook is literally just five or 10 seconds that people watch. That just puts them in. It brings in their attention. It makes them want to continue to watch the video. So as I'm watching through all of my footage of the day, I'm looking for about 567 seconds, 10 seconds, 15 seconds of a clip that I can pull out, and I can use that at the very beginning of my vlog. That's going to be the first five seconds, 10 seconds of my video. That's going to be the hook that I use. So I'll go through and I trim my footage up and then I go back to the very beginning and I drop in my hook. So my hook here on the screen is green. So as you can see, it's about 15 seconds along, right? So you don't have to use a hook in your vlogs. This is what I do for my daily videos. And after the hook, I then have the trailer. So I'll play this example for you see, you know what I'm talking about? So I have the hook that I have the trailer or the bumper real and it after the bumper real, I have the beginning of the vlog. The beginning of the vlog begins at the beginning of my day and I timestamp that. And then the vlog begins. Now, the timeline of my daily vlog is pretty easy. The vlog begins at the beginning of the day and ends at the end of the day. Right to the arc is beginning to end, beginning, beginning of the day. I go to sleep, end of the block, pretty basic. So that's how I structure these videos. So I'll play this example for you and you can see what I'm talking about with regard to a hook. And then I'll show you the trailer, which goes for about 30 seconds, and then the trailer jumps into the beginning of my daily vlogs. So here we go. Here is the hook is first ever more time a class is just first ever in his life. I wasn't a three to four pounds or liver wanted to do more, so so that's the hook. And I thought at the time, I still think it's pretty funny that little interaction that I had with that guy. In Episode 11, I thought that was good enough to be the hook. So yeah, that's why I picked that as a hook. And now going into the bumper real, I'm going to show you we can get really good bumper reels like templates, and you can easily customize them depending on your project. So I'll play this for you guys for about 30 seconds. Great, so that is the bumper real. Now, if you want to know where you can get really cool Premiere Pro templates, where you can actually take the template and then you can customize it with your own footage. Go over to this website here. I've been using this website for a long time. Go to Video Hive dotnet. And I have a membership of these guys. And if you just go into the search and type in Premier Pro templates. Now if you're not using Premiere Pro, there are other templates for other editing softwares that you can use. Final Cut Pro has its own templates that I use. Obviously use Premiere Pro. So I'm using the Premier Pro templates here. And if you just run your mouse over these templates, you can see that the style you can download. And then you can just use your own footage and you can use that as your bumper or your trailer. Really easy. So we'll play one of these for example. And I'll show you what they look like. Alright, so you get the idea. There's like so many to pick from, but I'll let you sort through that in your own time. And as I said before, the background music that I use is epidemic sound, which I talk more about in another video, but amazing high-quality music. And I take the tracks from here and I dropped them in as I'm listening to an editing my vlog, right, so keep those two in mind. So we'll go back here and I'll play this through now. The beginning of the vlog will now start after the trailer and worry my friends, 22,019, thirties, 2015 in the morning. It's a Friday. So as you can see, that we have the hook, we have the trailer and then the beginning of my day starts at 1030 in the morning. And then I pretty much just continue on editing my video, adding in the background music. And then I add in these special, not special effects like sound effects and other little things like that. So I go through and I add the sound effects and eye color grade and color, correct. And all that kinda stuff at the very end. So that's generally how I edit my vlogs. If we go to the very end of this video, this was episode 11 and go right to the end. And we're having dinner at night. It's pretty dark or I don't even know what time it is. Australia. So how did your family back home imagery here? So anyway, so I'm at the very end of Episode 11 is 23 minutes in. And as you can see, we're ending of log at night having dinner. So this is just a brief rundown of how I edit my daily videos for fitness street. As I said, the style does change every now and again depending on how I feel, I like to change things up a little bit. But if this is something that you want to incorporate, then certainly give it a try. Don't be afraid to try different things and let me know, hey guys, I hope this was insightful and I'll see you in the next video tutorial.
18. Production- The Best Video Editing Software for Beginner Vloggers: Hi, everybody. Welcome back in this video I want to talk about the best video editing software that you can use as a beginner vlogger. And you're probably wondering what software should you use to edit your videos both on PC Mac and also on your phone free and paid? I'm gonna talk about all of that in this video. I'm gonna keep it as short as possible. So I had my laptop in front of me to help me drive this conversation. But if you're just starting out as a video blogger and or just starting your editing journey and you're not sure about whether you want to continue to do this for a long time, that I definitely recommend sticking to the free software first. If you have a Mac and we're gonna get to the pasty options in a second, I'm actually editing all my videos on a laptop, which is a PC using Windows. So I'm more familiar with the windows side of editing software than I am I movie and final cut pro. But we'll talk about both in this little video so into my laptop, we dio if you're watching this and you're a Mac user and you wanting some good free editing software as a Mac user. Then you can't go wrong with my movie. It already comes with your operating system, and it's free, completely free, no watermarks. And this is a perfect place to start with editing your videos. My girlfriend actually edited her entire Pallotti's course, which is on Amazon Prime, and she did that through using I movie. I know it's on Amazon Prime, and she used I may be completely free. So if you ever Mac I Movie is perfect free software to start with for PC users out there or Windows users, you have movie maker tend right Windows movie maker, and you can get either preinstalled. If not, you can download it for free from the Microsoft website. It's up on your screen now and literally. Again. It's the Windows equivalent off my movie. Completely free. No watermarks. Use it. You know, if you're running a window system, the next three that I'm gonna show you is shot cut, so shot cut is completely free. It's open source, you know? No watermarks. Perfect piece of software to use eso Keep that in mind. Shot cut. You can use that one. You can use DaVinci resolve and on your screen. Right now we're up to version number 16. Really, really fantastic software, And you can do all sorts of powerful editing functions with this software, and it's free, right? DaVinci resolve. Want to check out the next one is hit film Express This thing editing software is actually a little different because there's also visual effects. Component off this editing software again. No watermarks, completely free. Check it out, hit film, and I'm gonna get into the paid options now. So this is only for people watching that. I'm considering taking video editing or flogging more seriously. That's when you would start to spend money on the software. And for May I completely justified because I do this. I do it all day, every day. So it's a business expensive. May I A tax write off for May. And like any business you invest in your business. And so this is no different to investing in your business eyes investing in good software. So there are two options here. There are on your screen. Right now. We have Adobe Premiere Pro, which is the software I use all day, every day, and I've been using this software for I don't know, three or so years now to the 16 was when I started, and I've never looked back. This is amazing software. I really love it. There is a steep learning curve, though I do one you I actually teach actually teach people in another course. I'll link it up if you're interested in how to edit videos in Adobe Premiere Pro Sisi. Really popular course, 50,000 students really enjoying it. If you're interested, check it out. But this is incredible software. If you're wanting to get serious and if you're a Windows user, how much that's this software cost? I'm not going to spend a lot of time on this because you can look this up yourself. I pay every month for this software, and I pay around $29 per month. I'm on an annual plan that I pay every month. If you If you buy the annual plan up front on your screen right now, its $343 including GST every year Now that's a lot of money because you pain that every year until you cancel it, which is really annoying because I wish I just had one fixed amount that you pay and that's it. But with that with that, you get all updates and everything included for the life of the membership. So, as I said before, I just considered as an investment. You get all updates and everything included that I do pay around $29 every month. So that is an option for you. And Premiere Pro is amazing. I am biased to Premier Pro because I use it. If you're a Mac user, then final cut pro is an option for you again. It is expensive. It's an upfront cost, and it's one single payment that you make and that's it. You get to keep the software for life without any further payment, which is amazing on your screen. Right now, you can only dot You can only download this software from the Mac from the from the Mac App store. You can get this software on a 30 day free trial. My girlfriend just downloaded this software. Now she's on the free trial as we speak. After a few years, he's decided to make the jump from my movie to final cut Pro X, but she's on the 30 day free trial and it's unlimited use with four use of the software for the 1st 30 days. And then after that, you have to pay. Now, I think in the US it's like $350 or something like that. Go check out the APP store. I'm not exactly certain, but in Australia it's $499 for this software. Again, you pay one fixed amount, and then you never have to pay anything else in the future for this software. That is amazing. I wish they did that with Premiere Pro, so I'll move onto to software choices that you can use if you're editing videos on your phone. Now, this is exactly what I did when I first started my journey. At the very, very, very beginning, I actually used my phone to film videos, and I actually edited those videos on my phone because I never even owned a laptop. I know it's crazy, but I never in the laptop. I just use my phone to film at it, published everything. The software that I used, I do get this question on your screen right now is kind, master. That's how I pronounce it and kind Master is really amazing. I used to edit my videos with Kite. Most on my phone at airport terminals were waiting to board my flights. Really, really funny. I can't believe I did that, and I uploaded those videos onto YouTube from my from my phone. That's an option. Thea, the one there used a lot, too, was quick. Q I k, its software from GoPro. And as you're already familiar with, I use a GoPro to shoot a lot of, in fact, prior to getting that big camera over there. I only use my GoPro to shoot videos, and so I was traveling a lot, making videos with my go pro, and then I just download the videos from my GoPro onto my phone. And then I used the GoPro supplied software called Quick, which could Dalit from the play store from the APP store. And then I just edit those videos. Using Quick, Quick is an amazing piece of software. Really, really awesome. It makes editing super simple, but really perfect. If you have a go pro and you're shooting videos on the Go pro and you want to make those videos on your phone. Quick is definitely a piece of software to check out. That's it, guys. I hope that was super helpful. As I said before, start with the free software first. And if you decide to get really serious with logging and editing and all that kind of stuff , then definitely considered, um, are the final cut pro or Adobe Premiere Pro. I know it's a lot of money, but think of it like a business. Invest up front and then, you know, learn the software for both of us. For both Premiere, pro and final Cut pro. It's a very steep learning curve, but my mate uses final cup. I use Premiere Pro. We would never go back. Teoh. Anything else way loved the software, so I love Premiere Pro. He loves final cut pro. So that's it. I'll see everybody in the next video
19. Production- Making Eye Contact with the Lens: So this is more or less a problem if you're a beginner of lager and you're using a vlogging camera that has a flip out screen, right, so that you can see yourself as you're talking. The problem with that is that when you're watching the videos of someone watching resolves in a flip screen, you know that they're looking over here, or over there, or up there, or down there. So it's very difficult to kind of build a connection with the logo or the speaker when they're not making any kind of eye contact with you because they're too busy looking at themselves in the flip screen. I have a flip screen camera that I'm filming on now, but I never use. I just look at the camera and I'm like ear I'm pretty much yeah, I'm in frame. Right? You can see my head, whatever. And I get the benefit of having a flip screen. You can easily frame yourself in the shot, right? And got IK, yup. So need to sit a little higher. Yeah. Okay. But the problem with that is it becomes a distraction, right? It's a distraction is difficult to watch videos when the vlog is not looking at you. They're looking over here or up there or down there. So just something to keep in mind. It's just a small little tip. If you're using a flip screen, maybe just use it to frame yourself and then just tuck it away and just use the lens and they're talking to the lens because you want to build a connection with your audience, right? And one of the ways, one of the ways of building a connection with your audience is to treat the lenses if you're talking to a mate, right? Just pretend that you're made is behind the lens and you're just having a conversation with them. So hey, what's going on? How is your day? Anyway? That was a quick tip. Had that was helpful and we'll move along into the next tutorial.
20. Production- Make Engaging Vlogs (Using B Roll): Okay, so let's talk about the role and how to use B roll to make your videos much more interesting and engaging for your viewers to watch. Now, if you're just starting your vlogging journey, you really need to know how to use B roll. It's not that hard, but it just makes your videos really engaging. So firstly have a role and you've got beer. Also a role just quickly a role is just the primary subject being filmed. So right now I'm sitting on a chair. I've got him in my living room. It's a cloudy day outside, and I have a camera on a tripod, and I'm talking Teoh about something to do with filming, right? So I'm right now filming the A roll off this video. The primary story. The primary subject is being filmed now when you're doing your blog's. Typically you're the main subject, right. We have your camera on a tripod or you know something some kind of try partners stand and you're filming yourself. Talk. You are the primary subject. You are the a role you're shooting the a role. Now when it comes to uploading that video as it is, if It's a five minute video of you just talking directly to camera about some experience. People are just gonna get bored. That's what happens. People get bored like I don't want. Watch this guy talk for five minutes and just watch his face for five minutes. It doesn't matter how entertaining the person looks on their face. People get bored very quickly. That's why you have B roll. B roll allows you to complement this story you're telling by showing the audience extra footage that does not include the subject. Now I usually break that rule, and my B road does sometime. It sometimes include me in it. You might see me in the B roll, but you won't see me actually talking in the beer. Also, the B roll is just the additional footage that helps complement the story that you're telling. So as I'm talking right now, I'm gonna be throwing up photos are gonna be throwing up videos that's really going to be complimenting what I'm talking about, right? So if for example, and I'll give you once you see this, you'll know exactly what I'm talking about. We've all seen this before, so just really, really quickly If I would have talked to you about you know, my training experience in the more Thai kickboxing camps in Thailand and spend the next five minutes telling you all about that you're going to switch off. But if right now I talk about how I usually spend, you know, 2 to 4 weeks in Thailand visiting all these different kickboxing camps whether you pay like , 2030 years trying dollars per session and you have these one on one private sessions and they're an amazing way to get fit and strong. And it's for everybody that wants to lose some weight, get in shape, learn more tired. Even this beautiful, amazing climate learning how to kick box and do more time. You meet people from all around the world. It's just one massive fitness camp. Right now I'm going back to my face. I just used a bunch of B roll to complement the a roll of me talking about my experience training at this kickboxing camps. So just a quick tip when you're shooting your a role. If you're doing travel videos, for example, then B roll is a great way to get really creative about how to collect that extra content that you use when you edit your videos and you overlay that extra content over the top of you talking in terms of how to edit B roll using Premiere Pro, explain that in a separate video somewhere else. That's a separate video tutorial in itself. But make a habit when you're doing videos just to shoot extra content that you feel as you're shooting the B roll. Make sure in your mind you're thinking, is this extra content gonna help tell my story? That's what it really comes down to. There's this extra content. Help me communicate with the audience The story that I'm trying to tell. So that's just that's it. That's be wrong. So if you have any questions, let me know if you're curious That had an edit. B Roll explained that in another video hope that was helpful on and enjoy the vlogging journey
21. YouTube- How to Pick A YouTube Channel Name (3 Tips): How to pick a YouTube channel name. I spent way too much time trying to think of the perfect YouTube channel name for my channel back in 2016 when I started this journey myself. So in this video, I'm going to give you a couple of tips and a bit of a framework that's going to help you create a YouTube channel name so you can get on with creating content and what really matters at the end of the day. How do you create a YouTube channel name? Well, the way I see is that there's two different kinds of ways of thinking about it. Pick up the big picture here. Do you want to create a personal brand? Or do you wanna create a business, or a company or a logo? And so once you think about whether you're going to create a personal brand versus a business, then that's going to help sort of direct you with creating an actual name. So personal brand is pretty easy. It's just your first and your last name. Now what I first started my YouTube journey. I was scared as hell of putting my name out there, Brad Newton, I didn't wanna do that. So seek fit life was what I created. I spent weeks trying to think of secret life or I came up with secret life and then I later changed it to Brad Newton blogs, I felt more comfortable putting my name out into the world. And over the last four years now, I've been using my name as a personal brand for my YouTube channel, brand news and blogs. So think about your ambition. What type of content do you want to create today? Don't think about five or 10 or 15 years from now because if you're just starting your journey, you probably don't know what kind of content you want to create right now. What is it that you enjoy making? And then use a name that kind of reflects the content that you're making. This is one way of doing it. For example, if you want to create just a fitness channel, you could say brand Newton fitness or fitness with bread or bread, Newton's fitness tips, whatever, insert name here. Or if you want to set up a gaming channel, it could be your name, gaming, gaming with Steven. Steven gaming lounge. So you could have a channel name that has some of the words of the mesh that you're going to be creating content on in your actual channel. And that leads me to the first major tip of this video. When you're creating a YouTube channel, make sure it's simple to say, it's easy to spell and it's easy to pronounce. When I started my YouTube channel five years ago and I came up with secret life. I didn't realize that people would like, be like saying, is it C for life or C? C, Well, Phil lie and that seek for life, seek fit life. And then when people were searching for that name, that will be spelling it out in three separate words. Seek fit life. When I was actually seek fit live all one word. So I didn't think about how other people would interpret, seek fit life. I didn't think too much about the spelling. I didn't think too much about the pronunciation. So when you're thinking of a name, think of a name that's easy to say, easy to pronounce, easy to write, and doesn't have any weird silent characters, special characters, and underscores and dashes and things like that. So keep it simple and think about what other people are going to think when you're saying your name. So maybe spent a couple of days and I wish I did this with secret life. Is this same two people, maybe your close friends or even saying to yourself, or even trying to think about how other people would interpret that name and see if there's going to be any potential issues with pronunciation or interpretation. Tip number two is Google the name and see who else is using that name. Now it's not absolutely essential and you can certainly build a brand if all of your social media handles and your website URL and your YouTube channel name are all different. But it kinda helps build your brand and the strength of your brand if you can kind of align everything together. So the name of your YouTube channel is the same as the domain name, which is the same as your Instagram handle and the same as Pinterest and Facebook and all the other handles. So do a bit of a Google search and see if that names being used anywhere else. There's a
22. YouTube- How to Create A YouTube Channel (2021 Beginner's Guide): So I'm going to show you how easy it is to create a brand new YouTube channel from the very beginning of setting up an e-mail address and Gmail account right through to the very end where you're about to upload your first video to YouTube. So I'm going to jump over to my laptop now, and you're going to follow me along on my laptop. Let's go. All right, I'm going to walk you through the process of creating a brand new YouTube channel here. If you want to follow along with me, we'll start by going to youtube.com and then overheat or see where it says sign in, you'll just click on that. And if you've already got a Gmail account and you want to use that for your brand new YouTube channel, you can just sign in here. Otherwise, if you don't have a Gmail account, then you'll just click on Create Account and you'll have two options. So if you click on Create an account for myself, it just means that your YouTube channel name is restricted to your account name. Whereas if you select to manage my business, it means that you can create a brand channel and that will allow you to create a custom channel name, right? So I do suggest selecting this one. You can always change it later on. If you select it for myself, you can always change it down the track. But for now, I would suggest clicking on to manage my business. And then you'll fill this out to create a brand new Google account. Once you have a brand new Google account, you'll then login and then we'll jump into the process of creating a channel. Okay, so now that I've created a brand new Gmail account for my brand new YouTube channel. I have now signed in and I will just click up here where you see the icon. And it will bring up a little menu. And then you'll see here where it says create a channel. So if I click on credit channel, I then have the option to name my channel. So I'm going to call this one Brad's travel adventures. And then here I can select Upload picture. And this will be the image that you'll see that identifies my channel as an adventure channels. So I can then select that image, click done. And I now have a little image there. And then I can click down here where it says Create Channel. And there we have it. We have now created a channel. So I've got my little image here, Brad's travel adventures. And now what we're gonna do is we're going to go into the settings. We're going to go over to the icon here, click on that. And then we're going to go down to where it says YouTube Studio. Click on that. And we're going to go into the dashboard of our channel. We'll just close that out. And then we're gonna go down to settings down here, click on that and I'm going to walk you through some of the things you should change to get started with your YouTube channels. So firstly, we have general, so usually with the currency, you just select whatever your currency is in your local country. So in my case, the Australian dollar is the one I'm going to select. And then I go down to channel. And then here I just select here country of residence. So this is obviously my case. I'm from Australia. Even if your audience is from a different country, you'll select the country of residence that you're in. So for me it's Australia. And then here we have some key words. Now, what you would put in here are just keywords that kind of relate to the content that you're creating for your YouTube channel. So for example, for this channel, if I'm creating travel adventure content, I usually start with firstly putting in my name. So Brad new turn vlogs and, and then travel vlogs and, and then adventure vlogs. So put in, you know, five or six different keywords that really describe the kind of content plan on creating. You can always change these. And so we'll start with three for now, and then we go to Advanced Settings. Click on that. And then this is pretty important. This is where you need to stipulate where your content is made for kids or not. And you'll see three options here. So you'll see here, yes. Set this channel as made for kids. Or no, this channel is not made for kids. Or you can review every video that you put out as being for kids or not. So for my channel, my main channel, I've set it to know. This channel is not made for kids, but it really depends on the kind of content that you're making, but you really do need to select an option here. And we'll move down. And as we scroll down here, we've got here subscriber counts. So this is where you can display the number of people that are subscribed to your channel where I first started by YouTube journey. I actually de-selected this. So I didn't want people to see that I had no subscribers or like not many subscribers. So this is really up to you. I have it selected now people can see how many subscribers I'm subscribed to my channel publicly. But I'll leave this up to you to select or deselect. If we scroll down, we have no other options. We'll go to Feature eligibility. And we have two options here. Now one thing that I really recommend that you do is that you verify your channel with your mobile phones. So it just means that you have access to more features in your YouTube channel. So if we hit the drop-down here, you will see here that your channel, if you don't verify your channel with your mobile phone, you won't be able to release videos that are longer than 15 minutes. You won't be able to add custom thumbnails, live streaming. And you see you won't get these options here. So I do recommend that you click here, it says verify phone number. And when you click on that, you'll put in your country. So YouTube will either contact you with an automated voice message with the verification code, or send you a text message with a verification code, select your country, put in your mobile phone number. And then this is how you will verify your YouTube channel. And that will give you access to all of these other features, which I do really recommend because Most people do put out videos that are over 15 minutes at some point in their YouTube journey. Okay, so now what I suggest you do is click on Save and that will apply all the settings that we've changed so far. Okay, So we'll go back into Settings and then we'll have a look at Upload defaults. So this is where you can put in default values. For every single video that you upload to your channel. It just saves you having to retype out the same stuff every time. So there might be something which is fairly consistent in every video in your description. And so if you're not sure what that means, I'll show you how I've done it with my channel. So here we've got my channel brand Newton blogs. And here I've got, I've left this one blank, but down in the description, I've just kind of made it clear that my description goes here, filming date goes here, and some hashtags go here. And then I've got my Skillshare courses, social media, the gear I use for my videos, and I could disclaimer. So this kind of stuff is fairly consistent in every single video that I make just saves me having to copy and pasted every time I can just make it a default upload. And then down here where it says visibility, I always make it so that every new video that I make or upload is automatically set to private. That means that I can go in own leisure and I can make it public whenever I feel like it. So that's another one to keep in mind. Okay, So we'll go over to advanced settings. And this is where we can tell you tube, what category our YouTube channel falls under. Now, I don't really worry about this too much. You can either set it to people and blogs or comedy or entertainment. You know, if you're making a mixture of content, there falls under different genres. It doesn't really matter. Just pick the genre that best suits your channel and you can always change it later on. And then we've got here comments. So by default out comments are set to a whole potentially inappropriate comments for review. And then you can disable comments here. You can allow all comments for my channel. I'll just leave it set to hold potentially inappropriate comments for review. So that's what I have on my channel. And then we'll go down to permissions. Note we'll go down to communities so we can set moderators here. This is not really applicable to you if you're just starting a brand new YouTube channel, when you get big enough, then you can bring in people that can help manage your YouTube comments for you. Okay, That's it. So if you've made any changes, click on Save, otherwise click Close. Okay, so let's customize our brand new channel further. So click down here where it says customization. And then over here where it says branding, click on that. And then we can make some further adjustments so we can change your profile image here. Very easy to do. You can just follow these little guidelines here. Needs to be at least 98 by 98 pixels and four megabytes or less. We can change our banner image here. And again, it gives you guidelines for that less than six megabytes. And I'll create separate videos that will show you how to do that. But for now, I'll do it very quickly with you. So click on upload. And I'm just going to use this image here. And I'll show you what to do very quickly. So here if I run my mouse over viewable on TV, this is what your YouTube channel banner will look like on your TV. If you are viewing your YouTube channel on your desktop computer, this is what your banner will look like. And if you're watching your YouTube channel on your mobile phone or any other device, then it's going to be like this. So typically when you're creating these banners, all of the important information that you have in your banner, like your contact details and links to your website and things like that need to be in this small area here. But I'll create a separate video that will explain that in more detail. But for now, you can just crop, move this down if you want. You can resize and crop out what part of the image you want for your banner. Otherwise, we'll just leave a like this for now. Click on done. And we've now uploaded our banner image. So we'll go down to Video watermark. So this is a little image that you'll see when you're watching videos. Down the bottom right-hand corner, you'll see usually the company branding or logo or watermark on every single one of that person's videos. And so this is where you can add that custom watermark. Now, to do that, you'll need to follow these dimensions here, 150 by 150 pixels. Again, I'll show how to do this in another video. But typically what I like to do is I like to use this on my YouTube videos. So the YouTube subscribe branding watermark. And I'll just include this one here. And I'll click on done for now. And so that's what it looks like on every single one of your videos. And here you can select whether you want the Video watermark to display at the end of the video, or you can set it so that it starts appearing after the first five seconds. Or you can select the entire video. So it's up to you. I mean, you can select this one here so that the watermark appears after the 5 second ad plays on your video. So then I'll click on Publish over here. And that will just save all of the changes that I've made. Okay, So now if we go over to basic info, this is where we can type in a brief description of what our YouTube channel is all about. And so for me, I keep this super, super simple. I'll show you what mine looks like. So for Brad Newton vlogs, it says, you know, I cried fitness video courses to help you get into shape or travel vlogs to inspire your next travel adventure. So That's pretty much all I do. I keep it super simple. Some of the guys, they put links to their website and all this other detail about downloading free e-books and stuff out that you've got 1000 characters to play with. It's completely up to you. You can always change it later. But we'll move on. Okay, so if we scroll further down, we've got channel URL. So this is the actual URL of your YouTube channel. And as you can see, it's terribly long and ugly. And it's definitely not something that somebody's going to type in. However, when you work up to a 100 subscribers and as a few other requirements, you can actually get a custom URL, which means it's a much easier for people to type in. If I show you my YouTube channel over here. So I've got my channel URL here, which is what I started with, like everybody else. But then when I hit a 100 subscribers, I was able to customize my YouTube channels. So now it says youtube.com slash Brad Newton. You don't have to put the c in there, right? But you can just go.com slash Brad Newton. If you click on Learn More, these are the requirements to get accustomed channel URL. So you need to have 100 subscribers or more. Your channel needs to be at least 30 days old. You must have uploaded a profile picture and you must have a banner image. So all of them are pretty easy. Getting the first 100 subscribers, that's always going to be the challenge. But once you hit the 100, then you can apply for a custom URL, which I highly recommend that you do. Okay, So if we keep scrolling down now, this is where we can add some custom links to our YouTube channel right here. So we can click on add link and we can call this my website. And then www dot Newton. I'll just put in brand new fitness.com, right? And then you can put in as many links as you want. But if you're not sure what that looks like, I'll go over to my YouTube channel. And over here, you'll see, I've got here one link which is tomorrow webs to my video editing course. Some people have their Facebook and Instagram links, Pinterest links. You can put anything you want here that will take people back to your social media channels or your website and so forth. So it will appear here, that's where you make the adjustments to your links is in this section here. So it can add more or I can delete them. It's very, very straightforward. Now if I keep scrolling down, we have contact info. So this is very important. You'll just put in your email address. It just makes it easier for people to find you when they click on the About section of your YouTube channel. So if we go over to my YouTube channel, and if I click on about, you'll see here I've got for business inquiries. If I click on View email address, then it'll say your robot, I'm not a robot car. I'm not going to go through this. But once I go through all of that, it will display the email address for my YouTube channel. So that's exactly where you'll put in. Your email address is here. Okay, so once you've done that, you'll then click on publish to save any changes that you've made. And then we'll go over to layout. And so layout is where you'll add a channel trailer. Now it's really important. I don't actually have a channel. I used to how channeled trailers, but I don't really use them anymore. I usually just put in the latest video that I've uploaded to my YouTube channel. I'll usually just put that in here as my channel trailer. So it's not absolutely essential, but something that you can do later on in your YouTube being journey. So I'll show you on my YouTube channel how that sort of looks like. Click on layout here. My channel trailer is literally just a video that I'm really trying to push and promote on my channel, fitness street memories. And I can click here and click Change video to anything I want. So it's not necessarily a channel trailer, It's just a video that I'm trying to push. And here it says featured video for returning subscribers. And in this case I've got exactly the same video. So how that appears on your channel is like this. Okay, so I'm on the home screen of my YouTube channel, and that is the channel trailer right here. And as you can see, we have that little tiny watermark here, which is how, what I showed you before, which appears in my case, and for the entire length of the video. Okay, That's pretty much it. Now let's see what our channel looks like and see all that hard work we've done. So if we click on our profile image, this is what our YouTube channel looks like publicly. And so we got our name here. We're a little profile image. So if you want, you can run your mouse over that and change it. If you don't want to use that anymore. If you want to change the banner image, you can run your mouse over this and you can click on this little icon here to change it. You'll see that link that we put in here, which is to your website or to your social media. And then of course, we need to, we need to add some videos. So right now we have no videos, which is how we all start. But you can click on this icon over here and then click on Upload video. And this is the beginning of your journey into YouTube and uploading your very first video. I hope you enjoyed this and I'll see you in the next video tutorial.
23. YouTube- How To Make A YouTube Channel Banner: I'm going to show you how easy it is to create a YouTube channel banner using a website, snapper.com, which is completely 100% free to use. In this tutorial, I'm going to hand over to my laptop and you're going to follow me along. We're going to create this simple little banner. And I'll show you how you can create something really simple for your brand new YouTube channel. Let's go. So I'm going to show you how easy it is to create a very simple and nice looking YouTube banner for your brand new YouTube channel. Using a really simple cool tool called Snapper.com, doesn't cost anything, it's absolutely free. You can just sign up to it for free. So go to snapper.com and you can follow along with me in this tutorial. So all you need to do once you sign up to this, you can scroll down here and where it says here under headers, banners and profile pages, you'll see her YouTube channel art. And so YouTube recommends the dimensions or 2560 by 1440 pixels. And so you'll click on that. And you'll see here that snapper gives you a bunch of pre-made templates that you can pick and choose from here. So if you want, you can just use one of these and you can just customize it. So snapper does all the work for you. You can just click here, type in your own name. You get the idea. But we're going to actually create one from scratch. And so I'll go back and hear versus crack from scratch. We're going to click here and we're going to do it ourselves. So you'll notice here this is very important. So here it says here tv only area. And then we've got here Mac's desktop safe area. And so when you view your YouTube channel on different devices and TVs and things of that nature, you're going to only see parts of this banner. So for example, if you're watching your YouTube channel on a normal TV set, then you'll get to see the entire area here where it says TV only area. You're watching your YouTube channel on your laptop or a desktop device, then it is now cropped down to this area here. And if you're watching a YouTube channel on your mobile phone device, then it's this white area here, which you'll get to see and everything else is chopped away. So it's, it's very important when you are creating or YouTube banner that all of the important text, your branding, anything written is inside this white box and everything that's not really essential is outside of this white box or what they call the safe area. So I am going to walk you through this. It's very simple. So click on background over here, and we're going to select a background image. Now we can either select the photo that is supplied with snapper or we can click on patterns. And we can select the pattern that we want to use that's kind of in alignment with the branding that we're trying to achieve. Or we can even upload our own here if we're not happy with what we're seeing there. Okay, so we're gonna go back to photos. I'm going to use one that snapper has supplied here. And because we've created a travel adventure channel, I'm going to look for a photo that looks more travel adventure looking. So maybe this photo here from maybe not. So keep God of it. This one here. Now this one looks pretty good. So it looks like a desert and two people there. Okay, great. So you can see what this image looks like when viewable on a TV or on a smart phone, or on a desktop device. And so we're going to use this template as a bit of a guide for where we're going to place our text. So what we can do is we can click on re-position here, and we can click and drag the image around so that it kind of fits with nice composition inside of the box here. Okay, so I'm going to drag this up a little bit because I want to put some text down here actually. So my drag it up there and then click Apply down here. And then we're gonna go over to text. Actually will go into effect first. No, actually will go into saturation and we'll drag the saturation up. Okay, so that looks more like a desert. So I've dragged it up to maybe five or something, give it a little bit more of an orange look. And then maybe brightness might drag it up a little bit and contrast. Yeah, that's quite good. I'm happy with that. So I'll let you play with this in your own time. We'll go to Text and we'll add in some text. So I'm going to type in something like, what did we say before brads? Travel adventures. And I'm going to select all of this and I'm going to change the color. So click there, click on white. That looks pretty good. I can change the font here, so I might scroll down and look for some kind of font that looks kind of travel-related and little bit carefree and fun. How about water lily? I've used this one before in previous projects. I'm going to stretch that out. All right, so just going to center this so you'll see that it kind of snaps to position. So perfectly centers that text there might just make that a little bit smaller. So I can reduce the size here. Little bit. There we go. Looks pretty good. Okay, great. So what am I do is I might create a border around this text as well. Don't just center that up. See you see that line there that tells me that the text is perfectly centered there. All right, looks pretty good. And then I'll go over two shapes. And I'm going to create a border around this text. So these are working quite normal shapes. That one there looks like I can create a border with that. And I'm going to click and drag this down and just kind of set it up so that it's creating a nice little border around my text. I'm going to change the color of the border to white. And I might even reduce the thickness of that border down to something which is kinda thin. So maybe down to three or something. Looks pretty good. Quite happy with that. Maybe just shrink that a little bit. Also as well when you're playing with snapper. And like with most other photo editing software packages, you'll see here that we can move our layers forward and back. So for example, if I want to click on the text, I can't do that because this is a layer. The border is a layer over the top of the text. I can just click here where it says Move layer back. And then I can now click off that click on the text. So that's how you can move between your layers. They're very easy to use. And then from here, yep, I'm very happy with the text, very happy with the border. And so what am I do? I might add a tagline so I can click on this text here. And I can very easily clickers as duplicate layer. So that duplicates the text layer. And I might just type in something like, What do you guys think? Escape the norm. Escape, escape the ordinary. That sounds pretty good. Pretty sure that's been used somewhere else. So then we'll change the text on that one will make it smaller or change the font. Change the font to something like Okay, significant, we'll use that one. And then what we'll do is we'll create another shape. So we'll go to Shape and we'll put that shape behind that text. So I'll bring this down a little bit, shrink it up. There we go. And as you can see, the shape is over the top of the text that we're going to change the color of the shape. So we'll need to do is select the shape, click over here, and then I might just go and select a color for got a custom offer. Just look for color. They kinda matches the color of the sand. And it looks pretty good actually. It's very, very rough. I'm going very quickly. So I'm doing this for the first time. And I will again push this back. So move layer back and click on that one that will bring the text Ford. And the shape will get pushed backwards. And it might just shrink that a little bit more. So you get the idea, escape the ordinary. Now I might just increase the letter spacing here a little bit. There we go. Perfect. So we have escaped the ordinary. We've got our shape there in the background. And it's not perfect, but it's better than, better than what we started with. And then all we gotta do to see what this looks like on a TV device is, we can actually toggle the safe zone on and off. So if we click on that, you'll see that if we're watching this on a TV set, that's exactly what it looks like. And if we turn that back on, then we'll go back to what we were working with before. Okay. So that's pretty much all I want to do. I mean, I can always go back and I can click on Background, click on re-position. And I can kind of shift this up a little bit. If I want to change the composition of the text a little bit there. I can click apply there. I can also check in my website. So you get the idea. It's very, very easy to use. Then when it comes to exporting what you've created, just make sure that you've turned off this little, this little grid here, this little template in the background, which is going to help you to place your text and things of that nature for your banner. So turn that off and then click over where it says download. And I usually recommend selecting a PNG file. So no matter what sort of online application and you're using to create your banner. Try and export it in the highest quality possible PNG. So click on that one, and it's going to download our image for us. Okay, There we have it. So we have our image which has downloaded. And let's not too bad. We worked through this pretty quickly and I'm going to show you how to upload this to your brand new YouTube channel. Okay, So this is our brand new travel adventure channel. And if we go down to customize, click on that, and then we go over to branding. And you'll see here it says banner image. So we'll click on Change and we will apply the new mountain. So there it is. Double-click and there you have it. So again, I, if I run my mouse over viewable on TV, that sort of looks like on a desktop device and on a mobile phone device. And then I'll click Done. Okay, and then over here click on Publish. Okay, So now we're gonna see what this looks like. If we click on View channel on YouTube, we're going to see what our banner look. Oh, that looks pretty good. I'm happy with that. So there we go. That's how easy it is to create a brand new YouTube banner with snap a.com. I hope this was helpful. If you have any questions, please let me know. Give this give this a go and let me know what you think. And I'll see you in the next video tutorial.
24. YouTube- How to Add Chapter Markers Using Timestamps: How to add chapter markers to your videos in YouTube using timestamps, it's really easy to do. And if you're making long videos, I believe it's really important to use them because it's going to help your audience kind of navigate around the video, right? So I'll show you an example in my laptop in just a second. But if you have like a 20 minute video and you own, you want to watch one small portion, then using this method is highly recommended. So if you're not sure what I'm talking about, I'll show you right now on your screen down the bottom of the scrubber bar is if you run your mouse over. I've actually used it here on this video and many videos in my fitness street series to help people jump to one particular part of my day, are shooting daily vlogs there. And not everybody wants to watch the whole 15, 20, 30 minute video. So IQ the audience. And this is another important point. Even if you're using this, you're just going to remind the audience or people watching your videos that they can actually like click down but down below using the timestamps. It's about, hey guys, thanks for watching. This is another day in the life, your own fitness street. And if you're only interested in watching one part of this video down below, click the timestamp, huge jump straight to that part of the day, something like that. Let's jump into my laptop and I'll show you how easy it is to do this for your own videos and create these little timestamps here. And I'll go into this video. And the way I do it is I have a little description written out for the video itself, and then I have timestamps, and then I just list out all the sections of the video using timestamps. But the most important thing you need to do is put 0 colon 00 at the very beginning. If you do not do this, then it will not work, right? So that's the cue to YouTube that you're using this chapter systems, you must put 0 column 0000. If you don't do that, it will not work. And then you can just go through here, put timestamps in, and then mark at each section of the video, it is that easy. And then when you hit Save and you updated, then you just go back to your video and refresh it. And then didn't scroll here using your mouse and your intro, which starts at 0 column 0000, and then move along and our quick visit to drag and meu tie, cool, our quick tour of unit 27. So you get the idea. It is that simple. I hope this is helpful if you have any questions, let me know. See in the next tutorial.
25. YouTube- My Comment Pinning Strategy for YouTube Videos: So I'm going to be sharing with you my comment pinning strategy for my YouTube videos in this tutorial. And if you want to use my strategy, that's completely fine. I've been doing this for several years. I've done a lot of experimentation over the years as well. So this will save you a lot of messing around. But you would have seen, if you've watched the video, you scroll to the comments section and we all do it. We will go into the comments section. And you would sometimes see a pinned comment at the very top. So if I jump into my laptop real quick, this is an example of me using a pinned comment. And you can either pin comments from your viewers if you find them funny or they really add value or a good kind of atmosphere to become in section, you can pin that. So that's curated at the very top of the comments section. Or what I like to do. I like to pin my own comment. That way I can put in the information that I wanted that I have control over and I can pin that to the top. But inside that comment are usually links that augment the value of the video, right? They'd like an extension of the video. I will show you how to pin a comment. It's super easy. So I've got a video here, and I've got my comments section here. And to pin a comment from someone who's left a comment, you just run your mouse over. And this three little dots here on the right-hand side, you click on that and you click Pin. It is that simple, right? And then if you want, you can unpin the comment. If you want to remove that pin. How I like to do it is for example, I've got a video here which is from my fitness read series. So very popular series on my channel that are shot on fitness street or serotype and poo kept Thailand. And I've got a very, very much the same comment on each of these fitness street and videos. So if you take a closer look at this here, I've got that. I, first and foremost, I want to direct people to the playlist of fenestrated. So essentially, I want to bring the audience if they've loved this video, I want them to watch more videos from the same playlist that's going to help drive up of watch time, which is then going to help the algorithm promote that, that series, two more viewers. So there's a real strategy there to bringing your audience and feeding them back into your YouTube channel. The second thing that I've done here is I've put a link to my complete editing cause because I teach people how to edit videos and Premier Pro on Udemy and Skillshare. And so I have a link there because some people ask like they like the way I edit my videos on fitness tree or other videos. And how do you do this? How do you do that? And if they see that they're, they might click on that and check that out as well. The next one is a travel guide. So that just takes people to my fitness blog if they want to read more about fitness street. And the last one is driving people to my Facebook community, which is all relating to fitness route and what I do and I go one step further. If you take a closer look, busy bit line links. So I use a link shortening service called bit lie. And that allows me to shorten the link. So it's not one dirty long link because no one's going to want to look at a comment that has long links in it. So I shortened link down and I drop it into the pin comment. So I use bitly, take you into that now so it's free to sign up. I just use the free version and I take the long link and I shorten it. And that I can also track the analytics on those clicks, on those links. So I can see how many people have clicked on each of these bit line links and how effective they are. So for example, the editing, my complete editing course here, that editing with Brad, that's the short, short link go to Bitly. I can see that that particular link has had several a 140 clicks. So I know that that link is actually quite effective. And so I know I need to just keep that one there in the pin comment, right? But if I look at a link and it's not really performing well, not many people are clicking on it. Then I then go through edit my, my pin comments. And then I'd put in another link to another blog post or something that I believe is going to help people. And I try that for 30 days, 60 days, and then I re-evaluate the analytics on that. I'm going to go into this pin comment. So if you need to edit or a pinned comment, you just go over to the three dots here on the right-hand side. Click on that, click on Edit, and then you'll be able to edit the pin comment. Now remember whenever you edit a pinned comment, I'll do that now for example. So I'm just going to remove this here and you hit save. It no longer pins the comment. So now I've saved the update, but the comment is no longer pinned. So now I have to go back and click on the three dots and hit Pin to pin that again. So that's something that I didn't know about until about 12 months ago. I was like, What happened to my pin comment? It's dropped all the way into the comments section. So whenever you edit a pinned comment, he have to pin it again, right? So also to make your pin comment like boldface are really stands out in the comments section. You've got to put this little asterix things here at the beginning and the end, right? If you look closely at that on my screen, if you don't put those asterix things in, then it will not highlight, it will not make that bold face to your CEO. To me, it doesn't really stand out as much. So I like to make my pin comments bold. Note cancel. I'll just go back in there and edit that again. And also the links. I just get them from bit lie. I shorten them using bit lives, so I recommend using bit lighter. You can use another link shortening service, it's up to you. So that is my common pinning strategy for my YouTube videos. Now if you go through my fitness treats series on my channel, you'll see I used the same pinned comment on all of those videos. But if you go to other videos in other playlist, you'll see that the first line, I'm trying to get the audience that watches that video to jump back into the same playlist, to watch more videos from the same playlist. So I hope this was informative and interesting. If you have any questions, let me know and I'll see you in the next video tutorial.
26. YouTube- How to Add YouTube Hashtags: So I'll be showing you how to add hashtags to your YouTube videos and why you should use them. And if you're not sure what that is, you would have seen, if you've watched enough YouTube videos, they're like two or three hashtags above the title of the video. So using one of my videos as an example, we have the title of the video and then we've got three hashtags that are used. So I'm going to show you how to use those hashtags, how to add them in this very, very easy to do. And then we'll talk about why you should use them. So we'll jump into this video behind the scenes, we'll go to Edit and we'll go into the description of the video. Now there's two ways you can add these hashtags. You can either put them in the title of the video or you can put them in the description of the video. It's up to you. I personally throw them in the description of the video. And if you have a look in your screen now, I just throw them in down here, sort of, sort of halfway down the description. It doesn't really matter. But make sure when you're using these hashtags that you use all one word so you can't have spaces, right? So Brad Newton blogs all one word, fitness street or one word, otherwise it won't work. And so the limit is three hashtags per video. And so what I usually do, this is how I use them, is I have the first hashtag as a branding hashtags. So it's my name, like brand Newton blogs or brand Newton or brand Newton TV. And then the second two hashtags literally just represent the kind of content that's in the video, right? So if I am shooting a travel video and I'm shooting a video on fitness Street, for example, It's going to be hashtag fitness street or hashtag fitness or hashtag polychaete or hashtag Thailand's. It's something related to the content in that video. And also keep in mind that if you're using, if you're putting the location of the video, it will override the hashtags. So if you scroll down here on the scrolling on my video here, I'll show you what I mean. So if we go down here to where it says recording date and location. So if you put in like video location Melbourne, Australia, for example, or your location, that will override the hashtags that you throw in your description. Personally, I never use video location. I just put in the hashtags. I preferred the hashtags above the title of the video. And so that's pretty much it. Now, if we go back to the video itself, you'll see we've got our three hashtags there. And if you click on the first one, like the, I call it the branding hashtag, Brian Knutson vlogs. It will bring up all of the videos that I've tagged with that hashtag. And so a lot of people don't realize that YouTube is actually, you can search YouTube with using hashtags. So you can type in hashtag, you know, Brad Newton, vlogs. And all those videos tagged with a hashtag will come up in the search results. Now if I go back and I click on hashtag fitness, for example, because fitness is such a generic, huge key term, then you'll see that there's over 810 thousand videos tagged from a 182 thousand channels using hashtag fitness. There's no way my video's going to be sitting at the top there. So use the branding user branding hashtag for your own name. And that's all there is to it. I hope this was helpful. Use three hashtags in your videos. If you have any questions, let me know and I'll see you in the next tutorial.
27. YouTube- How to Create and Add YouTube End Screens: So I'll be showing you how to create an ad. Really awesome YouTube end screens to your videos that will help extend the watts time on your channel. Help rank your videos and keep people on your channel. So if you're not sure what these are, you would've seen them all kind of mimic it off, squeeze myself into a little box. So at the very end of videos, you'll see where you can subscribe to a channel or watch more videos or, you know, all the social media links. So we're going to be creating that in this tutorial. And I'm going to walk you through on my laptop how I do it, and there's different ways of doing it. I'll give you plenty of resources so you can go away and play around with this in your own time. Key thing is that you've got five to 20 seconds at the end of your video to make this work. No more than 20 seconds, that is the limit. So before we get into how to create custom and screen templates, I'll show you how to find them inside your YouTube channel dashboard and where you can make changes to the end screen elements. So I'll go into one of my videos here for the fitness treats series and I'll show you just how it works inside YouTube first. And if you click on end screen here, it'll bring up this little box. And this is where I can tell YouTube what end screen elements to display inside my YouTube end screen template. And as you can see over on the preview window, I already have an end screen template that I'm using. And you'll see here there's a little shaded area there, which essentially is talking about the safe region or safe zone. You cannot move or place and screen templates. So N screen elements outside that shaded area, as you can see, right? So that's the workable area there. And as you can see, if I move these n squared elements around, There's like little white boxes there, which are part of the template which we're going to get to in the second section of this tutorial, I will show you how to do that, but I'm going to move these back in here so they fit nicely. I can also make these little thumbnails bigger, but I can't make them any smaller. Right? And then over here I've got like a little subscribe icon to my YouTube channel, which I can move around as well. So you can see here that I've just placed these end screen elements inside of the screen template that I've created there. Now, down here we have quite unlike a very simplified video editing timeline. I guess we have a little scrubber tool here where we can preview how and screen looks like without end screen elements. And you can click on each one of these layers here. So we've got here the subscribe layer, which is this little circle, little icon there. And I can make it shorter or I can make it longer, stinger like very basic video editing. In your timeline window, where you can just make things longer or shorter. You can pick it up and drag it around, but you only got 20 seconds to work with, right? So you can't make it any longer than 20 seconds and you can't make it any shorter than five seconds, as you can see there. 20 seconds, five seconds. But I'm just going to place it there so that with the play head, if I play this bang, that's where I want the end screen elements to appear. And you can see a thumbnail view of our video on the timeline there. And I guess I can click on any of these videos. And I can actually tell YouTube what I want that n-squared element to be. So I can tell YouTube to display the most recent upload in this element by clicking here. Or I can tell you tube to display the video that's best for the viewer based on the algorithm by clicking this option. Or I can have complete control over what video displays there by clicking here on video. And then I can select the video that I want people to watch next, which is what I've done here for these two ends screen elements. And then of course I've got the subscribe for my channel brand news and blogs. That's pretty much a quick rundown of how the end screen elements work within the YouTube dashboard. Let's get into actually making an end screen template. Let's do it. Okay, so let's get into customizing and creating your very own end screen template. And so I'm going to show you different resources depending on what you plan on using to create these templates. So if you don't have Premiere Pro or Final Cut Pro, then we're going to start with snapper.com. And so everyone watching this can follow along with me using snapper.com. And then if you want to use Premiere Pro or Final Cut Pro, then at the very end of the video, we're gonna go through how to use those two bits of software, Specifically Premier Pro, to create animated and screens. So let's start with snapper.com. So if we could all go to snapper.com and we're going to create a screen template. We're going to scroll down here. And this is free to use as well. But you've only got five free downloads a month, but you only need to download it once, you know, once you create the template, hit download, that's one. And that's all you need to do. So let's have a look for the YouTube and screen template, which is down here, 1920 by 1080. We'll click on this one. And as you can see, we have a number of templates we can pick from. So I'll let you play around with this in your own time. But for the sake of this video, we're going to find this one here and wait for it to load. And fantastic. So all you need to do is just customize this to your own branding and your own style, and your own personality for your videos. And we're going to spend a lot of time on this because, you know, this would be a very long video, but you can go through here and you can change the color of the font and all that sort of stuff to whatever color is your branding. Very easy to do. And you can also change the background by clicking on background over here. And you can either upload your own background or you can use patterns, or you can use whatever photos that have supplied here. You can easily change the background just like that. Very easy to do. And as you can see, it says up here, non and screen elements only. So that's important to keep in mind because these little white boxes here, that's where our end screen elements are going to go inside of YouTube. You don't want to put these end screen boxes in the shaded area here where it says non end screen elements only, right? You don't want to put those white boxes in that shaded area. But you can put text like this in that shaded area. That's completely fine because that is not an end screen element. That's just a bit of text, right? So you can go through here, customize all of this in your own time, progress through super quickly like this. And once you kinda happy with it, then you can, you know, you can, by the way, you can delete this image here. This is just like a place holder image. So if you delete that, that's where your little subscribe to your channel subscribe icon is going to go in that little circular white there. And then once you've finished, you're going to go to Download and you're gonna click on high res PNG. And you're going to download that to your computer. And then we're going to put that inside of your editing software. Whatever that is. Premiere Pro Final Cut, Seibel link, whatever software you're using. But for this video, I'm going to jump into Premiere Pro, and I'm going to add what we've just downloaded into Premier Pro. I'm going to show you very quickly how this works. So I'm going to import it very quickly. Go to downloads, go to the design we've just downloaded. I'm going to drag that over into my timeline. And I'm going to stress that across. Now, this is not a tutorial on how to use Premiere Pro, but whatever software you're using, it's kind of the same principle, right? So we play this back and we have our end screen there. Now, as mentioned before, the end screen can be no longer than 20 seconds, right? So something to keep in mind. Now in this case, this little end screen template is about eight seconds long. So we can make this a little longer, but no more than 20 seconds, right? And so when you're uploading the video, when you go to YouTube, when the video finishes uploading, and we'll go into N screen here. And you will complete this section of the process. Okay, so it's that easy. You've just added in your very own custom end screen for YouTube videos. Now also the other two resources as well, where if you want to use animated and screens and not just a static and screen like in this case, then you can use to other resources. But one in particular I'll show you is mixed kit dot code. So mixed kit dot co is free to use. Now you can, if you're using Premier Pro, then this is going to be more applicable to you. This is where you can download really cool free YouTube templates for Premiere Pro. Whether that be these little tiny subscribe now or like or comment on the video. And these little elements you can download and you can incorporate into your videos. But this video is about n screens. So I'm going to show you how you can download these n screens, as you can see here, we have an end screen there we can download as a template and we can customize that insider Premier Pro. We have another one here, so there's quite a few that you can download. So if you're using Premier Pro, this is a great website to use a really cool free end screen templates if you're using Final Cut Pro, the same website and mixed kid dot co, have animated and screens for you as well. So if you don't use either of these bits of software than this website is not going to be of use to you. But you might want to look at a website called place at.net. So place it dotnet, however, it does come at a cost of how much is it? $15 a month. I don't use it, but this is a website that checkout as well. But we'll have a look at this website when we use one of these templates and I'll walk you through Premiere Pro and how you can customize this inside Premiere Pro. So you have a look at what you want you downloaded and it downloads as a MOG art file, right? So just the file. And then once you download it, you bring it into Premiere Pro. And it first and foremost, so that we're on the same page. You go to Window workspaces and then click on reset to save layout. Now this is not a editing tutorial. I teach Premiere Pro in another course on the platform to absolute beginners. So I'm going to move through this pretty quickly and make sure you've got graphic selected at the top here. And then over on the right-hand side we have essential graphics. And essentially what we've downloaded is a morgue file which will display as an essential graphic inside of Premiere Pro. Now of course I've already added it, but all you need to do is click on this icon down here where it says install motion graphics template. Click on that little icon there. And so that's the Mogul file. We double-click on that. And of course I've already got it installed, so I'm not going to override it. And there it is there. And so all you need to do is click, drag it over into your timeline there, and you can customize it once it imports. Now the thing is you need to install the font files as well. And again, I'm not going to go into that in this video. You'll have to install the font files. Now it's complaining that these particular fonts are not installed. So I'm just going to click Okay, I'm not going to bother with it right now. And then this is what it looks like. We play this back. We have our really nice animated end screen. If we click on that, they on our timeline. And then we go over into essential graphics. We can change all of the colors, we can change the text. We can change all of this stuff here on the right-hand side, which I'm not going to go through in this video. You kinda get the idea. It's very, very straightforward, and that's pretty much it now, before I finish with this, this end screen is only five seconds long, which is the minimum for n screen lengths for YouTube. Now if you want to make it longer, or you need to do is scroll or scrub across with your play head, take your razor tool and then cut it somewhere here, and then go back to your selection tool. Click, hold down the Alt key. I'm going very fast because this is not a Premier Pro editing tutorial. And then just kinda duplicate that across a couple of times like this. And then we play this back. And essentially you're looping that animation for play this back. There we go. So that's how you make five seconds into something that there's a little bit longer. So hope that was helpful if you have any questions, let me know. This is a fantastic way to boost your watch time, increase engagement on your videos and keep people on your channel. I have gone pretty quickly through this tutorial just if you need to go back, rewind, pause, do whatever. But I didn't want to waste any time, so I hope I've got everything across. But if I've missed something or if you have any questions, feel free to message me. I'm not far away and I'll see you in the next tutorial.
28. YouTube- How to Create A Playlist (Tips & Tricks): Okay, so the first thing is how to create a playlist. It is super easy. I'll show how to do it. So I'm in my dashboard here for my channel. And I will click here on the left-hand side where it says playlists. I click on that. And then I've got all my playlists here. If you go over here where it says new playlist, click on that. And we're going to call this one awesome new playlist, right? So very straightforward. And it's going to be publicly visible and we click on Create. And then we've just created a brand new playlist with nothing in it. So if I go inside this playlist here, it is absolutely empty. And I'll show you a couple of little parameters as well. But I'll show you the parameters not on this playlist because there's nothing in it to really show you. But I'll use fenestrated as an example. So this is a filled out playlist of all my finished three videos. And so if you click here on these three little dots here and go down to playlist settings. Now it's a couple of little things I want to mention here when you're using playlists for YouTube videos, the first one is allowed embedding, so important, make sure that's turned on, especially if you want to embed your playlist into your website or your blog. That's what I've done for this particular playlist, fitness street. It, it's an embedded on my website. So I need to turn this on so I can allow that to happen. Another option as well is the add new videos to top of playlists. So whenever I'm making a video for fitness tree, I want to make sure that video gets chucked to the very top of the playlist and not to the very bottom. And I've got to click and drag that video all the way to the top. And there's a 144 videos in this playlist. And I can sit there for about a minute trying to draw that video all the way to the top of the playlist. So that's a handy little feature. Make sure that's turned on. And the last one, it's pretty important, set as an official series for this playlist. So essentially what that means is that you're telling YouTube that the content within the playlist in that particular order, the videos in that particular order need to be watched in that particular order. And I'll be served to the audience in that same order that you list them in the playlist. For example, if you go from my fitness street series here I've got starting at Episode 1, 2, 3, 4, episode 5, Episode 6, all the way to episode 22. Now of course it's a series I want people to watch from one to three consecutively. I don't want those videos to be served out of order to the audience. So I tell you too that this playlist should be played to the audience in the order in which I've put these videos inside the platelets. So if you have a look here, I can actually run the mouse over here and I can shift and move these videos around and change the order. Right? But I've set it up so that episode 5, 6, 7, 8, 9, 10, everything is in consecutive order. And I tell you to using that setting here under playlist settings. Please set this official series for this playlist. So make sure that's turned on. Of course, I add a little description for my playlist here. So join Robert and I where we return for season two for one month training adventure to fitness street. And typically what I do when I'm putting in my little description for my playlist. And you just change it by clicking on the little pen icon here and modifying the description here is I usually use a couple of keywords that I know people are going to be searching for in YouTube. And the reason for that is because the YouTube playlists actually comes up as a separate entry inside the YouTube search results. And so YouTube, if you have looked at the very top here, this URL here is actually the URL for the playlist. So YouTube treats this playlist kinda like a video in its own way. And so you can take that link and you can share it with people, and you can share the entire playlist with your audience or on your website, on your blog. And so when you're going to the Search and you type in, for example, fitness tree or do this right now. So fitness street, poor cat. I'll show you why it's important to consider keywords when you're writing your playlist description, because you actually are going to help rank the entire playlist inside of the YouTube search results. That's going to help give you what your videos more exposure. And if you can get that playlist in the search results and people click on that, then all of a sudden people fall into this funnel of all of this content. Which is probably the reason why a lot of these fitness videos have done really well, because there's a 144 videos in this playlist alone. And when someone lands on one of those videos from the playlist in the search results, they get to see all a 144 videos or ahead. So fitness street per cat enter. And so if we scroll down, you'll see here there's these videos and I've used branded thumbnails to make it clear that they're all videos of the same type. And if I keep scrolling down, So we've got, we've got here, this is the playlist, fitness street blogs. And if so, if someone clicks on this from the search results, they land inside this massive playlist of videos. So keep in mind when you're putting that, when you're creating the title for your playlist, which you can click on this little pen icon here. And I've called it fit ministry vlogs or you're writing out the description for your playlist. Keep in mind, do a little bit of keyword research. And find out what people are searching for and use those same keywords inside the title of your playlist and saw the description of that same playlist. And also another thing I like to do is I like to set a thumbnail for that playlist. And I use, I go through the videos and my pilot is look for the nicest, most representative thumbnail that can represent the entire playlists. And I said that thumbnail as the official thumbnail for the playlist. What does that mean? I'm inside the district series and I have a look through my videos here and they go, What thumb out do I want to represent this playlist, as you can see on the left-hand side here, I've selected this thumbnail to be representative of this playlist, or you gotta do is you'd click, you run your mouse over any one of these videos and you find these little, three little dots here. Click on that, and then click where it says Set as playlist thumbnail. So it's something that I like to do. It just gives me more control over what thumbnail is my feature thumbnail for a particular playlist, as you might be wondering, how do you, how do you add videos to a new playlist or how do you move videos from one place to another? Pretty straightforward. You just jump into any particular video, for example, I don't know, I'm just going to use this one here, fitness street memories. So on click on Details and I go into the video itself and then I scroll down past the thumbnail and where it says playlist here. I've got this video inside the fitness tree, vlogs playlist, but I can select any other playlist here. And if I want to move it into another playlist, so it is that easy. Or if I want to add multiple videos to one particular playlist, I go back to where it says content. So click on content on the left here, and then I just click and look for all the videos that have a similar kind of theme. I'm targeting the same kind of audience. And I'll just click all these kind of videos that I want to add there. So this one and this one and this one. And then where it says add to playlist, I click on that. And I can add all of the selected videos into a particular playlist, so it is that easy. And then typically what I do is I go to Customize channel here. And I take those nicely laid out, beautiful playlist that I think people are really going to enjoy all of the content within that particular country because I organize my playlist according to country. And then I go here and I change the layout of my YouTube homepage. You'll see here that where it says featured sections. I can add and remove playlist, and I can move playlists around to make my channel a, look a certain way according to my branding. So if I scroll down here, I've got a playlist for RC Adventures South Africa. And on this three dots, I click on that and I can edit and change the playlist that I want to display in that particular part of my channel home screen. What does that mean? So if I go back to my YouTube channel home screen, I've got Ozzie adventure videos, South Africa, Cambodia. These are separate playlists. I want to move the order of those playlist. Then I just go to channel customization and then I look for, I can either click here and move it around this way, like that. Or I don't wanna do that, I'll just change it back. Or I can click on these three dots, click on Edit section contents. And then I can select a different playlist that I want to pop up in that particular shelf. So couple little tricks and tips that are used for playlist on my YouTube channel. I hope this was helpful if you have any questions, let me know and I'll see you in the next tutorial.
29. YouTube- How to Monetise YouTube Videos: So I'm going to share with you how to monetize your YouTube videos on your YouTube channel. And also different ways that you can make money outside of YouTube by using your YouTube videos. And for me, this is a full-time job. And ironically, I don't make a lot of money directly from YouTube itself, also known as AdSense. So in this video, we'll talk a bit about AdSense and how to become a YouTube partner. But more importantly, is how to make money outside of YouTube, but using your YouTube videos. So to make money with your YouTube videos directly through YouTube itself, you need to be part of the YouTube Partner Program, which means you need to have an AdSense account. So I have my laptop in front of me right now. And if you go to google.com slash AdSense, you can sign up with an AdSense account here, which can be linked across to your YouTube channel. And that he can make money from the advocate displayed on your videos on YouTube, which we've all seen before. However, there are certain minimum requirements you must meet before you can be entitled to join the YouTube Partner Program. So I'll throw those up on your screen right now. Need to have had 4000 watch hours in the last 12 months and at least 1 thousand subscribers. So before you stop watching this video, because we only get to the ways of making money outside of YouTube. Getting 1000 subscribers takes a long time. For most people, for me, it took me about 14 months to get my first 1000 subscribers. But even when I've got a thousand subscribers, I didn't meet the 4000 hours watch time requirement, so I had to wait a little bit longer before I met both requirements to then start making money from my YouTube channel. So if we head over into our sample YouTube channel that we set up here in this section of the course, Brad's travel adventures. We have a total of 0 subscribers, which by the way, we all start from somewhere. We all start from the very bottom. So don't worry about 0 subscribers. It's all uphill from here. If we go to monetization, and you'll see here it says as a YouTube partner, you'll be eligible to earn money from videos, get credit support, and so on. And down here it says you have 0 subscribers, and it says we need a 1000. And over here we have 0 public watchtowers and we require 4000. So you can actually click on where it says notify me when I'm eligible. So if you click on that, you'll get an e-mail that will tell you when you are eligible to apply for the YouTube Partner Program. So let's take a look at my YouTube channel here and the last 28 days of brand Newton vlogs and how much money I've made from YouTube, AdSense. In other words, money that I've made from ads that display on my YouTube videos over the last 28 days. So I'm gonna jump in. I'm going to be totally transparent and show you that I only made a $108.47 in the last 28 days as of up to the tenth of May 2021. Now, as I said in the early piece of this video, that I do not depend on YouTube AdSense to pay my bills. It pays my mobile bill or a $115 a month almost, but it doesn't pay anything else. And that's why it's important to build other income streams outside of YouTube and not be dependent on Google AdSense, it's really, really important and I won't be the only one telling you that if you were to, other creators, talk about how to make money for YouTube. But if we go further into the backend of my YouTube channel, will go to the content here. So as you can see, we have a list of my videos here, and then we have monetization column right here. Now I can turn monetization on and off each one of these videos. And green means the green dollar sign there means that the video is monetized. But you might see other colors there like yellow or red. Yellow just means that there are some restrictions on the revenue that you are making on that video. And read typically means that the video is not entitled for monetization. But these are things to think about once you become part of the YouTube Partner Program. Otherwise, if we go into monetization on my channel, once your channel is approved for monetization, you meet the minimum requirements and so forth. Then you have the ability to do things on your YouTube channel directly that can make you more money than just the Adsense alone. So besides being able to make money from your YouTube videos through video advertising, once you're entitled to the YouTube Partner Program, you actually have the ability to make money directly through YouTube through these other methods. So as mentioned, we talked about video advertising, which is the first five seconds typically of a video, you'll see an ad from an advertiser. But the other options are merchandise. You can actually set up merchandise on your YouTube channel and sell merchandise underneath where the video plays. And you could sell anything from T-shirts, hoodies, phone cases, and all that pops up below the playback window or inside of YouTube. And then the other option is memberships. So you can have fans or subscribers of your YouTube channel that wish to become fans. And they pay a certain monthly membership fee to get exclusive access to perks or benefits or unreleased content, or the ability to ask you questions directly about something on your YouTube channel or anything along those lines. So there are the membership options as well. And then lastly, you have supers, which means that your fans or your subscribers can purchase goods from your YouTube channel. And they can connect with you during live streams where they can tip you, like tipping dollars, like a tipping jar. During a live streams, you'll see that if you've ever watched the livestream where there's a super enabled, then you'll see that you'll be able to tip that person or that creator directly if you, you know, and you can usually ask questions in exchange for a tip, that kind of thing. And if we go over to settings and we go to Upload defaults and then go over to monetization. Here's where I can make some changes to the monetization options directly inside of YouTube. So if I want, I can turn on and off overlay ads, sponsored cards and so forth. I can even turn on and off these mid role as well. So that's where I have the option to manipulate monetization across my entire channel. Okay, so let's talk about the different ways you can make money from your YouTube channels outside of YouTube, which is how I've been able to do this full time. And so I'll share what I do to make money outside of YouTube with my YouTube channel. And then I'll give you a few other options as well. So I'm going to jump into my laptop and I'm going to show you these other options. So let's go. Okay, so let's look at different ways that you can make money outside of YouTube using your YouTube videos, which is what I do, and that's what pays my rent. And so I'm going to share with you how I do it. And you can use my techniques or you can use other ones that I'll talk about in this section of the videos. So I'm inside my YouTube channel now. I'm inside one of my videos here. I'm in the description section of one of my videos. And the first way that you can make money off of YouTube is through digital products. So that might be in the form of online courses or e-books or presets or templates. For me personally, my digital product, my online courses. And so if people watched my YouTube videos and they like the way I edit my videos, or they liked my travel adventures, or they just like me as a person. Then they get curious and they fall down the rabbit hole of, you know what I'm, what I have to offer outside of YouTube. So they might go to my website, they might send me an email, or they might read my fitness blog. And then they discovered that I've got some courses. And so then they go down that path and are either by courses or watch my courses on Skillshare or you demi. And so that's one way that you can monetize your YouTube channel without using or relying on YouTube AdSense. So as you can see in the description, and you'll see this in all of my videos. I've created my Skillshare courses and I teach basic fitness and video editing on Skillshare and Udemy. And I have a little referral link here as well. So if you have some kind of a skill set that you can package into a course, then you can put that onto Skillshare or you demi, and that's one way that you can, you can make money and you can put that into the description. Your YouTube videos as a very indirect way of promoting your course. So if we go over to a couple of other YouTube channels, as an example, you'll see here that lossless bronchi Christian LeBlanc channel. If we go here and click on his link here, he's promoting his lost Creator Academy course or online group. And he's using YouTube and YouTube channel to promote the loss Creator Academy. And so if we have a look at another YouTube guy here, Greg, to set his in the realms of fitness. He's here promoting his e-books and coaching services using his YouTube channel. And so people watches YouTube videos and then they get, they get curious and then they see are he's got some e-books, are he's got a cookbook or he does online coaching as well. And so this is how he promotes his digital products and coaching services by using his YouTube channel. If we have a look at my YouTube channel, as I said, people can go to the description of my videos and see that I've got my courses there. Or they can click up here, it says my video editing course. And that takes people directly to an online platform where they can purchase the course and they get a bit of a discount there. And so I don't promote these courses in any of my YouTube videos. I let people kind of find them themselves. I feel like if people are interested enough and they liked me enough, that people will kind of figure out what I have to offer without me directly telling them that I have something to offer. So the second one I've got here on my list is affiliate marketing. So essentially, when you are promoting and selling products on behalf of somebody else, you can earn a small commission. And so affiliate marketing is a very lucrative way of making money, but it does take a lot of time and a lot of hard work in the very beginning to kind of build up a library of videos on your YouTube channel and to get enough views and to get enough traction that will then translate into enough traffic and people clicking on those affiliate links so that you can make enough of a commission that's going to be worth your time. But what's really good about affiliate marketing is that after a while, it kind of I just keeps building and building and building and you make more and more money. But in the very beginning, you don't make much money at all, but you have to be persistent and patient. So if I move down my list here, I've got the background music in my videos. I use Epidemic sound now I used to use Sound Stripe. Here is an affiliate marketing link or referral link for Epidemic Sound. So in other words, when people watch my videos and they're like the music that they hear in the background of my videos. Then they go into the description of the video and I'll see that he uses Epidemic Sound and they click on this link. And if they use my referral code right here, then I actually get a free one month free membership for Epidemic sound. So for the last 12 or 18 months or so, I haven't had to pay for Epidemic Sound membership because I'm getting these referrals come through every month. So that's a nice little perk. But if I move further down. I've got here these little links here, because some people get curious. I want to know what cameras I use, what lens I used for my videos, the drone and the microphones and the laptop I'm using right now to edit my videos. And so they click on these Amazon links. And that takes people to the Amazon website where if they want they can purchase the same good that I use and I get a small commission. And that's because I'm part of the Amazon affiliate program. So this is what it looks like. And I suggest you sign up to this. It's free to sign up to. If you go to this website here, affiliate dash Program, amazon dot amazon.com. And you can sign up to have a read through it. And, and obviously, of course, I recommend you only promote the products that you really believe in and the products that you actually use, and not products that are going to make you the most amount of commission. But check this one out. It's a really good option. And so in the description of all of my videos, I have this little amazon affiliate links here and I earn a small commission every time someone clicks on them and purchases one of the products here. The other way of making money from your YouTube channel is through brand deals and sponsorships. And so what that means is that usually a brand will come to you if they believe you have the right type of audience for their product. And I will pay you to produce a video to promote the brand. In exchange. You'll make a video for them and you'll publish that on your YouTube channel. And so of course, it is an exchange. And I only always recommend that you do brand deals and sponsorship deals with companies or brands that you actually believe in. And for me personally, this is not the way I go about making money. I've had different brands approach me over the years, wanting me to make videos on certain travel adventure products like backpacks and shoes and all that kinda stuff, and sunglasses and, and all of that. And for me, when I've looked at these, the scope of the deal, for me, never felt right and so I've never, ever taken up any of these brand deals because none of them really resonate with me and I'm not going to promote a product or a service that I don't always use. And I don't truly believe in. For example, epidemic sound that I haven't affiliate relationship with. I really do believe in the music that they have on their platform and so I'm very happy to promote them. Sound Stripe. I very much believe in them as well, and I'm very happy to promote them, but I will not promote anything I don't believe in. And so that's a personal rule that I have for myself. I'm not going to sacrifice my brand to make a couple of $100. I think it's worth it. But definitely sponsorships and brand deals is a very lucrative way of making money if you're making videos for brands that you truly believe in. And interestingly enough, you don't need a lot of subscribers to get brand deals. I mean, I started getting brand deals around for 5000 subscribers. And when I started making a lot of videos of the Philippines and Indonesia back a 2.5 years ago. And I had about four or 5 thousand subscribers then a lot more travel adventure brands that are reaching out to me. So, you know, four or 5 thousand subscribers and not a lot, but you don't need a lot of subscribers to start getting these brand deals. Hope that was helpful. They are the ways that I make my money off YouTube. I don't, as you know, I don't make a lot of money directly through YouTube, through AdSense, a $108.47. As I said before, it doesn't really pay my mobile bill. My mobile bill comes to a $115 a month or something. But it's very important to diversify your income streams and to start building that out very early in your YouTube journey, please do not depend on AdSense to pay your bills. A lot of big YouTube creators will tell you the same thing. Some that have millions of subscribers. It's very, very quick and easy for YouTube to just change a policy or something happens in the algorithm and your ad revenue can get reduced by half overnight. Or they might even just the monetize your videos. And so the video is that we're making the most amount of money and no longer making any money. And so you can't just, you can't depend on AdSense for your money and for your revenue. You have to diversify. Thanks for watching and I'll see you in the next video.
30. YouTube- The Best YouTube Upload Schedule: A common question that beginners asked that are just starting the YouTube journey is how often do I need to upload to YouTube? Now, when I first started my YouTube journey five years ago, I was a little bit fanatical. I uploaded every day for 14 months, and I realized that was the craziest thing I could ever do. So I never missed a video. I did a daily video for the first port, hey, months of my YouTube journey. And I don't recommend that at all because I didn't have a social life, but very quickly I learned how to edit videos, how to be consistent. And then I also realized that I didn't have enough time to learn or self-educate or to make my videos better. So most of those videos pretty much look the same because I didn't spend a whole lot of time, because I didn't have a whole lot of time to actually improve my storytelling and my editing ability. That's a whole other conversation we're talking about daily vlogging, which is what I did when I first started. But the more sensible approach, and by the way, I had a full time corporate job when I did that. So not only do I have a full-time corporate job making these videos, but what I usually recommend people when they're first starting out is to pick a schedule and stick with it. And typically, once, one video a week or two or three videos a week is a pretty good place to start. And then depending on your lifestyle and how busy you are with family, you might have kids, a corporate job and other commitments, then you can re-evaluate that after three months. So pick a schedule and stick to it and then re-evaluate. That's the easiest way. And also, I wish I applied this from the very beginning and not just turned into a machine making video after video after video. And that is giving yourself time to actually learn and make your videos better. Because yeah, it's great to make videos, but you also need to get better at making videos. Because remember, when you're on YouTube, you're a business. Essentially, your YouTube channel is like setting up a business and you're going to have competitors in your particular niche. So you need to really think about when you're not making videos. You need to look at how you can make your video editing, storytelling, thumbnails, tags, titles, you know, how you can improve or that and make it better. If you're making a video every single day, there's only so much you can improve. So I really do believe that you need to give yourself time to self-developed, grow, and innovate your video content and your thumbnails. And once you pick what you're uploading schedule is going to be, then it's just a matter of working backwards and going all. Okay, if I'm releasing two videos a week, That's Wednesday and Friday, then that means that I need to film on Monday or maybe even Sunday. And then I need to edit that video on Tuesday and then get it ready for upload and publication on Wednesday. And so that's a pretty good strategy to use. And you can always re-evaluate that in three months if it doesn't work for you. For me, I typically use a diary like this when I'm planning my video releases or I use a calendar on my computer. And that helps me plan out what videos I'm going to make and what I'm going to publish. And I also believe that if I didn't publish videos consistently over time, that I would then lose rank my channel and all my views would just go down and down and down. And actually for the first time in five-years, I took a four month break and I really needed that break because a lot of things have been going on behind the scenes with this pandemic. And I needed to take a break to focus on those other things and believe it or not, my channels performance still remain the same even though I took the longest break four months from my channel. So there's no need to worry about losing rank or your video performance or your channel performance dropping considerably. If you do decide to take a break or go on vacation with her family, spend this time now a sit down. Think about your lifestyle. Think about your schedule. Think about all the commitments you have. Asada, YouTube, and think about how many videos per week can you create based on your lifestyle and your work-life balance and then re-evaluate in about three or four months from now to see if that schedule is working for you or see you in the next video.
31. YouTube- Best Copyright-Free Music for YouTube Videos: Where to find the best copyright free music for your videos, for your vlogs so that you can monetize those videos and not have to worry about getting copyright strikes or claims made against you when you make your videos. I've been doing this for over five years. I've made lots of mistakes. And so I'm going to really just make it simple for you and save you a whole lot of time and headache. And I'm going to jump into my laptop and show you where you can get really awesome background music. Then you can monetize and your videos and not have to worry about potential copyright strike. So if you need to pause the video, please do so. But I'm not going to waste any more time. I'm going to jump into my laptop. Get on with this right now. Alright, the best copyright free music for your YouTube videos or your vlogs. I'm going to show you where you can get amazing high-quality background music that's copyright free and you can monetize your videos and not have to worry about copyright strikes. But before I show you some of the really amazing YouTube channels where you can get amazing background music. This is where I started Soundcloud.com. Feel free to register an account. Take a look around. I spent hundreds of hours looking through this site. And I did manage to find a couple of really good background music tracks, but, you know, it wasn't worth my time. So feel free to have a look around. You will probably find something decent that you can use without copyright. Soundcloud.com, That's one option for you. So we have the first channel here, which is the Audio Library, YouTube channel. So audio library, music for content creators. So pause the video, take notes, check this out. And a really great resource. If you click on the About tab here in the Youtube channel, have a look through to see what's required of you before you can actually use the tracks from each of these YouTube channels I'm about to show you. So for example, audio library here gives you a list here, you must include the full credits in your video description. You cannot claim the music as your own. Yada, yada, yada, right? So this is one option that you can use. Fantastic music. Take a look through it. That's the first option. The second one that I really like is check vibe sound. So write that one down, check vibe sound. Again, go to the About page and see what the requirements are to use that music. And also, you can go into each of the videos. And I highly recommend you do go into the music tracks or the music video tracks. Click on it, go to the description of the video and just see what they require of you. Sometimes they say you need to copy and paste reference to the original author or composer. But all that you do that in your own time, just make sure you read the description to see what the requirements are to use that particular track. The next one is base rebels, a really, really great YouTube channel source for good, high-quality, copyright free background music. I have a flip through here. Go to the About page, see what they require. Go to the playlist and see they've got here, they got future house, they've got instrumental music. They've got all different ambient sound tracks, all sorts of stuff here. The next one is vlog, no copyright music. This is actually one of my favorite ones. So check this one out. Vlog, no copyright music. And again, go to the About tab and see what they require. Ok, so there's not much in there. If we go back and we go to videos and we'll check out this one here. And if we go down and have a look at the description, it will tell you what you need to do. So it says here, under license, you're free to use this song in any of your videos, but you must include the following in the video description, copy and paste. So you have to copy and paste this into the description of your vlog or your video on YouTube. And that will give you permission to use that track. If you're wondering about how to download this track. Here, there's a link here says free download. You just click on this link and you can download that track. There's another way of doing it, which I'll show you at the very end. Otherwise we'll go to the next one. And another one of my favorite ones is no copyright sounds. And again, it's another YouTube channel. Same thing. Click on the About page. Look around for the music that you want. Listen to tracks, and then go to the description. Always go to the description and have a look to see and read the description and just see what you need to do so that you can use the track. So when you are using this track, we simply ask that you put this in your description, right? So again, you just have to copy and paste that into your description. Pretty easy, right? You go to the next one. Based nation is really good. So write this one down base Nation. And then the last one I want to show you is breaking copyright, which are only just discovered recently. Actually, breaking copyright music for videos and streams. And again, you're just click around, go to About, click on the videos tab here, and just do the same thing that I've been showing you to do when checking the requirements to use that audio track. Now, if you're wondering about how to download the audio tracks here from these channels. If you use for K download, this is what I use sometimes for K video downloader. Or if you click here, convert YouTube to MP3, it will help you extract the audio from these videos here on these channels. So it's actually, I use the free version for K video downloader. I don't I don't use the paid version. It's the free version is good enough. And that will allow you to extract the audio from video. So I hope this was helpful. Let me know what you think. If you have any questions, let me know. Actually before I go, you can simply just go to the Search tab in YouTube and type in, say, royalty-free. Here we go. Royalty-free music. If you type in royalty-free music, and then go up to where it says filters, and then click here where it says channel. It will give you a whole list of different channels that are offering royalty-free or no copyright music. And some of these ones we've already mentioned here, so royalty-free music, no copyright music. That's a channel to check out. Here's another one. So the whole list of channels that offer royalty-free music that we haven't discussed, but you get the idea. So I hope this is super helpful if you have any questions, please let me know. Otherwise, I will see you in the next tutorial.
32. YouTube- My Favourite No-Copyright Music Provider: So in the previous video, I talked about where you can get free, copyright, free music for your vlogs, for your videos. Absolutely free, which is awesome. It's how I started years ago, when I started my journey of making videos five-years ago. However, if you want to take the production quality of your videos to a whole new level and you ought to really impress your friends or your audience with out, I would say Hollywood quality background music. Then I'm going to share with you a music provided that I've been using for years, that Peter McKinnon has been using for years, and other top vloggers had been using for a long time. Then stick around because I'm going to share with you how I use this company and how I get my licenses and stuff like that. If you want to go to the next level with your video production. So I should point out real quick, I'm not being paid or more sponsored to make this video. So they don't know, I'm making this video. I'm just sharing with you a little bit of inside knowledge that I've been doing for years. If you like my vlogs on my YouTube channel, and the music that you listen to, that music comes from this provider. I pay $15 a month. I know. I know it's a lot of money. If you're just starting out and you don't know if you're gonna do vlogging or video production long-term, Right? I totally respect that. I didn't want to pay any money when I first started. That's why the previous video or that free stuff I that I preferred that however, there is a 30 day free trial and so you can try it for free, which is exactly what I did with this music provider. I try it for free. I downloaded as much music as I could in 30 days, and then I've been stuck with them for years and I absolutely loved service. So I'm going to jump into my laptop. I'm going to share that with you and let me know what you think. If you have any questions, let me know. But that's jumping to the laptop. My favorite no copyright music provider is Epidemic Sound. I've been using this platform for years and I absolutely love it. And I guarantee you if you're looking at increasing the production quality of your videos or your vlogs. And you never want to have to worry about copyright strikes or claims. This is the platform for you seriously, I'm going to walk you through this platform and how I use it. Yes, I pay $15 a month. You will get your money's worth. And as I said before, there's like a 30 day free trial or something like that, which is how I started before I signed up, but I'll link it up for you later on. So essentially you've got access to over 35 thousand tracks and they're always updating their database. And what I love about this platform is that everything is categorized. You know, when you go to the YouTube channels that I showed you in the previous video, it's not as easy to find the exact mood or genre of music compared to this platform. For example, if you'd like my cinematic vlogs, I usually go into cinematic and I listened to any of the tracks and the cinematic genre. If I'm actually looking for a particular type of mood that I'm trying to recreate in my videos, I just click on moods. And if I'm one happy or Epic or dreamy or euphoric or whatever, then I can just click on any one of these moods and that will sort the music based on the mood. And as I said, we've got genres or hip hop, which is one of my favorite, one of my favorite genres. I'm always inside this section here or play this one. I haven't heard this one before. Could you please tell me what they bring me to my nice to meet you tell me honestly and file wasn't bad, not bad, not bad. I like that track. It's one of those tracks I would use in my more tie videos. So we'll go back and continue having a look and we'll keep scrolling through. They've also got sound effects as well, which I've used in a lot of my videos. They've got over, I believe it's like 90 thousand different sound effects like fuel or shoes or waves. I've used waves in my, in my ambience for my YouTube videos, for my travel videos. So, so they've got all sorts of different sound effects here, waves and also computers typing, bells, ringing all that kinda stuff. So Heaps a different sound effects that always updating. So this is the platform I use. If I go back to music and I scroll down, I also check out the staff picks here as well. And I check out what the staff Pixar. And if I like a track and I want to track that similar to the track that I like. I click on this little icon here, it says similar and it will give me all of the tracks that are similar to that particular track. Great little feature, I love it. Otherwise, what I love about Epidemic Sound is they offer unlimited track downloads, so I pay $15 a month. But essentially I can download as many of these tracks as I want and they're always updating their database. And it's very easy to navigate and find exactly what our native I want to travel track for a travel video I'm making, then they've got all these different categories here. If I'm, you know, if it's a road trip kind of track that I want anyway, so you get the idea. So a question that I actually had about using Epidemic Sounds music is what happens if I cancel my membership, Brad, does it mean that the music that I've used will get copyright strikes and things like that in my videos, The answer is no. While you still have a membership with Epidemic Sound, you're allowed to use all their music or their sound effects copyright-free, no issues with copyright strikes. However, if you cancel your membership, you cannot continue to use that music in any future videos. All the tracks that you've used in your previous videos, Waltz, do you had the membership is perfectly fine. It's yours to keep if I have to worry about copyright strikes, but you just can't use it after your membership expires. So that's the answer to that question. Otherwise, I hope this was helpful, that little bit of an insight to a platform that I love, as I said, dot-dot-dot or sponsored. And I'll link up where you can access a 30 day free trial if you wish, which is how I started and otherwise enjoy the editing journey and I'll see you in the next tutorial.
33. Conclusion- What's Next? My Challenge To You: Okay, so what's next? You've done this course, you've finished it. Now what? I would argue that this is the beginning of the journey. This is actually the beginning of the next chapter. And so there's not much more I can talk about. I've covered a lot of stuff in this little cause and most of it is mindset really it is. I mean, you know, we can talk about equipment, we can talk about editing, we can talk about different stuff. But at the end of the day, it really comes down to getting through the obstacles in here. Because that's what's really going to stop you, right? It's the fear of judgment. It's the obsession with analytics and the obsession with subscribers and views and becoming rich and famous. And it's dealing with your own insecurities and all of that's up here. Like this is what is holding you back at your mindset. It's all that other stuff. Once you cross this, then you're 90% of the way there, right? Then the talking to a camera and all this other stuff becomes more natural. But how do you break through this? It's a process. It takes time. You're not going to do it in one video. I didn't break through my fear of talking to a camera. In the first set of videos. I did it over time. It was I just made a video after video after video. One-rep, another rep. Next rep, one-rep, one-rep, one replica into the gym. When you go to the gym, when you first go to a gym, it's no different. You think everybody's watching you and you're so self-conscious, you're like, Yeah, but I don't wanna do this because I look like an idiot. This is how I was when I first started in the gym years ago. And then when you go to the gym more often, if you're more comfortable and when you start doing more bench press and dead lifting and overhead press and all that kinda stuff. You just get better and more comfortable doing it because you've done it enough. This is the same thing. You break through the mindset barriers by just chipping away that one video at a time. You get better and better and better. Be patient, be persistent. Be can't just make 20 videos or 10 videos and go here, not for me. Or maybe you might do that. You might say, Look, I don't wanna do this YouTube thing anymore. That's fine. But if you want any kind of success from this blogging journey, you need to be persistent over a period of several years. It's going to take several years. And it's going to take you about 12 months, six months. Even everyone's different to really get used to talking to a camera. Like getting used to this, almost like it's almost like an initiation period of kinda getting used to the cameras and stuff, right? So my challenge to you is to set yourself a challenge and make two videos a week or so or two videos a week. I was a bit hardcore. I did a video every day for 14 months. I don't recommend that. I think just pick and I was working a full time corporate job when I was doing that. So if you're working a full-time corporate job, then you have to force yourself to make so many videos per week. Caught two videos, caught three videos a week. Monday, Wednesday, Friday, or just pick look at your schedule. When do you work, when do heavy days off and just really work at making two videos a week for the next 3456 months. I would argue to make two to three videos a week for the next 12 months. That is my challenge to you. I did it. Most people that are successful in this, in this arena have done it. And if you really want to give this a crack, and I really recommend that you need to squeeze the lemon when it's ripe. Like this is the opportunity. If you're in locked down, if you're in a pandemic, we're in a pandemic right now. I can't travel anywhere. I have no excuse. I can make videos. You can do this too, right? So get rolling. Feel free to share your channel with me, share your videos with me. You can email me. I'll link it up. Otherwise, I wish you all the best. It's a fun journey. Enjoy this. I kind of have fond memories of my early days on YouTube and making blogs and stuff like that. It's a little bit different now because now I've put out a video and people watch it and it's just a different part of my journey. So I do have fond memories of my early days, but you know what, I'm just an ordinary person or no one particularly special. I don't have any outrageous talents. I've just done this a lot, put it in the work and I'm putting the reps and I haven't even I'm still at the bottom. I'm still down here somewhere, right? So, you know, if I can do it and if I can make these videos and I have no special talent, then you can do it too. This is, this is YouTube, you know, huge YouTube it's viewed. It's about you, your journey, your experience. Anyway. Thanks for watching. Thanks for being part of this little journey. I hope you've enjoyed these videos. If you have any questions, please let me know. I'll also suggest that you go and check out other guys on YouTube such as video influences and think media. They are great channels for more content around. I'm creating content on YouTube. They are specialists. They will help you get granular with your editing. Not you're editing, but your, your journey on YouTube. So you go and check out video influences and think media. Otherwise, thanks to stick around and I'll see you in another course somewhere sometime in the future. She is.
 Brad Newton, Online Fitness Coach for Skinny-Fat Men