Transcripts
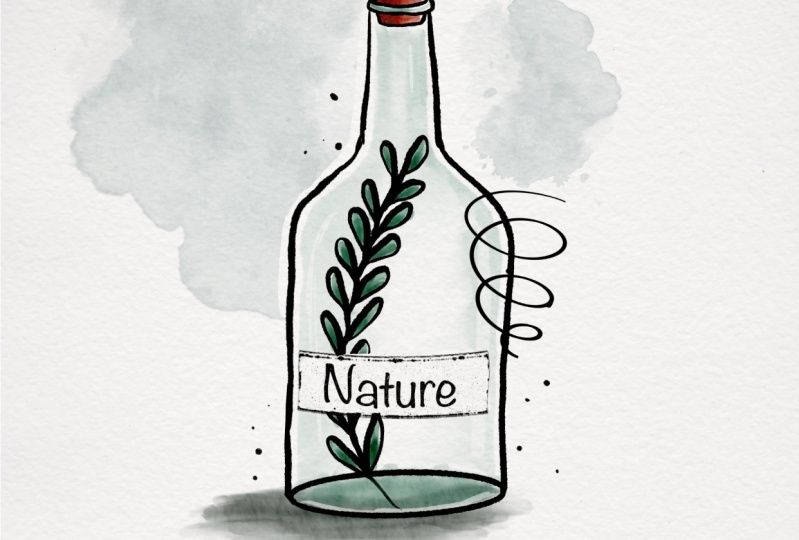
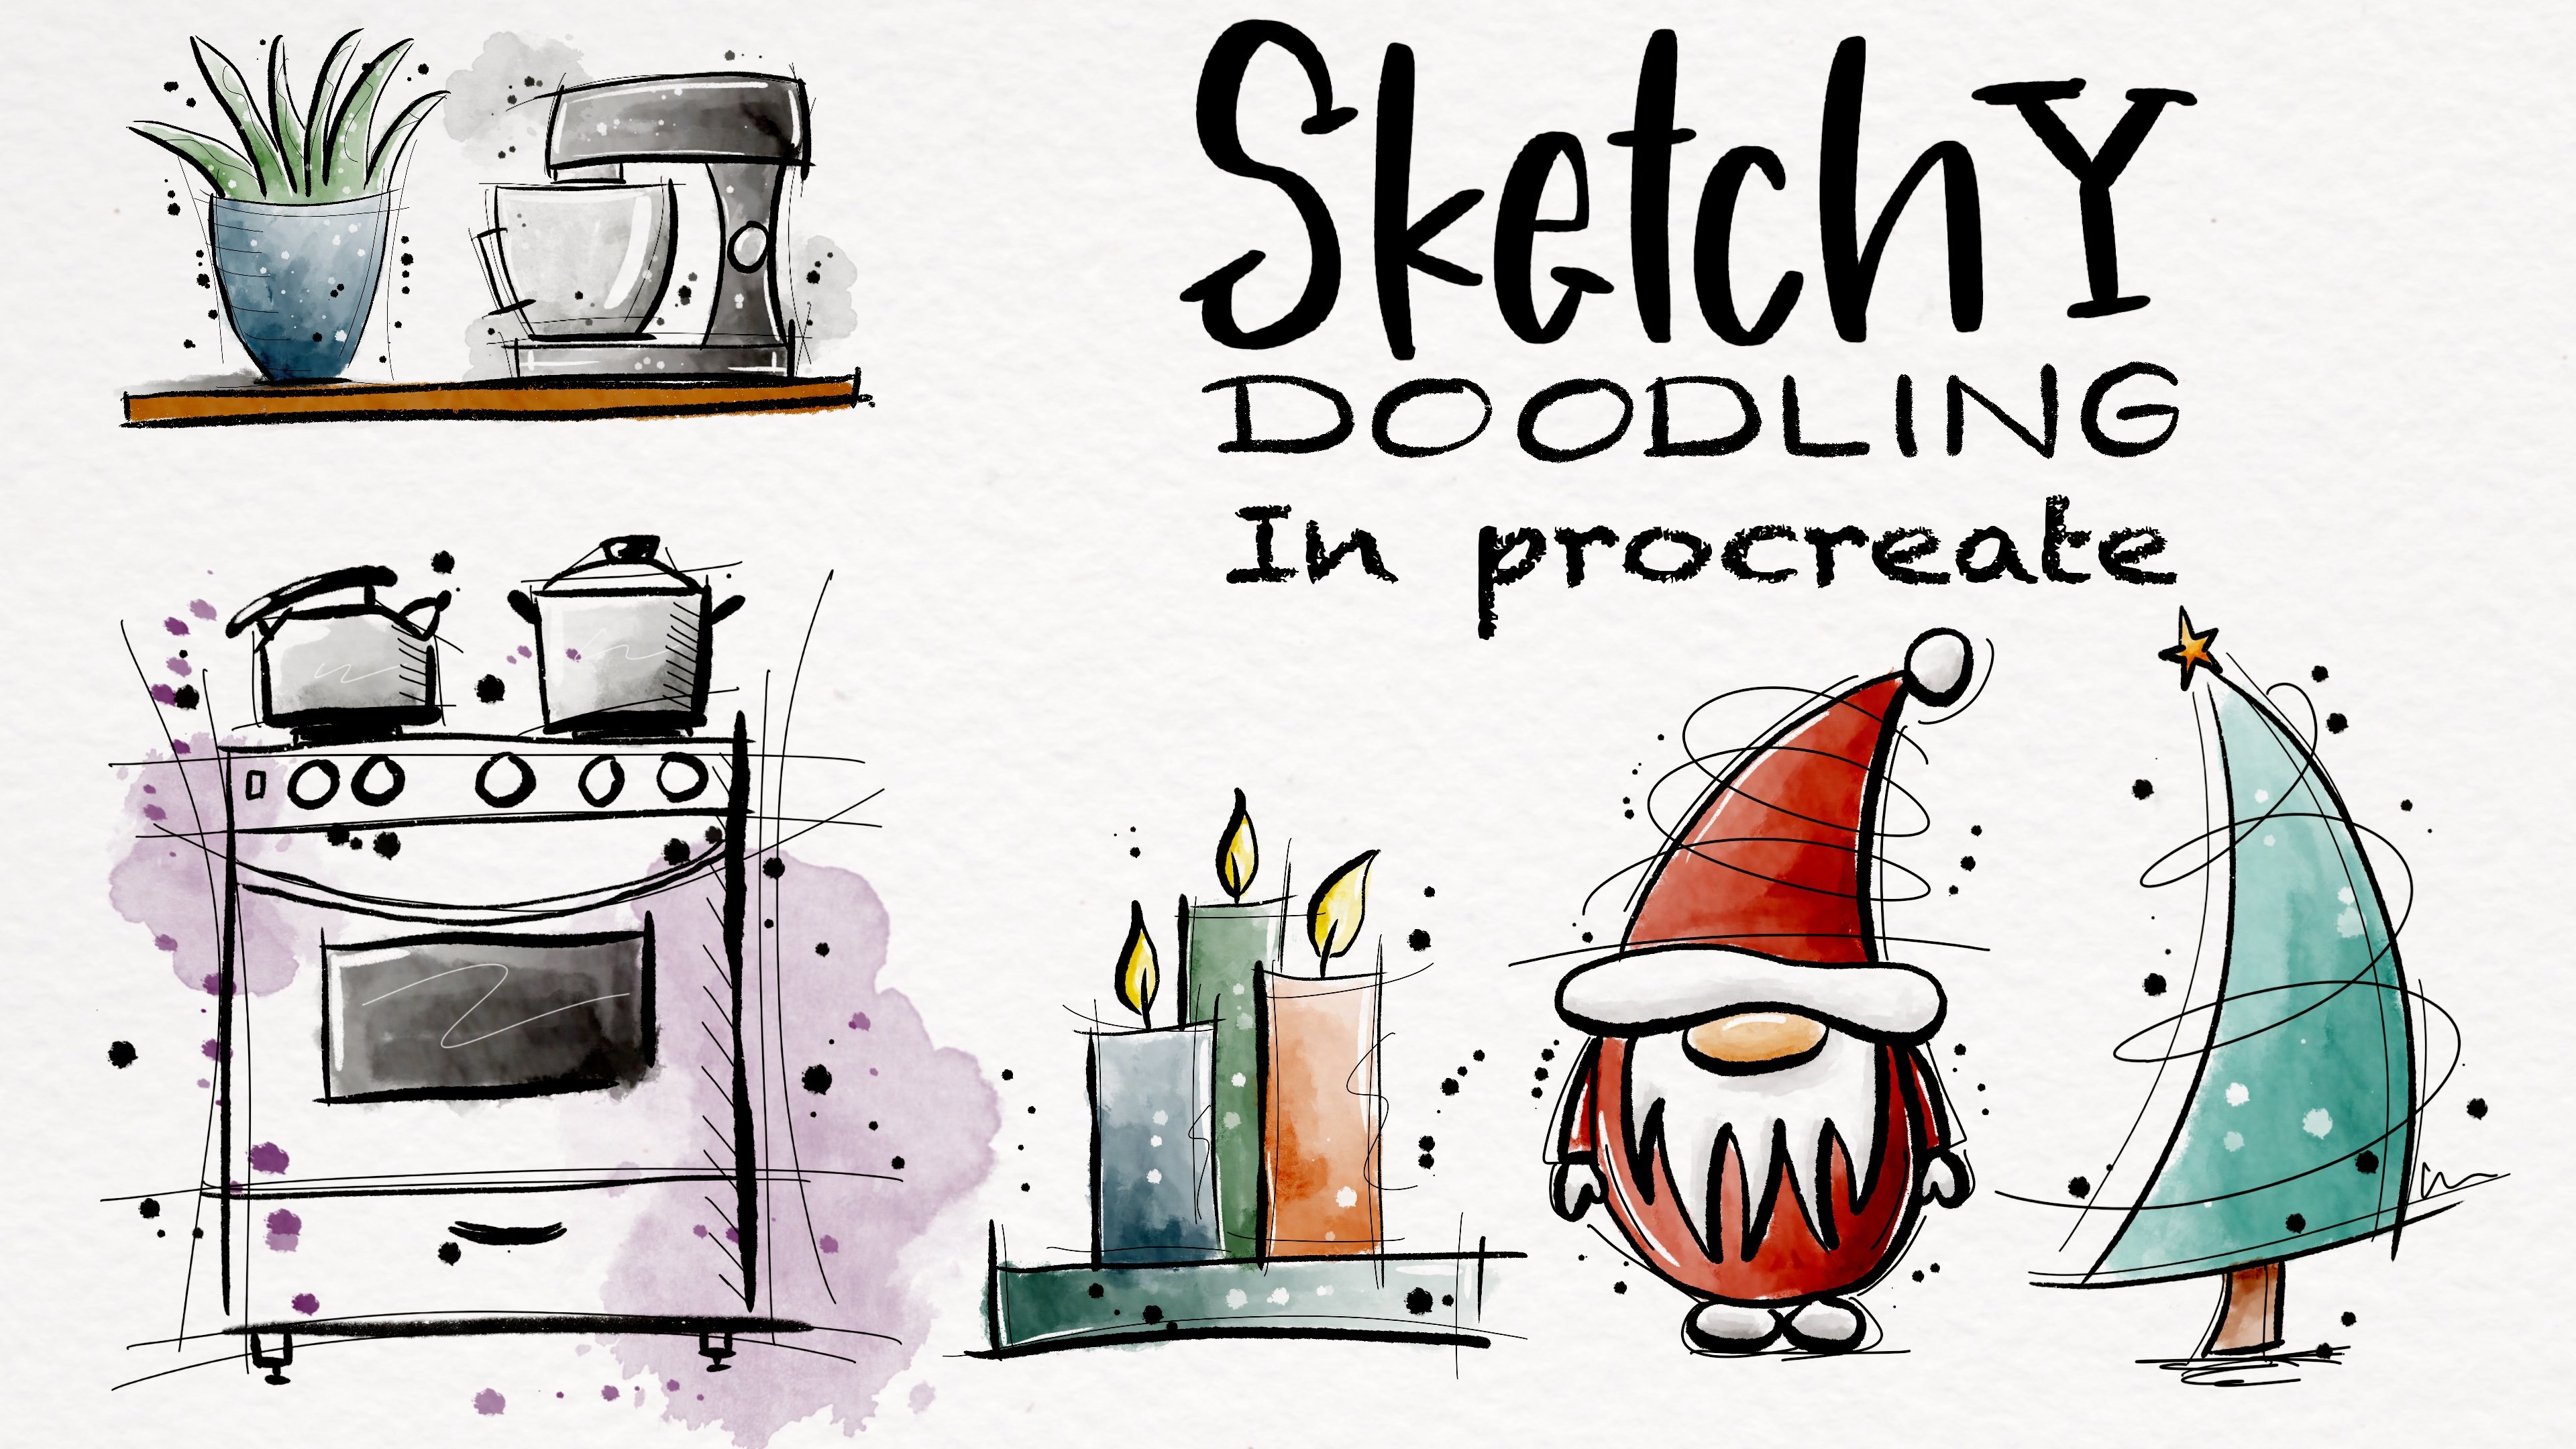
1. Intro: In this case. Hi and welcome to my new Skillshare class. My name is Melinda Bucher and I'm from the Netherlands. In this class, I'll be teaching you my way of doing sketchy dueling, drawing of a glass bottle, tellurium, using Procreate. I have so much fun in creating these kinds of drawings that I would like to teach you my way of drawing them. So if you are interested, I would like to take you step-by-step and draw this together. I put on my glasses so we can get started. See you in class.
2. Importing Brushset, Watercolorcanvas and Colorswatch : Before we can start this class, you have to make sure we are going to browser. So not through, through the app, but just a browser. In my case, it's Safari. I've heard that will work the best and we have to get our precious and everything else we need. So we go to the Projects and Resources section. And here you can find three resources you will need. And that's the glass bottle swatch at the glass plant bottle swatches, um, my watercolor tensors, perhaps you already have it if you've done some other classes of mine. And I created a new sketchy dueling brushes. And these are a lot of brushes I have from a previous class, plus some extra. So perhaps you can do a mix and match, and maybe you can delete something you already have from other classes. But in order to get them, you have to tap on them and you have to download it. It will come right here. Then you're going to click on it. And it will appear in your downloads on my downloads is fairly full, so I go to my recent downloads and you can find it here. And it will import right away. And if you go into any Canvas, you can see it a new swatch all the way at the bottom of your color swatches. I created it on top, so I have a lot of it will be all the way at the bottom there you can find your new swatches. So when we go back to class, I want to import, I want to erase this. I want to import my watercolor canvas. Also downloaded. It will take a little bit longer because it's a great canvas, large in size. So when it's here, you're going to import and it will import right away. And you can find it all the way in your gallery. Go all the way up there. And it's all the way at the upper left corner. So that's where you can find your canvas. And for the last one, the sketchy don't link, brush it. Click on Download. It will come right here again. And brushes click on it. You can also find it in downloads or go to Recent. And when you tap on it, it will import right away. And you can find it if you hit any Canvas, you can find it at the top of your brush library. So now you are ready and now we're going go into get started. Me explain something about the canvas. It's very easy. It has a lot of layers where the textures are. I want to advice you to keep this on top and you can play with it, but I'm rather advice you don't, every time you want to draw on this canvas, duplicated first, so you always have spare one. The brushes. I'll walk you through very easily. It's just a 6, 6 B pencil from procreates, a dry ink brush from procreate. I think I played a bit with it. I don't I can't remember anymore. I did some little tweaks. My medium. Messy tip is just a little bit of a fine liner with a little bit of bleed and a fine tip that's very fine. Also a little bit like a mono line, but fairly slow. Got my watercolor all-rounder. It's multiplied watercolor brush. The watercolor scribble brush is made out the Herge brush from Procreate itself. But I've done some tweaking to it and multiplied it. And I named it differently so we can remember what we are going to use it for. A create fine dots. You can play with those very fun dots. And I've got my messy brush pen. You don't need it for this class, but I will give it to you anyway because it's fine. Brush to write with and my background ink splash, very fun. We're going to use these in-class. And I've got a new stem for you. It's a tech stamp which you can play with. I'm going to explain also in class. So now you already have this. Let's get started.
3. Short Warm up Round: So we're going to start off with a warm up brand. Just duplicate your canvas first so you always have a spare one in the beginning. And we're going to draw on this one. The warm-up round is especially for the use of the pressure sensitivity of your dry ink brush. Let's warm up with some strokes. And for that we're going to make long strokes just down the paper. I'm just slightly touching my with my hands on the iPad. And practice thin strokes, thicker strokes by pressing harder. And you also will be doing this horizontally. Just a thin strokes. Thicker strokes. Since strokes. You see you're not moving with your with only your risk, but you have to use your whole arm. Because when you're doing this from your wrist, you always get banded lines. I have sometimes I have trouble doing that. For the next practice I want you to do is for the pressure sensitivity. Make thicker and thinner strokes in one line. So push, lift, push, lift, push, push, lift, push, lift, Bush. And when these kind of things happen, let them happen because they look natural in your drawing. So push left Bush, lift, push, push, push, lift, push, and do the whole paper round. The next practice I want you to do is make thin upstrokes and thicker downstrokes. So up, down, lift, push, lift, push, lift, push, lift, push, lift, push. Once you do that one more time, lift, push, lift, push, push, lift, push, lift, push. And practice it as long as you like because this is very natural to the way your drawing. Because further in class we're going to create a kind of flower-like up, push, up, push, push, push. So that's what we're going to do. So that's why I want you to practice this a lot. So that would be fun. So if you weren't up enough, Let's hop into class. I don't want to take a lot of your time. I won't just have more time with having fun on drawing. So let's get started.
4. Creating the Bottle Oultlines: The bottle is a little bit of a symmetric shape. So go to your wrench tool. Click on Canvas, click on drawing guide because I want to look for symmetry. So I edit my drawing guide and choose Symmetry. It's always in the middle and there I can touch them. And now I have an assistant layer in my Canvas and textures you should keep on top so you can draw underneath the texture. So first of all, I'm going to sketch on this layer to create a bottle. And I'm just going for a simple shape just now. So let's get my black my pencil. Yes. And I want to have a bottle with a lid on it, so like here. And just go easy. It isn't hard. And also a little of an ellipse at the bottom side. The round shape, It's got here approximately create derived shape about here also. And I think it always has a little bit of an thickened part of pair. And you can see I'm sketching all over. So on the left and on the right side sometimes becomes, because I want to get the shapes right. And in that LET, there is a cork approximately like this. And you can choose about what size do you want to have it? You can put it further in enlarging it, make it wider. You can make adjustments to the shape. Like I think I can get rid of the assisted layer now because I want to be home to hand-drawn and not too perfect. So I'm going to get rid of the Assisted Drawing Guide here also. And let me play with the shapes. I can play with distortion. So I can make it a wider, broader URL. Or I can make it longer bottle. I can play with it anyway, I like. So let's create a shape like this. Put it approximately in the middle again. And now I want to draw all over it. I'm going to make it more clean sketch. So I'm going to reduce the opacity, create a new layer on top of deaths. And there I want to create my sketch. As we practiced before, we're going to use the dry ink brush and we're trying to get a quick shapes but also with sicker and senior lines. So just go ahead and don't make it too hard on yourself. It doesn't have to be perfect. It's supposed to look like fun. And when you have a two perfect drawing, it doesn't scream like, hey, I had fun here. I had difficulty by getting it right. So let's go with quick shapes, like so. And just play along with it. This is way too hard. It doesn't have to be perfect. I want it to be fun. Perfect is overrated. I wanted to be more to the inwards side because it has to fit in the bottle. And leave a little bit of space here because the bottle is also a little bit with folio. So I think this already looks like a lovely bottle. So now that we've got our quick line sketch, I want to create a lot of movement to it. So let's get rid of this drawing layer. Not totally get rid of it, just make it invisible and create a new layer on top of this. Go to the fine tip and let's create some lovely movements, just like sort of loose sketches. Create loved swings. And this one could be a little less visible. Also for the cork. Just give it a spin and just give it more energy. It doesn't have to be perfect. Just make it fun. Maybe like here, also this one. And we can already create some fine dots. But do it always on a new layer so you can easily get rid of them just to get some from already. So now I think this part is done. So let's do some watercolor.
5. Watercolor the Bottle, Cork and Shadow: But before we do the watercolor, we're going to group this. So keep this together in one group by swiping everything to the right. And then let's group this one and rename the quick sketch. Then you can always go back to this group when you want to change something or want to get rid of something. For the watercolor. I'm going to do this underneath it because I want the line sketch on top of everything. But sometimes I will do some little highlights all the way on top, but maybe we'll get into that later. So let's do some water coloring for this. For this class, I created a little pellets with some gloss colors. And we're going to use my watercolor or rounder. And I am going for the grayish green. You see It's very light color over here. And I'm on the layer below. Yes. And I'm just going to make this very easy. Mostly I'm doing some outlines. Keep your pencil on the paper when you take a great area again, because if you lift it and go over it, it will make it darker. You can do that somewhere. Sometimes, mostly at the bottom, it will be darker here and I'm going to do at some stripe again. And I'm not going to make this very hard. My light will be coming from here. So I create this side of the, of the bottle. I created a little bit darker. I go to my watercolor scribble brush and I'm not going to paint with it. I'm only going to match it with this brush. And don't make it too hard on yourself. Just step and depth. And have some fun with it. And leave some open spaces, white, dragon, some white again from the side. And I think it's already going to look a little bit like gloss right now. I've seen, I've touched here all the way to decide I don't want it because there is a little bit of gloss in between. So I'm going to erase that way is my dry ink brush. And I don't mind if a little bit of watercolor is getting out of the bottle I wanted because it's painterly done. And now I'm going to add some highlights on the glass, but I'm going to do that on a different layer above. So a small one with a dry ink because watercolor is a see-through color and white you can't see. So I take my dry ink, go to my whites, stripe down on the left and a thicker one on the right's, and something below. Maybe something up here also. And I think this will be great. Now you see, we already got selves, lovely doodled bottle with little bit of a glass. Look. You see, I'm a bit of a messy painter, but that's what I like about my sound is sketchy do links now. So now we're going to draw in the cork. So created a new layer and go to a little bit of the orangey look. Go again to my watercolor around the brush. And let's creates a little bit of an orangey color underneath it and darken it on this side. So we'll go over it again. And then Smartsheet a bit. You see it's outside the lines a bit, but I like that in my drawing, so I don't want to erase that too much. Maybe I will, maybe I won't. Just keep its lovely and smooth and just have fun with it. Sometimes little accidents make it worse. So I'm going to go over this a lot to darken it with the same color because this is a multiply brush. I can get it a lot darker. Smudge it again. To create a fun look. You see unlike those mistakes, because it's hand-drawn and it May work like this for me, it does. Maybe we could use some speckles within the cork. Let's try and do this and create a new layer on top of this. But we'll do this with a clipping mask goes, I don't want to do it outside because maybe I want some something different on the background. So just above the cork, create an overlay layer. Go to black because black, dark and sin overlay. And then I'm going to take my fine dots again. And let's get some, maybe let's make it smaller. So in black and also perhaps in whites. Something from yeah, I think it's looks happy and cheerful and that's what I'm going for. So now the corpus already done, maybe we can make it some little green also here. So let's go back to the bottle layer. Take this brush again of that color we used in the first place. And create a little bit of a greenish dot n here. Also make it a little bit darker on the sides. Smartsheet, a bit very small because it's very small size. And you see I leave those spaces wise because I think white brightens and it also brightens my day and my coloring. And maybe I want to do something on top of this also. Lets do the music clipping mask. I'm just going on top of this one. So create a clipping mask. Also. Go to my whites, go to my dry ink. It's all instant decisions I make. Well, that's just me. Some people are very careful with what I draw. I'm not that way. And just have fun and do what I like. I don't think too much about my drawings, but that's what I like. And I think my bottle is already finished. So let's create a shadow underneath it. For a quick shadow, we go all the way to the bottom, so create a new layer on the bottom. Go to black and to the watercolor 0 round brush again. And just make sure your clothes underneath the bottle to create a dark stripe. Go over it again. So I lift up my pencil to darken the color again and then make larger area. You see because it darkens. The top one where I already did my first stroke is getting, gonna get darker. Go to my watercolor, scribbles mature again, make it a little bit bigger. And then I'm going to smudge this to my liking just by tapping and diving. And this is, I think is the hardest part for me because sometimes I don't know where to stop or where to go to. So this I could be done. I could I could be doing this all over again. But I think for now, I'm going to leave it like this. Maybe it's a little bit tilted, so make sure it is is a little bit straight. Well, I think now it's already standing on something and that's the most important thing I want from this. It doesn't have to be perfect. Maybe I sometimes I'm, I'm a bit too hard for myself as well. So now to shed apart, we already have it's hair. So now it's time to create some very lovely fine in it.
6. Pop the Bottle and Squeeze in the Twig: So since this always ready, we're going to create a little tweak inside of it because we want to have it drawn as terrorism in, we cited in Dutch also. So this is very weird for me. Tellurium. Let's create a new layer and I'm going to draw it underneath the bottle, but above the shadow. So make sure you're underneath the bottle, but above the shadow. Maybe I can group all of this from the bottle and the cork as well first. So first let me do the highlights of the cork. Well, maybe we can use just group the cork. This is the cork. Is this also known as the bottle? So let me group this one as the core. I hope my English as well. So, and this the bottle. It's very easy bottle. That's not much of a bottle. Well, let's group it anyway. It's the largest piece of the painting. It's the smallest group. That's funny. It's the bottle. Watercolor. So we gums, mix it up with the sketch layer. So underneath here we're going to draw the little twig. So let's go back to our dry ink brush. I'm going to do this out of the blue. My drawing style is a little bit messy, so just let me check here at what I'm, what I'm going to do is just go thick or thin lines. So variety, variety lot with the pressure. And I'm mostly not coming to lift my pencil. So I'm going to make is a lot of different shapes. So you can go upwards with a slightly touch and downwards with a harder touch. So make it a messy one that's waveform. So that's what we're going to do inside of this one. I'm on a new layer. Yes. And I think I'm going to give my tweak a line of drawing first. So that's how I wanted bend in it. So let's go get another layer on top of that one. And this is just my quick sketch, my guideline. So I'm going to draw on top of that one. So I'm going to follow strokes, make sure it's inside because I shouldn't supposed to be lifting my pencil. It doesn't matter if you do, but it's more sketchy when you don't and otherwise you get too precise about it. So just let it flow. So verify with your pressure and it doesn't have to be precise, is just about so you know, a bit of where you're going. That's the part of sketchy do linens, having some fun. So I think this will already looks great. And for now, I think that one is done. And let's give it some color now. I can get rid of the guideline. And underneath this one, I'm going to color because I also want my line drawing on top of my coloring. So I go to my greenish color, go back to my watercolor or rounder. And I'm just slightly going just as messy in and outside the lines. It doesn't matter, just give it some color. And I'm not leaving a lifting my pencil just now. So I'm going over it inside the lines. I, I skipped some pieces and I add some pieces outside the lines. I like that because, you know, that little white spot there. Yes, that's what I love. And when you zoom out, it's very sketchy and very cartoonish. Likes are going to make my brush a little bit smaller, just like this. And I'm going to do this with lot of tapping inside of this to create a little bit of darkness in the color, just with the same color. But because these brushes multiplied just as you add some more ink to it by pulling down with your brush. And you can even make it a little bit more grayish darken. Just play along with the colors is just how hard you want the colors to be. I like them very vibrance, so and maybe I'm going to smudge them a little, but I also do like, when it's not too much, much. So just a little bit, just tap and depth. And I don't want it too precise. Just wanted to bid like messy watercolor. And I think this looks lovely, but I think these highlights are a bit in my way because I did them on another layer which was in my quick sketch. I think it was this one. No, that word. Where is it? Where is it? Yes, it's here on my watercolor. I can reduce the opacity of this one. So it will be a little bit of shine through, you know, when it's all opaque, you can't see a little bit of a tweak inside. I want to see you a little bit, just the highlights, just a glossy shine of the highlights. Feasible. So that's what I like about this one. So I think this one is really just creates a new thing on top. And that's my doodling with a fine tip. Just some little energetic curl I like so much because then it's not just here, it's also a little bit in balance. So maybe we can play with another one like here. I think I like it like this.
7. Creating more Depth, add Splashes and draw a Sticker: So we've got our main bubble here and we can get some extras by getting an overlay. And I'm going to do that on the Watts on top of the watercolor. So I'm opening this up again. I'm going inside this group, put on, on overlay a new layer, new layer and go to overlay, go to my black again, and then take the background ink splash. And then we're going to darken some colors. You see I can darken some of the watercolor colors. That's what I like about this one. And maybe if I put him on a clipping mask and have to go here, then it's only on the gloss and not on the blend and the shadow as well. So I put this on a clipping mask and then my blend doesn't have the extra shadow. But you can see those lovely stains created here by my background ink splash. And I can also use it as my background ink splash. So I go above the shadow, but behind everything else, go to my green for my plant. Now, I think I'm going to take my glass green and I'm going to create a nice and lovely splash behind it. I think like this. And then I'm going to get rid of everything within the bottle. So I go to my selection tool, freehand creates just like this. And freeze free. A three finger swipe and GOT. And now I only have the splash outside of the bottle. And maybe I'm going to erase a little part with my dry ink brush again. So it doesn't hit the bottle because I don't like that. It doesn't have to be precise silver rhyme with a thickness of your pressure. So we have a little bit wide outside here also. That's what I like. Maybe I'm making a little bit lighter. So it's just a hint of color there. Not too much. I think that looks lovely. And for you as a presence, I created this stamp is just a blank text stamp and only new layer. You can stamp it. This is way too big and you can play with it. So let's, for instance, if I want to make it bigger with high, just distorted and create a little bit on top. And we can also create something like this. Well, I like it. So we can play with it and we can make a sticker out of it so we can tape it on the bottle, but just Shall we write on it. So I'm put it on another layer and I'm going to write something about it's on top of it with my messy tip. I'm just going to write the nature and fun part is we can make adjustments to it so if it doesn't fit, we make it fit. So let's make adjustment to this once again. Mike, So easy-peasy. And now I'm going to group these two together. It's my sticker. And let's move this one on top of this. But then now my sticker is straight and my bottle is a little bit curved, so I have to do that also with this one. So I go into my work and I take my advanced meshes. And I'm going to pull a little bit just as I have the curve on the bottom side and I have to pull this also in the exact same order because it's moving everything around it. So this is what I like now and now it's a little bit bended like this. And underneath this one, I'm going to create and make it in the same group. So I swipe it into the group with my dry ink on white. I'm going to create a sticker out of it. So why isn't it feasible? Because I'm below my watercolor? Yes, I have to move it upside my watercolor. On top of my watercolor. Yes. And now we can see what I'm doing. So I'm going exactly our the lines of the sticker. And it's Y is a little bit outside of the sticker as well. Stickers, do. They have a white outline always. So now I can color it in and now it's blended too much in the bottle. So what I'm going to do now, make sure everything is covered. What I'm going to do now is duplicate this white light layer and select it. Choose black and fill layer. And now you're directly see there's a little bit of an outline and that's because my dry ink brush has a little bit of texture. So get rid of the war. I want to go to uniform, but I'm not going to use it. So you see like this and you can play a little bit with it. You can move the shadow a little bit, like tapping little bit to here if you want. For me, I don't like it too much. I'm like it's where it was. So now it's very natural drawn sticker. And we can play little bit with letters as well. So make this a little bit bigger. All the John strokes we can make little bit bigger. And also this one going down. You can play with it. How you like. It. Doesn't have to be perfect for me. I don't like perfect. I used to like perfect. But I have to be perfect in my work. So I love to draw freely. So this is what I like about the sticker on top of the bottle. Let's create another phone part.
8. Creating a Raffia Bow and adding Soil: So I want to show you something else again. So we're going all the way on top of all the layers, but always keep the textures on top. So just beneath the texture layers, we're going to, our Black, going to use the dry ink. And we're going to create a messy kind of strength. Strength like rope. Going to create a dots. And maybe just some bows. Going to create a new layer on top of deaths. Go to the khaki color and doing exactly the same. Go over it. Newton knots though the bows. Just keep it messy. I like it messy. Going to create a new top layer on top of deaths. Go to our whites. And do that again. I make the exact same order. And now it's just looking like you have a little bit of rough ER, rope around it. And you can also play with it with a little bit of soil on the nice. So let's go and are we going underneath watercolor? I think so. And above the flower of the tweak because it disappears in the soil. So let me take like the cork color again because when you put it on, let me see what watercolor scribble brush, it also multiplies. So just color it a little bit in and go over it a couple of times. In darkens itself. And maybe a little bit of KCI on top of that we'll do to make it less red. Maybe a little bit brown. Just play with it. But then you have to get rid of everything that's outside of it. So let's erase that part. Dry ink. Yes, that will be nice. And I have to merge those together in order to get rid of everything. Soil underneath the bottle. I think it could be a little bit thicker in here. Just missing up with colors, like so. And maybe I could erase a bit of the lens to go on top of this one. So this was too high. And I think we covered it all. Is I think I'm happy with this. I hope you are too, and I hope you have fun with exploring and create some lovely little tweaks in phases. Maybe one with an open cap on. It's like those bold plants. Let me just sketch a few. Shall we do that in the next chapter? Yes. Why don't we do that?
9. Other Ideas and a Quick Bonus Class: So I duplicate it. New canvas again. Go to my Canvas, go to Drawing Guide, go to Symmetry, choose down. And there we could sketch some lovely more kind of bottles. So dry ink of six B pencil. And let's create some different phases like so. How also miss this? And create one with an opening. So you can create some soil in it. And when I get rid of my Assisted Drawing, go on top of that, we can create some lovely flowers coming out of sight of the pods and creates a cactus in it, something like that. It's just something you can draw easily. Could draw cactuses within. Just quick sketches. Just to give you some ideas. So this will be fun as fun bottle. And we can even use those lovely. Let's those, those jars like so. You go little bit rounded, something like this. You can play with the Liquify to make the shape even better. More bigger DC, this is much more rounded than deceased, so let's choose this one. And yes, you can play with lots of these kinds of bottles and jars. And then it's easy to bring in some colors here we do that one more time. Just for practice sake. I have fun with it. I hope you do too. So let's take on this very speedy and it's not sped up. It's my real time drawing, but that's what I like. So I'm going to my dry ink brush again, going to quickly draw and sketch. So I'm not talking too much VC, little bit of this on the back. Sell my care. So it's not precise, but I don't mind. It's just for fun. Let's create a new layer underneath. Let's go to our, shall we more greenish, this one's more greenish. Shall we go more greenish glass? Yes, I think that I would like that. And go to my watercolor all-rounder and just block in some color. This is always a little bit darker. At the bottom is always a little bit darker. You see when I lifted It's getting darker. And that's what the color scribble. Bring in some color and play with it. Suddenly it almost is the impression of something which is already gloss. So giving it some highlights on top. With my dry ink brush in white. Because it's all new layer. You can also do something different with it. So I'm taking a big part now. Also here. Maybe this one smaller and not a lot of pressure here also. Something like so. So I think we've got creates another nice bottle here. Go to the fine tip just to, sometimes this is also fun. You can just draw around it a little bit with some shaky loose stripes. Just To get another kind of energy from it. So those are all kinds of different techniques you can use and have fun and play with. So maybe you like that also is fun thing is that we also can do this with flowers. Like when I use my dry ink for flower. I'm just going loosely shaped flowers when I draw. And get rid of these. Just a loose sketch. Then go to the fine tip again. Make it small. You just go slightly around them. Just wiggle. There. You can create some lovely watercolor underneath it. I'm taking this too when you new piece with something just came up and I wanted to show you. So go to selection freehand. Just three fingers swipe down, cut and paste. So it's only new layer. And underneath that, I'm going to drop in some color. Like well, maybe our orangey red. Yes, very simple. Lifted make it darker. Tone down color. Watercolor, scribble brush for smudging. Just you hear me tapping and dabbing so I'm going to splash my colors around. So and creating on top of this with my highlights again, dry ink brush. Just some ways to have fun with it again, and it'll rim on this side so it will make it more interesting. So this is just another fun, scribbly watercolor flower. Just quick and easy, just with thin and thick strokes. So maybe a little bit of stamps inside of it. And go dry ink. Yes. It's fun. Yes, some black dots on it. And also some white dots again, to brighten the whole thing up. So that's an easy flower, just as a little bonus. So I can get rid of this and leave it just the default. Or maybe we can move it into the box. So easy. These kind of things. Well, just for the picture had lovely picture for this one, maybe we go bigger. Emitter is much better. I like it. I hope you liked it too. So let's have fun, Let's play and show me your bottles. Bye-bye.
10. Bonus 2 Creating a Brush Stamp from your Line Art: Just want to give you one more tip. So if you go to this piece you just drew in within class. We can do some, something else. We get rid of the texture, not going to delete it, but just make it invisible. So get rid of the texture. You see my painting is very pale. Don't bother. What I'm going to do is make a stamp out of everything that I could need to be using in the future. So get rid of my name, get rid of these calls. Maybe I would like to keep this strand here and get rid of this one. I want to dive into my sketches and I want to leave my bottle just there, so get rid of everything else. Do I want my core? Yes, but I don't want a color, so that's okay. Sticker. I don't want no water color can be all set back. I can get rid of the soil, I can get rid of the plants. I can get rid of the backgrounds, splash and I can get rid of the shadow. So now I have my bottle drawing just here. And what I can do with that is to put a three finger swipe down and I say Copy All. And then I'm going to make a new brush like this. I'm going to the shape, go to Edit, going to import and press, paste. And now it's black on white and I needed reversed. So I'm going to do a two-finger tap. And now it's done. And now you can see is just a brush. So when I just tap it once, it will become a bottle, but it's fairly small. So I have to make some changes to it. So i because they're all behind each other, I have to go do my spacing way back. So now they're all individuals, so that's what I do now. And then I'm going to my properties and choose my maximum size. Very big, like so. And now you see there if very different opacity and I all, I all want them very black. So I go into the Apple Pencil and choose Opacity. None. And now I've got the perfect stamp for my brush. And now I stamped it in white. I have to choose my black. So I can create large bottles, even larger if I make it larger. But now I can create three in a row for card or something. And I can do this with all my sketches. So just pick out the pieces you want and create stems out of it and just keep them on hand. Make a new different brush category for all your stamps. I've got it in here also. It seems I have a lot of brushes. I have two. Clear this up. So I've got a lot of brushes from a lot of things I've drawn in the past, also very long time ago. But sometimes I want to use them again, so it's easy, so you can get them very quickly. So just save your sketches for later in a brush stamp. So maybe you would like to tip. So thank you for watching and I hope you liked it.
11. Tank You and about Projects and Reviews: So thank you for watching this class until the very end. I hope you've enjoyed it as much as eyelids. I love to teach what I know and what I do. And I hope you'll get as much joy out of it as I do. You can post your projects of your work. You finished in the project section of this class. And you can also tag me on Instagram at stake level and please do leave me a review here on Skillshare so other people can see what you think of this class. It would help me a lot. So again, thank you for watching and hope to see you in the next class. Bye.
 Brenda Bakker, Sharing my skills is sharing my joy