Transcripts
1. Introduction: Hello everybody. My name is Jenna Moreci. I am a dark fantasy author as well as a YouTuber where I teach hundreds of thousands of people all about the writing industry. Today, I'm going to teach you how to navigate self-publishing your novel from start to finish. Self-publishing is a valid and potentially lucrative option for writers that has completely changed the publishing industry. I'm living my dream of being a full-time author thanks to self-publishing, and I'm making more than double the income I ever made back when I worked a normal job in finance years ago. It all sounds so exciting, turning your creativity into a career, having complete control of your art. But the side is self-publishing is really complicated. You're embarking on this journey without a publishing house to guide you, and that can be extremely overwhelming. My goal today is to change that. I'm breaking down the step-by-step process of self-publishing your novel, starting with the professional edit, all the way to approving the final copy of your book. I'm also going to give you tips for making each step easier to manage. Not sure what type of editor to hire, how to write an author bio, or how to format your book? I've got you covered. This class is for anyone considering the self-publishing route, whether you have a completed manuscript that's ready for publication or your story is just an idea floating around in your head. This class can either guide you for your impending self-publishing journey or it can help you decide whether self publishing is the right choice for you in the first place. My lesson plan is very comprehensive. I'm going to cover the professional editing process, including which types of editors you will need along the way, I'll also cover all the details you'll need for your book, including your Blurb and ISPNs. Then I'll break down the cover art and formatting processes so you can navigate them with ease. Lastly, we'll get into the act of publishing, including copyrighting and distributing your book to vendors. This is the part that often trips writers up, but I promise it doesn't have to be as hard as it seems. Your project revolves around one of every writers favorite parts of the publishing process, cover art. Your book cover is your biggest marketing tool. I want you to be able to walk away from this class knowing exactly what makes a book cover in your genre successful and enticing to readers. Self-publishing a book is a long, and convoluted process, so allow me to make it easier for you. I've been through this process multiple times, and I'm excited to break it down piece by piece so you have a simple, straightforward guide to publication. Once you're ready, I will see you in the next module. I cannot wait to help you get your book ready for release.
2. Disclaimers: I'm super excited to take you through the step-by-step process of self publishing your book. That said, before we get started, there are a few disclaimers I want to present just to make sure that you get everything you need out of this class. Please do not skip over the section. It's very important and may save you some confusion in the future. Number one, I will be presenting the publishing steps in roughly the accurate order in which they should occur. However, please be aware you don't necessarily have to follow this order exactly. Many publishing steps overlap, or happen at the same time. For example, while a writer is waiting for an editor to work on their manuscript, they may start working on the blurb or author bio, or maybe your proof reader gets sick, thus the proofread of your novel is delayed. You may decide to skip over to a different step while you wait. Basically, please refer to the order of these steps as a general guide, not an absolute. Number two, while I feel these steps are necessary to the self-publishing process, you may feel differently. Maybe you're writing a different type of book, or maybe you have different intentions for the release. My goal here is to give you as much information as possible to make the publishing process easy for you. However, ultimately the final decision is up to you. If you feel like skipping certain steps is best for your release, that is your executive decision to make. Number three, the publishing industry is constantly changing. That's why it can be so hard to find accurate information about self-publishing. You may find a great resource, and then bam, one year later it's obsolete. Because of this, there's a chance that over time some of the steps featured in this class may change. Do your due diligence to make sure that the steps you're taking when publishing are timely to the current market. Number four, this is a class about publishing, not marketing. No matter whether you go traditional or indie, the author, that's you, will have to market their book in order to have a successful release. I'm not going to touch on marketing whatsoever in this class. Don't feel like once you've completed all these steps, boom, you're done, because you're not, you still got to market the book. If you want a beginner's guide to marketing a book release, check out my class, Digital Marketing for Writers: Planning a Successful Book Release. Number five, any programs, software, companies, or websites that I mention in this class are not endorsements. I am simply providing examples for writers looking to navigate the publishing process. It's real hard to do that without mentioning the relevant platforms. Please don't think I'm trying to sell you on something. What you do with your money is none of my business. Lastly, number six. These steps are most relevant to authors looking to self-publish in the US. While many of these steps can translate into international publishing, not all of them will. I wish I knew more about publishing internationally, but unfortunately, my expertise resides in the USA. There you have it. Those are my disclaimers for the class. I hope you are ready to learn about self-publishing, because I'm ready to talk about it. Let's get to it starting with one of the most dreaded parts of the publishing process, the professional edit.
3. The Professional Edit: We are officially starting the self-publishing process. If you're not excited, you should be. You maybe dreading this process because the first step is one that so many writers hate, and that's the professional edit. I personally love the professional edit, and I'll tell you why. As much as I love my story and believe in it, there's no way I wrote a perfect finished product. I take comfort in knowing that professionals are going to point out mistakes I would've never noticed otherwise. I also feel that I become a better writer with each cycle of professional edit. I learn new skills that not only help my current manuscript, but can also help manuscripts that I write in the future. Try to look at it this way: these people are helping you polish your story to a shine so readers will devour it, plus you'll come out of the process, a much stronger writer. Now there are four stages of the professional edit that you'll likely encounter. The first edit is what's known as the developmental or content edit. This edit is focused on the meat of your story. I'm talking plot, characters, character arcs, setting, pacing. A developmental editor is going to tell you what's working in your story and what needs an overhaul. This is the first edit you'll likely encounter because it's looking at the storyline overall, as opposed to smaller pieces like syntax or grammar. Next up is the line edit, which covers your writing on a paragraph and sentence level. This is where the editor examines flow and consistency. Do all of your sentences have the same structure? Are they too flowery? Are they robotic? The next edit is the one most writers are familiar with, and that's the copyedit. This is all about the nuts and bolts of your writing: grammar, syntax, punctuation, the little things. Sometimes, writers think it's okay to skip the copyedit because like I said, grammar and punctuation are the little things, right? The problem is, grammar and punctuation errors can be glaring, and they can completely ruin the reading experience. Trust me, you probably don't want to skip this. The last edit we look at really isn't an edit at all, it's actually the proofread. The proofread is your final safeguard. It's one last read of the manuscript to find any lingering errors. We're not looking at big mistakes like flat characters or poor word-building. We're looking at things that might have slipped through the cracks. A typo here, a formatting error there. Now whether or not you decide to implement all of these edits is up to you. However, it behooves you to implement them in the exact order I listed. Developmental is first, line is second, copyedit is third, and finally, we have the proofread. If you enlist the copyeditor first, and then the developmental editor, you're essentially wasting money. Remember, a developmental edit is the big stuff: setting, plot points, character arcs. Quite often, developmental editors require you to rewrite entire scenes or entire chapters. That means if you've already enlisted a copyedit, all that hard work you paid for is getting deleted. Now you may be looking at this list and thinking four types of edits? Does that mean four different editors? Not really. Many editors offer packages for example, a developmental and line edit package or a line and copyedit package. That means, while it's likely you'll be hiring more than one editor, you probably won't be hiring four. The last point I want to mention is what I refer to as the helper proofread. While professional editors are an immense help, they're also human, which means that even after four rounds of edit, there may be lingering mistakes. Once my book is completely formatted, I enlist a handful of writer friends to read through the story one more time just to make sure there aren't any remaining typos. This may sound paranoid, but the industry will do that to a person. I've seen things, terrible things. It's worth it to give your book one more read-through, and if you have friends who can help you with this, all the better. So that's the professional editing process in a nutshell. I know it can seem overwhelming, but if you understand the different types of edits and the purpose they serve, it will make the process way easier. Once you're ready, I will see you in the next section where we will be talking about all the special goodies you need to slap on to your book cover.
4. About The Book : You may be thinking the next step in the publishing process is cover art. However, there are a few steps that I personally believe you should take into consideration beforehand. The first of which is what I like to call about the book. You want to gather all the information that will appear on your book cover, or back cover, and I'm breaking down those goodies for you right now. I'm going to assume that if you've gone as far as the professional edit, you've already figured out your book's title, but just in case you haven't, nail that down right now. If you're writing a series, you'll also want to know the name of the series. Some writers feature the series name on their book, others don't. Again, for series writers be sure to know which number your book is within the series. Other basic things to nail down are whether or not you're publishing under your real name, or a pen name. That was the easy stuff. Now we got to move into the things that sometimes get writers in trouble. I'm talking about the book blurb and depending on whether or not you intend to include them, taglines and endorsements. Let's start with the blurb. A book blurb is a brief summary of what the book's about. It's also sometimes referred to as the synopsis, or the back of the book summary. Your goal is to give the reader a snapshot of what this book is about without revealing any spoilers, or the ending. Here are a few tips when writing your blurb. First, your blurb should be pretty short. I'm talking 100-200 words. Though more often than not, 150 is a good goal to aim for. If your blurb is too boring, and rambling for the reader to finish, they're definitely not going to dive into the book itself. Second, this should go without saying, but do not info-dump. You do not need to explain every subplot, or list every character. Quite often the only characters that need to be mentioned by name are the main characters and maybe the villain. Third, start with a bang. The opening line should catch the reader's attention. Think of the most interesting, or exciting element of your book and make that your opening line. Fourth, use powerful words that will hook the reader. Is your main character fighting a bad guy, or are they battling unthinkable darkness? Hyperbole is your friend. If it sounds like it could be the narration of a movie trailer, you're on the right track. Fifth, end with a question. That doesn't mean you have to literally end with a question, though you absolutely can, but you should end in a way that leaves your readers questioning, or wondering. Cliff-hangers are always a safe bet when it comes to book blurbs. Sixth, do your research, read a ton of blurbs written by other authors, especially within your genre. By doing this, you'll often notice a formula plus it'll give you an idea of what works and what doesn't, and lastly, ask for help. Show your blurb to critique partners, ask them what they think could be improved. A lot of editors are also happy to edit your blurb for a small fee. This is your readers first taste of your writing, so make it count. Once you've worked out your blurb, you may be done with this step. However, more often than not, it's also a good idea to look into taglines and endorsements. A tagline is a catchy phrase typically on the front cover of your novel that catches the reader's attention. Sometimes it's a line directly from the book, other times it's a line inspired by the book. In my dark fantasy novel, The Savior's Champion, my tagline was a quote from chapter 3, "Respect the labyrinth, obey the labyrinth." However, for it's companion novel, The Savior's Sister, my tagline was a line inspired by the story, "She was born in death, now she fights to live." Taglines add intrigue and anticipation, plus they also help to balance out the art on your cover. The last point to consider is endorsements which are praise quotes either given by other writers or reviewers. Endorsements really help to sell books because it's encouraging to see that someone else enjoyed the story. It's even more helpful if you can get an endorsement from someone with a stellar reputation. That means endorsements from best-selling, or award-winning authors are going to mean a whole lot more to readers than an endorsement from your grandma. If you want to get endorsements from prominent authors, you're going to have to ask them if they would be interested in reading an advanced copy of your novel and providing a praise quote provided they enjoy it. If you don't have any prominent figures to contact, another option is endorsements from reviewers. These won't be quite as powerful, but five stars is still five stars. Once you have your endorsements, you can choose to place them on the back of the book, you can use them as a header for your blurb, or you can create an entire page of endorsements within the book itself. You've got a lot of options when it comes to endorsements. This is another situation where it's a good idea to research other authors, checkout their books, see how they did it and see which layout you like best. Once you've tackled this step, we move onto our next step, which is all about the author. I'll see you there.
5. About The Author: Now that you've figured out the details of your book, it's time to focus on one of the most irritating parts of the publishing process, putting together your author bio. It's important to get your author bio nailed down before you start the cover art because your cover artist is probably going to need that author bio if you plan to have it listed anywhere on your book cover. Writers hate this step because what do you even say about yourself? Fortunately, it doesn't have to be as daunting as it seems, and I'm here to walk you through it. First things first, let's get the easy stuff out of the way, do you have any accolades? This is an important question because accolades are not only relevant to the author bio, they can be relevant to the book cover itself. Some writer accolades include being a bestseller of some kind or winning a prestigious award. If you've got any recognitions under your belt, consider featuring it alongside or above your name on your book cover. It'll give your book some clout plus it'll make you feel awesome. You should also feature any relevant accolades in your author bio itself, specifically in the first line. Readers don't get far into author bios, typically because they're super boring, so hit them with the important stuff first. Next up, authors often mention their qualifications. For example, a historian who writes historical fiction might talk about their background, a biochemist who writes sci-fi might mention that as well. If you don't have any specific qualifications, which is extremely common, you can instead list your specialty. Are you known for your poetic prose, your lighthearted romance, your whimsical fantasy? This lets readers know what to expect. Once you've gotten your accolades, qualifications, and specialties out of the way, you can now give some brief information about where you live, how you live, and maybe an interesting factoid about you. You don't need to list the exact city you live in. For example, I simply mentioned that I live in Silicon Valley. However, it is common to give people an idea of where you reside. How you live can simply refer to the fact that you're happily married with three kids or that you live a cozy life with a precious three-legged dog. An interesting factoid is exactly what it sounds like, something special or quirky about you. Not hard, is it? Now, a few things to keep in mind when writing your author bio, first, it should be short, four, maybe five sentences. You know what readers see when they read an essay author bio? Ego for days. It's not a good luck. Second, consider your style, author platform, and genre. If you write romantic comedies, then it's perfectly acceptable to make your author bio funny. However, a funny author bio would be supremely inappropriate if you wrote heart-wrenching tragedies. Third, if you're going to include an interesting factoid, make sure it's actually interesting. If you're going with the goofy angle, then a silly factoid could work, or maybe something flowery if you're a poet. But if the factoid doesn't enhance the bio in any way, then it doesn't need to be there. Lastly, whatever you do, do not mention that you're a voracious reader. Why? Because every single newbie author mentions that they're a voracious reader in their author bio. I don't know if you know this, but reading and writing go hand in hand. It's pretty much a given that you, a writer, are also a reader. You don't need to mention this. It just looks like you didn't have anything interesting to say about yourself. While you're cooking up your dreaded bio, I encourage you to go through lots of other books within your genre. Read their author bios, see what they said and how they said it. You will most likely notice a formula, a similar link, the same sort of facts being mentioned. Feel free to use this as a guide. Once your bio is complete, you're done, right? Wrong. You, my friend, still need an author photo. If you can get a photo professionally taken, that's definitely encouraged. However, if you've got a friend who's great at photography and has a nice camera, that can work too. But you probably shouldn't use a filtered or grainy selfie. You may look cute, but it doesn't exactly scream professional. Again, this is a great time to look at other authors in your genre and see what they're doing. Nine times out of 10, you're going to see a professional photo that's relatively simple and hopefully flattering. Okay, I know you weren't looking forward to this step, but it's done, and it wasn't that terrible, right? I mean, you're still living, so that's a plus. Now that your author bio is taken care of, we move on to our next step. I'll see you there.
6. All About ISBNs: You're in luck because this step is one of the quickest on the entire list. It's time to get into ISBNs. An ISBN or International Standard Book Number is a 10-digit number assigned to every book before publication. They're super important because they're ultimately going to be used by retailers for tracking and distribution. If someone is looking up your book, their best bet is through the ISBN. The reason we're tackling this step next is because you're going to need your ISBNs once you start the cover art and formatting process because the ISBN is going to be listed on the book itself or in the book itself. So here's what you need to know before you start hunting down ISBNs for your book. First off, you will need an ISBN per each version of your book. That means, if you're publishing an e-book and a paperback, you will need two ISBNs. If you are publishing an e-book, a paperback, and a hardback, you will need three ISBNs. Note this is one ISBN per format, not distributor. You do not need one ISBN for Barnes & Noble, another ISBN for Kobo and another one for Books-A-Million. It doesn't work like that. Now some self-publishing platforms will offer ISBNs for free. It will depend on the platform you're using. You are welcome to take advantage of these freebies, but please read the terms and conditions carefully because there may be limitations associated with those free ISBNs. Another thing to consider is the ASIN, which is Amazon KDP's version of the ISBN. If you decide to upload a Kindle version of your e-book through Amazon KDP, they will automatically assign your book an ASIN. This means that this version of your book technically won't need an ISBN, at least to be trackable on Amazon. However, many writers still purchase an ISBN for their e-book because it will allow the book to be trackable through libraries and other retailers. Now that we've covered the free options, there will still likely come a time when you will need to purchase ISBNs, and I'm going to warn you, they're not cheap. ISBNs come with a hefty price tag, but on the plus side, most distributors offer bulk pricing. That means the more ISBNs you buy, the cheaper each will be. If you plan to write a ton of books in your lifetime, then it might be worth it to buy a bulk of ISBNs. If is just a one-off, then maybe only get the ISBNs you need for this book. As for where to purchase your ISBNs, there are several platforms that vary in popularity depending on the region or country. For example, in the US, the most popular site is Bowker. Wherever you purchase your ISBNs, be sure to research the platform and make sure it's reputable. Once you buy them, that's it. They are yours to use as you please. That means it is finally time to start working on cover art. I will see you in the next module for details.
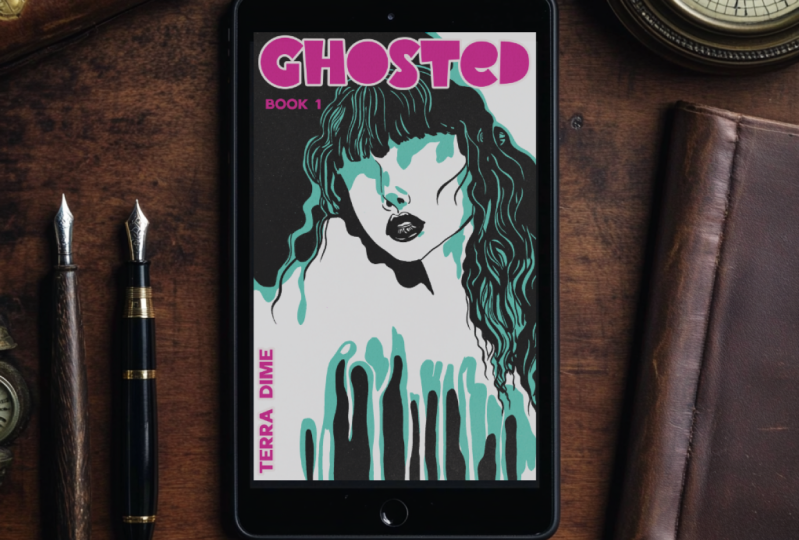
7. Cover Art: We're finally at most writers favorite part of the publishing process and that's cover art. Cover art refers to the artwork that's on the front of your book. If you're publishing hardbacks and paperbacks, it also refers to the spine, the back, and the inside flaps. Now you might be expecting me to teach you how to create cover art, but I'm not going to do that. Unless you're a professional cover artist or a graphic designer with a healthy understanding at a publishing industry, you should not be creating your own cover art. Your book cover is your number 1 marketing tool. It is the first thing all of your potential readers are going to see. Before the title, before the blurb, even before the rating, they are going to see your book cover. Thus, if your cover looks unprofessional or home-made, it is guaranteed to lose sales. Readers are going to see that you put no time, effort, or money into the cover and they're going to assume the inside of the book is just as neglected and honestly, can you blame them? It's a fair assumption to make. When choosing your cover designer, it pays to do your research. Of course, you can do a handy-dandy Google search, but it's especially helpful to talk to other writers and see who they've worked with and who they recommend. Another trick is to check out self-published books in your genre with covers you like. Cover artists are usually credited in the book itself, either on the copyright page or in the acknowledgments. Once you've nailed down a few cover artists you might like to work with, it's time to get an idea of what sort of covers you'll need. This is when you refer to the number of formats or versions your book will appear in. Are you publishing an e-book? Are you publishing a paperback? Are you publishing a hardback or an audiobook? Each version needs its own cover. Yes, the front will look the same, but they will all have their own format and sizing. An e-book will typically be a rectangular cover, whereas the audiobook is a square. Paperbacks include a back and spine, hard backs include a back, spine, and inside flaps. Please note if it wasn't obvious already, the more formats you create, the more you're going to spend on your cover art, so budget accordingly. I have seen designers offer packages as cheap as 50 bucks and as expensive as $4,000. The price range is huge, so you should definitely do your research so you can get an idea of how much you will need to save. The last thing you want to consider and probably the most important part is to figure out what you want featured in your cover art. Again, it's a smart idea to refer to best selling books within your genre to get an idea of what readers expect. This will help you choose the style and artwork as well as the layout. For example, if you plan to create a paperback and hardback book, you'll notice that most books feature a similar layout. The standard paperback book will have a back that features the blurb of the story. It may also have a praise quote or two and if there's room, possibly an author bio, though that's not quite as common. Hardbacks will often feature the author bio and blurb on the inside flaps, whereas the back will be reserved for praise quotes, teasers or both. You may be thinking this information isn't relevant to you, after all you're hiring a cover artist and they're going to take care of it, but you are hiring them, which means they're going to take your direction. It's very important to have an idea of what you want on your cover so you can lead them throughout the process. That's all I got for you in terms of book covers. Get to researching cover designers so you can find the perfect one for you.
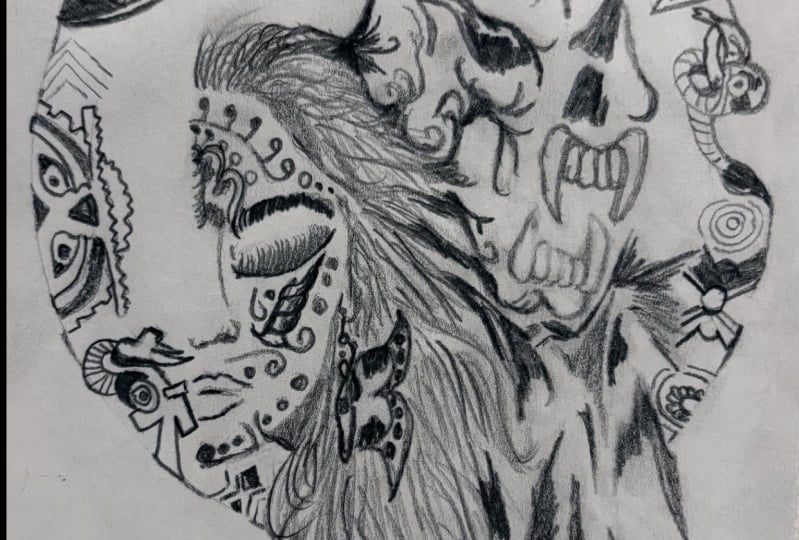
8. Class Project: I've got an assignment for you and it's all about book covers. You don't have to be at the publishing stage in order to complete this assignment. So long as you have a work in progress, you can do this. This assignment is divided up into 10 steps, so pull out a notebook or a Word document and list these steps in the order in which I'm about to give them. The goal is to help you determine what you want out of your book cover. Even if you already have an idea of what you're looking for, you may realize it's actually not any good. These steps will help steer you in the right direction, and when the time comes for you to hire a cover artist, you'll be prepared. Step number 1, determine your genre. This should be easy. You're writing a book, so you should probably already be aware of its genre. A lot of people write cross genre books, which means the book falls into more than one genre. For example, my series, the Savior series is a dark fantasy series, but it's also a romance and action adventure series. If your book is cross genre, you're going to have to choose which genre is most relevant. I know this is really hard, because all the genres are relevant. I like to think about which genre appears in every single chapter. That's the one I'm going to focus on. Step number 2, determine your target audience. Your target audience is the group of people your book was written for. Typically target audiences include children, if you're writing kids books, middle grade, which refers to junior high schoolers, young adult, which refers to high schoolers, and adult which refers to any 18 and over. There's also new adult, which is a middle ground between young adults and adults ,it typically refers to a target audience of people who are embarking on their first big boy or big girl job or if they're just getting started at college. The reason you need to determine your target audience is because this will affect your cover. A young adult fantasy cover is going to look pretty different from an adult fantasy cover. Step number 3, research your genre and target audience. Pull up Amazon and search for books within your particular niche. For example, I would type in adult dark fantasy novels and then shuffle through all the book covers provided. It's a good idea to look at the best sellers within your genre and target audience because then you know, without a doubt that they're covers were effective. Step number 4, analyze trends. If you pull up enough book covers within your genre and target audience, you are going to start to notice trends. Are the cover is very detailed and busy, or are they simple and streamlined? Are the covers bright and vibrant or dark in eerie? Are there people on the cover? If so, do we see their faces or is it just their back or silhouette? Make note of these trends because it will be very helpful to you when crafting your cover. Step number 5, choose 3-5 covers. After going through a bazillion covers, choose 3-5 that are the closest reflection of how you'd like your cover to look. This does not mean we're copying covers, but you should find a few that employs stylistic elements that are relevant to your work. For example, when I was researching covers for the Savior series, I found one that had a very dark background and a bright glowing helmet in its center. The contrast between the dark and the brightness was something I definitely wanted to employ in my series. Save your favorite covers because they can be very helpful when communicating with your future cover artist. You can use them as a reference. Step number 6, what are the symbols of your novel? What are the recurring images that show up in your novel? Things that pop up often or symbolize your story. For example, recurring images in the Savior's Sister were blood, blades, lilies, purple, darkness, and light. You want to have this imagery written down because they could play a future role in your book cover. Step number 7, what are the themes of your novel? Themes aren't easily translated in the cover art. However, they can give you an idea of the emotional tone your cover art should convey. For example, many of the themes in the Savior's Sister involved darkness and death, so I wanted a cover that was dark and showed hints of danger. Step number 8, what color scheme are you interested in? Sometimes the color scheme is obvious, especially if color is relevant to your story. If you're writing about Superman, clearly the color scheme is going to be blue, red, and gold. Other times it's not quite so obvious. Do your best with this step. It doesn't have to be perfect. Step number 9, what snapshot do you want to deliver to readers? Readers are going to make a snap judgment about your book based on its cover, so you need to decide early on what you want that judgment to be. If a book features a shirtless man holding a woman in lingerie, readers are going to assume that this book is steamy, which is a problem if it's a book about physics, what snapshot do you want to deliver? Write it down. Lastly is step number 10. What do you want your cover to look like? This is where you take everything you've learned through steps 1 through 9 and put them to work. How do you want your cover to look? It's okay if you have multiple options, in fact, that's preferred, your cover artists will thank you for giving them a variety of options to work with. Once you've finished steps one through 10, please share your finished assignment with the class. If you don't want to share what your finished cover will look like you are more than welcome to leave step 10 blank. We will respect your privacy, but at least share your steps one through nine, and that way your classmates can see your line of thinking and offer feedback. I can't wait to see what covers you cooked up.
9. Formatting: The formatting process is a bit of a conundrum, because it's both extremely exciting and incredibly stressful. Formatting refers to taking your manuscript, and arranging its pages into a book format. This process is exciting because you get to see your book come to life; it's stressful because it can be long and tedious, but hopefully I can make the process easier for you. First and foremost, let's cover the types of formats you'll need to create. If you are publishing an e-book through Amazon for Kindle devices, you're going to need to create what is known as a MOBI format. If you are publishing your e-book through iBooks, Kobo or any other e-book device that isn't Kindle, you're going to need to create what is known as an EPUB format. If you are publishing a hardback or paperback book, you will need to create a PDF for each physical version of your book. In terms of how to format your book, you have a handful of options. Your first and most obvious option is to hire a professional formatter. Many cover artists double as formatters, so you may see packages available that combine these services. The benefits of hiring a professional is, one, it'll be done professionally, obviously. They know what they're doing, so hopefully there will be minimal errors. Two, you don't have to learn the skill yourself. The negatives of hiring a professional are, one, it's expensive: a professional format can cost hundreds of dollars; and two, it's a really long process. It's common to find errors in your formatted book, in which case, you got to let your formatter know about those errors so they can fix them. This process can take weeks, which is really frustrating if you've got a book release on the horizon. The second option for formatting a book is to do it yourself via a word processing platform. The benefit is obvious. You're doing it yourself, which means it's free. The negatives, on the other hand, are a bit more complicated. First up, you have to learn how to format a book in a word processing document, which, I've heard is very difficult. Second, books formatted using a word processing platform, tend to look less professional than other books. You run the risk of making it obvious that you formatted the book yourself, which can turn readers off. The last option and the one I personally implement, is to format a book using a book formatting program. There are several available, but I personally use Vellum. The benefits of using a formatting program like Vellum are, one, it's less expensive than hiring a professional. Programs like this are not free, however, they're usually cheaper than professional formatter rates. Plus you can usually use the program over and over again for unlimited books, which means you're just paying once to get unlimited formatting. Two, these programs are a lot easier to use than learning to format of book through Word. Three, these platforms make formatting much quicker. I was able to format my book in less than an hour, and four, the finished product will look professionally done. The negatives of using a program like Vellum are: one, it's not free, like formatting via Word; and two, it may not be available on your computer or device. Once you've decided how you're going to format your book, please remember to proofread. The final proofread of your novel typically occurs after the book has been formatted. That way, if there are any lingering mistakes or errors, they can be nipped in the bud before the book is released. Don't skip this step, you'll regret it. I hope this information was helpful, and you're able to make the decision that is right for you, for your publishing path. When you're good to go, I will see you in the next section, which is all about copyrights.
10. The Copyright: While books are considered copyrighted the moment they are written, it's still a good idea to file for an official copyright before publication. That way the copyright is on record in case you need to exercise any legal action in the future. Whenever writers get to the copyright portion of the publishing process, they freak out. How do I even copyright a book? It sounds so complicated and intense. What if I told you, it's the easiest part of the publishing process. All you do is go to this website and follow their steps for submitting your book for copyright. From my understanding, it is best to do this once your novel is done, no more edits, no more alterations. The website will take you through the submission process step-by-step. You typically have to submit a few versions of your book, fill out a questionnaire, and pay a small fee. But honestly it's a very quick and easy process, nothing to fret over. After your copyright is submitted, it can take months to process. I think the typical amount of time is about six months. According to my research, if your book is published before the copyright has officially gone through, that's okay so long as you file for the copyright before the book is published, you should be good to go. That's all I got for you on copyrights. Bet you're relieved. Of course, as I mentioned in the disclaimers, this is the copyright process for the US. I'm not exactly sure how it works internationally. Sorry, wish I could help you. I'll meet you in our next section where we will talk about library access.
11. Library Access: A lot of writers assume getting your books into libraries is an easy process. You just publish the book and libraries will carry it, right? Wrong. Well, it's possible for your book to be requested at libraries. The best bet for getting your book on library shelves is to apply for an LCCN. An LCCN or a Library of Congress Control Number is a book that catalogs records in the US Library of Congress. While requesting an LCCN will not guarantee your book will be distributed to libraries, it will make it a lot easier and more likely. Similar to filing for a copyright, all you have to do is visit their website, request an LCCN, and follow their listed steps. Please note that in order to qualify for an LCCN, you have to meet the following criteria. Number one, your book is not yet published. Number two, your book has a US city as a place of publication listed on the title page or copyright page. You'll also need to add your LCCN to your copyright page once the number is generated and you'll need to send copies of your book to the Library of Congress. Certain books are ineligible for an LCCN, such as mass-market paperbacks or e-book, exclusive books. All of the steps and qualifications will be provided on the website. Unlike applying for a copyright, LCCNs are typically generated very quickly. Again, and I cannot stress this enough, an LCCN will not guaranteed library presence, but it sure will help. Once you're ready, I will see you in the next module where we will discuss the actual act of publishing your book. See you there.
12. Publication: A million sections later, we are actually at the step where you finally publish your book. Well, it's time to upload your files to the appropriate vendors. Uploading files to vendors can mean a few things because there are different ways to do it. The most obvious is uploading your file directly to the vendor you plan to sell through. For example, uploading directly to Amazon KDP, uploading directly to Apple iBooks, uploading directly to Kobo. Another way is to upload your file to third-party distributors that then send your book to vendors. Some example of third-party distributors are Smashwords, Draft2digital, and IngramSpark. Most writers I know do a combination of these tasks. Maybe they upload directly to Amazon KDP, but then they have the rest of their e-books distributed through Draft2digital. Maybe they upload their e-books directly to specific vendors, but then have their physical books distributed through IngramSpark. Unfortunately, I cannot tell you where to upload your files because the decision is highly subjective. Whichever path you choose is going to be based on extensive research and what works best for you and your author platform. Please study all options, talk to other authors you trust, and make the decision that's best for you. Once you upload your files, you're going to have to input a lot of data about your book. I can't break down a step-by-step guide to uploading your book because each vendor is going to have a different process. What I can give you is an overview of the basics you'll probably need to know across all platforms. Number 1, you are going to need to know your book's title and if applicable, your series title or subtitle. Number 2, you are going to need your author name and if applicable, contributor names. I hope those first two steps are easy for you. They should be. Number 3, you will need to have your formatted pages and cover art ready in the appropriate file type. Number 4, you need your book blurb handy. Endorsements can be added to a digital book blurb, so if you've got any, get them ready. Number 5, you need to know your book's genre and category. You can usually pick more than one category for a book. Most platforms allow two or three, but on Amazon KDP, you can actually e-mail them directly and get your book added to up to 10 categories. Number 6, there is a good chance you will need to choose keywords. Keywords are searchable terms that help make your book available to the appropriate audience. There are platforms and services available that can help authors choose effective categories and keywords so that they can make their book available to an even wider audience. Some of these platforms include Publisher Rocket and K-lytics. Number 7, you have to price your book. This can be tricky, but it helps to research the market in your genre. See how other books within your category or with your page count are priced when choosing a competitive rate. Last but not least to number 8, pick a release date. When you upload your novel to vendors, you get to decide when your book will be released. You also get to decide if you want your book available for pre-order and for how long. Please do your due diligence and research the market and the pros and cons of pre-sales and when the best seasons are for releasing which genre. Please also be sure to give yourself enough time to get all of your publishing and marketing tasks completed before the book release. Last-minute hiccups happen, so try to account for them. Give yourself some wiggle room just in case the worst-case scenario happens. These are the general points you'll need to nail down when uploading your file to vendors or third-party distributors. Again, keep in mind it varies from platform to platform. Some may ask for additional information, others may be more streamlined. Do not be afraid to pause the process and do some additional research or ask for help. After all, this is your book baby. You'll want to make sure you're getting it right. Once you're ready, I will meet you in the next section where we will be covering the last step of the publishing process. See you there.
13. Proof Copies: You never thought this day would come, but we're finally here. This is the last step to the publishing process, ordering and approving proof copies. A proof copy is a copy of your novel that you receive before publication. Writers get really excited over proof copies. They think they're going to marvel over their hard work and cry tears of joy, and some writers do that, others not so much. The purpose of a proof copy is to check to make sure your final book is free of errors. Guess what? It ain't always free of errors. This is why the proof copy stage is so important and why you should give yourself adequate enough time to analyze your proofs and make sure they are flawless. There are different kinds of proof copies, there are digital proofs and physical proofs. If you're publishing an e-book, all you'll need to see is a digital version of your novel. Digital proofs tend to be generated very quickly, sometimes within a business day or two other times they're generated immediately. Download your digital proof and flip through every single page. Check I'm serious. Check to make sure there are no formatting errors and that everything is appearing the way you've intended. If it looks good, you can approve the proof, which means your e-book is ready for publication. When it comes to physical copies, like paperbacks and hardbacks, you will have the option for two types of proofs, digital proofs, and physical proofs. I recommend checking both. Digital proofs are usually free, but at the end of the day, they are only going to tell you so much. It's far more worthwhile to receive a physical copy of your book and flip through the pages by hand. Physical copies are not free. However, most vendors will sell you a physical proof at cost as opposed to the full price. Once you receive your physical proof, analyze the cover. Is it clear or is it grainy? Are the colors sharp or faded? Then flip through every page and just like with a digital proof, makes sure everything is formatted correctly. If there are issues, address them promptly. You should be able to log in to the platform and make adjustments when necessary. Once you've finished your modifications, guess what you get to do. You got to order another proof and maybe another after that. Do this until you are happy with the final product. Please do not be discouraged if your first proof isn't perfect. I have published three books at this point in my life and I have never received a perfect proof on around one. It's normal to have to make changes. Like I said, account for this when you are selecting a release date. Give yourself time to go through your proof copies and work out the kinks. That's it. You've got a release date, your files are uploaded and now you are ready to release your book to the masses. Congratulations, you have self-published your book. You should be extremely proud of yourself.
14. Course Wrap Up: There you have it. That's how you self-publish a book from start to finish. Whether you're ready to publish now or you're researching for the distant future, you now have the tools at your disposal to self-publish properly. As I said at the start, please be aware that you will need to do extensive marketing for your book. But in terms of getting your book published and distributed, you've got that on lock. Don't forget to complete your assignment. I want you to create the best book cover possible for your target audience and genre. Once you're done with your assignment, share it in the project section. That way your classmates can take a look, they can give you feedback, they can ask questions. Thank you so much for taking my class. I hope I was able to demystify the self-publishing process and ease some of your concerns. There are a lot of steps to take, but I've taken them, I've lived to tell the tale, and I've made a profitable career out of it. You can do that too, just follow these steps and you'll be good to go. Congratulations on your upcoming release. I can't wait to see your book out in the world for people to enjoy.
 Jenna Moreci, Bestselling Author & YouTuber