Transcripts
1. Introduction: Hello, and a very warm
welcome to this class, all about how to paint a golden retriever or golden
animal in acrylic paints. My name is Alex, and I've been painting
pet and animal portraits for about eight years now. I create original
pieces, prints, bookmarks, and greeting cards that I sell through my website. And recently, I've started
creating tutorials, all about my painting process
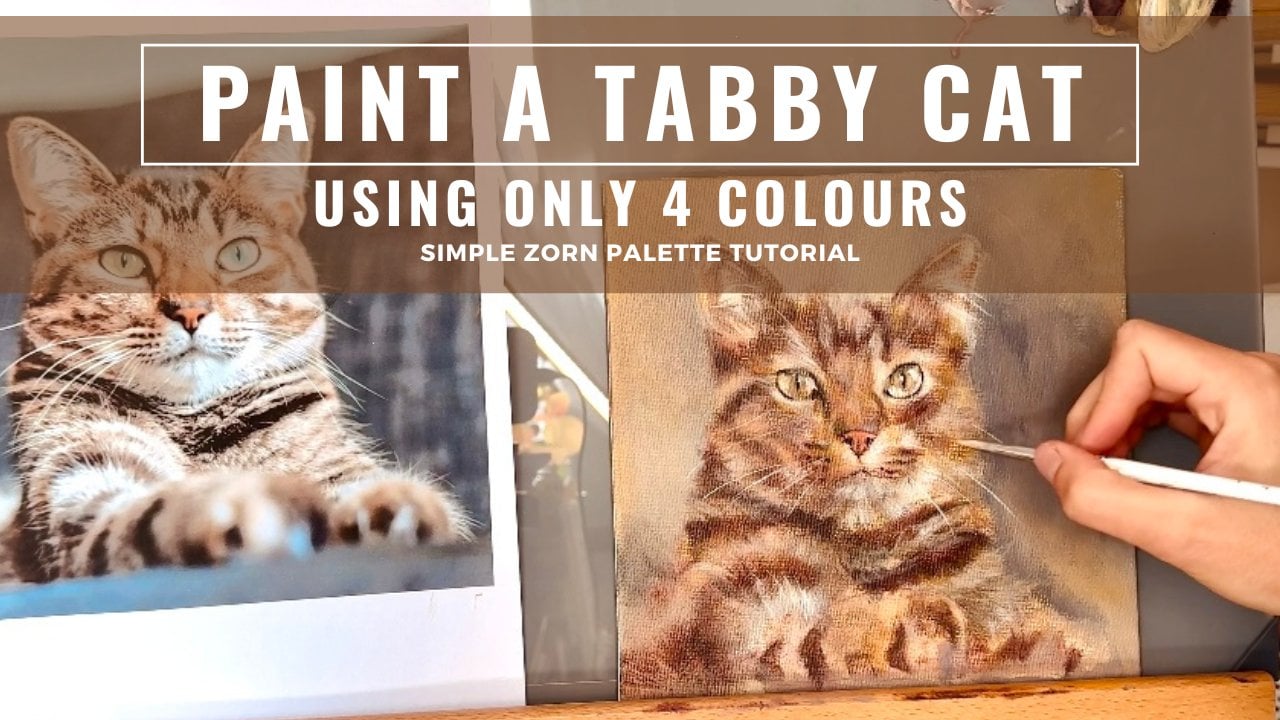
that I share on Skillshare. Golden animals can be tricky to paint because just like an all white or an
all black animal, the value and temperature changes throughout the
painting can be very, very subtle, and
they are difficult to get right in order to
create a realistic painting. But in this class, I'm
going to be showing you all the materials that
you're going to need, how to sketch out
your reference photo onto your painting surface, and I'm going to show you the exact colors
of paints to use, how to mix these paints
together in order to get the right values
and temperatures. And then I'll show you how
to create the painting from start to finish in bite
size manageable chunks. So hopefully by the
end of this class, you're going to have a
painting that you're proud of. And you're also going to
go away with the knowledge and techniques to apply to
other paintings in the future. Grab a drink, a hot
chocolate, a coffee, a tea, and feel free to watch this class
all the way through. Alternatively, paint
along with me. I recommend watching
the material section first just to find out exactly what you're
going to be needing. And then you can paint along
with me at your own pace. I'm so excited to get started, and thank you so much for
joining me on this class. So without further ado, let's talk about our class project.
2. Class Project: For the class project, I would love for you to have
a go at painting your own golden retriever
or other golden animal. Perhaps you have a
pet at home who's a golden retriever
or a golden lab. Just take a photo of them and
use that as your reference. Alternatively, you can use the reference photo that I'll
be using for this class. I'll pop the file below in the projects
and resources section. You just want to print that off. A four size is completely fine. If you did want to
go away and find your own reference
photo and perhaps you don't have a subject
to take a photo of, then I can highly recommend
the website on Splash. It's great for finding
royalty free reference images to use as inspiration
for your paintings. Whether or not you've
finished your painting, if you get to a
stage where you're happy to photograph it, please pop a photo of the painting down below in the projects and
resources section. I would love, love love to see what you create from
watching this class, and I will comment and provide feedback on every single photo.
3. Materials: Now, I'll run through
exactly what materials you're going to be needing for this class in no
particular order. So first of all,
you're going to need a surface to paint on. My preferred surfaces are either stretched linen
or stretched cotton. I love painting on these. But quite often, if I'm
doing a practice piece, I will use canvas boards. They're really easy
to order in bulk, and they're very
inexpensive as well, and they're also
really, really easy to store if you're short on space. You're also going to need
some acrylic paints, and I'll go over the exact
colors that we're going to be using in the preparing
your palette lesson. Doesn't really matter which
brand of paint you choose, but I would advise against going for anything
that's too cheap. If you stick to the
reputable brands like Golden or Windsor and
Newton, you should be fine. You're also going
to need a range of different sized
paint brushes. I normally go for one larger
brush for doing a wash over the canvas and then a selection of medium to small size brushes. You're also going to
need a brush that has a very fine point on the ends, just for doing fine details like the highlights in the
eye and whiskers. And again, don't go for any paint brushes
that are too cheap. If you do go for cheap ones, you're going to find that they
get misshapen very easily, and their bristles will
start falling out. So again, you don't
have to go for, like, top of the range, most
expensive brushes, but go for reputable brands and also make sure that they're
suitable for acrylic paints. You'll also need a palette
to mix your paints on. And for acrylic paints, I cannot recommend enough
a stay wet palette. It keeps the paint moist
and workable for days. You just need to make sure
that you keep the membrane underneath wet and replace the lid once you
finish painting. And honestly, once I
squeeze out my palette, I don't have to change the membrane for an
entire painting, which can take up to two weeks. So I'd really recommend
getting a stay wet palette. Also going to need a container. I normally use an old glass
jar, a container of water. Get out your reference photo
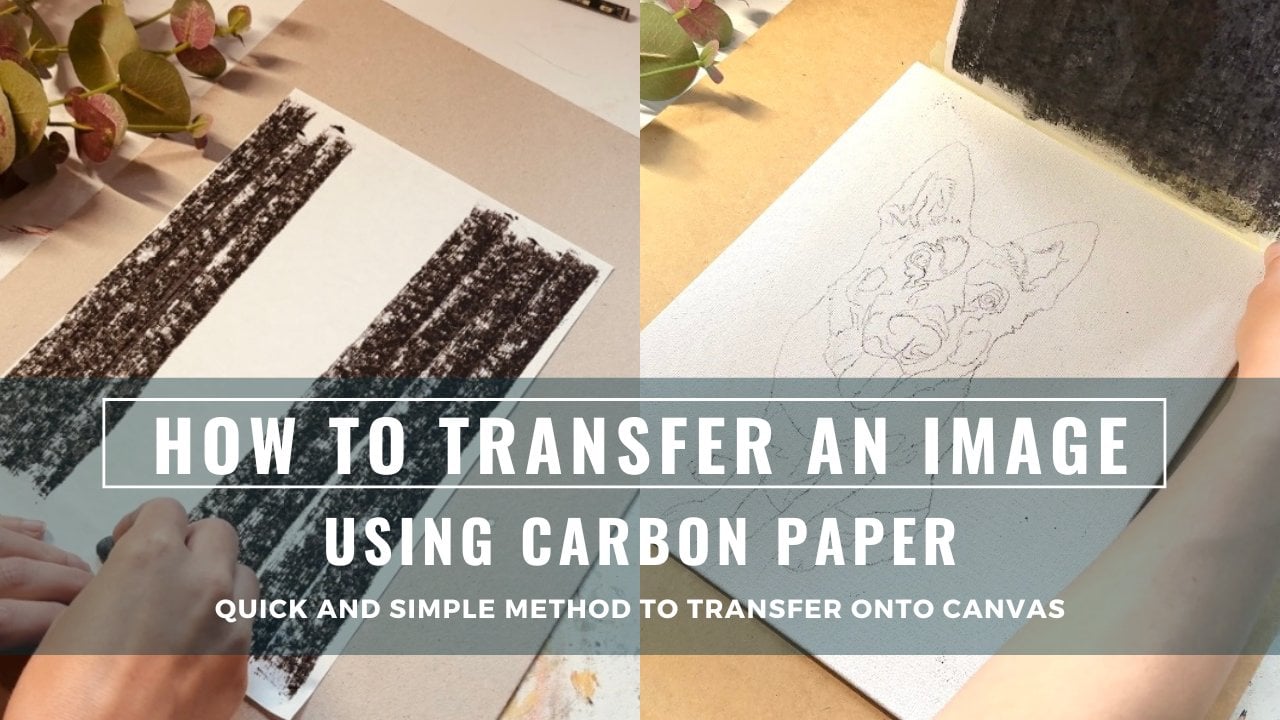
onto your painting surface. For this class, I'm
actually going to be using the carbon
transfer method, which I'll talk about
in the next lesson. For this, you're going to need some carbon transfer paper, or I make my own, and I just use a piece of tracing paper and
a carbon stick and also a sharp pencil or
biro something like that. You're also going to
need to print out your reference photo onto a four paper like
I've done here.
4. Transferring Your Reference Image: I've got my painting surface. This is just a canvas panel. It's a fairly
inexpensive, cheap one. I usually use these just
for practicing painting. I did already have
a painting on this, which I've just covered
up with a couple of layers of white Gesso. If you can see some marks,
that's what that is. I've also got my reference
image, which I've printed off. Onto a four paper. A piece of advice here is to use a painting surface that is the same size as
your reference image. If you're using this method to draw out the
outline on Canvas. If you're using the
carbon transfer method, then it's a really
good idea to have a painting surface that is the same size as your
reference image. Also, got my carbon paper. This is one that I created
myself with a piece of tracing paper
and a carbon stick and I just wiped or run the carbon stick sorry over the surface of
the tracing paper. I'm going to turn
that face down. If you want to, you can
use a bit of tape just to secure it in place and stop
it from sliding around. Then I'm going to take
my reference image and place it on top of the carbon paper and
then just play around with whereabouts you
want that to sit. On the painting surface, I'm going to go roughly there, and then you can take
either a sharp pencil or I sometimes use just a big ro and I'm going
to use what I've got here. I've got this sharp pencil here. You're then going to go around the outline of your
reference image. Where you press down with your pencil is where the carbon is going to transfer onto your painting surface. Obviously, only press
down where you want to if you want to
leave any lines out, then don't press
down in those areas. I'm going to go all over the lines now and
I'll speed this up. Okay, so I've gone round the
outline and it's a good idea just with one hand sell on
the paper so it doesn't move. Just check as you're drawing just to see if you've
missed out any key areas. Now obviously, you
don't need to draw out every single
individual hair or line. You want to outline the areas
where the values change. So if you go from a light
to a dark color and also where the temperature of
the color changes as well. So for example, if you have a
warm next to a cooler area, this is just going to
help you as a guide when you are painting, as
I've already mentioned, it's those shifts in
value and temperature, which you're really
going to make for a really, really great painting. So just getting those areas
locked in now is a good idea. I'm just going to put
this shape in down here, and then I think I am all good. There's actually one
more little shape here. Okay, and there we have the outline of
the golden retriever. If you started painting
straight onto this, then the carbon would smudge. So I'm going to fix the carbon with just
a spray fixative. This is the one I use. It's the Dalla brownie
colorless fixative spray. There's lots of different
options available. You don't have to
get this one, but this is just the one I use. Obviously, follow the directions that you want to be spraying it in a
well ventilated area. So I'm just gonna
quickly open my windows. You want to be doing it outside. But what I'm gonna do is
open my windows wide. Spray it, and then I'm going
to actually leave the room, so I'm gonna go and
have some lunch. So.
5. Preparing Your Palette: I've laid out all of the
colors that we're going to be putting into our palette. And as I said earlier, I don't tend to stick to one
particular brand of paint. I chop and change between them. Also, some tubes of paint
are much older than others. I tend to find that the
more saturated colors, so the saturated
yellows and reds, those tubes of paint
do last a really, really long time because
you only need to squeeze out a tiny amount
onto your palette, so a little bit goes a long
way with those colors. We've got two yellows,
a cool yellow, which is our cadmium
yellow, pale hue. You could also use cadmium
yellow light as well. So that's our cool yellow, and then we've got
a warm yellow, which is yellow ochre. This is quite a good brand
from Windsor and Newton. It's their galeria brand, and this one from
Dew is also good. They're system three acrylics. They're both kind of
graduate level paints, so they're slightly cheaper, but they still do a
really, really good job. We've then got our two reds. We've got a warm red,
which is this one, our cadmium red, and then a cooler red,
which is our crimson. You can see there
the difference. This one's a lot more
warm and fiery colored. Whereas this one's a bit cooler, it's leaning more
towards a blue. We've then got our blue, which is ultra marine deep. And this brand is I'm not
actually sure how you say it. Is it a Ara or ARA? I'm not sure. And yeah, I don't know why I
chose this brand. I just thought I'd
give it a try. This is another
good one, actually, and very, very affordable. This huge bottle was
fairly inexpensive. So yeah, definitely
a good one to try. We've then got titanium white. I have this in the golden
artist color brand. This is slightly
more expensive than the more entry level
graduate paint brands, but it's really,
really good quality. I love using these golden ones. We've also got transparent
yellow iron oxide. Again, this is golden. It's their open series, which basically,
they're just slower drying than their
book standard paints. And then finally, we've
got red iron oxide. This again is from
Windsor and Newton, and it's their artist
quality paints, again, slightly more expensive
but really, really good. So, one, two, three, four, five, six, seven, eight. That's our eight paint colors. I'm going to sqeeze them
out onto the palette now. Hopefully, you can see
bring you a bit closer. So as I mentioned,
I'm only going to put fairly small amount
on to begin with. You don't really need a lot. A little goes a long way, especially with the size of painting that I'm doing
in this tutorial. I'm only doing A four size, so it's really not a massive
painting surface to cover. So you can really see
when I squeeze them out, this one's much
lighter and cooler, and this one's a lot
warmer and darker. I go for our reds, our cadmium red, which
is our warmer red, and then our crimson. That's our cooler red. The ultramarine deep. I might actually
just squeeze out tiny a bit more of
the ultramarine deep because we are going
to use that for a wash. Over the canvas. And then I'm going to
put my white here. Oh, is that one dried out? Let me go grab a different whit. That one is
completely dried out. Okay, this is the same white, just a larger tube. Definitely recommend
squeezing out double the amount of white. And also, when you are
purchasing your tubes of paint, always get a larger white
because that would be the one you use more
than any of the others. And then I'll put my transparent
yellow oxide there and my red iron oxide there. Okay.
6. Colour Mixing: I Okay. First of all, I'm going to mix up. Well, you may have noticed
that I don't have black. So we're gonna have
to mix a black up. If you use black
straight from the tube, then it tends to sit very flat on the surface
of the painting. So I always mix blacks from
other colors for things like the eyes and the
nose, nostrils as well. They're very dark. To do this, I'm going to take a bit
of the ultramarine blue, a bit of the red oxide, mix those together roughly
in sort of equal quantities. No, I'm just mixing to kind of show you what it looks like. I probably won't
be enough quantity wise to do the whole painting. But obviously, you
can mix as you go. You're never gonna know exactly how much
you're gonna need. I'm also going to add
in some of the crimson. Bit more of the blue. See
that's darkening up nicely now. Bit more of the
blue, bit more of the leather and crimson. Okay. Hopefully, you
can see that's a very, very dark mix bordering
on too black. So that would be
what I'm going to be using for my darkest areas. And you can either make it a cooler black by
adding a bit more of the ultramarine blue or a warmer black by adding
more of the alzarin. Sorry, more of the crimson. Okay, so that's going
to be black color. And then we're also going
to be using a purple. Again, purple is a color that
we don't have squeezed out. So we're going to need to mix colors together to
make our own one. So for the purple, I'm going to be using the cadamiu
red this time. So this warmer red and mixed
with the ultramarine blue, just to make a nice purple. So as you can see, that's
slightly lighter than the dark black
because we haven't added in any of that red oxide. So that's going
to be our purple. We're also going to
mix two oranges. Again, we don't have oranges. I'm going to mix
two, a warm orange and then a cooler orange. So for the warm orange, I'm going to use
the cadmium red. And the yellow ochre. So this will give us a very
saturated, warm orange. And you can see already,
it's very, very saturated. And for the second orange, let me just wash
out my brush again. This time, we're gonna be using the red oxide and
the yellow ochre. So this would give us a
cooler, more muted orange. You see that ones a lot more fiery and this one's
a bit more muted. So they're gonna be
our two oranges. Also, if it helps
you, wearing or mixing your colors
helps you to remember. You can always write down
on a piece of paper, how you've mixed each color. So exactly which red or
which yellow you've used. 'Cause it is kind of difficult
remembering everything. Okay. And the last color
we don't have is green. We haven't squeezed
out any green, so we're gonna have
to mix our own one. And for this, we're going
to make a light green. So I'm going to use
the yellow ocha. Make a bit of n, and
the ultramarine. You probably want slightly more yellow than
blue for this one, use your actiary
blue is going to be more stronger
color of the two. It's actually looking
a bit too yellow. Add a bit more Actary
blue. There we go. So that is a very
kind of muted green. We don't want a
bright green because of what we're painting. We're painting a golden animal, so it doesn't have any kind
of bright greens in it, but that will be perfect for cooler areas that are
more kind of in shadow. So there we have our palette that we're going to
be working from. And it's important
to remember with this palette which colors are warm and which colors are light. So I'm just going to
bring in my color wheel to show you quickly. Now, if you don't have
a color wheel to hand, you can buy one or you
can make one yourself. I highly recommend making one yourself because whilst
you're painting, you kind of take in
more what you're trying to kind of
understand by creating it. So we've got our
cooler colors here. And these are going
to be your blues, and then we've got your
warmer colors opposite, which are going to be your reds. Then in between the
cool and the warm, we've got what's known as
our transitionary colors. And these are the purple, so the purple that we mixed
up here and also your greens. So the green that
we mixed over here. So basically, we've
got all bases covered on the color wheel. Your transitionary colors
of purple and green can either be warm or cool. So if you want to make
your purples cooler, you're going to obviously
add a bit of blue. If you want to make your purples a bit warmer, you're
going to add red. And again, with green,
if you want to make a cooler green, you're
going to add a bit of blue. If you want to make
a warmer green, you're going to add
a bit of yellow. So if you're not confident
with color theory, I highly recommend
using a color wheel. It's just going to be a really good aid for
you as you're painting. The one color we don't have
on the color wheel is white, probably because it's
not I don't know. Is it really a color? I suppose it is, but white
is a very, very cool color. So whenever you add white
into any of your mixes, it's going to not
only lighten them, but also cool them down. So just bear that in mind. It's also a great idea, and something I've done
on here is to add in the actual names of the
colours of paint you use. So, for example, cadamiumRd If you have cadmium red
in your paint collection, then write on it where it
would sit in the collar wheel. This this will just help you remember which are
warm and which are cool. This is what I struggled
with a lot at the beginning, understanding which reds
were cooler and which reds were warmer and the same with the yellows and the
blues, for example. So of the paints that you got in your house
in your studio, maybe just right on the collar wheel, whereabouts they sit. And then when you are
squeezing out your palette, you can refer back to this and figure out which ones
you're going to be using.
7. Complimentary Pairings: So now that we do have an
excellent choice of our warm, cool and transitionary colors, we're now going to
further mix these to get our
complimentary pairing. So this is basically using complimentary colors to get a really effective and
convincing painting. So if we bring our color
wheel back in again, we've got our complimentares that sit opposite each
other on the color wheel. For example, red is the
complimentary of green, blue is the
complimentary of orange, and purple is the
complimentary of yellow. So, again, in order to
understand this relationship, refer back to your color wheel. I'm going to use
yellow and purple to paint this golden retriever. So if you look on
the color wheel, yellow is opposite purple. Let's mix our yellow
and purple together. So I'm just going to
use this purple mix, and I'm going to add some of
the cadmium yellow into it. Now, I don't know
if you saw that. You can instantly see that it's neutralized down
that purple color, and it's kind of made it
into almost a brown shade. Now, if I take some of that brown and I add in some
white to lighten it. Now, remember,
white will lighten, but it will also
cool the color down. It might be a bit too
much a bit more, is that? So it's now given us a kind
of a gray brown color. Now, notice that I've used
just one of the yellows, but you've also got two other
yellows on your palette. You've got a warmer
yellow ochre, and the warmest yellow
we have is this one, the transparent
yellow iron oxide. Now, let's quickly bring
in our color wheel again. So if we were looking
on our color wheel, this would be our
cadmium yellow light here or cadmium yellow pale
hue, I think I've got. Here's our yellow ochre and here's our transparent
yellow oxide, so you can see they go from cool all the
way around to warm. So when we're mixing our purple
and our yellows together, just bear in mind that you can create warmer
mixes or cooler mixes. So let's just mix up
our base purple again. And then add in our
warmest yellow, which is our transparent
yellow iron oxide. Then we'll add a
little bit of white. Now, you can see that would give a it's kind of
hard to see on camera. Let me see if I can That is slightly warmer in
tone than this one. If you wanted to make
this mix even cooler, you can add a bit
more of the yellowca. Also, a bit more of
the cadmium red. That's probably too much. Now,
that's very, very orange. So to neutralize,
let's add some of our blue to bring it back down. So basically what
I'm doing here, I'm just playing
around with the mixes. It's a great exercise to do, just so you can get
familiar with mixing the warm and cool
temperatures and what happens when you
add tiny touches of warmer color or cooler color? What happens to your mixers?
8. Adding a Wash: The fixative spray
has dried now, so I'm ready to
start the painting. The first thing
that I want to do is go over the
painting with a wash. I recommend doing
this because if you start painting directly
onto a white canvas, then it makes it
really hard to judge your tones because
white is so light. It's going to make it hard to
judge your lightest tones. So the best thing to do is to create what's known as
a wash. And for this, I'm going to use some
of the Bolchmarne deep. Let me just grab my rag. And some of the
transparent yellow oxide. Add bit of that. And the brush that I'm
gonna be using for this is one of these
large flat brushes. Let's find the exact name. This is a probably I think this is a watercolor
brush, actually, but any kind of flat, larger brush is good
for creating a wash. I just gonna add in a bit of the yellow ochre
to that, as well. I prefer my washes to
be on the warmer side. Rather than cool
because also you'll find the further you
progress into your painting, you'll still be able
to see touches of the wash underneath
coming through. And when it comes to
painting animals, it's really nice
for that wash to be slightly on the warmer
side rather than cooler. I've added quite a lot
of water into this mix. It's almost like very kind of watery watercolor
paint consistency. Some of the charcoal, as you can see, is actually
coming off in the paint. So this is another
good reason to do the wash or just lock that charcoal in a
little bit better. I normally paint with my
painting upright on an easel, but I'm actually painting on a flat table because
I think it's just easier for you to see my
palettes if I do it this way. You don't want to put too
thicker paint on it this day. You want it to be nice and thin so that you can
still see through it, so you can see through to the lines you've already put down. You don't
want to lose those. Okay, a little bit more. Yeah, that charcoal has
come off quite badly. It's normally not
as bad as that, I don't think I put
enough fixative spray on, so just bear that in mind. Okay. Now, at this stage, I'm just gonna go
in with some of the yellow ochre on its own. I'm actually gonna start
using the flat brush just to suggest some of the direction that the dog's fur is going in. I just want to get this
in quite early on. No. Okay.
9. Studying Your Reference Photo: Whilst that's dry, I'm just going to bring in
the reference photo, and I'm just going to have a look at it now and kind of
figure out which areas are going to be my cooler
temperature areas and which are going
to be my warmer. So this bit here is really
coming out as being very warm, and this is the area that's
going to be in shadow. And the cooler areas
are around here. You can see some blues and
greens coming through. And also up here,
it's very light. And as I said earlier, white
light equals cool as well. Sorry, the white color
equals lighter and cooler. So I'm going to make
that area a bit cooler. I think what I'm going
to do is make my shadow areas warmer and then my areas
that are in light cooler. See this area here, it's nice and warm, it's going to contrast nicely. With some pops of
cooler temperature. This area is a bit cooler. This area is a bit cooler. So if you're not using the
same reference photo as me, maybe just have a look at
your reference image now and just kind of study it for a few minutes and figure out where your
lights coming from, which areas are in shadow, which areas are in
light, and where your cool and warm
temperatures going to be. Also, it's a good idea
to look at your value. So which parts of the
reference image are going to be dark and which
parts are going to be light? Obviously, you're going to
have some areas that are dark because of the color of the
animal that you're painting, but some areas are also
going to be darker because they're in shadow
like this area here, so it's going to be
warmer and darker, and this is going to
be lighter and cooler. So we're going to have some
really nice contrasts, some bigger areas, but also
some smaller areas within. That's going to make for
a really nice painting. So I'm going to let
that dry for a minute, and then I'm going
to come back and we're going to do
our second layer.
10. Starting with Your Darks: For the second layer, I'm going to start off
by doing some darks. I'm going to mix up
my dark black color, if you remember from
our mixing session, which was here,
so it was some of the ultramarine
transparent, yellow. And some of our
crimson, as well. Just go to mix that all in. It's coming out quite
red, so a bit more. The blue and a bit more
of the yellow just to neutralize the purple down. If your mix is too purple, then remember your
color will and whatever the complimentary
color of your mix is, that is going to neutralize it. So to my purple, I'm going to add some yellow, which will really knock it back. I think I may be adding a
little bit too much then, so I'm gonna a bit more blue and a bit more
of the crimson. You're not gonna get
the mixing right. Well, sometimes you might get
it right on the first go, but it's gonna take a
little bit of tinkering. And my vices don't add
too much of each color. Just add a tiny bit 'cause
you can always add more. You can't take it away,
so and a bit more blue. I kind of want a nice big
dollop of dark anyway, 'cause I'm gonna be
using it quite a lot. In this first part. So
now I'm just gonna go in and paint my darkest areas. So you don't need to be too precise at
this stage, really. I've got a nice dark area
here inside a mouse. And this area here. When I did the pencil sketch, I didn't add too much
detail to this area. You'll see in the
reference photo, there's lighter areas within this because it's
very wet this area, so it's going to have highlights where the lights reflecting
off that wetness. But I can add that in later on. For now, I'm just going to
add in the overall value, which is dark. Okay. And the eyes. Similarly with the eyes. There's lots of, like, little color variations
within them. But the overall color
for now is dark. And the great thing about
acrylic paint is you can layer so many times, as
many times as you want. And I feel like with each layer, you can just add more and more detail on
top of the painting. So at this stage, don't worry about the detail because there will
be time later on. Now, to do this bit
around the nose, I'm gonna wipe off some
of the excess paint onto my rag because I want to have a fairly dry brush and just
paint it in like that. So I don't want to go too thick here because it's
not a solid color. It's got lots of tiny
little hairs there. So I want to kind of create
that illusion of small hairs by wiping a dry ish brush
with the color on still. But a dry ish brush
over that area. And then I'm going
to do the same here. Same here. And I'm also going to bring that
down the darker area there. Actually, already, the
adding those darks is really starting to make
the painting come to life. But now I'm just going over my reference photo
and just picking out those darker areas either because that part of the dog is dark or because that
area is in shadow. Now, this area down
here is quite dark, and this shadow area
is also warm as well. So I'm actually going to warm up my mix with a bit of
the transparent oxide. I think I'm even going to add a tiny touch of the
red oxide as well. I'm not gonna mix
it into the whole. Clams gonna do it on the edge. It's a good idea not to mix from scratch each
time you mix a color. Try to use a color that you've already mixed
and just add to it. That would just help harmonize the whole painting because
you're using similar mixes, but just sort of
slightly slightly, yeah. Warmer or cooler, depending on what
you're adding to them. Okay, that's a warmer dark. Which one can and down here. Again, that's quite a lot, so I'm gonna wipe off a bit
of the excess onto my rag. I almost always start with the darkest
areas in a painting. I don't think I've ever really started with the lightest areas. And when you're doing
an acrylic painting, this is especially
good because you can build up those layers
from dark to light. I just find that
the easiest way. So I don't be too
concerned that you're too dark your first, second or even third layer because you might
do more than that, more layers than three, you
might do four or five layers. You can always build up
to those light colors, so it is best to start off darker than you think
is kind of accurate. Just taking that same
color up around here. And you'll notice here that
is gonna be a lovely, cool, light color there, and it's
going to hit against this, which is going to be
darker and warmer. That's going to be a really
nice transition there. So it adds some of
that warmer color. And then bring it
all the way down. So, again, my brush
is still very dry. I've got hardly any paint on it. You don't want to
overload the brush. I'll start off. Very thin layers. The first layer is always thin. And then right at the
end, if I've got any, like, super light areas, I'll put a big dolop of white, thick opaque paint there, and that just makes
those areas really pop. Now I'm going to take
this colour again, and I did put some of
the cooler dark there, but I'm actually going
to go in now and add this warmer dark
because it is warmer here. Again, this area
here is going to be a nice contrast between the ear. The ear is much light it's
got a highlight down here. I'm going to sweep
this color down here. I'm still using those
lines as a guide. I'm also going to take
this color up here and just add it to the
underside of the ear there. So let's have a look
at these shapes. That's going to be light
from there to there. Is light and then
it goes darker. This bit coming down
here is slightly darker. So I'm not being too specific
at this stage about detail. I'm just blocking in
the larger shapes. Oh, my God, I'm
going to put some of the mix up a bit more
of the warmer dark. Actually, instead of crimson, I'm going to use a bit
of the warmer cad red. That really warm up the mix. Then it's going a
little bit purple, so I'm going to add a bit of yellow ochre to
neutralize that down. Okay and then I'm going
to put this yeah. Use this for the nose, as well. This dark. Coming around here, just gently, not pushing down hard
on my brush now. Just gently around the nose. Keeping the layers thin. Thin and transparent. You can see now, this first dark that I put on is very cool, and this is much warmer. So hopefully in your painting, you're going to really see those subtle temperature changes starting to appear. And I'm going to take
I actually want to put a bit of the cooler wash N dress out of the cooler dark up here. Put that shape in
there. A bit more here. Now, I'm definitely
going too dark. There's nowhere really as dark as this on the top
of the dog's head. But that's fine because you can go over with
a lighter layer. You're better off going
darker to begin with. It just makes it easier and gives you something
to kind of build on. If you go too light
in the beginning, then you can't go any lighter,
if you know what I mean? There's a ceiling to how
light you can go. No. Okay, now I'm going
to put a bit of this on the tongue area. That one coming down there. It's not going to be as dark as this bit right inside the mouth, but it's still slightly dark. Okay. And these first layers
are actually almost dry, which is another reason
I love acrylic paint. They dry. It's let's
go for the crimson. I'm gonna make a call a dark. Bit of a thumb keeps
it nice and dark. So just to remind you about the transparent yellow oxide, which is what we've got here. If you want to keep
your dark mix dark, but you want to make it a
bit warmer in temperature, that's the best color to use. If you use just a
plain yellow ochre, then it's going
to lighten it up. But because this
one's transparent, it won't alter the
value of the color. Now, this bit here
is nearly dry, so I'm gonna come
in again 'cause it's not quite dark enough. So I want to add another
layer of color there. I've just remembered
I've used the wrong mix. That was the cooler, and
I wanted to go for the lighter. Sorry, the warmer. So let me just make
some of that warmer. Dark to go there. Using a lot of blue,
so I might have to squeeze out some more
blue in a minute. Okay, that's better. That's
slightly warmer now right. Let's go back in there. Okay. I'm gonna bring
this up slightly. You don't want to stick too rigidly to where the lines are. You want to overlap them. This will also create
interest. In your painting? So I'm gonna now revisit those warmer areas that are nearly dry and just
add a bit more in. I don't have a lot on my
brush at all, really. I'm just going to
put a bit more here. So we've got some
nice long fur here. So I'm going to put in some
long lines, not every hair. I'm not looking at each
individual hair and seeing which direction
each one goes. I'm just taking the general
direction of the area. Of this bit around here, I'm going to add a
lot more blue to it. It's gonna be a very cool, dark. Just put that there. That's very Hopefully it's
coming out on camera. Make that very blue,
bring it down. Now, here, you might notice
I've just left this bit. I didn't actually do
that intentionally, but I like it, so
I'm gonna leave it. Yeah, so if that happens, you don't need to fill
in every little gap and go right up to the lines, just make we're painting interesting leave gaps here and there showing through
the color underneath. Let's bring that blue out. And on this side as well. Bring out past the line. Okay. That's you can kind of
see now that's very blue. I'm gonna bring that
down here as well into the mouth and around the
outside of the mouth, then. Now, this bit down here
is very blue as well. Round the eyes. So now I'm really
just looking at where the more kind
of bluey cooler. Areas are, you want to
exaggerate the colors now. You can see a blue area, then really exaggerate
that blue because this is still the first layers
of the painting. You can tone down that blue the further on
you get in the painting, but that first or second layer
will still show through. That could just create
a really nice effect. I hope that makes sense. Down here. And now I think I'm going to do
a bit more in the eye. I'm just going to bring in
my reference photo I need to look quite closely. A bit there. I'm leaving
this bit here for now. Put down. Actually, I might just go
over it in one thin layer, so it's not so obvious. Okay. Realized I haven't told you what brush
I'm using yet, so it's a long fielbert
brush. It's by Rosemary. Rosemary is a very good brand
brush and quite pricey, but you can just get
a cheaper fielbt that's suitable
for acrylic paint, that'll work quite well, and
it's quite soft as well. I'm going to move
on to a flat brush. Yeah, this one's from Pro art. I think I got this one
from Amazon, actually. I love flat brushes, and I'm
going to mix up a little bit more of that warmer dark. So I'm just going to add a bit
of the transparent yellow. I'm gonna take that I've got not too much
on my brush again. And I'm going to revisit those warmer areas just to go over them a little bit more. This is your opportunity now
to make those dark areas. Very, very dark. So I'm going to do that now. A bit more. And again, I'm now
you may think very, very dark, but as I said, that's not an issue
at this stage, and I am I've waited for
this first layer to dry. And now I'm sort of
just going in and painting in the direction
that the fur is going with some of
that warmer color. And actually, I put a lot of
the transparent yellow into it and just pulling out those areas of
dark, if you can see. Remember I said this area under
here is going to be warm. So this is working quite nicely already. This is a very warm. It's our warmest
yellow on our palette. This was our coolest medium, and this is our warmest. Just make sure this
isn't blurring. Okay. And then I'll do the same. Here So it's still the warm dark, but I've added loads of
transparent yellow into it. So I haven't mixed I haven't
mixed anywhere else, really, apart from that wash colour, I'm still using the same mix. I'm just adding and
taking away to it. That would really help
your palette not to get too confusing as well. You don't want to
be creating loads of new mixes everywhere. I'm always paying attention to the direction that the hair, sorry, the fur is going. It's dog fur and
cat hair, isn't it? Don't want to go the wrong
way because it would just make the painting
not look right. Thank I think this but here is actually part of
the gum, so it's quite pink. I'm just going to go
in with just some of the transparent yellow because that pink's probably
going to be quite warm and the same around the
top of the tongue there. I'm leaving this area.
This is going to be cool. This area is going
to be fairly cool. And this area's
going to be I mean, it's difficult with
a golden animal because it is a warm
colored animal. Gold is warm. So you could, if you wanted to put a warm base color down and
then add some lighter, cooler paint on top. And I'm just gonna so the overall shape, I'm
going to make cooler, but there is going to be
some little shapes within it that are going to
be slightly warmer. I'm just gonna a
little bit that there. Okay, I feel like now, I'm
gonna wait for it to dry, and then I'm going to
put the background in. I'm going to have a
background color that contrasts with the golden tone, so I'm going to make it
cool bluey, greeny color.
11. Adding a Background: Now I'm going to mix up
the background color, and I'm going to use it back into this wash so I
don't create a new mix. First of all, ultramarin blue, quite a lot of white and
some of the yellow ochre. This is my favorite
mix for a background. Now you're going to
need quite a lot of this color for
the background. Now, it's quite bright
green at the moment, so I'm going to add a little bit of the crimson. That
might be too much. That's fine. A bit more blue. Okay, I quite like
that. And then I'm going to paint in background. I like to get the
background in fairly early. It just makes it
easier to, again, dodge the tones better in
the painting and the values. I'm still using my
medium sized flat brush. These areas where the fur. Sorry, the, sorry,
the comes down. I'm not putting the background
in in a straight line. I'm not getting the brush
and going or I'm going in at an angle like I
would paint in fur, but I'm doing that
with the background. This just means then you
haven't got a harsh solid line, which won't make the
painting feel realistic. It will make the dog seem like it's kind of stuck
onto a background, but you want it to blend
in with the background. Well not blend in, but
you know what I mean? You want it to sit
as though it is in a real place and not No made up. I'm also overlapping slightly, you can see, I'm just
kind of going over. Again, I've not got
a lot on my brows. Overlapping slightly into
the mix I've already made. That creates a softer edge. Right I've already run out, so I'm gonna have to mix the more. Blue, white yellow ochre, touch of the red. Bit more white. Okay.
And touch of water. That's quite dry. Okay.
Just loosen it up a bit. Then That was slightly warmer
than the first mix I made, but that is fine because that then creates interest in
the background as well. It's not a problem.
This won't be the only layer we put in the background even
This is just going to be one of two or perhaps
even three layers. This line here I'm
making a bit harsher because there's not
as much fur coming out here and also
where you've got your harder lines like that is where the viewer's eye
is going to be drawn to. I want the focal point of this painting to be
the eyes and the nose. If I make my lines harsher here, harder is the artistic term, then the eye will be drawn. If I make my meeting
point softer. For example, here, if I blend the pain in and if the
values are similar, it'll create a softer edge. Sorry, tables.
Wobbling. Okay. You can see already how that cooler background color
is making the warm of these initial washes pop. Just go to you can see
the charcoal line there, which I don't like. I'm going to try
and cover that up. That will be covered up
probably eventually. I'm going to keep going round
and doing my background. I'll speed it up a bit in a sec. But this is also another trick. Take very little of that
background mixture onto your brush and use it
within the animal. So I'm going to use this
in my cooler areas. Not a lot, just tiny little
touches here and there. And the reason for this is it helps to harmonize
your painting. So it will help to tie in some of that foreground
with the background, which again, just makes for a nicer, more realistic image. I'm going to go in and
put it in my lighter, cooler areas, which
are likely to be the areas where you can only see that first
wash we put in. Not too much. Just a little bit. And then up here as well, I'm gonna just go
back and forth. I've got so little of it
on my brush that I can go over it with more of
a scumbling technique. And then also down here,
I've got some cooler areas. Mm hmm. Yep. I'll have to mix up
some more in a minute. Here. Okay, I'm going to
mix up some more of that color and finish
off the background, and I'll see you in a sec. Gonna replenish my
ultramarine blue. Oh That's the first background layer done. I will do some more
layers a bit later. I'm just again going to come in with that background
colour and do a little bit of a wash over the cooler areas
of the painting. Okay, I think I'm going
to leave that to dry now, and yeah, I'll come back
to it in a little bit.
12. Moving onto Your Lights: Okay, my background
is all dry now. So I think what I'm
going to do now is move on to my light areas. I did say that I normally paint the dark areas first and
then build up to light. But I think I'm going to save my mid tone areas for a bit later and work on
the lighter areas now. So I'm going to mix
up a very light, cool purple for the area around the nose here and
the top of the head. This lighter this area is
actually lighter and cool. You can see a bit of blue.
This is lighter and warmer. So I'm going to have to slightly adjust my mix accordingly, and then I'll use
those two mixes the cooler and the warmer for the other areas of
light in the dog. So I'm going to go into
this mix here that we mixed when we did our
complimentary pairings. Just get a bit of water. I've
changed my water as well, so nice and clean. So I'm going to start by
adding a touch of white. And again, I'm not creating a
whole new mix from scratch, going into that existing mix. I think I'll add
a tiny bit more. And for this cooler area here, I'm going to call it slightly by adding
a little bit of blue. I think I need some more white. Now, I think it is probably
a little bit too cool. So I'm going to add I don't
want to change the value. I think that's light enough, but I want to make
it slightly warmer, so I'm gonna go for some
of my transparent yellow. You can remember the
transparent yellow doesn't alter how light
or dark the color is. Makes it slightly
warmer or cooler. Okay, I think
that's pretty good. So then I'm gonna come in here, put my photo up here. And where I've painted the dark, I'm going to slightly
overlap that area, so it blends in nicely, so it's not such a harsh line. And also, again, this
is I'm painting in a fairly transparent layer, so it will show through
what's underneath, which is really, really nice. Again, I'll just
overlap this bit here. I'm just gonna use
my finger there. Sometimes the finger's great
for smudging things out. And I'm going to
use that same color this side here as well. I'm gonna go over that. I'll see the charcoal line there,
so I'm gonna go over that. I just come down here. Always looking at
my reference photo, as well. I'm never guessing. Always. Looking. I think I'm going to bring
that up here as well over this charcoal line. That's very strong,
so I want to try and take some of that
out if possible. Pie. Added a little
touch more of the white. And I'm gonna bring
that around here. And then coming down. Let's give that little
smudge out there as well. At the moment, it is
looking quite cool, but we are gonna
bring in some of that lovely warm color soon. A little bit here. Let's
give that little smudge out. Okay. And then we'll take
that down here. I'm going in the direction
of the fur again, as well. That's nice long
area of fur here. And I'm painting in the
direction that's going, and I'll bring it around
this side as well. And then up that's quite
a nice warm area there. So I'm gonna go just below it. But also bringing it up
into the mix, as well. Then I'm going to take that underneath the eye
slightly here as well. Just bring it down to link with this area here
that I just painted. Also gonna do a touch. I'm just scanning
my reference photo, and where I see that's
lighter. Cooler color. I'm just adding that in. And the nose also
had a little touch. I've got hardly any of
it on my brush now. I'm just What? Going
over around here. Okay. I'm now going
to make that mix that light mix warmer and do some of the warmer
lighter areas. Okay, so let's warm that mix up. We're gonna put some more
transparent yellow in there. Quite a fair bit more,
touch more white. Also gonna put a
touch of the cad red. It's very, very strong.
It's probably too much. But it's okay 'cause I need
more of that mix anyway, so I'm going to add
some wind to it. Et's put some of the
yellow ochre in there. Okay, a bit more of the white. Tinkering with it now to get the bring this in to
get this color here. I think it might be
slightly too yellow, so I've just cleaned my brush, and I'm going to add some
of our purple mix into it. Remember that purple
is the complimentary, so it will just knock back
that brightness a little bit. Okay, that's looking
a bit better. Now I'm going to take
this colour onto the painting. Reference photo. Okay, I'm gonna
bring it up here. And down. Once again,
overlapping slightly, as well into the other colors. I was gonna put a little
bit more white in there. Bring that down towards the eye, across the top of the nose. This area here,
we've got a lovely, really warm golden tone. So I'm gonna save that. I'm looking forward
to putting that in. Bring that round there. O Now, you can see this
warmer lighter color, I am putting alongside that cooler lighter color
that we just mixed. And warm and cool colors next to each other work
really, really nicely. I'm gonna bring that up here. Okay, let's mix a little
a little bit more up. Me white, more
transparent yellow. And then touch of the cad red and a little bit
of the ultramarine deep, which is basically our purple. If you remember the
red and the red and the blue mixed together
was our base purple. It's probably slightly too much. I'm going to add a bit of white. People. Gonna have to squeeze out some more
transparent yellow in a minute. Okay, that's going
nice and light. Just need it a little
bit more warmer. So we're gonna add a fair bit
of the transparent yellow. Okay, that's getting there now. Touch more teensy winksy
bit of the white. Okay. Now let's come down. It's gonna put a touch of that here
next to that lighter blue. That's on the underside here. We got over a bit too far there, so I'm just gonna knock
that back with my finger. See, we've got the
lovely warm light going into the cool white. Light is hitting off this part, but not necessarily
hitting off this part. So we've got this bit
warmer. This bit cooler. If you remember we said our
light was gonna be cooler. Just gonna put a bit
more of that here. Coming up here. We're going to bring
it through and up. Down there. Then this area them here. So again, I'm just scanning my reference overlapping
those initial layers, but keeping the paint thin and transparent so you can still
see the layers underneath. And once I put in my midtones, I will come back and
revisit my lights. It's not like you
get one chance. You can come back in and alter values and
alter temperatures. Yeah, it's a bit
more forgiving than oil paint in terms of being
able to sort of come back in. I mean, you can do that
with oil paint as well, because it stays
wet for so long, so you can come back
in alter things. But with acrylic paint,
although it dries quickly, you can then paint
over the top of it. So you still get a chance
to change what you've done. Oh, not change what you've done, but alter what you've done. Okay, I'm happier with
that at the moment. I think now I'm going to come in and work on the features, so I'm going to put the eyes
in the tongue and the nose. I often to find that
once the eyes are done, it really kind of lifts
the whole painting. And then after that, we're
gonna come in with our more golden, more saturated tones.
13. The Eyes, Mouth and Nose: So, first of all, I'm
going to work on the eyes, and I've taken a
much finer brush. This is called a dagger brush. Nice fine point on it, which will be really
good for doing the eye. Now, I'm gonna mix
up a warm dark. And I'm going to go
back into this mix. I'm going to add a little bit of I'm basically gonna make
a dark purple again, but a warm dark purple. So let's go with
our chmarin blue. I hope you can still see. Clearly, it's much grayer
and duller outside today. And I'm just painting
with natural light. I don't have any
artificial light on. I want you to see the
painting in natural daylight. But I was painting yesterday
and it was much sunnier. Okay, that's looking
good. So now I'm gonna hold my
reference photo clace. And this is probably aside from doing some
individual hairs, right, and this is
probably the most detailed I get in my paintings. I do much prefer painting
in a more looser style. Here, the eyes are
very, very dark. Um, I don't think I would
go as dark on my painting, 'cause I feel like the camera may have made them darker
than they actually are. And I'm gonna now a little bit of that mix on
my brush, make it cool. I'm gonna add some blue and a touch of the cadmium yellow, and then a bit of white to
lighten a bit more white. Tinte bit more blue. That's more of a
cooler gray purple. I'll bring that here, as well. I'm going to keep that color
on my brush and also add it into the nose area. So I'm going to
darken this bit here. Gonna bring it around there. And on this side, slightly down into that area
that I've left. I'm not going to completely cover it up because
I still really like that bit into the nostrils. So you add in that second
layer really darkens them up. And this is much lighter
here and warmer. I'm going to come back into
my warm mix and just using the tiny bit of paint on the
end. Add some white to it. And then paint this in and
bring it down and across. Take it over the nostrils. Let's get a bit
more in my brush. See, I'm not too worried about getting the color
right on the nose. There's so many
different colors in it. I'm more concerned
with the value. So the relative lightness and darkness of different
areas of the nose. This is the lightest bit here, which works nicely
because it sits next to that really dark nostral
area, so it makes it pop. And then we've got a
really light bit here, which I'm going to put
a lot more white into. And it's also quite warm there. So I'm going to ops
that bit dried out, add a touch of
transparent yellow. Okay. And that sort of goes
down very thinly there. Okay, I'm gonna take some of that warm mix with the extra transparent
yellow and just add it right to the tip of the nose. Okay. Wash my brush out again. I'm going to add the
pupil of the eye in now. Sorry, not the pull the
highlights of the eye. So I've just got some more
of the white onto my brush. We'll come back
into the eye color. It's almost gonna be straight from the tube of white paint. It's gonna be very, very white,
but not completely white. I've just added it into
the mix a little bit. Then we'll put that there.
Another one on the other side. I always find that adding
the highlight in the eye just really makes the
whole painting pop. And then I'm going to take
it's pretty much neat, transparent yellow, and just kind of this is sort of
glazing over the surface. So the paint underneath is dry. I'm just going over the
top with a very watery, thin layer of the
transparent yellow because it was looking a bit. You eye was looking
a bit flat and dark, and I just wanted to add
some interest into there. And then I'll take that
transparent yellow up and around. There's also this lovely bit of hair that flaps over the eye. I go to make that from the transparent
yellow and the white. I'll just put the first
iteration of that in. I'll have to go over
it again because it's very transparent. Okay, now I'm going
to put the tongue in. So I want the tongue to be warm, so I'm going to go for my
actually, I want it to be cool. I'm gonna go for my crimson, and I'll go back
into this mix here. This looks fairly
similar. Bit of white. And that is already
looking pretty good. It's a great place
to start, anyway. So I'm just gonna put in
the overall shape for now, not be too worried about the tonal shifts
for the time being. I've gone quite a bit lighter for my overall tongue shade. There's much darker shades of pink and red in
there, my overall color. It's pretty good. Just go
over that charcoal line. And then, actually,
I'm going to take it up and over.
I'll paint there. This area here of gum
is also pinky purple, but very dark, so I put
that base color in. I'll wait for that to try. Now, I'm gonna use
that same pink mix, but I'm gonna go
back to my slightly larger Philbert rosemary brush. Take some of that
color. And again, I want to use that in different
areas of the painting. Once again, to harmonize, but also I can see the same colours elsewhere
in the painting. No, I'm not gonna do
huge areas with it, little I can see little touches popping out
here and there. They're probably not
as pink as this paint, but I'm emphasizing
them a little bit. That's artistic license. You can do that if you want
to. No one's gonna stop you. Bit here. So just little
touches here and there. For the purposes of this class, I'm not going to work
too much on this area. I want to just focus on this. Ordinarily, I would paint this area with the same kind of care and attention
as other areas, but I really wanted
to show you this part of the dock more
because otherwise, it would be hours and
hours and hours long. Just give you kind of the
fundamental principles, and then you can take those away and finish the whole painting. Okay. I think that's right. So now, using that same mix, I'm going to come
back in and mix up a darker color for the
darker areas of the tongue. So I'm going to
go. It's going to be a more muted darker pink. So I'm going to mix up a purple. And then to knock that
back, we're going to use the complimentary yellow ochre. And that, as you can see, is very kind of orange brown, so I'm going to add more red. More red. Okay, now let's take that down here. Com. I think that's
too brown still, so I'm going to
add some more red. Now, if it's coming out too red, the complimentary of red, as we know, from our
color wheel is green. So this was our green over here. I'm going to mix a
bit more of that. So it was the cad yellow
and the ultramarine blue. It's kind of a
very bright green. I'm just gonna add a bit
of the yellow och to make it not so bright. And then I'm going to add
our green to our red. Okay. Doing a lot of smudging
with my finger here. Okay. Then there's
just some bits on the end. Okay. Now I'm going to
win that same mix, make it slightly cooler. Just go it here on the end. A bit of white it's very dark. For the bit of gum here, that's much more kind of purple. I'm gonna mix black color in here a little bit
it's very bright purple. I don't want it that bright. Then there's some cooler
areas in the tongue. I'm just going to add to that. So I hope you get
the idea of that. I mean, once that's dry, I will come in and adjust
that area a bit more, but it's just to show you how even within a
small area like that, adding your cool and warm
tones, is necessary. I mean, you could just
paint the tongue in one flat pink color, but it wouldn't have the life and realism that you're after. I'm just taking that
cooler tongue color again using it elsewhere
in the painting. Gonna come on this
transitionary line between the darker and
the cooler color here. Paint that in. And then we've
got a bit of a shadow here. I don't want to use
this too many places, not as many as the pink. A little bit he showing? Okay, how's that look in? Okay, that's looking good. And just to finish
off the tongue, I mean, you can
obviously, as I said, spend much longer
on it, revisiting. You're cool and
warm temperatures, but I'm gonna take some white and make a
really, really light. Pink mix for the
highlights on the tongue. It's very, very
light. I'm actually gonna put a bit
more white in it. Again, doing this will
really make this area pop. I love adding white highlights. Again, you probably want to
soften with your finger. You don't really want a harsh
highlight on the tongue. The highlights are soft. And then up here as well, between the edge of the
tongue and the gum. Okay, happy with that. I
will use that here also. Just a Dutch right on top. A little bit here as
well. Soften that off. And whilst I'm here, I'm going to do the highlights
in the gum area here. I'm going to use
that same colour, but rather than it being pinky, it's more cooler blue, and I'm going to add some
yellow ochre, as well. Just mix that in together. That's fine. Okay, that's
looking pretty good. Now, I do need to go over this gum area again in the dark. Definitely not dark enough, but I thought I may
as well just put the highlights in now. And then I can fill in the
gaps with the darker color and again soften
with your finger. Your finger really is
a good painting tool. Don't just rely on
your paint brushes, get your finger
involved as well. And then bring that down here. Yeah. Okay, that's
right. For now. I always find it helps to do a few dotty type highlights
as well, isn't it? Okay, that's looking
good. And gonna take some of the dark mix, and then go back
into that gum area, as I said, and just
touches here and there. It's probably nice to
leave a little bit of it as the more
transparent black. Rather than filling
in everything. It's not a paint by numbers. You don't want to stick to your shapes and just
feel those shapes in. You want to a bit of variation
in there transparencies. Okay, then I'll bring
that in here as well. No, it looks like he's smiling. I don't want to
lose that, so I'm gonna bring that
up a little bit. Were you want him to
have that big smile? And then just pull that darker
color out a little bit. Don't want that line
to be too harsh. Just pull it out into the fur. Saying no here, pull that down. Poll that down. Okay, and then
we want just a touch here. Now, if you start putting
this color everywhere, it's gonna detract
from your focal point. So just use sparingly. I can see down here, there's some really
light areas as well, but I'm not gonna use this
here because you want to keep it to where you want the
viewer's eye to be drawn. I want it to be drawn to here. This is where
everything's going on. We're still trying to get
rid of that charcoal line there. That will go eventually. And then a little bit
here above the eye. Okay, I think I am
pretty happy with that. Do I want to put any
more little hairs in? Let's have a little
look. I think this side needs
some, doesn't it? It's just My brush is a bit dry, so I've added a
little bit of water. Now, let's do some on this side. Tiny Strokes. This is also really fun
doing the whiskers. I don't normally save the whiskers right till
the end, either. Um, yeah, I don't know why. I think because once you
add the whiskers in, it just adds another
dimension to the painting, and I don't know, you start feeling
good about yourself because the whiskers
add something. That improves adds something
that improves the painting, I think, is what
I'm trying to say. And you kind of think, Oh, yeah, that is, looking good. Gives you a bit more
confidence to carry on. I think that's what
I'm getting at. I as some tiny little.
Don't be too uniform. That was quite uniform there. You're not gonna get
whiskers that are uniform. So make sure you don't
do it in your painting. It'll make it look unrealistic. Also, you can add
some more in later on as well. We tooth? I sort of add them
throughout the painting. And then let's just put in a light area here to get
rid of that charcoal line, and also is really light
in the painting, anyway. A few hairs here to blend that
line with the background. And then let's just
take. I know I said I wouldn't do pure white, but I'm gonna put a couple
of hairs in. That's all. Not too many. Okay. Right, that is looking. There's a little
bit of white there. Okay, that's looking
good. So next, I'm going to start putting in my really tones,
golden warm tones.
14. Adding Your Golden Tones: I've mixed up a golden color. I'll just show you how I did it. So I went into my green mix, which was my cad yellow light, my ultramarine blue, and a
bit of the yellow ochre. So I basically went
into that mix, and I added a bit more
of the yellow ochre. Touch of the white
just to lighten it up and a touch of the red. Sorry, I didn't
see that, I think. I added a touch of the red
iron oxide up here as well. A little bit more of
the yellow ochre. And touch of white. Okay. Touch more white, lighten it and touch
more yellow ochre. See, they're quite similar now. I think that had a touch
more yellow ochre in it. It's quite saturated,
and I'm going to take the excess off
my brush with my rag, so I've not got a
lot on there at all. And then, first of all,
I'm going to start with the really warm areas, which I think was down here. And yeah, I'm gonna paint
transparently again. So, as I said, not
much on the brush. And as you can see, it's very, very saturated. So I'm gonna take
more of my brush. Just run that over the surface. Again, I'm paying attention to the direction that
the fare is going in. Come down there. And then
we'll go up around the ear. Now, I'm going to go over
the top of this dark area. The fur is kind of
flicking up here, so I'm making that movement
with my brush as I go. A bit more on my brush. Oh, that was a bit thick. Knock it back with your finger. Okay, now let's take that. Cool, I'm gonna add
a little bit more. A bit more of the white. Very little on my brush, overlapping. Bringing it here around
that cool color. Overlapping that cooler, lighter white area
around the nose. This kind of effect
where you're going over the surface back and forth with very, very
little painting. It's called scumbling. And I use that technique
in every single painting. Bringing that down around
the mouth a little bit. I think I've got this area
quite dark enough yet, so that's an area that I go to make a mental
note to revisit. Okay. And this side, again, we're going to come over the
top of that darker color, same direction as the fur. And I'll also bring a
little bit in here. This area where the light's hitting is
cooler and lighter. And as it turns as
the form turns round, you're losing the
light, basically, so I'm gonna make it darker and warmer because we said our darks are warm and our
lights are cool. So this is kind of a concept I haven't really talked about yet in this video,
and that's form. So form is another really
important element of painting. If you can create
form in a painting, then you can make it
look more realistic. So again, here, where the light's not necessarily
getting through. Add a bit of that
more of a color. I would bring some of this color down here and work down
here, but as I said, I don't want to focus
too much down there, 'cause it would make
the tutorial very long. So I'll just put a
little bit there. And I want to bring some Oops. Let's bring some
of that lighter. Color up there. Okay. As I said, up here is where it's gonna be getting the most light. But I do want to make
some of the light warm because it is
a golden animal, so to make it all very,
very cool and blue, it's not gonna look like
a golden retriever, so, although we do have
blue tones up there, I'm also gonna put a
few smaller patches of the warmer lights as well. And actually, I'm gonna
go a little tinsy bit. Darker here? Blend that in a little bit. And I'm going to put some
under the eye as well. Definitely need a
little bit there. And then I'll come round. Going to I might
come in with my. We'll dag a brush again to
do this bit of the year here to make a light golden
mix, and then do some. Again, not all of the
individual hairs, but just a couple. Just a couple coming down. Also not uniform. Bring that into the background. Okay. We're just
defining this ee. I want it too defined. Once again, it's not
our focal point, but I think just add in
in some individual hairs. Golden retrievers, one of
the things they're most well known for is this long fur. So if we can put a few of
those individual hairs in really bring out that
characteristic. Okay. I'm gonna bring some
hairs down here as well. Okay. And I'm taking that
lighter golden colour, and I'm going to add some of the cooler cad and
some of the white. A bit more of the cooler cad, a bit more of the white. And then just do this
bounce up in the nose. It's much cooler and lighter. That's lovely. Now
I'm gonna look to see if I can put that
color anywhere else. And I'm going to put
a little bit up here. Just kind of flick
that out slightly. And then it bit here as
well, not too many places. And then I'm gonna
add even more lots and lots of white into that. And really lighten up
this area now. It's time. Acrylic paint actually
dries darker, which is why you're
going to have to revisit some of your lighter areas
to lighten them up again. If you paint an area light, you go away for a
couple of hours, you come back and it's looking
quite dull. That's why? Because acrylic
paint dries darker. Okay. Now, add a bit
more here. Come down. Bit there. So you could really spend hours and hours on this painting
tinkering with it, but I hope I'm
giving you kind of the fundamental lessons
here that you can apply. Play around with. Then this area, I kind of
think is a bit too purple. So I'm going to go over the top. Again, transparent, thin. Really bring that color there. I'm not going to go all
the way down because this area is going to
be darker and warmer. Just go to stick
to this top bit. And again, I'm going
to take some of the white and revisit this really lovely
bright light area. As you progress
in your painting, you'll find that the areas, the size of the areas that you paint gets smaller as well. So you see how I just put
that little dash there. Just small touches
here and there. You start off with
the bigger shapes. And then you work towards just
thin, sorry, small shapes. That was a very cool blue area. I've just see that tiny
touch of warmer paint there. Just interacts and it's
kind of hard to explain it. I don't sometimes even
do it consciously. I think when you've just
been painting a long time, some of your decisions
are just so unconscious, but you just think
it's gonna look right, so you just do it. And I just saw a touch of the warmer lighter color next
to that cooler one there, and it seems to have worked. Let's put in this
hair over the eye. Now, that has really
worked well, as well. I love look of that. Let's do kind of got
one here as well, but I think I've kind
of already done that. Um, I might need to
whilst I'm here, I am gonna go back
into a darker color? This great thing
about acrylic paint. Just dive back in. Darker color, and I just want to go back in, 'cause I probably
forget to do it. So I'm gonna do it now. Okay, do it. Then a few little wispy heads.
15. Refining the Painting: I thought I'd bring the
painting in and have a little chat before
I start refining. So I'm really, really happy with the stage that it's got to. And I would say it does
need a lot more work, but I hope up to this
point I've given you a good indication
of how to get that subtle change in value and in temperature
and how to incorporate that into your painting
in order to create a painting that's realistic
and also that adds form. I think you can really
tell that the kind of nose and mouth area is coming out and some areas
are receding back. So that, again, is
something that's really, really key to make sure your painting has
that sense of form. Now I'm going to work on
refining the painting. So I'm going to
start off by doing another layer on the background. I quite like this kind
of broken paint effect. I don't want it too uniform, but I do think it does look unfinished and a
little bit patchy, so I'm going to do another
background layer next. And then I'll go
back in and work on my cool and warm tones and my light and dark values and just revisit and
refine each area. So I probably won't talk
through what I'm doing, but I'm going to show you on camera and I'll speed
it up slightly. Otherwise, this lesson or class
would be very, very long. Now, yeah, let's get cracking
on refining the painting. Okay, I'm still in the process
of refining the painting, but there's one
little thing kind of like a bonus lesson that
I wanted to show you. So gloss glazing
liquid. I love this. It's an acrylic painting medium, and I probably use this in most of my paintings more
towards the end. So basically you mix it in equal quantities
with your paint. So I'll just show
you now in order to create glazes that you
can use over the surface. So I'm going to add
just a tiny drop. Well, that's quite a big drop, actually. Onto my palette. And I'm going to
use a new color. This is burnt umber. So I'll squeeze out
a tinsy bit of fat. I'm going to take my
This is my flat brush. It's the pro art,
synthetic brush. And I'm going to mix a glaze. So use half glazing medium
and then half paint. And that will create
a nice thin glaze. And don't use it too
much. Use it sparingly. I'm just going to
come into these burnt umber worth mentioning
is a warm color. So I'm going to come
into my warm areas and just paint over them. Hopefully, that
comes out on camera. But it really just creates another dimension to the paint, and it allows you to
darken some areas. See how that went on there. Uh, down here. So if you look at your
reference image and you see some areas need to be a
little bit warmer and darker. Or even warmer and
cooler, but obviously, you just choose a
different color to glaze with a different
colour paint. A little bit on the tongue. Honestly, a little bit of
this stuff goes a long way. You don't really need
a latch. Down here. And I thought this area here
was a bit light as well, so just go over the top of
that and warm up slightly. I'm not gonna add it
to my cooler areas. I'm just gonna keep
it. To my warmer. Hopefully you can see there's a nice little warm
patch here as well. Just a bit around
the eyes as well. Yeah, so again,
this stuff's great. You can pick it up
fairly inexpensively and a whole bottle lasts a
really, really long time, especially if you're only using it at the end of the painting, just for a little bit of glazing here and
there like I do. It really does last forever, so it's well worth
the investment. And
16. Final Thoughts: Okay, I've been working
on refining the painting, and I still think I've
got a fair bit to do, but I'm really happy with
the stage that it's at, and I do love a more painterly
approach to my paintings. I don't like them to
be too photorealistic. So, yeah, I'm really, really happy with where it's got to. And I just wanted
to pop on and say, thank you so much for
joining me in this class. I hope you've
enjoyed it and found some tips and tricks to take away with you
onto your next painting. If you did enjoy this class, then please go and check out my other classes on Skillshare. So you can follow me on Instagram and YouTube
at Alex Godard art. Once again, thank you so
so much for joining me. I really, really appreciate
it and hope to see you soon.
 Alexandra Goddard, Pet Portrait and Animal Artist