Transcripts
1. Introduction: Now if you ever wanted to
try your hand at making cute little hand
painted clay pins, then I have the class for you. In this class we will be taking any old ordinary air dry clay, learning how to transfer our pin designs to the clay,
cutting them out, sanding them, painting them, and going through the entire
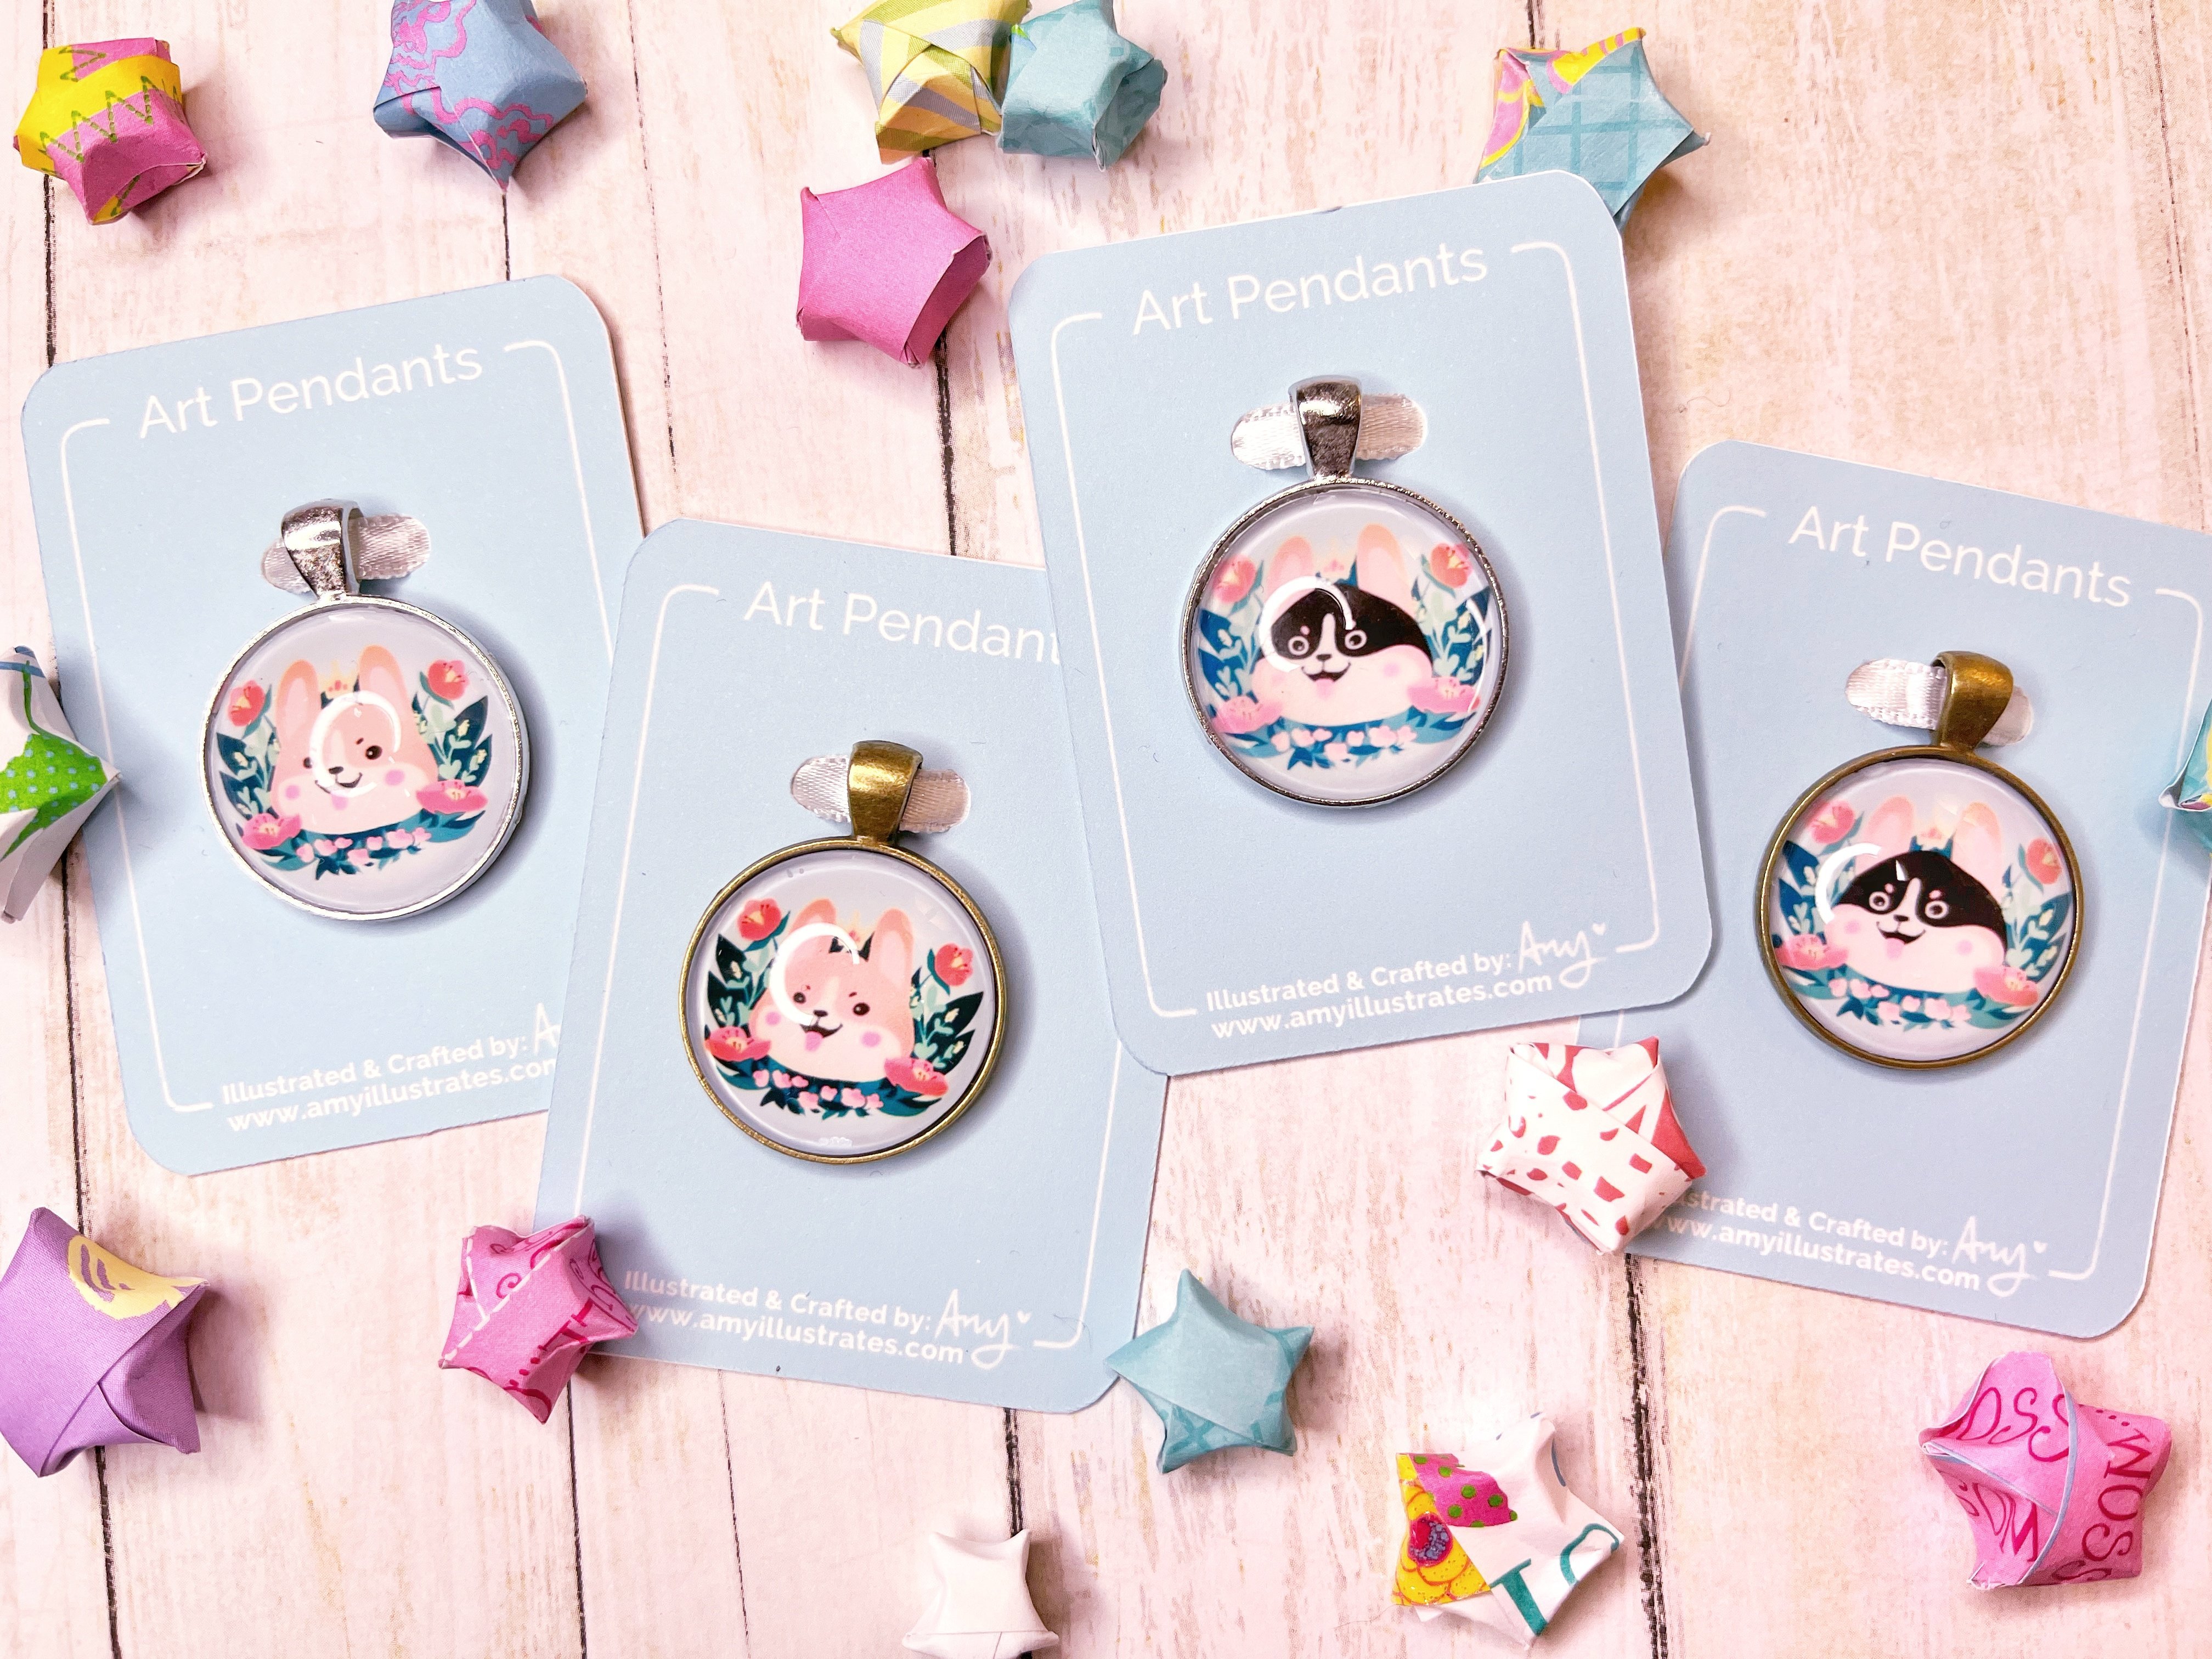
process until at the end, you have a beautiful resin
coated handmade clay pin that will last a long time and make wonderful
gifts or products. If you'd like to know a
little bit more about me. My name is Amy Stoddard and I am an illustrator living in
the American Midwest. I'm actually trained
as an art educator, but I have chosen to pursue
freelance illustration. I hope you will join
me on this pin making excursion and add a few more
skills to your repertoire. See you in class. Bye bye.
2. Lesson 1: Creating and Cutting out your Design Patterns: Hello and welcome
to the first lesson on making your own
handmade clay pins. This lesson we'll focus on
turning your designs into a pattern that you can then
easily cut out on the clay. Here I have my design sketches, print it out in varying sizes so that I have a spread of which to choose the best sizes. From. Here I take a ruler
to get an idea for the dimensions of
each of these sketches. Usually when I make Pins, I like to make them
around 1.5 inches by 1.5 inches or for longer pieces, it could be like 1.5
by almost two inches. You can make approaches. There are a lot
larger than this. It doesn't matter what size you want to make
your approaches, but I generally prefer mine to be a little
on the smaller side. After you have chosen the size of designs
you want to use, then comes the cutting process. You don't need any
special tools to do this. You can just use basic pair of scissors
if that's all you have. I think everyone has already gained a scissor skills
since elementary school, but I will share a small
clip of me cutting here just in case anyone really
wants to see how I do it. Now onto my pro tip here, what I like to do is use an
old dead cricket cutting mat. This one has been
used and abused, but it still has enough
stick so I can actually stick the little form
down onto the mat. And I can just use
my exacto knife that cut out any of
those little tiny, dodgy areas that are a
little difficult to get to. I find it really
easy to do this way. If you have these tools, feel free to go ahead
and do this as well. Some pieces may be easier to cut out by Scissors
rather than pasting them onto your Cricket Board and cutting them out
with an exacto knife. Just use whatever is
most comfortable for you because that will obviously
yield the best results. This little cat head pin design here I've found that starting with scissors and
finishing off with a little fiddly bits
with the exacto blade, work the best for me. Here at the end of this lesson, you should have all of
your designs cut out. You can double-check
their sizing and see how they
feel in your hand. And in the next lesson
then we will be applying these to the clay and cutting
out our Pinball searches. So I look forward to seeing
you in the next class. See you later. Bye-bye.
3. Lesson 2: Transferring your Designs to Clay: Hello everyone and
welcome to lesson two on how to craft your
own handmade clay pins. To begin, let's take a quick look at the
tools you're gonna need. I like to work on
a ceramic tile. You're going to want something to roll out your clay with. I have this little copper
pipe from the garage. You're going to
need two chopsticks to roll your pins
the proper width, you're going to need
a cutting implement, a cup of water, of course, your little pattern designs, you're going to need some clay. And it is also helpful if
you have some paper towels. I would also like
to add that you can work on any work
surface you prefer. I just choose ceramic tile because it's easiest
to clean and all that. For the clay rolling
implement you can make do with whatever you
can find around the house. You can also just use a little piece of
a wooden dowel rod. You can buy a
wooden rolling pin. And they also manufacturer acrylic rolling
pins used for clay. Just be sure that
whatever you're using, you're not also using for food. With the tools out of the way, we are ready to begin. So we're gonna go ahead
and get some clay. I'd like to make
note that I keep a damp paper towel and with my air dry clay because it
just keeps it softer longer. So what you're
going to want to do is just take your cutting implement and get yourself
a nice sized chunk of clay. Always when you're working
with air dry clay, you want to keep a damp
piece of paper towel around to keep your clay
in when it's not in use. So it doesn't dry out. Once the clay dries out, then it's no longer usable. What I'm doing here is I'm just giving it a little bit
of a kneading process. This is what you would do with normal stone clay and
also polymer clay. It helps get the air
bubbles out of the clay. Since it's air dry, you don't really need to worry about air bubbles too much. But this is just a practice
that I like to do. After you have needed your clay, you are going to slap your little bulb blob of
clay in the middle of your work surface and put your two chopsticks
on either side, then you are going to begin rolling out your clay this way. Having the two chopsticks
on either side ensures you get a nice even slab
of clay at the end. So there's no hills and
valleys in your clay. And it just results
in a nicer product overall that you don't have to put in a
lot of extra effort to try to get things
nice and extra smooth. Once you have your slab
of clay nice and smooth, you are going to take your water and dip your hand
into the water and just add a nice layer of water to the surface of
the clay with your hand. It doesn't need to
be a whole lot, just a little bit of do yet. After you have
applied the water, you're going to want to start applying your little
design patterns, kind of like how you would
make cut-out cookies. The little bit of
water will hold your pattern pieces to the clay, but don't add too much water, otherwise, your paper will
start to deteriorate. And you will want to reuse
these as much as you can before you have to
print out another set. After you have all of
your pieces placed, you're going to want
to take this little clay knife tool and you're just going
to want to begin cutting them out like so. Any excess clay that
you cut completely out, you're going to want to
form it into a little ball. And you'll use that to clean your knife blade just
as I have done here. And while your little ball
of clay is not in use, you are also going to want
to keep it covered with a damp paper towel and just keep using it as a knife
blade cleaning tool, but always keep it damp so
it doesn't get dried out. Dry it out Clay, of
course, is the enemy. At this point. You're just
going to want to go ahead and continue cutting
out the rest of your little clay pieces and keep on preserving all
of your excess clay. The next step after you have
cut out all of your pieces of clay is to put them
somewhere to dry for storage. I like to use another
smaller piece of floor tile for this. At this point, you're going
to want to go ahead and peel up your paper forms. For the most part, they should peel up okay, and be reusable for the
next round of gla pins. But this particular round, I think I got a few a
little too wet and they did stick to the clay and
I had to scrap the form. But basically, if you use a heavier weight of paper and
you take your time with it, you should be able
to peel off all of your little paper patterns and reuse them after
they've dried. After I have removed all
of the paper patterns, I like to add a
little water and just begin smoothing things
with my fingers. You are, of course, also welcome to use clay
tools to smooth things down. But basically, while
the play is wet here, we just want to get
any major divots, giant flaws, smooth down enough so it won't be as
much of a hassle when we get to the
sanding process. You can of course, feel free to use as
much time as you like in smoothing the
clay while it's wet. I just have a tendency to
prefer smoothing the clay with sanding and using dry carving
methods to smooth clay. All right, after you have
smoothed everything to liking, you're just going to
want to go ahead and set these aside someplace safe where they can dry for at least a
good 24 hours if not more. We will end this lesson here
and we will pick up with the dry pieces and begin the sanding process in
lesson number three. So I'll see you in
the next class. Have a great day. Bye-bye.
4. Lesson 3: Sanding and Patching the Clay: Hello everyone and welcome
to lesson three on how to make your own
handcrafted play pins. This lesson we'll focus
on the sanding and repairing of
completely dry clay. As you can see right here
when I flip these over, these aren't quite dry yet. You'll notice that the interior has a dark Craig gray color. So you will want
to check and make sure that your clay pieces are 100% dry and they do not feel
cold to the touch anymore. If there's still
cool to the touch, it means there's
still some wetness in the clay and you're
going to want to let them dry a
little bit longer. Unfair, completely dry. You can begin the
sanding process. For this. I just use a regular
old sheet of sandpaper with a
grid of extra fine, around 400, any brand will do. I just have 3M at the moment. The first thing I like to do in the sanding process is to lay my piece of sandpaper down upon my work surface and
just gently sand the largest faces of the pieces using a little bit of a circular motion to
help keep it nice. And even. You can
see here how much smoother that piece
has become just with that small
amount of sanding. This type of air dry clay
also makes a lot of dust, so you'll want to tap
off the dust after each sanding round just to keep things a little
easier to sand. Because if your paper
gets loaded with grit, obviously it's going to
sand less effectively. After you have sanded both the front and the back
planes of your pieces, you'll want to go ahead
and start taking care of those rough side
edges as well. Again, you can use the exact
same sandpaper with this. You can hold it in your
hands or place it back on your work surface
and work it like you did the front and
the back planes, it's really up to you. And what you find
most comfortable. One little pro tip here
for you and that is that nail files actually are really helpful for
filing the sides. You can get in around little
hard to reach places. And it just works really well. It's easy to hold in
your hands, so yeah, go for it if you want to try
sanding with nail files. Another important
finishing tool, we have our clay carving tools. You can see a couple here that I have that I use
quite frequently. The blades on these
are quite a bit less sharp than a
normal exacto blade, which allows you to really
get in there and pull out some really big bumps of clay and get them
all sanded down, that would have
taken you forever. Otherwise, if you had just
been using sandpaper, like you can really
smooth things off with these clay carving tools. So it's nice to invest in them, particularly for really
extraordinarily rough edges. Another tool that's helpful is larger grit sandpaper
like this, 80 grit here. The little sanding particles on there will be a lot larger. And you can sand down edges a lot faster than you
can with the 400. But it will leave scoring
and gouging marks. You only want to use
the harder grid papers. Whenever you have something like a really deep divot that
you need to get rid of, that you not quite deep enough that you want
to fill it in with clay. After you use something like
an 80 or 180 grit sandpaper, you are going to need to go
back with a finer grain grid, like a 400 or higher to smooth out all of those scoring marks that the
larger grid leaves. Now let's talk
about the patching and repairing process for this. You're gonna need a sponge, a little bit of
water, a jar of slip, which I'll discuss more
about in a few minutes, a brush and of course
some more fresh clay. Basically, you are
going to do a patch and repair on any pieces
where there's just some bumps or divots or other imperfections
that are just way too large for you
to get out with the basic sanding process. Now what is this
thing called slip? Some of you may be
wondering about, basically it is a mushy
pudding, consistency of clay. You can make it with your dust, your clay dust scraps. You add a bunch of water until
it's all mushy and gushy. And you can use this
kind of like plaster in a way to put between two dry pieces of clay
to fuse them together. You can also do this
with stone where clay and it also works
with pay-per-click, obviously otherwise
I wouldn't make it. Basically it's
another patching tool to have in your repertoire. So let's get patching
some clay here. You can see one of my pins
has a pretty big divot in it. The first thing you're
going to want to do is you're going
to want to wet down the dry clay
pretty thoroughly. You really want to get it
nice and good and wet. Then you're gonna take your
patching piece of clay. You are also going
to get the piece of patching clay all wet as well. And then you're going to
smash it into the cavity. Both pieces must be
good and wet otherwise, they will not stick
to each other. What Clay does not stick
to dry clay very well. That's why you make things like slips and stuff to make sure that the pieces will bond back together
again and be solid. So at this point, you can just continue going on and patching any major flaws in your pieces and be sure to smooth them
out the best you can. So the next round of sanding you'll have to
do will be a lot easier. Right? So here's another example of a large patch job I had
to do on the back of this one pin where there was just a whole section of
both that was missing. I wet it down really well. And again, I just took some wet clay and I went
that I patched it up. And I will just leave you to have this little
bit of footage. So it's another example
that you can watch. I should also add here that I like to use my
fingers and nails and everything for doing this
kind of fiddly patchwork. But if you're more
comfortable with tools, that's great and you should use what you're most
comfortable with. I am more comfortable with
using my hands as the tools. Though here I am using a
little bit of a paintbrush. I do find it a little bit
helpful to smooth out some edges and to drag
clay along certain planes. All right, So after you've
finished patching or clay, you're just going to
want to leave it to dry. And it'll take a little
less time to dry this time. And then after it's
completely dry again, you'll just want to go
through and give it another cursory
sanding check and make sure that everything
is to your liking. Alright, so we will wrap
up this lesson here, and the next lesson
we will go on and add our primer so we can get
to painting these things. So thank you for watching and I will see you
in the next lesson. Have a great day. Bye-bye.
5. Lesson 4: Priming your Pieces: Hello everyone and
welcome to lesson four on how to create your own
handmade clay pins. This lesson we
will be going over the basics of Jesse doing your dried clay pins to make a nice canvas for
your paint to lay on. You will need a paintbrush, a little bit of water, some gesso or another
primer of your choice, and of course your clay pins. So let us first begin by getting our Justo setup and getting
it to the right consistency. I am using a whole
binds just so you can use whatever brand you prefer. Go ahead and squeeze some
out into your palette tray. And I had a little
bit too much there. Next up you're going to
want to add a little bit of water to your gesso to get
the right consistency. You don't want to use really thick just so you want to use nice thin coats of gesso so that your paint will
be nice and smooth. If your paint is too thick, it will get a gloomy. And you will see paint brush strokes In your
finished product. Here, I am going
to be switching to a paint pipette to put some drops of
water into the gesso. This works a lot better than just trying to get
some off your brush. Here's a little close-up
of me thinning out my ISO. You're going to be
aiming for probably around the consistency
of heavy cream. If you know what that is. That will give you
enough coverage, but also be thin enough
to let the paint glide smoothly and dry smoothly
on your clay surfaces. And here's another
clip to help give you an idea of the consistency. I'm painting on top
of parchment here. And you can see kind of how the consistency is working
there and laying on the paper. After you have your ISO
at the right consistency, it's time to paint
these guys up. The goal is to have nice light, even coats of paint. And you will probably be doing about two to three coats of this thinned paint
on top of these. I would like to reiterate
that the reason why we do just so slash prime these pieces
before we paint is so that we make a
really nice surface for the paint to stick to. Also, when you just
saw your clay pieces, you are sealing away that air dry clay
from getting damaged. Like if it happens to get wet, because air dry
clay can be re-wet and start to fall apart. Alright, so after
you have Gesso, the tops and the sides, then naturally you're going
to let them sit and dry that you can flu then
flip them over and continue doing the
Jesu on the back side. Here is a piece where the JSR has dried on the front face. After only just
one code of gesso. These might actually
just need to coats. It's really up to
you and the project. And here's a little comparison. There's a piece on the
left is still raw clay, and the piece on the
right has been painted. You can just barely
notice the tone shift. Basically, you're
just going to want to continue just summing
the pieces until you have a nice even coat of gesso on all the
fronts, backs and sides. And then you are going
to want to leave them to sit too dry for a
few hours because the just so does sort
of make the clay damp again and you want the clay
to also dry out as well, so leave them to dry
for a couple of hours. And that my friends
is pretty much all there is to just
sewing your pieces. In the next lesson, we will pick up
where we left off and we will begin the
painting process, which I know is probably
the most fun of the entire process because then your little character is
actually start coming to life. Thank you for joining
me in this lesson and look forward to
lesson number five. We're gonna start painting. See you next time. Bye. Have a great day.
6. Lesson 5: Applying your Base Colors: Hello everyone and
welcome to lesson five, where we finally begin
painting our creations. To start, let's go over
the supplies you'll need. You can use any
old acrylic paint, acrylic gouache,
regular gouache. Any of those paints
will do great. We're also going to need
some paint brushes. You can also use posca pens
which come in very handy. You're going to need a
couple of things of water and a little pipette to
water down your paints with. Just remember that
before you begin, you want you're just sewed
pieces to be very dry. We don't accidentally
smear paint similar as to when you thin
down your ISO. You are also going
to want to add a little bit of water
to your paint to sit it just a little bit so it glides
nicely across the surface. And you also want
to do a buildup of thin coats to prevent any big, clumpy, streaky
brush written pieces or brushstroke
written, I should say. The first thing you're
going to want to do is add down the base
color of your piece. This cat, I want the
base color to be pink. And I'm just going to
apply the base coat over the entire surface, front-facing surface
of the piece. This will also include the
sides, but not the back. So we'll discuss
the backs later. As each layer of
your base, it dries, you're going to want
to add another layer until you get full opacity. Different paints will
react differently. Some paints will
be able to achieve opacity sooner than others. But typically, I put on around two to three coats
of my base paint. I also want to mention
that as my P stands right now it does look
brushstrokes street. But as the paint dries, the paint will level and it
will produce a flat surface. Granted, there will be layers where it's more
opaque versus less opaque, but you will get
a smooth surface. And hence this is why
you want to do smooth, even look thin layers
of paint so that your final product will be
opaque and also smooth. Here's an example of
a type of paint that likes a lot more layers
before the T heads opacity. For some reason, whole binds opera acrylic gouache requires a lot more coats of
paint to get that nice, hot, hot pink across the piece. I think I almost ended
up with five layers of paint before I achieved the opacity that I
was looking for. Here are all my pieces with their base coats
completely applied. Gray ones just look a little bit uneven because when
gouache dries, it dries a lot darker
than whenever it is wet. So that's why that looks uneven. Anyway, I think I'm going to stop this class here for now, and we will pick up the
detailed painting in the next lesson as this is going a little long in
the tooth right now. So thank you for joining me in this lesson and I'll
see you in the next one. Have a great day, Bye.
7. Lesson 6: Adding Your Detail Paint: Hello everyone and
welcome to lesson six, where we get down
to the nitty-gritty of doing the detailed
painting on our pin. Already everyone, This is gonna
be a really meaty lesson. Let's just go ahead
and jump right on in. You are of course going
to need to start out with you're completely dry
base coded pieces. When doing the
detailed painting, I like to keep my designs handy so I can remember
exactly how they should look. Here. I'm going to
start with my pink pen and I made a swatch
off to the side. Using a test swatch
off to the side, allows me to play around
a little bit with my color palette before I
commit any colors to a piece. Therefore, it saves
me a lot of time in case I put down a color
that I don't really like, like I didn't put the hot
pink on this pink pin. Aside from being able to
test out your colors first, it also allows you to test how the different
media will react to each other before you apply them to your
piece as well. Last but not least, it also gives you a
little space to try out your detailed drawings before you apply them to
the final piece. And this helps out so much because then
you can really get a feel for how you want to draw something
before you apply it. That way you don't
accidentally mess it up. When I'm finally ready to
do my detailed painting, I like to keep my sketches
nearby so it will serve as a visual reference and a guide
for my detailed painting. I would also like to add
here that posca pens work really well for
doing the detailing. And it just makes getting nice clean lines so much easier. If you struggle a little bit
with brushwork like I do, you may want to invest in
some posca paint pens. If you want to do
this regularly, I will go ahead and leave
you now with few seconds of my detail work just so you
can see how things go down. All right, so another
important thing I want to make note of is it's completely okay to go ahead and draw your design on first
before you begin painting. I usually do this a lot for the more complex
designs personally. But yeah, just using
a light amount of regular old pencil will work fine for drawing
your designs on. The next thing I
want to touch on are the properties of your
regular gouache paint. Regular gouache paint. Whenever it becomes
wet, it reactivates. And here I am applying some posca pen to
regular gouache surface. And the paint is actually coming off and it is getting
onto my paint pen tip, which I then have to clean. And this row is going to end
up all smeared in the end. But I was determined, I thought I could
power through it. But do not do this. It is not a good choice to do. Instead, I have a better way. Here's the end result of
me powering through it. As you can see, this paint
application is terrible. The paints have mixed. And you can see how many
times I've had to strike my paint pen tip and how much of the blue pigment
has been coming off. So I'm going to now tell you about a much
better way to do this. Savior in these kinds
of situations is going to be adding
a mat clear coat. I have mr. Super clear just because that's what I
use when I paint dolls. But there are plenty of other brands you can
choose from as well. Just make sure that it works
well with acrylic paints. Normally when I
apply clear codes, I do this outside, but this isn't an option
at this time due to the fact that it is winter and
it is bitter cold outside. So I'm in doing this instead in the bathroom which
is of oil ventilated area. I'm also wearing my face mask, my respirator mask, so I
don't breathe in the fumes. Basically. You want to add a
few very light coats of your chosen spray. Then you will wait
for it to dry before you can then continue
to apply paint. When the clear coat has dried, it will again look very matte, just like you had
nothing on it at all. Once the clear coat is dry, you can then take it back to
your painting table and have a much easier time with
painting over gouache. As you can see, the coverage
just gets so much better. So there really is no
point in fighting it. Again, I do want to reiterate
that you want a mat or a flat clear coat to
do this with so that there's enough tooth in the spray for your
paint to stick to it. If you use a high
gloss or something, your paint isn't going to
stick to the gloss very well, so it definitely has
to be flat or Matt. This is pretty much
all of the tips and tricks I have for you for detailed painting
your approaches. And I think I'm gonna go ahead
and stop the class here. Then in the next
class we are going to pick up with ceiling nice. And for this particular class, we are going to be using
a UV resin to seal them, but there are other options
available for you that we will also discuss
in the next lesson. Thank you for tuning in, and I will see you in
the next lesson. Bye.
8. Lesson 7: Touching up the Backs and Applying UV Resin to the Tops: Hello and welcome to
lesson number seven on turning your illustrations
into handmade clay pins. But at this point
you should have your handmade clay pins all
paint it up and ready to go. But there is one more
thing we need to do before we can
apply the resin. That thing is you
are more than likely going to need to touch up
the backs a little bit. As you can see there, I got a little pink on the back. So unless you are
absolutely perfect, there's a good chance
you're gonna need to do a little touch at painting on the back that won't
take very long. To do this touch up, you're going to want to grab
a little bit Titanium white. Grab a small brush. Then you're going to
thin a little bit of that titanium white paint
with just a touch of water just to get it to about
heavy cream consistency. Then you're just going
to do a little bit of touch-up painting
on the back. You want to be extra
careful low at this point not to damage the paint that you've already
done on the sides? I should say that
I prefer to use a smaller brush for this
portion of the project just because it gives me a lot more control over where
that paint is going. Here on the pink piece, you can see that I was a
little more messy here. So this is going to require a little more of a cover-up job. But as you can see, nice coat of thinned out, titanium white is gonna go a
long way to ceiling that up. You shouldn't really need to add too much to these
backs unless you really had spread a
really dark color back there by
accident or whatever. Here's an example
with a darker color. I believe it was
a Prussian blue. And this will actually take a couple of coats just
around the edges to get it opaque enough. I will leave you with
a little spot of footage of me painting
this one in particular. All right. So at this
point you should have all your pieces painted
and your backs touched up. And we will get started
with applying the resin. The type of friends and
we will be using for this project is a UV resin. I have been using let's resin as where as well as TD YL resin. And you can see that one here. I personally prefer
to use UV resin on clay projects just because
the resin with the clay, the two-part epoxy one
can be very unforgiving. Other tools you will need is some sort of UV lamp
of your choosing. I just bought this professional
nail lamp off of Amazon. The higher the wattage, generally the better on this. You are also going to need some toothpicks or other
wooden resin applicators. You will want a
silicon mat to protect your surface and some sort of
protection for your hands. All right, so with the
tools out of the way, let's go ahead and
apply some reason. As the name implies, UV resin cures via UV light. So it's only one fluid, I guess you would call it. And you can squeeze it
directly out of the bottle. Your goal for applying the resin to the
surfaces is to get a nice even coat over
the entire top surface. Then you can add a little
bit more to get a nice dome. At this point, we are not going to be worrying
about the sides. We're actually going to
cure the top resin first before we paint the
sides with the resin. If you try to resin the
sides at the same time, what's going to happen is
it's just going to run down the surface
because it is a liquid. And then it's just going
to make a big mess and get all over the place
and also possibly damage the backs that you
took all that care to do the touch-up
paint on on-site. I'm done getting a
nice even coat of resin all the way across
from edge to edge. Then it's time to go ahead
and put it under the UV lamp. Here I am very gingerly trying to get this piece
under the nail lamp. I do have finger protection
on but I didn't even use it. So there we are. I gently tap it under there. And I'm gonna go
ahead and I will hit the timer for good 99 seconds. There you can see the
light has come on and it will begin
curing right away. One more thing I want to
make note of is do not start applying resin
too close to this lamp. If you do, that, resin will actually start curing from the light scatter that
comes out of the lamp. So just wait until it's done. Alternately, you can
choose to have your resin workspace further away from the lamp so you can
just keep on going. But I find it easier. Just have the lamp as
close as possible. So there aren't any snafu is
when I'm trying to transfer these very delicate pieces under the nail lamp after I'm
done applying the resin. I also want to mention
that it actually takes about 12 minutes for this
resin to fully cure. At least when you put it under the nail
lamp for like 99 seconds. That'll make it firm enough
so that it's not going to be liquid anymore and it's not going to slide
off if your piece, but you can still accidentally put fingerprints
in it and so on. So what I like to do is
after I finish every piece, I just slowly start
collecting all these pieces. And I keep on giving
them shots of that UV light and
shots of the UV light. I'll give you an example here. I have both pieces
onto the UV lamp and I'm giving them both more time. Basically with each
each piece I finish, it gets put under the nail lamp with everything else I've done. So ultimately, these
will get exposed to a ton of UV light and
eventually completely cure. But here is the slightly
dissatisfactory thing about using the UV resin. It takes generally
a lot more time than just 12 seconds
or not 12 seconds, 12 minutes for it to
reach a full year. After I have them all
under the nail lamp. Then I wind up transferring
them to my windowsill and I let them sit under the actual sunlight
for a full day. By that time, the resin
feels a lot harder and is less likely to produce
fingerprints when you touch it. Basically after 12 minutes, you can very gingerly
handle them. But it won't be for at
least another 24 hours before you could actually get in and do some more
work on these. At this point, I'm going
to end this lesson here, since these pieces really should be cured for a good 24 hours, the sunlight, and I
hope you will do it. And in the next lesson, which will hopefully
be the final lesson, we will put resin
on the sides and resin on the back and get these things ready to
be gifted or sold. So thank you for tuning
in in this lesson, and I will see you
in the next one. Have a great day. Bye bye.
9. Lesson 8: Adding Resin to the Sides and Attaching Your Pin Backs: Hello everyone and welcome
to lesson eight on turning your illustrations
into handmade clay pins. All right, so in this
lesson we will be adding the resin to the sides and
the backs of the pins. When it comes to adding
resin to the sides, I find it helpful to have a little silicon cup and
then a little applicator, any piece of wood will do, even a toothpick if
that's all you have. Basically, I like
to start by adding a little blob of
resin to my cup. Then I will dip my applicator into the cup of
resin and just apply a little drop to the side and gently move it along the surface until I get
the coverage that I want. As you can see here. Basically going to want to apply the resin between
the two fingers that you're using to hold it. Be sure that no resin
touches your fingers. If it does, then it could
actually solidify under the lamp onto your
finger and then cause a little bit of a mess that you will have to repair later. And I can show you that accident because
it did happen to me. Once you have finished painting one side all the way up to
where your fingers are, then you are going to
want to hold it under your UV lamp for
good 99 seconds. After it has cured for a good
99 seconds under the lamp, then you can lay it on
its back and set it aside under the lamp and let it get some more curing time. Here is the mistake I was
talking about earlier. Some of the resin had come to rest upon my finger and then it hardened into a little
bump on the edge of my pin. And of course I don't like that. So now I'm gonna fix it. Fix it. You're
basically going to take an exacto knife and gently
just sort of scrape it off. Since the resin hasn't
fully cured yet, it's usually very easy to do
without much pressure on it. Basically, at this
point you're just going to continue applying resin to the sides and then
holding them under your UV lamp until they
get a 99 second cure. And then you can lay them
down on their backs and let them do a complete cure for
the rest of the 12 minutes. And then you'll just keep on
working on different pieces. And then eventually
after 12 minutes, you can go back to
the first pieces you started and then start
getting the other side. Yes, it can be a little bit tedious this part,
but you know what, That's also a great
time to listen to an audio book or watch
some YouTube videos. Once you have all of the
sides completed and they have cured for a good 12
minutes and you can touch them. We can go ahead now without
waiting a full 24 hours. And we can go ahead and resin the backs and put
the pin backs on. So the same as my
shrink film pins video, you are going to
want to check all of your brooch
clips and make sure that they are
completely functional before you permanently glue them on the backs
of these things. Because it would
really suck to have to pry one off and
put another one on. Alright, once you have
your brooch clip selected, go ahead and set them aside. And I like to prep
them for resin work by making sure that the
latch end is facing up. This way. It ensures that no resin accidentally
gets caught in the latch. And then you end
up is essentially a super gluing this shut
on the back of your piece. You don't want that to happen. One quick sidebar here
now would be the time to sign the back of your pieces if that's what you'd like to do. Yeah. Do that before we put on the resin and using
a copic is fine. After you've signed
them, if you want to, then it's time to add
the resin to the backs. When you are applying
resin to the backs, you are going to want to use a lot less resin than
you used on the front. If you use too much resin
on the back of these, the resin will wick up your brooch clips and it
will likely seal them shut, then they're not functional. This is why we only put a
thinner code on the backs. Once you have a nice
thin even coat applied, then it's time to
add on the backs. You can maneuver them into the proper place
with your fingers. And then what I like
to do is to take another tiny little
spot of the resin and just just a tiny little
dab around the edges. If I can, I like to
try to get into the, the little holes that
are in brooch clip. That way it makes a nice, nice, good seal and it's really
hard fast on there. Once you have everything
to your liking, it's time to put
it under the lamp. At this point, you're just
going to go through and continue adding the resin and the brooch clips to the backs and keep them under
the nail lamp. And you will want to
make sure that these again cure for a good 12
minutes under the lamp. After a 12 minute
cure under the lamp. I do also like to set
these on my window sill and let them get a good 12
hours of light, sunlight. That is, at this
point you should have some lovely little
handmade clay pin bridges that you can gift or a cell. I hope you enjoyed this
class and I hope you will join me in any future
classes that I give. And thank you for joining
me on this journey. Have a great day and enjoy
your wonderful pins, everyone. Bye bye.
 Amy Stoddard, Amy Illustrates