Transcripts
1. Introduction: Hi, I'm Rob Dion and welcome
to my class on how to make high-quality coffee at home
for a fraction of the cost. Here's where my class
is different than any other class on Skillshare. The goal of this class is to focus on improving
the quality of your coffee by
teaching you how to roast your coffee right at home, basically eliminating the
coffee roaster middleman. Now if you're currently spending $20 or more on coffee because, well, you just won't accept
anything less than the best. Or maybe you're
buying cheap coffee, but you wish your coffee tasted like it did
when you go to the specialty coffee shop
or maybe you're like me and you're just a
DIY kind of person. You love figuring things out. Well, any of those options makes you the perfect
candidate for this class. First, I'm going to
teach you where you can source your green coffee. That is usually only reserved
for specialty coffee shops. And then I'm going to show you the equipment that you need that you probably already have
lying around the kitchen. Then I'm going to show you step-by-step how
to roast probably the best coffee
you've ever had in your life at home
in 15 min or less. Now this course is designed
for the coffee snob, the coffee nerd,
anybody that loves coffee but wants to
up their coffee game. Now after this course, you are going to know more about coffee and the roasting process, the 99% of people. And you're going to
learn how to roast enough coffee to last few weeks. That's a fraction of
the cost it would be to buy it at a
specialty shop. Finally, let's talk about the class project
because let's be honest, there's no better
way to learn That's roll up your sleeves
and dive right in. So your assignment is to take a picture of your first roast, good or bad, and post it in
the project gallery below. Alright, let's get roasting.
2. Equipment You'll Need: Okay, step one,
collecting what you're going to need in
order to Rose coffee. There's five things that
you're going to need. First one on the
list is a scale. A digital scale would be preferable one when the
timer is great because especially if you
are a coffee brewer currently and you're doing
pour overs and arrow press, you probably already have one
of these, so that's good. Make sure that you get
one that has an option to switch between ounces,
grams and such. That's why the digital
scales a little bit better. Okay, so that's
the first 1 s one you're going to
need is a colander. Now a colander is used
in the step from getting your hot coffee
cooling and you're going to put it in
a colander so you can't get a plastic one. You want to have a metal, steel, whatever this
is aluminum colander. I haven't aluminum
wanted as well, but this thing is
not going to melt. So that's the most
important thing. When you roast
coffee, it gets hot around 400 degrees
on the finished. This is what you're gonna do. After you're done, starting
to cool your beans, you're going to then transfer
them to a sheet pan. So you want again
a metal sheet pan. This one is restaurant grade. I get the set of
smart and final. Obviously you can tell
I've used it quite a bit, but you're going to want to have probably had two of them. You'll get by with
one, that's fine. But if you plan on
doing multiple rows, you'll have one
that's cooling and then you're going to
have a second one. I'm going to be
Rosie right after, especially if you're
going to be messing around and really trying to get good
at roasting coffee, which I highly recommend
having multiple sheet pans. The optional one is
a temperature done. So the reason for this is because of when you're
roasting coffee, you're gonna be
recording what you're doing as you do it because you want to be able to
replicate what you've done. If your coffee tastes
great, you want to say, Oh wow, that was amazing. How do I do that again, having a temperature gun will give
you the option of knowing exactly what your starting
temperature was in your, which is leading me into the
next day, your worldly pop. This is the big
daddy of what you're going to need around
roasting coffee. Now there is a video, another video class on
how to roast coffee that was done with a cast
iron skillet on Skillshare. But this is definitely
more high-capacity, much easier to use, less work and more controllable. This is how I started
roasting coffee. I actually, the first
row is they ever did was on a cast iron. And that was a big
waste of time. And so I shifted
something like this. This one specifically is
called a stove top popper. Okay. That's the brand was Victoria. They've changed since then. But if you type in to Amazon
stove top popcorn popper, you'll find this one and you'll, what you want is you want the one that has
this little kind of magnetic thing at the top that prevents this from just
shutting on its own. So it locks open. And you also want the
one that has a coil. It's like a patents
that they own, that this company owns. Where when you turn this
at the bottom there, these little arms that
spin at the bottom. So this way your popcorn
doesn't stick, right? Same applies for the coffee. We don't want our
coffee to burn, so you want to get one
that's got some wait to it. This is made of steel. The worldly pop one
is made of aluminum. It's very lightweight. This one's got some
weight to it so you can actually do it on the stove top without actually
having to hold it down. And it's much more
manageable when it comes to affecting the
temperature of the coffee. Got it. So that's it, that's all you'll need for
the roasting of the coffee. So if you've got all
of those things, Let's move on to the next video where you're gonna
get the beans. How much should you buy?
3. Buying Green Coffee Beans: Alright, let's talk about Beans. Where do you get them? What
should you be looking for, how much they cost? Alright, so the first part of this video
is going to start out here talking about what
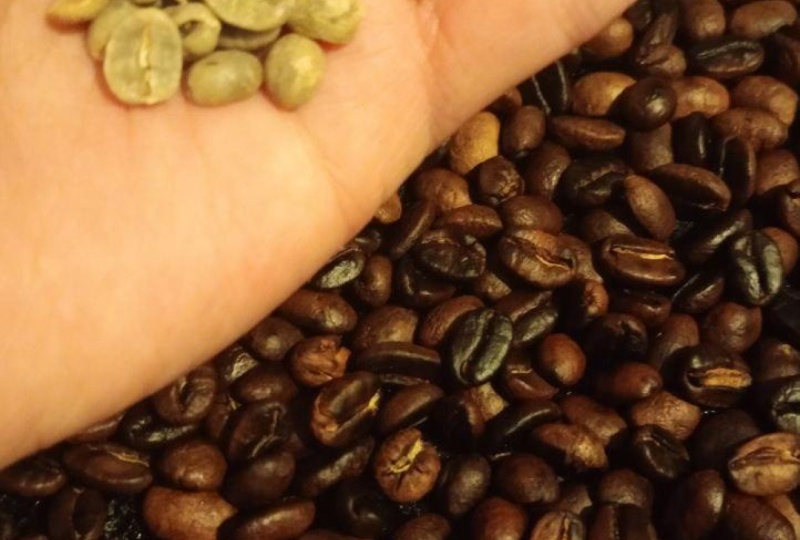
I'm holding in my hand, the green beans, so
what you'll be buying. And then I'm going
to take you to the video of like
background so you can kinda see where I'm getting them and over the shoulder
on my computer, what I'm holding years in
Ethiopia, green beans. Now technically, coffee
beans are not beans, their seeds there from the
Cherry of the coffee plant. So for depending on the region
you're buying them from, they will be processed
differently. And process just means
how do you remove the hole from the seed, from the bean itself. So around the world, this one is an Ethiopian. It's very common for
Ethiopian coffee is to be dry process. There's wet processing,
There's honey processing, there's natural process, right? Don't worry about any of
that stuff at this point. Just worry about
getting your hands on some beans that are in a price range that
you're comfortable with, but also maybe fit depending on where
you're buying them from. They're gonna give you
a flavor profile that fits with what you
like to drink. And that's really the
most important thing. Let's go over the shoulder here and I'm going
to show you where I get my coffee from and
how much I pay for it. So let's talk about where
you can buy your coffee and whether or not it's
really cost-effective, I'm going to break this
down for you right here. So let's compare the difference between specialty
coffee roasters. Basically buying really
good high-end coffee from a roaster and then roasting
it at home on your own. Now a couple of the
different coffee roasters in Los Angeles that are
really good that I like, or go get em, tiger
and Blue Bottle. You might have heard of them. They're really popular. They have cafes in Los
Angeles, multiple cafes. I'm going to show you
their price points and it's not gonna be
far off from most of the coffee roasters that you're potentially buying
from currently go get them. Tiger has an Ethiopia
here for $20.75. If you do the math
on the ounces, the price per ounce,
it's $27 a pound. Now if you are currently
brewing at home and doing a pour-over and using
a scale and doing ratios, you're probably paying
this much because you're not going to pay that
much money for coffee unless you are really paying attention to the quality
of your Pacific cup. So this is basically the
lowest price to coffee so far that I'm going to show you there next one
is a Guatemala. There's ends up being
about $32 per pound. I'm just going to let you
know right out of the gate, we're going to be a third of
the price when we're doing this on our own and we're
roasting it at home ourselves. Now looking at Blue
Bottle Coffee, They have a Bella Donovan. Funny enough, Bella
Donovan was the coffee that I actually drank, loved and was like, how do they do this and why am I spending
this much money? I'm a DIY person. I love figuring things out. So this was the coffee
that I had and I was like, I have to figure out
how to do this myself because I can't be
spending this much money. I love this so much. I can't spend this much
money on it all the time ago broke drinking this coffee,
I have to figure it out. So I ended up learning
how to do it. Now, you'll see here
this is a Costa Rica, I know it says $72 per pound with the exclamation
points and everything. This is a geisha coffee. Coffee is more specialty coffee, usually a micro lot harder
to get your hands-on. It's scores really
high in CU grading, which is basically like a
sommelier care of for wine. Q graders are for coffee. This is gonna be a really
good cup of coffee, but again, $72 per pound. I'm going to show you how
to get gastric coffee or where I got my
geisha coffee for, for $10.50 per pound. So stick with me. When you first start off, you're going to order
from a place probably called Sweet Maria's
or Berman's. You could just
find, they're just literally searching
Google, boom, you're gonna get
your hands-on coffee that's anywhere from a one-pound upwards of 20
pounds roughly or more, depending Berman sells them for more and I'm going
to take you through it. So here's the pricing
for sweet maria coffees. This is their Guatemala
selection right now, this is what they're offering. It's ranging from $7 upwards of $8 per pound of green coffee. And so that averages out
to somewhere between $9.50 per pound after moisture loss when you
roast your coffee, you're losing about ten to 15%. The number is more
like $9.50 per pound. If you are going to be selling
and pay attention to it, That's gonna be your
cost per pound. Here's their Ethiopia,
roughly the same price point, maybe a few cents higher, $0.20 higher or so. But you're looking at some
really good selections here. They even have organic
coffees below eighths, which is really good. You can get them
for cheaper keep in mind when you buy
higher quantity. But generally this is
the normal price point when you're buying 1-20 pounds. The reason I put on
this Brazil slide here is because one,
it's super cheap. So you're getting
20 pounds for $100. If you factor in
the moisture loss, it's $5.80 per pound. The other reason I
put this in here is because at the bottom
you see it says 86.5. That's a cue grading. That's the total score. That's a cue grading. Basically what that means is that acute grade or tasted
this coffee graded at 86.5. And now it's technically
a specialty coffee. Specialty coffees are
copies that rate over 80. Generally, if you're drinking five-dollar bags or
per pound of coffee, like if you go to your
supermarket, you buy them for $5. It's because they're
not good quality coffee and generally they're
usually over roasted. So they're like a dark roast, French Roast, Italian roast. They're cheaper coffees
and they're not going to be good
quality coffees. So this is actually a pretty good Brazil and for
the price, it's banging. And you can imagine if you're just starting out and you're
learning how to rows, this is not that big
of a commitment to maybe burned through a few
batches for $15 of cost. Burn through a few
batches in your learning, you could give that coffee
away, you can taste it. You don't even have to
roast one pound at a time. Nobody ever does when
they first start out and I'll show you that when
we get to the roasting level. Okay, next one, Berman's. This is just to show you
the way that they have their sliding scale in terms of pricing you buy for the
Brazil in the middle there, the premium, $7.30 when
you buy one pound or $6.15 when you buy 60
pounds or more, got it. So the price drops
as you buy more. They do offer that there
are better places to buy. What you're going to
buy 60 pounds more. But this is a good option for starting off because you can buy low quantity of coffee and
get really good stuff. Alright, let's move on
now just to solidify. So when you're
buying small batch, it's somewhere between
one pound and 20 pounds. When you're buying
larger quantity, it's usually upwards
of 65 pounds. Just to wrap up on this portion, it's the home roasting
roughly will run you about $6 to $10 per pound
for specialty coffee. For coffee that would
normally cost you from a roaster to 20
to $72 per pound. Okay, now I'm gonna get
out of here and I'm going to take you to the
website quickly. And I want to show
you very, very fast. This is sweet Maria's.
This is their offering. This the only reason I really
want to show you this one. This is their offering here. They have coffee from
all over the world, Africa, South America,
Central America. Quick little layout of
what they have in stock. But the reason I wanted
to show you some of these websites is
because this is my, this is where I order from. It's called genuine origin. They sell 65 pounds
bag and a box. I just got this geisha
recently from Costa Rica. Now if you remember back, the blue bottle cassia
was $72 a pound. Here. It's $10.50 per
pound for a gotcha. Now you can argue
that theirs was maybe a micro law and maybe
it was even better, even if they paid twice
as much as I did. It's only $20 per pound, which is maybe if you're talking about the yield
with moisture loss, $25 per pound to $30 per pound. If they with moisture loss, Let's just go crazy
and say they paid 30. So you're still saving so much money if you
just do it yourself. And also keep in mind, the shipping at genuine
origin is free. Whereas with sweet
Maria's and Berman's, you have to pay for shipping. So it doesn't matter
if you order 20 pounds or if you order one pound,
you're paying for shipping. Whereas when with
genuine origin, shipping is free
with your orders depending you're
not going to order from genuine origin
at the beginning, but you will
eventually get there. If you really do dig this, you'll probably end up ordering higher quantity of coffee. So that's it guys. I
hope that was helpful. Let's move on to the roasting. Shall we?
4. How to Roast Coffee and more...: Let's get roasting, shall we? So first and foremost, make sure that you have
all your windows and doors open or at least
a little bit of jar. So there's a little
bit across breeze, because roasting does
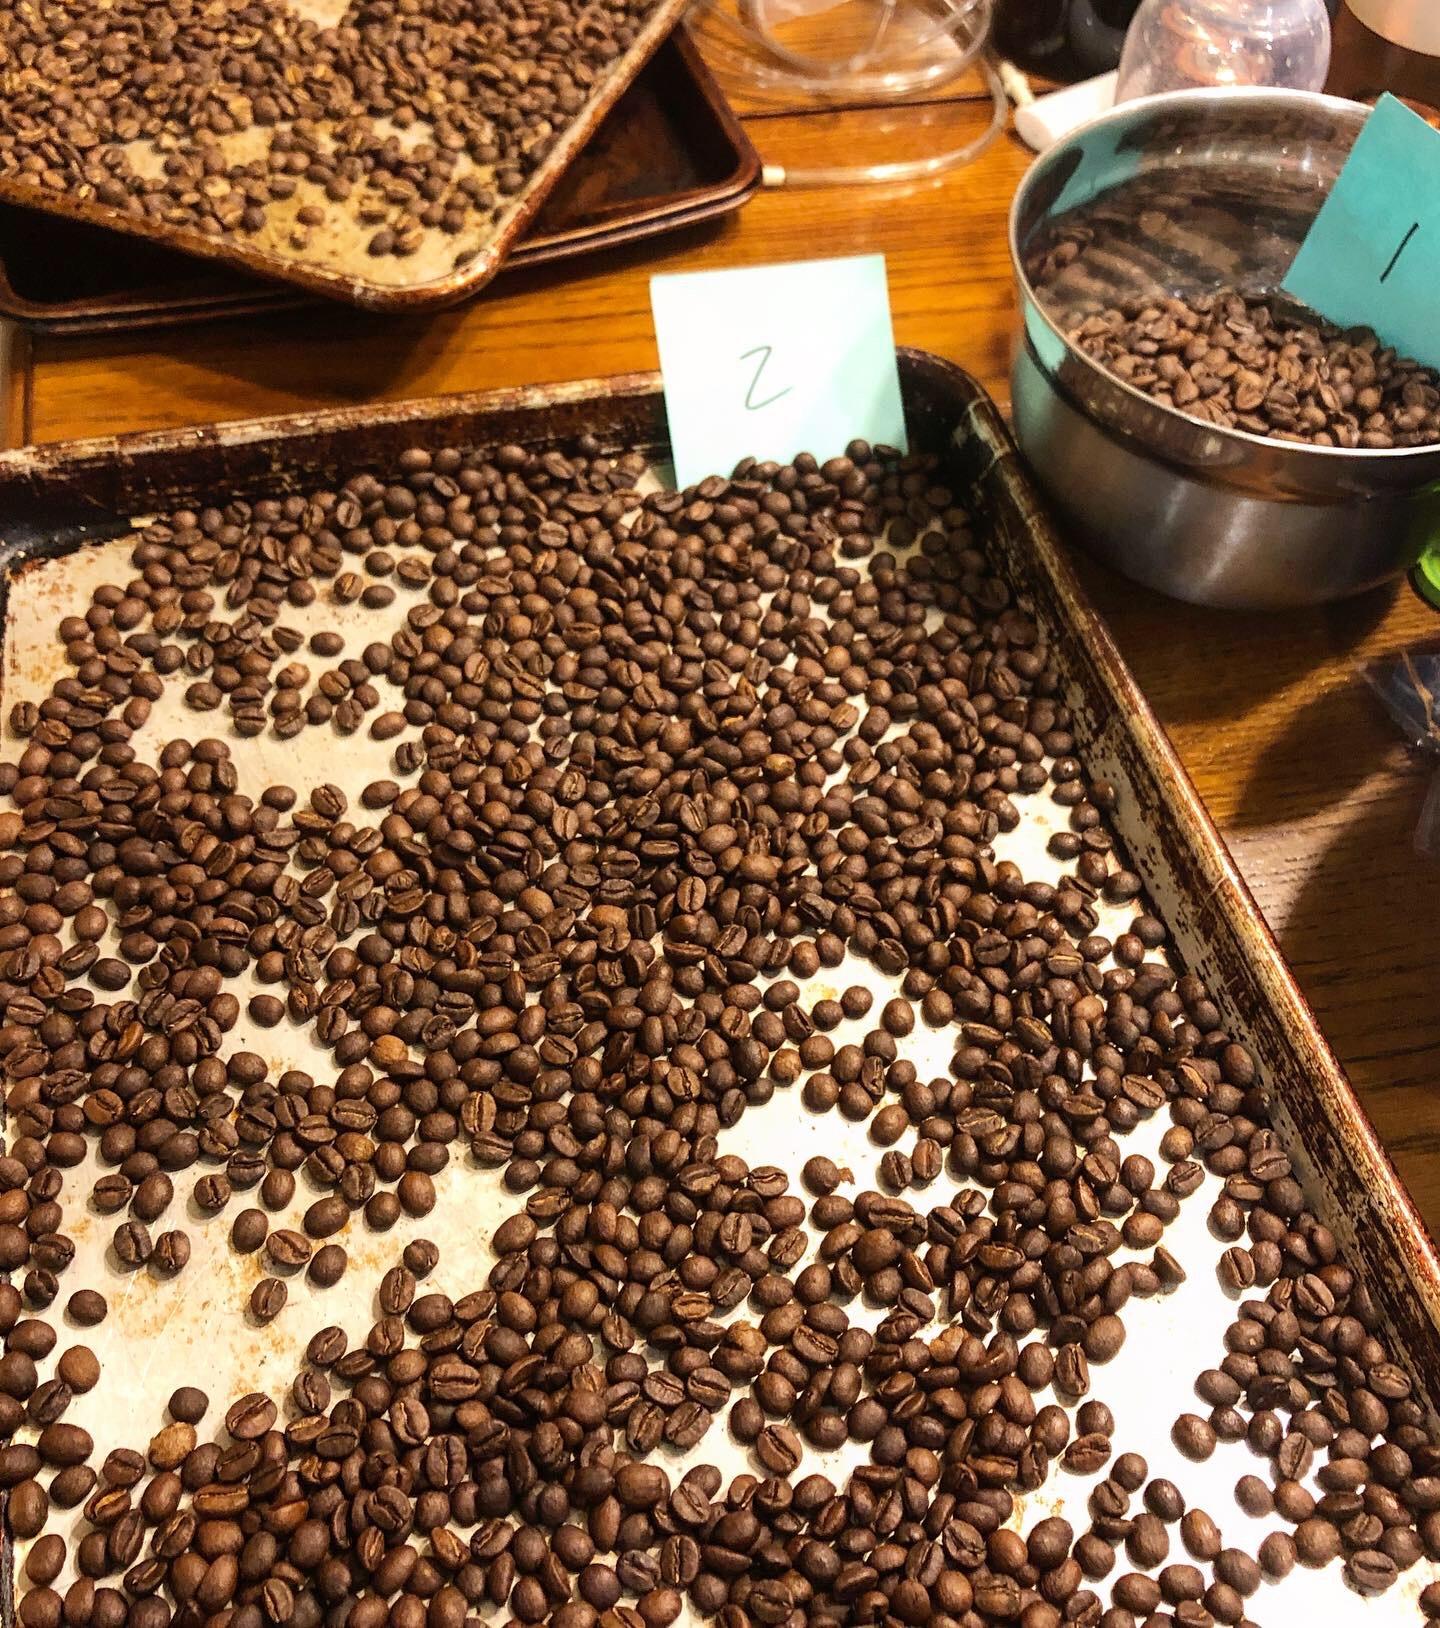
throw some smoke. I just finished roasting
two different batches. Both are in Ethiopia. One is a little bit
darker than the other. I'm not sure if you can see
in that shot the difference. But this one is a
little bit lighter. I pulled it maybe
20 to 30 s earlier. This one's a little bit darker. And I'm going to show
you how I got to this. But before I do, I want to
cover a couple of things. Before you start. There's that
French term me some plots. You want to make sure that
everything you need is here. Got it. I've got my
green coffee ready, I've got my worldly pop ready, I've got my colander, I've got my sheet pan, everything is here that
I'm going to need. My beans are already
pre weighed. I'm doing 11.5 oz, which should yield me
somewhere around 10 oz. I might have to give
or take depending. I might come in a little short, I might come in a little high. But if my goal is to hit 10 oz, then I'm gonna go with 11.5
because that's a 15% loss. So I'm going to turn
on my worldly pop. I'm going to keep this
open for a second. This is the only time we're
ever going to need the gum. So right now it's at
130 up to 187 degrees. But because I've
used this twice. So something that you're really going to want to
make sure that you have when you're doing
this is the game plan. So the way in which to
create a game plan, or basically a recipe. It's called a profile
in coffee terms, is that you want to always be able to replicate
what you're doing. The only way you're
gonna do that is by recording what you
do every time. So just like I was doing here, I'm making sure
that my temperature is somewhere where I want it. I'm somewhere 3-5400. I'm going to drop my beans
and in just a moment, but that's gonna be what's
called the charge temp. The next event or
marker that I'm gonna be looking
for is my dry end. And basically what
that means is, right now I've got my
green coffee, Okay? And then I'm going
to try to write down the time from when I go
from green to my dry end, which is when the beans go from green to a yellowish brown. Not quite finished yet, right? I pulled this out of the last
row so you guys can take a look then and then I'm
going to mark that time down. And what that tells me is like is my speed at
which I'm roasting, it gives me a good
amount of information. After that, the next
thing that I'm going to pay attention to is what's
called first crack. And that's basically
when the beans start releasing moisture,
There's some crackling. It sounds like popcorn and you're going to see
in just a moment, then there's another crackling. So there's gonna be a break in the crackling and then there's something
called second crack. Again, that's going
to be like when you're getting further
into like a darker roast, you'll be paying
attention to that and you'll mark those times. And then the last thing
you're going to write down is going to be your drop. And you don't have
to worry about the temperature or
anything like that. You just weigh about the time. Because what you're
doing then is you're creating a
recipe for replication. If you loved that coffee
the last time you did it, you just wanna be able
to do it again that way. Otherwise, you're
kind of leaving it to chance every time. Once you get good, you don't really have to pay in
touch soon as much. But in the beginning,
especially write down all of those markers in time as I
bring the temperature up, I'm looking to get it
up to about 35400. It can be for 25. It's okay. Once I dropped my beans
and it's going to cool the inside of the roast, of the roaster on calling it, but it's my worldly pop, right? Everybody's kitchen
is different. Everybody stove is
slightly different. I took this one time, it did a presentation somewhere and I burnt my beans
right at the gate. I was so embarrassed,
but that that's stove was so hot comparatively
what I'm used to. So just be mindful of that. So whatever recommendations
I give you going to have to probably make
modifications for yourself. I think we're just over 400. Yeah. We're at 04:10.
I'm going to drop my beans and now I'm
going to start my timer. So here we go. Boom, time or something, the trap start spinning. What we don't want to do
is just leave it, right. We want to make
sure that our beans are in constant motion. The most important thing, a couple of techniques that
I've kind of developed. Well while I'm roasting is, one is the slide like this, usually that's something
you do and you're popping popcorn on the stove. And then there's the pancake
flip, which is this one. Why do I do that? Those little arms at the bottom, those can trap a beam. And oftentimes it all, one side of a bean
will get burned. If that little theme gets
into that specifically, you're growing that day through
the case something burns. So what I'm looking for is consistently consistency
with the rows. I don't want any Bernstein's, I don't want any kind
of inconsistency there. So I tend to flip or shouldn't shuffle a
little bit like this. Every 30 s to a minute. I know it's kinda loud. As we go. You're going to start
to pay attention. Right now I'm at 1 min. My marker for my last row says somewhere between 330
on the first one. And I think I came in
a little bit slower. I was at 04:10 on
the second one, I didn't write it down often than I should have wrote
it down, but I oftentimes. Sure that you, you write
it down after the fact, don't stop and then
go write it down. Keep the pressure on. As they say. Here, I'm at a minute and 30,
I'll show you in here. There's really not
much happening, so it's all green, but
it's all staying in there. I'm gonna go through
the terminologies of roasting in just a second
because there's the, there's the industry terminology
and then there's what we often hear as terminology when we're
buying a bag of coffee, like light roast, medium roast, dark roast, French, French
rows, that kind of thing. Well, you're blonde as, I think Starbucks kinda coined as the blonde terminologies. I don't think there's necessarily
a a real industry term. So I'm at 3 min. I'm about thirty-seconds away, probably from my
from my dry end. But I'm not quite there yet. I'll show you guys
once I get there. Once my first crack is done, it'll kind of level off. You'll hear it's just like this. There's nothing really
happening besides me spinning. Then there's the next
level, it's second crack, and that'll be locked fainter than the first crack,
but it's still, what it is, is an indicator of view moving into a darker roast. So where am I at right
now? I'm almost there. I'm going to keep an eye on
and I'm at 04:10 right now. And what I'm looking for is
that color like I showed you, the ones that are
like yellowish brown. Again. And now I'm there. Let's see if I can
show you kind of like a yellowish brown
in there to see, you know, it's a little
start from that position. There is a little bit
of green there still. That's okay. This one's probably a little
beyond dried and I kinda like I was at
diagnosis who I should pull this out so you
guys can see it. So I was maybe a little
late to the game on that, but I'm gonna know that I was
about 4 min and 2020 5 s. I try him. So I'm about 20 s or 15
s away from my last one. I'm not too far off,
which is totally fine. Also my positioning
on the stove top. I can adjust temperature by moving off of the flame
just a little bit. I can now I've only got
half blame on the pot, which the heat on one side. And as my beans rotate, they're not on the hottest
part of the pods at all times. There's like there's a
little bit of kind of break between that gives, and this is kinda like the
method that I created. This is what gives those
beans a little bit of time to tolerance and change. And then once we do this, I'm going to take you outside. I'm going to dump these
beans in my colander. And I'm going to
take you outside, can be really bright out there. And I'm going to
show you how to get the chaff off of the beans
and had a cool them quickly. But we're not there yet. Actually, I got to turn my
beans down a little bit. Usually I turned down
somewhere around dry end because I was a little slow in
this time, I didn't. But usually around
Ryan is when I lower my heat from high to medium. And then when I get
the first crack, I'll again adjust
the temperature from medium to like a
light low medium. I'm at 6 min and 25 s. First time I did this, I was at 6 min and 40
s on my first crack. I'm right around six
at 06:40 right now. No first crack yet. The second time I did it, I was just passed 7
min on first track, which I haven't I'm gonna be somewhere in that same range, about seven to 730 on this one. So here we go. We're at 7 min. Oh, there was there
was little crackle. I'm gonna let it
get into the crack. One side. Here it going. I'm gonna let it get
into it. It's going now. I'm going to let it get
into the full eruption and then I'm going to bring
it close so you can hear it. But it's 7 min and 35 s roughly. So I'm not that far off. We
get a little slip again. Want to make sure
oh, there we go. I'm going to bring it up
to you so you can hear it. It's going I don't want
to take it off too long. Right? You don't want to,
you don't want to mess with your heat source while
you're roasting. Now crackling to take this all the way
through first crack. And so for the last time, when I did this, it took almost, I guess it almost took like
2 min for it to get through first crack or 3 min depending. Okay. Let me actually this
is a good time, so I'll let you guys
know while this is going through first crack. So there are four
different recommendations of roasting temperature
in the roasting world. One is city than
their city plus, then there's full city. Then there's full city. When you bite them sweet
maria is on the bag. It's going to say
city to city plus that's just a recommended
rows temperature where they, they found it to be the
most desirable in terms of the flavor profile when it
comes to your taste buds, it really matters what you want. So what city means is it
means it's a light rough it's pulled immediately
after first crack or right at the
end of her track. Cd plus generally means you're somewhere between
light and medium, meaning maybe towards
medium a little harder. Both steady means
that your medium and then maybe a little beyond. And then full City plus means that you are
in a dark roast. And generally in terms of like what you'd see
on your bag of coffee. Oftentimes it's the way
that it's described is more of like a Italian roast. So we're still picking
it off. Listen up. Right. We're still in the first
crack and I'm at 10 min, so I'm running a
little longer than the last one because I haven't
finished my first draft. Need to take a look here.
And then I'm going to quickly take you guys with
me while this is all hot, will take you outside
to see how this goes. Alright, I'm going
to pull gestures. My first crack is about done. I'm sure you guys have dropped. You can hear it cracking still. See it smoking. Turn your heat off. Don't run outside without
turning your heat off. Okay guys, here's
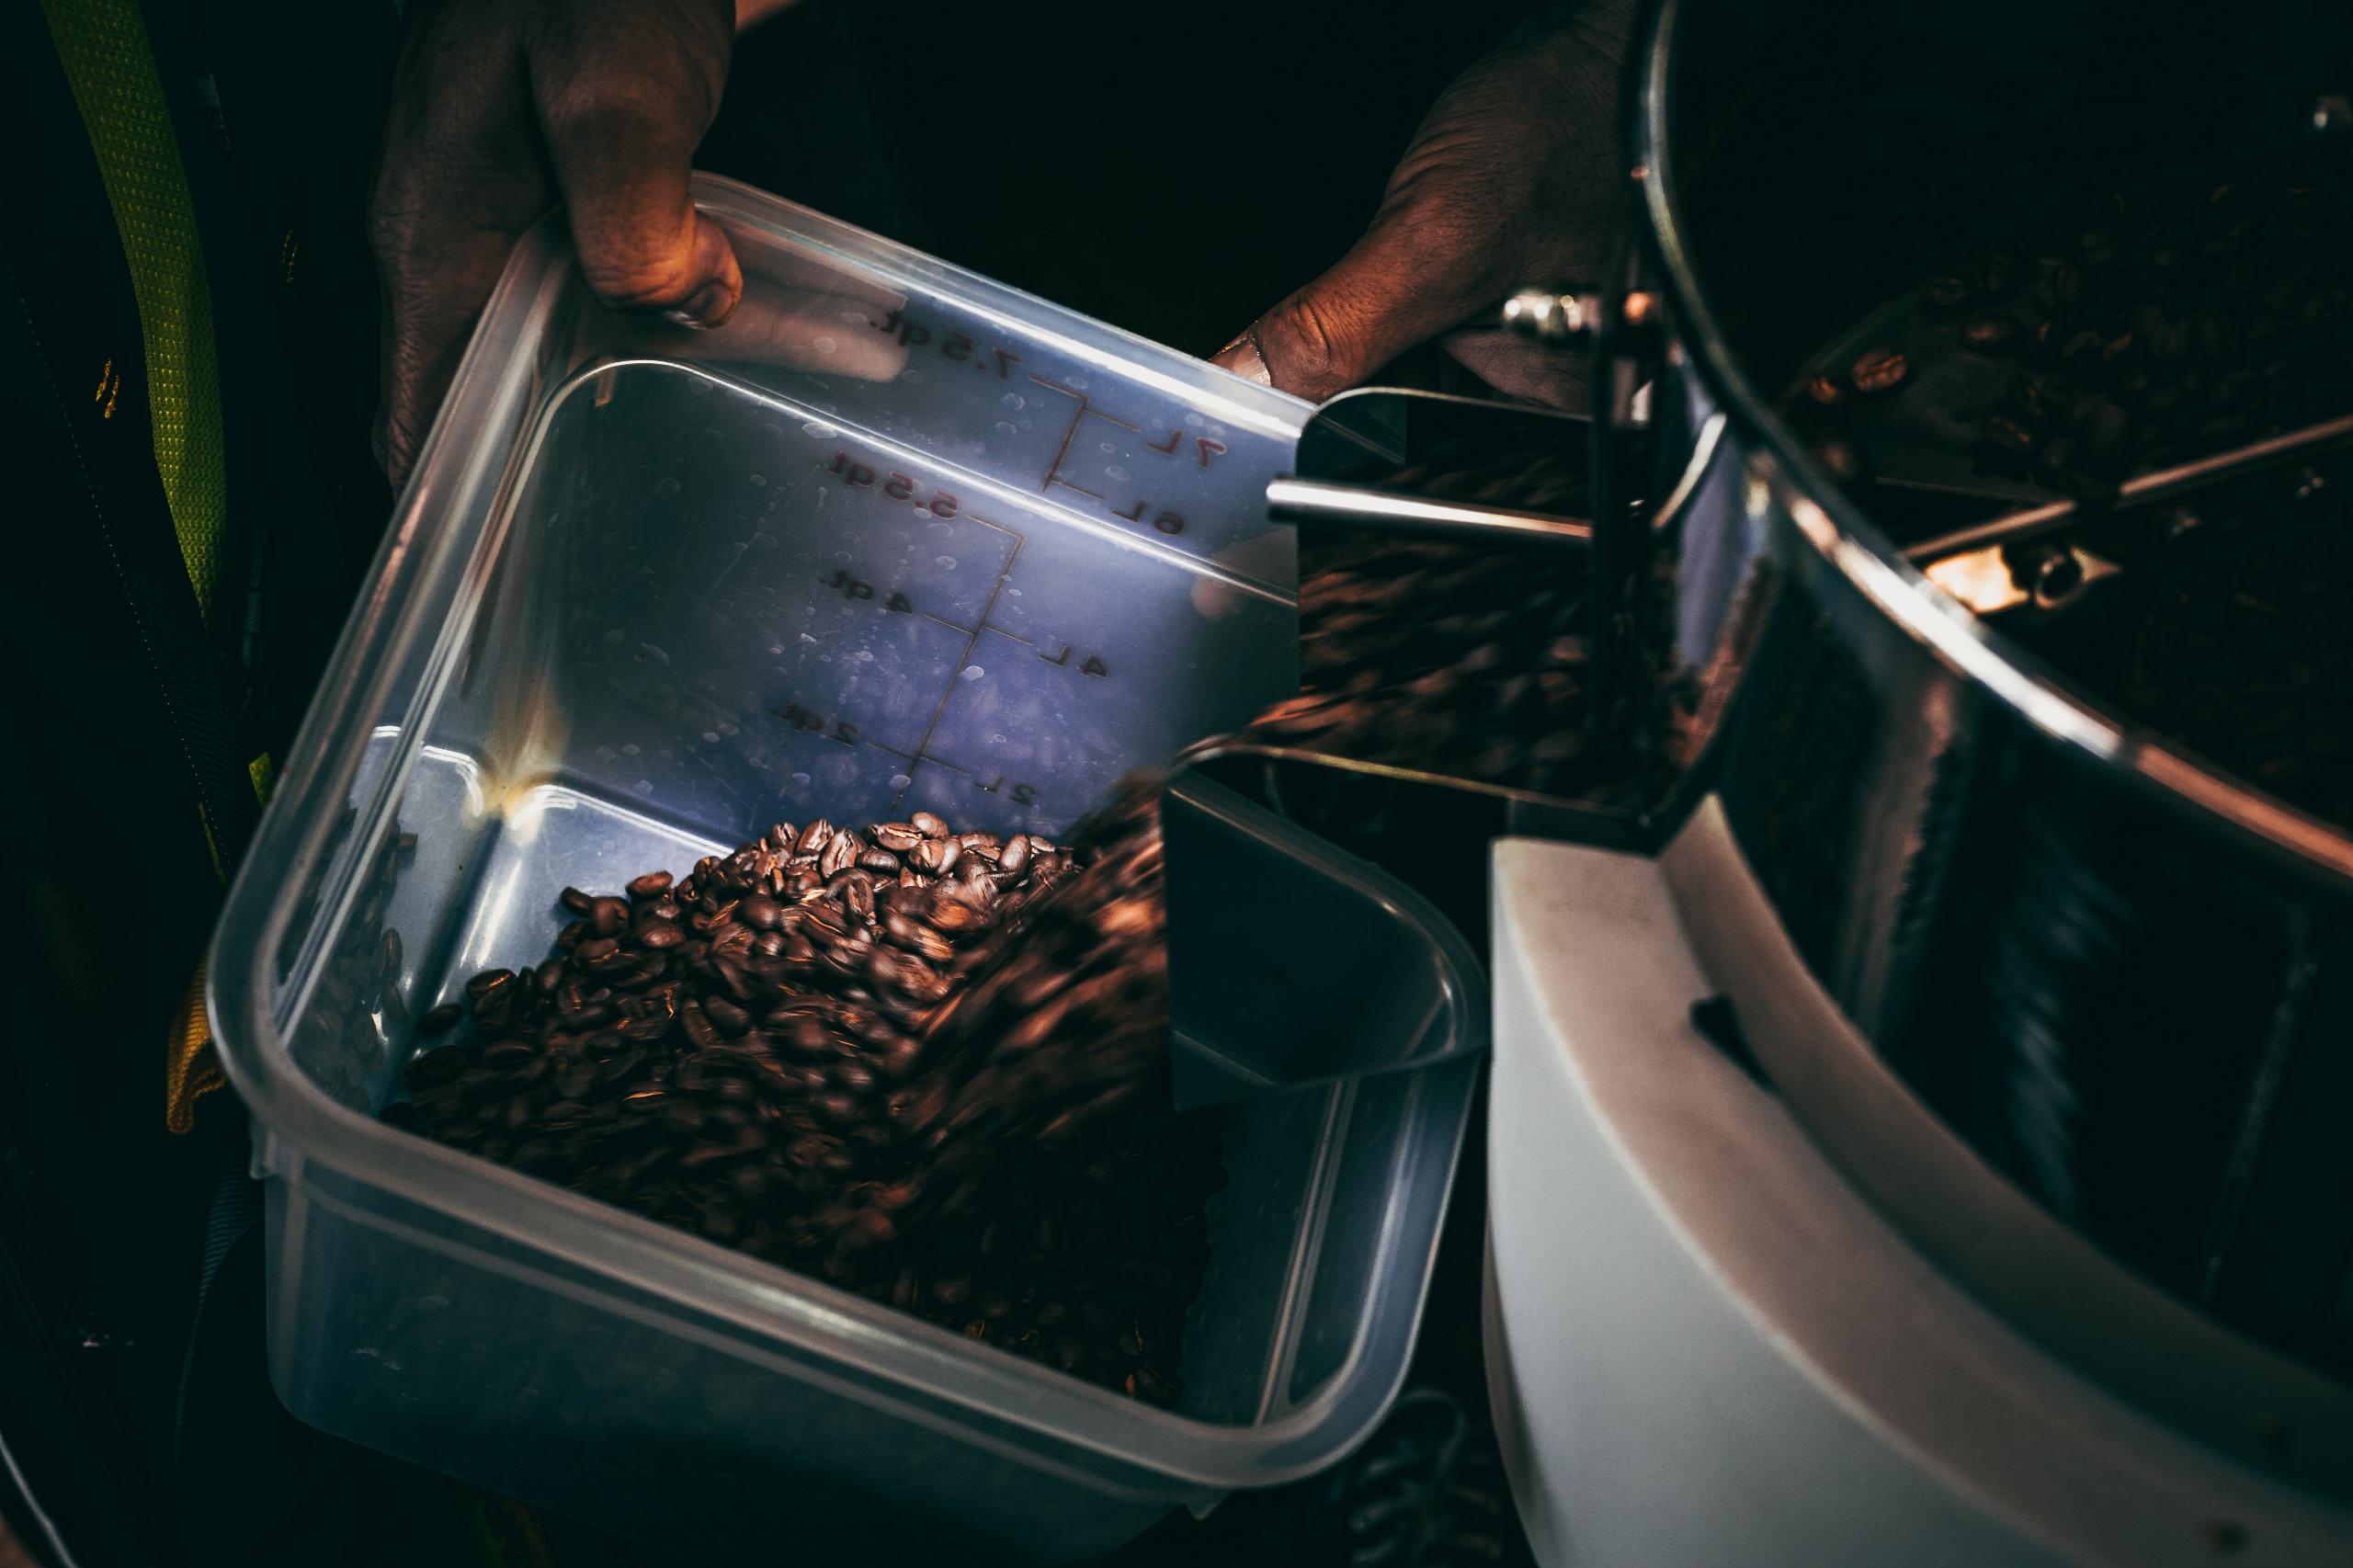
what it looks like. When you get the strap off, you see all that stuff coming off. That's called the chat. And I'm also at the same
time cooling my beans. So as you can see,
the color is there. It's really nice. It's like a well roasted. And all I want to show you. And you could also
give it a little blow. It's your coffee so you could
see how the chat flows off. You're going to sell
this coffee made. Maybe you don't, maybe
don't blow on it. As you can see in here, you
see this little white guy, this little light one. It's like an outlier. Can you see it right
in the middle there, this little guy right there. You want to pick those out. You want to take those out? Right. And then you can just toss
them right on the grass. I got a couple of
those in there. That's normal. That happens even
when you're roasting on a commercial Rosie, they'll always be a
couple of outliers. And that's it. Alright, here we
are back inside. I'm going to take my
coffee that I just finished while it's not cooling completely because
it's still very hot. I didn't mention,
don't touch this. The colander here is metal so it conducts a
lot of heat very quickly. So just try to keep
your hands off air. And here's what we do. We literally just
spread these out. There's still extremely hot. We spread these out on there. And you can see, we just
let them cool like this. Let's see if I get a cool shot. It takes my head. It keeps focusing on my face. There we go. There we go. I think my cameras designed
to pick up my eyes. Alright, so that's gonna
be your roast there. And then you can do
the great thing is, is that you can start to
compare the previous roasts, all these different
ones with the new one. Something to keep in mind. Do not drink your
coffee right away. It's not going to taste good. You want to let it cure
and settle overnight. Just so you know, this coffee doesn't
smell like anything special when you roast
it immediately after. It doesn't really
have much smell. When you put it in a container. Obviously, you have
to let it cool before you put it
in a container. But when you put
it in a container and you close it first, be careful because
it releases gases. So you might have to
crack it here and there at the beginning or
if you're going to put it in a bag that's
totally cool with that one-way gas
valve, that's cool. But if you'd want it
to smell like coffee, you have to then put it in a container and then smell
it like an hour later, half an hour later,
it'll it'll smell great. Don't plan on drinking it
the same day you roast it. Don't even grind it up. In fact, you're
better off waiting two days to really get an idea
of what your flavors are. And then up to like three to
four days is really great. And then up to the first
week is phenomenal. Obviously, you have
to keep it sealed. Once after, once you're past
like ten days to two weeks, then the flavors start
to diminish slightly. Just keep that in mind when
you're roasting coffee if you need it and you want to have it for a certain time period, you want to roast it a
couple of days in advance. But now, look how much I mean, you saw that took 10 min, right? Look how much coffee I have. This is 10 oz, this is
10 oz and this is 10 oz. And each one of those roasting
time from his 10 min. So in 30 min I've got like
two pounds plus of coffee. And just the last few weeks right here in 30-minute,
easily 10 min. I don't know how much
coffee you drink. I drink a lot of coffee. But if you drink a lot, if you do drink lot of coffee, you can really easily keep
up very, very quickly. I hope you guys found
that really informative. If you have any questions, feel free to hit me up in the
comments below, remember, take a picture of
your first rows no matter what and posted here, ask me any questions
you'd like as well in the comments
and I'm happy to help. All right guys, good
luck on your roast.
5. Storing Your Coffee and Brew Ratios: Alright, so we have officially finished roasting our coffee. Couple of things to cover
before I totally wrap up, I want to make sure that you have a place to
keep your beans. So I like to use old mason jars. Maybe if I had some pickles and I cleaned up the jar,
I use the pickle jar. Why? Because it's
the perfect size like these larger jars are the perfect size for keeping just shy of
a pound of coffee, as well as making sure
that I have a lid, something to keep it airtight. Make sure you're storing
your coffee properly. Do not put it in the freezer. Not necessary actually. In fact, it doesn't really prolong the life of the coffee. And in fact, it'll
probably more likely in part some negative
flavors on the coffee. Don't freeze, keep it in a cupboard or somewhere
where you're not gonna get a light exposure on it and make sure that you're taking
care of it in that capacity. Next is make sure you buy some tools that
are going to help you brew a really
nice cup of coffee. This is a V64. This is pretty standard
pour-over device here where I'm going to put, let's say I wanted to
do a nice pour over. I would do 23 g to
350 g of water. Basically, what that is, is, uh, 15 to one ratio. So 15 g of water for every
gram of coffee. Got it? If I'm gonna do a pour-over, I'm generally going to
grind to a medium, grind. Another one that I
really liked for single cups is a arrow press. Arrow press is very
simple to use. There's all different if
you look it up on YouTube, there's all different
ways in which to get fancy with your arrow
press preparation. But this is also a great
one for tasting your coffee because it only makes about
200 g of coffee per pore. That's something to keep in mind when you're, when
you're tasting. Remember what I said
in the last video. Don't taste your coffee
immediately after roasting. Make sure that the coffee has a good 12 to 24 h to
sit before tasting. And then it'll get
better and better and better for the
next few days. And then it's slowly, slowly, slowly, the chart
starts to decline. After about two weeks,
it will probably not be as great as it was in the
first week of having it. That's it, guys. Let me know if you
have any questions and feel free to reach
out to me anytime.
6. That's a Wrap!: Well, I just want
to say thank you very much for
watching this video. Again, my name is Rob DON, founder of OCD coffee. I hope you enjoyed it. I hope you found it informative and I just wanted to remind you, make sure to take a
picture of your coffee and posted in the
project gallery below. I'm here if you need me, if you have any questions. So that's it. Happy roasting.
 Rob Dionne, Coffee Roaster