Transcripts
1. Introduction: Hello, I am Stephanie
killed gas and I've been a professional artist
for over 12 years. I mostly sculpt,
but I also paint in acrylics or watercolors
and more recently oils. In today's class, I'm
going to show you how to draw paint and
sculpt butterflies. Yes, it's a three-unit
class because it's a mixed media sculpture
and I'm going to require all of your skills. I'm going to first
show you how to simply draw a butterfly
from scratch. And then we're going to continue and I will show you
how to make one. Now the way I approach butterflies is to use
paper for the winks. And this is while you will
need to be able to draw and possibly paint or use colored pencils for
coloring the wings. And then at the end,
we are going to sculpt the body itself
using Android clay. You can use other class
if you feel like it. And I invite you to check out my class on modelling
place if you're unsure. Otherwise, I would
simply suggest you use the clay that you
already have at home. This class is super fun. I loved making
butterflies myself. I plan to make many more in the coming days
for my own work. And I really hope that you
are going to love it as well. The class project for this is
extremely straightforward. I am going to ask you to
make your own butterfly. Feel free to make it very
colorful are black and white, just within how you
really prefer it. I want you to find your own path and
your own preferences. I really hope that you are
going to take this class, but most importantly that
you're going to enjoy it.
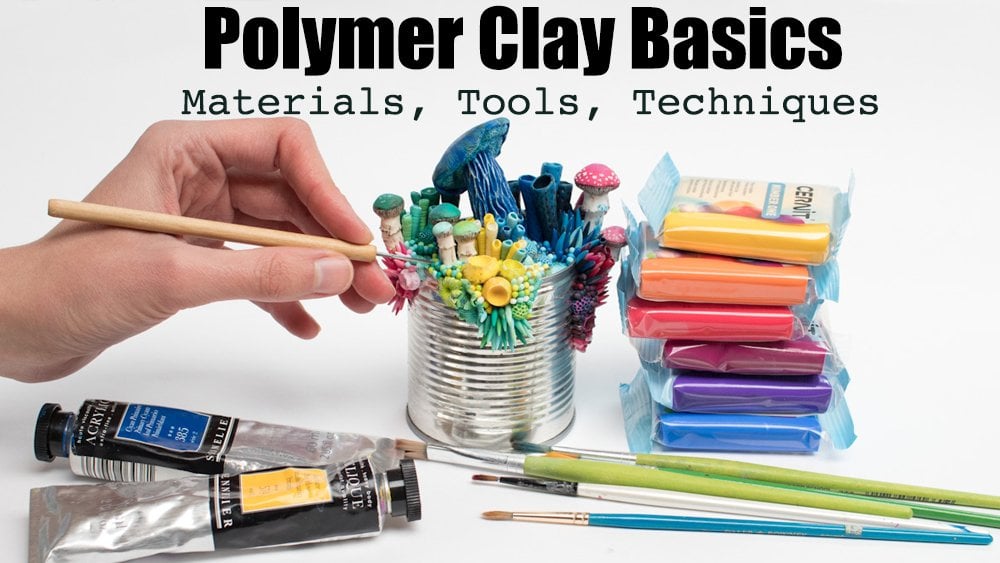
2. Materials: For this class,
we're going to need some hot pressed
watercolor paper. A 100% cotton is the best. This is careful because
I live in France, but any brand will do. For the ink. I am going to use
DR. tremendous ink in black with a fountain
pen and a converter. Alternatively, you can
use a simple dip pen, all those technical pens, I will also be needing an exacto knife to count the
wings for the watercolors, I'm going to use only
these seven pigments. Quinacridone, magenta,
PR, one-to-two, pyrrole, red PR to 55, yellow orange PY E11 0,
transparent yellow pea. E15 0 ultramarine blue. P B29 phthalo blue PB 153
lamp black, PB, PK A6. I'm using the branch linker
for the and I'm going to add the exact codes in the PDF sheet that
goes with the class. We're also going
to need a brush. This is a synthetic brush
from Rosemary and Co, but any watercolor brush will do just take what you prefer. I am going to use
stone and dry clay and I personally prefer
premium from an adult. We are also going to need
some acid free white glue. This is a French no-name
brands, some sculpting tools, blog artistic wire in 22 goats, some beading wire, 0.5
millimeter thickness. Finally, we are also going
to need varnish and I'm using pull your thin
varnish from Valais whoa, premium, which are actually vanishes that are
meant for our brushes, but I really like these. I will also add all materials in the PDF that goes
with the class. So don't hesitate to check it.
3. Step 1 - Basic Drawing: Now for this class
we will have to draw and paint a butterfly. So I wanted to show
it simplified way of drawing butterflies. We're first starting
with the rectangle. You want to divide it into, because butterflies
are symmetric. You want to place butterfly's body
approximately in the center. Now, very roughly. The wings will be triangle. So start with that. Then. The upper wings are
going to be rounded on top. Slightly rounded in the edge, straight, rounded straits,
and same on the other side. The bottom wings are
more like a lemon. Go down like this
and then you round it up and you go straights. And then round up. Straight. Straits, rounded. The same on the other side. Now of course, bottom wing
are rarely that square. They actually go down a bit and slightly overlap
the bottom wings. Let's just do that. And in symmetry, here is still going to have a square angle of not
always, but often. You just go like this. It is rounded, here,
a straight, straight. And here it's round. And same on the other side, straight, slight round straits. And he like this. So frowned. Round, straight, straight. Now the bottom wings tend
to be almost cuts like so. But in a more rounded way. You often have some
kind of pattern. So if I now take
another pencils, we can better see we are
going to have an arc, rounded edge, straight,
rounded edge, straights, same on
the other side. Then at the bottom. Rounded with some pattern. Rounded, straight
in and then out, straits, some kind of pattern. And run that. And you don't see the straight edge here
because it overlaps. Here you have the head, the torso, and the abdomen. Antenna. Here you have a very simplified way of drawing a butterfly
from scratch. In the next step I'm going
to work from references. And I always encourage you
to look at real butterflies. But this is a simplified way of understanding the geometrics.
4. Step 2 - Drawing from Reference: The butterfly I took as
reference for this is a Prius ugliest subspecies
boutique agencies. But feel free to pick
your favorite butterfly as a reference or
invent your own. I am using a 100% cotton
paper for watercolors. I always use hot pressed as this is the best
for detailed work. Alternatively, you could use any other paper instead
of watercolors, use either just ink
or colored pencils. Another key to have realistic
butterfly is to keep the basic shape in head
that we saw in step one. And to make sure it is
symmetric, for the symmetry, I am simply using
a ruler to mark the distances from the center for key points of the drawing. Be sure to keep space in the
center for the body as well. We will sculpt the body
with clay later on. Now if you have
now drawn before, I would rather just do a quick project for fun
Our with your kids. I have scanned and added my own butterfly drawings
for you to print at home. Bear in mind, these are
for personal use only. If you are trying to
improve your skills, I would highly encourage
you to not use these PDFs and to
make the effort of drawing butterflies
by yourself, don't hesitate to use an eraser when you're
drawing looks off. You can also measure
your reference picture to know the exact proportions. That will likely help you, especially if you're
a beginner draftsman. Once you are content
with your wing shapes, start to replicate
the wing cells. The approach is the
same as with the wings. You want to start on one
side and once Happy, use your ruler to replicate
on the other side. Of course, you do not
have to use a ruler. If your eye is very trained, feel free to do without it. But symmetry can be
a little bit tricky. And the ruler is an easy way to double-check if your
drawing is well done. The cells on butterfly
wings are often similar, with a bigger cell in the
center and small ones that join the central one
to the edges of the wings. Once you are happy
with your wings, you can cut them using an X-Acto knife or
a pair of scissors. It always very careful
when using sharp tools. You do not want to cut yourself.
5. Step 3 - Inking: For the inking, I am
using a fountain pen with a converter and ink
from DR. tremendous. If you've never used the
converter, therefore, it is basically a
refillable cartridge. You plunge it into an ink bottle and pull
our twist the piston, depending on your converter
which sucks the ink in. Not just be sure to use ink, that it's fit for fountain pens. Not all inks are fit for them. You can also use a
simpler dip pen, technical pencils. Those throwaway pencils. Keep in mind that you
will need waterproof ink as we will paint with
watercolors on top later on. I would also highly suggest
to get light fasting. For the inking, I am
starting to draw over all of our cells I did
previously with a pencil. I also visually thickened the edges of the wings with ink. For more graphic look. I also did ink the block on dark parts of the
butterfly wings, very loosely following
the reference picture. I started with a pencil to avoid making mistakes before
adding the ink. Again using a ruler to make sure that both wings are symmetrical. Now feel free to mix and
match butterfly patterns from different references
to make it your own. Unless you are going for an anatomically correct
representation. It really doesn't
matter all that much. I decided to go
with tiny dots to cover the darker
parts of the wings, representing the wings
scales too well. Alternatively, you could simply use black watercolor later on. Here, the other butterflies
I did draw, caught and ink. Now, since these are meant
to become sculptures, you do need to ink the
other sides of the wings. For this, the easiest
is to go against the window or use a
transparent support. Flip the wings and draw what
you see with the pencil, then simply ink all your cells. On the flip side. I personally kept
it rather simple, as I knew in my sculpture, we would focus on the top. Lastly, depending
on your pattern, you might also want to add
black ink on the papers edges.
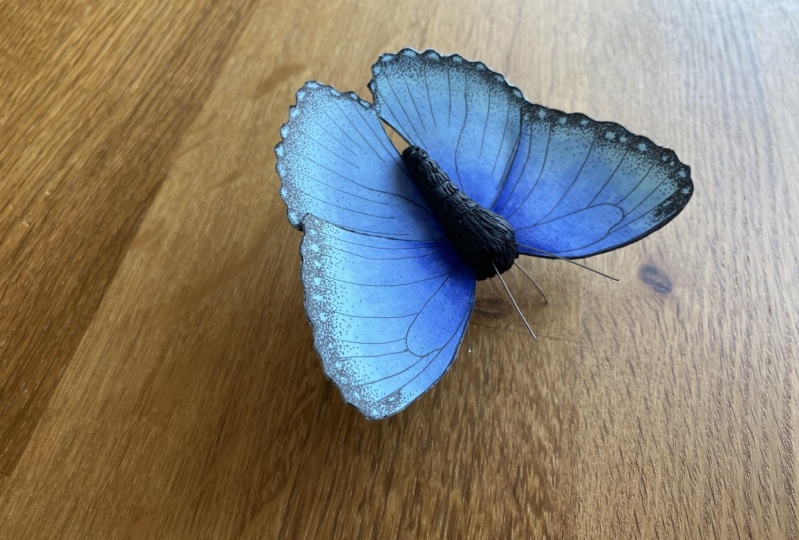
6. Step 4 - Watercolor Painting: For the coloring of
the butterflies, I went with watercolors. Alternatively, you could
use colored pencils or leave it just with ink
for very graphic finish. I am going to show you how I painted the three butterflies. You know which pigments I
used and how I mixed colors. Color mixing is a skill
that comes with practice. I hope this will
help you out a bit. For the purple, I mixed
quinacridone magenta, PR, one-to-two with
ultramarine blue, P B29. This is the ultimate mixture
for very vibrant purple. In order to keep the
purple more interesting, I also added a layer of yellow, blue, purple mixture itself. I varied a little
across the wings from a more bluish purple
to a more pinkish one. For that, I simply
add either more ultramarine blue or more
quinacridone magenta. If you feel insecure
about Carlos, have a spare sheet of paper
next to your palette to try out the colors you mix before applying them on your
butterfly wings. I repeated the
same principle for the purple on the bottom wings. As a complimentary color, I went with a greenish yellow. For that, I mixed
transparent yellow PY 150 with a very small
amount of phthalo blue. Now at the best is to
water the blue down first and add just a bit
of that to the yellow, tint it ever so slightly. You really want
it to stay mostly yellow but with very
slight greenish tint. Thaler blues and greens
and great pigments. They are reliable
and light fast. However, they are
very strong and loud, so you need to use
them sparingly. For the butterfly we did in the previous steps
of this class. I changed my mind a
little while painting it. I started with a
greenish yellow, but decided to go for
the warmer yellow, orange, PY E11 0. For the red part, I did a lot of different glazing which muted the red down. I started with mostly
the quinacridone, PR one-to-two, but then went
for pyrrole, red washes. This gives it a lovely
earthy yet bright red color. Glazing can be
surprising in that way. For the last one, I went
with a duo of colors. First, a light pink wash. I mixed my two reds,
quinacridone and pyrrole. To get something
closer to common, if you use a lot
of water with red, it will turn pink, which is exactly
what I did here. The main color I used, phthalo blue and a little
bit of transparent yellow. This will give you a
nice strong teal color and you simply need to water
it down to a pastel shade. I let everything dry and
then proceeded to paint the flip side of all wings
in conquering colors. Feel free to use different
color combinations. Are no colors at all. I really want you
to explore what you like best for your
own butterflies.
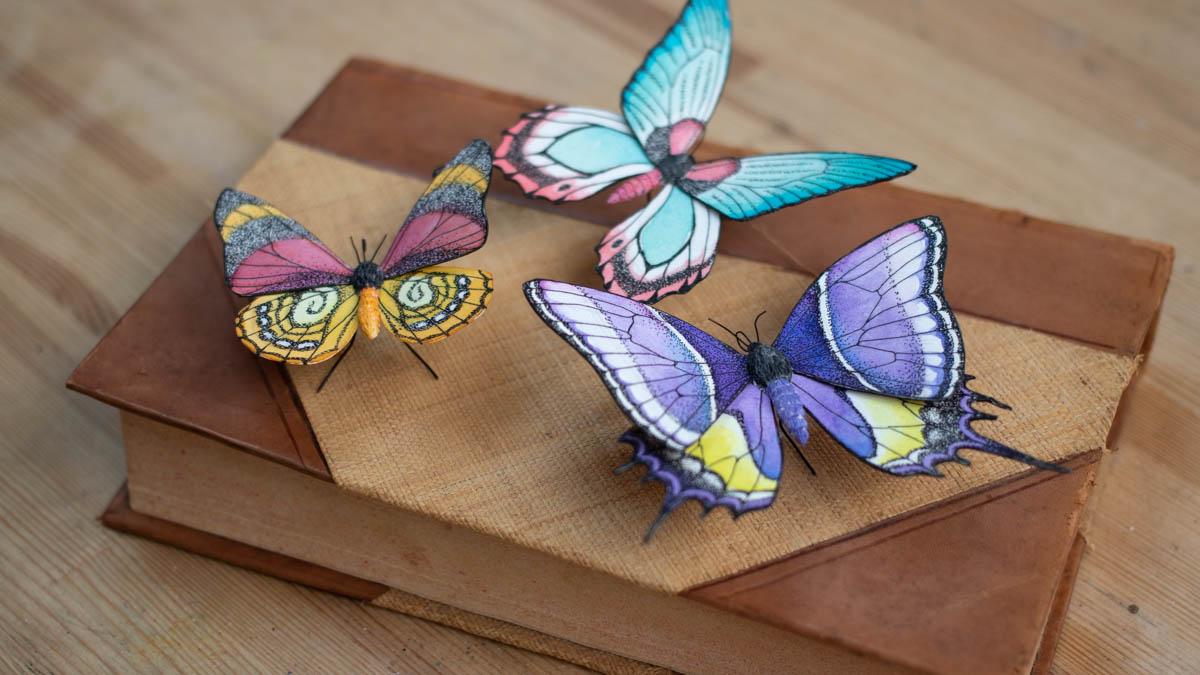
7. Step 5 - Sculpting The Body: First, glue the wings together. You want the top winks to overlap the bottom
ever so slightly. The glue I am using is
an acid free white glue. Be sure to only use
acid free white glue. The asset free is very
important as acidic glues will destroy your work over time and effect
materials and pigments. Leave the glue to
dry. The antennae. I am using brown plastic
coated beading wire. In 0.5 millimeter. I cut a small piece of
about three centimeters. That's one inch, 1
eighth of an inch. Fold it into the body itself. I am using stone, air dry clay. I roughly shaped the body
by pinching and rolling a small ball of clay between
thumb and forefinger. I did the antennae into acid free wine glue and
push them into the hand, add some glue onto the wings
and place the Bondi on top. Just the shape
with your fingers. Now using your favorite
tool first mark the hand. Van MOG was segments
of the abdomen. The clay starts to dry. You can brush some water over it to keep texturing
more comfortably. Then using a tiny spatula
tool or a needle tool, create tiny lines to
replicate the Fuhrer. Once you are happy, let dry. Then turn the
butterfly and brush some water over the abdomen
to losing the clay. First month was segments then creates tiny lines to
replicate the hand. Prepare the legs using black
artistic wire and gosh, 20 to cut pieces of
about four centimeters. That's 1.5 inches for them. And two, we will be making two pairs of legs
for each butterfly. Now insects and
butterflies are insects, normally have six legs. However, most butterflies
have only four visible legs. The two front legs having
evolved into stops that aren't used anymore
and can't be seen easily. That's why we're
doing only four legs. Some butterflies have six legs, but again, most have four. So that's why I decided
to go for only four legs. If you are going
for something that is an atomically correct, please check on the
butterfly you have picked. If you can see four or six legs. Also prepare the
proposed case by using the same wire we
use for the attorney, cut a small piece and roll
it around round pliers. The proposed case is the tube with which butterflies
eat neck tar. For the torso, add some
glue onto the wings. And when a small ball
of clay push into place the proposed case
into glue and into the head, then the legs. And she asked her free glute
and push into the clay, close the clay
around everything, and then start texturing
into tiny lines like we did before to create
the hair texture. Once you are happy, let dry.
8. Step 6 - Finishing Touches: The body he's should
be dry overnight. You can touch them if they
still feel cold to the touch, let them dry a little longer. I personally like using
stone air dry clay because you can easily
paint it with watercolors. Now for the body, I used the same column
mixes I used for the wings, for each butterflies, abdomen, for the torso and the head. I used lamp black, PB, PK A6. Be sure to paint the
front and the back. You might want to
add a few layers until you get the right colors. Don't overwhelm the clay with your paintbrush because you
might remove the texture. You also want to bend
the legs into shape. You should have legs
that are too long. I always keep the legs longer
on my insects so I can more easily integrate them in bigger environments in
my sculptural work. Finally, I would recommend to
give two or three coats of varnish for the clay
body for added strength. Here I am using polyurethane
varnish from Valais. Whoa, ideally you
would go for two codes of glossy varnish and one
coat of either matte, satin or glossy, depending on the finish
you are looking for. Always test your
vanishes upfront. She's see how glossy
on mater they are.
9. Conclusion: Thank you so much for
taking this class. I hope you loved it. Now alternatively,
you can use any kind of paper you would like
to create. The wings. You don't have to
use watercolors, but you can use colored
pencils or even acrylics. I'll leave it just with ink. It's really up to you and I cannot encourage
you more to find your own way and your own path to discovering
what you like this. I would love to see
what you come up with. So please share your
project with the class. If you share it online
and forget to tag me, I go along the
Monika pretty plot, pretty much anywhere but
mostly active on Instagram. Thank you so much for
watching and I really hope to see you in my
next class. Bye.
 Stephanie Kilgast, Contemporary artist.