How to Make a Zine: The Art of Making and Printing Zines | Amaya Jade | Skillshare
Search

Playback Speed


  • 0.5x
  • 1x (Normal)
  • 1.25x
  • 1.5x
  • 2x

How to Make a Zine: The Art of Making and Printing Zines

teacher avatar Amaya Jade, Artist and Video Creator

Watch this class and thousands more

Get unlimited access to every class
Taught by industry leaders & working professionals
Topics include illustration, design, photography, and more

Watch this class and thousands more

Get unlimited access to every class
Taught by industry leaders & working professionals
Topics include illustration, design, photography, and more

Lessons in This Class

    • 1.

      Introduction

      1:44

    • 2.

      History of Zines

      1:33

    • 3.

      What You Need

      1:00

    • 4.

      How To Fold Your Zine

      2:29

    • 5.

      Making the Zine: Part One

      3:23

    • 6.

      Making the Zine: Part Two

      5:40

    • 7.

      Printing Your Zine

      2:24

    • 8.

      Conclusion

      0:54

  • --
  • Beginner level
  • Intermediate level
  • Advanced level
  • All levels

Community Generated

The level is determined by a majority opinion of students who have reviewed this class. The teacher's recommendation is shown until at least 5 student responses are collected.

1,310

Students

5

Projects

About This Class

Hi! My name is Amaya and I'm an artist & video creator!

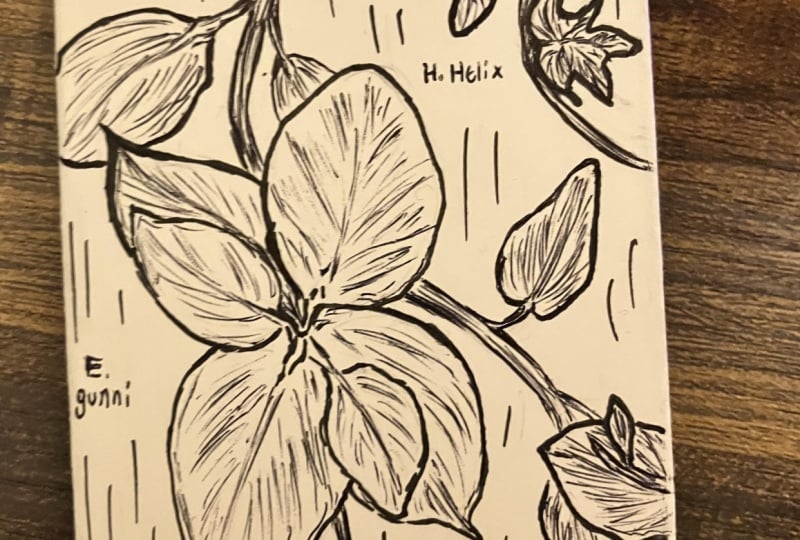
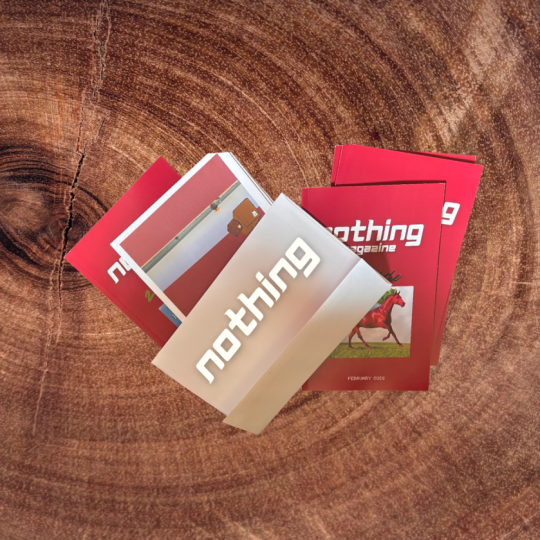
Zines are a creative and fun way to share your ideas and thoughts with the world. Like all art and media, zines can be anything and everything. They are a collection of artwork, photographs, poetry, magazine clippings, and much more. 

There are many ways to make zines, but the one I'm going to teach in this class is one of the easiest and quickest - this way you can follow along while watching. You'll learn all about zines, what they're used for, and then I'll show you how to copy and print your zine to share with others.

Lessons include:

  • A brief history of zines
  • An overview of all materials needed
  • Creating the structure of the zine
  • Sketching and painting your zine
  • Scanning and printing the zine

If you have any questions at all, be sure to ask me in the discussions page!

Meet Your Teacher

Teacher Profile Image

Amaya Jade

Artist and Video Creator

Teacher

Related Skills

Crafts & DIY More Crafts
Level: All Levels

Class Ratings

Expectations Met?
    Exceeded!
  • 0%
  • Yes
  • 0%
  • Somewhat
  • 0%
  • Not really
  • 0%

Why Join Skillshare?

Take award-winning Skillshare Original Classes

Each class has short lessons, hands-on projects

Your membership supports Skillshare teachers

Learn From Anywhere

Take classes on the go with the Skillshare app. Stream or download to watch on the plane, the subway, or wherever you learn best.

Transcripts

1. Introduction: Hi. My name is Maya and I'm an 18 year old artist that makes drawing and painting videos on YouTube. And this is my first class on school share. So in this class, I'm going to be teaching you how to make a zine. If you've never heard of a zine before, I'm going to be telling you all about them what they're used for. And then I'm gonna show you how to make your very own. And this is the one that I made. Censorship in the media is widespread, and some people can start to feel hopeless in their efforts to share their creativity with the world. Zines are a creative outlet that advertises complete freedom. The more voices that are heard, the more people will be able to understand one another's point of view and experiences. Zines gonna be anything. The collection of poetry, artwork, photographs, magazine clippings for all of the above. There's no limit to what you can create, and there's no one to tell you that you can't. Although magazines can be viewed online, physical copies are passed around creating conversation and by word of mouth. The movement has spread. Zines are great because they could be made by literally anyone. It's a simple US folding some paper and unleashing your creativity. So go ahead and watch next video lesson, and I'll tell you a little bit more about scenes, and then I'll move on to what you will need to make your own. 2. History of Zines: So what is the scene? Scenes are self published booklets, often created by drawing, painting and placing text in images onto a flat for photocopying. It's also common to produce them by typing and formatting pages on a computer. The publication is usually folded and stapled. Since the invention of the coffee machine, zine making has been one of the most popular forms of independent publishing. Historically, scenes have been around since 17 76 when Thomas Paine self published Common Sense and used it to promote the ideas that contributed to the war for independence. Scenes were generally circulated by socially marginalized groups to give voice to their opinions and beliefs that usually don't make it into mainstream media. In the next video lesson, I'm going to show you what you need to make your own scene. 3. What You Need: Of course, there are many ways you can make a scene, but the way I'm going to show you is one of the quickest and easiest. And to make it, you really only need two things paper and scissors, so you can use larger paper. But the one that I used is in 8.5 by 11 this paper size is going to create a postcard size Visine. And then besides those two things, the only other things they're going to need are the materials that you were going to use to make the team. So I just used arts of high materials. But of course, if you want to use photographs or things for Maxine's, all of that is totally up to you. You can use whatever you want, but that's everything that you're going to meet once dizziness finished, I'm gonna show you how I printed my own seen so that you can also copy and print yours. If you want to continue watching and I'll show you how to fold your scene 4. How To Fold Your Zine: So first you're gonna take your sheet of paper and fold it down horizontally like this, and to press the edges down, I use a ruler and then you're going to fold it again and then one more time. So then you're going toe, unfold it halfway like this, and then take your scissors and cut a little slit in between the two centerfolds. So once you unfold it completely, it should look like this. And then this way you're able to cut throughout the middle. Just between the two centerfolds, though. So now when you push the sides together, it should form a little booklet like this. And then again, I'm using a ruler to press all the edges down. And then this is a super important step. Make sure to number all the pages so that when you unfold it, you know, in what order to put all the art in and then this is what it should look like at the end. So it's super easy. Super quick to make this. The's few clips are just be sketching out kind of the ideas that I had for my zine. So if you don't really know what you're gonna put in your zine yet, then you couldn't sketch it out. If you want to 5. Making the Zine: Part One: 6. Making the Zine: Part Two: 7. Printing Your Zine: So now I'm going to show you how I printed my scene. So first thing I did was I unfolded my zine and then I scanned it just like that. Once I brought my zine and to photo shop. I just kind of adjusted all the colors way. And then I cropped it so that I could print it on an 8.5 by 11 sheet of paper. So it was as simple as that on. Then what you're gonna do with your printed scene is folded exactly the same way you did with your original. - And then make sure that you cut in between the two centerfolds again. So as you can see, it was super easy to do this. 8. Conclusion: and that's it. You should have a finished zine by now. So here's how mine turned out. So I really hope that you guys enjoy this class and found it super helpful and fun. Follow me if you're interested in more classes like this because I'll have a lot more coming up soon and thanks for watching.